2 Tips for Proper Post Stitch Placement – in Rows and Rounds
Have you ever been confused about proper post stitch placement?
When working a cabled crochet project in the round or in a row, have you ever found yourself asking, “Where do I work the next crochet post stitch?”, or “Where is the post of the next stitch?”. If so, then then keep on reading!
One of the most common questions I receive about crochet patterns and stitches is: “How do I know that I’m working the next post stitch around the correct stitch?”. So, I put together a complete photo and video tutorial for proper post stitch placement when you’re working in both rows and in rounds.
Among the many techniques that can elevate your crochet work, post stitches stand out for their ability to add dimension, texture, and visual interest to your projects.
In this blog post, we’ll dive deep into the world of crochet post stitches, explaining what they are, how to make them, and we’ll clear up any confusion you may have with where to work them in your set-up row or round!
At the end of this tutorial, you will have mastered proper post stitch placement and you’ll have learned the two important tips to remember each time you work crochet post stitches!
What are Crochet Post Stitches?
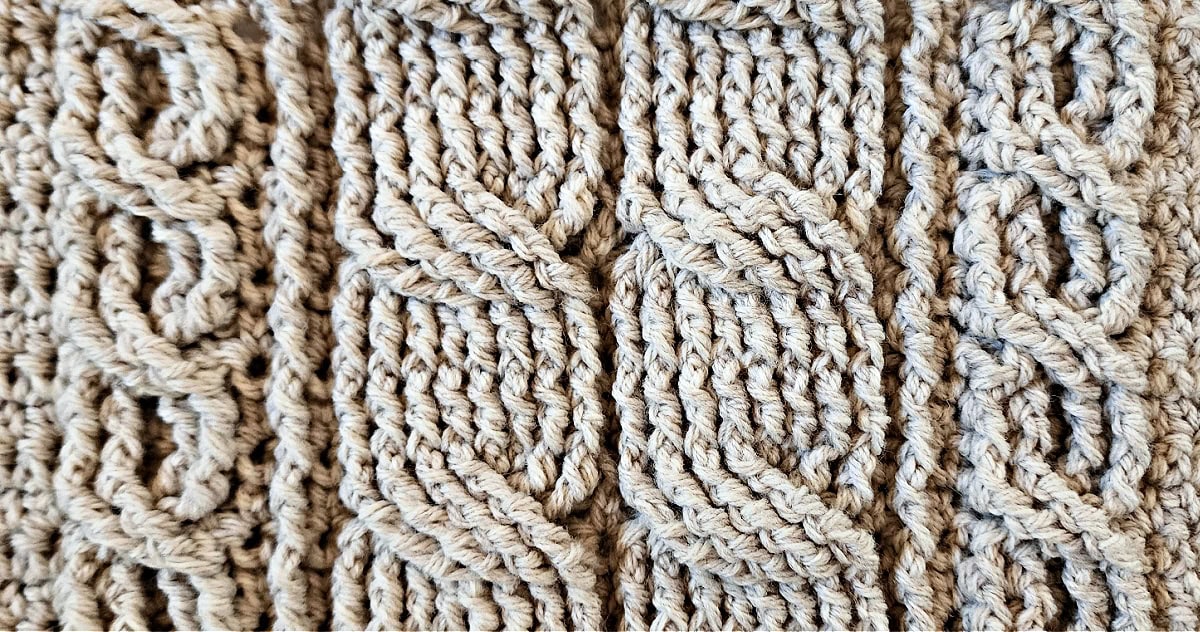
Post stitches are a type of crochet stitch worked around the post of a stitch from a previous row, rather than into the top loops. This technique creates a raised, textured effect, making it ideal for patterns that require dimension, such as ribbing, cables, and basketweave designs.
There are two main types of post stitches:
- Front Post Stitches (FP stitches) – worked around the front of the stitch.
- Back Post Stitches (BP stitches) – worked around the back of the stitch.
By alternating these two types of stitches, you can create a variety of textures and patterns that bring depth to your crochet projects.
Why Use Post Stitches?
- Texture and Dimension: Post stitches are perfect for adding texture to blankets, scarves, hats, and garments. The raised stitches create a three-dimensional effect that stands out.
- Structural Integrity: Post stitches add structure and firmness to your crochet fabric, making them ideal for sturdy projects like bags or baskets.
- Cabling and Ribbing: Post stitches are essential for crocheting cables, ribbed edges, and waffle patterns, making them a go-to stitch for advanced crochet techniques.
How to Crochet Front and Back Post Stitches
Front Post Double Crochet (FPdc)
- Yarn Over (YO): Start as you would for a regular double crochet by yarning over the hook.
- Insert Hook: Instead of inserting the hook through the top loops of the stitch, insert it from front to back, around the post of the stitch from the previous row.
- Pull Up a Loop: Yarn over again and pull the loop through, bringing it around the post.
- Complete the Stitch: Yarn over and pull through two loops, then yarn over and pull through the last two loops, just like a regular double crochet.
Back Post Double Crochet (BPdc)
- Yarn Over (YO): Start as for a front post stitch, by yarning over.
- Insert Hook: This time, insert the hook from the back to the front of the work, wrapping around the post of the stitch from behind.
- Pull Up a Loop: Yarn over and pull the loop through from the back, around the post.
- Complete the Stitch: Yarn over and pull through two loops, then yarn over and pull through the last two loops.
Practice Tip: If you’re new to post stitches, try practicing on a swatch of double crochet. Work a few rows of regular double crochet stitches, then introduce a few rows of front and back post stitches. This will help you get used to the technique and see how it affects the overall texture.
Common Patterns Using Post Stitches
- Ribbing: Alternating FPdc and BPdc creates a ribbed texture that’s great for edges of hats, cuffs, and waistbands.
- Cables: Crochet cables use post stitches to create twisted designs that mimic knit cables.
- Basketweave: Alternating blocks of front and back post stitches in a grid pattern creates the look of woven fabric, perfect for cozy blankets and warm scarves.
Post Stitch Variations
Once you master the basic front and back post stitches, you can explore several variations:
- Post Treble Crochet (FPtr, BPtr): Similar to double crochet post stitches, but with an extra yarn over, creating an even taller and more dramatic texture.
- Post Half Double Crochet (FPhdc, BPhdc): A shorter post stitch that’s slightly less raised, but still adds texture.
Creative Ideas for Post Stitches:
- Use post stitches to create intricate geometric patterns by alternating front and back post stitches in strategic rows.
- Crochet vertical stripes of post stitches in different colors to create a striped effect with added depth.
- Try mixing post stitches with bobbles or puff stitches for more complex, tactile textures.
Tips for Working with Post Stitches
- Gauge Check: Post stitches can affect the gauge and tension of your project because they use more yarn than standard stitches. Be sure to check your gauge, especially when working on larger projects.
- Use a Larger Hook: If your post stitches are too tight or stiff, try using a slightly larger crochet hook to make the stitches more pliable.
- Mind the Yarn: Thicker yarns work well with post stitches, as they highlight the raised texture. Consider using worsted weight or bulky yarns for projects like blankets or sweaters.
- Stitch Count Awareness (the MAIN reason for this crochet tutorial): Post stitches don’t usually affect the stitch count, but it’s important to remember which stitches count as posts versus regular stitches in your pattern.
2 Important Tips for Proper Post Stitch Placement
In this crochet tutorial, I will share one important tip for working proper crochet post stitch placement in rows and one tip for working in rounds.
If you remember these simple tips each time you crochet post stitches, your set-up row of post stitches will ALWAYS be on point!
Crochet Along with Me: If you want to crochet along with me in the video tutorial, I’ve included swatch instructions below for both rows and rounds. Scroll down to each section.
First, let’s go over a list of materials and standard abbreviations you’ll see in this crochet tutorial.
Materials
- Yarn: Any weight yarn will work, but I prefer using worsted weight / 4 yarns for tutorials.
- Crochet Hook: I suggest using the crochet hook size noted on the label of the yarn you choose.
Abbreviations (U.S. Terms)
- ch(s): chain(s)
- hdc: half double crochet
- dc: double crochet
- fpdc: front post double crochet
- yo: yarn over
- st(s): stitch(es)
- Rnd: round
I’d love it if you’d subscribe to my YouTube channel while you’re visiting!

Working Post Stitches in Rows
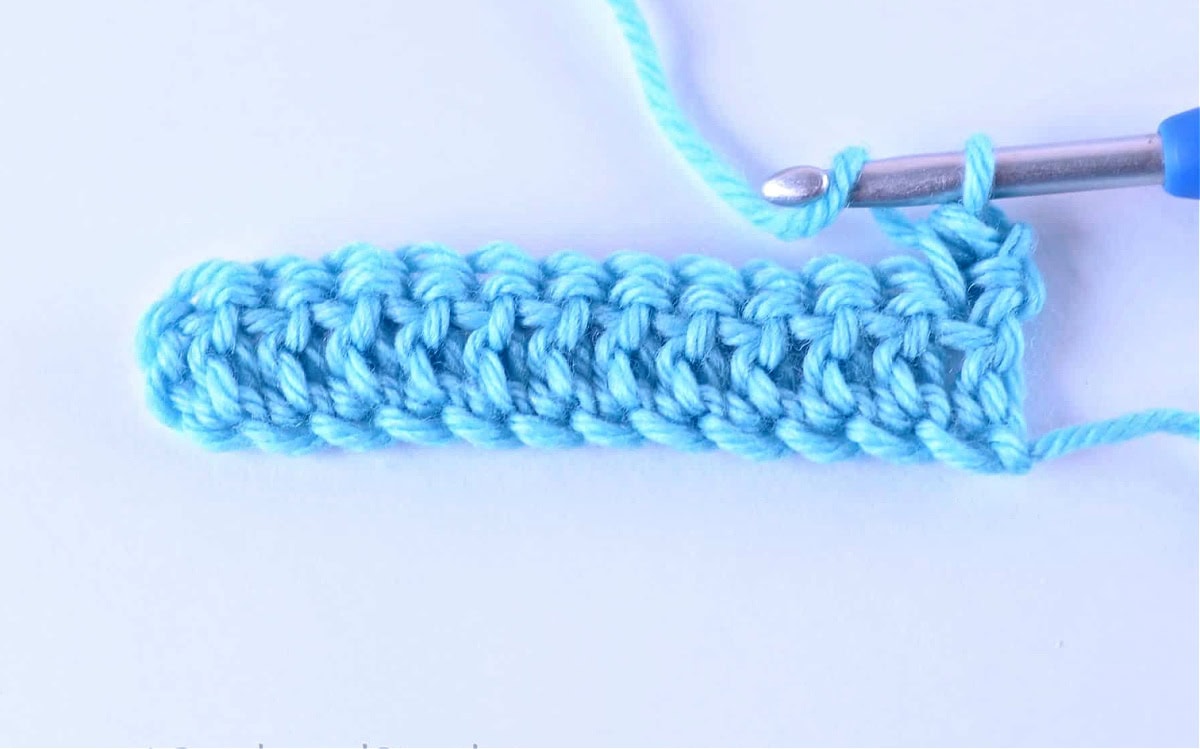
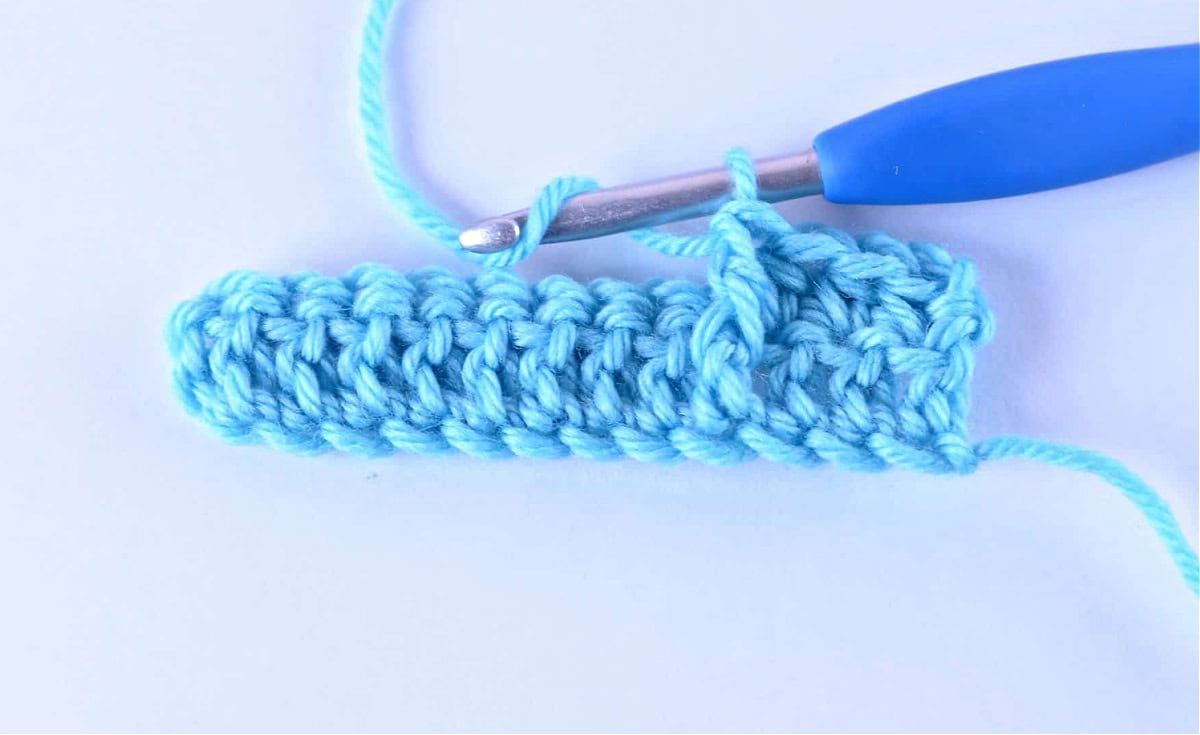
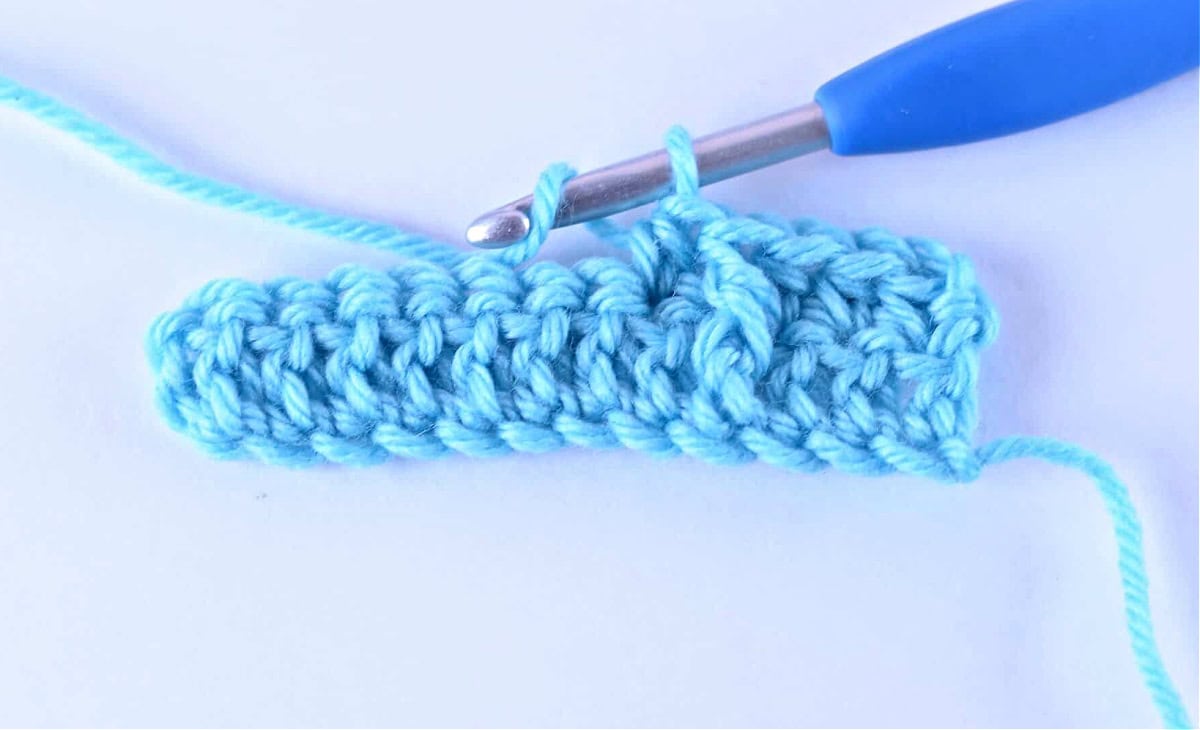
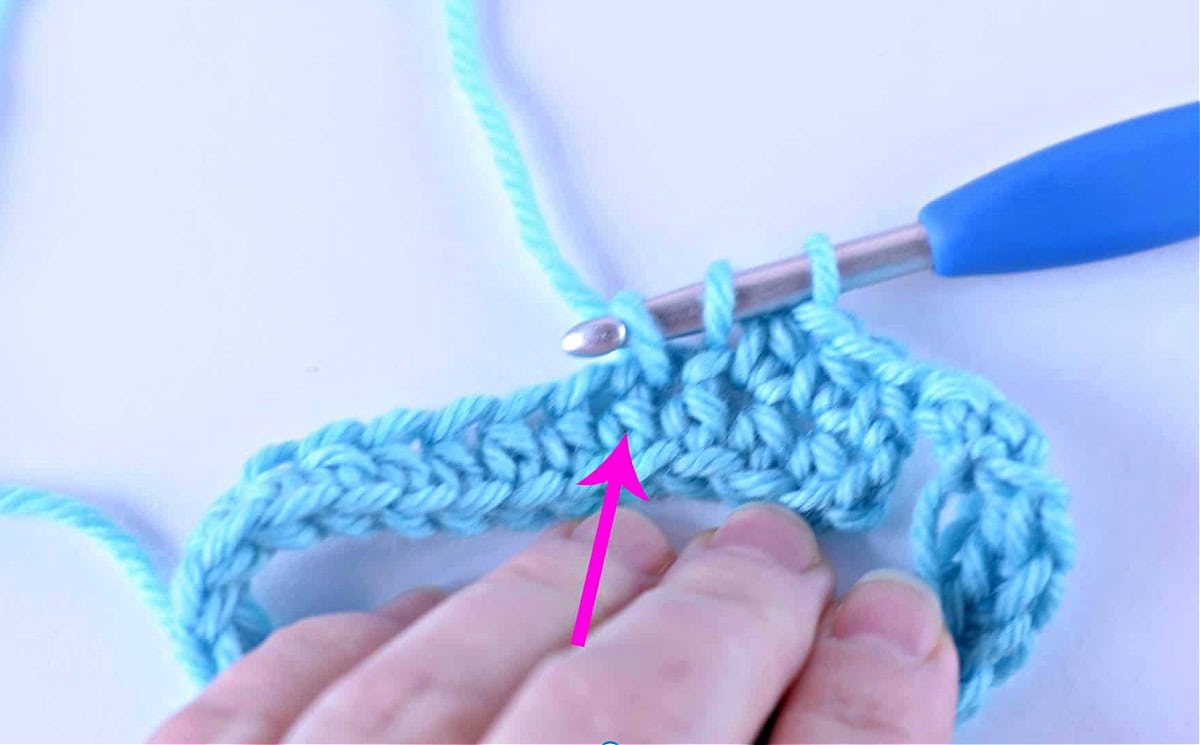
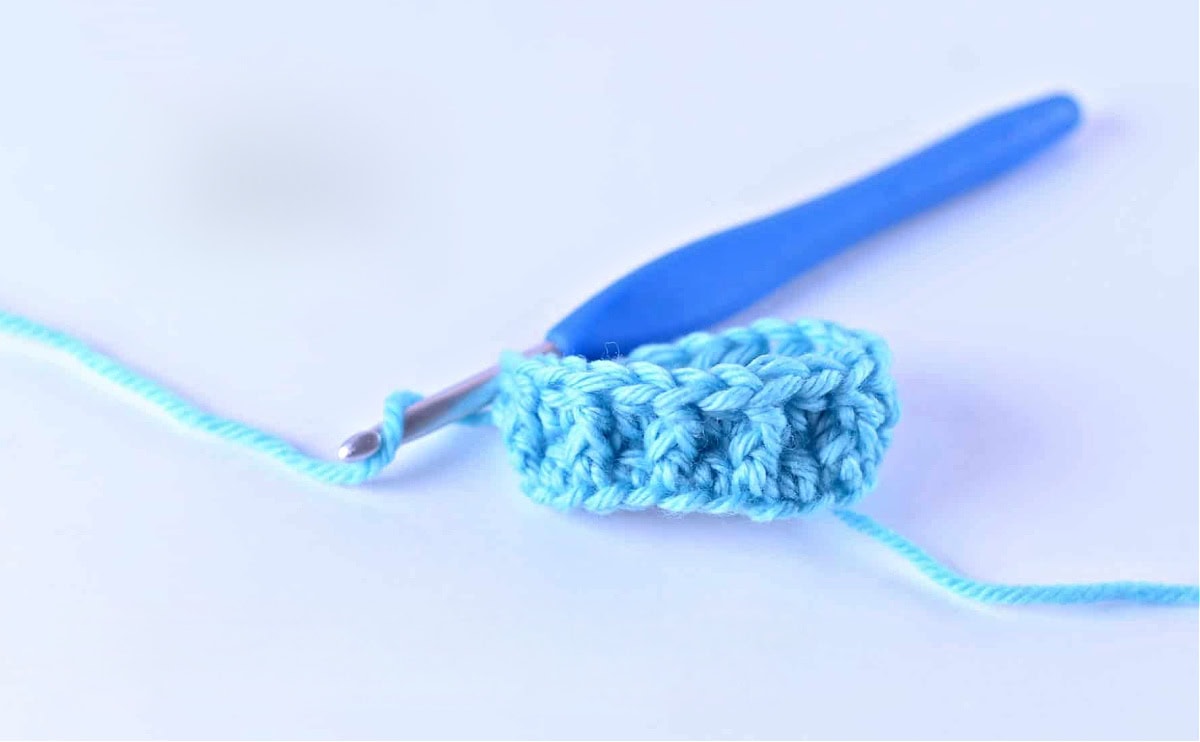
Important Tip #1: When you are working in rows, you will find the post of each crochet stitch directly under the top loops of that stitch. Scroll to the second photo for a visual of this.
Swatch: If you’d like to work a small swatch and work along with the video tutorial, choose a worsted weight yarn and a crochet hook, work Row 1, then start the video.
Row 1: With yarn & your crochet hook, ch 14, working in the back humps of the foundation chain, dc into the 3rd ch from your hook, dc in each ch across. Turn. (12 sts)

Row 2: Ch 1, hdc in the first st, hdc into each of the next 2 sts, (fpdc around the next st, hdc in the next st) 4 times, hdc in the last st. Turn. (12 sts)

Now that you’ve learned where to work post stitches in rows, let’s move on to working in rounds.
Practice Working Post Stitches in Rows with these Free Crochet Post Stitch Patterns
- Chic Cabled Headwarmer
- Aelia Cable Crochet Sweater
- Cozy Crochet Cable Cardigan
- Marseille Crochet Cable Blanket
- Cabled Ice Cream Cozy or Drink Mitt
Working Post Stitches in the Round
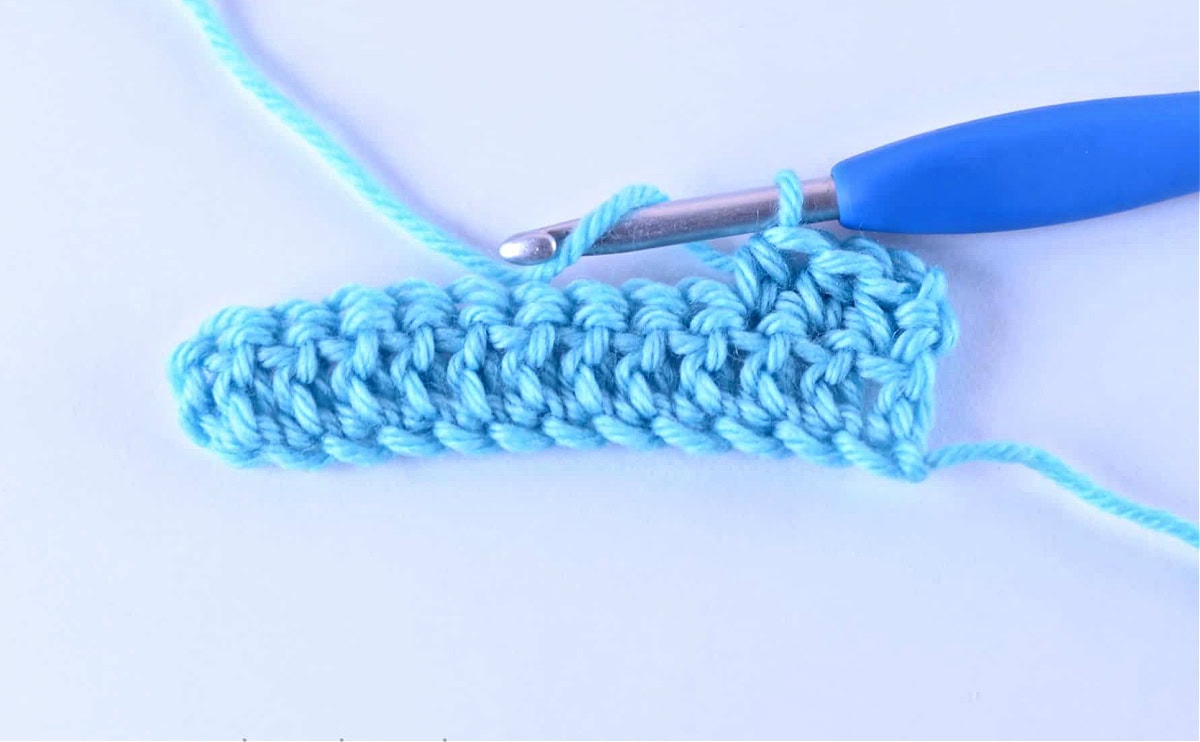
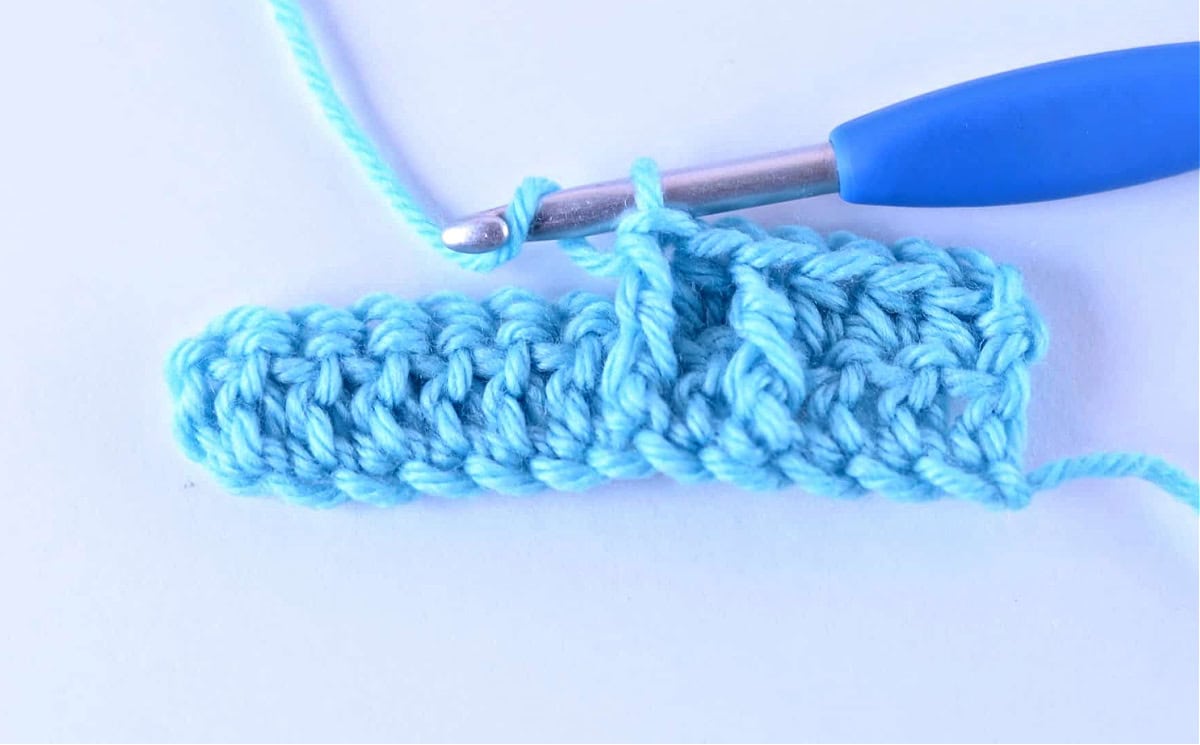
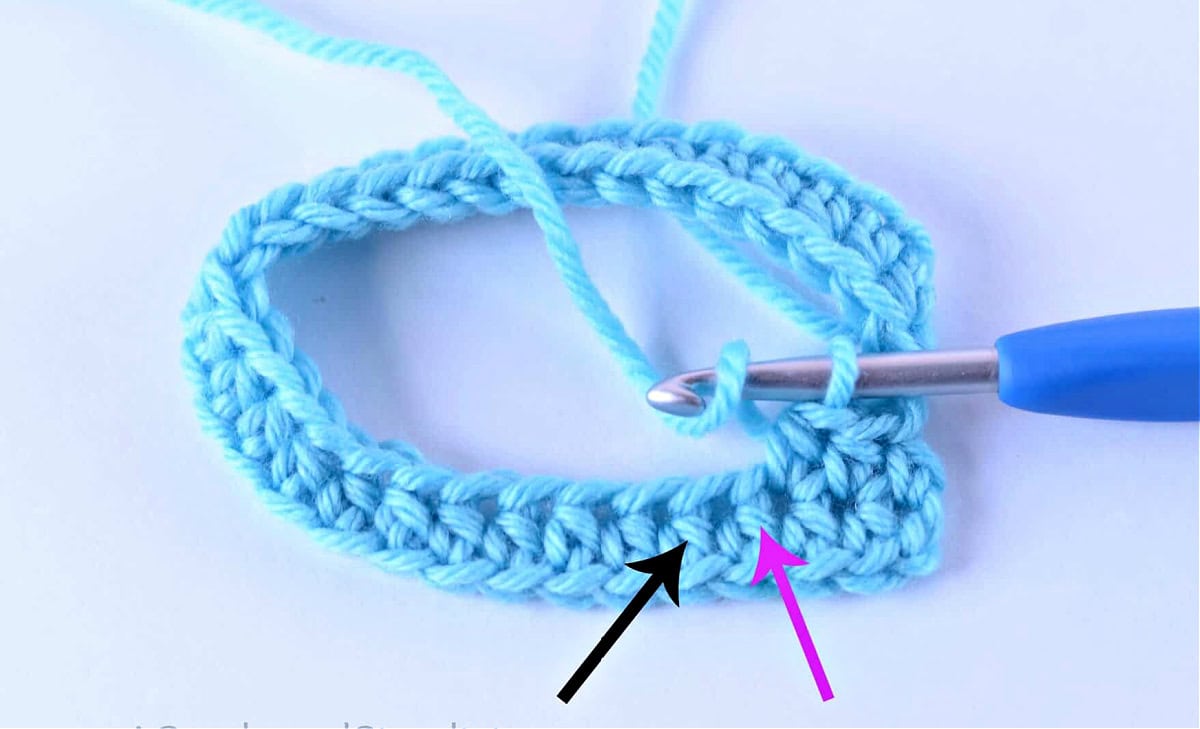
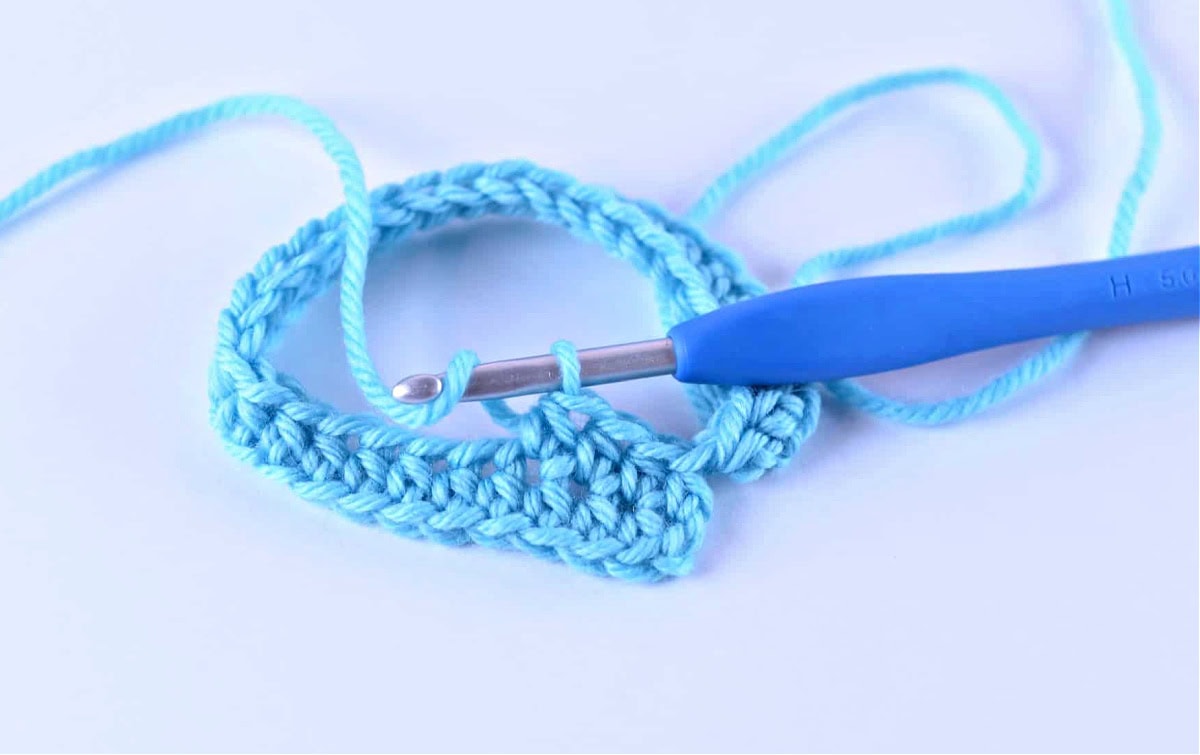
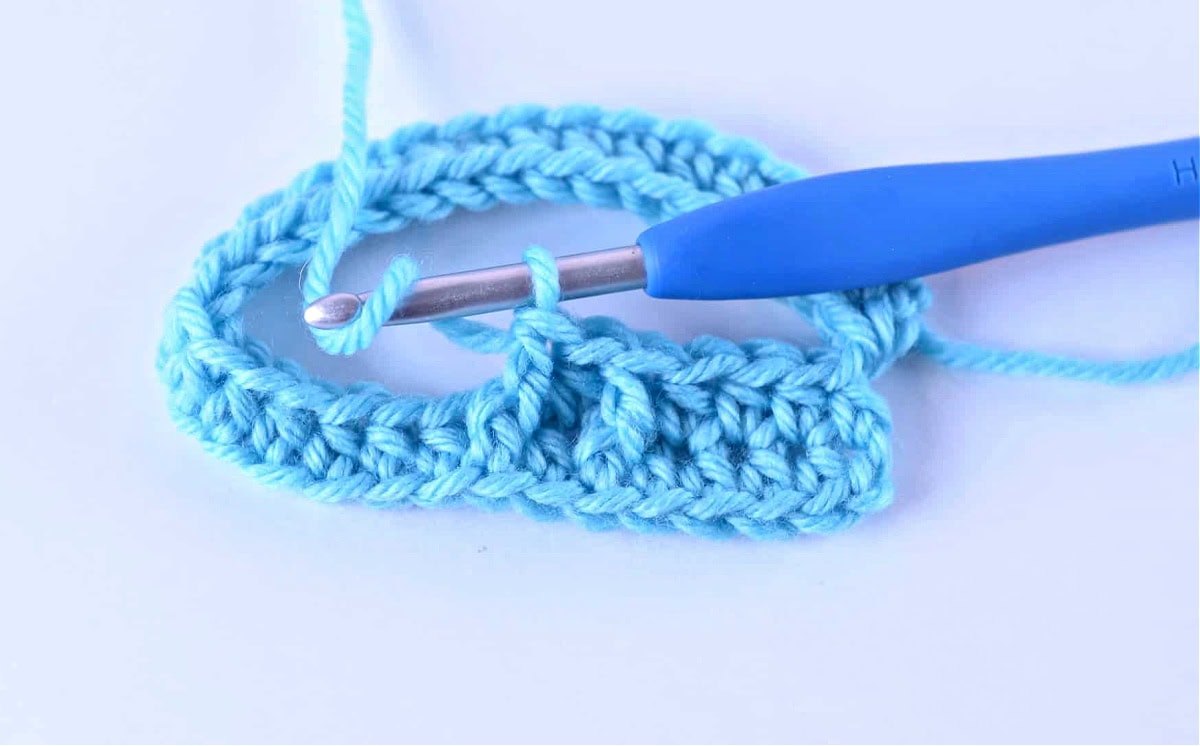
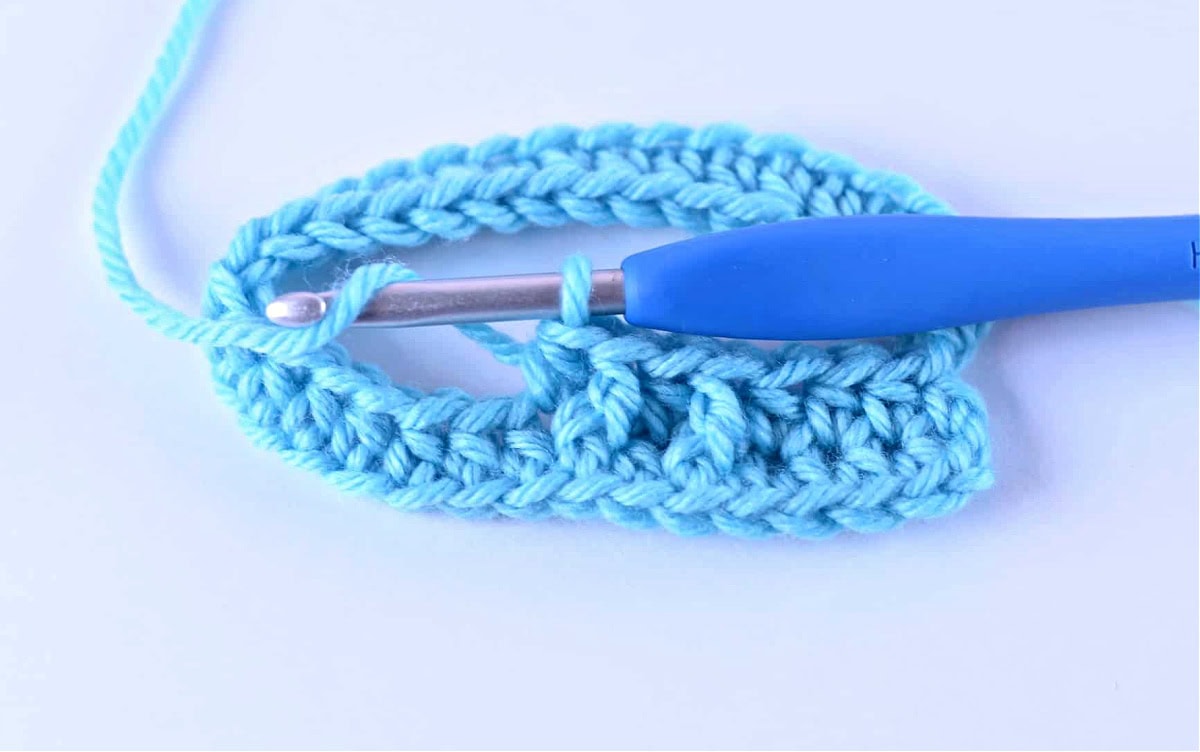
Important Tip #2: When you are working in rounds, you will find the post of a crochet stitch to the LEFT of the top loops of that same stitch. Scroll to the third photo for a visual of this.
Swatch: If you’d like to work a small swatch and work along with the video tutorial, choose a worsted weight yarn and a crochet hook, work Row 1, then start the video.
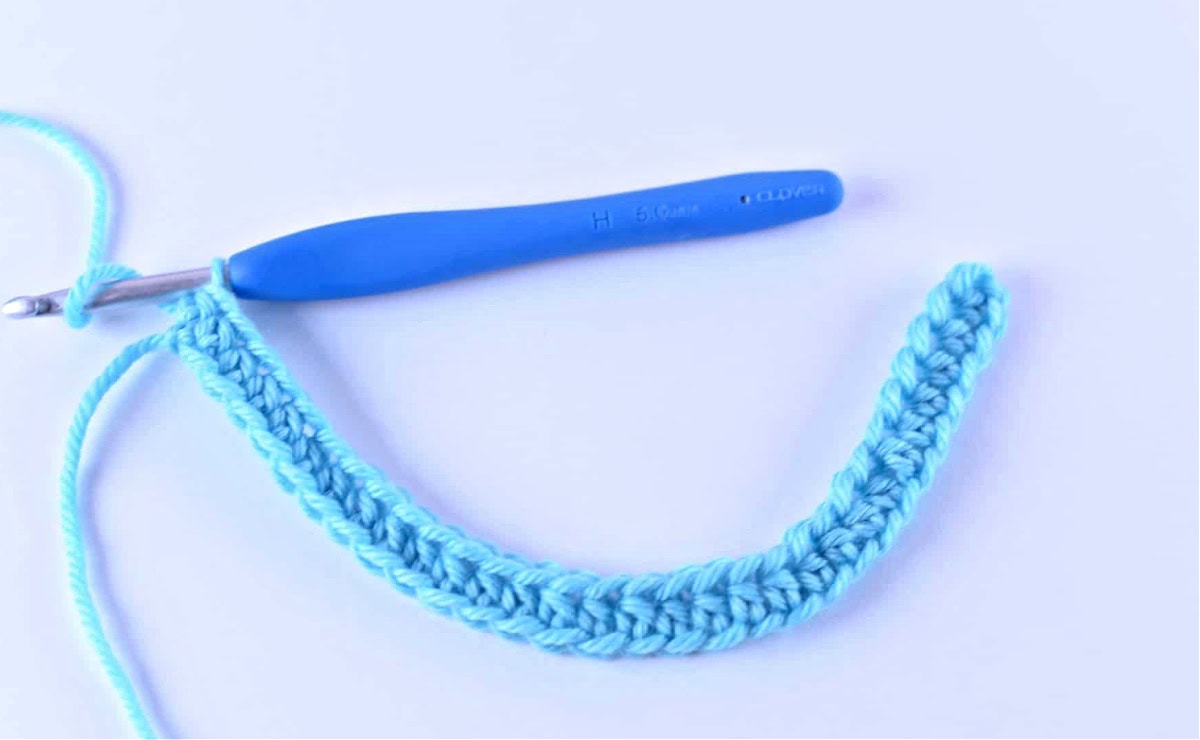
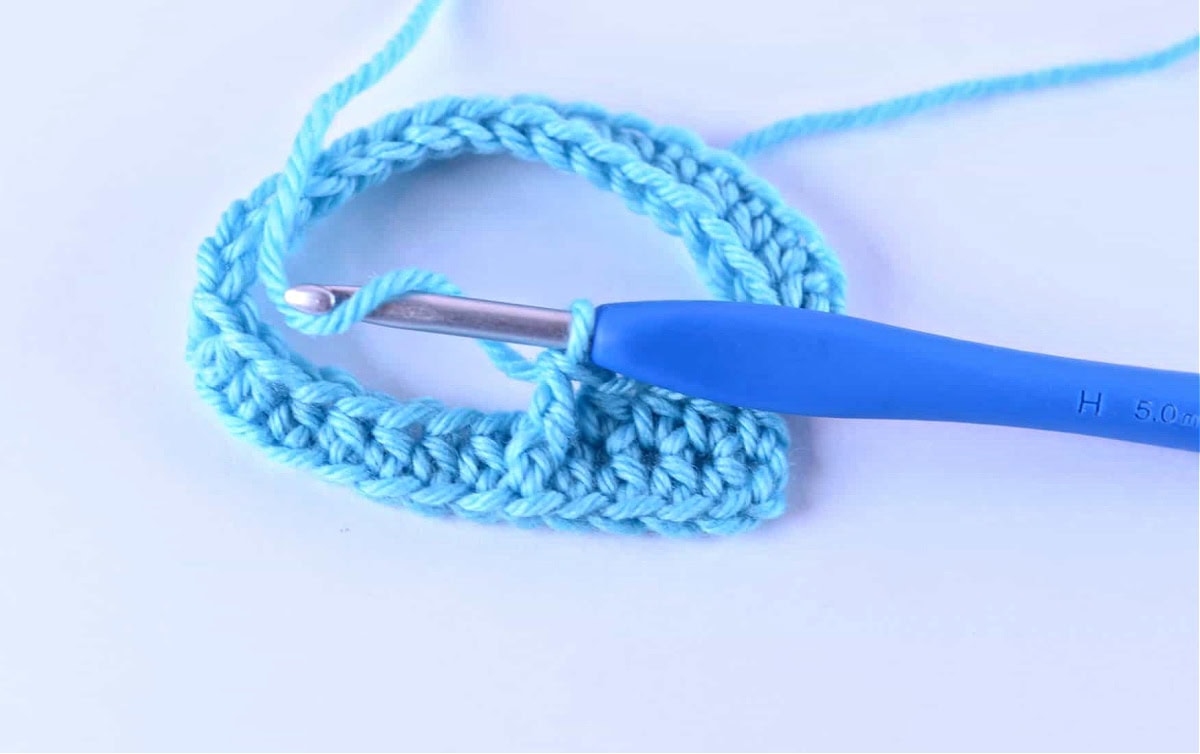
Row 1: With yarn & your crochet hook, ch 31, working into the back humps of the foundation chain, hdc in the 2nd ch from your hook, hdc in each ch across. Do not join just yet. (30 sts) Beginning in round 2, we will work in continuous rounds (a spiral). Do not crochet join with slip stitch.
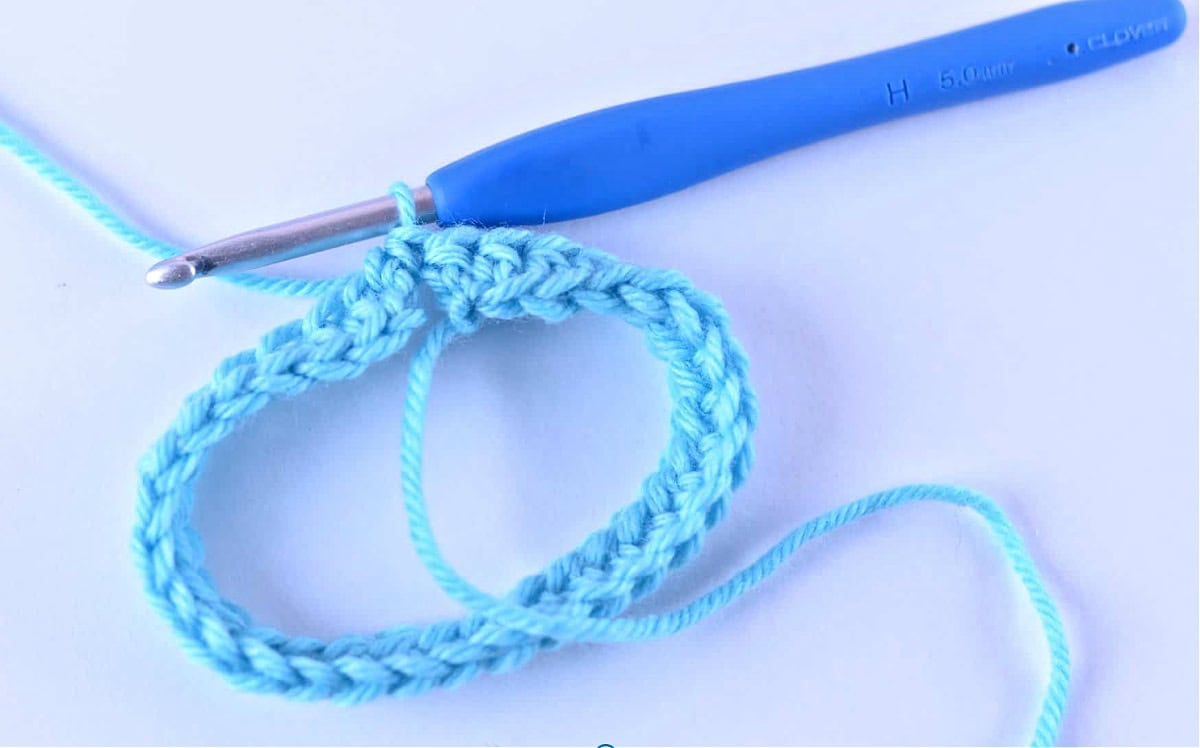
Rnd 2: Bring the first stitch of row 1 around to meet the last stitch of the row, begin working in a continuous round by working a hdc in the 1st st of the previous row (this forms a ring), hdc in each of the next 3 sts, (fpdc around the next st, hdc in the next st) rep from ( to ) around. Do not join. (30 sts)
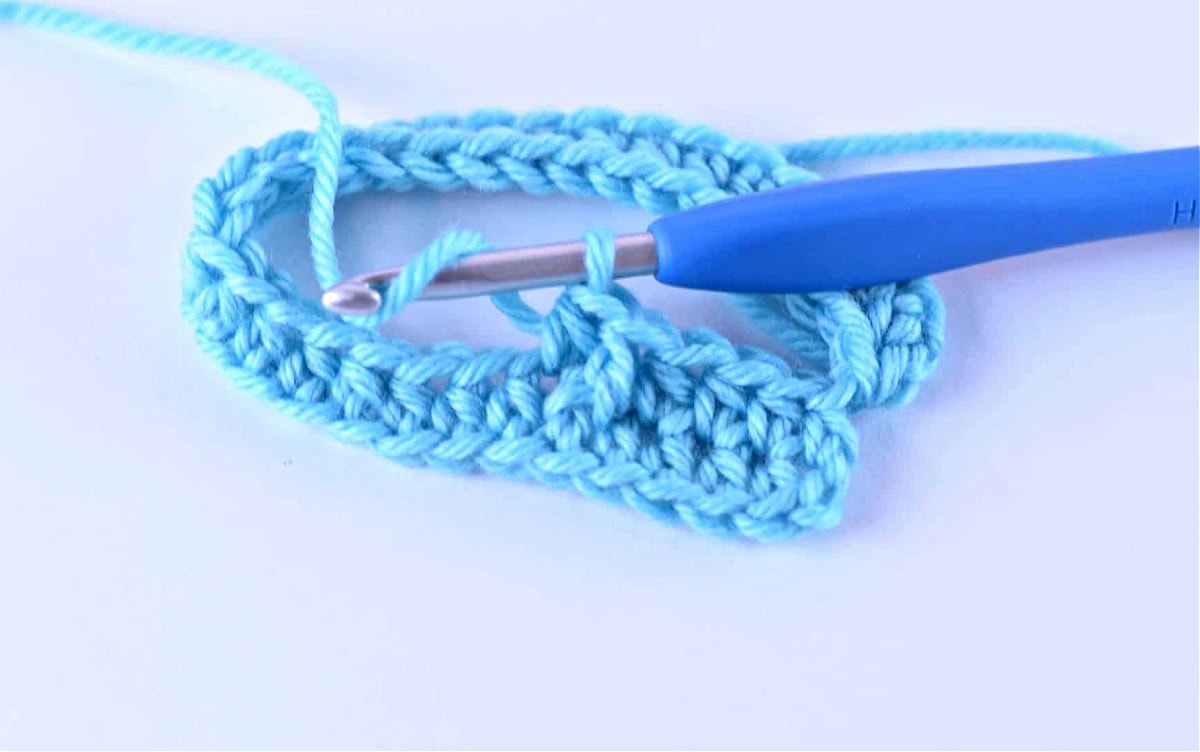
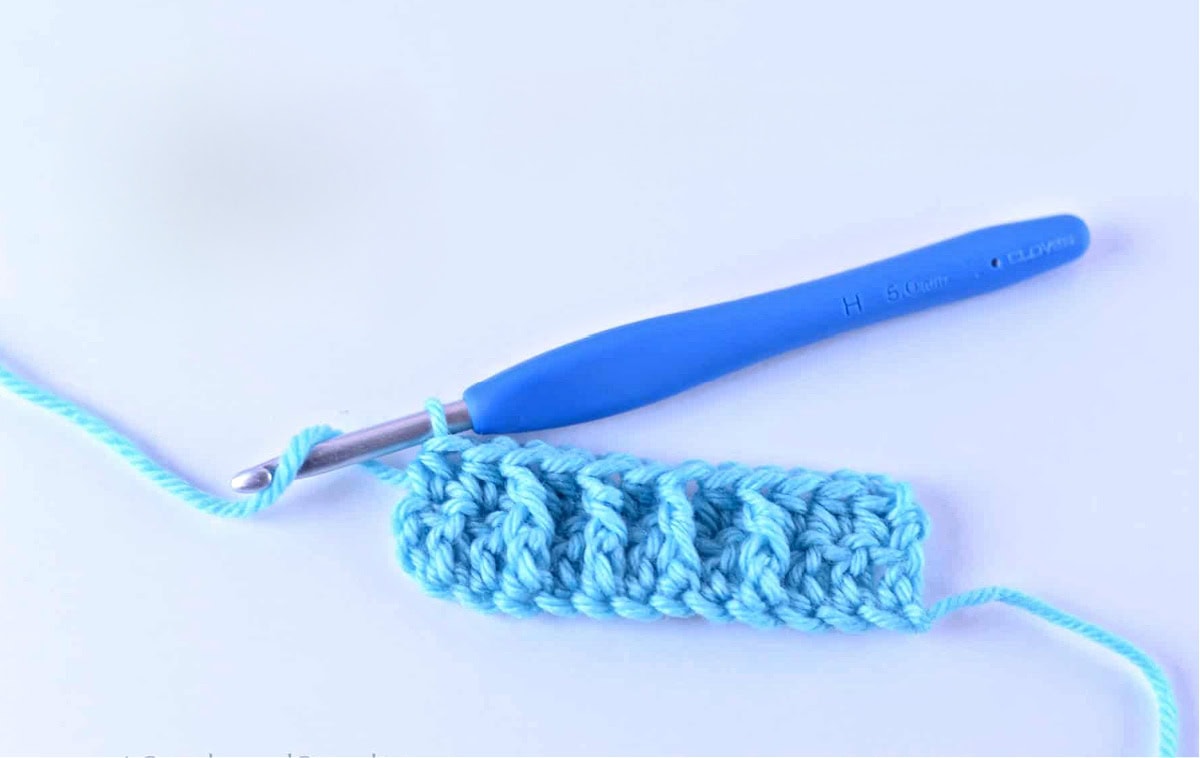
When you work a hdc after a front post crochet stitch, it feels like you are crowding the fpdc, but you are not.
When you work a fpdc after working a hdc, it feels like you are working the fpdc too far away, but it isn’t.
Practice Working Post Stitches in Rounds with these Free Crochet Post Stitch Patterns
- Cabled Blooms Crochet Blanket
- Twisted Textures Crochet Wine Cozy
- Crochet Cabled Beanie
- Eloise Slouch Bulky Crochet Hat Pattern
- Diamonds & Twists Cabled Beanie
In Closing
Crochet post stitches are an excellent way to elevate your crochet skills and add texture and depth to your projects. Whether you’re creating simple ribbing or intricate cable designs, mastering front and back post stitches opens up a world of creative possibilities. Experiment with these stitches, combine them with others, and watch your crochet work come to life!
By incorporating crochet post stitches into your designs, you can create stunning textures that are as fun to make as they are beautiful to look at. Grab your yarn and hook, and give post stitches a try in your next project!
Join us in the Facebook Community Group!
Come share your finished projects with us in the A Crocheted Simplicity Crochet Community Group on Facebook. Join us for fun community events such as crochet alongs, join in on crochet conversations, ask questions, get advice, and share your love for crochet!

More Free Crochet Post Stitch Patterns to Try
More Free Tutorials for Crochet Techniques
- 1 Simple Trick to Counting Rows
- How to Block Acrylic Yarn
- 2 Quick Tips for Crocheting the Herringbone Half Double Crochet Stitch (Hhdc)
- 1 Quick Tip for Crocheting Perfect Spike Stitches
This is the best tutorial EVER! I am new to crochet and after pulling my stitches out many many times I was about to give up. I then found this site, watched the tutorial on post placement stitches in the round, and fixed my piece perfectly first time, with the correct number of stitches and it looks AWESOME!! Thank you so much for posting this, now I’m excited to finish my project.
Hi Tammy,
I’m SO happy to hear that this tutorial has helped you. 🙂
Happy Crocheting,
Jennifer