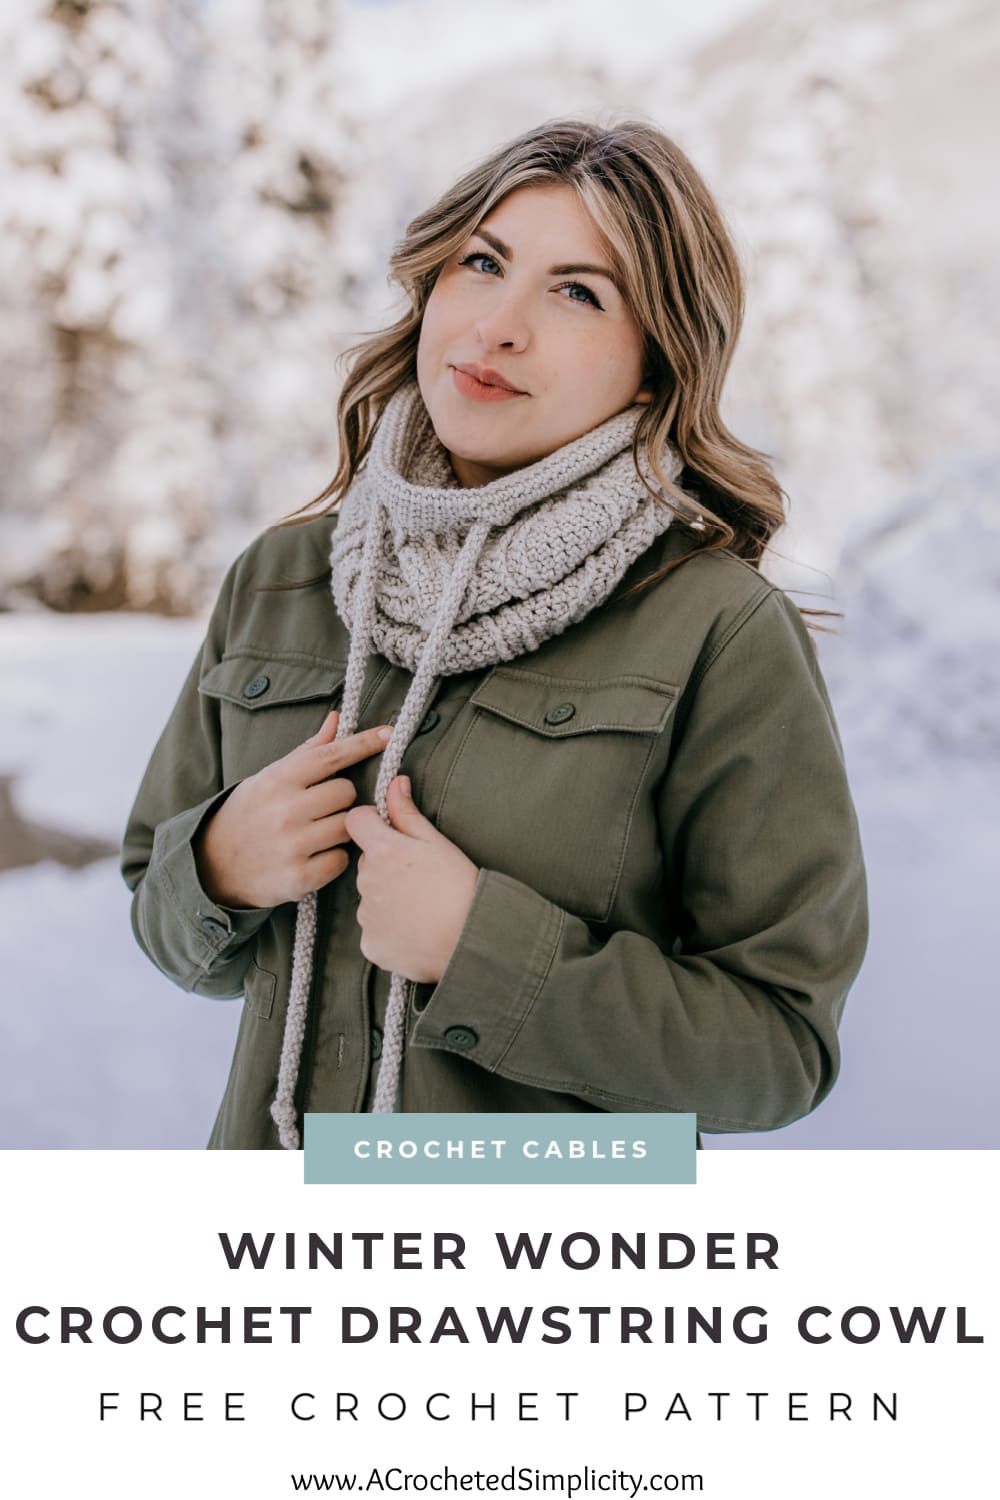
Crochet Drawstring Cowl – Winter Wonder
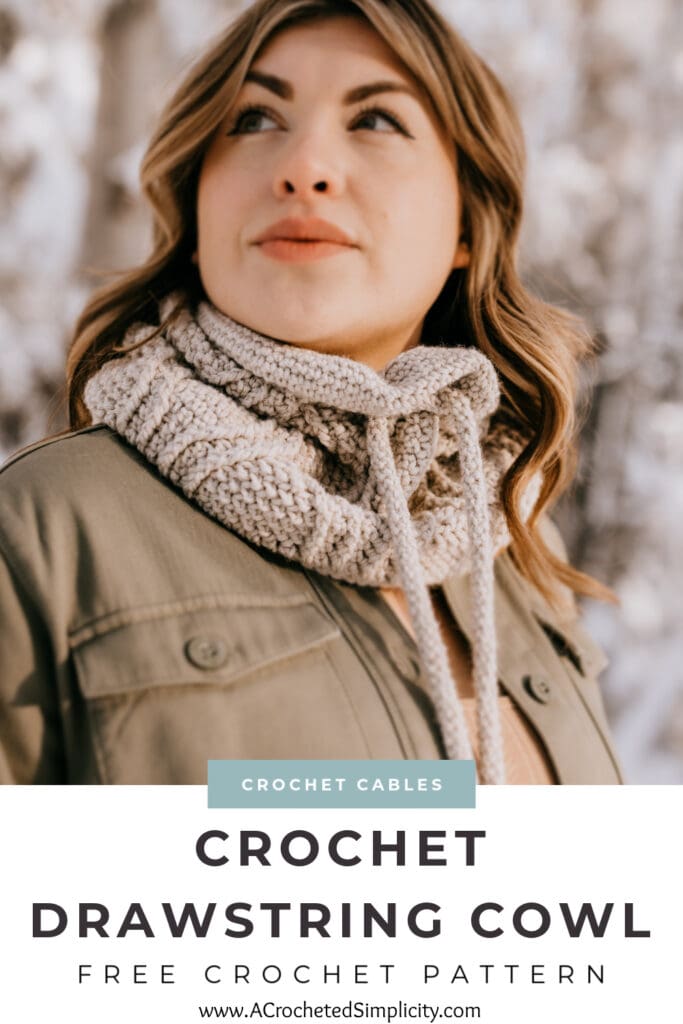
Learn to make a crochet drawstring cowl that will keep you cozy and warm all winter long.
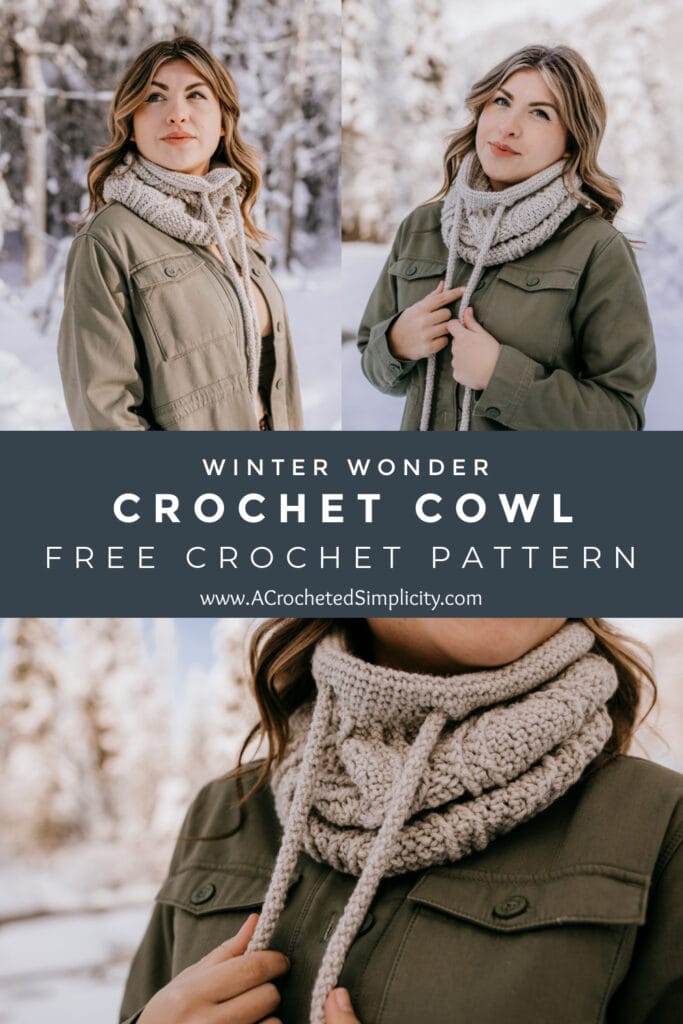
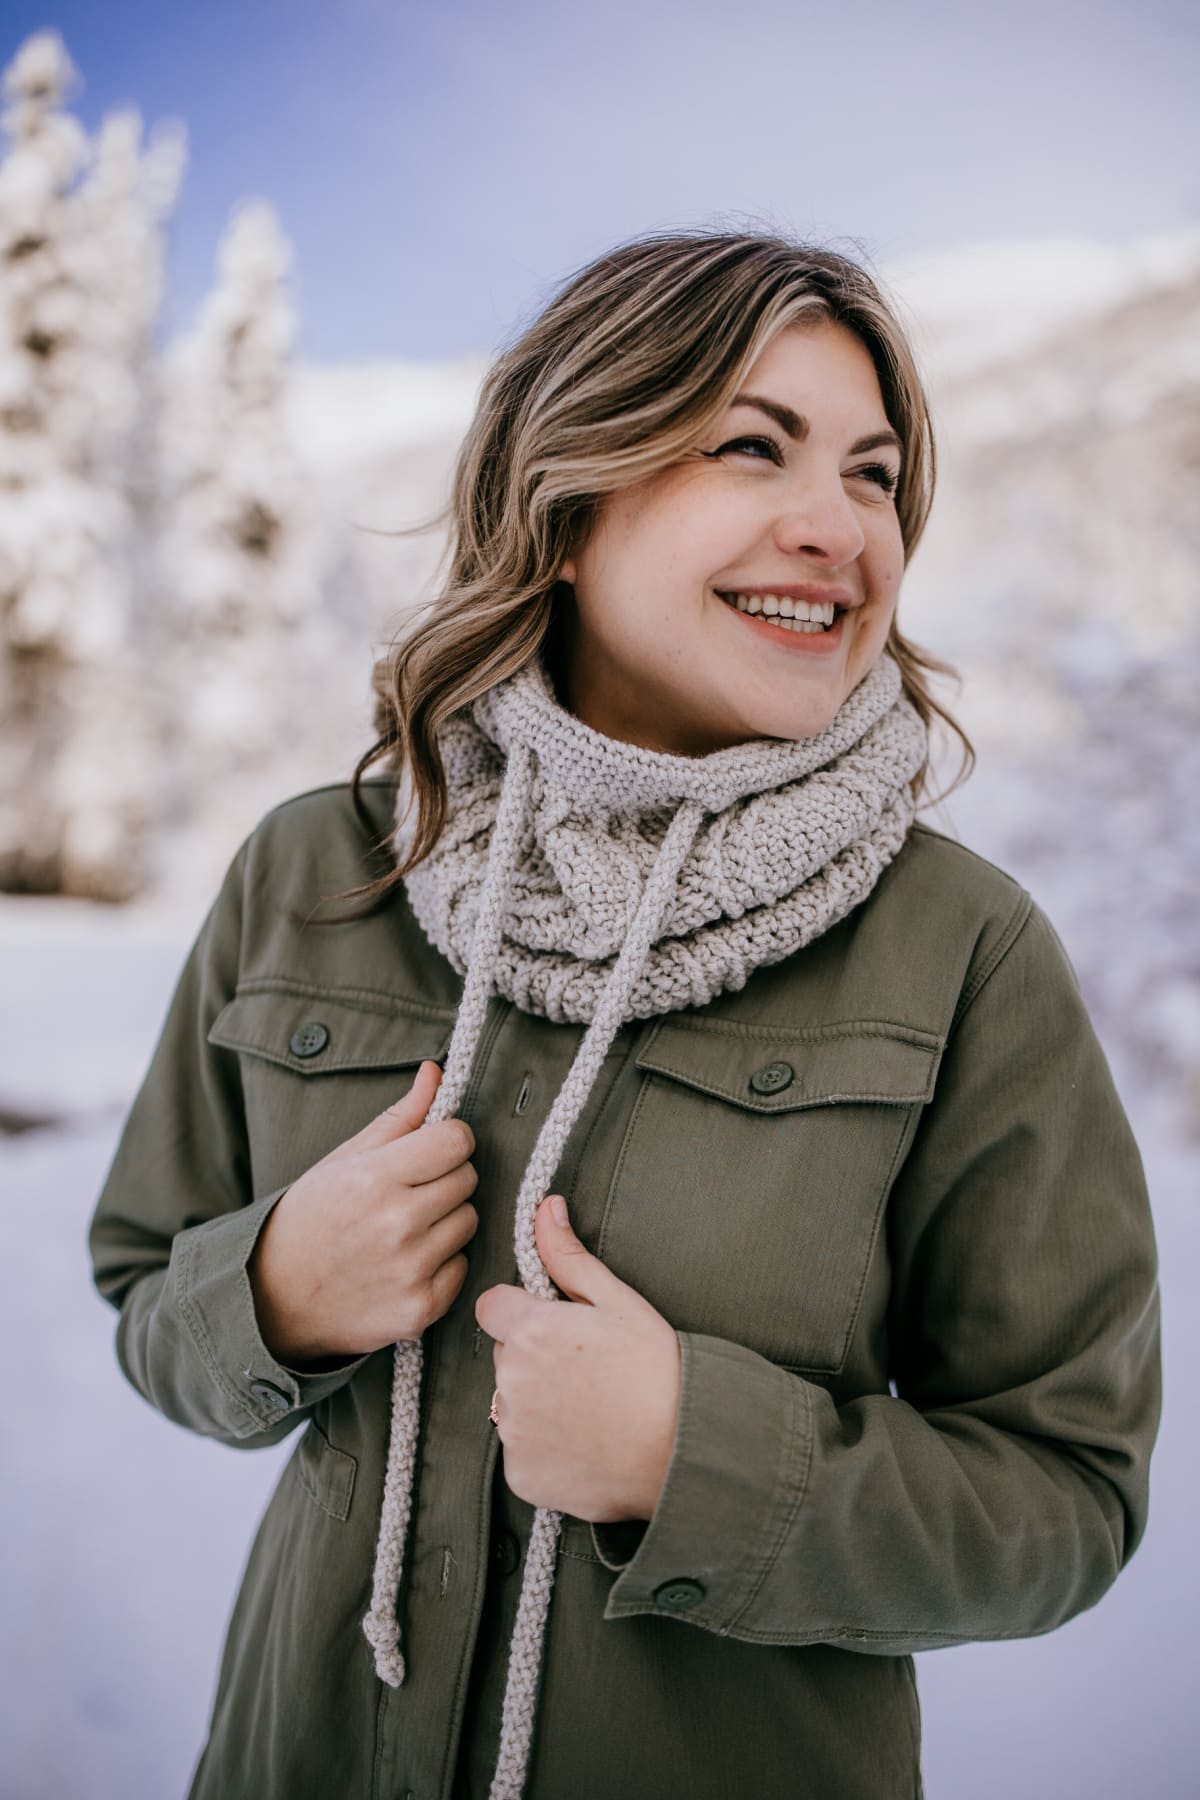
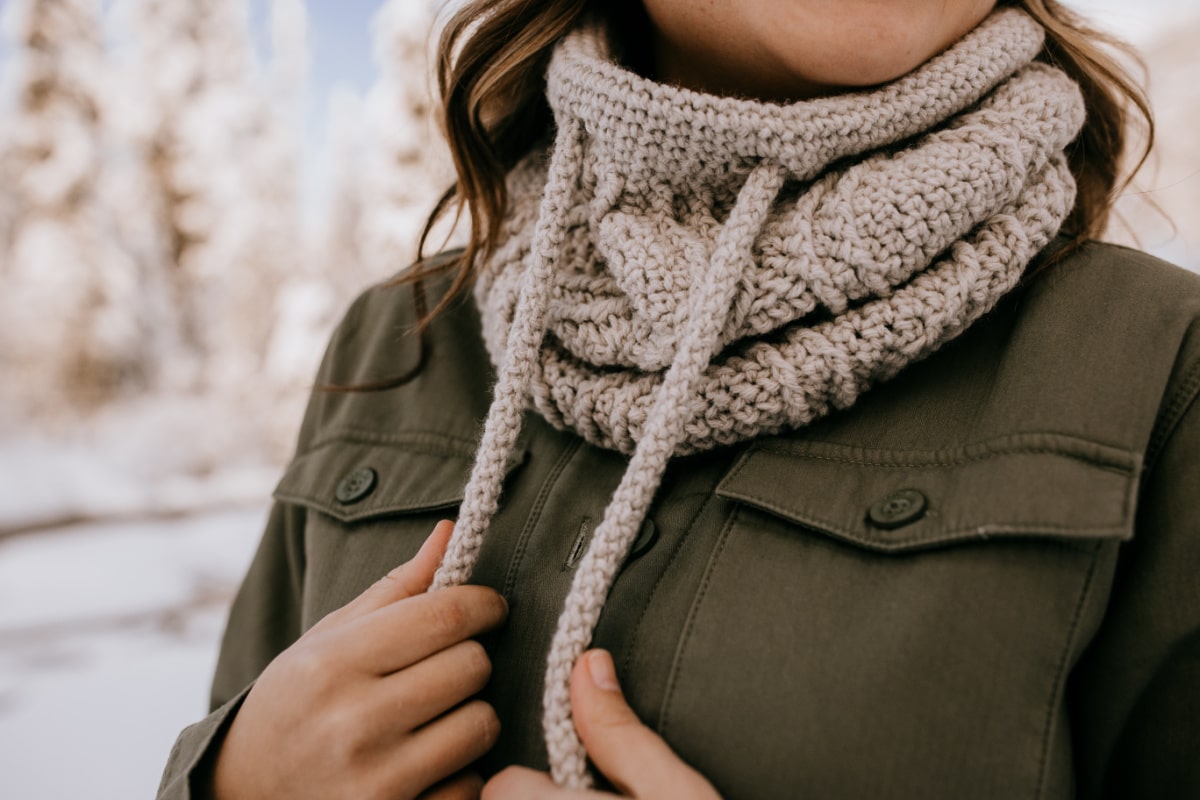
This crochet cabled cowl has an adjustable drawstring feature that allows you to choose just how snug you want to be, making it a great accessory for fall, winter, and spring!
You’ll find the free crochet cowl pattern below, or you can find an ad-free print friendly version (that includes all photo tutorials + a BONUS crochet stitch chart) on Ravelry, or on Etsy (aff).
I love knit-look crochet stitches, crochet cables, and stitches with a lot of texture and I’ve combined all three in the Winter Wonder Crochet Drawstring Cowl.
Traditional cowls are great, but sometimes you need a little more versatility and that’s the biggest benefit of a drawstring cowl.
Having a drawstring in your cowl gives you the option of having a more loosely fit cowl and also a cowl that you can wear snug up against your neck.
If you live in an area where the winter weather changes every couple of hours (like I do), having this versatility in a cowl is a must!
How do you make a cowl?
The Winter Wonder Drawstring Cowl is crocheted from the bottom up to the top in continuous rounds (also referred to as a spiral). I love crocheting in a spiral because it is an easy way to avoid ugly seams.
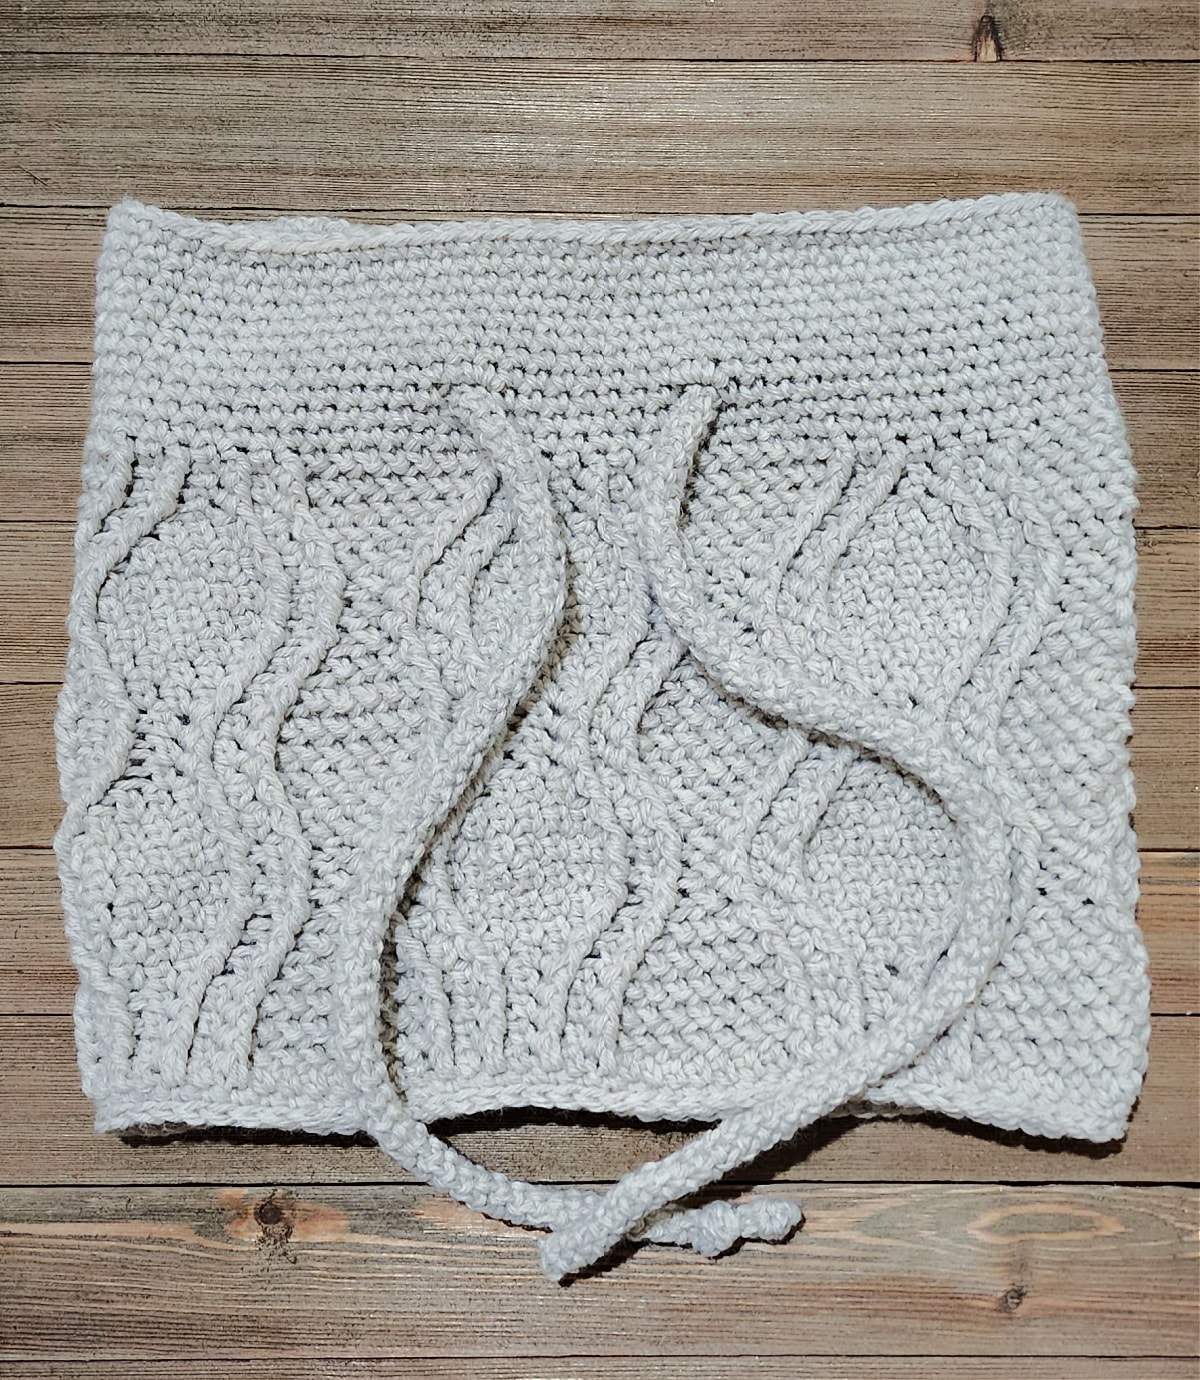
You begin the cowl with a section of crochet cables that move horizontally inward and outward to create wavy cables that resemble an hourglass.
After you complete the cabled section, you’ll move on to the simple crochet drawstring channel. You’ll use simple chains to create two small holes in the front of the cowl for the drawstring to go through.
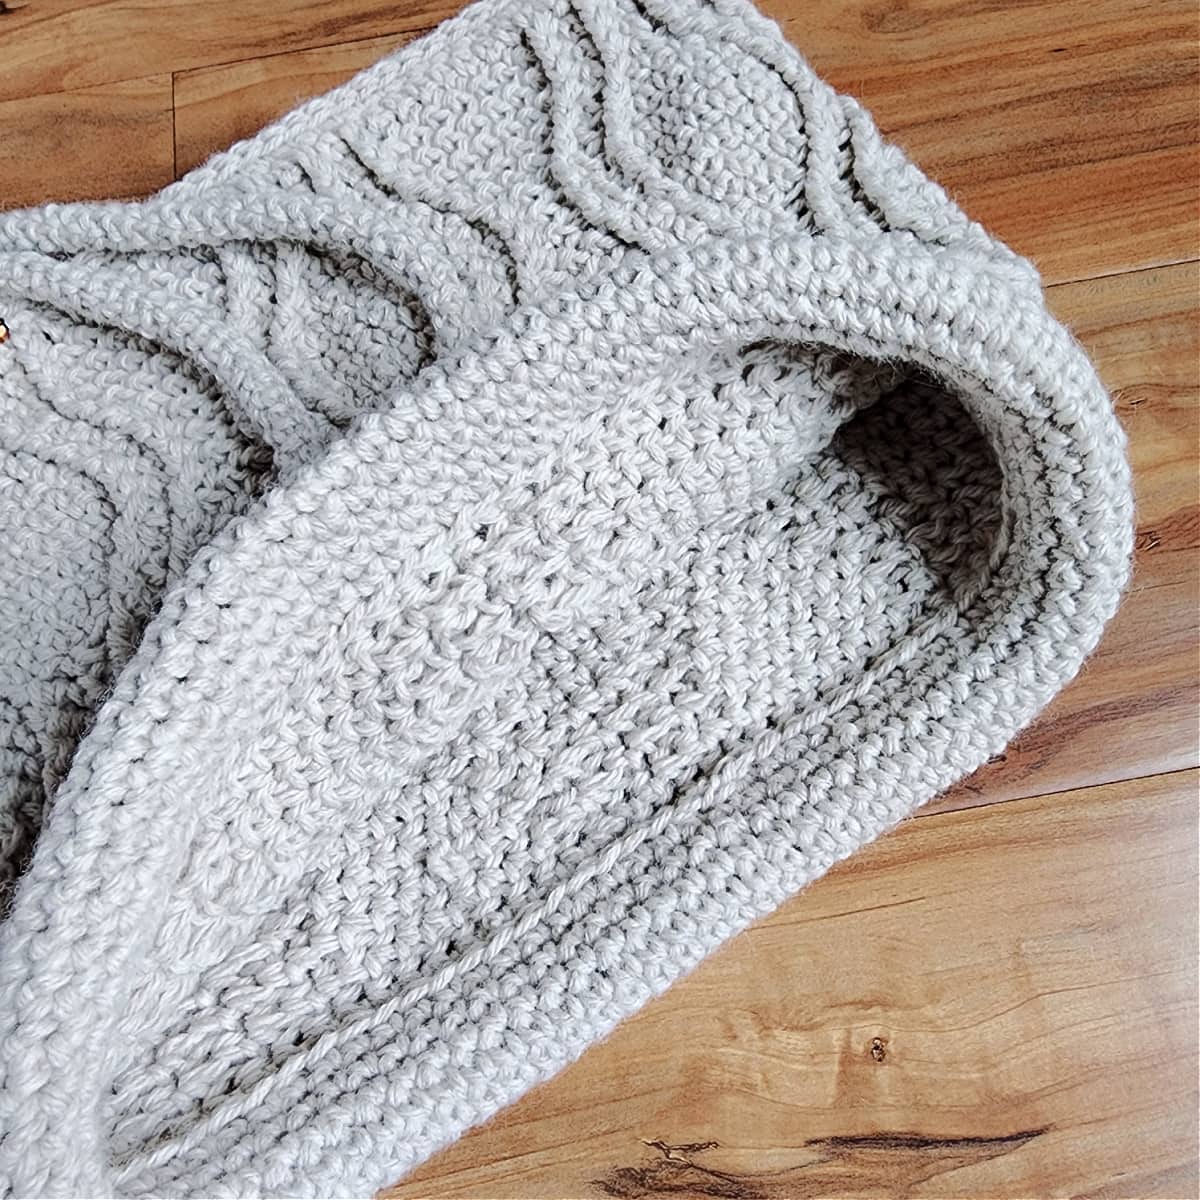
Next, you’ll add a round of single crochet around the bottom edge, followed by a round of surface crochet to give it stability.
Then, you’ll crochet a rope drawstring. I’ve also added an easy alternative for you, if you prefer.
Lastly, you’ll place the drawstring in the channel, fold the channel down and sew it to the inside edge to enclose the drawstring.
Yarn
I chose a worsted weight yarn because I wanted to make sure my drawstring cowl was warm enough to wear with a lightweight jacket or sweater.
I used Lion Brand Yarns Wool Ease for the drawstring cowl crochet pattern shown in this blog post. This is, hands down, one of my favorite worsted weight yarns!
Wool Ease is a worsted weight / 4, acrylic wool blend yarn and it’s currently available in 31 fabulous colors! You’re sure to find the perfect color for your crochet cowl.
There are several other worsted weight yarns that would make great substitutions. Lion Brand Wool Ease Recycled, Lion Brand Heartland, Lion Brand Pound of Love, Lion Brand Vanna’s Choice… just to name a few.
I’d love to see this cabled cowl in an ombre yarn too!
Self-Striping Yarn: If you choose a self-striping yarn, your stripes will be horizontal, from the bottom of the cowl to the drawstring channel.
Winter Wonder Cowl – Crochet Drawstring Cowl Pattern Free
The crochet cable cowl pattern is free below, but if you love to work offline, I’ve got a couple other great options for you.
Purchase the ad-free, printable PDF, including all photo tutorials + a BONUS crochet cables stitch chart, on Ravelry, or on Etsy (aff).
This post contains affiliate links.
Materials
- Yarn: Worsted Weight / 4 / Yarn, Lion Brand Yarn Wool Ease was used for the sample in the photos, 80% Acrylic / 20% Wool (197 yds / 180 m / 85 g / 3 oz).
- Linen: #620-096A 2 balls (360 yards)
- Crochet Hooks: K/10.5/6.50mm; J/10/6.00mm; G/6/4.00mm; or size needed to obtain gauge (My favorite crochet hooks are the Clover Amour Crochet Hooks, I’ve never had an ache in my hands since switching).
- Locking Stitch Markers
- Scissors
- Yarn Needle
Abbreviations (US Terms)
- ch(s): chain(s)
- sl st(s): slip stitch(es)
- st(s): stitch(es)
- sc: single crochet
- ext sc: extended single crochet
- Hhdc: herringbone half double crochet
- fpdc: front post double crochet
- yo: yarn over
- SM: stitch marker
- Rep: repeat
- Rnd: round
- RS: Right Side
- Join yarn with a standing sc
Experience Level
- Intermediate
Gauge
- In ext sc with 6.00mm hook: 16 sts = 5″ W; 9 rows = 3″ H
Size
- One Size: 13″ W x 9.5″ H (laid flat)
Special Stitches
- Extended Single Crochet (ext sc): Insert hook into stitch indicated, yo, pull up a loop, yo, pull thru 1 loop on hook, yo, pull thru remaining two loops on hook.
- Front Post Double Crochet (fpdc): Yo, insert hook from front to back to front around the post of the designated stitch, yo, pull up a loop, yo, pull thru 2 loops, yo, pull thru remaining 2 loops.
- Herringbone Half Double Crochet (Hhdc): Yo, insert hook into stitch indicated, yo, pull up a loop and pull it thru 1 loop on hook, yo, pull thru remaining loops.
- Join yarn with a standing single crochet: Begin with a slip knot on your hook, insert your hook into the stitch or space indicated, yo, pull up a loop, yo and draw thru both loops on hook.
- Surface Crochet
Pattern Notes
- Turning chains are not included in stitch count unless noted otherwise.
- Yarn Notes: Lion Brand Yarns Wool Ease was used for the sample. Another comparable worsted weight yarn may be used as long as gauge is met.
- Lion Brand Yarns Wool Ease: 80% Acrylic / 20% Wool (197 yds / 180 m / 85 g / 3 oz)
- Yardage
- Linen: #620-096A 2 balls (360 yards)
- Please Read “Cable Movement – Important Notes” below before beginning. If you’ve not yet worked one of my cable designs where the cables move inward and outward, you may find these notes helpful. These notes go over how the stitches are worked in this cowl so that the post stitches move horizontally outward and inward.
- Crochet Drawstring Cowl Construction: The cabled cowl pattern is worked in a spiral from the bottom up to the drawstring channel. After completing the crochet cables section, you’ll create a simple drawstring channel. Then, you’ll add surface crochet around the bottom edge to stabilize it. Next, crochet a rope drawstring. Lastly, place the drawstring in the channel, fold the channel down and sew it to the inside edge to create the channel.
Cable Movement – Important Notes
Keep these notes in mind while working your cowl. They will help you properly place your crochet cable stitches, especially when your post stitches are moving horizontally, outward and inward.
- Note #1: Unwritten Rule of Post Stitches: When working post stitches, you are working around the post of a stitch. This means that you always skip over the top loops of 1 stitch behind each post stitch. If you do not skip over those top loops, you’ll end up increasing your overall stitch count. **I believe that most of us do this without even thinking about it, but when it comes to using the post stitches to create cables that move, we forget about that little tidbit.
- Note #2: Pay REALLY close attention to wording; it is very literal. The pattern always says “fpdc around next post st“. Except for Round 2 (which is the first round of post sts) you will work EVERY post st around a post st from the previous round (not around an ext sc). In short, make sure to work EVERY post st from Round 3 or later, around the post of a post st from the previous round and your post sts will be where they need to be.
- Note #3: To achieve proper movement of post stitches, there are rounds where you may be working into BOTH the top loops of a post stitch and around it. Watch wording carefully and make sure to always skip the top loops of 1 stitch behind every post st.
- Note #4: To maintain post stitch movement and stitch count, there are also times when you will not be working into an ext sc. Count stitches and pay special attention to wording.
Crochet Drawstring Cowl Pattern
Body of Cowl
Set-Up: With yarn & a 6.50mm crochet hook, ch 84. Join with a sl st to the back hump of the 1st ch. (84 sts)
Rnd 1 (RS): Switch to a 6.00mm crochet hook, ch 1, working into the back humps of the foundation ch, ext sc into each ch around. Do not join. (84 sts)
Note: Begin working in continuous rounds (a spiral) at the beginning of Round 2 by working the first ext sc of Round 2 into the first ext sc of Round 1. I highly suggest placing a stitch marker (or scrap piece of yarn) between the first and last stitches of each round to help keep your place. Move the stitch marker up as you complete each round.
Rnd 2: [ ext sc in next st, fpdc around next ext sc, ext sc in next st, fpdc around next ext sc, Hhdc in next 7 sts, fpdc around next ext sc, ext sc in next st, fpdc around next ext sc ] work from [ to ] 6 times. (84 sts)
Rnds 3 – 4: [ ext sc in next st, fpdc around next post st, ext sc in next st, fpdc around next post st, Hhdc in next 7 sts, fpdc around next post st, ext sc in next st, fpdc around next post st ] work from [ to ] 6 times. (84 sts)
Rnd 5: [ ext sc in next st, (ext sc in top of next post st, fpdc around same post st as last ext sc just worked, skip next st) twice, Hhdc in next 5 sts, (skip next st, fpdc around next post st, ext sc in top of same post st as fpdc just worked) twice ] work from [ to ] 6 times. (84 sts)
Rnd 6: [ ext sc in next 2 sts, (ext sc in top of next post st, fpdc around same post st as last ext sc just worked, skip next st) twice, Hhdc in next 3 sts, (skip next st, fpdc around next post st, ext sc in top of same post st as fpdc just worked) twice, ext sc in next st ] work from [ to ] 6 times. (84 sts)
Rnd 7: [ ext sc in next 3 sts, (ext sc in top of next post st, fpdc around same post st as last ext sc just worked, skip next st) twice, Hhdc in next st, (skip next st, fpdc around next post st, ext sc in top of same post st as fpdc just worked) twice, ext sc in next 2 sts ] work from [ to ] 6 times. (84 sts)
Rnd 8 – 9: [ ext sc in next 4 sts, fpdc around next post st, ext sc in next st, fpdc around next post st, Hhdc in next st, fpdc around next post st, ext sc in next st, fpdc around next post st, ext sc in next 3 sts ] work from [ to ] 6 times. (84 sts)
Rnd 10: [ ext sc in next 3 sts, skip next st, fpdc around next post st, ext sc in top of same post st as fpdc just worked, skip next st, fpdc around next post st, Hhdc in top of same post st as fpdc just worked, Hhdc in next st, Hhdc in top of next post st, fpdc around same post st as last Hhdc just worked, skip next st, ext sc in top of next post st, fpdc around same post st as last ext sc just worked, skip next st, ext sc in next 2 sts ] work from [ to ] 6 times. (84 sts)
Rnd 11: [ ext sc in next 2 sts, skip next st, fpdc around next post st, ext sc in top of same post st as fpdc just worked, skip next st, fpdc around next post st, Hhdc in top of same post st as fpdc just worked, Hhdc in next 3 sts, Hhdc in top of next post st, fpdc around same post st as last Hhdc just worked, skip next st, ext sc in top of next post st, fpdc around same post st as last ext sc just worked, skip next st, ext sc in next st ] work from [ to ] 6 times. (84 sts)
Rnd 12: [ ext sc in next st, skip next st, fpdc around next post st, ext sc in top of same post st as fpdc just worked, skip next st, fpdc around next post st, Hhdc in top of same post st as fpdc just worked, Hhdc in next 5 sts, Hhdc in top of next post st, fpdc around same post st as last Hhdc just worked, skip next st, ext sc in top of next post st, fpdc around same post st as last ext sc just worked, skip next st ] work from [ to ] 6 times. (84 sts)
Rnds 13 – 14: [ ext sc in next st, fpdc around next post st, ext sc in next st, fpdc around next post st, Hhdc in next 7 sts, fpdc around next post st, ext sc in next st, fpdc around next post st ] work from [ to ] 6 times. (84 sts)
Rnds 15 – 24: Rep Rnds 5 – 14.
Do not fasten off. Measurements when laid flat: 13″ W x 8″ H. Continue on to Top Drawstring Edge.
Top Drawstring Edge
Rnds 1 – 2 (RS): Sc in each st around. (84 sts)
Rnd 3: Sc in each of the next 37 sts, ch 2, skip each of the next 2 sts, sc in each of the next 7 sts, ch 2, skip each of the next 2 sts, sc in each remaining st around. (80 sts + 2 ch-2’s)
Rnd 4: Sc in each st and ch around. (84 sts)
Rep Rnd 4 until the Drawstring Edge measures approximately 2.75″ H.
Fasten off. Weave in ends. Continue on to the Bottom Edge.
Bottom Edge
This section is to add a nice clean edge to the bottom of the cowl and to add a stabilizing stitch.
Rnd 1 (RS): With a 6.00mm crochet hook, join yarn with a standing sc in a st nearest to where you joined your foundation ch for the cowl, sc in each st around. Do not join. (84 sts)
Rnd 2: Work a surface crochet into each stitch around. Make sure not to work these stitches too tightly or it will cinch in the bottom edge of your cowl. Join with a Special Join Technique. See the surface crochet photo tutorial.
Fasten off. Weave in ends. Continue on to make a Crochet Rope, or an easier alternative below.
Crochet Rope & Alternative
My personal favorite is a crochet rope, but if you’d like an easy alternative, I’ve included instructions below. The Ad-free PDF includes all photo tutorials, including the crochet rope photo tutorial.
For the crochet cowl drawstring pictured in the photos, use my Crochet Rope Instructions and make a crochet rope that measures 64″ long, when slightly stretched.
Fasten off. Weave in ends. Continue on to Finishing.
Easy Crochet Rope Alternative
The easiest alternative is to double or triple strand your worsted weight yarn. Then using a larger crochet hook, create a chain that is 64″ L, or desired length.
Finishing
Step 1: Place your crochet yarn rope on the inside of the cowl within the area of the top drawstring edge. Make sure to pull one end of the yarn rope thru to the front of each opening that you created in round 3 of the top drawstring edge.
Step 2: Fold the Top Drawstring Edge down towards the inside of the cowl to create a channel for the crochet drawstring rope.
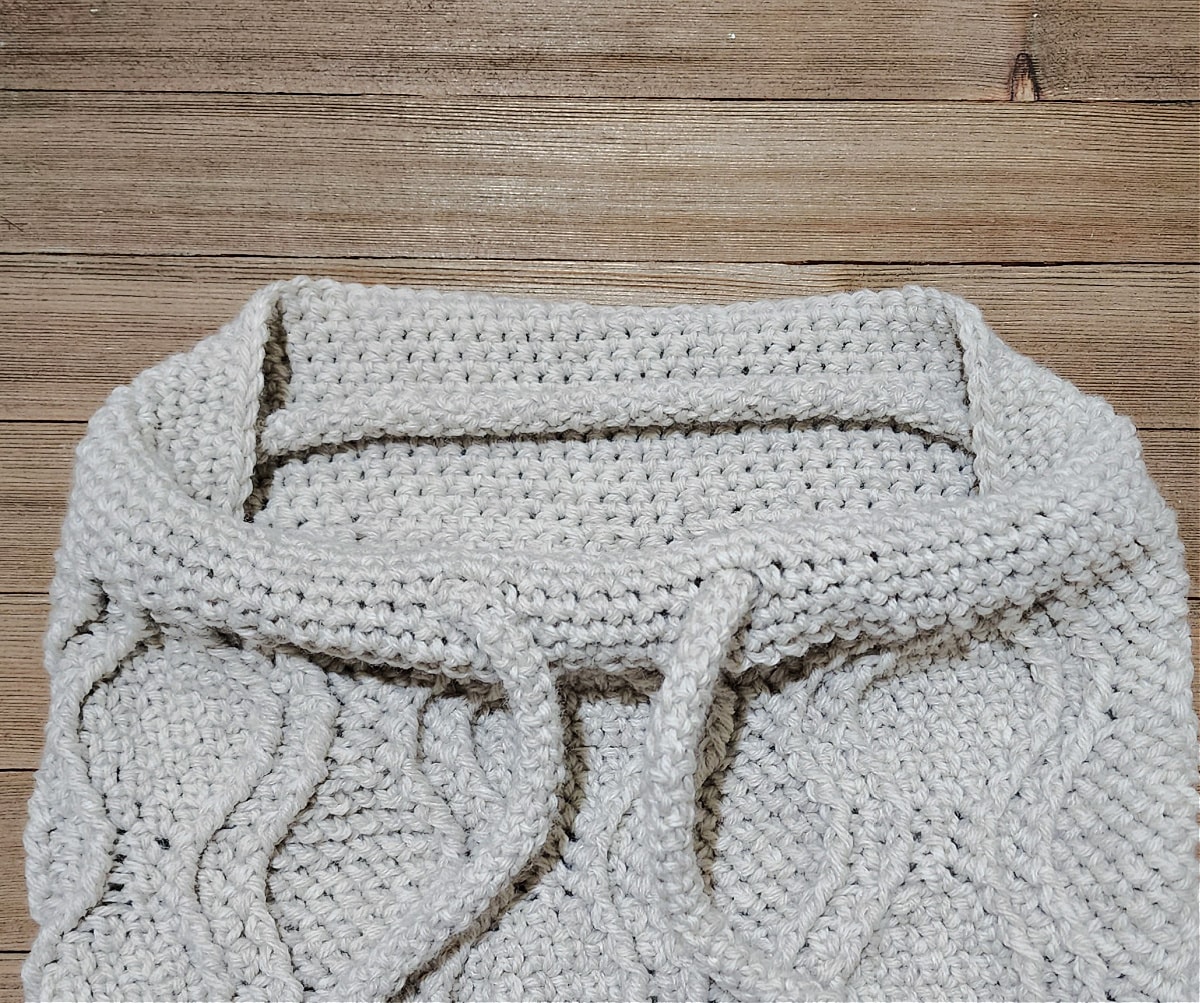
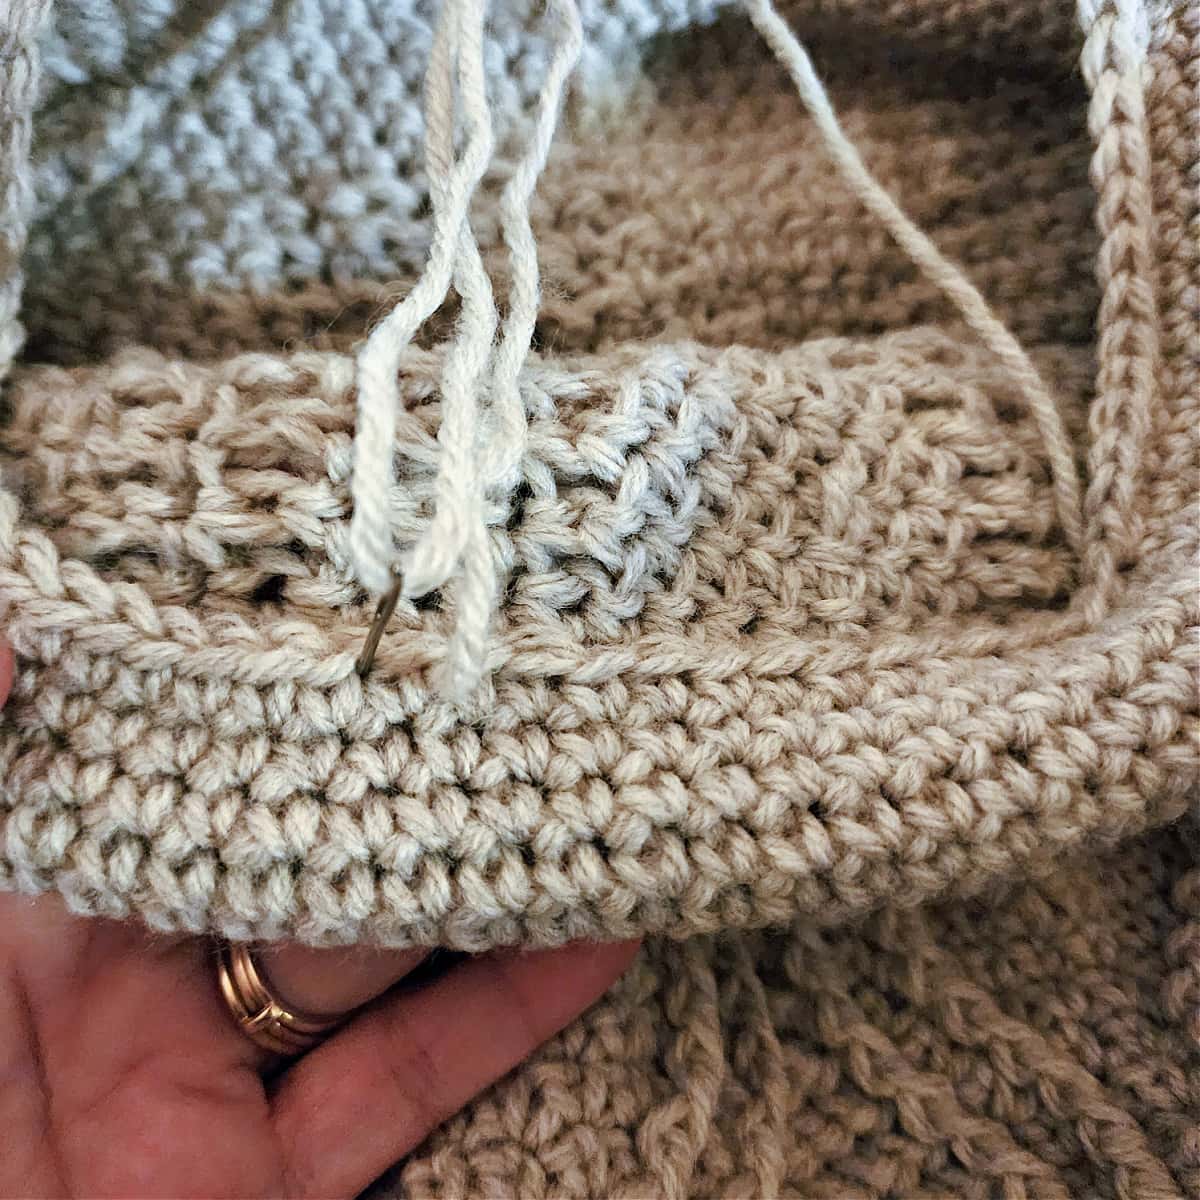
Step 3: Using a yarn needle and tail of yarn, and working thru both layers, sew the top ribbed edge down to keep it in place and create the channel for the yarn rope. Sew all the way around the cowl.
Fasten off. Weave in ends. I added a decorative knot at each end of my drawstring.

For Customized Leather, Cork, and Wood Labels, I highly recommend All This Wood on Etsy! I used a wooden tag for my cowl.
Questions Crocheters Frequently Ask About Crocheted Cowls
In addition to questions I’ve answered in this blog post above, below are some commonly asked questions about a crochet cowl pattern.
What size should a crochet cowl be?
This varies a little depending on the style and fit of the cowl. The Winter Wonder Cowl is intended to fit a little closer to the neck and it is 26″ circumference and 9.5″ tall.
On average, crochet cowls for adults should range between 26″ – 30″ circumference and between 9″ – 12″ tall.
How much yarn do I need to crochet a cowl?
The answer to this question varies from crochet pattern to crochet pattern depending on the weight of yarn used and even the crochet stitches that are used. For instance, a crochet cowl made with basic crochet stitches will require less yarn than a crochet cabled cowl. Crochet cables can be yarn eaters.
For this crochet cable cowl, you will need approximately 350 – 360 yards of worsted weight yarn. This is less than two balls of Lion Brand Wool Ease.
How long does it take to crochet a cowl?
Again, the answer to this question will vary from one crochet cowl pattern to the next and also the speed of the crocheter. The Winter Wonder Drawstring Cowl took me about 3 – 4 hours to crochet.
What can I crochet for the winter?
There are SO many crochet projects that are perfect for winter! You can crochet beanies, mittens, sweaters, scarves, cowls, blankets, crochet for your pets, and more! You can also crochet for the winter holidays!
I MADE IT! NOW WHAT?
Pin this post! Save this free drawstring cowl pattern to your Pinterest boards so that you can come back and make it again.
Leave a comment below: We love to hear your feedback.
Share Your Finished Projects on Facebook or Instagram: I love to see your finished projects! Share with us on social media and tag me @acrochetedsimplicity or use the hashtag #ACrochetedSimplicity so I can find your posts.
JOIN US IN THE FACEBOOK COMMUNITY GROUP!
I hope you’ve enjoyed this winter cowl neck scarf pattern! Make sure to check out our other winter cowl patterns.
Come share your finished projects with us in the A Crocheted Simplicity Crochet Community Group on Facebook. Join us for fun community events such as crochet alongs, join in on crochet conversations, ask questions, get advice, and share your love for crochet!

MORE CROCHET PATTERNS FOR WINTER I THINK YOU’LL LOVE
MORE CROCHET WINTER WEAR
Are you looking for more winter crochet patterns? We have several free crochet patterns for men and women, right here on our blog.
We have a variety of crochet patterns for winter wear, such as crochet sweaters, crochet hats, crochet shawls & scarves, crochet mittens, and more!
This is an amazing cowl! Have the perfect stash in my closet!
Thanks, Donna!
I love cables on crocheted items. will definitely have to make this.
This is gorgeous and going on my must make list!
I love everything about this cowl. Not too bulky. Beautiful color and fancy stitch. Thanks for sharing.
This cowl will make a very nice gift.
The stitch pattern is beautiful and having a drawstring to cozy up in the chilliest of weather is wonderful!! I’m looking forward to creating this in January!!!
Questo schema mi piace tantissimo e sembra essere molto caldo e confortevole
I’m getting a jump start for Christmas 2024. My sister and daughters are going to love this!
Thank you for such a beautiful pattern.
I love this cowl scarf, especially the draw string. It’s very modern looking! Thanks for this updated scarf!
Like the idea of the drawstring cowl.
I think the drawstring in this pattern is genius!!
Love this cowl especially with the drawstring, you can turn it into a messy bun hat.
Love this cowl! It’s perfect for Western PA weather! Thank you~!
I can’t wait to try this pattern! I have the perfect yarn for it!!
I love the drawstring addition to this cwl
I love this cowl and stupidly showed my sister what I was going to do for myself. she decided that I could do one for her birthday(and she would even buy the yarn) so all I needed to do was provide the love. how could I refuse put like that?
that would of been fine if she hadn’t shown my mum and 2 neices I now need to make 5.
I’m looking forward to making this in the New Year! The drawstring really adds a touch of class.
In general, I am not a cowl person but this design has me changing my mind! I can’t wait to make this one. The drawstrings and the cables make this design one of a kind!!
Thank you for the free PDF for this pattern during Marly’s 24 Days of Christmas! I look forward to making it this winter.
I love the way this looks. It’s on my list to make.
I made this as a secret Santa gift and how fabulous it looked! The recipient couldn’t believe it was homemade and what a fantastic pattern from Jennifer. Once I got into the flow of the cables it was really fun to do. I am just sorry I didn’t get a picture before it went. Instead of sewing the top over for the channel I used the surface crochet technique which looked really effective. Love your patterns Jennifer!😊
This is definitely on my list!
I absolutely love this cowl! It is the pattern that drew me to your website, to which I now subscribe. Thanks for sharing such a beautiful design!
This cowl is pure perfection!! I can’t stop looking at it. From the amazing cables to the drawstring. I find myself wishing that it was cold where I live so I could make and wear this beauty!!
I can’t wait to give this cowl a try.
I love this pattern i am trying out some new skills this year so this will be top of my list!
I was able to get this during Marky Bird’s countdown. I have to say that I can’t wait to make it! The rope to keep your neck warm is genius! Thank you for offering it to us. Have a happy new year!
I am looking forward to making this in 2024.
I love the look of this cowl! I have been looking for one that isn’t too narrow and is versatile, I think this one definitely fits the bill. Thanks for the pattern, might be my first make of the new year!
I love that pattern, very nice and easy to do.
I can’t wait to make this cowl, I’m recovering from a broken arm and can’t do much right now. I’m so looking forward to crocheting again.
I’m anxious to try this out! I just got the pattern and it’s something I’m going to actually make for myself!
When Marly was doing the Christmas quickies I saw this pattern and had to download it. I will be making it soon. it looks so beautiful and comfy.
So cozy looking and beautiful.
I absolutely love the drawstring! I can’t wait to make it. 🙂
I’m look forward to making this in 2024. Love the pattern.
I can’t wait to make this cowl for my friends and myself. It gets very cold here in the mountains near Yosemite National Park. I have the perfect yarn for it!!
I’m looking forward to making this beautiful cowl. thank you!
I love the creative idea of the drawsting on this cowl.
This would be a good project to challenge me in 2024. I love the idea of a drawstring! 🙂
I love your sense of style and have made so many of your things! I made this draw sreing cowl for my 2 granddaughters and they both loved them. You rock!
Another new year for more crocheting happy new year to my crochet friends
Really like this pattern. Hoping to make several.
thank you for the free patterns. I’ll be sure to tag you in any photos I take off the completed patterns.
What a great idea!
This looks so cozy! Can’t wait to make it.
What a lovely pattern. I have pinned this, definitely one to make this year