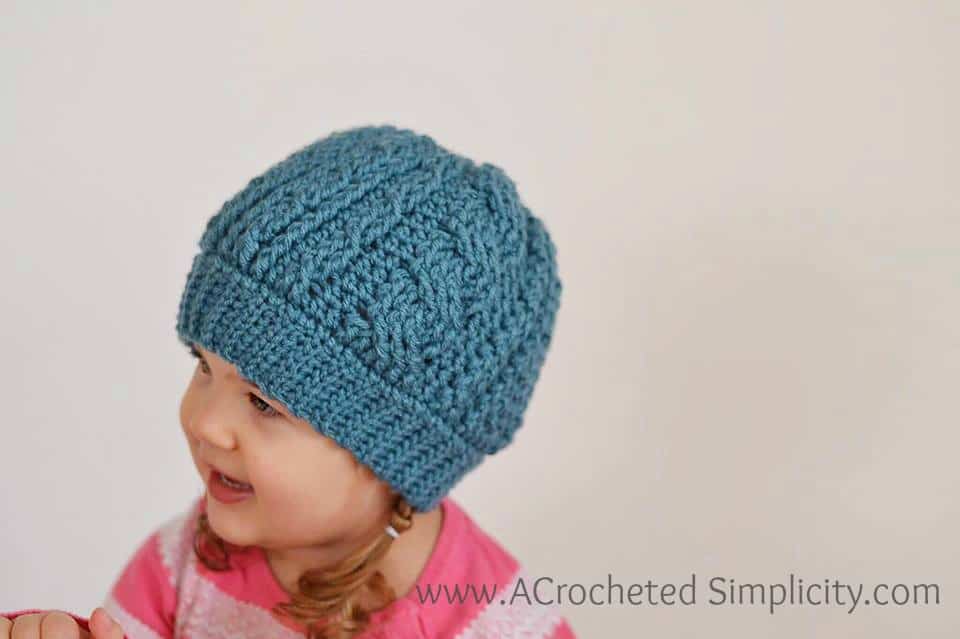
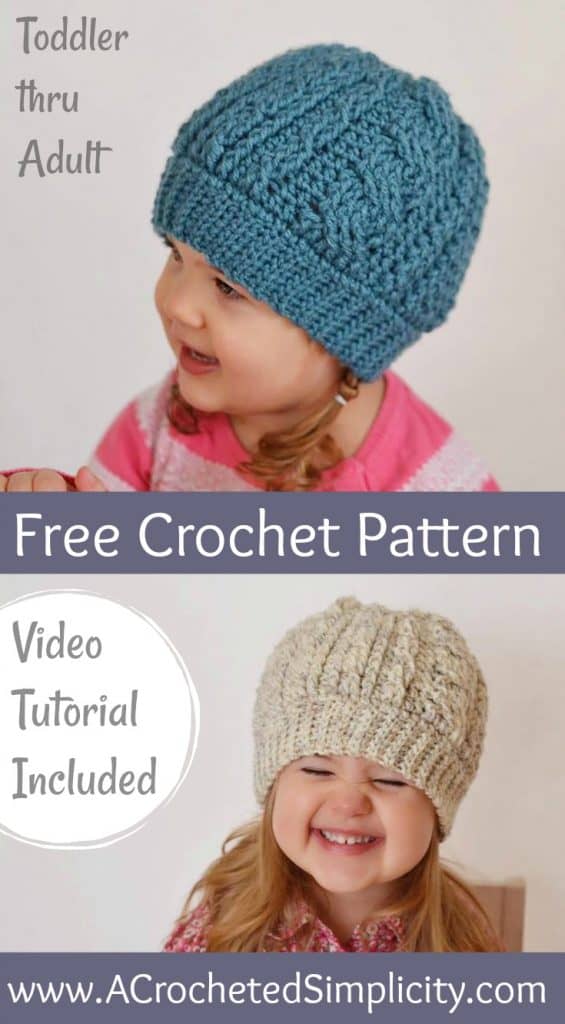
Free Crochet Pattern – Crochet Cabled Beanie (Toddler – Adult) (video tutorial included)
After designing my Crochet Cabled Messy Bun Hat, I was asked if I could add instructions for a beanie. So here it is, the Cabled Beanie version! ?
~Click HERE to sign-up to receive our newsletter!~
~Don’t lose it, add It To Your Ravelry Favorites or Queue.~
~Don’t forget to Pin It too!~
*Purchase an ad-free PDF of this pattern (including all charts and photo tutorials) on Craftsy or Ravelry* Ad-Free version includes BOTH the Beanie & Messy Bun versions (all sizes) in ONE file!
This post contains affiliate links.
Materials
- Yarn: Worsted Weight / 4; Lion Brand Vanna’s Choice in Dusty Blue or Wheat were used for the samples shown on this page. 2 balls of yarn are needed (3.5 oz / 100g / 170 yd / 156 m / 100% acrylic)
- Crochet Hooks: H/8/5.00mm; J/10/6.00mm
- Scissors
- Yarn Needle
 Clover 1047/H Deep Blue Amo...Shop on Amazon
  Clover 1049/J Amour Crochet...Shop on Amazon
  Fiskars All Purpose Scissor...Shop on Amazon
  Outus 9 Pcs Large Eye Blunt...Shop on Amazon
  Lion Brand Yarn 860-145F Va...Shop on Amazon
Experience Level: Intermediate
Stitch Abbreviations
- ch(s): chain(s)
- st(s): stitch(es)
- sl st(s): slip stitch(es)
- sc: single crochet
- hdc: half double crochet
- dc2tog: double crochet decrease
- fpdc: front post double crochet
- fptr: front post treble crochet
- fpdc2tog: front post double crochet decrease
- rep: repeat
- rnd: round
- BLO: back loop only
- RS: right side
Sizes
- Toddler: fits 18″ – 19″ circumference
- Child: fits 19″ – 20-1/2″ circumference
- Teen/Adult Small: fits 20″-22″ circumference
- Adult Medium/Large: fits 23″-24″ circumference
Click HERE for Messy Bun Kid Sizes
Click HERE for Messy Bun Adult Sizes
Notes
- The first stitch of each row/round is worked into the same stitch as the beginning/turning chain.
- The beginning chain or a row/round does not count as a stitch.
- I tend to crochet on the tighter side. You may find yourself needing to go down a hook size (or two) to properly meet gauge.
Special Stitches
- Forward Cable 2 (FWD Cbl 2) (click for tutorial): Skip the next post st, fpdc around the next post st, working in front of the post st just worked, fpdc around the skipped post st.
- Forward Cable 6 (FWD Cbl 6) (click for tutorial): Skip the next 3 post sts, fptr around each of the next 3 post sts, working in front of the post sts just worked, fptr around each of the 3 skipped post sts.
CLICK HERE to view Video Tutorial
*Note: Video is for the cabled messy bun option, but both hats are worked the same way. Make sure to check the written pattern for the number of repeat rounds before the crown shaping and Rnd 3 of crown shaping.
Cabled Beanie: Kid Sizes
Band Instructions
Crochet Hook: H/8/5.00mm
Gauge: 7 sts = 1.5″
Row 1 (RS): Ch 8, working in the back hump of the foundation chain, sc in the 2nd ch from your hook, sc in each ch across. Turn. (7 sts)
Row 2: Ch 1, BLO sl st in each st across. Turn.
Row 3: Ch 1, BLO sc in each st across to last st, BOTH LOOPS sc in last st. Turn.
Rep Rows 2 – 3, ending with a Row 3 Rep, until your band (unstretched – meaning before it’s been wrapped around a head) measures (13″, 14″). Do not fasten off. Continue on to Seam.
Seam
With the right side facing out, bring the first row up to meet the last row. Make sure to keep your working yarn on the inside of the band. Ch 1, insert your hook from front to back into the FLO of the first row, insert your hook from back to front into the BLO of the last row, yo, pull up a loop and pull it thru all loops on your hook to complete a sl st. Repeat across the short edge of the band. Continue on to Body of Hat.
Body of Hat – Toddler / Child
Changes for sizes written as follows: Toddler (Child)
Switch to J/10/6.00mm crochet hook
Gauge (in fpdc): 8 sts x 6.25 rows = 2″
Rnd 1: Ch 1, working into the sides of the band, sc 65 (70) sts evenly around the band. Join w/ a sl st to the 1st sc. (65, 70 sts)
Note: Beginning with round 2 we will be working in continuous rounds so that we do not have a visible seam in our hat. I highly suggest using a stitch marker or a 3-4″ long scrap piece of yarn place between the first and last stitches of each round. Move it up as you complete each round.
Rnd 2: Ch 1, [ hdc in the next st, fpdc around each of the next 4 sts ] work from [ to ] 4 times, hdc in the next st, fpdc around each of the next 2 sts, hdc in each of the next 2 sts, fpdc around each of the next 6 sts, hdc in each of the next 2 sts, fpdc around each of the next 2 sts, then work from [ to ] 6 (7) times.
Click HERE for help with post stitch placement
Rnd 3: [ hdc in the next st, fpdc around the next post st, FWD Cbl 2, fpdc around the next post st ] work from [ to ] 4 times, hdc in the next st, FWD Cbl 2, hdc in each of the next 2 sts, FWD Cbl 6, hdc in each of the next 2 sts, FWD Cbl 2, then work from [ to ] 6 (7) times.
Rnds 4 – 5: [ hdc in the next st, fpdc around each of the next 4 post sts ] work from [to ] 4 times, hdc in the next st, fpdc around each of the next 2 post sts, hdc in each of the next 2 sts, fpdc around each of the next 6 post sts, hdc in each of the next 2 sts, fpdc around each of the next 2 post sts, then work from [ to ] 6 (7) times.
(Toddler) Rnds 6 – 13: Rep Rnds 3 – 5, ending w/ a Rnd 4 rep. Do not fasten off. Continue on to Crown Shaping.
(Child) Rnds 6 – 15: Rep Rnds 3 – 5, ending w/ a Rnd 3 rep. Do not fasten off. Continue on to Crown Shaping.
Crown Shaping
Rnd 1: [ hdc in the next st, fpdc around the next post st, fpdc2tog around the next 2 post sts, fpdc around the next post st ] work from [ to ] 4 times, hdc in the next st, fpdc2tog around the next 2 post sts, hdc in each of the next 2 sts, fpdc around each of the next 6 post sts, hdc in each of the next 2 sts, fpdc2tog around the next 2 post sts, then work from [ to ] 6 (7) times. (53, 57 sts)
Rnd 2: [ hdc in the next st, fpdc2tog around the next 2 fpdc (skipping over the fpdc2tog from the previous rnd) ] work from [ to ] 4 times, hdc in the next st, fpdc around the next post st, hdc in each of the next 2 sts, ( fpdc2tog around the 1st & 3rd post sts of the next 3 post sts (skipping over a fpdc) ) twice, hdc in each of the next 2 sts, fpdc around the next post st, then work from [ to ] 6 (7) times. (29, 31 sts)
Rnd 3: [ dc2tog over the next 2 sts ] work from [ to ] 4 times, dc in each of the next 2 sts, (dc2tog over the next 2 sts) 3 times, dc in the next st, then work from [ to ] 6 (7) times. Join w/ a sl st to the 1st st of the rnd. (16, 17 sts)
The finished height of your hat should be approximately (6.75″, 7.25″).
Fasten off leaving an 8″ tail. Using a yarn needle and tail of yarn, weave in and out of the stitches from the last round of crown shaping, pull tail of yarn tight to cinch and close the hole, weave in ends.
Cabled Beanie: Adult Sizes
Band Instructions
Crochet Hook: H/8/5.00mm
Gauge: 8 sts = 1.75″
Row 1 (RS): Ch 9, working in the back hump of the foundation chain, sc in the 2nd ch from your hook, sc in each ch across. Turn. (8 sts)
Row 2: Ch 1, BLO sl st in each st across. Turn.
Row 3: Ch 1, BLO sc in each st across to the last st, BOTH LOOPS sc in the last st. Turn.
Rep Rows 2 – 3, ending with a Row 3 Rep, until your band (unstretched – meaning before it’s been wrapped around a head) measures (15″, 16″). Do not fasten off. Continue on to Seam.
Seam
With the right side facing out, bring the first row up to meet the last row. Make sure to keep your working yarn on the inside of the band. Ch 1, insert your hook from front to back into the FLO of the first row, insert your hook from back to front into the BLO of the last row, yo, pull up a loop and pull it thru all loops on your hook to complete a sl st. Repeat across the short edge of the band. Continue on to Body of Hat.
Body of Hat – Teen/Adult Small & Adult Medium/Large
Changes for sizes written as follows: Teen/Adult Small (Adult Medium/Large)
Switch to J/10/6.00mm crochet hook
Gauge (in fpdc): 8 sts x 6.25 rows = 2″
Rnd 1: Ch 1, working into the sides of the band, sc 75 (80) sts evenly around the band. Join w/ a sl st to the 1st sc. (75, 80 sts)
Note: Beginning with round 2 we will be working in continuous rounds so that we do not have a visible seam in our hat. I highly suggest using a stitch marker or a 3-4″ long scrap piece of yarn place between the first and last stitches of each round. Move it up as you complete each round.
Click HERE for help with post stitch placement
Rnd 2: Ch 1, [ hdc in the next st, fpdc around each of the next 4 sts ] work from [ to ] 5 times, hdc in the next st, fpdc around each of the next 2 sts, hdc in each of the next 2 sts, fpdc around each of the next 6 sts, hdc in each of the next 2 sts, fpdc around each of the next 2 sts, then work from [ to ] 7 (8) times.
Rnd 3: [ hdc in the next st, fpdc around the next post st, FWD Cbl 2, fpdc around the next post st ] work from [ to ] 5 times, hdc in the next st, FWD Cbl 2, hdc in each of the next 2 sts, FWD Cbl 6, hdc in each of the next 2 sts, FWD Cbl 2, then work from [ to ] 7 (8) times.
Rnds 4 – 5: [ hdc in the next st, fpdc around each of the next 4 post sts ] work from [ to ] 5 times, hdc in the next st, fpdc around each of the next 2 post sts, hdc in each of the next 2 sts, fpdc around each of the next 6 post sts, hdc in each of the next 2 sts, fpdc around each of the next 2 post sts, then work from [ to ] 7 (8) times.
(Teen / Adult Small) Rnds 6 – 17: Rep Rnds 3 – 5, ending w/ a Rnd 5 rep. Do not fasten off. Continue on to Crown Shaping.
(Adult Medium / Large) Rnds 6 – 19: Rep Rnds 3 – 5, ending w/ a Rnd 4 rep. Do not fasten off. Continue on to Crown Shaping.
Crown Shaping
Rnd 1: [ hdc in the next st, fpdc around the next post st, fpdc2tog around the next 2 post sts, fpdc around the next post st ] work from [ to ] 5 times, hdc in the next st, fpdc2tog around the next 2 post sts, hdc in each of the next 2 sts, fpdc around each of the next 6 post sts, hdc in each of the next 2 sts, fpdc2tog around the next 2 post sts, then work from [ to ] 7 (8) times. (61, 65 sts)
Rnd 2: [ hdc in the next st, fpdc2tog around the next 2 fpdc (skipping over the fpdc2tog from the previous rnd) ] work from [ to ] 5 times, hdc in the next st, fpdc around the next post st, hdc in each of the next 2 sts, ( fpdc2tog around the 1st & 3rd post sts of the next 3 post sts (skipping over a fpdc) ) twice, hdc in each of the next 2 sts, fpdc around the next post st, then work from [ to ] 7 (8) times. (33, 35 sts)
Rnd 3: [ dc2tog over the next 2 sts ] work from [ to ] 5 times, dc in each of the next 2 sts, (dc2tog over the next 2 sts) 3 times, dc in the next st, then work from [ to ] 7 (8) times. Join w/ a sl st to the 1st st of the rnd. (18, 19 sts)
The finished height of your hat should be approximately (8.25″, 8.75″).
Fasten off leaving an 8″ tail. Using a yarn needle and tail of yarn, weave in and out of the stitches from the last round of crown shaping, pull tail of yarn tight to cinch and close the hole, weave in ends.

Find all of my FREE crochet patterns HERE
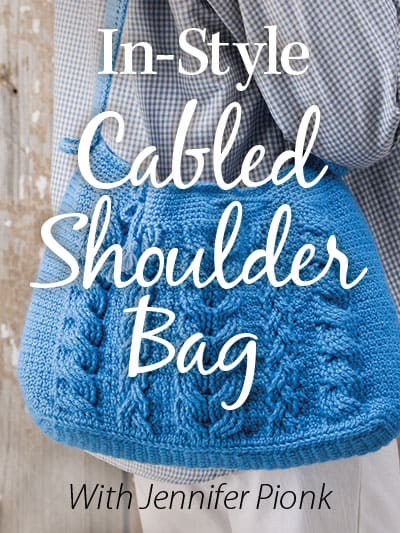
Are you intimidated by crocheted cables? Would you love to learn? Take an Annies Video Class with me and let me ease your fears of crocheted cables! Click on the photo below to watch a free preview. You can also see the other 2 classes I have available! (affiliate link)
I hope you’ve enjoyed this free crochet pattern! Check out my Ravelry shop to see all of my designs!
I LOVE seeing your finished projects! Please feel free to share them in the A Crocheted Simplicity Crochet Community group on Facebook!
Happy Crocheting!

Hi~ You’ll find the instructions for the adult sizes here: https://www.acrochetedsimplicity.com/free-crochet-pattern-crochet-cabled-messy-bun-hat-adult-sizes-video-tutorial-included/
This is the beanie version! I do have a messy bun version in another post, but this one is for the beanie and not the messy bun. 😉
Then maybe I miss counted? When I finish the last row of hat there’s a hole at top of hat.
Cables are one of my favorite things to make. People are always impressed too!