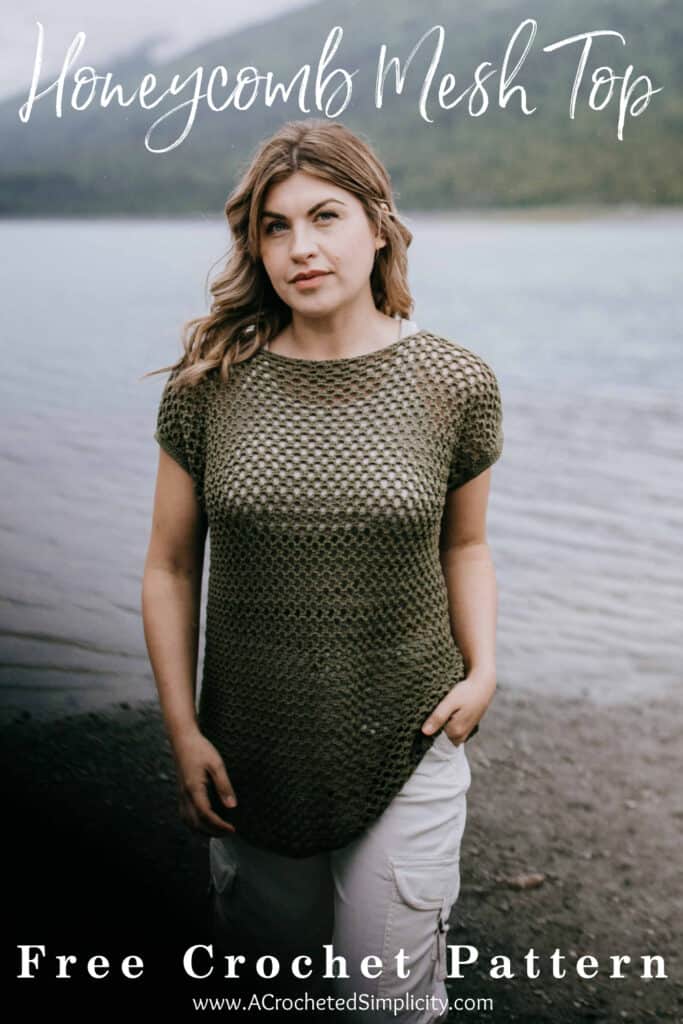
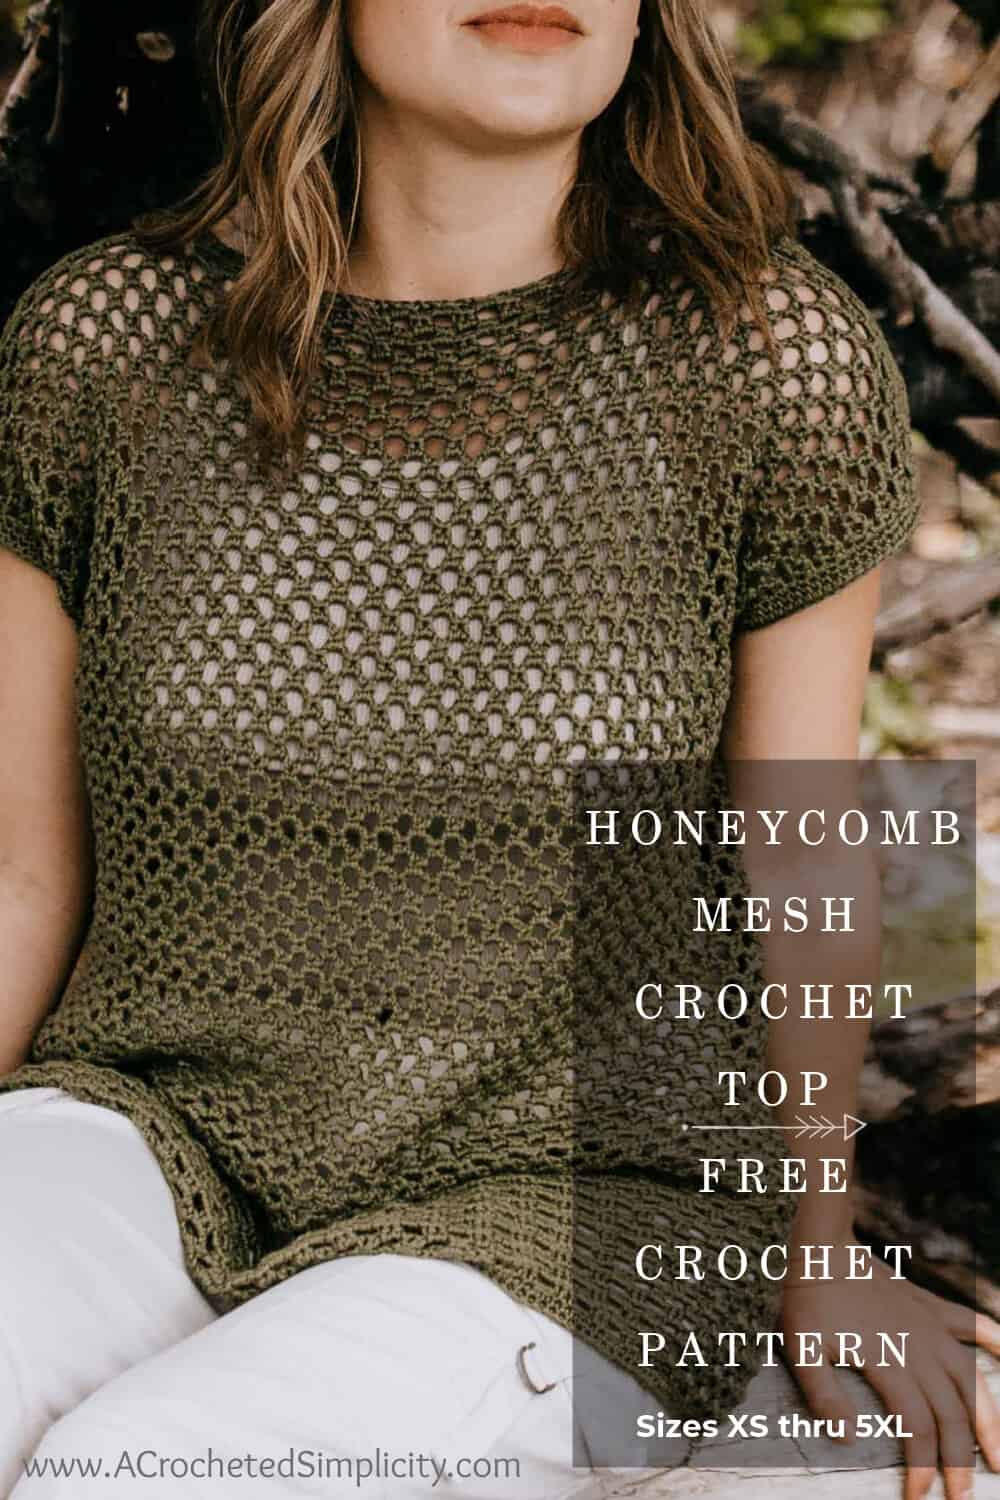
Honeycomb Crochet Mesh Top Pattern

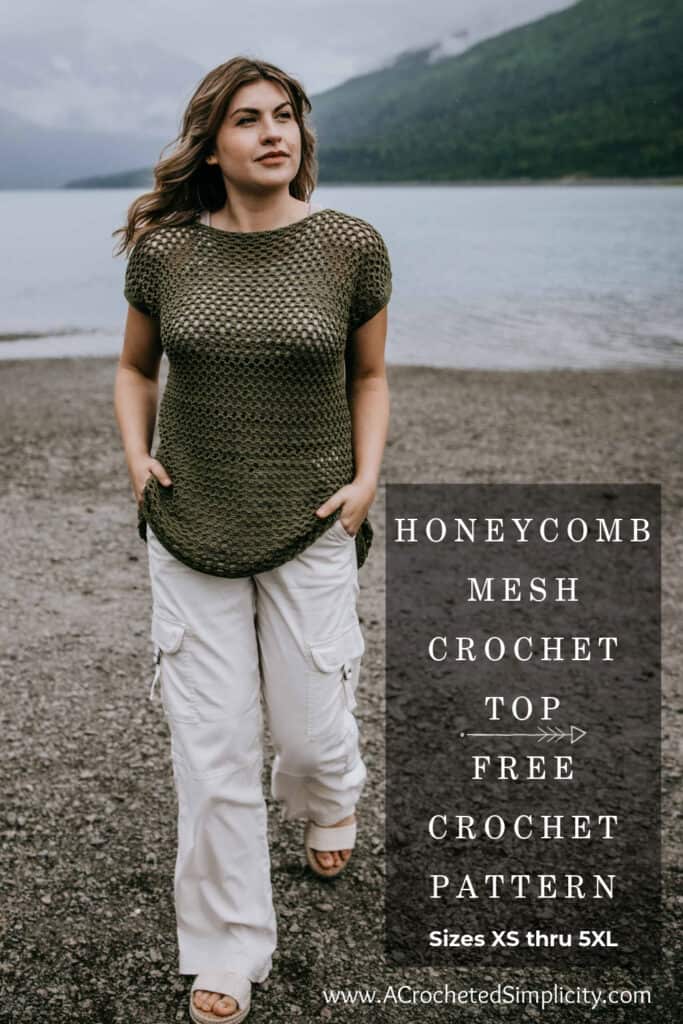


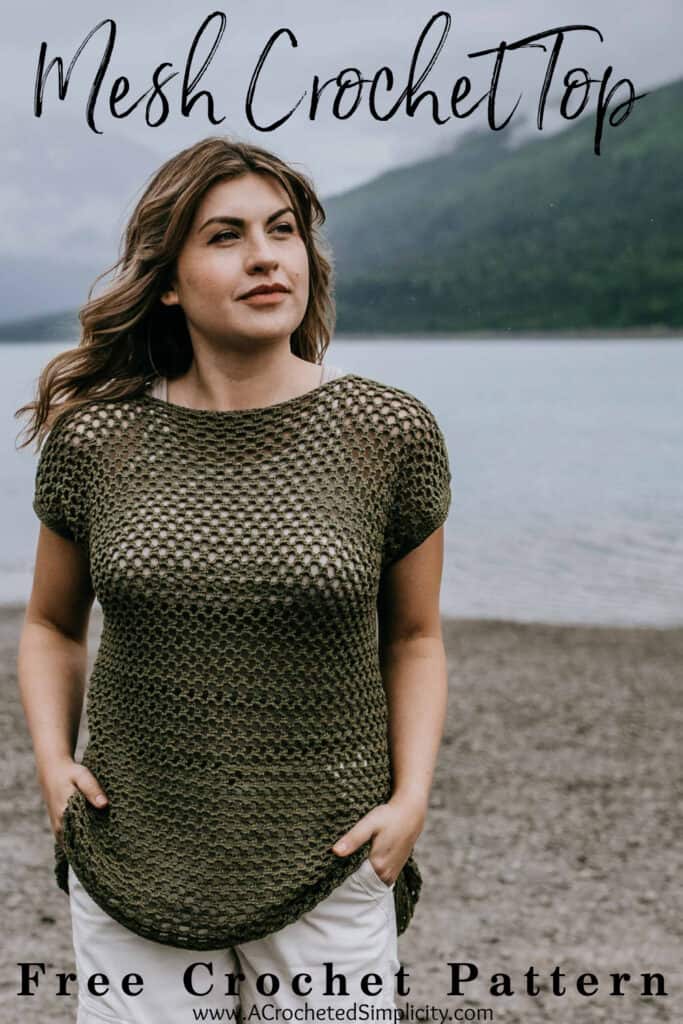
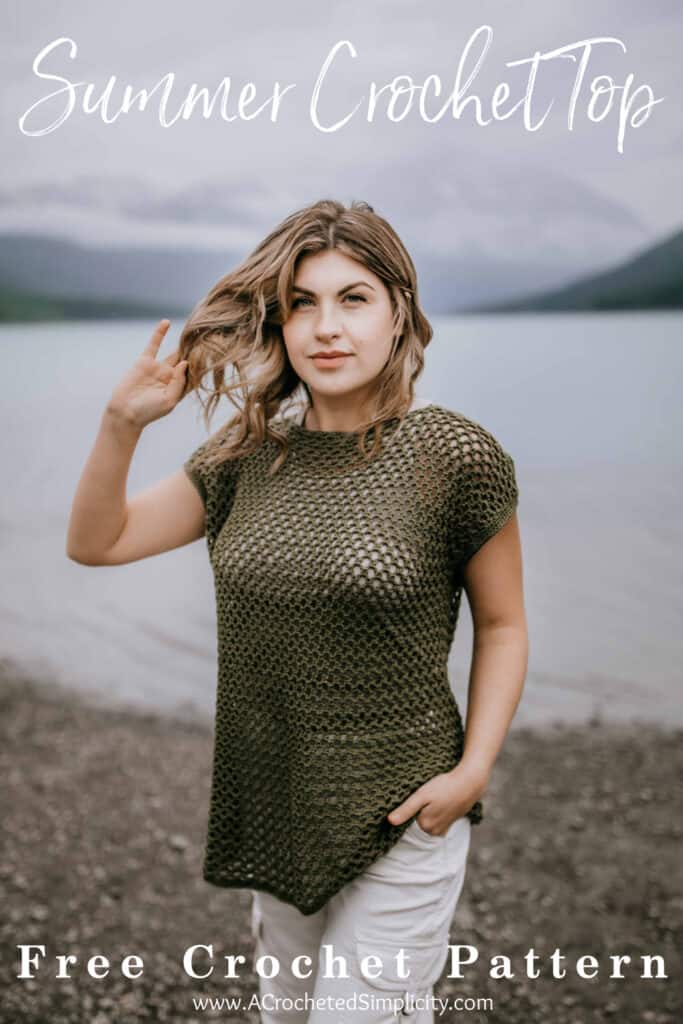
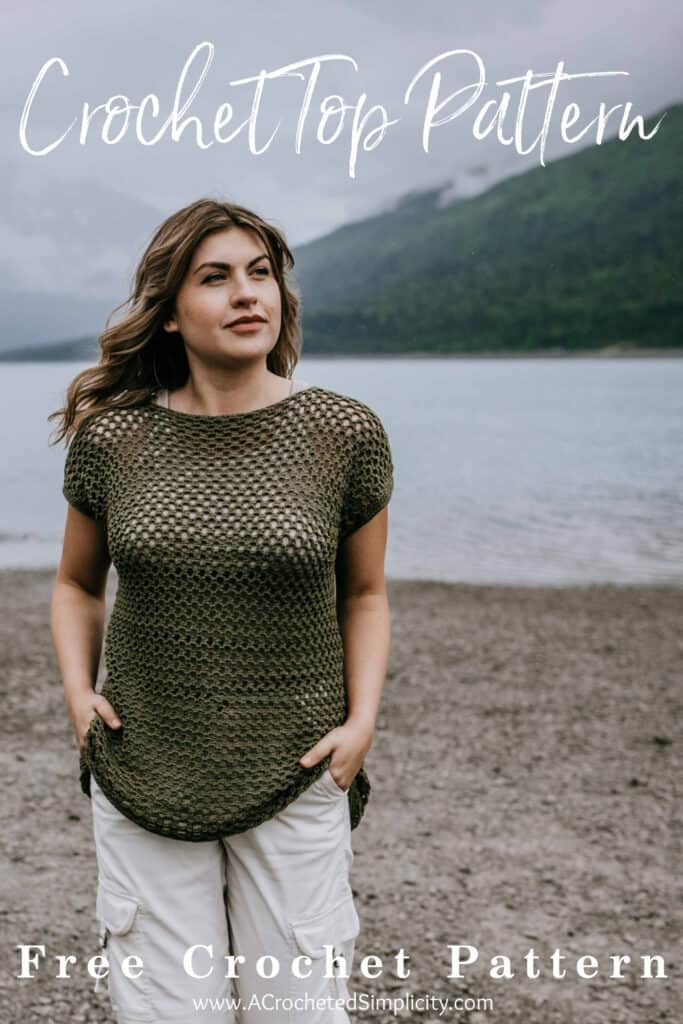
Learn how to crochet a crochet mesh top. This is the perfect crochet top pattern for warm weather wear.
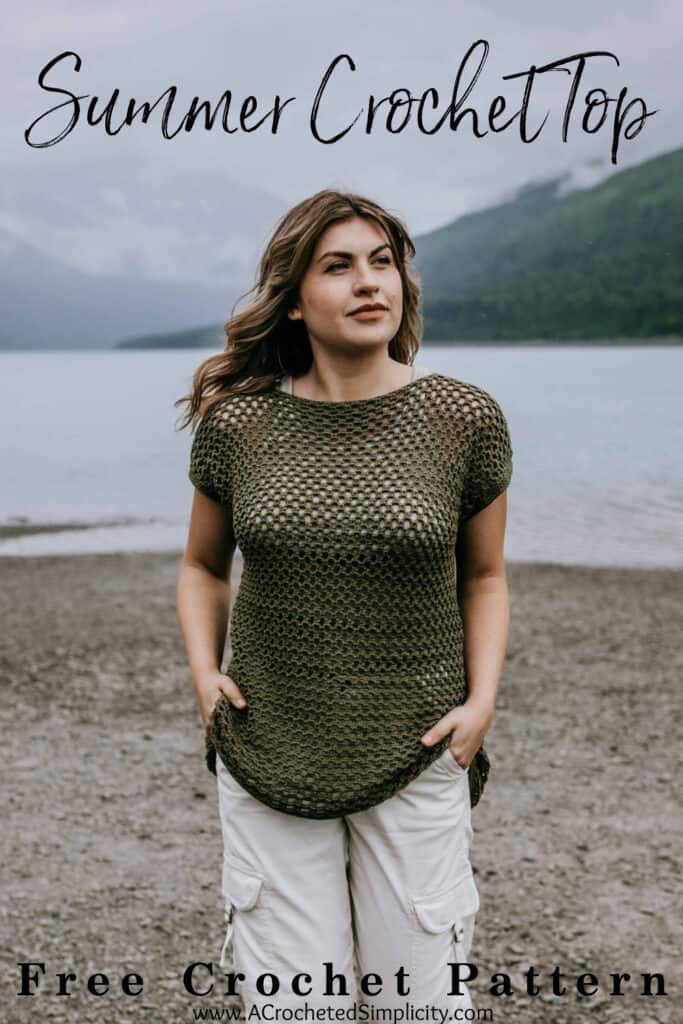
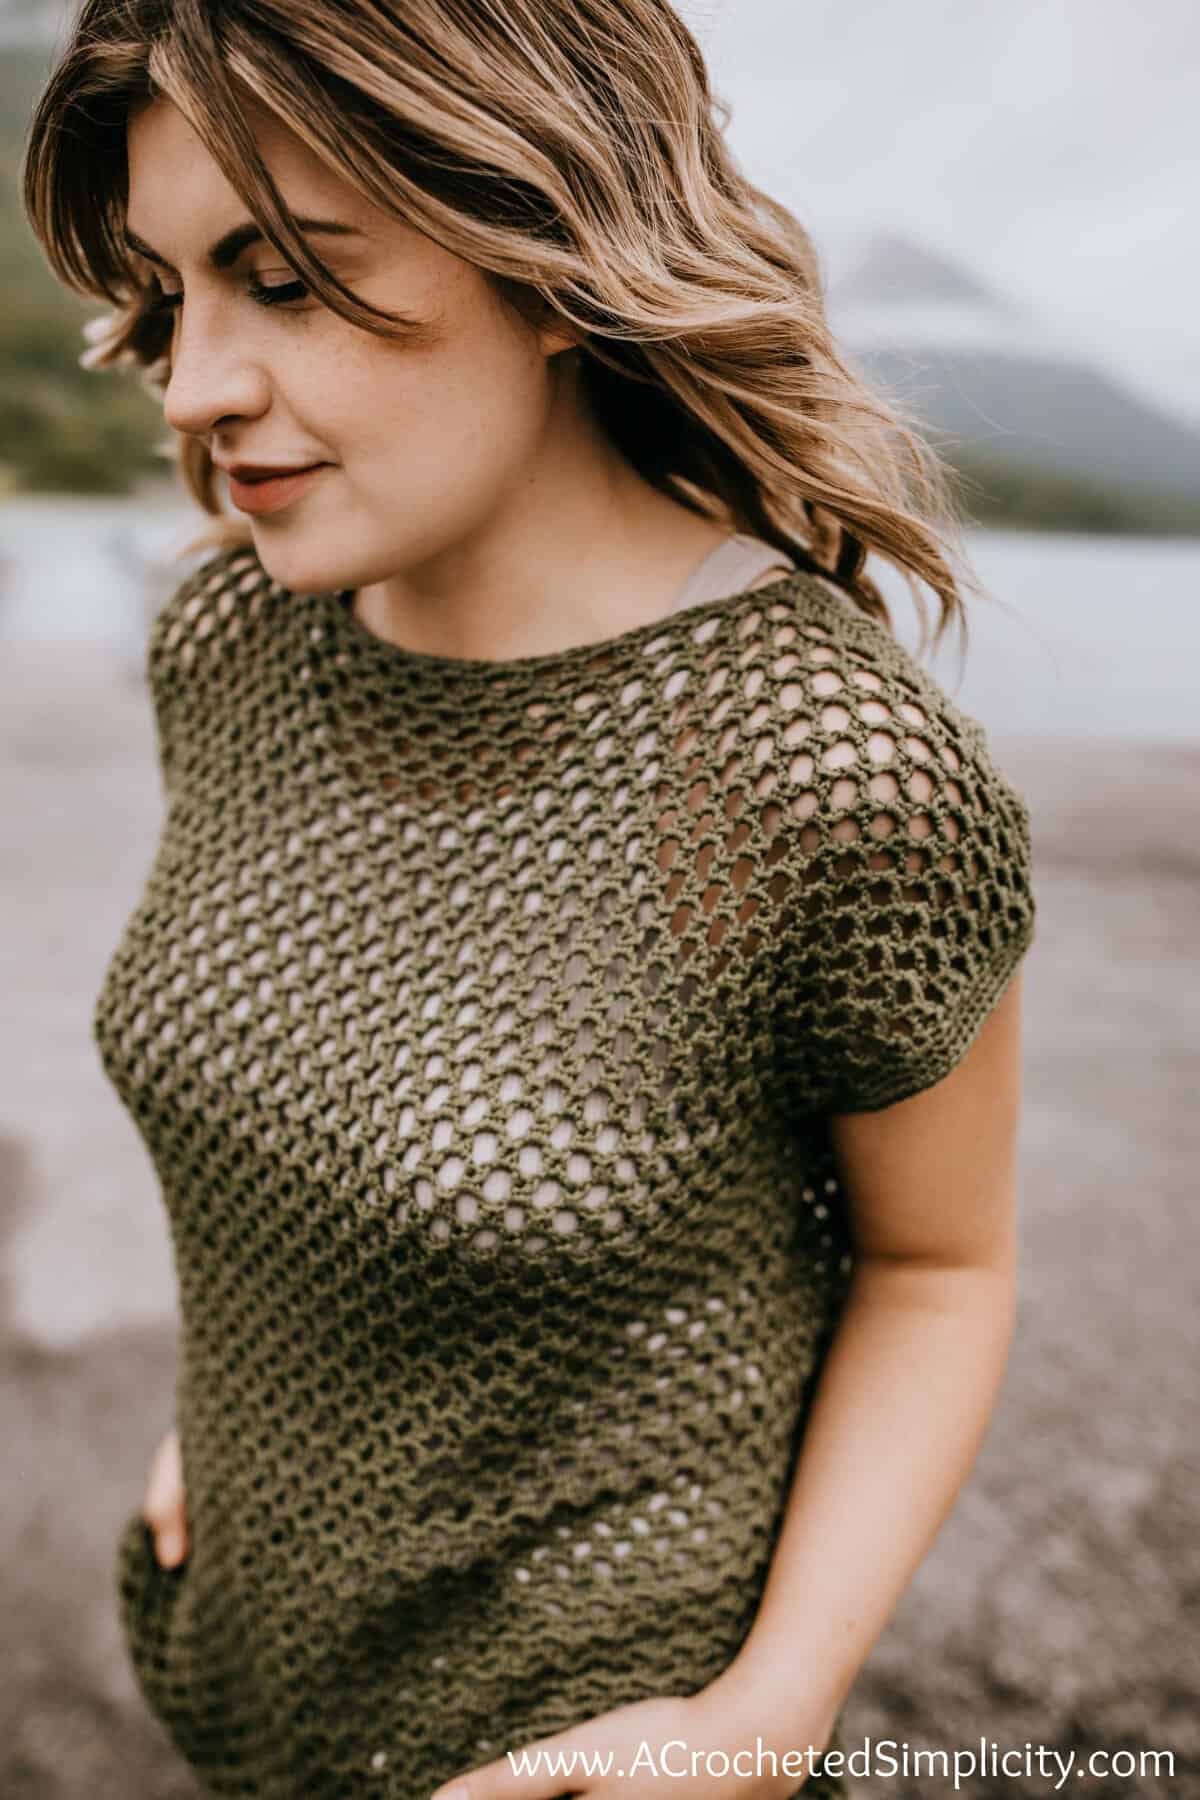
Wear it over a tank top, cami, or swimsuit for a fun crochet beach top. Pair it with shorts, jeans, or a skirt. Get many different looks with just one simple crochet top!
You can find the crochet mesh top free pattern in this post below, or an ad-free print friendly version (including all photo tutorials + BONUS garment schematic) on Ravelry, or on Etsy (aff).
Versatile Women’s Crochet Tops
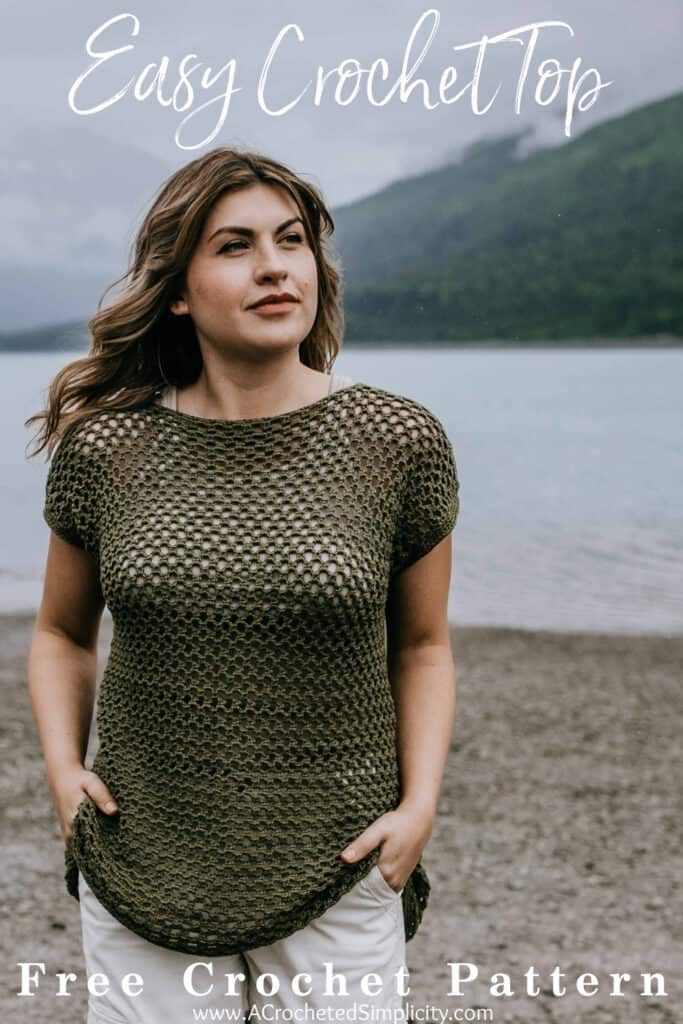
This versatile women’s crochet top is easy to adapt for several different crochet styles.
- Make it shorter and it becomes a fun crochet mesh crop top pattern.
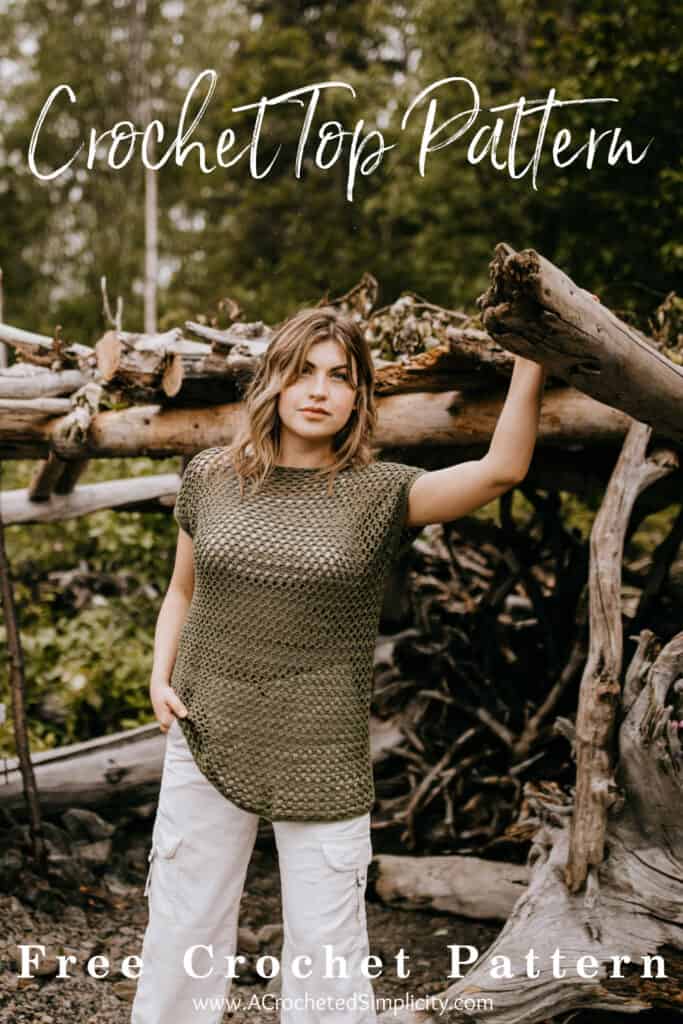
- If you like crochet tunics, make it a little longer.
- A little longer yet and you’ll have a nice cover up crochet for the beach.
Related: Lightweight crochet summer cardigans and swim cover ups are also a lot of fun to crochet during summer.
Trendy Crochet Top Pattern
Crochet mesh and lace are among trendy crochet ideas for summer. With a lace crochet stitch or crochet mesh stitch you will find many different open and airy stitch patterns that make the best summer tops or a nice cardigan for summer. They will also make a beautiful throw blanket.
I’ve come across a few different honeycomb crochet stitches, but many have a row of single crochet worked into the chain spaces. This makes a more dense crochet fabric. In my opinion, it would be too heavy for a summer top (unless you use fingering weight yarn).
The honeycomb mesh crochet stitch that I used for this easy crochet top is worked a bit differently.
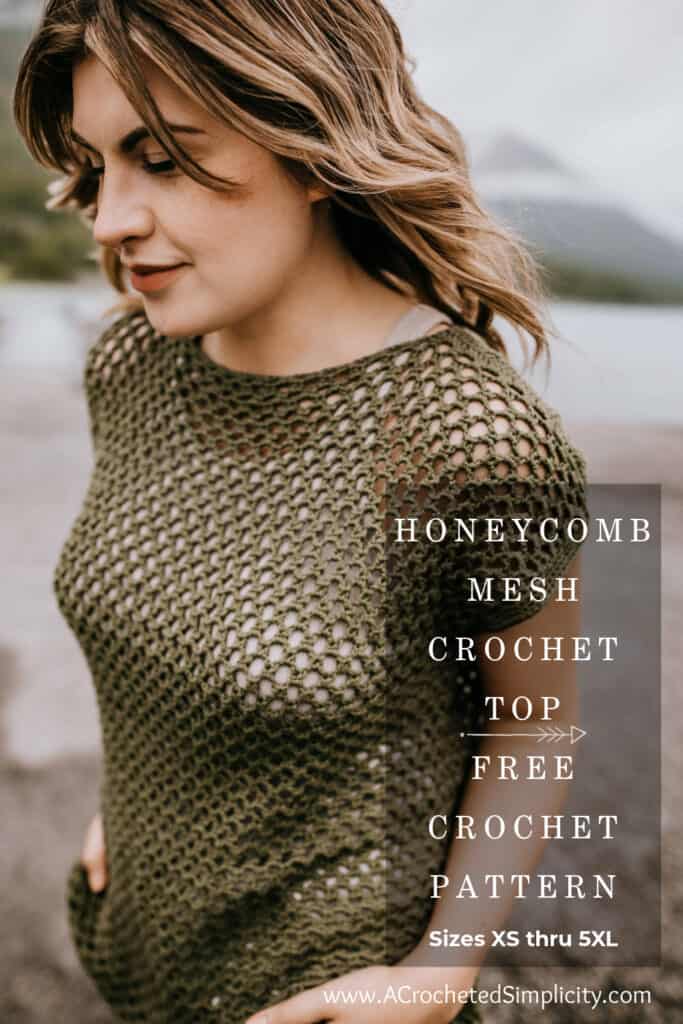
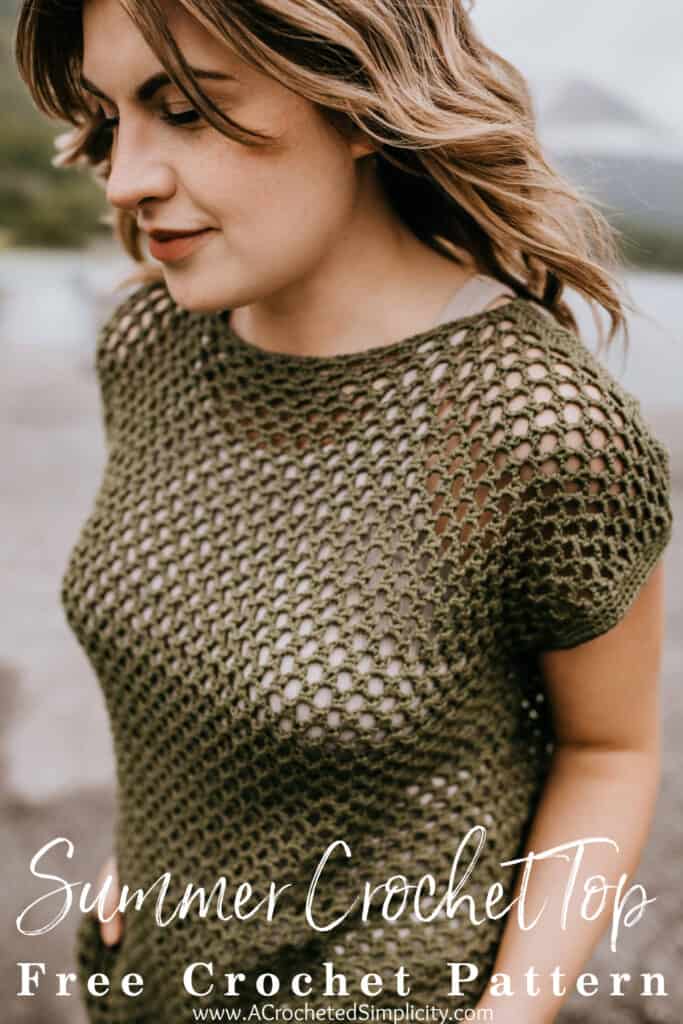
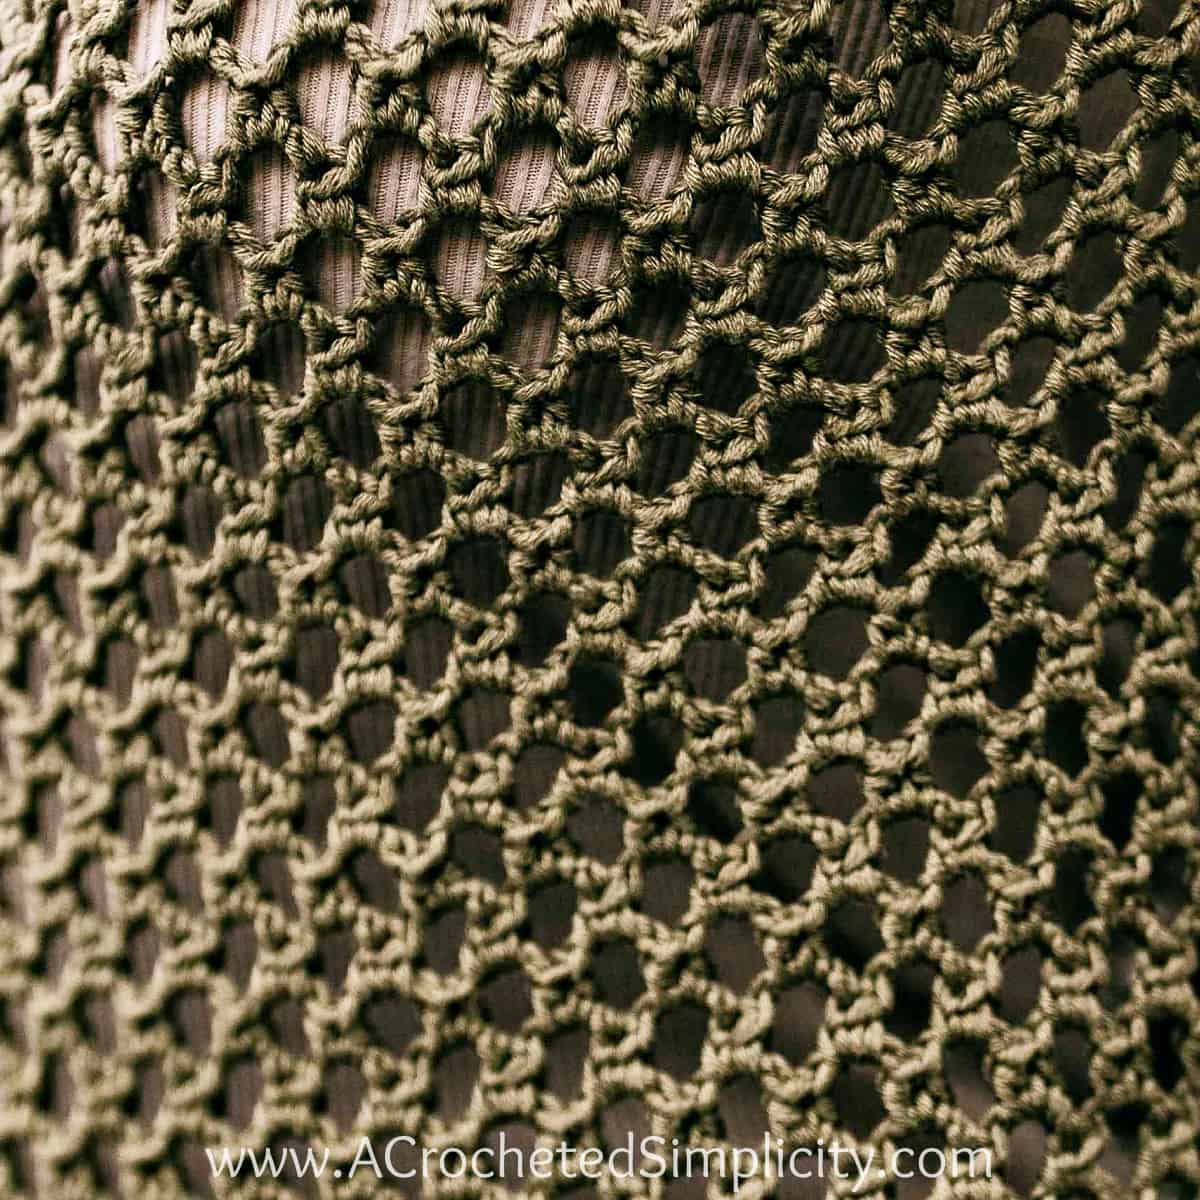
Honeycomb Mesh Crochet Stitch
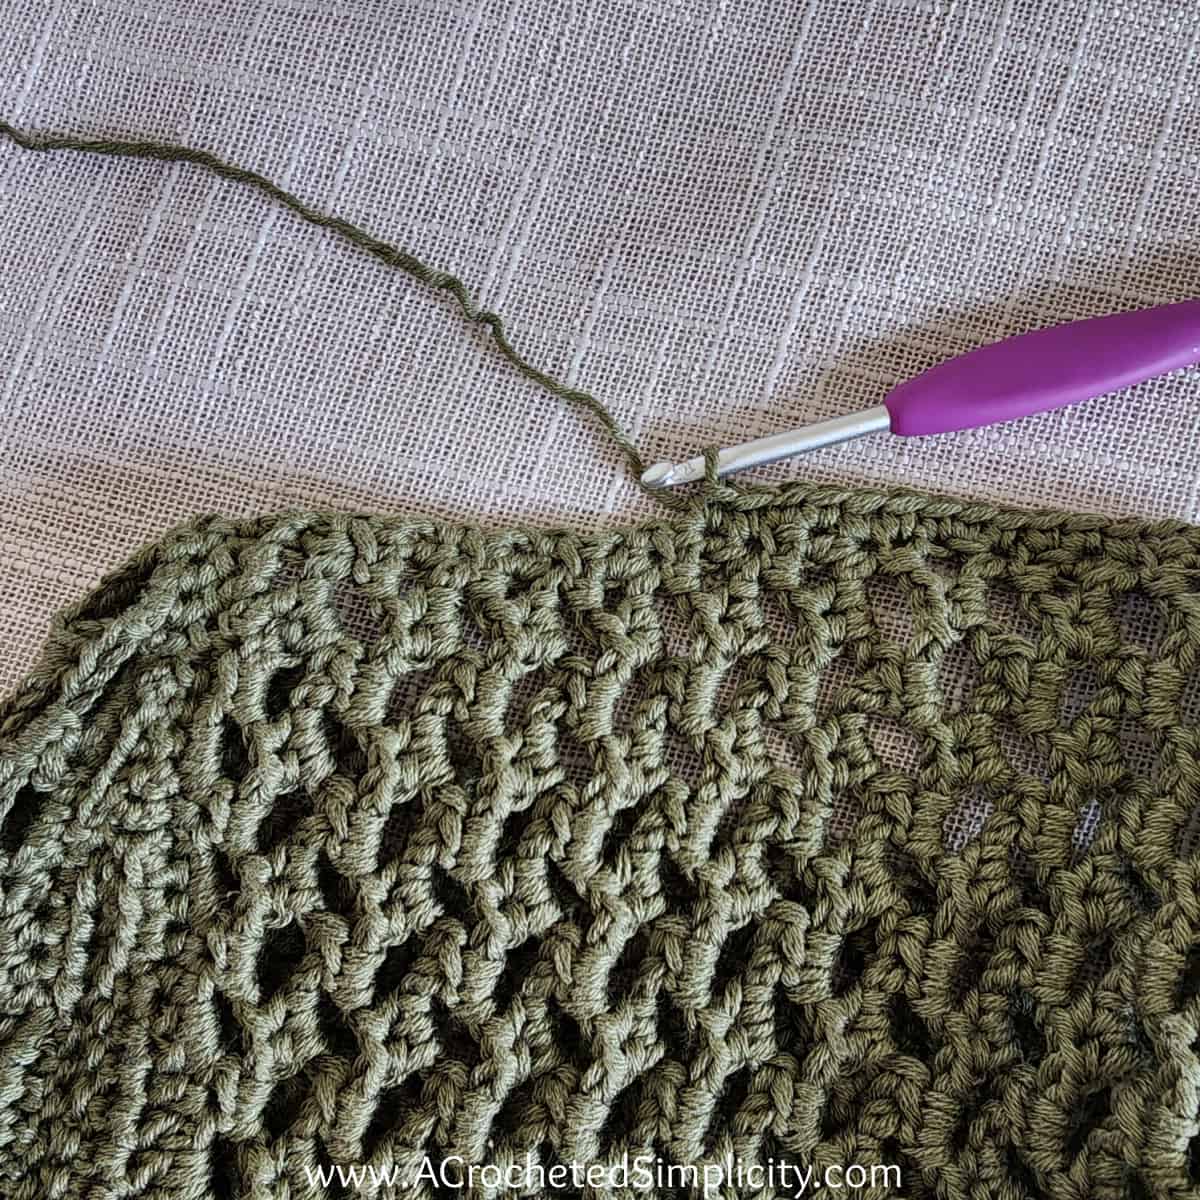
This crochet mesh pattern is a variation of the double honeycomb mesh stitch. When working the double honeycomb crochet mesh stitch pattern you work a double crochet stitch into each chain space.
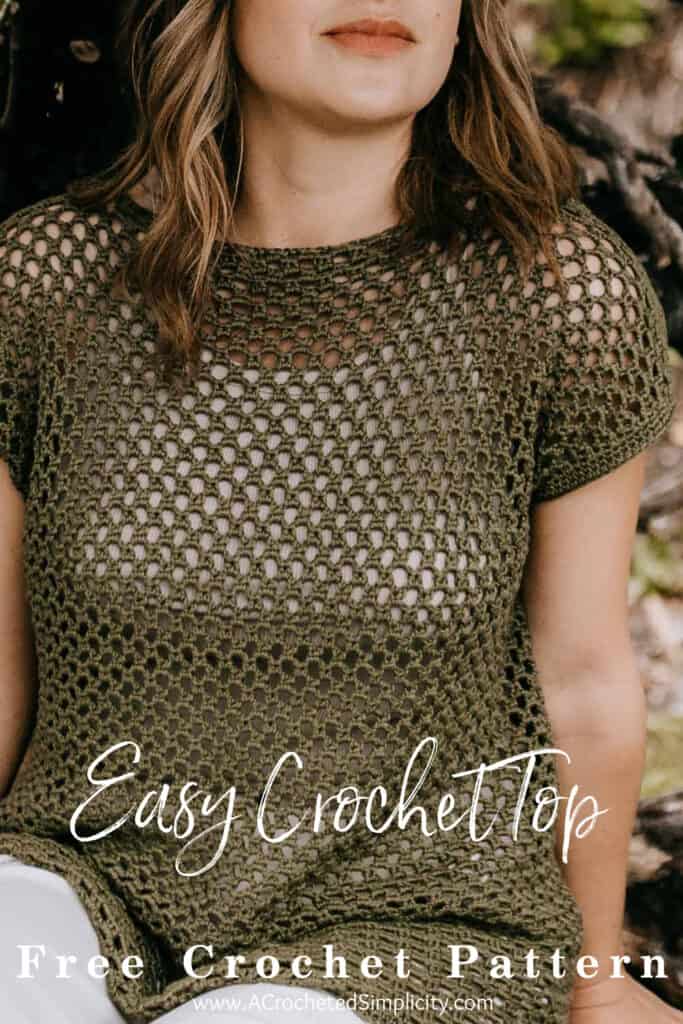
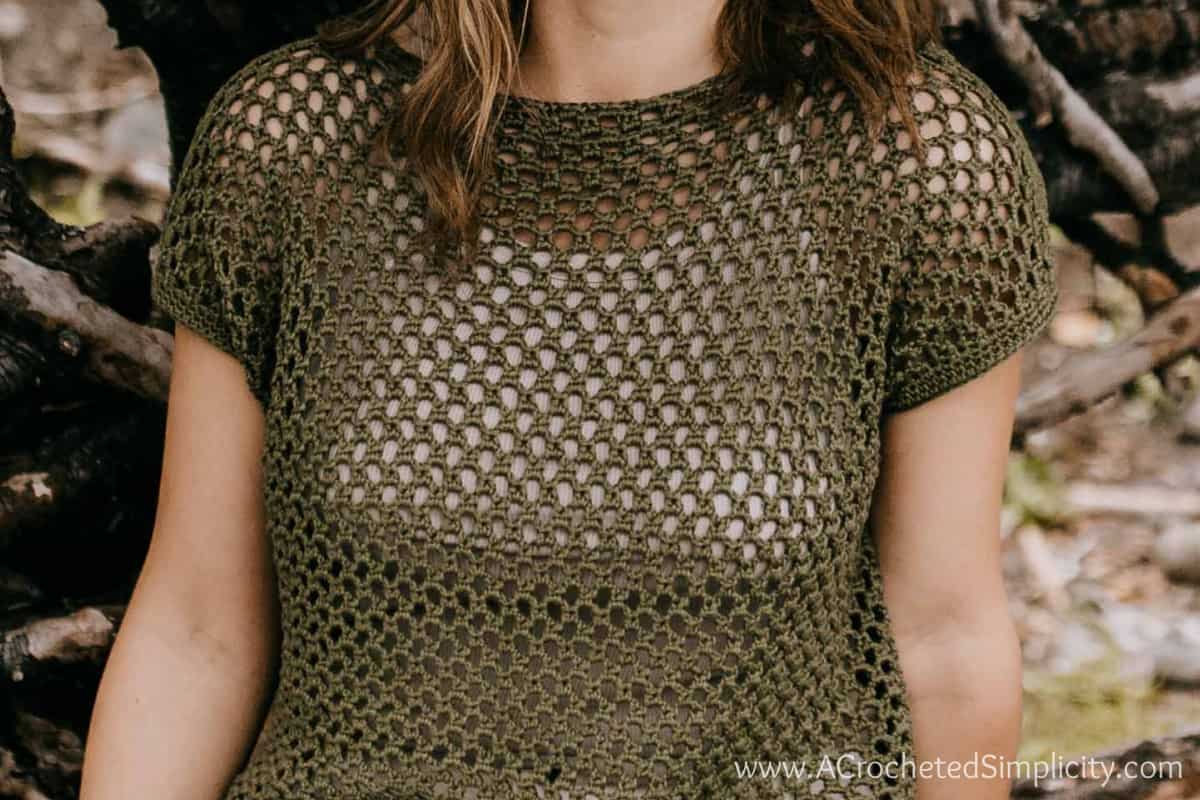
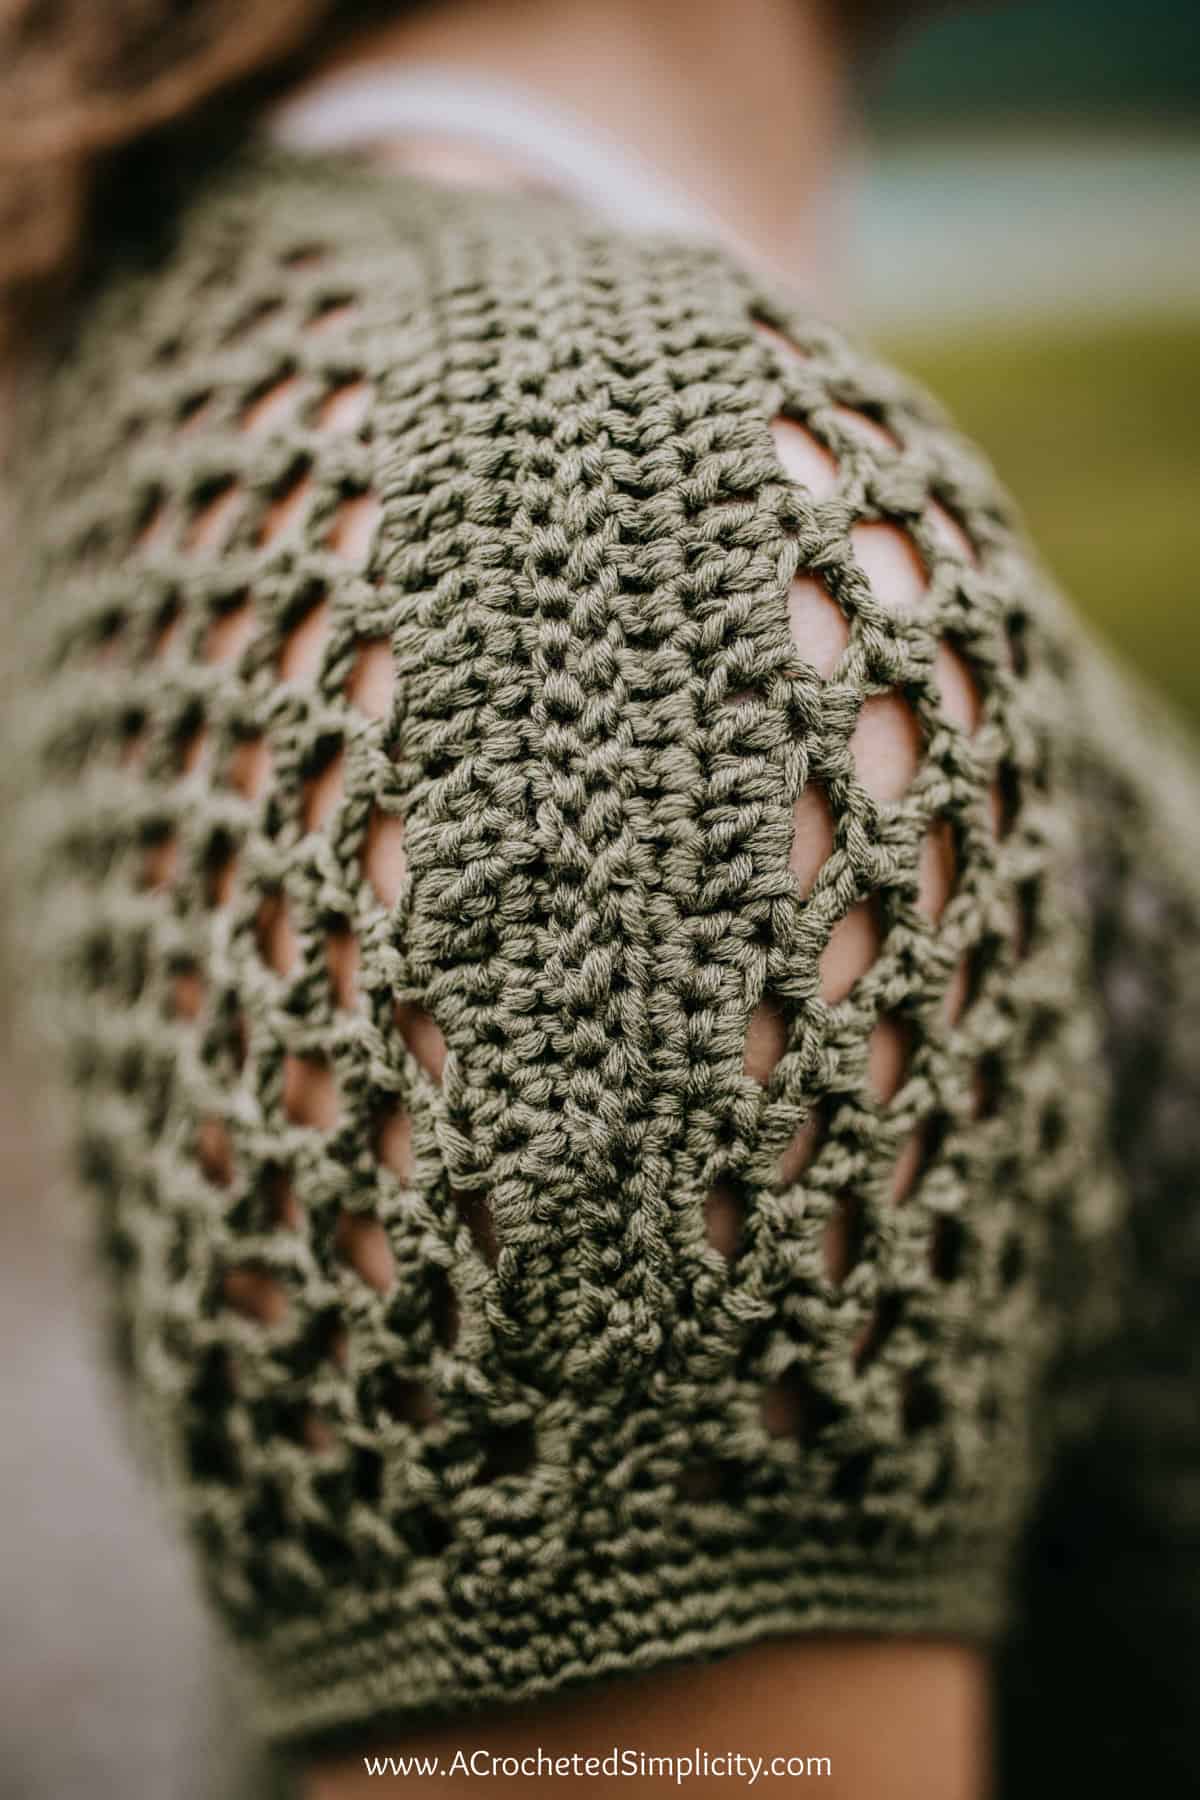
For the honeycomb mesh crochet in this top, you will work two half double crochet stitches into each chain space.
I chose to work the two shorter half double crochet stitches in the chain spaces because I wasn’t going for a crochet fishnet top. I wanted a top that was a little more covering.
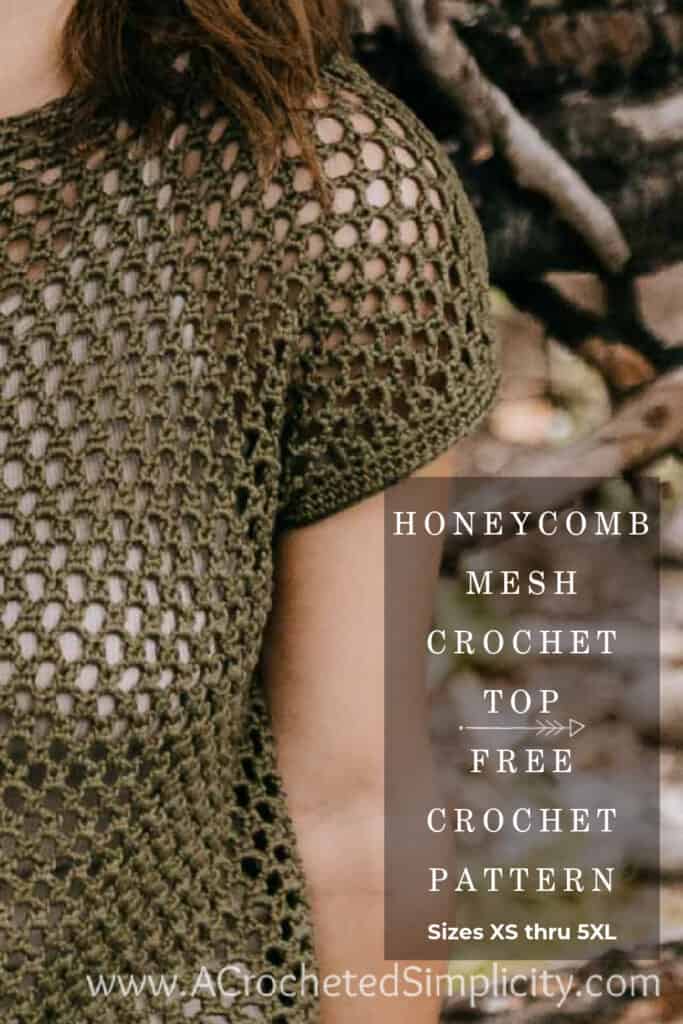
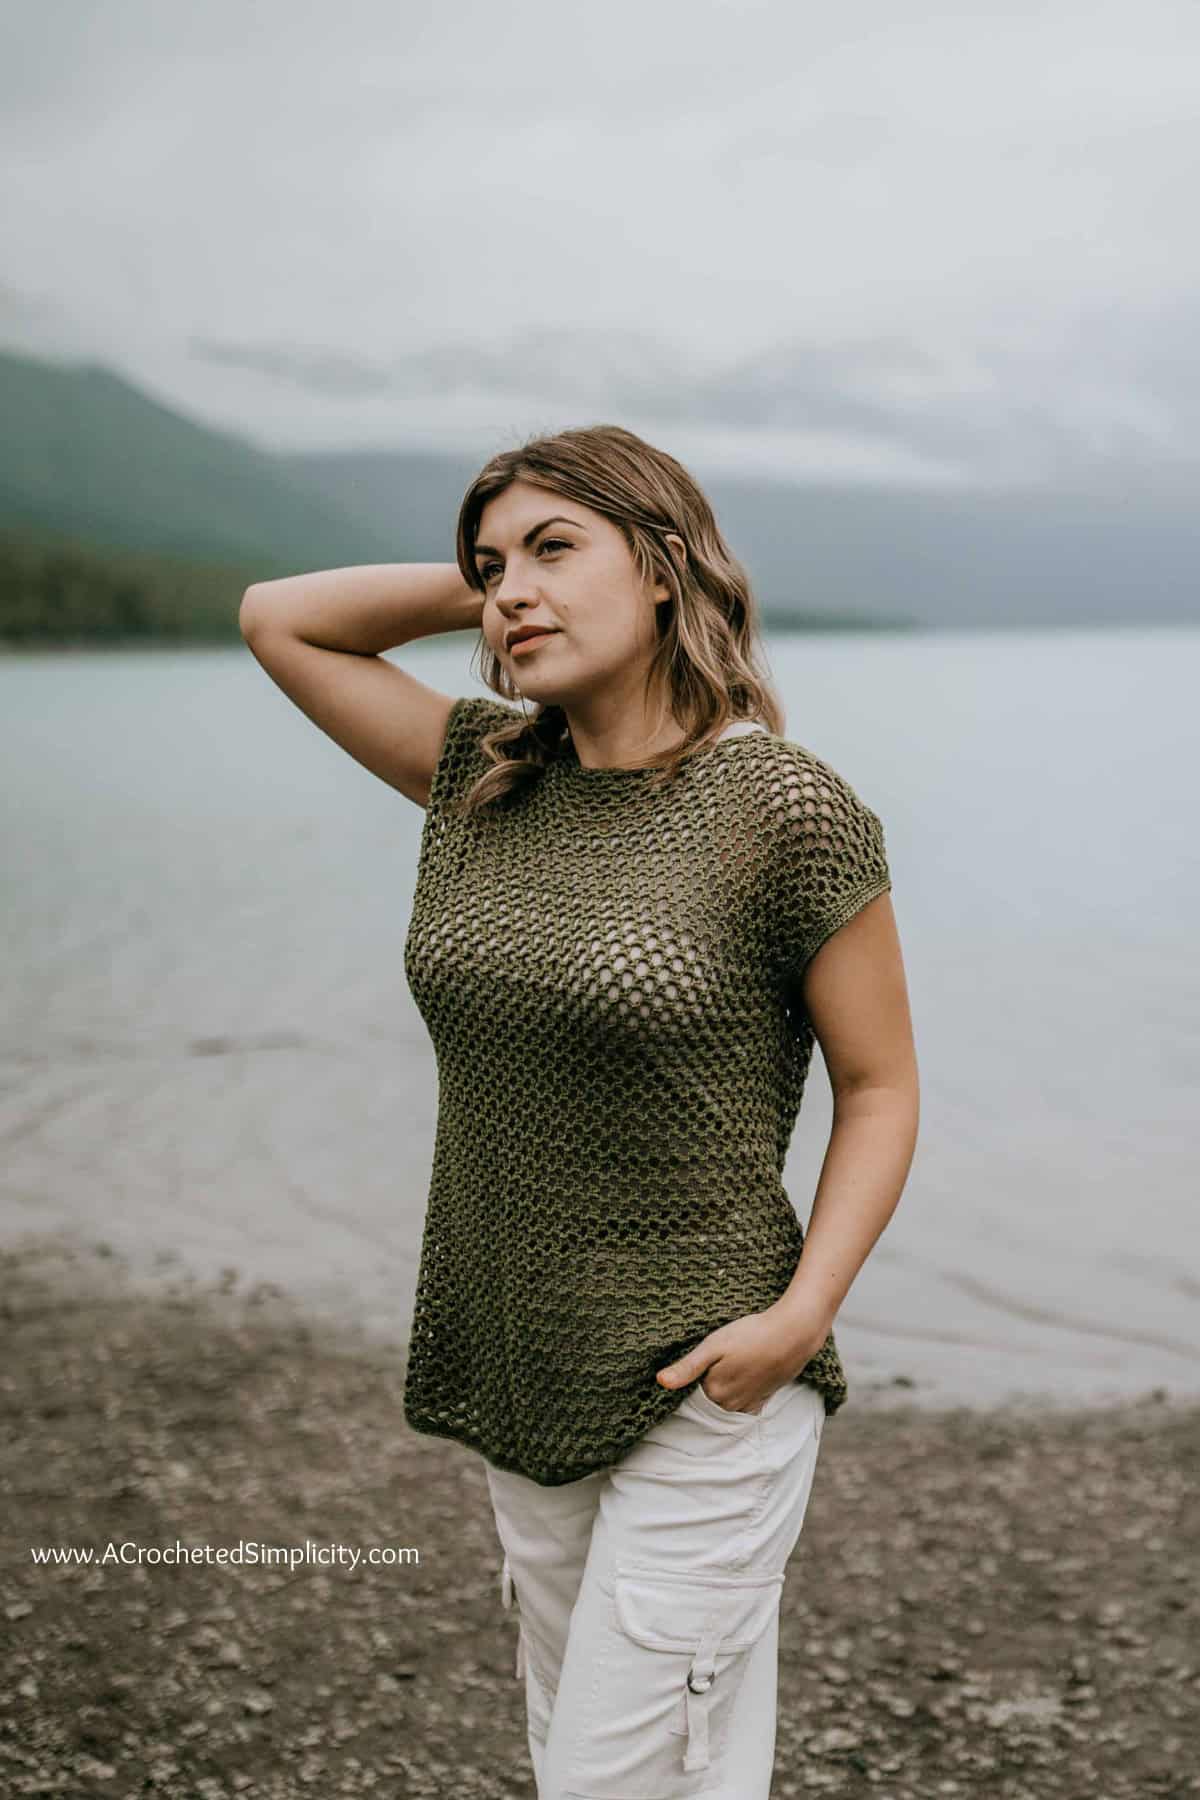
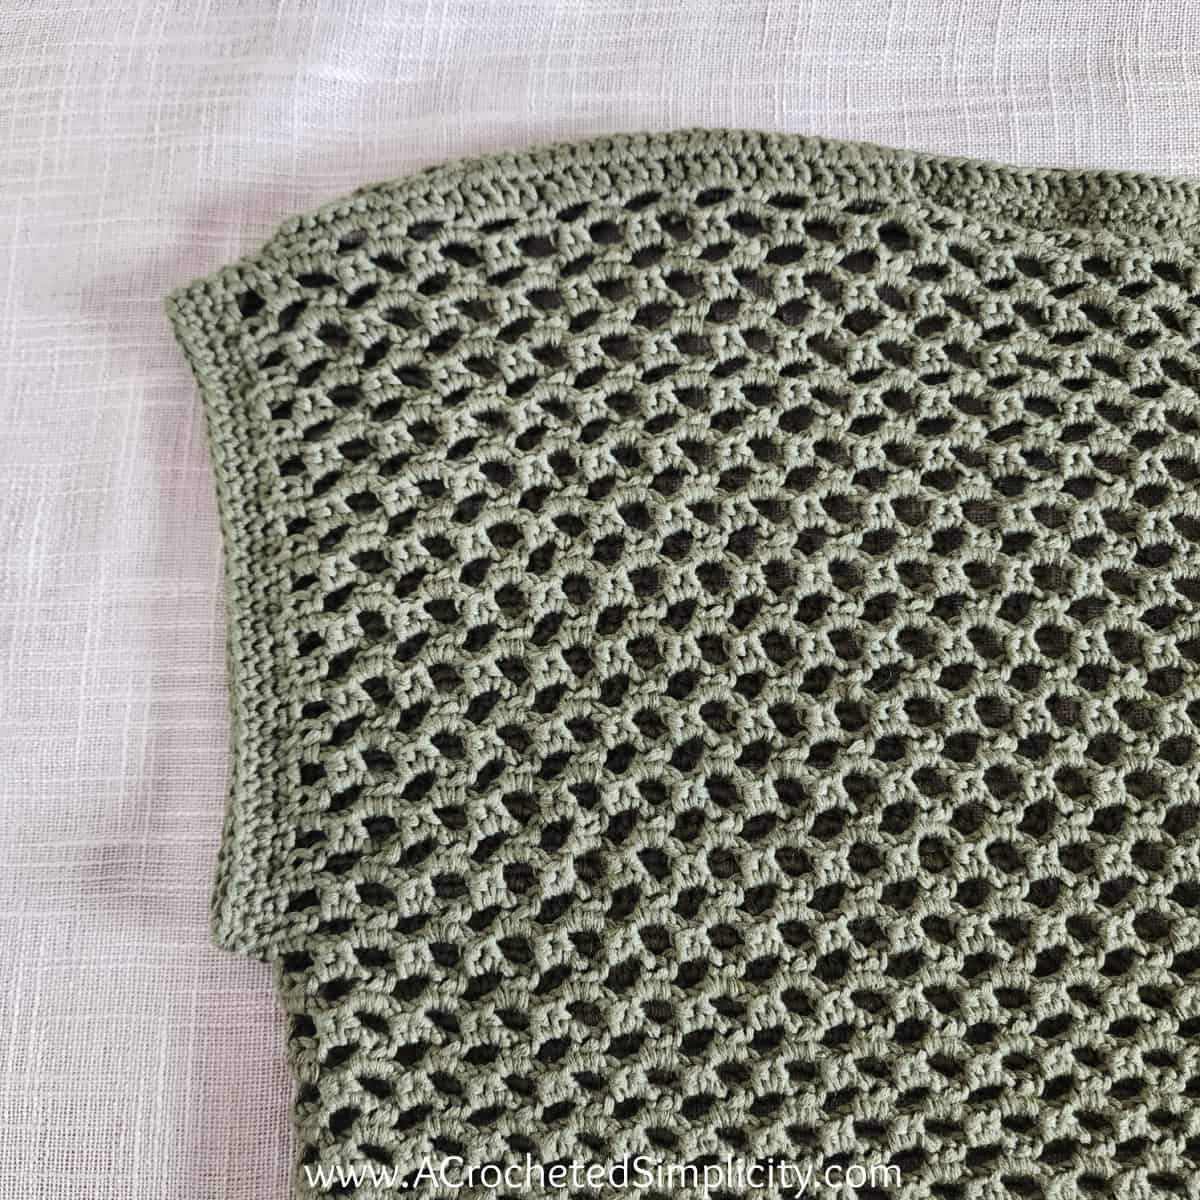
As you’re crocheting, it can be hard to see the honeycomb shape, but once worn, the weight of the crochet garment really opens up the stitch pattern.
Related: I first used this honeycomb mesh crochet stitch for a new crochet beach tote. It added a nice design element to the crochet bag.
How to Make a Crochet Top
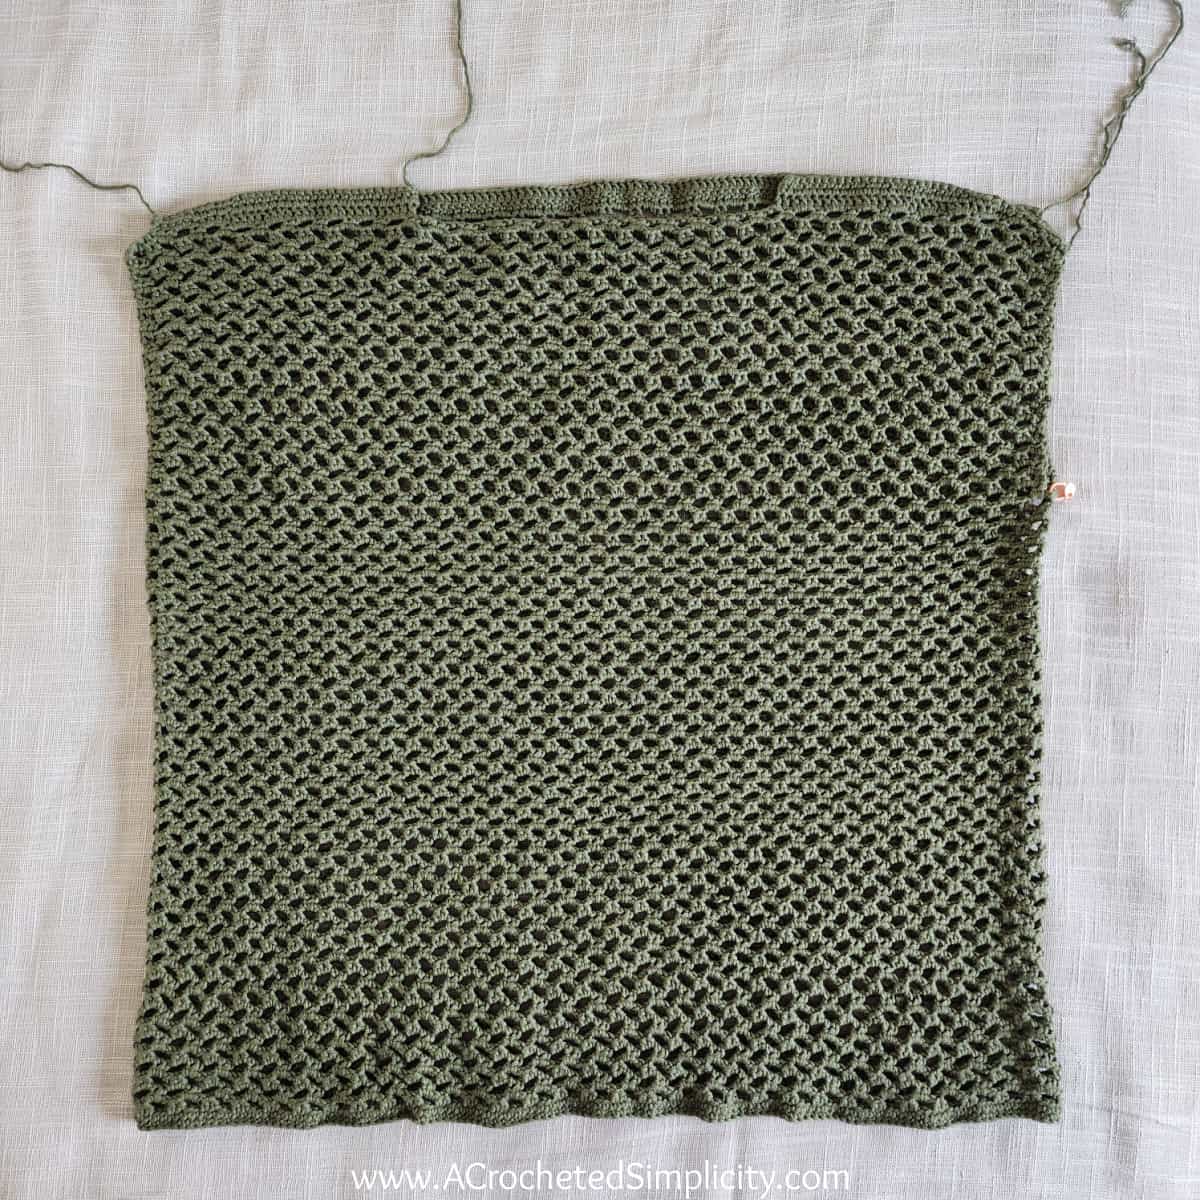
If you’re searching for easy crochet top patterns for beginners, this crochet mesh pattern checks all the boxes. It’s crocheted in one piece from the bottom hem to shoulders and has very minimal seaming!
This crochet top is worked from the bottom up using joined and turned rows and a simple one row repeat.
First, you’ll chain a specific length and join to form a circle, then work a single crochet stitch in each chain around to create a simple bottom hem. You’ll work two rounds of single crochet.
Next, you’ll begin the crochet mesh stitch pattern. You’ll repeat this simple one row repeat until your top is the length noted in the written pattern. This is where you can adjust the length of your top. You can add more rounds to make a crochet tunic, or work less rounds to make a crochet mesh crop top.
After your top is the length you’d like, you will split it in two sections. Crochet the front panel and simple shoulder shaping, then the back panel and shoulder shaping.
After completing the shoulder shaping for the front and back panels, it’s time to seam the shoulders. Use mattress stitch crochet to seam the shoulders.
Lastly, you’ll add a simple short sleeve cuff to each armhole opening using single crochet stitches.
And there you have it! An easy crochet mesh top!

How To Get The
Honeycomb Crochet Mesh Top Pattern
Option 1: Scroll down for the free summer crochet top pattern right here in this blog post.
Option 2: Purchase the ad-free printable PDF from one of my shops:
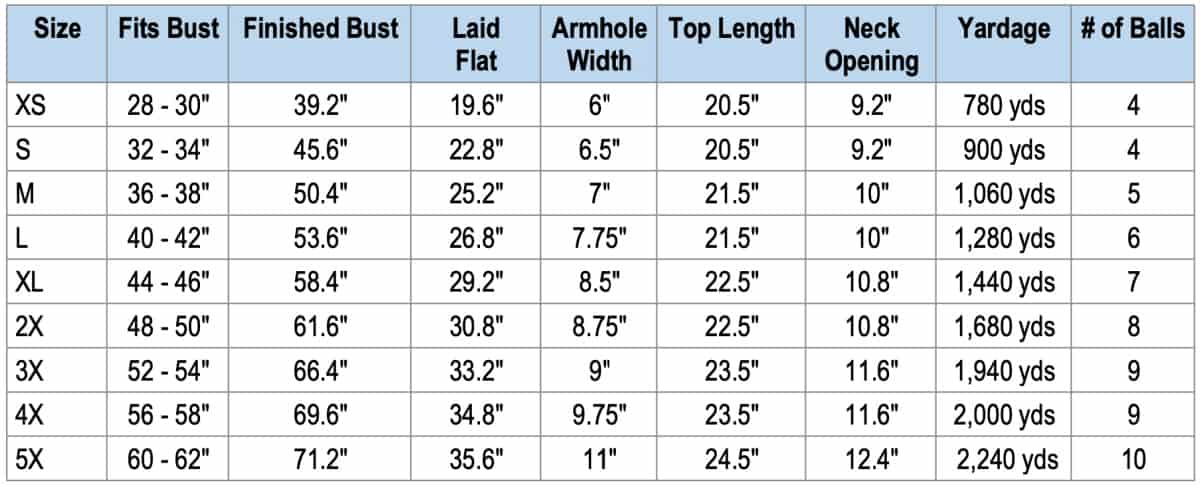
Choosing Which Size to Crochet
To choose your size, look over the size chart below.
- ‘Fits Bust’ measurement is the measurement of the intended wearer, not the garment’s finished measurement.
- Finished Bust, Laid Flat, and Top Length are measurements of the finished garment.
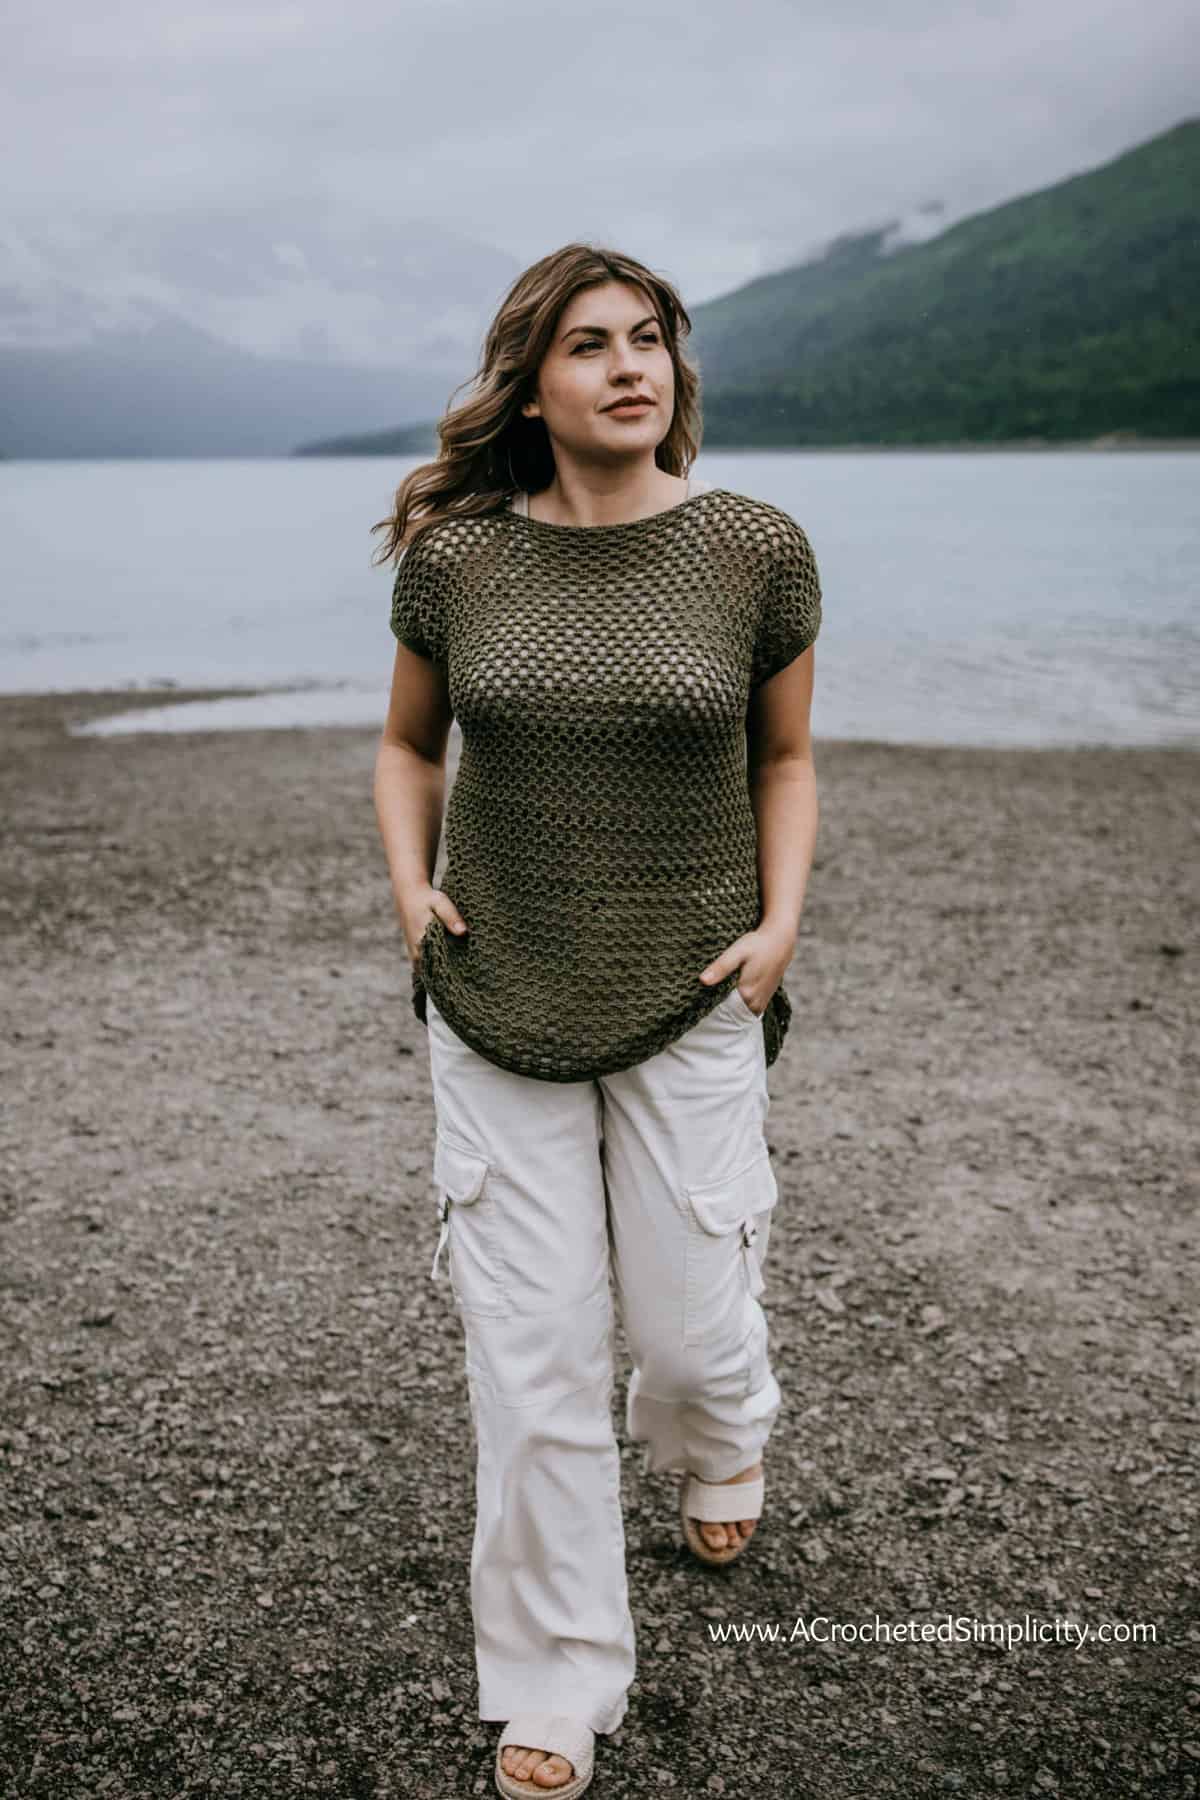
- This loose crochet top was designed to have an oversized fit. For best fit, choose your size based on your actual bust size.
- If you prefer a more fitted look, I would suggest sizing down (as long as your chest size is within the range of the smaller size).
- If you prefer a crochet loose top, I would suggest making a top one size larger than bust size.
- Top length is measured from the top of the shoulder to the bottom edge of the top.
- Adjusting Top Length: See the notes at the end of the Body of Top section for adjusting length.
- Note: Adjusting the size of your crochet mesh summer top will affect the amount of yarn you’ll need. You may need more or less than what is specified in the yardage chart below.
Size & Yardage Chart
The notes above refer to this size chart.
Yarn
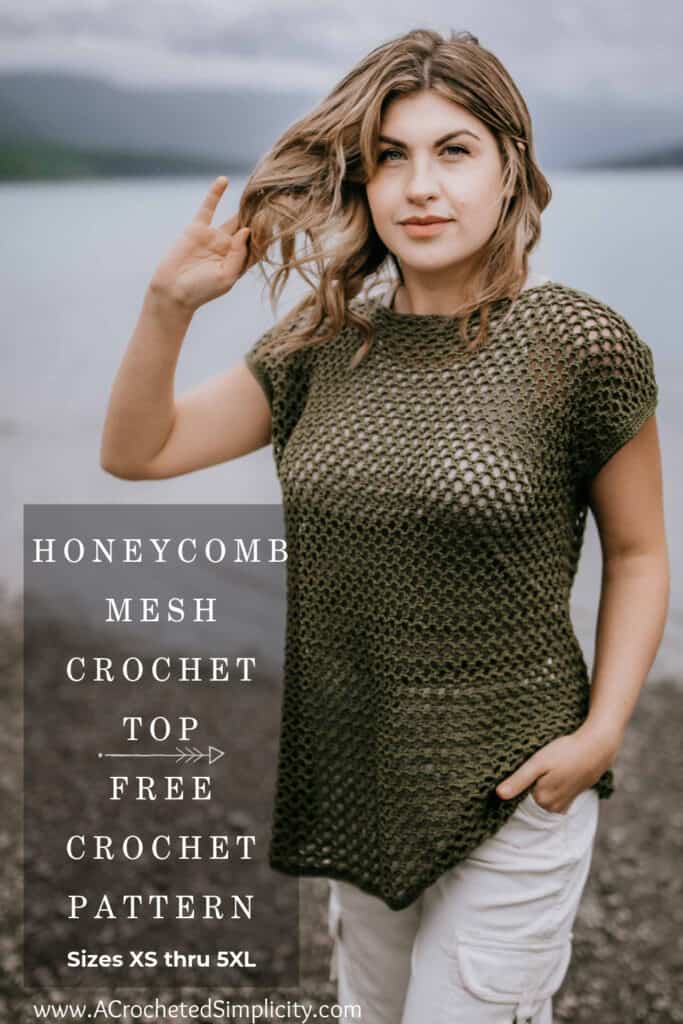
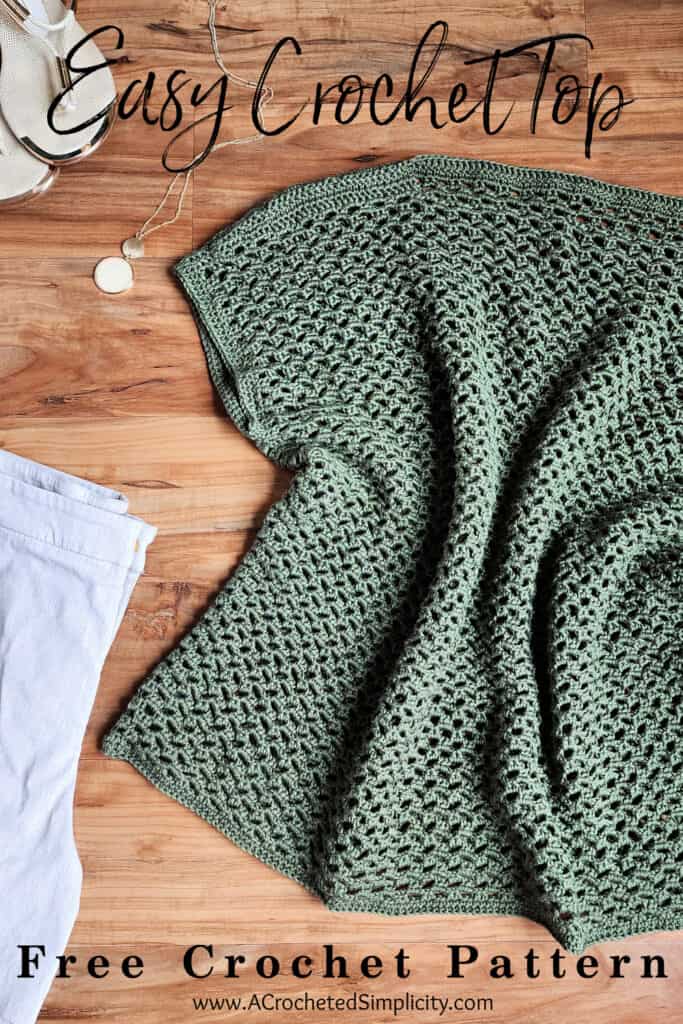
Made using Lion Brand Coboo, a soft cotton blend yarn, this crochet mesh top pattern is a wardrobe staple that’s perfect for the warmer months. It’s also great for fall. Wear it under a jean jacket for a fun casual vibe.
I chose this yarn because it’s a cooler cotton blend DK weight yarn which makes it a great choice for summer crochet tops. It’s a lightweight yarn with a beautiful drape that is perfect for this crochet mesh shirt.
Yarn Substitutions
You can substitute other DK weight yarns as long as you’re able to meet gauge and you’re happy with the drape of the crochet fabric.
I personally recommend a DK weight yarn that is a cotton blend for a summer crochet top. I feel they are less dense than 100% cotton yarns and much cooler to wear in summer months. Also, the more dense the yarn, the hotter your top will be to wear.
Honeycomb Mesh Crochet Top – Free Crochet Top Patterns
The free crochet mesh top patterns are below, but if you love to work offline, I’ve got a couple other great options for you.
Purchase the ad-free, printable PDF, including all photo tutorials + BONUS crochet garment schematic, on Ravelry, or on Etsy (aff).
Purchase the crochet mesh top kit! (aff): Lion Brand has a full kit of the Honeycomb Mesh Crochet Top, available on their website. The crochet kit includes your choice of colors and a digital copy of the crochet pattern.
This post contains affiliate links.
Materials
- Yarn: DK Weight / 3 / Yarn, (Lion Brand Coboo in Olive was used for the samples in the photos) (100 g / 3.5oz / 232 yards / 212 m / 51% cotton / 49% rayon from bamboo).
- Yardage: See Size Charts Above
- Crochet Hooks: H/8/5.00mm; G/6/4.00mm; or size needed to obtain gauge (My favorite crochet hooks are the Clover Amour Crochet Hooks, I’ve never had an ache in my hand since switching).
- Locking Stitch Markers
- Scissors
- Yarn Needle
Abbreviations (U.S. Terms)
- ch(s): chain(s)
- sl st(s): slip stitch(es)
- st(s): stitch(es)
- yo: yarn over
- sp(s): space(s)
- sc: single crochet
- hdc: half double crochet
- dc: double crochet
- Alt-dc: alternate double crochet
- Join with a standing single crochet
- Join with a standing half double crochet
- Join with a standing double crochet
- SM: stitch marker
- Rep: repeat
- Rnd: round
- RS: Right Side
- WS: Wrong Side
- BLO: back loop only
Experience Level
- Easy
Gauge
- With 4.00mm crochet hook: 20 sts = 4″; 12 rows = 4″
- See swatch instructions below.
Sizes
- Women’s XS through 5XL
- See size chart above.
Special Stitches
- Alternate Double Crochet (alt-dc): After turning your work, do not ch, instead, insert your hook into the first st, yo, pull up a loop, yo, pull thru both loops, insert your hook between the legs of the st just made, yo, pull up a loop, yo, pull through one loop, yo, pull thru remaining loops.
- Join with a standing single crochet: begin with a slip knot on your hook, insert your hook into the stitch or space indicated, yo, pull up a loop, yo and draw thru both loops on hook.
- Join with a standing half double crochet: begin with a slip knot on your hook. YO, insert your hook into the stitch or space indicated, yo, pull up a loop, yo, pull through remaining loops on your hook.
- Join with a standing double crochet: begin with a slip knot on your hook. YO, insert your hook into the stitch or space indicated, yo, pull up a loop, yo, pull through 2 loops on your hook, yo, pull through remaining 2 loops on your hook.
Pattern Notes
- Turning chains are not included in stitch count unless noted otherwise.
- Lion Brand Coboo (100 g / 3.5oz / 232 yards / 212 m / 51% cotton / 49% rayon from bamboo).
- Colorway & Yardage
- Olive #835-132 (see yardage in chart above)
- Changes for Sizes are written as follows: XS (S, M, L, XL, 2XL, 3XL, 4XL, 5XL)
- Stitch Counts are written at the end of the rows as follows: (XS, S, M, L, XL, 2XL, 3XL, 4XL, 5XL).
- Construction: This crochet top is worked from the bottom up using joined and turned rows and a simple one round repeat. Once your summer crochet mesh top reaches the bottom of the armhole opening, the top is split to work the front and back panels. You’ll add a little shoulder shaping to the last two rows of each of the panels. After completing each of the panels, you will seam the shoulders with a mattress stitch crochet. Lastly, you’ll crochet a simple short sleeve cuff around each armhole opening.
- Model wears a women’s medium and is wearing a medium sample.
Honeycomb Crochet Stitch – Swatch Instructions
It’s helpful to make a small honeycomb mesh crochet stitch swatch to check gauge so your crochet tops come out the correct size.
Set-Up: With a 5.00mm crochet hook, ch 27, switch to a 4.00mm crochet hook, working into the back hump of the foundation ch, sc in the 2nd ch from your hook and in each ch across. (26 sts)
Row 1: Ch 2, hdc in each of the first 2 sts, (ch 3, skip each of the next 2 sts, hdc in each of the next 2 sts) rep from ( to ) across. Turn. (14 hdc + 6 ch-3’s)
Row 2: Ch 2, hdc in the first st, ch 2, 2 hdc in the next ch-3 sp, (ch 3, 2 hdc in the next ch-3 sp) rep from ( to ) across to the last 2 sts, ch 2, hdc in the last st. Turn. (14 hdc + 5 ch-3’s + 2 ch-2’s)
Row 3: Ch 2, hdc in the first st, hdc in the ch-2 sp, ch 3, (2 hdc in the next ch-3 sp, ch 3) rep from ( to ) across to the last ch-2 sp, hdc in the ch-2 sp, hdc in the last st. Turn. (14 hdc + 6 ch-3’s)
Rows 4 – 13: Rep Rows 2 – 3.
Your swatch should measure approximately 5.2″ W x 4.125″ H.
Hanging Swatch Instructions
Do Crochet Tops Stretch?
Yes they do and some crochet stitches tend to stretch more than others. I suggest making a hanging swatch to see just how much your crochet top with stretch when worn. This way you can crochet it shorter or longer to adjust for any future stretching.
Step 1: Using the swatch instructions above, make a swatch that is approximately 8″ – 10″ long. Write the measurements down.
Step 2: Hang it from any place that the entire top edge can be secured. I’ve hung mine from the hearth above a fireplace. I’ve also used a towel bar in my bathroom. The most important thing is that you hang it evenly across the top edge and don’t just hang it from a corner or from a center point.
Step 3: Clip a few clothespins (or something else that’s similar weight) onto the bottom edge of your swatch. I’ve also used an empty DVD case by closing it with the bottom edge of the swatch in it.
Step 4: Allow it to hang for a few hours. Re-measure the length to see how much it has stretched. This will help give you a better idea of how much your garment will lengthen as it’s worn.
Pro Tip! It’s natural to gradually tighten up your chains when you’re working crochet mesh. Be mindful of this because if you start working your chains tighter and tighter, your top will get smaller and smaller. This can have a huge impact on the size of your summer top!
Honeycomb Mesh Tee Instructions
Changes for Sizes: XS (S, M, L, XL, 2XL, 3XL, 4XL, 5XL)
Set-Up: With a 5.00mm crochet hook, ch 196 (228, 252, 268, 292, 308, 332, 348, 356), be careful not to twist the chain, join with a sl st to the back hump of the 1st ch. (196, 228, 252, 268, 292, 308, 332, 348, 356 chs)
Rnd 1 (RS): Switch to a 4.00mm crochet hook, working into the back humps of the ch, sc in each ch around. Join with a sl st to the 1st sc. (196, 228, 252, 268, 292, 308, 332, 348, 356 sts)
Rnd 2: Ch 1, sc in each st around. Join. (196, 228, 252, 268, 292, 308, 332, 348, 356 sts)
Rnd3 (RS): Ch1, (hdc in each of the next 2 sts, ch 3, skip each of the next 2 sts) rep from ( to ) around. Join. Turn. (98 hdc + 49 ch-3’s) (114 hdc + 57 ch-3’s) (126 hdc + 63 ch-3’s) (134 hdc + 67 ch-3’s) (146 hdc + 73 ch-3’s) (154 hdc + 77 ch-3’s) (166 hdc + 83 ch-3’s) (174 hdc + 87 ch-3’s) (178 hdc + 89 ch-3’s)
Rnd 4: Ch 1, (2 hdc in the next ch-3 sp, ch 3) rep from ( to ) around. Join. Turn. (98 hdc + 49 ch-3’s) (114 hdc + 57 ch-3’s) (126 hdc + 63 ch-3’s) (134 hdc + 67 ch-3’s) (146 hdc + 73 ch-3’s) (154 hdc + 77 ch-3’s) (166 hdc + 83 ch-3’s) (174 hdc + 87 ch-3’s) (178 hdc + 89 ch-3’s)
Rep Rnd 4, ending with a RS Rnd, until Body of Top measures approximately (13″, 12.5″, 13″, 12.25″, 12.5″, 12.25″, 13″, 12.25″, 12″).
Adjusting Length: If you prefer a longer or shorter top, here is where you’ll want to adjust. The top length stated in the chart on page 2 is measured from the top of the shoulder to the bottom edge of the top.
Note #1: The Body of Top is only the section of your top that is from the bottom of the armholes down to the bottom hem.
Note #2: Depending on yarn you’ve chosen, the weight of the top may open up the stitch work a bit more and naturally lengthen your top. Keep this in mind when determining whether or not to lengthen or shorten your top. I suggest making a hanging stitch swatch with your yarn so you will know how your specific yarn will react when worn. See above for instructions how to make a hanging swatch.
- Longer: If you’d like a longer top, repeat round 4, ending with a RS round, until your top is the desired length from the bottom of armhole down.
- Shorter: If you’d like a shorter top, remove a few rounds, ending with a RS round, until your top is the desired length from the bottom of armhole down.
Do not fasten off. Continue on to the Front Panel.
Front Panel
Changes for Sizes: XS (S, M, L, XL, 2XL, 3XL, 4XL, 5XL)
Row 1 (RS): Ch 1, (2 hdc in the next ch-3 sp, ch 3) work from ( to ) 24 (28, 31, 33, 36, 38, 41, 43, 44) times, 2 hdc in the next ch-3 sp. Turn. (50 hdc + 24 ch-3’s) (58 hdc + 28 ch-3’s) (64 hdc + 31 ch-3’s) (68 hdc + 33 ch-3’s) (74 hdc + 36 ch-3’s) (78 hdc + 38 ch-3’s) (84 hdc + 41 ch-3’s) (88 hdc + 43 ch-3’s) (90 hdc + 44 ch-3’s)
Before turning to work Row 2, place a SM in the next hdc to mark the beginning of the Back Panel.
Row 2 (RS): Ch 1, hdc in the first st, ch 2, skip the next hdc, (2 hdc in the next ch-3 sp, ch 3) work from ( to ) 23 (27, 30, 32, 35, 37, 40, 42, 43) times, 2 hdc in the next ch-3 sp, ch 2, skip the next hdc, hdc in the next hdc. Turn. (50 hdc + 23 ch-3’s + 2 ch-2’s) (58 hdc + 27 ch-3’s + 2 ch-2’s) (64 hdc + 30 ch-3’s + 2 ch-2’s) (68 hdc + 32 ch-3’s + 2 ch-2’s) (74 hdc + 35 ch-3’s + 2 ch-2’s) (78 hdc + 37 ch-3’s + 2 ch-2’s) (84 hdc + 40 ch-3’s + 2 ch-2’s) (88 hdc + 42 ch-3’s + 2 ch-2’s) (90 hdc + 43 ch-3’s + 2 ch-2’s)
Row 3: Ch 1, hdc in the first st, hdc in the ch-2 sp, (ch 3, 2 hdc in the next ch-3 sp) work from ( to ) 23 (27, 30, 32, 35, 37, 40, 42, 43) times, ch 3, hdc in the next ch-2 sp, hdc in the last st. Turn. (50 hdc + 24 ch-3’s) (58 hdc + 28 ch-3’s) (64 hdc + 31 ch-3’s) (68 hdc + 33 ch-3’s) (74 hdc + 36 ch-3’s) (78 hdc + 38 ch-3’s) (84 hdc + 41 ch-3’s) (88 hdc + 43 ch-3’s) (90 hdc + 44 ch-3’s)
Rows 4 – 18 (20, 22, 24, 26, 26, 28, 30, 32): Rep Rows 2 – 3.
Row 19 (21, 23, 25, 27, 27, 29, 31, 33): Ch 1, sc in the first st, sc in the ch-2 sp, sc in each of the next 2 hdc, (2 hdc in the next ch-3 sp, ch 2) work from ( to ) 22 (26, 29, 31, 34, 36, 39, 41, 42) times, 2 hdc in the next ch-3 sp, sc in each of the next 2 hdc, sc in the ch-2 sp, sc in the last st. Turn. (54 hdc + 24 ch-2’s) (62 hdc + 28 ch-2’s) (68 hdc + 31 ch-2’s) (72 hdc + 33 ch-2’s) (78 hdc + 36 ch-2’s) (82 hdc + 38 ch-2’s) (88 hdc + 41 ch-2’s) (92 hdc + 43 ch-2’s) (94 hdc + 44 ch-2’s)
Do not fasten off. Continue on to the Front Left Shoulder.
Front Left Shoulder
Row 1 (RS): Ch 1, sl st in each of the first 4 sts (do not count as sts), sc in each of the next 2 hdc, 2 sc in the next ch-2 sp, sc in each of the next 2 hdc, 2 hdc in the next ch-2 sp, hdc in each of the next 2 hdc, (2 dc in the next ch-2 sp, dc in each of the next 2 hdc) work from ( to ) 3 (5, 6, 7, 8, 9, 10, 11, 11) times. Turn. (22, 30, 34, 38, 42, 46, 50, 54, 54 sts)
Before turning to work Row 2, skip 46 (46, 50, 50, 54, 54, 58, 58, 62) sts (chs count as a st), place a SM in the next st to make the beginning of the Front Right Shoulder.
Row 2: Alt-dc in the first st, dc in each of the next 11 (19, 23, 27, 31, 35, 39, 43, 43) sts, hdc in each of the next 4 sts, sc in each of the next 2 sts, sl st in each of the next 4 sts (count as sts), skip the last 4 sts. (22, 30, 34, 38, 42, 46, 50, 54, 54 sts)
Fasten off. Continue on to the Front Right Shoulder.
Front Right Shoulder
Row 1 (RS): With a 4.00mm crochet hook, join yarn with a standing dc in the st you marked to begin the Front Right Shoulder, dc in the next st, (2 dc in the next ch-2 sp, dc in each of the next 2 hdc) work from ( to ) 2 (4, 5, 6, 7, 8, 9, 10, 10) times, 2 dc in the next ch-2 sp, hdc in each of the next 2 hdc, 2 hdc in the next ch-2 sp, sc in each of the next 2 hdc, 2 sc in the next ch-2 sp, sc in each of the next 2 hdc, skip the last 4 sts. Turn. (22, 30, 34, 38, 42, 46, 50, 54, 54 sts)
Row 2: Ch 1, sl st in each of the first 4 sts (count as sts), sc in each of the next 2 sts, hdc in each of the next 4 sts, dc in each of the next 12 (20, 24, 28, 32, 36, 40, 44, 44) sts. (22, 30, 34, 38, 42, 46, 50, 54, 54 sts)
Fasten off. Continue on to the Back Panel.
Back Panel
Row 1 (WS): With a 4.00mm crochet hook, join yarn with a standing hdc in the st marked to begin the Back Panel, ch 2, (2 hdc in the next ch-3 sp, ch 3) work from ( to ) 23 (27, 30, 32, 35, 37, 40, 42, 43) times, 2 hdc in the next ch-3 sp, ch 2, skip the next hdc, hdc in the next hdc. Turn. (50 hdc + 23 ch-3’s + 2 ch-2’s) (58 hdc + 27 ch-3’s + 2 ch-2’s) (64 hdc + 30 ch-3’s + 2 ch-2’s) (68 hdc + 32 ch-3’s + 2 ch-2’s) (74 hdc + 35 ch-3’s + 2 ch-2’s) (78 hdc + 37 ch-3’s + 2 ch-2’s) (84 hdc + 40 ch-3’s + 2 ch-2’s) (88 hdc + 42 ch-3’s + 2 ch-2’s) (90 hdc + 43 ch-3’s + 2 ch-2’s)
Row 2 (RS): Ch 1, hdc in the first st, hdc in the ch-2 sp, (ch 3, 2 hdc in the next ch-3 sp) work from ( to ) 23 (27, 30, 32, 35, 37, 40, 42, 43) times, ch 3, hdc in the next ch-2 sp, hdc in the last st. Turn. (50 hdc + 24 ch-3’s) (58 hdc + 28 ch-3’s) (64 hdc + 31 ch-3’s) (68 hdc + 33 ch-3’s) (74 hdc + 36 ch-3’s) (78 hdc + 38 ch-3’s) (84 hdc + 41 ch-3’s) (88 hdc + 43 ch-3’s) (90 hdc + 44 ch-3’s)
Row 3: Ch 1, hdc in the first st, ch 2, (2 hdc in the next ch-3 sp, ch 3) work from ( to ) 23 (27, 30, 32, 35, 37, 40, 42, 43) times, 2 hdc in the next ch-3 sp, ch 2, skip the next hdc, hdc in the next hdc. Turn. (50 hdc + 23 ch-3’s + 2 ch-2’s) (58 hdc + 27 ch-3’s + 2 ch-2’s) (64 hdc + 30 ch-3’s + 2 ch-2’s) (68 hdc + 32 ch-3’s + 2 ch-2’s) (74 hdc + 35 ch-3’s + 2 ch-2’s) (78 hdc + 37 ch-3’s + 2 ch-2’s) (84 hdc + 40 ch-3’s + 2 ch-2’s) (88 hdc + 42 ch-3’s + 2 ch-2’s) (90 hdc + 43 ch-3’s + 2 ch-2’s)
Rows 4 – 18 (20, 22, 24, 26, 26, 28, 30, 32): Rep Rows 2 – 3.
Row 19 (21, 23, 25, 27, 27, 29, 31, 33): Ch 1, sc in the first st, sc in the next st, 2 sc in the next ch-3 sp, ch 2, (2 hdc in the next ch-3 sp, ch 2) rep from ( to ) across to the last ch-3 sp, 2 sc in the next ch-3 sp, sc in each of the last 2 sts. Turn. (54 hdc + 22 ch-2’s) (62 hdc + 26 ch-2’s) (68 hdc + 29 ch-2’s) (72 hdc + 31 ch-2’s) (78 hdc + 34 ch-2’s) (82 hdc + 36 ch-2’s) (88 hdc + 39 ch-2’s) (92 hdc + 41 ch-2’s) (94 hdc + 42 ch-2’s)
Do not fasten off. Continue on to the Back Panel Shoulders.
Back Panel Shoulders
Row 1 (RS): Ch 1, sl st in each of the first 4 sts (do not count as sts), 2 sc in the next ch-2 sp, sc in each of the next 2 hdc, 2 sc in the next ch-2 sp, hdc in each of the next 2 hdc, 2 hdc in the next ch-2 sp, (dc in each of the next 2 hdc, 2 dc in the next ch-2 sp) rep from ( to ) across to the last 3 ch-2 sps, 2 hdc in the next ch-2 sp, hdc in each of the next 2 hdc, 2 sc in the next ch-2 sp, sc in each of the next 2 hdc, 2 sc in the next ch-2 sp, skip the last 4 sts. Turn. (90, 106, 118, 126, 138, 146, 158, 166, 170 sts)
Row 2: Ch 1, sl st in each of the first 4 sts (count as sts), sc in each of the next 2 sts, hdc in each of the next 4 sts, dc in each st across to the last 10 sts, hdc in each of the next 4 sts, sc in each of the next 2 sts, skip the last 4 sts. (90, 106, 118, 126, 138, 146, 158, 166, 170 sts)
Fasten off. Continue on to Shoulder Seaming.
Shoulder Seaming
Step 1: Lay your top flat, with RS facing out, as shown in the photo below. Line up the stitches from each shoulder with stitches along the back panel. Use locking stitch markers to hold the panels together while seaming. You will seam (26, 34, 38, 42, 46, 50, 54, 58, 58) sts on each shoulder.

Step 2: With a yarn needle and piece of yarn that is 4 times the width of a shoulder, seam the shoulder using a mattress stitch crochet. Make sure to seam ALL sts from the front shoulders (including the sl sts and skipped sts along the outside edges). Check out my mattress stitch seam tutorial for tips!

Weave in ends. Seam the second shoulder, then continue on to the Short Sleeve Cuff.
Short Sleeve Cuff
Tip: If you feel the short sleeve cuff is too tight, go up to a 5.00mm crochet hook.
Rnd 1: With a 4.00mm crochet hook, join yarn with a standing sc in a st nearest the bottom of the armhole opening, work 1 sc in each st around armhole opening. Join with a sl st to the 1st st. Stitch count isn’t crucial.
Rnds 2 – 3: Ch 1, sc in each st around. Join.
If you prefer a wider cuff on your sleeve, repeat round 2.
Fasten off. Weave in ends. Repeat for the second short sleeve cuff.
That’s it! Block your crochet tee (if you prefer) and wear it!!!
Related: If you have never blocked a crochet project before, check out my post on 3 blocking methods!
Frequently Asked Questions About Crochet Mesh Stitch Patterns
If you have any questions that I haven’t answered below, always feel free to reach out to me, (e-mail me: ACrochetedSimplicity at Gmail dot Com), and I’ll do my best to help!
How to crochet mesh stitch?
There are many different crochet mesh stitches. Some mesh stitch patterns, such as filet crochet, when you work stitches into stitches ands chains worked above chains, from the previous row. And then there are crochet mesh patterns where you work stitches into the chain spaces from previous rows, such as diamond or honeycomb mesh.
How do you crochet a mesh top?
There are several ways to crochet a mesh top. This top is crocheted from the bottom to the top with only shoulder seams. Others may require you to crochet panels and sew them together.
There are no right or wrong ways, only the way that works best for the mesh stitch pattern and style of the crochet summer top.
What do you wear under crochet mesh top?
I recommend choosing undergarments that match your skin tone. This will help to create a seamless, barely-there look underneath.
How much yarn do I need for a mesh top?
For this crochet mesh top, you’ll need any where from 780 – 2,240 yards, depending on which size you’re making. Also, keep in mind that you will need more or less yarn, if you are making your top longer or shorter than the dimensions in the size chart above.
Are crochet tops good for summer?
When crocheted with a lighter cotton or cotton blend yarn, a crochet top pattern can help you beat the heat during the warm summer months. The best summer crochet tops are made with lace or mesh stitches that are open and airy.
I Made It! Now What?
Pin this post: Save this crochet mesh top pattern to your Pinterest boards so that you can come back and make it again.
Leave a comment below: We love to hear your feedback.
Share Your Finished Projects on Facebook or Instagram: I love to see your finished projects! Share with us on social media and tag me @acrochetedsimplicity or use the hashtag #ACrochetedSimplicity so I can find your posts.
JOIN US IN THE FACEBOOK COMMUNITY GROUP!
Come share your finished projects with us in the A Crocheted Simplicity Crochet Community Group on Facebook. Join us for fun community events such as crochet alongs, join in on crochet conversations, ask questions, get advice, and share your love for crochet!

More Free Shirts & Crochet Tops Patterns I Think You’ll Love
More Fun & Free Summer Crochet Patterns
Are you looking for your next summer crochet project? We have several more free crochet patterns for summer lovin’.
Crochet newbie here. THANK YOU for the inspiration!
Hi Andre,
You’re most welcome!
Happy Crocheting!
Jennifer
Not sure whether to turn in each round of the main body.
Hi Jeanne,
Yes, you will turn at the end of each round. 🙂
Happy Crocheting!
Jennifer
This too is just what I’m looking for- my 1st project that isn’t a scarf, shawl or afghan. Love the pattern!
Love the texture or this design. Will be great for vacation time.
I love this top. I live in Florida, so no thick sweaters for me!!
I love how comfy this top looks and the drape. I put this in my Ravelry favorites as soon as I saw it!
Would be great for the warmer weather here in FL
Such a beautiful top…will be perfect for 3 seasons at least
love this pattern. i have some silk yarn i want to use for it. thank you so much
Loving this!
Beginner-friendly –
lots of sizing options –
minimal seaming!
It’s perfect!
This sweater is SOOO cute, and looks very comfy. I think it would be perfect for the late spring/early summer days here in Tennessee! Adding to my Ravelry favorites!
I love this! I can’t wait to start on thus fir each of my granddaughters and my daughter. I’m thinking they could use this as a bathing suit cover if I make it longer. if not it us adorable top. Thank you for sharing!
Of all the mesh tops I’ve come across, this is by far my favourite. Thanks A Bunch Jennifer for sharing. Appreciate your generosity & great tips!
I’m so glad to hear this! Thank you!
Happy Crocheting,
Jennifer
Help! I mistakenly made the body with 2 sc and ch 3 instead of 2 hdc and ch 3, realizing my mistake when I was starting the front panel. Will this make a difference do you think? I really don’t want to start over.
Hi Robin,
My guess is that your panels may be a little but shorter than with the hdc, but that shouldn’t be a problem with the finished product. You may just need to work a few more rows.
Happy Crocheting,
Jennifer