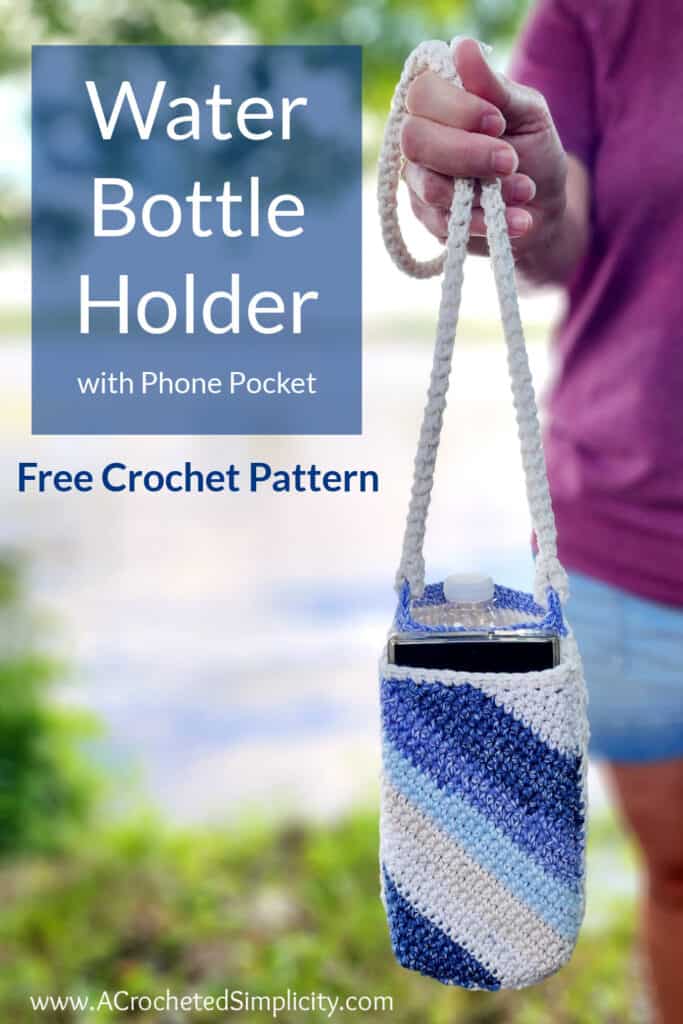
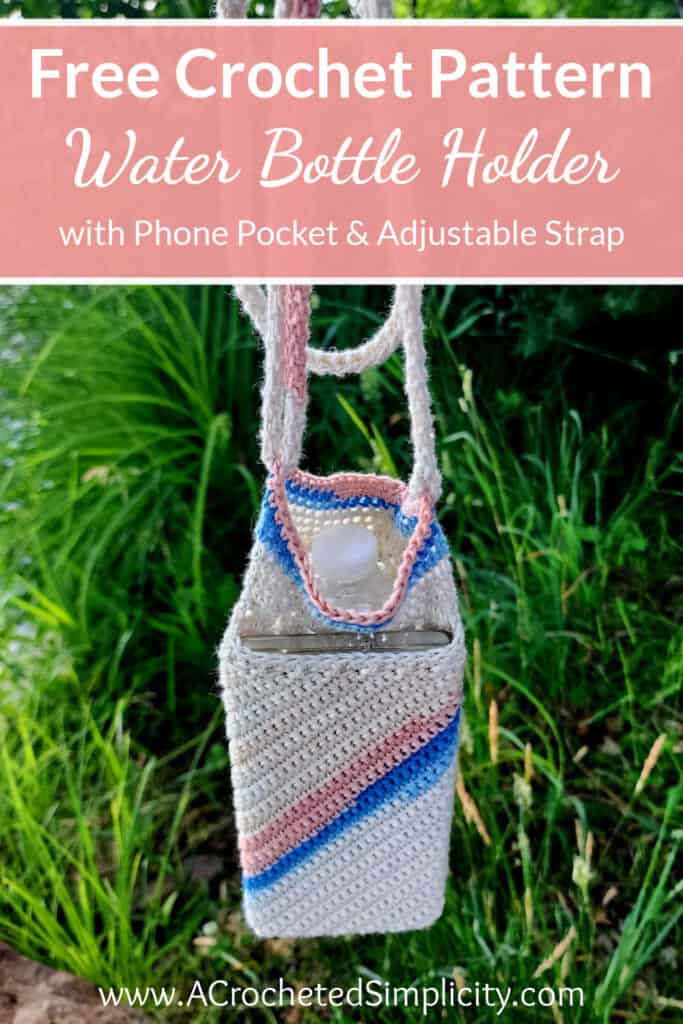
Crochet Water Bottle Holder with Phone Pocket & Adjustable Strap

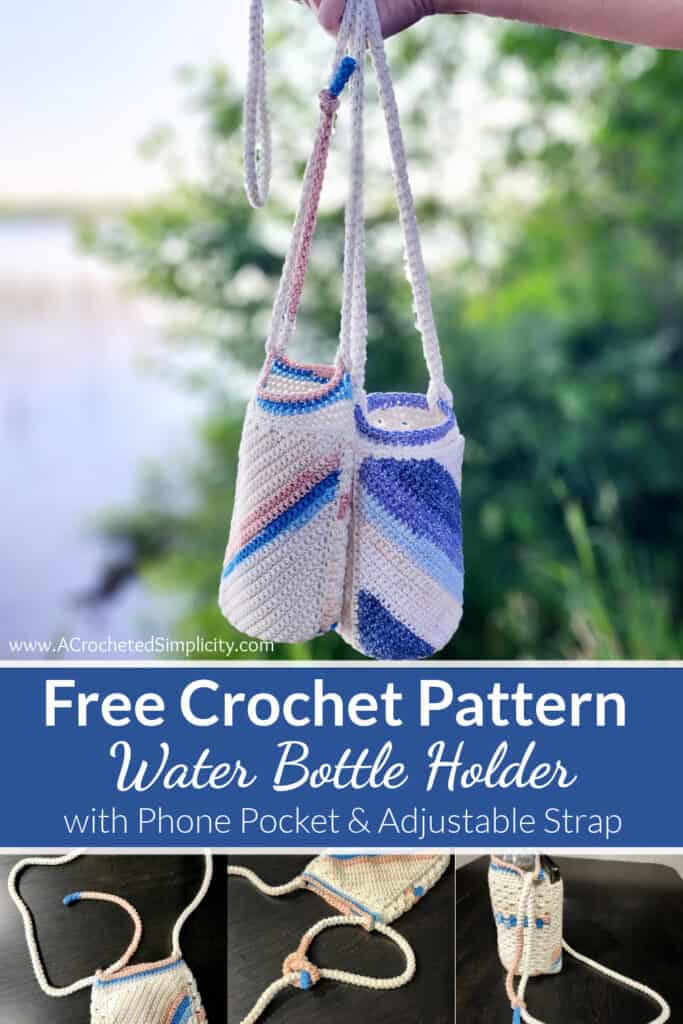
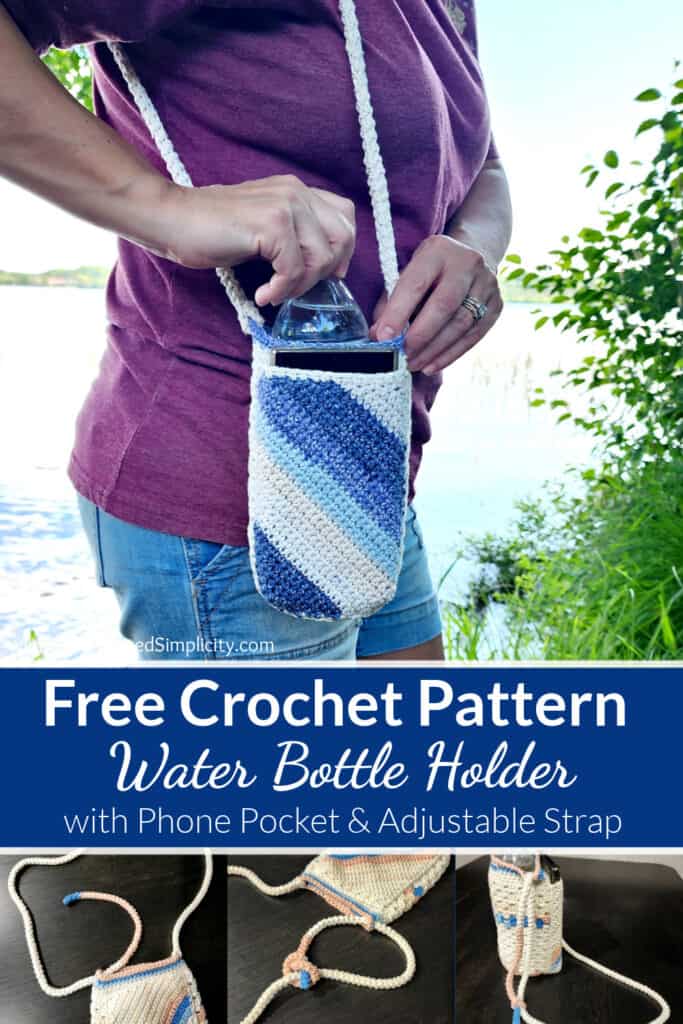

Learn how to crochet this fun crochet water bottle holder to take on your everyday adventures. A water bottle holder is the perfect solution to staying hydrated, all while keeping your hands free when you’re out on your daily walk, or just walking around the grocery store.
You’ll find the crochet water bottle holder pattern in the post below for free, or an ad-free print friendly version on Ravelry, or on Etsy (aff).

I’ve also included instructions for customizing the crochet bottle bag to accommodate different size water bottles.
With this quick crochet project, you’ll be able to complete your crochet bottle holder in one evening and take it out hiking the very next day to keep your hands free for exploring.
If you’re short on time and looking for something practical, an easy crochet water bottle holder also makes a great last minute gift!
If you need a small gift to crochet for kids, this crochet water bottle holder with pocket is perfect! It keeps their hands free to explore the world while hiking and the pocket is the perfect place for them to store little the treasures they find. The adjustable strap is also great because it makes sure they can use it for years to come.
Crochet Water Bottle Holder with Phone Pocket
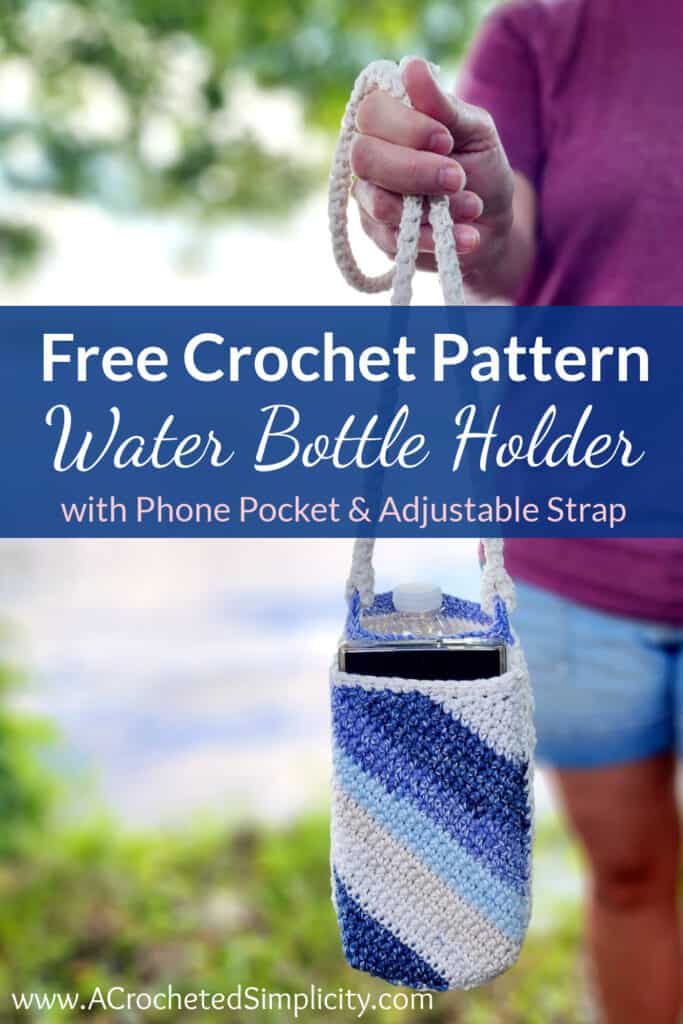
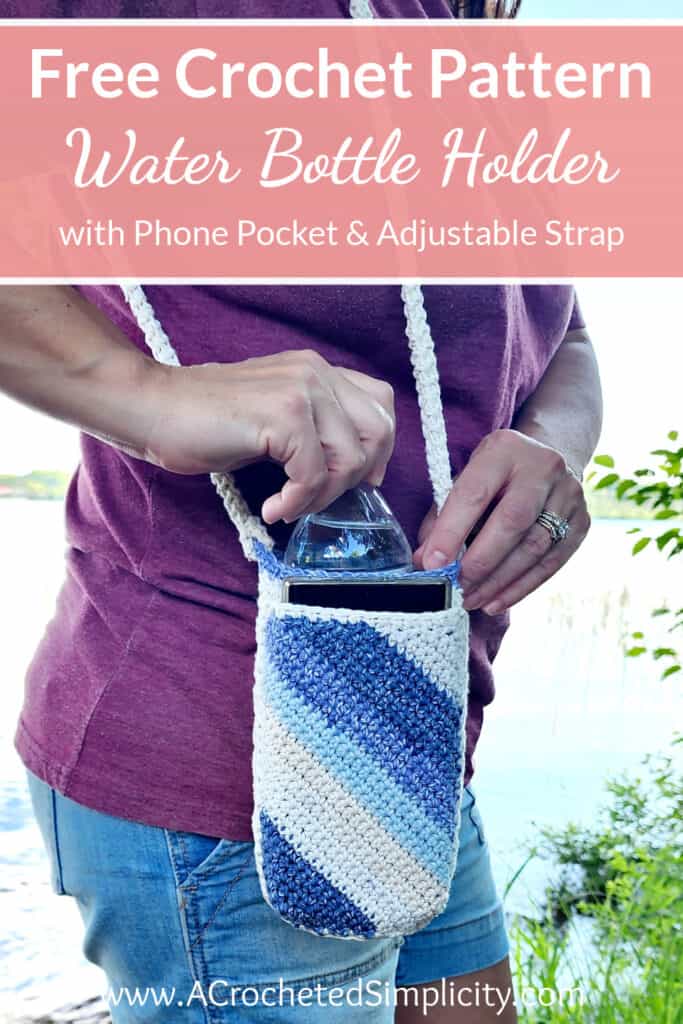
I’ve been focusing on my health this summer by going for daily walks around a lake. The lake is three miles around so bringing a water bottle and cell phone is a must, but carrying them means that both my hands are tied up.
If I need to take a sip of water, or answer a phone call, I have to stop and set one of them on the ground. This isn’t convenient. But with a water bottle holder for walking, I can take a drink or answer a call without stopping. I stay both hands-free and hydrated.
In this crochet pattern for water bottle holder, you will learn to crochet a water bottle carrier that has the option of adding a pocket large enough to hold your cell phone and an adjustable crocheted strap.
How to Crochet a Water Bottle Holder
This free pattern for water bottle carrier is crocheted in rounds and in joined and turn rounds, from the bottom up.
First, you’ll crochet the base of the crochet bottle bag in a spiral, using single crochet stitches.
Next, the crocheted water bottle is made using granny stitch crochet. You’ll join at the end of each round, then turn to crochet the next round.
After the crochet bottle cover is the height you need it to be, you’ll then crochet the cell phone pocket by crocheting single crochet C2C, also known as corner to corner crochet or crochet on the bias.
Then, you’ll attach the pocket to the water bottle holder.
Finally, you’ll make a crochet rope for the crossbody water bottle holder. Choose either the stationary strap or adjustable crochet strap option. Both options make a sturdy carrying strap.
The last step is to attach the crochet strap, then your hands-free water bottle holder is ready to wear!
How To Get The
Crochet Water Bottle Holder with Pocket Pattern
Option 1: Scroll down for the free crochet water bottle pattern right here in this blog post.
Option 2: Purchase the ad-free printable PDF from one of my shops:
Crochet Bottle Holder Pattern – Design Details
There are three main features in this bottle holder crochet pattern: a granny stitch crochet water bottle, a corner to corner crochet (C2C) phone pocket, and an adjustable crochet strap.
Granny Stitch Crochet Water Bottle Cozy
Flat granny stitch crochet is a classic crochet stitch pattern. It’s popularity waxes and wanes just like everything else, and this year you’ll see it everywhere!
I chose granny stitch crochet for my water bottle holder for a couple reasons. 1) It’s really popular this summer and 2) It’s an openwork stitch pattern that will help the water bottle bag to dry more quickly.
Corner to Corner Crochet (C2C) Phone Pocket
Crocheting on the bias (aka corner to corner crochet), is my favorite crochet technique to use when I want to be able to adjust the size of a feature without having to frog it and start over. I chose single crochet C2C to help showcase the self-striping yarn.
Easily adjust the size of your pocket for any size phone. For a wider pocket, work more increase rows (in multiples of 2). For a taller or shorter pocket, work more or fewer rectangle rows (in multiples of 2). It’s super easy to customize the size of your cell phone pocket!
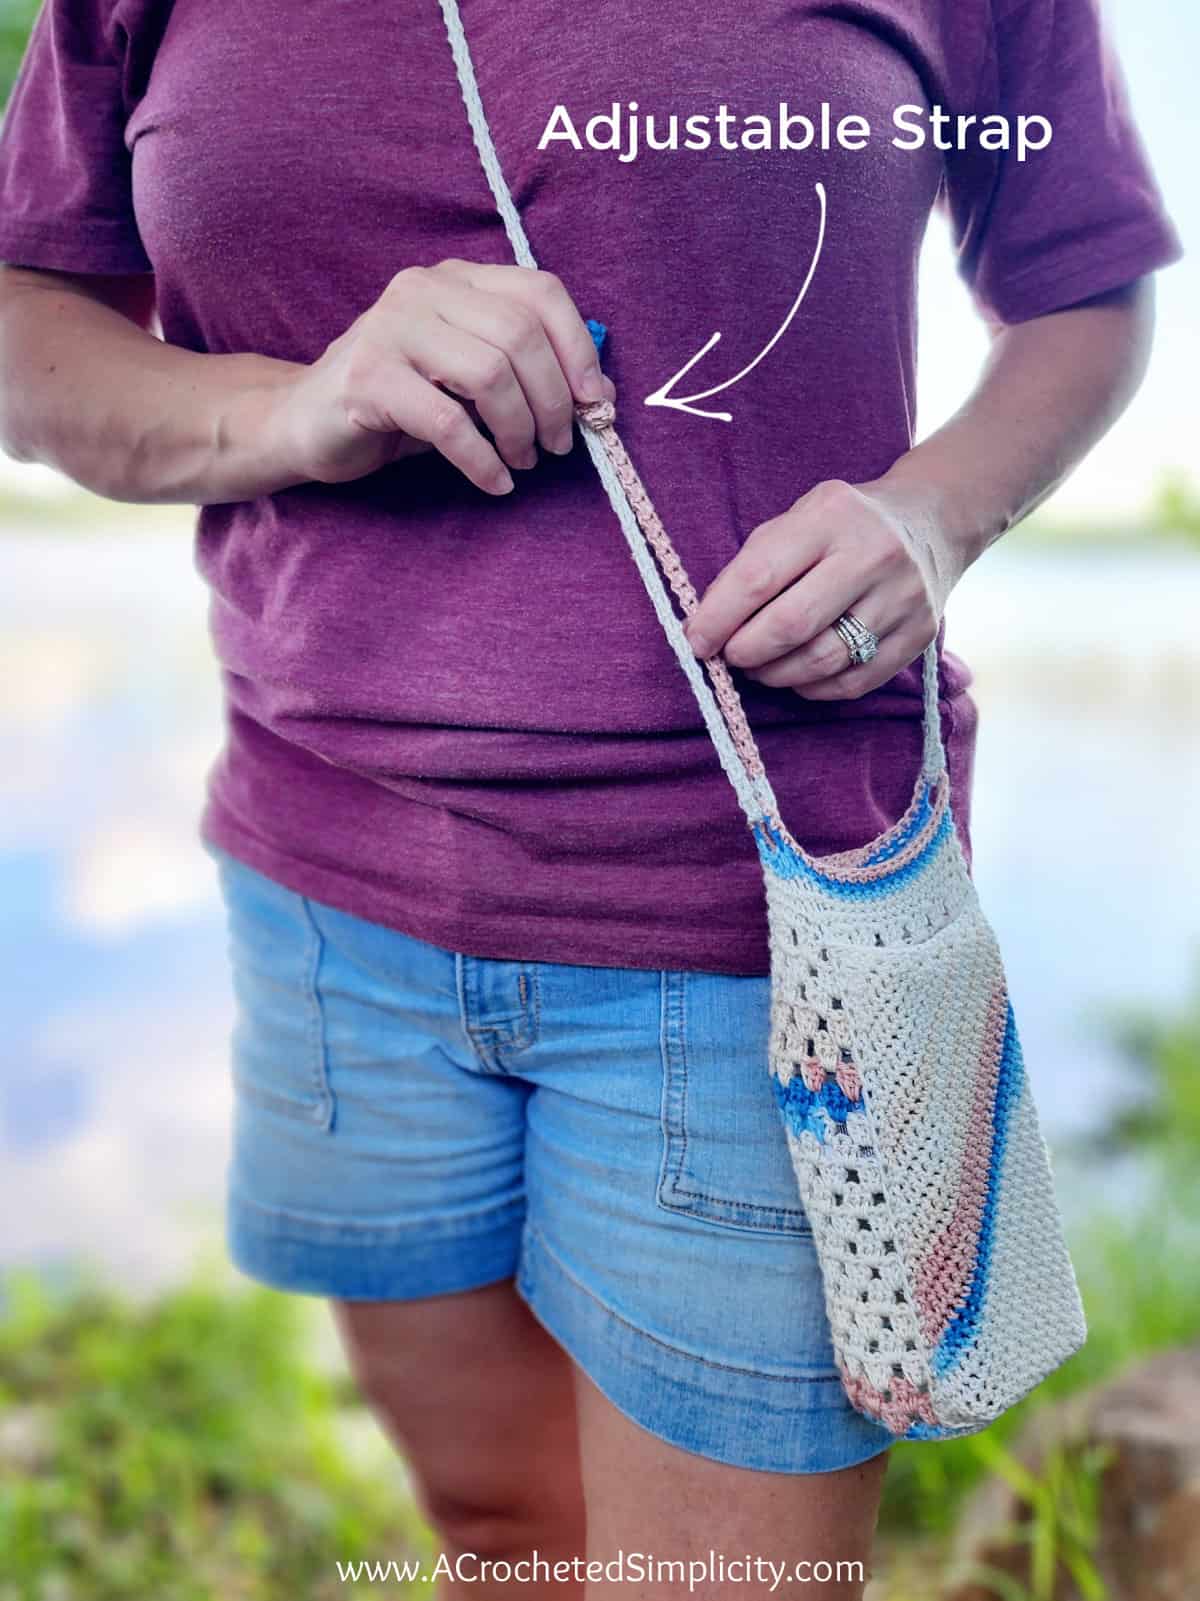
Adjustable Crochet Strap
While my husband and I were on vacation this past spring, I saw a macrame water bottle holder that had an adjustable strap. So, when designing this water bottle sling pattern, having an adjustable crochet strap was a must!
This crochet pattern includes instructions for two different crochet straps.
- A shorter stationary strap for those who only plan to wear their bottle holder on one shoulder.
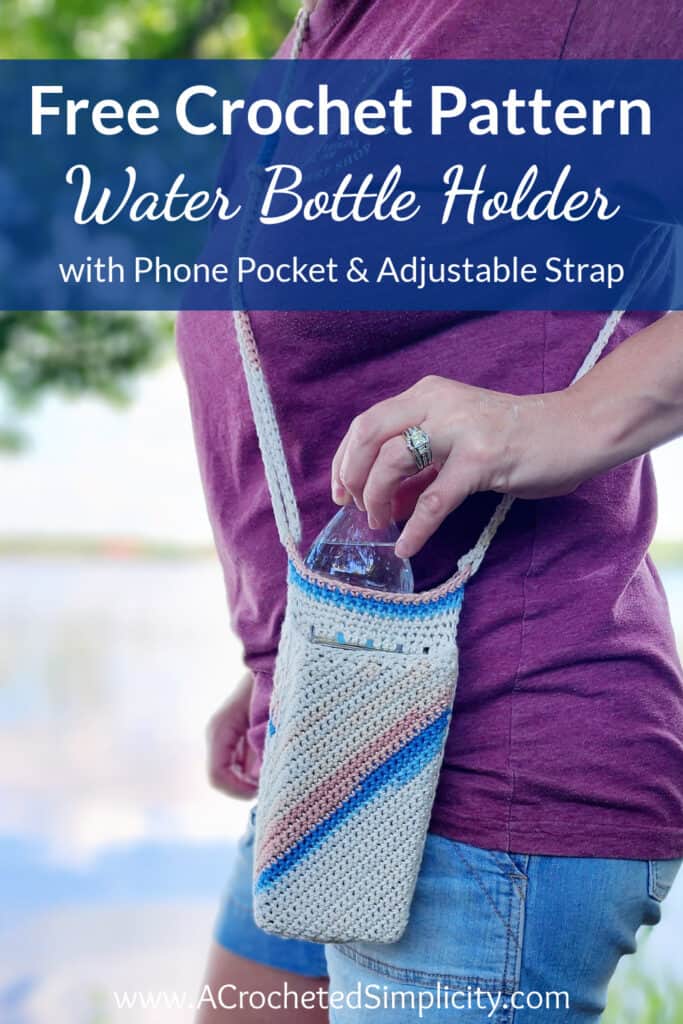
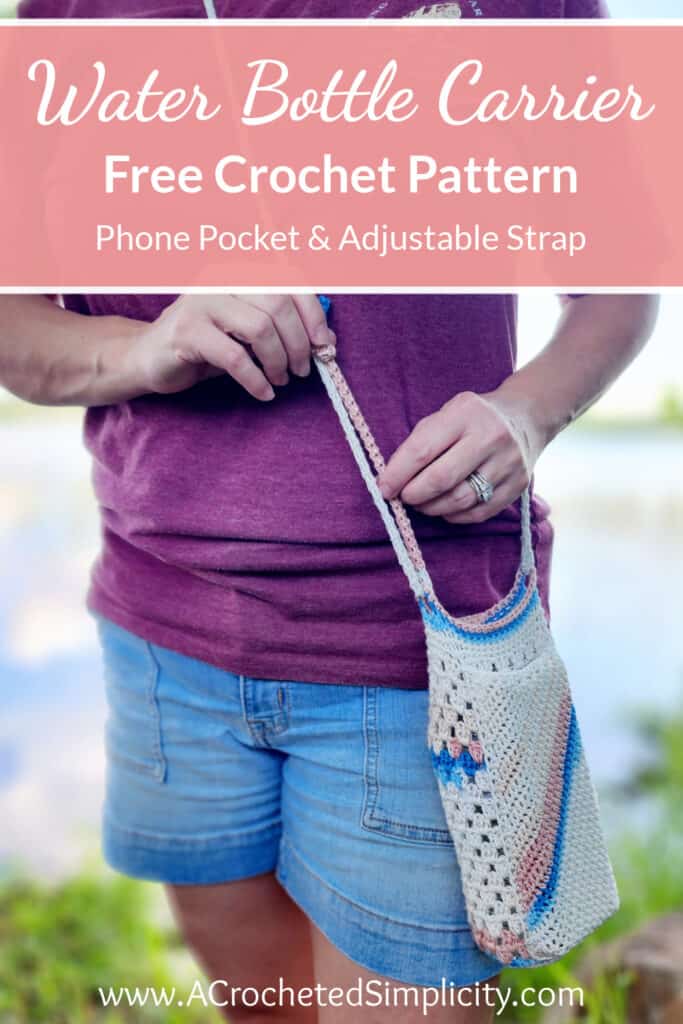
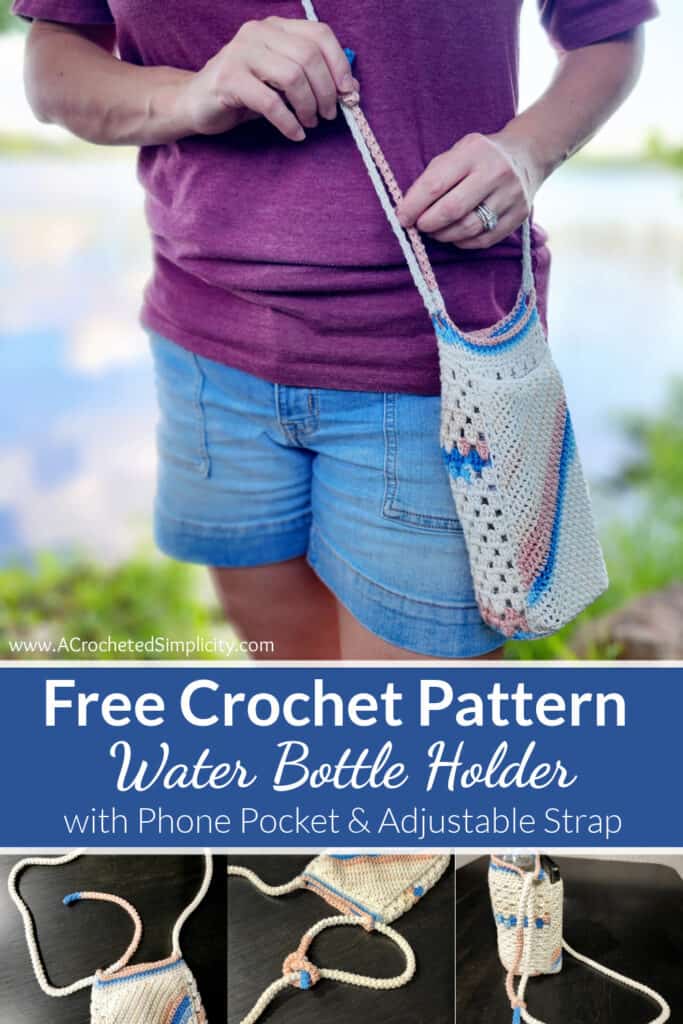
- An adjustable bag strap that allows your water bottle holder to be worn as a cross body bag or shoulder bag. Switch it up a bit when the mood strikes you.
If you love the look of macrame, I think you’ll love this crochet plant hanger.
Custom Sizing Instructions
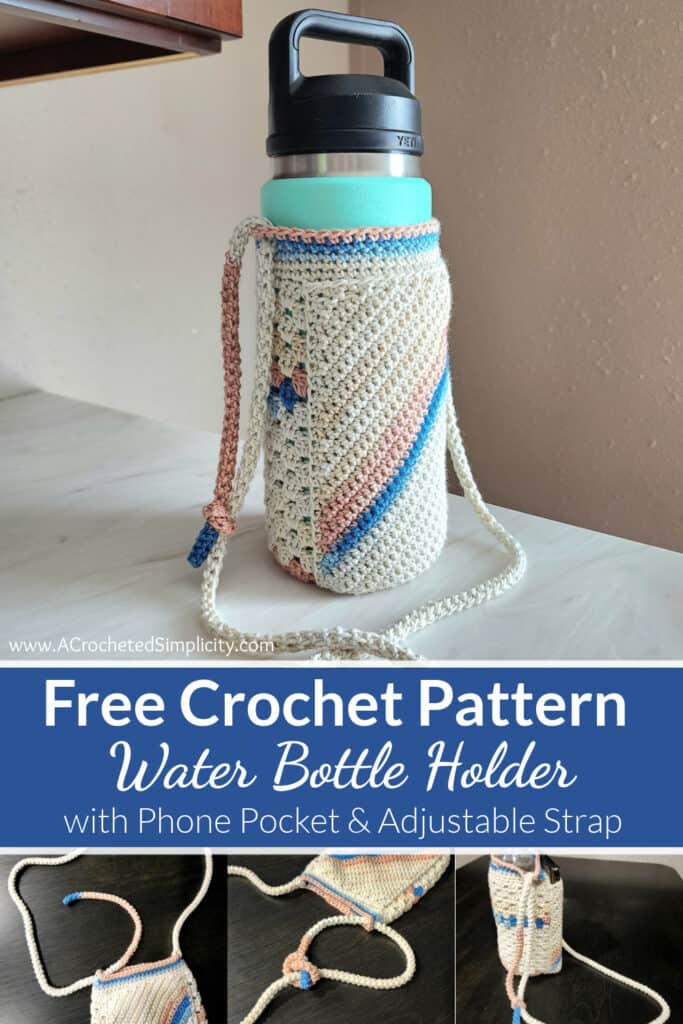
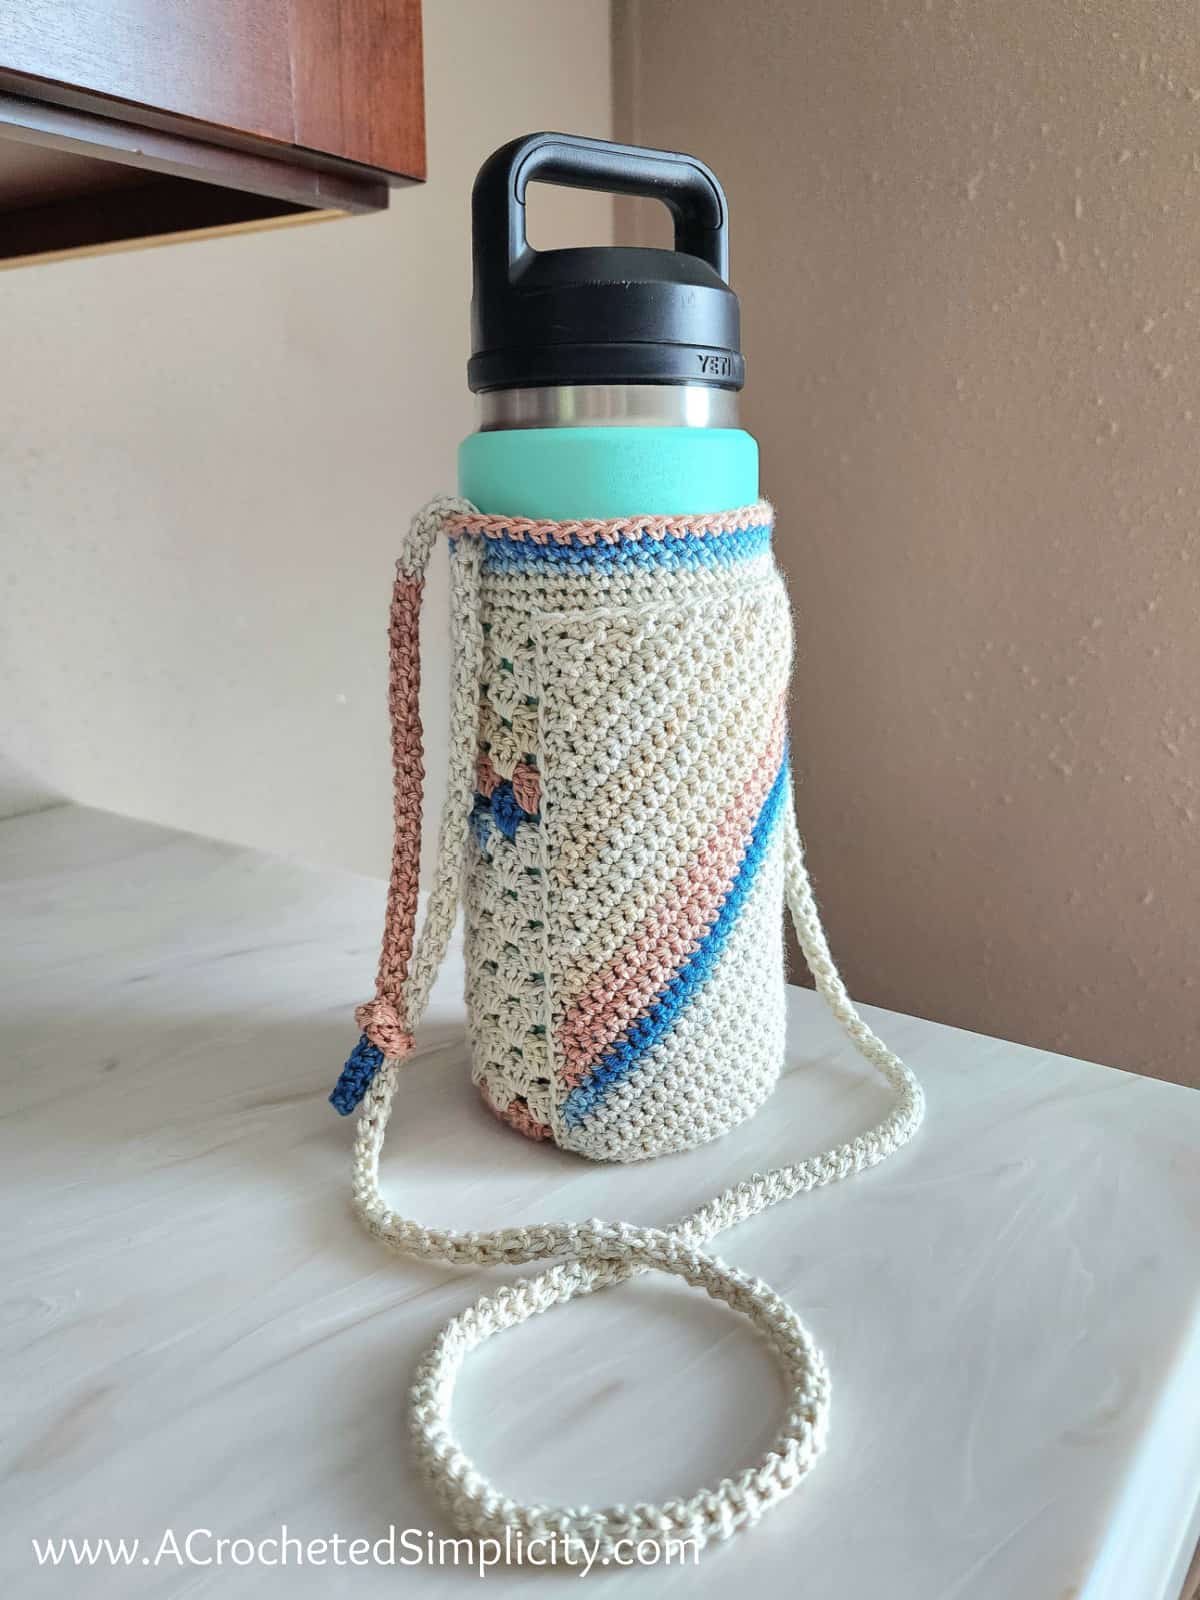
This free crochet water bottle holder pattern will fit standard 16.9 oz / 500 ml plastic water bottles. However, by making simple adjustments, you can make a yarn water bottle holder to fit larger reusable water bottles, such as 32 oz Hydro Flasks and Yeti Rambler (my girls love these chugger caps for high school sporting events).
Note: You may not need to adjust the DK weight pattern if using a softer cotton yarn like Lion Brand’s 24/7 Cotton DK because it easily stretches (see photo above).
Make a crochet Hydro Flask holder or crochet Yeti holder by making a couple simple adjustments to this free crochet pattern for water bottle holder.
26 oz to 32 oz Reusable Water Bottle – If using a worsted weight #4 kitchener cotton (such as Lily Sugar n’ Cream), you can easily adjust this pattern to make a crochet water bottle holder 32 oz. Using worsted weight #4 yarn, crochet the DK Weight Yarn Instructions for the Base, Body of Crochet Bottle Cover, and Top Edge. Then follow the worsted weight yarn instructions for the pocket.
If you need an even larger water bottle holder, try going up to a 5.00mm crochet hook.
The Yarn
A crochet water bottle sling is a great stash buster project so you can use almost any yarn you have on hand. Have fun with it!
I recommend using 100% cotton yarn for crochet water bottle holders because it is most absorbent, it’s durable, and it’s easy to care for… simply toss it in the washer!
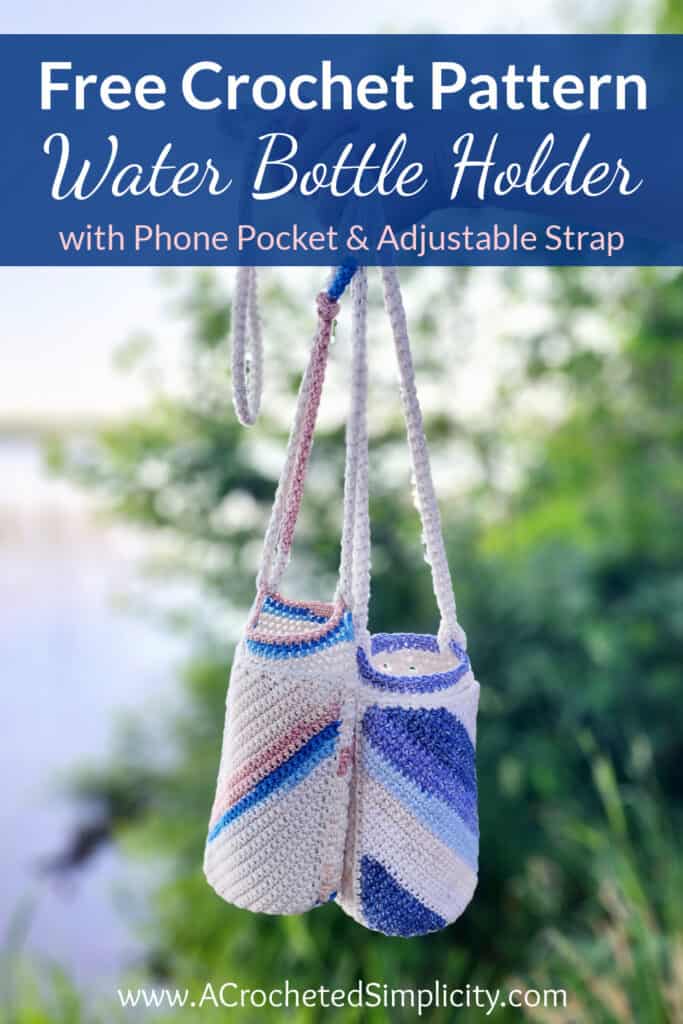
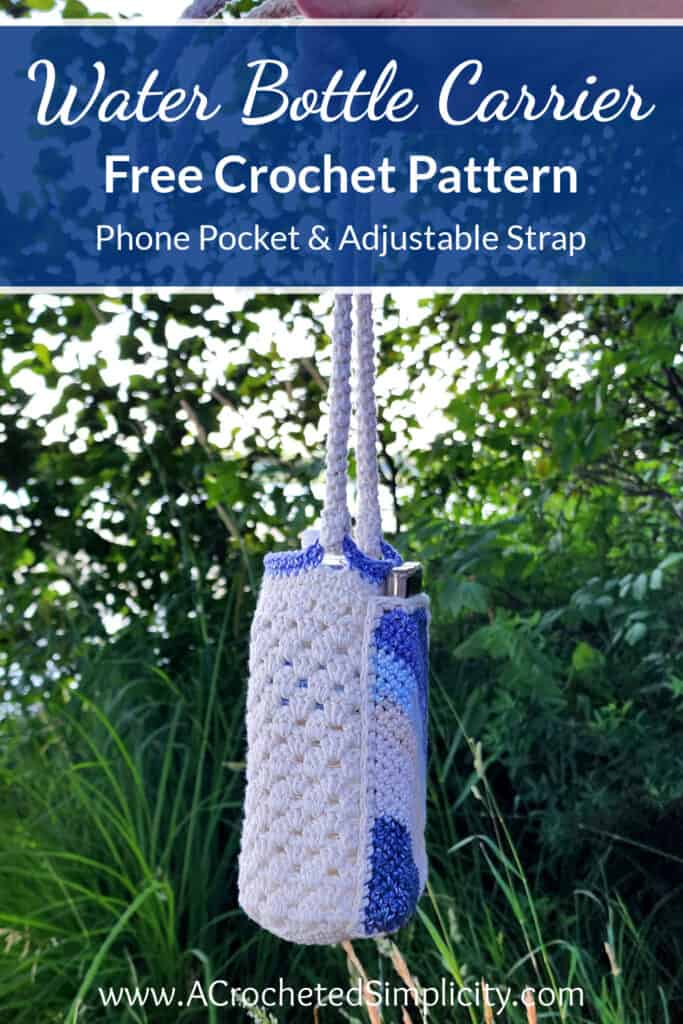
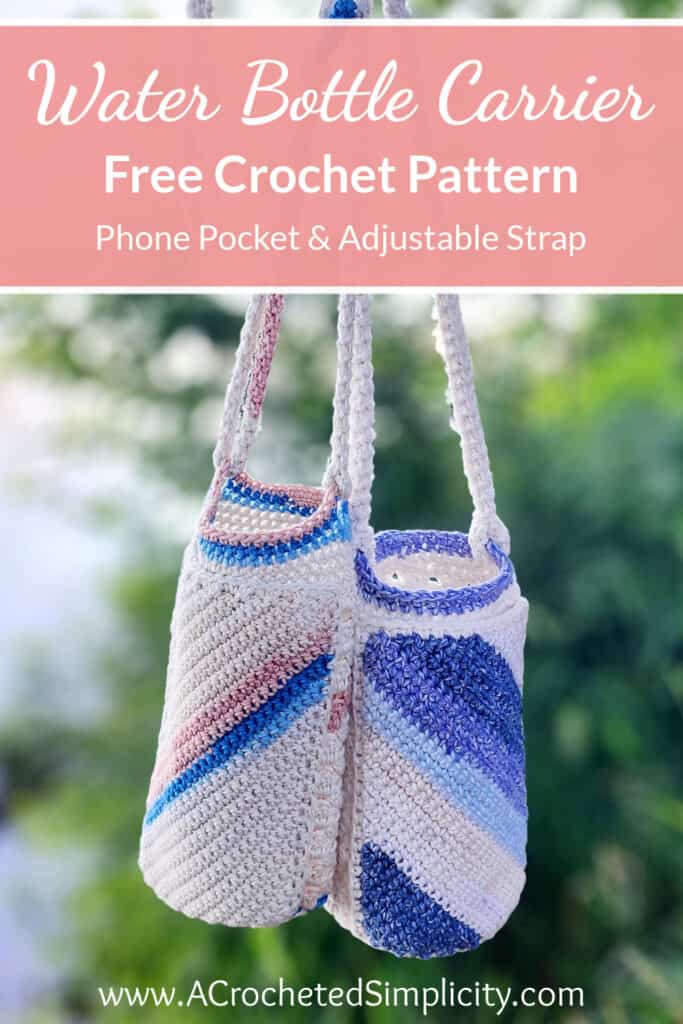
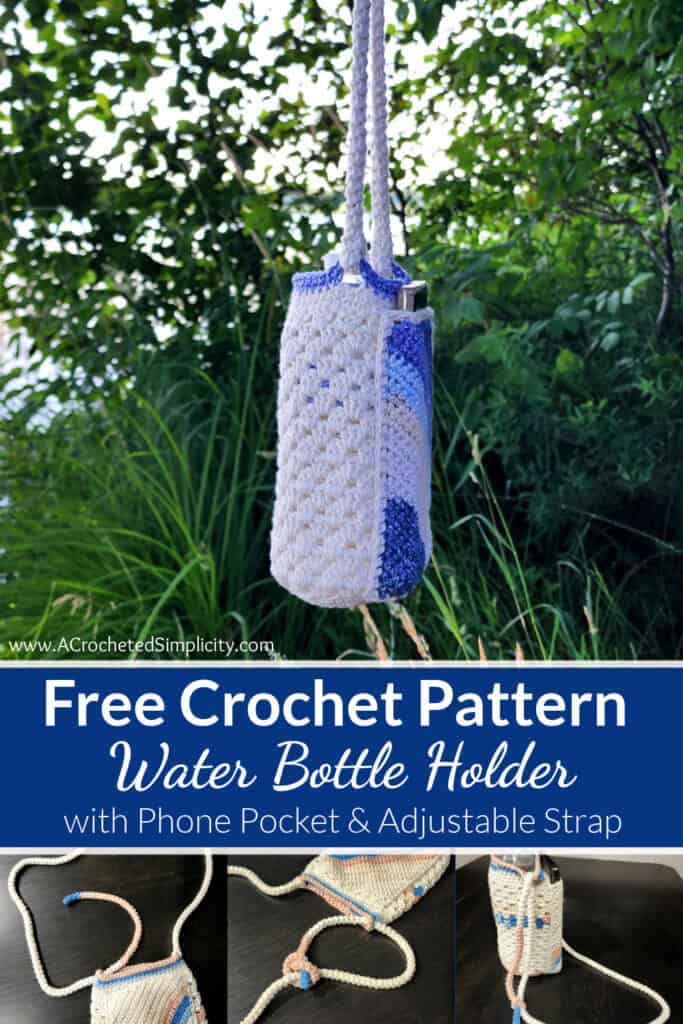
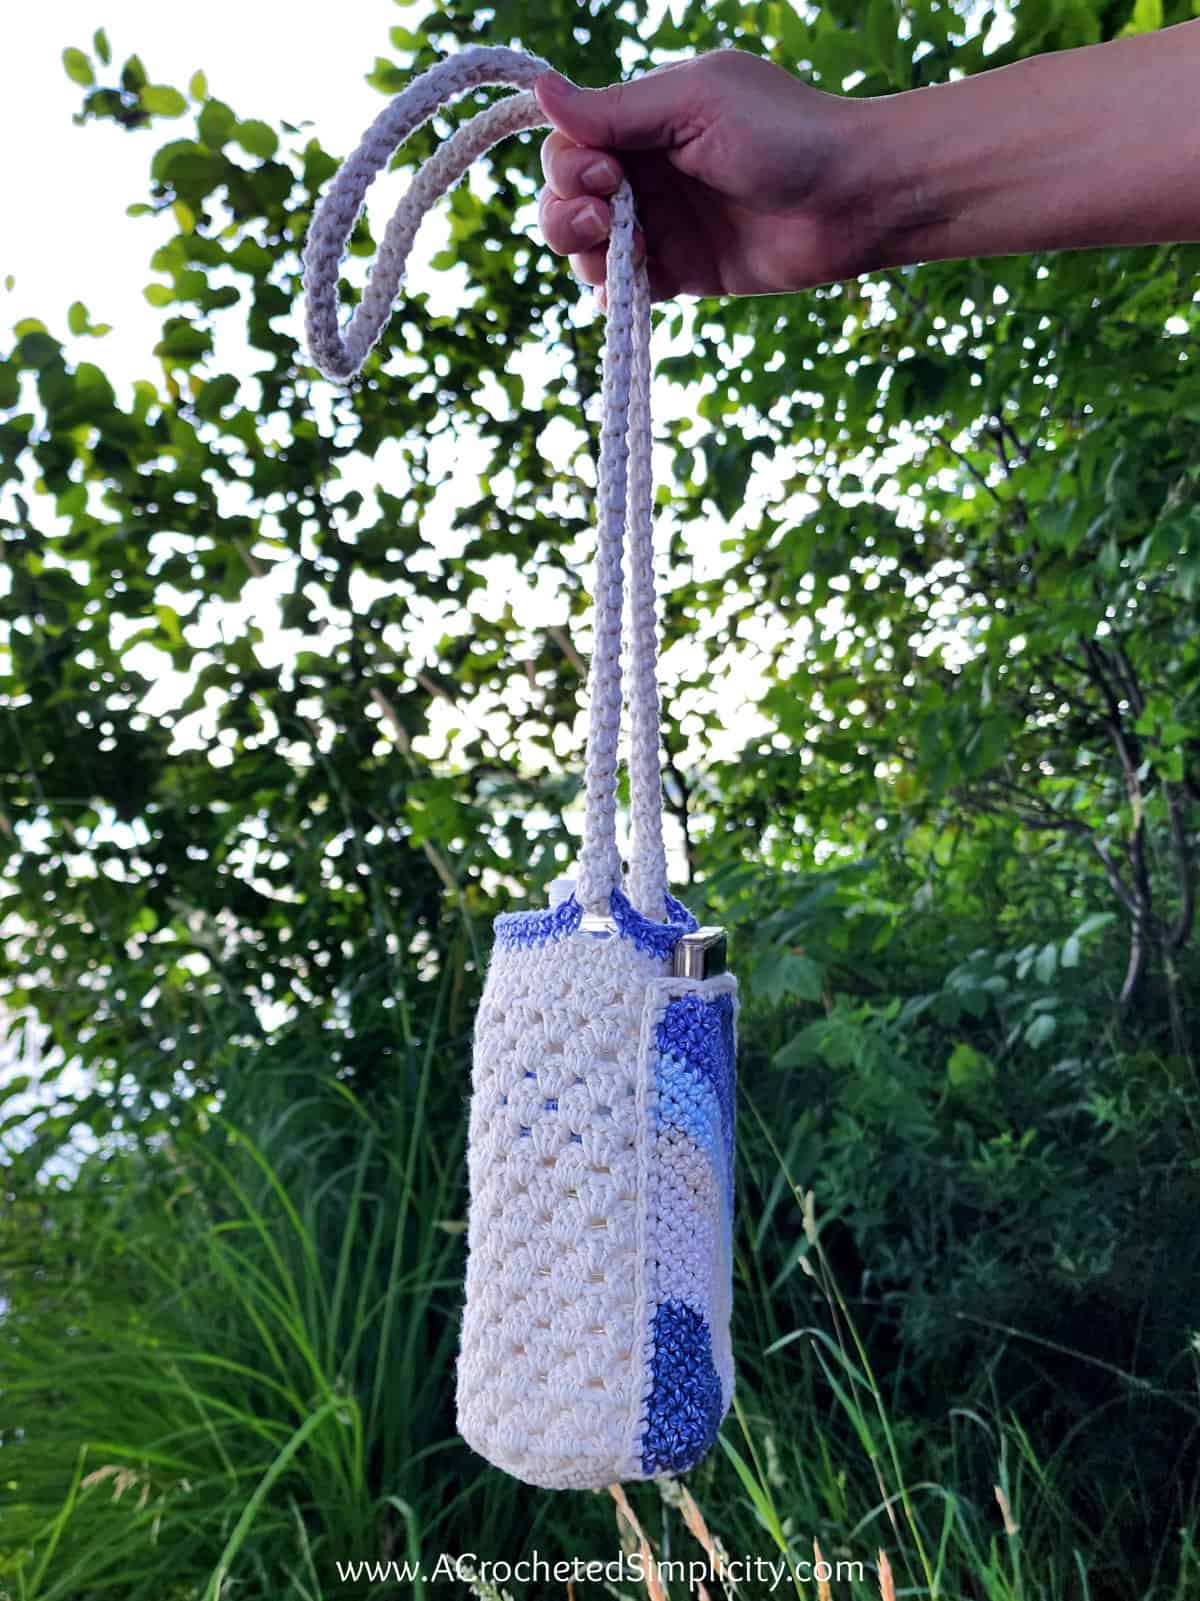
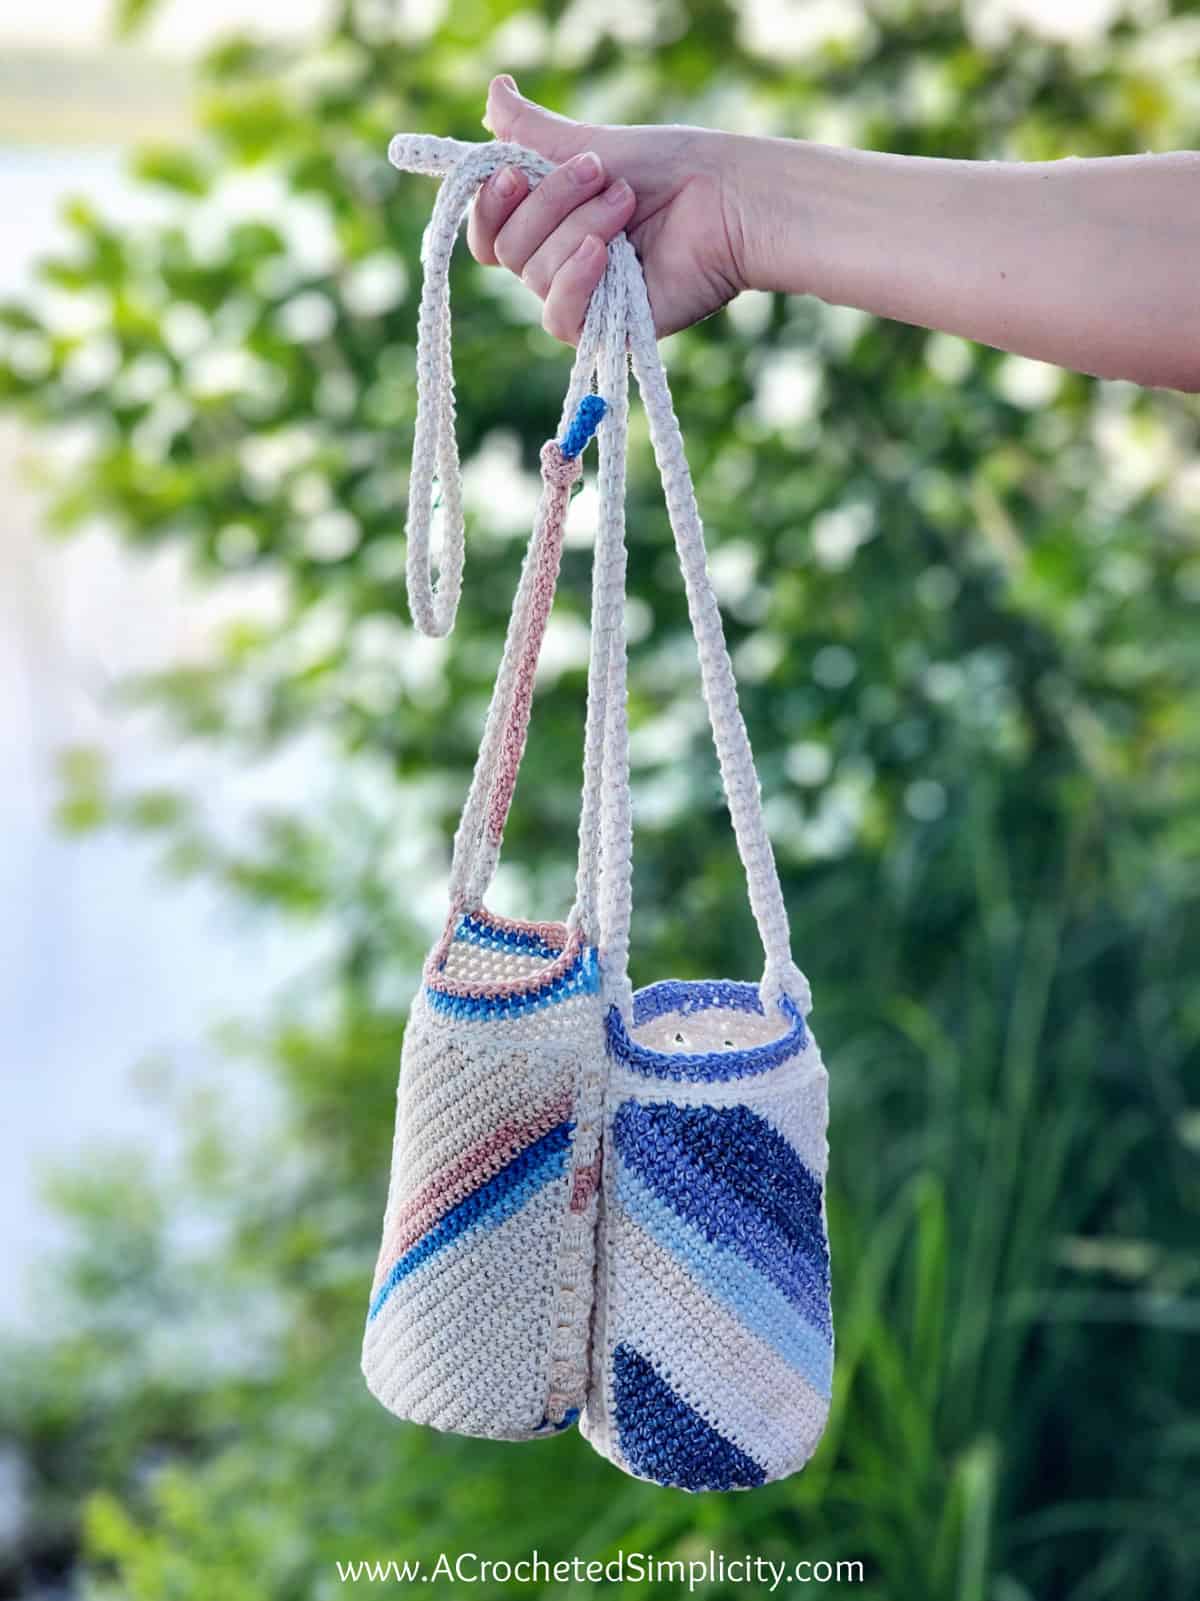
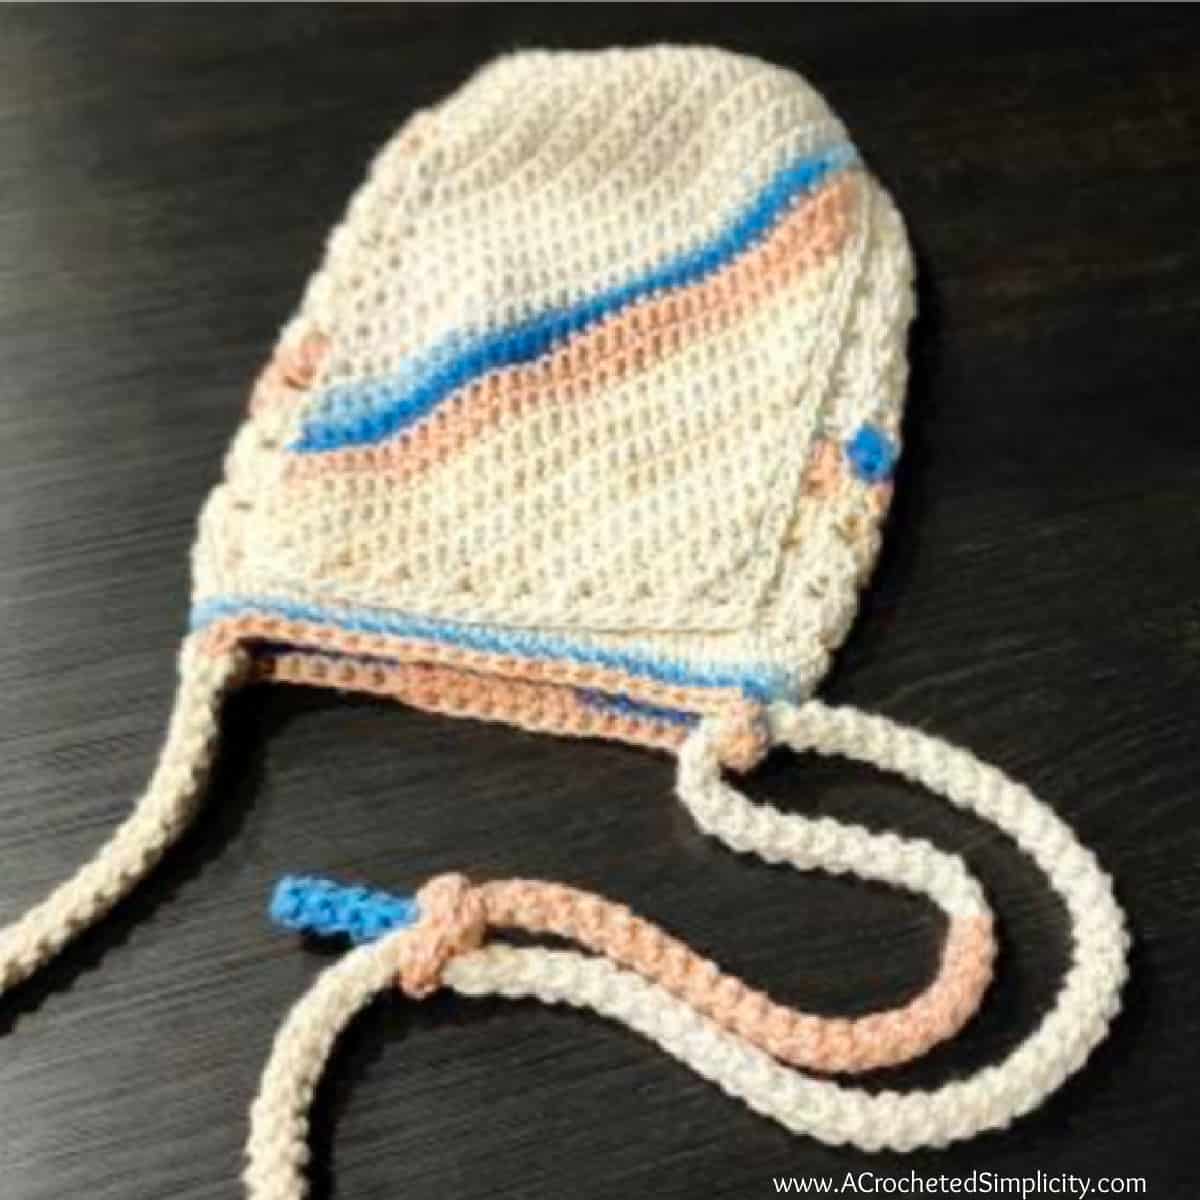
I made two samples (shown above). For the sample on the left, I used a DK weight #3 cotton yarn and for the sample on the right, I used a worsted weight #4 cotton yarn.
DK Weight Yarn Sample
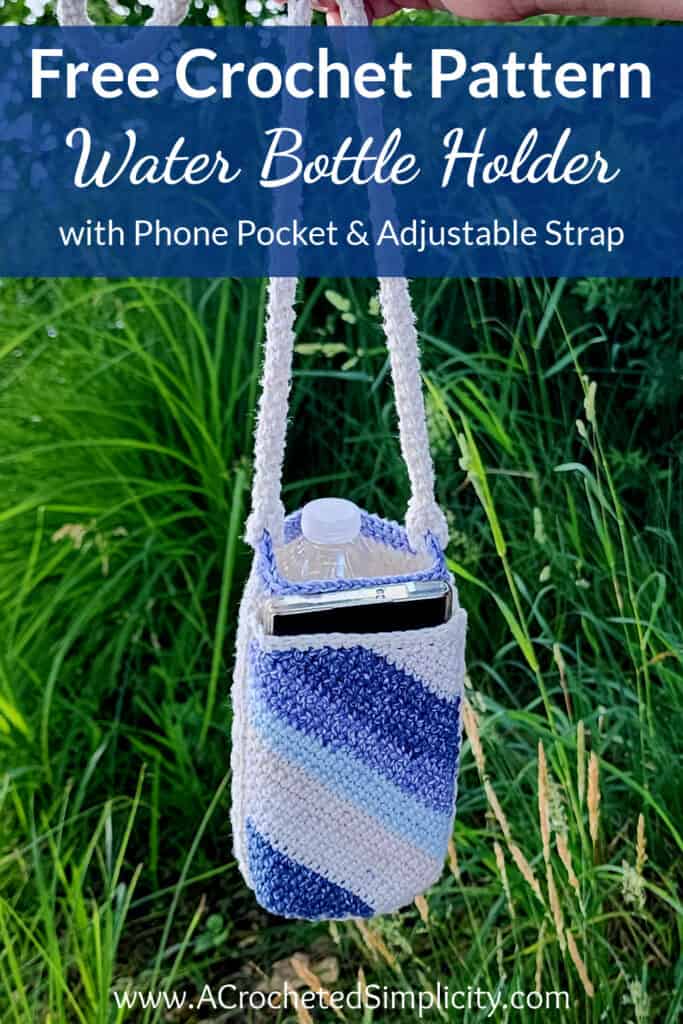
For this water bottle holder with strap (photo above, left), I chose Lion Brand Yarn’s 24/7 DK Prints in the color Azul. 24/7 Cotton DK is a wonderfully soft 100% cotton yarn that’s perfect for year round use. It’s currently available in 24 colorways.
I had a ball of this yarn left over after making a summer crochet top (pattern coming soon!). I love how the long self-striping colorwork came out. I especially love how the cell phone pocket color changes came out.
I absolutely LOVE this yarn! It makes the coziest garments, but keep in mind that because it’s a softer cotton yarn, it has a little more stretch to it than a kitchener cotton (such as the yarn I used for the worsted weight sample).
Worsted Weight Yarn Sample
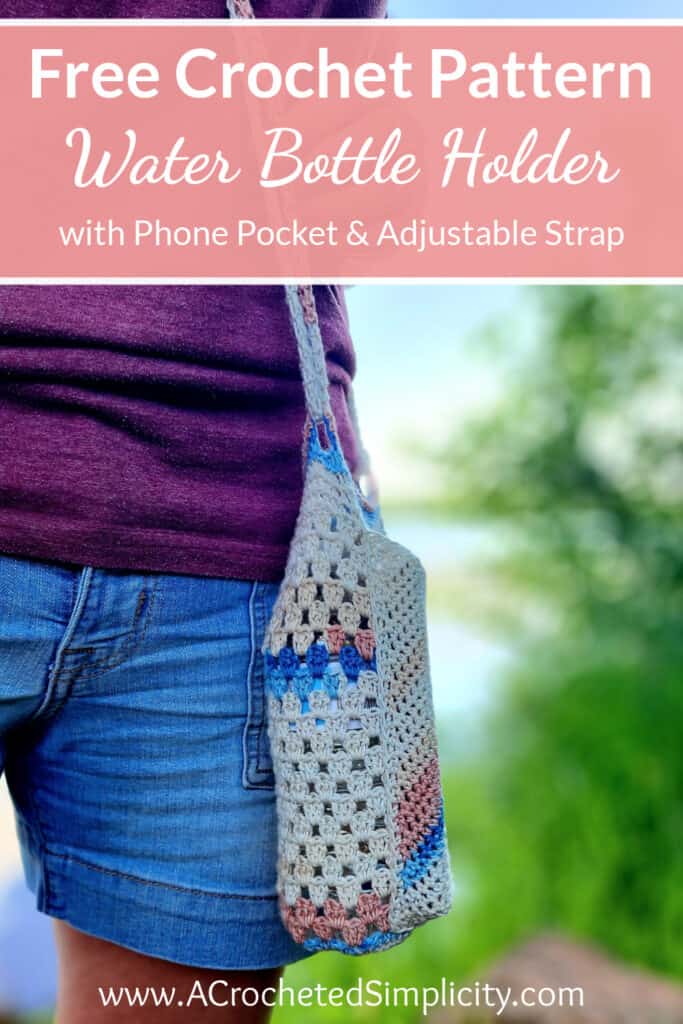
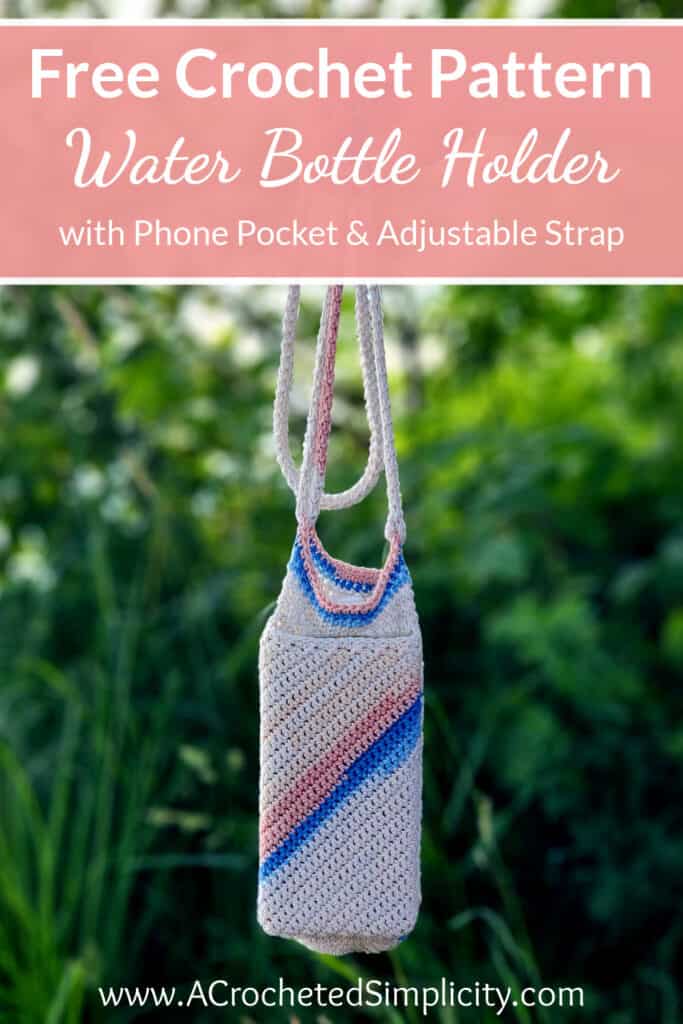
For this hiking water bottle holder (photo above, right), I used Lily Sugar n’ Cream in Ecru (cream) and Peaches & Creme Stripey in Denim. Both of these worsted weight cotton yarns are kitchener cottons. They are super durable and have less stretch than softer cotton yarns.
I used the Peaches & Creme Stripey to edge the top of the crochet bottle bag and also for the pocket. This self-striping yarn added a bit of personality to this project and it turned out just as I had envisioned (that’s always a plus).
Related: If you love to crochet for summer, check out our Summer Lovin’ Crochet Essentials.

Crochet Water Bottle Holder with Phone Pocket – Free Crochet Pattern
The free pattern is below, but if you love to work offline, I’ve got a couple other great options for you.
Purchase the ad-free, printable PDF, including all photo tutorials, on Ravelry, or on Etsy (aff).
Save this pattern to your Ravelry favorites.
Subscribe to my YouTube Channel!
Easy Crochet Water Bottle Holder Pattern
This post contains affiliate links.
Materials
- Yarn: DK Weight Yarn OR Worsted Weight Yarn
- DK Weight #3 Yarn – Lion Brand 24/7 DK Prints in the color Azul (80 g / 2.8oz / 219 yards / 200 m / 100% cotton).
- Azul: 200 yards (1 ball)
- Worsted Weight #4 Yarn – Lily Sugar ‘n Cream (70.9 g / 2.5 oz / 120 yards / 109 m / 100% cotton)
- Sugar n’ Cream in Ecru: 100 yards (1 ball)
- Peaches & Crème Stripey in Denim: 70 yards (1 ball)
- DK Weight #3 Yarn – Lion Brand 24/7 DK Prints in the color Azul (80 g / 2.8oz / 219 yards / 200 m / 100% cotton).
- Crochet Hook: G/6/4.00mm; or size needed to obtain gauge (My favorite crochet hooks are the Clover Amour Crochet Hooks, I’ve never had an ache in my hand since switching).
- Locking Stitch Markers
- Scissors
- Yarn Needle
Abbreviations (US Terms)
- ch(s): chain(s)
- sl st(s): slip stitch(es)
- st(s): stitch(es)
- yo: yarn over
- sp: space
- sc: single crochet
- dc: double crochet
- SM: stitch marker
- Rep: repeat
- Rnd: round
- RS: Right Side
- WS: Wrong Side
- MC: main color
- CC: contrasting color
Experience Level
- Easy
Gauge
- Measurements are given throughout the pattern.
Finished Size
- 5.5″ W x 8″ H (laid flat, not including strap)
- Easily adjustable for a custom size.
Pattern Notes
- Turning chains are not included in stitch count unless noted otherwise.
- This pattern is written using standard U.S. terms.
- You may notice that the crochet bottle holder portion is bigger than most water bottle holders. This is intentional because when you put your cell phone in the pocket, it’ll reduce the size of the bottle holder portion.
- This crochet pattern includes instructions for using either a DK weight #3 yarn or worsted weight #4 yarn. Make sure to follow the instructions for the weight yarn you’re using.
- DK Weight Cotton Yarn: Lion Brand 24/7 DK Prints (80 g / 2.8oz / 219 yards / 200 m / 100% cotton).
- Azul #769-504J – 1 ball (200 yards)
- Worsted Weight Cotton Yarn: Lily Sugar ‘n Cream (70.9 g / 2.5 oz / 120 yards / 109 m / 100% cotton)
- Sugar n’ Cream in Ecru: 1 ball (100 yards)
- Peaches & Crème Stripey in Denim: 1 ball (70 yards)
- Cell Phone shown in the photos is 3.25″ W x 6.5″ H.
- To make a custom size water bottle holder to fit larger reusable water bottles, use the instructions given above in the section titled ‘Custom Sizing Instructions’.
- Construction:
- This crochet water bottle holder is crocheted from the bottom up.
- First, you’ll crochet the base in a spiral.
- Next, you’ll crochet the bag portion of the holder by working the crochet granny stitch in joined and turned rows.
- You’ll finish the bag portion with a few rounds of single crochet and add loops at the top for the crocheted rope strap.
- Next, you’ll crochet the cell phone pocket by working C2C single crochet (on the bias).
- Then you’ll sew the cell phone pocket onto the water bottle holder.
- Lastly, choose to make either a stationary or adjustable crochet rope strap and attach it to your water bottle holder.
Crochet Pattern Water Bottle Holder
DK Weight Water Bottle Holder Instructions
Base
Crochet in a spiral. Use a scrap piece of yarn to mark the end of each round and move it up as you work.
Rnd 1: With a 4.00mm crochet hook and DK weight yarn, ch 2, work 8 sc in the 2nd ch from your hook. Do not join. (8 sts)
Rnd 2: 2 sc in each st around. (16 sts)
Rnd 3: (2 sc in the next st, sc in the next st) 8 times. (24 sts)
Rnd 4: (2 sc in the next st, sc in each of the next 2 sts) 8 times. (32 sts)
Rnd 5: (2 sc in the next st, sc in each of the next 3 sts) 8 times. (40 sts)
Rnd 6: (2 sc in the next st, sc in each of the next 4 sts) 8 times. (48 sts)
Rnd 7: Sc in each st around. Join with a sl st to the 1st st. (48 sts)
Do not fasten off. Continue on to Body of Crochet Bottle Cover. Diameter of the base should be approximately 3.25″ across.
Body of Crochet Bottle Cover
Rnd 1 (RS): Ch 3 (counts as the first dc), 2 dc in the first st, skip each of the next 2 sts, (3 dc in the next st, skip each of the next 2 sts) 15 times. Join with a sl st to the top of the ch 3. Turn. (48 sts)
Rnd 2: Ch 3 (counts as the first dc), 2 dc in the same sp as the ch 3, 3 dc in each sp around. Join. Turn. (48 sts)
Rep Rnd 2, ending with a WS round, until the Body of Bottle Holder measures approximately 6″ H.
Do not fasten off. Continue on to Top Edge.
Top Edge
Colorwork: For this section, I deconstructed the ball of yarn and cut out the striped section (blues and pink). Rounds 1 – 3 I used the cream color. Then at the beginning of round 4, I joined the striped section of yarn, joining the light blue end. I continued rounds 4 – 6 with the striped section of yarn and let the colors flow naturally.
Rnd 1 (RS): Ch 1, sc in each st around. Do not join. Crochet in a spiral using a scrap piece of yarn to mark the end of each round. (48 sts)
Rnds 2 – 4: Sc in each st around. (48 sts)
Rnd 5: Sc in each of the next 11 sts, ch 3, skip each of the next 3 sts, sc in each of the next 21 sts, ch 3, skip each of the next 3 sts, sc in each of the remaining 10 sts. Join with a sl st to the 1st st. (42 sts + 2 ch-3’s)
Rnd 6: Sc in each st and ch around. (48 sts)
Fasten off. Weave in ends. Continue on to DK Weight – C2C Cell Phone Pocket.
Your water bottle holder should be approximately 7″ tall at this point (measured from the beginning of Body of Crochet Bottle Holder).
DK Weight – C2C Cell Phone Pocket
Increase Rows
Row 1: With DK weight yarn & a 4.00mm crochet hook, ch 2, work 3 sc into the back hump of the 1st ch. Turn. (3 sts)
Row 2: Ch 1, 2 sc in the first st, sc in the next st, 2 sc in the last st. Turn. (5 sts)
Row 3: Ch 1, 2 sc in the first st, sc in each of the next 3 sts, 2 sc in the last st. Turn. (7 sts)
Row 4: Ch 1, 2 sc in the first st, sc in each of the next 5 sts, 2 sc in the last st. Turn. (9 sts)
Row 5: Ch 1, 2 sc in the first st, sc in each of the next 7 sts, 2 sc in the last st. Turn. (11 sts)
Row 6: Ch 1, 2 sc in the first st, sc in each of the next 9 sts, 2 sc in the last st. Turn. (13 sts)
Row 7: Ch 1, 2 sc in the first st, sc in each of the next 11 sts, 2 sc in the last st. Turn. (15 sts)
Row 8: Ch 1, 2 sc in the first st, sc in each of the next 13 sts, 2 sc in the last st. Turn. (17 sts)
Row 9: Ch 1, 2 sc in the first st, sc in each of the next 15 sts, 2 sc in the last st. Turn. (19 sts)
Row 10: Ch 1, 2 sc in the first st, sc in each of the next 17 sts, 2 sc in the last st. Turn. (21 sts)
Row 11: Ch 1, 2 sc in the first st, sc in each of the next 19 sts, 2 sc in the last st. Turn. (23 sts)
Row 12: Ch 1, 2 sc in the first st, sc in each of the next 21 sts, 2 sc in the last st. Turn. (25 sts)
Row 13: Ch 1, 2 sc in the first st, sc in each of the next 23 sts, 2 sc in the last st. Turn. (27 sts)
Row 14: Ch 1, 2 sc in the first st, sc in each of the next 25 sts, 2 sc in the last st. Turn. (29 sts)
Row 15: Ch 1, 2 sc in the first st, sc in each of the next 27 sts, 2 sc in the last st. Turn. (31 sts)
Row 16: Ch 1, 2 sc in the first st, sc in each of the next 29 sts, 2 sc in the last st. Turn. (33 sts)
Do not fasten off. Continue on to Rectangle Rows.
Pocket should be approximately 4.125″ W at this point.
Rectangle Rows
Row 1: Ch 1, sc2tog, sc in each st across to the last st, 2 sc in the last st. Turn. (33 sts)
Row 2: Ch 1, 2 sc in the first st, sc in each st across to the last 2 sts, sc2tog. Turn. (33 sts)
Rows 3 – 10: Rep Rows 1 – 2.
Do not fasten off. Continue on to Decrease Rows.
Pocket should be approximately 6.25″ H at this point.
Decrease Rows
Row 1: Ch 1, sc2tog, sc in each st across to the last 2 sts, sc2tog. Turn. (31 sts)
Rows 2 – 15: Rep Row 1. (3 sts) At the end of Row 15. Stitch count decreases by 2 sts each row.
Do not fasten off. Continue on to Final Row.
Final Row
Row 1: Ch 1, sc3tog. (1 st)
Do not fasten off. Continue on to Cell Phone Pocket Edging.
Cell Phone Pocket Edging
Note: I chose to work the pocket edging with a solid color yarn.
Rnd 1: Continue on from the Final Row, with a 4.00mm crochet hook, work 3 sc in each corner and 1 sc in each st along each edge around the perimeter of your cell phone pocket. Join with a sl st to the first st. Stitch count isn’t crucial.
Fasten off. Weave in ends. Scroll way down to Attaching the Pocket (scroll past the worsted weight bottle holder instructions)..
Weave in ends. Scroll way down Crocheted Rope Instructions (scroll past the worsted weight bottle holder instructions).
Worsted Weight Water Bottle Holder Instructions
Base
Crochet in a spiral. Use a scrap piece of yarn to mark the end of each round and move it up as you work.
Rnd 1: With a 4.00mm crochet hook and worsted weight yarn, ch 2, work 6 sc in the 2nd ch from your hook. Do not join. (6 sts)
Rnd 2: 2 sc in each st around. (12 sts)
Rnd 3: (2 sc in the next st, sc in the next st) 6 times. (18 sts)
Rnd 4: (2 sc in the next st, sc in each of the next 2 sts) 6 times. (24 sts)
Rnd 5: (2 sc in the next st, sc in each of the next 3 sts) 6 times. (30 sts)
Rnd 6: (2 sc in the next st, sc in each of the next 4 sts) 6 times. (36 sts)
Rnd 7: (2 sc in the next st, sc in each of the next 5 sts) 6 times. Join with a sl st to the 1st st. (42 sts)
Do not fasten off. Continue on to Body of Crochet Bottle Cover. Diameter of the base should be approximately 3.25″ across.
Body of Crochet Bottle Cover
Rnd 1 (RS): Ch 3 (counts as the first dc), 2 dc in the first st, skip each of the next 2 sts, (3 dc in the next st, skip each of the next 2 sts) 13 times. Join with a sl st to the top of the ch 3. Turn. (42 sts)
Rnd 2: Ch 3 (counts as the first dc), 2 dc in the same sp as the ch 3, 3 dc in each sp around. Join. Turn. (42 sts)
Rep Rnd 2, ending with a WS round, until the Body of Bottle Holder measures approximately 6.25″ H.
Do not fasten off. Continue on to Top Edge.
Top Edge
Colorwork: For this section, I chose to add a little color to the last two rounds. This is optional.
Rnd 1 (RS) (Ecru): Ch 1, sc in each st around. Do not join. Crochet in a spiral using a scrap piece of yarn to mark the end of each round. (42 sts)
Rnd 2 (Ecru): Sc in each st around. (42 sts)
Rnd 3 (Blue): Sc in each of the next 9 sts, ch 3, skip each of the next 3 sts, sc in each of the next 18 sts, ch 3, skip each of the next 3 sts, sc in each of the remaining 9 sts. Join with a sl st to the 1st st. (36 sts + 2 ch-3’s)
Rnd 4 (Blue): Sc in each st and ch around. (42 sts)
Fasten off. Weave in ends. Continue on to Worsted Weight – C2C Cell Phone Pocket.
Your water bottle holder should be approximately 7″ tall at this point (measured from the beginning of Body of Crochet Bottle Holder).
Worsted Weight – C2C Cell Phone Pocket
Increase Rows
Row 1: With worsted weight yarn & a 4.00mm crochet hook, ch 2, work 3 sc into the 1st ch. Turn. (3 sts)
Row 2: Ch 1, 2 sc in the first st, sc in the next st, 2 sc in the last st. Turn. (5 sts)
Row 3: Ch 1, 2 sc in the first st, sc in each of the next 3 sts, 2 sc in the last st. Turn. (7 sts)
Row 4: Ch 1, 2 sc in the first st, sc in each of the next 5 sts, 2 sc in the last st. Turn. (9 sts)
Row 5: Ch 1, 2 sc in the first st, sc in each of the next 7 sts, 2 sc in the last st. Turn. (11 sts)
Row 6: Ch 1, 2 sc in the first st, sc in each of the next 9 sts, 2 sc in the last st. Turn. (13 sts)
Row 7: Ch 1, 2 sc in the first st, sc in each of the next 11 sts, 2 sc in the last st. Turn. (15 sts)
Row 8: Ch 1, 2 sc in the first st, sc in each of the next 13 sts, 2 sc in the last st. Turn. (17 sts)
Row 9: Ch 1, 2 sc in the first st, sc in each of the next 15 sts, 2 sc in the last st. Turn. (19 sts)
Row 10: Ch 1, 2 sc in the first st, sc in each of the next 17 sts, 2 sc in the last st. Turn. (21 sts)
Row 11: Ch 1, 2 sc in the first st, sc in each of the next 19 sts, 2 sc in the last st. Turn. (23 sts)
Row 12: Ch 1, 2 sc in the first st, sc in each of the next 21 sts, 2 sc in the last st. Turn. (25 sts)
Row 13: Ch 1, 2 sc in the first st, sc in each of the next 23 sts, 2 sc in the last st. Turn. (27 sts)
Row 14: Ch 1, 2 sc in the first st, sc in each of the next 25 sts, 2 sc in the last st. Turn. (29 sts)
Do not fasten off. Continue on to Rectangle Rows.
Pocket should be approximately 4″ W at this point.
Rectangle Rows
Row 1: Ch 1, sc2tog, sc in each st across to the last st, 2 sc in the last st. Turn. (29 sts)
Row 2: Ch 1, 2 sc in the first st, sc in each st across to the last 2 sts, sc2tog. Turn. (29 sts)
Rows 3 – 8: Rep Rows 1 – 2.
Do not fasten off. Continue on to Decrease Rows.
Pocket should be approximately 6.25″ H at this point.
Decrease Rows
Row 1: Ch 1, sc2tog, sc in each st across to the last 2 sts, sc2tog. Turn. (27 sts)
Rows 2 – 13: Rep Row 1. (3 sts) At the end of Row 13. Stitch count decreases by 2 sts each row.
Do not fasten off. Continue on to Final Row.
Final Row
Row 1: Ch 1, sc3tog. (1 st)
Do not fasten off. Continue on to Cell Phone Pocket Edging.
Cell Phone Pocket Edging
Note: I chose to work the pocket edging with a solid color yarn.
Rnd 1: Continue on from the Final Row, with a 4.00mm crochet hook, work 3 sc in each corner and 1 sc in each st along each edge around the perimeter of your cell phone pocket. Join with a sl st to the first st. Stitch count isn’t crucial.
Fasten off. Weave in ends. Continue on to Attaching the Pocket.
BOTH – DK & Worsted Weight Instructions
Attaching the Pocket
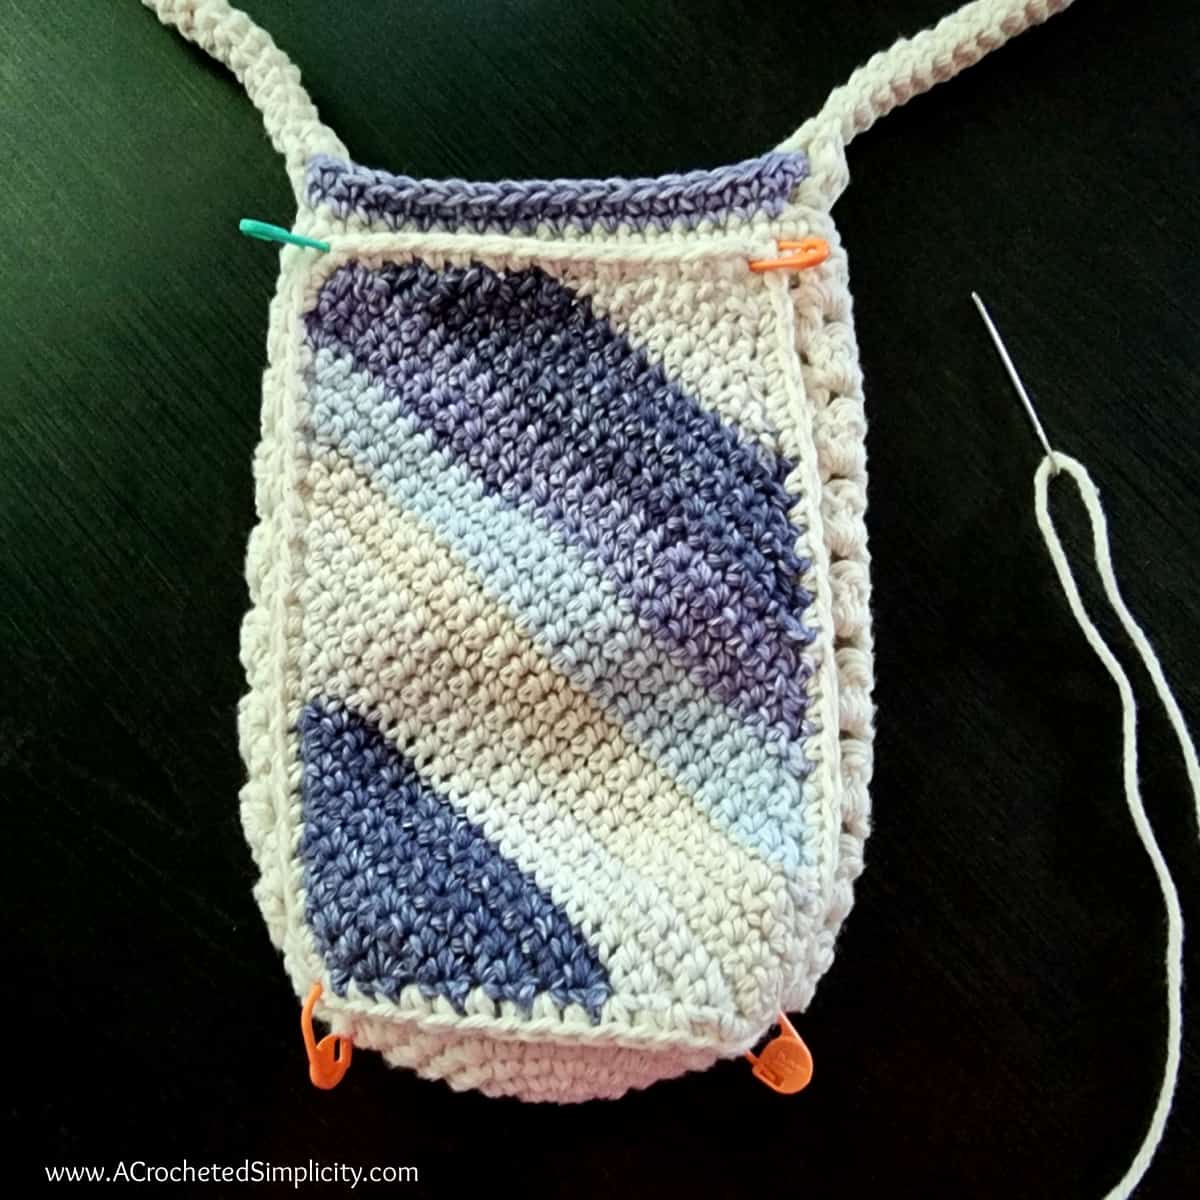
Step 1: Center the short edge of the pocket between the 2 handle loops on the top of the bottle holder. Line up the top edge of the cell phone pocket with Rnd 1 of the Top Edge of the bottle holder. Line up the other short edge of the cell phone pocket with the last round of the Base. I highly recommend using locking stitch markers to hold the pocket in place while you sew it on (see photo below).
Step 2: With a piece of yarn approximately 56″ long and a yarn needle, sew the pocket onto the bottle holder. Only sew the two vertical sides and the bottom edge. Leave the top edge for the pocket opening.
Weave in ends. Continue on to Water Bottle Holder Strap.
WATER BOTTLE HOLDER STRAP
The Ad-free PDF includes all photo tutorials, including the crochet rope handles photo tutorial.
Option #1 – Stationary Strap: Use my Crochet Rope Handle Instructions to make a crochet rope that measures 34″ long, slightly stretched.
Option #2 – Adjustable Strap: Use my Crochet Rope Handle Instructions to make a crochet rope that measures 42″ long, slightly stretched.
Fasten off. Weave in ends. Continue on to Attaching the Strap.
Attaching the Crochet Strap for Bag
Stationary Strap – 34″ Crocheted Rope
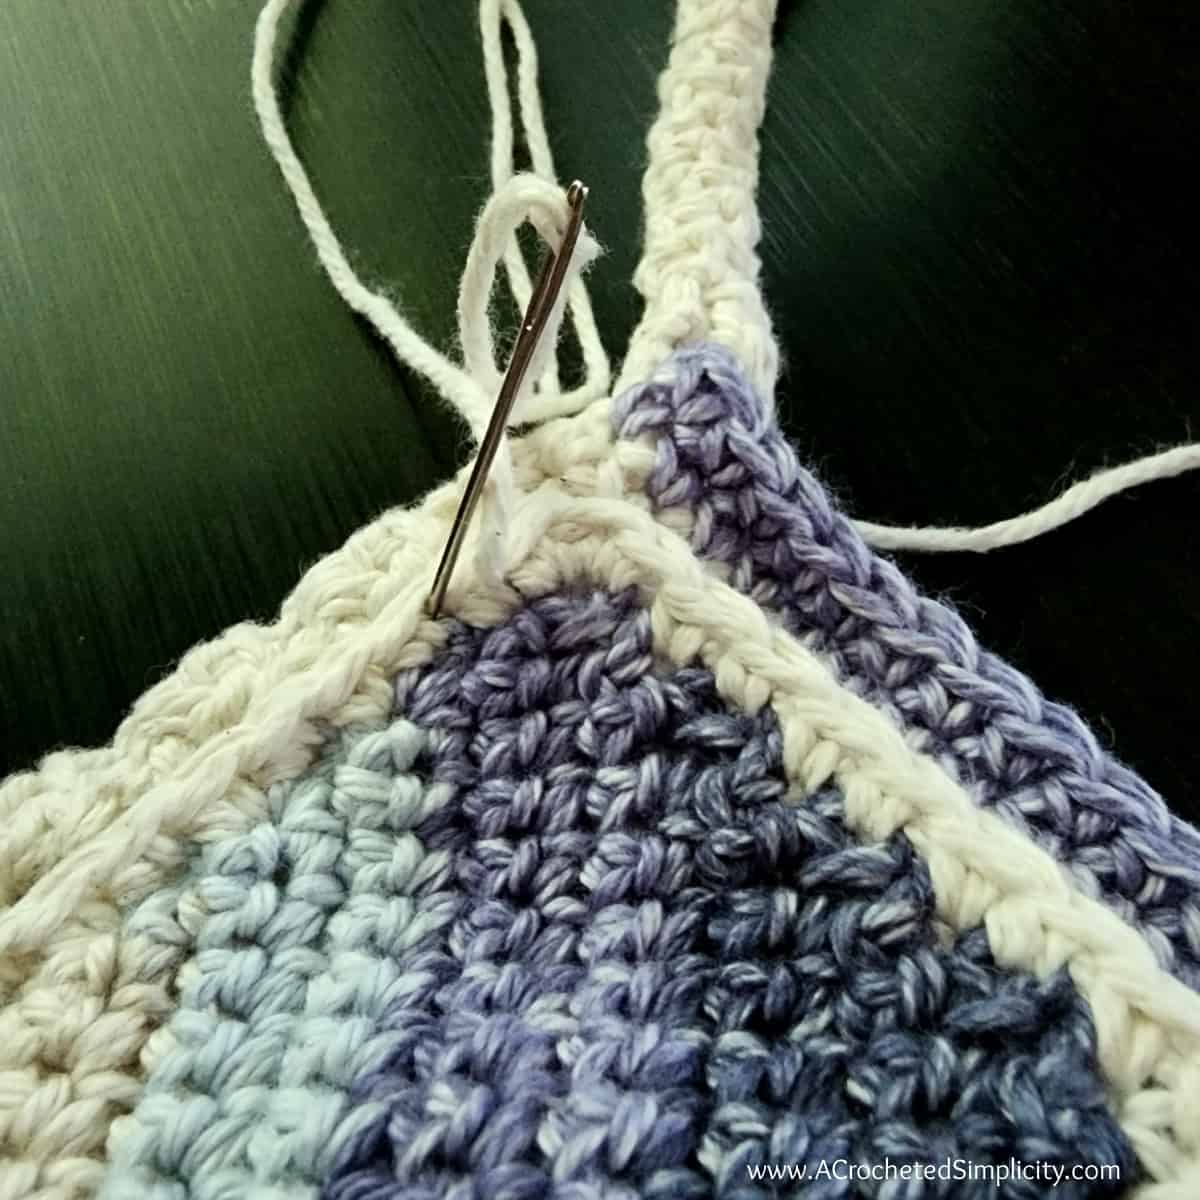
Insert one end of the crochet rope, from outside to inside, into a hole along the top edge of the bottle holder. Insert it just far enough so that it wraps around and reaches the rope. Use a yarn needle and piece of yarn and sew the end of the crochet rope to itself. Repeat for the opposite end of the crochet rope. Weave in ends.
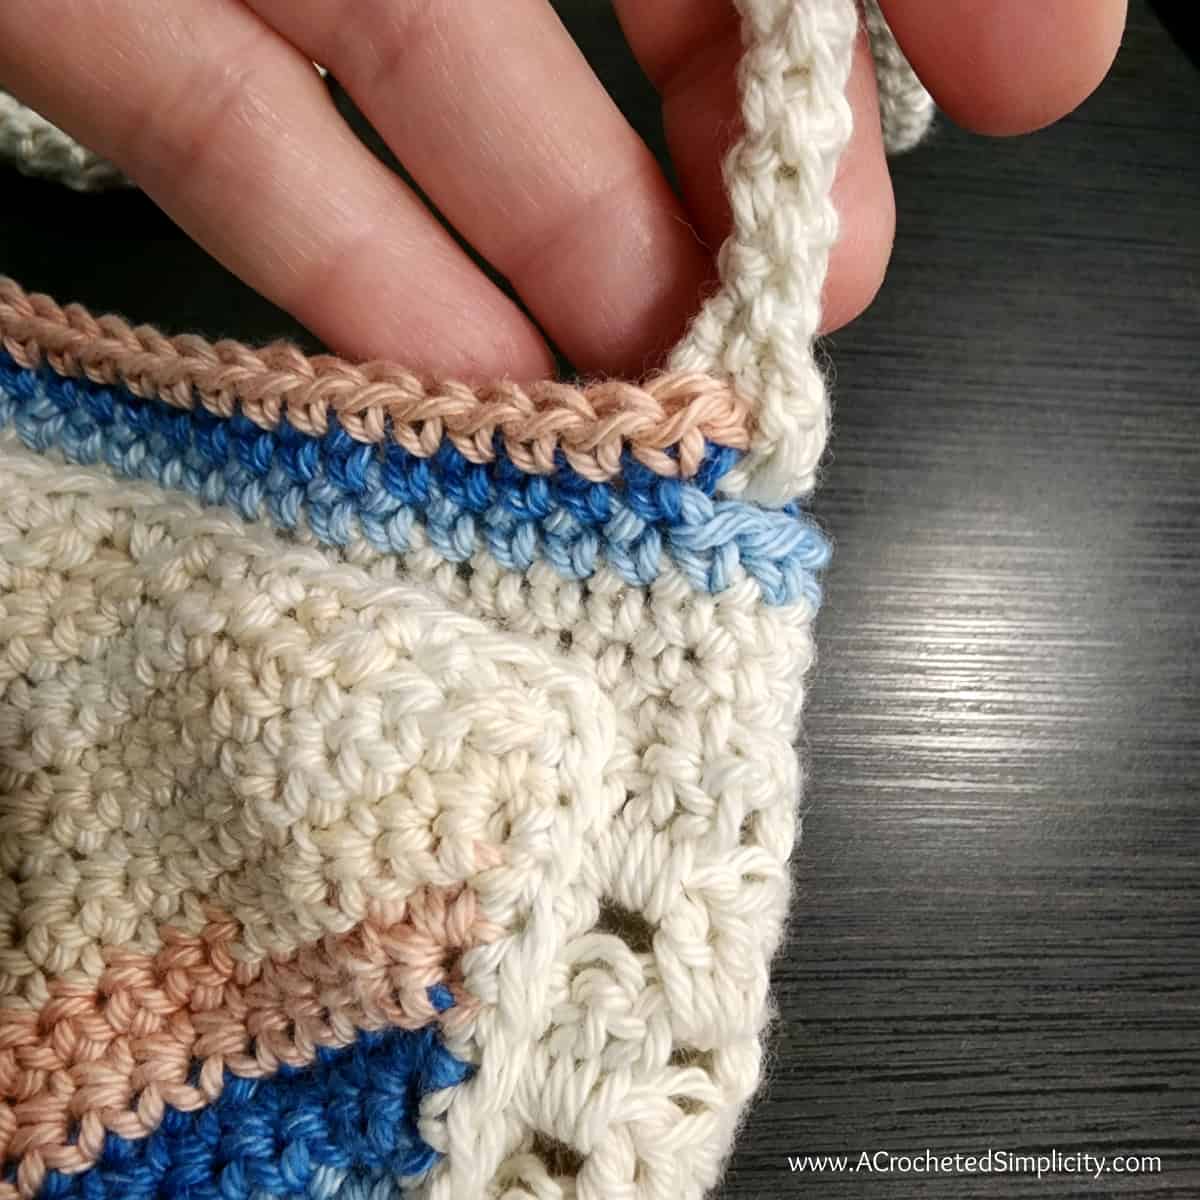
The three photos above show how to attach a stationary end of the strap.
Adjustable Strap – 42″ Crochet Rope
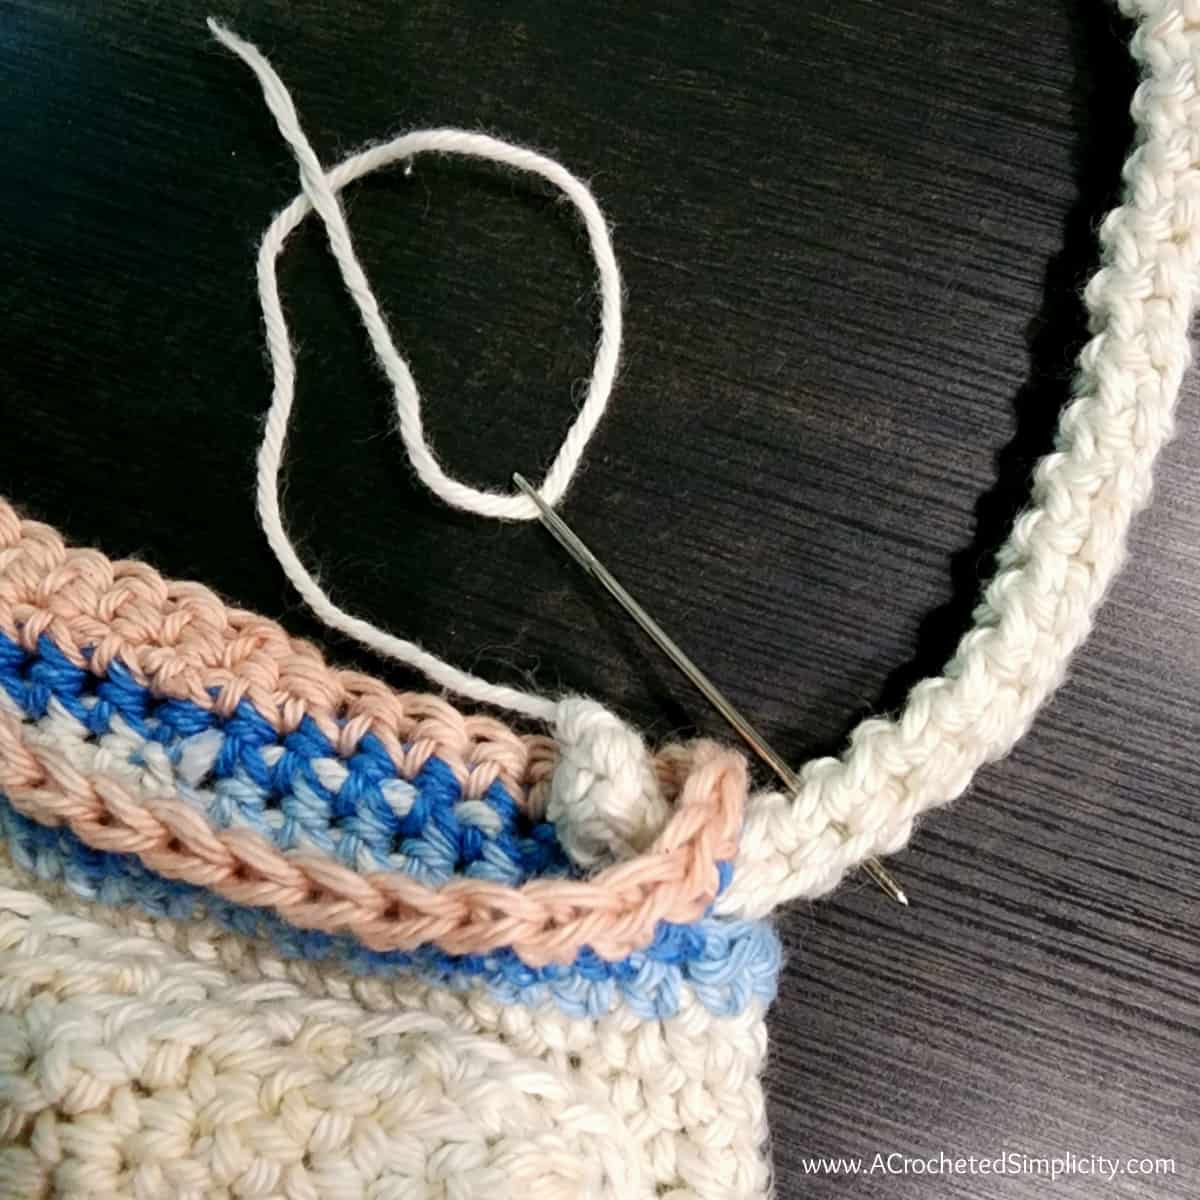
The first side is just like the Stationary Strap above: Insert one end of the crochet rope, from outside to inside, into a hole along the top edge of the bottle holder. Insert it just far enough so that it wraps around and reaches the rope. Use a yarn needle and piece of yarn and sew the end of the crochet rope to itself.
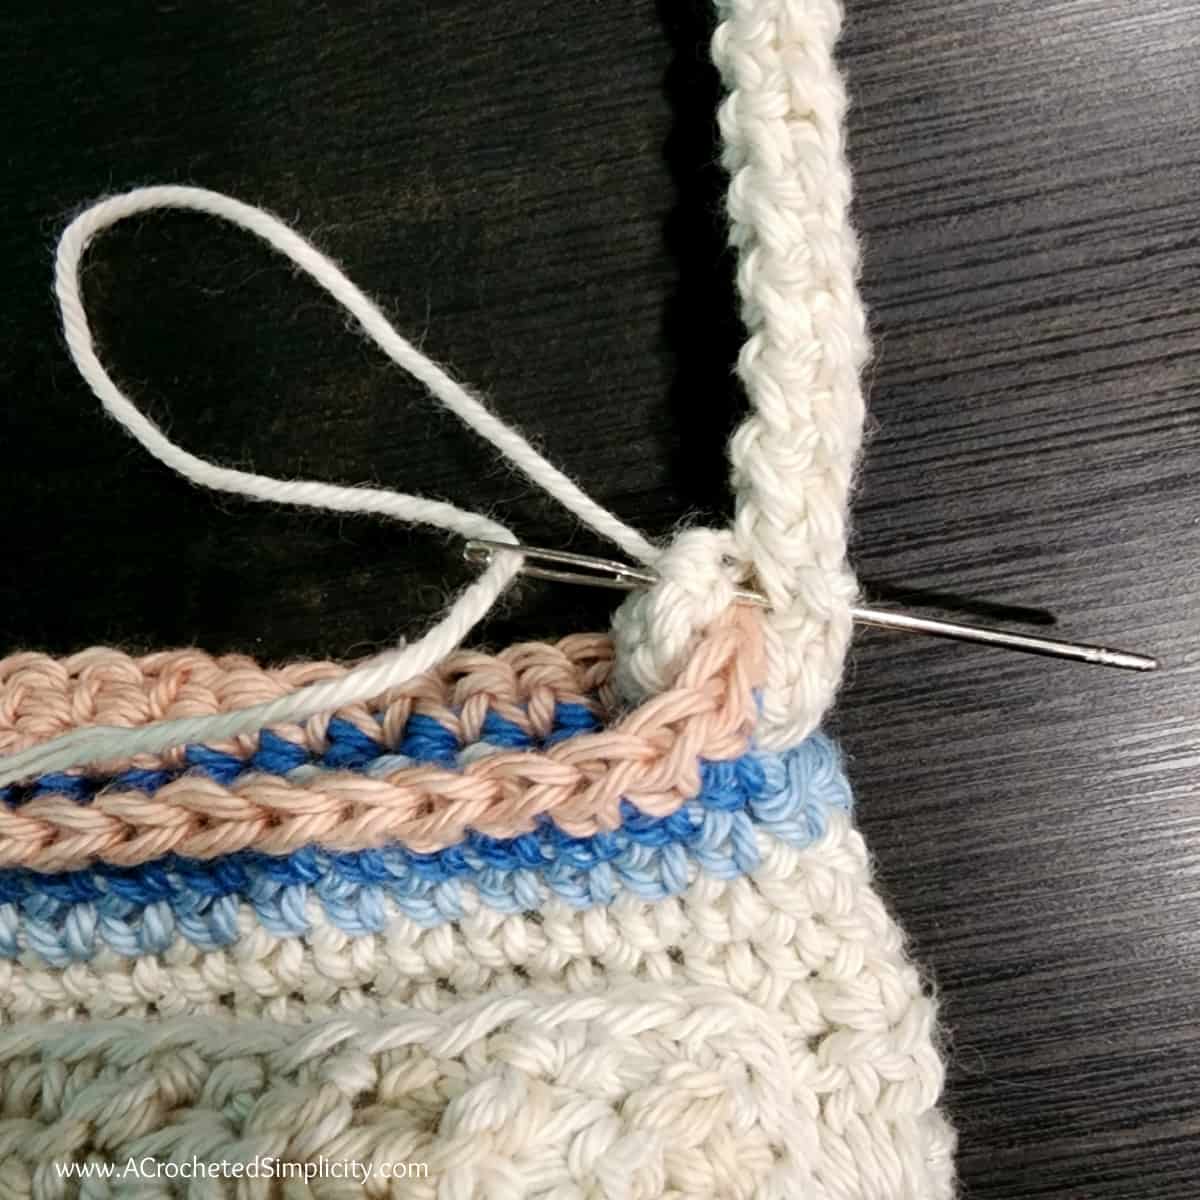
Second side: Insert the opposite end of the crochet rope, from outside to inside, into the other hole along the top edge of the bottle holder. Knot the loose end of the crochet rope around itself, as shown in the photos below. Tighten knot. Weave in any ends.
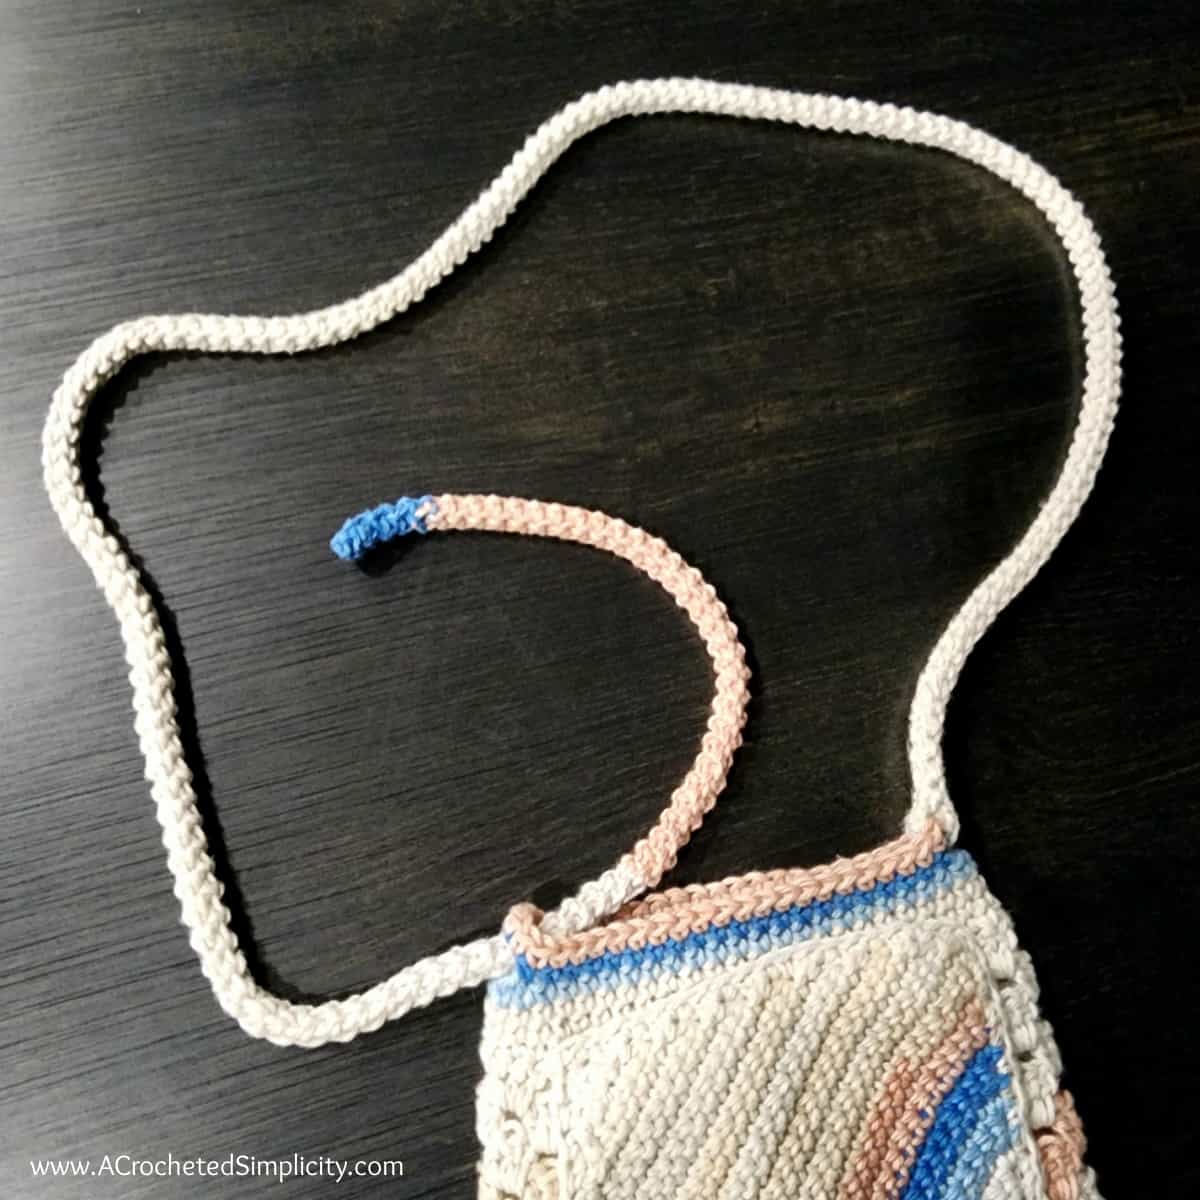
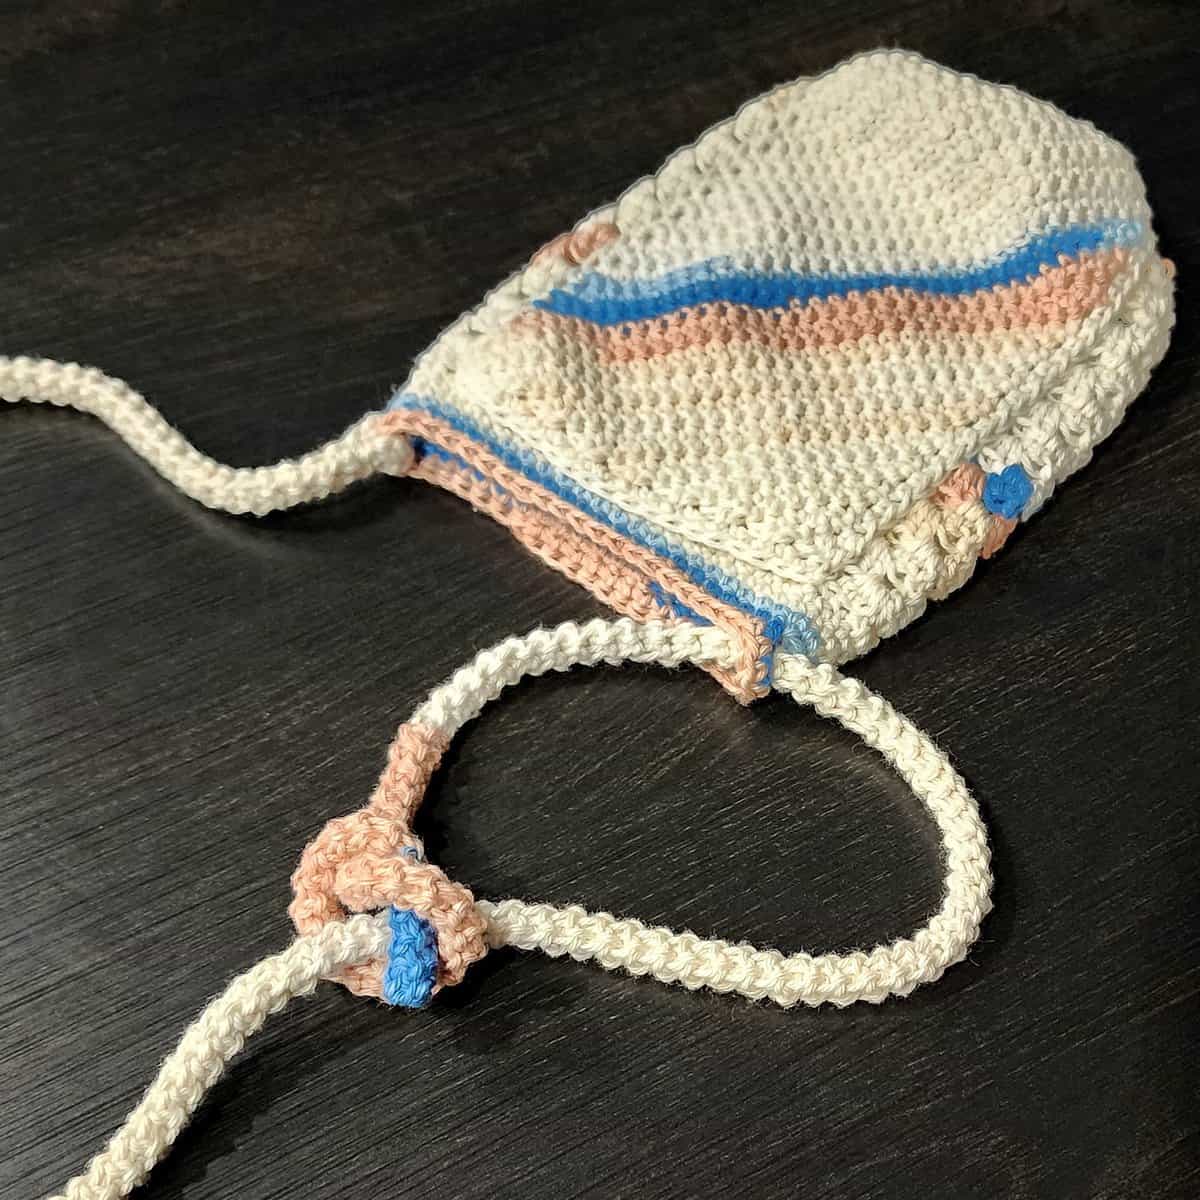
The three photos above show how to attach the adjustable end of the strap.
The knot you just created is what makes the strap adjustable. It slides up and down the crochet rope.
Frequently Asked Questions About Crochet Water Bottle Holders
If you have any questions that I haven’t answered below, always feel free to reach out to me, (e-mail me: ACrochetedSimplicity at Gmail dot Com), and I’ll do my best to help!
What yarn to use for a crochet water bottle holder?
I prefer to use 100% cotton yarn because it is most absorbent. It’ll also keep its shape better than other yarn fibers and it’s super easy to care for… simply toss it in the washer!
A crochet water bottle sling is a great stash buster project so you can use almost any yarn you have on hand. Have fun with it!
Can I use acrylic yarn for water bottle holder?
You can use acrylic yarn as well, it just won’t absorb the condensation like cotton yarn will.
How long is the strap on a crochet water bottle holder?
This water bottle holder was designed with two different strap options so it could be worn two ways. If you choose to make the adjustable crochet strap, you can wear it as either a shoulder or crossbody bag. You will crochet this strap 42″, slightly stretched.
However, if you choose to make the stationary strap, you will wear your crochet bottle cozy as a shoulder bag. Crochet this strap 34″ (slightly stretched), unless you prefer a longer strap.
How do you crochet a water bottle holder for beginners?
Easy crochet water bottle holder holders are worked from the bottom up. You begin by crocheting a small circle for the base, then work the body of the bottle holder around that base until you reach the desired height. Lastly, crochet and add a simple strap to your water bottle bag crochet.
Is a Water Bottle Sling the Same as a Water Bottle Holder?
The terms water bottle sling, water bottle carrier, and water bottle holder all mean pretty much the same thing. These terms are used interchangeably to describe a crochet over the shoulder water bottle holder.
I Made it! Now What?
Pin this post: Save this crochet water bottle holder tutorial to your Pinterest boards so that you can come back and make it again.
Leave a comment below: We love to hear your feedback.
Share Your Finished Projects on Facebook or Instagram: I love to see your finished projects! Share with us on social media and tag me @acrochetedsimplicity or use the hashtag #ACrochetedSimplicity so I can find your posts.
Join us in the Facebook Community Group!
Come share your finished projects with us in the A Crocheted Simplicity Crochet Community Group on Facebook. Join us for fun community events such as crochet alongs, join in on crochet conversations, ask questions, get advice, and share your love for crochet!

I’ve made two of these already. One for myself and one as a gift and it got rave reviews.
Love this bottle holder! Thank you for the pattern! Would love to win PDF’s of all your 2024 patterns!
This is perfect for my nan who lives in a nursing home. she pops her phone and a bar of chocolate in it and she can keep her hands free.
I love this pattern — I made it for when I go for walks — holds a water bottle and my cell phone. They don’t make women’s pants pockets deep enough to hold a cell phone so this is fantastic. Now I can walk with my hands free.
I just started a weight loss program. This holder will be perfect for me.
I made this water bottle/phone holder to use at a charity golf event & absolutely loved it. It was great to have my water bottle handy, phone easily assessible when needed & my hands free to work without having to worry about keeping up with those items. I received several compliments on it, so am planning to make quite a few of these for gifts next year. I know they will be a hit & greatly appreciated. Thank you for such a fabulously useful pattern!!!