Frankenstein’s Monster Crochet Treat Bag
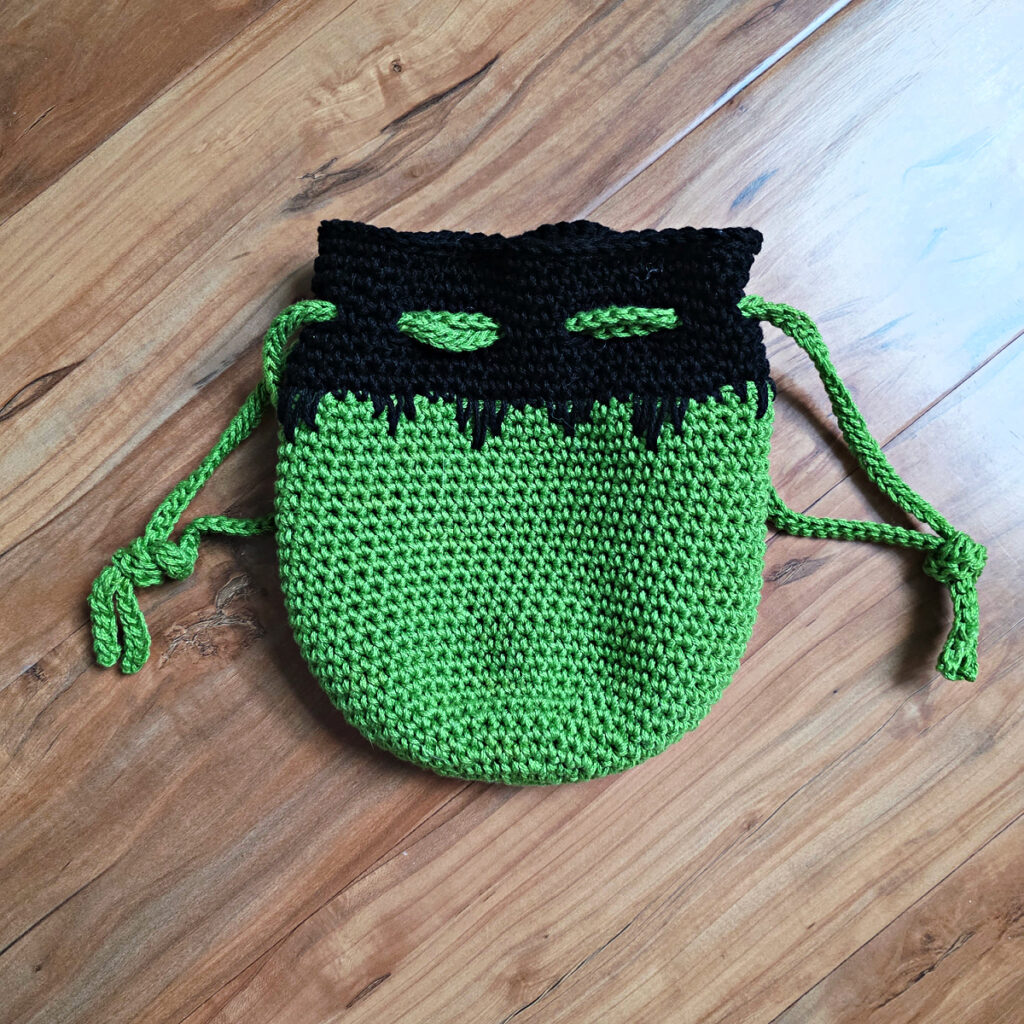
We all know the classic story and how this particular character has become a big part of Halloween. If your kids are planning to dress up like him or they want a unique trick-or-treating bag this year, make the Frankenstein’s Monster crochet treat bag for them with these simple-to-follow instructions!
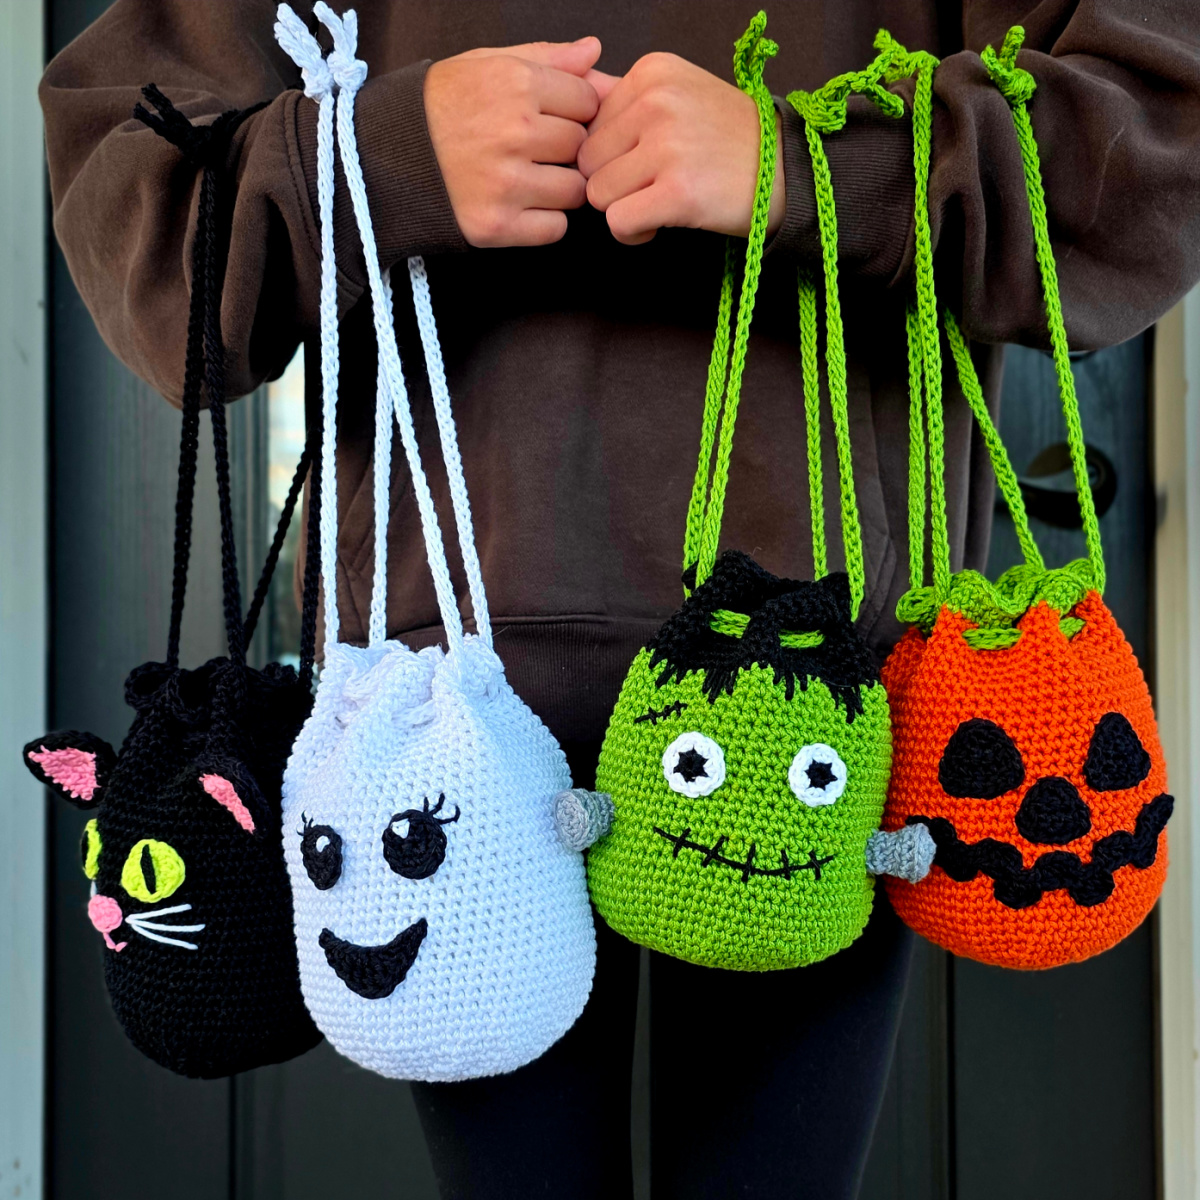
This spooky monster is a set of four Crochet Candy Bags that include a Jack-O-Lantern Pumpkin, Black Cat, and Ghost. You can work just this one up or all of them to complete the trick-or-treating gang!
You’ll find the free Frankensteins monster crochet treat bag in the post below, or you can find an ad-free printable PDF (that includes all FOUR Halloween crochet treat bag patterns), on Ravelry, or Etsy (aff).
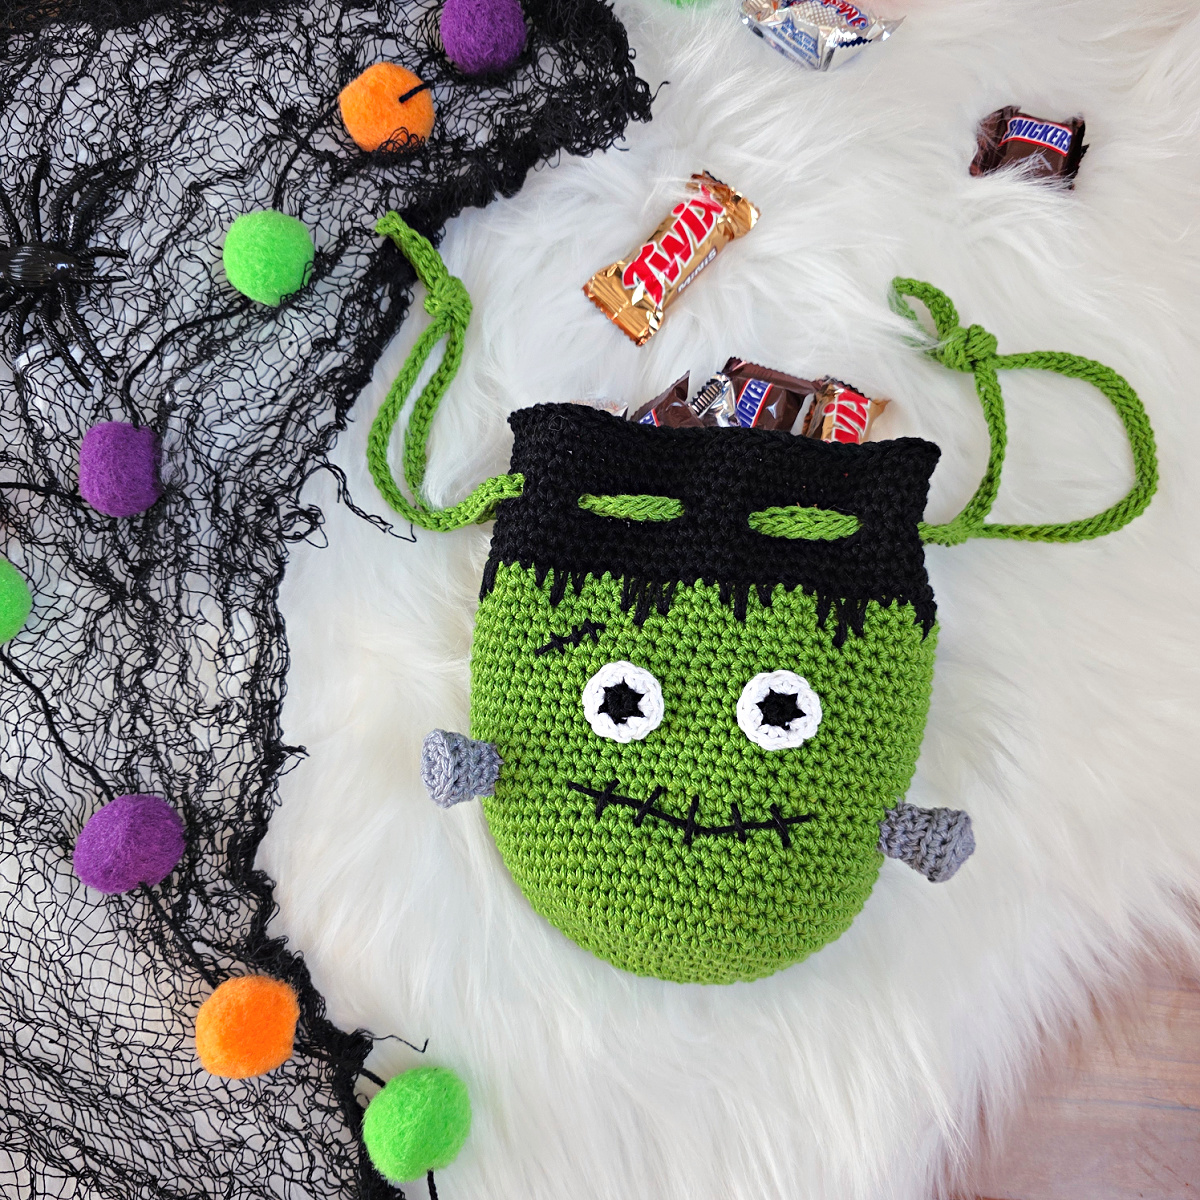
Every part of these Halloween Crochet Treat Bags is designed to make them quick and easy to work up and very convenient to use. Whether that’s the use of the sturdy single crochet stitch to make the body of the bag, the thick drawstrings that can easily open and close it while it’s in use, or the features which are seamed on securely, these are the best crochet treat bags to have on hand. They can even be made from the scraps of your bigger Halloween-themed projects!
Related: If you’re looking for a “monstrous” bowl to store your candy in for the trick-or-treaters, check out Frankenstein’s Monster Candy Bowl.
How to Crochet a Drawstring Treat Bag
These Halloween goody bags are made from the bottom up by crocheting in a spiral. Once the top of the bag is reached, you’ll use chains to create spaces for the drawstrings to be woven through.
Different pieces are made depending on which character you’re making. Once you have all of them, the pieces are sewn onto the goody bag. Lastly, a double drawstring is made which is weaved through the gaps that you created to secure the top of the bag and keep the candy safe inside. This drawstring doubles as a handle for the bag.

🎃 Get All 4 Halloween Treat Bags in One Ad-Free PDF! 👻
Skip the ads and keep all four spooky-cute designs together! The Ad-Free PDF includes the complete patterns for Frankenstein’s Monster, Ghost, Black Cat, and Jack-O’-Lantern Treat Bags—perfect for Halloween parties, trick-or-treating, classroom treats, or handmade gifts.
Grab your ad-free PDF and start crocheting your whole Halloween crew today!
Best Yarn for Crochet Bags
I typically recommend using 100% cotton yarn for a crochet treat bag for several reasons:
- Cotton yarns are soft and durable.
- Cotton yarns don’t pill easily.
- They hold up well to several washes in a washing machine.
- They show crochet stitch definition really well.
- They keep their shape.
- They don’t snag easily.
- They’re fairly inexpensive.
My second favorite yarn to crochet a bag with is 100% worsted weight wool, but keep in mind that animal fibers have a tendency to felt. And my third choice is double stranded acrylic yarn with a smaller hook than what’s recommended on the yarn label (because acrylic is stretchier).
If you’re going to line a Halloween crochet treat bag with fabric, you can use any yarn you’d like because the fabric will bear the weight of the items you place in the bag.
Yarn
Since I love to use cotton for crochet bags, for the Frankenstein’s Monster crochet treat bag, I chose Lion Brand Yarn 24/7 Cotton which is 100% mercerized cotton.
This collection is known for both its sheen and structure which remain no matter how much you wash and wear out your project. Since it’s machine washable, your handmade drawstring bag can easily get a lot of use before you clean it and will definitely be able to withstand a night of vigorous trick-or-treating.
The weight of this yarn give it a firmness and density that help the bag hold its shape better compared to lighter yarns.
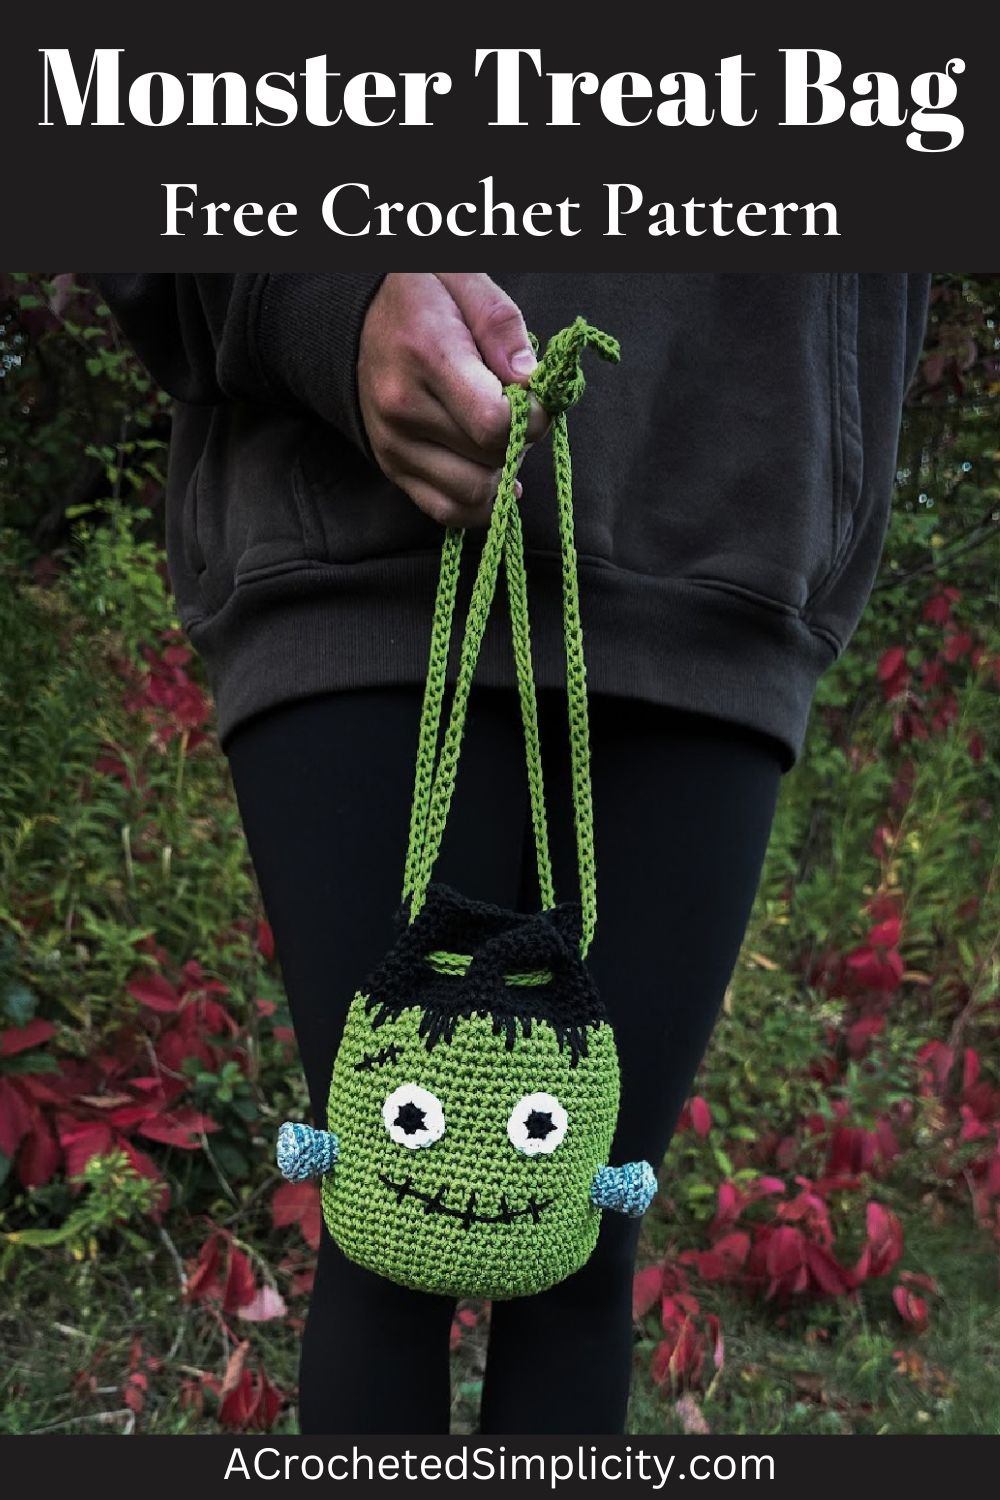
Frankenstein’s Monster Crochet Treat Bag – Free Pattern
The Frankenstein’s Monster crochet treat bag is free below, but if you love to work offline, I’ve got a couple other great options for you.
Purchase the ad-free, printable PDF, (that includes all FOUR Halloween crochet treat bag patterns), on Ravelry, or on Etsy (aff).
This post contains affiliate links.
Materials
- Yarn: Worsted Weight / 4 / Yarn, Lion Brand Yarn 24/7 Cotton [100% Mercerized Cotton (186 yds / 170 m / 100 g / 3.5 oz)] was used for the samples in the photos.
- Yardage and Colors:
- MC: Green (1 Ball / 110 yards)
- Black (1 Ball / 40 yards)
- Grey (1 Ball / 8 yards)
- White (1 Ball / 4 yards)
- Crochet Hook: H/8/5.00mm; G/6/4.00mm; or size needed to obtain gauge (My favorite crochet hooks are the Clover Amour Crochet Hooks, I’ve never had an ache in my hand since switching).
- Measuring Tape
- Scissors
- Yarn Needle
Abbreviations (US Terms)
- ch(s): chain(s)
- sl st(s): slip stitch(es)
- st(s): stitch(es)
- sc: single crochet
- hdc: half double crochet
- dc: double crochet
- sc2tog: single crochet decrease
- spike sc: spike single crochet
- Rep: repeat
- RS: right side
- SM: stitch marker
- Rnd: round
- yo: yarn over
- sp: space
Experience Level
- Easy
Gauge
- Measurements given throughout pattern.
Sizes
- 7″ W x 8″ H (laid flat, not including drawstrings)
Special Stitches
- Spike Single Crochet (spike sc): Spike stitches are worked just like regular single crochet stitches except you work into a row below the current row you’re on. You may be instructed to work 1 to 5 rows below the current row. Working into varying rows will produce spike stitches of varying heights. The further down you work, the longer your spikes will be. No matter how far down you’re instructed to work, always remember to pull the loop of yarn up to the height of your current row before finishing the stitch.
- Join with a standing single crochet: Begin with a slip knot on your hook, insert your hook into the stitch or space indicated, yo, pull up a loop, yo and draw thru both loops on hook.
Pattern Notes
- Turning chains are not included in stitch count unless noted otherwise.
- Yarn Notes: Lion Brand Yarn 24/7 Cotton (3.5oz / 100 g / 186 yards / 170 meters / 100% mercerized cotton) was used for the samples. Another comparable worsted weight yarn may be substituted.
- Yardage & Colors:
- MC: Green (1 Ball / 110 yards)
- Black (1 Ball / 40 yards)
- Grey (1 Ball / 8 yards)
- White (1 Ball / 4 yards)
- Construction Notes: These Halloween goody bags are made from the bottom up by crocheting in a spiral. Once the top of the bag is reached, chains are used to create spaces for the drawstrings to be woven through. Different pieces are made depending on which character you’re making. The pieces are sewn onto the goody bag. Lastly, a double drawstring is made.
Frankenstein’s Monster Crochet Treat Bag – Written Pattern
Goody Bag
Gauge isn’t crucial for this project. Gauge checks have been added at the end of rounds 4 and 10.
Note: This section is worked in continuous rounds to keep from having an unsightly seam. Do not join at the end of each round, instead use a scrap piece of yarn to keep track of the beginning of each round. Move the scrap of yarn up as you complete each round.
Rnd 1 (RS): With Green yarn & a 5.00mm crochet hook, ch 2, work 6 sc into the 2nd ch from your hook. Do not join. (6 sts)
Rnd 2: 2 sc in each st around. (12 sts)
Rnd 3: (2 sc in the next st, sc in the next st) 6 times. (18 sts)
Rnd 4: Sc in the next st, (2 sc in the next st, sc in each of the next 2 sts) 5 times, 2 sc in the next st, sc in the next st. (24 sts) Your circle should measure approximately 2″ in diameter at this point.
Rnd 5: (2 sc in the next st, sc in each of the next 3 sts) 6 times. (30 sts)
Rnd 6: Sc in each of the next 2 sts, (2 sc in the next st, sc in each of the next 4 sts) 5 times, 2 sc in the next st, sc in each of the next 2 sts. (36 sts)
Rnd 7: (2 sc in the next st, sc in each of the next 5 sts) 6 times. (42 sts)
Rnd 8: Sc in each of the next 3 sts, (2 sc in the next st, sc in each of the next 6 sts) 5 times, 2 sc in the next st, sc in each of the next 3 sts. (48 sts)
Rnd 9: (2 sc in the next st, sc in each of the next 7 sts) 6 times. (54 sts)
Rnd 10: Sc in each of the next 4 sts, (2 sc in the next st, sc in each of the next 8 sts) 5 times, 2 sc in the next st, sc in each of the next 4 sts. (60 sts) Your circle should measure approximately 4-1/2″ in diameter at this point.
Rnd 11: Sc in each st around. (60 sts)
Rep Rnd 11 until your goody bag measures 6-1/2″ H, when laid flat.
Do not fasten off. Continue on to Final Rounds.
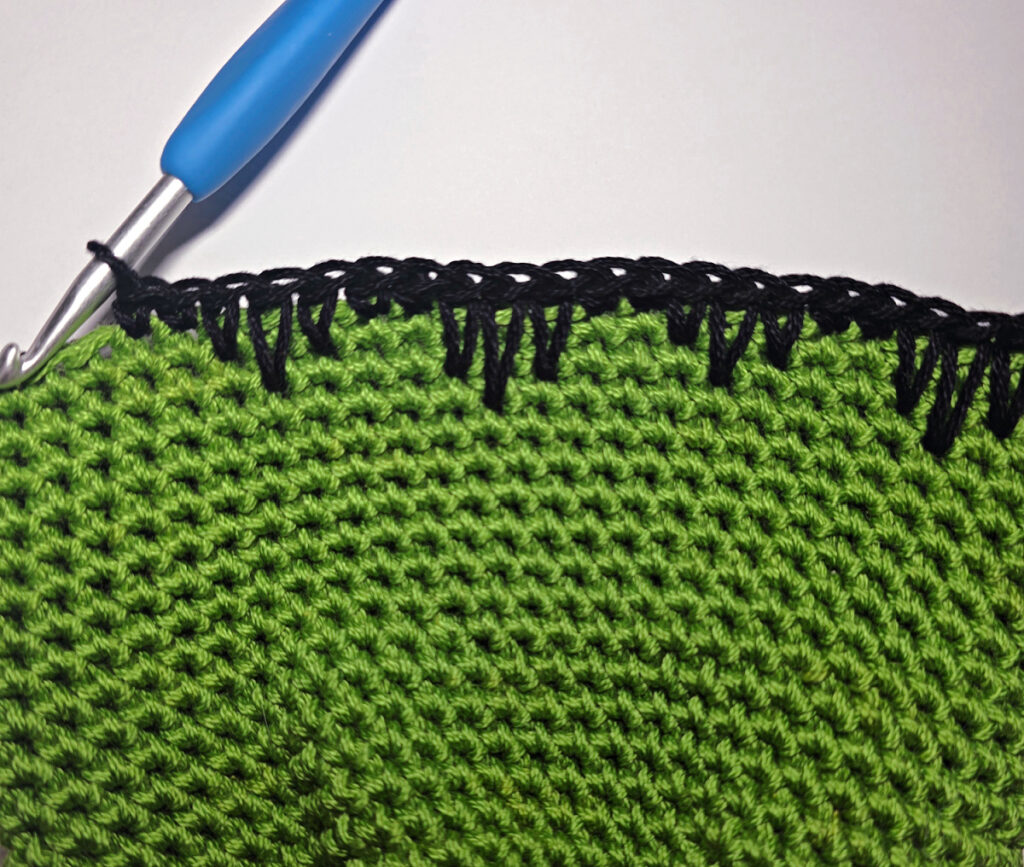
The following quick tip may help you with the next section: 1 Quick Tip for Crocheting Perfect Spike Stitches.
Final Rounds
Note: This section is worked in continuous rounds to keep from having an unsightly seam. Do not join at the end of each round, instead use a scrap piece of yarn to keep track of the beginning of each round. Move the scrap of yarn up as you complete each round.
Set-Up: Continuing with Green yarn & a 5.00mm crochet hook, join yarn with a sl st to the 1st st of the previous round.
Switch to Black yarn when joining.
Rnd 1: Ch 1, sc in the first 2 sts, (spike sc 2 rnds below, spike sc 3 rnds below, spike sc 2 rnds below, sc in each of the next 2 sts, spike sc 1 rnd below, spike sc 2 rnds below, spike sc 1 rnd below,** sc in each of the next 2 sts) rep from ( to ) around ending the last rep at **. Do not join. (60 sts)
Rnds 2 – 4: Sc in each st around. (60 sts)
Rnd 5: (sc in each of the next 3 sts, ch 2, skip each of the next 2 sts) rep from ( to ) around. (60 sts)
Rnd 6: Sc in each st and ch around. (60 sts)
Rnds 7 – 9: Sc in each st around. (60 sts)
Rnd 10: Sl st in each st around. Join using the Special Join Technique. (60 sts)
Fasten off. Weave in ends. Continue on to the Monster’s Eyes. When laid flat, bag should measure approximately 7″ W x 8-1/4″ H.
Monster’s Eyes (Make 2)
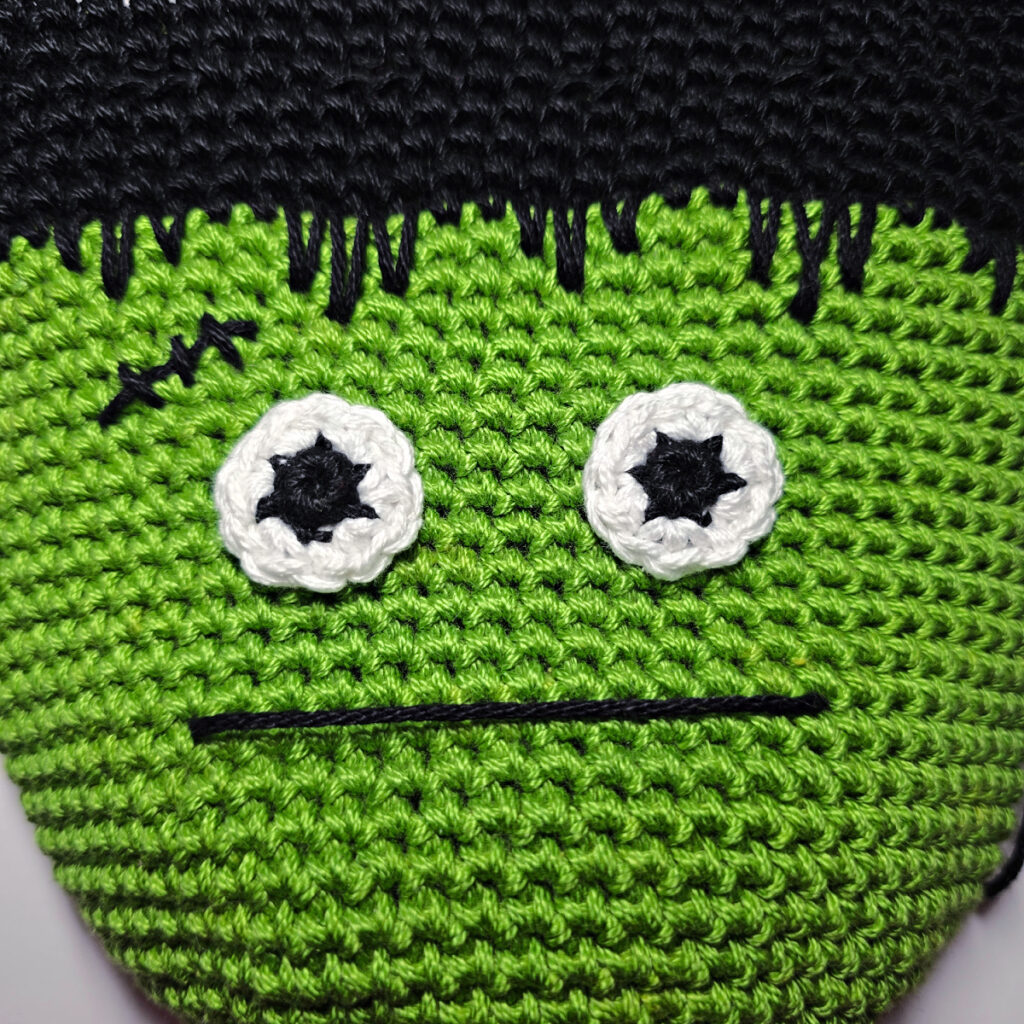
Rnd 1 (RS): With Black yarn & a 4.00mm crochet hook, ch 2, work 6 sc into the 2nd ch from your hook. Join with a sl st to the 1st st. Change colors to white when you join. Fasten off black. (6 sts)
Rnd 2: With White yarn, work 2 sc in each st around. Join. (12 sts)
Fasten off, leaving a 12″ tail of white yarn to use for attaching the eyes to the goody bag. Eye should measure approximately 1″ diameter. Make a second eye then continue on to Attaching the Eyes.
Attaching the Eyes
Attach the eyes on the goody bag so that there are 2 rounds between the top of the eyes and the longest piece of “hair”. Place them approximately 2″ apart, center to center.
Continue on to Bolts.
Bolts (Make 2)
Note: This section is worked in continuous rounds to keep from having an unsightly seam. Do not join at the end of each round, instead use a scrap piece of yarn to keep track of the beginning of each round. Move the scrap of yarn up as you complete each round.
Rnd 1: With Grey yarn & a 4.00mm crochet hook, ch 2, work 6 sc in the 2nd ch from your hook. (6 sts)
Rnd 2: 2 sc in each st around. (12 sts) Diameter at this point: 7/8″.
Before continuing, weave in the tail of yarn you began with.
Rnd 3: BPsc around each st. (12 sts)
Rnd 4: Sc in each st around. (12 sts)
Rnd 5: Working in BLO, * sc2tog, sc in next st, rep from * around. (8 sts)
Rnd 6: Sc in each st around. Join with a sl st to the 1st st. (8 sts)
Fasten off leaving an 8″ – 10″ tail of yarn. Approximate size: 7/8″ diameter x 7/8″ H. Lightly stuff with scrap yarn, if desired.
Make a second bolt, then continue on to Create Stitches & Mouth.
Create Stitches & Mouth
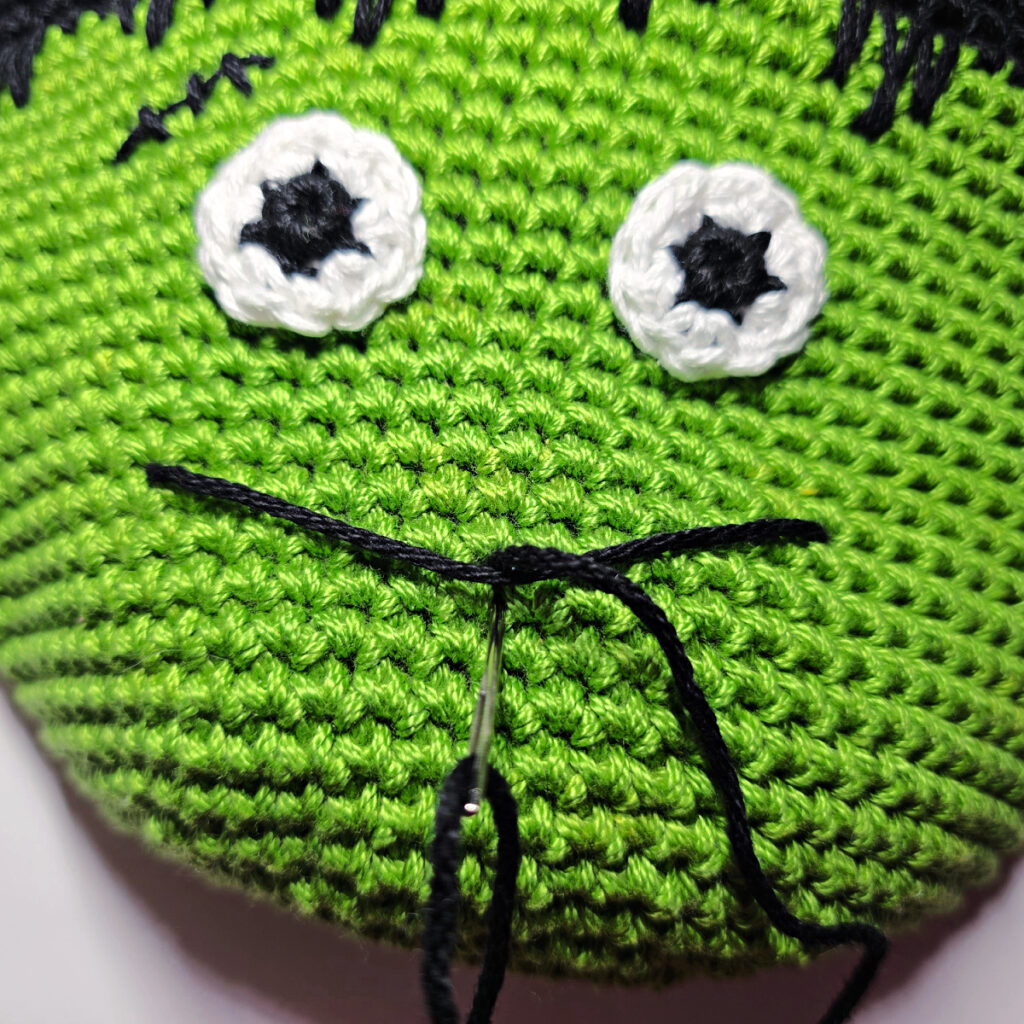
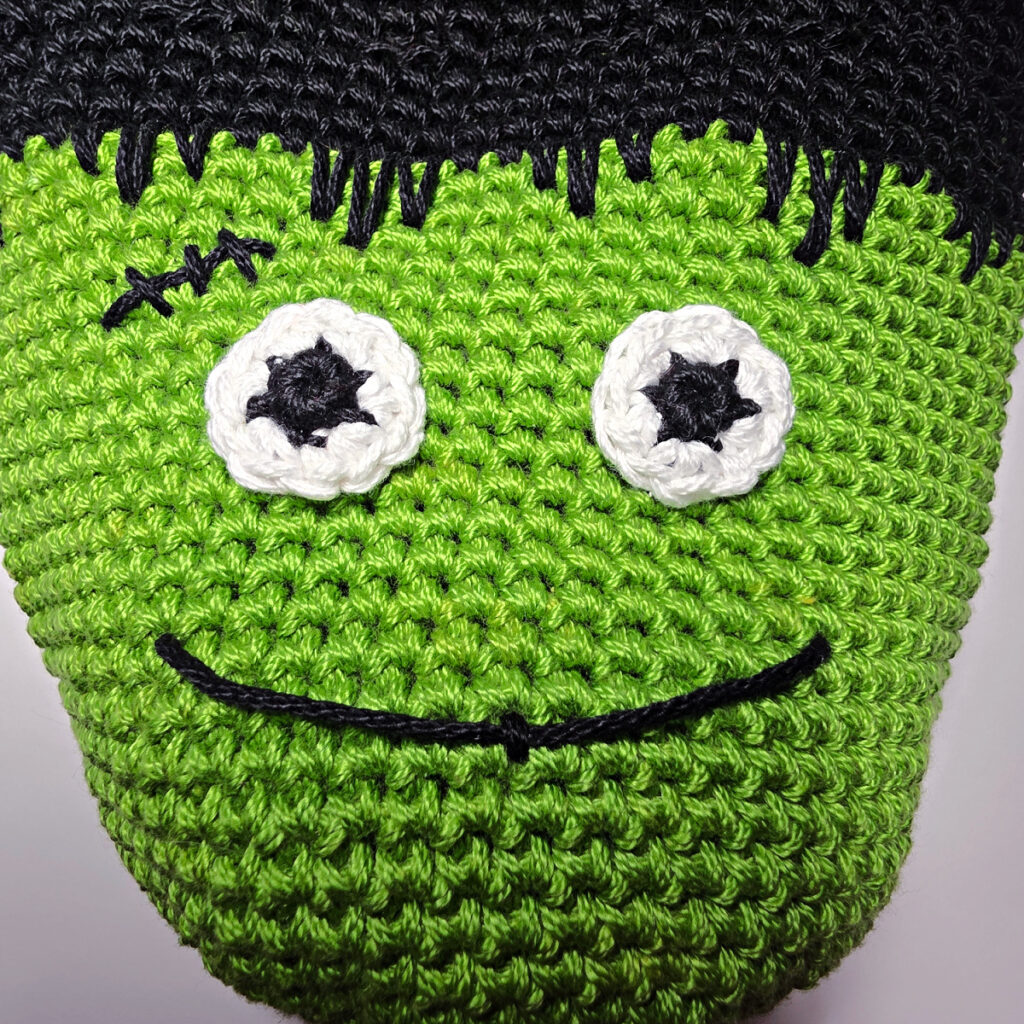
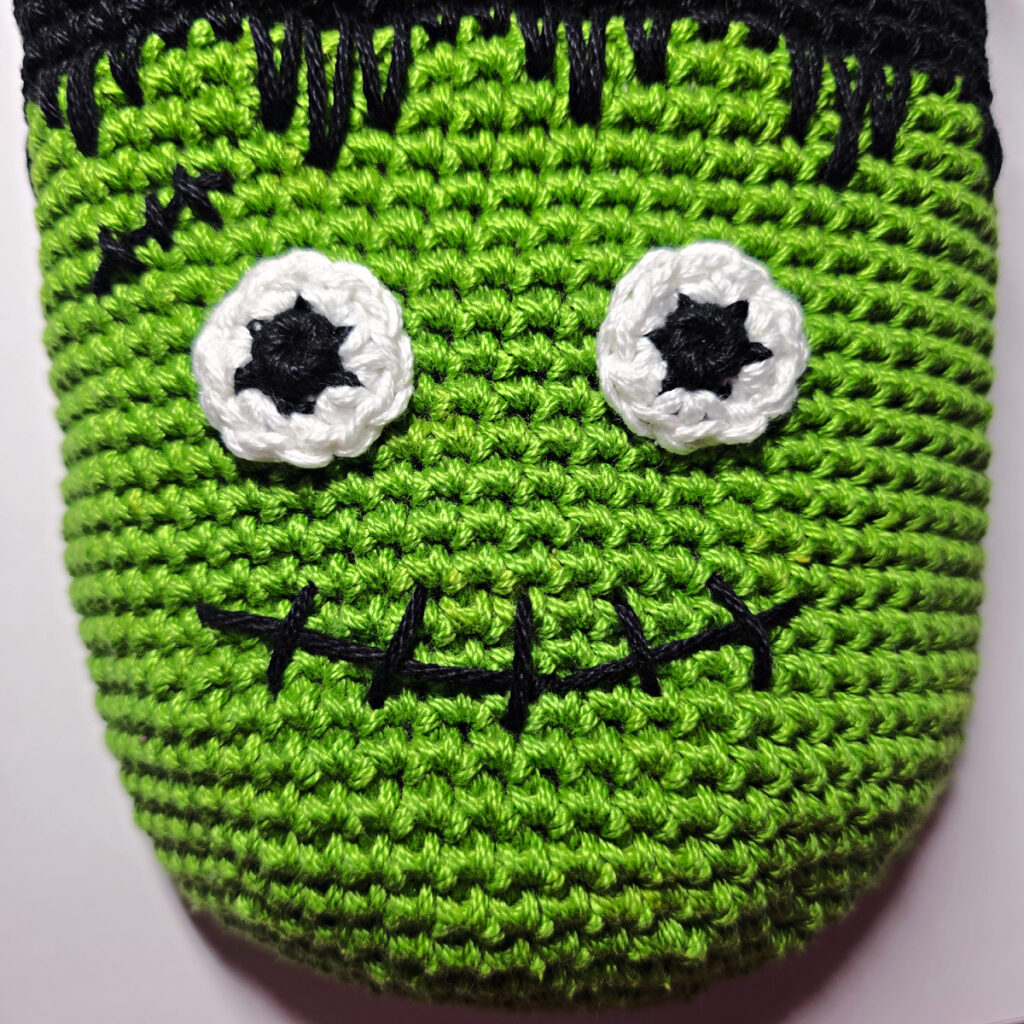
With a yarn needle and 12″ piece of black yarn, create a scar above his right eye, similar to what’s shown in the photos. Make one longer stitch and then 3 shorter stitches across it.
With a yarn needle and an 18″ piece of black, create a mouth as shown in the photos.
Weave in ends. Continue on to Attaching the Bolts.
Attaching the Bolts
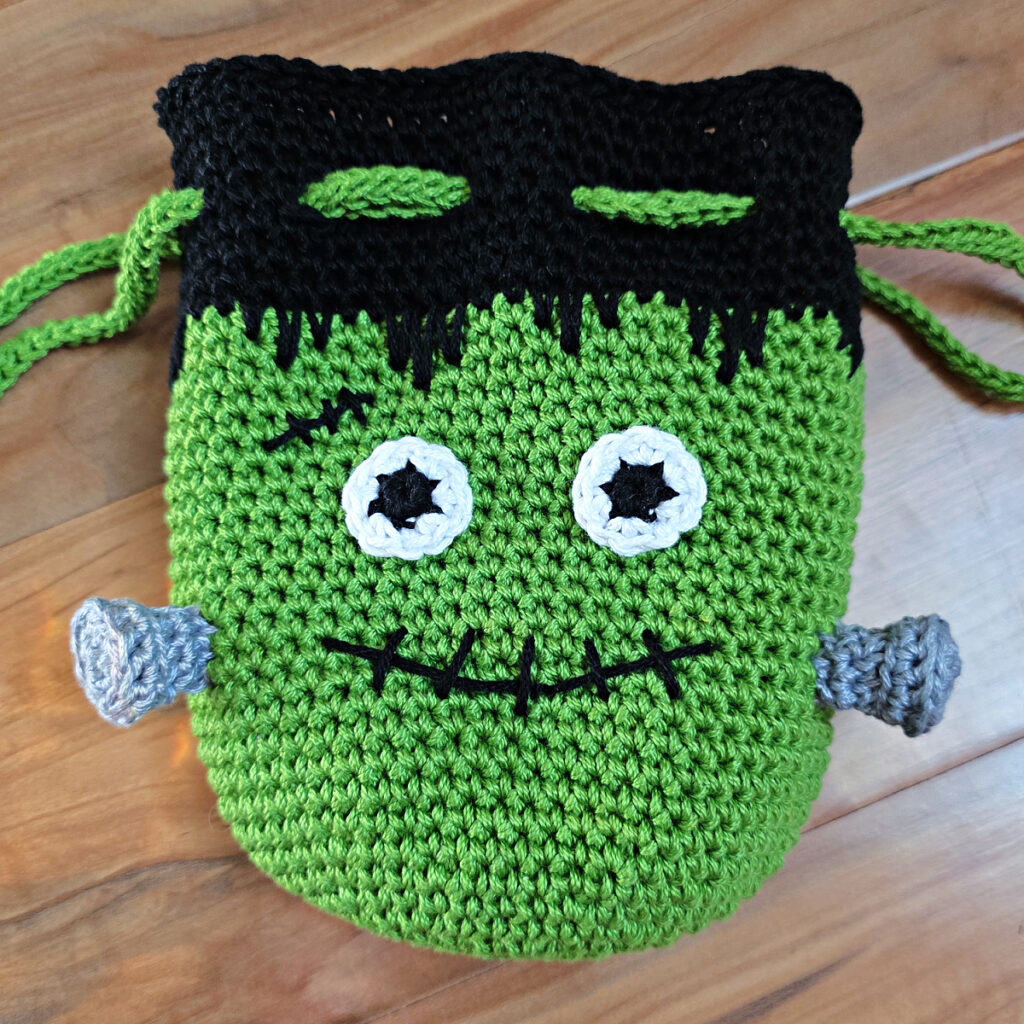
Position the bolts 4 stitches to the left and right of the mouth. Use a yarn needle and tail of yarn to sew the bolts onto the goody bag
Weave in ends. Continue on to the Drawstrings.
Drawstrings (Make 2)
Note: You may notice that I added my drawstrings before I added the facial features. I only did this so that you could see the drawstring holes in the progression photos.
Note #2: If you prefer a thinner drawstring, instead of following the directions for Row 1 below, simply create a chain that is 32″ L. Then skip working slip stitches into the chain.
Row 1: With any color yarn & a 5.00mm crochet hook, create a chain that is approximately 32″ long. Switch to a 4.00mm crochet hook, then working into the back humps of the chain, sl st into the 2nd ch from your hook and in each ch across. Stitch count isn’t crucial.
Fasten off. Weave in ends. Make a second drawstring. Continue on to Finishing.
Finishing
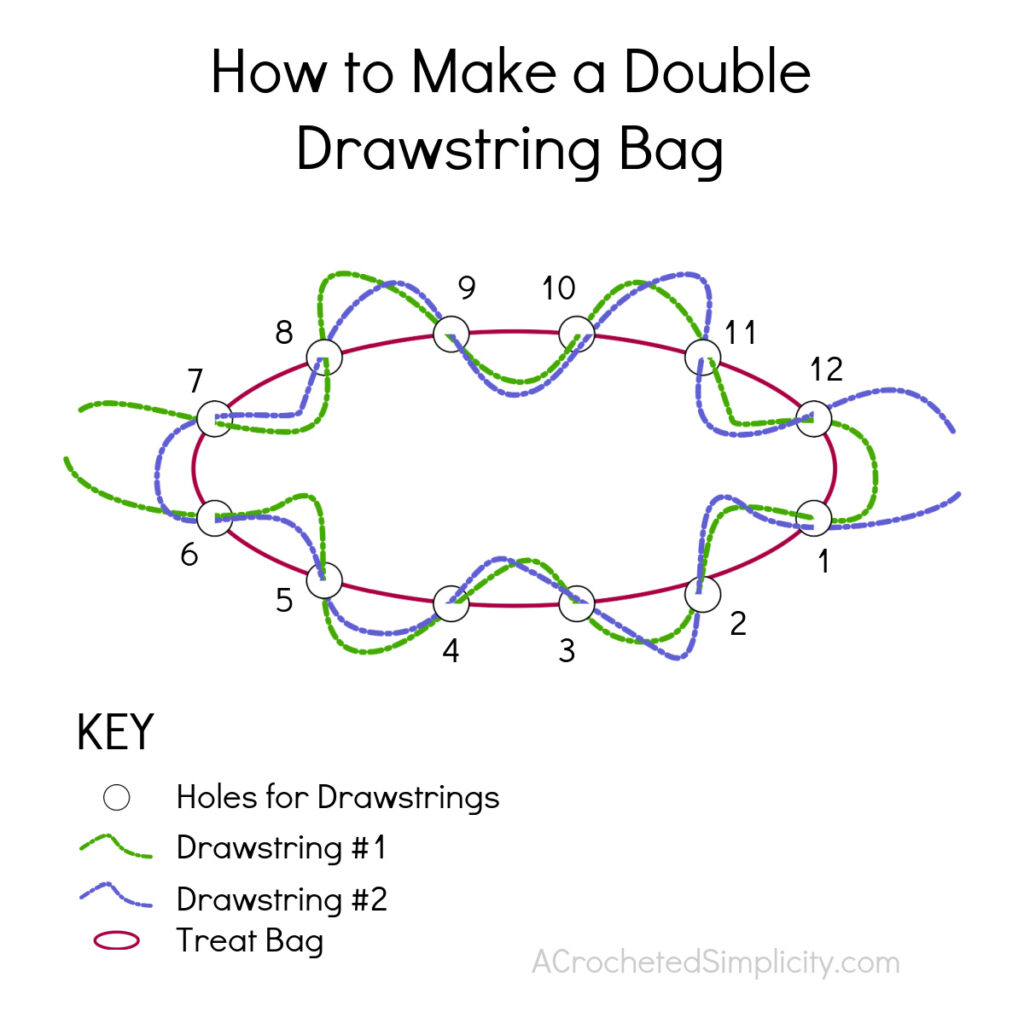
In this section, follow the numbered chart below to weave each of the drawstrings through the openings to create a double drawstring bag.
Drawstring #1 (Purple): Begin at any hole. This hole will become Hole #1. Insert one end of a drawstring into hole #1. Then continue to weave the drawstring in and out of all 12 holes around the bag. You’ll end by coming out Hole #12.
Drawstring #2 (Green): Begin at Hole #7. Insert one end of the second drawstring into Hole #7. Then continue to weave the drawstring in and out of all 12 holes around the bag. You’ll end by coming out Hole #6.
Finishing: Knot the ends of the purple drawstring together. Knot the ends of the green drawstring together.
I MADE IT! NOW WHAT?
Pin this post!: Save this Frankenstein’s monster crochet treat bag pattern to your Pinterest boards so that you can come back and make it again.
Leave a comment below: We love to hear your feedback.
Share Your Finished Projects on Facebook or Instagram: I love to see your finished projects! Share with us on social media and tag me @acrochetedsimplicity or use the hashtag #ACrochetedSimplicity so I can find your posts.
Join us in the Facebook Community Group!
Come share your finished projects with us in the A Crocheted Simplicity Crochet Community Group on Facebook. Join us for fun community events such as crochet alongs, join in on crochet conversations, ask questions, get advice, and share your love for crochet!
More Free Halloween Crochet Patterns
More Crochet Patterns for Crochet Purses & Handbags
Are you looking for more crocheted purse patterns? We have several more free and premium crochet patterns for bags, backpacks, purses, and totes. We have a variety of free crochet bag patterns and premium crochet bag patterns.
