Autumn Gathering Crochet Garland – Fall Pumpkin, Leaf & Sunflower Garland Pattern
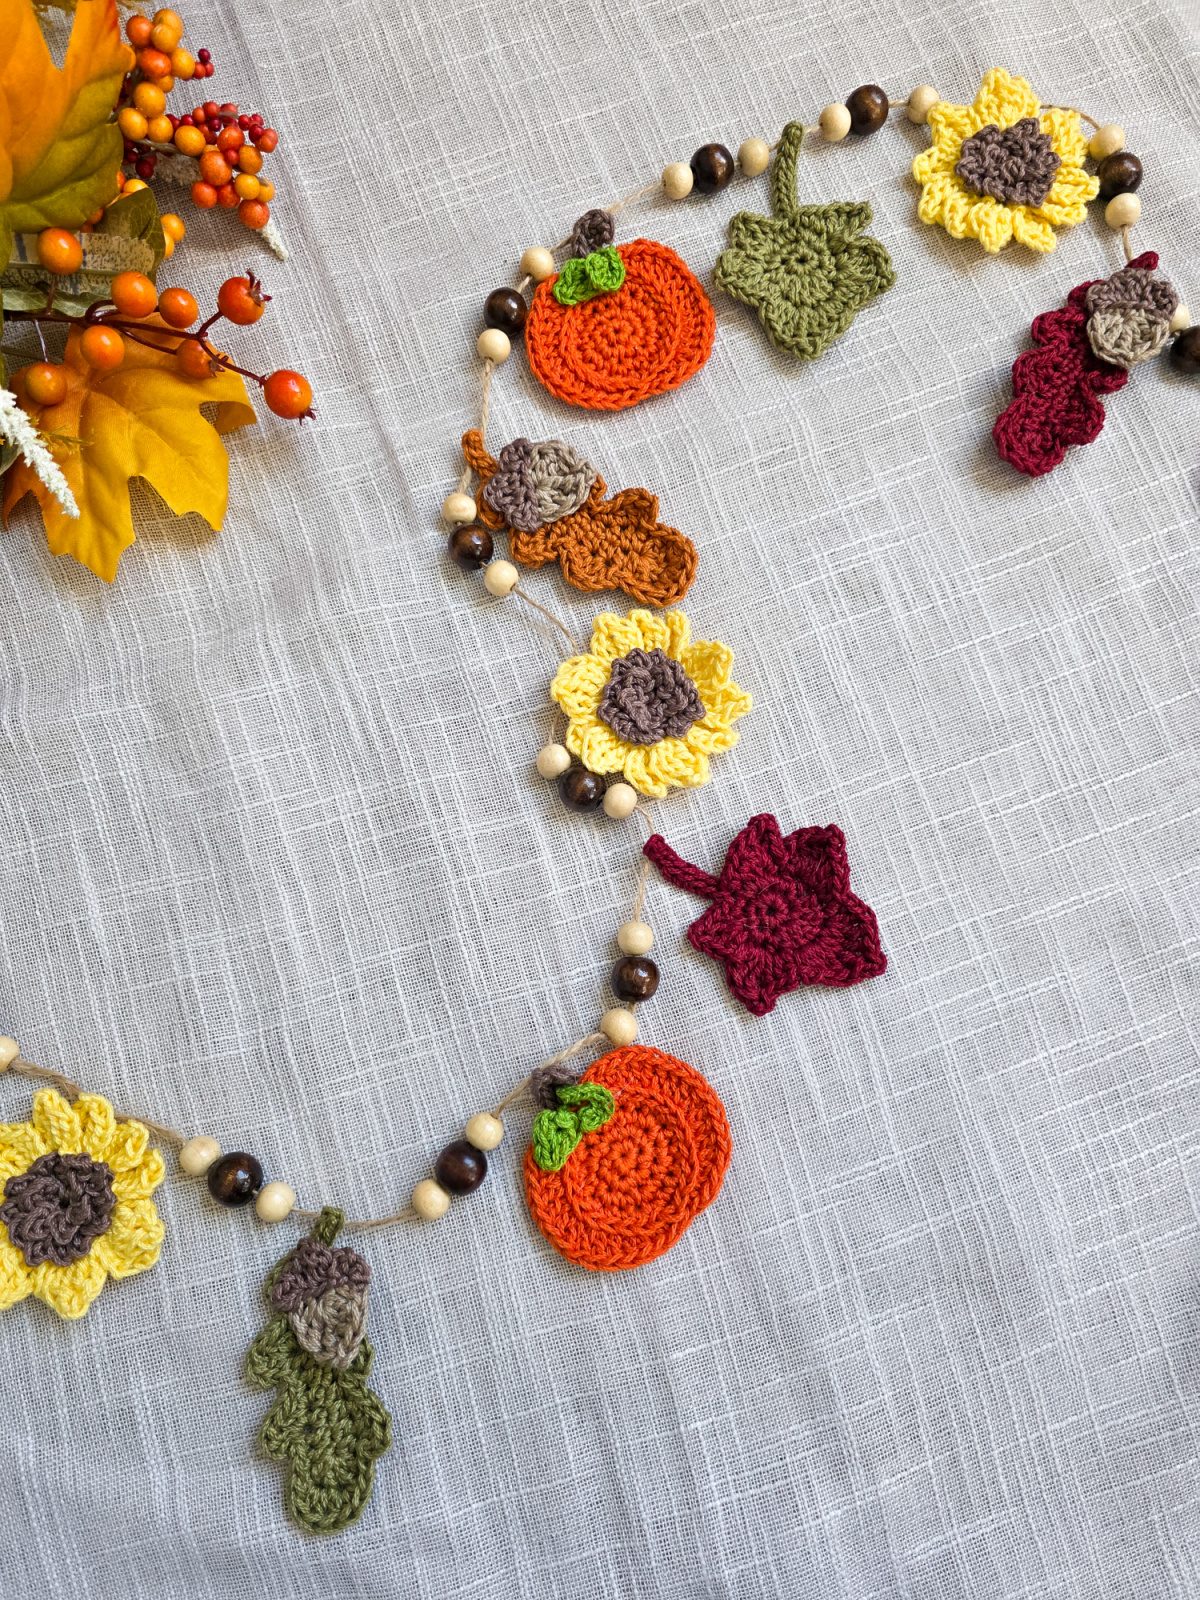
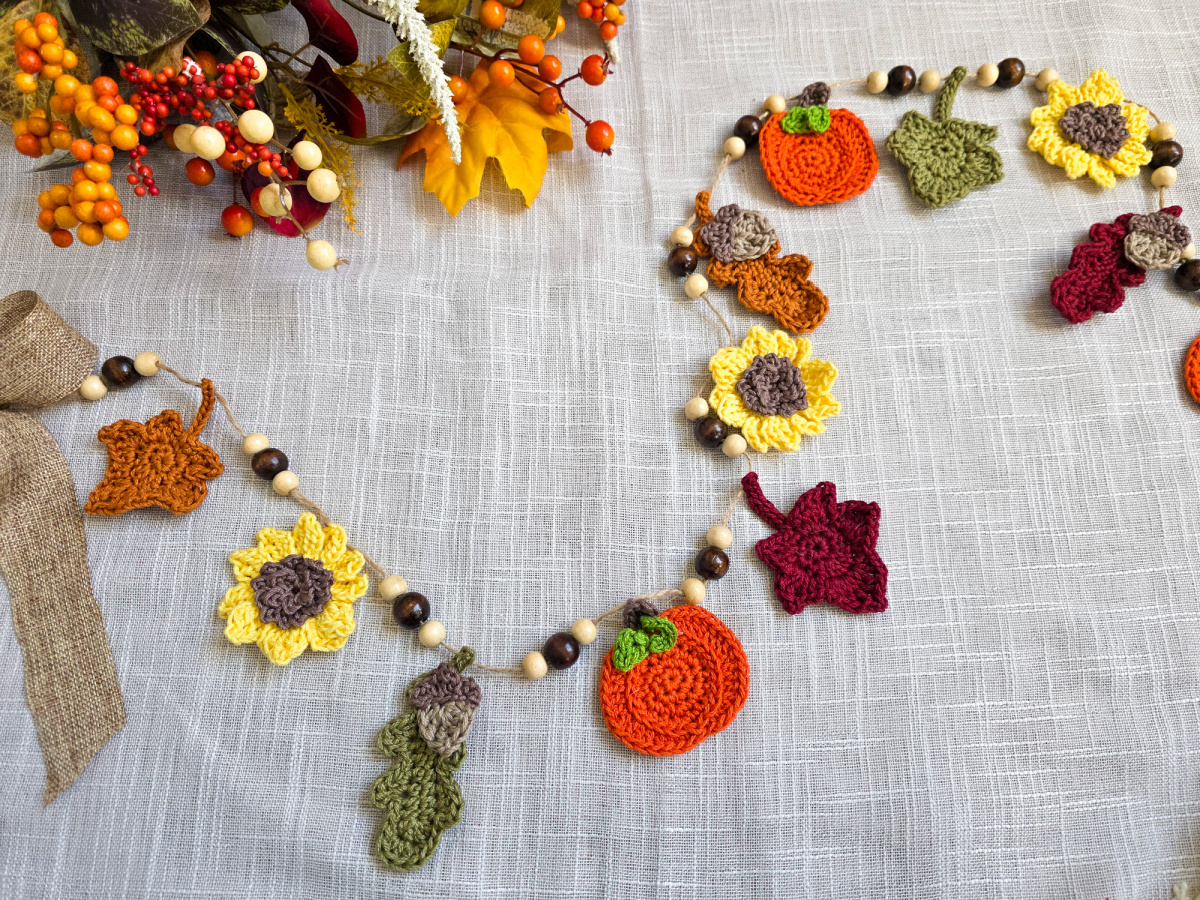
Fall decor is all about the warm, vibrant tones which reflect how many changes nature is going through during this time. This autumn gathering crochet garland captures all of that perfectly with cute pumpkins, sunflowers, and leaves strung up in a row.
One of the best parts about this fall garland for mantle is that you can keep it up for quite a bit as it sees you through September, October, and November. That’ll give you plenty of time to get some holiday crocheting in too. If stored nicely, this autumn garland will last you many years to come!
You’ll find the free autumn crochet garland in the post below, or you can find an ad-free printable PDF (that includes all photo tutorials) on Ravelry, or Etsy (aff).
I know there are a lot of amazing fall crochet ideas in store right now that you might be working on. For this garland, you can use up your scrap yellow and brown yarn to make the crochet sunflower; put your orange tones into the adorable crochet pumpkin, and utilize all shades of brown for the crochet leaves. There are even some crochet acorns in the mix to really capture what autumn is all about!
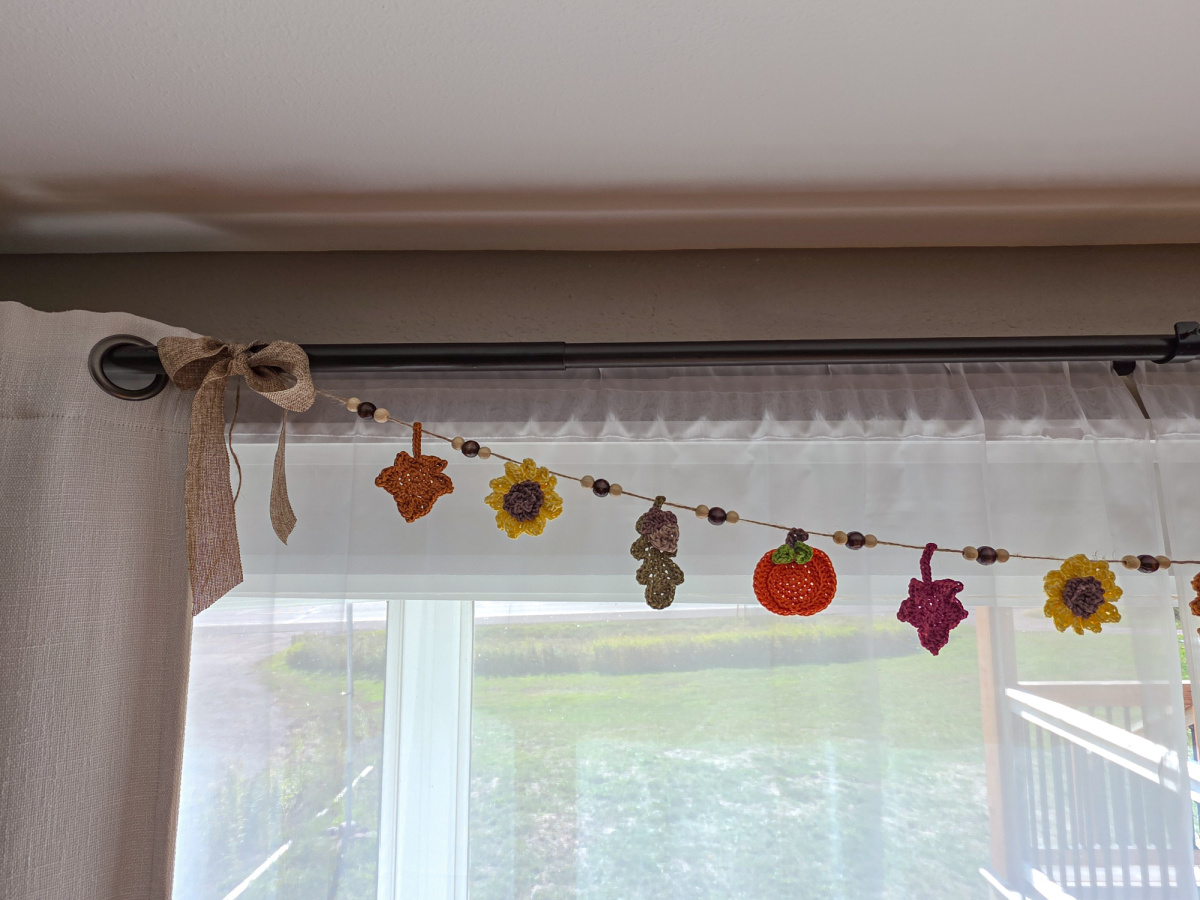
Hang this garland up on your curtain rod or mantelpiece, or lay it out in bunches on your dining room table if you’re planning on hosting a feast. It’ll look great just about anywhere!
Related: Pair this fall crochet garland up with my Fall Leaves Cutlery Holder and Large Pumpkin to complete your table setting.
How to Crochet a Fall Garland
This fall garland is all about having fun and enjoying the end result! Before you begin crocheting, plan out the number of pumpkins, acorns, oak leaves, maple leaves, sunflowers, and wooden beads you’ll need. Play around with spacing and different layouts so that you get the look that you want once it’s done.
I made 3 of each applique for mine and I spaced them 4″ – 4-1/2″ apart. I placed 3 small wooden beads between the appliques and 3 beads before and after the first and last appliques. Similarly, you should figure out how many of each you want in your garland, how close together or far apart they should be, and if you want to add anything extra in between like beads and tassels.
Once you have all of the required material, you’ll string them on to the cord by sewing them into place and adding ribbon bows at the ends.
How To Get The
Autumn Gathering Crochet Garland
Option 1: Scroll down for the free crochet garland pattern right here in this blog post.
Option 2: Purchase the ad-free printable PDF from one of my shops:
Yarn Colors & Yardage for Each Crochet Applique
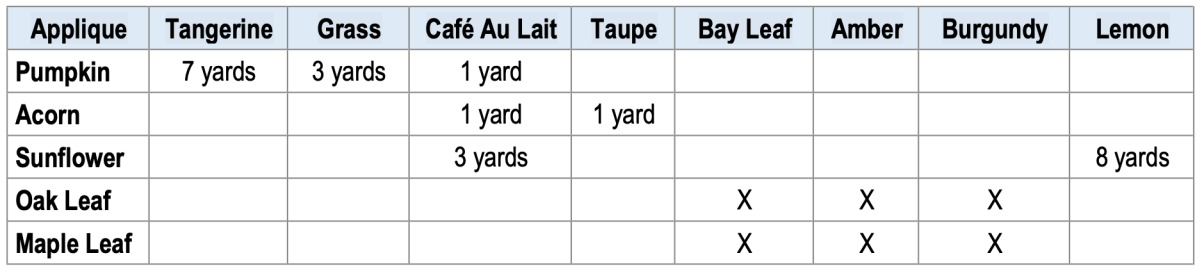
The yardage listed in the chart is to make one of each fall applique.
Oak & Maple Leaves: For the Oak & Maple Leaves, you’ll need 7 yards of ANY color yarn. In the chart below, I marked the colors with an X that I used for mine.
Yarn
For my sample of this fall crochet garland, I chose Lion Brand 24/7 Cotton which is 100% mercerized cotton.
This collection is known for both its sheen and structure which remain no matter how much you wash and wear out your project. Since it’s machine washable, your handmade fall garland can easily get a lot of use before you clean it, especially if you’re planning on keeping it out for a long period of time.
The weight of this yarn give it a firmness and density that help the appliques hold their shape better compared to lighter yarns.
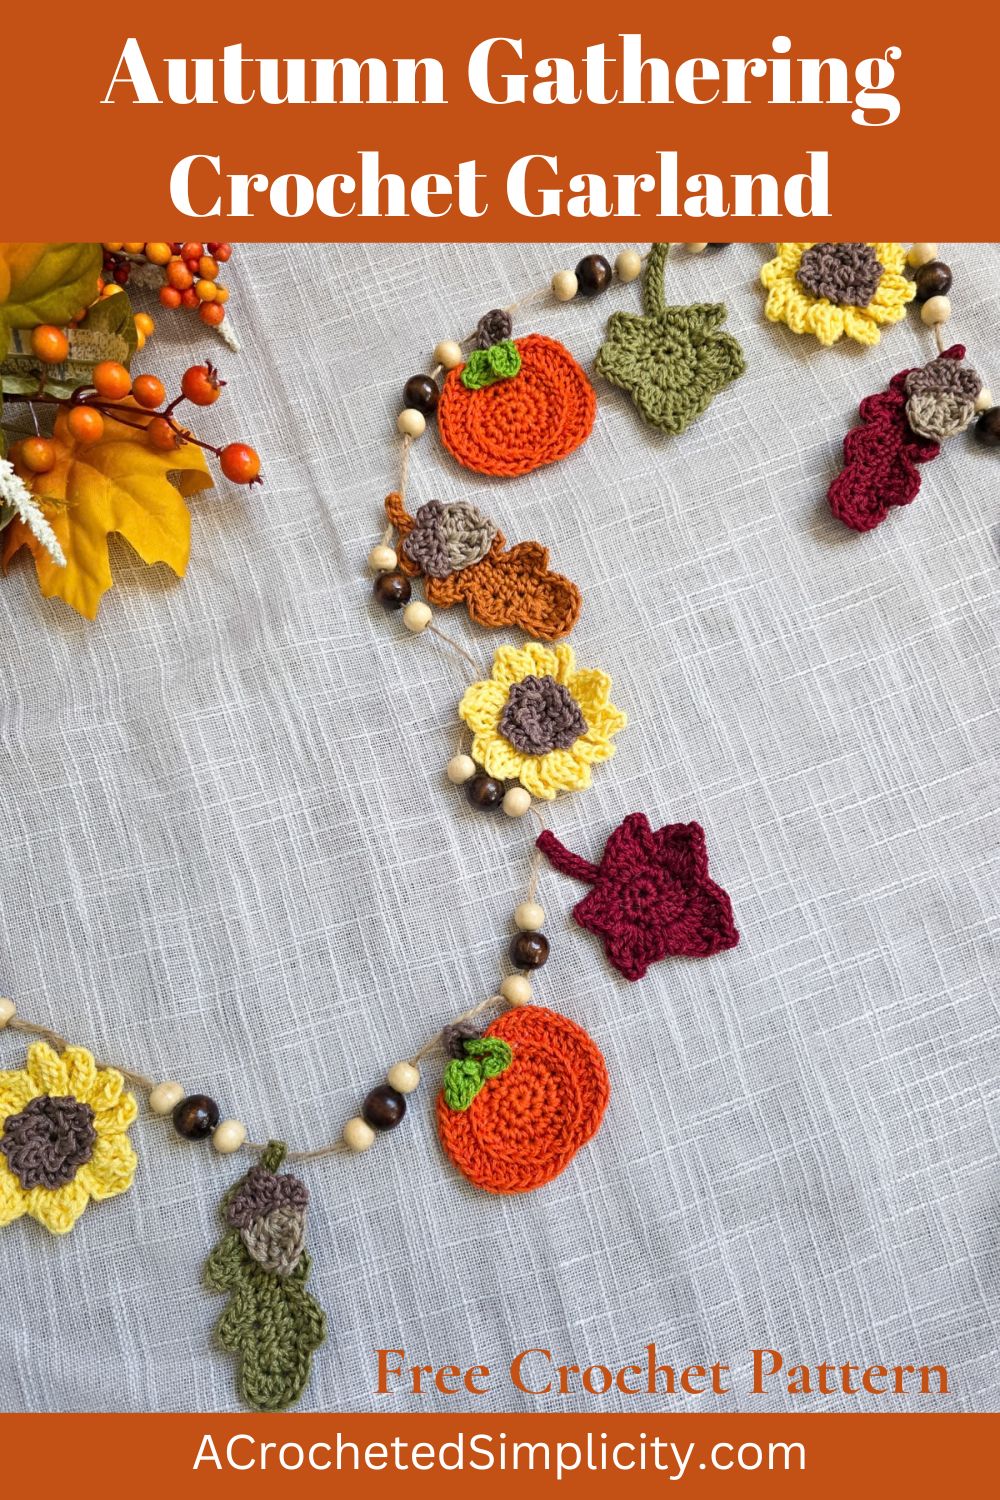
Autumn Gathering Crochat Garland – Free Pattern
The Easy Crochet Garland is a free pattern below, but if you love to work offline, I’ve got a couple other great options for you.
Purchase the ad-free, printable PDF (that includes all photo tutorials), on Ravelry, or on Etsy (aff).
This post contains affiliate links.
Materials
- Yarn: Worsted Weight / 4 / Yarn, Lion Brand 24/7 Cotton (100% Mercerized Cotton / 185 yards / 100 g / 3.5 oz / 170 m) was used for the samples shown in the photos.
- Yardage & Colors: For my version of the crocheted garland, I used:
- Tangerine (orange): #761-186G
- Grass (green): #761-172H
- Café Au Lait (dark brown): #761-126AA
- Taupe (light brown): #761-122D
- Bay Leaf (sage green): #761-171V
- Amber (dusty orange): #761-186G
- Burgundy (deep red): #761-148AI
- Lemon (yellow): #761-157D
- See the chart above for the yardage of each.
- Crochet Hooks: G/6/4.00mm; C/2.75mm; or size needed to obtain gauge (My favorite crochet hooks are the Clover Amour Crochet Hooks, I’ve never had an ache in my hand since switching).
- Measuring Tape
- Scissors
- Yarn Needle
- Locking Stitch Markers
- Wooden Beads
- Jute Cord #20 (2mm)
- Ribbon 1-1/2” W
Abbreviations (U.S. Terms)
- ch(s): chain(s)
- sl st(s): slip stitch(es)
- st(s): stitch(es)
- sc: single crochet
- hdc: half double crochet
- dc: double crochet
- tr: treble crochet
- Rep: repeat
- RS: right side
- WS: wrong side
- SM: stitch marker
- Rnd: round
- yo: yarn over
- BLO: back loop only
- FLO: front loop only
Gauge
- Measurements given throughout pattern.
Experience Level
- Easy
Size
- Make ANY length garland.
- Width of Garland Shown is 64″ W (bow to bow as it is hung).
- Applique sizes are listed in each individual pattern section.
Pattern Notes
- Yarn: Worsted Weight / 4 / Yarn, Lion Brand 24/7 Cotton (100% Mercerized Cotton / 185 yards / 100 g / 3.5 oz / 170 m) was used for the samples shown in the photos.
- Another comparable worsted weight yarn may be substituted.
- Yardage & Colors: For my version of the crocheted garland, I used:
- Tangerine (orange): #761-186G
- Grass (green): #761-172H
- Café Au Lait (dark brown): #761-126AA
- Taupe (light brown): #761-122D
- Bay Leaf (sage green): #761-171V
- Amber (dusty orange): #761-186G
- Burgundy (deep red): #761-148AI
- Lemon (yellow): #761-157D
- See the chart above for the yardage of each.
- Plan the Layout of Your Crochet Garland: Plan out the number of pumpkins, acorns, oak leaves, maple leaves, sunflowers, and wooden beads you’ll need. Play around with spacing and different layouts. I made 3 of each applique for mine and I spaced them 4″ – 4-1/2″ apart. I placed 3 small wooden beads between the appliques and 3 beads before and after the first and last appliques.
Autumn Gathering Garland – Free Crochet Pattern
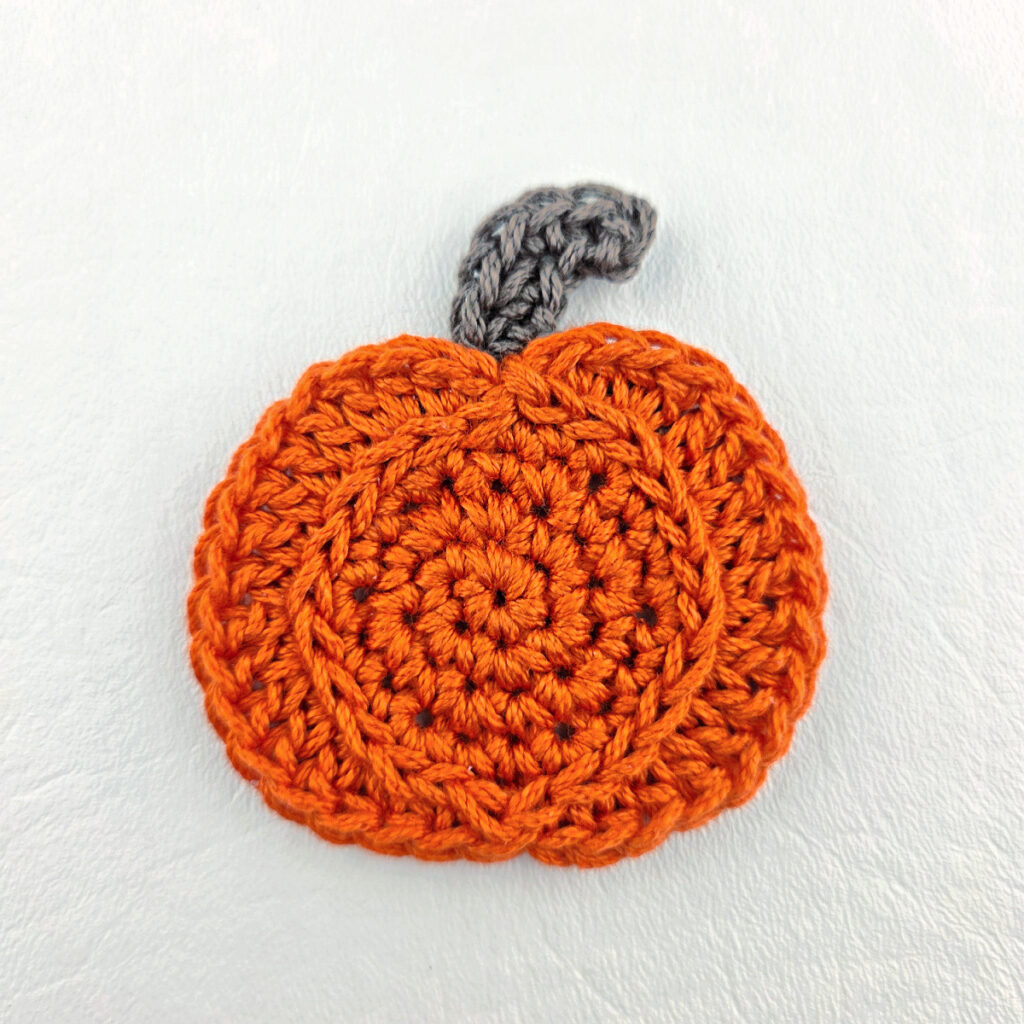
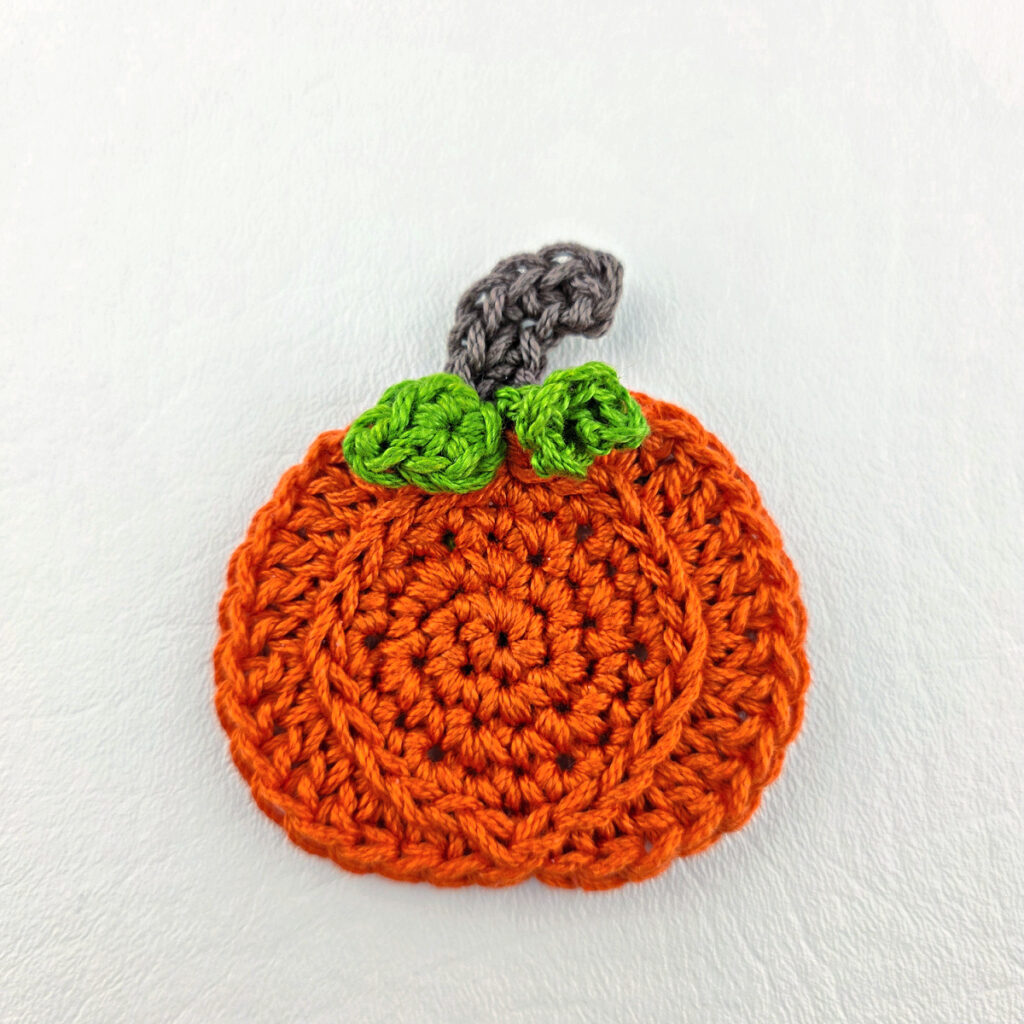
Pumpkin Applique
Note: The crochet pumpkin applique is worked in continuous rounds to keep from having an unsightly seam. Do not join at the end of each round, instead use a scrap piece of yarn to keep track of the beginning of each round. Move the scrap of yarn up as you complete each round.
Finished Size: 2-3/4″ W x 2-3/4″ H (including stem)
Rnd 1 (RS): With Orange yarn & a 4.00mm crochet hook, ch 2, work 6 sc into the 2nd ch from your hook. (6 sts)
Rnd 2: 2 sc in each st around. (12 sts)
Rnd 3: * 2 sc in the next st, sc in the next st, rep from * around. (18 sts)
Rnd 4: * 2 sc in the next st, sc in each of the next 2 sts, rep from * around. (24 sts)
Rnd 5: (sc, hdc) in the first st, (hdc, dc) in the next st, dc in the next st, 2 dc in the next st, dc in the next st, 2 dc in each of the next 2 sts, dc in the next st, (dc, hdc) in the next st, hdc in the next st, sc in each of the next 3 sts, hdc in the next st, (hdc, dc) in the next st, dc in the next st, 2 dc in each of the next 2 sts, dc in the next st, 2 dc in the next st, dc in the next st, (dc, hdc) in the next st, (hdc, sc) in the next st, sl st in the last st. (36 sts)
Do not fasten off. Continue on to Adding Pumpkin Details. Pumpkin measures approximately 2-3/4″ across, at the widest point.
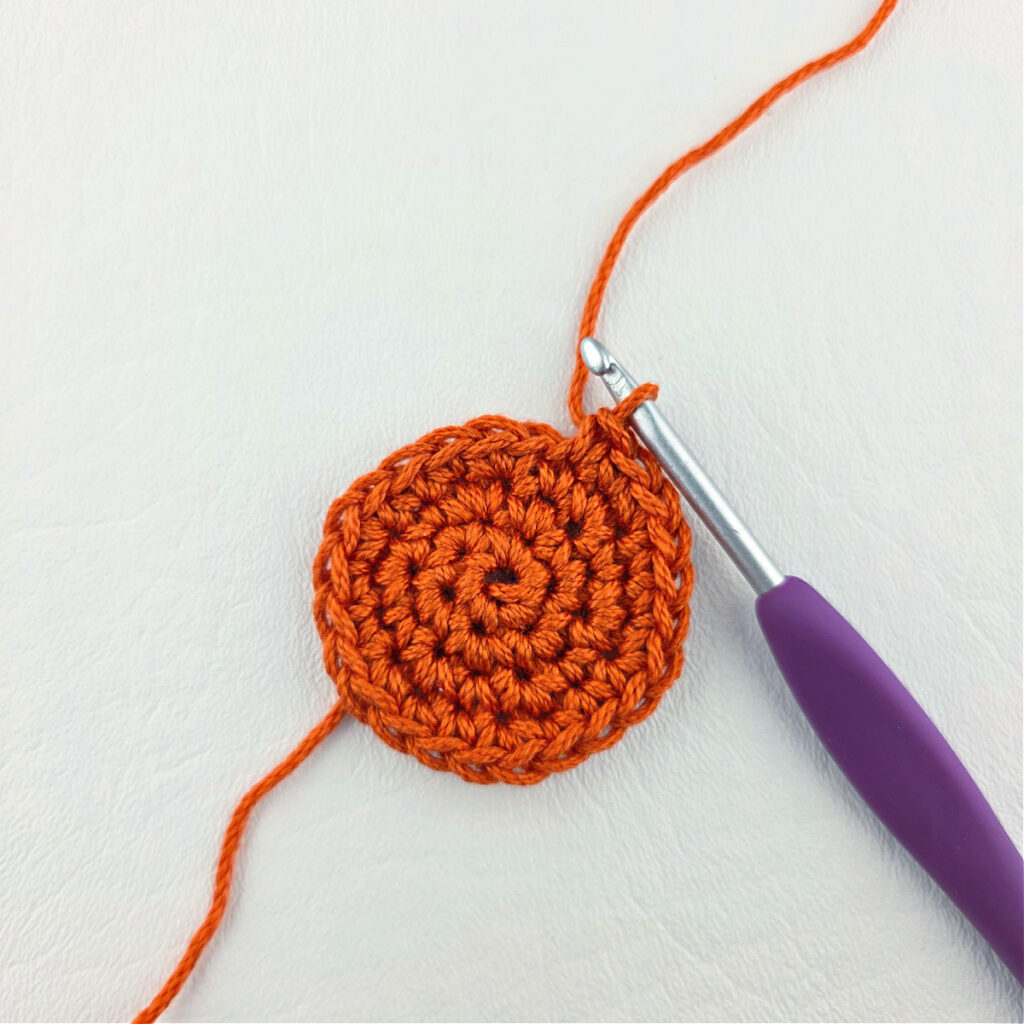
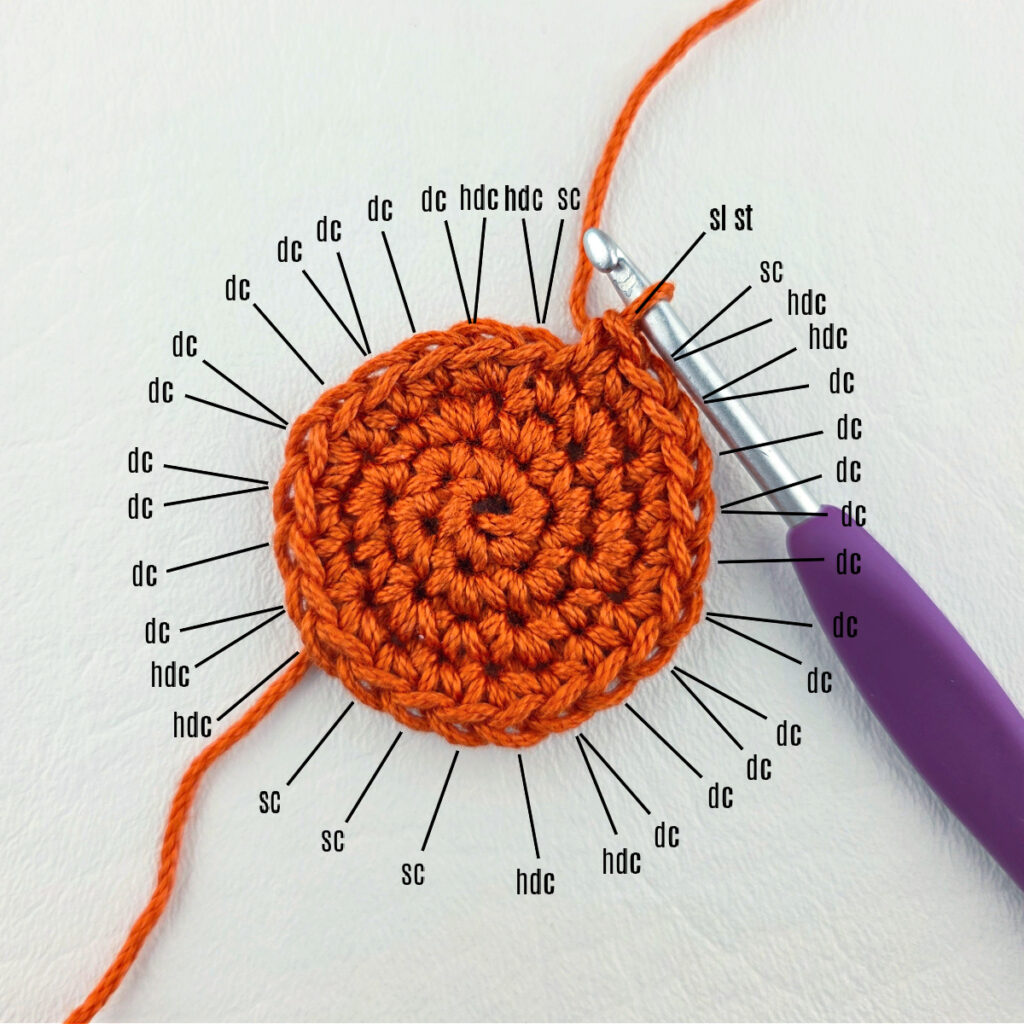
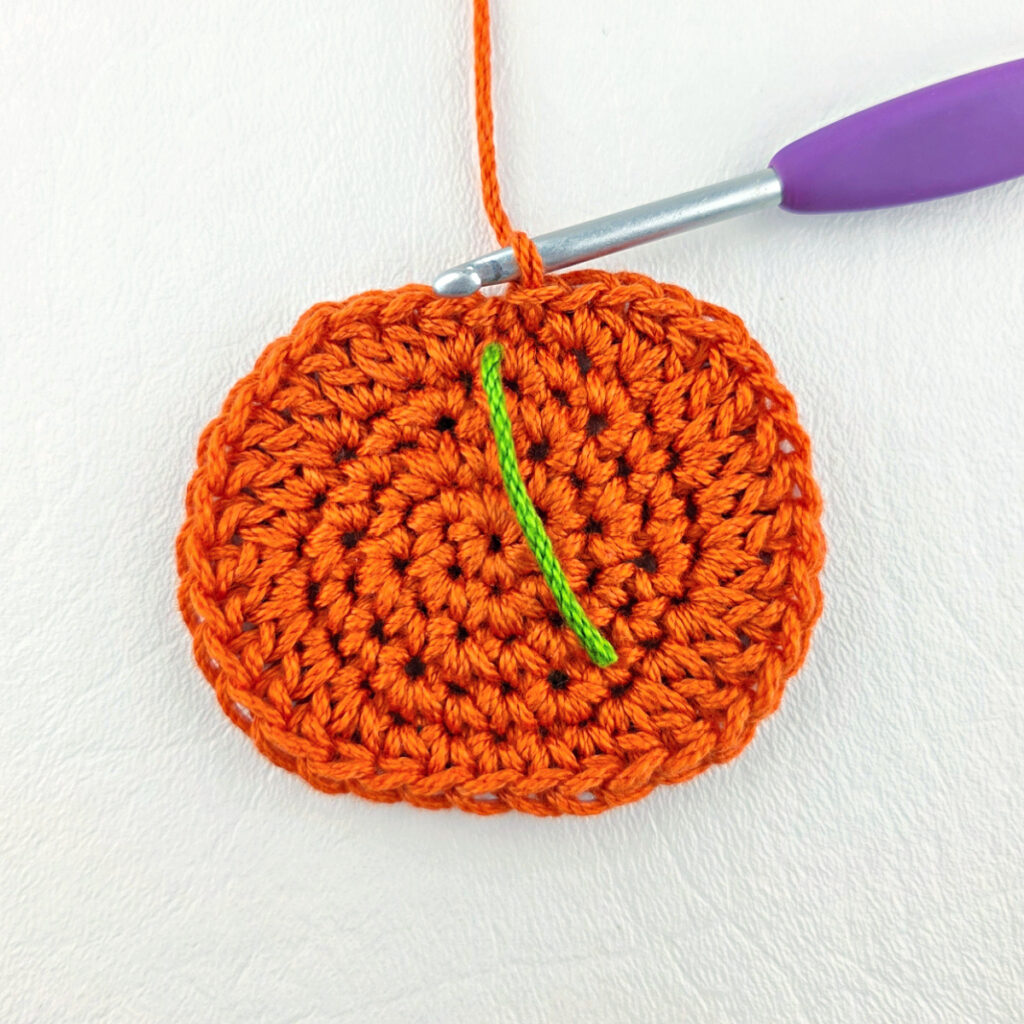
Adding Pumpkin Details
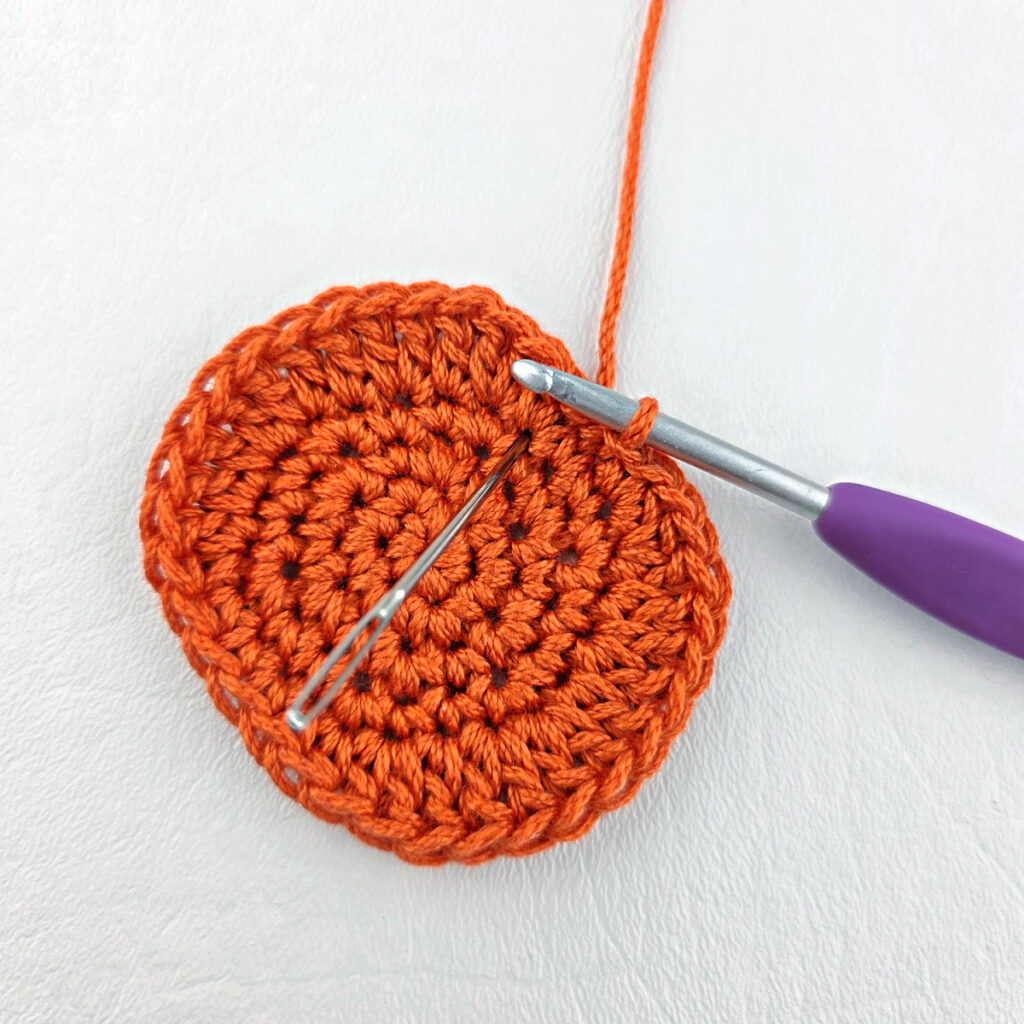
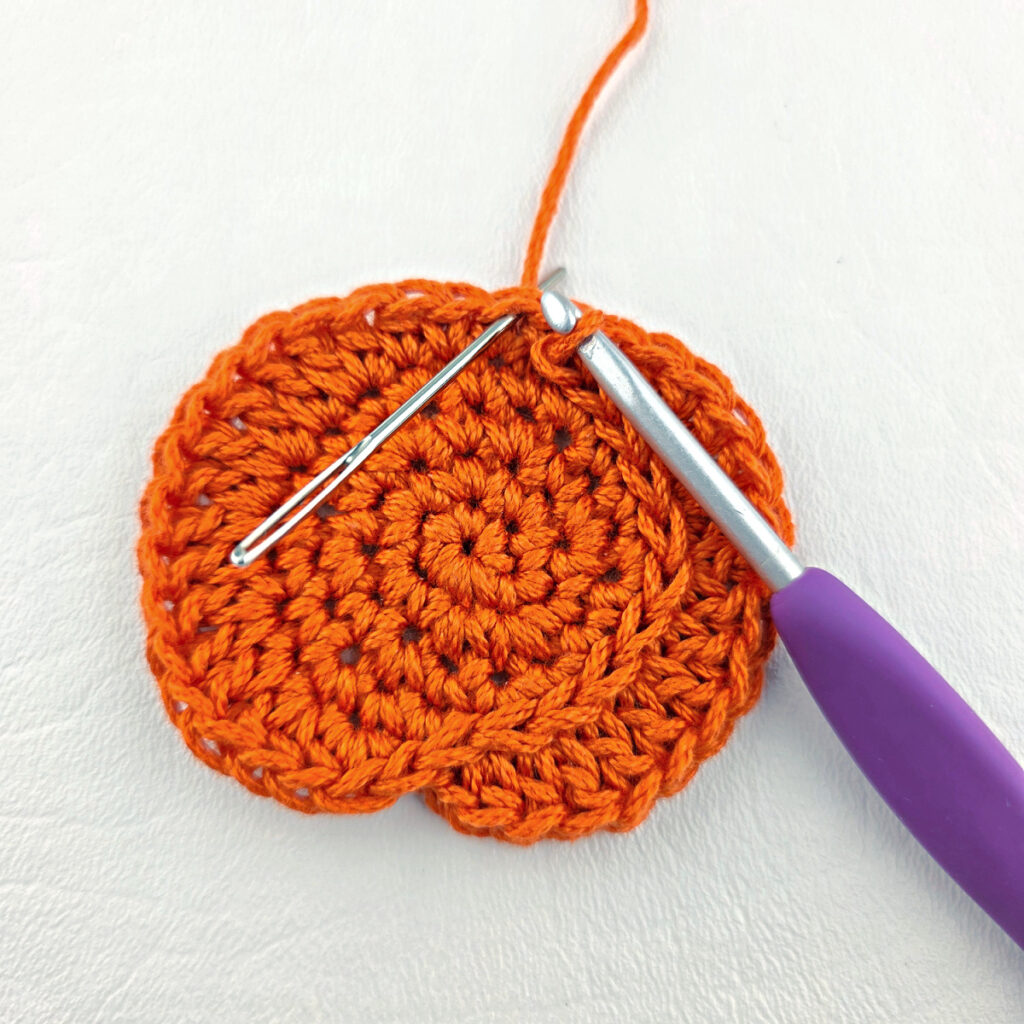
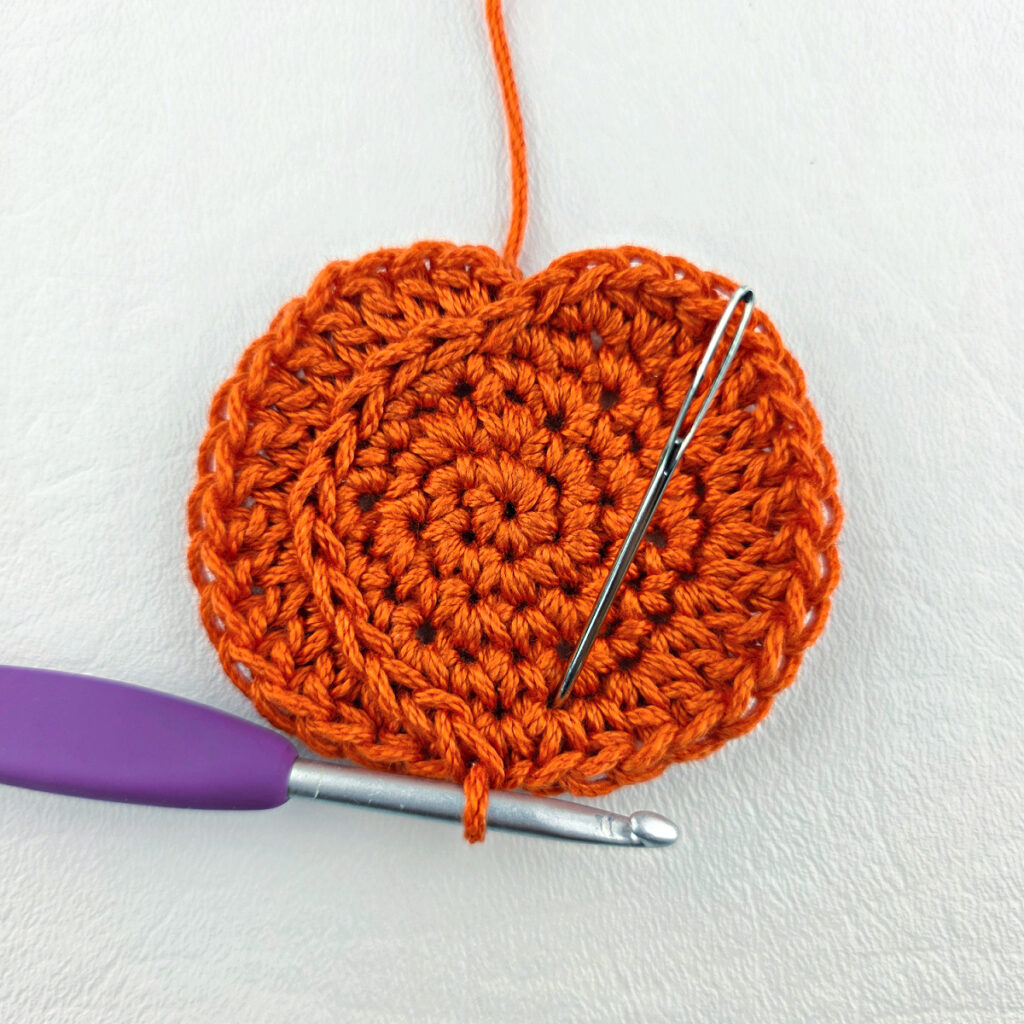
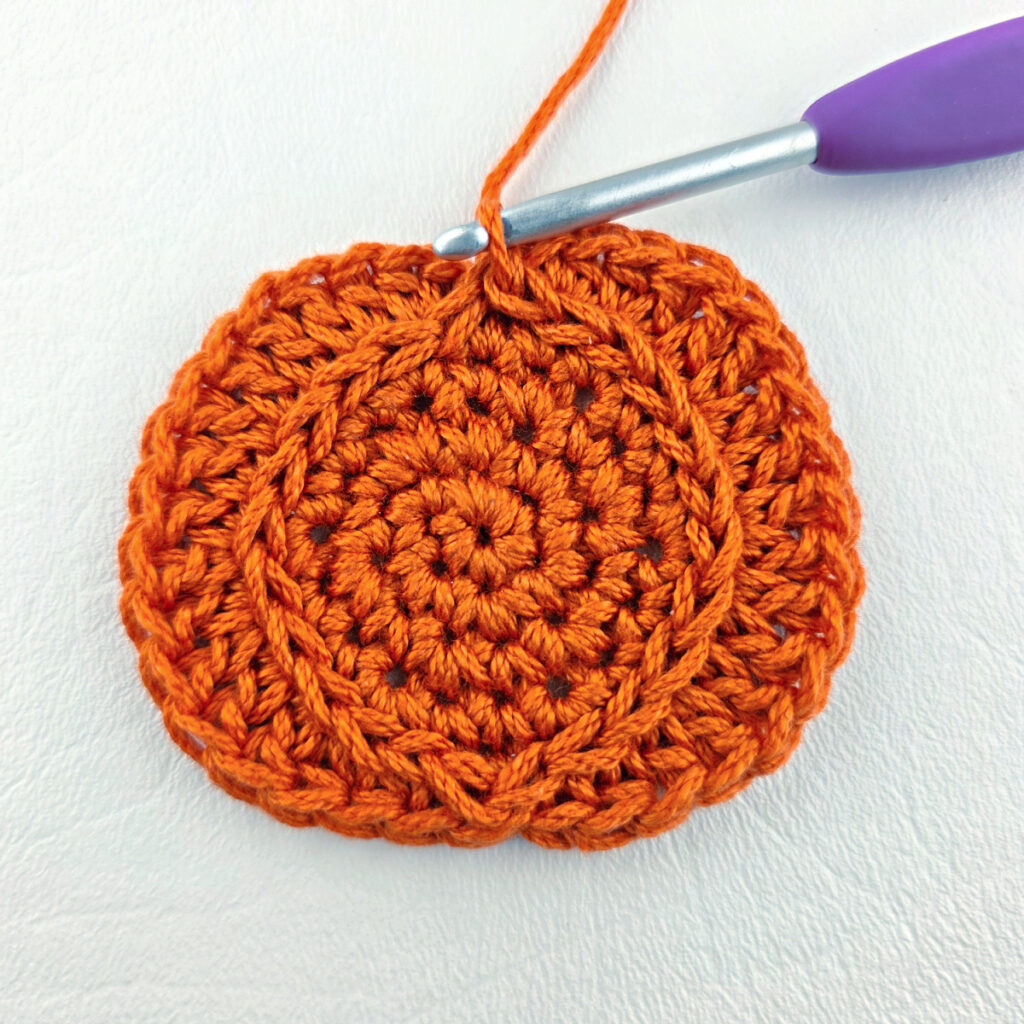
In this section, you’ll use slip stitches to add surface crochet details to the pumpkin applique. These slip stitches are worked into stitches from round 4 of the crochet pumpkin.
Slip stitch into each of the next 11 sts from Rnd 4, slip stitch into the next sc from Rnd 5 (this is the middle of the 3 sc at the bottom of the pumpkin), skip the next st from Rnd 4, then sl st in each of the next 10 sts from Rnd 4. Lastly, sl st into the same st as the last from Rnd 5.
Fasten off. Weave in ends. Continue on to Pumpkin Stem.
Pumpkin Stem
Row 1 (RS): With Brown yarn & a 4.00mm crochet hook, ch 5, working into the back hump of the ch, work 2 sc into the 2nd ch from your hook, 2 sc into the next ch, hdc in each of the last 2 chs. (6 sts)
Fasten off, leaving a tail long enough to attach the stem to the top of the pumpkin. With a yarn needle and tail of yarn, attach the pumpkin stem to the top of the pumpkin (where you fastened off for the pumpkin itself).
Weave in ends. Continue on to Pumpkin Leaf.
Pumpkin Leaf
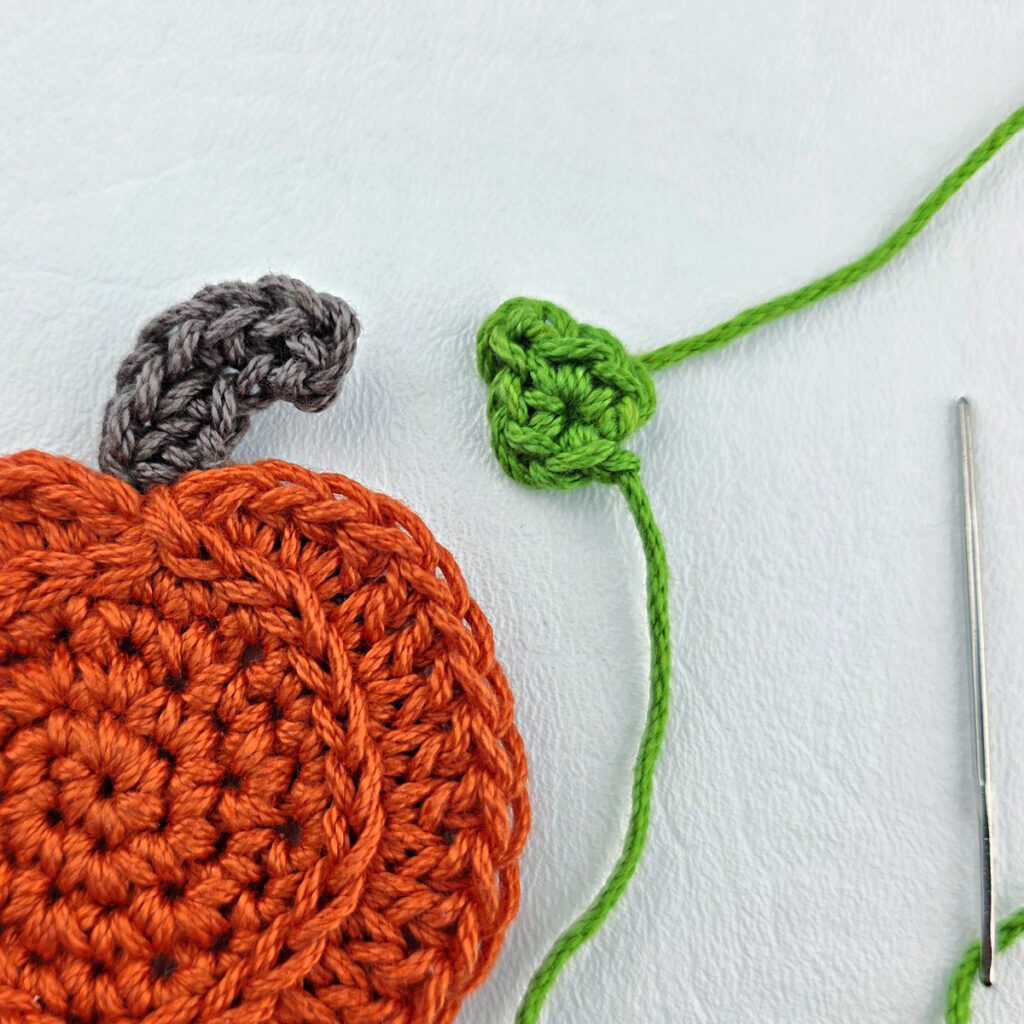
Row 1 (RS): With Green yarn & a 4.00mm crochet hook, ch 2, work all of the following into the 2nd ch from your hook, (2 sc, ch 2, sl st into the 2nd ch from your hook, 2 sc) and then end with a sl st to the very first ch. One leaf created.
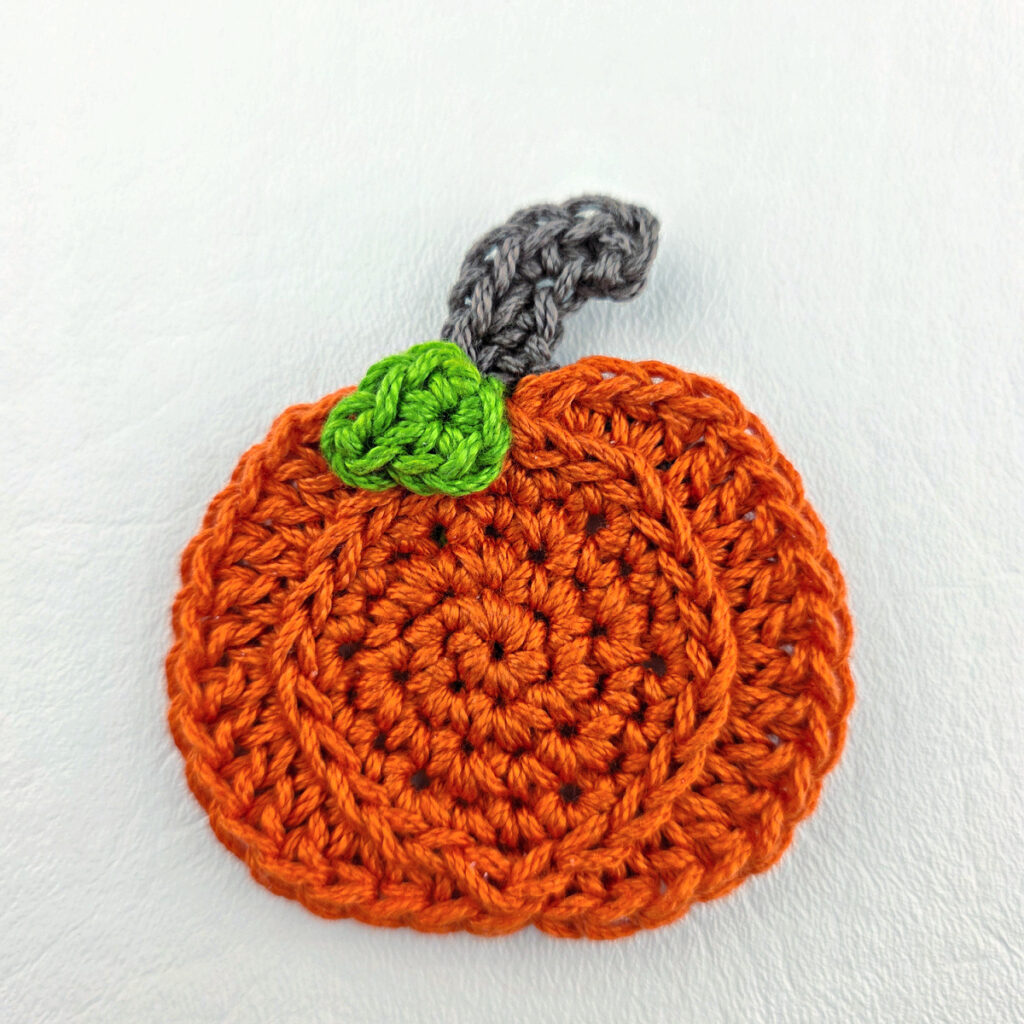
Fasten off, leaving a tail long enough to attach the leaf to the top of the pumpkin. With a yarn needle and tail of yarn, attach the pumpkin leaf to the top of the pumpkin, as shown in the photos. Weave in ends. Continue on to Pumpkin Tendril.
Pumpkin Tendril
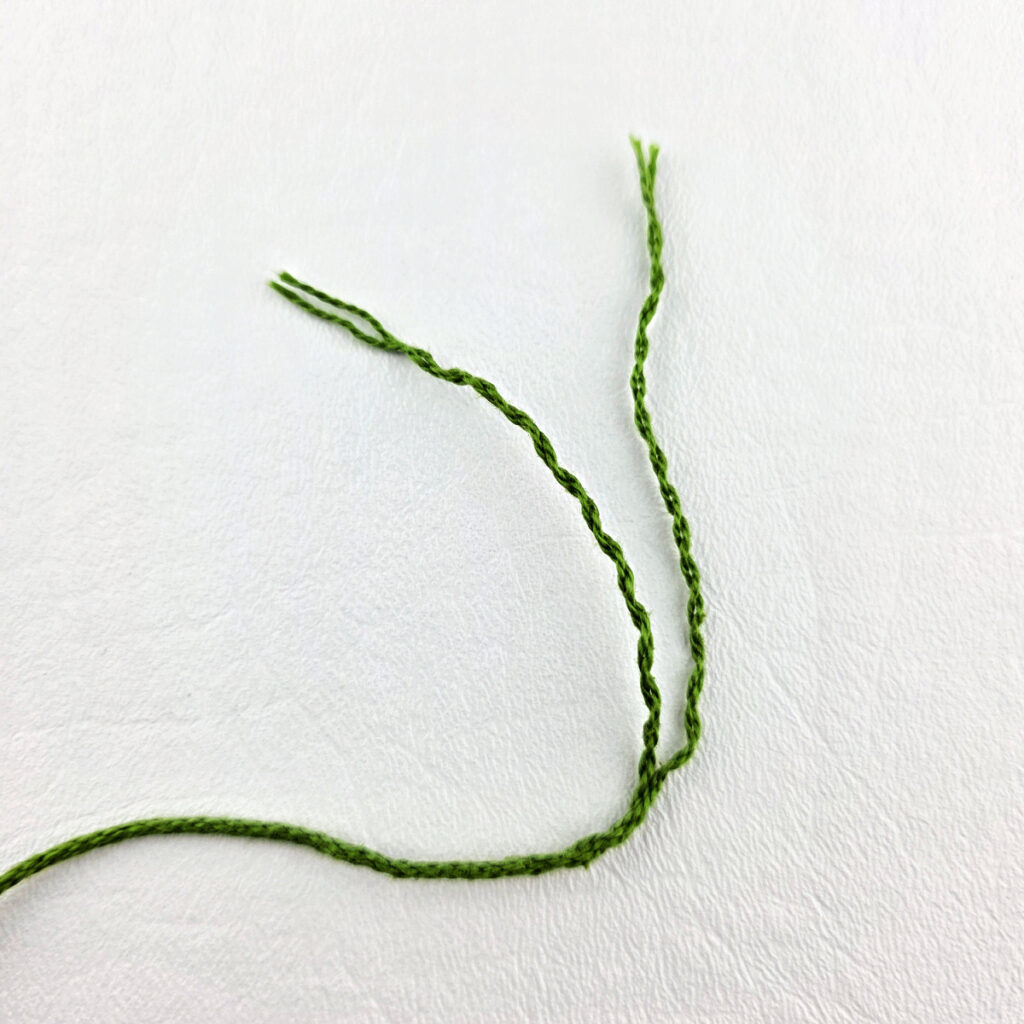
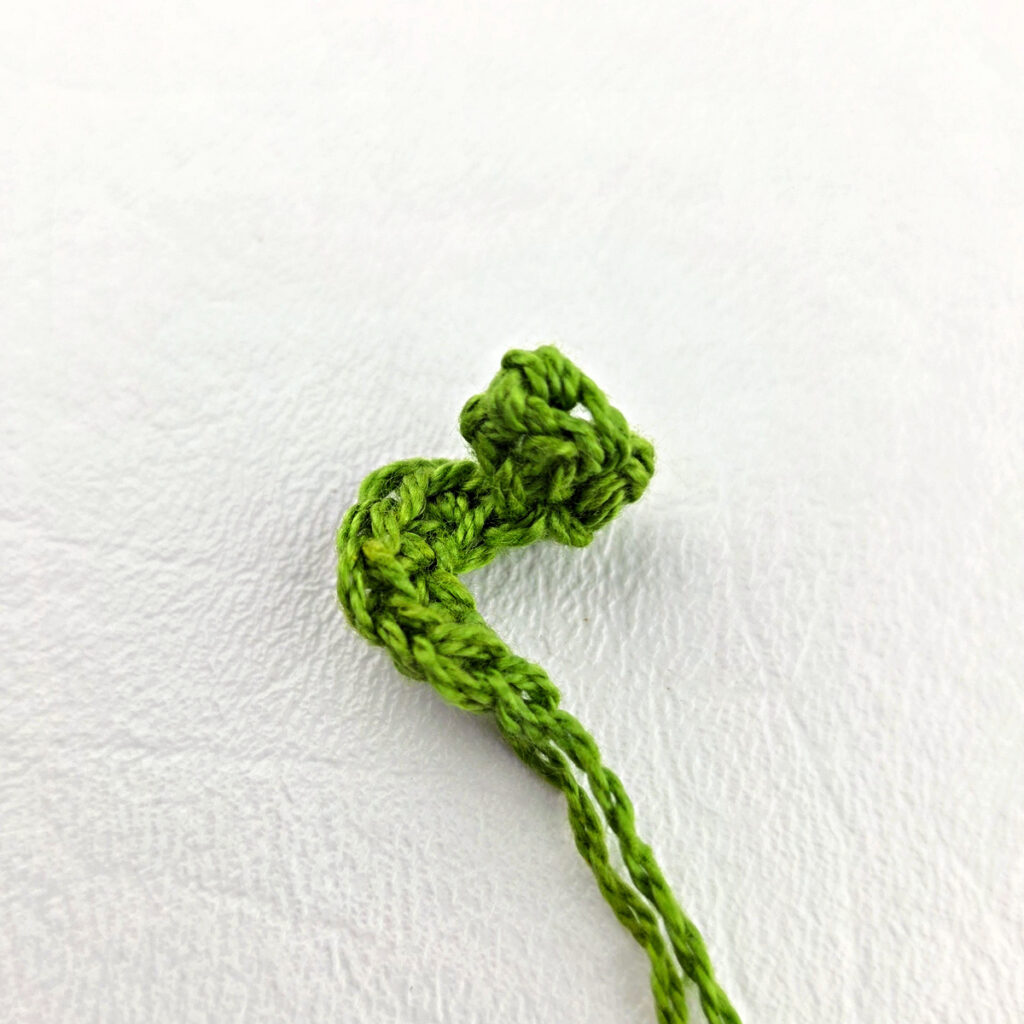
I did not have green embroidery thread so I pulled apart the plies of 1 yard long piece of my worsted weight green yarn. I used 2 of those plies to make my tendril.
Row 1 (RS): Using a 2.75mm crochet hook & either green embroidery floss or 2 plies of green yarn, ch 7, working into the back humps of the foundation ch, work 2 sc into the 2nd ch from your hook and into each ch across. (12 sts)
Fasten off. With a yarn needle and tail of yarn, attach the pumpkin tendril to the top of the pumpkin, as shown in the photos. Weave in ends. Repeat to make as many pumpkins as you’d like for your fall garland. Continue on to the Acorn Applique.
Acorn Applique
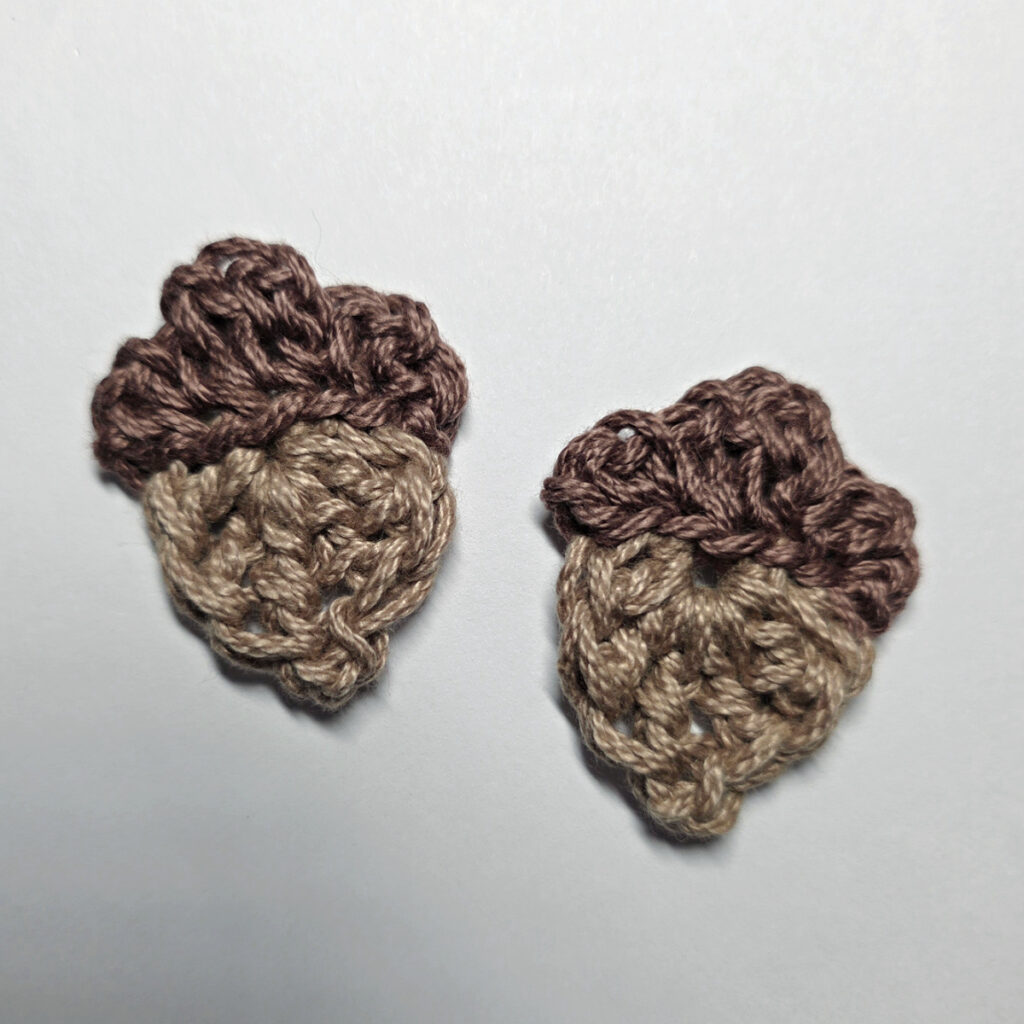
Finished Size: 1-1/4″ W x 1-1/2″ H (at widest points)
Bottom of Acorn (RS): With Light Brown yarn & a 4.00mm crochet hook, ch 3, work all of the following into the 3rd ch from your hook (dc, 2 tr, ch 2, sl st into the 2nd ch, 2 tr, dc) . Switch colors to Dark Brown: When working the last dc, change to dark brown before completing the last pull through of the stitch.
Do not fasten off. Continue on to the Top of Acorn.
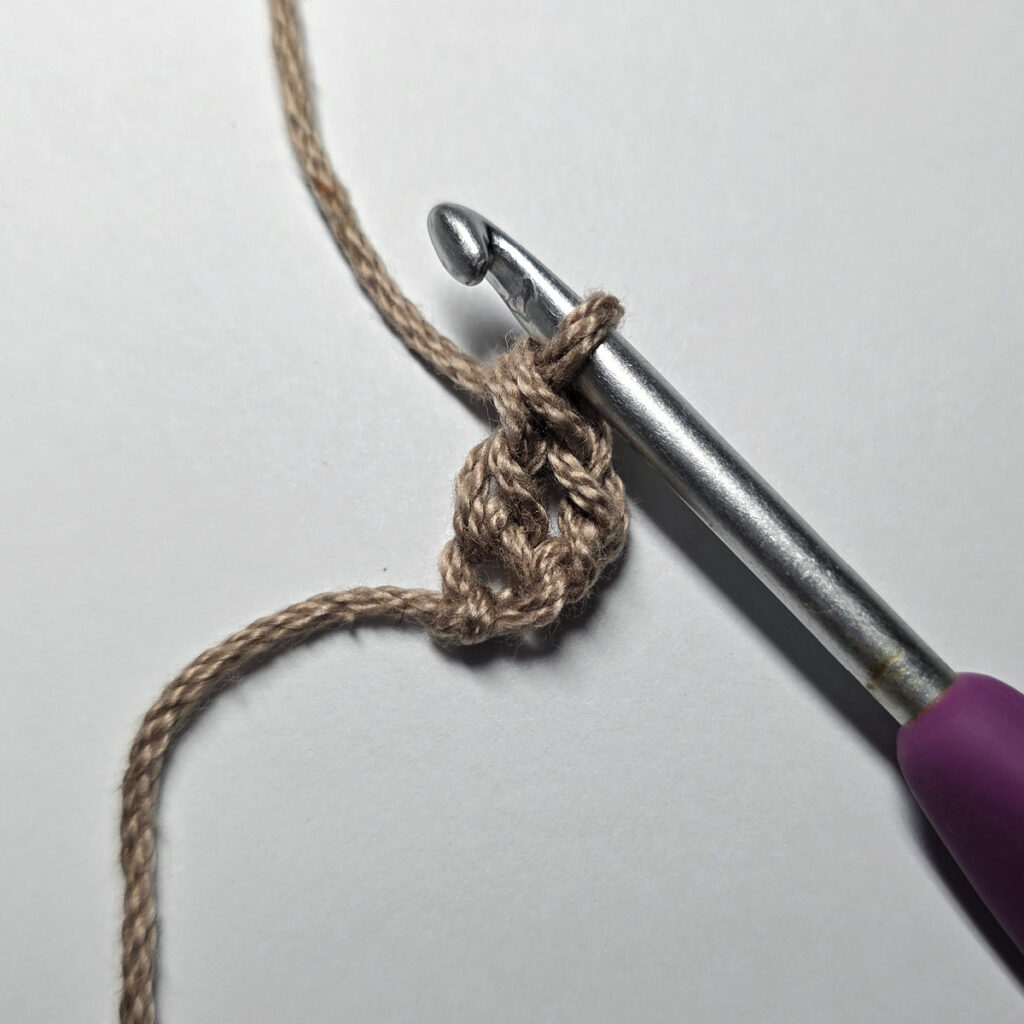
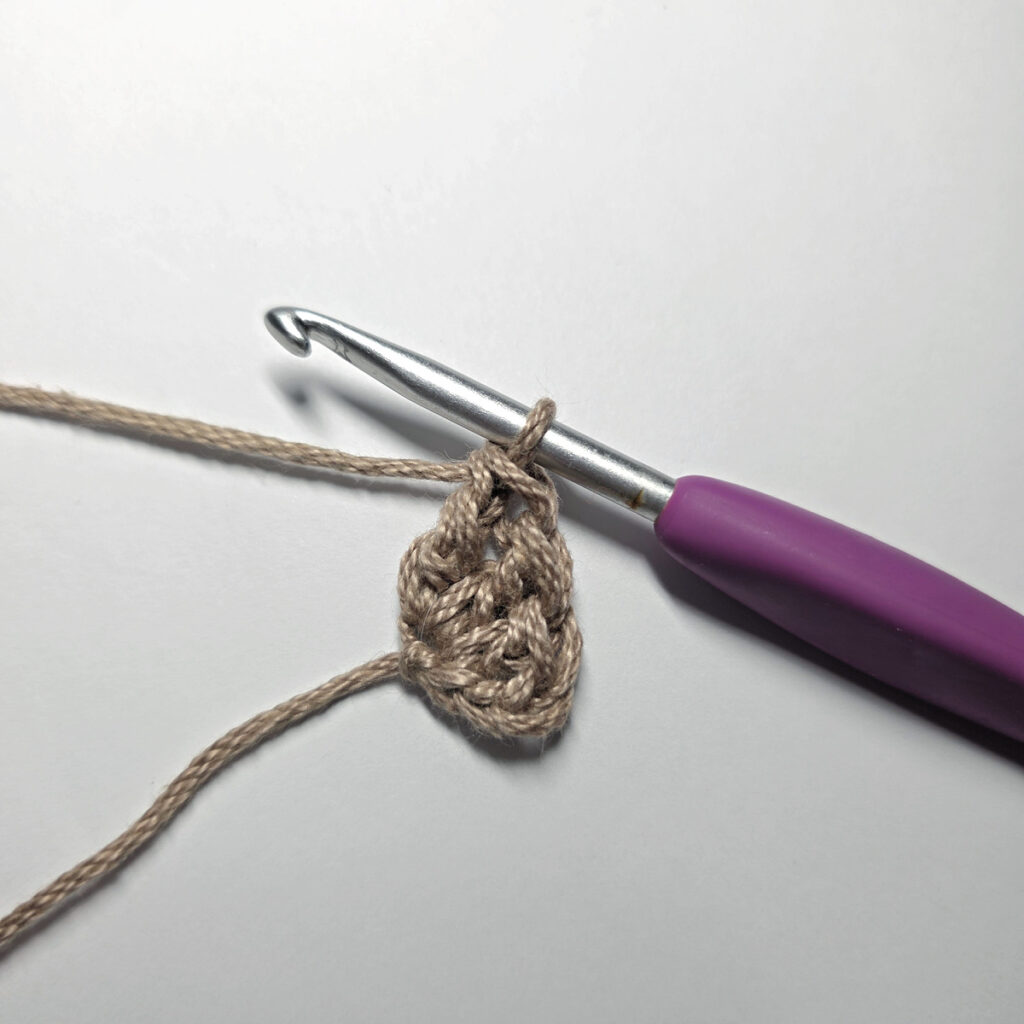
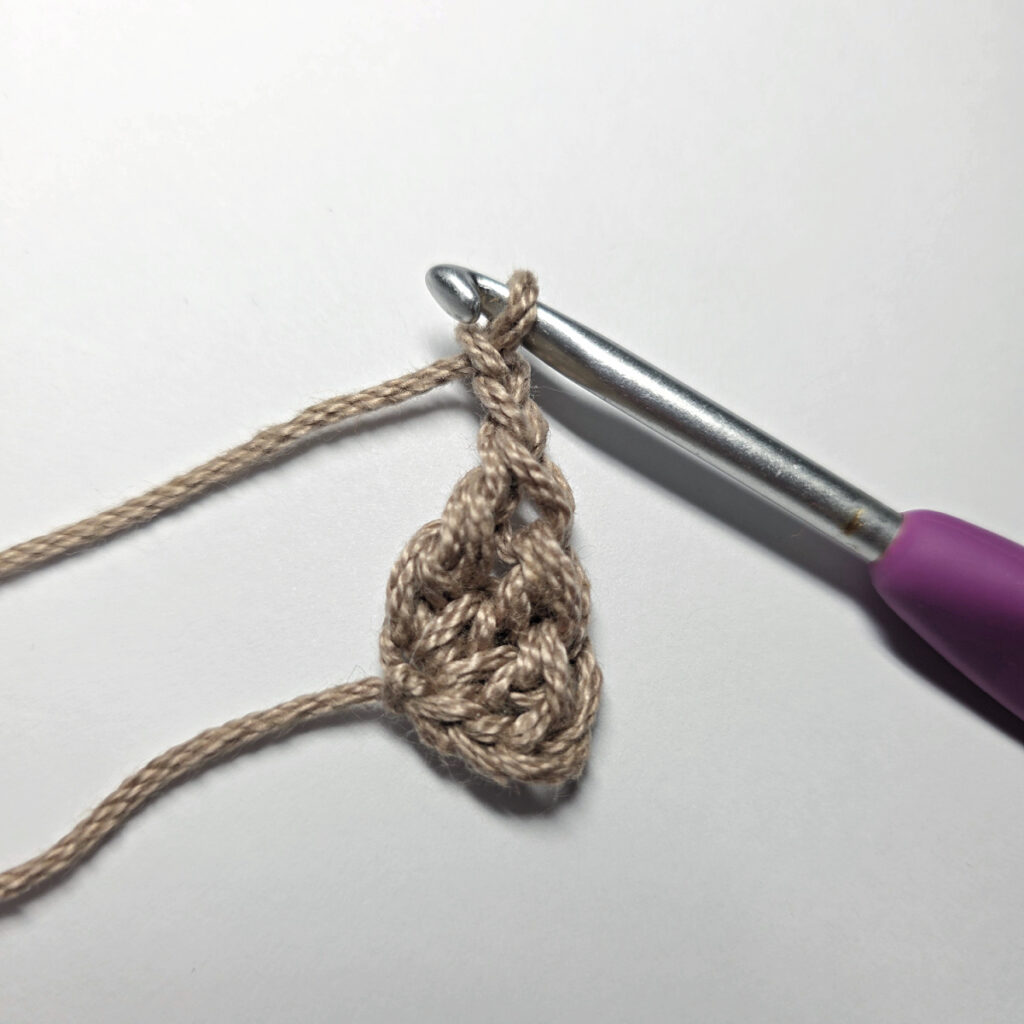
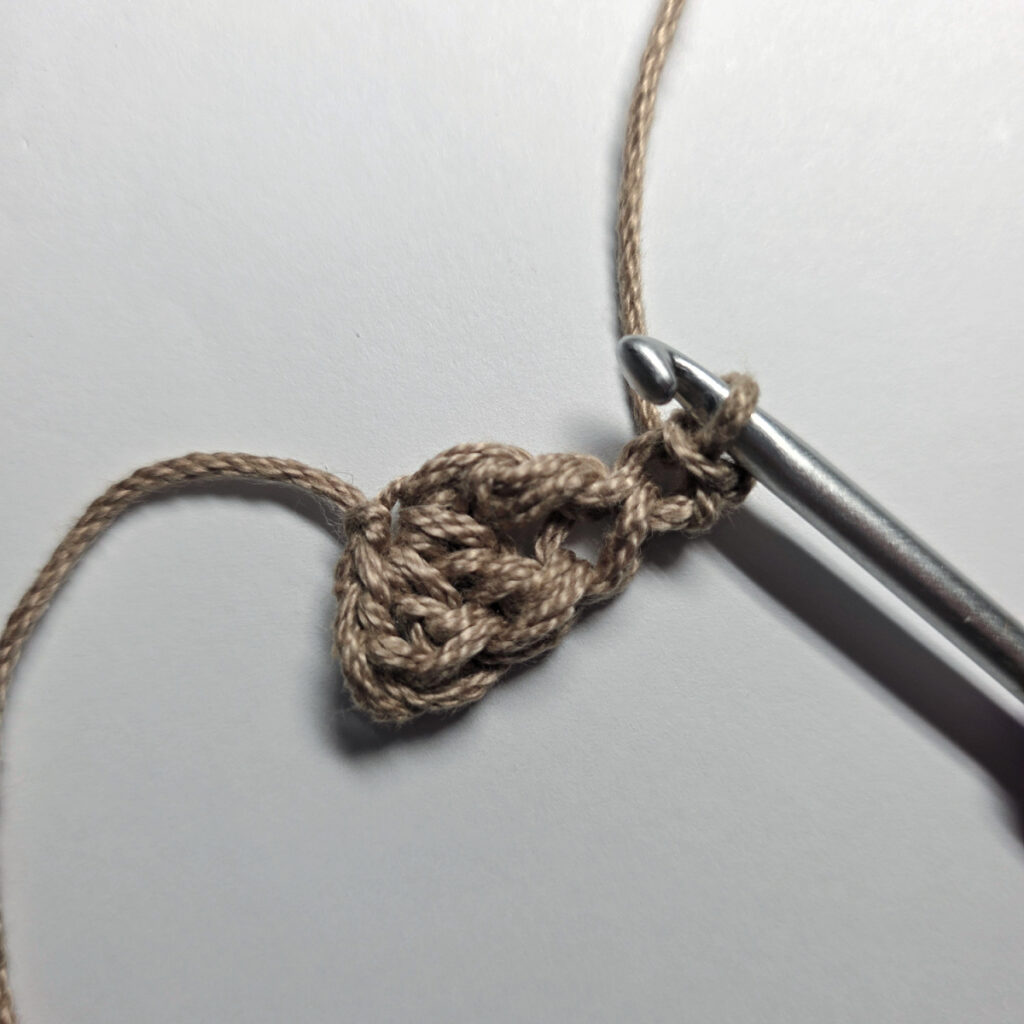
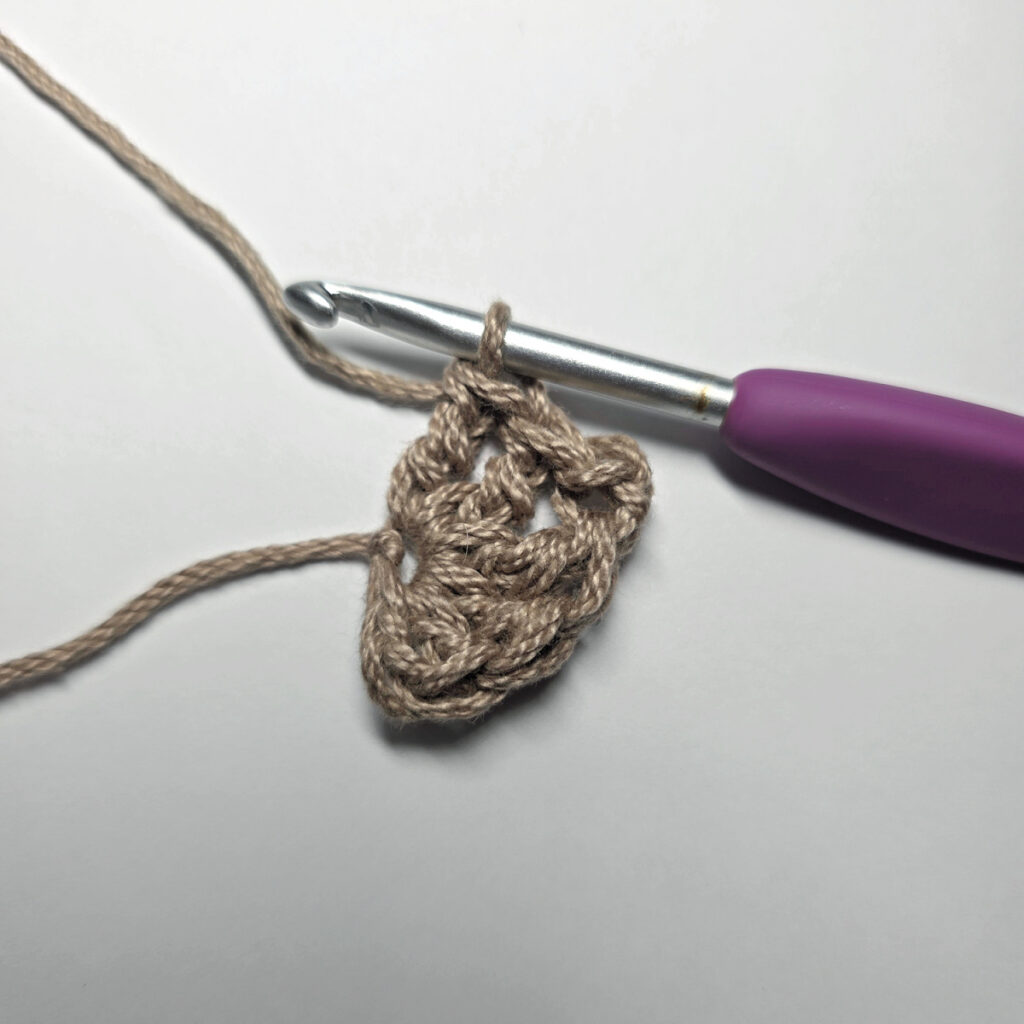
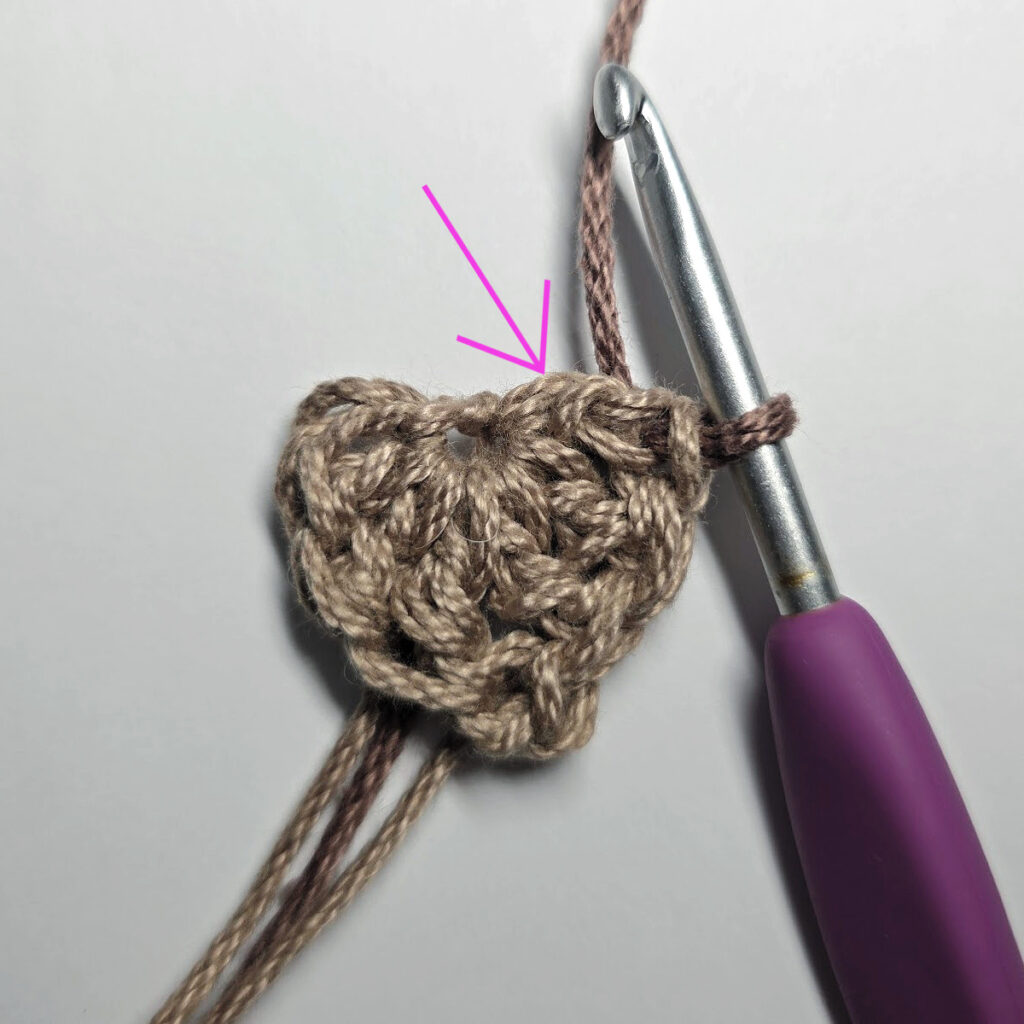
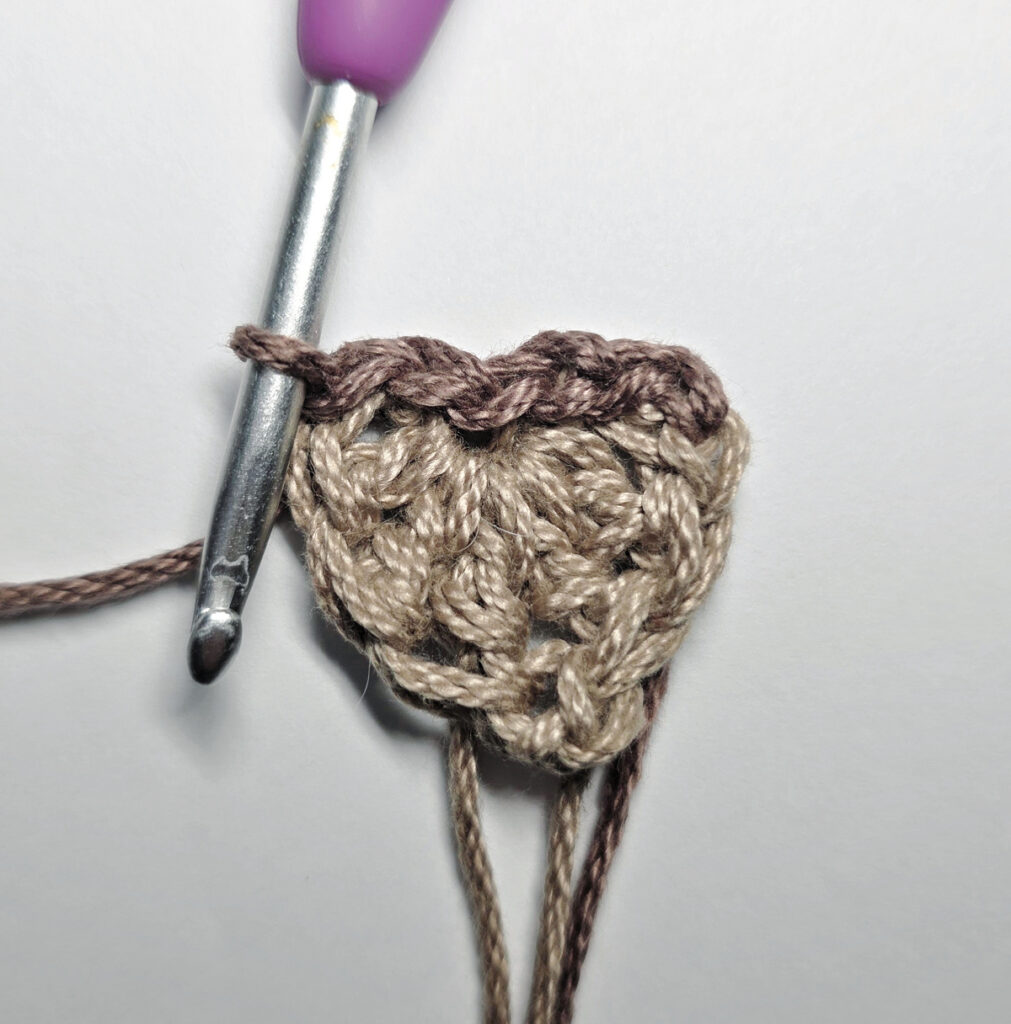
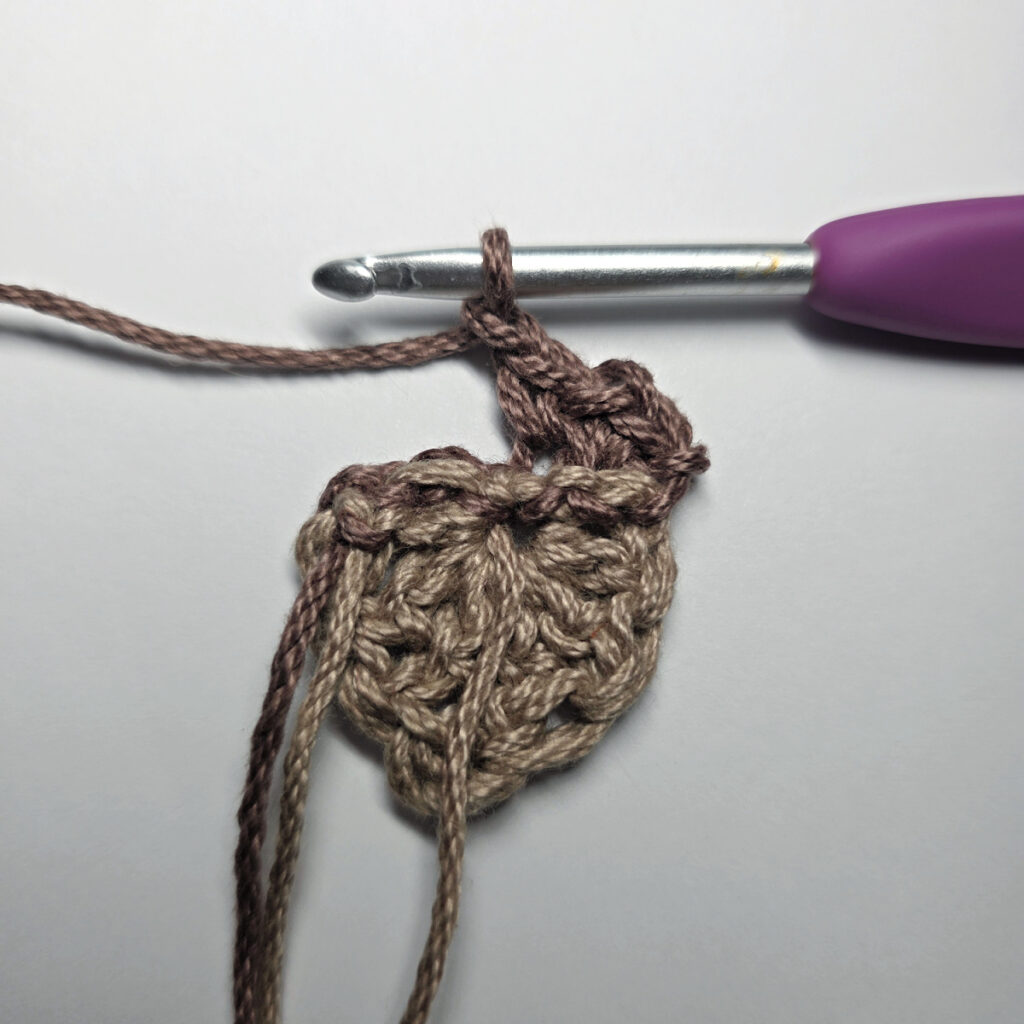
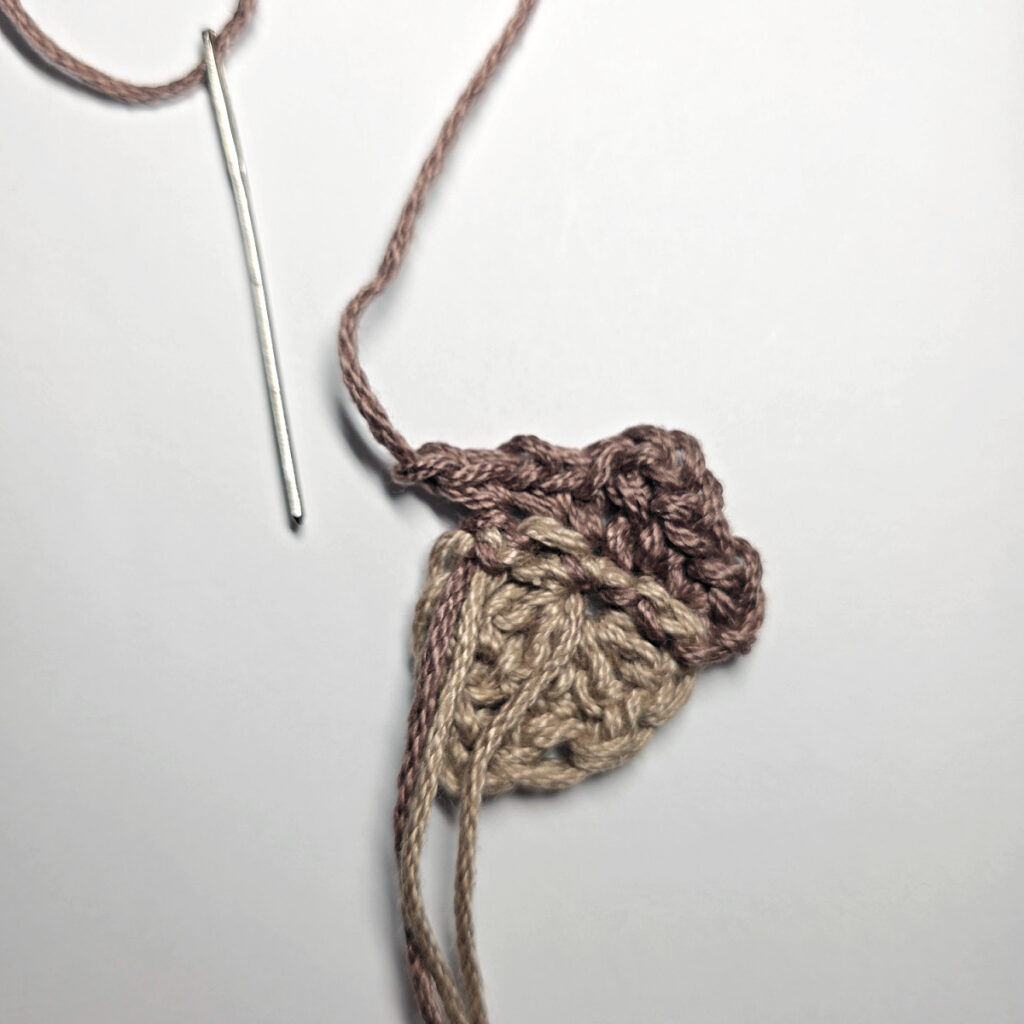
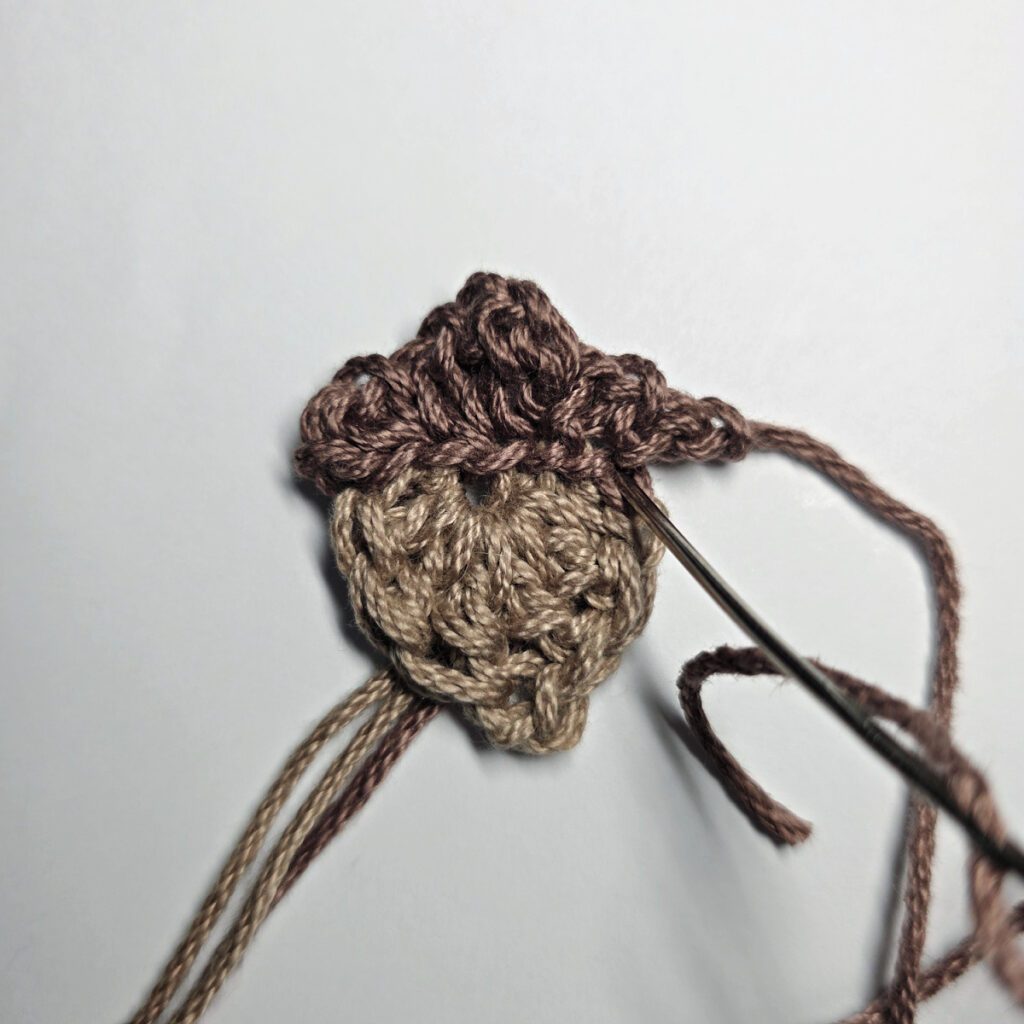
Top of Acorn: With Dark Brown yarn & a 4.00mm crochet hook, ch 1. Rotate to work across the flat edge (into the sides of the two dc’s, see pink arrow). Work 2 sl sts into the first dc, sl st into the beginning ch, work 2 sl sts into the next dc.
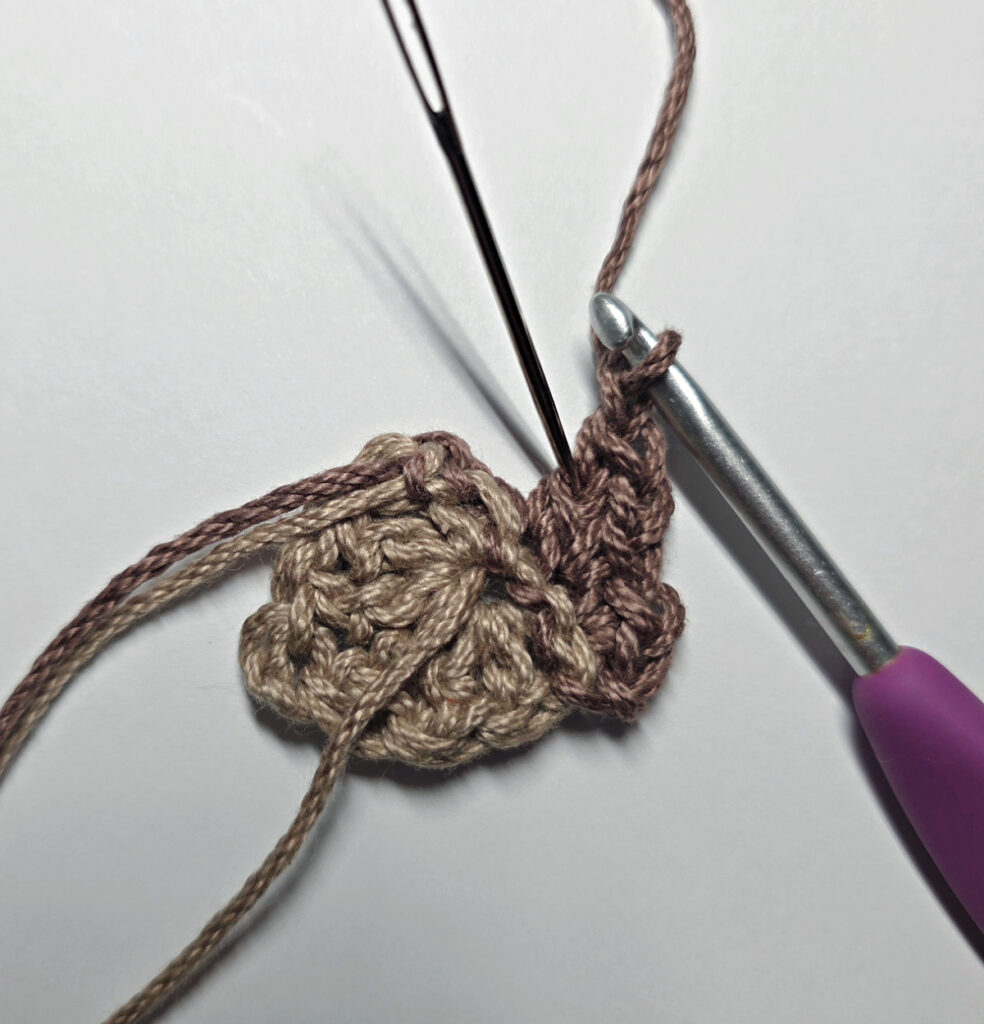
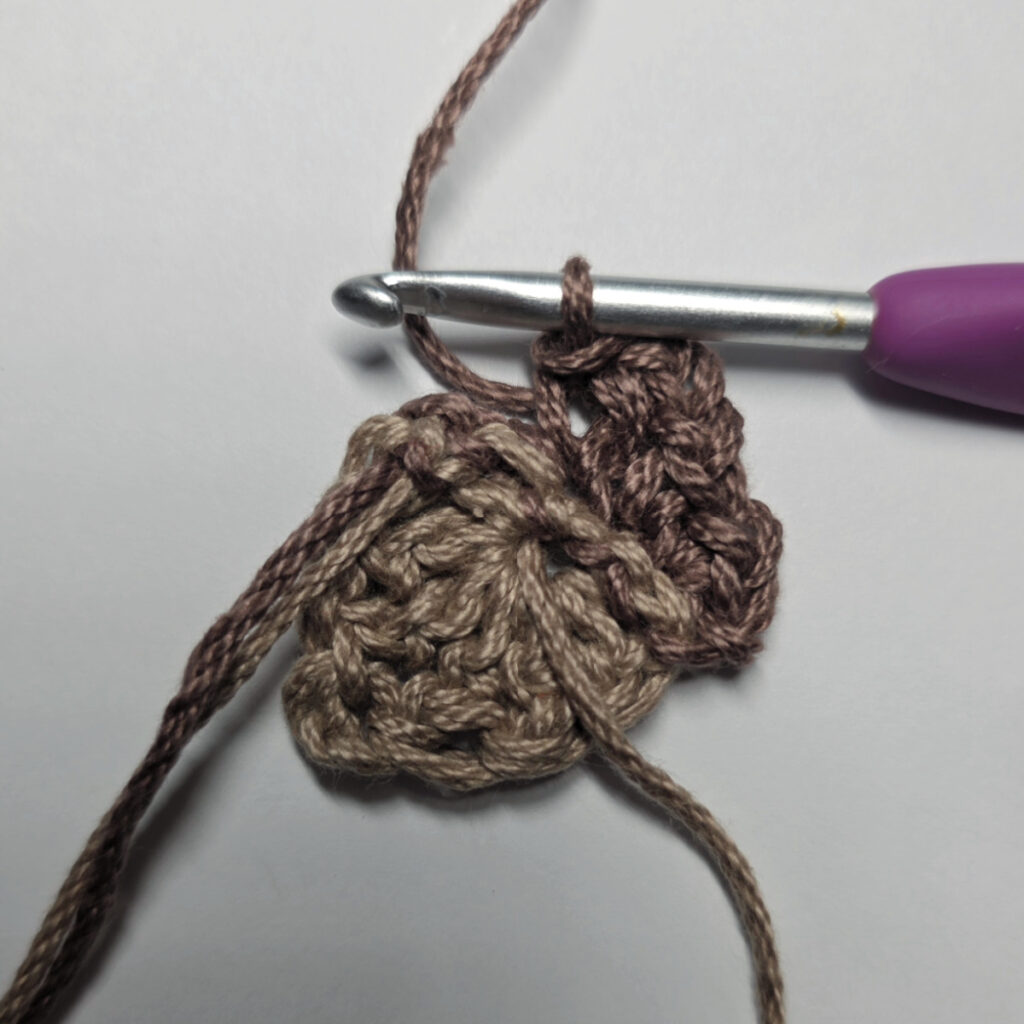
Ch 1, Turn to the WS, working into the FLO of the sl sts, sc in the first st, ch 1, sc in the next st, ch 1, dc in the next st, ch 1, sl st about halfway down and into the side of the dc just made, sc in the next st, ch 1, sc in the last st.
Fasten off. Turn to the RS. To finish the acorn, use a yarn needle and the tail of yarn left and weave the tail of yarn into the space shown in the photos below. Weave in dark brown ends. Leave light brown ends to attach acorn to leaf. Make as many acorns as you’d like for your fall garland.
Oak Leaf Applique
Finished Size: 1-5/8″ W x 3-7/8″ L (at widest points)
Rnd 1 (RS): With any color yarn & a 4.00mm crochet hook, ch 11, working into the back humps of the foundation ch, sc into the 2nd ch from your hook, sc in each of the next 3 chs, hdc in each of the next 5 chs, (hdc, 4 dc, hdc) in the last ch, rotate to work into the bottom of the foundation ch, hdc in each of the next 5 chs, sc in each of the next 4 chs. Do not join. (24 sts)
Tip: You may find it helpful to place a SM into the first single crochet of round 1 to make it easier to find after completing the stem.
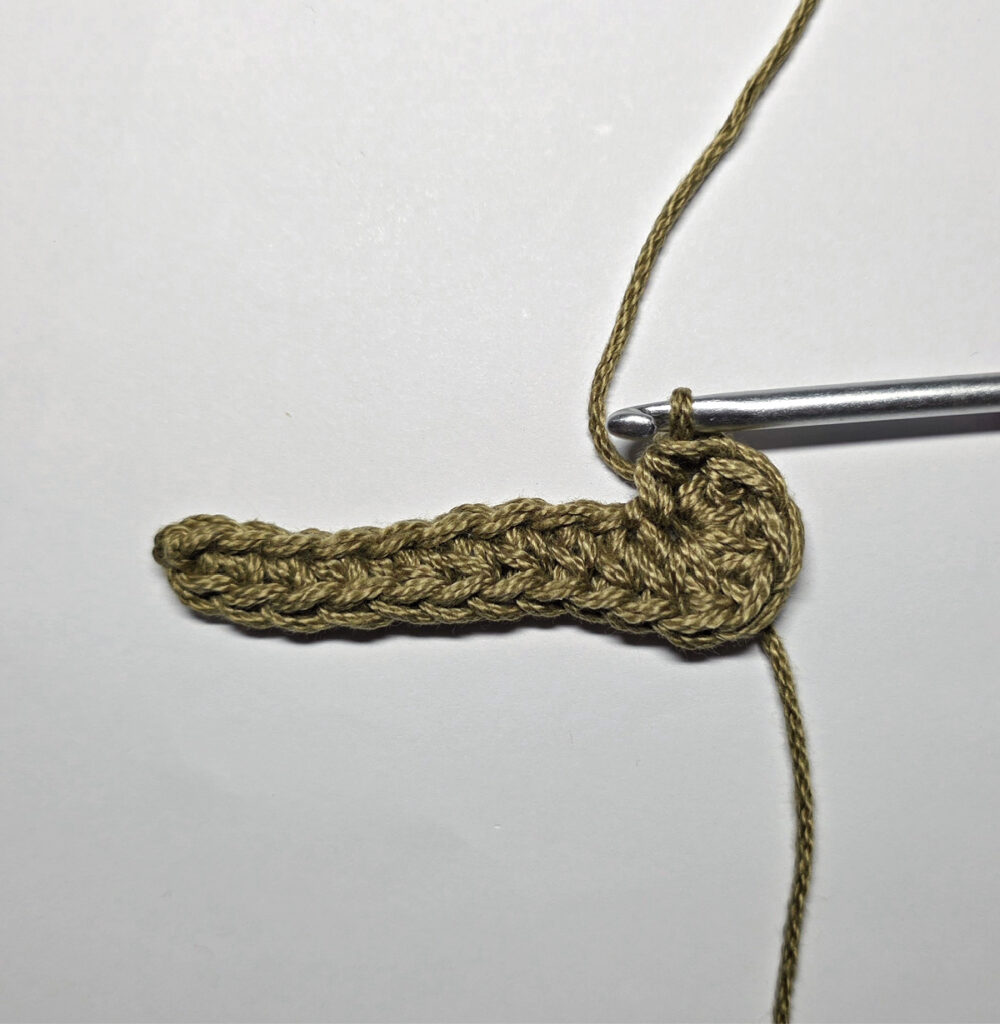
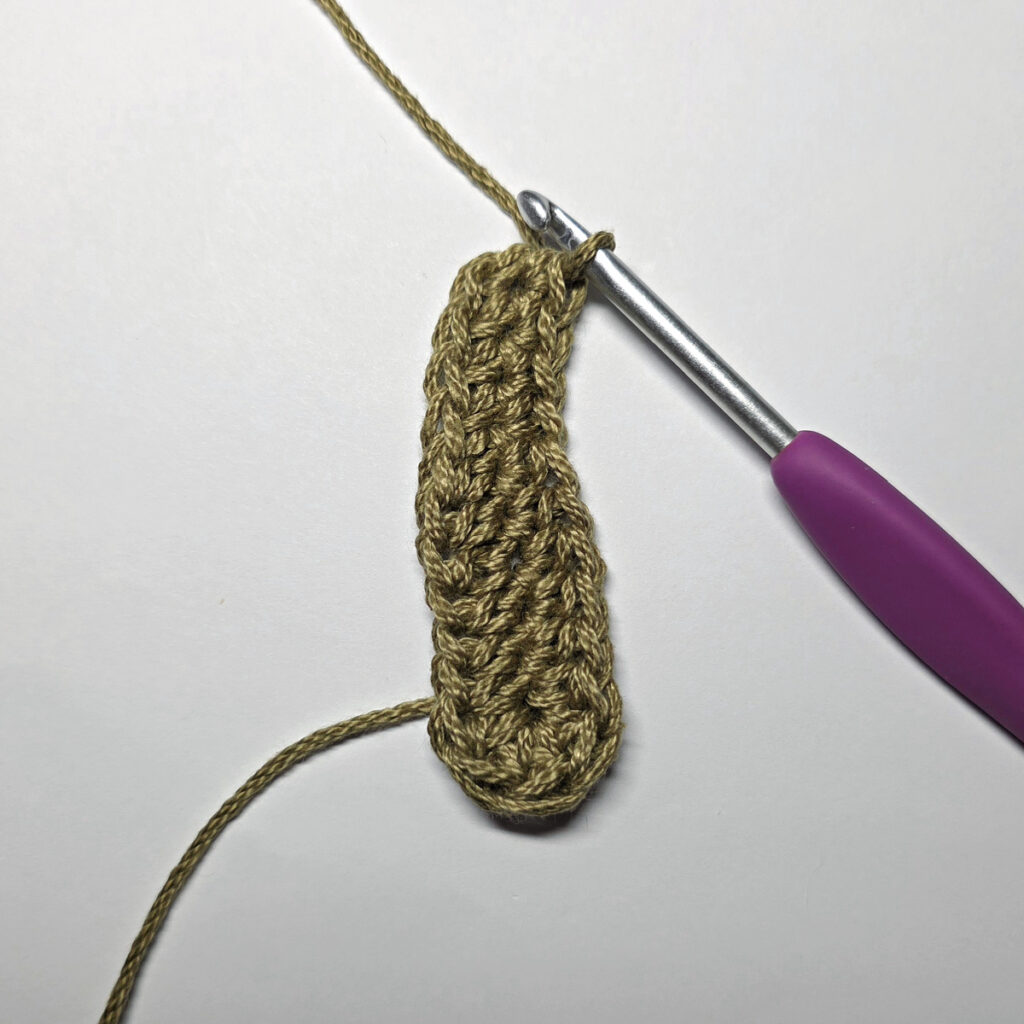
Next, Make Stem: Ch 5, sl st into the 2nd ch from your hook, sl st into each of the next 3 chs. Do not join. (4 sts)
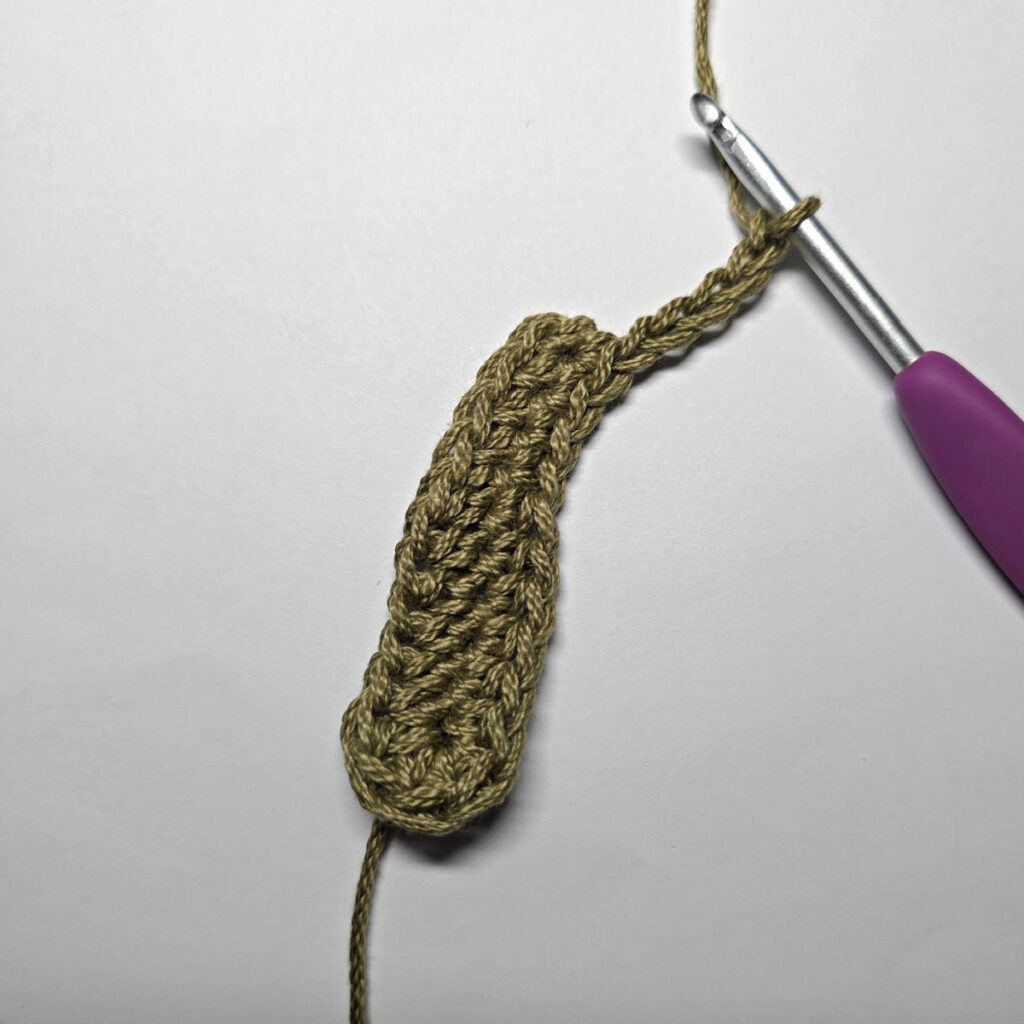
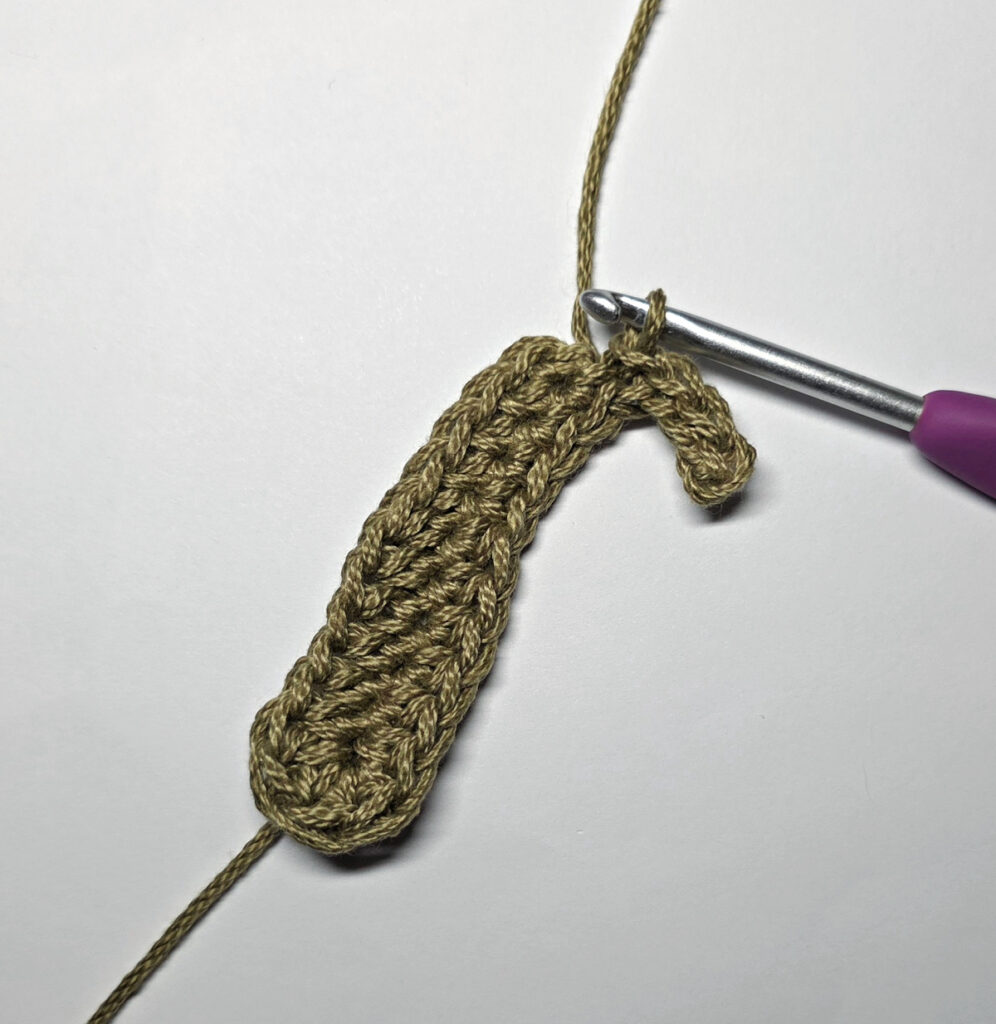
Rnd 2: Sc in the next st, 2 hdc in the next st, ch 1, sl st in the same st as hdc just worked, sl st in the next st, sc in next st, (hdc, 2 dc) in the next st, ch 2, sl st in the same st as the last dc worked, sl st in the next st, sc in the next st, hdc in the next st, 2 dc in the next st, ch 2, sl st in the same as as the dc just worked, sl st in next st, sc in the next st, (hdc, 2 dc) in the next st, (2 dc, hdc) in the next st, sc in the next st, sl st in each of the next 2 sts, ch 2, 2 dc in the same st as the last sl st worked, hdc in the next st, sc in the next st, sl st in each of the next 2 sts, ch 2, (2 dc, hdc) in the same st as the last sl st worked, sc in the next st, sl st in each of the next 2 sts, ch 1, 2 hdc in the same st as the last sl st worked, sc in the next st. Do not join. Weave in ends.
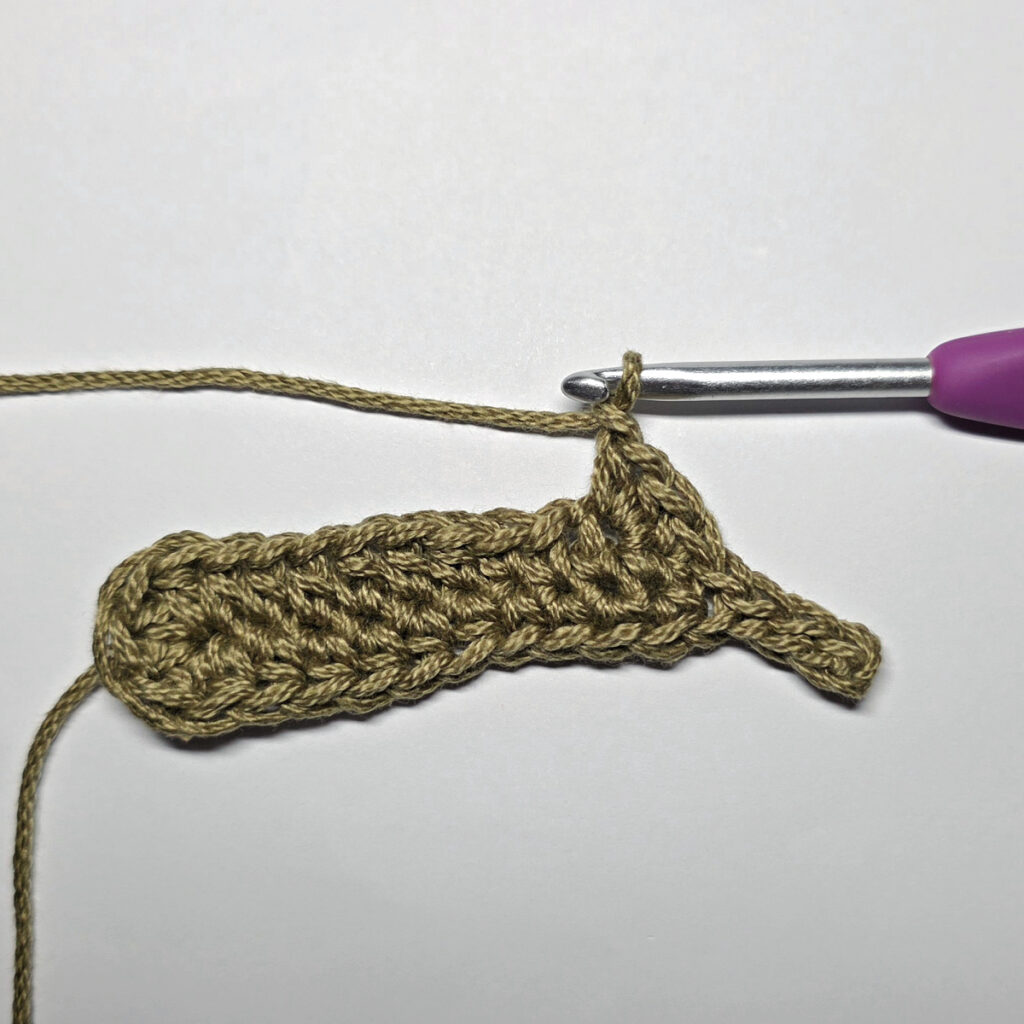
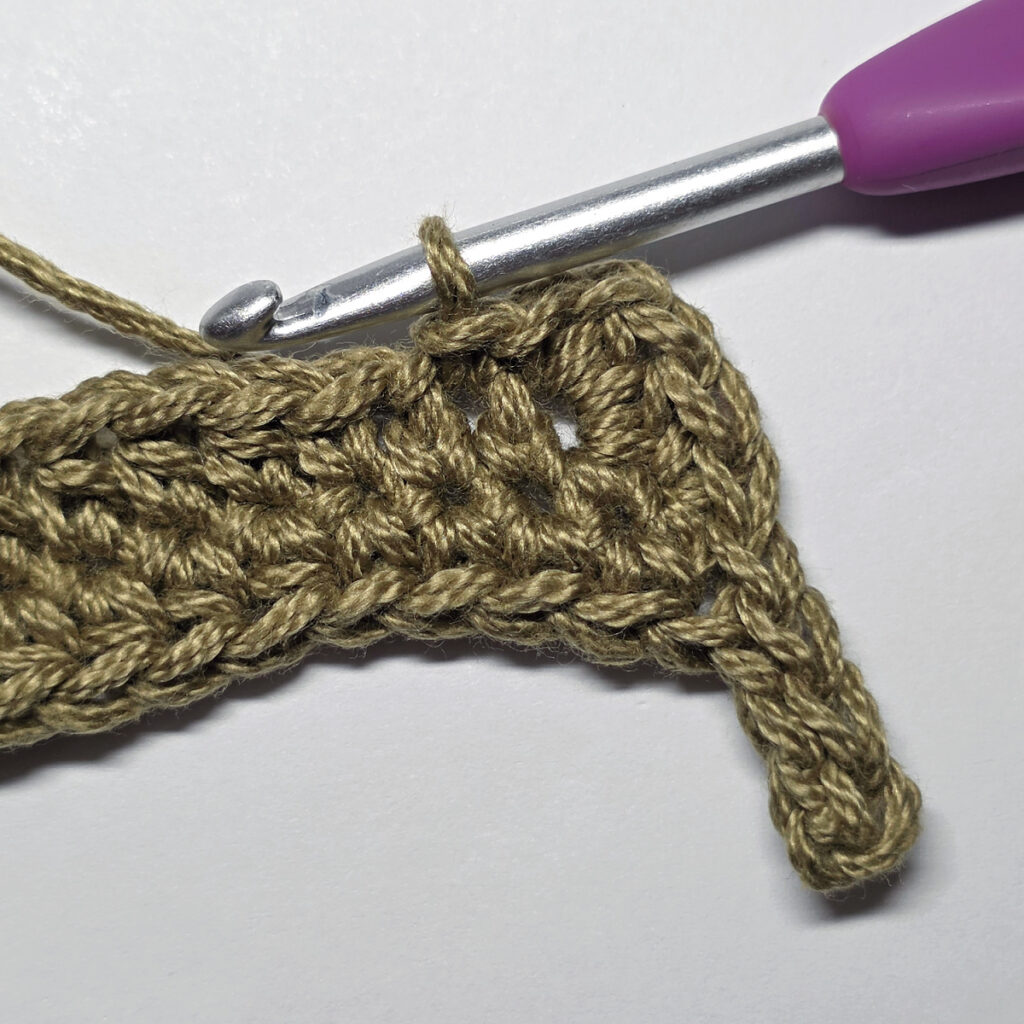
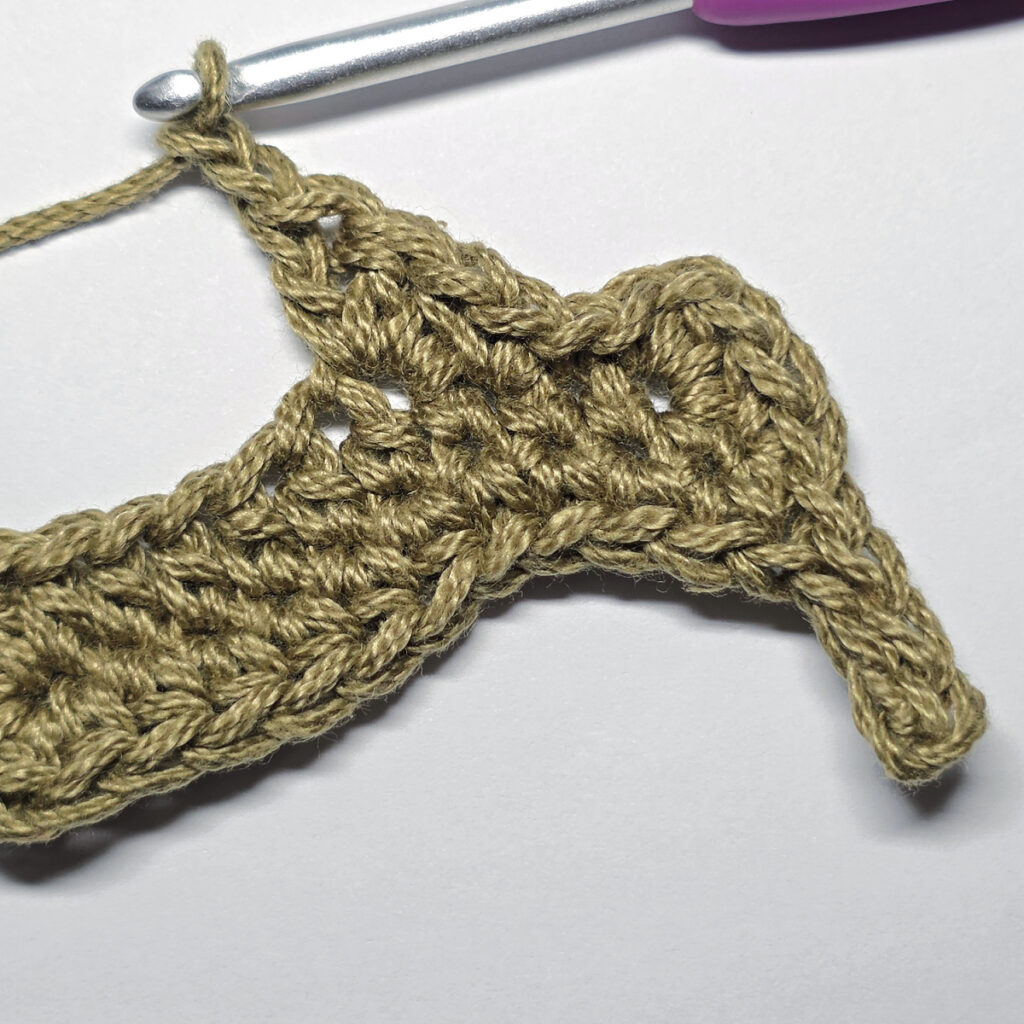
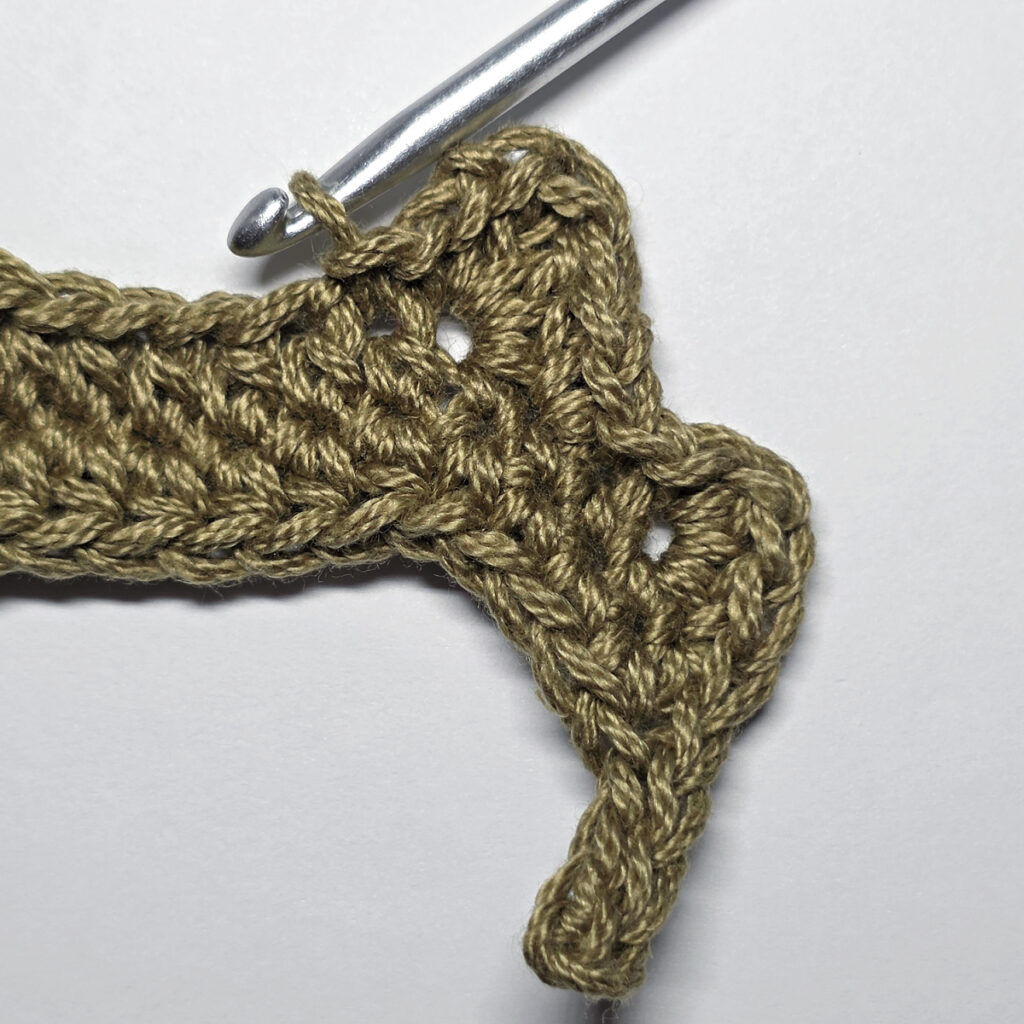
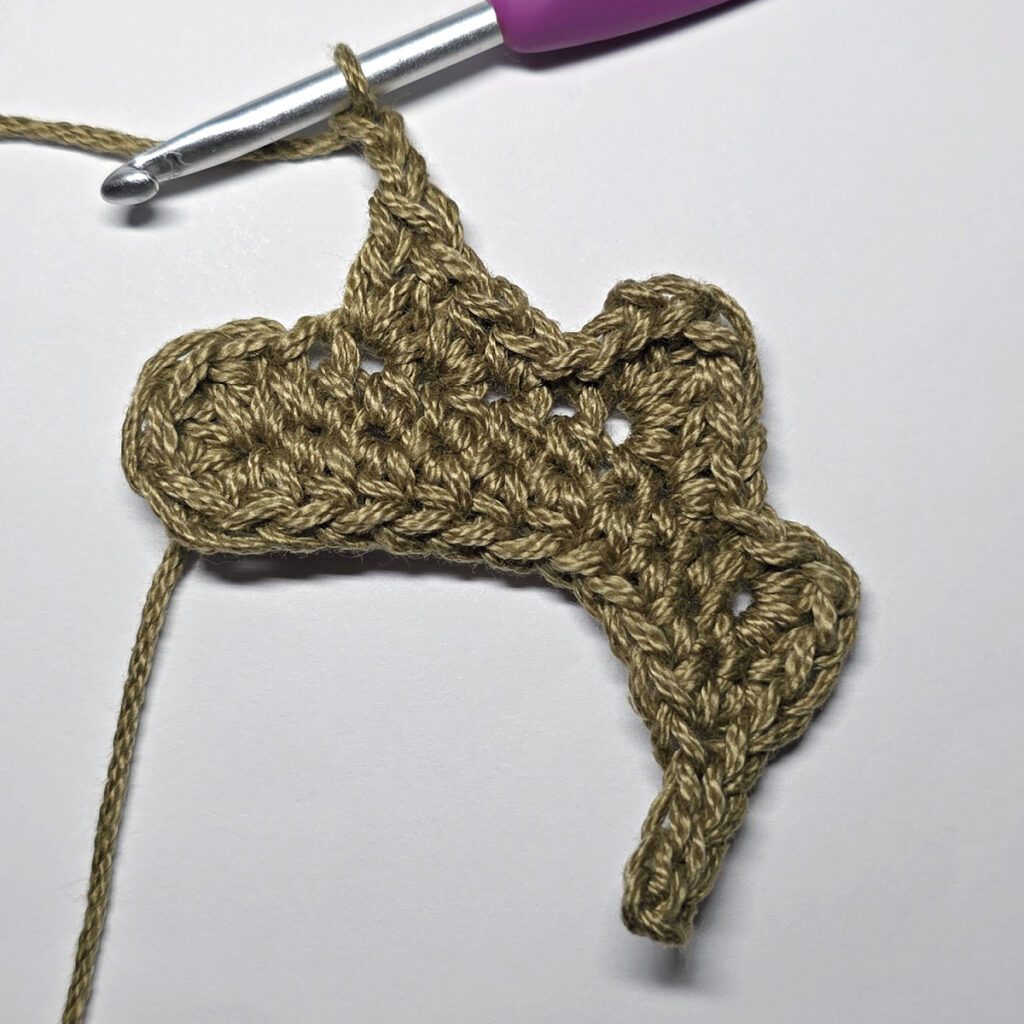
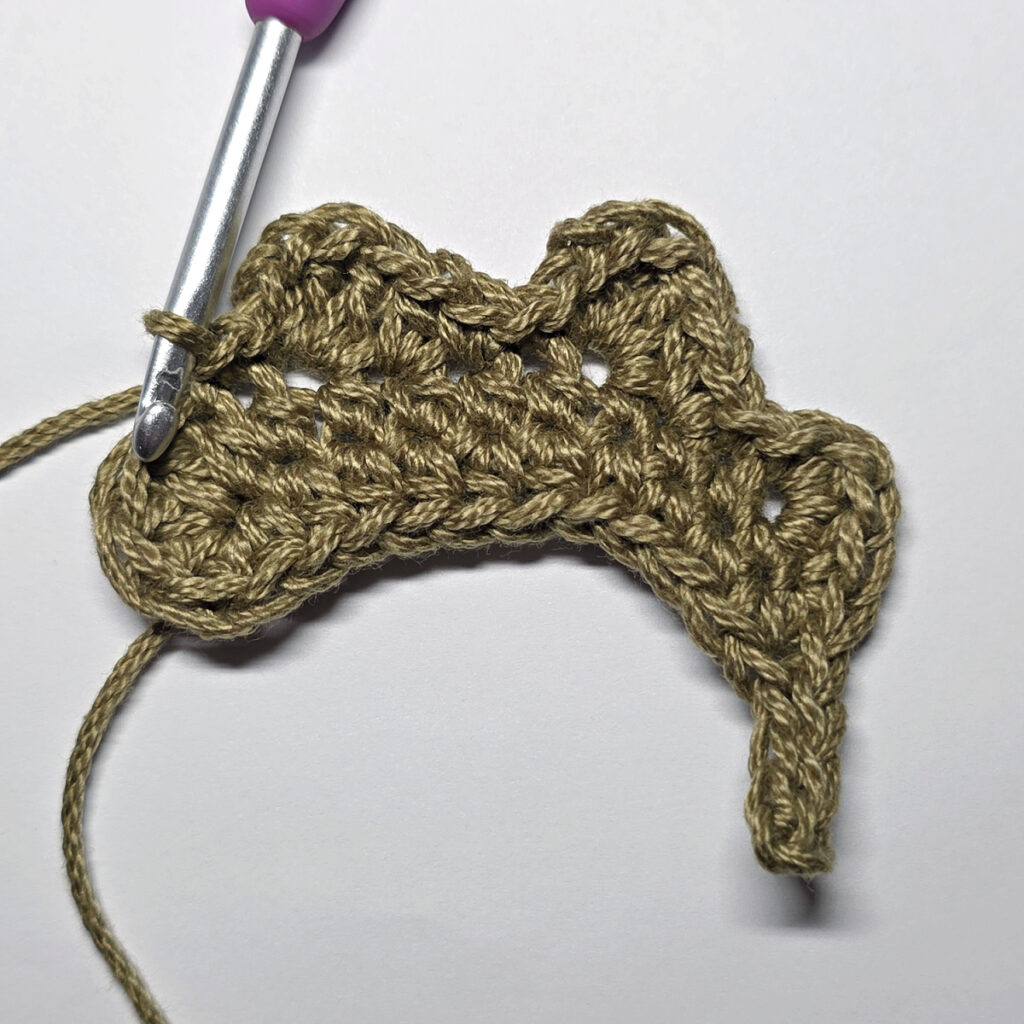
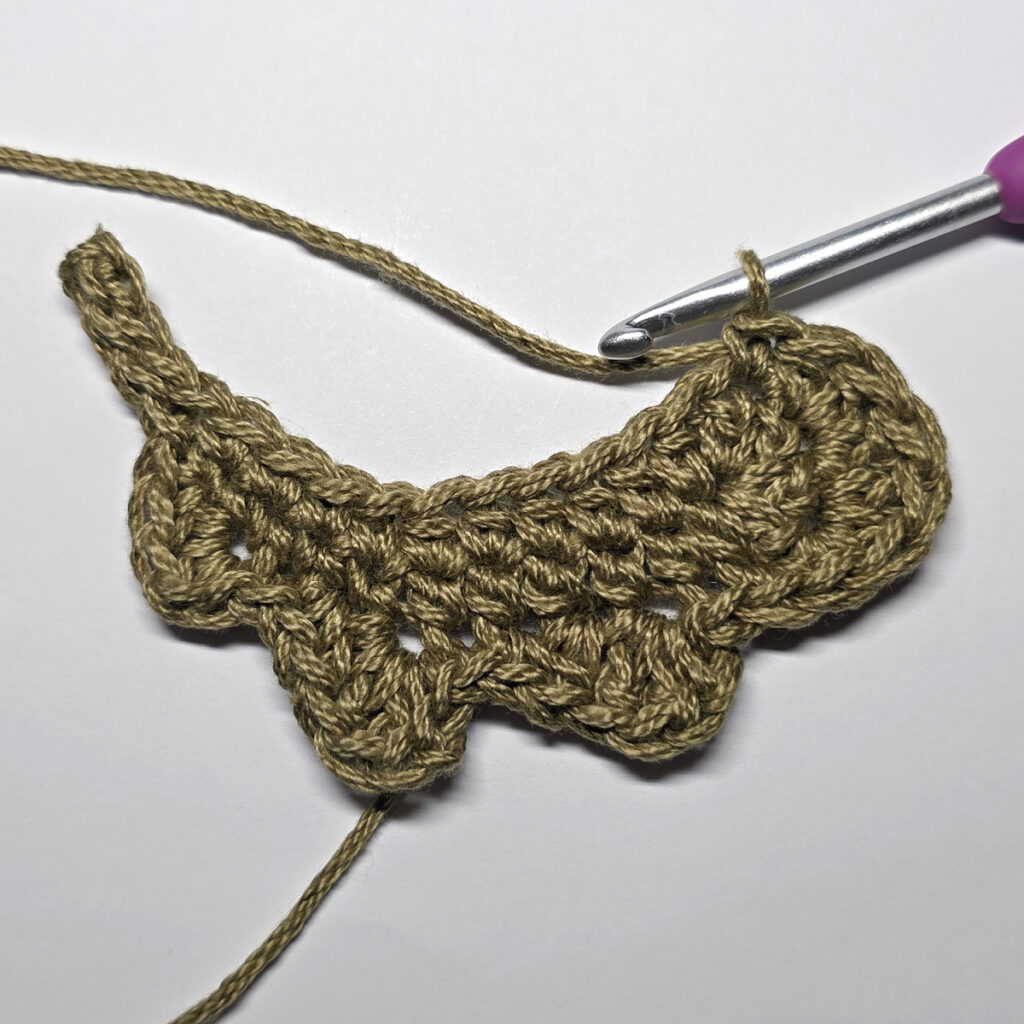
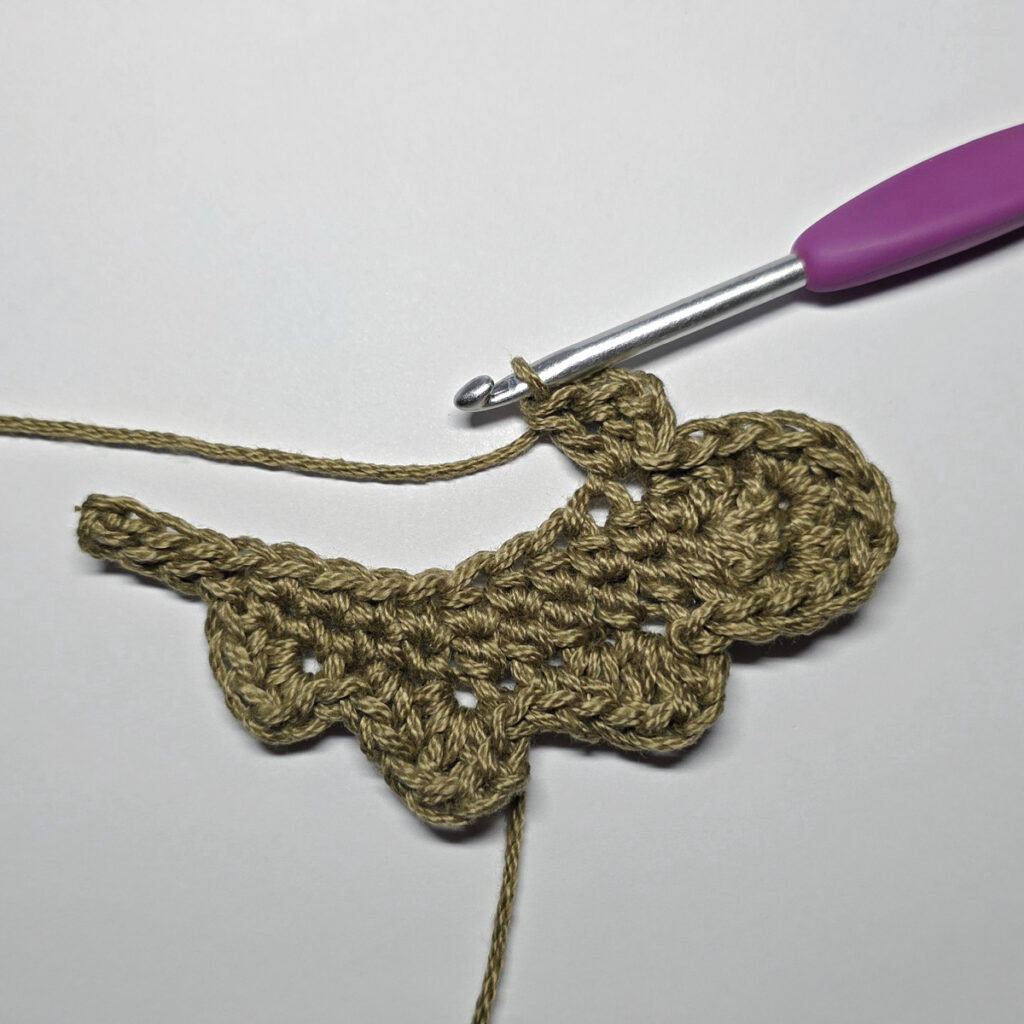
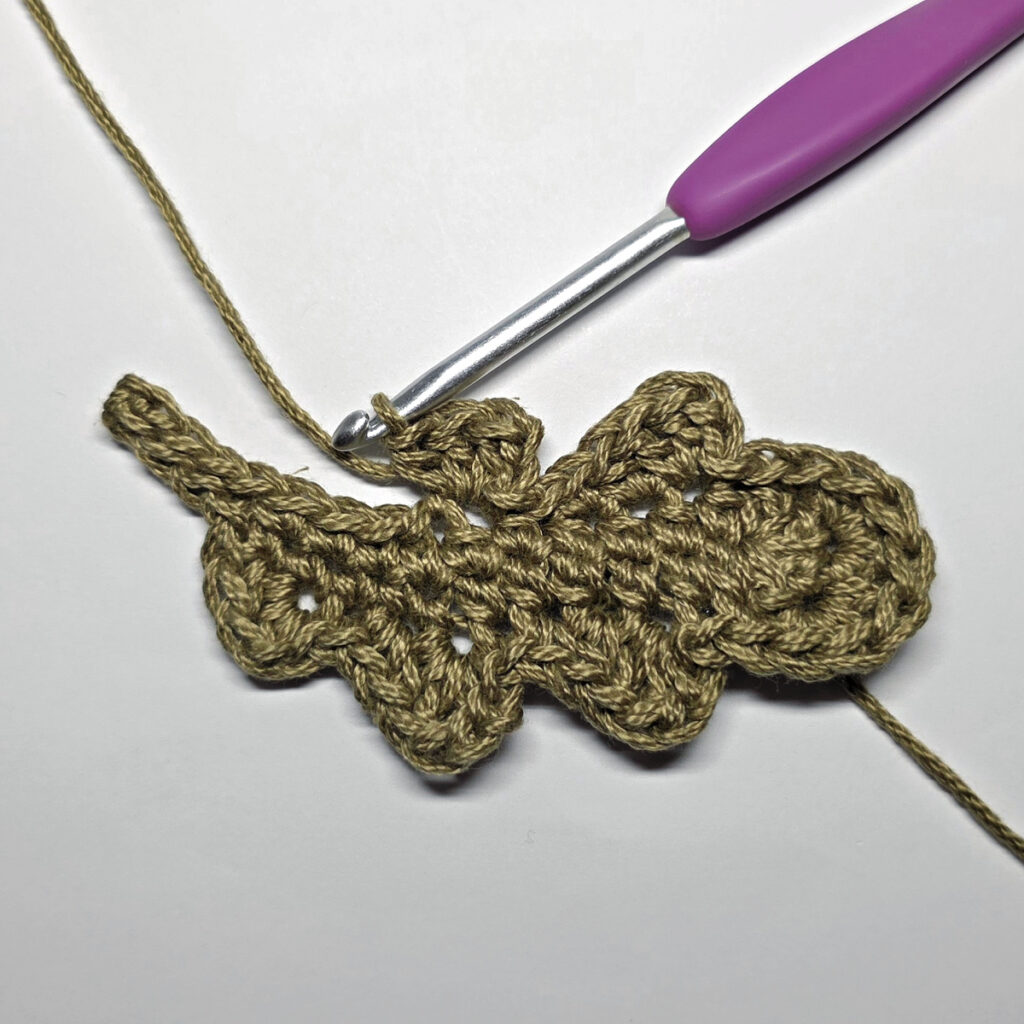
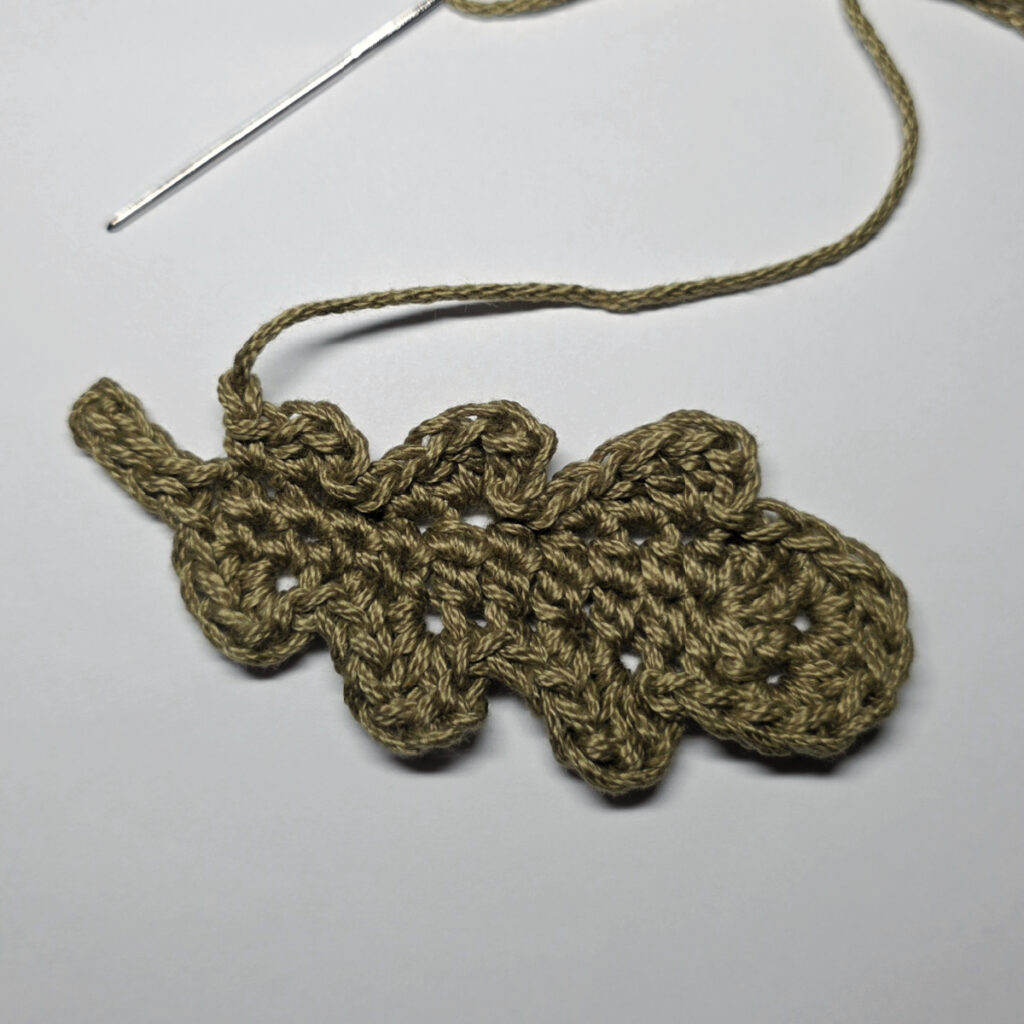
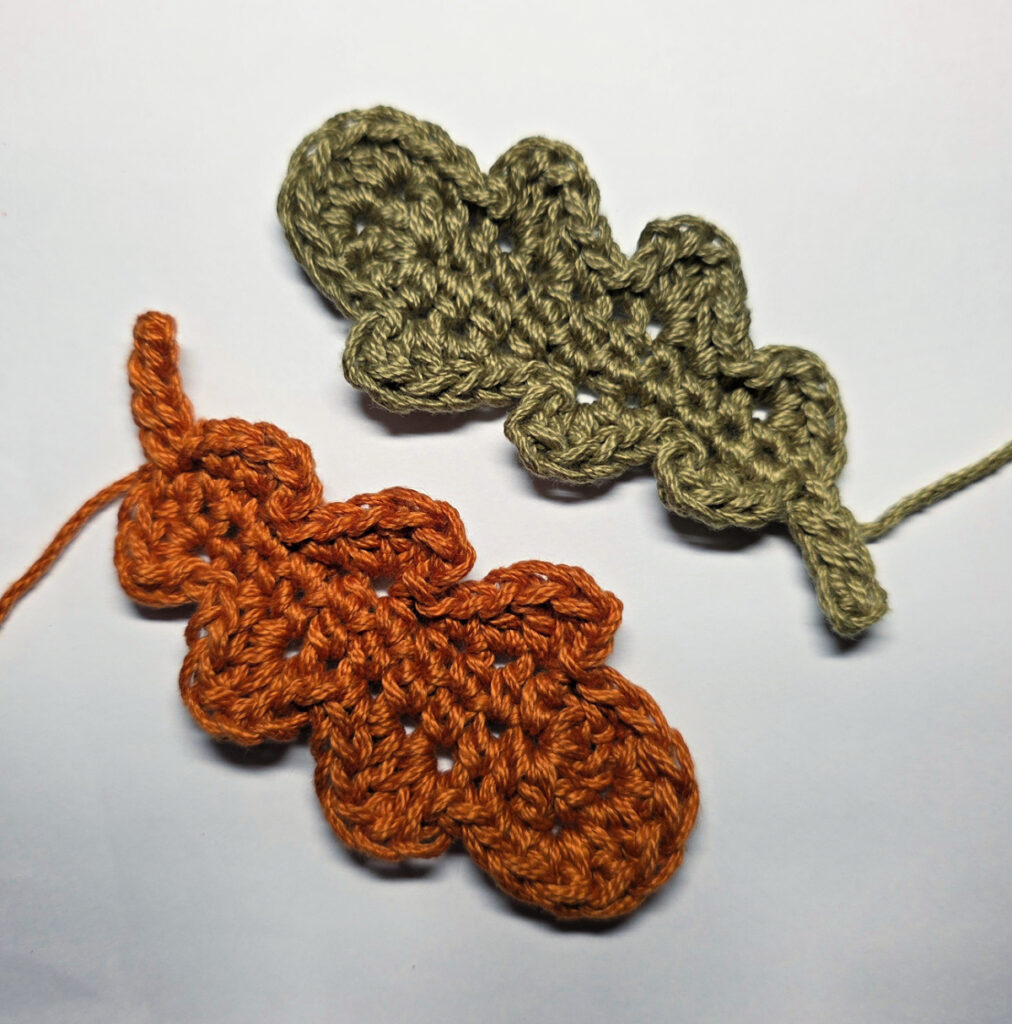
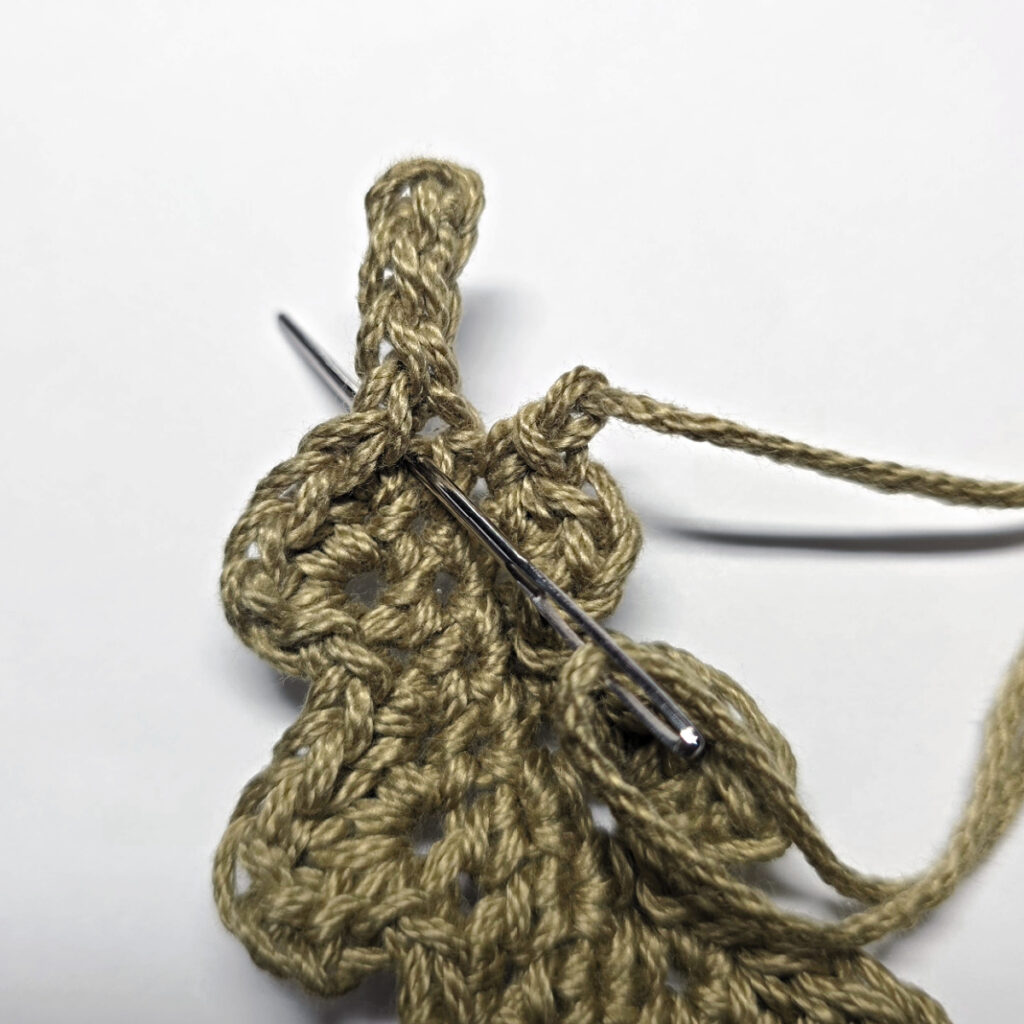
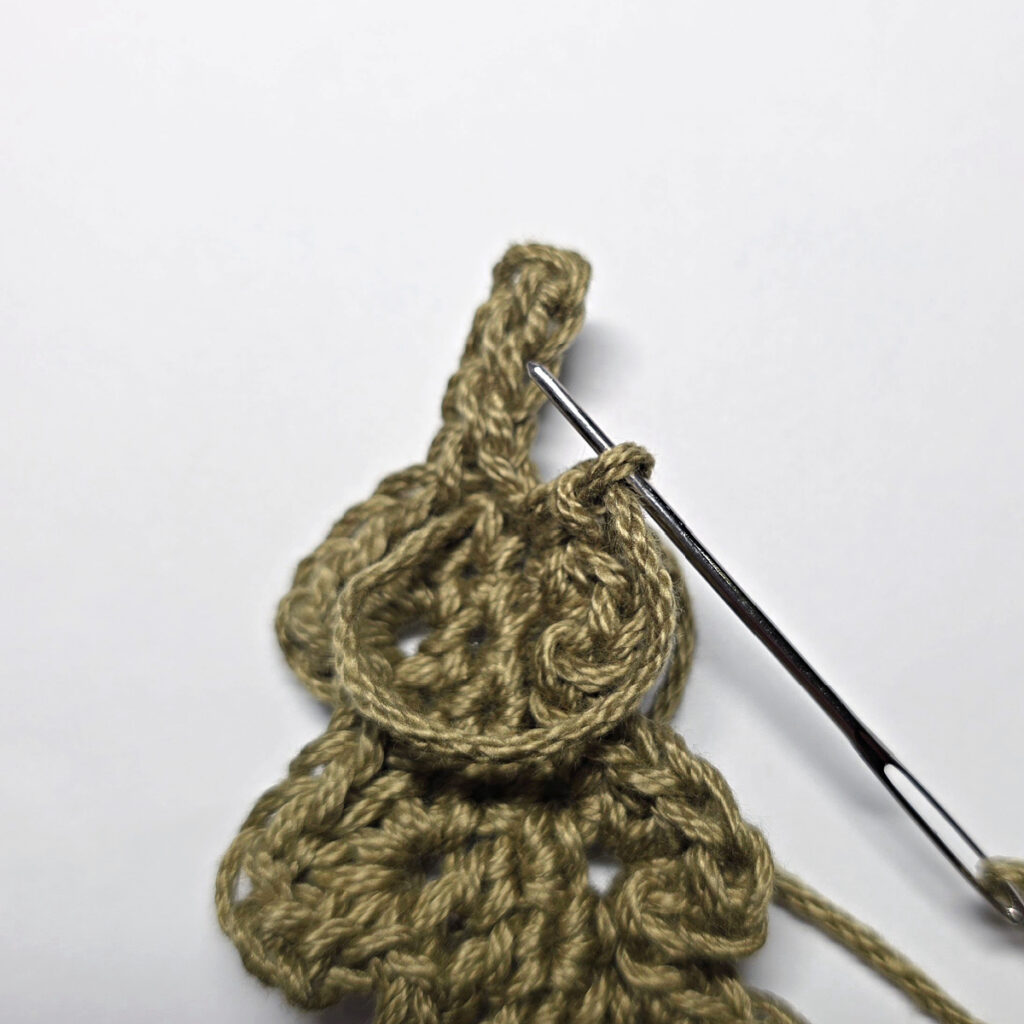
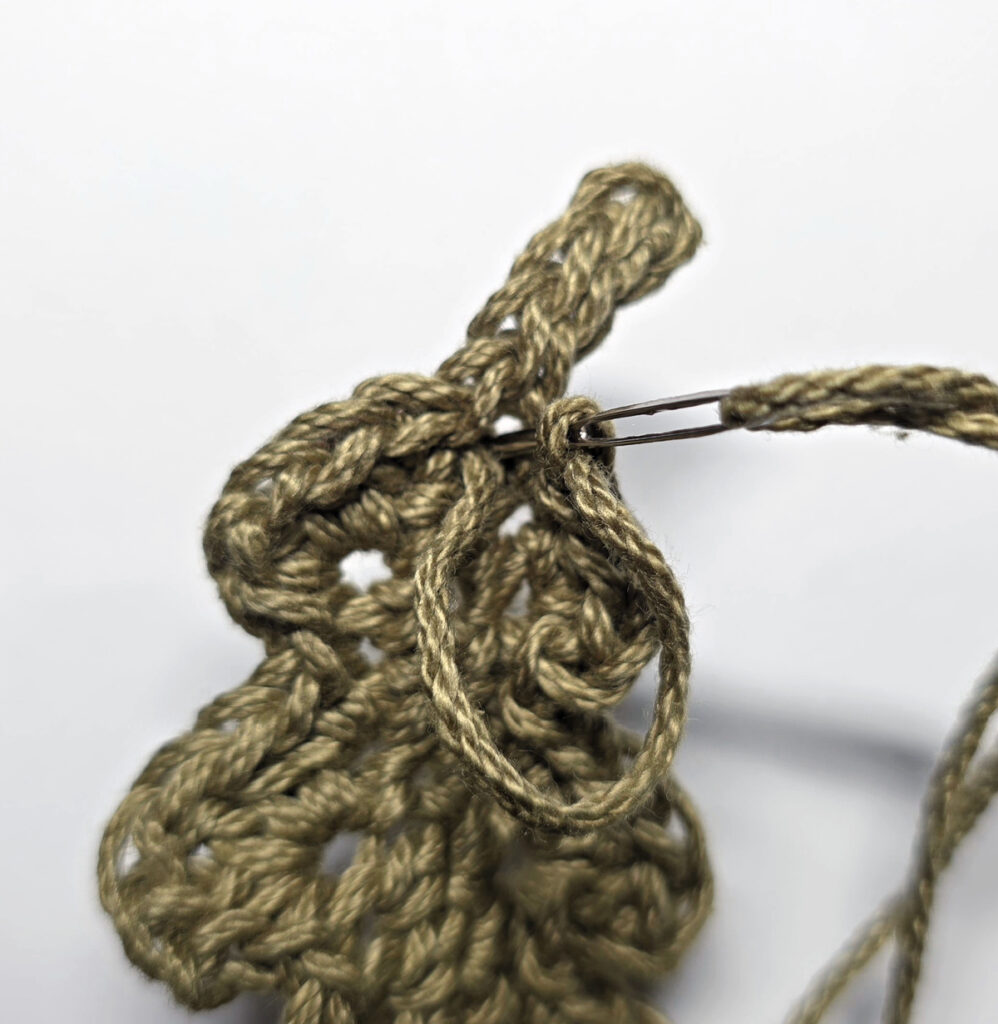
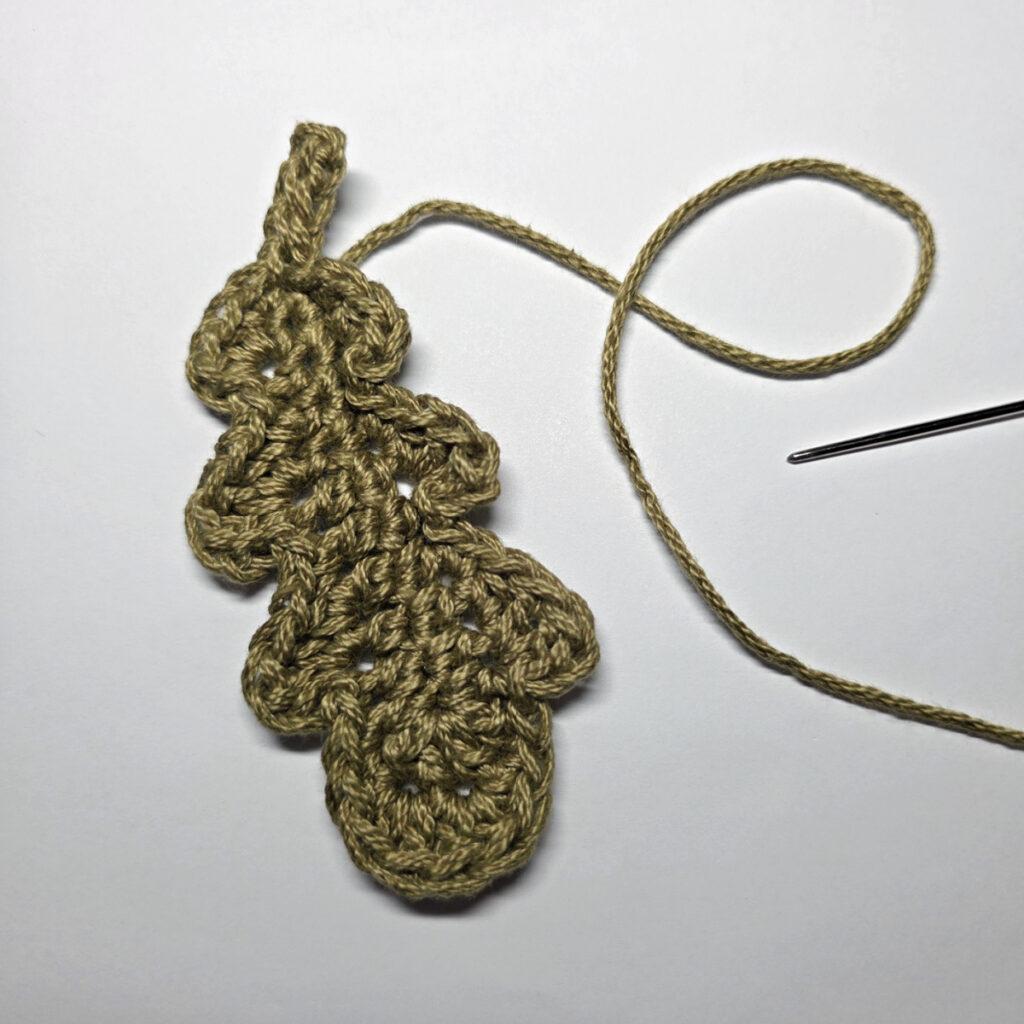
Oak Leaf will measure approximately 1-5/8″ W x 3-7/8″ L. Make as many as you prefer for your fall garland.
Continue on to the Maple Leaf Applique.
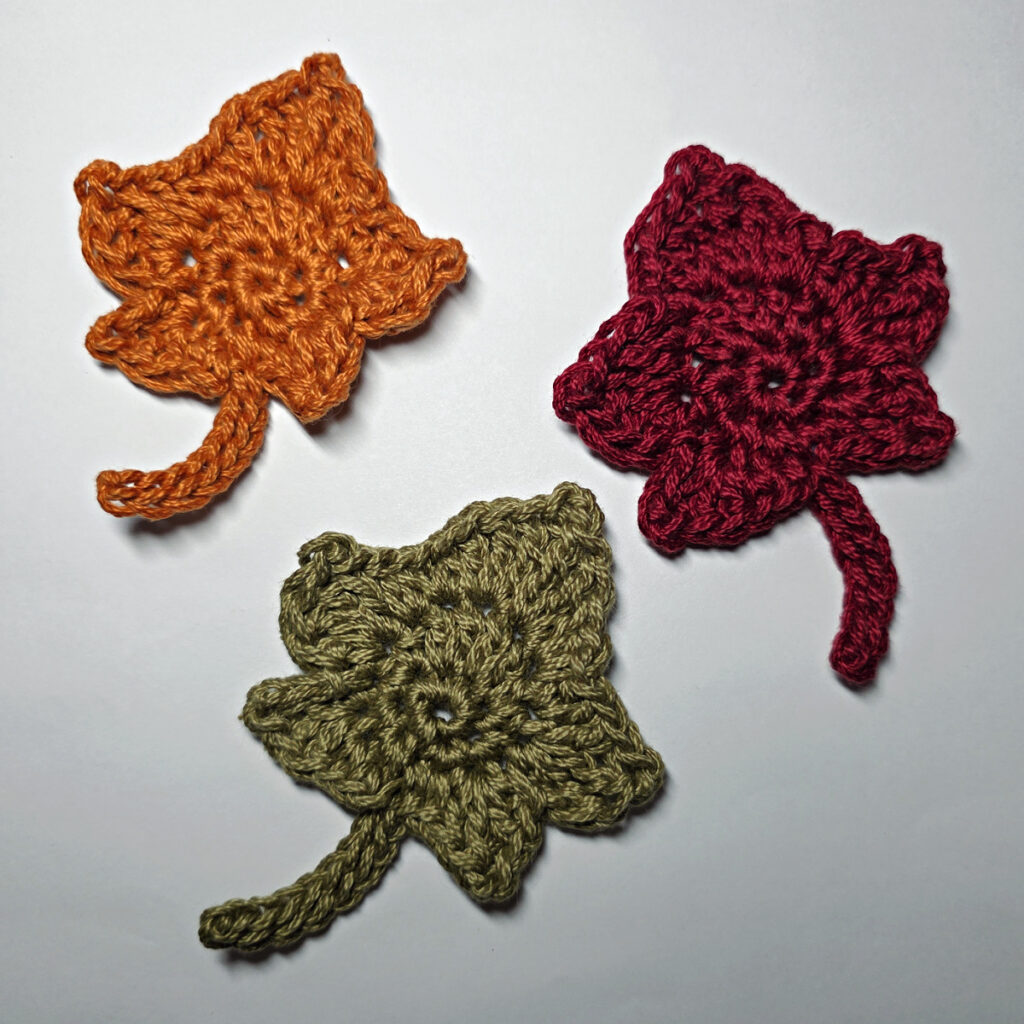
Maple Leaf Applique
Finished Size: 2-3/4″ W x 3-3/4″ L (at widest points)
Rnd (RS): With any color yarn & a 4.00mm crochet hook, ch 2, work 8 sc into the 2nd ch from your hook. Do not join. (8 sts)
Tip: You may find it helpful to place a SM into the first single crochet of round 2 to make it easier to find after completing the stem.
Rnd 2: 2 sc in each of the next 2 sts, 2 hdc in the next st, 2 dc in each of the next 2 sts, 2 hdc in the next st, 2 sc in each of the next 2 sts. Do not join. (16 sts)
Make Stem: Ch 9, working into the back humps of the foundation ch, sl st in the 2nd ch from your hook, sl st in each of the next 7 chs. Do not join. Continue to Rnd 3.
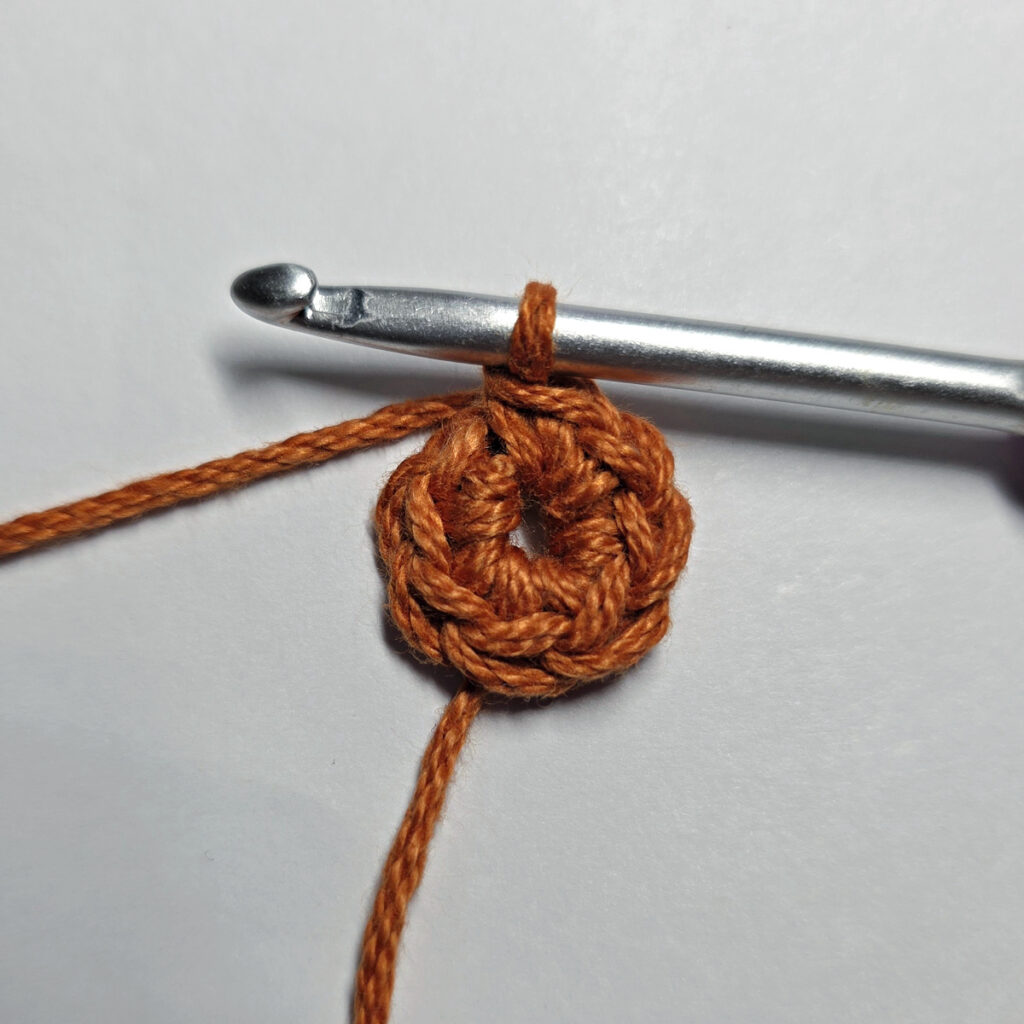
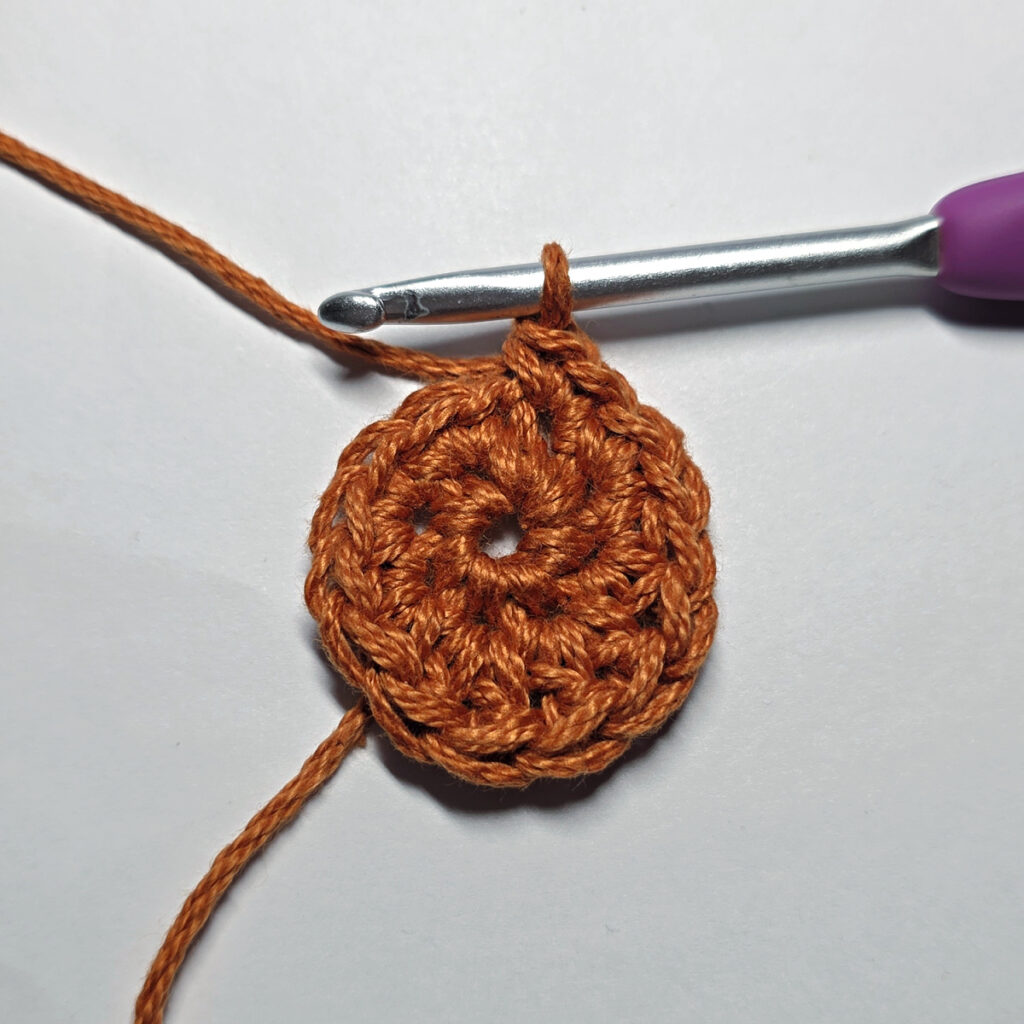
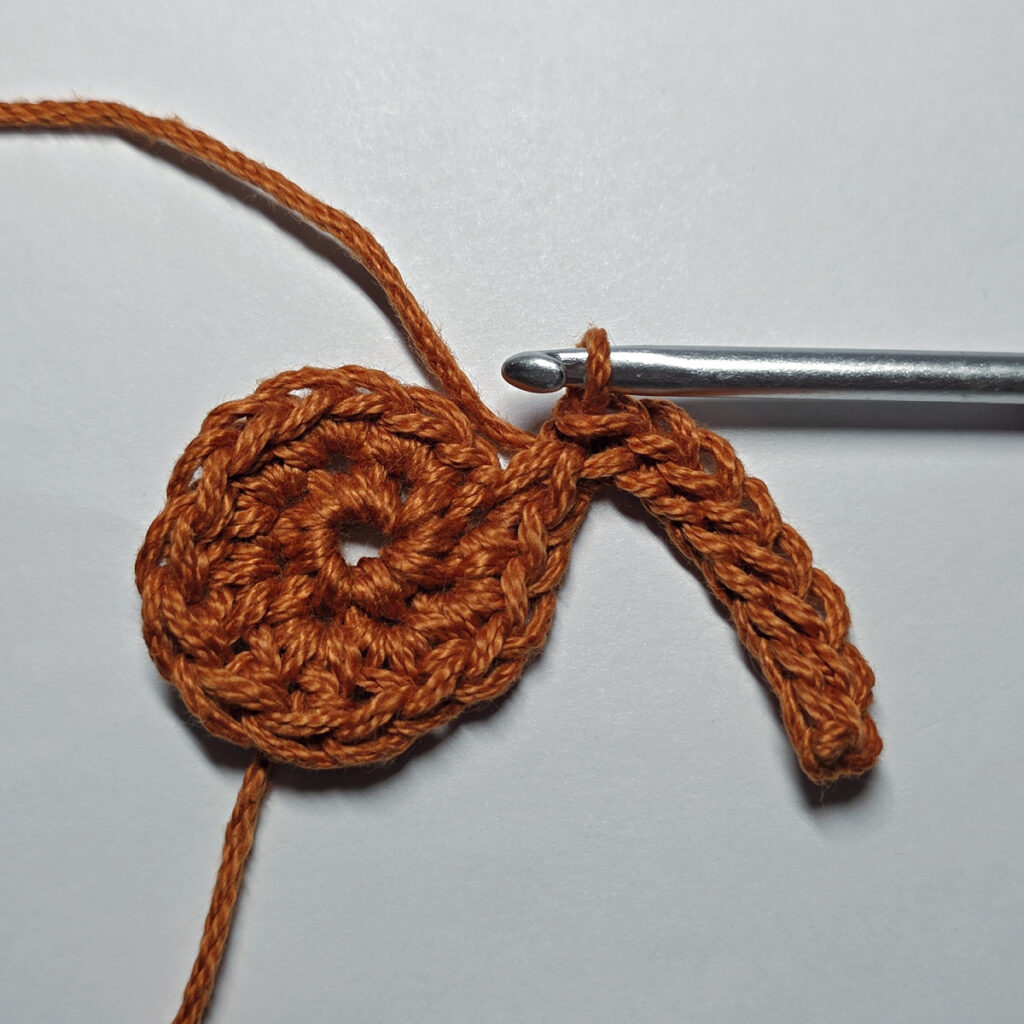
Rnd 3: Sc in each of the next 2 sts, (2 dc, ch 2, sl st in the 2nd ch from your hook, dc, hdc) in the next st, sl st in the next st, (dc, 2 tr, ch 2, sl st in the 2nd ch from your hook, dc) in the next st, (dc, hdc) in the next st, (sc, ch 1, hdc) in the next st, (dc, 2 tr, ch 2, sl st in the 2nd ch from your hook) in the next st, (2 tr, dc) in the next st, (hdc, ch 1, sc) in the next st, (hdc, dc) in the next st, (dc, ch 2, sl st in the 2nd ch from your hook, 2 tr, dc) in the next st, sl st in the next st, (hdc, dc, ch 2, sl st into the 2nd ch from your hook, 2 dc) in the next st, sc in each of the last two stitches. Do not join.
Fasten off. With a yarn needle and tail of yarn, weave the tail into the first sc of Rnd 3. Weave in ends. Maple Leaf measures approximately 2-3/4″ W x 3-3/4″ H (including stem).
Make as many as you prefer for your fall garland. Continue on to the Sunflower Applique.
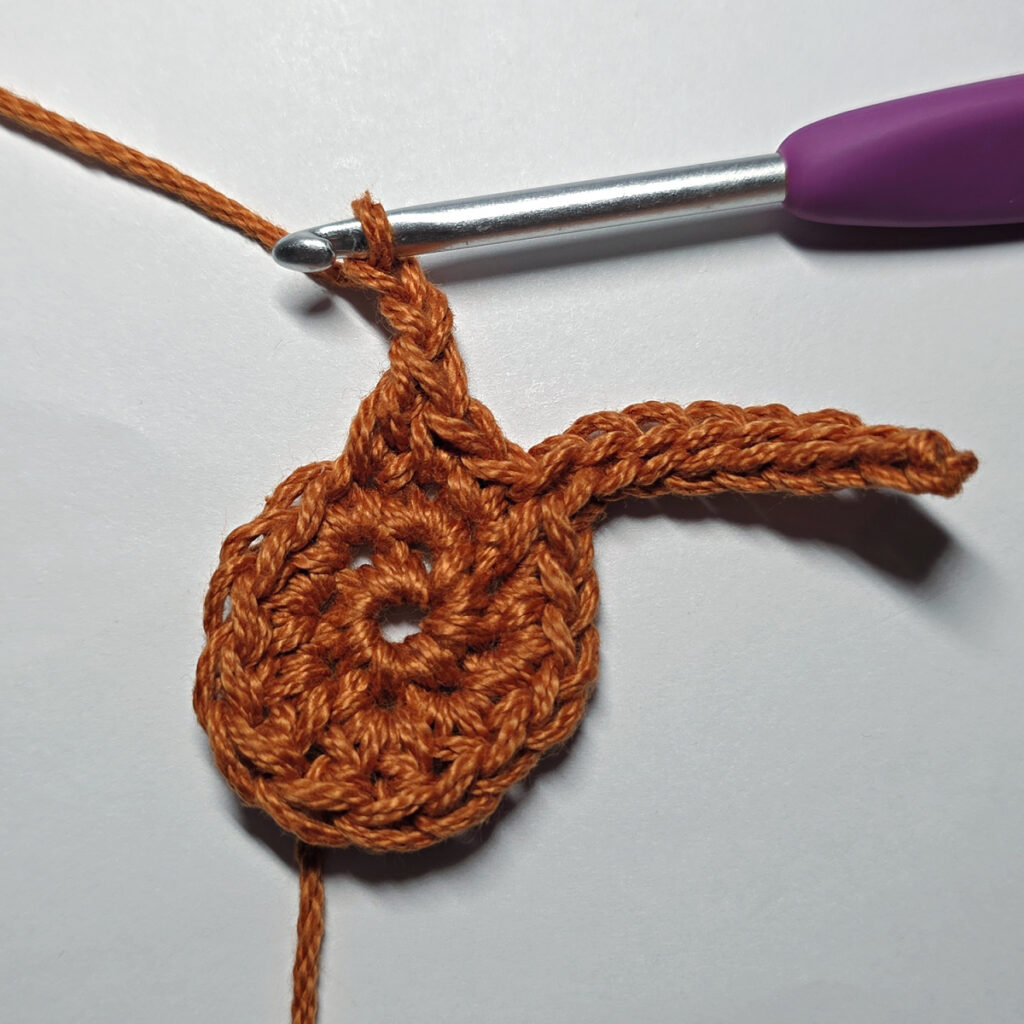
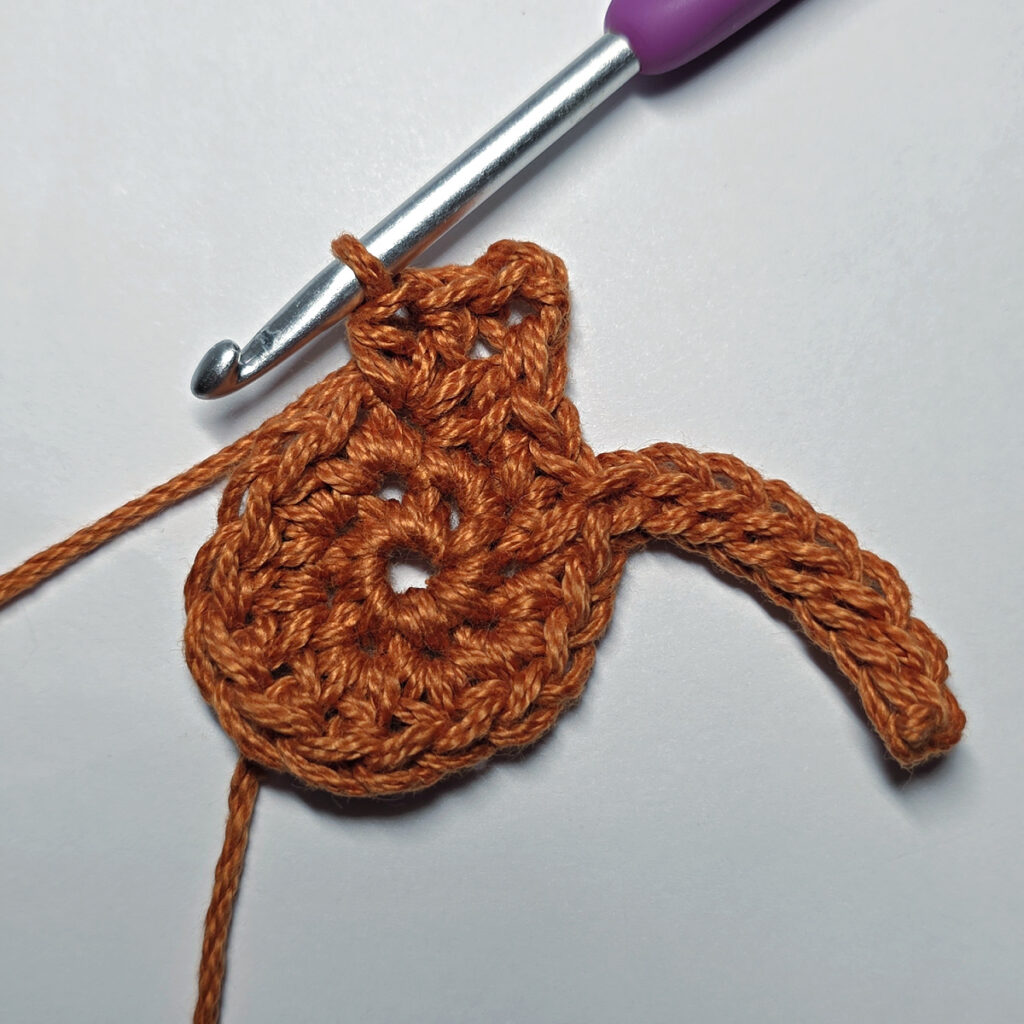
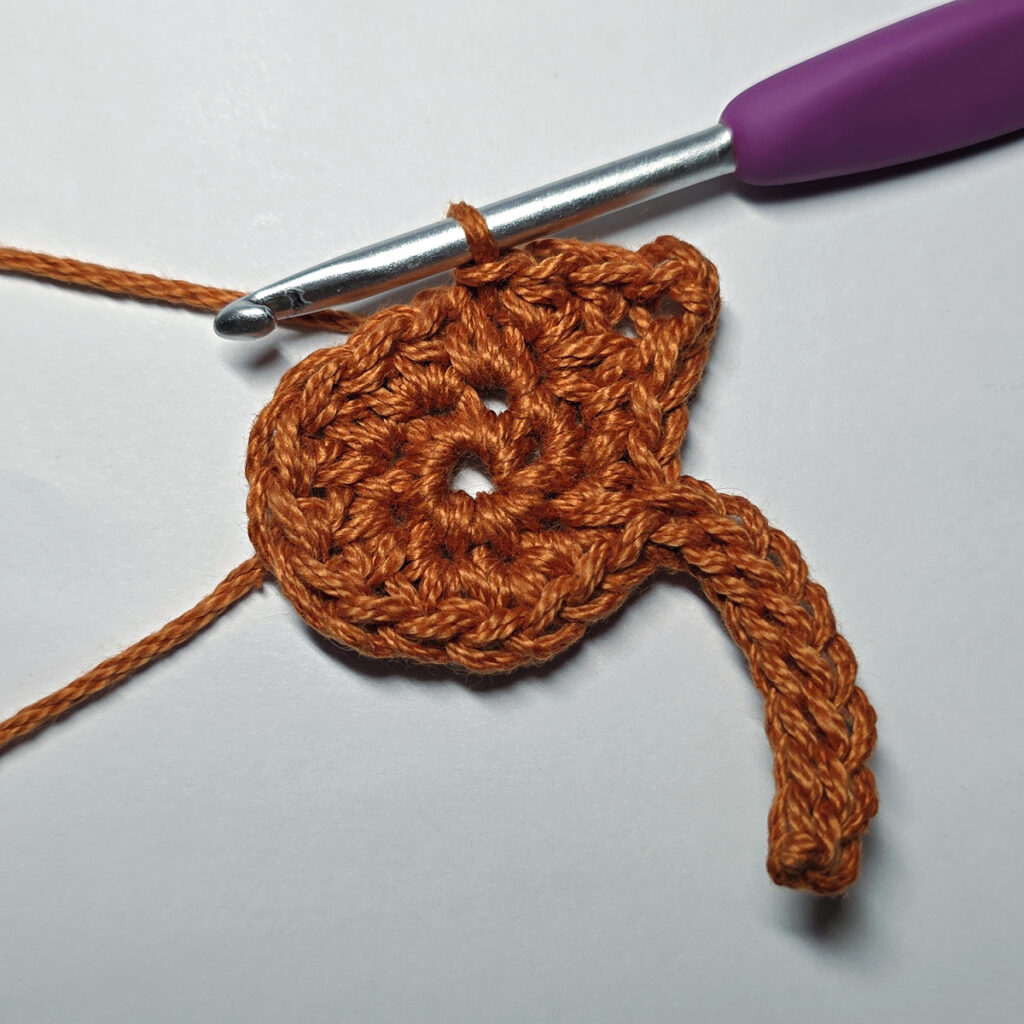
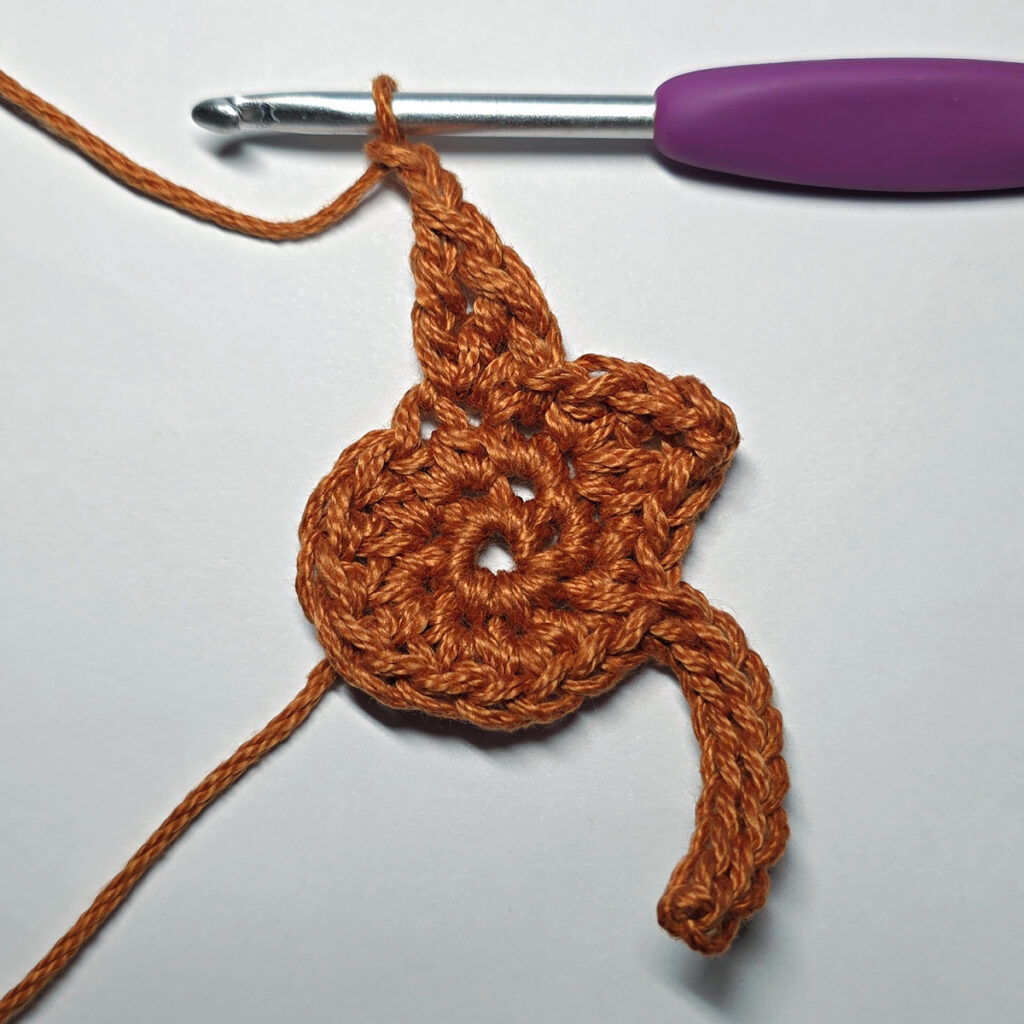
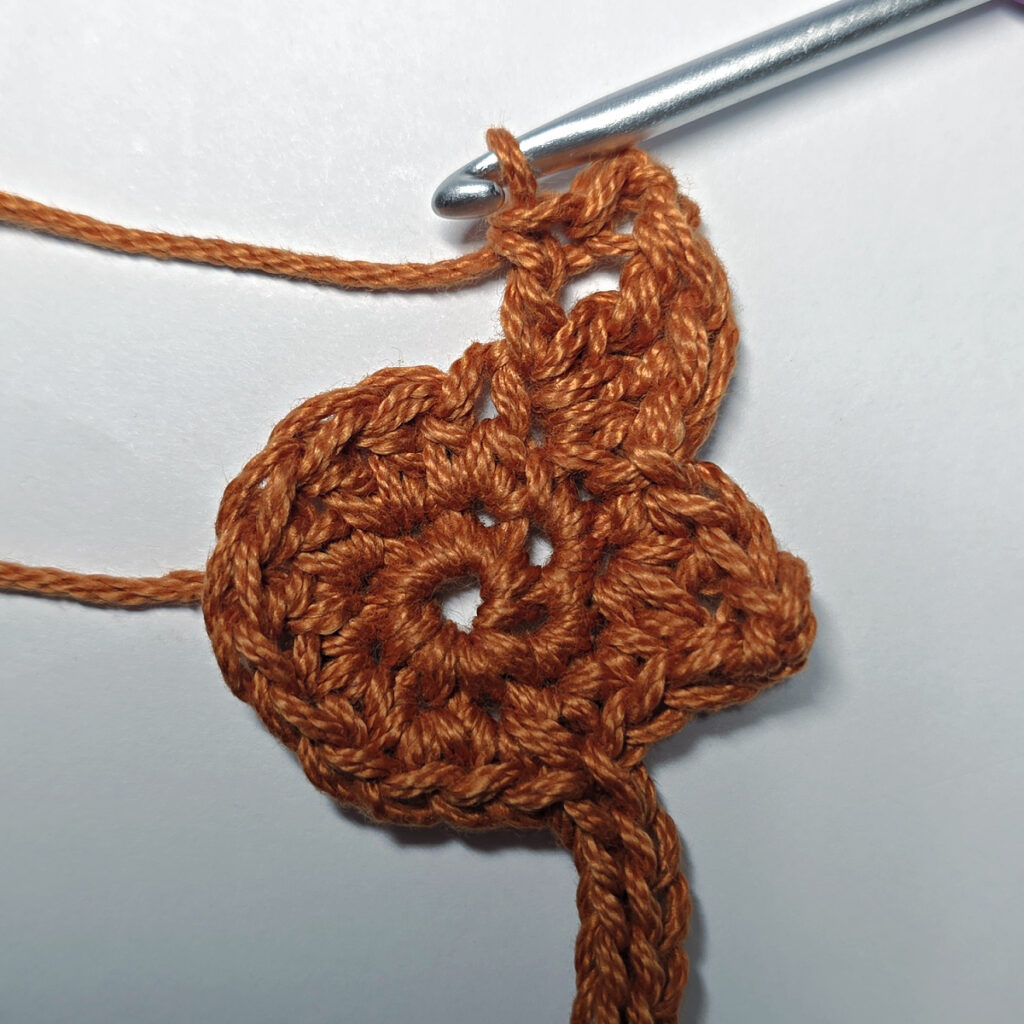
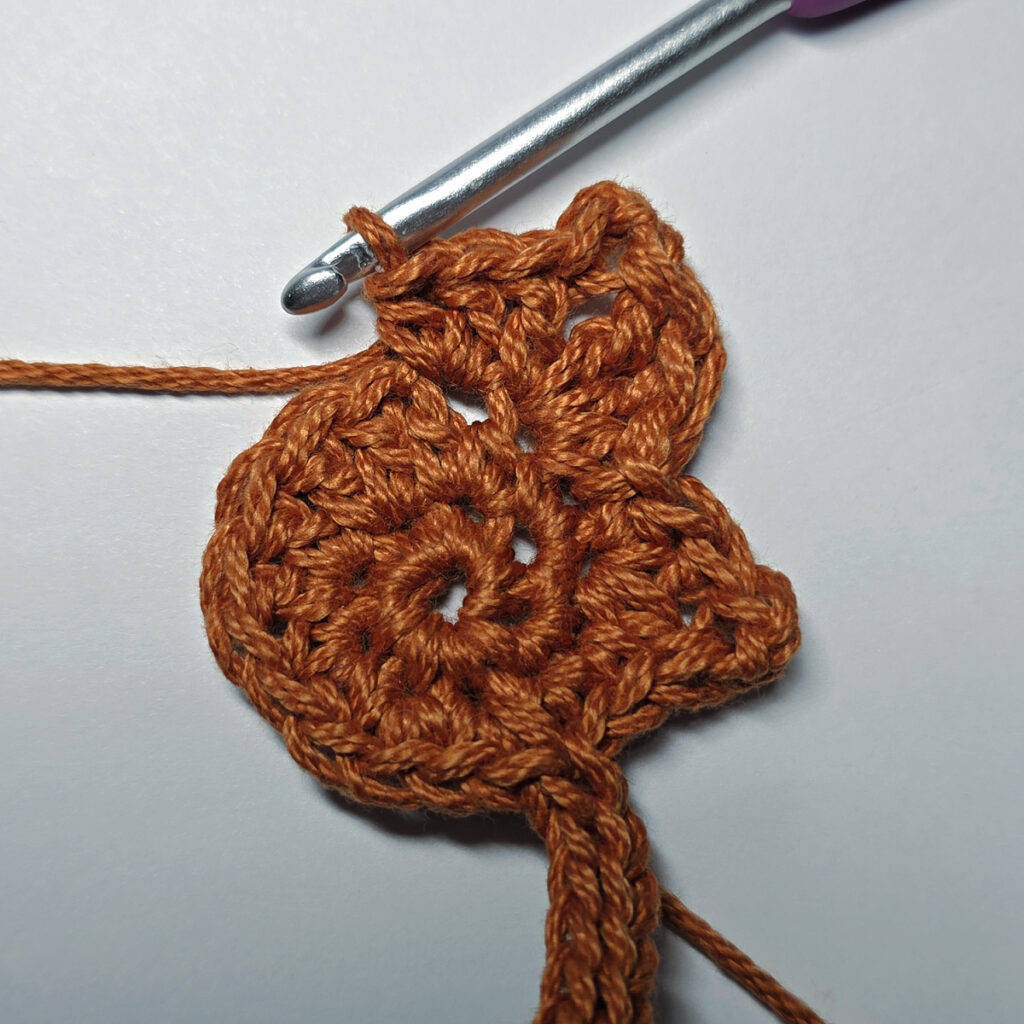
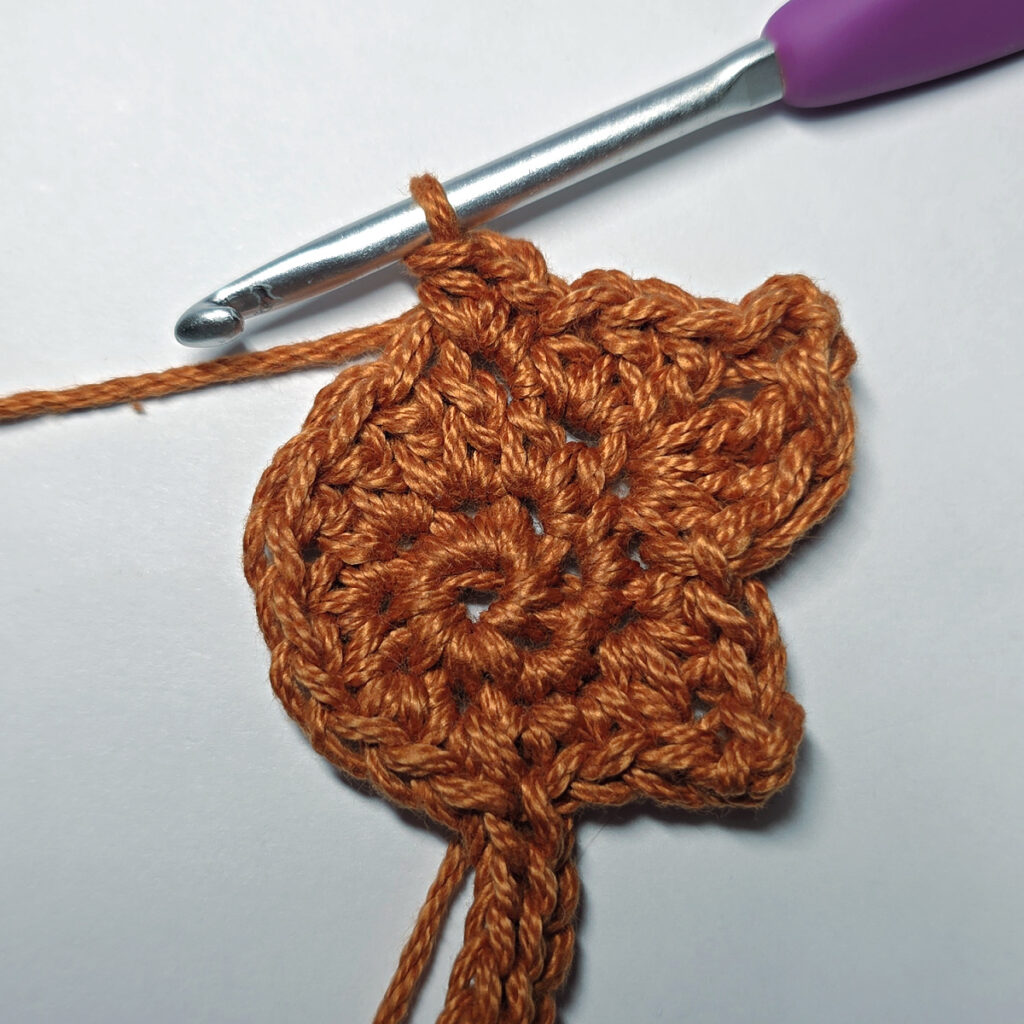
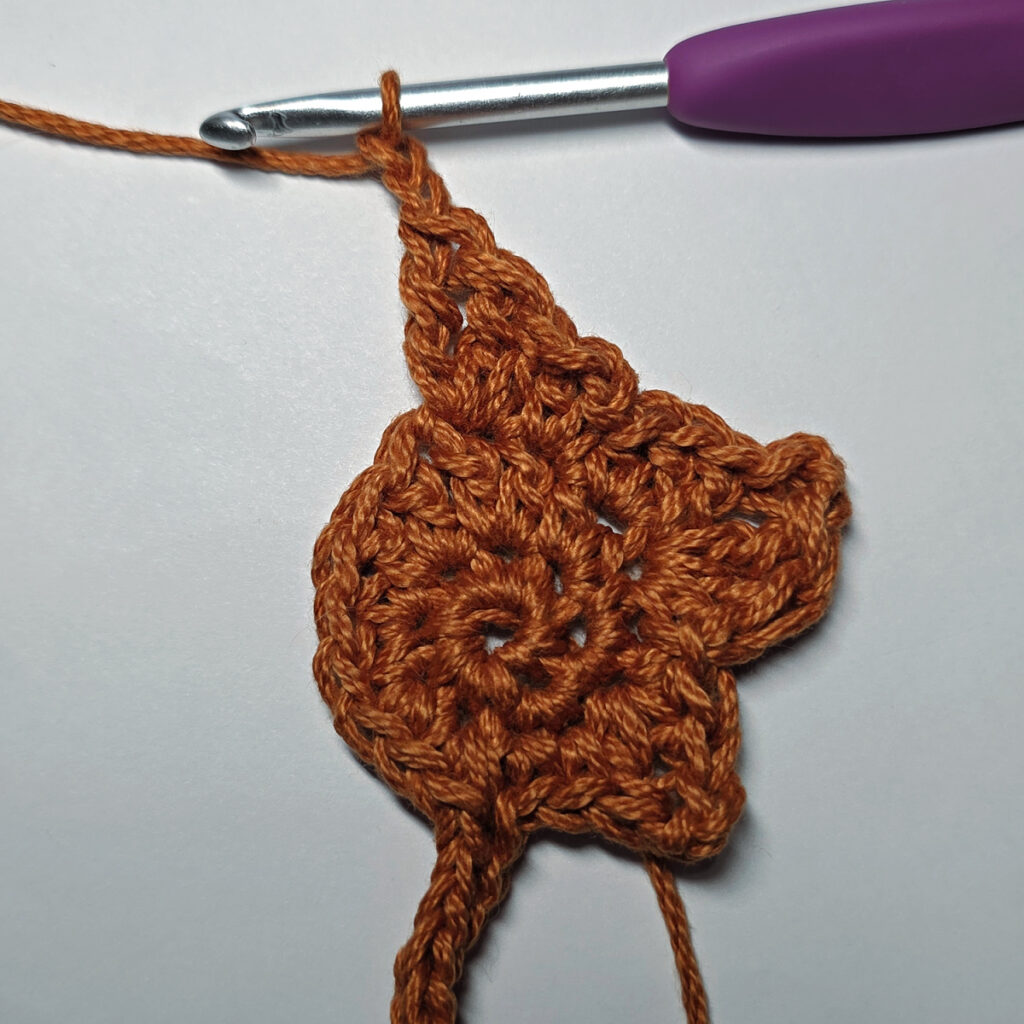
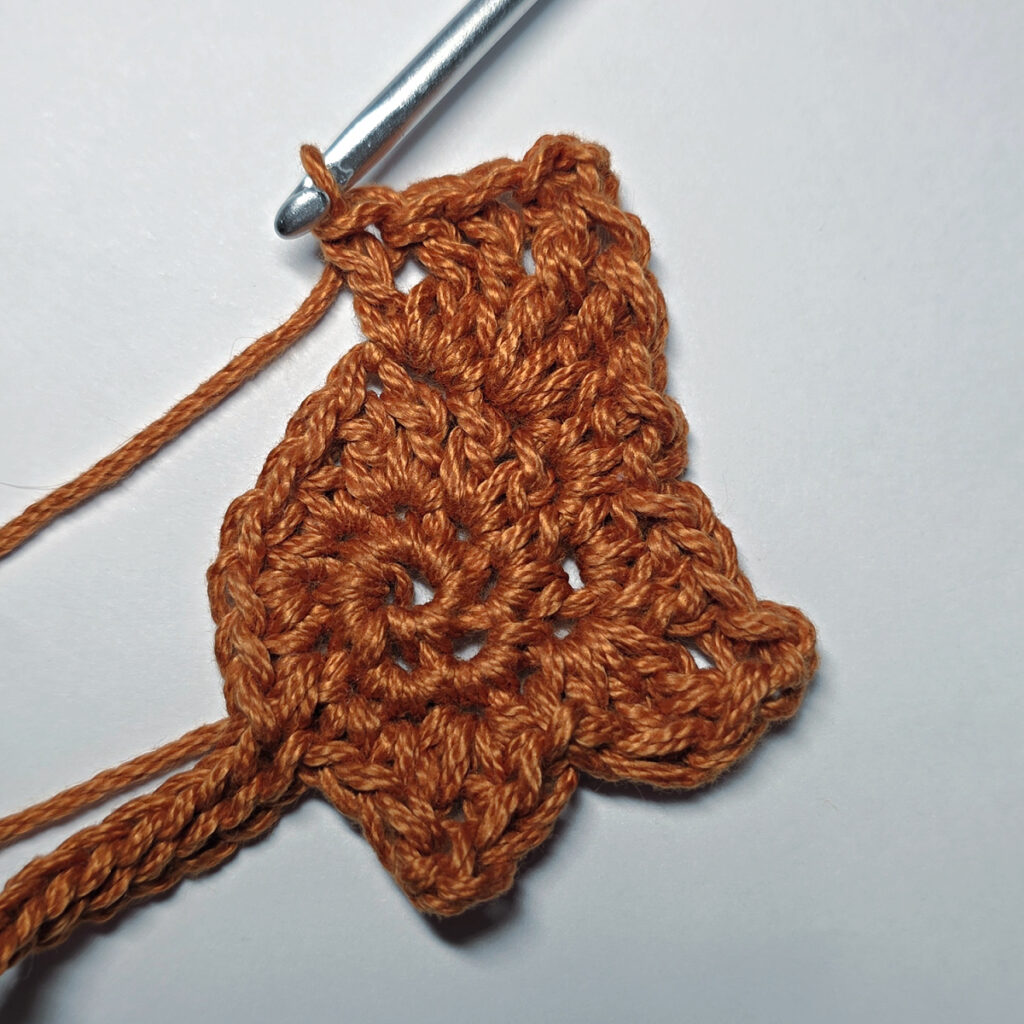
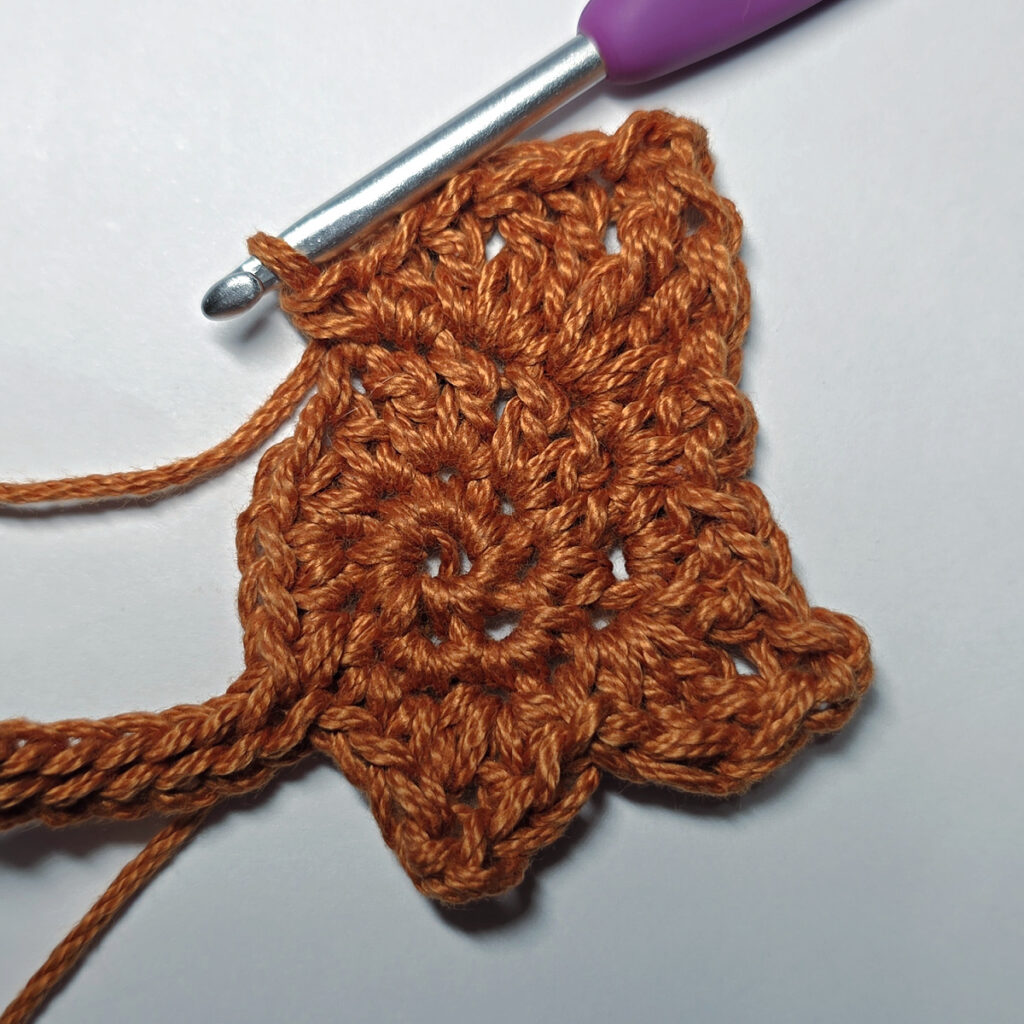
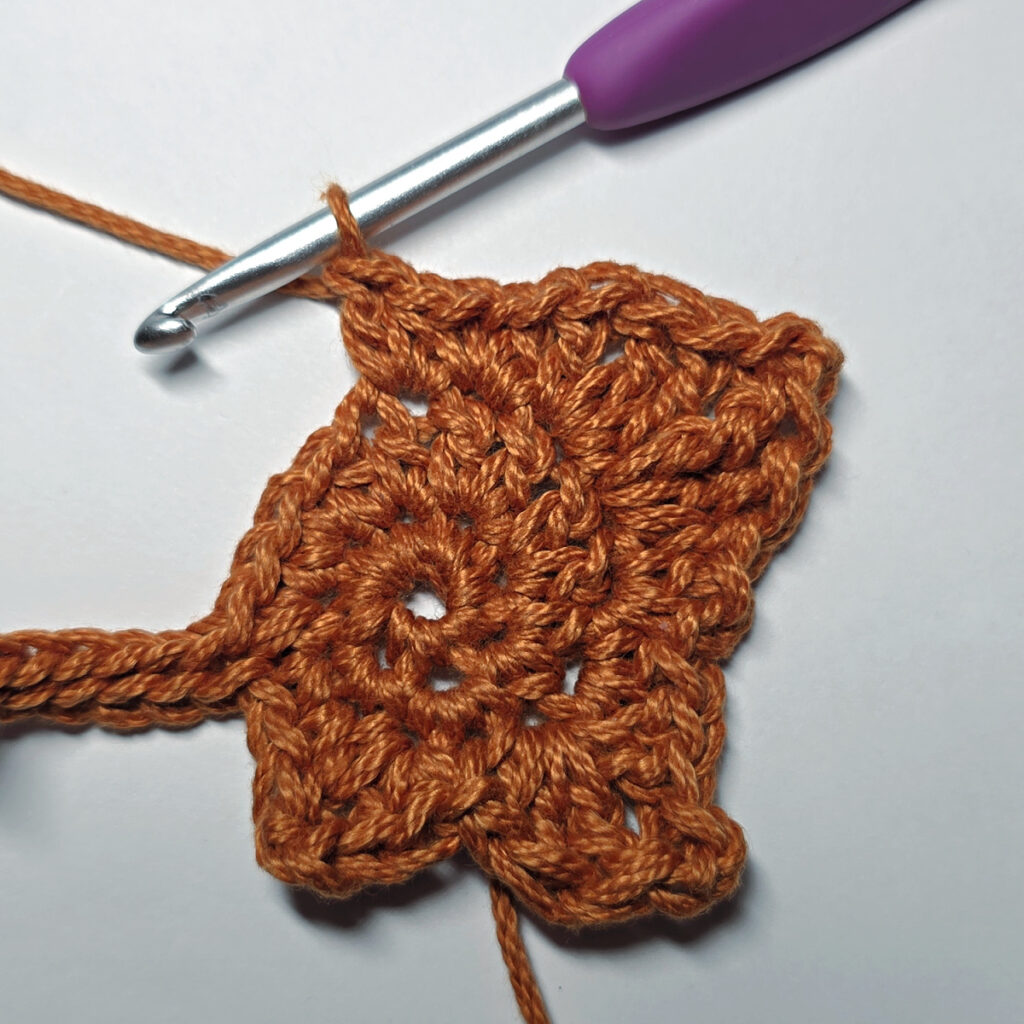
2 tr, dc) in the next st,
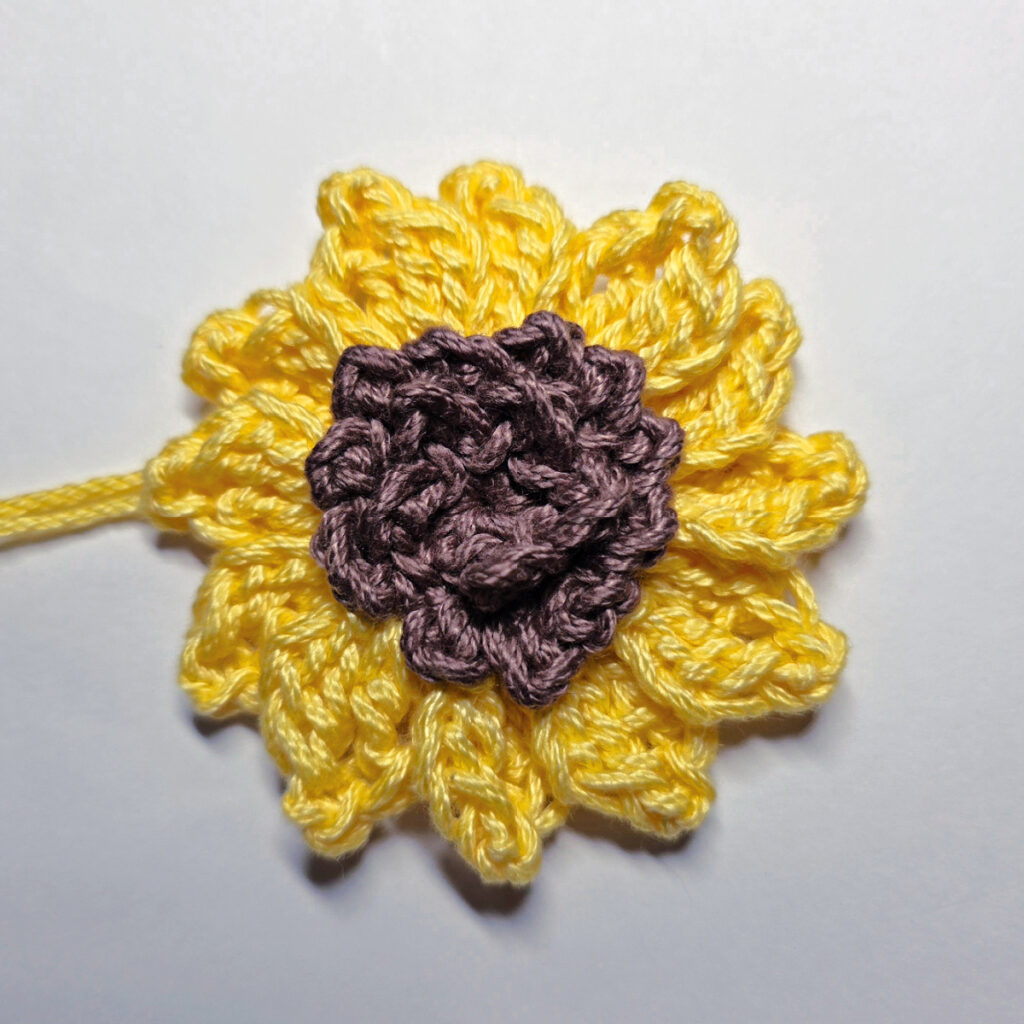
Sunflower Applique
Finished Sunflower Size: 2-3/4″ diameter
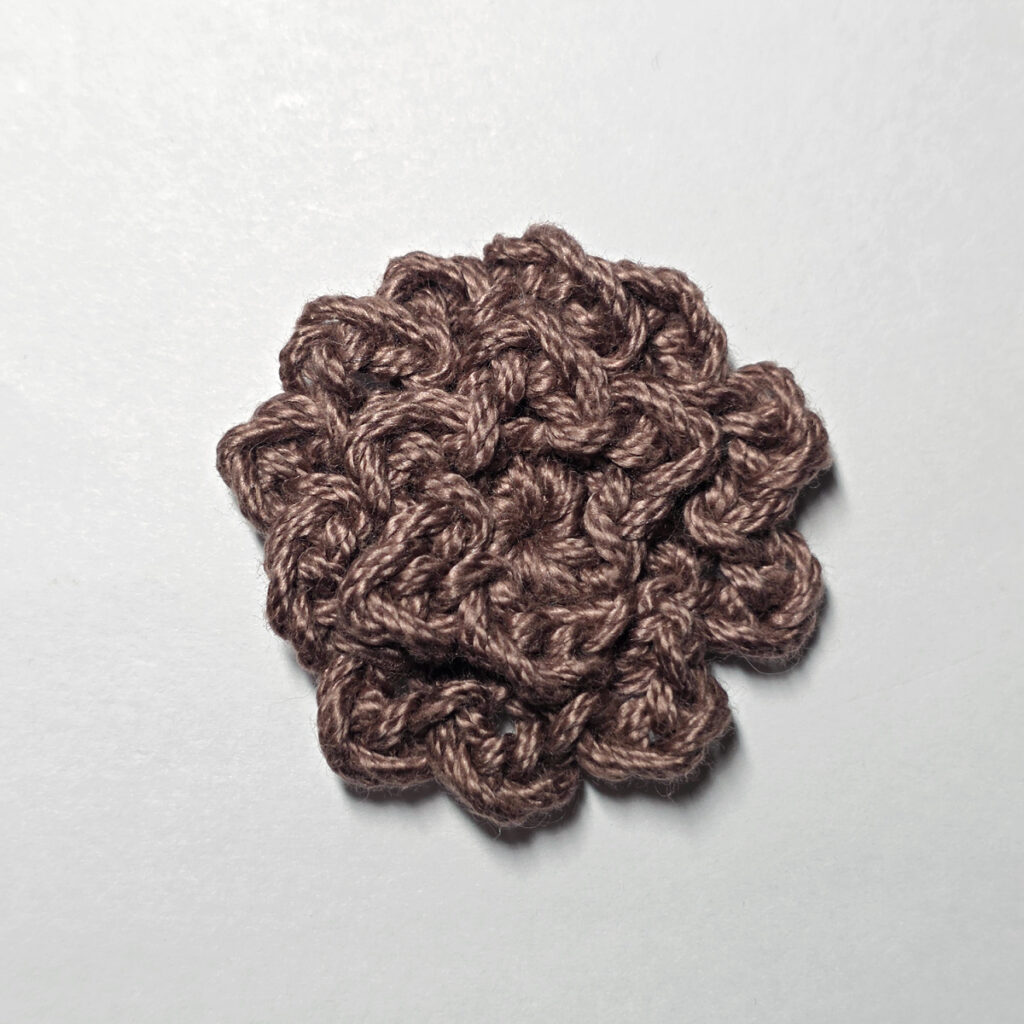
Center of Sunflower
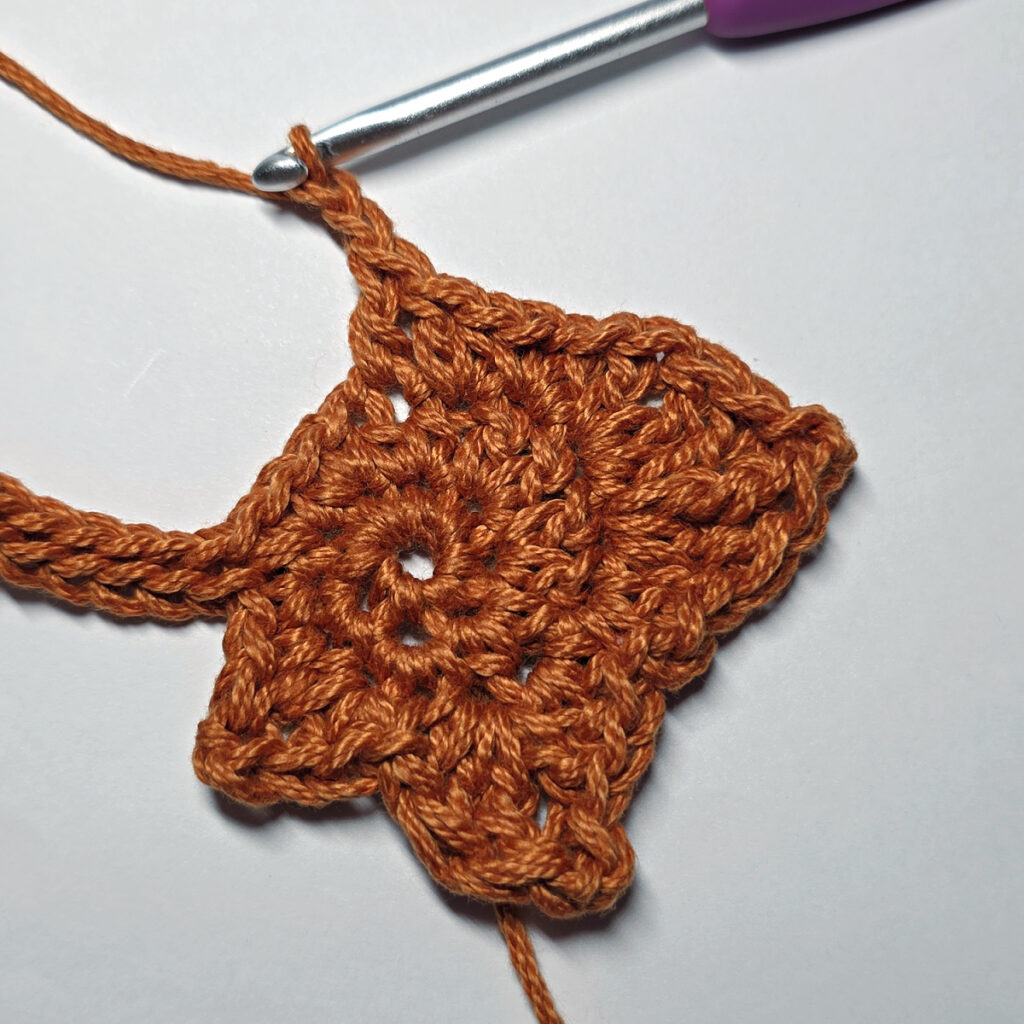
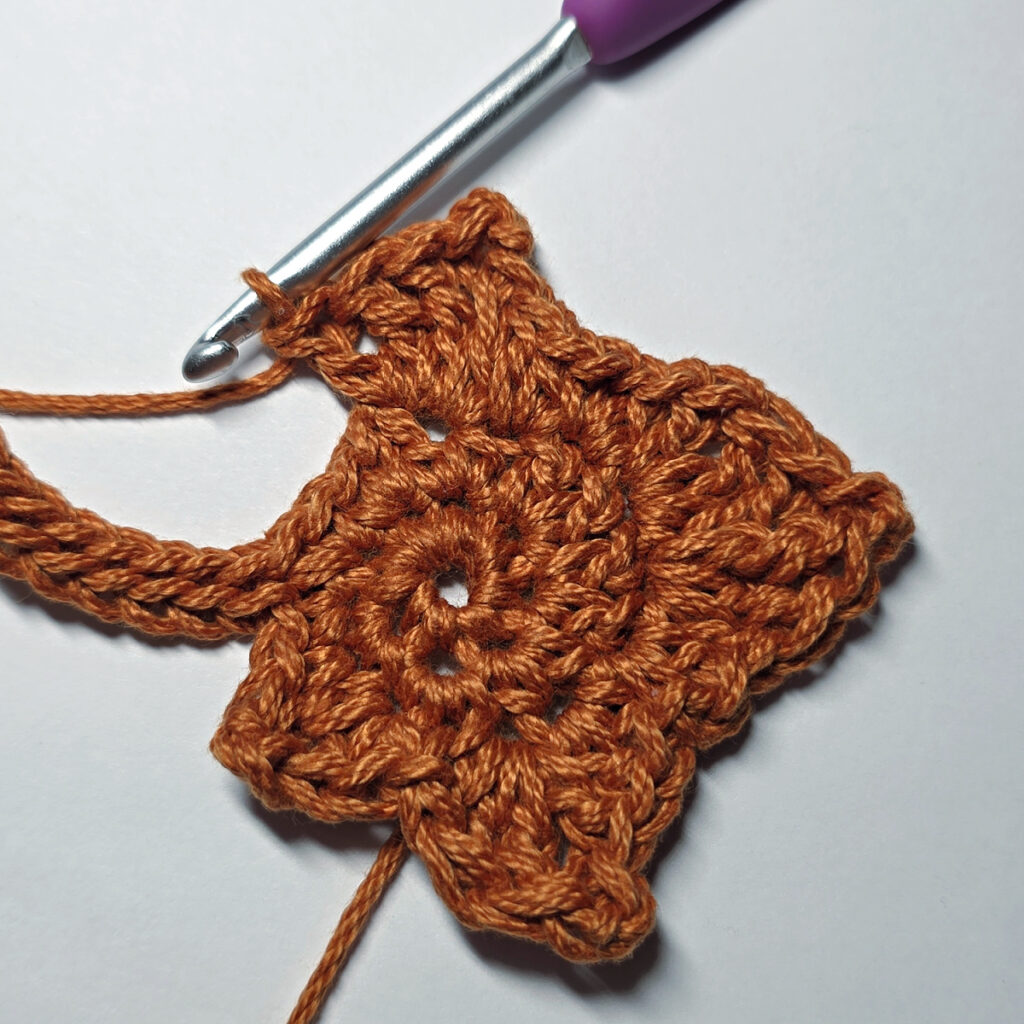
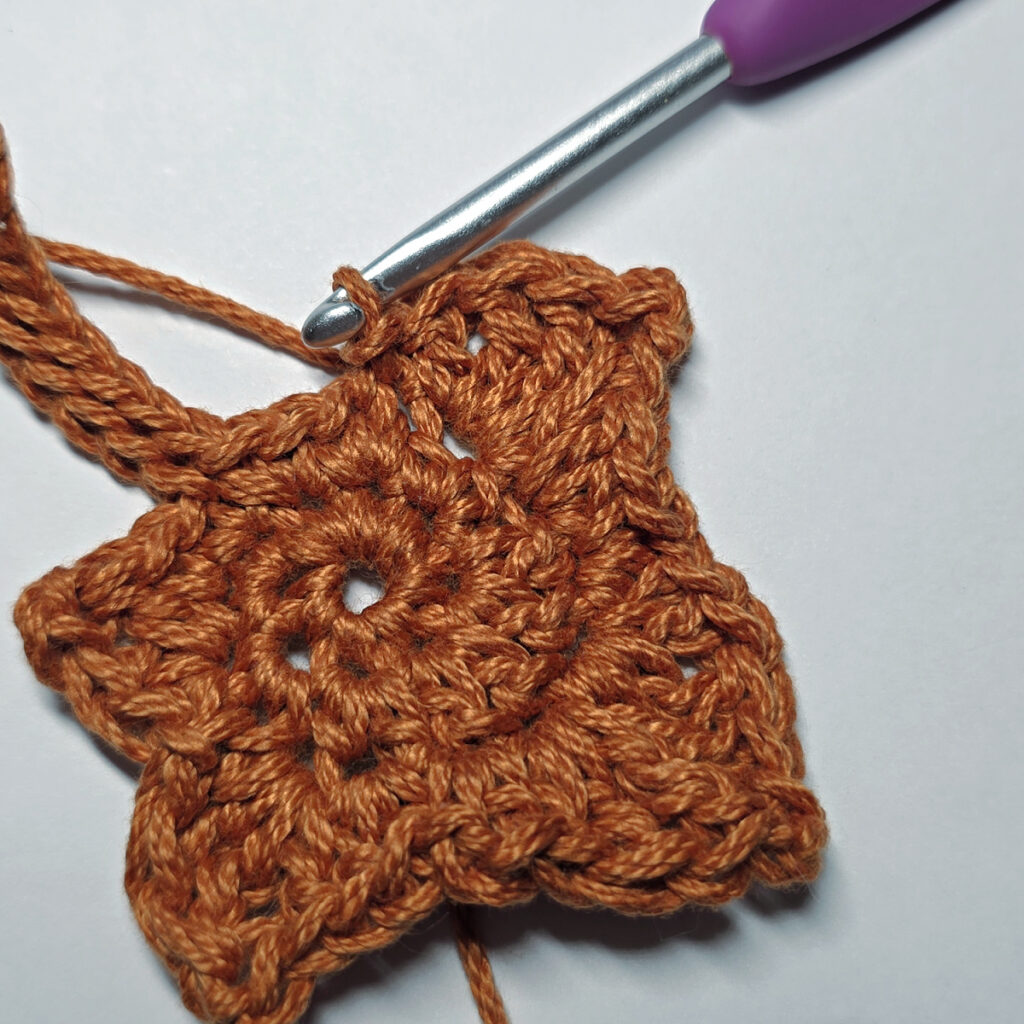
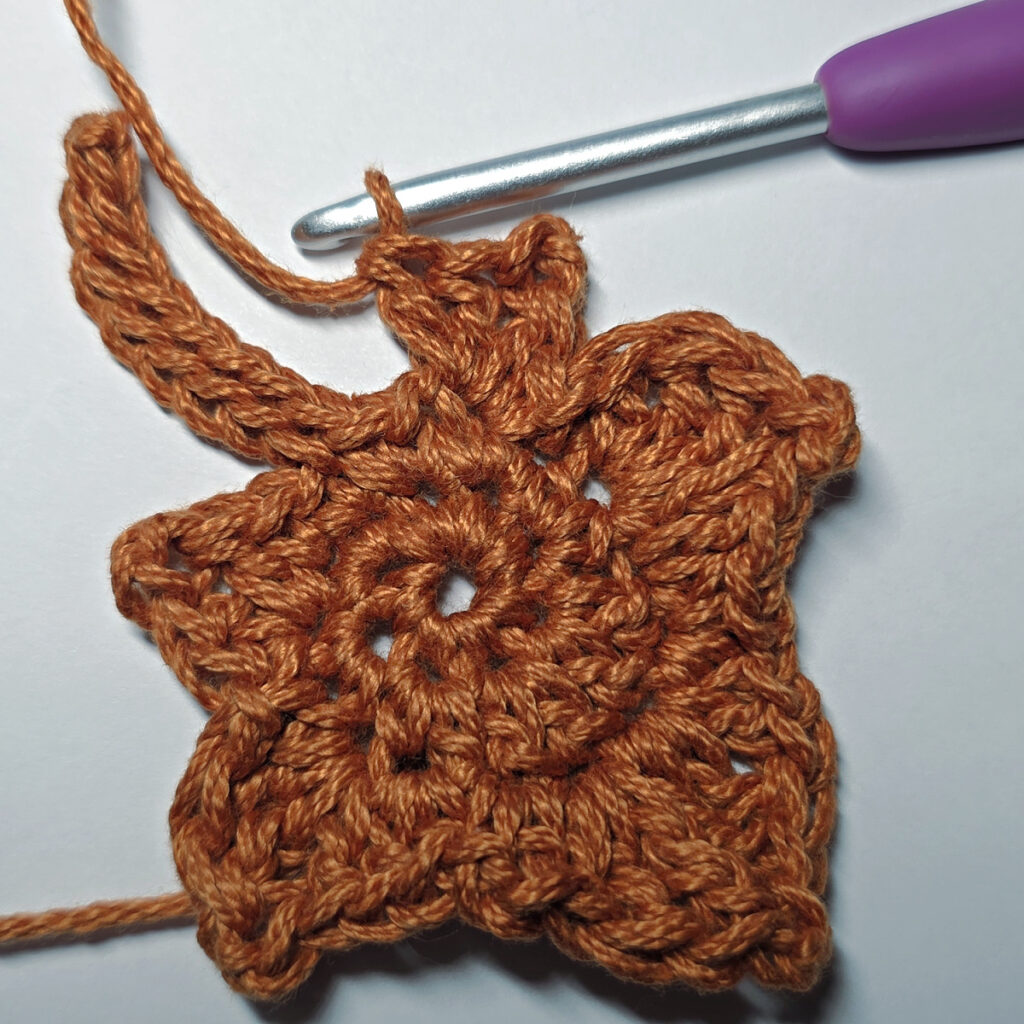
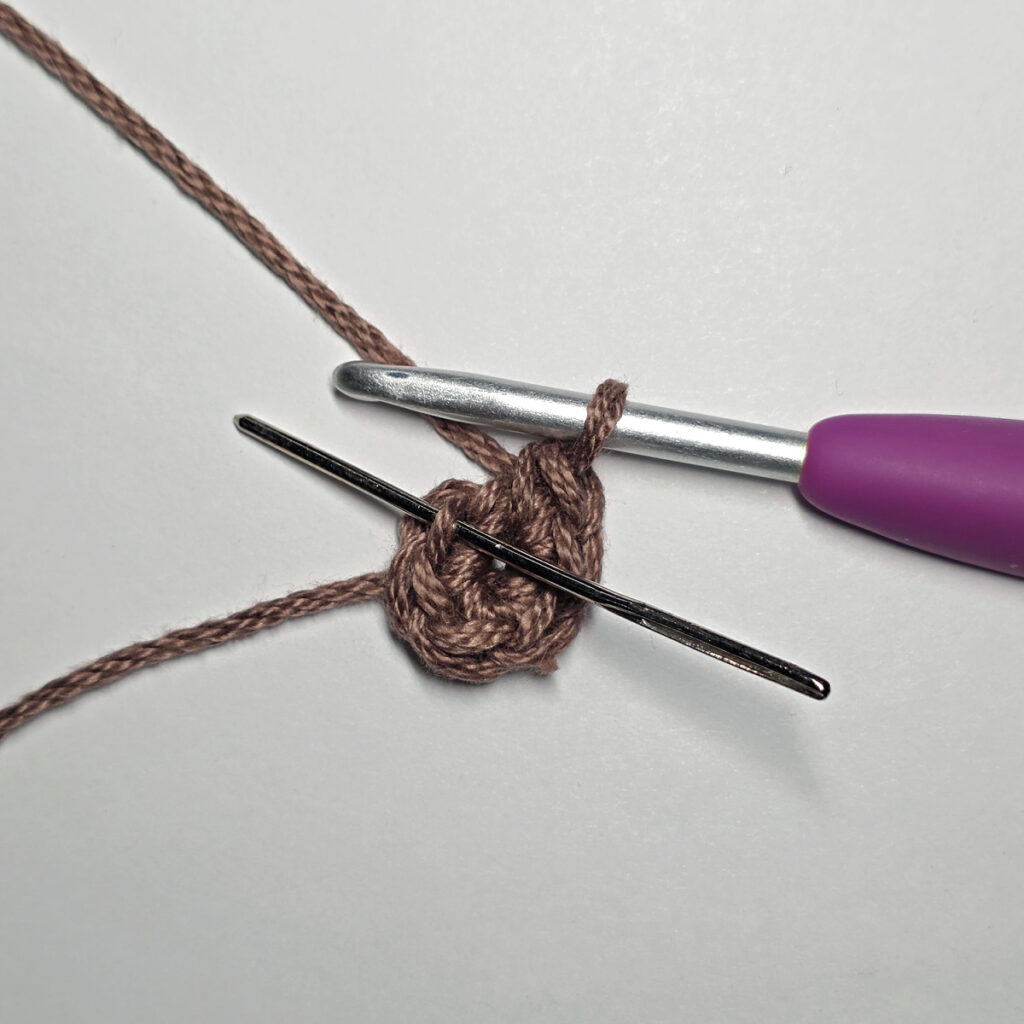
Rnd (RS): With Dark Brown yarn & a 4.00mm crochet hook, ch 2, work 6 sc into the 2nd ch from your hook. Do not join. (6 sts)
Rnd 2: Working in FLO for the entire rnd, (sl st in the FLO of the next st, ch 3) 5 times, sl st in the FLO of the last st. Do not join. (5 humps)
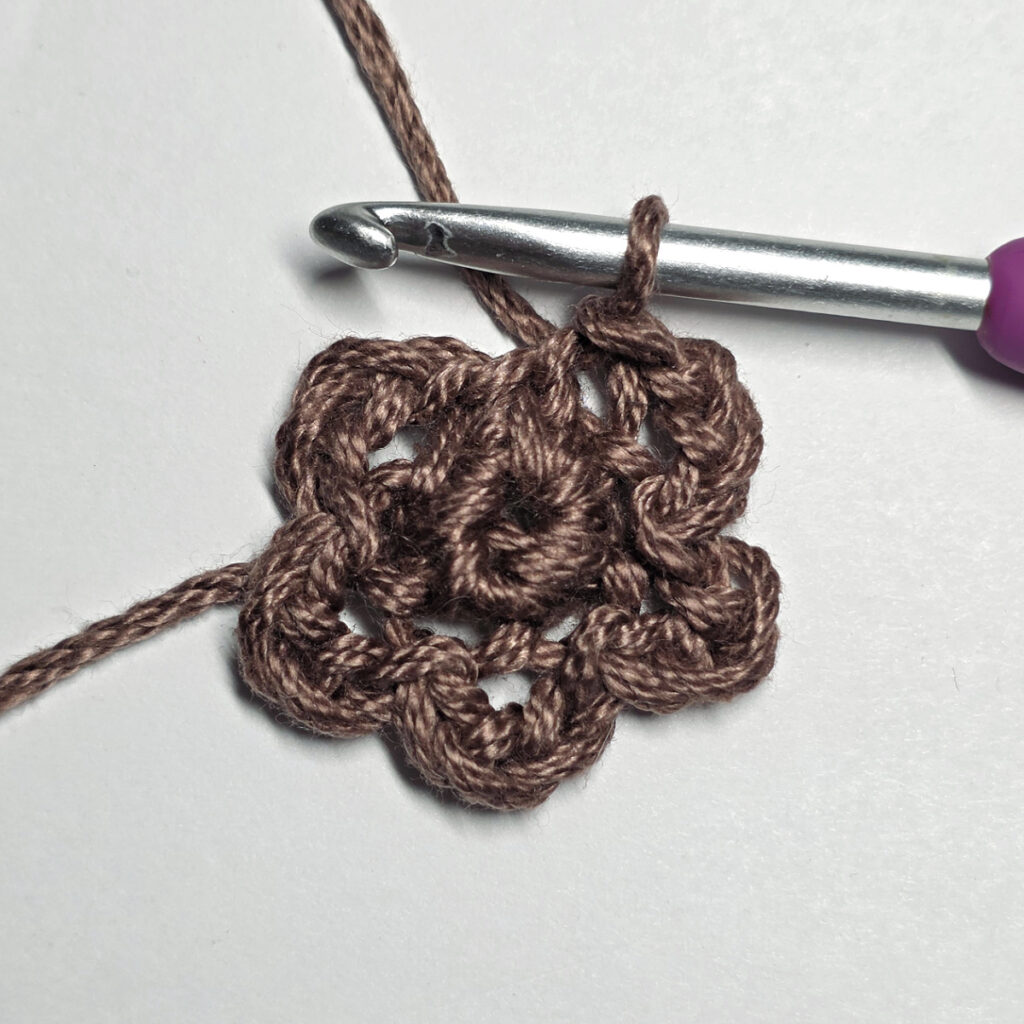
Rnd 3: Working in BLO of Rnd 1 sts, work 2 sc in each st around. Do not join. (12 sts)
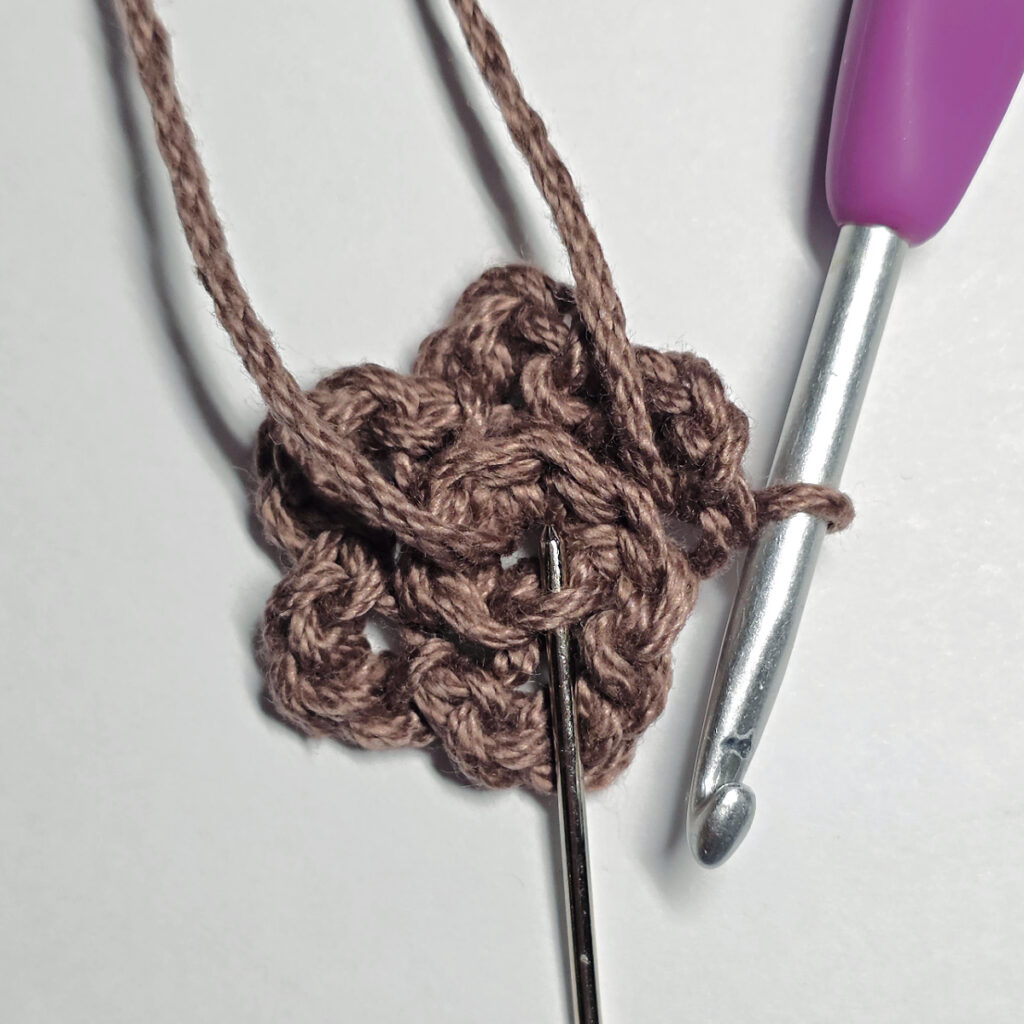
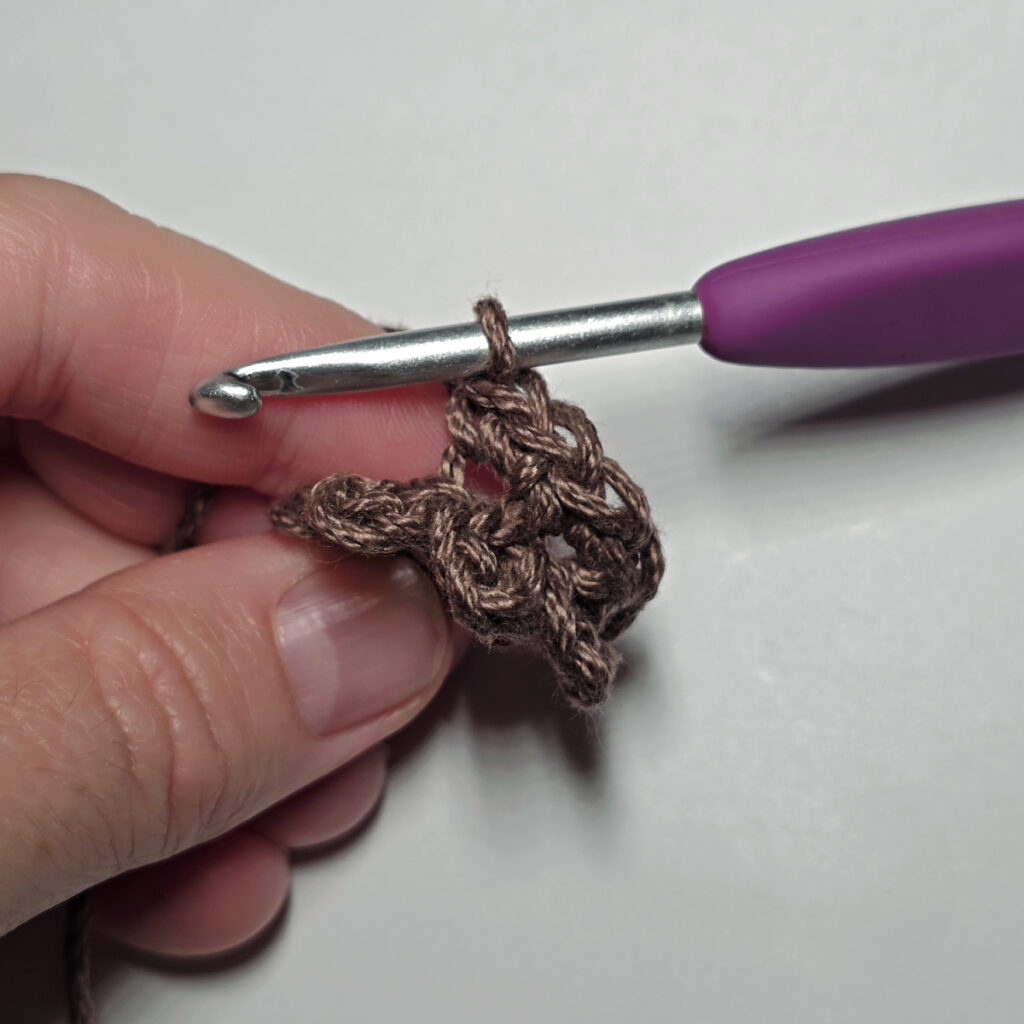
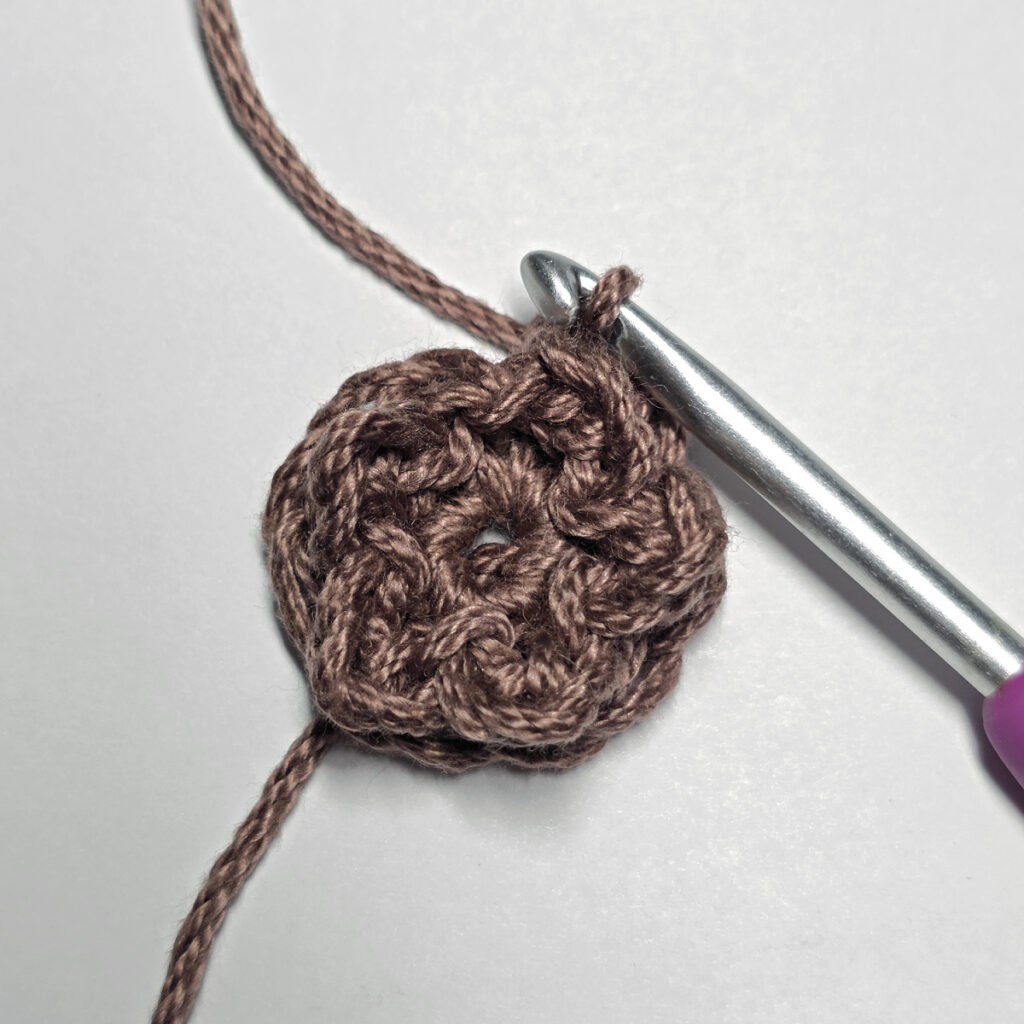
Rnd 4: Working in FLO for the entire rnd, (sl st in the FLO of the next st, ch 3) 11 times, sl st in the FLO of the last st. Do not join. (11 humps)
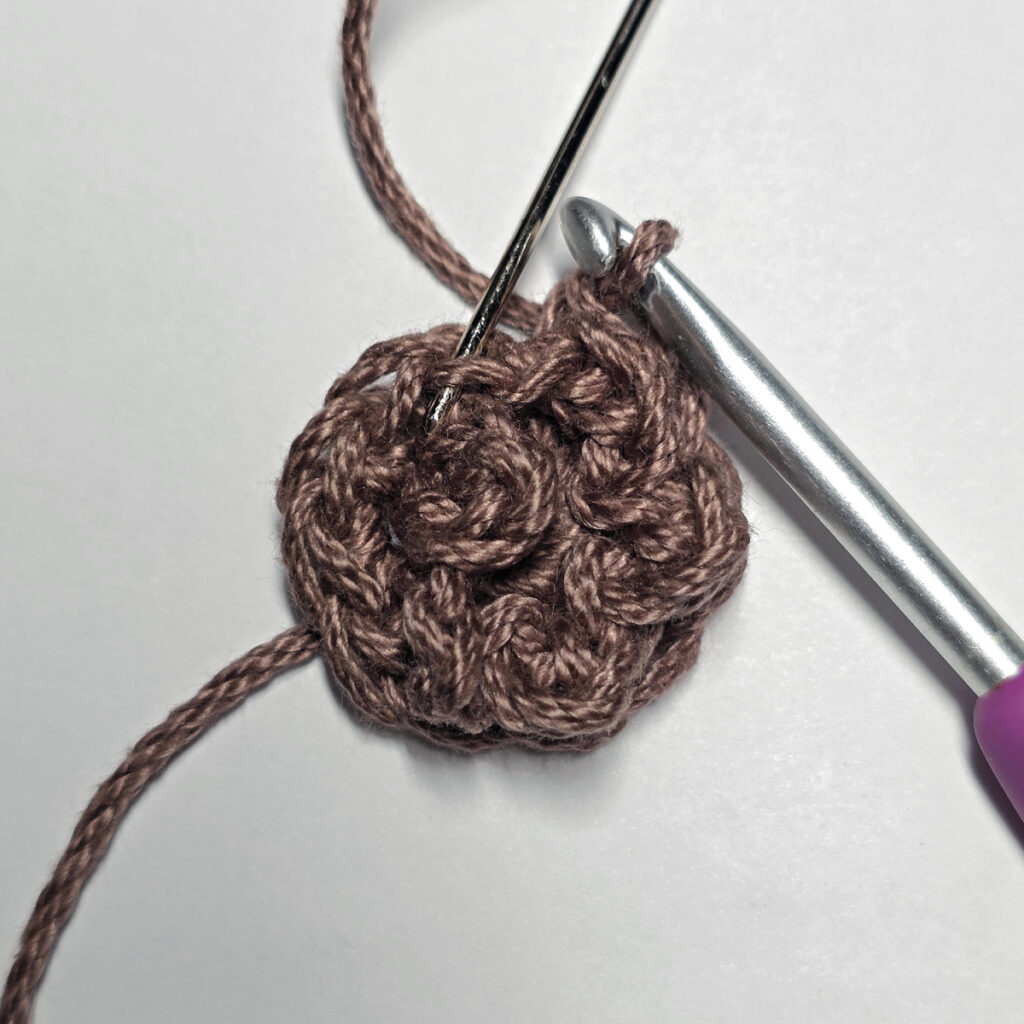
Fasten off. Weave in ends. Continue on to Sunflower Petals. Center of Sunflower should measure approximately 1-3/8″ in diameter.
Sunflower Petals
Special Stitch Instructions
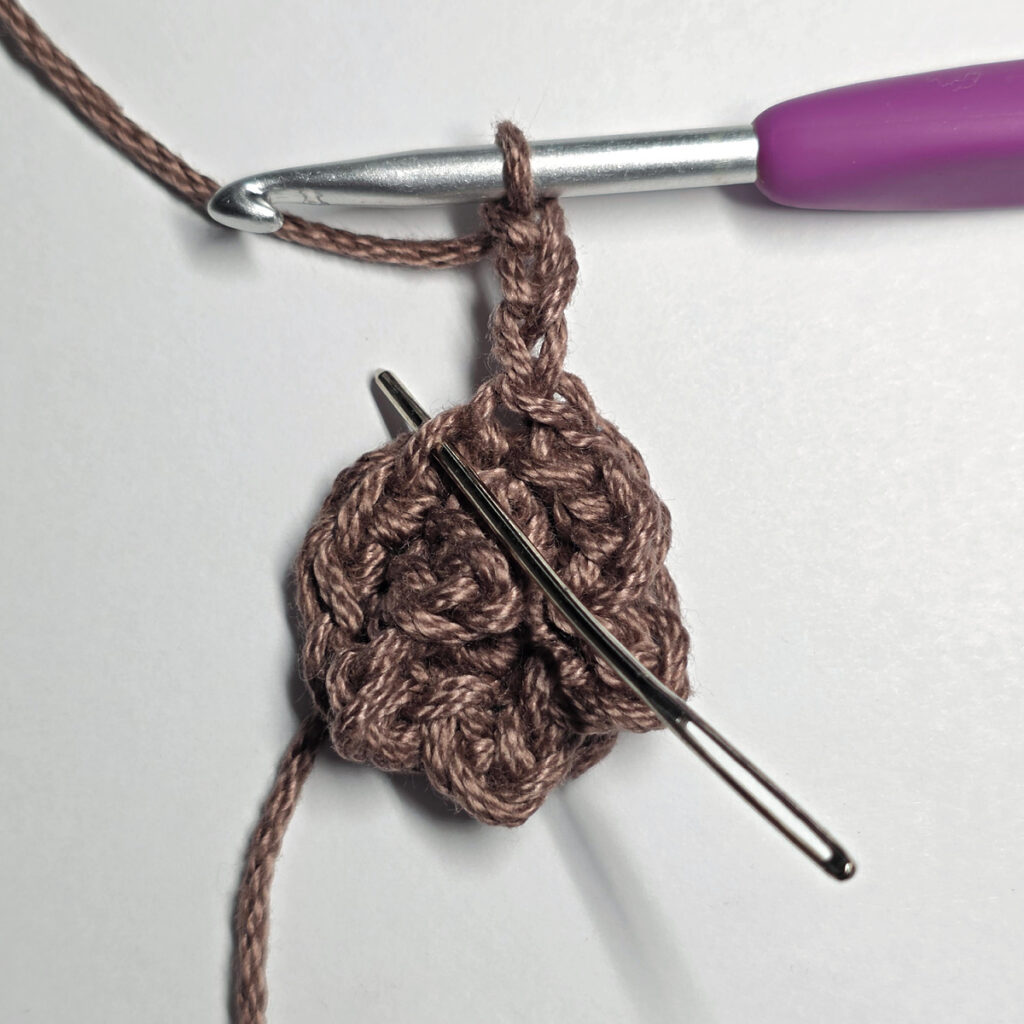
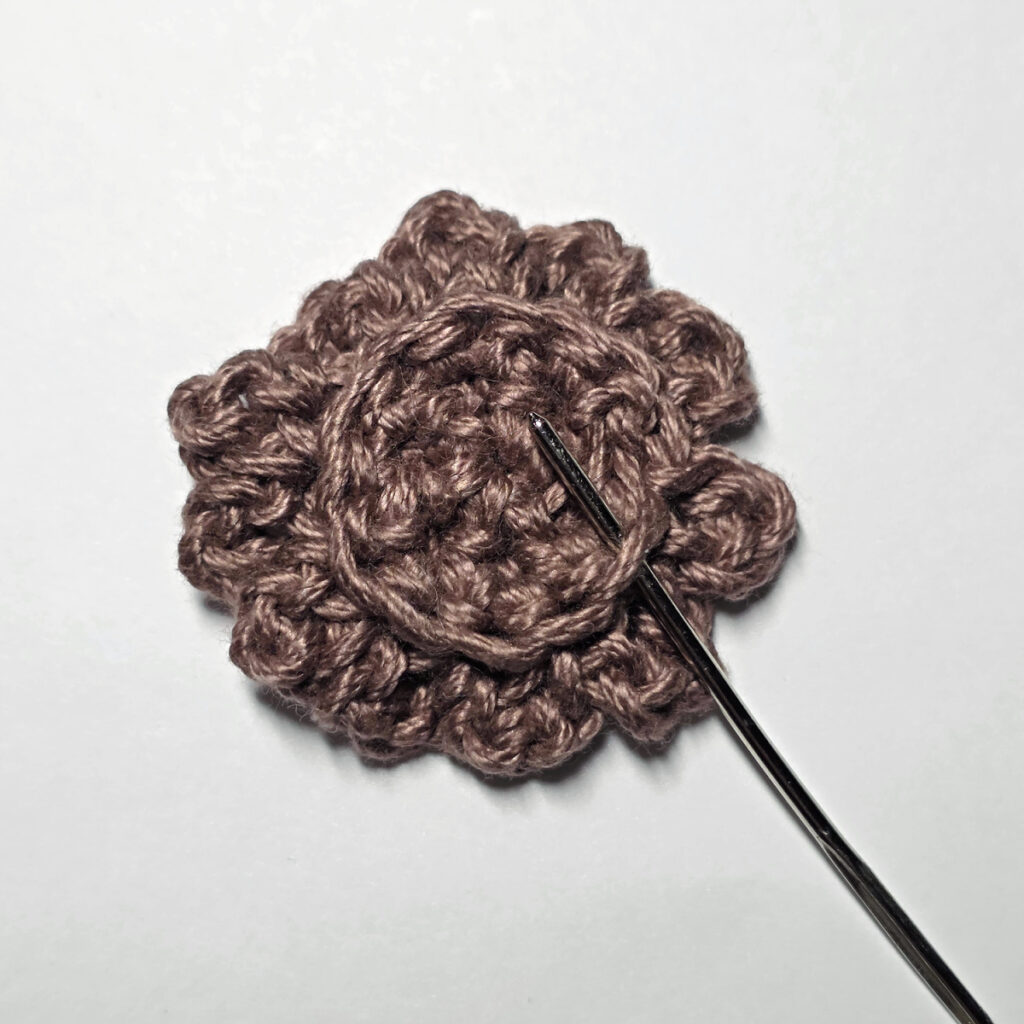
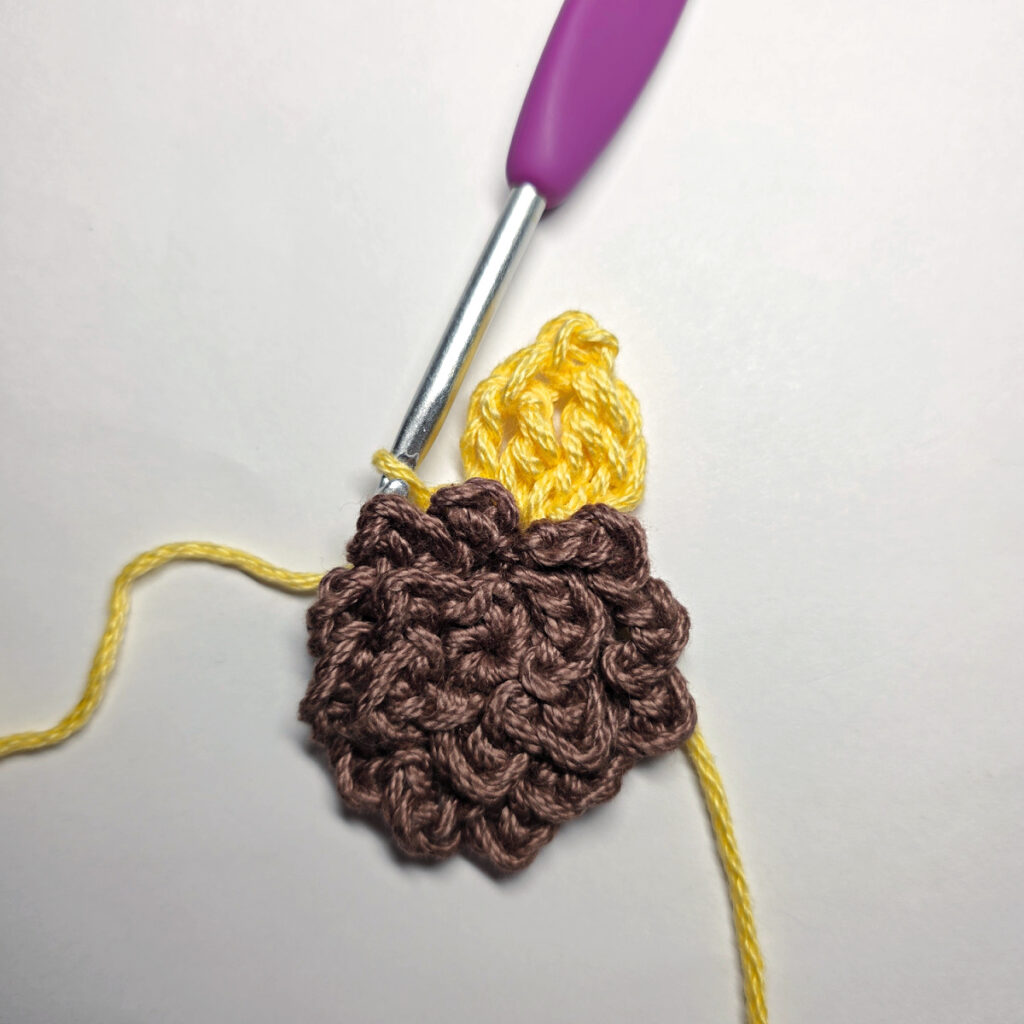
1 Petal Stitch = (ch 3, tr, ch 2, sl st in the 2nd ch from your hook, tr, ch 2, then sl st in the same st) in indicated stitch.
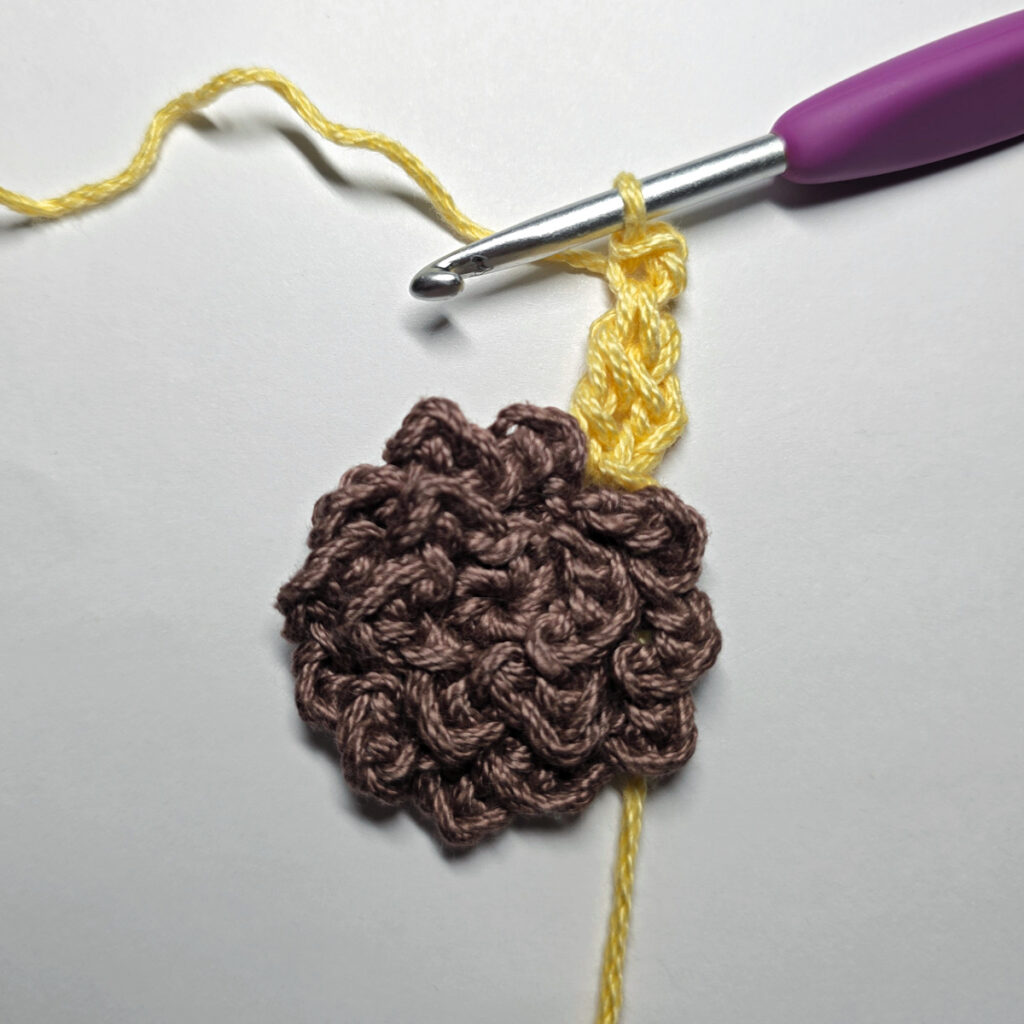
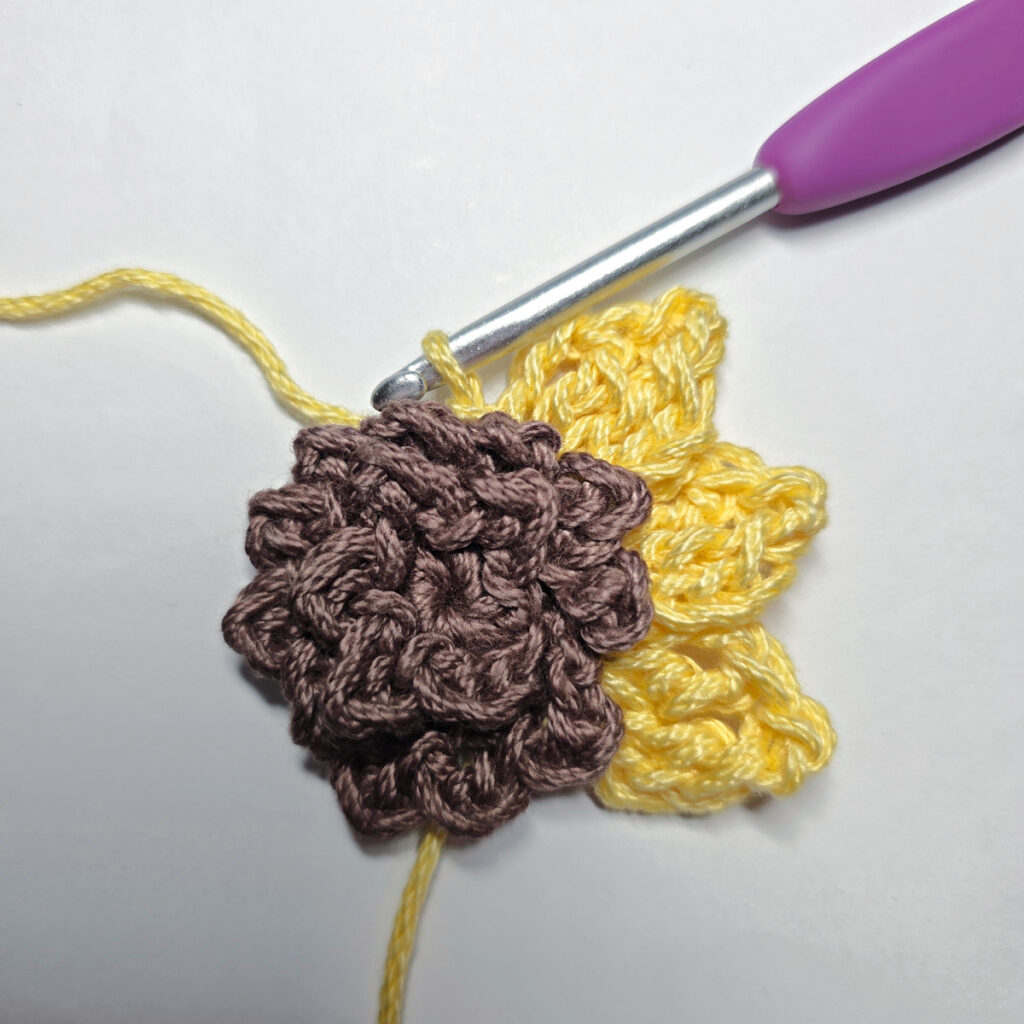
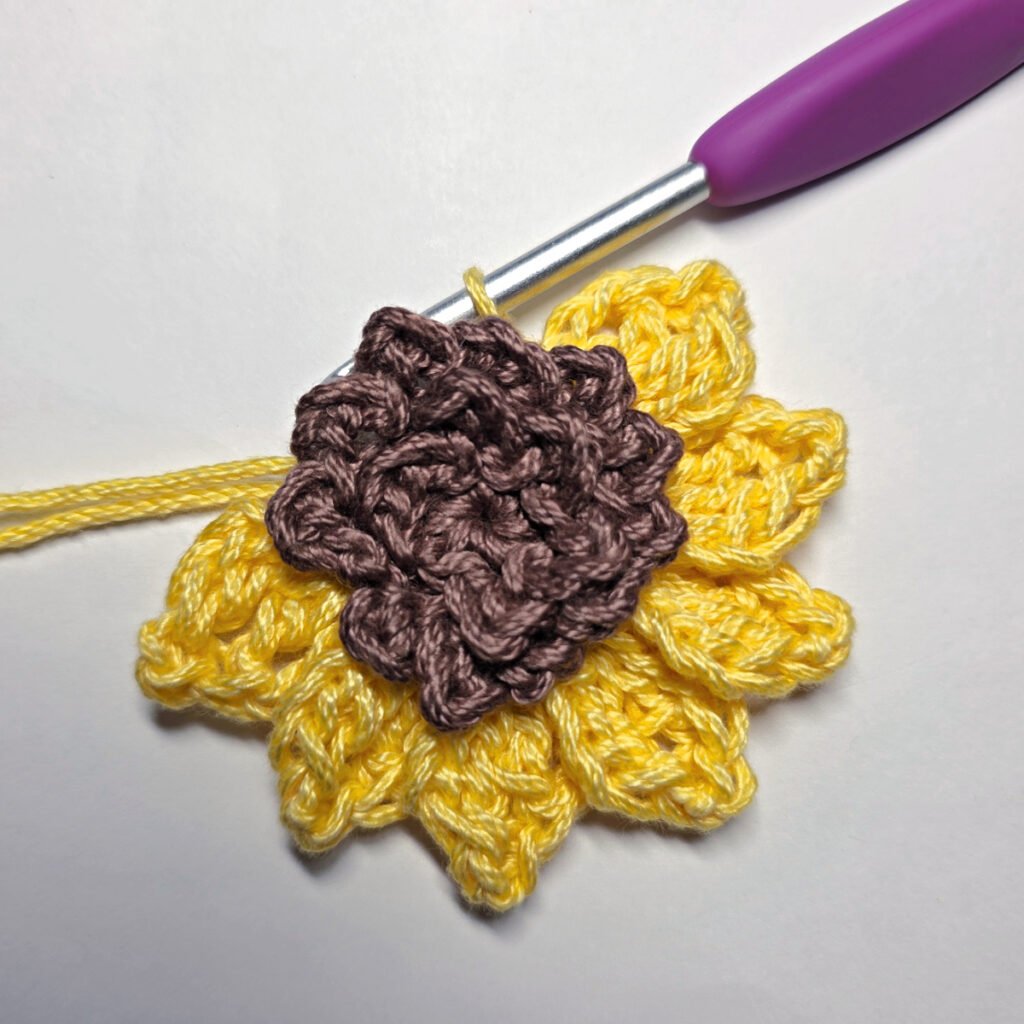
Rnd 1 (RS): With Yellow yarn & a 4.00mm crochet hook, join yarn with a sl st in any of the BLO left from Rnd 3 sts of the center of sunflower, (work 1 petal in the same st, then sl st in the next st) 11 times, then work 1 petal in the last st. (12 petals)
Fasten off. Weave in ends. Sunflower should measure approximately 2-3/4″ in diameter.
Make as many as you prefer for your fall garland.
After you’ve completed all of the pumpkins, acorns, oak and maple leaves, and sunflowers, continue on to Garland Assembly.
Garland Assembly
Other Materials I used for my Garland
- Darice Brand – Craft Designer Jute Cord #20 – 2 Ply (84″ L)
- DIY Wood Bead Mix – I placed 3 beads between each applique, 3 at the beginning, and 3 at the end. (39 beads total)
- Offrey Brand Ribbon – Natural 1-1/2″ W Woven Burlap (2 yards)
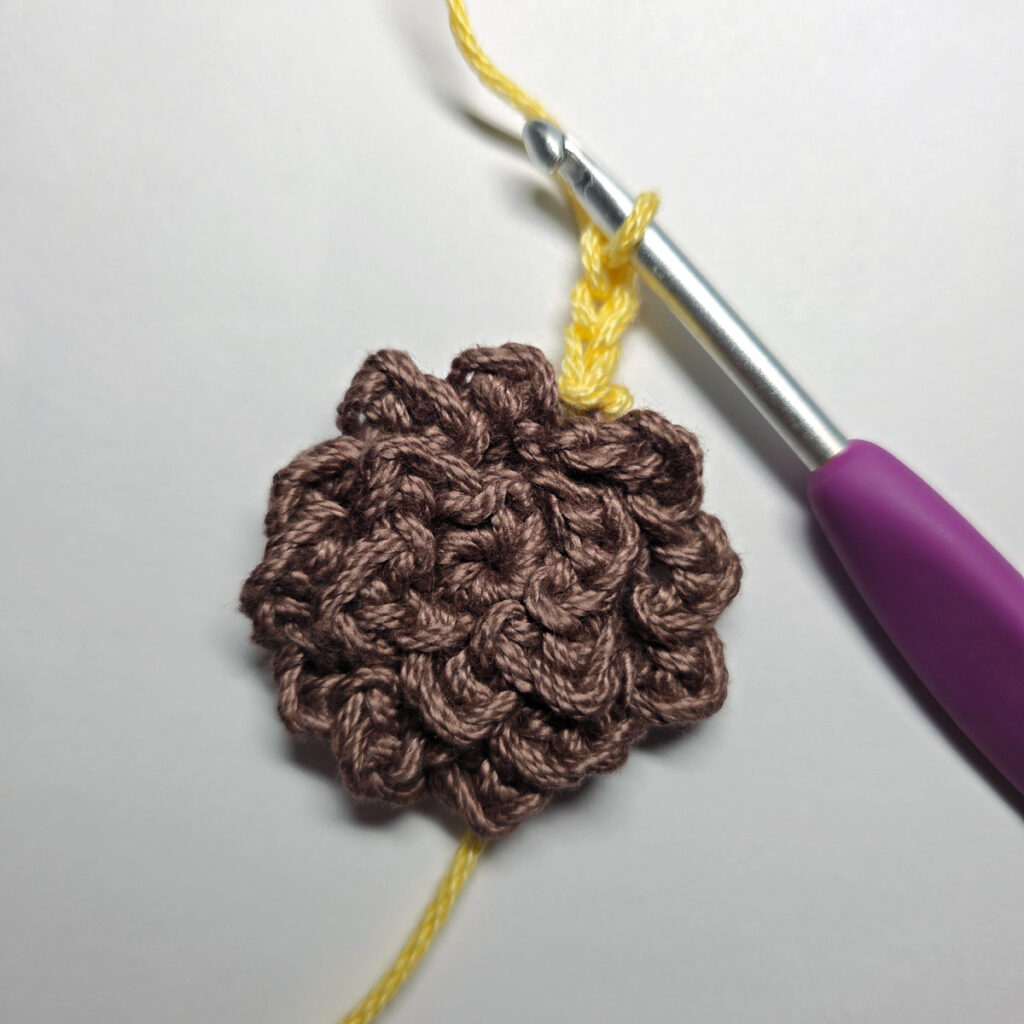
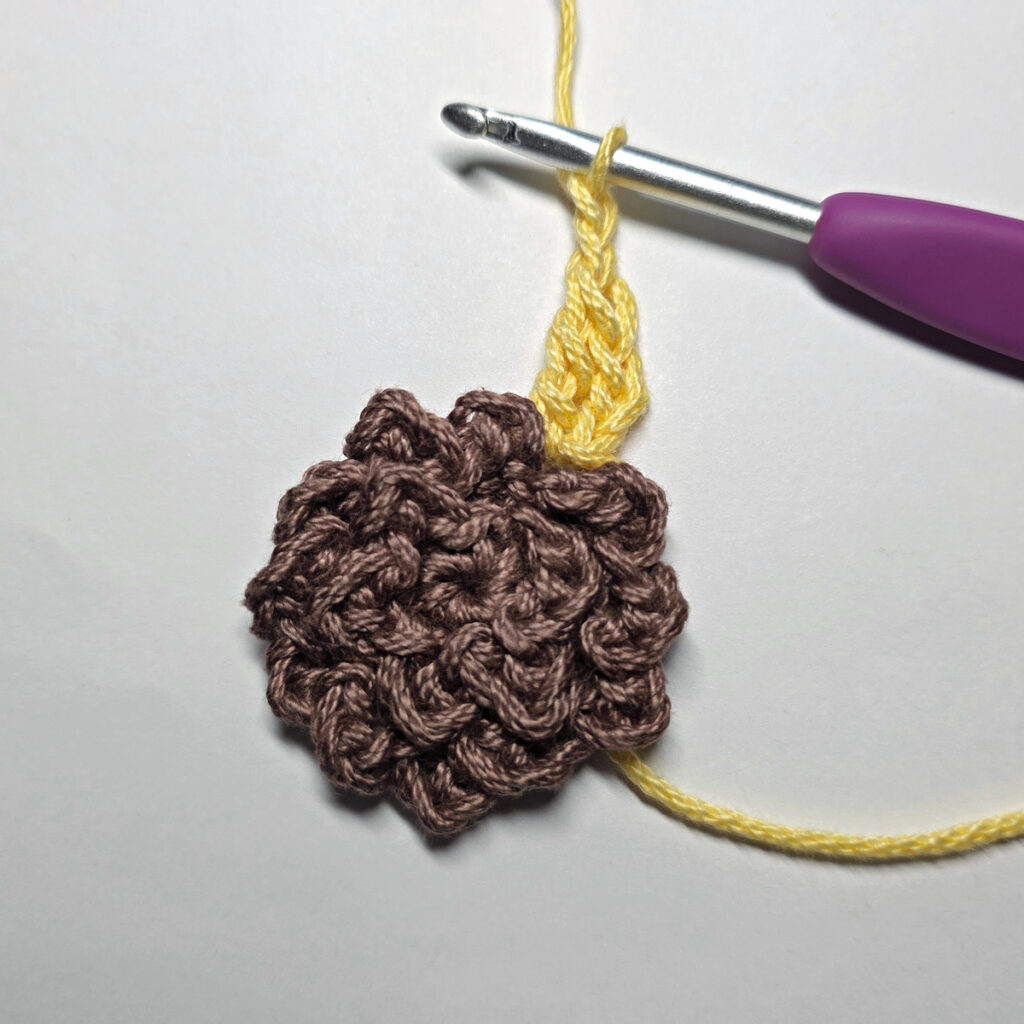
Step 1: Measure and cut your jute cord (or yarn) to length. I held mine up to the window the same way I planned to hang it (with a little droop in the center). Then I added 16″ to that measurement so that I would be left with 8″ at each end of the garland. As it’s shown hanging in the window, my garland measures 64″ from bow to bow. For this size, I cut my jute 84″ L.
Step 2: With a yarn needle and tail of yarn, attach each acorn to an oak leaf (near the stem) as shown in the photos.
Step 3: Use a yarn needle to string your appliques and wooden beads onto the jute cord (or yarn) in the order you’ve planned.
Step 4 (Optional): I added a to my garland, 8″ from each end. The ribbon I used was Offray brand, Natural 1-1/2″ Woven Burlap. They also have a 7/8″. Each bow used a little less than 1 yard.
I MADE IT! NOW WHAT?
Pin this post!: Save this fall crochet garland pattern to your Pinterest boards so that you can come back and make it again.
Leave a comment below: We love to hear your feedback.
Share Your Finished Projects on Facebook or Instagram: I love to see your finished projects! Share with us on social media and tag me @acrochetedsimplicity or use the hashtag #ACrochetedSimplicity so I can find your posts.
Join us in the Facebook Community Group!
Come share your finished projects with us in the A Crocheted Simplicity Crochet Community Group on Facebook. Join us for fun community events such as crochet alongs, join in on crochet conversations, ask questions, get advice, and share your love for crochet!
Looking for More Crochet Home Patterns?
Check out our other free crochet patterns that will enhance your home decor and give a unique handmade look to all of your spaces.
