Crochet Pumpkin Pattern
The weather is starting to get colder and the leaves are changing to hues of orange, red, and yellow as we enter into the beloved autumn season. It’s time to bust out the pumpkin spice, pull on our shawlettes, and work on a crochet pumpkin pattern to add to the decor!
This beginner-friendly pattern will walk you through every step on how to crochet a pumpkin, from its round frame to the sturdy stalk and twirling tendril. You’ll thoroughly enjoy each part and when you’re done with it, you’ll want to make more to keep it company.
You’ll find the free crochet pumpkin pattern in the post below, or you can find an ad-free printable PDF (that includes all photo tutorials) on Ravelry, or Etsy (aff).
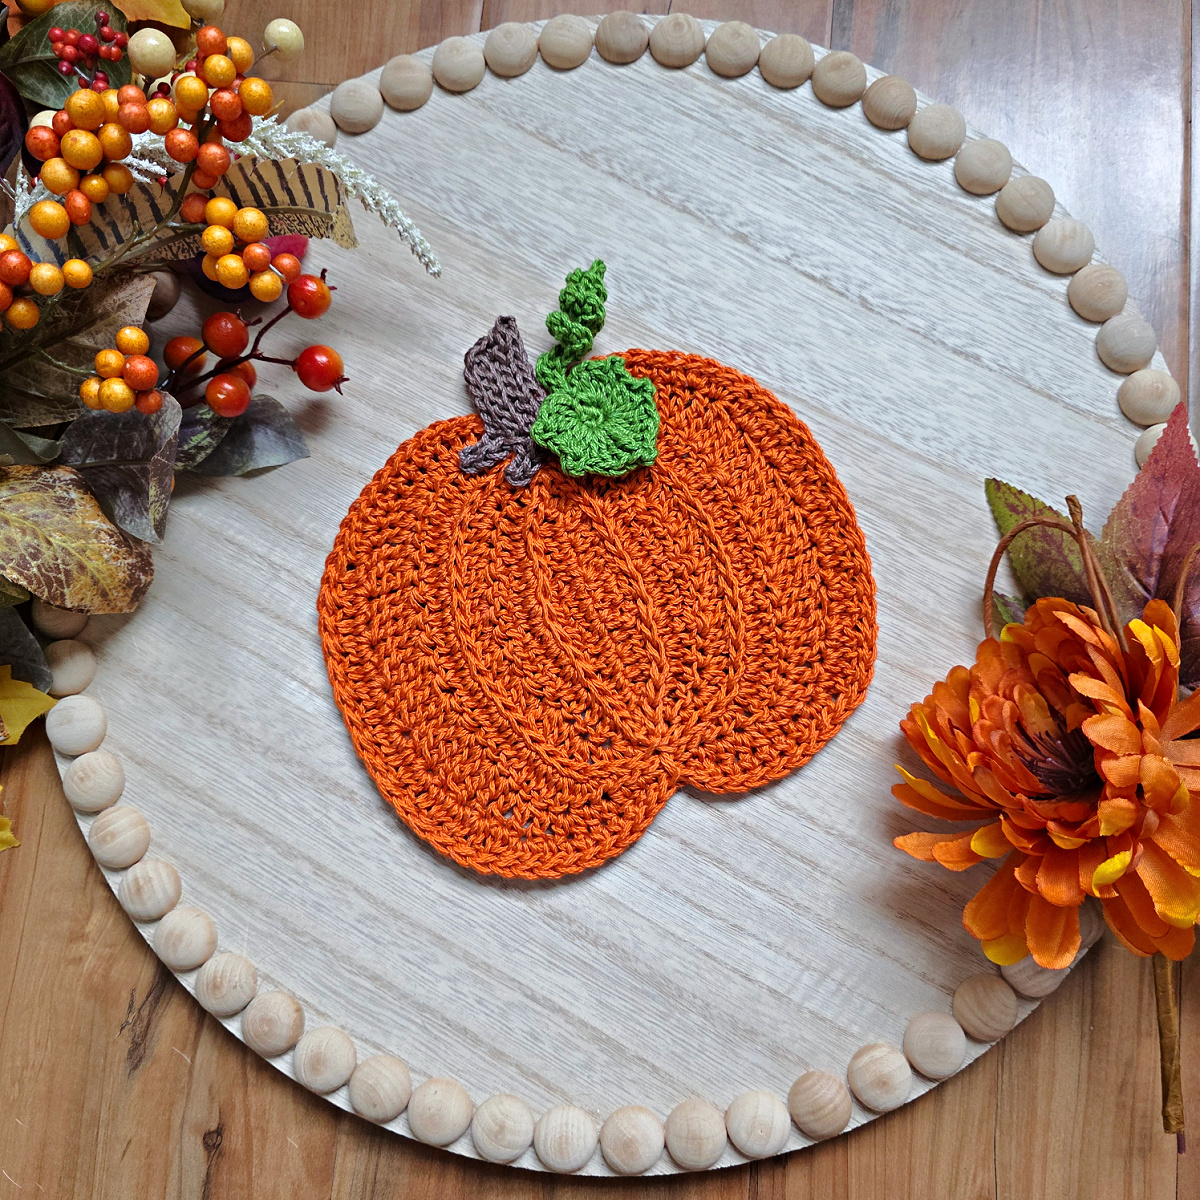
Add a festive touch to your handmade projects with this large crochet pumpkin appliqué! This crochet pumpkin is perfect for fall crochet projects, Halloween decorations, and cozy autumn home décor. Use the pumpkin appliqué to embellish blankets, pillows, tote bags, sweaters, hats, scarves, table runners, and more. It’s an easy way to add seasonal charm to handmade gifts and crochet decorations for your home.
While I’ve made my crocheted pumpkin in a vibrant orange color of yarn, you have the option of choosing any other variation you prefer. You can even use a self-striping yarn to give it a truly unique look and set it apart from the colors of the season, especially if you’re intending to keep it around beyond fall.
Related: Pair these pumpkins up with my Fall Leaves Cutlery Holder Pattern to use them as a table setting.
How to Crochet a Pumpkin
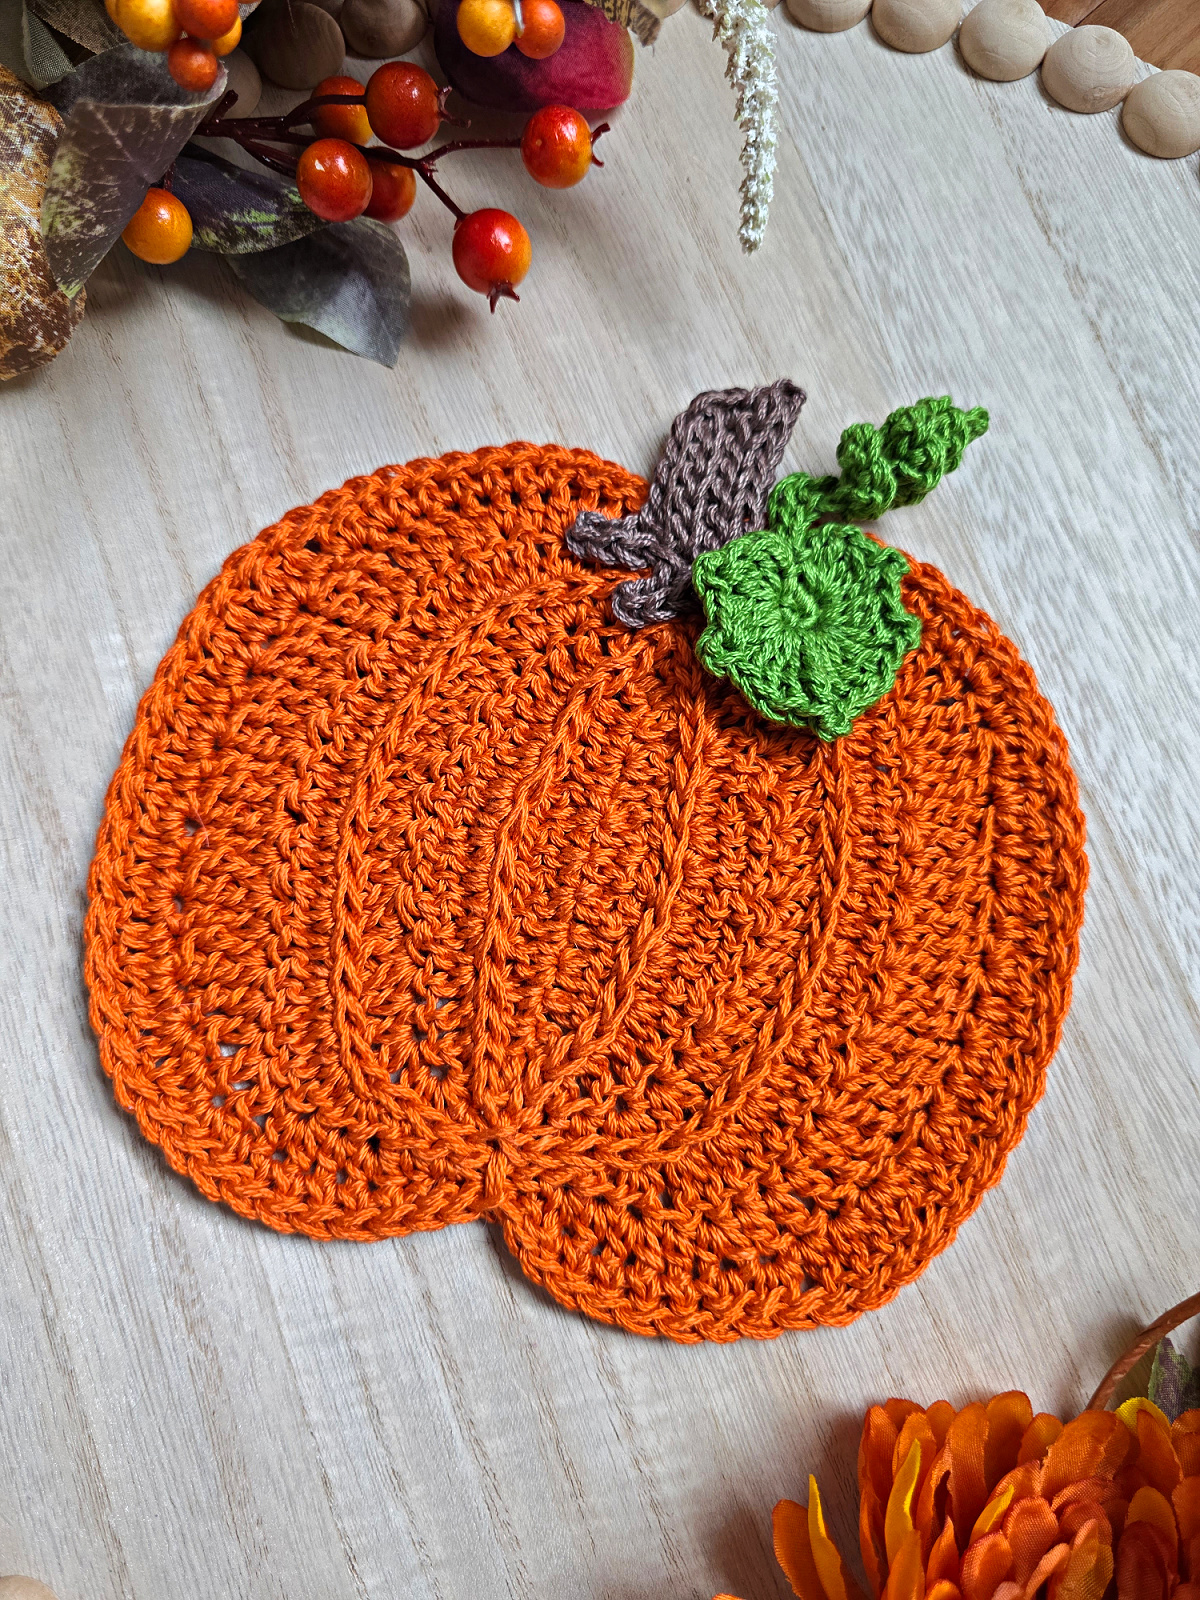
There’s nothing complicated about crocheting a pumpkin, especially not this one. It is made in three separate pieces which are the main body of the pumpkin, its stem, and the leaf with tendril.
You’ll start by crocheting each of these parts and then seaming them together securely to ensure your crochet pumpkin lasts you a very long time. You can then use this as a potholder, placemat, large applique, wall hanging, and more!
How To Get The
Easy Crochet Pumpkin Pattern
Option 1: Scroll down for the free crochet pumpkin pattern right here in this blog post.
Option 2: Purchase the ad-free printable PDF from one of my shops:
Yarn
For my samples of this large crochet pumpkin pattern, I chose Lion Brand Pound of Love. Pound of Love is a premium acrylic yarn that holds up well to many washes, making it the perfect yarn for home decor items. For the stem of the pumpkin, I used Lion Brand Vanna’s Choice.
Pound of Love is a wonderful option for so many different crochet projects, whether that’s garments, blankets, or decor, and the yardage in one ball is incredible at 1,020 yards, making it affordable too!
I also made samples using Lion Brand 24/7 Cotton. This is a great yarn substitution, especially if you’d like to use this as a hot pad or prefer working with cotton yarn for your kitchenware.
Crochet Pattern – Free Pattern
The Easy Crochet Pumpkin is a free pattern below, but if you love to work offline, I’ve got a couple other great options for you.
Purchase the ad-free, printable PDF (that includes all photo tutorials), on Ravelry, or on Etsy (aff).
This post contains affiliate links.
Materials
- Yarn: Worsted Weight / 4 / Yarn, Lion Brand Pound of Love (100% Premium Acrylic / 1,020 yards / 454 g / 16 oz / 932 m) and Lion Brand Vanna’s Choice 100% Acrylic (170 yards / 100 g / 3.5 oz / 156 m) were used for the samples shown in the photos. I also used Lion Brand 24/7 Cotton (100% Mercerized Cotton / 185 yards / 100 g / 3.5 oz / 170 m).
- Yardage and Colors: For my version of the crocheted pumpkin, I used:
- Sample #1 Colors (Pound of Love & Vanna’s Choice)
- Pumpkin Spice: #550-132Z (45 yards)
- Olive: #550-172T (6 yards)
- Chocolate: #860-126 (3 yards)
- Sample #2 Colors (24/7 Cotton)
- Tangerine: #761-133 (45 yards)
- Grass: #761-172 (6 yards)
- Café Au Lait: #761-126AA (3 yards)
- Sample #1 Colors (Pound of Love & Vanna’s Choice)
- Crochet Hooks: H/8/5.00mm; G/6/4.00mm; or size needed to obtain gauge (My favorite crochet hooks are the Clover Amour Crochet Hooks, I’ve never had an ache in my hand since switching).
- Measuring Tape
- Scissors
- Yarn Needle
- Locking Stitch Markers
Abbreviations (U.S. Terms)
- ch(s): chain(s)
- sl st(s): slip stitch(es)
- st(s): stitch(es)
- sc: single crochet
- hdc: half double crochet
- dc: double crochet
- tr: treble crochet
- 2dc-cl: double crochet cluster
- 2tr-cl: treble crochet cluster
- Rep: repeat
- RS: right side; WS: wrong side
- SM: stitch marker
- Rnd: round
- yo: yarn over
- BLO: back loop only
Gauge
- Measurements given throughout pattern.
Experience Level
- Easy
Size
- 7″ W x 6″ H (not including stem)
Special Stitches
- 2 Double Crochet Cluster (2dc-cl): Yo, insert hook where indicated, yo, pull up a loop, yo, pull thru 2 loops, yo, insert hook in same st, yo, pull up a loop, yo, pull thru 2 loops, yo, pull thru remaining loops.
- 2 Treble Crochet Cluster (2tr-cl): Yo twice, insert hook where indicated, yo, pull up a loop, (yo, pull thru 2 loops) 2 times, yo twice, insert hook in same st, yo, pull up a loop, (yo, pull thru 2 loops) twice, yo, pull thru remaining loops.
Pattern Notes
- Turning chains are not included in stitch count unless noted otherwise.
- Yarn Notes: Worsted Weight / 4 / Yarn, Lion Brand Pound of Love (100% Premium Acrylic / 1,020 yards / 454 g / 16 oz / 932 m) and Lion Brand Vanna’s Choice 100% Acrylic (170 yards / 100 g / 3.5 oz / 156 m) were used for the samples shown in the photos. Lion Brand 24/7 Cotton (100% Mercerized Cotton / 185 yards / 100 g / 3.5 oz / 170 m).
- Another comparable worsted weight yarn may be substituted.
- Yardage and Colors: For my version of the crocheted pumpkin, I used:
- Sample #1 Colors (Pound of Love & Vanna’s Choice)
- Pumpkin Spice: #550-132Z (45 yards)
- Olive: #550-172T (6 yards)
- Chocolate: #860-126 (3 yards)
- Sample #2 Colors (24/7 Cotton) (shown above)
- Tangerine: #761-133 (45 yards)
- Grass: #761-172 (6 yards)
- Café Au Lait: #761-126AA (3 yards)
- Sample #1 Colors (Pound of Love & Vanna’s Choice)
- Construction Notes: This large pumpkin applique is made in three separate pieces (pumpkin, stem, and leaf with tendril). After crocheting a pumpkin, stem, and leaf with tendrils, you’ll quickly attach the stem and leaf to the pumpkin.
Large Pumpkin – Free Crochet Pattern
Pumpkin Motif
In this section, you’ll crochet a pumpkin from the center out. Pay close attention to the end of each round. You will join some rounds, but not every round. You will turn some rounds, but not every round.
Rnd 1 (WS): With Orange yarn & a 5.00mm crochet hook, ch 16, working into the back humps of the foundation ch, sl st into the 2nd ch from your hook, * sc in the next ch, hdc in the next ch, dc in the next ch, 2dc-cl in the next ch, dc in the next ch, 2tr-cl in each of the next 3 chs, dc in the next ch, 2dc-cl in the next ch, dc in the next ch, hdc in the next ch, sc in the next ch, sl st in the next ch *, ch 1 (counts as a st), rotate to work into the bottom of the foundation ch, sl st in the next ch, then rep from * to *. Do not join. Turn. (31 sts) Round 1 should measure approximately 1-1/2″ W x 4-1/8″ H. The height is measured along the foundation chain.
TIP: I like to place a SM in the ch-1 worked at the point. I move it up as I complete each round. This ch-1 marks the middle of each round of instructions. This isn’t mandatory, but it can help keep you on track.
Rnd 2 (RS): Ch 1, sl st in each st around (surface crochet). Use the Special Join Technique to join the round. Turn. (31 sts)
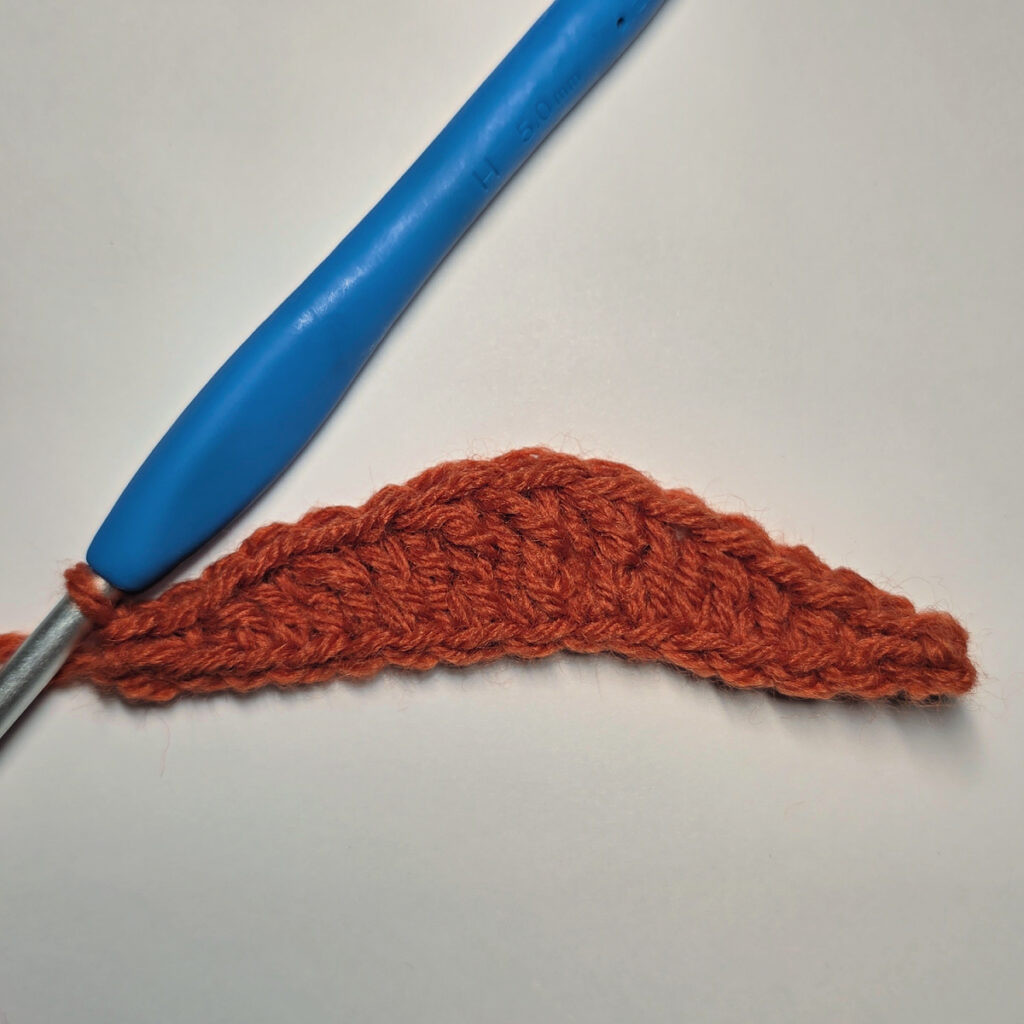
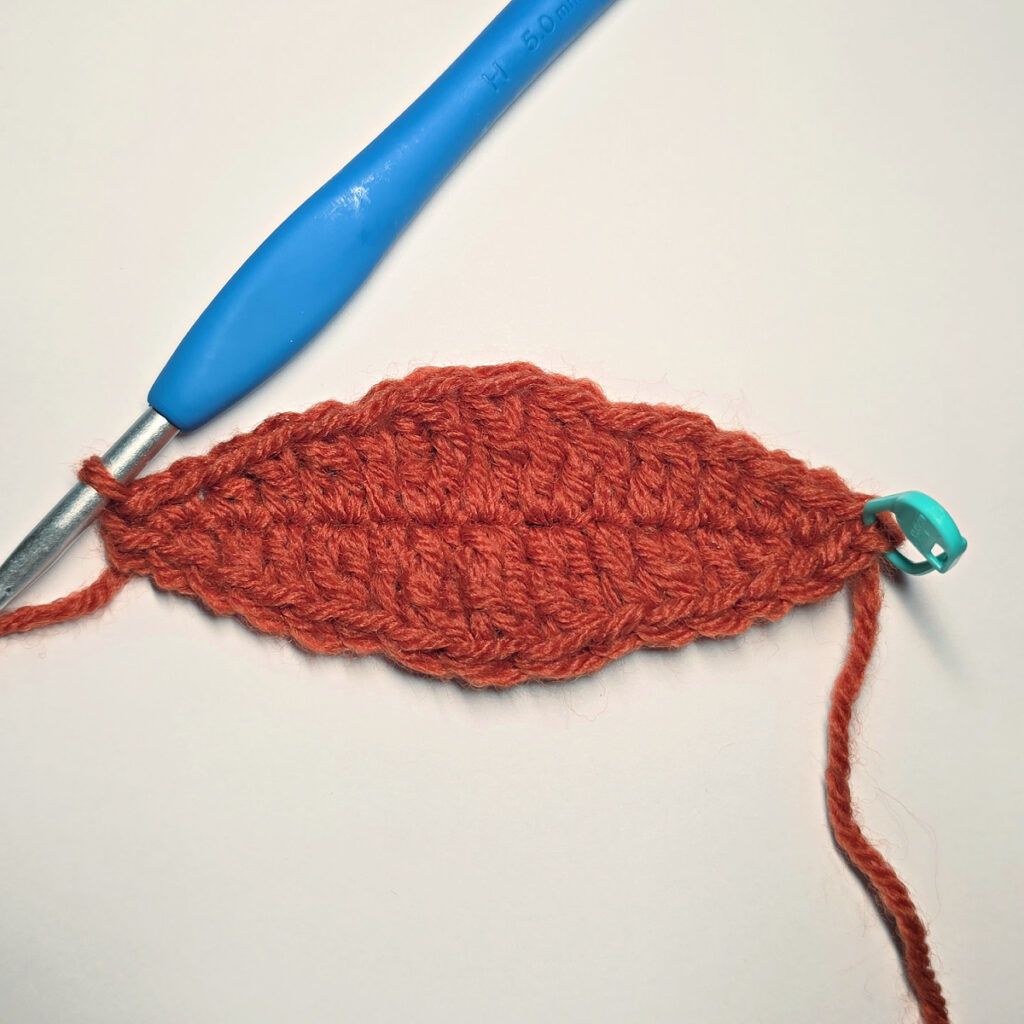
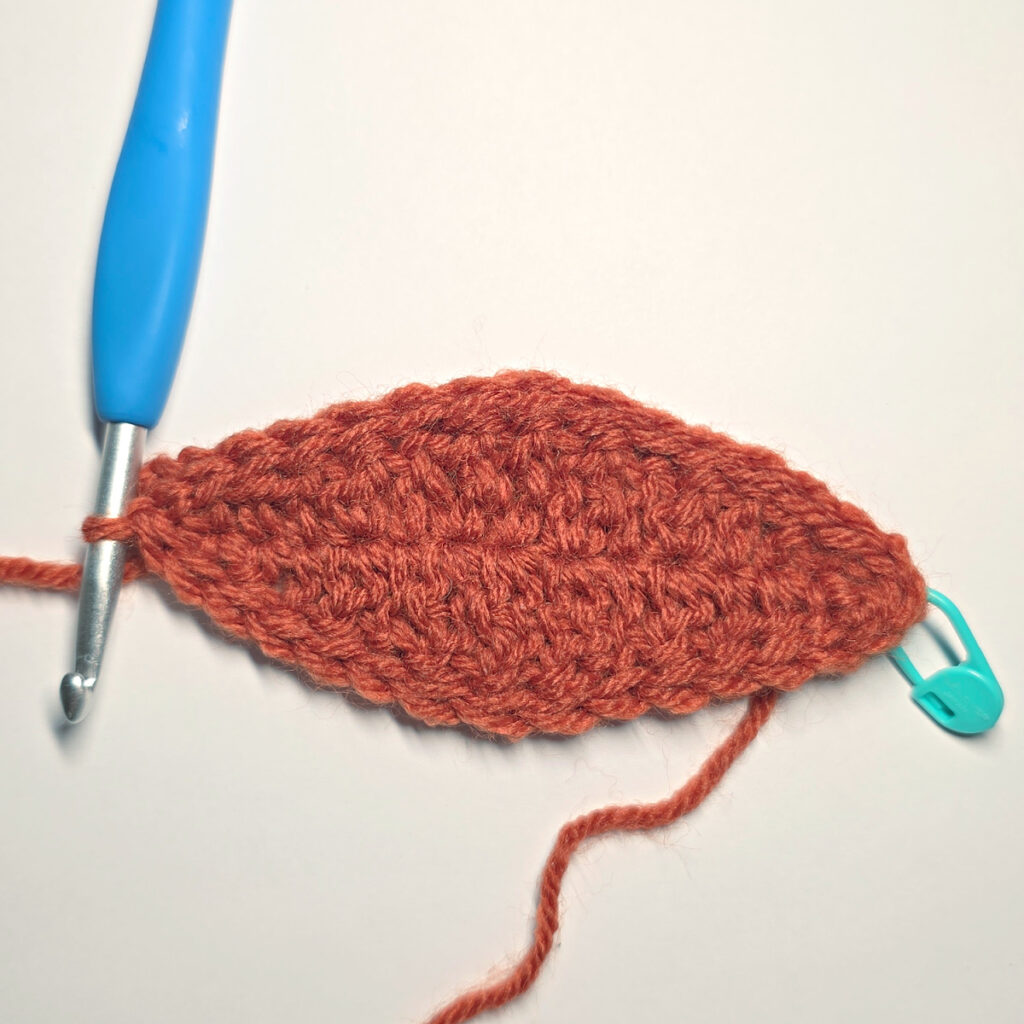
Work ALL Round 3 stitches into the stitches from Round 1. Do not work into the sl sts from Round 2.
Rnd 3 (WS): Ch 1, * sc in the next st, hdc in the next st, dc in each of the next 2 sts, 2 dc in the next st, (2tr-cl in the next st, 2 tr in the next st) 2 times, 2tr-cl in the next st, 2 dc in the next st, dc in each of the next 2 sts, hdc in the next st, sc in the next st *, sl st in the next ch-1, repeat from * to *. Join with a sl st to the 1st st. Turn. (39 sts)
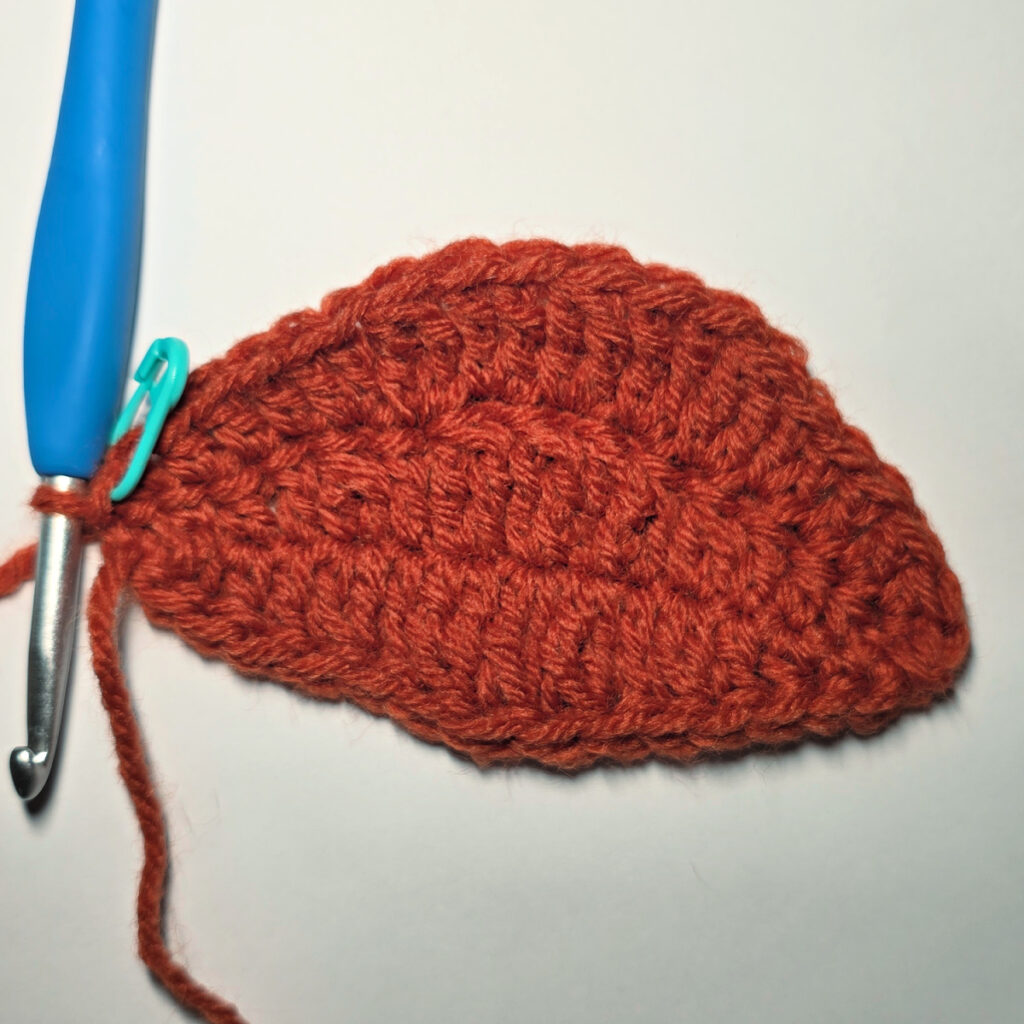
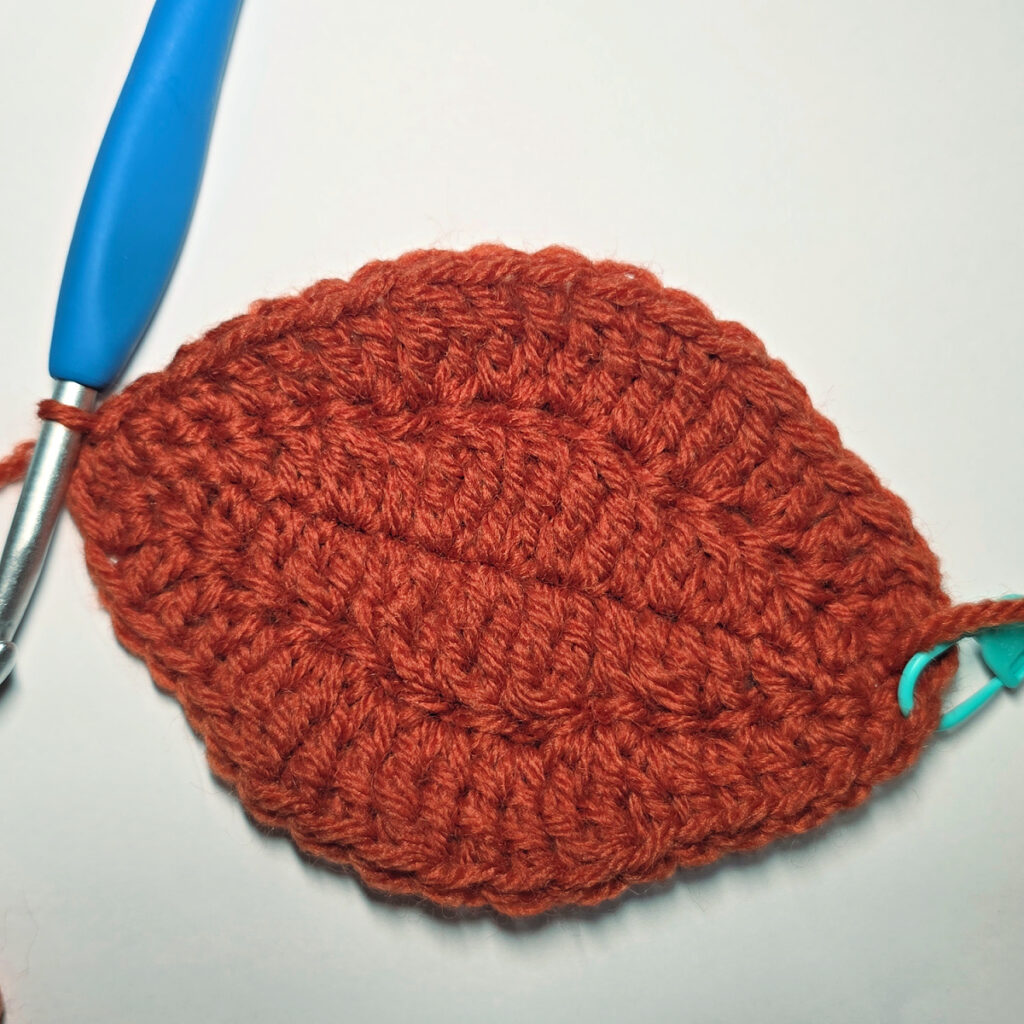
Rnd 4 (RS): Ch 1, * BLO sl st in the next st, working in both loops, hdc in the next st, 2 hdc in the next st, 2 dc in the next st, dc in the next st, (2dc-cl in the next st, dc in the next st) 5 times, 2 dc in the next st, 2 hdc in the next st, hdc in the next st, BLO sl st in the next st *, BLO sl st next st, rep from * to *. Do not join. Do not turn. (47 sts)
Pumpkin should measure approximately 3-3/4″ W x 4-3/4″ H.
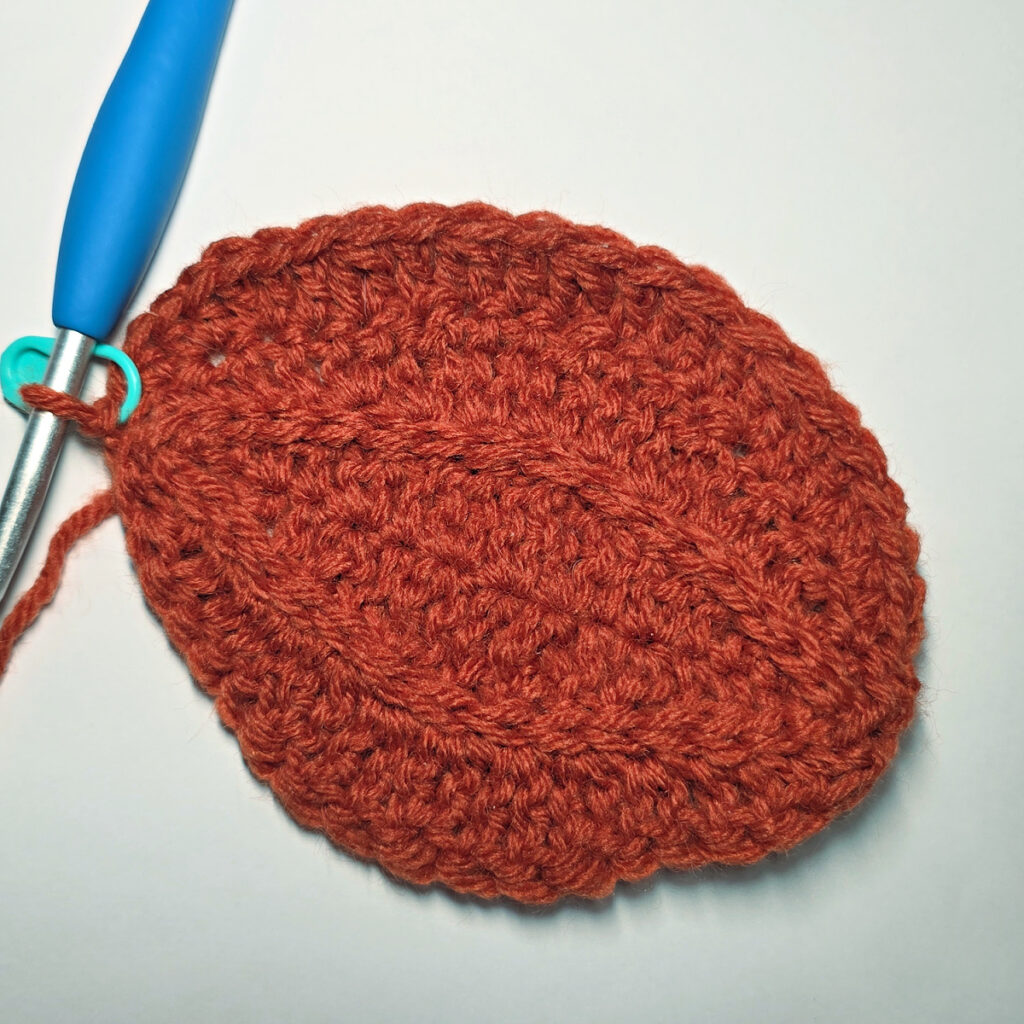
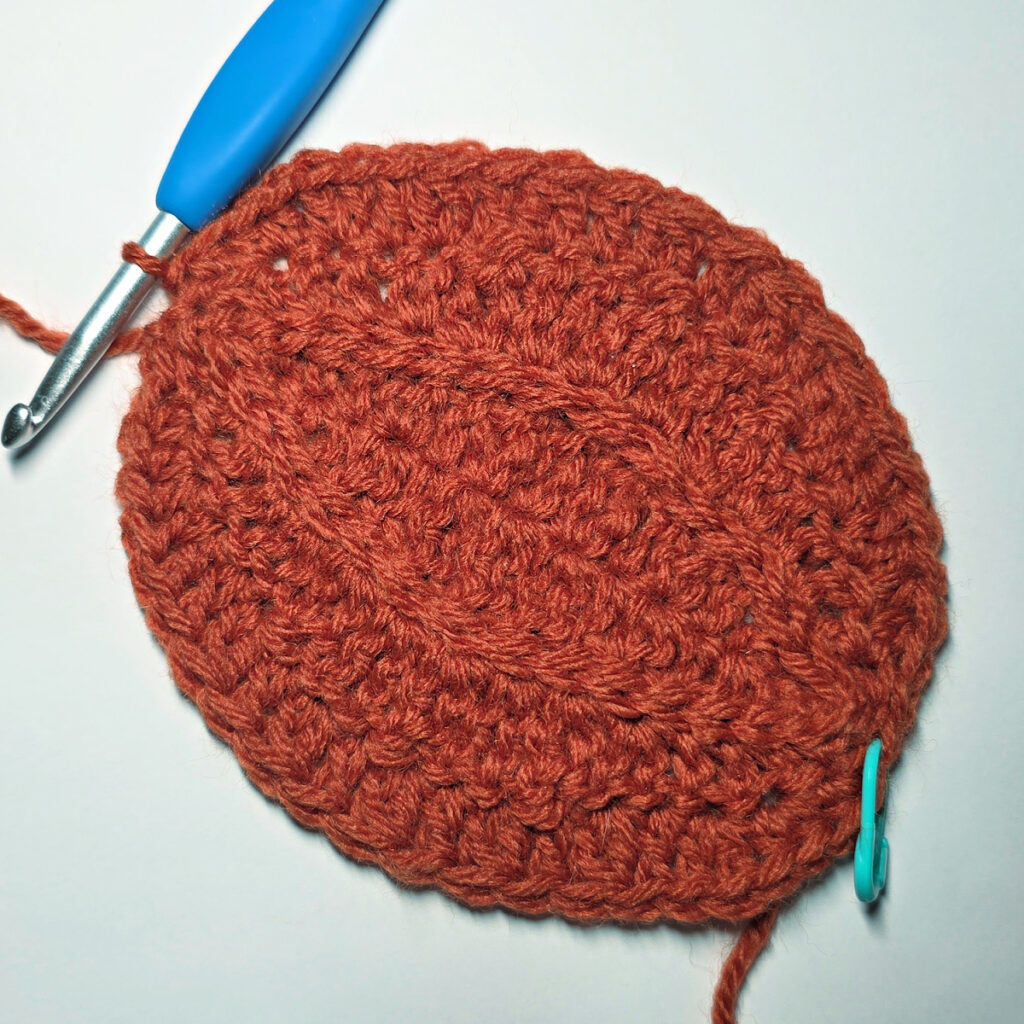
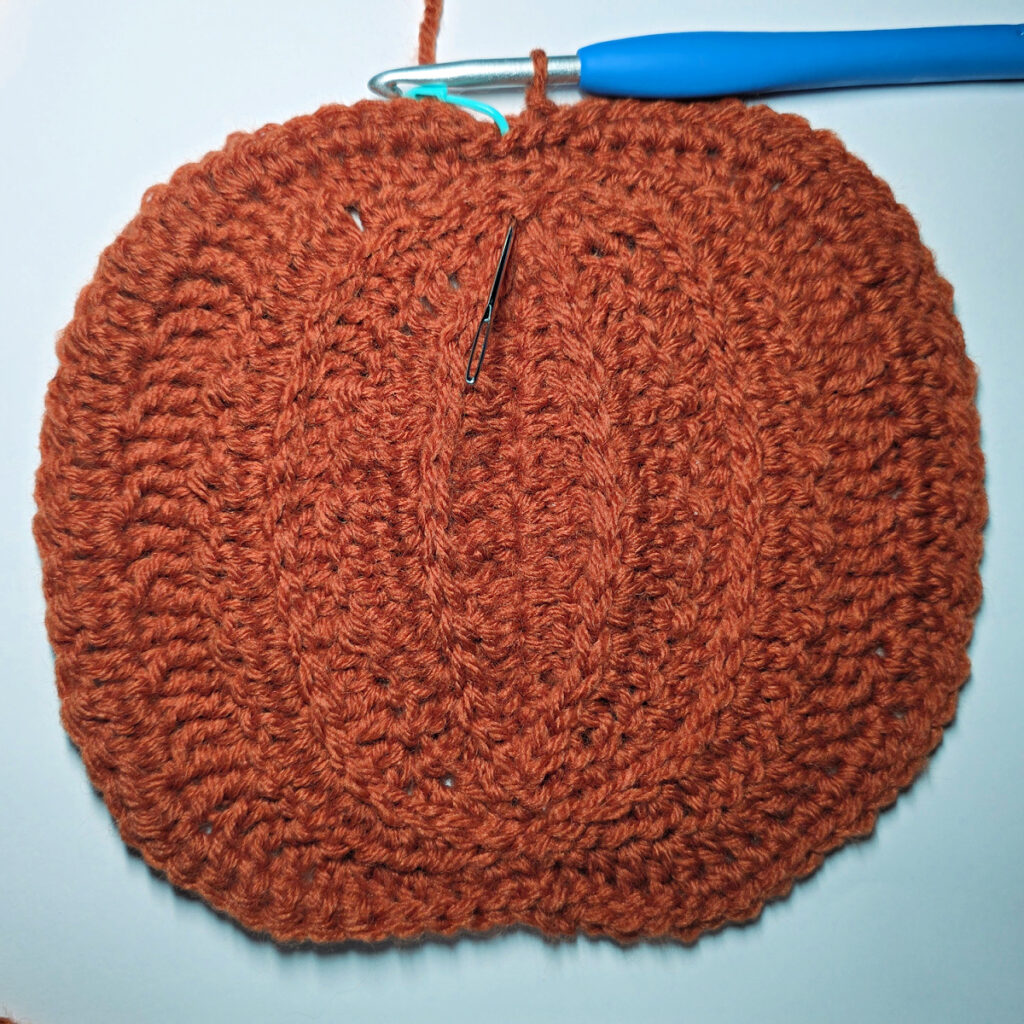
Rnd 5 (RS): No beginning ch , sl st in each of the first 23 sts (surface crochet), then reach down and sl st into the sl st from Rnd 2 (where the yarn needle is marking in the photo below), then sl st in each of the last 23 sts . Use the Special Join Technique to join the round. Turn. (47 sts)
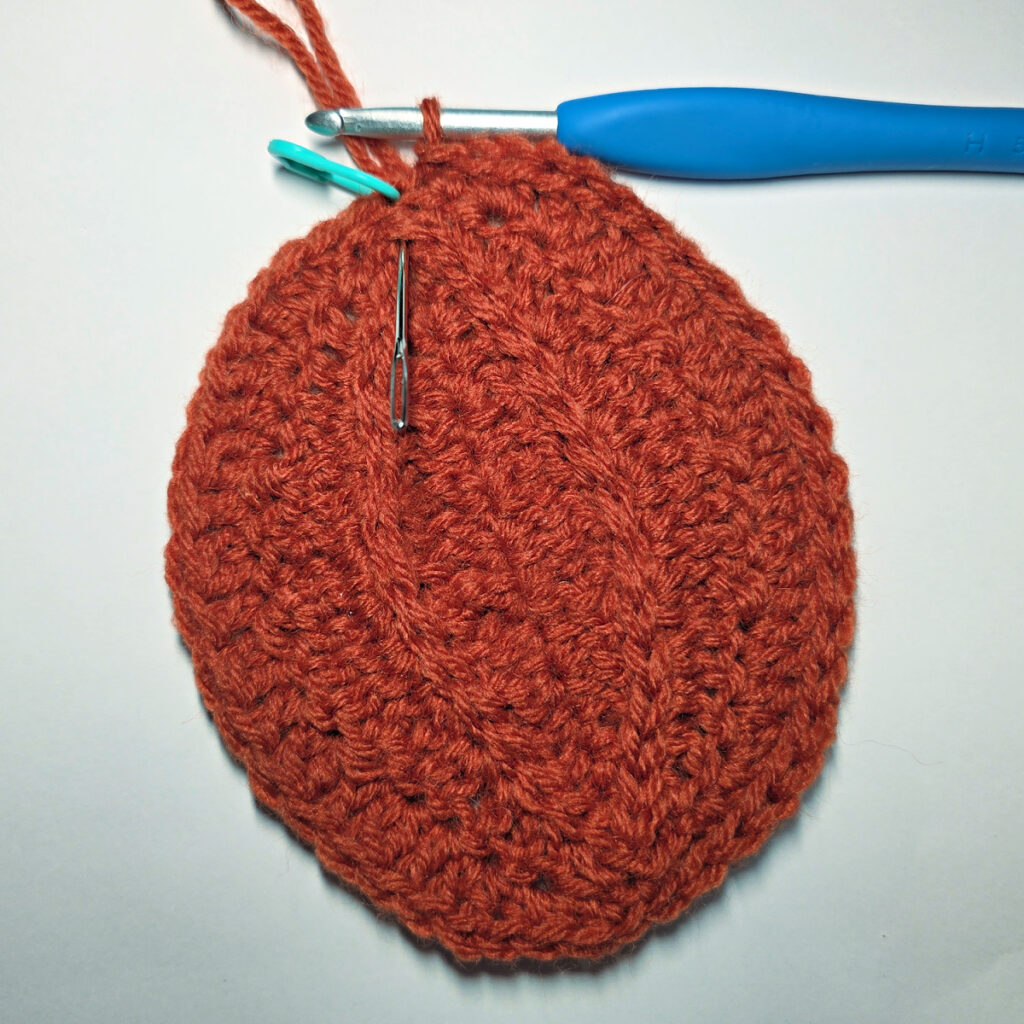
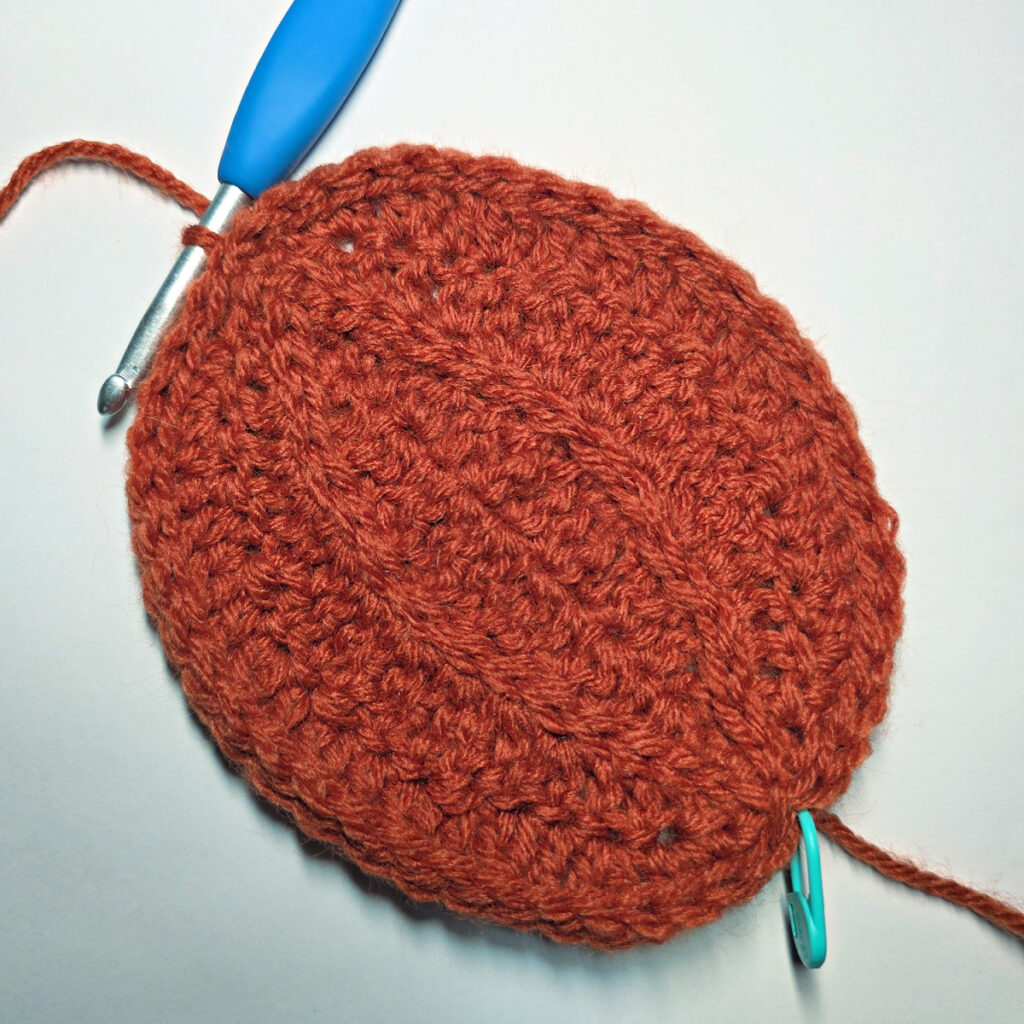
Work ALL Round 6 stitches into the stitches from Round 4. Do not work into the sl sts from Round 3.
Rnd 6 (WS): Ch 1, * BLO sl st in each of the next 2 sts, working in both loops, hdc in the next st, 2 hdc in the next st, 2 dc in each of the next 3 sts, dc in the next st, (2dc-cl in the next st, dc in the next st) 4 times, 2 dc in each of the next 3 sts, 2 hdc in the next st, hdc in the next st, BLO sl st in each of the next 2 sts *, BLO sl st in the next st, rep from * to *. Join with a sl st to the 1st st. Turn. (63 sts)
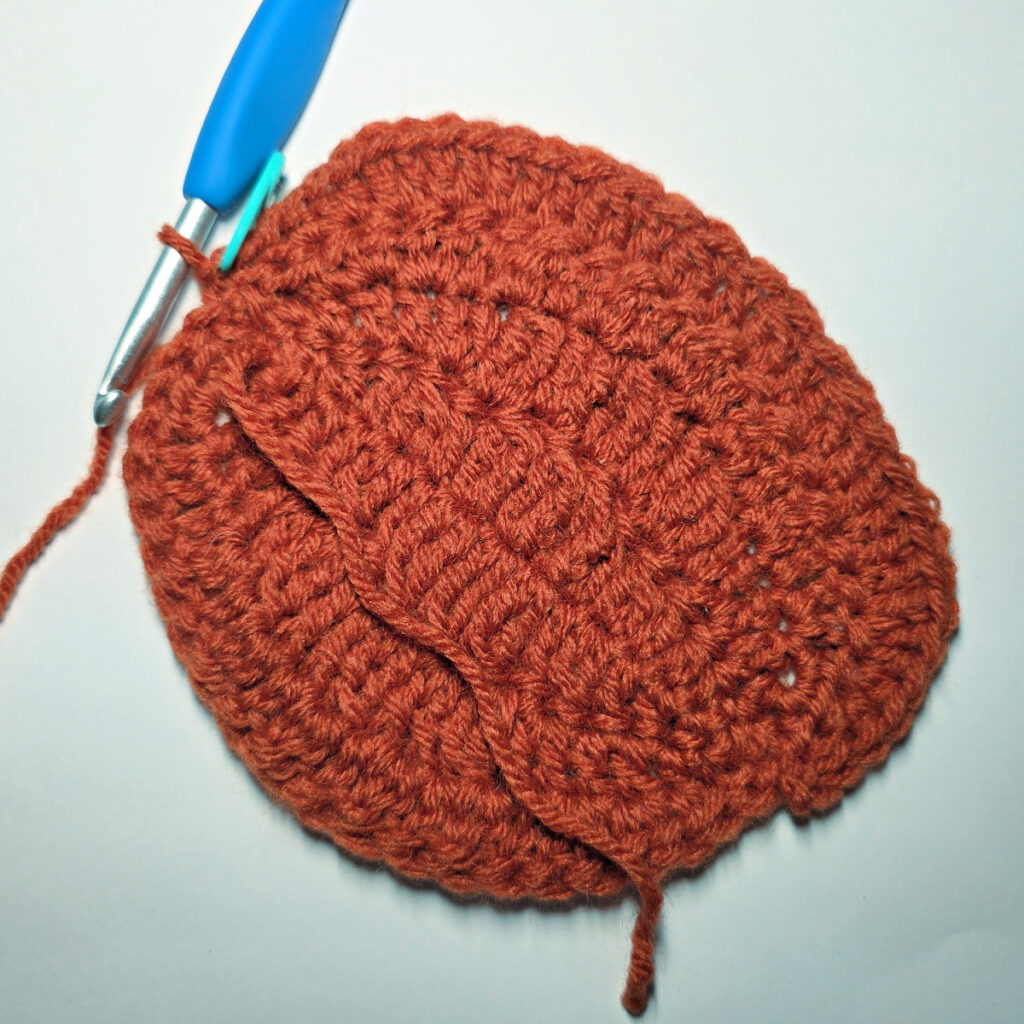
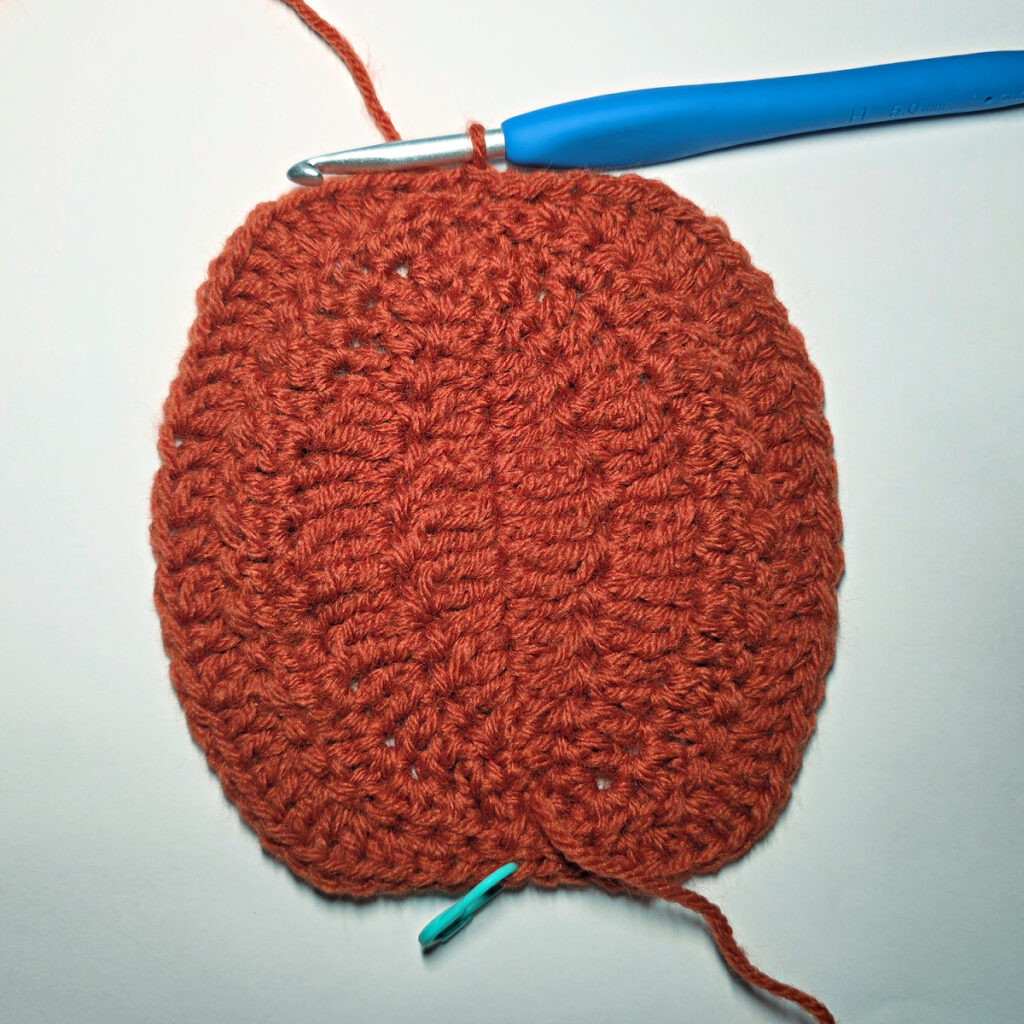
Rnd 7 (RS): Ch 1, * BLO sl st in the next st, working in both loops, sc in the next st, hdc in the next st, 2 hdc in the next st, hdc in the next st, 2 hdc in the next st, dc in each of the next 3 sts, (tr in the next st, 2tr-cl in the next st) 6 times, tr in the next st, dc in each of the next 3 sts, 2 hdc in the next st, hdc in the next st, 2 hdc in the next st, hdc in the next st, sc in the next st, BLO sl st in the next st *, BLO sl st in the next st, rep from* to *. Join with a sl st to the first st. Turn. (71 sts)
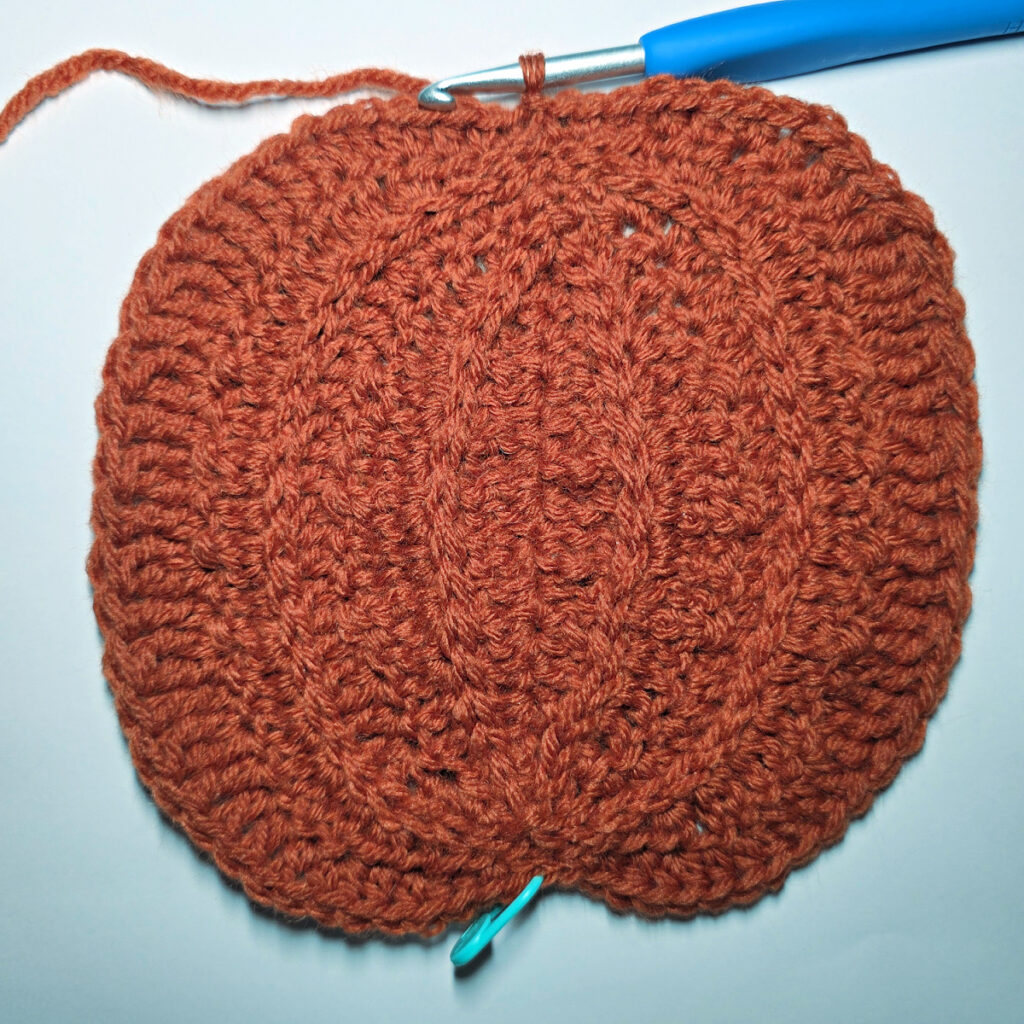
Rnd 8: Ch 1, BLO sl st in each of the next 5 sts, working in both loops, sc in each of the next 5 sts, 2 sc in the next st, 2 hdc in the next st, (dc in the next st, 2dc-cl in the next st) 6 times, 2 dc in the next st, dc in the next st, 2 hdc in the next st, hdc in the next st, sc in each of the next 5 sts, BLO sl st in each of the next 2 sts, BLO sl st in the next st, BLO sl st in each of the next 2 sts , working in both loops, sc in each of the next 5 sts, hdc in the next st, 2 hdc in the next st, dc in the next st, 2 dc in the next st, (2dc-cl in the next st, dc in the next st) 6 times, 2 hdc in the next st, 2 sc in the next st, sc in each of the next 5 sts, BLO sl st in each of the next 5 sts. Join with a sl st to the 1st st. Turn. (79 sts)
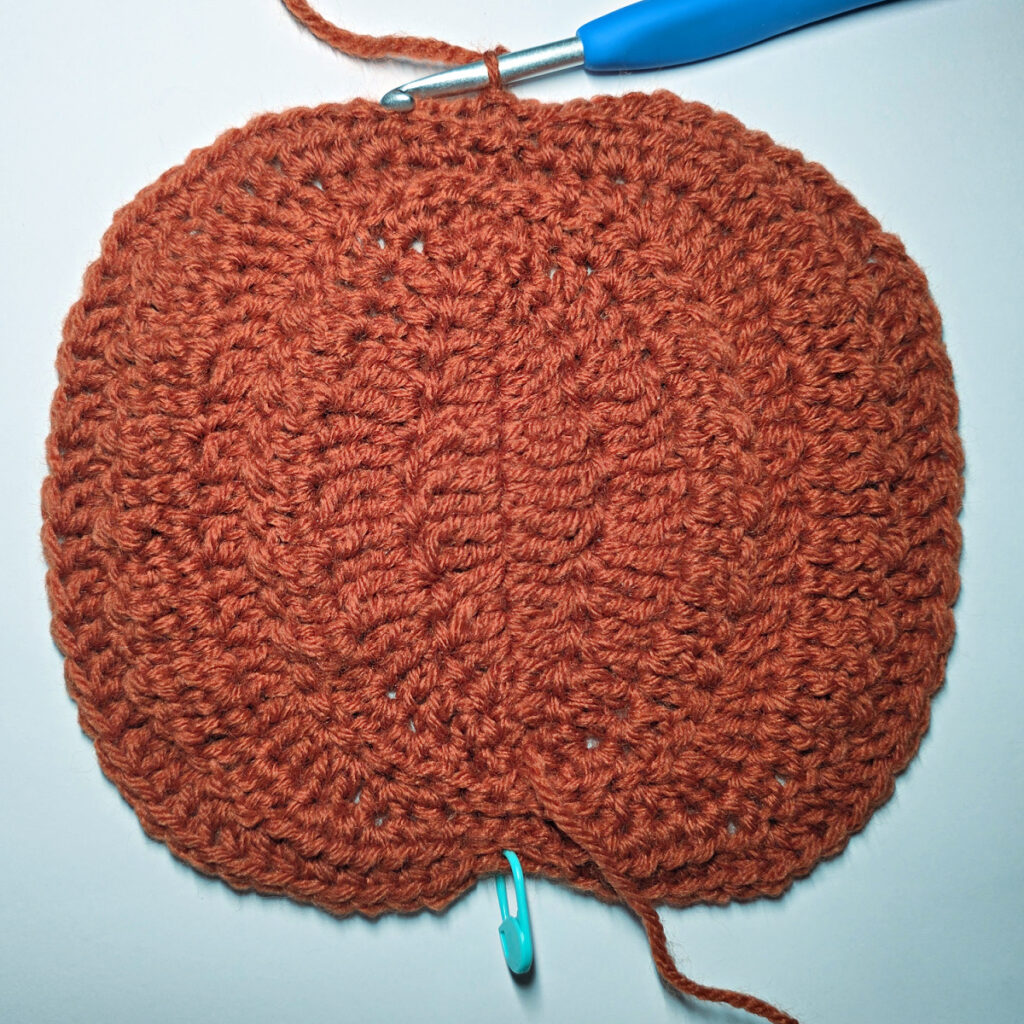
Rnd 9 (RS): Ch 1, sl st in each of the first 38 sts (surface crochet), then reach down and sl st into the sl st from Rnd 5 (where the yarn needle is marking in the photo below), then sl st in each of the last 38 sts. Use the Special Join Technique to join the round. (79 sts)
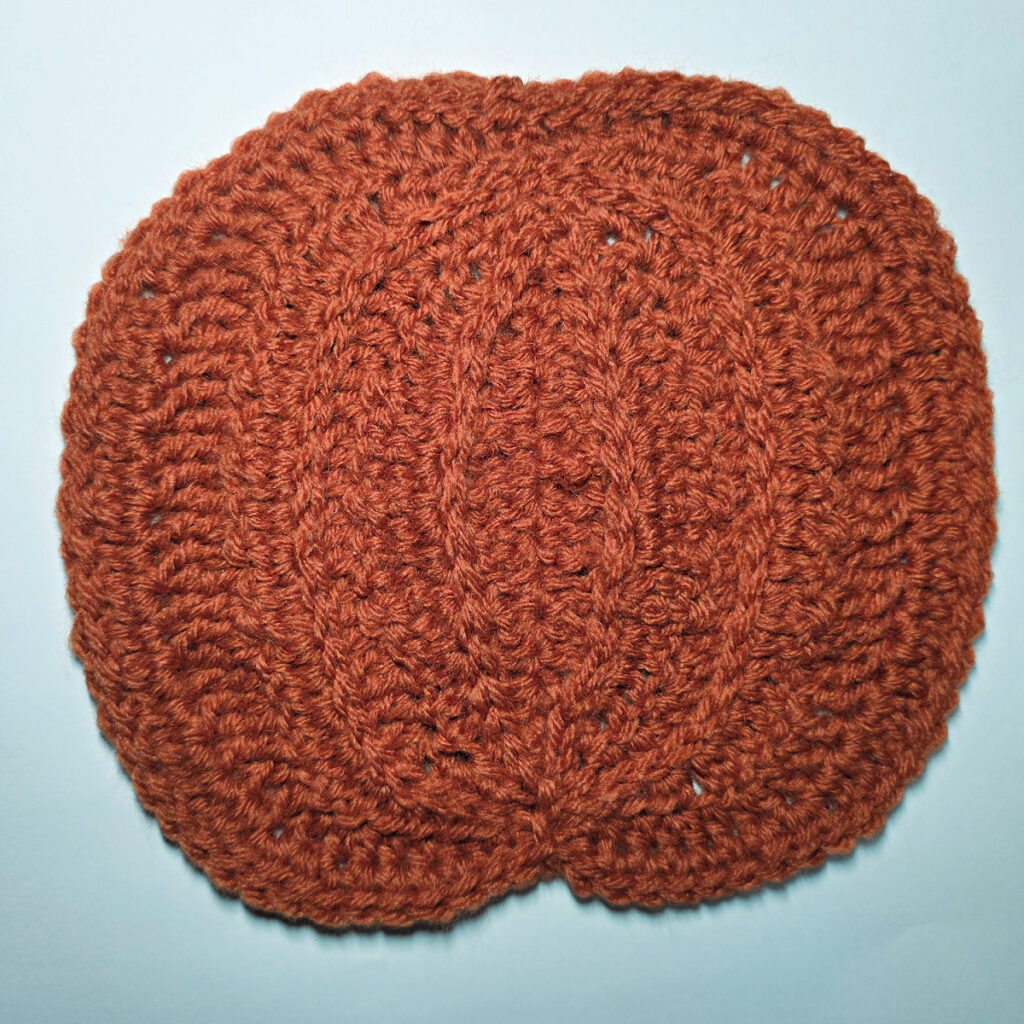
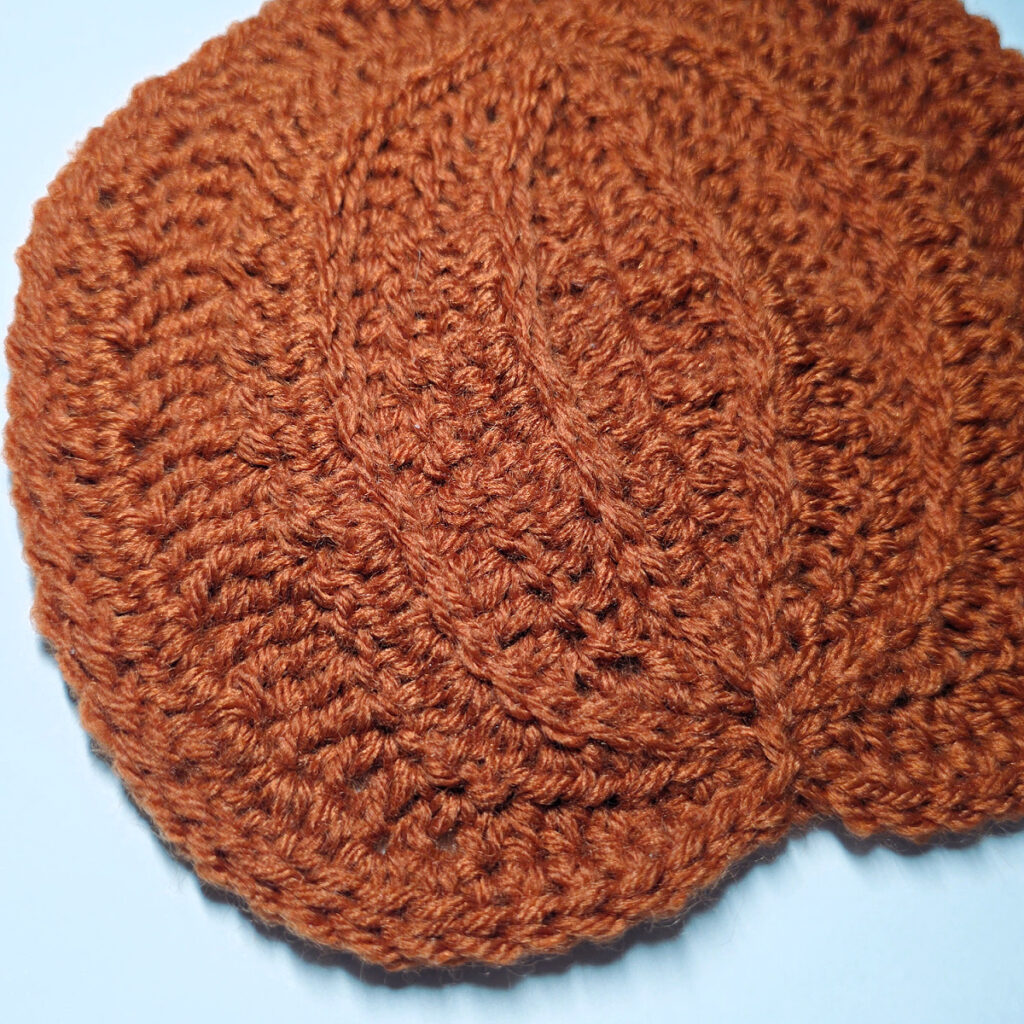
Fasten off. Weave in ends. Continue on to the Pumpkin Leaf & Tendril. Pumpkin should measure approximately 7″ W x 6″ H. Block your pumpkin, if needed.
Pumpkin Leaf & Tendril
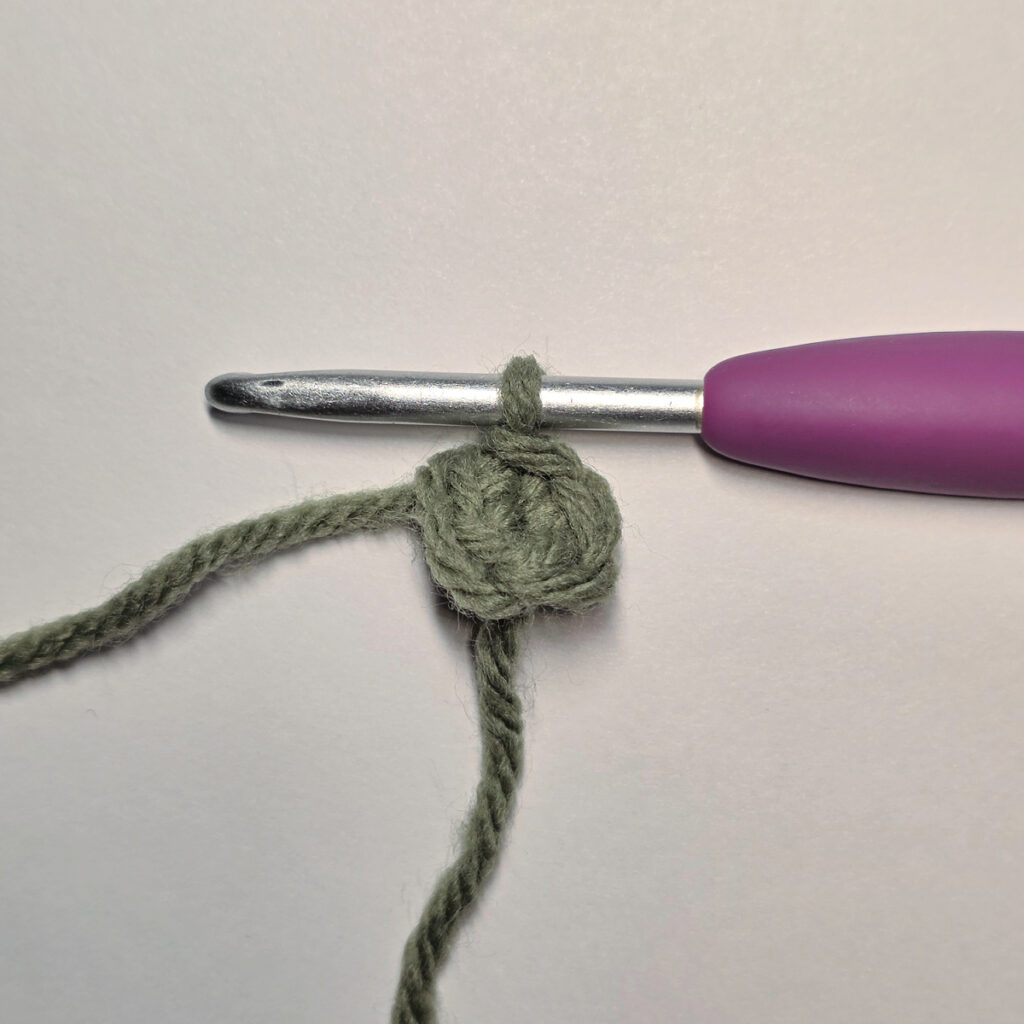
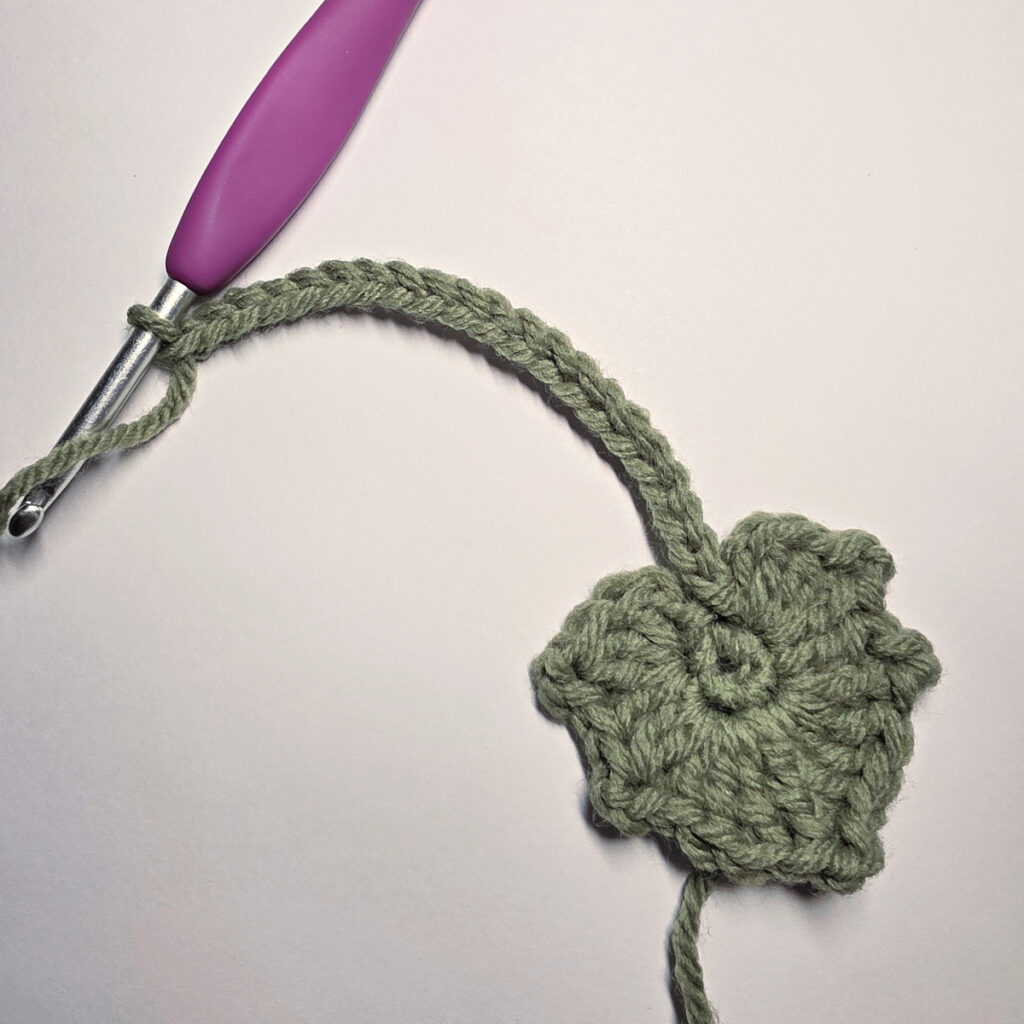
Rnd 1 (RS): With Green yarn & a 4.00mm crochet hook, ch 2, work 4 sc into the 2nd ch from your hook. Join with a sl st to the 1st st. (4 sts)
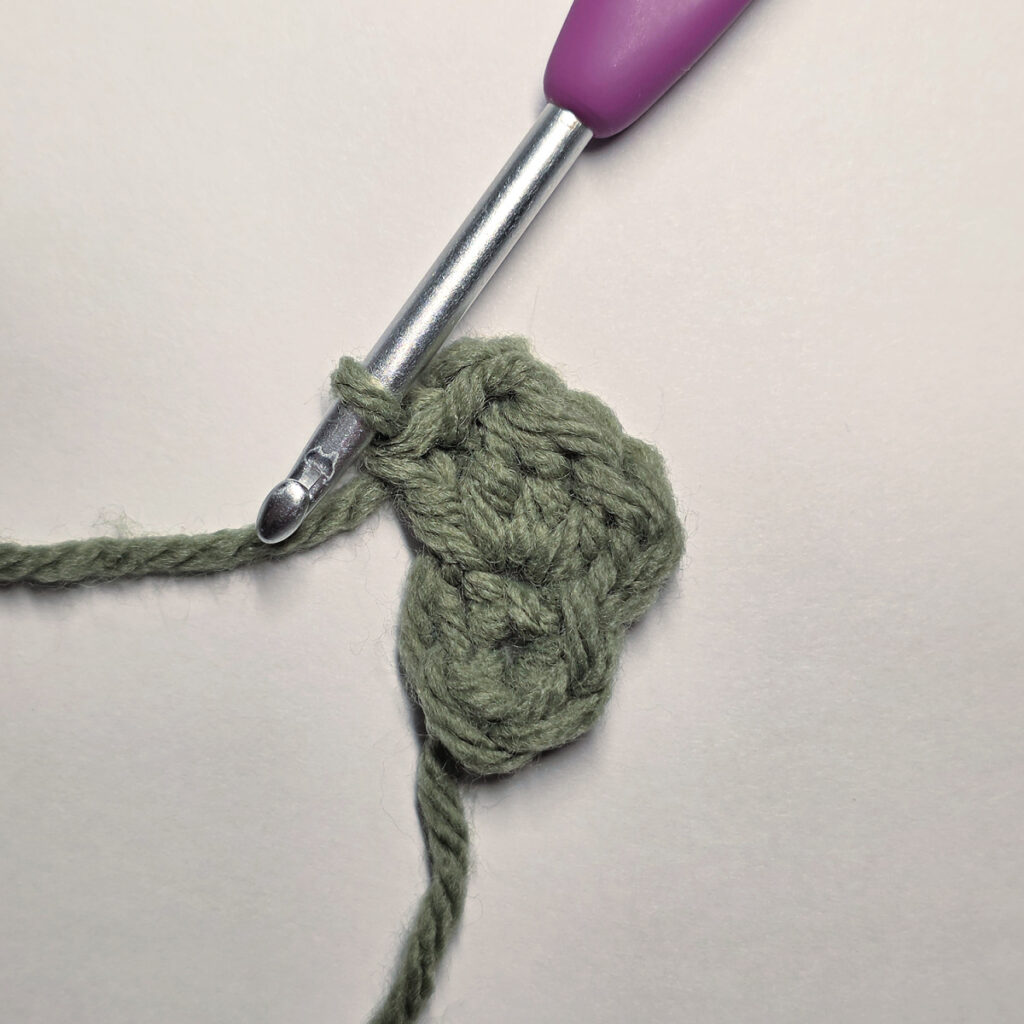
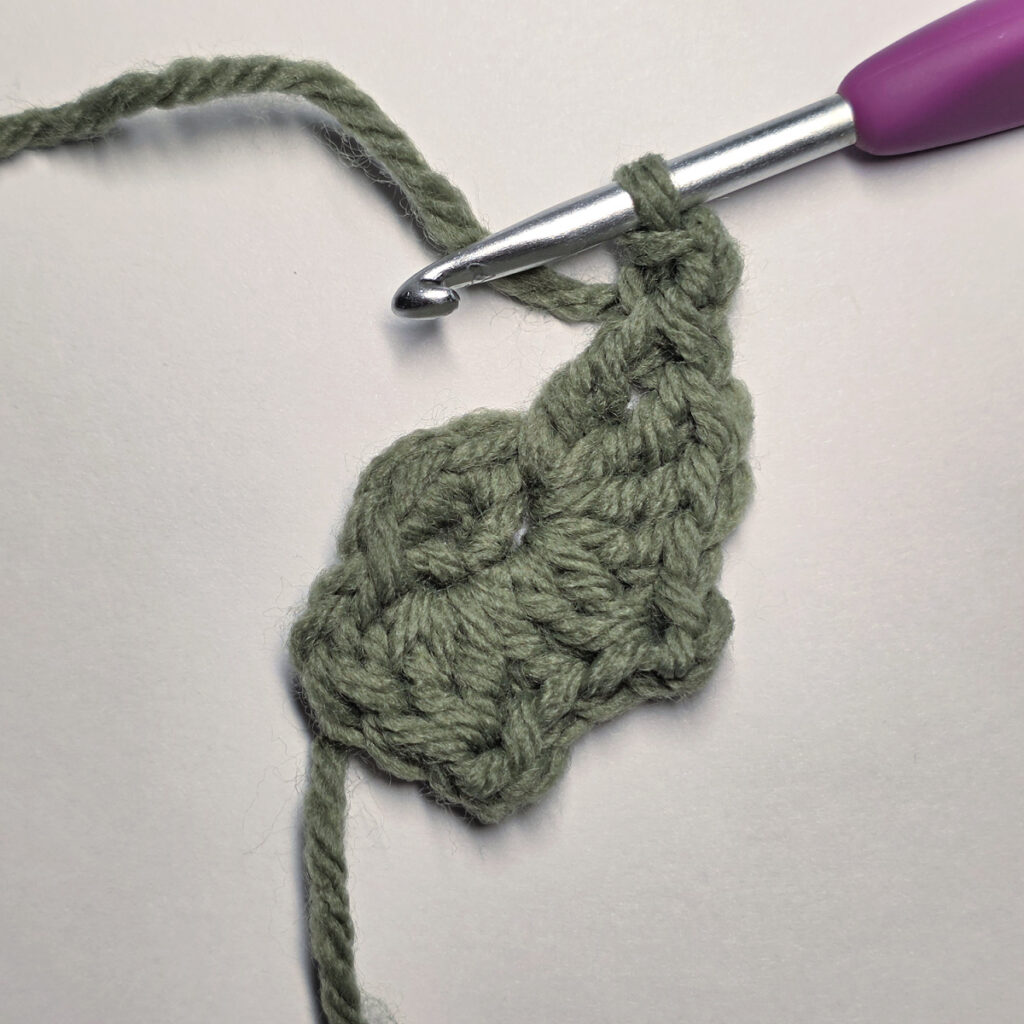
Rnd 2: Ch 2 (does not count as a st), (dc, 2dc-cl, ch 2, sl st into the 2nd ch from your hook, dc) in the first st, (2dc-cl, ch 2, sl st into the 2nd ch from your hook, dc, 3 tr) in the next st, ch 2, sl st into the 2nd ch from your hook, (3 tr, dc, ch 2, sl st into the 2nd ch from your hook, 2dc-cl) in the next st, (dc, ch 2, sl st into the 2nd ch from your hook, 2dc-cl, dc) in the next st, ch 2 (does not count as a st), sl st in the last st. (16 sts + 5 ch-2 points)
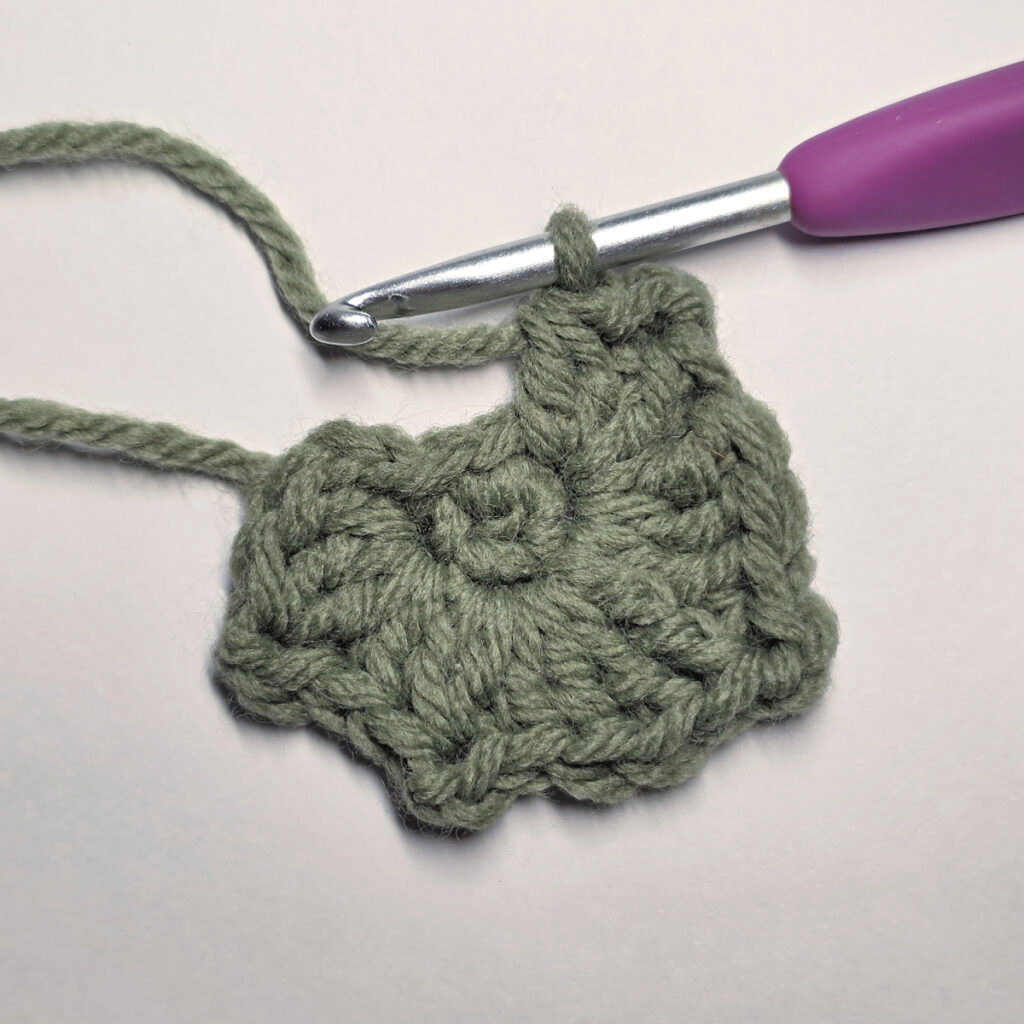
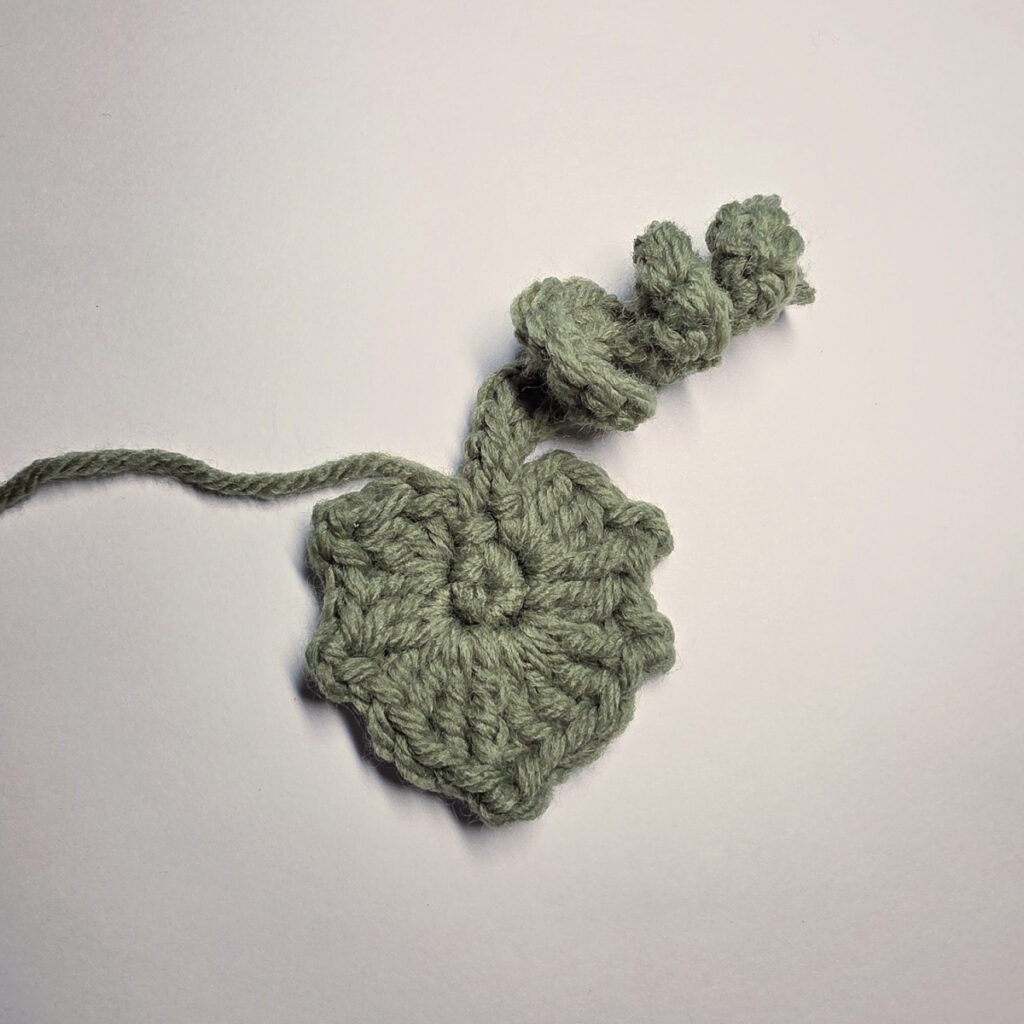
Make Tendril: Ch 21, working into the back hump of the foundation ch, work 2 sc into the 2nd ch from your hook, 2 sc into each of the next 16 chs, sl st into each of the last 3 chs.
Fasten off, leaving a tail long enough to attach the pumpkin leaf and tendril to the pumpkin. Pumpkin leaf should measure approximately 1-3″4 W x 1-3/4″ H. Tendril spiral should measure approximately 1-3/4″ long when curled up. Continue on to the Pumpkin Stem.
Progression Photos – Pumpkin Leaf & Tendril
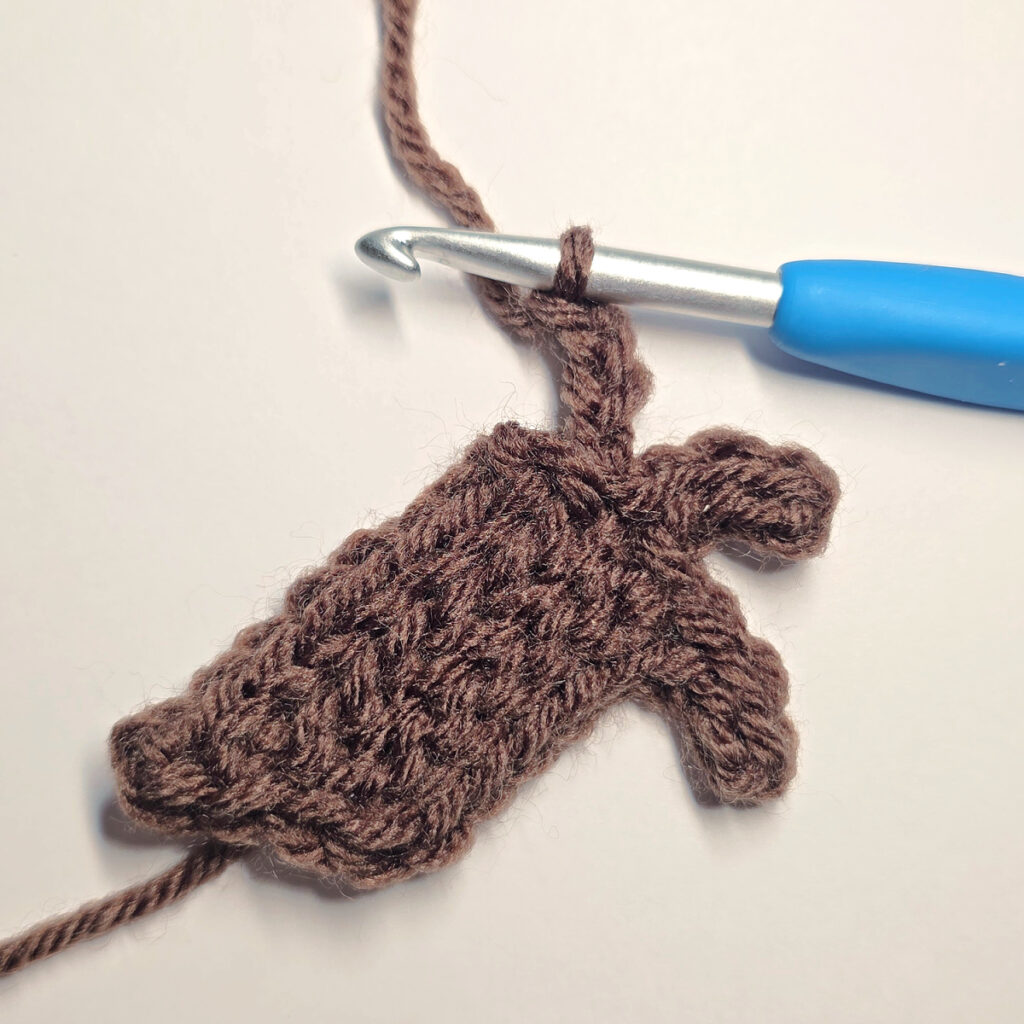
Pumpkin Stem
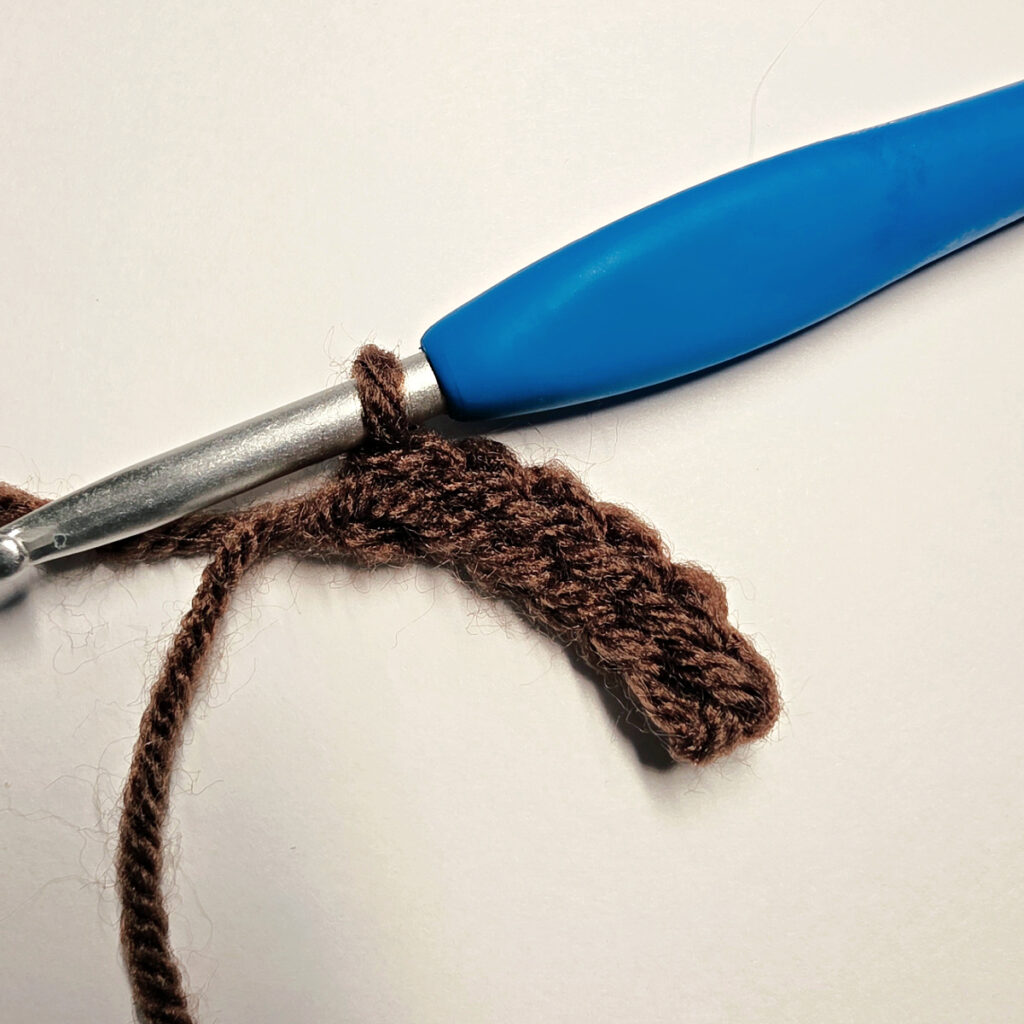
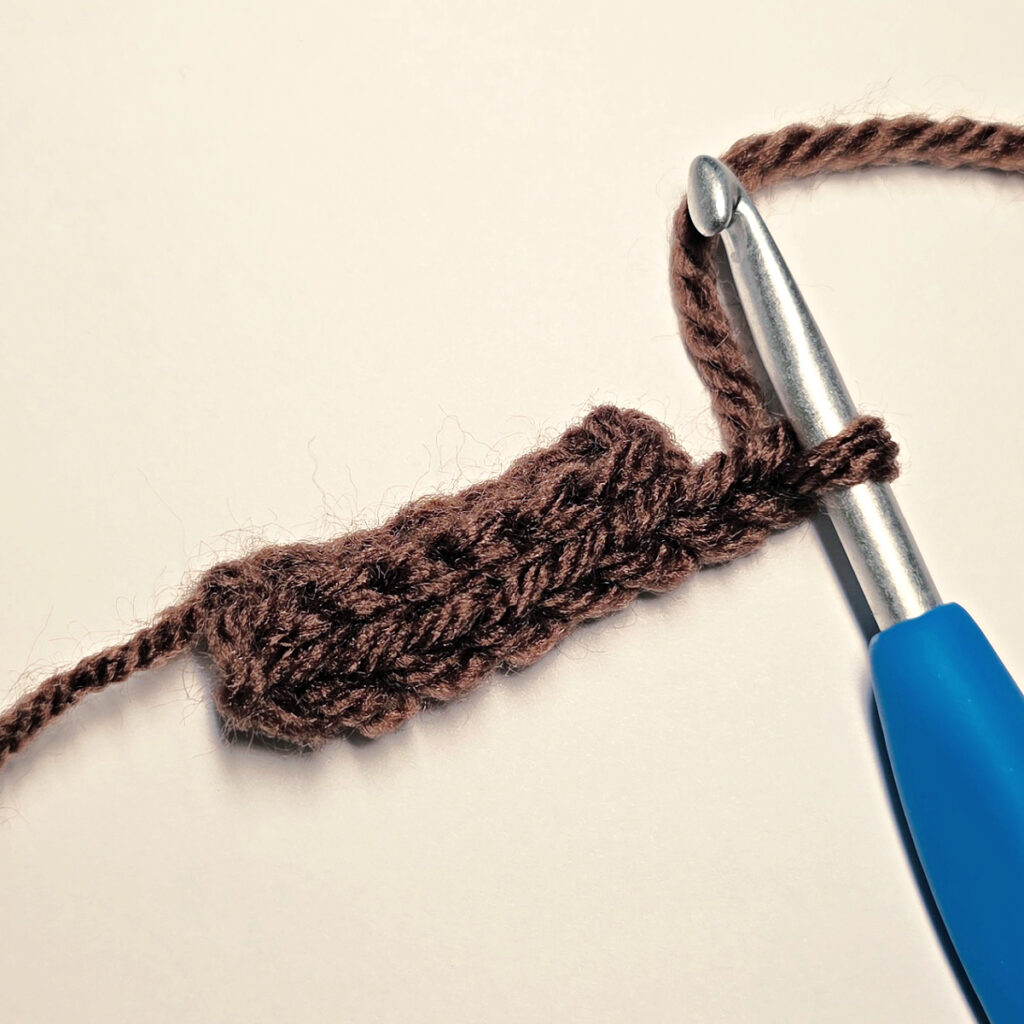
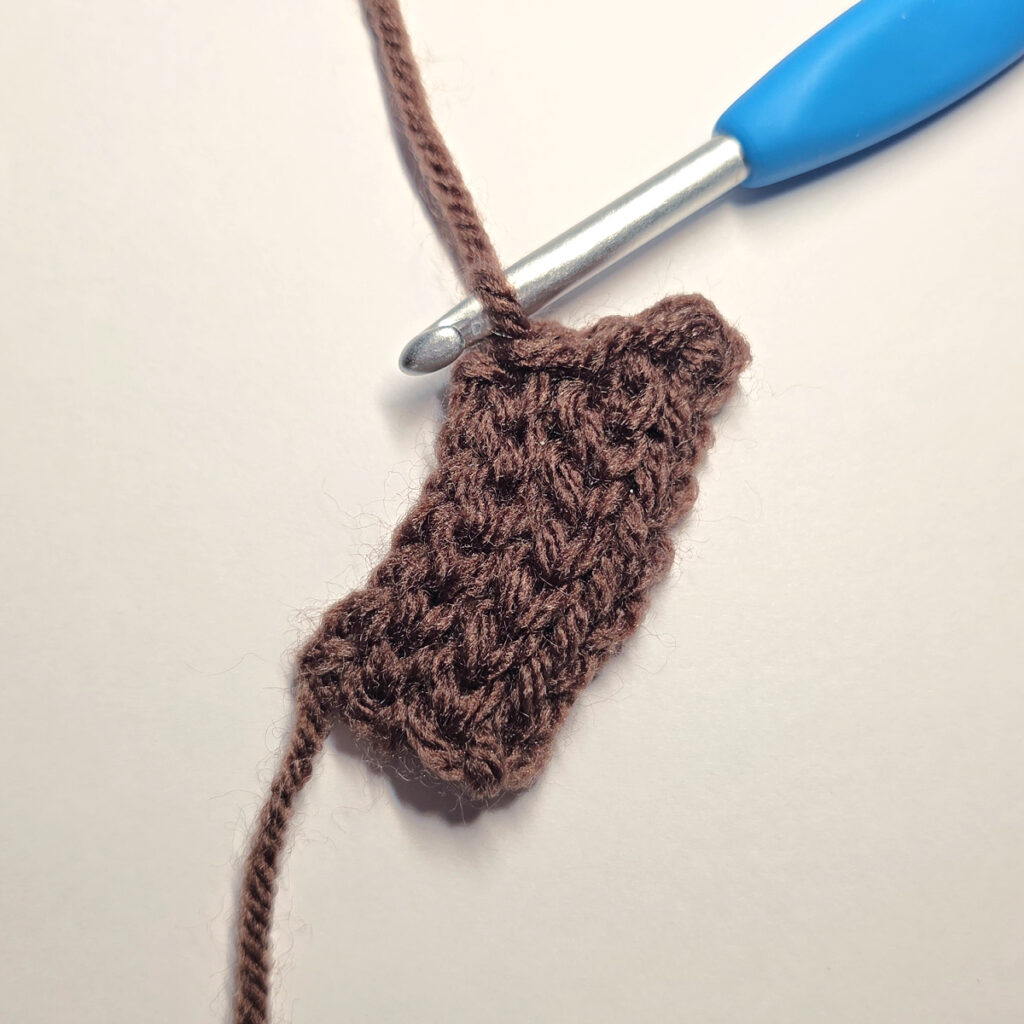
Row 1: With Brown yarn & a 5.00mm crochet hook, ch 7, working into the back humps of the foundation ch, sl st into the 2nd ch from your hook and into each ch across. Turn. (6 sts)
Row 2: Ch 1, BLO sl st in each st across. Do not turn yet. (6 sts)
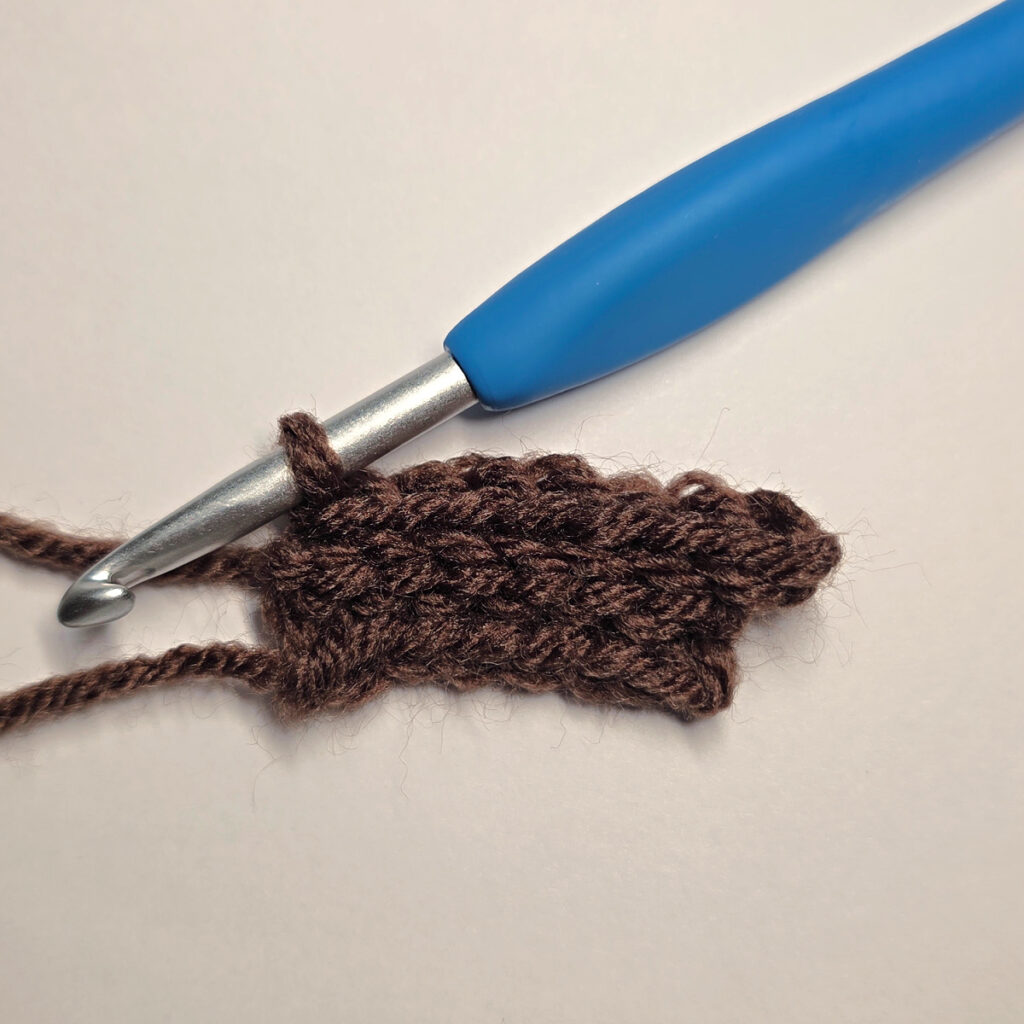
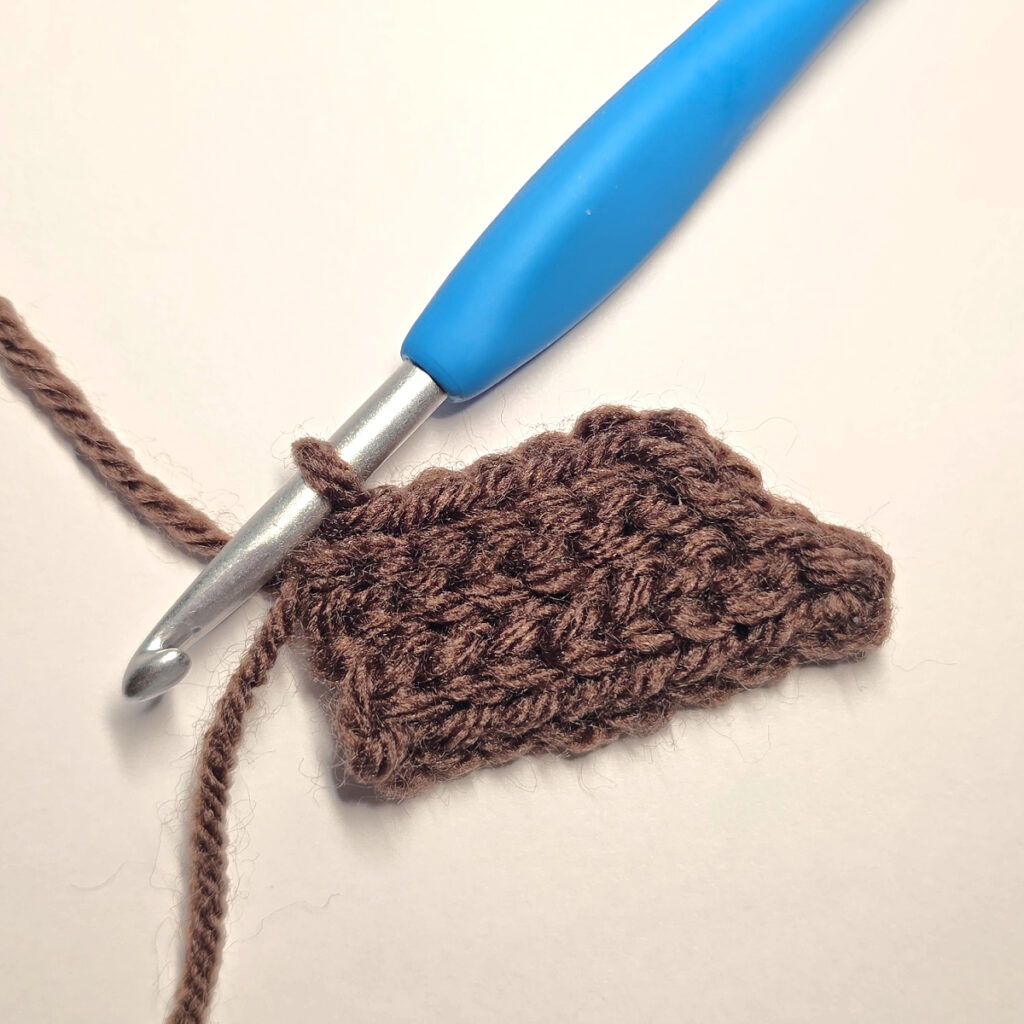
Row 3: Ch 2, TURN, BLO sl st into the 2nd ch from your hook, BLO sl st in each st across. Turn. (7 sts)
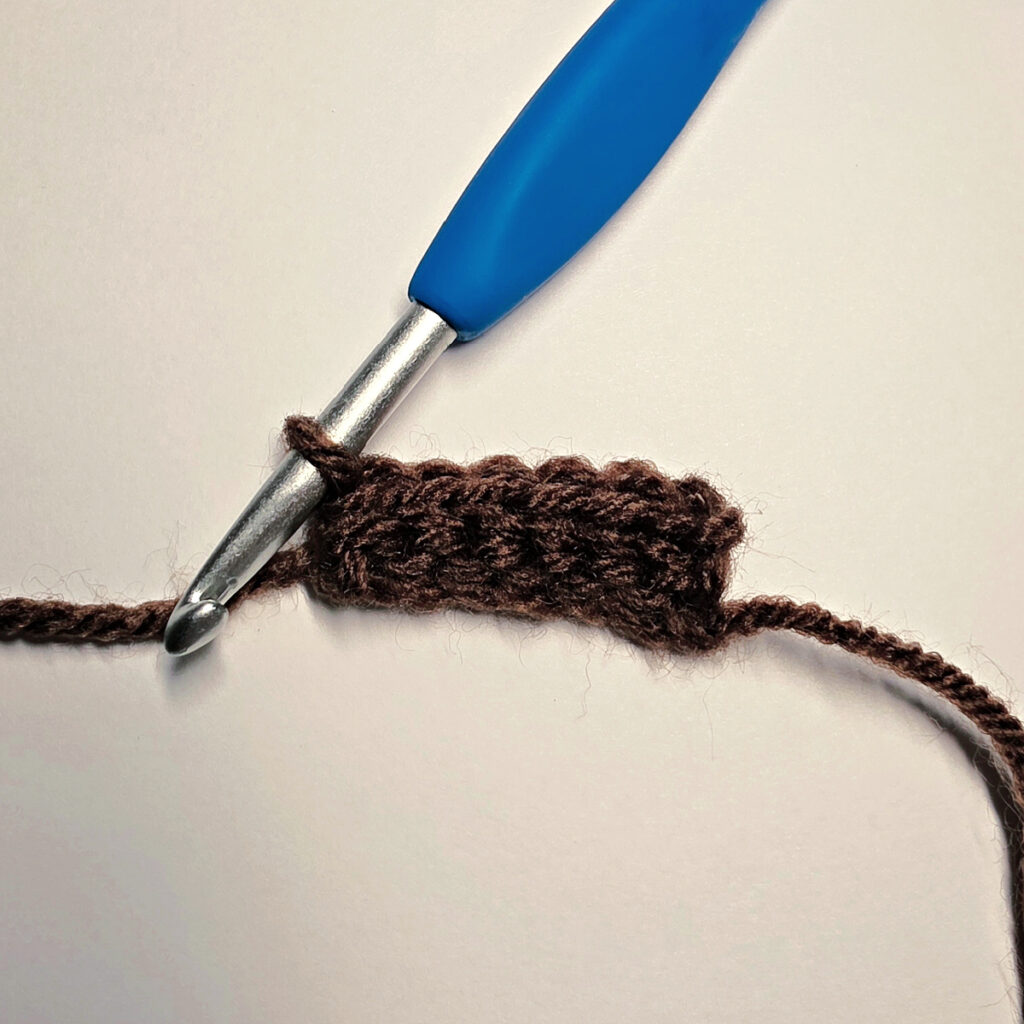
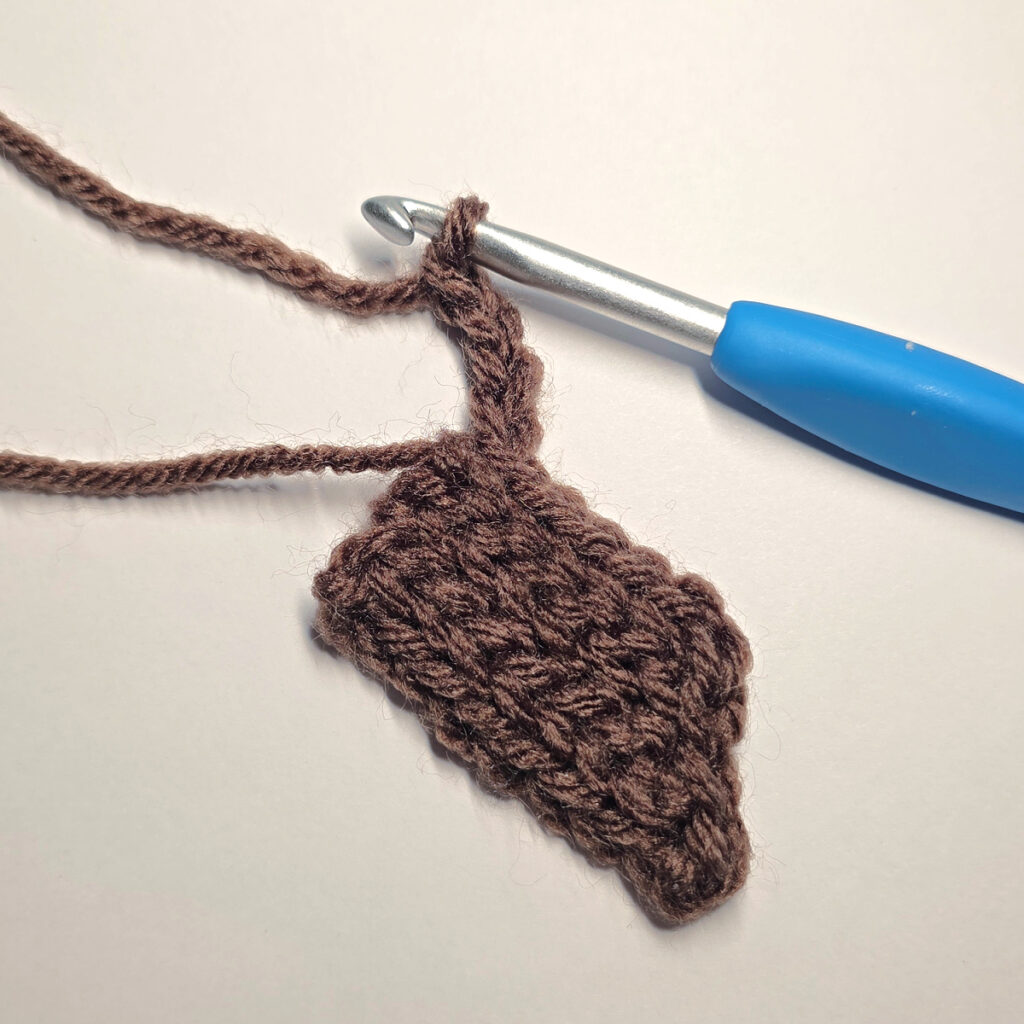
In the next row, you’ll work up the first side, across the slanted edge, and then work down the second side.
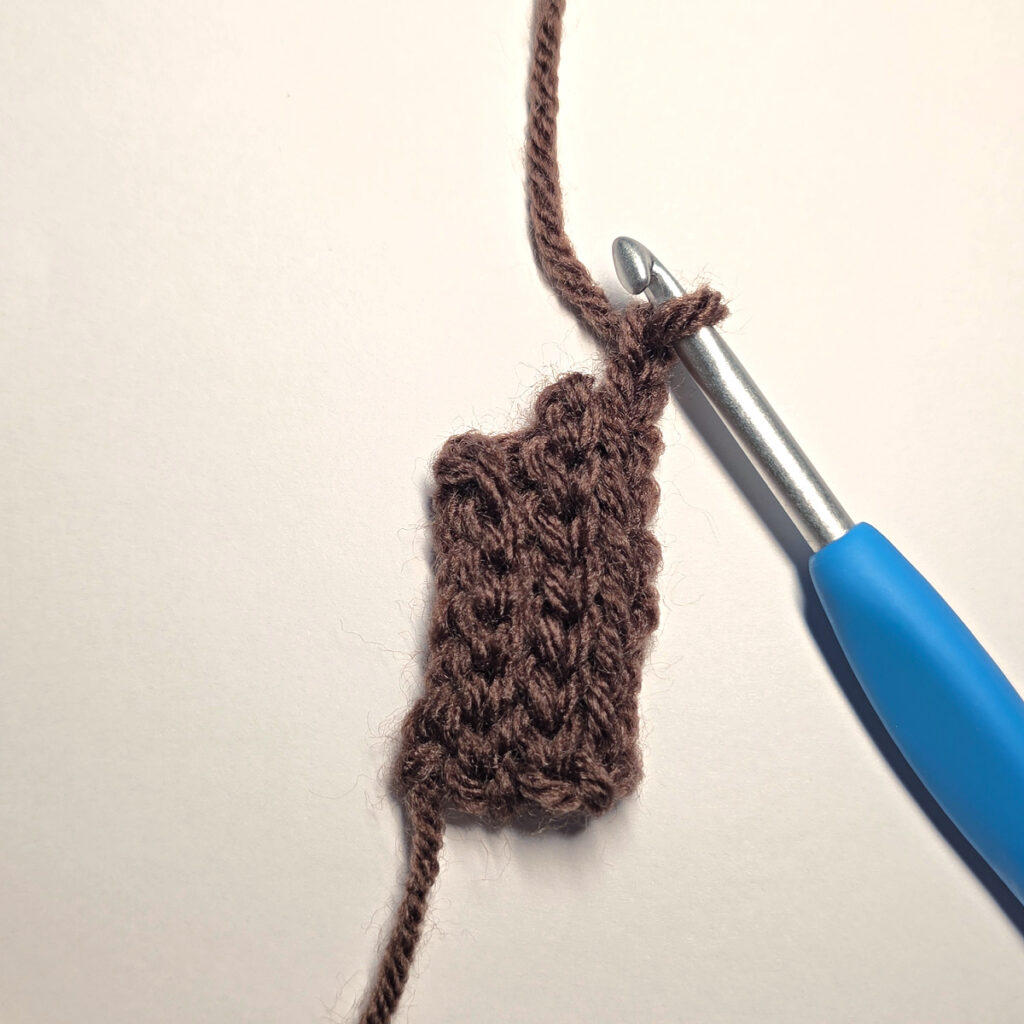
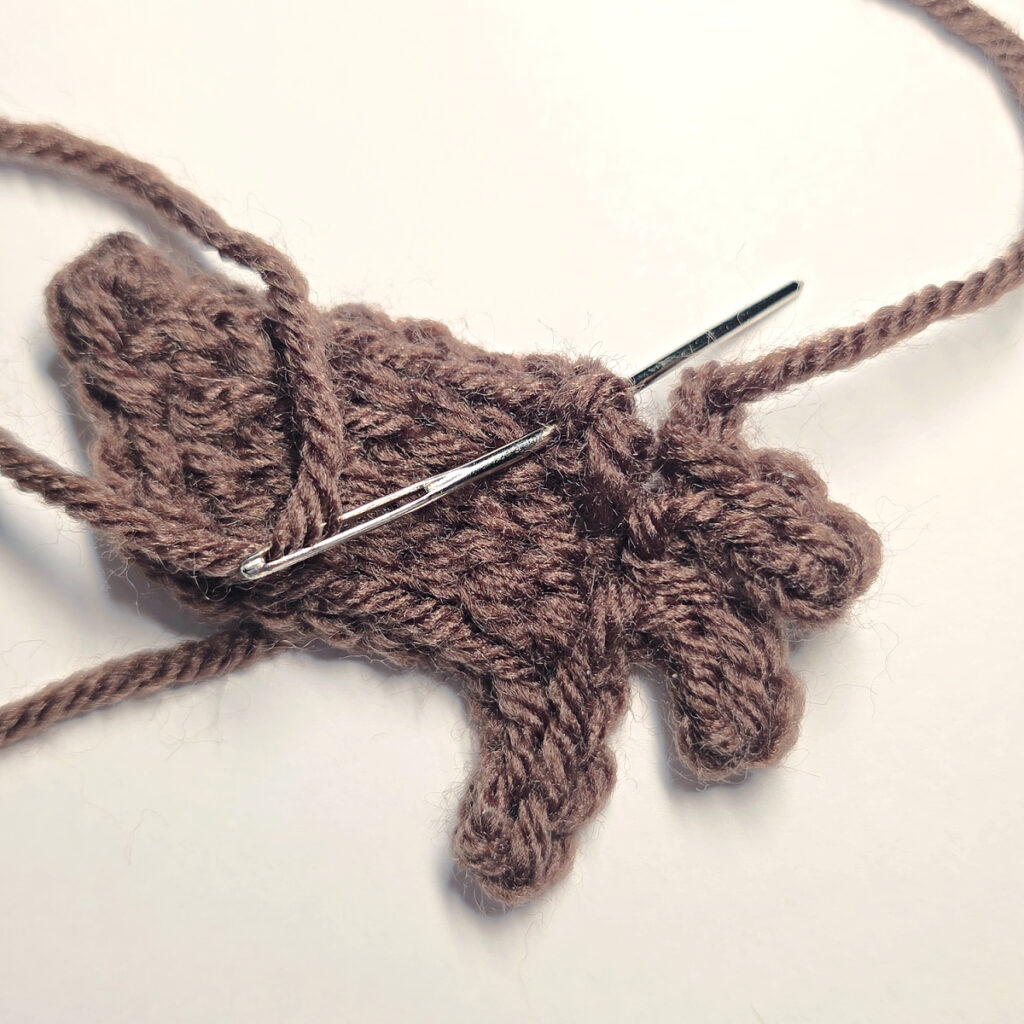
Row 4: Ch 1, BLO sl st in each st across the previous row, Do Not Turn, ch 2, sl st into the back hump of the 2nd ch from your hook, work 2 sl sts across the short edge of the stem, rotate to work down the side, BLO sl st in each st across. Do not turn. (16sts)
Jagged Bottom Edge (little fingers)
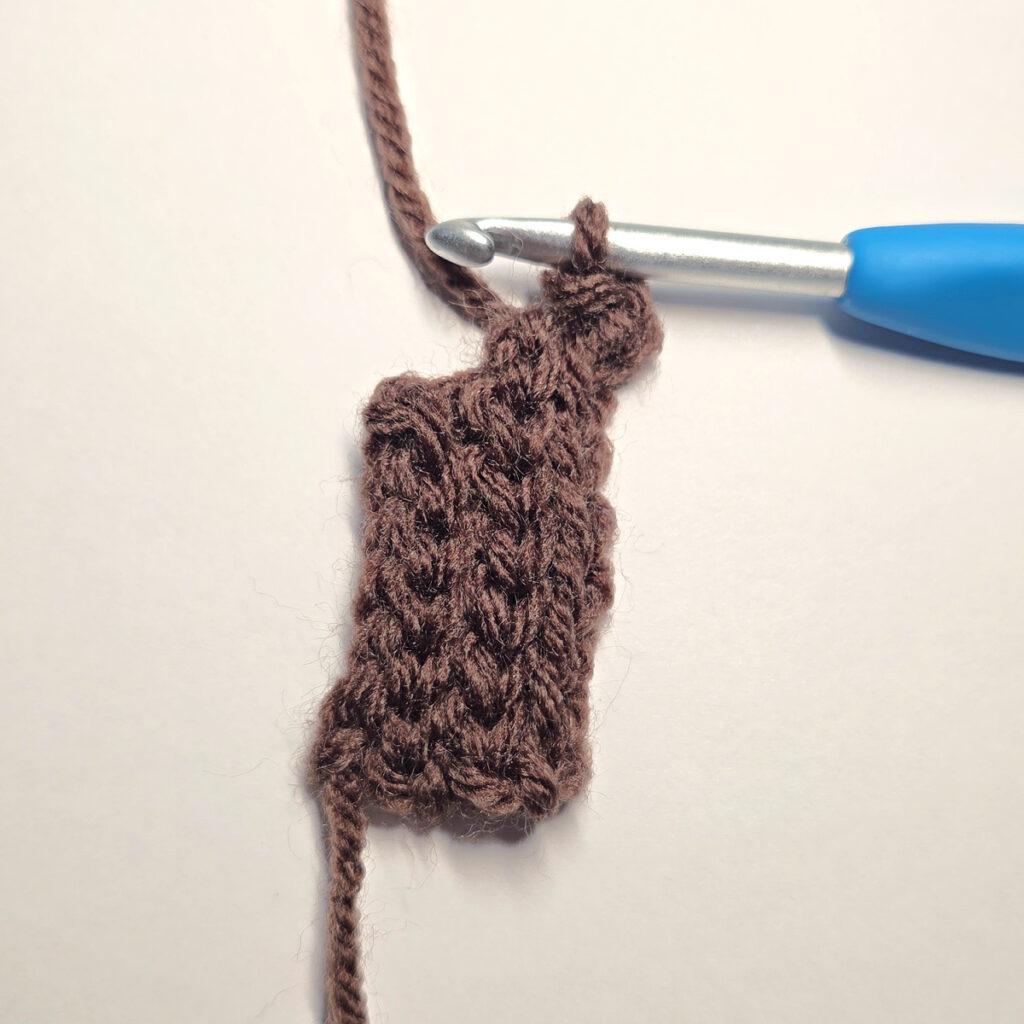
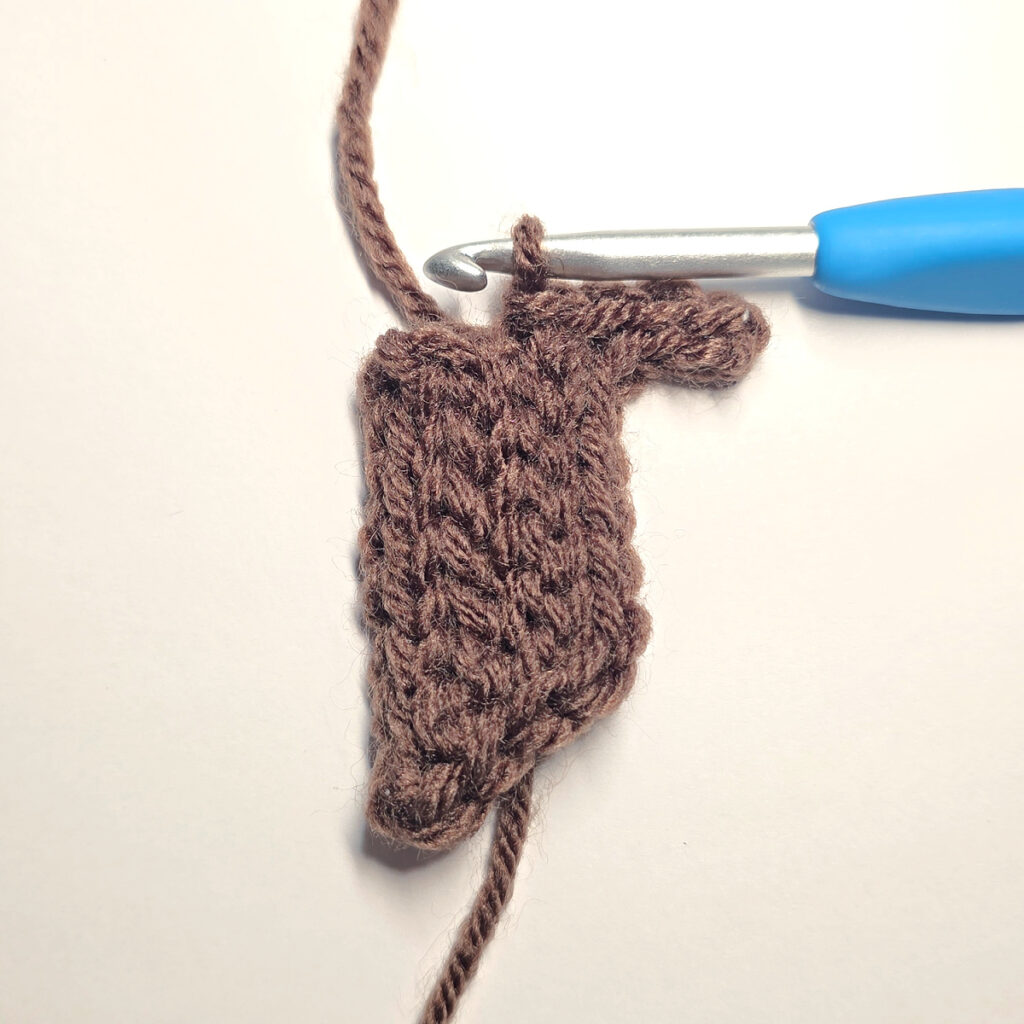
* Ch 4, working into the back humps of the ch, sl st into the 2nd ch from your hook, sl st in each of the next 2 chs *, sl st near the middle of the bottom edge of the stem, rep from * to *, then sl st to the bottom edge of the stem, rep from * to *. Do not work a final sl st. (3 little fingers)
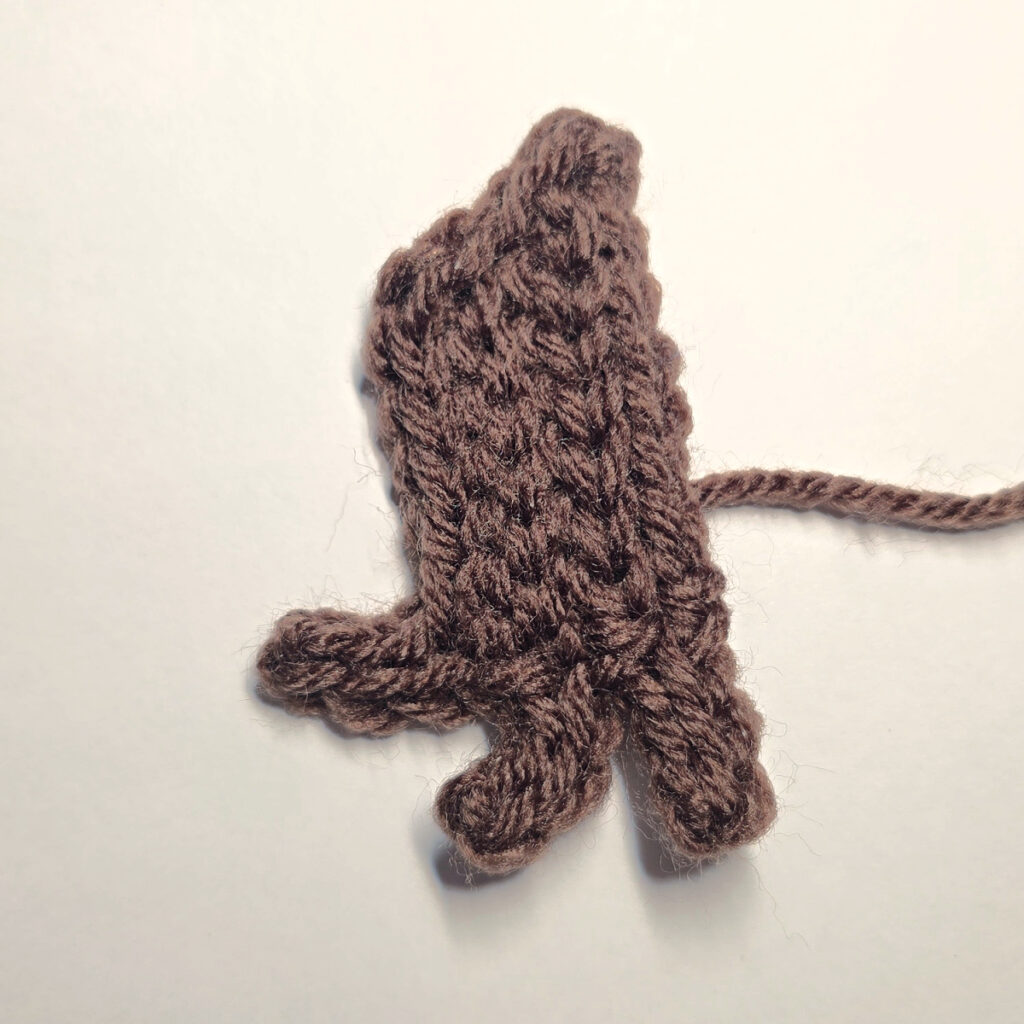
Fasten off leaving a 12″ tail of yarn. With a yarn needle and tail of yarn, secure the last finger to the bottom corner of the stem. I chose to use a yarn needle, instead of working a slip stitch join as the slip stitch left an ugly bump. The stem should measure approximately 2-3/4″ H x 1-1/8″ W (including fingers). Continue on to Finishing.
Progression Photos – Pumpkin Stem
Finishing
Step 1: Lay the pumpkin stem on top of the pumpkin as shown in the photo. With a yarn needle and tail of brown yarn, attach the stem to the pumpkin.
Step 2: Position the pumpkin leaf and tendril on the pumpkin as shown in the photo. With a yarn needle and tail of green yarn, attach the leaf to the pumpkin. I let my tendril hang loose. If your tendril is droopy, you may want to tack stitch it in place so it doesn’t cover up the leaf.
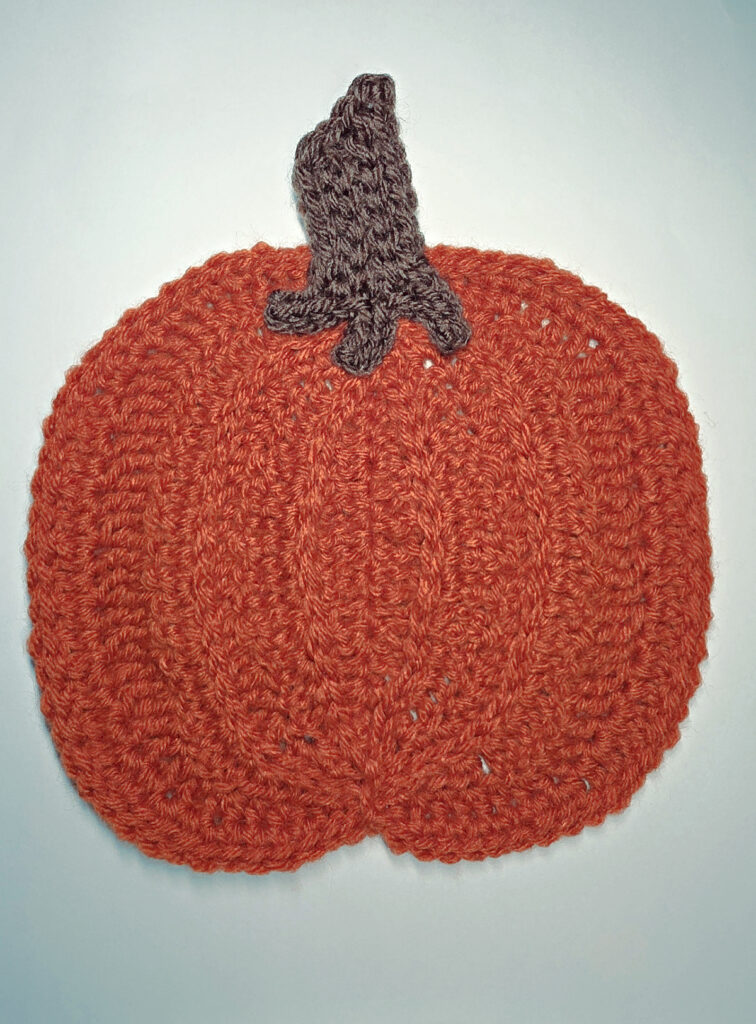
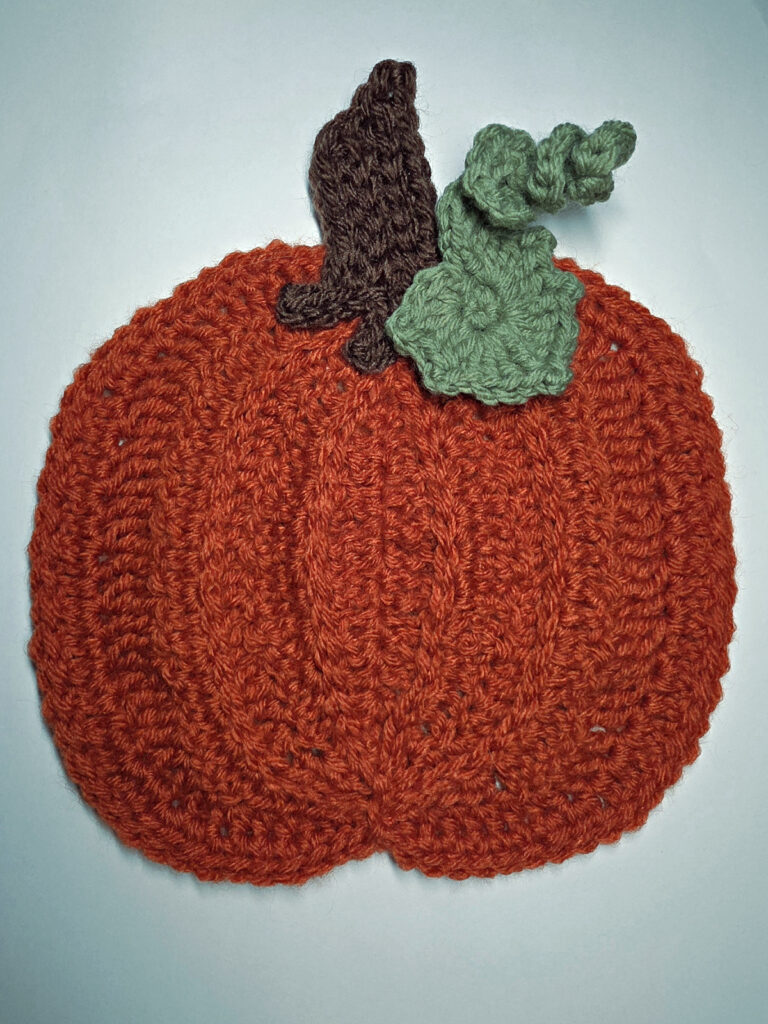
The sample above was made with Lion Brand Yarns Pound of Love and Vanna’s Choice.
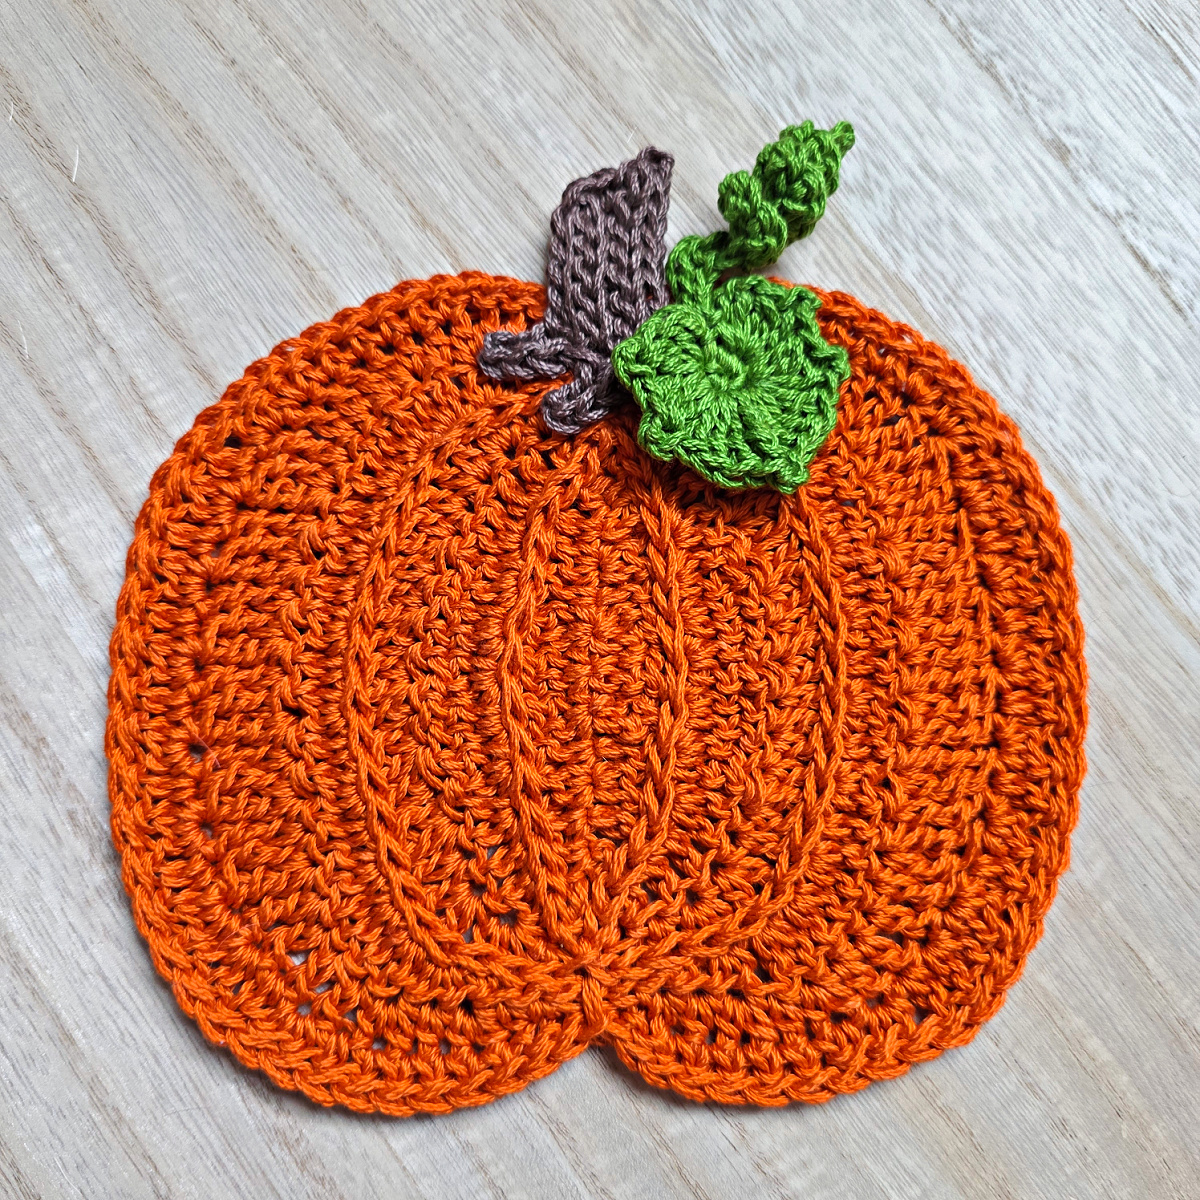
The sample below was made with Lion Brand Yarns 24/7 cotton.
I MADE IT! NOW WHAT?
Pin this post!: Save this crochet pumpkin pattern to your Pinterest boards so that you can come back and make it again.
Leave a comment below: We love to hear your feedback.
Share Your Finished Projects on Facebook or Instagram: I love to see your finished projects! Share with us on social media and tag me @acrochetedsimplicity or use the hashtag #ACrochetedSimplicity so I can find your posts.
Join us in the Facebook Community Group!
Come share your finished projects with us in the A Crocheted Simplicity Crochet Community Group on Facebook. Join us for fun community events such as crochet alongs, join in on crochet conversations, ask questions, get advice, and share your love for crochet!
Looking for More Crochet Home Patterns?
Check out our other free crochet patterns that will enhance your home decor and give a unique handmade look to all of your spaces.
