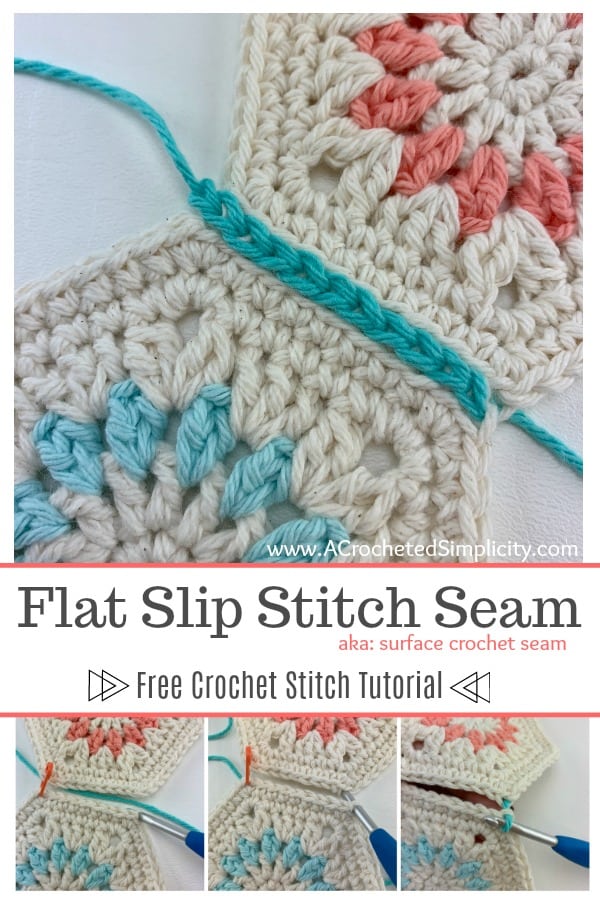
How to Crochet a Flat Slip Stitch Seam
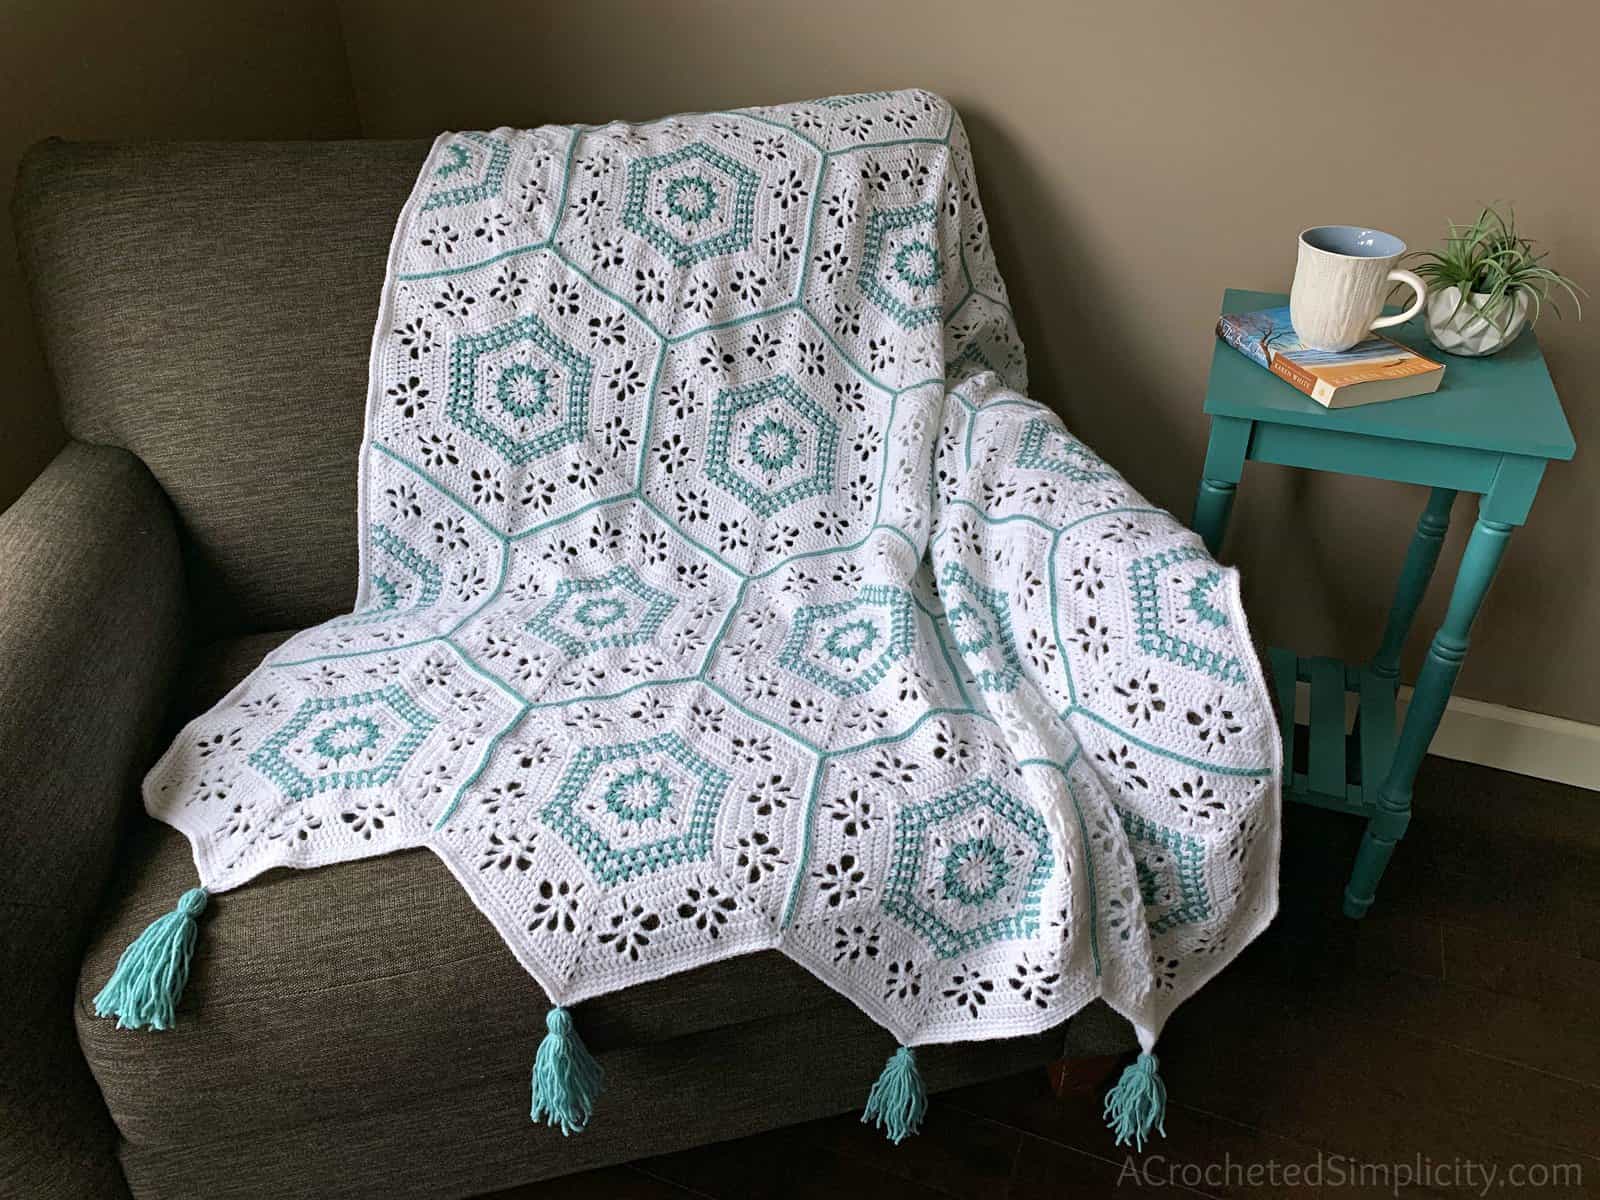
The first seaming technique that most crocheters learn is the whipstitch. While whipstitching has a time and a place, there are several other types of seams used to join two pieces of crocheted fabric, such as the flat slip stitch seam. The flat slip stitch seam is my favorite crochet seaming technique that’s often used to join crocheted squares or hexagons for afghans. Aside from the whipstitch or mattress stitch, the flat slip stitch seam is one of the flattest seaming techniques used and when you use a contrasting color of yarn to work the seam, as I did in my Succulent Spring Hexagon Afghan, it creates a visually stunning effect!
HERE ARE A FEW OF THE REASONS I LOVE THE FLAT SLIP STITCH SEAM:
- The seam is nearly invisible when using the same color of yarn as you used for the edges being joined.
- It is the flattest seam that you can crochet with a hook. The whipstitch and mattress stitch seams are flat as well, but they are hand sewn seams. So, for those crocheters who do not like to hand sew seams, this seam is a great alternative.
- When you use a contrasting color of yarn for the seam, it creates a visually stunning effect!
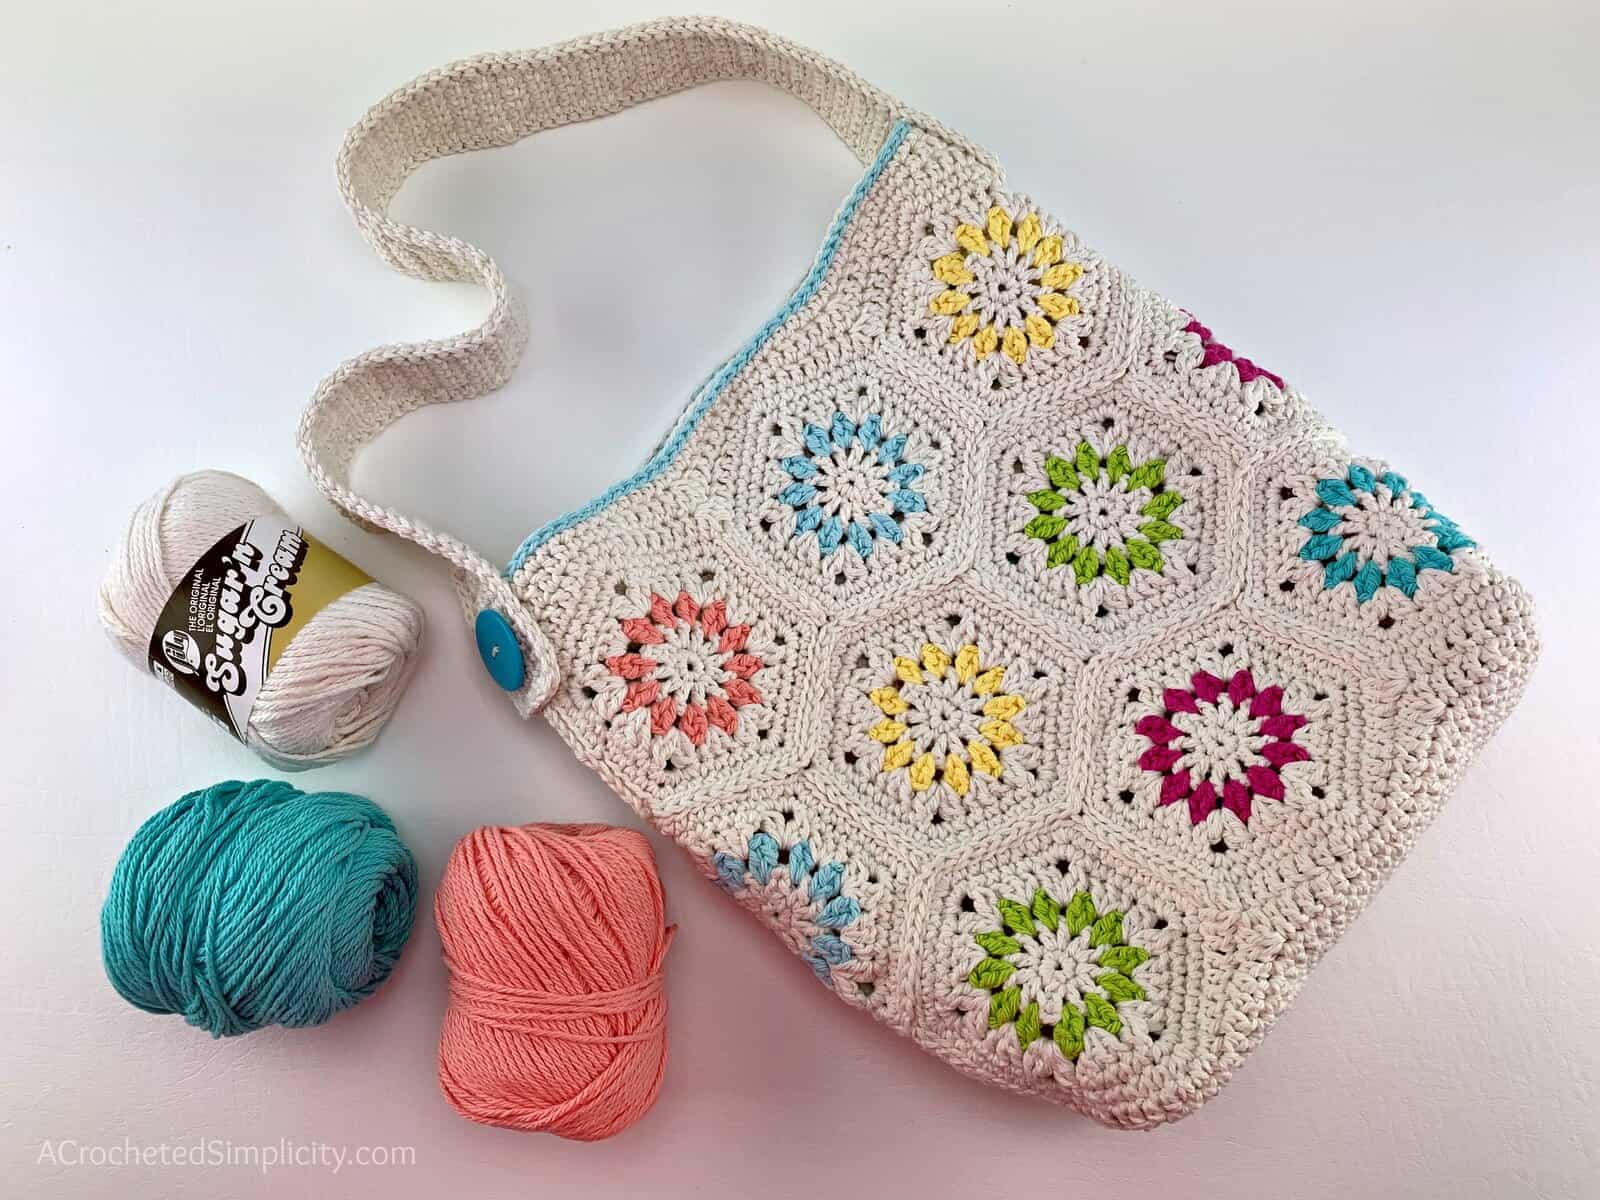
The most recent designs that I used a flat slip stitch seam on are my Succulent Spring Hexagon Afghan & Summer Retro Tote Bag. You can find the free crochet patterns here: Succulent Spring Hexagon Afghan & Summer Retro Tote Bag.
FLAT SLIP STITCH SEAM TUTORIAL
The flat slip stitch seam is a very common technique used to join crocheted squares and hexagons for crochet blankets. It’s a simple technique and I’ll give you a couple of tips to help make it easier. This is my favorite technique to use to seam crocheted squares and hexagons together because the finished seam is nearly invisible!
Tip #1: Use several stitch markers when suggested. The stitch markers not only hold pieces together temporarily, they also help guide you while seaming.
Tip #2: If your seam is causing your work to cinch inward, you’re working your slip stitches too tightly. Try going up a hook size or two. If your slip stitches appear to be “loopy” or too big, try going down a hook size or two.
LET’S PRACTICE WORKING A FLAT SLIP STITCH SEAM!
Using a piece of yarn, 2 – 3 times the length of the seam to be made, and a crochet hook, use the flat slip stitch seam technique to seam your next crochet project!
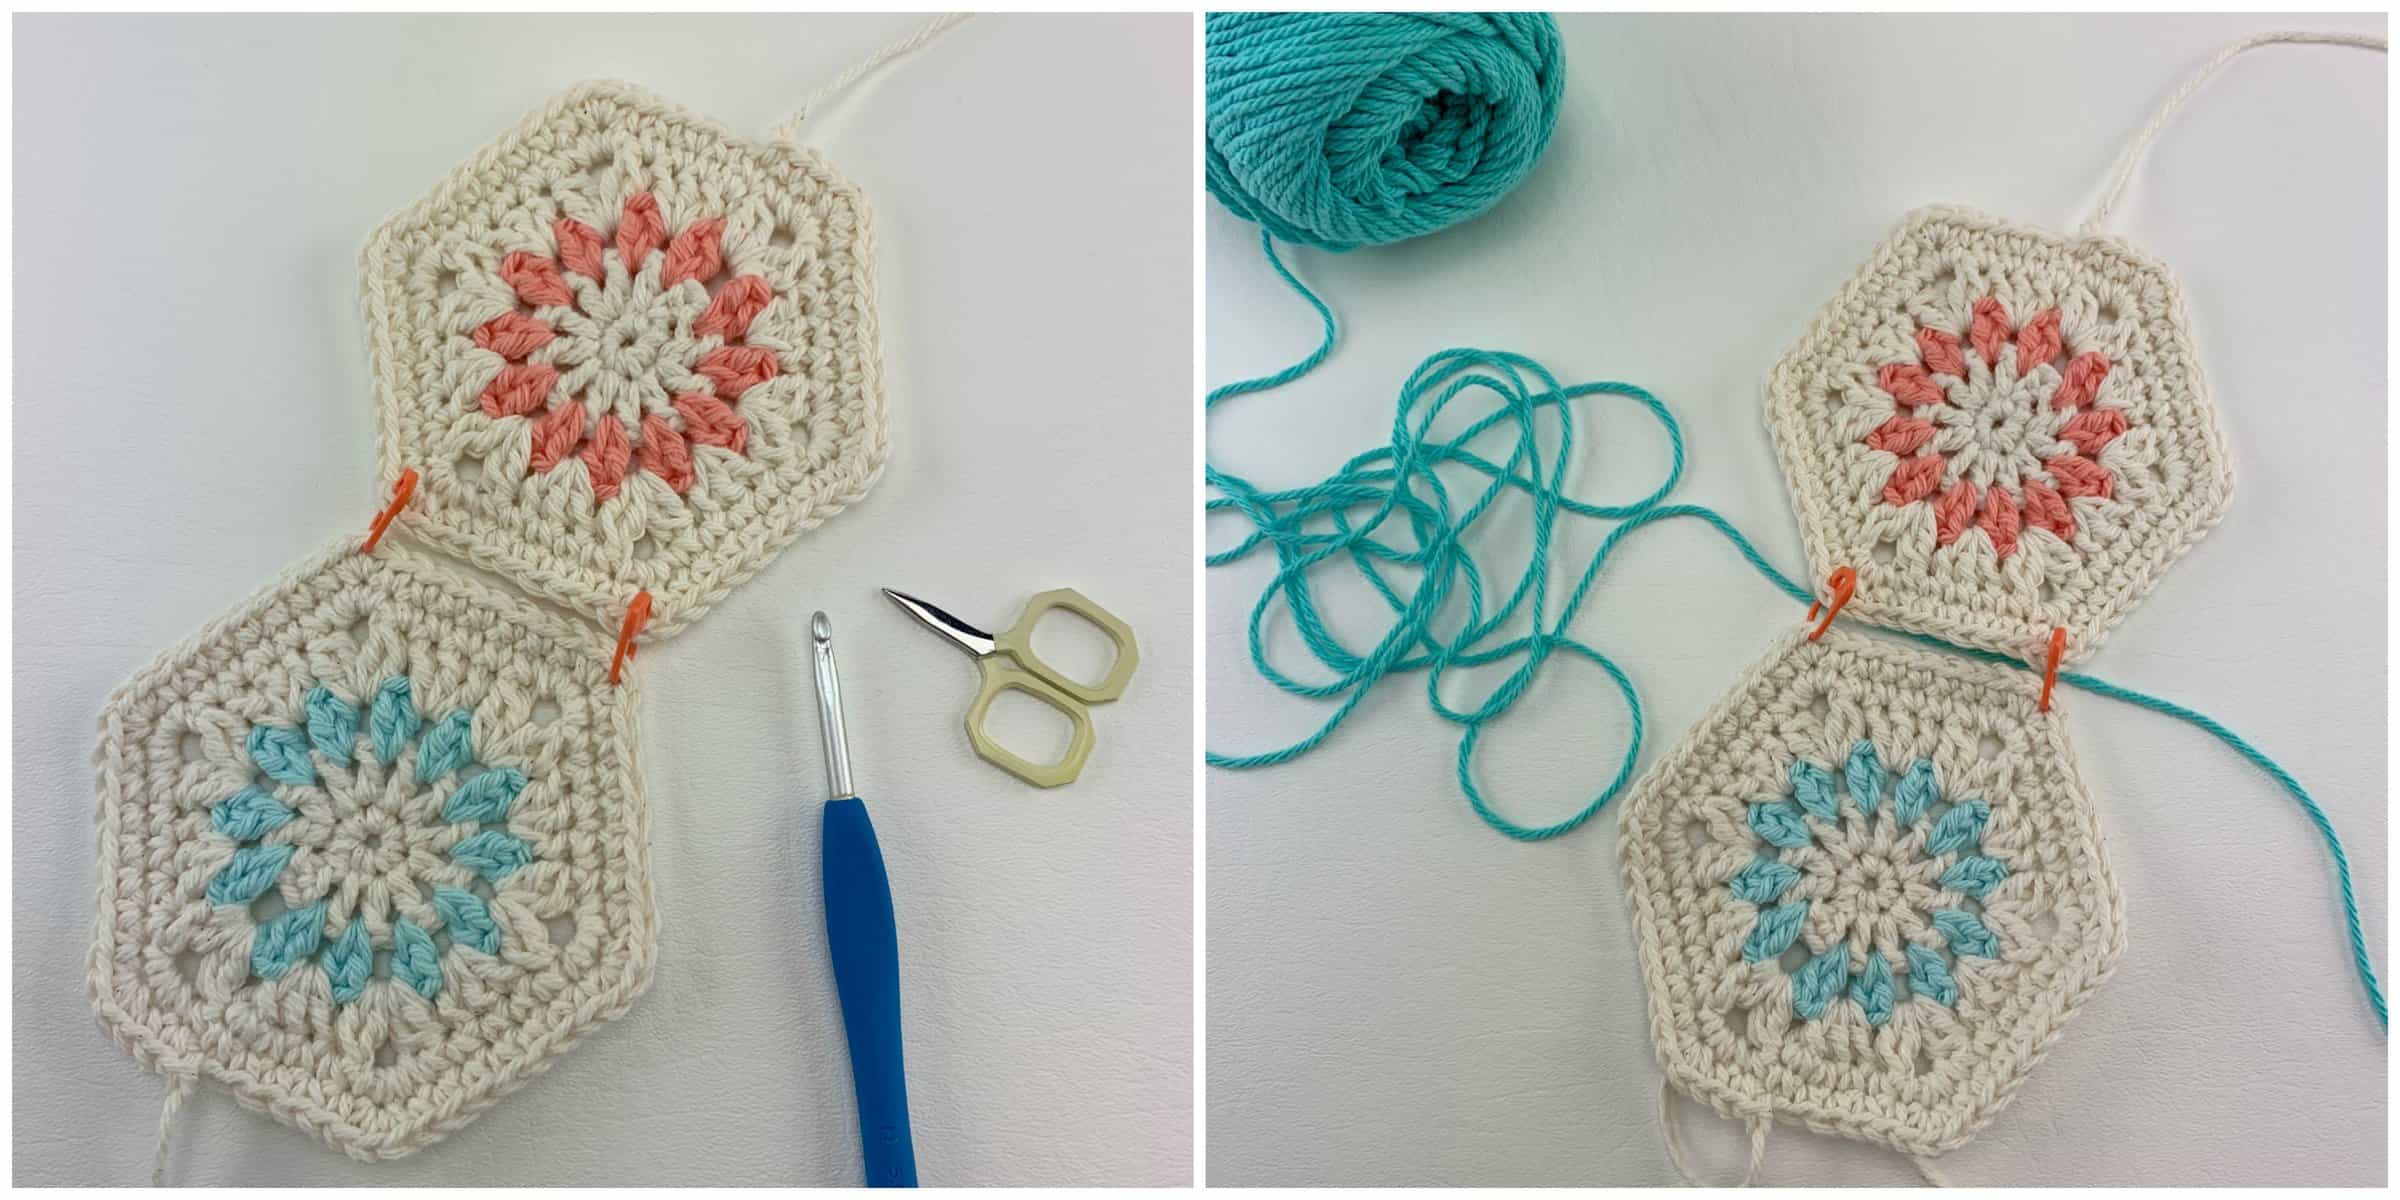
Step 1: Line up the edges to be seamed. Use locking stitch markers or scrap pieces of yarn to help hold your work together. In the photo above, left, I’ve placed locking stitch markers in the corners of each hexagon. There are 3 single crochet in each corner so the stitch markers are placed in the middle single crochet stitches.
Step 2: Place the working yarn underneath the pieces to be seamed.
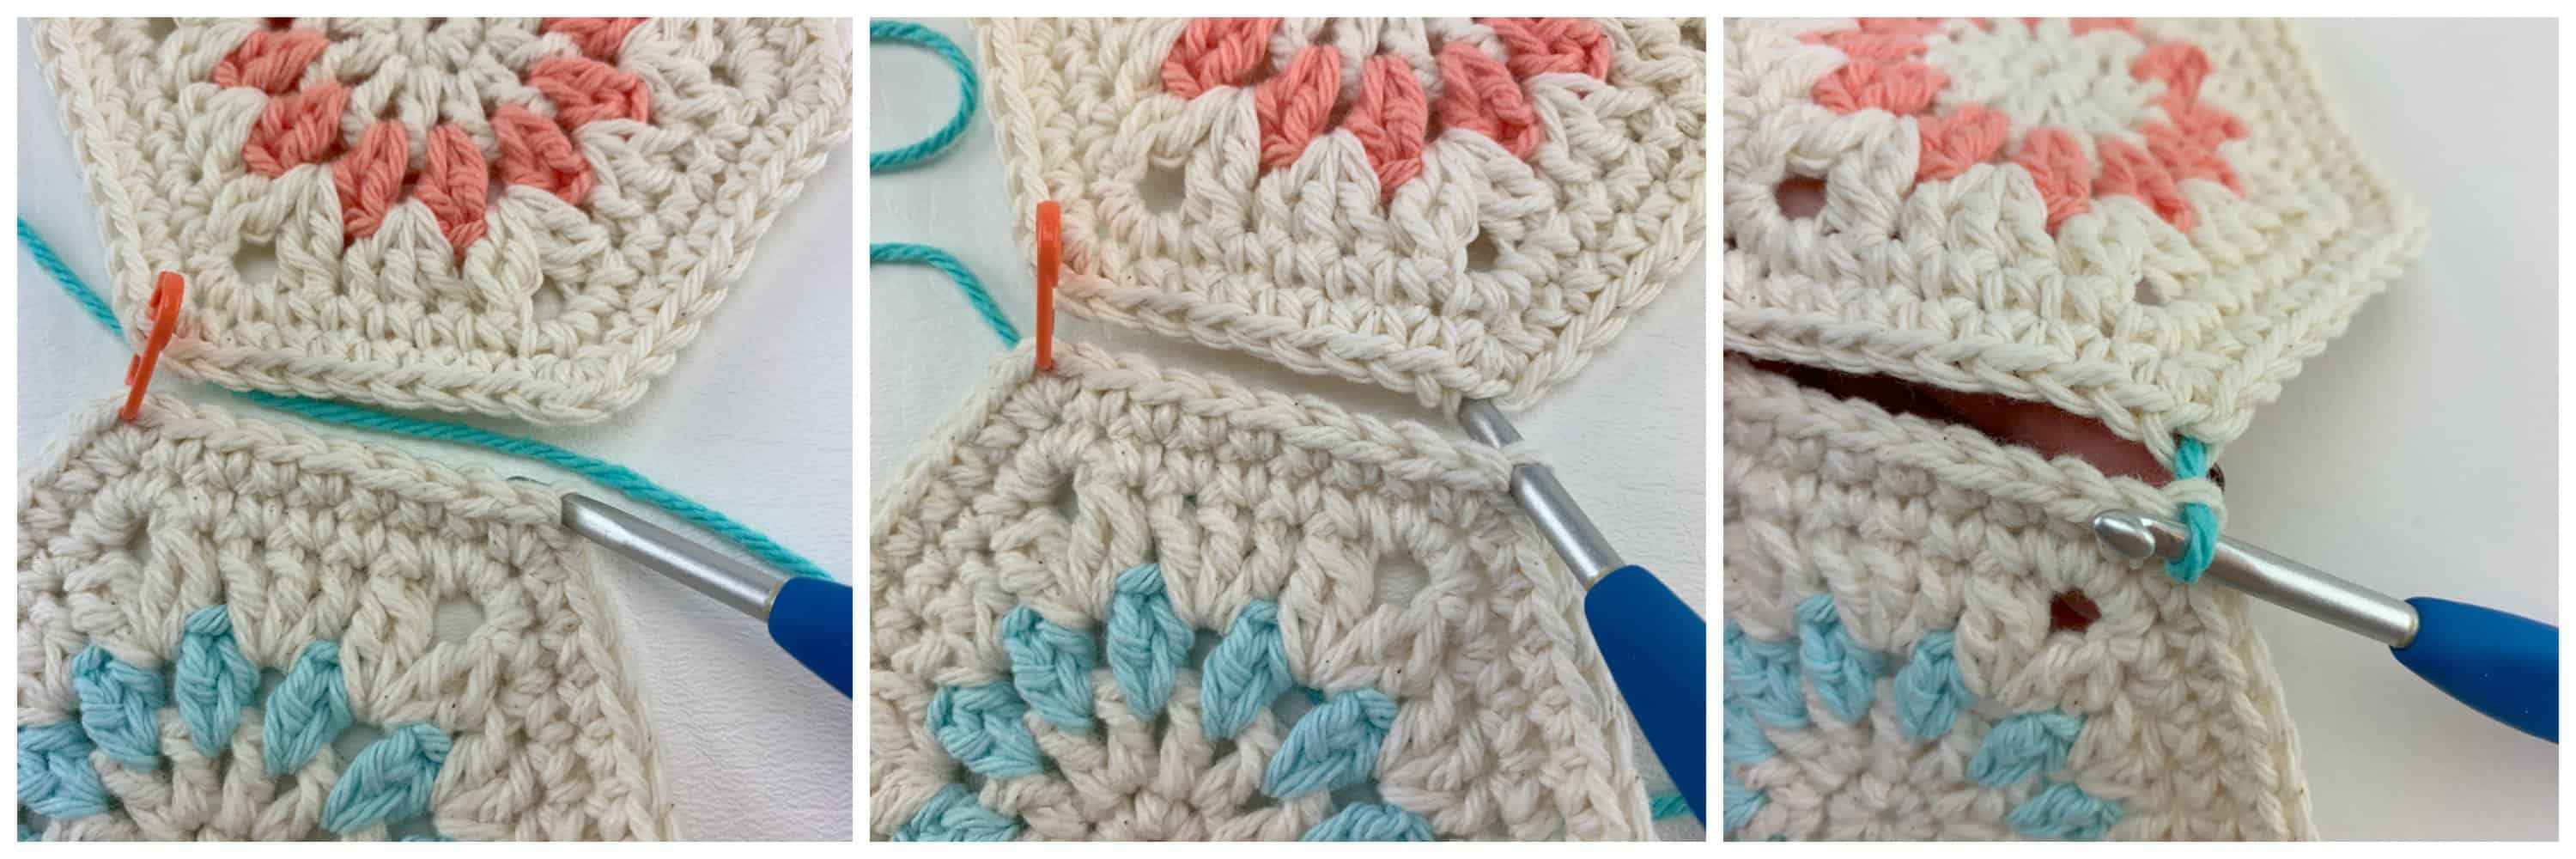
To work this flat seam you’ll alternate which side you insert your hook into first. First, you’ll work from left to right. Next, you’ll work from right to left and then continue alternating back and forth as you work the seam.
Photos Above: Insert your hook from front to back into the back loop only of a stitch from the edge on the left (photo left), insert your hook from front to back into the back loop only of a stitch from the edge on the right (photo middle), yo, pull up a loop and pull it through all loops on your hook to complete the slip stitch and join your yarn (photo right).
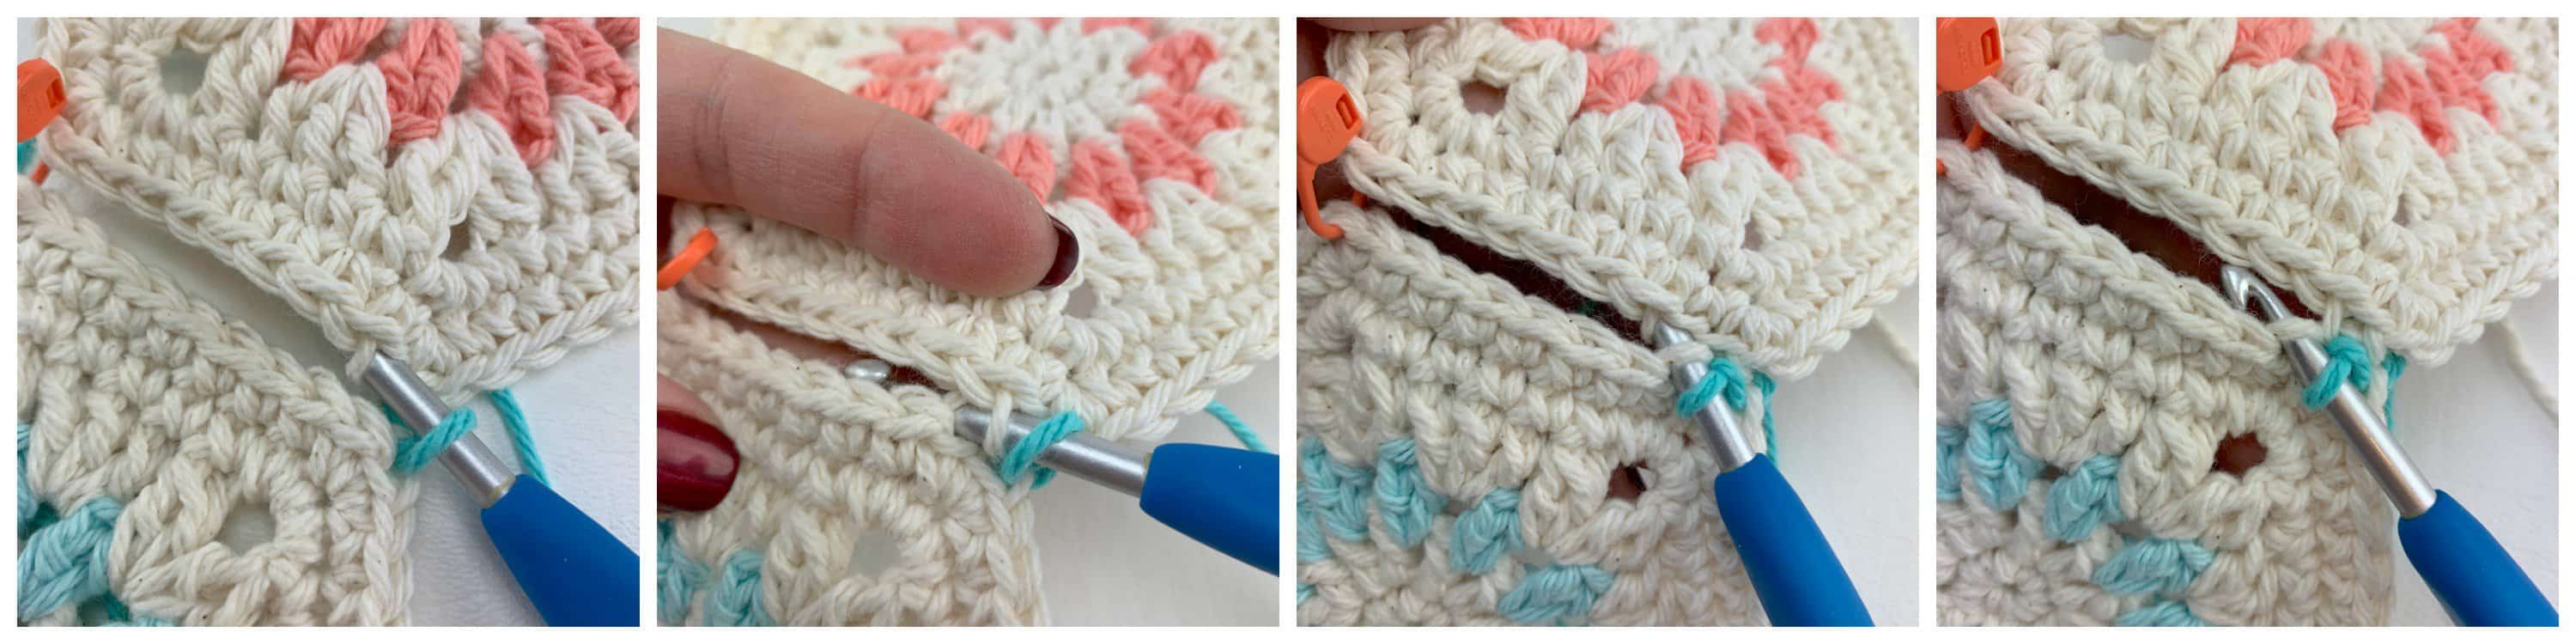
Photos Above: Insert your hook from front to back into the back loop only of the next stitch from the edge on the right, insert your hook from front to back into the back loop only of the next stitch from the edge on the left, complete a slip stitch.
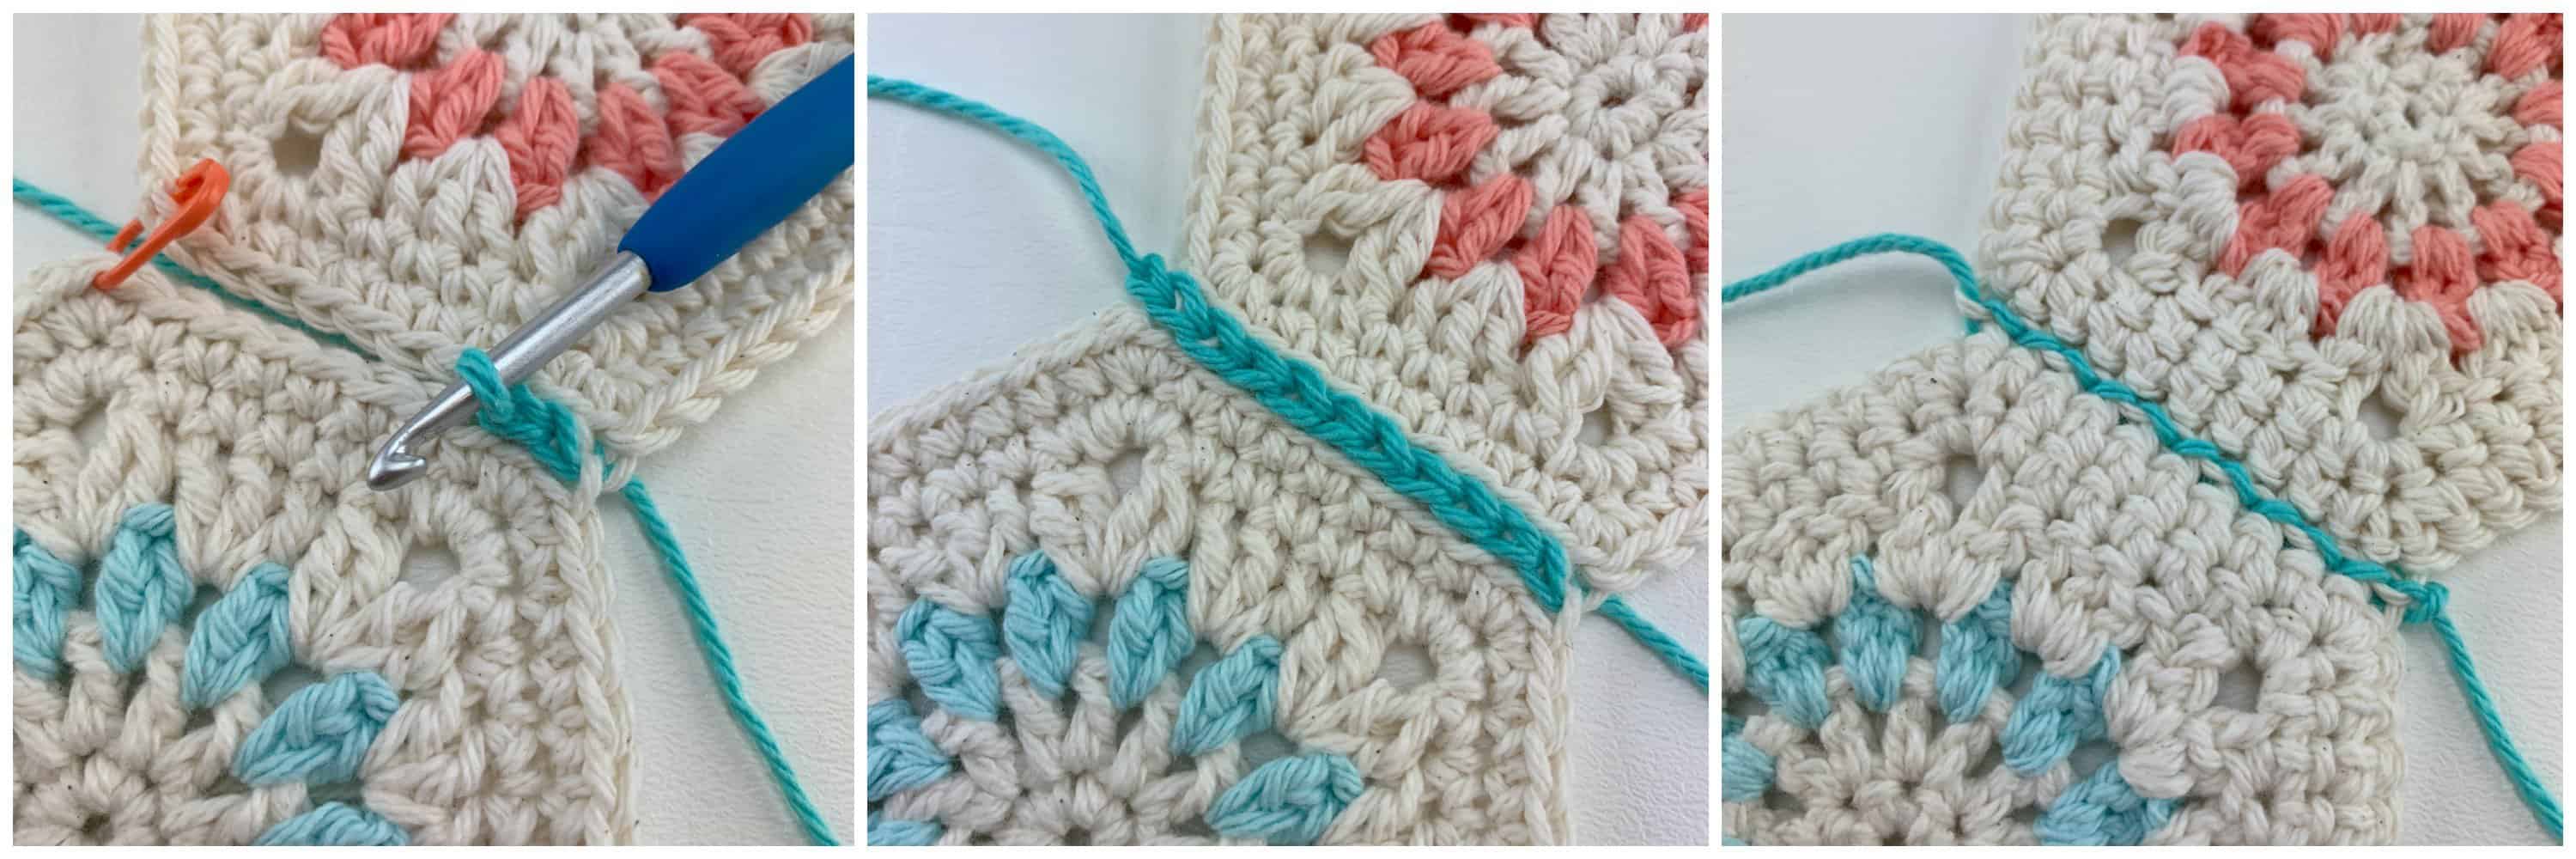
Photos Above: Continue to slip stitch across alternating working from left to right and right to left. The center photo shows a slip stitch seam complete. The photo on the right shows the wrong side of the seam.
Once you have worked the entire length of the seam to be made, fasten off, and weave in all ends.
Seaming, no matter which technique you are using, takes a little practice and maybe a tad more patience, but this skill is an excellent one to add to your crochet toolbox. I hope it quickly becomes your favorite crochet seam!
Are you intimidated by crocheted cables? Would you love to learn more? Take an Annies Video Class with me and let me ease your fears of crocheted cables! Click on the photo below to watch a free preview. You can also see the other 2 classes I have available! (affiliate link)

Please share your finished ACS projects with us in the A Crocheted Simplicity Crochet Community Group on Facebook! Use hashtag #ACrochetedSimplicity when sharing on social media so I can find your posts!
