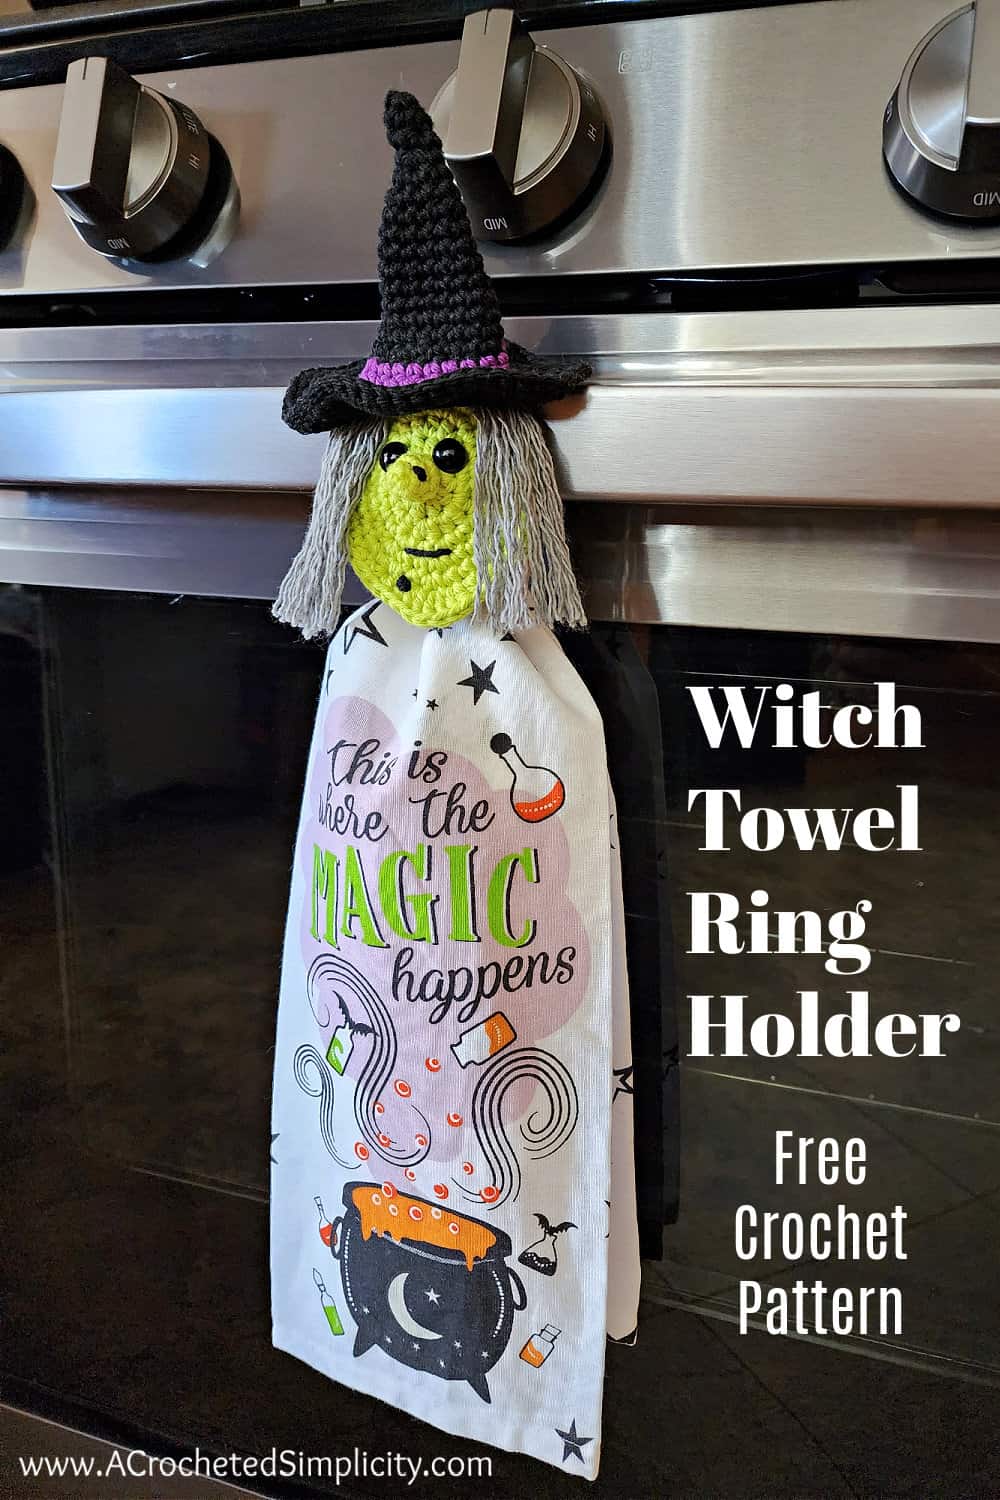
Witch Crochet Towel Holder Pattern

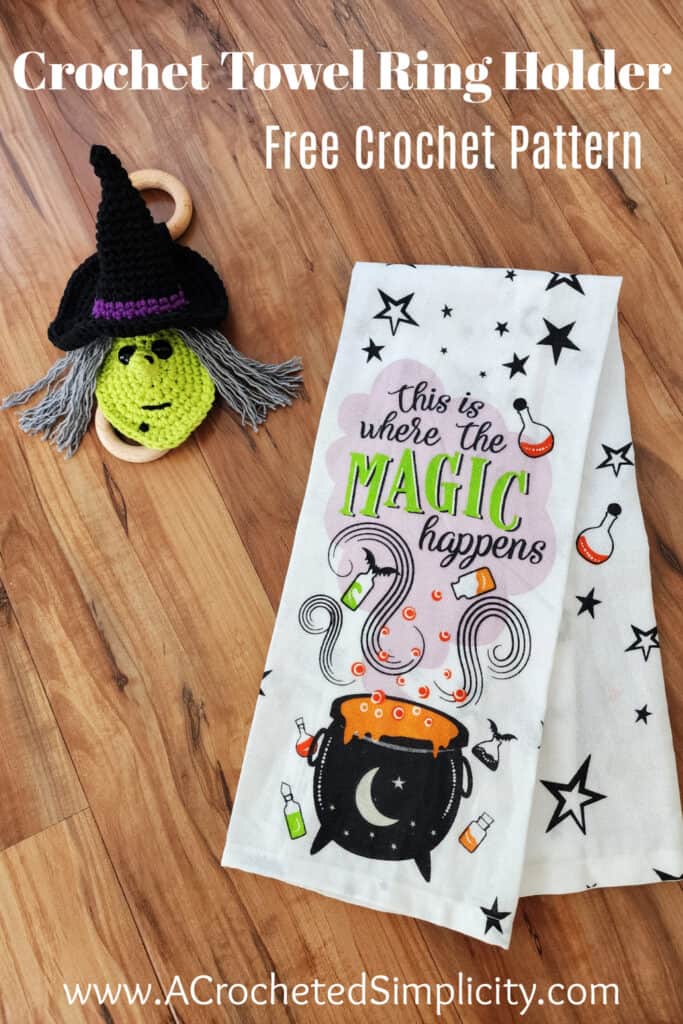
Learn to crochet a Witch Crochet Towel Holder and add a little fun Halloween decor to your kitchen and bathrooms.
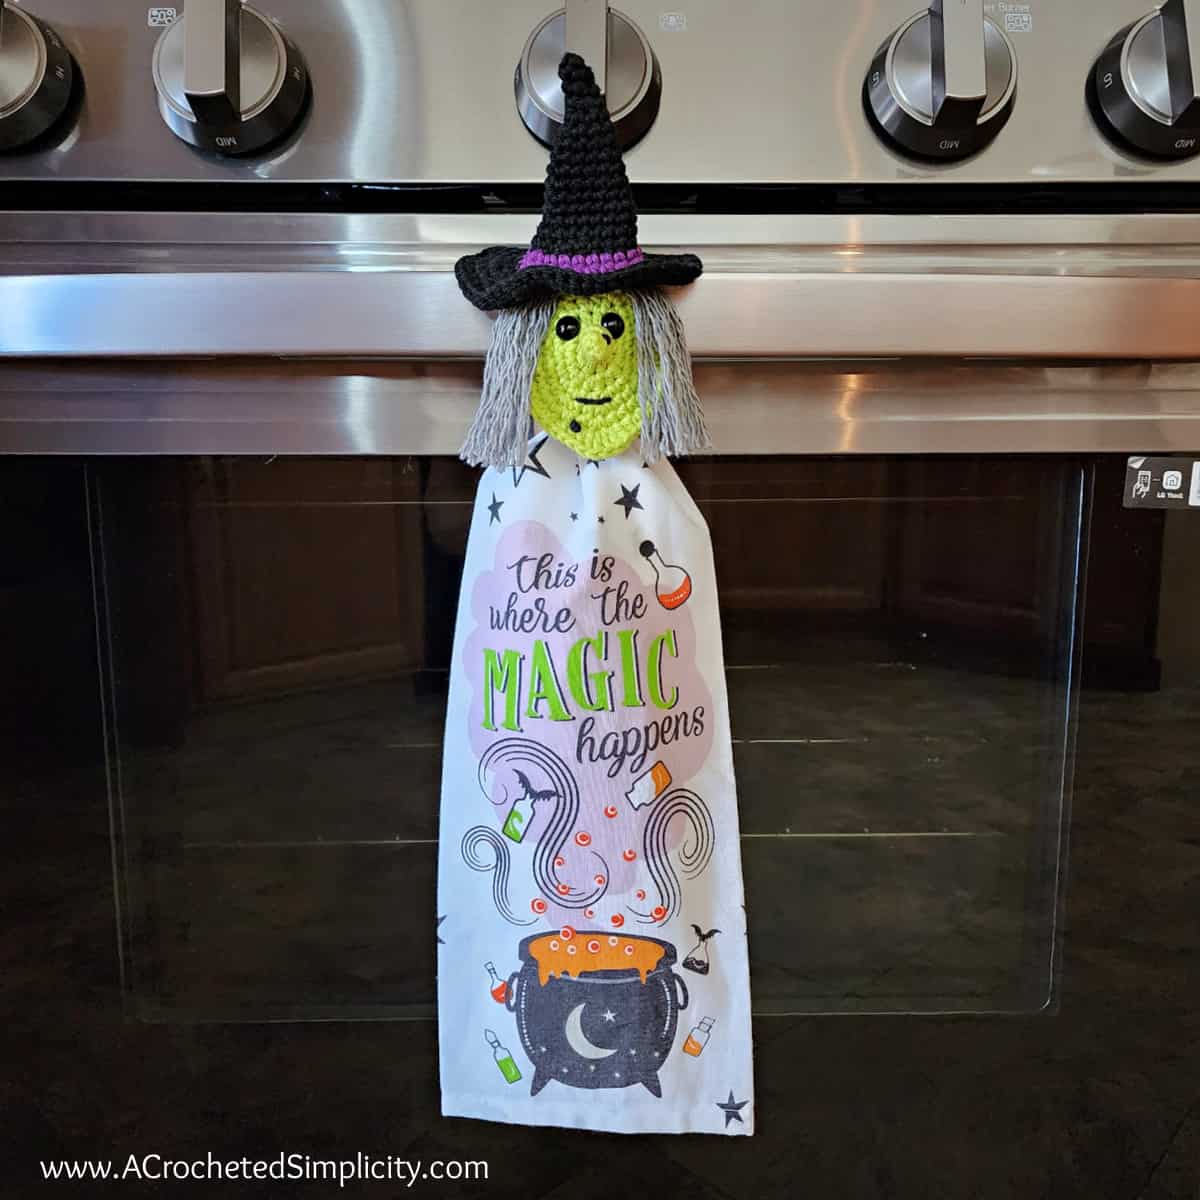
Your crocheted dish towels will never slip off the oven door handle or towel bar again with this cute crochet towel hanger.
You’ll find the crochet towel holder free pattern below, or an ad-free print friendly PDF (including all photo tutorials) on Ravelry, or on Etsy (aff).
This cute crochet kitchen towel holder is a great stash buster project!
We crocheted them during our September/October 2023 Mini Mystery Crochet Along and almost everyone was able to use leftover yarns from other crochet projects.
How perfect is that? A quick and easy crochet project that uses leftover yarn!
PLEASE NOTIFY ME OF FUTURE MMCAL’S
Make sure to subscribe to our e-mail list! I will send out a newsletter a couple days before each MMCAL begins to give you time to choose yarn from your stash and get everything ready.
When I was a young girl, one of the projects I remember sitting and watching my grandma crochet were crochet towel toppers. She would crochet a topper along the top edge of a hand towel, add a button and buttonhole, and this would keep the towel attached to the over door handle or kitchen cabinet pull.
The easy crocheted towel toppers she would make were functional, but they always had buttons to keep them from falling on the ground. I’ve crocheted a few dish towels with hanging loops and buttons for Christmas, Valentines, and everyday use, but there are other fun options to crochet a stay put towel!
You’ll find over two dozen towel crochet patterns for free on my blog. I’ve made a variety of Christmas kitchen towels, several other holiday towels, and towels you can use year round. They all have either crochet keyhole designs or buttons to secure them (my favorite are crochet keyhole towels).
While I love making crochet hand towels, this time I wanted to make a crochet towel holder pattern with rings. I used two small wooden rings, but I’ve also included instructions for crochet rings and other options, if you don’t have wood rings.
Quick Crochet Project
If you’re short on time and looking for something practical and fun, this crochet towel hanger also makes a great last minute gift!
Or, if you’re looking for a crochet project, or towel holder ideas that you can crochet in an evening, this free crochet towel holder pattern is perfect.
Small items sell great at craft fairs so these crochet towel toppers are great projects to make and sell!
No Wooden Rings – No Worries! I’ve included crochet instructions a crochet ring option below. And during the MMCAL, crocheters also used Shower Curtain Rings, Canning Jar Rings, and Ponytail Holders!
How to Crochet a Towel Holder
This crochet towel holder free pattern is constructed by crocheting a few small pieces and then assembling them.
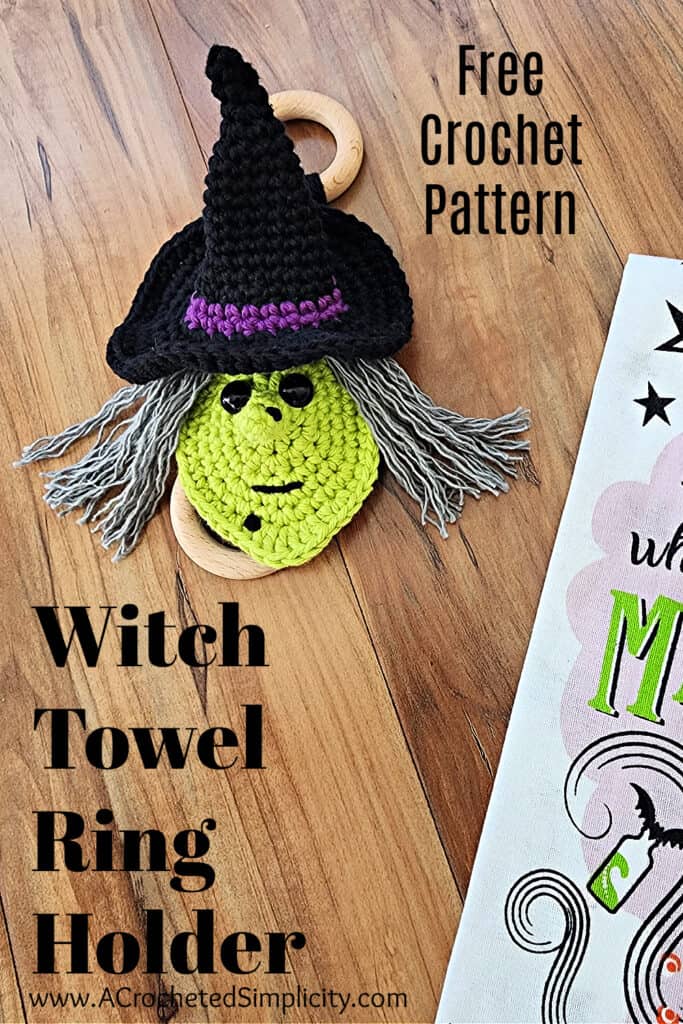
First, you’ll make the witch hat crochet pattern, which is worked from the top down with a simple crochet color change for the purple hat band.
Second, you’ll crochet the witch’s face and nose and add a small wart.
Next, you’ll then choose a crochet towel ring option and crochet that.
Then, you’ll add facial features and yarn fringe for hair to complete the crochet witch applique.
After completing the crochet witch hat, crochet towel holder with rings, and crochet witch face applique, we’ll assemble our crochet pieces.
Lastly, I’ll show you how to use your witch crocheted kitchen towel holder to hang your holiday towel!
Old Crone or Good Witch?
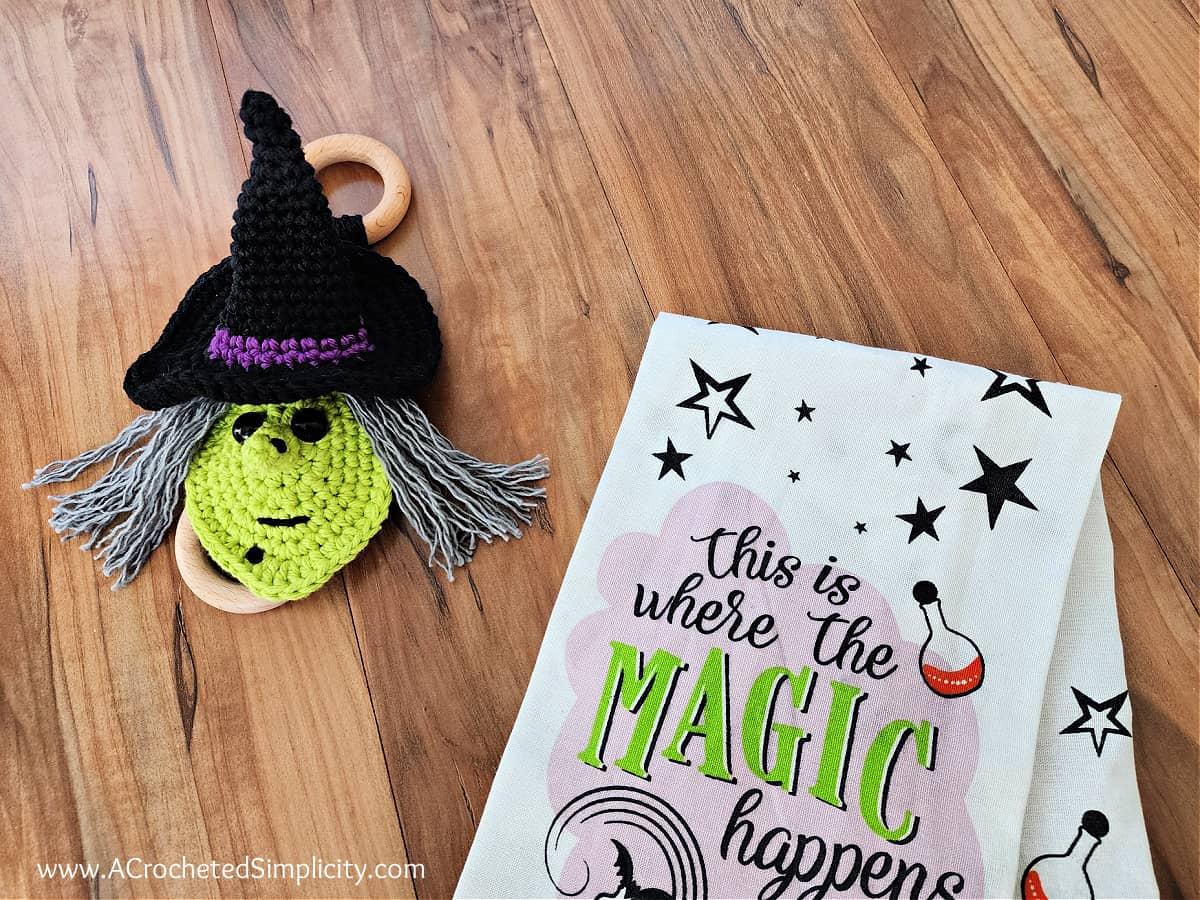
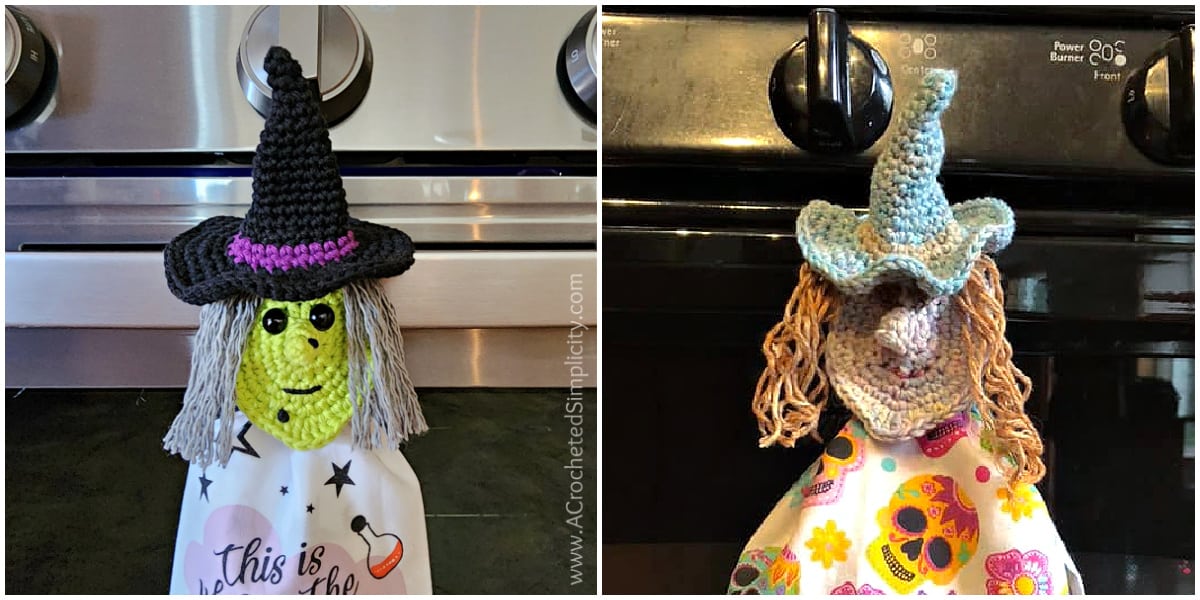
My witch crochet towel ring holder pattern was designed to resemble an old crone, but you could easily make a good witch.
To make a good witch instead, choose a flesh color yarn for her face and nose, pink yarn to give her a sweet smile, and leave off crochet warts.
During our Mini-Mystery Crochet Along, Anita J. (Nita’s Knots) chose to make a “good witch” and she’s given me permission to share her photo for inspiration. Isn’t she cute??? I love the color she chose for her witch hat pattern.
Towel Holder Yarn
This crochet dish towel topper is a great stash buster project so you can use almost any worsted weight / #4 yarn you have on hand.
I recommend using 100% cotton yarn for a crochet dish towel holder you’re going to be hanging on an oven door because it won’t melt with the heat like acrylic yarns will, it’s also durable and easy to care for… simply toss it in the washer!
I used Lily Sugar n’ Cream for my crochet towel holder. I love the color choices available in the Lily Sugar n’ Cream line and it’s easy to mix and match with Peaches and Cream and Bernat Handicrafter. All 3 are very similar yarns.
Crocheted Dish Towels are such an easy way to add a little fun to your crochet home decor. You’ll find free patterns for crochet hand towels for almost every holiday and for year round kitchen decor too!
Witch Crochet Towel Holder Pattern – Crochet Kitchen Towel Holder Free Pattern
The towel holder crochet pattern is free below, but if you love to work offline, I’ve got a couple other great options for you.
Purchase the ad-free, printable PDF, including all photo tutorials, on Ravelry, or on Etsy (aff).
This post contains affiliate links.
Materials
- Yarn: Worsted Weight / 4 Cotton Yarn such as Lily Sugar n’ Cream, Peaches & Cream, Bernat Handicrafter, or another comparable yarn – see PATTERN NOTES below (acrylic yarn can also be used)
- Black: 20 yards
- Purple: 3 yards
- Green: 15 yards
- Grey: 3 yards
- Crochet Hook: G/6/4.00mm (These crochet hooks are the only ones I use!)
- Scissors – These are my favorite because they’re super sharp and mini! You can purchase just ONE, or NINE (only $1.44 each & they make great gifts for your crafting friends)
- Tapestry Needle
- Optional Materials: (2) 50mm Wooden Ring; (2) 12mm Plastic Safety Eyes
- Instructions are included for crochet rings & crochet eyes.
Abbreviations (US Terms)
- ch(s): chain(s)
- sl st(s): slip stitch(es)
- st(s): stitch(es)
- yo: yarn over
- sp: space
- sc: single crochet
- hdc: half double crochet
- dc: double crochet
- single crochet spike stitch
- SM: stitch marker
- Rep: repeat
- Rnd: round
- RS: Right Side
- WS: Wrong Side
- BLO: crochet in back loops only
- FLO: crochet in front loops only
Experience Level
- Easy
Gauge
- Measurements given throughout pattern.
Size
- One Size – fits a standard size hand towel
Special Stitches
- Single Crochet Spike Stitch (spike sc): Insert your hook into the next st, 1 row below the current row, yo, pull up a loop that is the same height as your current row stitches, yo, pull through both loops on your hook to complete a single crochet spike stitch.
Pattern Notes
- Turning chains are not included in stitch count unless noted otherwise.
- Yarn Note: I used the 100% cotton yarns listed above for my sample. Another similar 100% cotton yarn will work great.
- Lily Sugar ‘n Cream (70.9 g / 2.5 oz / 120 yards / 109 m / 100% cotton)
- Alternative Yarns: Other fibers, such as acrylic, will work well too. The only difference I can think of may be that acrylic may stretch a bit more than 100% kitchen cotton and if the crochet towel topper gets to hot as a stove towel holder, it could melt a little.
- Yardage:
- Black: 20 yards
- Purple: 3 yards
- Green: 15 yards
- Grey: 3 yards
- Wood Towel Ring Alternatives: I used two wooden rings I purchased on Amazon, but other great options are: shower curtain rings, canning jar rings, and ponytail holders (elastics).
- Construction: This crochet towel ring holder is constructed by crocheting a few small pieces and then assembling them. First, you’ll learn how to crochet a witches hat, which is worked from the top down. Next, you’ll crochet the witch’s face and nose. You’ll then choose a towel ring option and crochet that. Then, you’ll add the facial features to the witch’s head. Lastly, you’ll assemble all the pieces and hang up your towel!
- Crochet Witch Ideas – Old Crone or Good Witch?
- I designed this witch crochet pattern for towel holder to resemble an old crone, but you could easily make a good witch. I’d use a flesh color yarn for her face and nose, simply give her a smile, and don’t add the crochet warts.
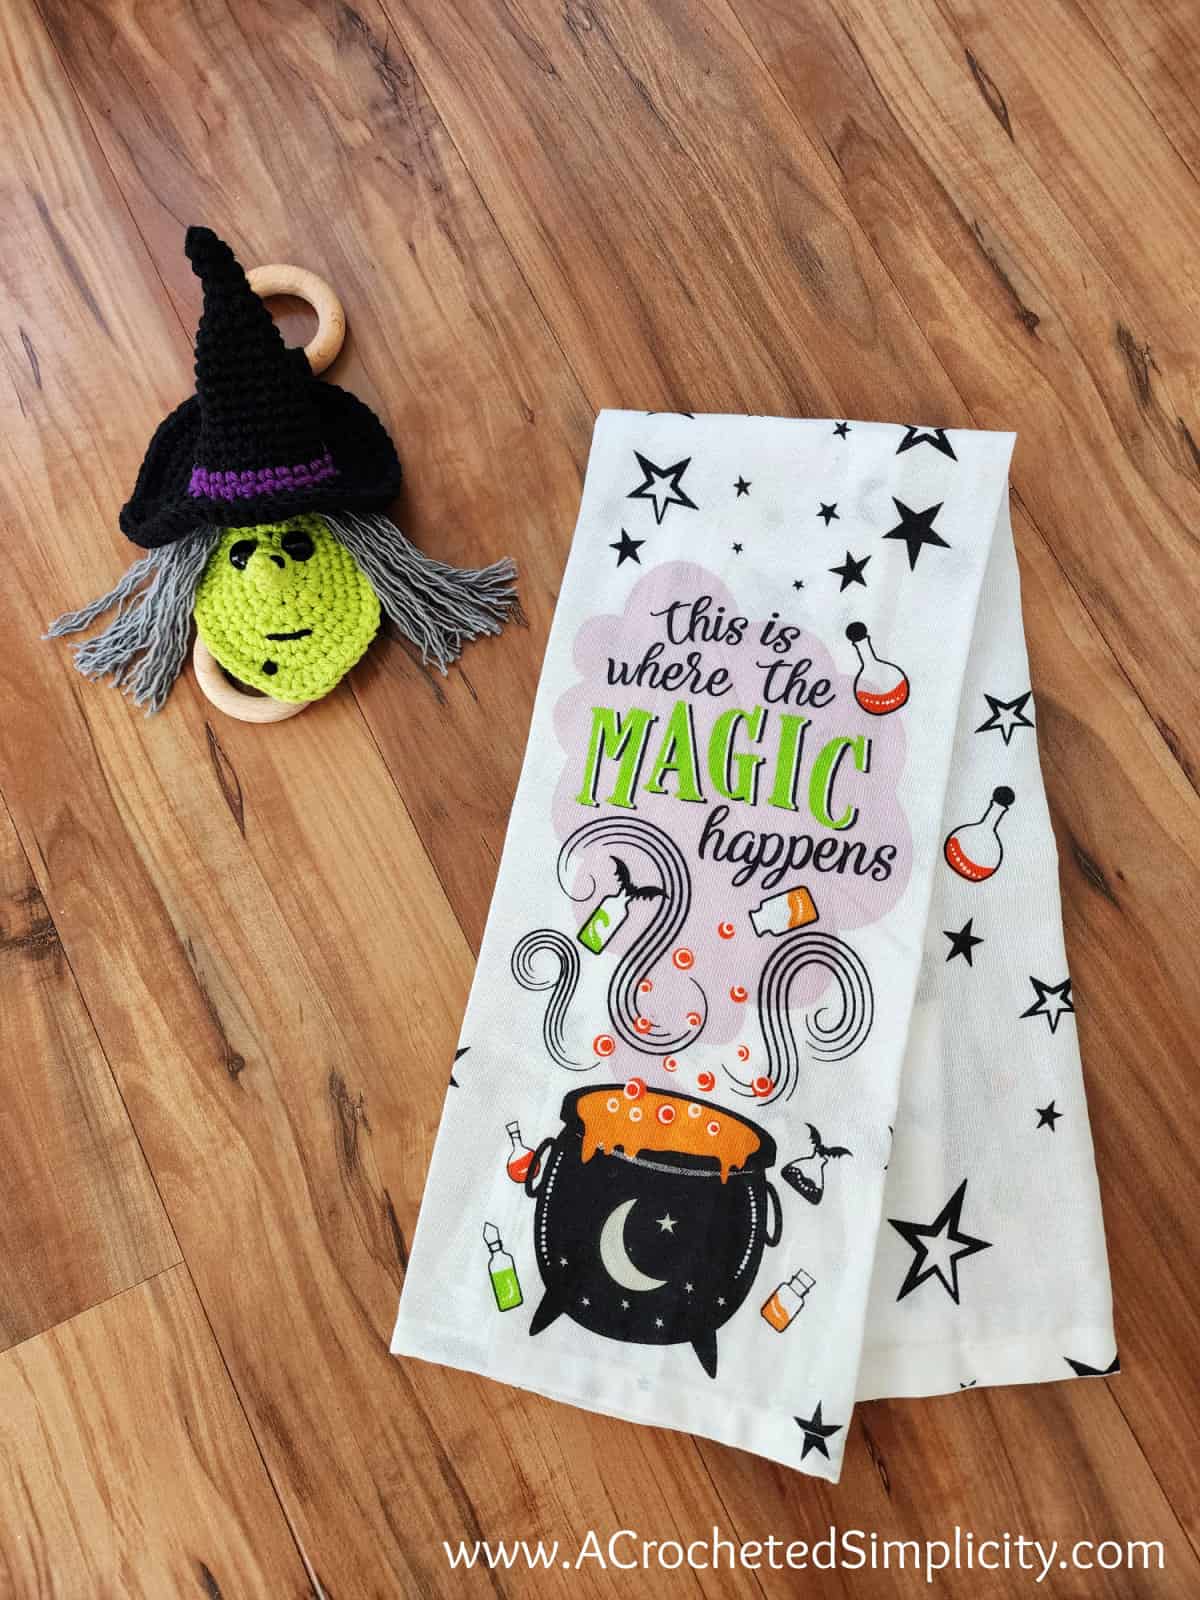
I found several super cute Halloween hand towels at my local Dollar Tree.
Witch Crochet Towel Holder Pattern Free
Crochet Witch Hat Pattern
Rnd 1 (RS): With black yarn & a 4.00mm crochet hook, ch 2, work 3 sc into the 2nd ch from your hook. Do not join. Begin working in a spiral. Use a scrap piece of yarn to mark the beginning/end of each round and move it up as you complete a round. (3 sts)
Rnds 2 – 12: 2 sc in the first st, sc in each remaining st. (14 sts) at the end of Rnd 12.
Rnds 13 – 15: Sc in each of the next 7 sts, 2 sc in the next st, sc in each remaining st. (17 sts) at the end of Rnd 15.
Join with a sl st at the end of Rnd 15. Do not fasten off Black yarn. Switch to Purple yarn.
Rnd 16: Ch 1, sc in each of the next 7 sts, 2 sc in the next st, sc in each remaining st. Do not join. (18 sts)
Rnd 17: Sc in each of the next 7 sts, 2 sc in the next st, sc in each remaining st. Join with a sl st to the 1st st. (19 sts)
Fasten off Purple yarn. Switch back Black yarn.
Rnd 18: Ch 1, (2 sc in the next st, sc in each of the next 2 sts) 6 times, 2 sc in the last st. (26 sts)
Rnd 19: Working in FLO, (2 sc in the next st, sc in the next st) 13 times. (39 sts)
Rnd 20: Working in BOTH loops, (2 sc in the next st, sc in each of the next 2 sts) 13 times. (52 sts)
Rnd 21: (2 sc in the next st, sc in each of the next 7 sts) 6 times, sc in each remaining st. (58 sts)
Rnd 22: Sc in each st around. (58 sts)
Fasten off. Weave in ends. Continue on to the Witch’s Head. Crocheted Witch Hat measures 4″ W x 3.75″ H.
Witch’s Head
Note: The witch’s head is worked in continuous rounds to keep from having an unsightly seam. Do not join at the end of each round, instead use a scrap piece of yarn to keep track of the beginning of each round. Move the scrap of yarn up as you complete each round.
Rnd 1 (RS): With Green yarn & a 4.00mm crochet hook, ch 2, work 6 sc in the 2nd ch from your hook. Do not join. (6 sts)
Rnd 2: [ (sc, hdc) in the next st, 2 hdc in the next st, (hdc, sc) in the next st ] work from [ to ] 2 times. Do not join. (12 sts)
Rnd 3: [ sc in the next st, (sc, hdc) in the next st, 2 hdc in each of the next 2 sts, (hdc, sc) in the next st, sc in the next st ] work from [ to ] 2 times. Do not join. (20 sts)
Rnd 4: [ sc in each of the next 3 sts, (2 sc in the next st, sc in the next st) 3 times ] work from [ to ] 2 times, sc in each of the next 2 sts. Do not join. (26 sts)
Rnd 5: [ sc in each of the next 3 sts, (2 sc in the next st, sc in each of the next 2 sts) 3 times ] work from [ to ] 2 times, sc in each of the next 2 sts. Do not join. (32 sts)
Rnd 6: [ sc in each of the next 3 sts, (2 sc in the next st, sc in each of the next 3 sts) 3 times ] work from [ to ] 2 times, sc in each of the next 2 sts. Do not join. (38 sts)
Rnd 7: sc in each of the next 6 sts, 2 sc in the next st, hdc in the next st, (hdc, dc) in the next st, 2 dc in the next st, (dc, hdc) in the next st, hdc in the next st, 2 sc in the next st, sc in each of the next 11 sts, 2 sc in the next st, sc in each of the next 2 sts, 2 sc in the next st, sc in each of the next 3 sts, 2 sc in the next st, sc in each of the next 6 sts. (46 sts)
Fasten off. Weave in ends. Continue on to the Witch’s Nose. The witch’s head measures approximately 2.75″ W x 3.75″ H.
Witch’s Nose
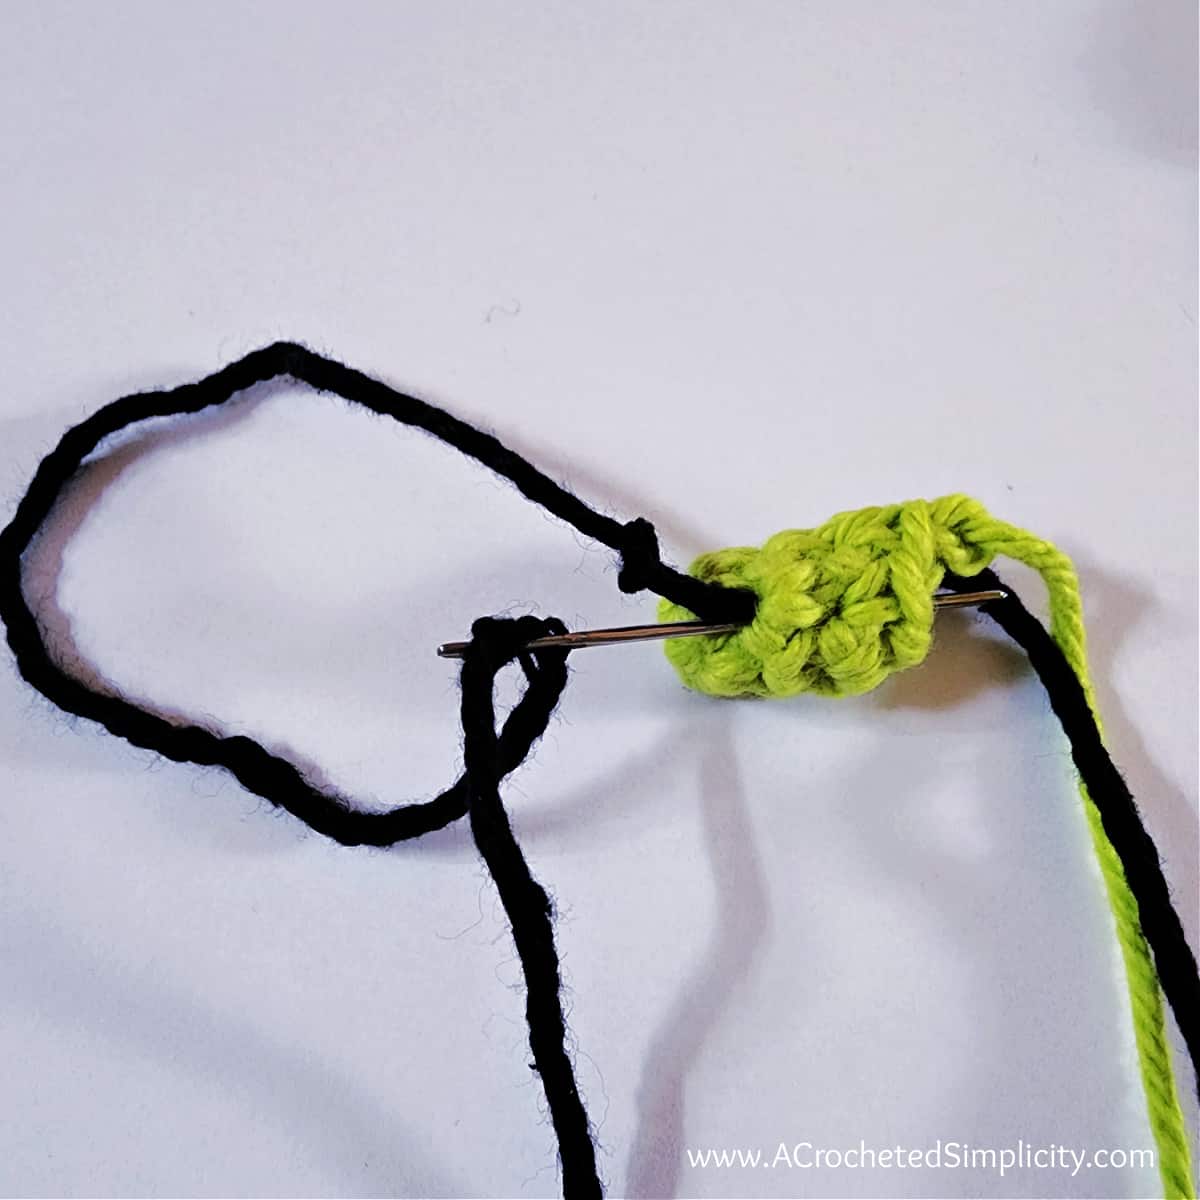
Rnd 1 (RS): With Green yarn & a 4.00mm crochet hook, ch 2, work 3 sc into the 2nd ch from your hook. Do not join. Begin working in a spiral. Use a scrap piece of yarn to mark the beginning / end of each round and move it up as you complete a round. (3 sts)
Rnds 2 – 3: 2 sc in the first st, sc in each remaining st. (5 sts) at the end of Rnd 3.
Tip!: If you’d like your witch’s nose to be longer, simply repeat rounds 2 -3.
Fasten off leaving an 8″ tail of yarn. The Witch’s Nose is approximately .5″ W x .75″ H. Continue below to the crochet towel ring pattern option you’ve chosen, either Towel Ring Option #1 or #2.
Towel Ring Option #1 (with 2 wooden rings)
Alternate Rings: For this crochet towel ring holder option, I used two wooden rings I purchased on Amazon. Other great options include: shower curtain rings, canning jar rings, and ponytail holders (elastics).
Row 1: With Black yarn & a 4.00mm crochet hook, work 5 sc around the first wooden ring. Turn. (5 sts)
Row 2: Ch 1, sc in each st across. Turn. ( 5 sts)
Rep Row 2 until the strap measures 4″ L.
Last Row: Ch 1, work 5 sc around the second wooden ring and into each st from the last row 2 repeat to secure it to the strap.
Fasten off. Weave in ends. Length of the crochet ring towel holder should be approximately 8″ (including wooden rings ). Continue on to Assembling Witch’s Face.
Towel Ring Option #2 (crocheted towel rings)
For this crochet towel ring holder pattern option, it is 100% crocheted all in one piece. First, you’ll crochet a ring. Next, you’ll crochet the hanging strap right onto the first crocheted ring. Lastly, you’ll make a crochet chain and join it to the opposite side of the strap to form the base of the second crochet ring.
Row 1: With Black yarn & a 4.00mm crochet hook, ch 22. Join with a sl st to the first ch to create a loop. (22 sts)
Rnd 2: Ch 1, working into the back humps of the ch, sc in each ch around. Join. (22 sts)
Rnd 3: Ch 1, work a spike sc around each sc from Rnd 2 and into the chains from Rnd 1. Join. (22 sts)
Row 4: Ch 1, sc in each of the next 5 sts. Turn. (5 sts)
Row 5: Ch 1, sc in each st across. Turn. (5 sts)
Rep Row 5 until the strap measures 4″ L.
Create Second Ring Rnd 1: Ch 17, skip 4 sts, join with a sl st to the next sc to create a loop. Turn. (17 chs)
Second Ring Rnd 2: Ch 1, working into the back humps of the ch, sc in each of the 17 chs. Join with a sl st to the next st on the hanging strap. Turn. (17 sts)
Second Ring Rnd 3: Ch 1, work a spike sc around each sc from Rnd 2 and into the chains from Second Ring Rnd 1. Join with a sl st. (17 sts)
Fasten off. Weave in ends. The length of this crochet towel holder ring should be approximately 8″. Continue on to Assembling the Crochet Witch’s Face.
The photo below is what your crocheted towel ring will look like.

Save yourself from weaving in ends and hide the posts of the safety eyes by crocheting another Witch’s Head and attaching it to the back of the witch’s face after you add the facial features!
Assembling the Crochet Witch’s Face
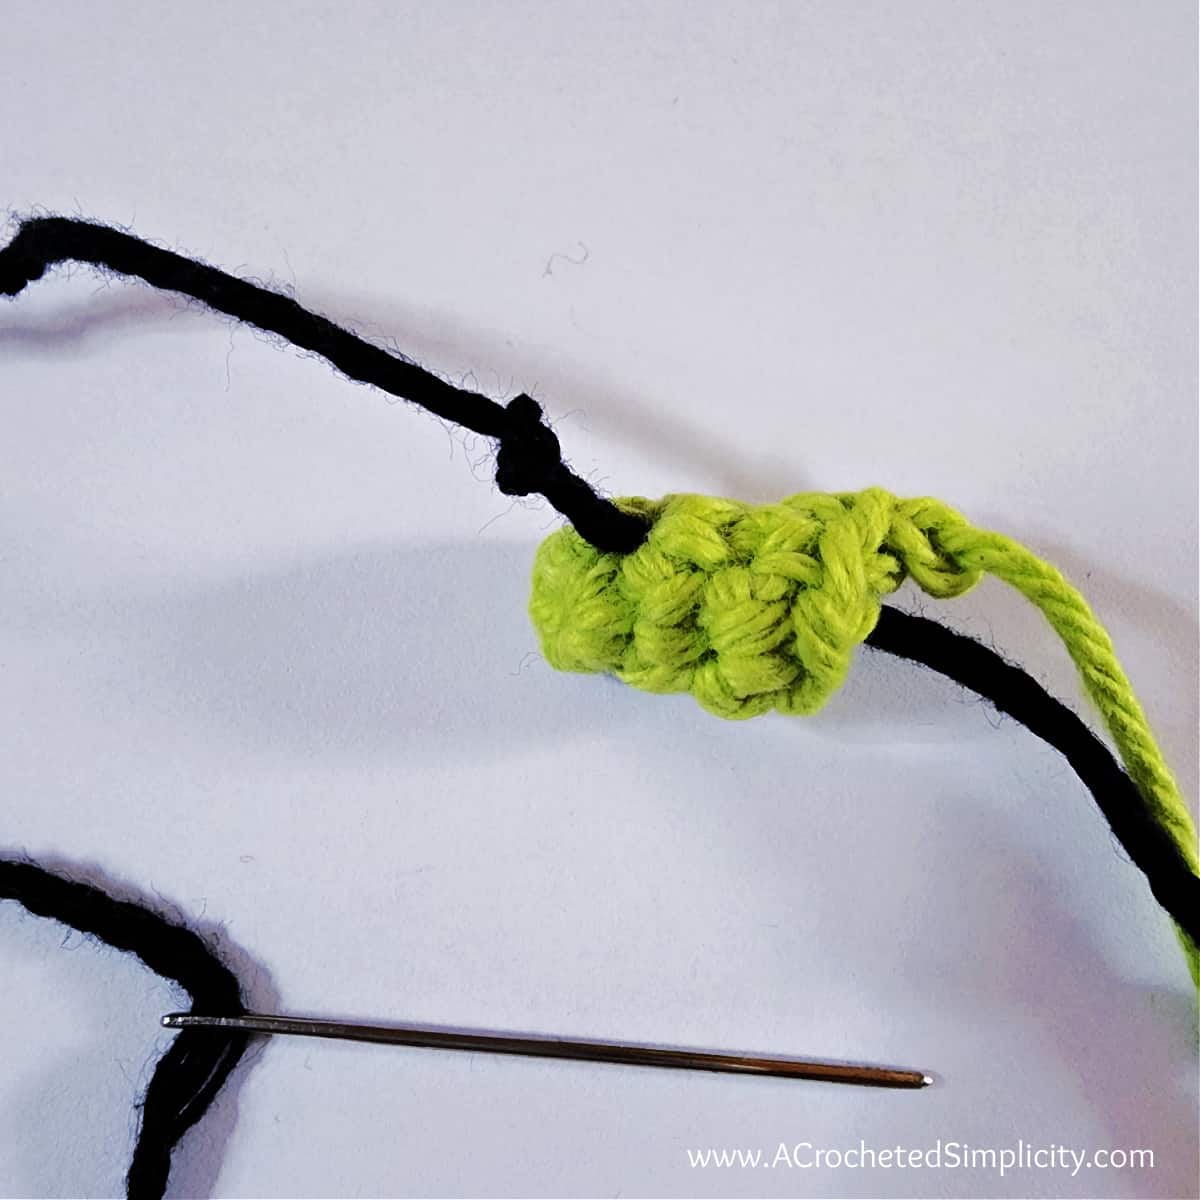
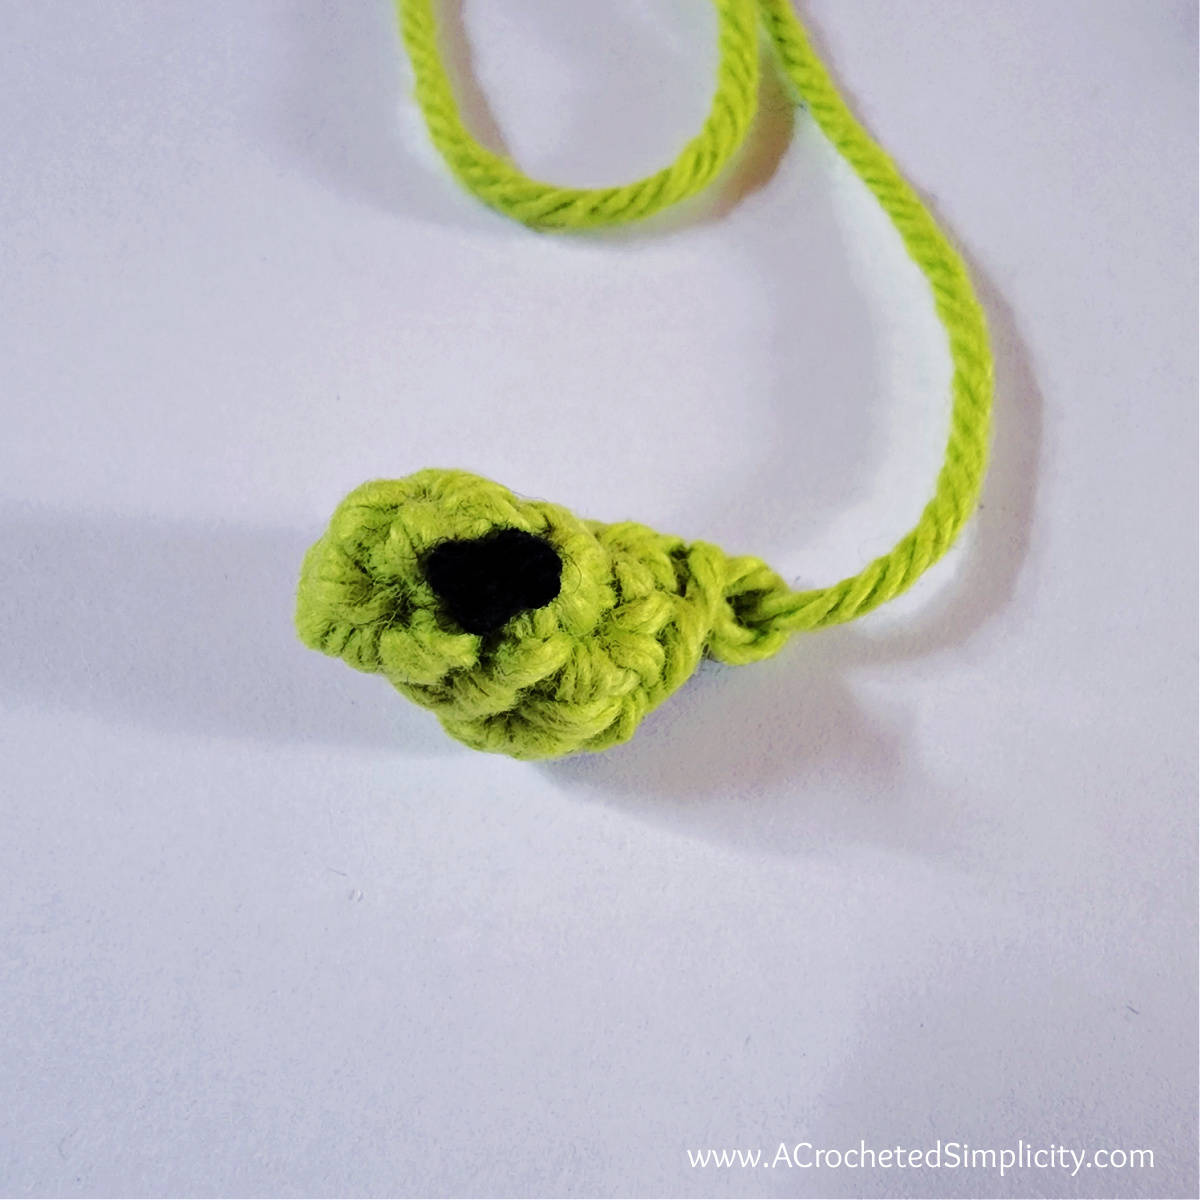
Adding a Wart to Her Nose
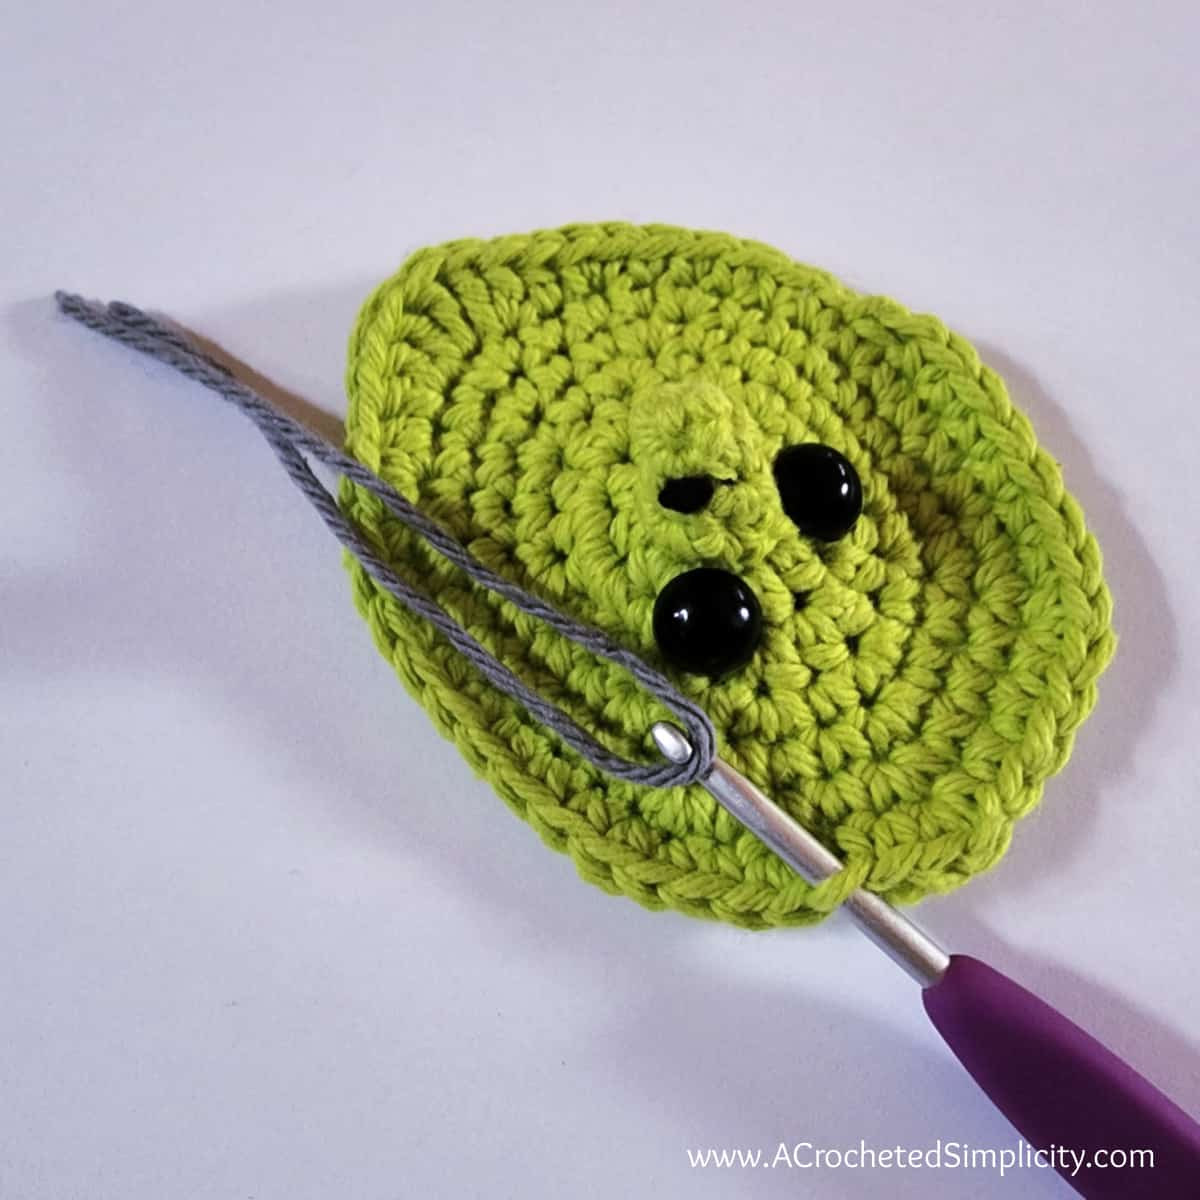
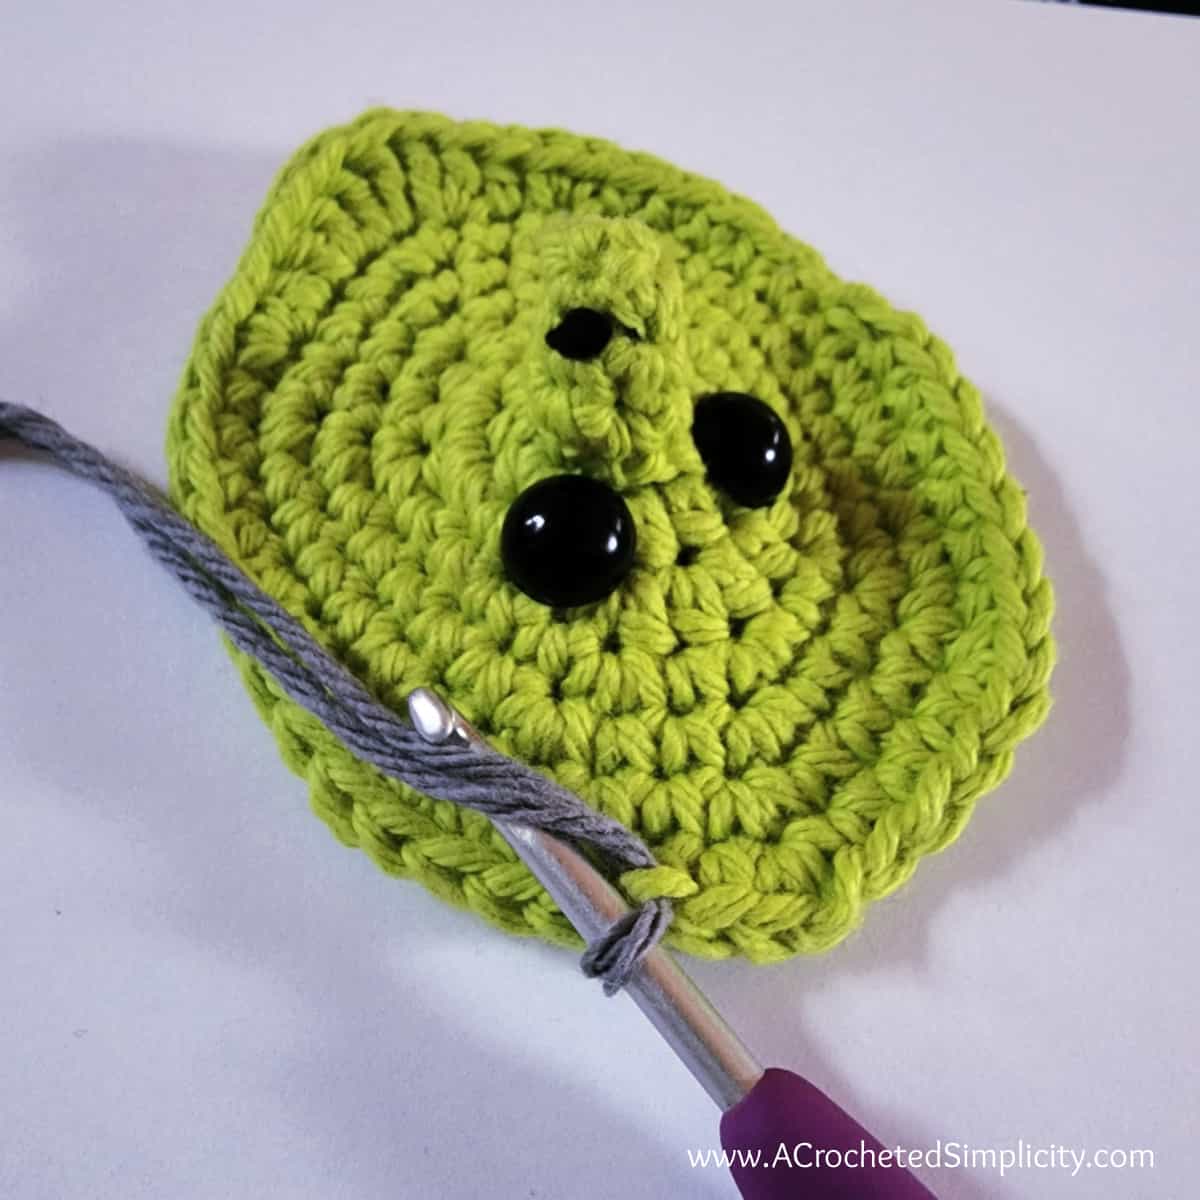
Using a piece of black yarn, approximately 6″ long, and a yarn needle, pass the needle through the nose (from back to front) the spot you’d like your wart to be (be careful not to pull yarn all the way thru the nose). Tie a knot in your yarn and gently pull to tighten. Pass the black yarn back thru the same hole or one closest, to the hole you originally passed it through. Secure yarn on the back side of the nose with a knot. Trim ends. See photos below.
Continue on to the Witch’s Crocheted Eyes instructions, if you’re making your eyes. If you’re using plastic safety eyes, continue on to Facial Features.
Witch’s Crocheted Eyes (Make 2 – optional)
Rnd 1: With black yarn and a 4.00 mm crochet hook, ch 2, work 3 sc in the 2nd ch from your hook. Join with a sl st to the first st. (3 sts)
Fasten off leaving an 8” tail for sewing. Weave in beginning tail end.
With a yarn needle and tail of yarn, attach yarn eyes to the witch’s face as shown in the photo below. Eyes are approximately 1/2″ in diameter.
Continue on to the Facial Features.
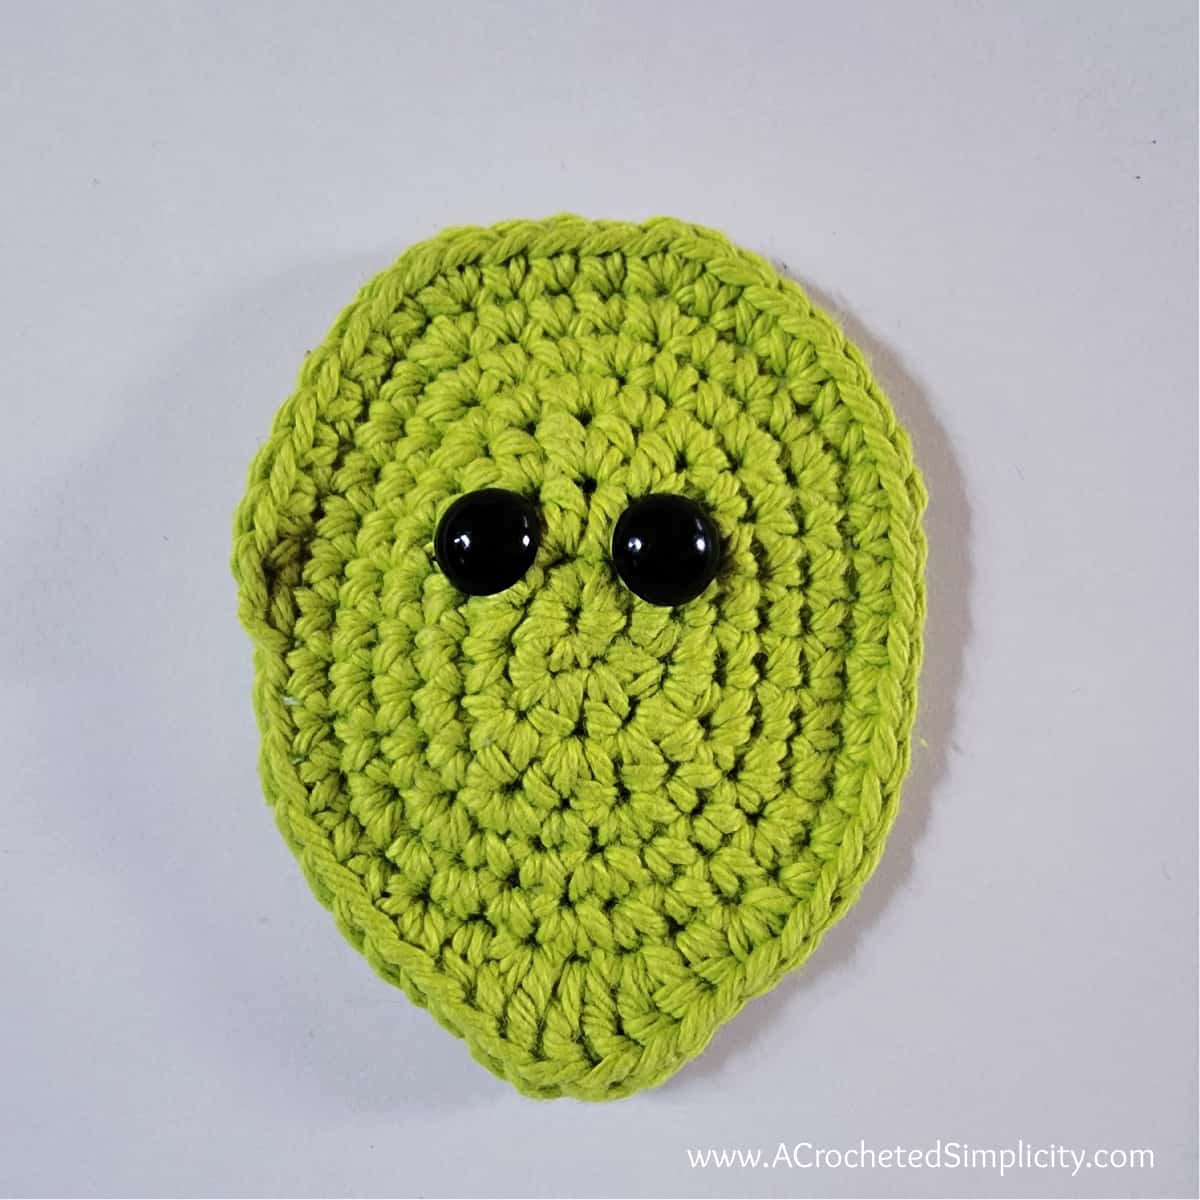
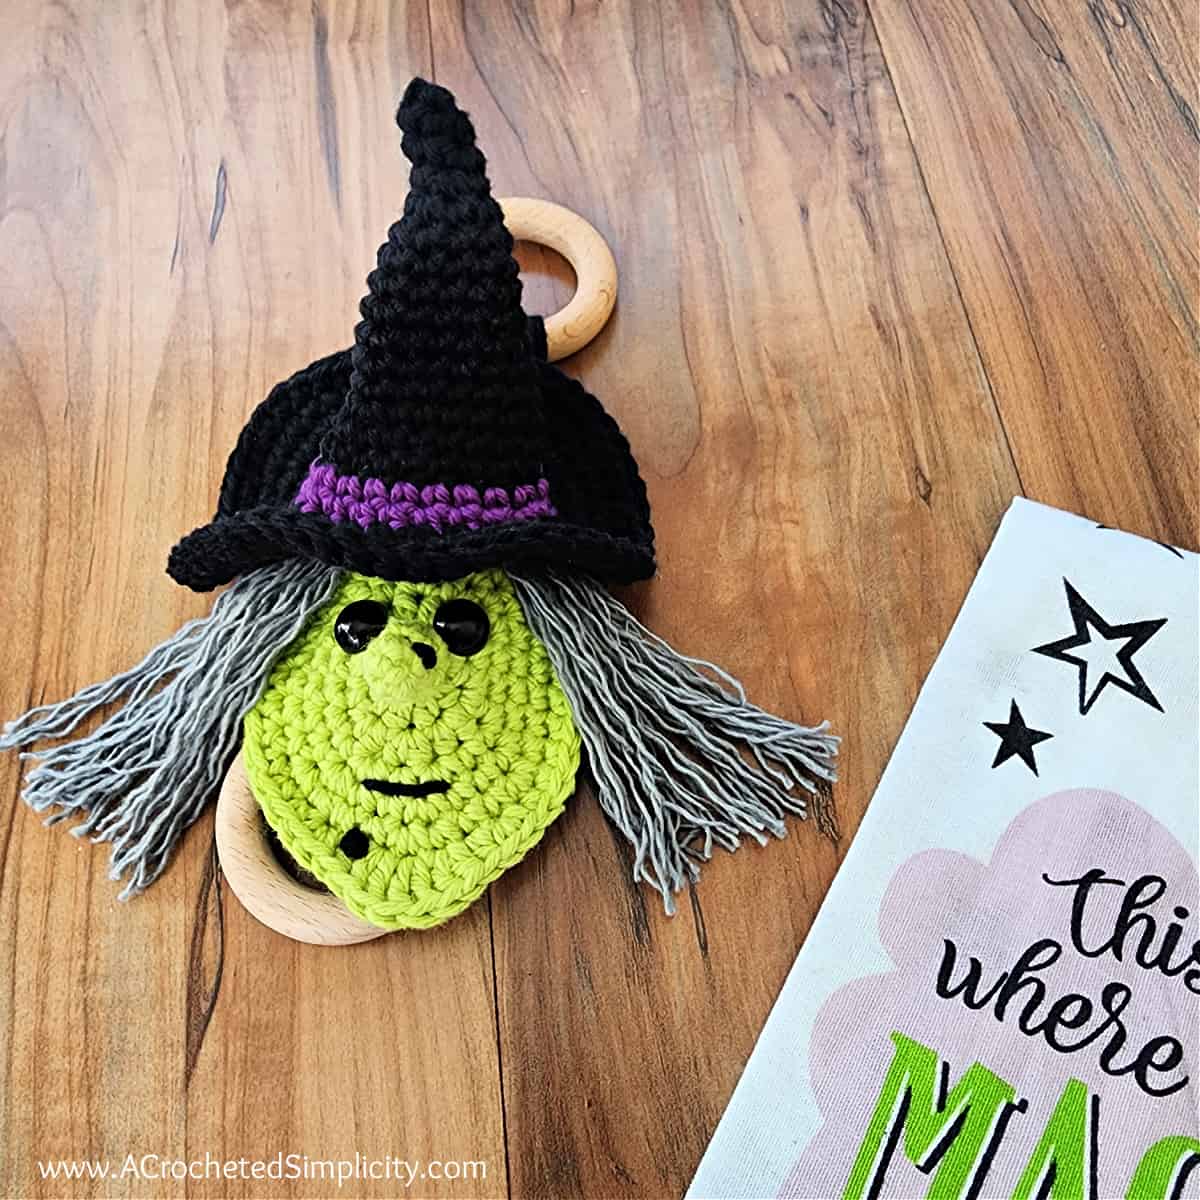
Facial Features
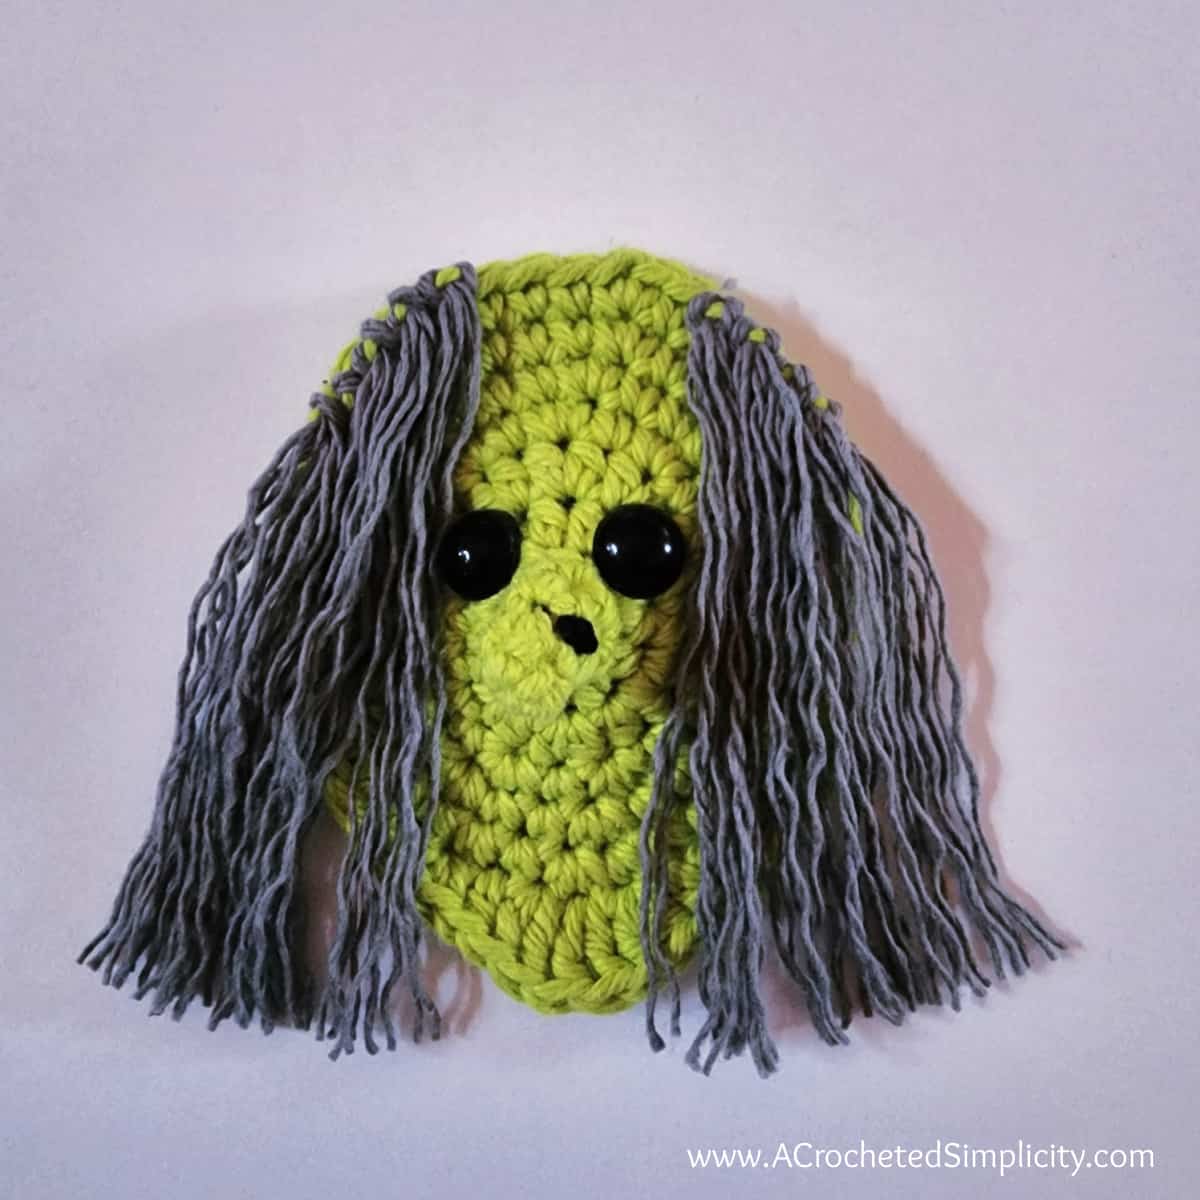
Eyes: Center and attach the eyes (snap on 12mm safety eyes or sew on yarn eyes) on the witch’s head as shown in the photos below. I placed mine between the stitches of Rows 2 & 3 of the head with a little less than 1/4″ between them.
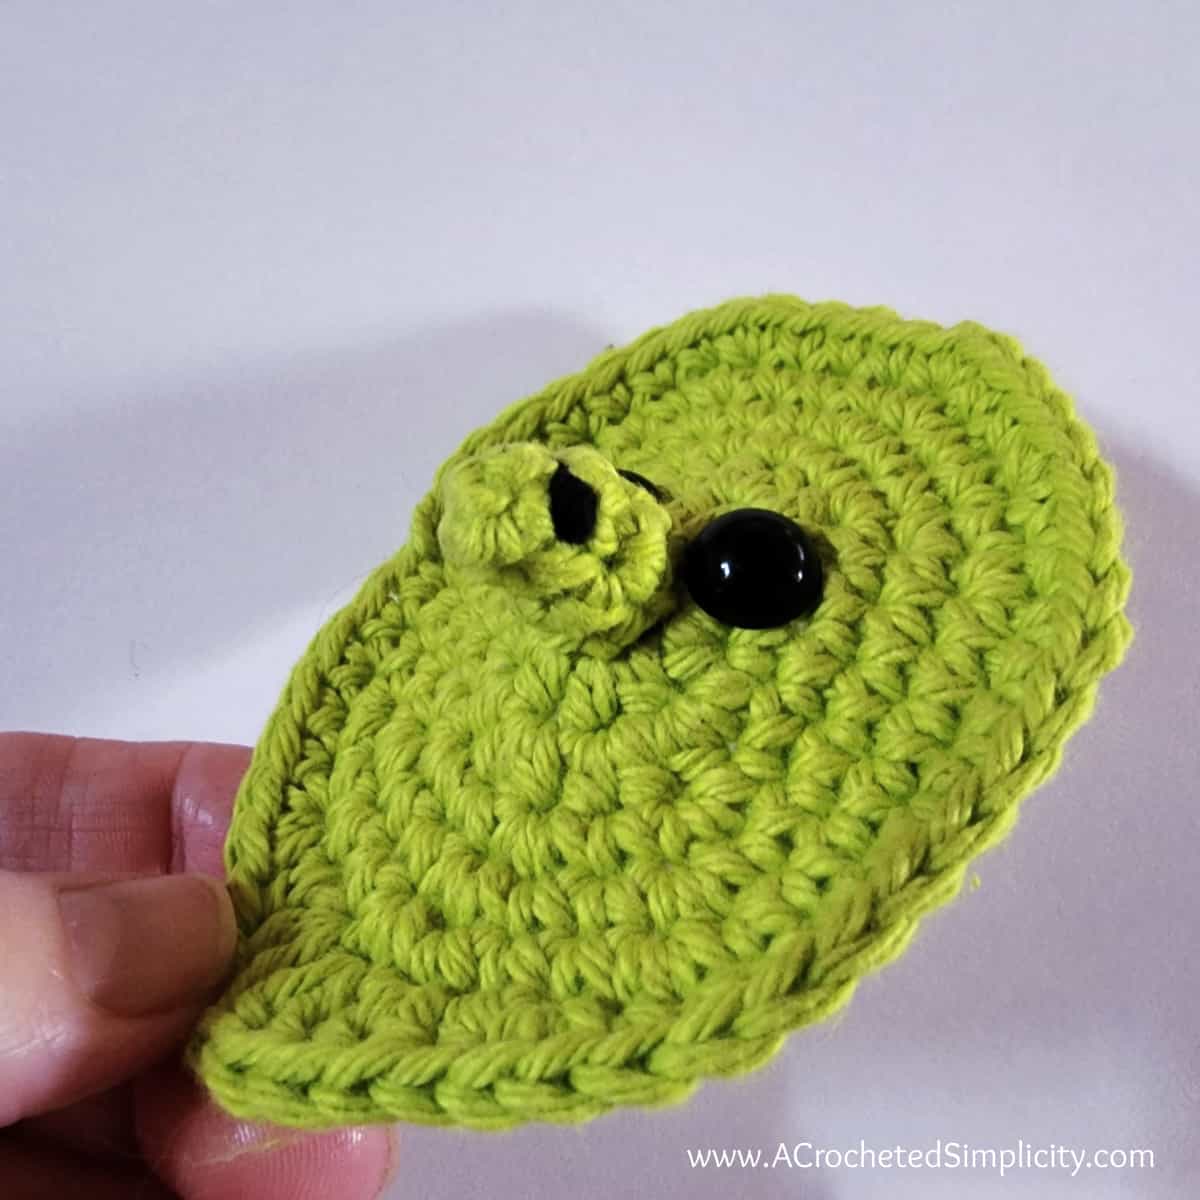
Nose: Position the nose as shown in the photo below. Use a yarn needle and tail of yarn and sew it onto the witch’s head. See photos below.

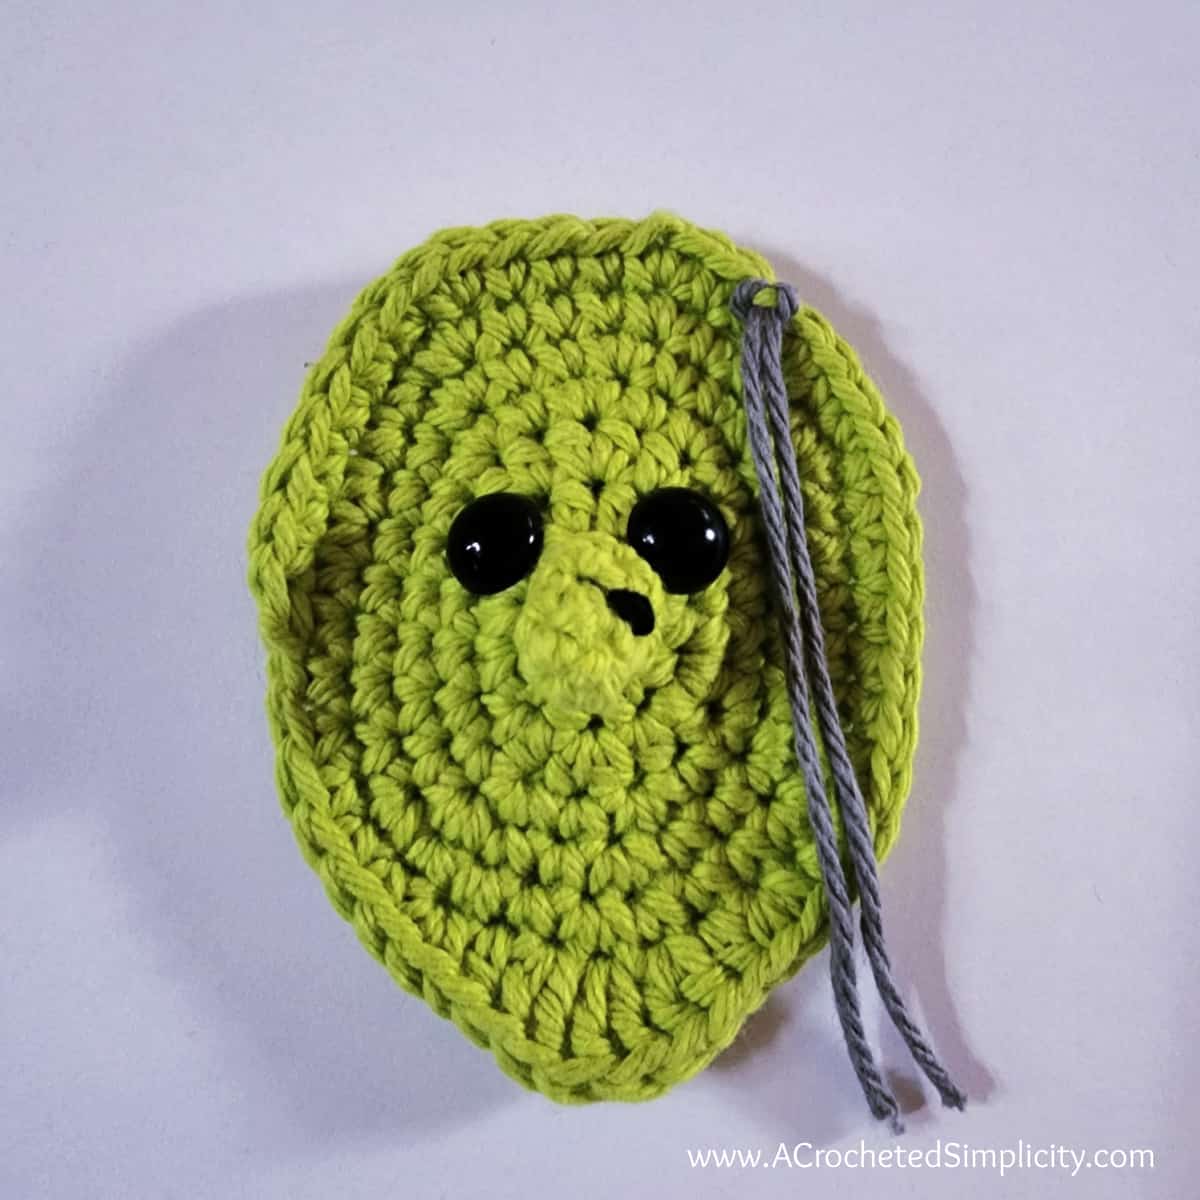
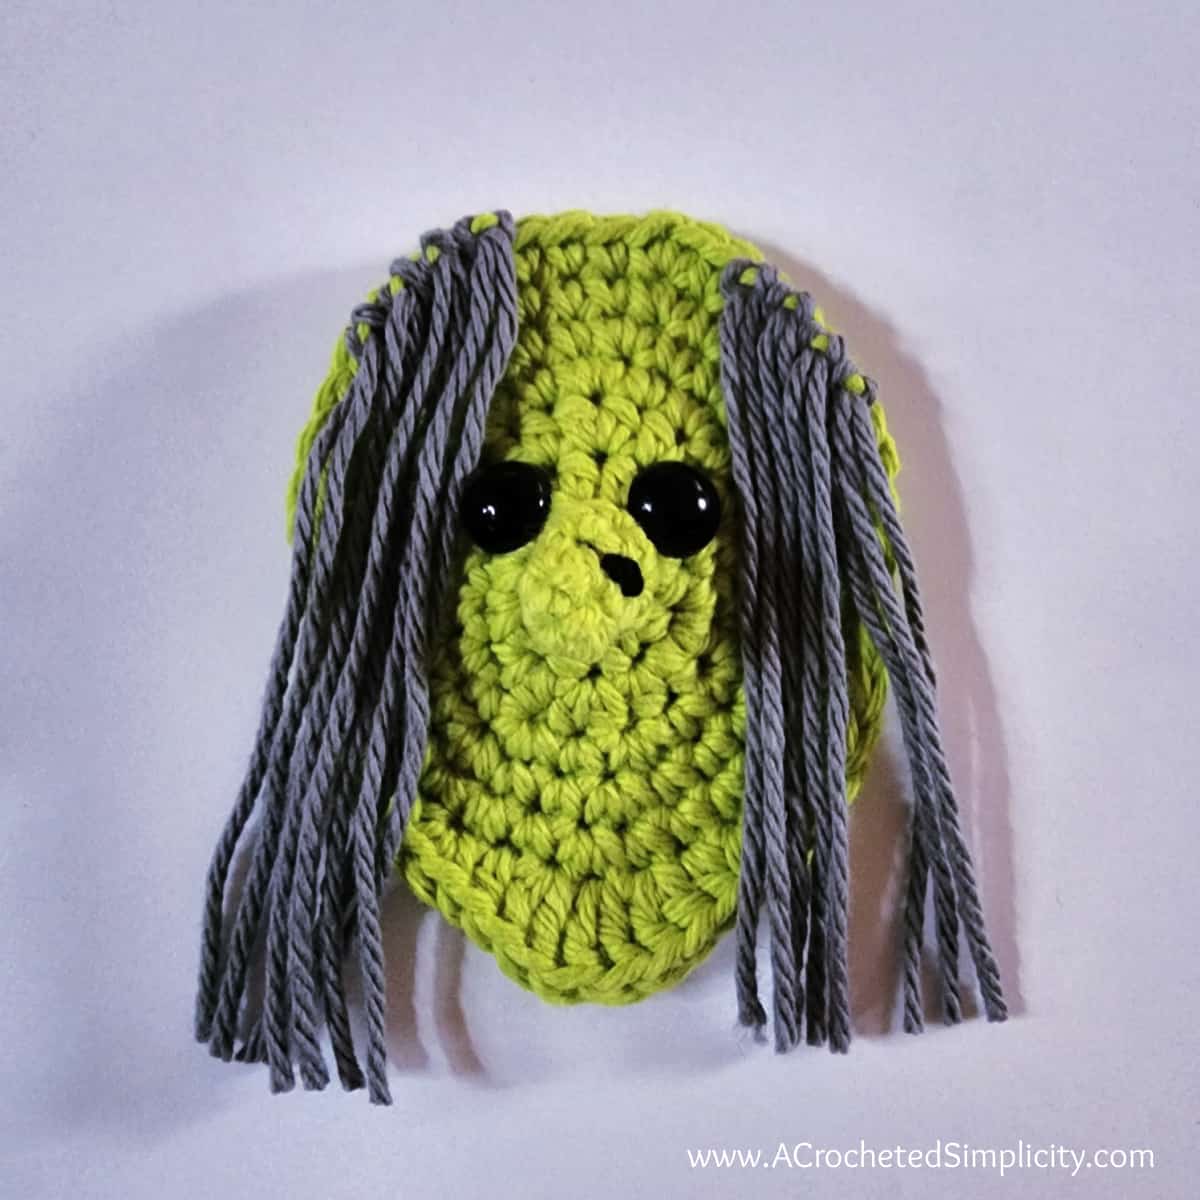
Frizzy Witch Yarn Hair
- Cut 10 strands of grey yarn 9″ long each.
- Mark the top centermost 6 stitches on the witch’s head using locking stitch markers. You will leave these stitches unworked.
- Add 1 strand of fringe to the FLO of each of the 5 stitches to the left and right of the 6 stitches you just marked.
- Separate the plies of yarn of each of the strands of fringe to make it look like frizzy witch hair.
- Trim the ends of the hair to make them even.
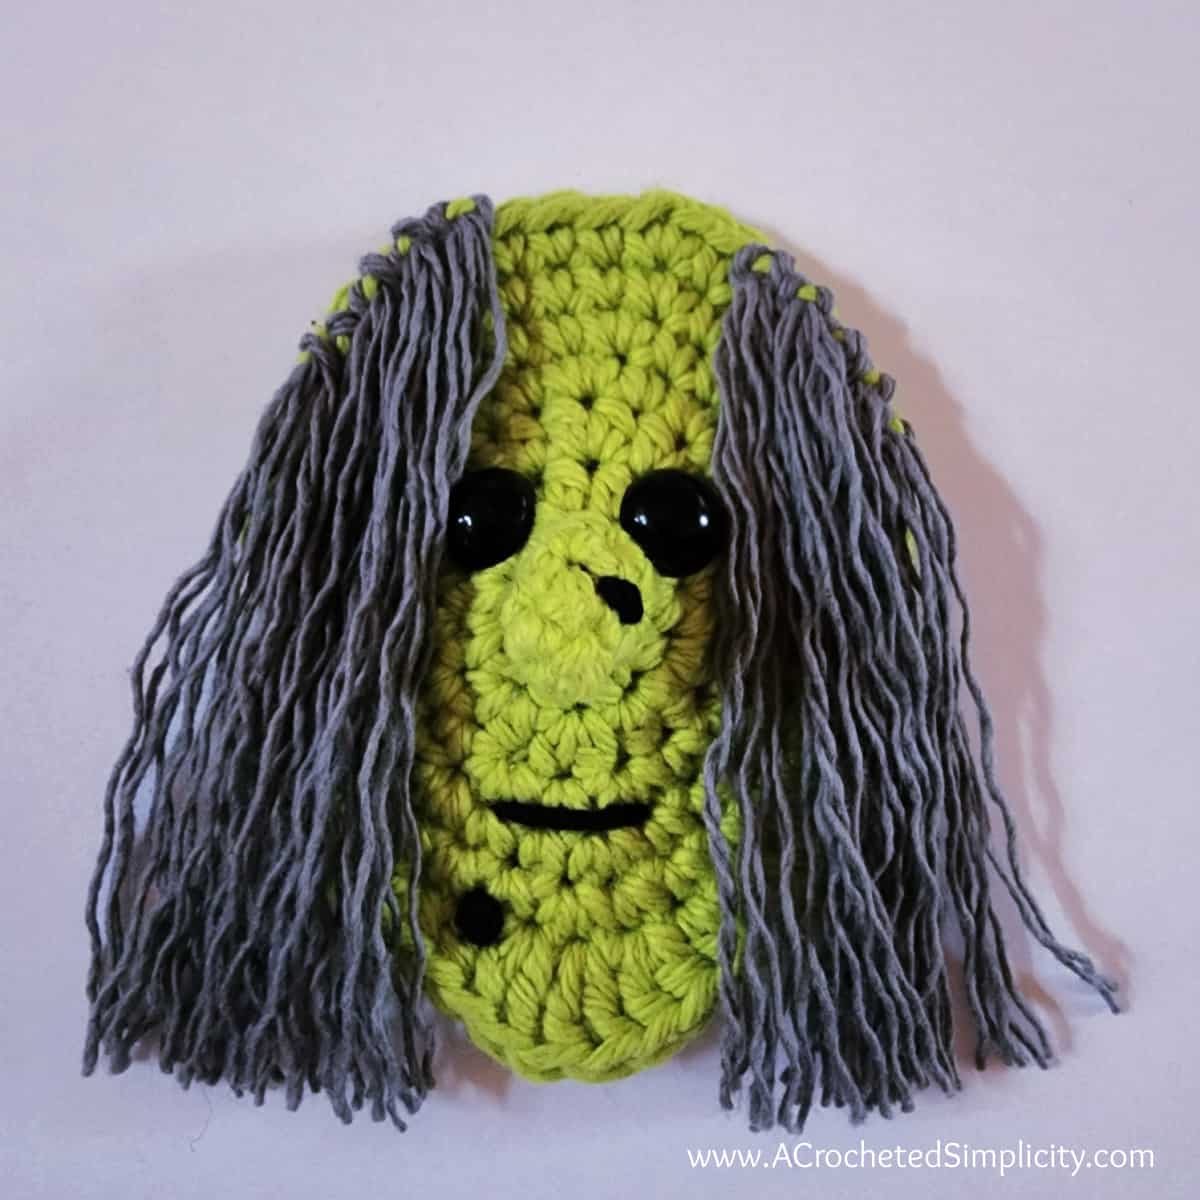
Mouth: Using a yarn needle and 8″ piece of black yarn, make an almost straight line to resemble a mouth.
Add a Wart to the Witch’s Chin: Use the same technique as you did to add a wart to the witch’s nose and add a wart to her chin. See photo below.
Save yourself from weaving in ends and hide the posts of the safety eyes by crocheting another Witch’s Head and attaching it to the back of the completed face!
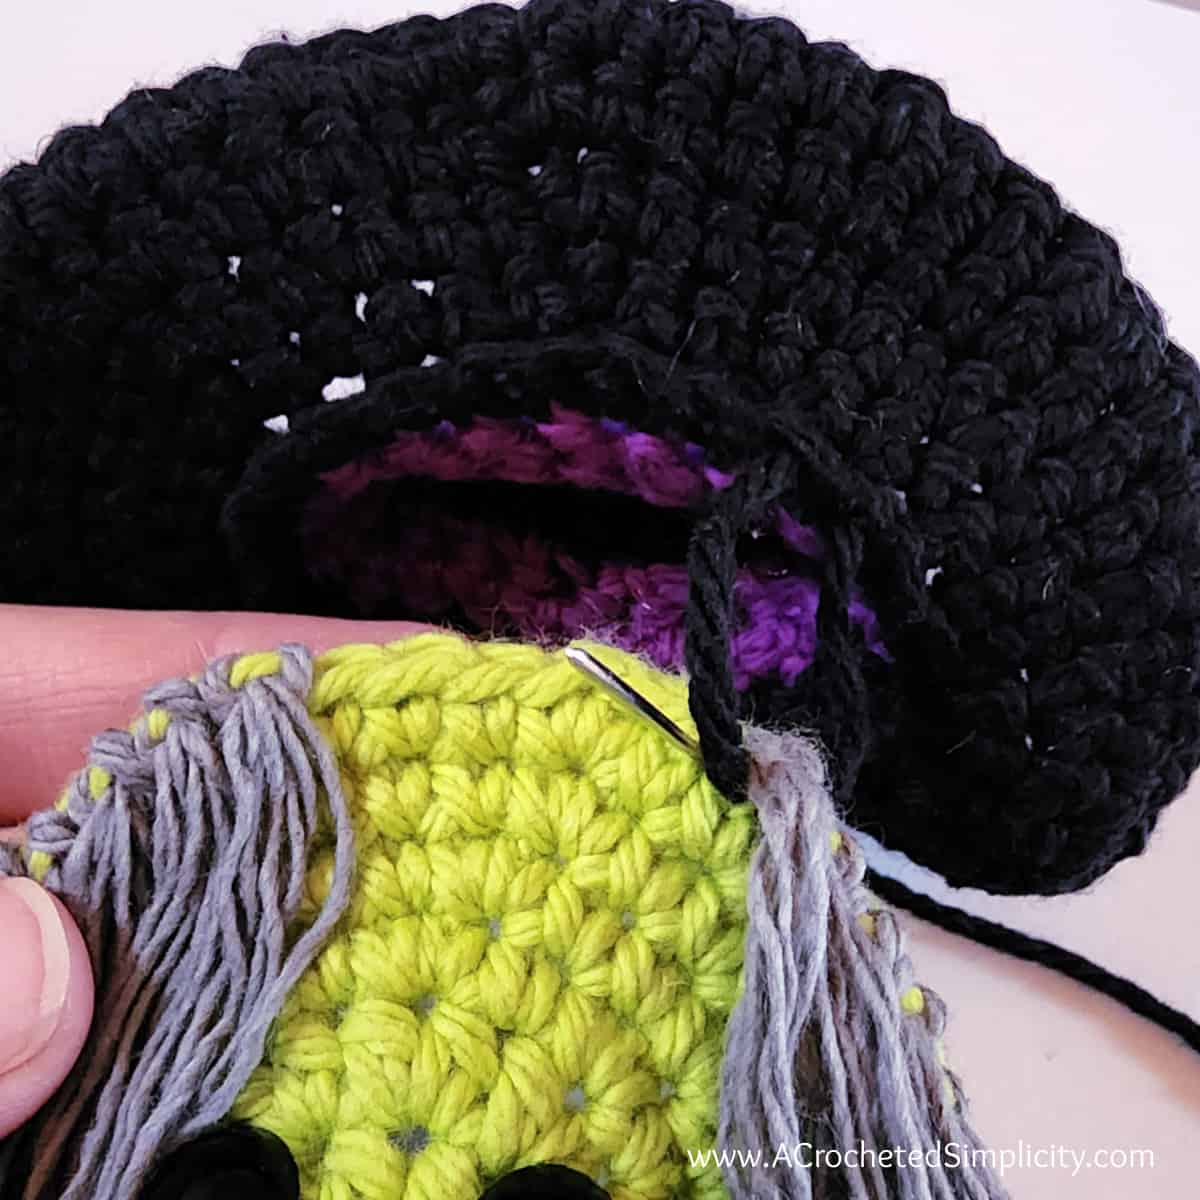
Attach Witch Head to Crochet Witch Hat
Insert approximately 1/2″ of the top of the witch’s head into the crochet witches hat. Use a yarn needle and black yarn to attach the witch’s head to her witch hat. Weave in ends.
Attach Towel Ring Hanging Strap to Witch’s Hat
- Fold the hanging strap, of the crochet towel ring pattern free, in half.
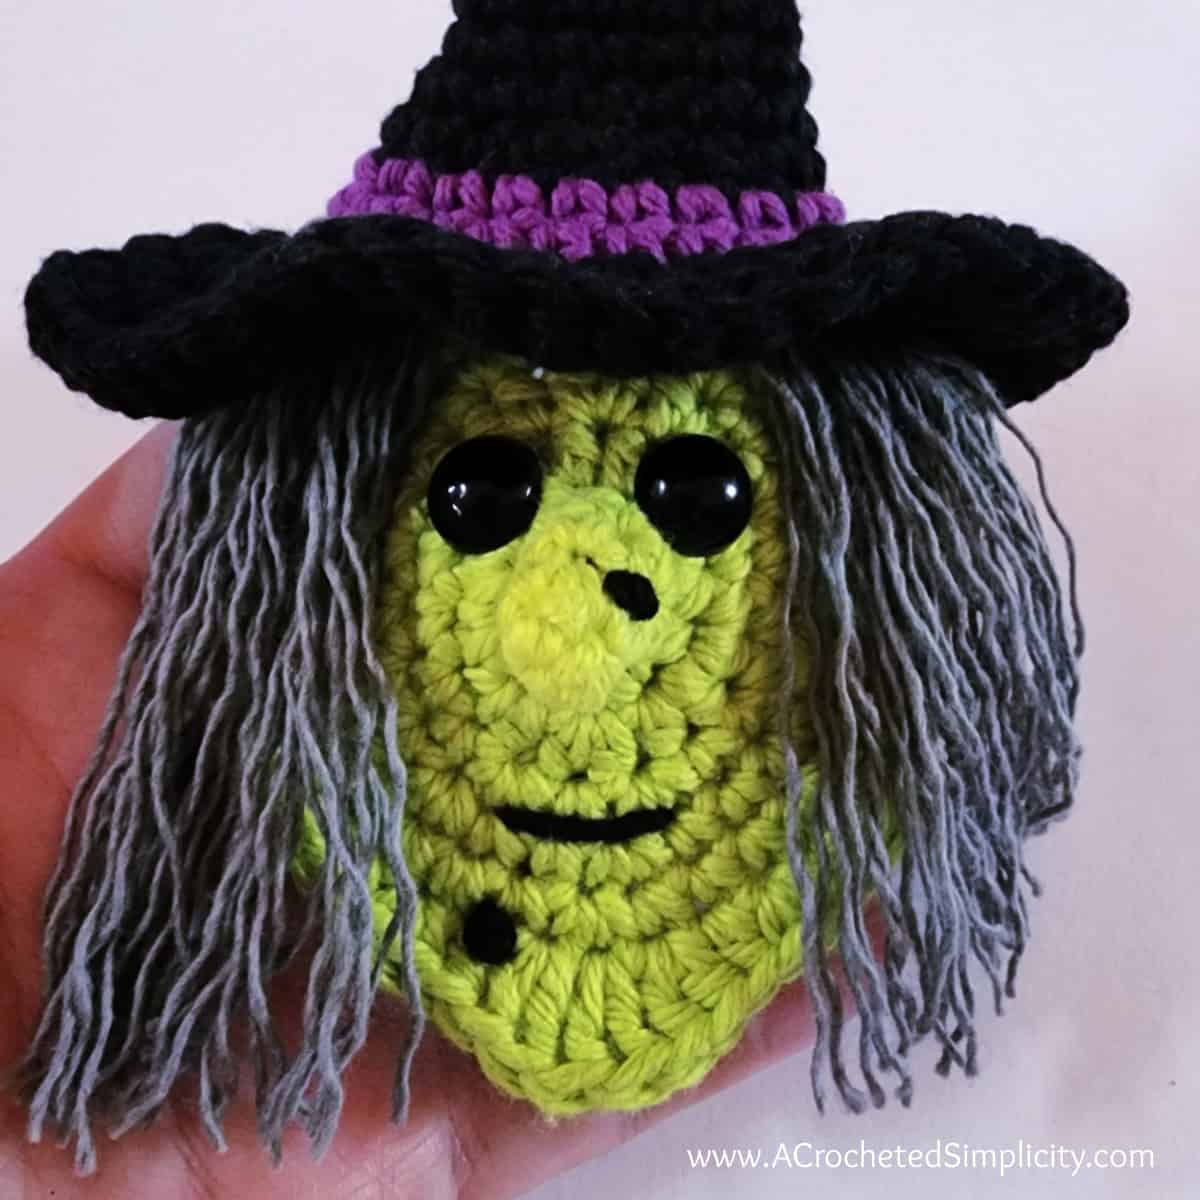
- Insert approximately 1/2″ of it into the witch hat. Using a yarn needle and black yarn, attach the hanging strap to the inside of the back of the witch’s hat.
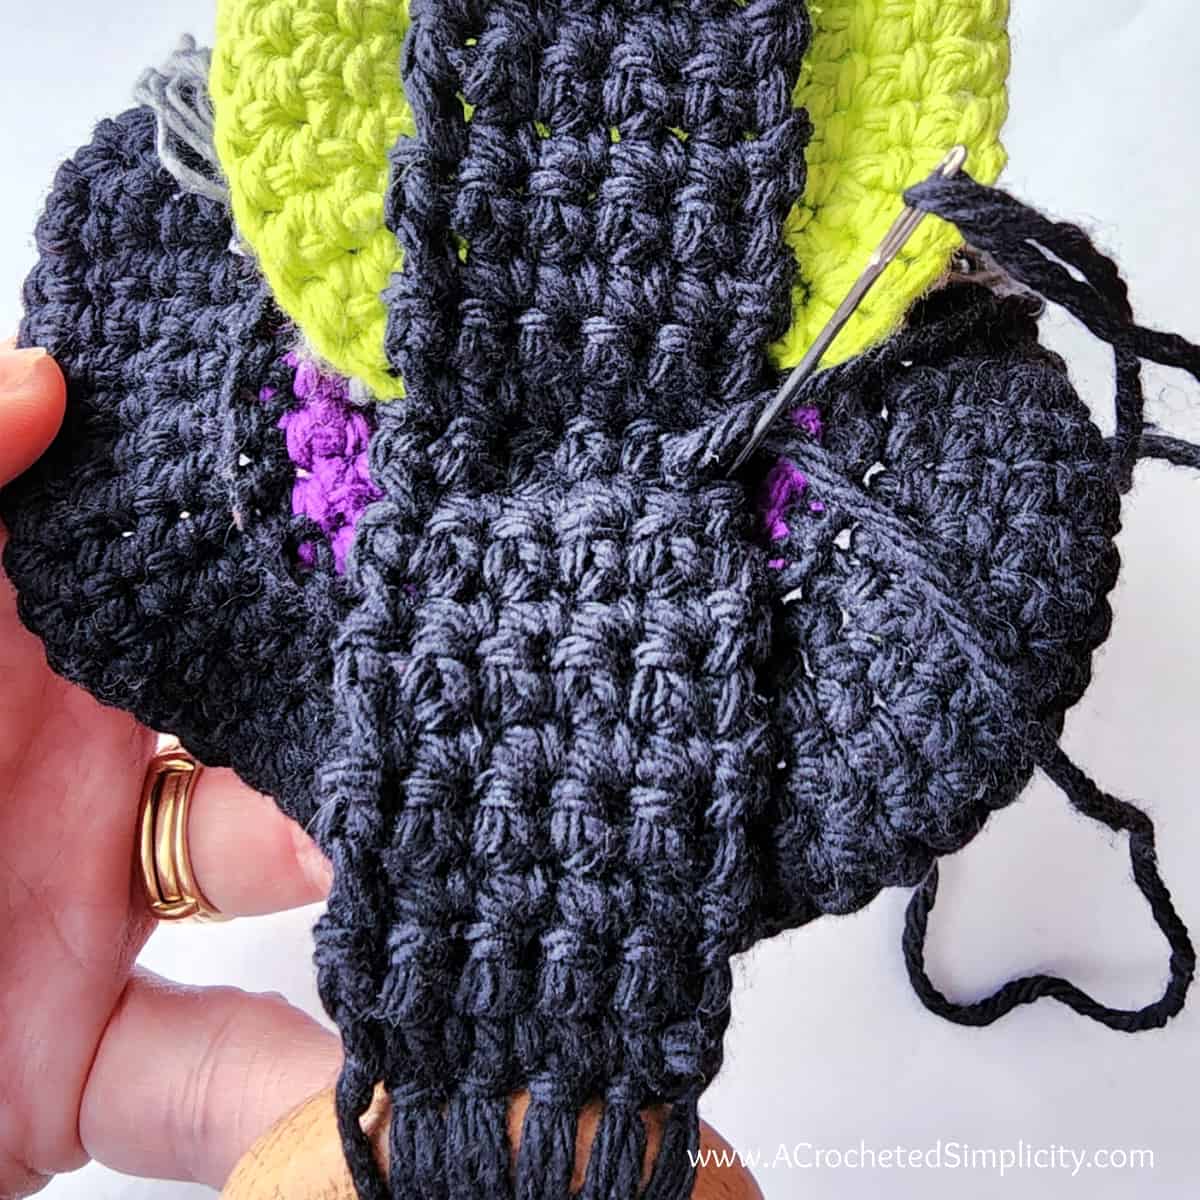
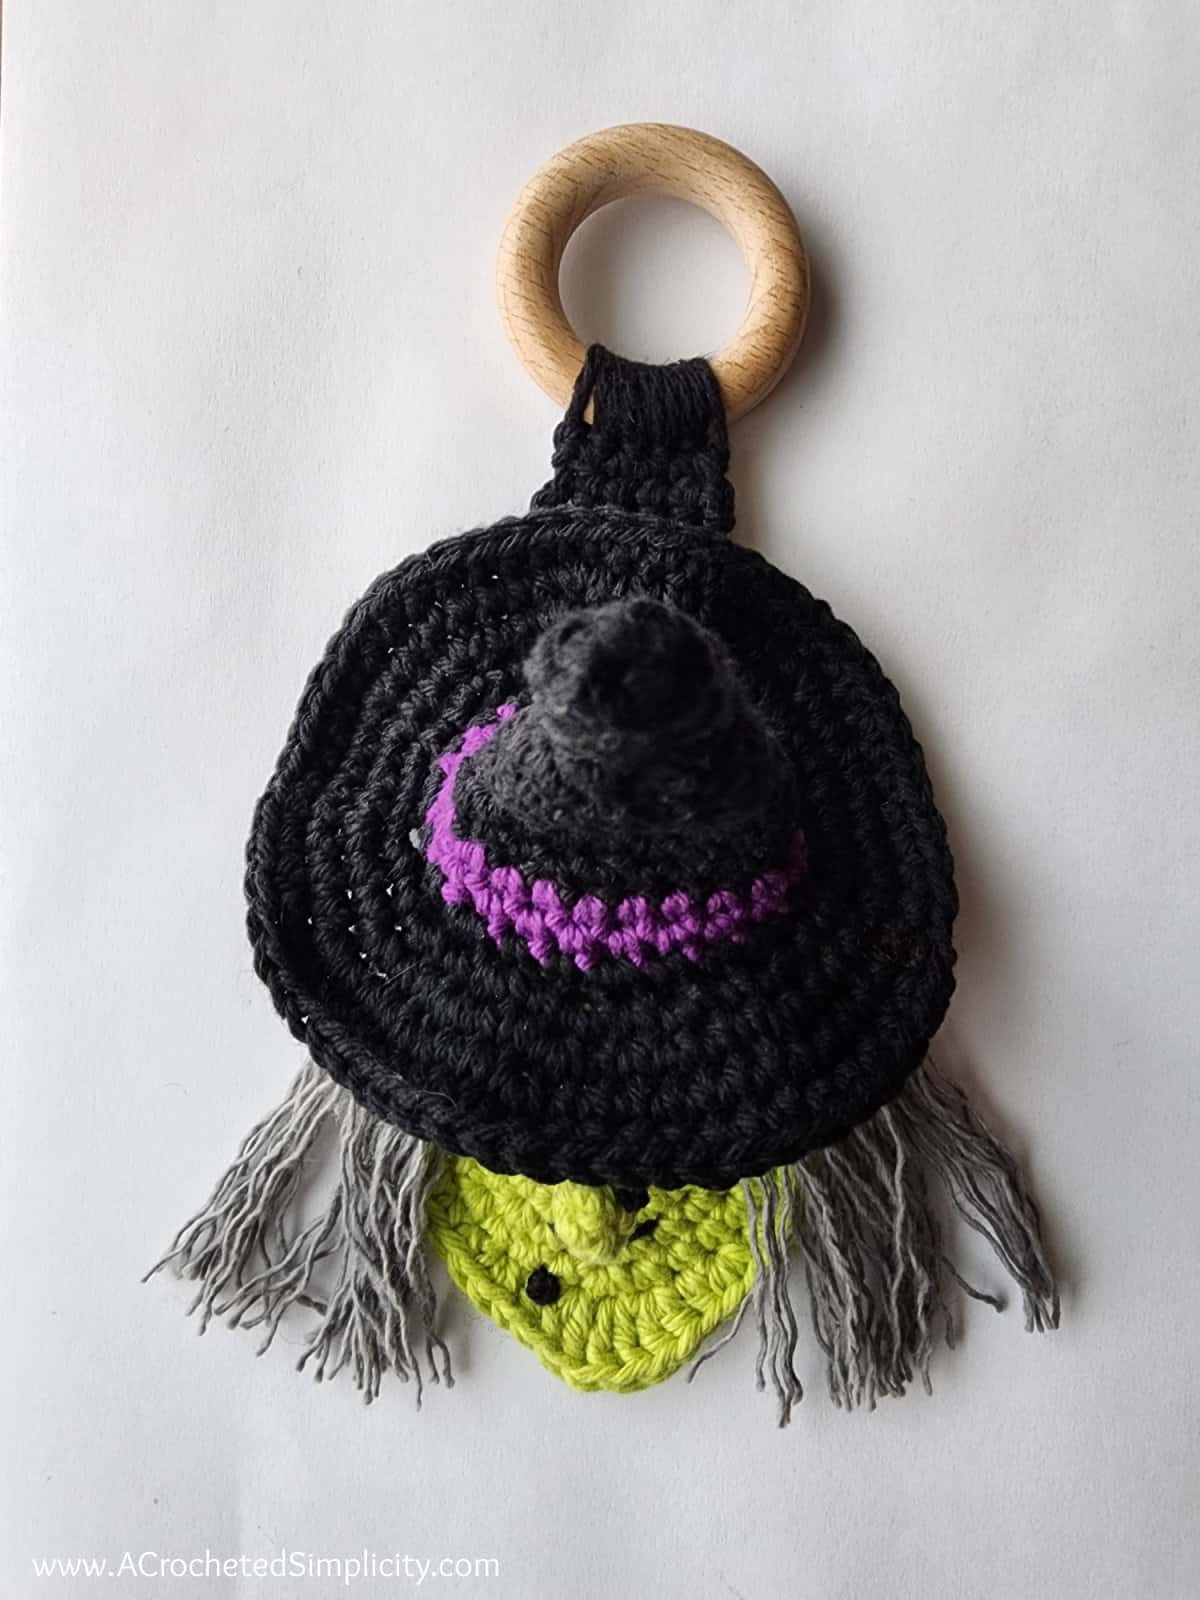
Only one ring is visible in the photo above. The second wood ring is hiding under her face.
I Made It, Now How Do I Hang My Crochet Dish Towel Up?
- See hanging tutorial below.
Kitchen Towel Holder Hanging Tutorial
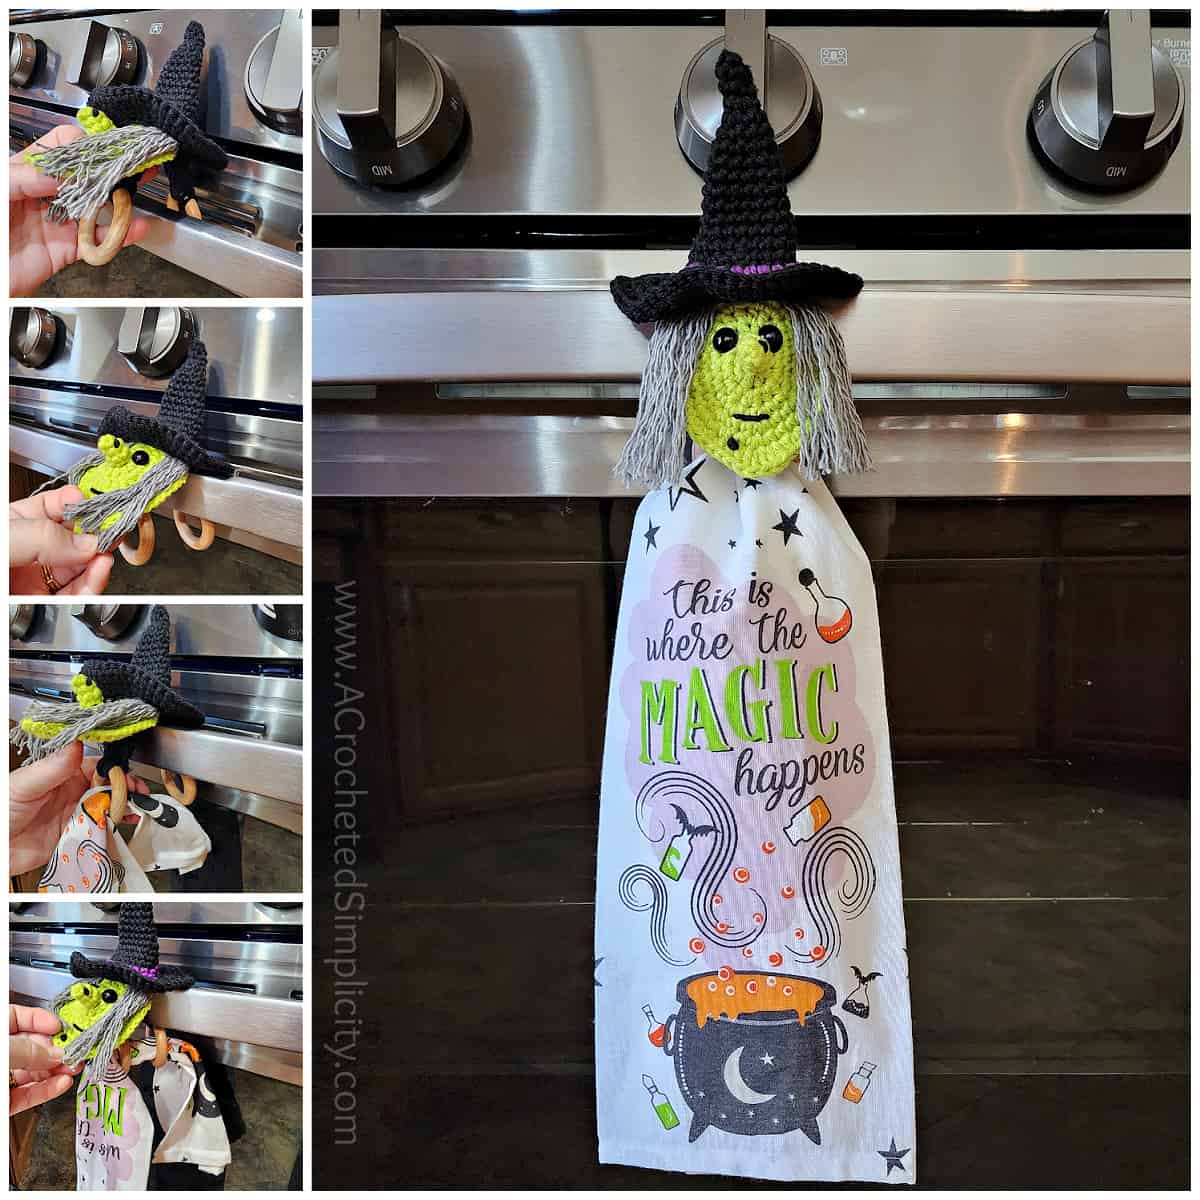
NOW THAT I’VE FINISHED, HOW DO I HANG IT UP?
Step One (top left photo): With the cute crochet witch looking at you, insert the back ring, behind the towel bar or oven door handle.
Step Two (top left, 2nd photo): Make sure you have one ring from the towel ring hanging strap on each side of the towel bar or oven door handle.
Step Three (left bottom 2 photos): Insert one end of your towel through the front ring, then through the back ring.
Step Four (photo on the right): Pull the holiday kitchen towel half way through to securely hang it.
I MADE IT! NOW WHAT?
Pin this post! Save this crochet towel holder free pattern to your Pinterest boards so that you can come back and make it again.
Leave a comment below: We love to hear your feedback.
Share Your Finished Projects on Facebook or Instagram: I love to see your finished projects! Share with us on social media and tag me @acrochetedsimplicity or use the hashtag #ACrochetedSimplicity so I can find your posts.
JOIN US IN THE FACEBOOK COMMUNITY GROUP!
Come share your finished projects with us in the A Crocheted Simplicity Crochet Community Group on Facebook. Join us for fun community events such as crochet alongs, join in on crochet conversations, ask questions, get advice, and share your love for crochet!

MORE CROCHET HALLOWEEN PATTERNS FREE
If you LOVE Halloween and are looking for more free Halloween crochet patterns, we have a bunch more for both Halloween decor for your home and fun crochet Halloween patterns for kids!
Along with this crochet Halloween witch, you’ll find crochet black cat patterns, Frankenstein’s Monster crochet patterns, ghost crochet patterns, Halloween candy bowls and bags and more!
MMCAL ARCHIVES
While you’re patiently waiting for our next MMCAL to begin, I’ve dug out a few links from our MMCAL archives to share!
Psst… If you’d like to see all of them, here’s the entire MMCAL Archive.
simply love this towel topper, reminds me of the witch in the Wizard of Oz!
thank you