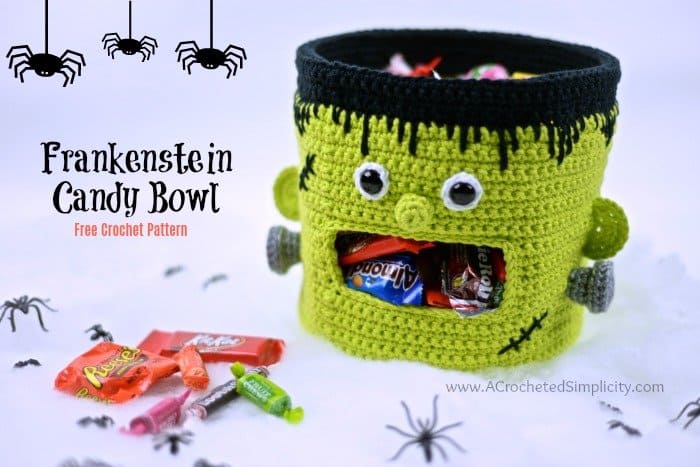
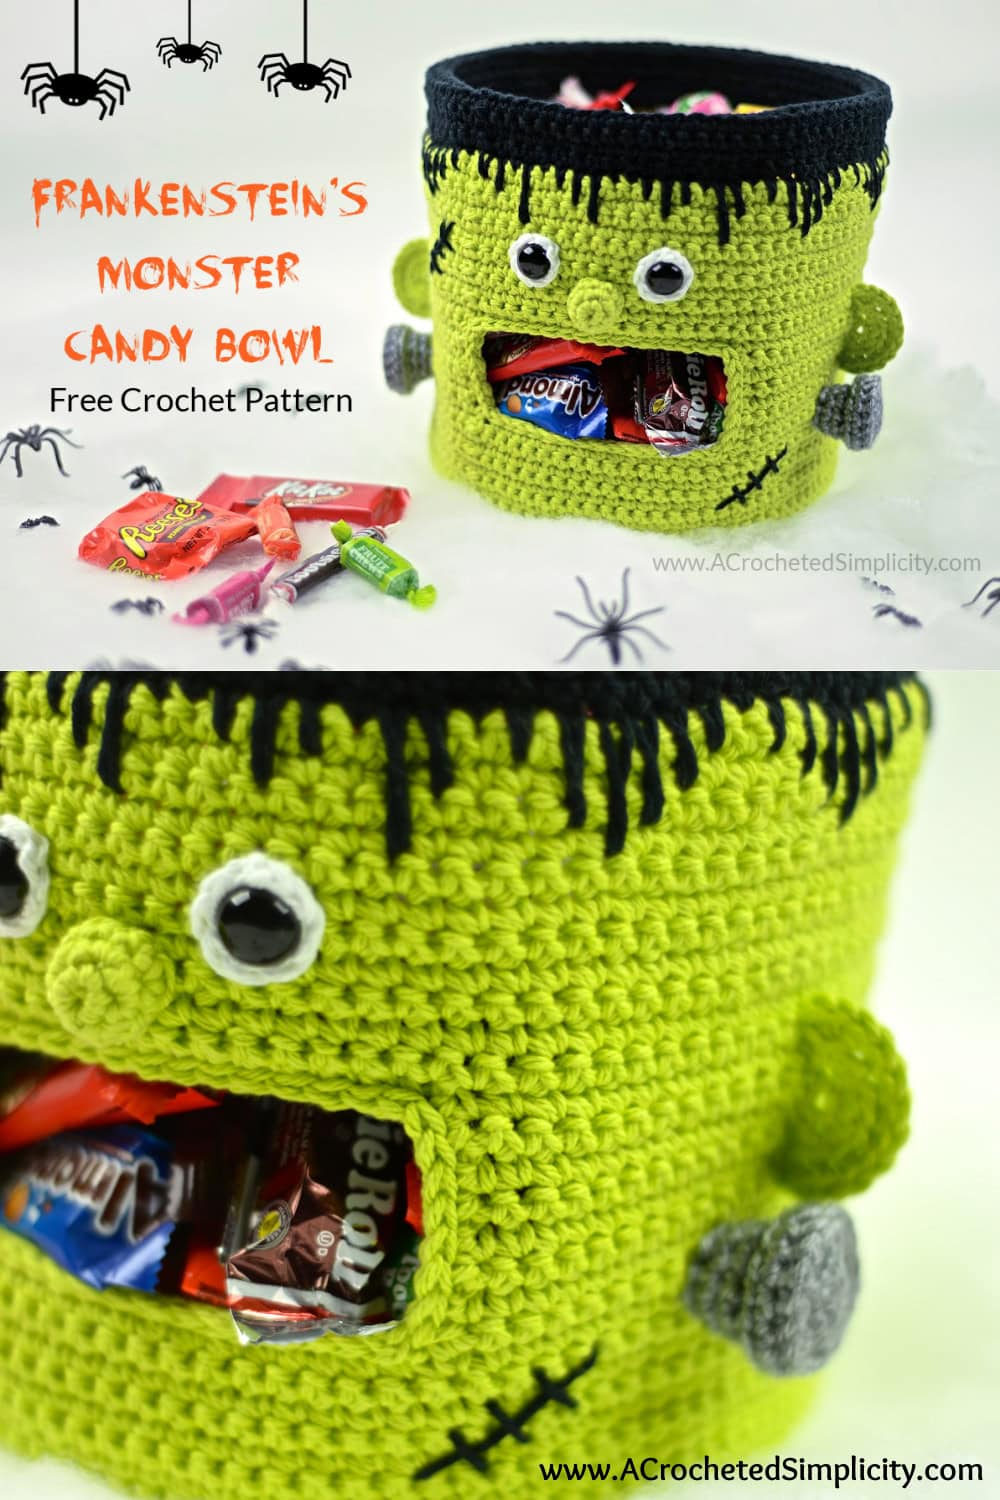
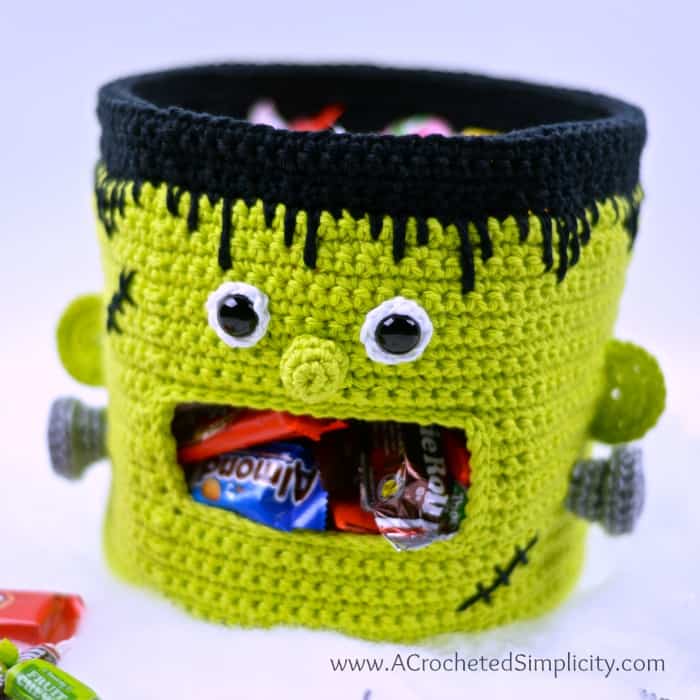
Frankenstein’s Monster Crochet Candy Bowl
Make a Frankenstein’s Monster Crochet Candy Bowl to add to your Halloween decor and put a smile on the faces of all your visitors this Halloween!
If you’ve been looking for a pattern to crochet a bowl to hold your Halloween candy, this big mouth Halloween candy dish is the perfect amount of fun and functional.
You’ll find the crochet Halloween pattern free below, or an ad-free print friendly PDF (including all photo tutorials) on Ravelry, or on Etsy (aff).
Halloween Decorations or Crochet Gifts
If you’re short on time and looking for something practical and fun, this crochet candy dish is perfect! It also makes a great last minute gift for any Halloween lover. Fill it with candy and you’ll have the perfect housewarming gift.
Not a fan of candy, but you still like to make Halloween decorations? This crochet basket also makes a fun fruit basket.
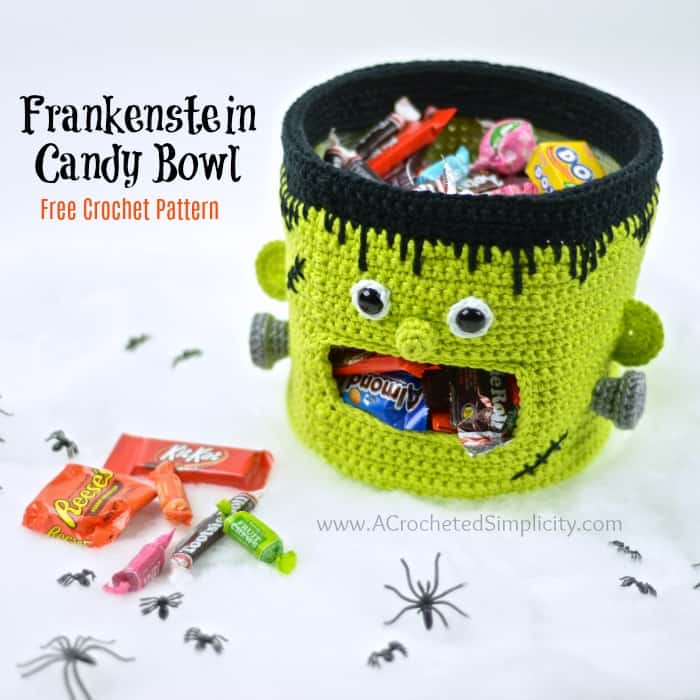
Frankenstein’s Monster Crochet Candy Bowl – Free Pattern
The crochet Halloween pattern is below, but if you love to work offline, I’ve got a couple other great options for you.
Purchase the ad-free, printable PDF, including all photo tutorials, on Ravelry, or on Etsy (aff).
This post contains affiliate links.
Materials
- Yarn: Yarn used for the sample shown above is Lily Sugar n’ Cream; 4 / Worsted Weight Cotton Yarn; (100% cotton / 120 yards / 70.9 g / 109 m / 2.5 oz ) and Caron Simply Soft; 4 / Worsted Weight 100% Acrylic Yarn (5 oz / 141.7 g / 250 yards / 228 m)
- Hot Green: 270 yards
- Black: 80 yards
- White: 2 yards
- Grey Heather (Caron Simply Soft): 6 yards
- Crochet Hooks: H/8/5.00mm; G/6/4.00mm (my favorite hooks are Clover Amour Hooks, I’ve never had an ache in my hand since switching)
- Measuring Tape
- Plastic Canvas: 12″ x 18″ (1) 12″x18″ sheet & (1) 8″x10″ sheet
- Solid Black Eyes (2) 15mm
- Scissors
- Tapestry Needle
- Candy
Abbreviations (U.S. Terms)
- ch(s): chain
- st(s): stitch(es)
- sl st(s): slip stitch(es)
- sc: single crochet
- hdc: half double crochet
- bpsc: back post single crochet
- sc2tog: single crochet decrease
- yo: yarn over
- SM: stitch marker
- FLO: front loop only
- BLO: back loop only
- RS: right side
- WS: wrong side
- Rep: repeat
- Rnd: round
- Join yarn with a standing sc
- Spike SC: spike single crochet
- Special Join Technique
Gauge
- Measurements are given throughout the pattern.
Skill Level
- Easy
Finished Size
- One Size: 8″ diameter x 7.5″ high
Pattern Notes
- Turning chains are not included in stitch count unless noted otherwise.
- The first stitch of each row is worked into the same stitch as the turning chain, unless stated otherwise.
- I tend to crochet on the tighter side. You may find yourself needing to go down a hook size (or two) to properly meet gauge, but gauge isn’t critical for this project.
- Yarn Note: I used the 100% cotton yarns listed above for my sample. Another similar 100% cotton yarn will work great. I also used a small amount of a worsted weight acrylic yarn.
- Lily Sugar ‘n Cream (70.9 g / 2.5 oz / 120 yards / 109 m / 100% cotton)
- Caron Simply Soft 100% Acrylic Yarn (5 oz / 141.7 g / 250 yards / 228 m)
- Alternative Yarns: Other fibers, such as acrylic, will work well too, but your crochet candy dish won’t be as stiff.
- Yardage:
- Hot Green: 270 yards
- Black: 80 yards
- White: 2 yards
- Grey Heather (Caron Simply Soft): 6 yards
- Construction: The Frankenstein’s Monster Halloween candy bowl is working from the bottom up. You’ll begin by crocheting two circles, join them, then work the sides of the basket up from there. After you’ve completed the basket, you’ll crochet all of the little features and attach them.
Special Stitches
- Spike Single Crochet (spike sc): Spike stitches are worked just like regular single crochet stitches except you work into a row below the current row you’re on. You may be instructed to work 1 to 5 rows below the current row. Working into varying rows will produce spike stitches of varying heights. The further down you work, the longer your spikes will be. No matter how far down you’re instructed to work, always remember to pull the loop of yarn up to the height of your current row before finishing the stitch.
- Join with a standing single crochet: begin with a slip knot on your hook, insert your hook into the stitch or space indicated, yo, pull up a loop, yo and draw thru both loops on hook. thru remaining loops.
Frankenstein’s Monster Crochet Candy Bowl Instructions
Note: The base is worked in continuous rounds. Instead of joining at the end of each round, use a scrap piece of yarn to mark the end of the round. As you complete a round, move that piece of yarn up to the next round.
Rnd 1: Using a 5mm crochet hook & green yarn, ch 2, work 8 sc in the 2nd ch from your hook. (8 sts)
Rnd 2: 2 sc in each st around. (16 sts) Diameter at this point: 1.5″.
Rnd 3: *2 sc in the next st, sc in the next st, rep from * around. (24 sts)
Rnd 4: *2 sc in the next st, sc in each of the next 2 sts, rep from * around. (32 sts)
Rnd 5: *2 sc in the next st, sc in each of the next 3 sts, rep from * around. (40 sts) Diameter at this point: 3″.
Rnd 6: *2 sc in the next st, sc in each of the next 4 sts, rep from * around. (48 sts)
Rnd 7: *2 sc in the next st, sc in each of the next 5 sts, rep from * around. (56 sts) Diameter at this point: 4″.
Rnd 8: Sc in each of the next 3 sts, *2 sc in the next st, sc in each of the next 6 sts, rep from * around to the last 3 sts, sc in each of the last 3 sts. (64 sts)
Rnd 9: Sc in each st around. (64 sts) Diameter at this point: 5″.
Rnd 10: *2 sc in the next st, sc in each of the next 7 sts, rep from * around. (72 sts)
Rnd 11: Sc in each st around. (72 sts) Diameter at this point: 6″.
Rnd 12: *2 sc in the next st, sc in each of the next 8 sts, rep from * around. (80 sts)
Rnd 13: Sc in each st around. (80 sts) Diameter at this point: 7″.
Rnd 14: *2 sc in the next st, sc in each of the next 9 sts, rep from * around. (88 sts)
Base #1: Fasten off. Weave in ends. Set aside and complete Base #2.
Base #2: Do not fasten off. Continue on to Circular Base Assembly.
Circular Base Assembly
Note: The photos shown below are not of this design, but the techniques are the same.
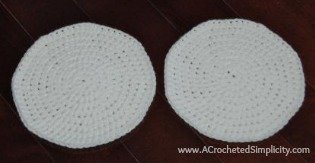
Photo above shows 2 completed circles for the bottom of your basket.
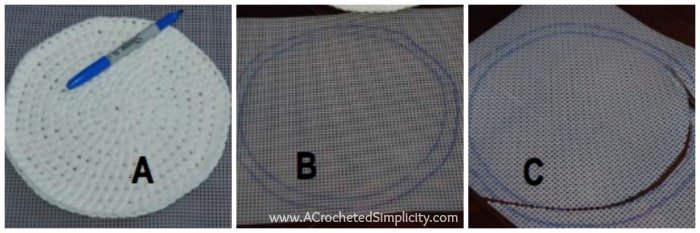
Step 1: See Photo A. Lay 1 of your completed circles on top of a sheet of plastic canvas.
Step 2: See Photo B. Using a marker & 8″ x 10″ sheet of plastic canvas, carefully trace around the edge of your circle. Draw a second circle 3/8″ to the inside of the outer circle.
Step 3: See Photo C. Cut out your circle by cutting on the inside circle you drew 3/8″ smaller than your base.
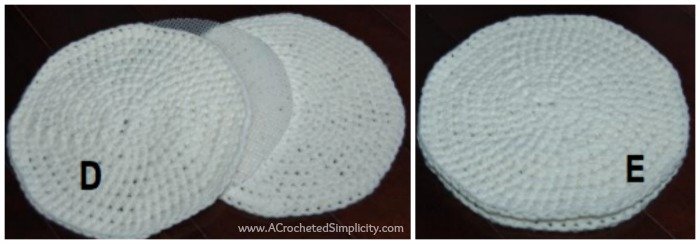
Step 4: See Photos D & E. Lay your plastic canvas circle on top of 1 of your crocheted circles. Lay your 2nd crocheted circle on top of the plastic canvas.
Tip! Use 4 – 5 locking stitch markers to hold the 2 bases together while you join them.
Step 5: Continuing on from Base #2 & using a 5mm crochet hook, join the 2 crocheted bases together by sc in each st around. (88 sts) Diameter at this point: 8″
Do not fasten off. Continue on to Bottom Sides of Basket.
Bottom Sides of Basket
Rnd 1 (RS): Continuing on from joining the bases & using a 5mm crochet hook, ch 1, bpsc in each st around. Join with a sl st to the 1st st. Turn. (88 sts)
Rnds 2 – 8: Ch 1, sc in each st around. Join. Turn. (88 sts)
Do not fasten off. Height at this point approximately 1.75″. Continue on to Create Mouth Opening.
Create Mouth Opening
Row 1 (RS): Ch 1, sc in each of the next 72 sts. Turn. (72 sts)
Rows 2 – 8: Ch 1, sc in each st across. Turn. (72 sts)
Rnd 9: Ch 1, sc in each st across, ch 16, skip over the mouth opening and join with a sl st to the 1st st of the rnd. Turn. (88 sts)
Do not fasten off. Height at this point approximately 3.75″. Continue on to Upper Sides of Basket.
Upper Sides of Basket
Rnd 1 (WS): Ch 1, sc in each st & ch around. Join. Turn. (88 sts)
Rnds 2 – 11: Ch 1, sc in each st around. Join. Turn. (88 sts)
Fasten off. Height at this point approximately 6.25″. Continue on to Hair.
Hair
Rnd 1(RS): Using a 5mm crochet hook and black yarn, join yarn w/ a sl st in the last st of the previous rnd, ch 1, sc in the first st, *spike sc 1 rnd below, spike sc 2 rnds below, spike sc 3 rnds below, spike sc 4 rnds below, spike sc 3 rnds below, spike sc 2 rnds below, spike sc 1 rnd below, sc in the next st, rep from * around to the last 16 sts, spike sc 2 rnds below, spike sc 4 rnds below, sc in the next st, spike sc 1 rnd below, spike sc 2 rnds below, spike sc 1 rnd below, sc in each of the next 2 sts, spike sc 3 rnds below, spike sc 2 rnds below, spike sc 1 rnd below, sc in the next st, spike sc 4 rnds below, sc in the next st, spike sc 2 rnds below, spike sc 1 rnd below. Join w/ a sl st to the 1st st. Turn. (88 sts)
Rnds 2 – 4: Ch 1, sc in each st around. Join. Turn. (88 sts)
Rnd 5 (RS): Ch 1, sc in each st around. Join. Do not turn. (88 sts)
Rnds 6 – 7 (RS): Ch 1, working in BLO, sc in each st around. Join. (88 sts)
Rnds 8 – 10 (RS): Ch 1, sc in each st around. Join. (88 sts)
Fasten off. Weave in ends. Continue on to Eyes.
Eyes (Make 2)
Rnd 1 (RS): Using a 5mm crochet hook and white yarn, ch 2, work 8 sc in the 2nd ch from your hook. Join with a sl st to the 1st st. (8 sts)
Fasten off. Weave in ends. Add (1) 15mm black eye to the center of each white eye you just made. Continue on to Attaching the Eyes.
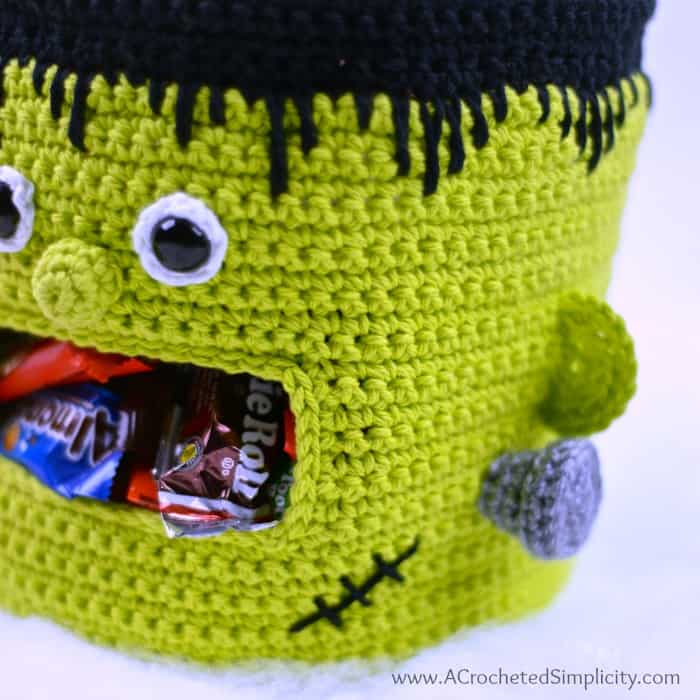
Attaching the Eyes
Attach the eyes between the 5th & 6th rows. Place 1 of them 5 sts in from the left corner of the mouth. Place the other 5 sts in from the right corner of the mouth. They should be approximately 2″ apart, center to center.
Continue on to Bolts.
Bolts (Make 2)
Note: Instead of joining at the end of each round, use a scrap piece of yarn to mark the end of the round. As you complete a round, move that piece of yarn up to the next round.
Rnd 1: Using a 4 mm crochet hook & grey yarn, ch 2, work 6 sc in the 2nd ch from your hook. (6 sts)
Rnd 2: 2 sc in each st around. (12 sts) Diameter at this point: 1.5″.
Rnd 3: *2 sc in the next st, sc in the next st, rep from * around. (18 sts)
Before continuing, weave in the tail of yarn you began with.
Rnd 4: BPsc around each st. (18 sts)
Rnd 5: Sc in each st around. (18 sts)
Rnd 6: Working in BLO, *sc2tog, sc in next st, rep from * around. (12 sts)
Rnds 7 – 8: Sc in each st around. Join with a sl st to the 1st st. (12 sts)
Fasten off leaving an 8″ – 10″ tail of yarn. Approximate size: 1-3/8″ diameter x 1″ H. Lightly stuff with scrap yarn, if desired. Continue on to Attaching the Bolts.
Attaching the Bolts
Attach the bolts between the 2nd & 3rd rows of the Create Mouth Opening section. Place 1 of them 7 sts to the left of the mouth. Place the other 7 sts to the right of the mouth. They should be approximately 2″ from the sides of the mouth. Use a yarn needle and tail of yarn to sew the bolts onto the basket.
Weave in ends. Continue on to Ears.
Ears (Make 2)
Row 1 (RS): Using a 4 mm crochet hook and green yarn, ch 2, work 4 sc into the 2nd ch from your hook. Turn. (4 sts)
Row 2: Ch 1, work 2 sc in each st across. Turn. (8 sts)
Row 3: Ch 1, 2 sc in the first st, 2 sc in the next st, sc in each of the next 4 sts, 2 sc in each of the last 2 sts. (12 sts)
Fasten off leaving a 10″ tail of yarn. Continue on to Attaching the Ears.
Attaching the Ears
Attach the bottom of the ears 1 row above the top of the bolt & 4 sts to the right or left of the bolt depending on which ear you are attaching. Make sure the ear is sewn on behind the bolt. Use a yarn needle and tail of yarn to sew the ears onto the basket.
Weave in ends. Continue on to Create Stitches.
Create Stitches
You can make as many stitches as you’d like. I chose to make 2. Using a yarn needle and 12″ piece of yarn, create scars similar to what’s shown in the photos.
Weave in ends. Continue on to Mouth Edging.
Mouth Edging
Rnd 1 (RS): Using a 5mm crochet hook & green yarn, join yarn with a sc in the lower right of the mouth, sc across bottom of mouth opening, rotate and work 8 sc evenly up the side of the mouth, rotate and work 1 sc in the bottom of each st across the top of the mouth opening, rotate and work 8 sc evenly down the side of the mouth. Do not join. (48 sts)
Rnd 2: Sl st in each st around. Use Special Join Technique (click here for tutorial), to join. (48 sts)
Fasten off. Weave in ends. Continue on to Reinforcing the Basket Sides.
Reinforcing the Basket Sides
Step 1: Cut a piece of plastic canvas approximately 7.25″ H x 18″ L. You can trim more off if needed after checking fit in your basket.
Step 2: Place the plastic canvas inside your basket. The canvas should not cover the mouth opening at all.
Step 3: Fold over the top black edge of the hair to check fit. If the plastic canvas is too tall, trim it down.
Step 4: Using a yarn needle and black yarn, sew the plastic canvas to the basket around the hairline.
Step 5: Using a yarn needle and green yarn, sew the plastic canvas to the basket near the base.
Weave in ends. Continue on to Nose.
Nose
Rnd 1 (RS): Using a 4.00mm crochet hook & green yarn, ch 2, work 5 sc in the 2nd ch from your hook. Do not join. (5 sts)
Rnd 2: Work 2 sc in each st around. Do not join. (10 sts)
Rnd 3: Work 1 sc in each st around. Join with a sl st to the 1st st. (10 sts)
Fasten off leaving an 8″ tail of yarn for sewing. Using a yarn needle, attach the nose to the face. center between the eyes and attach approximately 3 rows up from the upper edge of the mouth opening.
Weave in ends. Fill with candy & enjoy!
I MADE IT! NOW WHAT?
Pin this post! Save this crochet towel holder free pattern to your Pinterest boards so that you can come back and make it again.
Leave a comment below: We love to hear your feedback.
Share Your Finished Projects on Facebook or Instagram: I love to see your finished projects! Share with us on social media and tag me @acrochetedsimplicity or use the hashtag #ACrochetedSimplicity so I can find your posts.
JOIN US IN THE FACEBOOK COMMUNITY GROUP!
Come share your finished projects with us in the A Crocheted Simplicity Crochet Community Group on Facebook. Join us for fun community events such as crochet alongs, join in on crochet conversations, ask questions, get advice, and share your love for crochet!

More Halloween Crochet Patterns
If you LOVE Halloween and are looking for more free Halloween crochet patterns, we have a bunch more for both Halloween decor for your home and fun crochet Halloween patterns for kids!
Along with this crochet Halloween witch, you’ll find crochet black cat patterns, Frankenstein’s Monster crochet patterns, ghost crochet patterns, Halloween candy bowls and bags and more!
This is awesome!
This project took some time but I love the finished product! Thank you for the pattern!
Hi Mary,
I’m so glad that you enjoyed this fun crochet candy bowl! 🙂
Happy Crocheting,
Jennifer