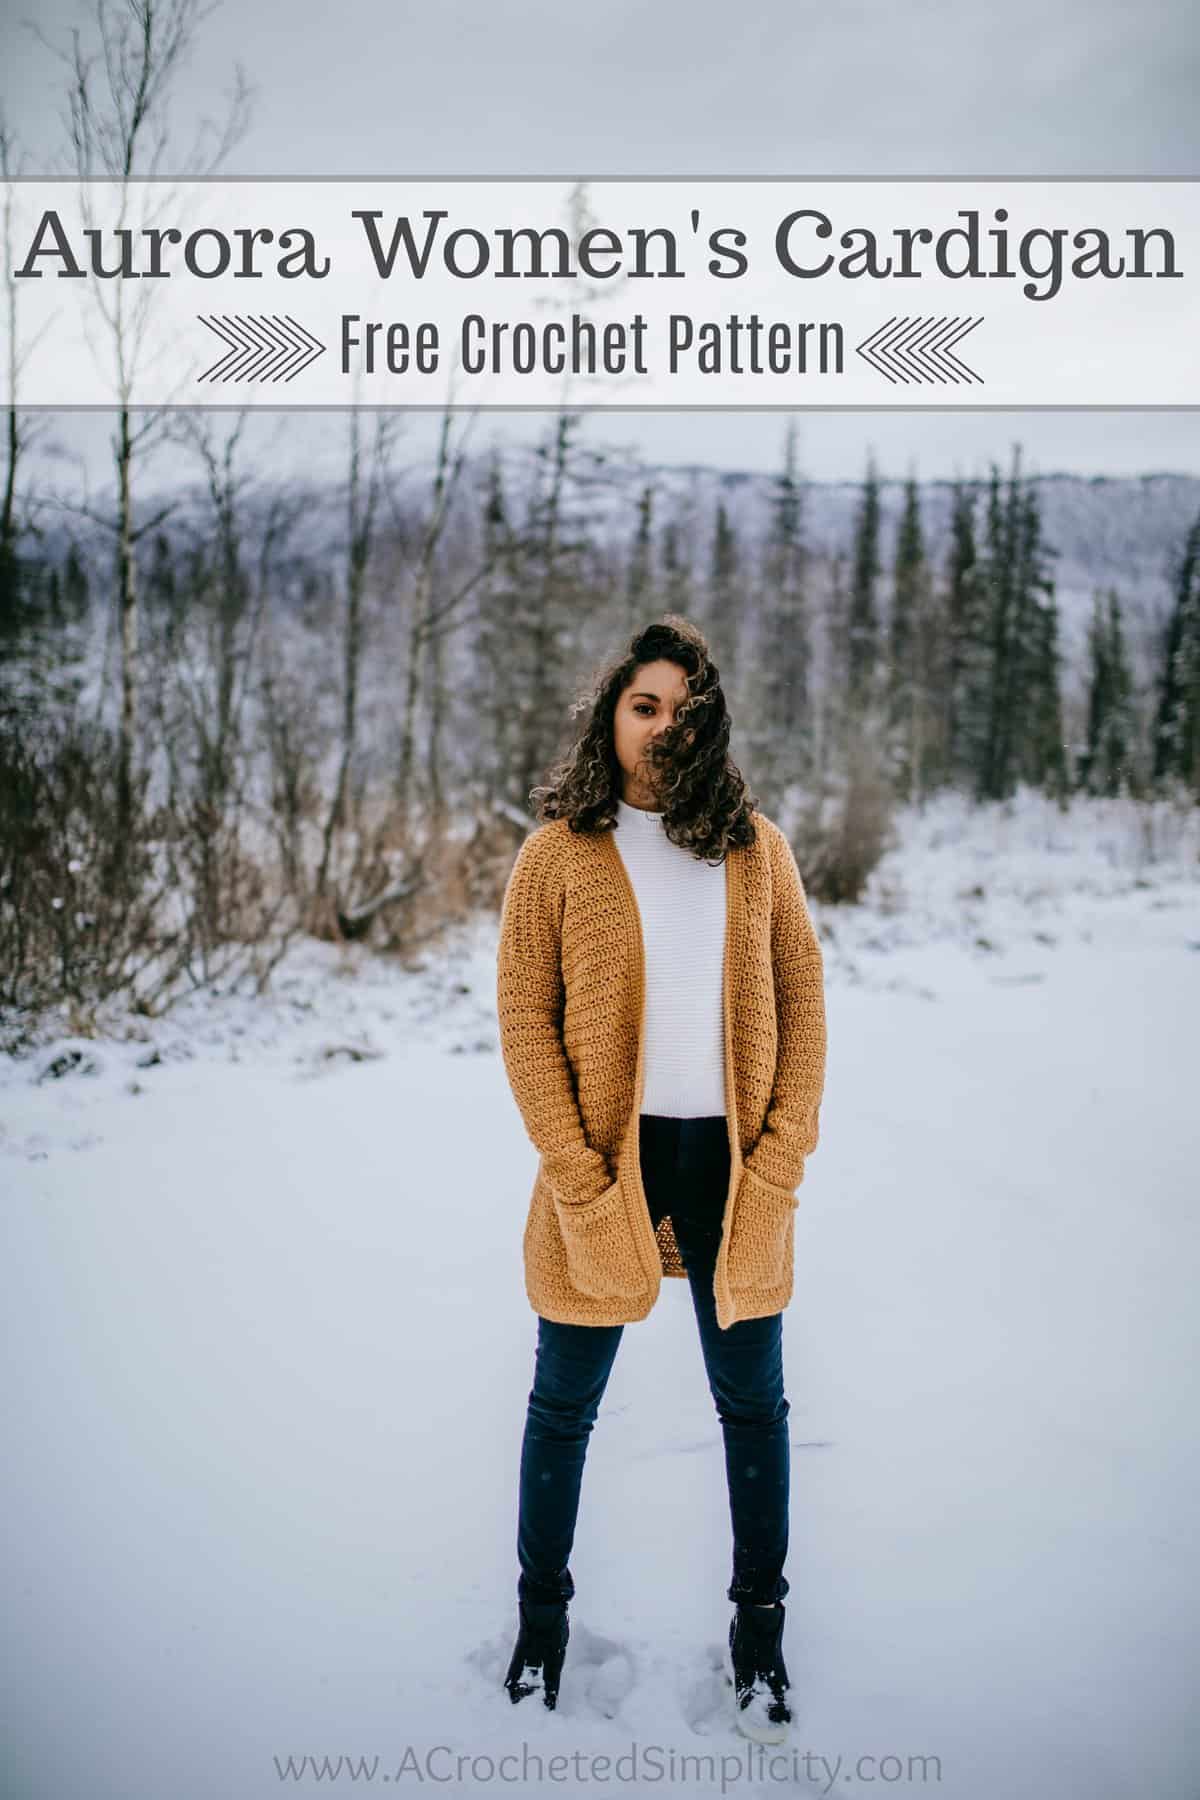
Aurora Cardigan for Women – Free Crochet Cardigan Pattern
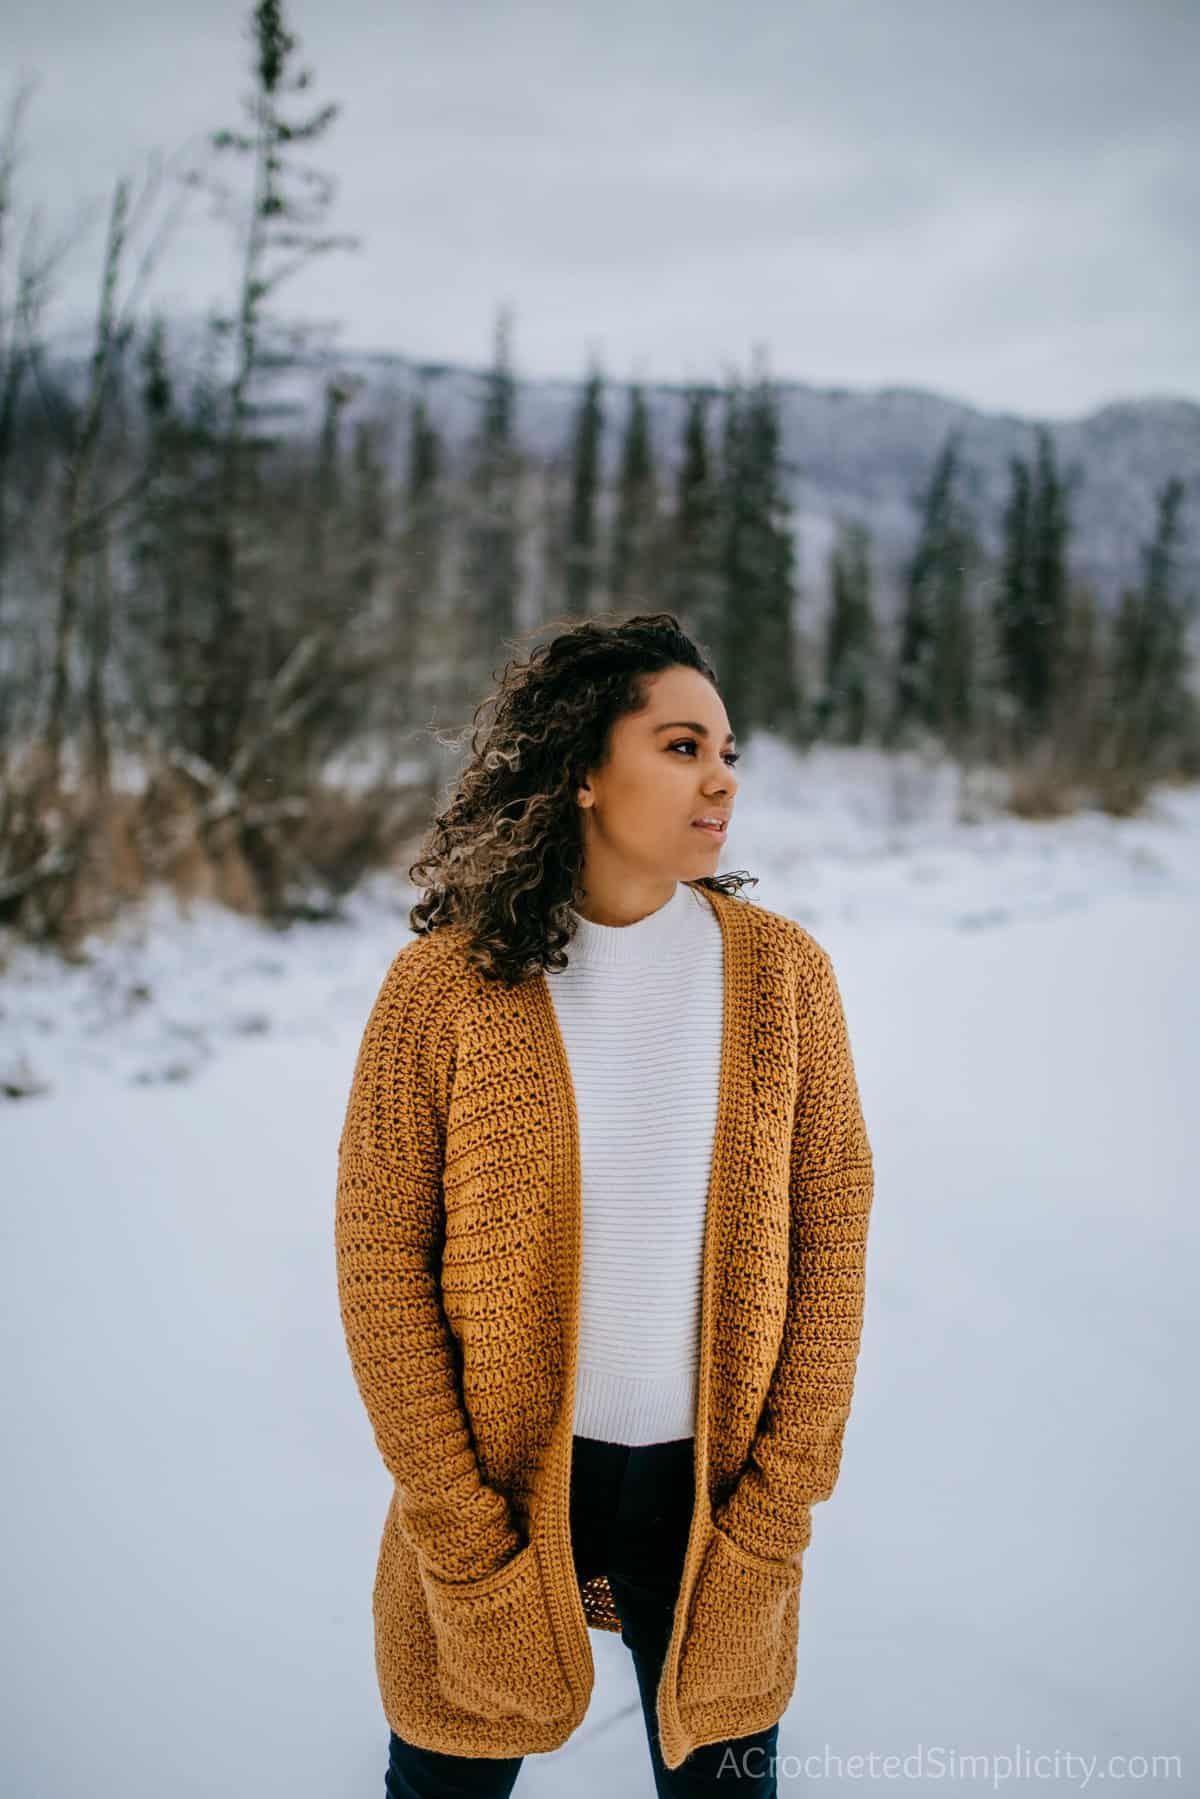
In early August when I took Claire shopping for new clothes for school, she found a simple, grey cardigan that she loved. I purchased it for her, but it was so thin and not nearly warm enough for our frigid winters. I loved the simplicity of the store bought cardigan, the simple shape, classic fit, and pockets. Pockets were one of Claire’s “must have” requests. This is where inspiration for the Aurora Cardigan came from. I released the Aurora Cardigan for Girls in October and you can find that free crochet cardigan pattern here. You can find the free crochet cardigan pattern for women in this post below, or an ad-free print friendly version on Love Crafts here, Ravelry here, or on Etsy here. The ad-free version also includes a detailed garment schematic.
> CLICK HERE TO SIGN-UP TO RECEIVE OUR NEWSLETTER <
Crochet cardigans are great to wear for seasonal transition pieces in spring and fall when the weather changes hourly. They’re also great for all day wear when the temps are bitter cold. Dress them up, dress them down. You really can’t go wrong when wrapped up in a crochet sweater to help keep you warm!
The Yarn
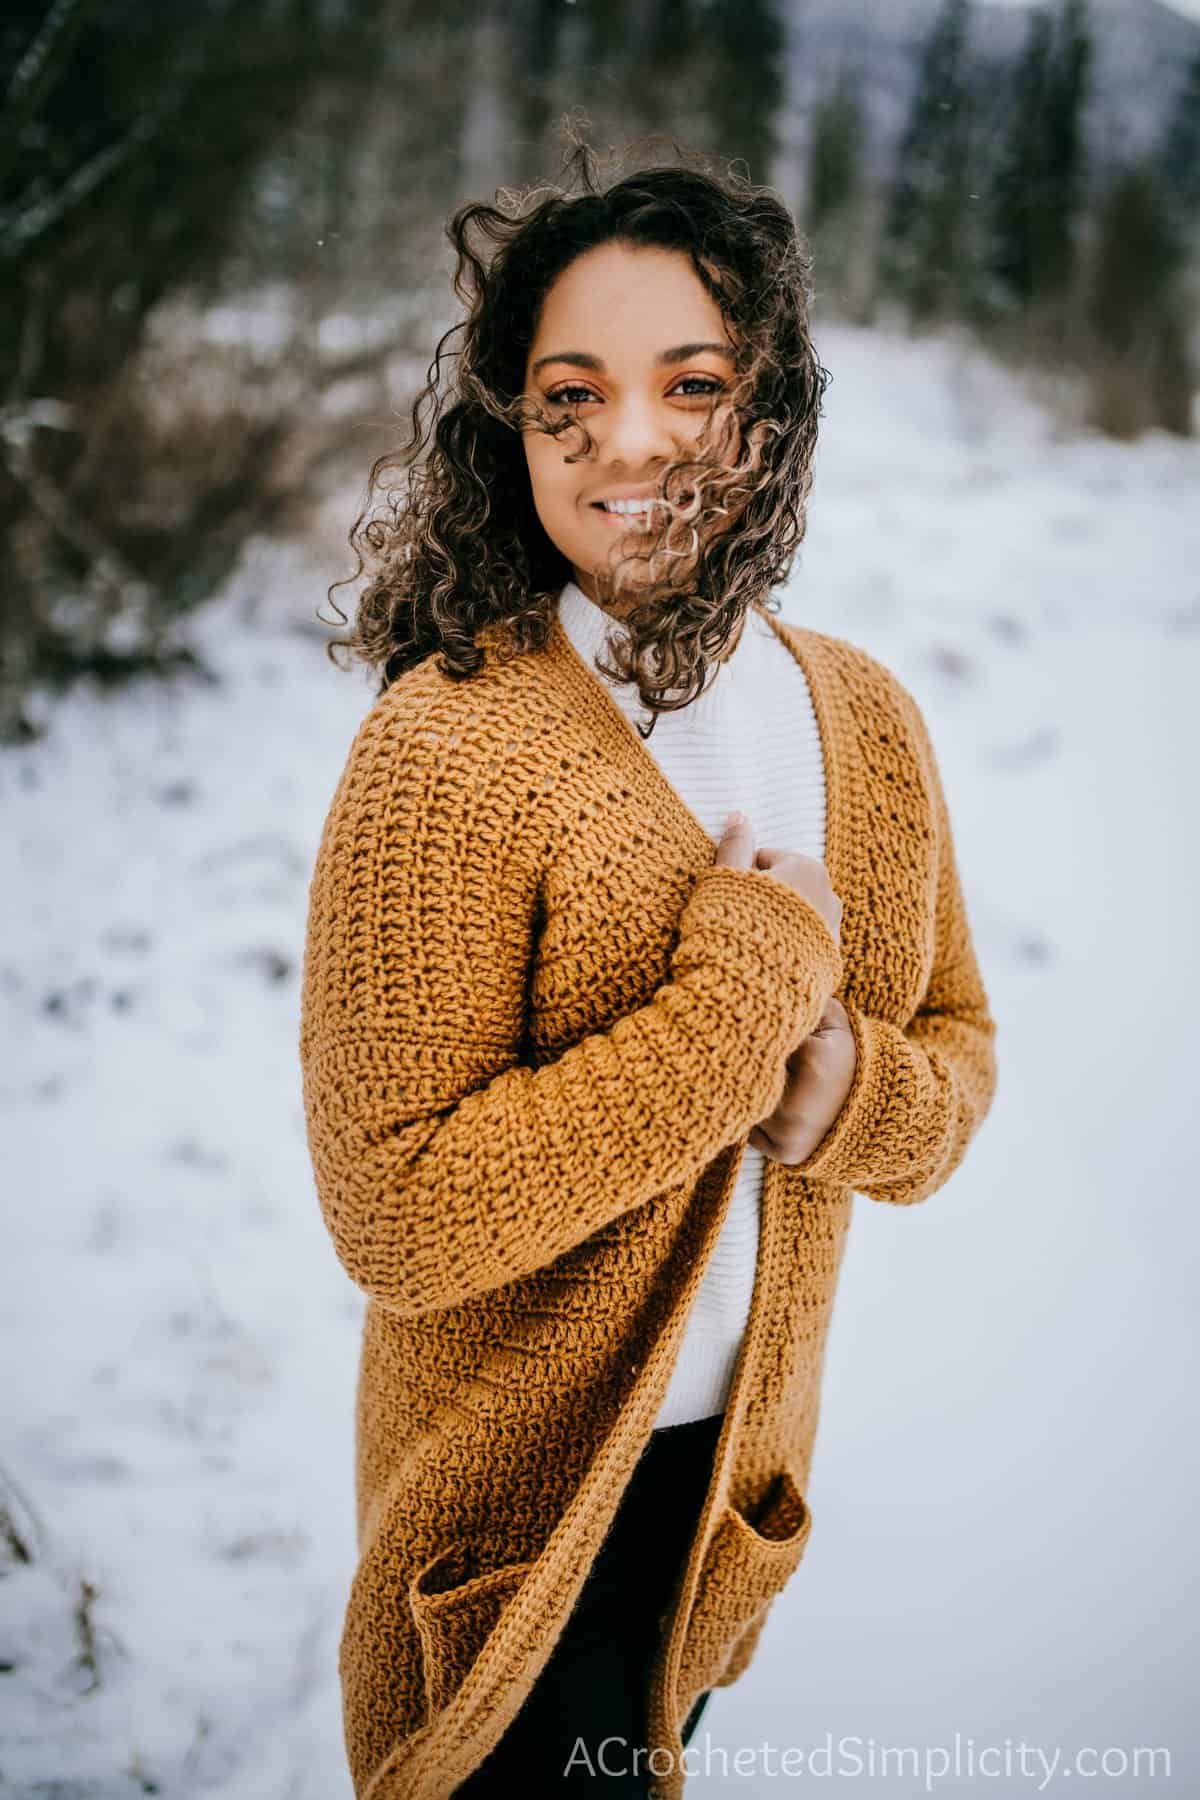
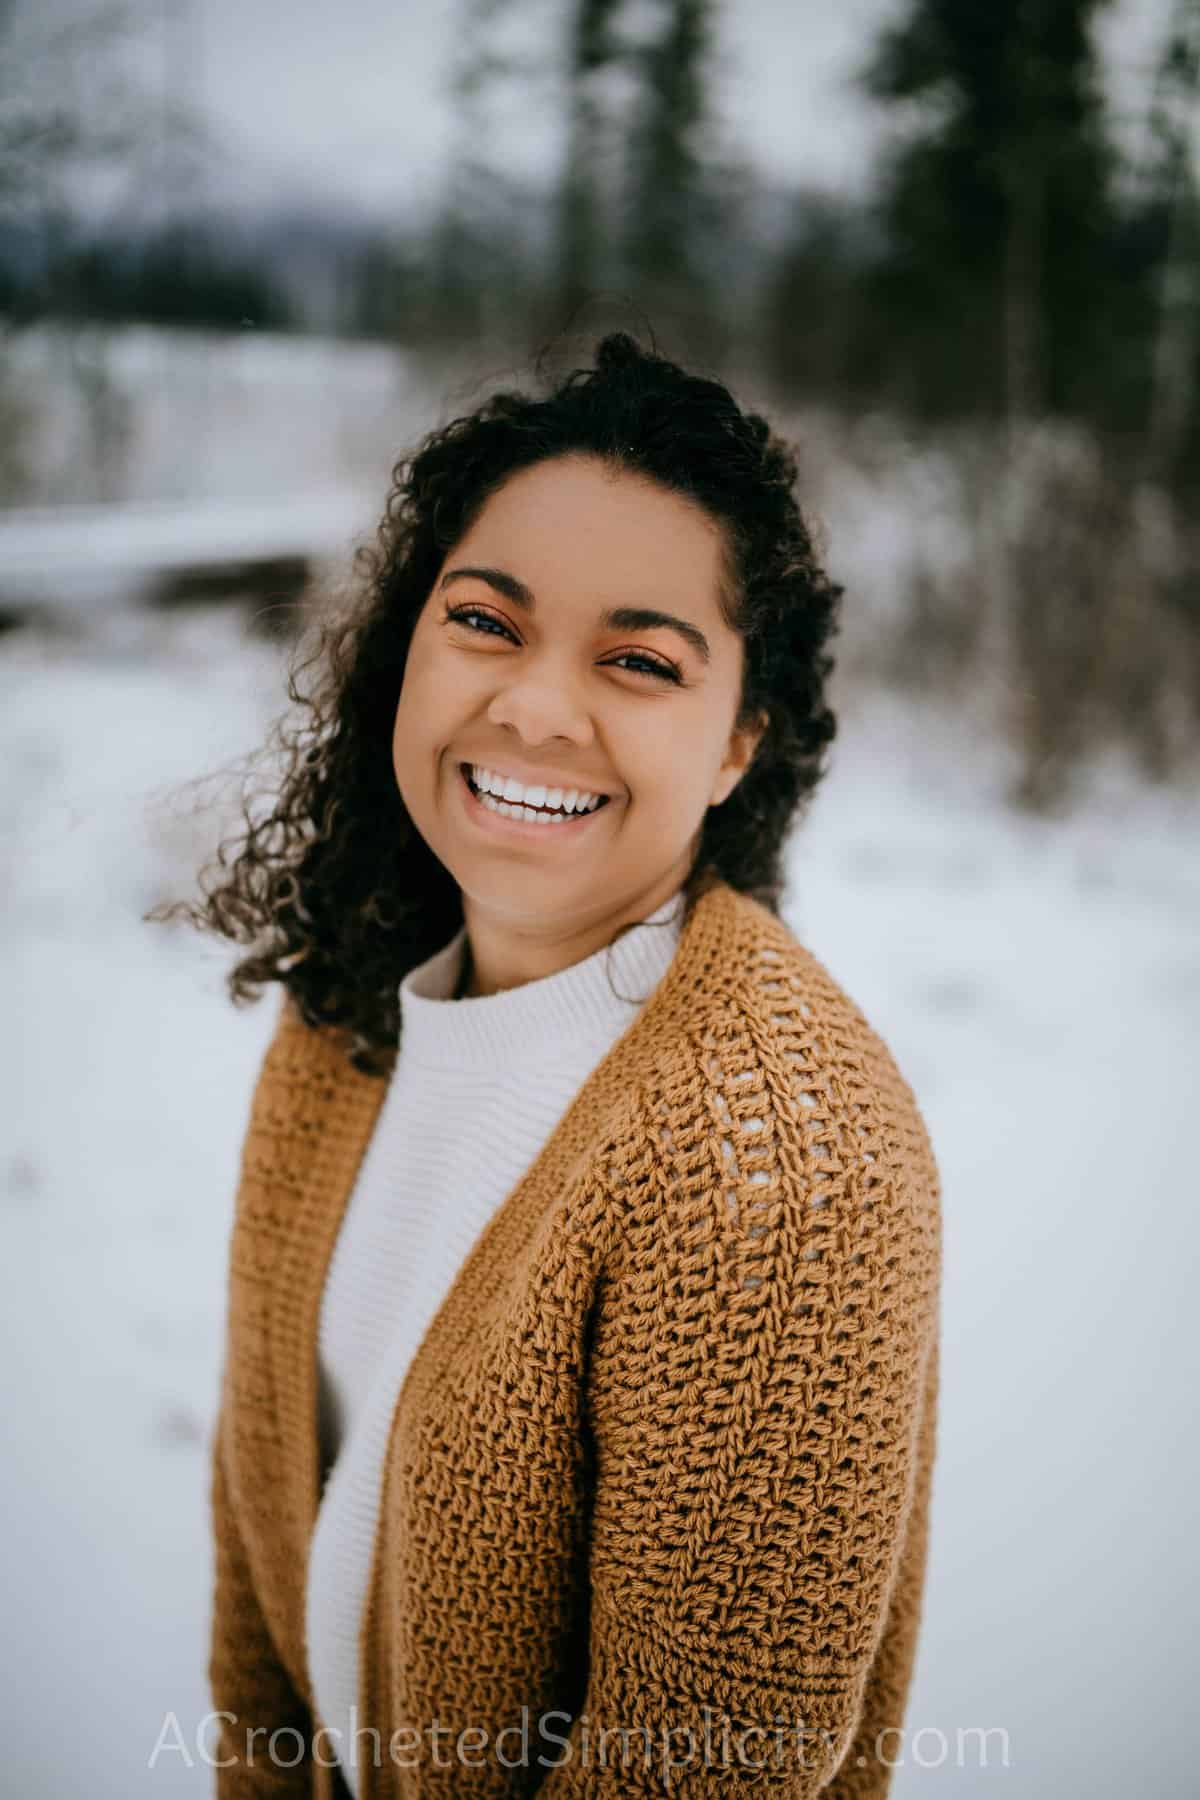
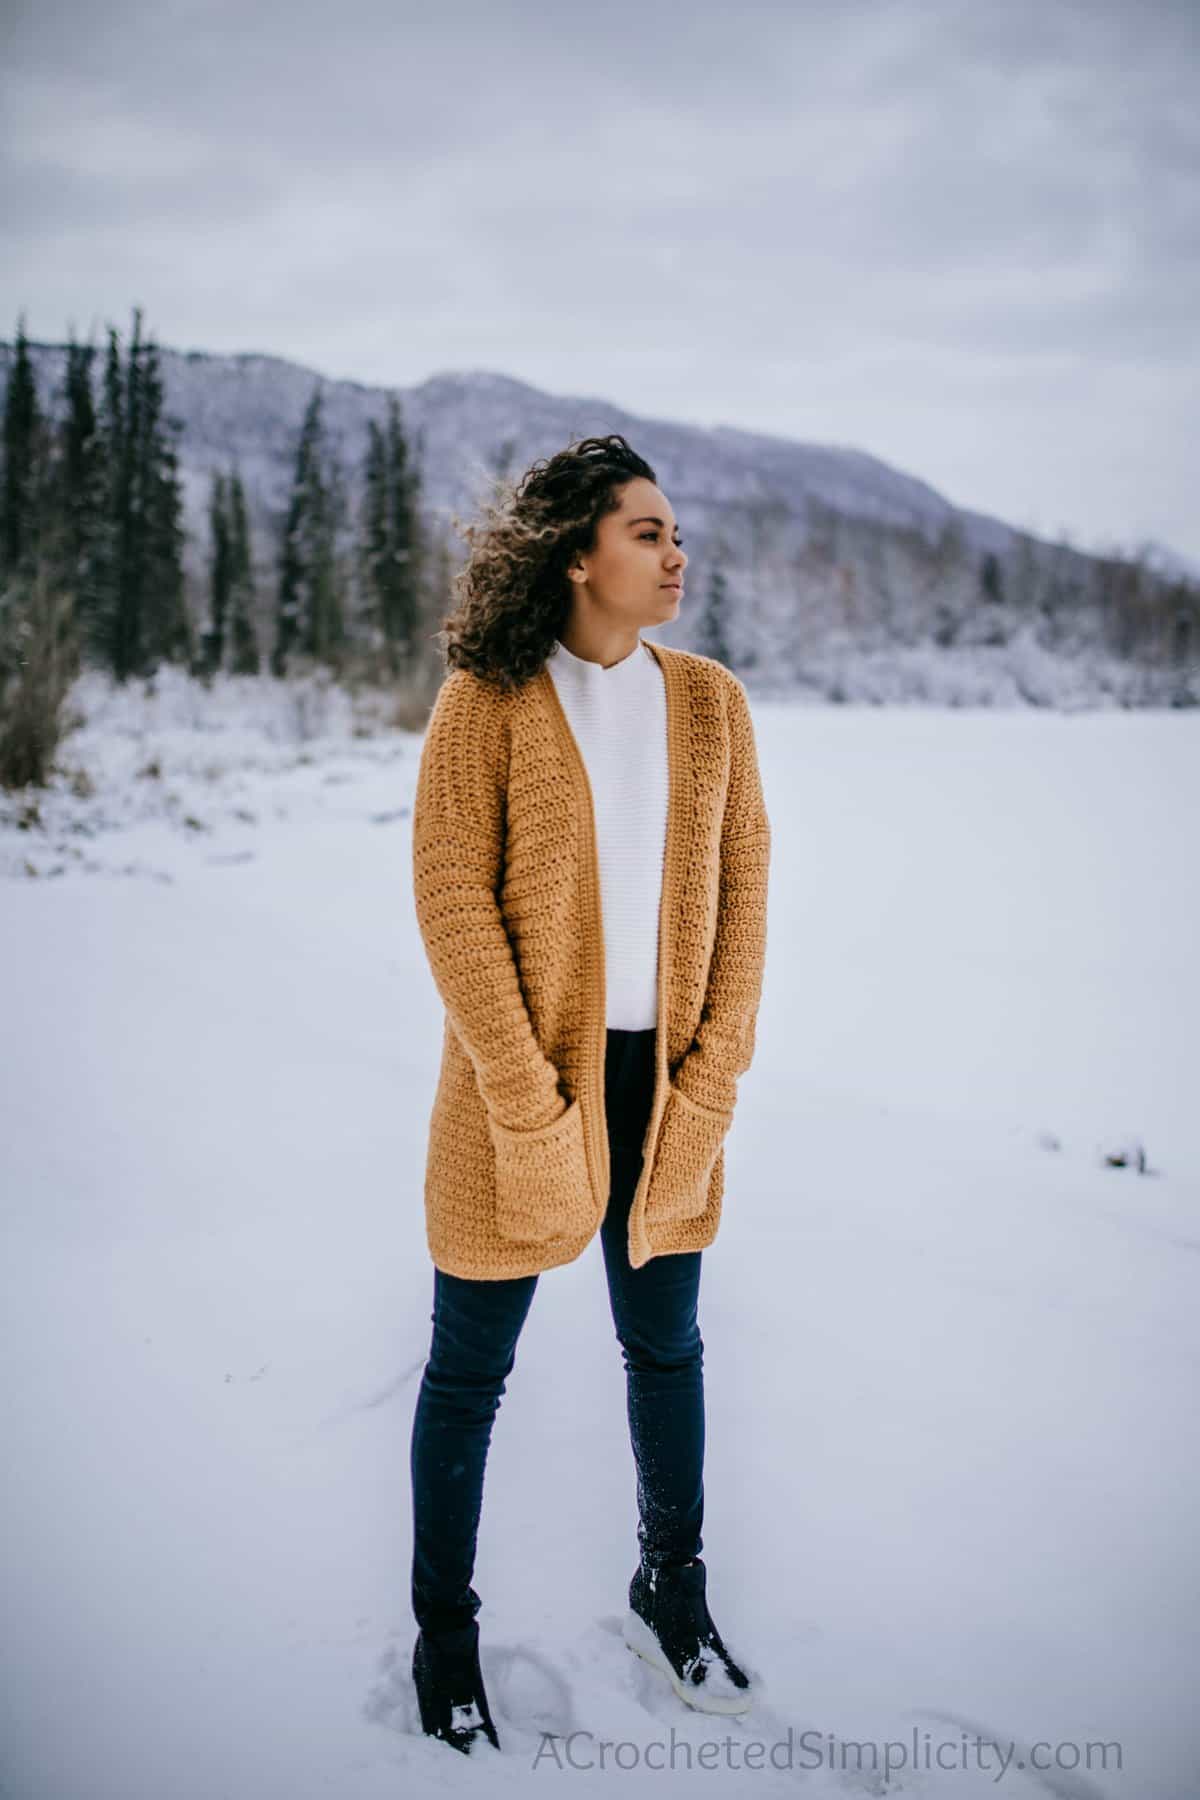
For this crochet cardigan, I chose Lion Brand Yarns Touch of Alpaca in Goldenrod, which is a worsted weight yarn. Touch of Alpaca is an acrylic / alpaca blend yarn that is available in 16 gorgeous colors. Although Touch of Alpaca is classified as a Craft Yarn Council 4 / worsted weight yarn, I’ve found that it is on the lighter side of most worsted weight yarns. Keep this in mind if you plan to substitute your favorite worsted weight yarn.
Photography Credit: Frozen Moments Photography
Aurora Cardigan for Women – FREE CROCHET CARDIGAN PATTERN
The free pattern is below, but if you love to work offline, I’ve got a great option for you.
Purchase the ad-free, printable PDF, including all photo tutorials & charts, on LoveCrafts here, on Ravelry here, and on Etsy here. The ad-free version also includes a detailed garment schematic.
Save this pattern to your Ravelry favorites here.
Pin it for later here.
This post contains affiliate links.
Materials
- Yarn: Worsted Weight / 4 / Yarn, (Lion Brand Yarns Touch of Alpaca in Goldenrod was used for the sample in the photos) (100 g / 3.5oz / 207 yards / 190 meters / 90% acrylic / 10% alpaca) per ball.
- Yardage needed per size is shown in the size chart below.
- Touch of Alpaca is also available on Amazon HERE.
- Crochet Hooks: K/10.5/6.50mm, J/10/6.00mm, H/8/5.00mm (My favorite crochet hooks are the Clover Amour Hooks, I’ve never had an ache in my hand since switching)
- Scissors
- Yarn Needle
- Locking Stitch Markers or scrap pieces of yarn
Many of these materials are available for purchase through our affiliates below:


Gauge
- Body of Cardigan stitch pattern: 15 sts = 4.5″ + 10 rows = 4″
Sizes
- Women’s Sizes S through 5X (see chart below)
- Girls sizes can be found HERE
Abbreviations (US Terms)
- ch(s): chain(s)
- sl st(s): slip stitch(es)
- st(s): stitch(es)
- sp: space
- sc: single crochet
- dc: double crochet
- dc2tog: double crochet decrease
- RS: right side
- WS: wrong side
- yo: yarn over
- Rep: repeat
- Rnd: round
- yo: yarn over
- Alt-dc: alternate double crochet (click HERE for tutorial)
- Alt-dc2tog: alternate double crochet decrease (click HERE for tutorial)
- standing sc: standing single crochet (click HERE for tutorial)
- sc spike st: single crochet spike stitch (click HERE for tutorial)
Pattern Notes
- I tend to crochet on the tighter side. You may need to go down a hook size (or two) to meet gauge if you crochet on the looser side.
- Turning chains are not included in stitch count.
- Yarn: Yarn used for the sample shown here is Lion Brand Yarns Touch of Alpaca in Goldenrod (100 g / 3.5oz / 207 yards / 190 meters / 90% acrylic / 10% alpaca) per ball.
- Yarns similar in fiber content and weight can be substituted as long as gauge is met.
- Chains (for chain spaces) are included in stitch count.
- This cardigan is worked from the bottom up then split for front and back panels. After the panels are worked, the shoulders are seamed, then sleeves are added. Finish it off with a bottom hem and collar. Add the optional pockets, if desired.
- This design is best worked in a solid color or a solid color with an accent color for the pockets & collar. It isn’t gradient/cake yarn friendly unless you have several cakes from which you can work from.
- Changes for sizes are written as follows: S (M, L, XL, 2X, 3X, 4X, 5X)
- Yardage: Please refer to the size chart below.
Special Stitches
- Double Crochet Decrease (dc2tog): (Yo, insert hook in next st, yo, pull up a loop, yo, pull thru 2 loops on hook) twice, yo, pull thru remaining 3 loops on hook.
- Alternate Double Crochet (Alt-dc): After turning your work, do not ch, instead, insert your hook into the first st, yo, pull up a loop, yo, pull thru both loops, insert your hook between the legs of the st just made, yo, pull up a loop, yo, pull thru one loop, yo, pull thru remaining loops. Click HERE for tutorial.
- Alternate Double Crochet Decrease (Alt-dc2tog): After turning your work, do not ch, instead, insert your hook into the first st, yo, pull up a loop, yo, pull thru both loops, insert your hook between the legs of the st just made, yo, pull up a loop, yo, pull thru one loop, yo, insert your hook into the next st indicated, yo, pull up a loop, yo, pull through 2 loops, yo, pull through remaining 3 loops. Click HERE for tutorial.
- Single Crochet Spike Stitch: Begin the spike stitch by inserting your hook into the stitch 1 row down from the current row, yo, pull up a long loop (make sure to pull the loop up to the top edge of your work), yo, pull through all loops on your hook. Click HERE for tutorial.
- Join with a standing sc: When instructed to “Join with a standing sc”, begin with a slip knot on your hook. Insert your hook into the stitch or space indicated, yo, pull up a loop, yo and draw thru both loops on hook. Click HERE for tutorial.
Size Chart
| Size | Fits Chest | Yardage |
| S | 32″ – 34″ | 1,550 yards |
| M | 36″ – 38″ | 1,700 yards |
| L | 40″ – 42″ | 1,850 yards |
| XL | 44″ – 46″ | 2,000 yards |
| 2X | 48″ – 50″ | 2,100 yards |
| 3X | 52″ – 54″ | 2,200 yards |
| 4X | 56″ – 58″ | 2,300 yards |
| 5X | 60″ – 62″ | 2,400 yards |
Size Chart Notes
- ‘Fits Chest’ measurement is the measurement of the intended wearer, not the garment’s finished measurement.
- This cardigan has 6 – 8″ of positive ease built in for a classic fit. If you prefer more of an oversized cardigan, I would suggest making one size larger than your chest size.
- Complete cardigan measurements & schematics are included as a bonus with the Ad-free PDF available on Love Crafts here, on Ravelry here, and on Etsy here.
Gauge Swatch Instructions
Note: If you’re struggling to meet gauge, focus on meeting gauge width as you can easily adjust the height of your panels & length of your sleeves by working more rows/rounds.
Gauge: 15 sts = 4.5″; 10 rows = 4″
Row 1 (RS): Using a 6.50mm crochet hook, ch 16, switch to a 6.00mm crochet hook, working in the back hump of the foundation ch, sc in the 2nd ch from your hook, (ch 1, skip the next ch, sc in the next ch) 7 times. Turn. (15 sts)
Row 2: Alt-dc, dc in each st and ch-1 sp across. Turn.
Row 3: Ch 1, sc in the first st, (ch 1, skip the next st, sc in the next st) 7 times. Turn.
Rows 4 – 10: Rep Rows 2 – 3, ending w/ a row 2 repeat.
Fasten off. Swatch should measure: 4.5″ W x 4″ H
Aurora Cardigan for Women – Free Crochet Cardigan Pattern
Body of Cardigan
Set-Up: Using a 6.5mm crochet hook, ch 124 (138, 150, 164, 178, 192, 204, 218).
Row 1 (RS): Switch to a 6.00mm crochet hook, working into the back hump of the foundation chain, sc in the 2nd ch from your hook and in each ch across. Turn. (123, 137, 149, 163, 177, 191, 203, 217 sts)
Row 2: Ch 1, sc in the first st, (ch 1, skip the next st, sc in the next st) rep from ( to ) across. Turn.
Row 3: Alt-dc in the first st, dc in each sc and ch-1 sp across. Turn.
Repeat Rows 2 – 3 (ending with a Row 3), until cardigan measures 23″ (23″, 23″, 22.5″, 22.5″, 21.5″, 21.5″, 21.5″).
Adjusting Length: If you prefer a longer or short cardigan, here is where you’ll want to adjust. The length stated above is the cardigan’s length from the bottom of the armhole to the bottom hem. If at all possible, check length, at this point, on the intended wearer.
Do not fasten off. Continue on to Front Left Panel.
Front Left Panel
Before you fasten off your panel, please make sure to read “Check Fit” below. This will help you easily customize your cardigan to your body shape and fit preference.
Row 1 (WS): Ch 1, sc in the first st, (ch 1, skip the next st, sc in the next st) 13 (14, 16, 18, 20, 21, 23, 25. Turn. (27, 29, 33, 37, 41, 43, 47, 51 sts)
Stitch Marker Placement: Before you “turn” to begin Row 2, place a stitch marker in the next stitch to mark the beginning of the Back Panel.
Row 2: Alt-dc in the first st, dc in each sc and ch-1 sp across. Turn.
Size S: Rows 3 – 17: Repeat Rows 1 – 2, ending with a Row 1 repeat.
Size M: Rows 3 – 18: Repeat Rows 1 – 2.
Size L: Rows 3 – 19: Repeat Rows 1 – 2, ending with a Row 1 repeat.
Size XL: Rows 3 – 20: Repeat Rows 1 – 2.
Size 2X: Rows 3 – 21: Repeat Rows 1 – 2, ending with a Row 1 repeat.
Size 3X: Rows 3 – 23: Repeat Rows 1 – 2, ending with a Row 1 repeat.
Size 4X: Rows 3 – 24: Repeat Rows 1 – 2.
Size 5X: Rows 3 – 25: Repeat Rows 1 – 2, ending with a Row 1 repeat.
Fasten off. Continue on to Back Panel. Panel Height: 6.75″ (7″, 7.5″, 8″, 8.5″, 9.25″, 9.5″, 10″).
Check Fit:
This isn’t mandatory, but if you’d like to make sure your cardigan fits you as best as possible, do the following:
- Step 1: Work all 3 panels, Front Left Panel, Back Panel & Front Right Panel, but do not fasten off. Use stitch markers to hold the yarn.
- Step 2: Use scraps of yarn to temporarily attach the front panels to the back panel (just as if you were going to seam the shoulders).
- Step 3: Try your cardigan on and check the depth of the armhole / width of the sleeve opening.
- Step 4 Sizes S – 3X:○ Perfect Fit: If your armhole depth fits perfectly, fasten off all panels and continue on to Shoulder Seams.
○ Too Snug: If you’d prefer larger armholes, work the number of rows specified for the cardigan that’s 1 or 2 sizes up from the size you’re making. For example, if I were making a size small and wanted a larger armhole, I’d follow the size M or L instructions for the panels and work Rows 3 – 18 or Rows 3 – 19. I would then follow the sleeves for that size as well, but possibly add a couple more decreases in the sleeve near the wrist when I got to that point. - Step 4 Sizes 4X & 5X:
-
- Too Snug: If you’d prefer larger armholes, increase the number of rows in each panel by multiples of 2. Begin by adding 2 more rows to each panel and re-check fit. Once you’ve achieved your preferred fit, continue on to Shoulder Seams.
- Adjusting the Sleeves: If you’ve added rows to your panels, this will increase the circumference of your sleeves as well. For every 2 additional rows that you add to your panels, your stitch count for Rnd 1 of the sleeves will increase by 6 stitches. Example: If you add 2 rows to a size 4X, then the stitch count for Rnd 1 of your sleeves will be 79 sts. Follow the remaining instructions for the sleeves (your stitch count will be a little off). As you’re working your sleeve add a couple more decreases as desired until your sleeve fits the way you want it to fit. Stitch count is not crucial.
Back Panel
Row 1 (WS): Join yarn with a standing sc in the st you marked with a stitch marker, (ch 1, skip the next st, sc in the next st) 34 (39, 41, 44, 47, 52, 54, 57) times. Turn. (69, 79, 83, 89, 95, 105, 109, 115 sts)
Stitch Marker Placement: Before you “turn” to begin Row 2, place a stitch marker in the next stitch to mark the beginning of the Front Right Panel.
Row 2: Alt-dc in the first st, dc in each sc and ch-1 sp across. Turn.
Row 3: Ch 1, sc in the first st, (ch 1, skip the next st, sc in the next st) rep from ( to ) across. Turn.
Size S: Rows 4 – 17: Repeat Rows 2 – 3.
Size M: Rows 4 – 18: Repeat Rows 2 – 3, ending with a Row 2 repeat.
Size L: Rows 4 – 19: Repeat Rows 2 – 3.
Size XL: Rows 4 – 20: Repeat Rows 2 – 3, ending with a Row 2 repeat.
Size 2X: Rows 4 – 21: Repeat Rows 2 – 3.
Size 3X: Rows 4 – 23: Repeat Rows 2 – 3.
Size 4X: Rows 4 – 24: Repeat Rows 2 – 3, ending with a Row 2 repeat.
Size 5X: 4 – 25: Repeat Rows 2 – 3.
Fasten off. Continue on to Front Right Panel. Panel Height: 6.75″ (7″, 7.5″, 8″, 8.5″, 9.25″, 9.5″, 10″).
Front Right Panel
Row 1 (WS): Join yarn with a standing sc in the st you marked with a stitch marker, (ch 1, skip the next st, sc in the next st) 13 (14, 16, 18, 20, 21, 23, 25). Turn. (27, 29, 33, 37, 41, 43, 47, 51 sts)
Row 2: Alt-dc in the first st, dc in each sc and ch-1 sp across. Turn.
Row 3: Ch 1, sc in the first st, (ch 1, skip the next st, sc in the next st) rep from ( to ) across. Turn.
Size S: Rows 4 – 17: Repeat Rows 2 – 3.
Size M: Rows 4 – 18: Repeat Rows 2 – 3, ending with a Row 2 repeat.
Size L: Rows 4 – 19: Repeat Rows 2 – 3.
Size XL: Rows 4 – 20: Repeat Rows 2 – 3, ending with a Row 2 repeat.
Size 2X: Rows 4 – 21: Repeat Rows 2 – 3.
Size 3X: Rows 4 – 23: Repeat Rows 2 – 3.
Size 4X: Rows 4 – 24: Repeat Rows 2 – 3, ending with a Row 2 repeat.
Size 5X: Rows 4 – 25: Repeat Rows 2 – 3.
Fasten off. Continue on to Shoulder Seams. Panel Height: 6.75″ (7″, 7.5″, 8″, 8.5″, 9.25″, 9.5″, 10″).
Shoulder Seams
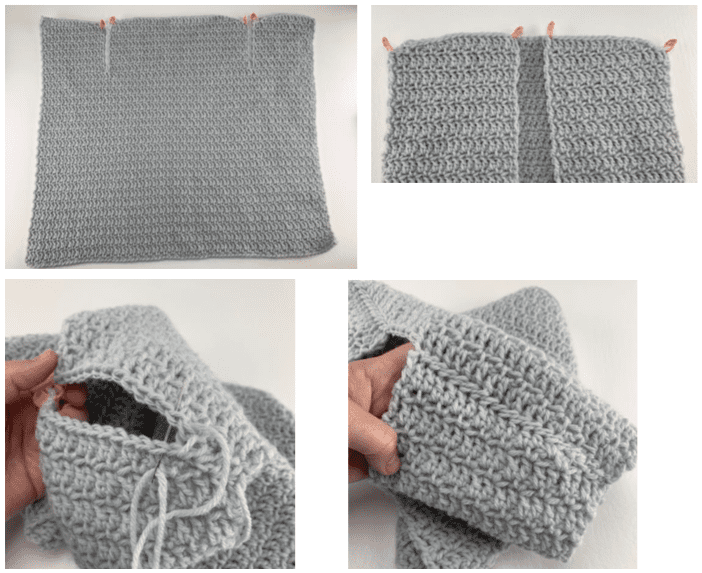
Step 1: Fold the two front panels in towards the center of the cardigan, folding where it splits for the sleeves. Line up the corners of the front panels with the corners of the back panel. Match up the stitches on the front panel with corresponding stitches along the back panel. Use stitch markers to hold the panels in place during seaming. You should have lined up 27 (29, 33, 37, 41, 43, 47, 51) sts for both the front left & right panels. You should have 15 (21, 17, 15, 13, 19, 15, 13) stitches remaining along the neck opening.
Step 2: With the right side facing out, use a yarn needle and 12″ piece of yarn to whipstitch a front panel to the back panel. Repeat for second front panel.
Weave in ends. Continue on to Sleeves.
Photos: The photos below show the girls cardigan. I forgot to take photos of my women’s cardigan at this point. The steps to seam are the same, just note that the girls cardigan has a little shaping in the shoulders and the women’s does not.
Sleeves
Rnd 1 (RS): Join yarn at the bottom of the armhole opening, ch 1, work 1 sc into the side of each sc, 2 sc into the side of each dc, and 1 extra sc at the shoulder seam. Join with a sl st to the 1st st. Do not turn. (51, 55, 57, 61, 63, 69, 73, 75 sts)
Rnd 2 (RS): Ch 1, sc in the first st, (sc2tog, sc in each of the next 10 (11, 12, 13, 13, 15, 16, 16) sts) rep from ( to ) around to the last 2 (2, 0, 0, 2, 0, 0, 2) sts, sc in each remaining st. Join. Do not turn. (47 , 51 , 53, 57, 59, 65, 69, 71 sts)
Rnd 3 (RS): Alt-dc in the first st, dc in each sc around. Join. Turn.
Rnd 4: Ch 1, sc in the first st, (ch 1, skip the next st, sc in the next st) rep from ( to ) around. Join. Turn.
Rnds 5 – 8: Repeat Rnds 3 – 4.
Rnd 9: Alt-dc2tog over the first 2 sts, dc in each st around to the last 2 sts, dc2tog. Join. Turn. (45, 49, 51, 55, 57, 63, 67, 69 sts)
Rnd 10: Ch 1, sc in the first st, (ch 1, skip the next st, sc in the next st) rep from ( to ) around. Join. Turn.
Rnd 11: Alt-dc in the first st, dc in each sc and ch-1 sp around. Join. Turn.
Rnd 12: Repeat Rnd 10.
Rnd 13: Repeat Rnd 9. (43, 47, 49, 53, 55, 61, 65, 67 sts)
Rnd 14: Repeat Rnd 10.
Rnd 15: Repeat Rnd 9. (41, 45, 47, 51, 53, 59, 63, 65 sts)
Rnd 16: Repeat Rnds 10.
Rnd 17: Repeat Rnd 9. (39, 43, 45, 49, 51, 57, 61, 63 sts)
Rnd 18: Repeat Rnd 10.
Rnd 19: Repeat Rnd 9. (37, 41, 43, 47, 49, 55, 59, 61 sts)
Rnds 20 – 22: Repeat Rnds 10 – 11, ending with a Rnd 10 repeat.
Rnd 23: Repeat Rnd 9. (35, 39, 41, 45, 47, 53, 57, 59 sts)
Rnds 24 – 26: Repeat Rnds 10 – 11, ending with a Rnd 10 repeat.
Rnd 27: Repeat Rnd 9. (33, 37, 39, 43, 45, 51, 55, 57 sts)
Rnd 28: Repeat Rnd 10.
Rnd 29: Repeat Rnd 9. (31, 35, 37, 41, 43, 49, 53, 55 sts)
Rnd 30: Repeat Rnds 10.
Rnd 31: Repeat Rnd 9. (29, 33, 35, 39, 41, 47, 51, 53 sts)
Rnd 32: Repeat Rnd 10.
Rnd 33: Repeat Rnd 9. (27, 31, 33, 37, 39, 45, 49, 51 sts)
Rnds 34 – 37: Repeat Rnds 10 – 11. Do not turn at the end of Rnd 37.
Check Sleeve Length: Before you continue on to Rnd 38, try on your cardigan to check the length of the sleeve. Keep in mind that the last few rounds will add approximately 1″ to your sleeve length. If your sleeve is too short, continue repeating rounds 10 – 11. If your sleeve is too long, remove a round of two.
Rnds 38 – 41 (RS): Ch 1, sc in each st around. Join.
Rnd 42 (RS): Sl st in each st around (be mindful not to work your sl sts too tightly or it’ll affect fit). Join using the Special Join Technique (click here for tutorial).
Fasten off. Weave in ends. Repeat for the second sleeve. Then, continue on to Bottom Hem.
Bottom Hem
Row 1 (RS): With the RS facing you, join yarn with a standing sc in the st furthest to the right, sc in each st across the bottom edge of the cardigan. (123, 137, 149, 163, 177, 191, 203, 217 sts)
Do not fasten off. Continue on to Collar.
Collar
Rotate to work up the front opening, around the neck, and back down the front opening.
Row 1 (RS): Ch 1, work 1 sc into the side of each sc row and 2 sc into the side of each dc row up and around the front opening and 1 sc in each unworked st across the top of the back panel. Turn. Stitch count isn’t crucial. Adjust your hook size, if needed, so that your collar isn’t wavy or puckered.
Rows 2 – 6: Ch 1, sc in each st. Turn.
Row 7 (RS): Ch 1, working on the RS of the cardigan (the backside of Row 6 sts), sl st in each st across. *This may feel a little odd to do, but will get the sl sts on the RS of the cardigan’s collar.
Fasten off. Weave in ends. Continue on to Pockets, if desired.
Pockets (Make 2)
Adjusting Pocket Size: If you’d prefer a wider pocket, simply increase your chain during set-up. If you’d like a deeper or more shallow pocket, simply work more or fewer repeats of Rows 2 – 3.
Set-up: Using a 5.00mm crochet hook, ch 20 (20, 20, 22, 22, 22, 22, 22).
Row 1 (RS): Working into the back hump of the foundation chain, sc in the 2nd ch from your hook and in each ch across. Turn. (19, 19, 19, 21, 21, 21, 21, 21 sts)
Row 2: Ch 1, sc in the first st, (ch 1, skip the next st, sc in the next st) rep from ( to ) across. Turn.
Row 3: Alt-dc in the first st, dc in each sc and ch-1 sp across. Turn.
Rows 4 – 17: Repeat Rows 2 – 3.
Row 18: Ch 1, sc in each st across. Turn.
Note: The spike sc worked along the top edge of the pocket, in the next row, will cause the top edge of the pocket to flare out a tiny bit. This is intentional, but if you do not like it, simply work sc in stead of spike sc in the next row.
Row 19: Ch 1, spike sc in each st across top edge, ch 1, rotate to work along remaining 3 sides, work 1 sc into the side of each sc row and 2 sc into the side of each dc row, work 1 sc into each st along the bottom edge, and work 1 extra sc in each of the bottom 2 corners, ch 1. Join with a sl st to the 1st spike st.
Fasten off leaving a 36″ tail of yarn for sewing the pocket onto the cardigan. Repeat for a second pocket, then continue on to Attaching the Pockets.
Attaching the Pockets
Step 1: Put your cardigan on and put her arms down as you would naturally. Use a stitch marker to mark where you would like the top edge of each pocket to be.
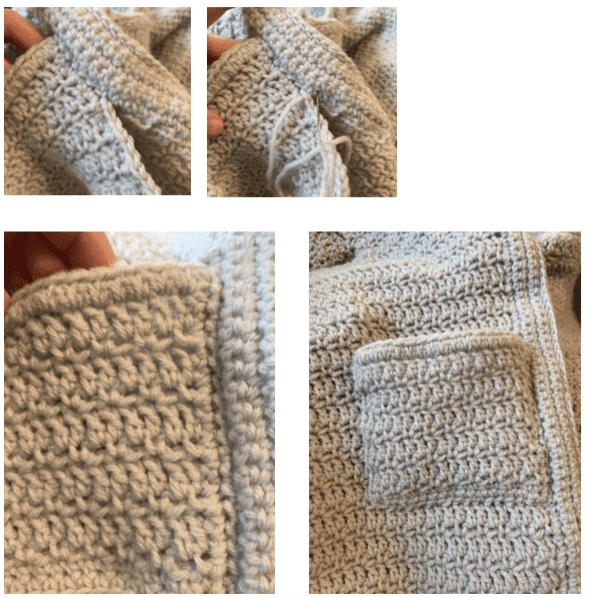
Step 2: Position the pockets so that the vertical edge closest to the front opening of the cardigan is lined up with Row 1 of the collar. See photos below. Use scrap pieces of yarn to hold the pocket in place during sewing.
Step 3: Using a yarn needle and yarn tail, sew the pocket onto the cardigan along the 2 vertical sides and bottom edge. Weave in ends.
Add a Personal Touch to your Wearables
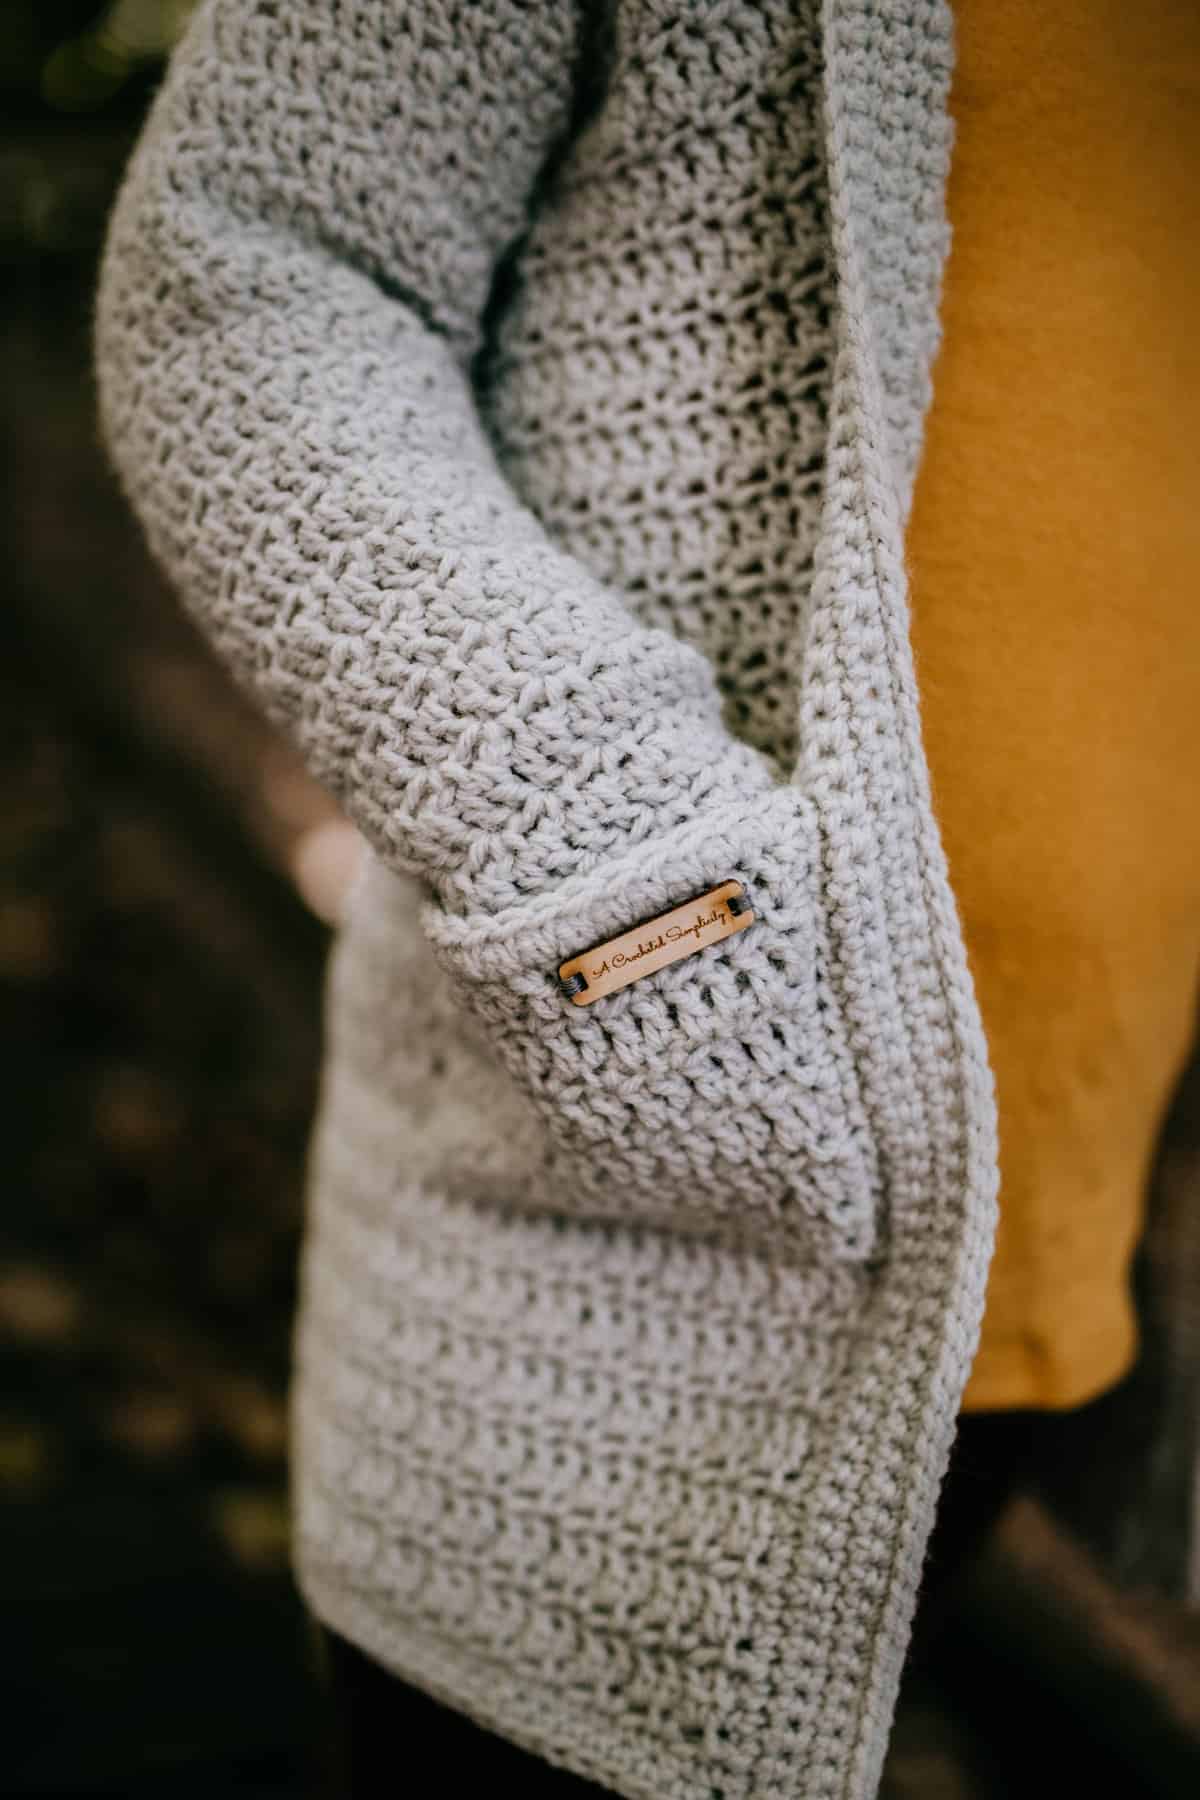
Aren’t personalized tags such a great finishing touch to add to our crochet items? I ordered these wooden ones and a couple different leather ones from an awesome online maker. You can find links to where I purchased and a tutorial on how to attach all of them HERE.
Blocking Your Crochet Wearables
- Blocking isn’t mandatory, but it does add a nice finished look to crochet wearables!
- Click HERE for my Blocking Tutorial & Learn 3 Different Ways to Block!
MORE FREE CROCHET PATTERNS FROM A CROCHETED SIMPLICITY
If you enjoyed this crochet cardigan pattern, you may enjoy these other projects as well. And if you just want to browse, you can find all of our free crochet patterns HERE.
Are you intimidated by knit-look crochet? Would you love to learn my tips & tricks? Take an Annies Video Class with me and let me ease your fears and help you increase your skills! Click on the photo below to watch a free preview. You can also see the other 4 video classes I have available!
Please share your finished ACS projects with us in the A Crocheted Simplicity Crochet Community Group on Facebook! Use hashtag #ACrochetedSimplicity when sharing on social media so I can find your posts!





Great pattern!! Easy to understand and turns out just like the picture. The only thing I did different is when doing the border on the front and collar, I did 3 sc in each bottom front corner to prevent curling. I love it. It will be my go to sweater.
I made the Aurora cardigan for girls for my daughter & niece & they are beautiful & fit perfectly. Easy to understand & i love how there’s minimal seaming. I can’t wait to finish this adult pattern! Thanks for sharing!
Making one for daughter in law ( almost done ) . My daughter loves it so be making her one next .love ,love, love this !
Hi Debbie,
I’m so happy to hear this!
Jennifer
I love this pattern! Now that the holidays are over, I’m going to try and make this. Just got a gift card to my favorite yarn shop, so I’m good o go.
I love this sweater band the color is a bonus! Plan to make this in 2024.
Lovely sweater. Yes, pockets are a must! I just finished your Brentwood men’s sweater so this is my next project.
I’ll have to add this one to my must make list for 2024. I’ve only done a few cardigans even though I’ve been crocheting for quite a while.
I love the cosy look of this sweater, I have some yarn I found at Ollie’s that you be great for this!!
Beautiful pattern..hoping to make this in 2024!
I have never made myself a wearable and I only started making any, but this is the one that I want to make just for me! I love it! I think it will probably be a medium gray, which is my favorite color. I really hope I can make myself proud.
This is at the top of my “Must Make List” for 2024. Can’t wait to get started!
This is lovely. I am looking for a sweater with pockets to make for my daughter in law. This might just fit the bill.
This pattern is wonderful! I fell in love with it the moment I saw the photo on Pinterest, I knew I had to make it. Well written, easy to understand. I have had mine for a couple years now, and it’s one of my favorite garments I’ve made myself in a really long time! gonna make another soon, thank you for all you do and happy new year!
My current WIP.
This is my second attempt. I love this sweater and I think it is going to be the first one I make for me. I love your patterns.
This was the first crochet garment I attempted. I was nervous about starting, but the pattern was very easy to follow and came together quickly.
Being an experiment, I used a budget stiffer yarn and want to redo this with the recommended yarn!
looks fantastic I might be able to achieve this pattern xx I love your designs.
Love the look of this sweater. May be a future project.
I made this cardigan in the suggested Touch Of Alpaca yarn (in a pale pink). The instructions were easy to follow (I’m new to crochet and this was my first sweater) and I love the finished product! It’s very soft, warm and cozy.
Hi Susan,
I’m so glad to hear this! Thank you!
Happy Crocheting!
Jennifer