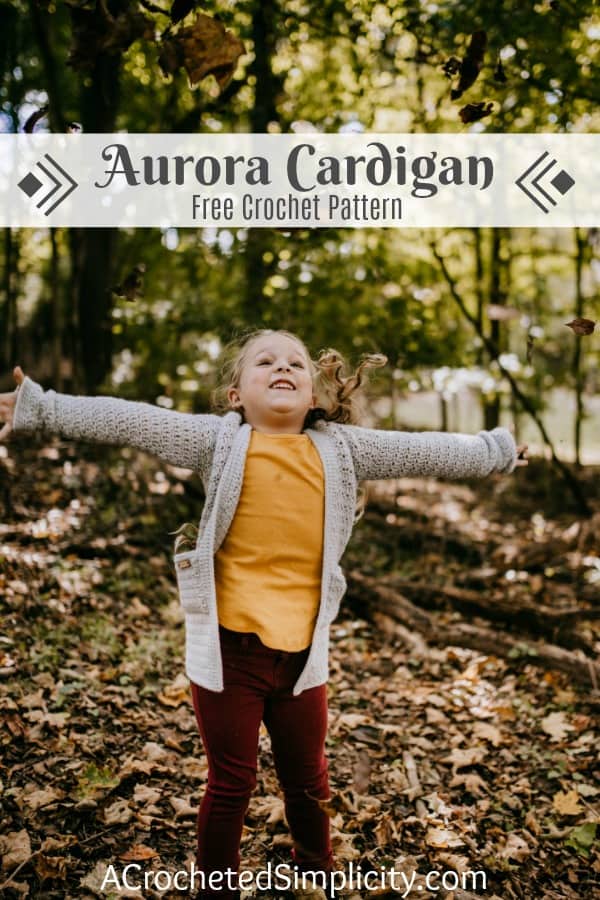
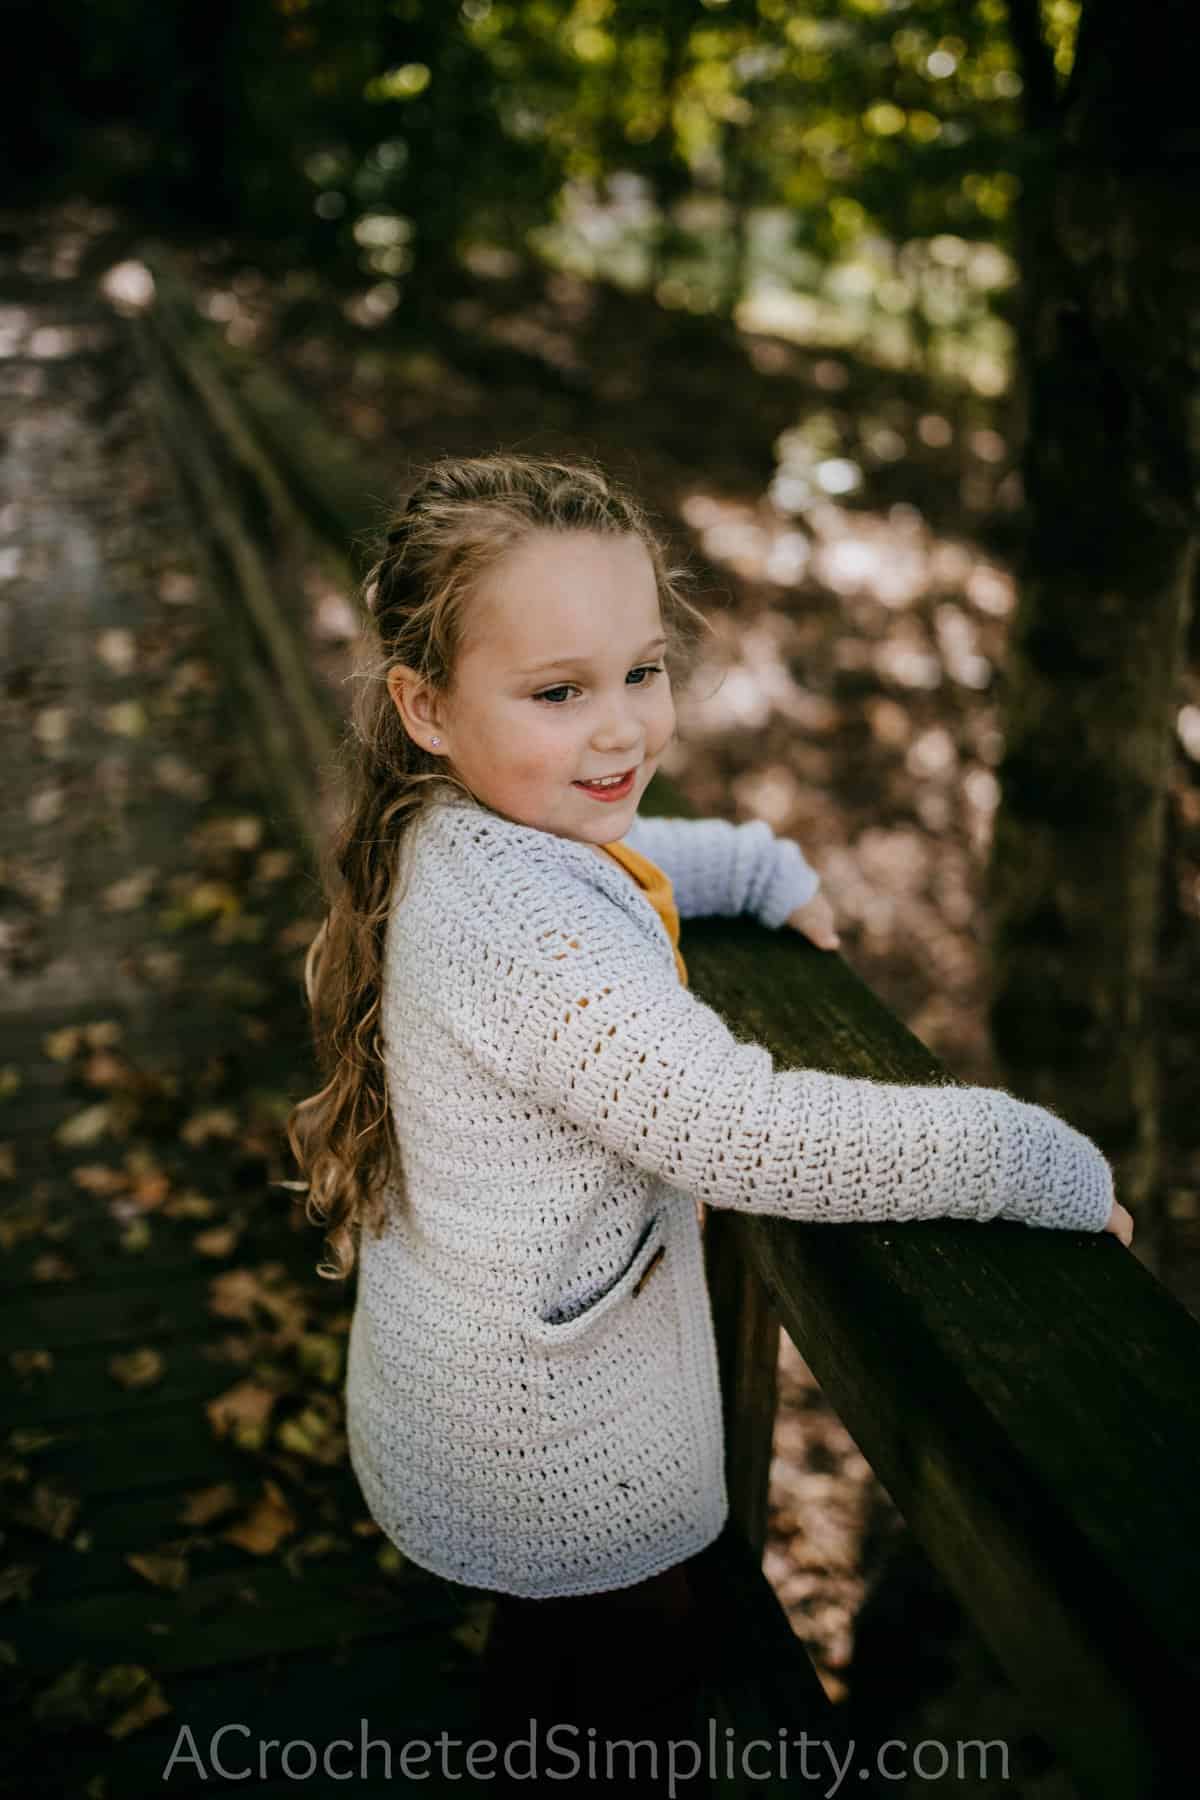
Aurora Crochet Girls’ Cardigan
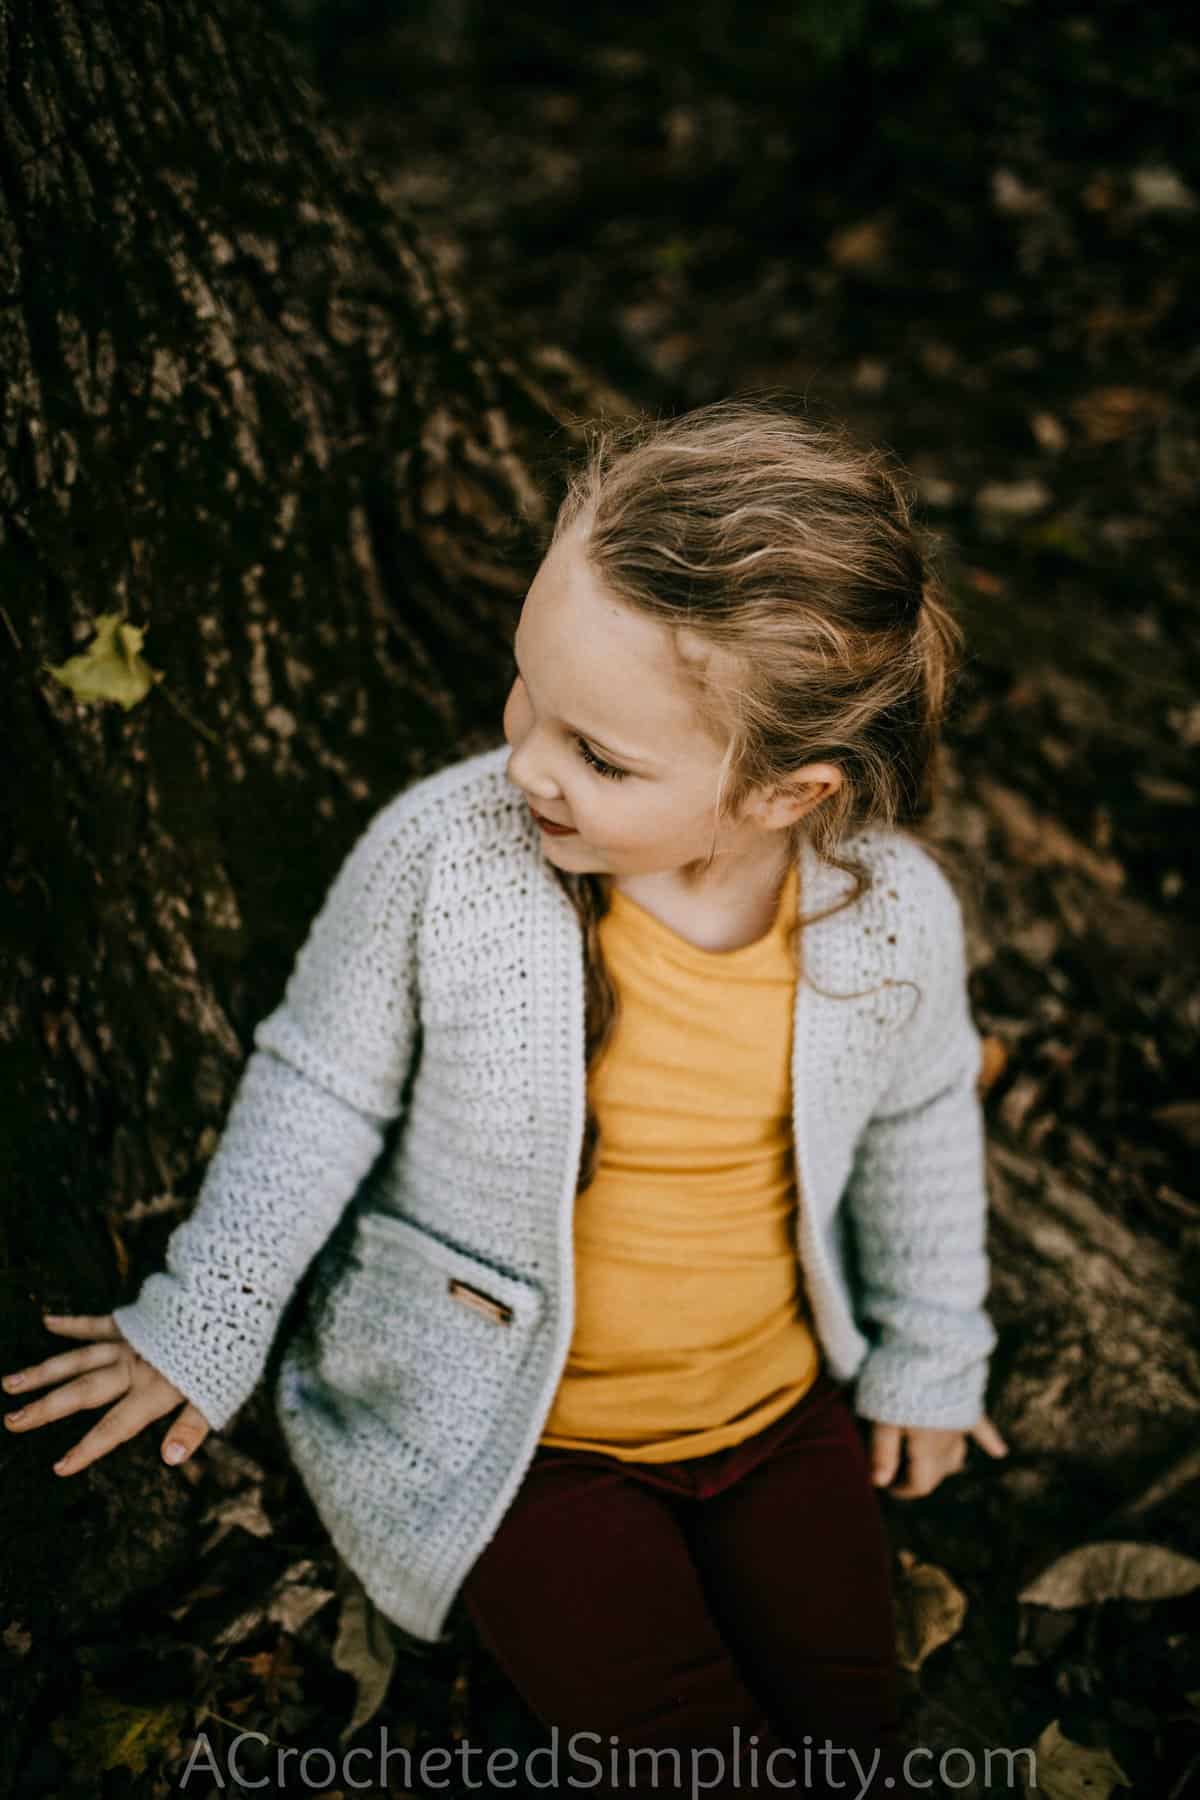
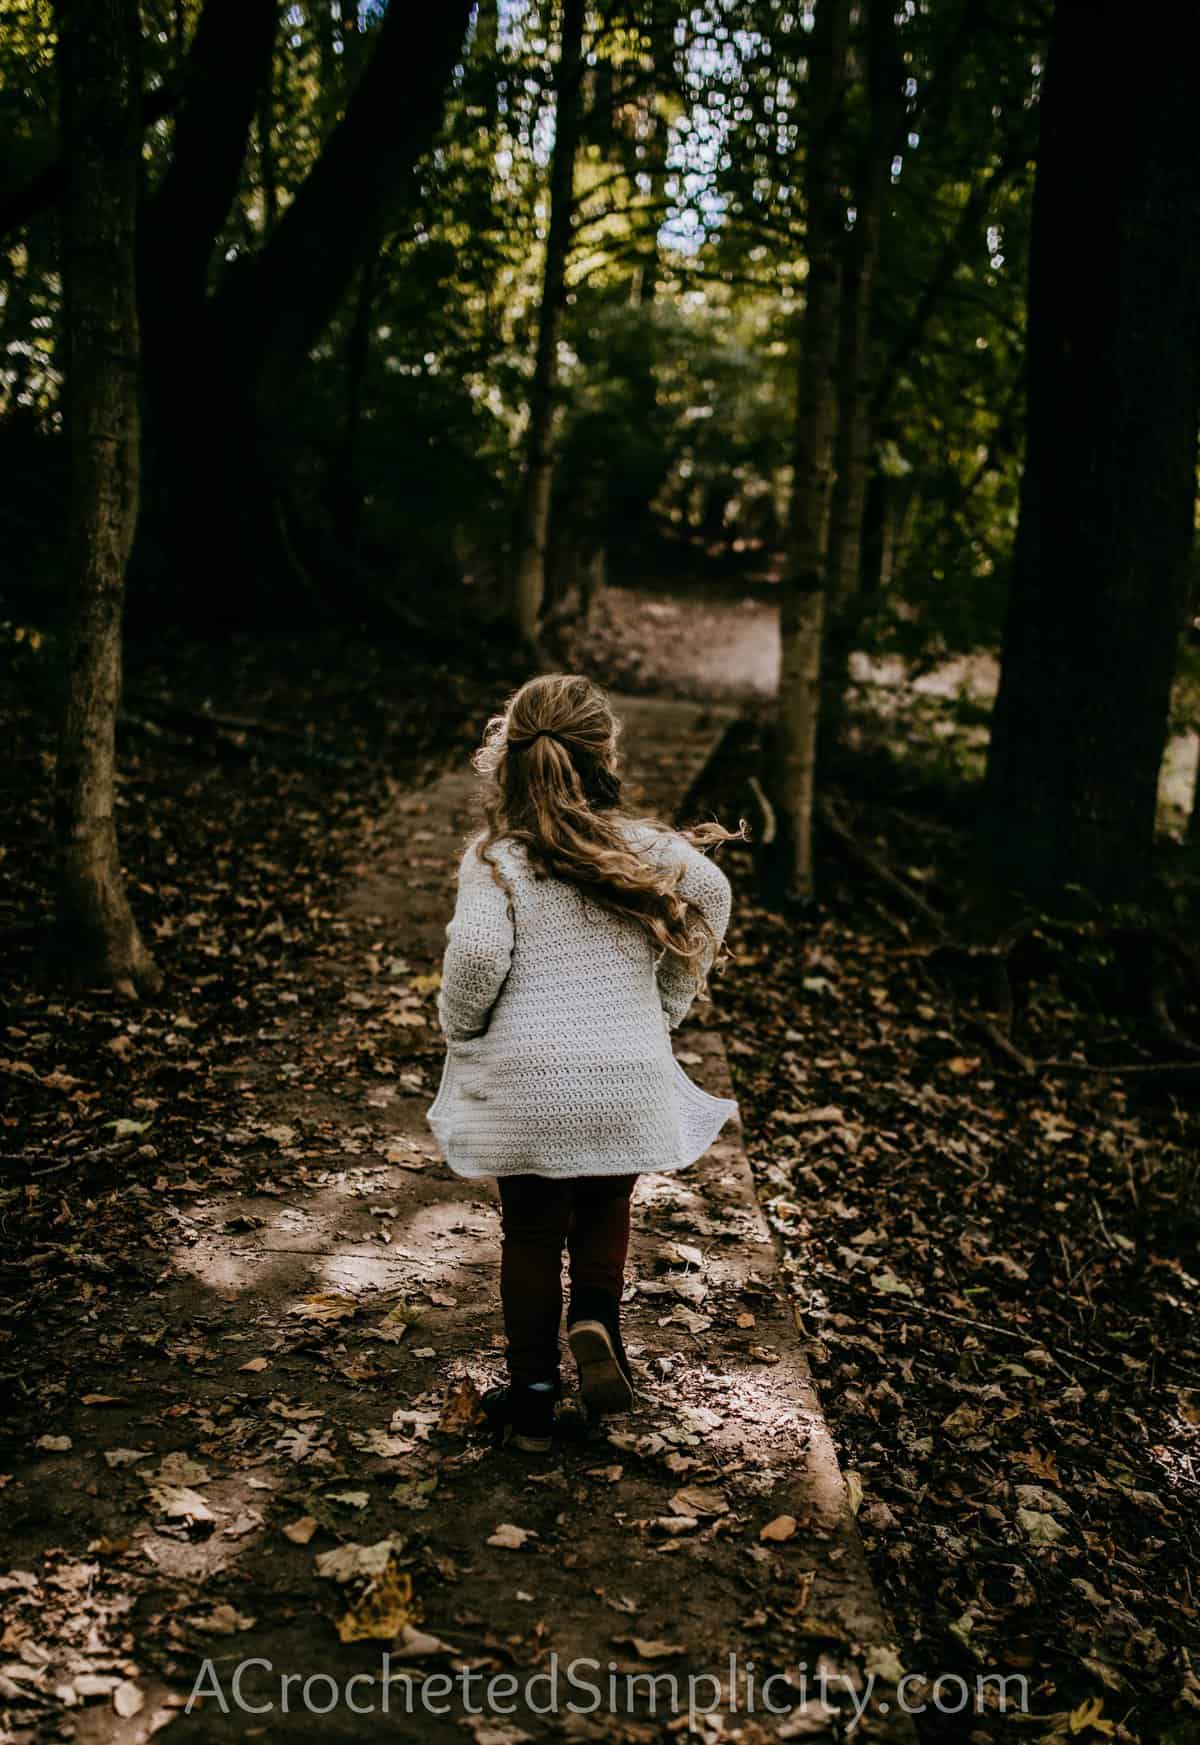
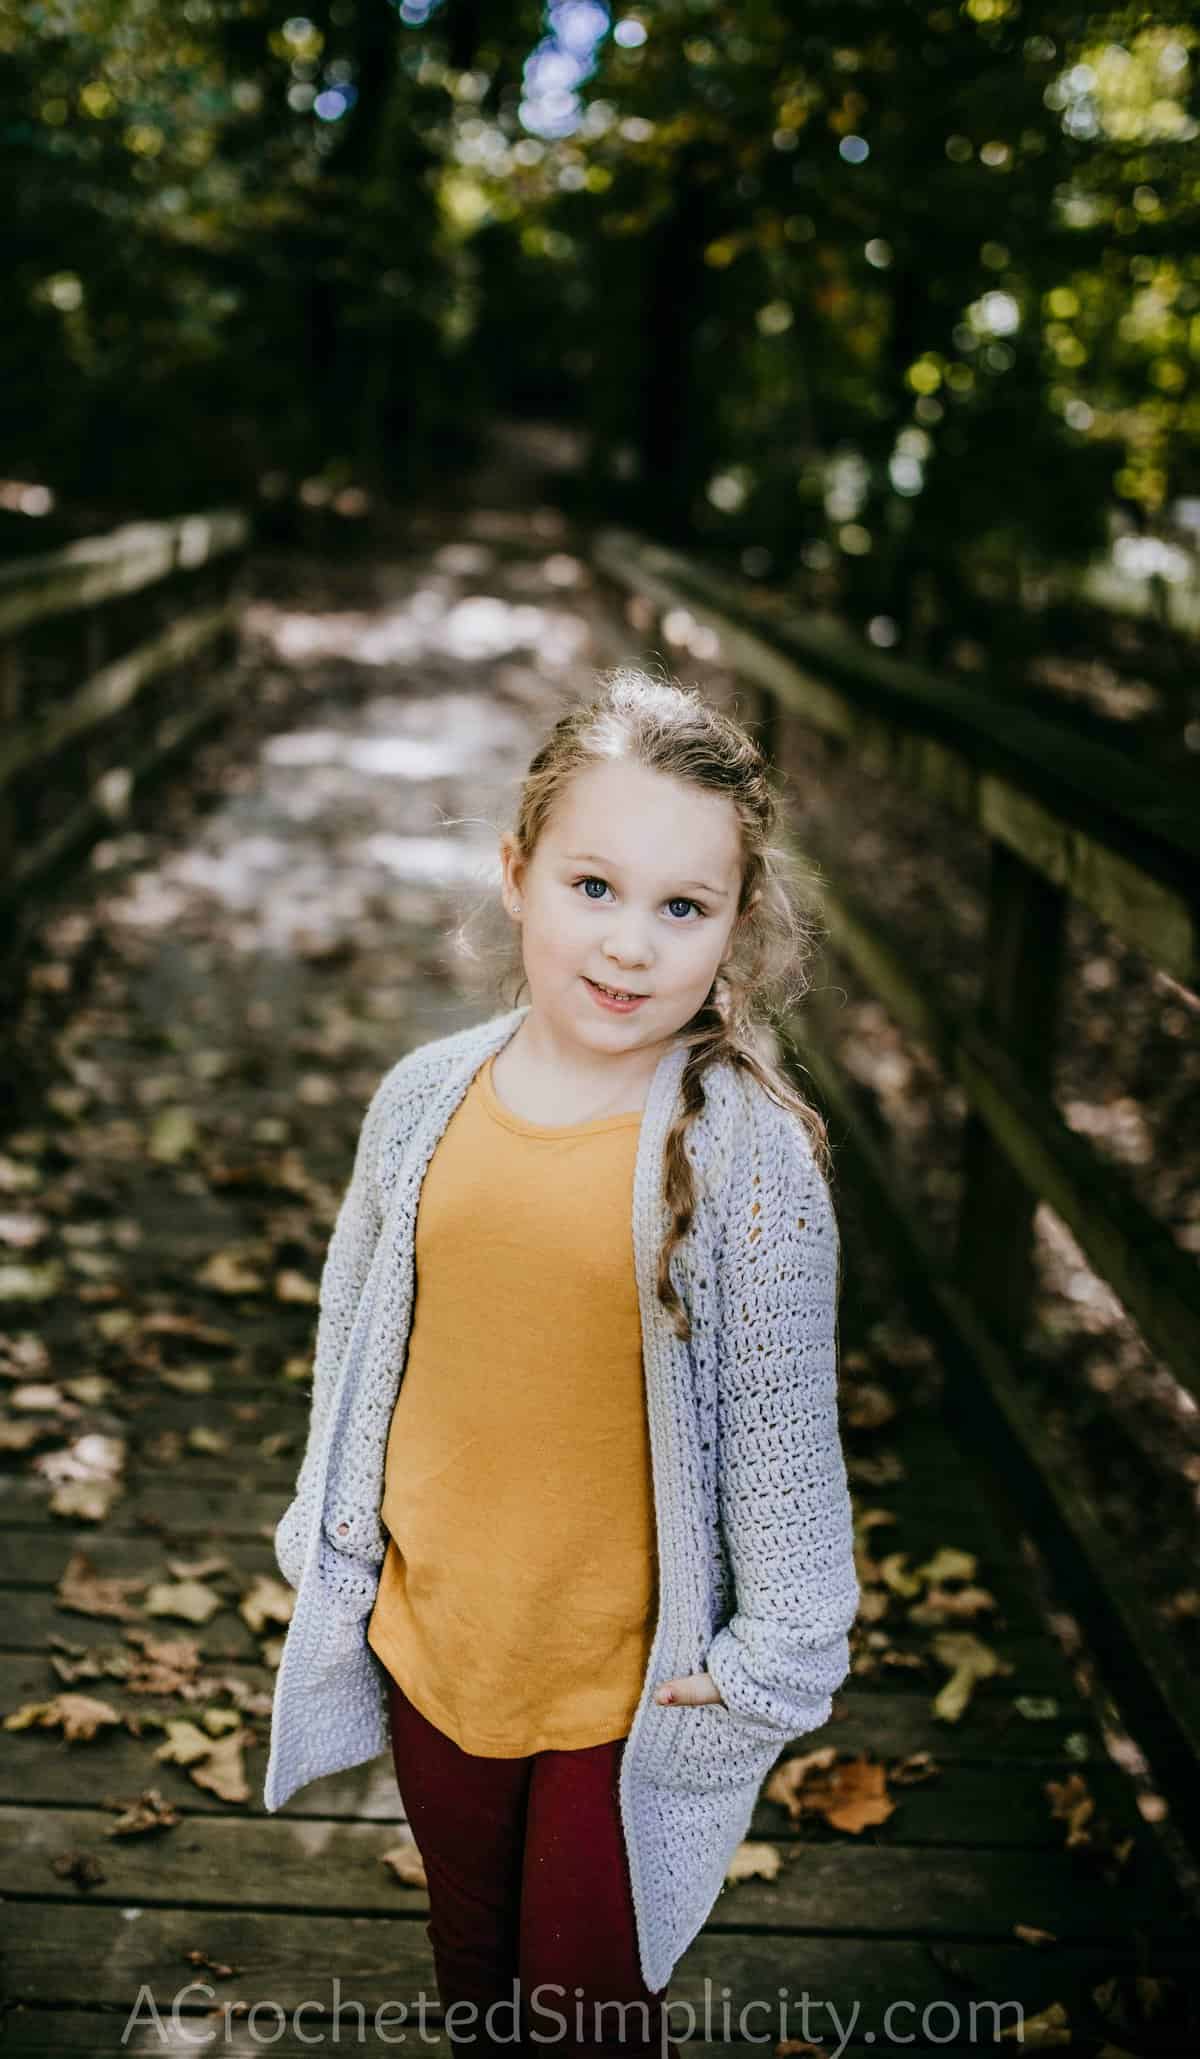
This crochet girls’ cardigan is a simple piece, with a nice fit, pockets, and a classic look to it that any little girl can easily wear over their outfit of the day. It’s durable enough in its construction that it can last quite a few seasons out and about, playing in the park or taking hikes through the woods.
And the best part about crocheting a sweater like this one is that if you have a girl who wants a very particular shade of pink or orange in their next cardigan, you can grab the right shade of yarn and make it for them!
You’ll find the free crochet girls’ cardigan pattern in the post below, or you can find an ad-free printable PDF (that includes all photo tutorials + schematic), on Ravelry, or Etsy (aff).
Crochet cardigans are great to wear as seasonal transitioning pieces as they’re perfect for layering during the spring and fall. They also make for comfortable all-day wear when the temperatures are bitter cold because you can add a nice thick turtleneck underneath. Dress them up, dress them down, crochet them in solids or variegated yarns – it’s up to you!
The crocheting process for this crochet girls’ cardigan itself is soothing because the pattern has all you need to know for a stress-free journey.
Related: If you want to make another layering piece with lots of warmth packed in it, you should check out the Emelyn Girls Crochet Poncho.
How to Crochet a Cardigan
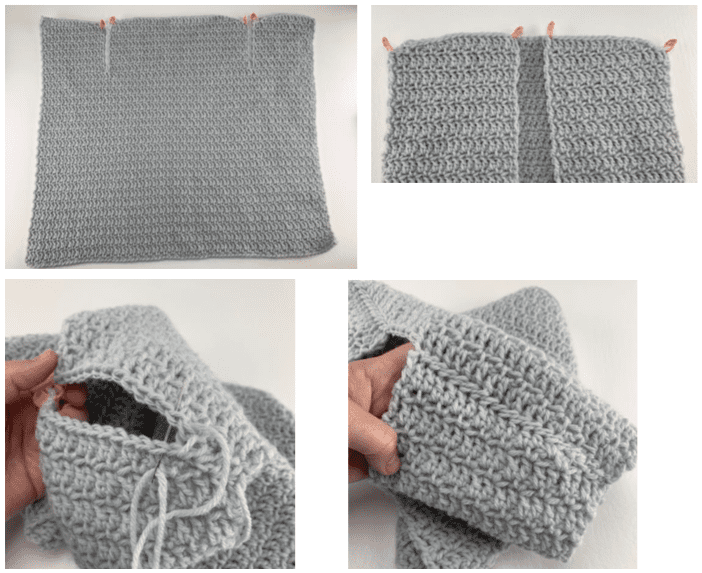
This crochet cardigan sweater pattern has an easy construction that you’ll be able to grasp in your first go! You’ll start from the bottom hem and work up to the shoulders to create the main body.
To do so, first, you’ll crochet the body until you reach the bottom of the armholes. There, you’ll split into three panels and crochet the upper right panel, back panel, and upper left panel.
You’ll then seam the shoulders, bringing all of the panels together. Next, you’ll crochet the sleeves right onto the armhole openings. That makes the entirety of the cardigan, minus the edging.
Try it on to make sure it fits perfectly! As a finishing touch, you’ll add the bottom hem and collar. Lastly, crochet the pockets and sew them onto the cardigan (you can skip this step if you don’t want pockets).
How To Get The
Aurora Crochet Girls’ Cardigan Pattern
Option 1: Scroll down for the free sweater crochet pattern right here in this blog post.
Option 2: Purchase the ad-free printable PDF from one of my shops:
Best Yarn for Crochet Sweaters
For this crochet girls’ cardigan pattern, while there are many options to choose from, I used an acrylic yarn. The acrylic allows it to holds its shape well and have good stitch definition, which is especially great for patterns that have a more fitted look to them.
This yarn is available in a wide variety of gorgeous solid colors which allows you to choose just the right one for the intended receiver of this cardigan.
Choosing Which Size to Crochet
To choose your size, look over the size chart below.
- ‘Fits Chest’ measurement is the measurement of the intended wearer, not the garment’s finished measurement.
- This cardigan has 2-3″ of positive ease built in for a classic fit.
- If you prefer more of an oversized cardigan, I would suggest making one size larger than child’s chest size.
- Adjusting Cardigan Length: If you need to adjust sweater length, there are instructions with how to do so in the Body of Cardigan section.
- Adjusting Sleeve Length: If you need to adjust sleeve length, there are instructions with how to do so in the Sleeve section.
Size & Yardage Chart
The notes above refer to this size chart.
| Size | Fits Chest | Yardage |
| 2 | 21″ | 500 yards |
| 4 | 23″ | 600 yards |
| 6 | 25″ | 800 yards |
| 8 | 26-1/2″ | 920 yards |
| 10/12 | 28-30″ | 980 yards |
| 14/16 | 31-1/2″ – 32-1/2″ | 1,050 yards |
Yarn
This girls’ crochet sweater was designed with a worsted weight yarn to make sure it would have a beautiful drape to it while also being warm enough for colder winter days. I chose not to use a bulky yarn for fear it would then be too thick to be worn in the transitioning months of autumn and spring (we want to get the most wear out of this everyday piece).
I chose Lion Brand Pound of Love for my crochet cardigan. This is a worsted weight / 4, acrylic blend yarn and it’s currently available in beautiful solid colors. This yarn offers a smooth even texture in a contemporary color palette with plenty of neutral tones.
Aurora Crochet Girls’ Cardigan – Free Pattern
The crochet girls’ cardigan pattern is free below, but if you love to work offline, I’ve got a couple other great options for you.
Purchase the ad-free, printable PDF, (that includes all photo tutorials, + a garment schematic), on Ravelry, or on Etsy (aff).
This post contains affiliate links.
Materials
- Yarn: Worsted Weight / 4 / Yarn, Lion Brand Pound of Love [100% Premium Acrylic (1,020 yds / 932 m / 454 g / 16 oz)] was used for the sample in the photos.
- Yardage: See Size Chart Above
- Crochet Hook: K/10.5/6.50mm; J/10/6.00mm; H/8/5.00mm or size needed to obtain gauge (My favorite crochet hooks are the Clover Amour Crochet Hooks, I’ve never had an ache in my hand since switching).
- Measuring Tape
- Locking Stitch Markers or Scraps of Yarn
- Scissors
- Yarn Needle
Abbreviations (US Terms)
- ch(s): chain(s)
- sl st(s): slip stitch(es)
- st(s): stitch(es)
- sp: space
- sc: single crochet
- hdc: half double crochet
- dc: double crochet
- dc2tog: double crochet decrease
- RS: right side
- WS: wrong side
- yo: yarn over
- Rep: repeat
- Rnd: round
- yo: yarn over
- alt-dc: alternate double crochet
- alt-dc2tog: alternate double crochet decrease
- standing sc: standing single crochet
- sc spike st: single crochet spike stitch
Experience Level
- Easy
Gauge
- Body of Cardigan stitch pattern: 15 sts = 4,25″ + 12 rows = 4.5″
- Gauge Swatch Instructions are below.
Sizes
- Girls Sizes: 2 through 16 years
- See Size & Yardage Chart above.
- Women’s Sizes are also available.
Special Stitches
- Double Crochet Decrease (dc2tog): (Yo, insert hook in next st, yo, pull up a loop, yo, pull thru 2 loops on hook) twice, yo, pull thru remaining 3 loops on hook.
- Alternate Double Crochet (Alt-dc): After turning your work, do not ch, instead, insert your hook into the first st, yo, pull up a loop, yo, pull thru both loops, insert your hook between the legs of the st just made, yo, pull up a loop, yo, pull thru one loop, yo, pull thru remaining loops. .
- Alternate Double Crochet Decrease (Alt-dc2tog): After turning your work, do not ch, instead, insert your hook into the first st, yo, pull up a loop, yo, pull thru both loops, insert your hook between the legs of the st just made, yo, pull up a loop, yo, pull thru one loop, yo, insert your hook into the next st indicated, yo, pull up a loop, yo, pull through 2 loops, yo, pull through remaining 3 loops.
- Single Crochet Spike Stitch: Begin the spike stitch by inserting your hook into the stitch 1 row down from the current row, yo, pull up a long loop (make sure to pull the loop up to the top edge of your work), yo, pull through all loops on your hook. .
- Join yarn with a standing single crochet: Begin with a slip knot on your hook, insert your hook into the stitch or space indicated, yo, pull up a loop, yo and draw thru both loops on hook.
Pattern Notes
- I tend to crochet on the tighter side. You may need to go down a hook size (or two) to meet gauge if you crochet on the looser side.
- Turning chains are not included in stitch count.
- Chains (for chain spaces) are included in stitch count.
- Yarn Notes: Lion Brand Pound of Love [100% Premium Acrylic (1,020 yds / 932 m / 454 g / 16 oz)] was used for the sample in the photos. Yarns similar in weight can be substituted as long as gauge is met.
- Color & Yardage
- Elephant Grey: #550-151N
- See Size & Yardage Chart above.
- Changes for Sizes as Follows: 2 (4, 6, 8, 10/12, 14/16)
- Construction Notes: This cardigan is worked from the bottom up then split for front and back panels. After the panels are worked, the shoulders are seamed, then sleeves are added. Finish it off with a bottom hem and collar. Add the optional pockets, if desired.
- This design is best worked in a solid color or a solid color with an accent color for the pockets and collar. It isn’t gradient/cake yarn friendly unless you have several cakes from which you can work from.
- Once done, you can block if desired.
Aurora Girls’ Cardigan Sweater – Written Pattern
Gauge Swatch Instructions
Gauge: 15 sts = 4.25″; 12 rows = 4.5″
Row 1 (RS): Using a 6.50mm crochet hook, ch 16, switch to a 6.00mm crochet hook, working in the back hump of the foundation ch, sc in the 2nd ch from your hook, (ch 1, skip the next ch, sc in the next ch) 7 times. Turn. (15 sts)
Row 2: Alt-dc, dc in each st and ch-1 sp across. Turn.
Row 3: Ch 1, sc in the first st, (ch 1, skip the next st, sc in the next st) 7 times. Turn.
Rows 4 – 12: Rep Rows 2 – 3, ending with a row 2 repeat.
Fasten off. Swatch should measure: 4.25″ W x 4.5″ H.
Body of Cardigan
Set-Up: Using a 6.5mm crochet hook, ch 72 (78, 82, 90, 100, 110).
Row 1 (RS): Switch to a 6.00mm crochet hook, working into the back hump of the foundation chain, sc in the 2nd ch from your hook and in each ch across. Turn. (71, 77, 81, 89, 99, 109 sts)
Row 2: Ch 1, sc in the first st, (ch 1, skip the next st, sc in the next st) rep from ( to ) across. Turn.
Row 3: Alt-dc in the first st, dc in each sc and ch-1 sp across. Turn.
Repeat Rows 2 – 3 (ending with a Row 3), until cardigan measures 14″ (15″, 15.5″, 17″, 19.5″, 19.5″).
Adjusting Length: If you prefer a longer or short cardigan, here is where you’ll want to adjust. The length stated above is the cardigan’s length from the bottom of the armhole to the bottom hem. If at all possible, check length, at this point, on the intended wearer.
Do not fasten off. Continue on to Front Left Panel.
Front Left Panel
Row 1 (WS): Ch 1, sc in the first st, (ch 1, skip the next st, sc in the next st) 7 (8, 8, 9, 10, 11) times. Turn. (15, 17, 17, 19, 21, 23 sts)
Stitch Marker Placement: Before you “turn” to begin Row 2, place a stitch marker in the next stitch to mark the beginning of the Back Panel.
Row 2: Alt-dc in the first st, dc in each sc and ch-1 sp across. Turn.
Size 2: Rows 3 – 10: Repeat Rows 1 – 2.
Size 4: Rows 3 – 10: Repeat Rows 1 – 2.
Size 6: Rows 3 – 12: Repeat Rows 1 – 2.
Size 8: Rows 3 – 14: Repeat Rows 1 – 2.
Size 10/12: Rows 3 – 16: Repeat Rows 1 – 2.
Size 14/16: Rows 3 – 18: Repeat Rows 1 – 2.
Do not fasten off. Continue on to Left Shoulder Shaping.
Left Shoulder Shaping
Row 1 (WS): Ch 1, sc in the first st, (ch 1, skip the next st, sc in the next st) 6 (7, 7, 8, 9, 10) times, skip the last 2 sts. Turn. (13, 15, 15, 17, 19, 21 sts)
Row 2: Do not ch, sl st in the first st, sl st in the next ch-1 sp (first 2 sl sts are not included in st count), sc in the next st, sc in the next ch-1 sp, hdc in the next st, hdc in the next ch-1 sp, dc in each remaining st and ch-1 sp across. (11, 13, 13, 15, 17, 19 sts)
Fasten off. Weave in ends. Continue on to Back Panel.
Back Panel
Row 1 (WS): Join yarn with a standing sc in the st you marked with a stitch marker, (ch 1, skip the next st, sc in the next st) 20 (21, 23, 25, 28, 31) times. Turn. (41, 43, 47, 51, 57, 63 sts)
Stitch Marker Placement: Before you “turn” to begin Row 2, place a stitch marker in the next stitch to mark the beginning of the Front Panel.
Row 2: Alt-dc in the first st, dc in each sc and ch-1 sp across. Turn.
Row 3: Ch 1, sc in the first st, (ch 1, skip the next st, sc in the next st) rep from ( to ) across. Turn.
Size 2: Rows 4 – 10: Repeat Rows 2 – 3, ending with a Row 2 repeat.
Size 4: Rows 4 – 10: Repeat Rows 2 – 3, ending with a Row 2 repeat.
Size 6: Rows 4 – 12: Repeat Rows 2 – 3, ending with a Row 2 repeat.
Size 8: Rows 4 – 14: Repeat Rows 2 – 3, ending with a Row 2 repeat.
Size 10/12: Rows 4 – 16: Repeat Rows 2 – 3, ending with a Row 2 repeat.
Size 14/16: Rows 4 – 18: Repeat Rows 2 – 3, ending with a Row 2 repeat.
Do not fasten off. Continue on to Back Panel Shoulder Shaping.
Back Panel Shoulder Shaping
Row 1 (WS): Do not ch, sl st in the first st, sl st in the next st (first 2 sl sts are not included in st count), sc in the next st, (ch 1, skip the next st, sc in the next st) 18 (19, 21, 23, 26, 29) times, skip the last 2 sts. Turn. (37, 39, 43, 47, 53, 59 sts)
Row 2: Do not ch, sl st in the first st, sl st in the next ch-1 sp (first 2 sl sts are not included in st count), sc in the next st, sc in the next ch-1 sp, hdc in the next st, hdc in the next ch-1 sp, dc in each of the next 25 (27, 31, 35, 41, 47) sts, hdc in the next ch-1 sp, hdc in the next st, sc in the next ch-1 sp, sc in the next st, skip the last 2 sts. (33, 35, 39, 43, 49, 55 sts)
Fasten off. Weave in ends. Continue on to Front Right Panel.
Front Right Panel
Row 1 (WS): Join yarn with a standing sc in the st you marked with a stitch marker, (ch 1, skip the next st, sc in the next st) 7 (8, 8, 9, 10, 11) times. Turn. (15, 17, 17, 19, 21, 23 sts)
Row 2: Alt-dc in the first st, dc in each sc and ch-1 sp across. Turn.
Row 3: Ch 1, sc in the first st, (ch 1, skip the next st, sc in the next st) rep from ( to ) across. Turn.
Size 2: Rows 4 – 10: Repeat Rows 2 – 3, ending with a Row 2 repeat.
Size 4: Rows 4 – 10: Repeat Rows 2 – 3, ending with a Row 2 repeat.
Size 6: Rows 4 – 12: Repeat Rows 2 – 3, ending with a Row 2 repeat.
Size 8: Rows 4 – 14: Repeat Rows 2 – 3, ending with a Row 2 repeat.
Size 10/12: Rows 4 – 16: Repeat Rows 2 – 3, ending with a Row 2 repeat.
Size 14/16: Rows 4 – 18: Repeat Rows 2 – 3, ending with a Row 2 repeat.
Do not fasten off. Continue on to Right Shoulder Shaping.
Right Shoulder Shaping
Row 1 (WS): Do not ch, sl st in the first st, sl st in the next st (first 2 sl sts are not included in st count), sc in the next st, (ch 1, skip the next st, sc in the next st) 6 (7, 7, 8, 9, 10) times. Turn. (13, 15, 15, 17, 19, 21 sts)
Row 2: Alt-dc in the first st, dc in each of the next 6 (8, 8, 10, 12, 14) sts and ch-1 sps, hdc in the next ch-1 sp, hdc in the next st, sc in the next ch-1 sp, sc in the next st, skip the last 2 sts. (11, 13, 13, 15, 17, 19 sts)
Fasten off. Weave in ends. Continue on to Shoulder Seams.
Shoulder Seams
Step 1: Fold the two front panels in towards the center of the cardigan, folding where it splits for the sleeves. Line up the corners of the front panels with the corners of the back panel. Match up the stitches on the front panel with corresponding stitches along the back panel. Use stitch markers to hold the panels in place during seaming. You should have lined up 15 (17, 17, 19, 21, 23) sts for both the front left & right panels. You should have 11 (9, 13, 13, 15, 17) stitches remaining along the neck opening.
Step 2: With the right side facing out, use a yarn needle and 12″ piece of yarn to whipstitch a front panel to the back panel. Repeat for second front panel.
Weave in ends. Continue on to Sleeves for the size cardigan you’re making.
Sleeves
Size 2 – Sleeves
Rnd 1 (RS): Join yarn at the bottom of the armhole opening, ch 1, work 1 sc into the side of each sc, 2 sc into the side of each dc, and 1 extra sc at the shoulder seam. Join with a sl st to the 1st st. (31 sts)
Rnd 2 (RS): Alt-dc in the first st, dc in each sc around. Join. Turn.
Rnd 3: Ch 1, sc in the first st, (ch 1, skip the next st, sc in the next st) rep from ( to ) around. Join. Turn.
Rnds 4 – 5: Repeat Rnds 2 – 3.
Rnd 6: Alt-dc2tog over the first 2 sts, dc in each st around to the last 2 sts, dc2tog. Join. Turn. (29 sts)
Rnd 7: Ch 1, sc in the first st, (ch 1, skip the next st, sc in the next st) rep from ( to ) around. Join. Turn.
Rnd 8: Alt-dc in the first st, dc in each sc and ch-1 sp around. Join. Turn.
Rnds 9 – 11: Repeat Rnds 7 – 8, ending with a Rnd 7 repeat.
Rnd 12: Repeat Rnd 6. (27 sts)
Rnds 13 – 17: Repeat Rnds 7 – 8, ending with a Rnd 7 repeat.
Rnd 18: Repeat Rnd 6. (25 sts)
Rnds 19 – 26: Repeat Rnds 7 – 8. Do not turn at the end of Rnd 26.
Rnds 27 – 30 (RS): Ch 1, sc in each st around. Join. *Sleeve length should be 10-1/2″.
Rnd 31: Sl st in each st around (be mindful not to work your sl sts too tightly or it’ll affect fit). Join using the Special Join Technique.
Fasten off. Weave in ends. Repeat for the second sleeve. Then, continue on to the Bottom Hem.
Size 4 – Sleeves
Rnd 1 (RS): Join yarn at the bottom of the armhole opening, ch 1, work 2 sc into the side of the next sc, work 3 sc into the side of the next dc, then work 1 sc into the side of each sc, 2 sc into the side of each dc, and 1 extra sc at the shoulder seam. Join with a sl st to the 1st st. (33 sts)
Rnd 2 (RS): Alt-dc in the first st, dc in each sc around. Join. Turn.
Rnd 3: Ch 1, sc in the first st, (ch 1, skip the next st, sc in the next st) rep from ( to ) around. Join. Turn.
Rnds 4 – 7: Repeat Rnds 2 – 3.
Rnd 8: Alt-dc2tog over the first 2 sts, dc in each st around to the last 2 sts, dc2tog. Join. Turn. (31 sts)
Rnd 9: Ch 1, sc in the first st, (ch 1, skip the next st, sc in the next st) rep from ( to ) around. Join. Turn.
Rnd 10: Alt-dc in the first st, dc in each sc and ch-1 sp around. Join. Turn.
Rnds 11 – 13: Repeat Rnds 9 – 10, ending with a Rnd 9 repeat.
Rnd 14: Repeat Rnd 8. (29 sts)
Rnds 15 – 25: Repeat Rnds 9 – 10, ending with a Rnd 9 repeat.
Rnd 26: Repeat Rnd 8. (27 sts)
Rnds 27 – 32: Repeat Rnds 9 – 10. Do not turn at the end of Rnd 32.
Rnds 33 – 36 (RS): Ch 1, sc in each st around. Join. *Sleeve length should be 12-1/2″.
Rnd 37: Sl st in each st around (be mindful not to work your sl sts too tightly or it’ll affect fit). Join using the Special Join Technique.
Fasten off. Weave in ends. Repeat for the second sleeve. Then, continue on to the Bottom Hem below.
Size 6 – Sleeves
Rnd 1 (RS): Join yarn at the bottom of the armhole opening, ch 1, work 1 sc into the side of each sc, 2 sc into the side of each dc, and 1 extra sc at the shoulder seam. Join with a sl st to the 1st st. (37 sts)
Rnd 2 (RS): Alt-dc in the first st, dc in each sc around. Join. Turn.
Rnd 3: Ch 1, sc in the first st, (ch 1, skip the next st, sc in the next st) rep from ( to ) around. Join. Turn.
Rnds 4 – 7: Repeat Rnds 2 – 3.
Rnd 8: Alt-dc2tog over the first 2 sts, dc in each st around to the last 2 sts, dc2tog. Join. Turn. (35 sts)
Rnd 9: Ch 1, sc in the first st, (ch 1, skip the next st, sc in the next st) rep from ( to ) around. Join. Turn.
Rnd 10: Alt-dc in the first st, dc in each sc and ch-1 sp around. Join. Turn.
Rnds 11 – 13: Repeat Rnds 9 – 10, ending with a Rnd 9 repeat.
Rnd 14: Repeat Rnd 8. (33 sts)
Rnds 15 – 19: Repeat Rnds 9 – 10, ending with a Rnd 9 repeat.
Rnd 20: Repeat Rnd 8. (31 sts)
Rnd 21: Repeat Rnd 9.
Rnd 22: Repeat Rnd 8. (29 sts)
Rnds 23 – 25: Repeat Rnds 9 – 10, ending with a Rnd 9 repeat.
Rnd 26: Repeat Rnd 8. (27 sts)
Rnds 27 – 34: Repeat Rnds 9 – 10. Do not turn at the end of Rnd 34.
Rnds 35 – 38 (RS): Ch 1, sc in each st around. Join. *Sleeve length should be 13-1/2″.
Rnd 39: Sl st in each st around (be mindful not to work your sl sts too tightly or it’ll affect fit). Join using the Special Join Technique.
Fasten off. Weave in ends. Repeat for the second sleeve. Then, continue on to the Bottom Hem below.
Size 8 – Sleeves
Rnd 1 (RS): Join yarn at the bottom of the armhole opening, ch 1, work 1 sc into the side of each sc, 2 sc into the side of each dc, and 1 extra sc at the shoulder seam. Join with a sl st to the 1st st. (43 sts)
Rnd 2 (RS): Alt-dc in the first st, dc in each sc around. Join. Turn.
Rnd 3: Ch 1, sc in the first st, (ch 1, skip the next st, sc in the next st) rep from ( to ) around. Join. Turn.
Rnds 4 – 7: Repeat Rnds 2 – 3.
Rnd 8: Alt-dc2tog over the first 2 sts, dc in each st around to the last 2 sts, dc2tog. Join. Turn. (41 sts)
Rnd 9: Ch 1, sc in the first st, (ch 1, skip the next st, sc in the next st) rep from ( to ) around. Join. Turn.
Rnd 10: Alt-dc in the first st, dc in each sc and ch-1 sp around. Join. Turn.
Rnds 11 – 13: Repeat Rnds 9 – 10, ending with a Rnd 9 repeat.
Rnd 14: Repeat Rnd 8. (39 sts)
Rnds 15 – 19: Repeat Rnds 9 – 10, ending with a Rnd 9 repeat.
Rnd 20: Repeat Rnd 8. (37 sts)
Rnd 21: Repeat Rnd 9.
Rnd 22: Repeat Rnd 8. (35 sts)
Rnd 23: Repeat Rnd 9.
Rnd 24: Repeat Rnd 8. (33 sts)
Rnd 25: Repeat Rnd 9.
Rnd 26: Repeat Rnd 8. (31 sts)
Rnd 27: Repeat Rnd 9.
Rnd 28: Repeat Rnd 8. (29 sts)
Rnds 29 – 31: Repeat Rnds 9 – 10, ending with a Rnd 9 repeat.
Rnd 32: Repeat Rnd 8. (27 sts)
Rnds 33 – 38: Repeat Rnds 9 – 10. Do not turn at the end of Rnd 38.
Rnds 39 – 42 (RS): Ch 1, sc in each st around. Join. *Sleeve length should be 14-1/2″.
Rnd 43: Sl st in each st around (be mindful not to work your sl sts too tightly or it’ll affect fit). Join using the Special Join Technique.
Fasten off. Weave in ends. Repeat for the second sleeve. Then, continue on to the Bottom Hem below.
Size 10/12 – Sleeves
Rnd 1 (RS): Join yarn at the bottom of the armhole opening, ch 1, work 1 sc into the side of each sc, 2 sc into the side of each dc, and 1 extra sc at the shoulder seam. Join with a sl st to the 1st st. (49 sts)
Rnd 2 (RS): Alt-dc in the first st, dc in each sc around. Join. Turn.
Rnd 3: Ch 1, sc in the first st, (ch 1, skip the next st, sc in the next st) rep from ( to ) around. Join. Turn.
Rnds 4 – 7: Repeat Rnds 2 – 3.
Rnd 8: Alt-dc2tog over the first 2 sts, dc in each st around to the last 2 sts, dc2tog. Join. Turn. (47 sts)
Rnd 9: Ch 1, sc in the first st, (ch 1, skip the next st, sc in the next st) rep from ( to ) around. Join. Turn.
Rnd 10: Alt-dc in the first st, dc in each sc and ch-1 sp around. Join. Turn.
Rnds 11 – 13: Repeat Rnds 9 – 10, ending with a Rnd 9 repeat.
Rnd 14: Repeat Rnd 8. (45 sts)
Rnds 15 – 17: Repeat Rnds 9 – 10, ending with a Rnd 9 repeat.
Rnd 18: Repeat Rnd 8. (43 sts)
Rnd 19: Repeat Rnd 9.
Rnd 20: Repeat Rnd 8. (41 sts)
Rnds 21 – 23: Repeat Rnds 9 – 10, ending with a Rnd 9 repeat.
Rnd 24: Repeat Rnd 8. (39 sts)
Rnd 25 – 27: Repeat Rnds 9 – 10, ending with Rnd 9 repeat.
Rnd 28: Repeat Rnd 8. (37 sts)
Rnd 29: Repeat Rnd 9.
Rnd 30: Repeat Rnd 8. (35 sts)
Rnd 31: Repeat Rnd 9.
Rnd 32: Repeat Rnd 8. (33 sts)
Rnd 33: Repeat Rnd 9.
Rnd 34: Repeat Rnd 8. (31 sts)
Rnd 35 – 37: Repeat Rnds 9 – 10, ending with Rnd 9 repeat.
Rnd 38: Repeat Rnd 8. (29 sts)
Rnds 39 – 44: Repeat Rnds 9 – 10. Do not turn at the end of Rnd 44.
Rnds 45 – 48 (RS): Ch 1, sc in each st around. Join. *Sleeve length should be 17″.
Rnd 49: Sl st in each st around (be mindful not to work your sl sts too tightly or it’ll affect fit). Join using the Special Join Technique.
Fasten off. Weave in ends. Repeat for the second sleeve. Then, continue on to the Bottom Hem below.
Size 14/16 – Sleeves
Rnd 1 (RS): Join yarn at the bottom of the armhole opening, ch 1, work 1 sc into the side of each sc, 2 sc into the side of each dc, and 1 extra sc at the shoulder seam. Join with a sl st to the 1st st. (53 sts)
Rnd 2 (RS): Alt-dc in the first st, dc in each sc around. Join. Turn.
Rnd 3: Ch 1, sc in the first st, (ch 1, skip the next st, sc in the next st) rep from ( to ) around. Join. Turn.
Rnds 4 – 7: Repeat Rnds 2 – 3.
Rnd 8: Alt-dc2tog over the first 2 sts, dc in each st around to the last 2 sts, dc2tog. Join. Turn. (51 sts)
Rnd 9: Ch 1, sc in the first st, (ch 1, skip the next st, sc in the next st) rep from ( to ) around. Join. Turn.
Rnd 10: Alt-dc in the first st, dc in each sc and ch-1 sp around. Join. Turn.
Rnd 11: Repeat Rnd 9.
Rnd 12: Repeat Rnd 8. (49 sts)
Rnd 13: Repeat Rnd 9.
Rnd 14: Repeat Rnd 8. (47 sts)
Rnds 15 – 17: Repeat Rnds 9 – 10, ending with a Rnd 9 repeat.
Rnd 18: Repeat Rnd 8. (45 sts)
Rnd 19: Repeat Rnd 9.
Rnd 20: Repeat Rnd 8. (43 sts)
Rnds 21 – 23: Repeat Rnds 9 – 10, ending with a Rnd 9 repeat.
Rnd 24: Repeat Rnd 8. (41 sts)
Rnd 25 – 27: Repeat Rnds 9 – 10, ending with Rnd 9 repeat.
Rnd 28: Repeat Rnd 8. (39 sts)
Rnd 29: Repeat Rnd 9.
Rnd 30: Repeat Rnd 8. (37 sts)
Rnd 31: Repeat Rnd 9.
Rnd 32: Repeat Rnd 8. (35 sts)
Rnd 33: Repeat Rnd 9.
Rnd 34: Repeat Rnd 8. (33 sts)
Rnd 35 – 37: Repeat Rnds 9 – 10, ending with Rnd 9 repeat.
Rnd 38: Repeat Rnd 8. (31 sts)
Rnds 39 – 41: Repeat Rnds 9 – 10, ending with Rnd 9 repeat.
Rnd 42: Repeat Rnd 8. (29 sts)
Rnds 43 – 48: Repeat Rnds 9 – 10. Do not turn at the end of Rnd 48.
Rnds 49 – 52 (RS): Ch 1, sc in each st around. Join. *Sleeve length should be 18-1/2″.
Rnd 53: Sl st in each st around (be mindful not to work your sl sts too tightly or it’ll affect fit). Join using the Special Join Technique.
Fasten off. Weave in ends. Repeat for the second sleeve. Then, continue on to the Bottom Hem below.
Bottom Hem
Row 1 (RS): With the RS facing you, join yarn with a standing sc in the st furthest to the right, sc in each st across the bottom edge of the cardigan. (71, 77, 81, 89, 99, 109 sts)
Do not fasten off. Continue on to Collar.
Collar
Rotate to work up the front opening, around the neck, and back down the front opening.
Row 1 (RS): Ch 1, work 1 sc into the side of each sc row and 2 sc into the side of each dc row up and around the front opening. Turn. Stitch count isn’t crucial. Adjust your hook size, if needed, so that your collar isn’t wavy or puckered.
Rows 2 – 4: Ch 1, sc in each st. Turn.
Row 5 (RS): Ch 1, working on the RS of the cardigan (the backside of Row 4 sts), sl st in each st across. *This may feel a little odd to do, but will get the sl sts on the RS of the cardigan’s collar.
Fasten off. Weave in ends. Continue on to Pockets, if desired.
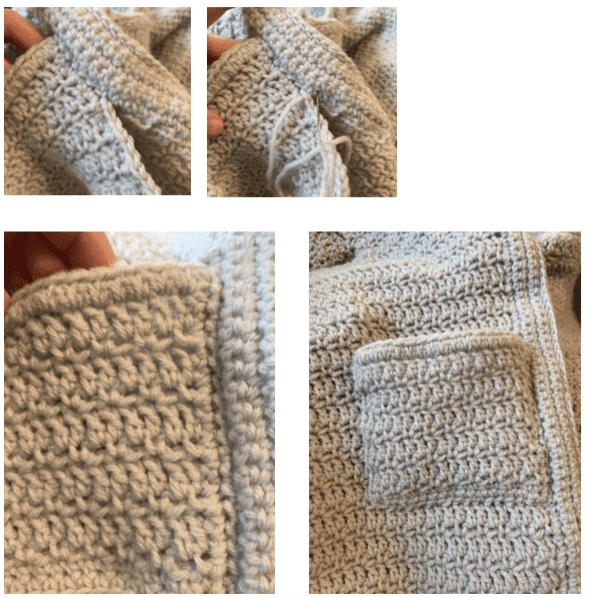
Pockets (Make 2)
Set-up: Using a 5.00mm crochet hook, ch 16 (16, 18, 18, 20, 20).
Row 1 (RS): Working into the back hump of the foundation chain, sc in the 2nd ch from your hook and in each ch across. Turn. (15, 15, 17, 17, 19, 19 sts)
Row 2: Ch 1, sc in the first st, (ch 1, skip the next st, sc in the next st) rep from ( to ) across. Turn.
Row 3: Alt-dc in the first st, dc in each sc and ch-1 sp across. Turn.
Sizes 2, 4, 6, 8 – Rows 4 – 11: Repeat Rows 2 – 3.
Sizes 10/12, 14/16 – Rows 4 – 15: Repeat Rows 2 – 3.
Row 12 (12, 12, 12, 16, 16): Ch 1, sc in each st across. Turn.
Note: The spike sc worked along the top edge of the pocket, in the next row, will cause the top edge of the pocket to flare out a tiny bit. This is intentional, but if you do not like it, simply work sc in stead of spike sc in the next row.
Row 13 (13, 13, 13, 17, 17): Ch 1, spike sc in each st across top edge, ch 1, rotate to work along remaining 3 sides, work 1 sc into the side of each sc row and 2 sc into the side of each dc row, work 1 extra sc in each of the bottom 2 corners, ch 1. Join with a sl st to the 1st spike st.
Fasten off leaving a 30″ tail of yarn for sewing the pocket onto the cardigan. Repeat for a second pocket, then continue on to Attaching the Pockets.
Attaching the Pockets
Step 1: Put the cardigan on the intended wearer and have her put her arms down as she would naturally. Use a stitch marker to mark where you would like the top edge of each pocket to be.
Step 2: Position the pockets so that the vertical edge closest to the front opening of the cardigan is lined up with Row 1 of the collar. See photos below. Use scrap pieces of yarn to hold the pocket in place during sewing.
Step 3: Using a yarn needle and yarn tail, sew the pocket onto the cardigan along the 2 vertical sides and bottom edge. Weave in ends.
Blocking Your Crochet Cardigan
- Blocking isn’t mandatory, but it does add a nice finished look to your crochet wearables!
- Learn 5 Different Ways to Block Crochet with my tutorial.
I MADE IT! NOW WHAT?
Pin this post!: Save this crochet girls’ cardigan sweater pattern to your Pinterest boards so that you can come back and make it again.
Leave a comment below: We love to hear your feedback.
Share Your Finished Projects on Facebook or Instagram: I love to see your finished projects! Share with us on social media and tag me @acrochetedsimplicity or use the hashtag #ACrochetedSimplicity so I can find your posts.
Join us in the Facebook Community Group!
Come share your finished projects with us in the A Crocheted Simplicity Crochet Community Group on Facebook. Join us for fun community events such as crochet alongs, join in on crochet conversations, ask questions, get advice, and share your love for crochet!

More Crochet Patterns For Girls I Think You’ll Love
- Emelyn Girls Poncho
- Girls Crochet Top
- Wasilla Poncho for Girls
- 16 Cute & Carefree Spring Dresses for Girls
More Crochet Sweater Patterns
Are you looking for more crochet cardigan sweater patterns? We have several more patterns for crochet clothes, including matching sweaters for mothers and daughters and even for fathers and sons.
What an adorable cardigan!! I’m eager to make one. Thank you for the lovely and thorough pattern.
You’re very welcome, Beth!
I have followed the pattern and there’s no way I have 9 stitches between the neck opening… There’s no way possible after lining up corners at shoulders…. Help please
Hi DW,
Based on the info you’ve given me, I’m assuming you’re working on a size 4. If this is incorrect, please let me know.
The back panel has 43 sts & each of the front panels has 17 sts. So if you take the Back and subtract the 2 fronts (43 – 17 – 17 = 9) that leaves you with 9 sts at the back of the neck opening.
Without seeing your work, the only thing I can think of to check is that you’re seaming the entire width of the panels (including the sloped parts where the shoulder shaping is).
Feel free to e-mail me if you’re still having troubles.
Jennifer
Thank you
You’re welcome!
Hi Jennifer, Your Aurora cardi is eally gorgeous. Can’t wait to try it out. Thank you for the free share today.
You’re welcome, Carol!
Thank you. This looks like a really great cardigan for little girls.
You’re welcome, Vickie!
Thank you! I pinnec this 🙂 Beautiful work and I appreciate your kindness of shsring it! The Lord Bless You!
You’re very welcome!
Ty working on it now 👍
You’re welcome, Lynn!
Thank you so much for this beautiful pattern! 💖
Just to clarify instructions: the slip stitch round on round 5 of the collar do I slip stitch in the back loop of sc from previous row?
Hi Cindi,
You slip stitch into the backside of the stitch, not the back loop. This is so that the slip stitch shows on the RS of the cardigan and so that you do not have to fasten off and reattach yarn at the opposite corner (saves on ends to weave in).
Jennifer
Just worked one up for my niece and it’s AMAZING. This is by far the best written cardigan pattern I have found. I’d love to share a picture with you of my completed piece!
Fabulous pattern! I have made 12 adult sized and will make 6of the girls size. Just love it!
This looks GREAT for my granddaughters! I cannot wait to make them each one in their favorite color. Thank you for another wonderful pattern.
I made 2 of these. 1 for each granddaughter. They loved them!! Great pattern, thank you so much.