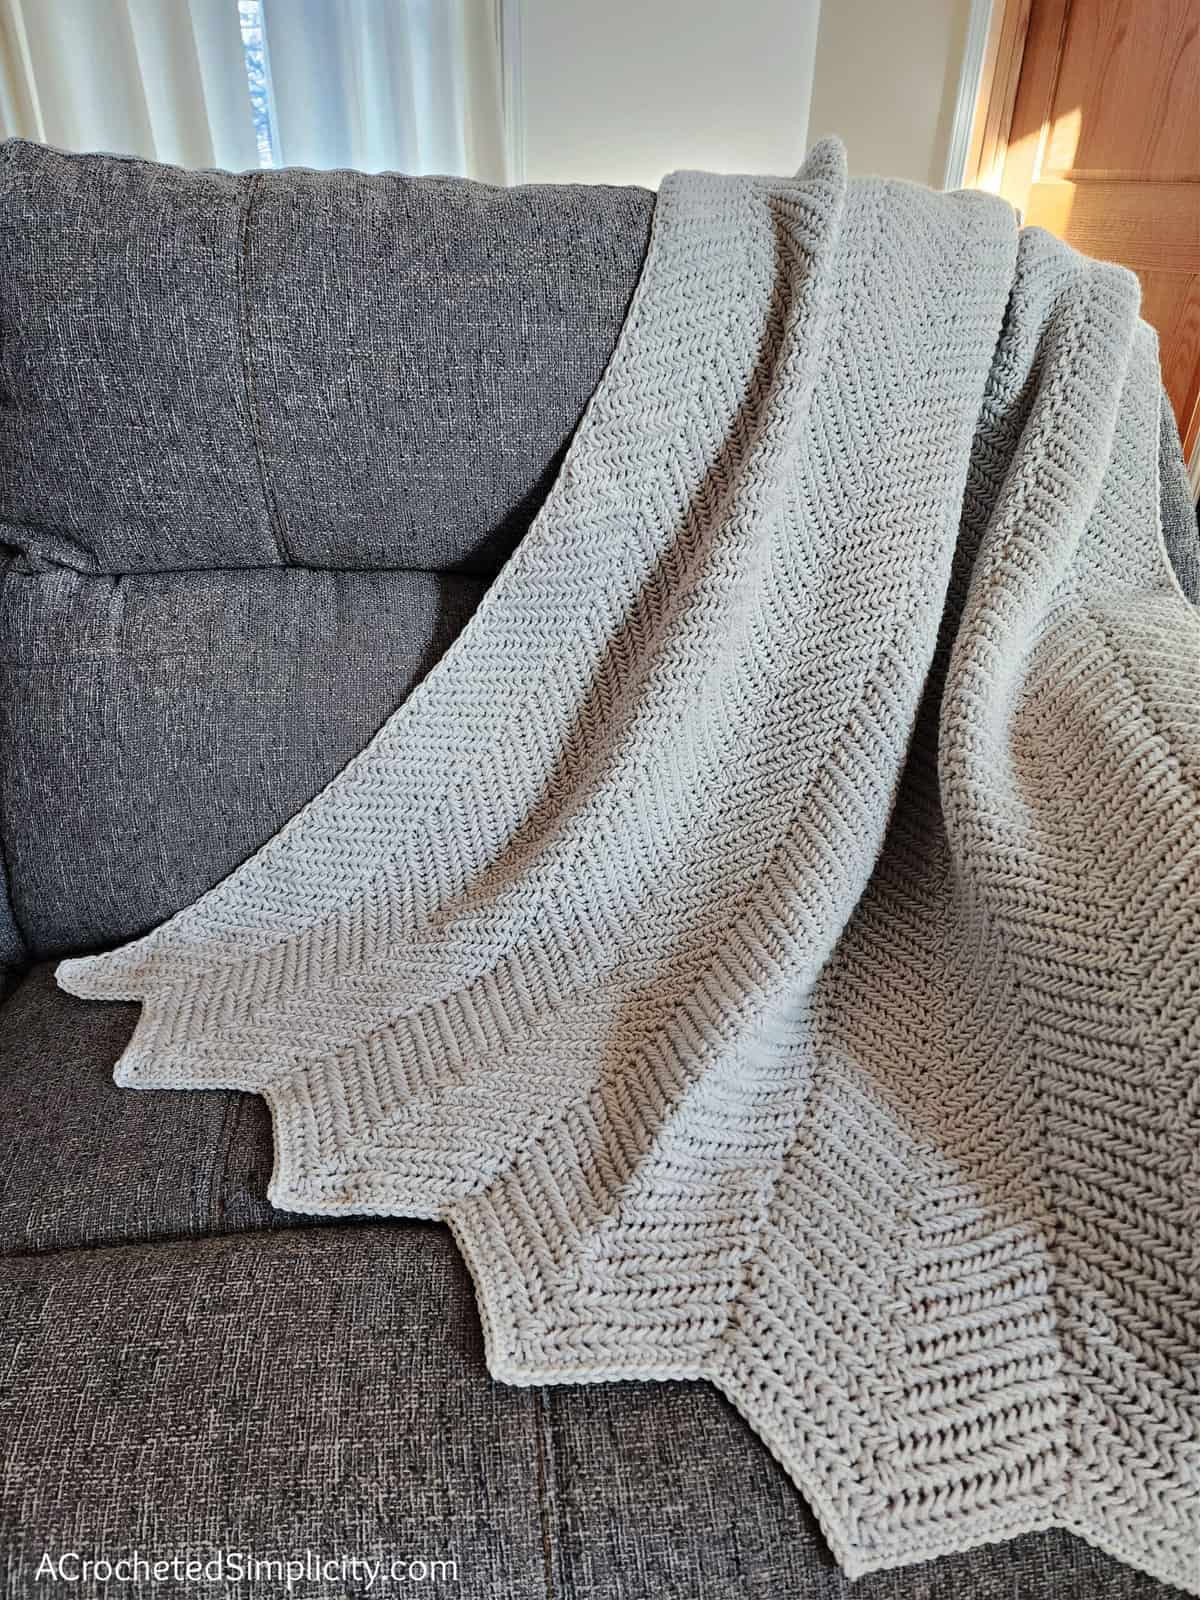
Herringbone Single Crochet Ripple Blanket
Learn to crochet the Herringbone Single Crochet Ripple Blanket, a beautiful, heirloom worthy herringbone crochet blanket.
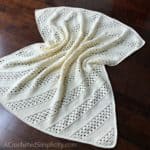
This herringbone crochet blanket combines the modern, knit look herringbone single crochet stitch and the crochet ripple stitch. It’s a classic crochet ripple blanket that will be in style for generations to come.
You can find the free crochet herringbone blanket pattern for the Herringbone Single Crochet Ripple Blanket in this post below, or an ad-free print friendly version (including photo tutorials for all special stitches) on Love Crafts here, Ravelry here, or on Etsy here.
>CLICK HERE TO SIGN-UP TO RECEIVE OUR NEWSLETTER!<
The herringbone single crochet ripple blanket is perfect for advanced beginners who have learned the basic crochet stitches and the herringbone single crochet stitch.
I love knit look crochet stitches and crochet chevrons so pairing the two was a lot of fun for me!

Crochet Ripple Stitch
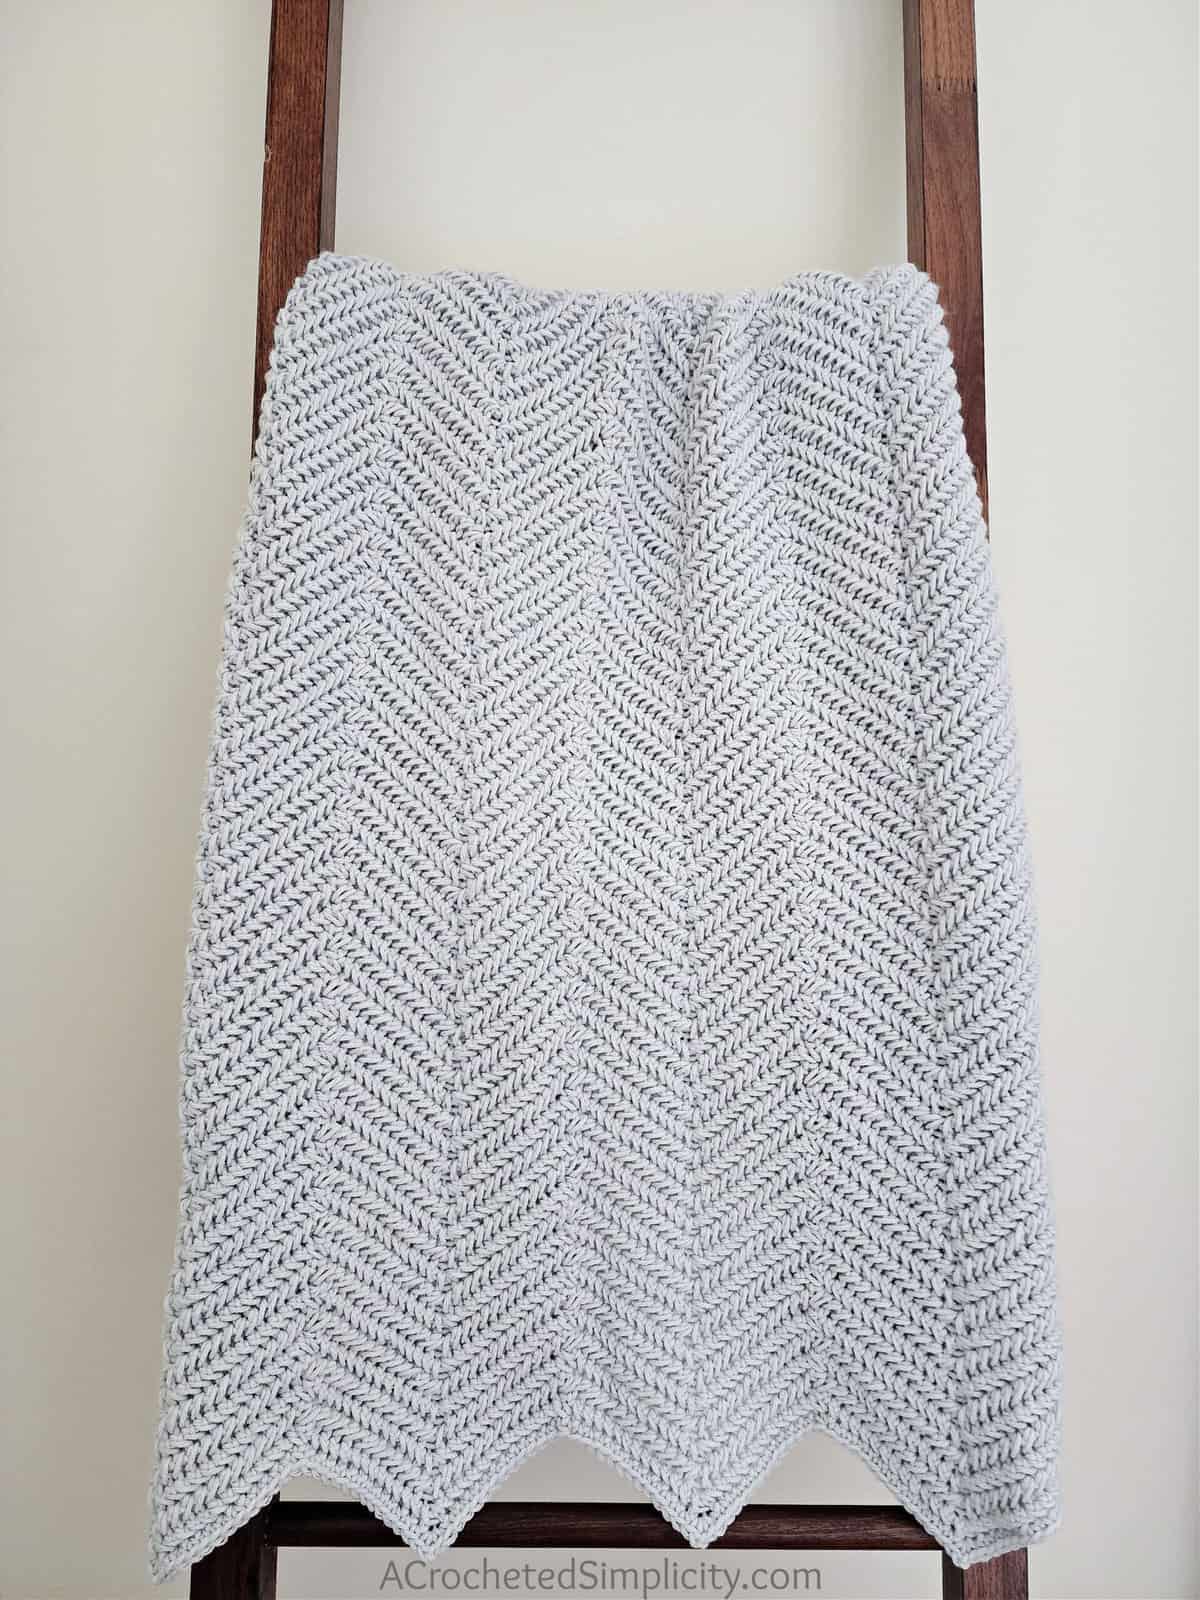
The crochet ripple stitch is also referred to as a crochet chevron stitch, or crochet zig-zag. It is a classic crochet stitch pattern that can be adapted for almost every crochet project you can imagine, including blankets, hats, bags, and more!
A crochet ripple stitch is created when you take a horizontal stitch pattern and work increases and decreases to form peaks and valleys, just as I did in the herringbone single crochet ripple stitch pattern.
Step-by-Step Photo Tutorial
You can find my extensive step-by-step photo tutorial for the Herringbone Single Crochet Ripple Stitch HERE. Refer to this crochet tutorial for the following:
- Step-by-Step photo tutorials for ALL 5 special stitches.
- Learn how to crochet the ripple stitch with step-by-step photos.
- Learn how to count rows of herringbone single crochet ripple stitch.
KNIT LOOK CROCHET
I love the look of knit, but I can’t knit a stitch to save my life. I tried and I failed. Then I taught myself to crochet.
The herringbone single crochet stitch resembles a knit stitch, the herringbone knit stitch. When I first saw it, I knew I had to learn it.
Once I learned it, I knew I had to do more with it. This is how the herringbone single crochet ripple blanket pattern was created.
So if you’re like me, and you love to learn knit look crochet stitches, you’ll love this one!
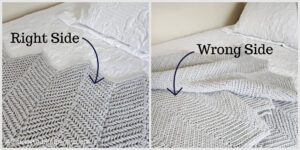
Is There a Right Side?
The herringbone single crochet stitch has only one “Right Side”, the deeply textured side. However, I think the backside has its’ own unique look and I like it too!
Which side is your favorite?
YARN
For this herringbone crochet blanket, I chose Lion Brand Yarns Pound of Love. Pound of Love is a 100% premium acrylic yarn that is available in 28 gorgeous colors. Although Pound of Love is classified as a Craft Yarn Council 4 / worsted weight yarn, I’ve found that it is on the lighter side of most worsted weight yarns.
I’ve had many crocheters tell me that they don’t like the feel of acrylic yarns, but Pound of Love becomes SO incredibly soft after a quick wash and dry! It’s the perfect yarn for many different projects and the yardage in one ball is incredible at 1,020 yards. This makes it a great choice for our herringbone crochet blanket.
Yarn Substitutions
Because this is a crochet blanket pattern and not a garment or an accessory you wear, you can easily substitute any yarn of any weight. I recommend using a DK or heavier weight yarn for this specific stitch pattern.
No matter which brand or weight of yarn you choose, I recommend using a larger crochet hook than what is suggested on the yarn label. For example, Lion Brand Pound of Love suggests a 6.00mm crochet hook and I used a 7.00mm hook for my blanket.
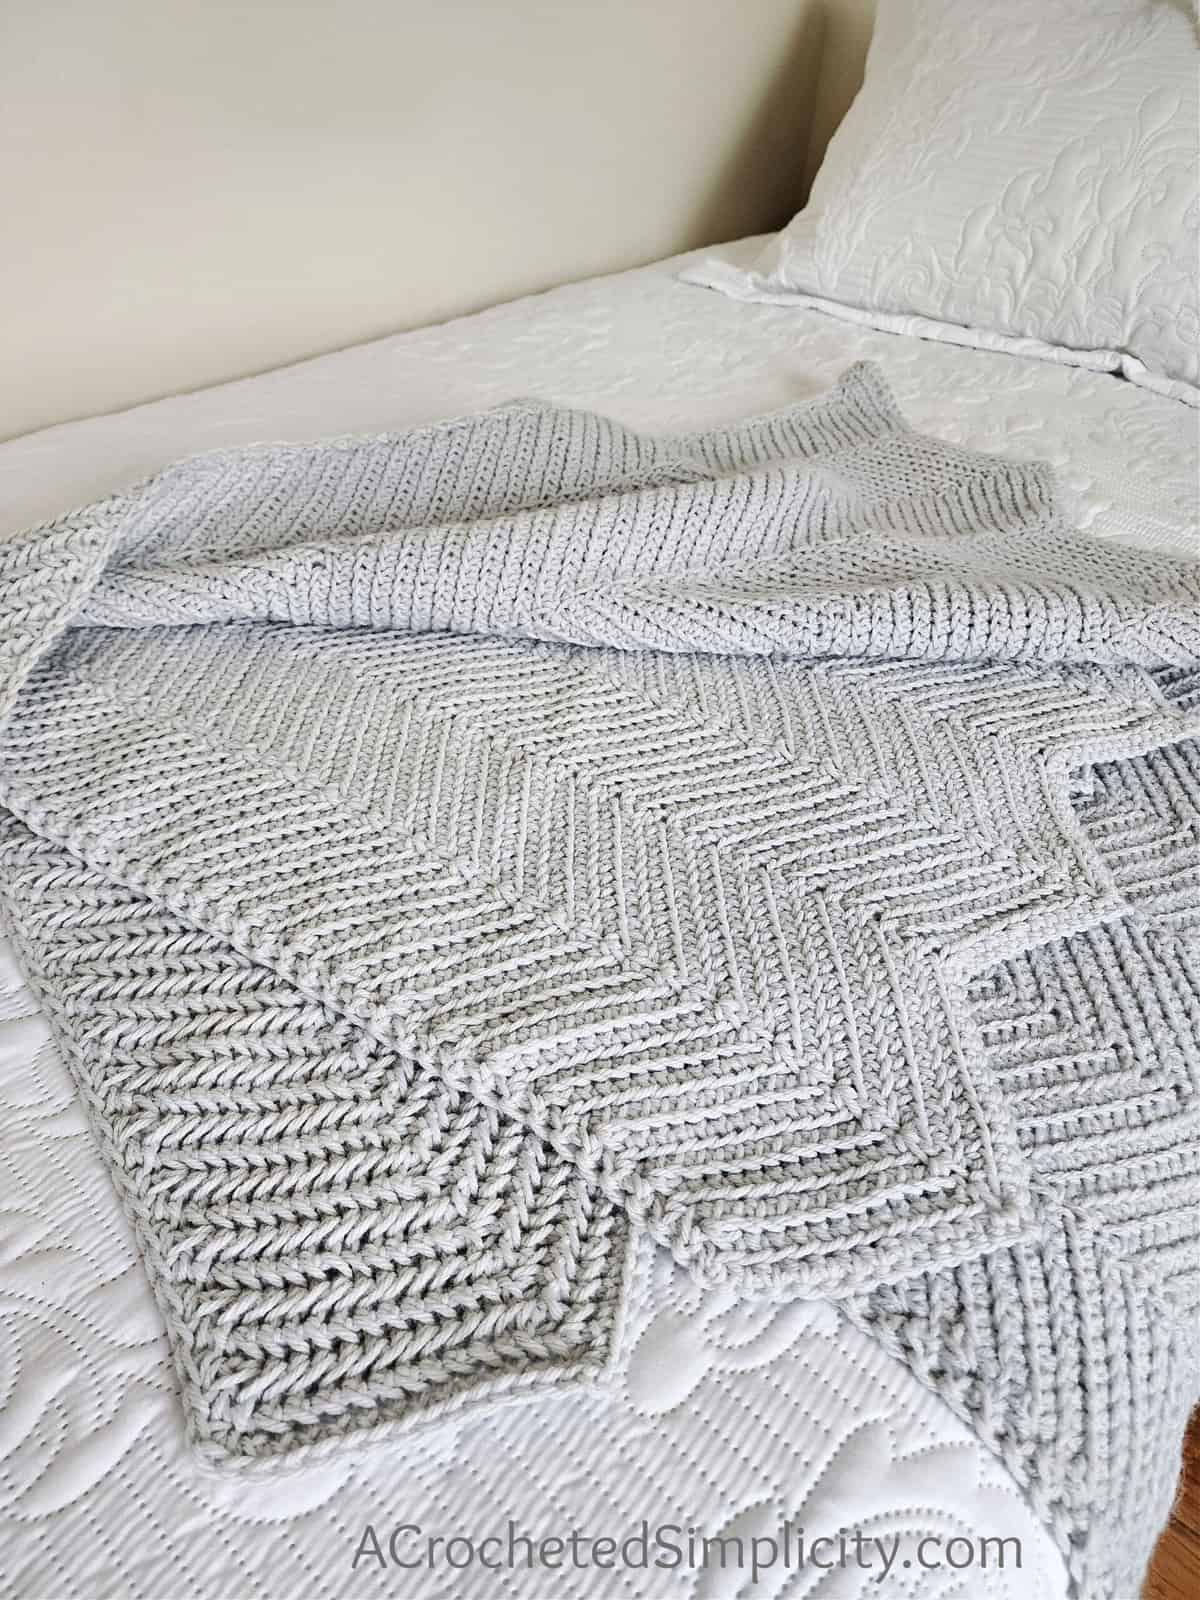
Herringbone Single Crochet Ripple Blanket – Sizing
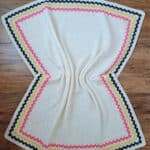
The crochet ripple blanket shown is lapghan size. I know others may want to make theirs smaller or larger so I’ve included instructions to make it in ANY size, from baby blanket up to king sized afghan!
Use my Standard Blanket Sizes Chart HERE to figure out measurements for your custom sized blanket.
Foundation Chain: Any Multiple of 28 sts + 25 sts + 1 st
Adjusting Width: To adjust the width of your blanket, simply add or subtract increments of 28 stitches to the foundation chain given in the instructions.
- *If using the noted gauge below, every 28 stitches that you adjust your foundation chain will change the width of your blanket approximately 6.5″.

HERRINGBONE SINGLE CROCHET RIPPLE BLANKET – FREE CROCHET PATTERN
The free herringbone crochet blanket pattern is below, but if you love to work offline, I’ve got a couple other great options for you.
Purchase the ad-free, printable PDF, including photo tutorials, on Love Crafts here, Ravelry here, or on Etsy here.
Purchase the crochet kit here! Lion Brand has a full kit of the Herringbone Single Crochet Ripple Blanket, available on their website. The kit includes your choice of color and a digital copy of the crochet ripple blanket pattern below.
Save this pattern to your Ravelry favorites here.
Pin it for later here.
This post contains affiliate links.
MATERIALS
- Yarn: Worsted Weight / 4 yarn, Lion Brand Yarns Pound of Love was used for the crochet ripple blanket shown in the photos.
- Elephant Grey: 2 balls / 2,040 yards
- Crochet Hooks: 7.o0mm; L/8.00mm (My favorite crochet hooks are the Clover Amour Hooks, I’ve never had an ache in my hand since switching)
- Scissors
- Yarn Needle
- Locking Stitch Markers
Many of these materials are available for purchase through our affiliates below:
 Lion Brand Yarn 550-151 Pou...Shop on Amazon
 ,Yellow") Clover Amour Crochet Hook (...Shop on Amazon
Clover Amour Crochet Hook (...Shop on Amazon  Clover 1055/L Amour Crochet...Shop on Amazon
  Clover Quick Locking Stitch...Shop on Amazon
Experience Level
- Easy / Intermediate
Gauge
- In herringbone single crochet (7.00mm hook): 12 sts = 3.5″; 7 rows = 3.75″
- Gauge isn’t crucial for this project.
Size
- 40″ W x 52″ L
- Instructions are given to make ANY size crochet ripple blanket.
Abbreviations (US Terms)
- ch(s): chain(s)
- sl st(s): slip stitch(es)
- st(s): stitch(es)
- sp: space
- sc: single crochet
- sc2tog: single crochet decrease
- InvSC: inverse single crochet
- HSC: herringbone single crochet
- InvHSC: inverse herringbone single crochet
- HSC2tog: herringbone single crochet decrease
- InvHSC2tog: inverse herringbone decrease
- yo: yarn over
- Rep: Repeat
- RS: right side
- WS: wrong side
NOTES
- Turning chains are not included in stitch count, unless noted otherwise.
- Yarn Notes: Lion Brand Yarns Pound of Love, worsted weight / 4, 100% Premium Acrylic, (1,020 yards / 454 g / 16 oz / 932 m) was used for this crochet ripple blanket.
- Yardage
- Elephant Grey: 2 balls / 2,040 yards
- This pattern includes easy instructions to make this blanket ANY width and length you’d like. However, the yardage listed above is for a blanket the same size as the sample.
- If you’d like to make a larger crochet afghan, checkout this list of Standard Blanket Sizes. Click Here
- Any weight yarn can be substituted as long as you adjust your hook size for the yarn weight you’re using. For this blanket, I suggest using a crochet hook larger than what is recommended for the yarn you choose.
- Gauge isn’t crucial for this project.
- Stitch Multiple: The foundation chain for this blanket uses a stitch multiple of 28 sts + 25 sts + 1 st.
- Adjusting Width: To adjust the width of your blanket, simply add or subtract increments of 28 stitches to the foundation chain given in the instructions.
- *If using the noted gauge below, every 28 stitches that you adjust your foundation chain will change the width of your blanket approximately 6.5″.
- This crochet ripple blanket is worked back and forth in zig zag rows to create the chevron or ripple look. Then, to finish off the edges, a simple single crochet border is worked around the perimeter.
Special Stitches
All 5 of the special stitches are shown step-by-step in the photo tutorial HERE.
- Herringbone Single Crochet (HSC): Insert your hook into the left leg of the stitch previously worked, insert your hook into the next st, yo, pull up a loop, yo, pull through all 3 loops on your hook. Click HERE for photo tutorial.
- Herringbone Single Crochet Decrease (HSC2tog): This is a variation of a typical decrease stitch as you will be working it in the 1st & 3rd of the next 3 sts, instead of working it in the next 2 sts. It is worked this way to create the bottom “valley” in the ripple. Insert your hook into the left leg of the stitch previously worked, insert your hook into the 1st st, yo, pull up a loop, skip the 2nd st, insert your hook into the 3rd st, yo, pull up a loop, yo, pull through all 4 loops on your hook. Click HERE for photo tutorial.
- Inverse Single Crochet (InvSC): With the working yarn IN FRONT of your work, insert your hook from back to front through the indicated stitch, yo, pull up a loop, yo, pull through both looks on your hook. Click HERE for photo tutorial.
- Inverse Herringbone Single Crochet (InvHSC): Tip your project towards you to work into the stitches from the back side, with the working yarn IN FRONT of your work, insert your hook from back to front into the left leg of the stitch previously worked, insert your hook from back to front into the next st, yo, pull up a loop, yo, pull through all 3 loops on your hook. Click HERE for photo tutorial.
- Inverse Herringbone Single Crochet Decrease (InvHSC2tog): This is a variation of a typical decrease stitch as you will be working it in the 1st & 3rd of the next 3 sts, instead of working it in the next 2 sts. It is worked this way to create the bottom “valley” in the ripple. With the working yarn IN FRONT of your work, insert your hook from back to front into the left leg of the stitch previously worked, insert your hook from back to front into the 1st st, yo, pull up a loop, skip the 2nd st (the HSC2tog from the previous row), insert your hook from back to front into the 3rd st, yo, pull up a loop, yo, pull through all 4 loops on your hook. Click HERE for photo tutorial.
HERRINGBONE SINGLE CROCHET RIPPLE STITCH PATTERN & TUTORIAL
For this herringbone crochet blanket I simply took the Herringbone Single Crochet Ripple Stitch pattern and added longer legs between the peaks and valleys.
You can find my extensive step-by-step photo tutorial for the Herringbone Single Crochet Ripple Stitch HERE.
Herringbone Single Crochet Ripple Blanket Instructions
Pro Tip! You may find it helpful to place a stitch marker in each ch-2 space and sc2tog to make it easier to find them when working the next row.
Set-Up: With yarn and an 8.00mm crochet hook, ch 166.
Row 1 (RS): Switch to a 7.00mm crochet hook, working into the back hump of the foundation chain, sc in the 2nd ch from your hook, HSC in each of the next 11 chs, (HSC, ch 2, HSC) in the next ch, HSC in each of the next 12 chs, [ work a HSC2tog in the 1st & 3rd of the next 3 chs (skipping the 2nd ch), HSC in each of the next 12 chs, (HSC, ch 2, HSC) in the next ch, HSC in each of the next 12 chs ] work from [ to ] 5 times. Turn. (161 sts + 6 ch-2’s)
Row 2: Ch 1, skip the first st, InvSC in the 2nd st, InvHSC in each of the next 11 sts, (InvHSC, ch 2, InvHSC) in the next ch-2 sp, [ InvHSC in each of the next 12 sts, work a InvHSC2tog in the next 2 HSC (skipping HSC2tog from previous row), InvHSC in each of the next 12 sts, (InvHSC, ch 2, InvHSC) in the next ch-2 sp ] work from [ to ] 5 times, then InvHSC in each of the next 11 sts, skip the next st, InvHSC in the last st. Turn. (161 sts + 6 ch-2’s)
Row 3: Ch 1, skip the first st, sc in the 2nd st, HSC in each of the next 11 sts, (HSC, ch 2, HSC) in the next ch-2 sp, [ HSC in each of the next 12 sts, work a HSC2tog in the next 2 InvHSC (skipping InvHSC2tog from previous row), HSC in each of the next 12 sts, (HSC, ch 2, HSC) in the next ch-2 sp ] work from [ to ] 5 times, then HSC in each of the next 11 sts, skip the next st, HSC in the last st. Turn. (161 sts + 6 ch-2’s)
Rep Rows 2 – 3 until the length of your blanket measures 52″, or desired length.
Do not fasten off. Continue on to the Crochet Border.
Crochet Border
Pro Tip! As you’re crocheting around the perimeter of your blanket, if your edges are becoming wavy, go down a hook size or two. If your edges begin to cinch inward, go up a hook size or two. Stitch count is not crucial for the border.
Round 1 (RS): Ch 1, FIRST, working along the first long edge, work 1 sc in each st along the long edge until you reach the corner of the first rippled edge, NEXT, rotate to work across the first rippled edge, work 2 sc in the first st, sc in each of the next 10 sts, [ work a sc2tog in the next 2 HSC (skipping HSC2tog from previous row), sc in each of the next 12 sts, (sc, ch 2, sc) in the next ch at the peak, sc in each of the next 12 sts ] work from [ to ] 5 times, then sc2tog in the next 2 HSC (skipping HSC2tog from previous row), sc in each of the next 10 sts, 2 sc in the last st of the first rippled edge, NEXT, rotate to work along the second long edge, work 1 sc in each st along the second edge until you reach the corner of the second rippled edge, LASTLY, rotate to work across the second rippled edge, work 2 sc in the first st, sc in each st to the next ch-2 sp, (sc, ch 2, sc) in the next ch-2 sp, ** sc in each of the next 12 sts, work a sc2tog in the next 2 HSC (skipping HSC2tog from previous row), sc in each of the next 12 sts, (sc, ch 2, sc) in the next ch-2 sp ** work from ** to ** 5 times, then sc in each st across to the last st of the rippled row, 2 sc in the last st. Join with a sl st to the 1st st. Stitch count is not crucial.
Fasten off. Weave in ends & block, if desired.
MORE FREE CROCHET BLANKET PATTERNS FROM A CROCHETED SIMPLICITY
If you enjoyed this crochet ripple blanket pattern, you may enjoy these other projects as well. And if you just want to browse, you can find all of our free crochet patterns HERE.

Are you intimidated by knit-look crochet? Would you love to learn my tips & tricks? Take an Annies Video Class with me and let me ease your fears and help you increase your skills! Click on the photo below to watch a free preview. You can also see the other 4 video classes I have available! (affiliate link)

Please share your finished ACS projects with us in the A Crocheted Simplicity Crochet Community Group on Facebook! Use hashtag #ACrochetedSimplicity when sharing on social media so I can find your posts!
