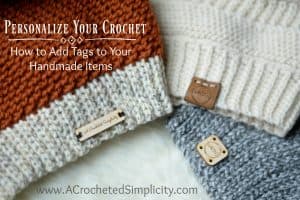
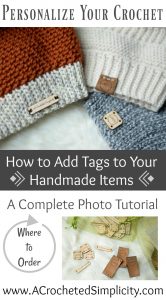
Personalize Your Crochet – How to Add Labels & Tags to your Crochet Items
This post contains affiliate links.
This winter I have had several crocheters ask me the following 2 questions: 1) where do you purchase the labels you add to your samples, and 2) how do you attach them? These two questions are what prompted this blog post and tutorial!
Adding a custom label to any finished crochet project can really help set it apart from others. Not only are labels great for advertising, but they also add a more professional finish to your crochet!
~DON’T FORGET TO PIN IT FOR LATER!~
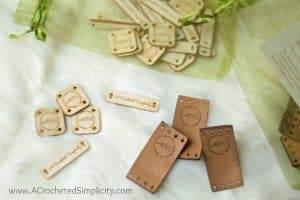
For leather, cork, and wooden labels, I highly recommend All This Wood on Etsy. The following are the listings I purchased for the labels shown in this tutorial:
- 50 Wooden Product Tags (in maple) (.4″ x 1.6″) Purchase on Etsy
- 50 Product Tags (in maple) (.85″ x .85″) Purchase on Etsy
- Leather Labels (1″ x 2″): Purchase on Etsy
If you’re interested in fabric labels, check out Custom Couture Label Co. on Etsy. They have lots of great styles! Click HERE to view them on Etsy
My friend, Diane, lives in Canada and she orders from Maple & Rose on Etsy. She highly recommends them. I was checking out their shop and they also have neat acrylic tags!
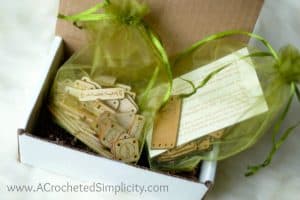
These are the wooden tags and leather labels I ordered from All This Wood. They arrived in individual drawstring bags and included was a nice postcard with all of the care information you’ll need. I highly recommend them!
How to Attach Leather Labels
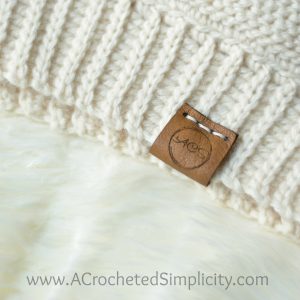
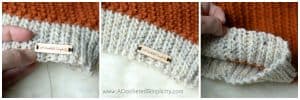
The leather labels I purchased are 1″ x 2″ rectangles. This particular style is made to be folded over the edge of your project. In the photos below, I show how I attached one to the band of my Purl Illusions Slouch.
Begin by folding your label in half, with your logo on the outside. Place it around the edge of your project, lining up the fold with your project’s edge.
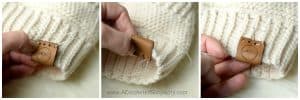
Use a needle and thread and sew the label to your project. Make sure that you line up the pre-punched holes in the label. For this label, I sewed between the two holes on the right, first, then gradually made my way across, sewing back and forth between each of the holes.
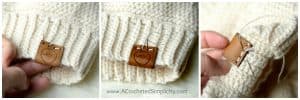
After you’ve sewn back and forth through all of the holes in the label, fasten your thread with a knot and weave in ends. See the photo below of my finished work.
How to Attach Wooden Tags
I purchased two different sizes of wooden tags (the specifications are listed above).
First, you need to decide where you want to attach them to your project. For the rectangular tags, you need to decide how you’d like to orientate them (vertically or horizontally).
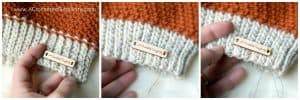
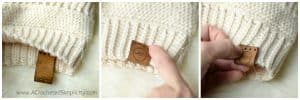
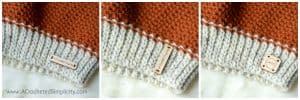
I chose to attach my rectangular tag, horizontally on the band of my hat. The first step is to use a needle and thread and attach one end of the tag to your project. Simply sew several times through the pre-drilled hole.
Please Note: When choosing to add a wide rectangular tag, horizontally, to a stretchy section of a project, you will need to slightly stretch the section a little before attaching the opposite end of your tag. See the photo above, left. You can see in the middle photo above that the band of my hat is slightly stretched, but once the hat is worn, it blends in with the rest of the band as it is stretch around the head.
I hope this tutorial has taught you how to add labels to your crochet projects and that you use it soon!
FIND ALL OF MY FREE CROCHET PATTERNS HERE
Join us in the Facebook Community Group!
Come share your finished projects with us in the A Crocheted Simplicity Crochet Community Group on Facebook. Join us for fun community events such as crochet alongs, join in on crochet conversations, ask questions, get advice, and share your love for crochet!

I’ve been thinking of a way to get small tags for my crochet items. This is wonderful! I can’t wait to get some personalized tags on some gift items I’m making. Thanks for sharing this resource.
Hi Iris,
I’m glad you found this resourceful!
Jennifer
Thank you for the information