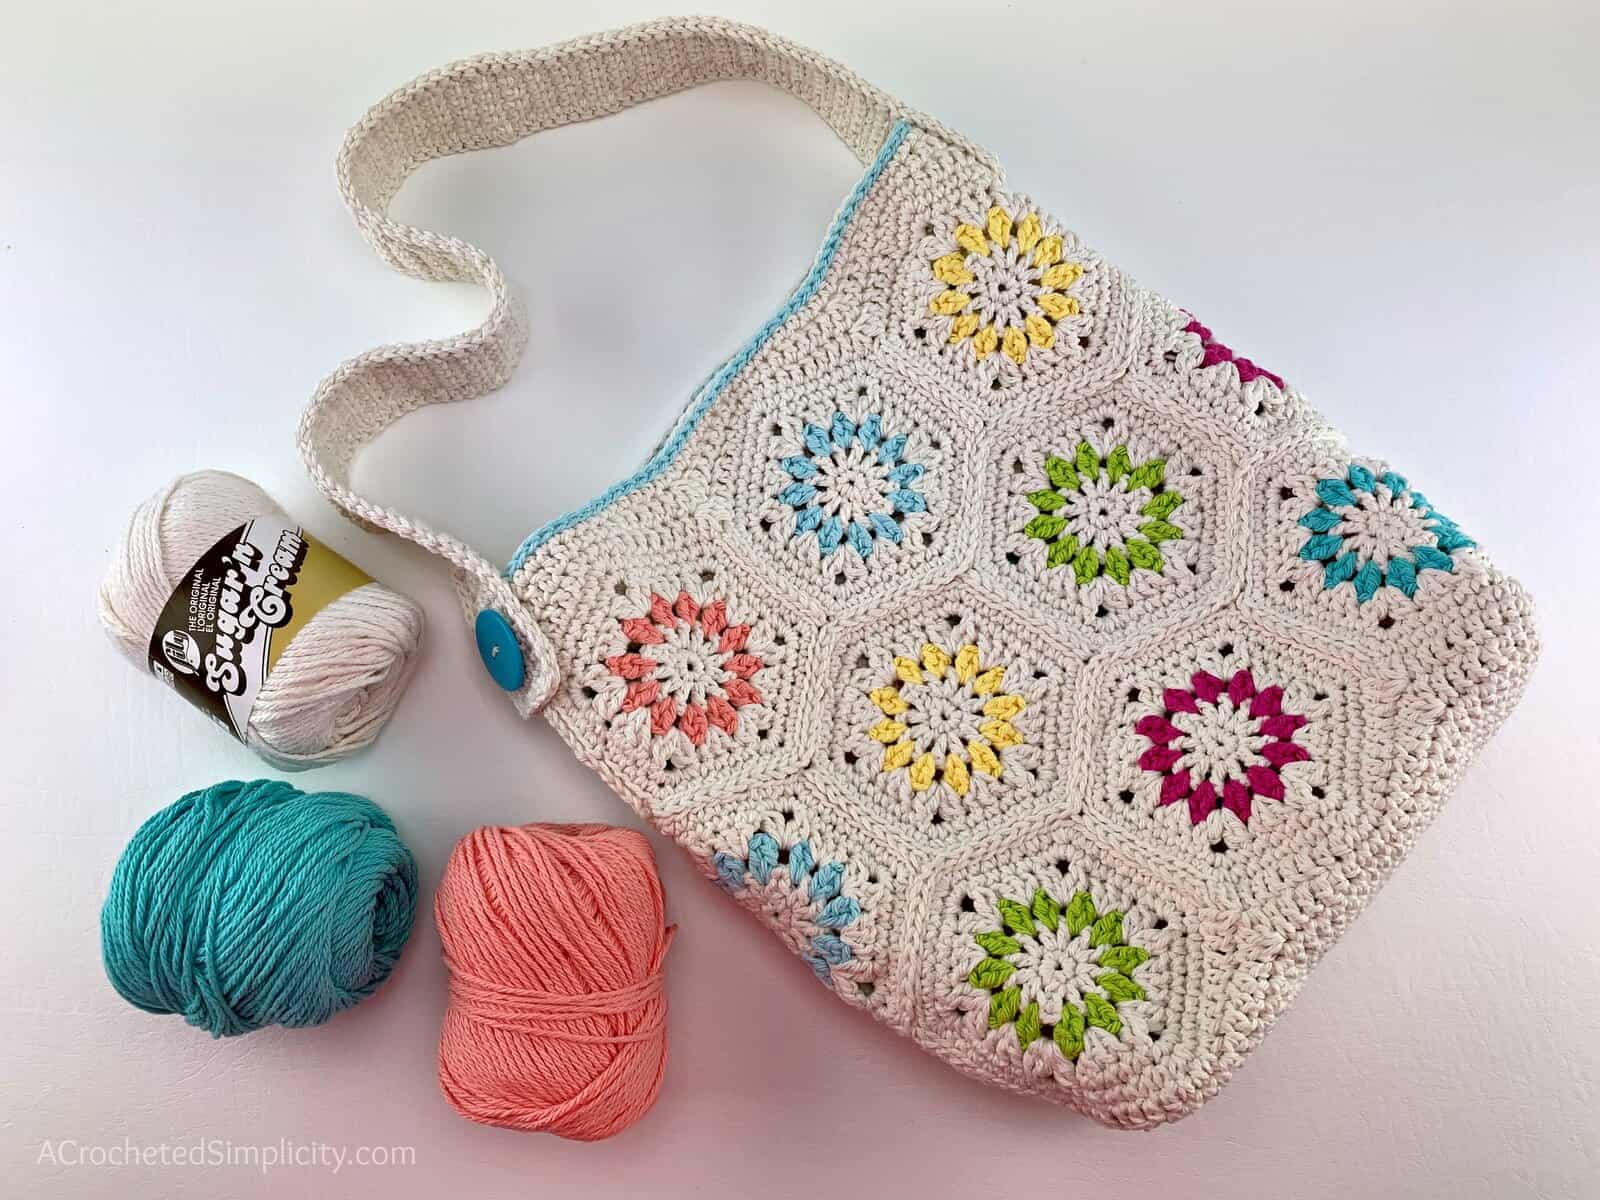
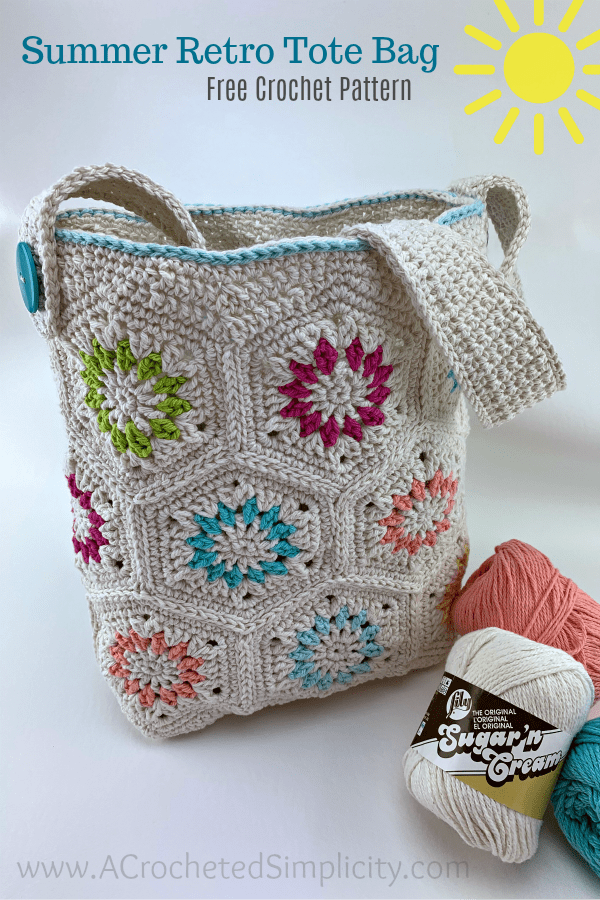
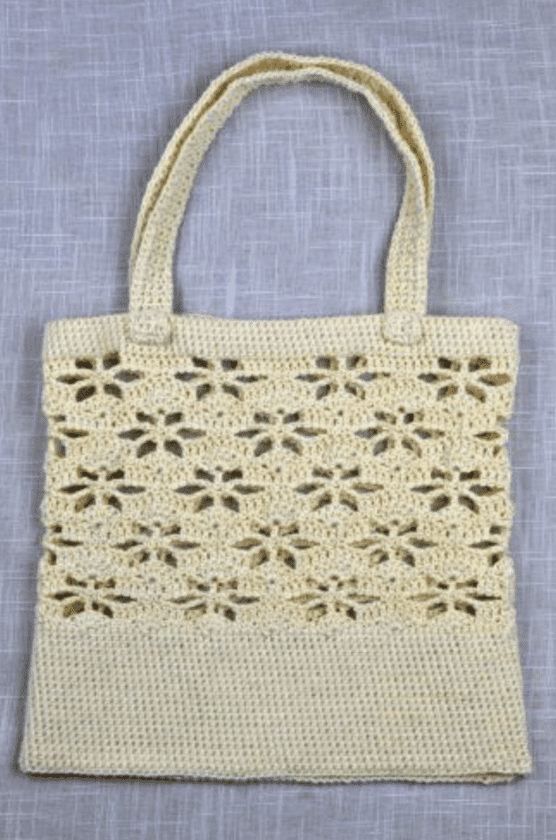
Summer Retro Tote Bag – Free Crochet Bag Pattern
Summer retro style meets function and versatility in this fun crochet hexagon tote bag. I used an easy hexagon pattern and added a little visual interest by adding a pop of color, to create the main portion of the bag. Basic crochet stitches were then used to form the bag’s solid, sturdy bottom and strap. This crochet hexagon pattern will be a fun challenge for advanced beginners and it will keep experienced crocheters from losing interest. Use your bag as a crochet project bag, beach bag, or everyday tote bag – customize it to suit your taste by playing around with color, or by adding tassels, poms, and more! The free crochet tote bag pattern can be found in this blog post below, or you can purchase an ad-free, easily printable PDF on Love Crafts here, Ravelry here or Etsy here.
> CLICK HERE TO SIGN-UP TO RECEIVE OUR NEWSLETTER <
SUMMER RETRO TOTE BAG – FREE CROCHET TOTE BAG PATTERN
The free pattern is below, but if you love to work offline, I’ve got a couple other great options for you.
Purchase the ad-free, printable PDF, including all photo tutorials, on Love Crafts here, Ravelry here, or on Etsy here.
Pin it for later here.
This post contains affiliate links.
Materials
- Yarn: Worsted Weight / 4 Cotton Yarn / 21 yards; I used Lily Sugar n’ Cream cotton yarn (colors I used are listed in the notes below)
- Main Color (ecru): 440 yards
- Contrasting Colors 1 – 6: 60 yards each color
- Crochet Hook: H/8/5.00mm or size needed to obtain gauge (My favorite crochet hooks are the Clover Amour Crochet Hooks, I’ve never had an ache in my hand since switching).
- Scissors
- Yarn Needle
- Locking Stitch Markers
- 1.5″ diameter buttons (2) (optional)
Many of these materials are available for purchase through our affiliates below:
 Clover 1047/H Deep Blue Amo...Shop on Amazon
  Fiskars 154110-1001 Non-sti...Shop on Amazon
Abbreviations (US Terms)
- ch(s): chain(s)
- sl st: slip stitch
- st(s): stitch(es)
- sp(s): space(s)
- sc: single crochet
- hdc: half double crochet
- dc: double crochet
- dc3tog: double crochet decrease by 2
- 2 dc-cl: 2 double crochet cluster (click here for tutorial)
- Alt-dc: alternate chainless double crochet (click here for tutorial)
- standing sc: standing single crochet (click here for tutorial)
- standing dc: standing double crochet (click here for tutorial)
- RS/WS: right side / wrong side
- Rep: repeat
- Rnd(s): round(s)
- yo: yarn over
- MC: main color
- CC: contrasting color
One Size
-
One Size: 9″ W x 4.25″ D x 12.5″ H (not including strap)
Gauge
- See each specific section. Dimensions are given as you work.
Notes
- Beginning chain(s) are not included in stitch count, unless noted otherwise.
- First stitch of each row is worked in the same stitch as the turning chain, unless otherwise specified.
- I tend to crochet on the tighter side. You may need to go down a hook size (or two) to meet gauge if you crochet on the looser side.
- Yarn Notes: Lily Sugar n’ Cream worsted weight cotton yarn was used for the sample, 100% Cotton (120 yards / 109 m / 71 g / 2.5 oz).
- Yardage:
- Main Color: ecru, 440 yards
- Contrasting Colors 1 – 6: 60 yards each. * I used Seabreeze, Hot Green, Robin’s Egg, Hot Pink, Yellow & Tea Rose.
- You can use another worsted weight yarn as long as it’s similar in thickness and you match gauge.
- This bag is constructed by making and seaming (18) 4.5″ hexagons. After the hexagons are seamed, a top edge and bottom is added to create the bag. A strap is added last.
- Flat Slip Stitch Seam: Click HERE for tutorial
Special Stitches
- 2 Double Crochet Cluster (2 dc-cl): Yo, insert hook where indicated, yo, pull up a loop, yo, pull thru 2 loops, yo, insert hook in same st, yo, pull up a loop, yo, pull thru 2 loops, yo, pull thru remaining loops. (click here for tutorial)
- Double Crochet 3 Together (dc3tog): (Yarn over, insert hook in next stitch, yarn over and pull up loop, yarn over, draw through 2 loops) 3 times, yarn over, draw through all loops on hook.
- Alternate Double Crochet (alt-dc): Do not ch, instead, insert your hook into the first st, yo, pull up a loop, yo, pull thru both loops, insert your hook between the legs of the st just made, yo, pull up a loop, yo, pull thru one loop, yo, pull thru remaining loops. (click here for tutorial)
Crochet Tote Bag Instructions
4.25″ – Hexagon Instructions (Make 18)
Color Scheme: If you’re planning to follow the same color scheme as shown in my bag, you’ll need to make 3 hexagons using each of the 6 different contrasting colors.
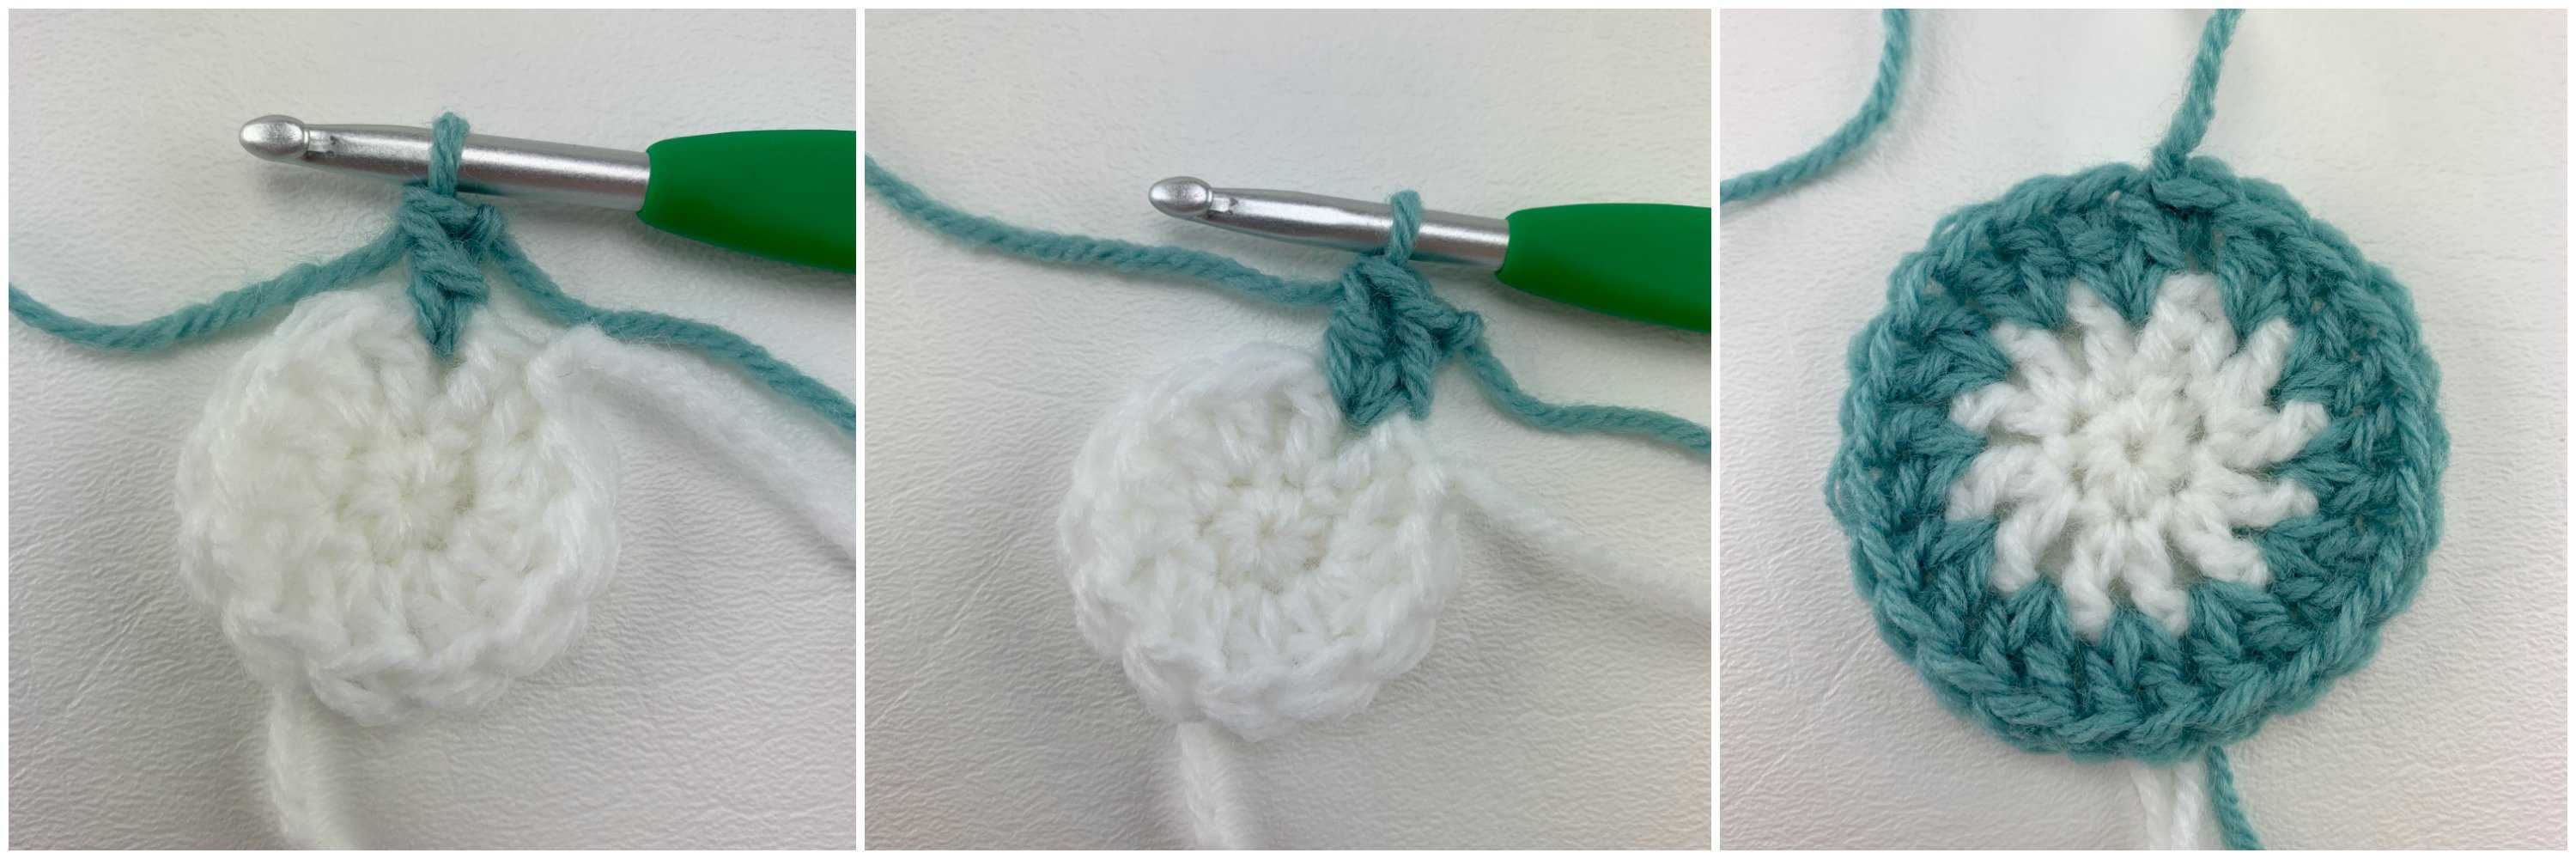
Note: Most of this hexagon is worked in a spiral (continuous rounds). There are a few rounds that are joined at the end of them. Pay close attention to the instructions. See photos below.
Tip! I highly suggest using locking stitch markers where noted. They will help to keep you on track while you crochet and they come in very handy when seaming the hexagons together.
Rnd 1 (RS / MC): With a 5.00mm crochet hook & MC yarn, ch 2, work 6 sc into the 2nd ch from your hook. Do not join. (6 sts)
Rnd 2 (MC): Alt-dc in the first st, work 1 more dc in the first st, work 2 dc in each remaining st around. Join with a sl st to the alt-dc. Fasten off MC. (12 sts)
Rnd 3 (CC): With a 5.50mm crochet hook & CC yarn, join yarn with a standing dc in the space between the first 2 sts of round 2, work 1 more dc in the same space, work 2 dc in the space between each 2 dc’s around. Join with a sl st to the standing dc. Fasten off CC. (24 sts)
Rnd 4 (MC): With a 5.50mm crochet hook & MC yarn, skip the first 2 dc, join yarn with a standing dc in the space after the skipped dc’s, work 2 more dc in the same space, skip each of the next 2 dc, work (2 dc-cl, ch 2, 2 dc-cl) in the space after the skipped dc’s, * skip each of the next 2 dc, work 3 dc in the space after the skipped dc’s, skip each of the next 2 dc, work (2 dc-cl, ch 2, 2d c-cl) in the space after the skipped dc’s, rep from * around. Do not join. (30 sts + 6 ch-2 sps)
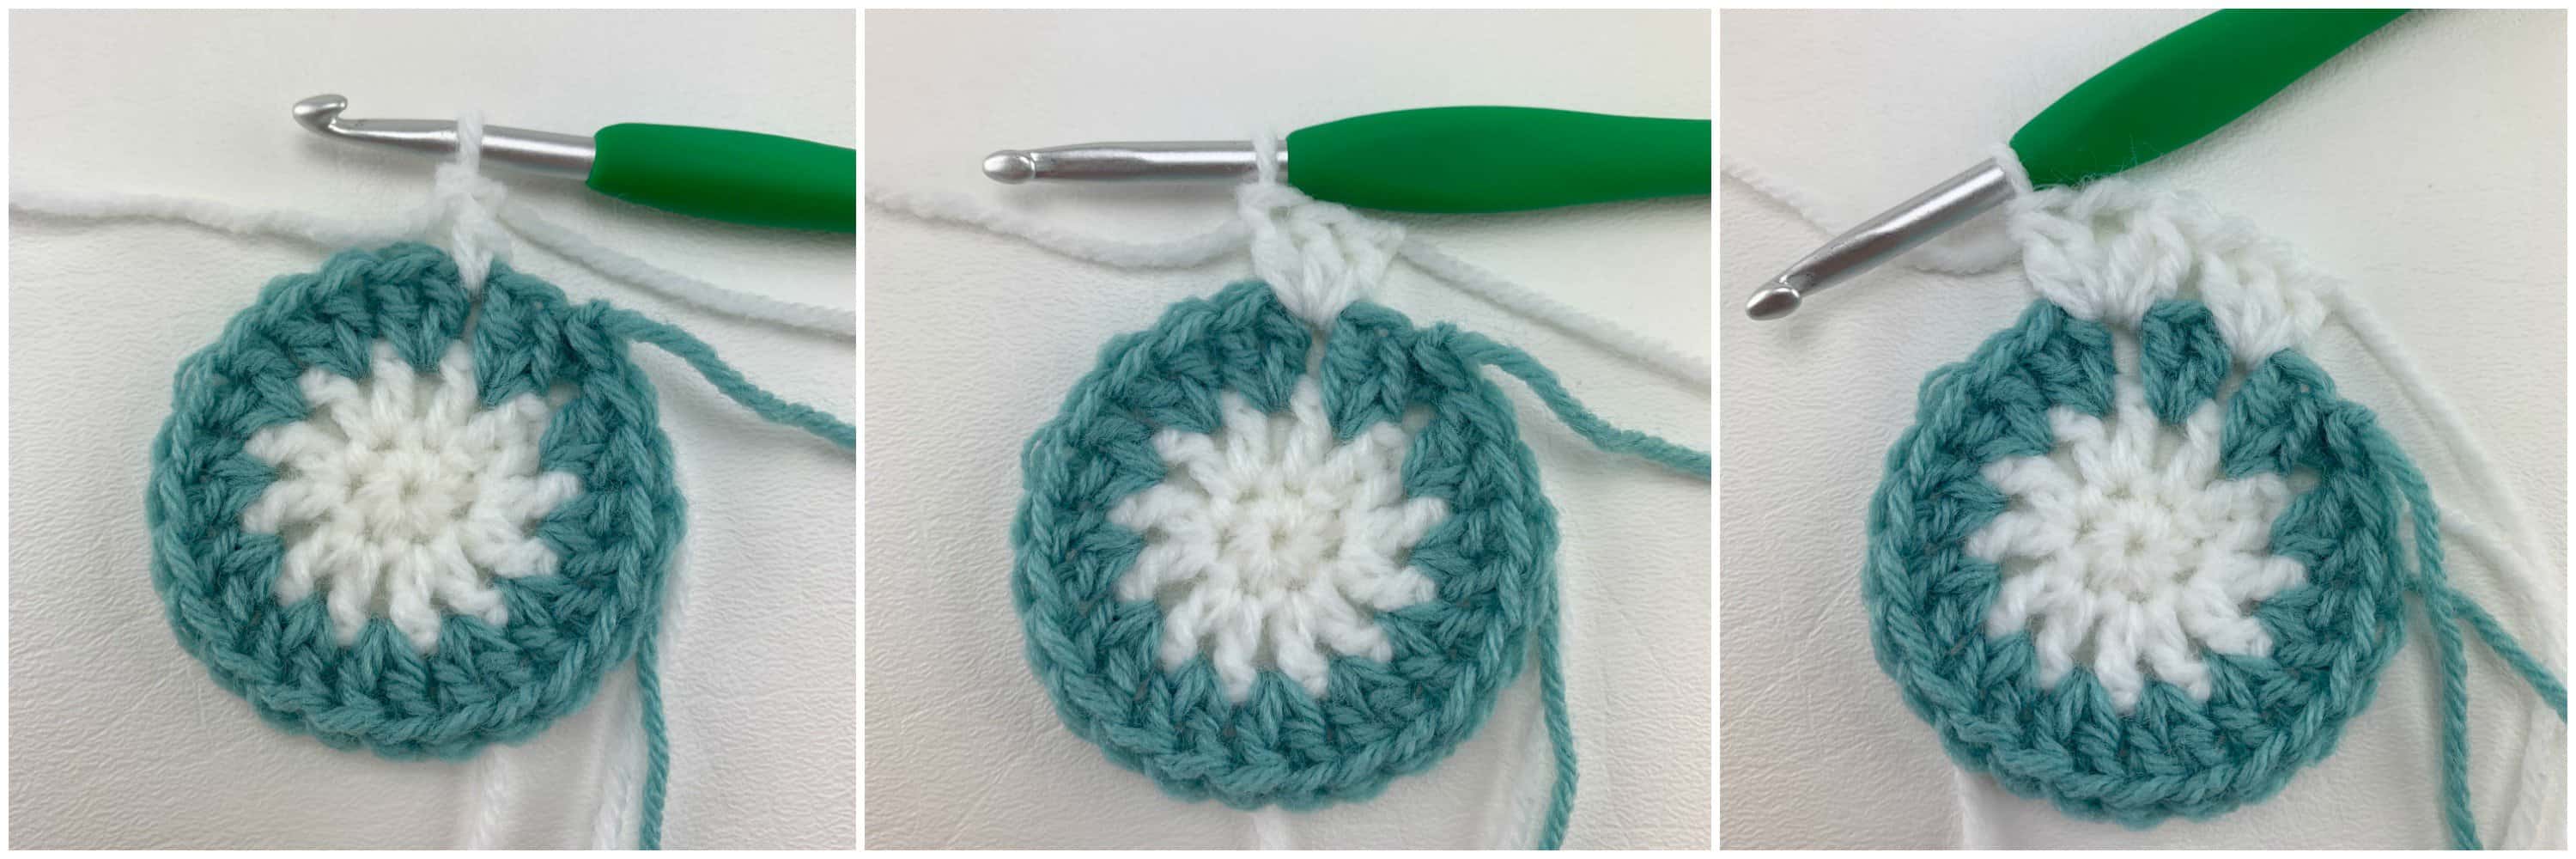
Tip! In rounds 5 & 6, you may find it helpful to place a locking stich marker in the 2nd sc of each 3 sc worked into the corners of the hexagon.
Rnd 5 (MC): Sc in each of the next 4 sts, 3 sc in the next ch-2 sp, * sc in each of the next 5 sts, 3 sc in the next ch-2 sp, rep from * around to the last st, sc in the last st. Do not join. (48 sts)
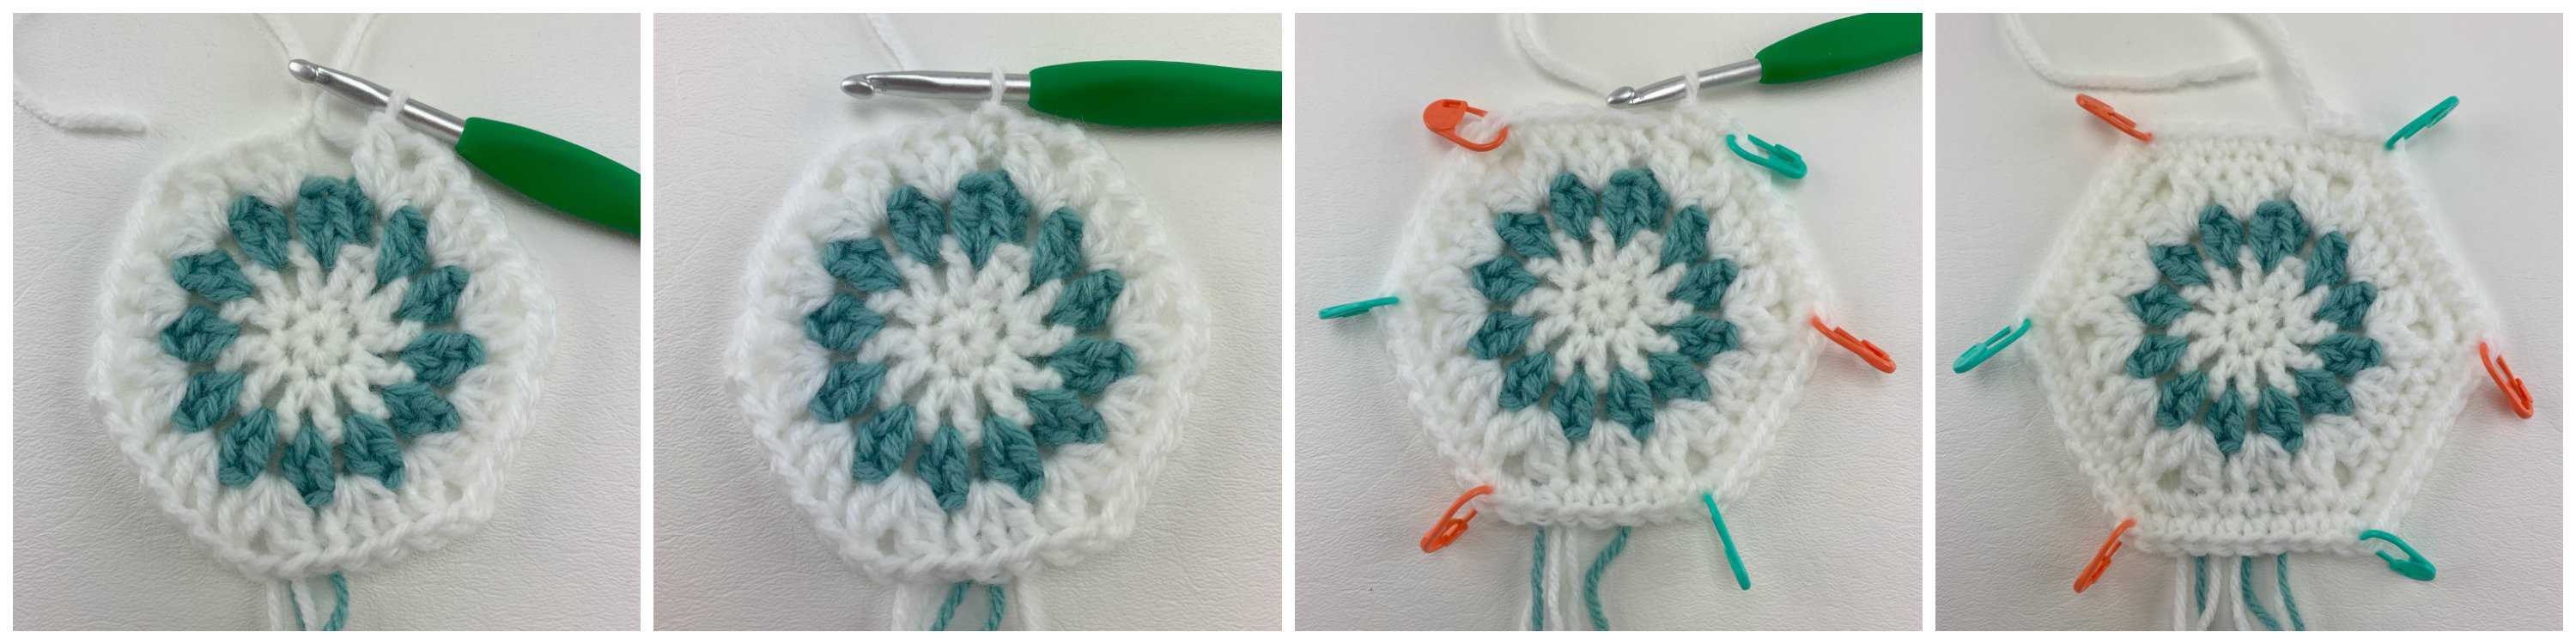
Rnd 6 (MC): Sc in each of the next 5 sts, 3 sc in the next st, * sc in each of the next 7 sts, 3 sc in the next st, rep from * around to the last 2 sts, sc in each of the last 2 sts. Do not join. (60 sts) Make sure you’ve placed stitch markers in the 2nd sc of each 3 sc group, in each corner of the hexagon. Approximate size at this point is 4.5″ from flat edge to flat edge.
Fasten off. Weave in ends. Continue on to Layout & Seaming.
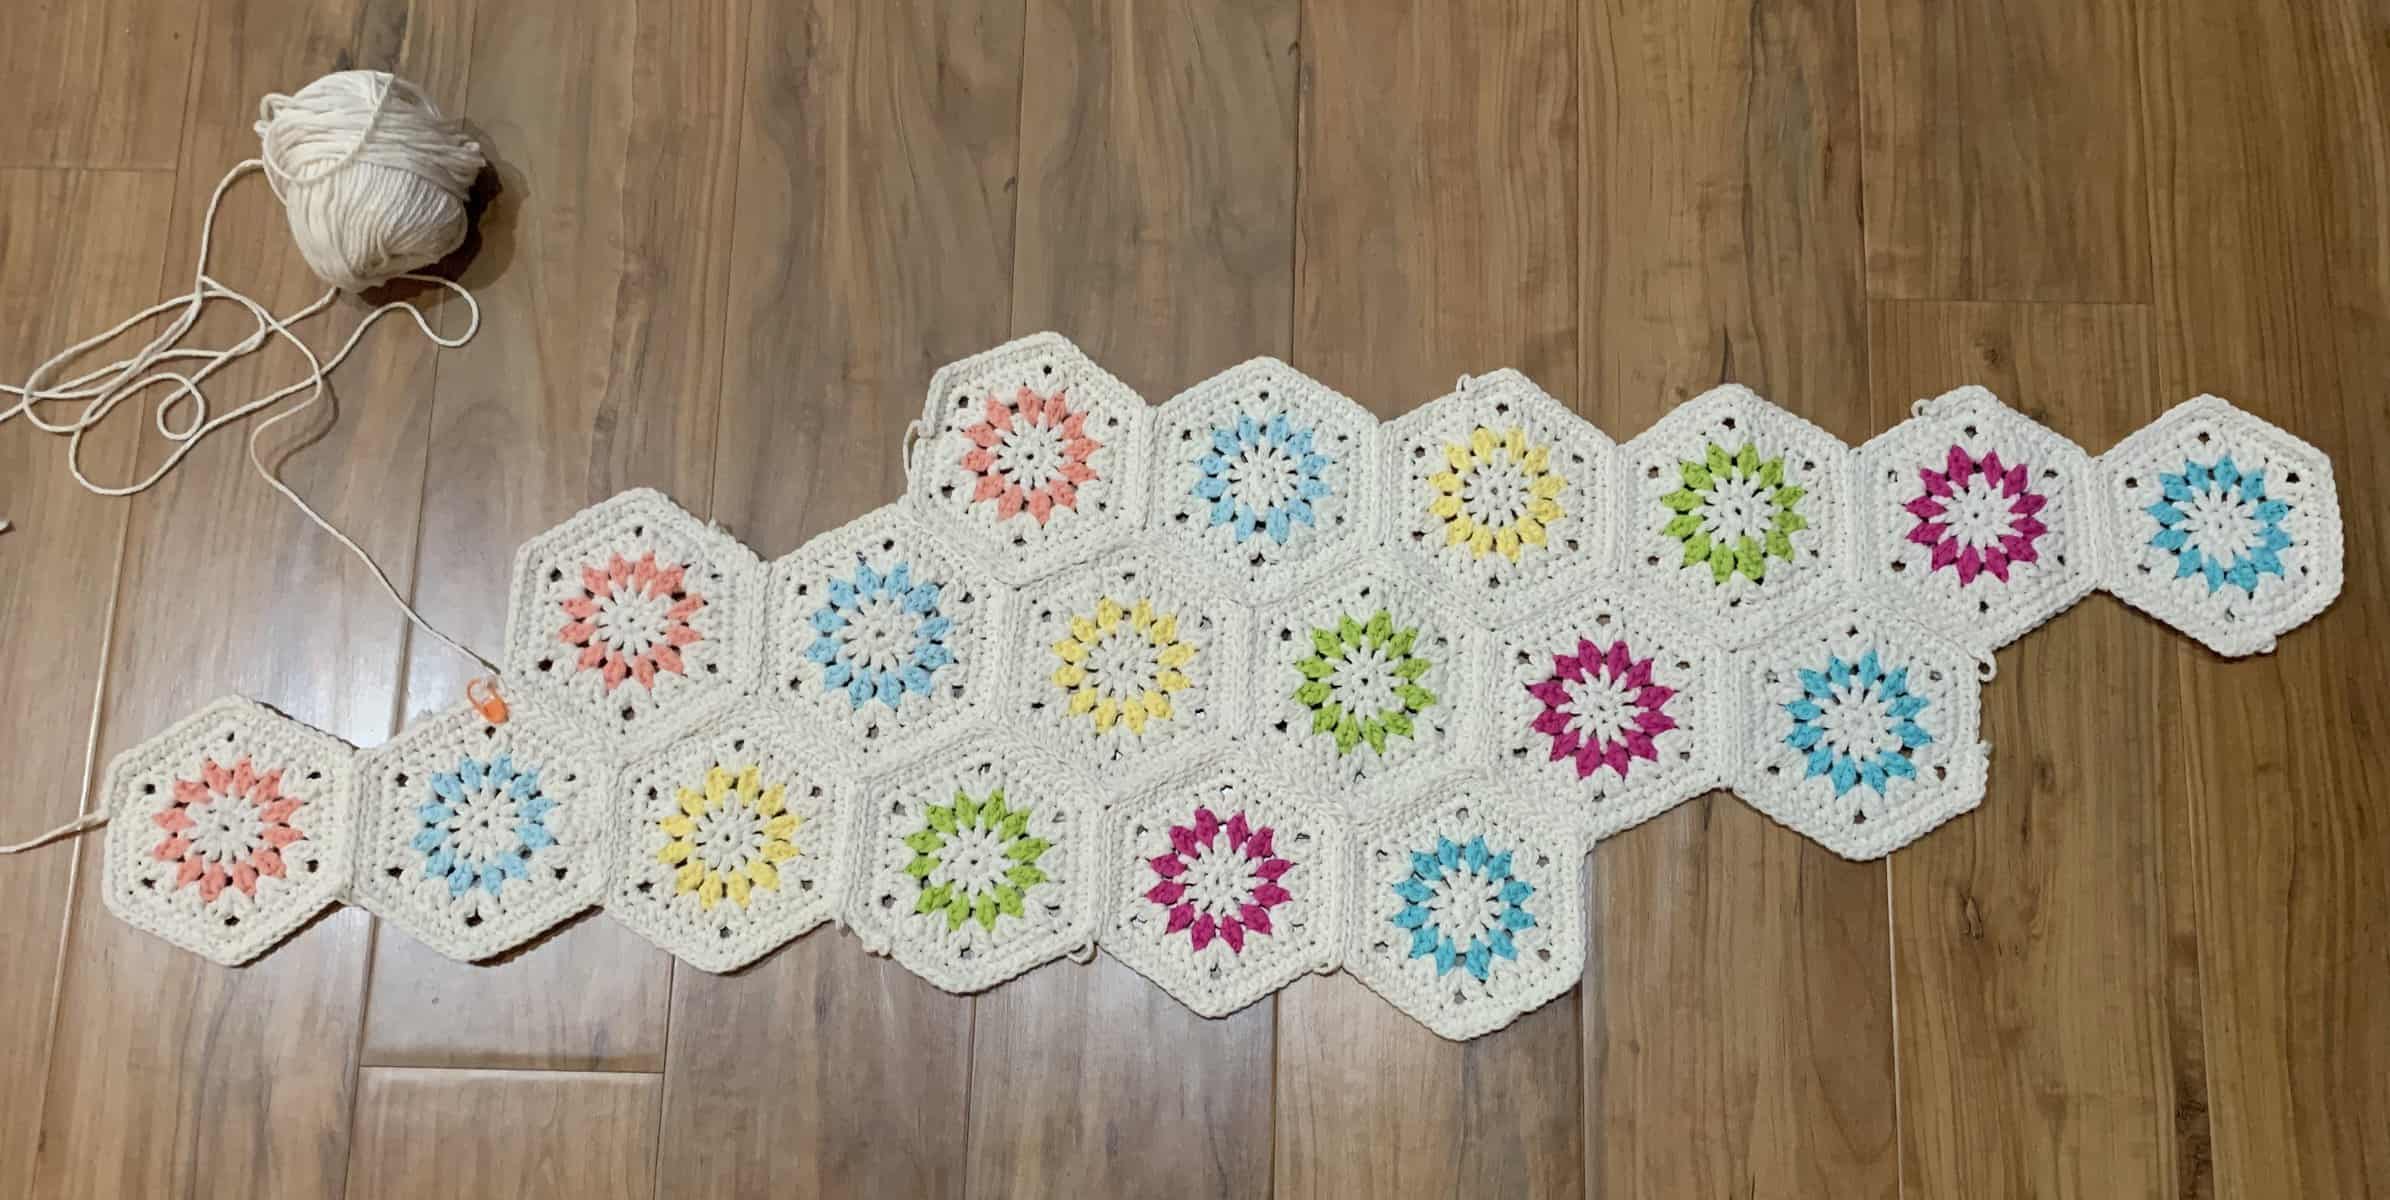
Layout & Seaming Hexagons
Step 1: Use the layout shown in the photo below to arrange your hexagons with the right sides facing up.
Step 2: Use locking stitch markers or scrap pieces of yarn to hold the hexagons together while you seam. Make sure to place the stitch markers in the middle single crochet at each corner to keep your pieces lined up.
Step 3: Use a 5.00mm crochet hook & a Flat Slip Stitch Seam (click HERE for tutorial) to seam your hexagons together. Create 3 strips of 6 hexagons, working all vertical seams between the hexagons first. Then work 2 longer zig zag seams to join the 3 strips of 6 hexagons.
Weave in all ends. Continue on to Folding & Seaming.
Folding & Seaming
Step 1: Flip the seamed hexagons over so that the right sides are facing down.
Step 2: Fold the seamed hexagons inward until they fit together like pieces in a puzzle and form a tube. See photo on the right.
Step 3: Seam the last zig zag section to form a tube. Work the last zig zag seam from the pink arrow to the green arrow.
Weave in ends. Continue on to Top Edging.

Top Edging
Rnd 1 (MC): With a 5.00 mm crochet hook and MC, join yarn with a standing sc in any middle sc from any of the hexagons’ points around the top edge, sc in the next st, hdc in each of the next 2 sts, dc in each of the next 5 sts, dc3tog, dc in each of the next 5 sts, hdc in each of the next 2 sts, sc in the next st, * sc in each of the next 2 sts, hdc in each of the next 2 sts, dc in each of the next 5 sts, dc3tog, dc in each of the next 5 sts, hdc in each of the next 2 sts, sc in the next st, work from * 5 times. Do not join. (108 sts)
Rnd 2: * sc in each of the next 2 sts, hdc in each of the next 2 sts, dc in each of the next 4 sts, dc3tog, dc in each of the next 4 sts, hdc in each of the next 2 sts, sc in the next st, repeat from * around. Do not join. (96 sts)
Rnd 3: * sc in each of the next 4 sts, hdc in each of the next 9 sts, sc in each of the next 3 sts, rep from * around. Do not join. (96 sts)
Rnd 4 (CC): Sl st in each st around. Join using special join technique. (96 sts)
Fasten off. Weave in ends. Continue on to Bottom Edging.
Bottom Edging
Rnd 1 (MC): With a 5.00 mm crochet hook and MC, join yarn with a standing sc in any middle sc from any of the hexagons’ points around the bottom edge, sc in the next st, hdc in each of the next 2 sts, dc in each of the next 5 sts, dc3tog, dc in each of the next 5 sts, hdc in each of the next 2 sts, sc in the next st, * sc in each of the next 2 sts, hdc in each of the next 2 sts, dc in each of the next 5 sts, dc3tog, dc in each of the next 5 sts, hdc in each of the next 2 sts, sc in the next st, work from * 5 times. Do not join. (108 sts)
Rnd 2: * sc in each of the next 2 sts, hdc in each of the next 2 sts, dc in each of the next 4 sts, dc3tog, dc in each of the next 4 sts, hdc in each of the next 2 sts, sc in the next st, repeat from * around. Do not join. (96 sts)
Rnd 3: * sc in each of the next 4 sts, hdc in each of the next 9 sts, sc in each of the next 3 sts, rep from * around. Do not join. (96 sts)
Rnds 4 – 10: Sc in each st around. (96 sts)
Fasten off. Weave in ends. Continue on to Seaming the Bottom of the Bag.
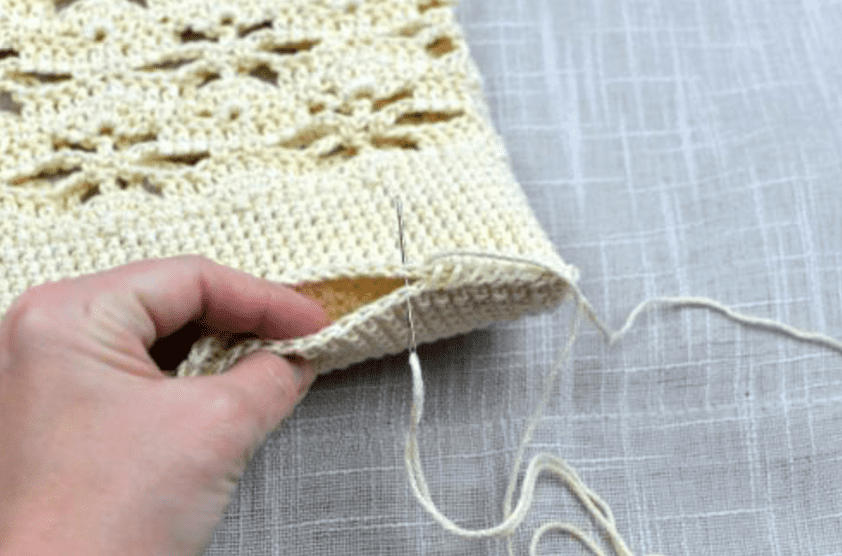
Seaming the Bottom of the Bag
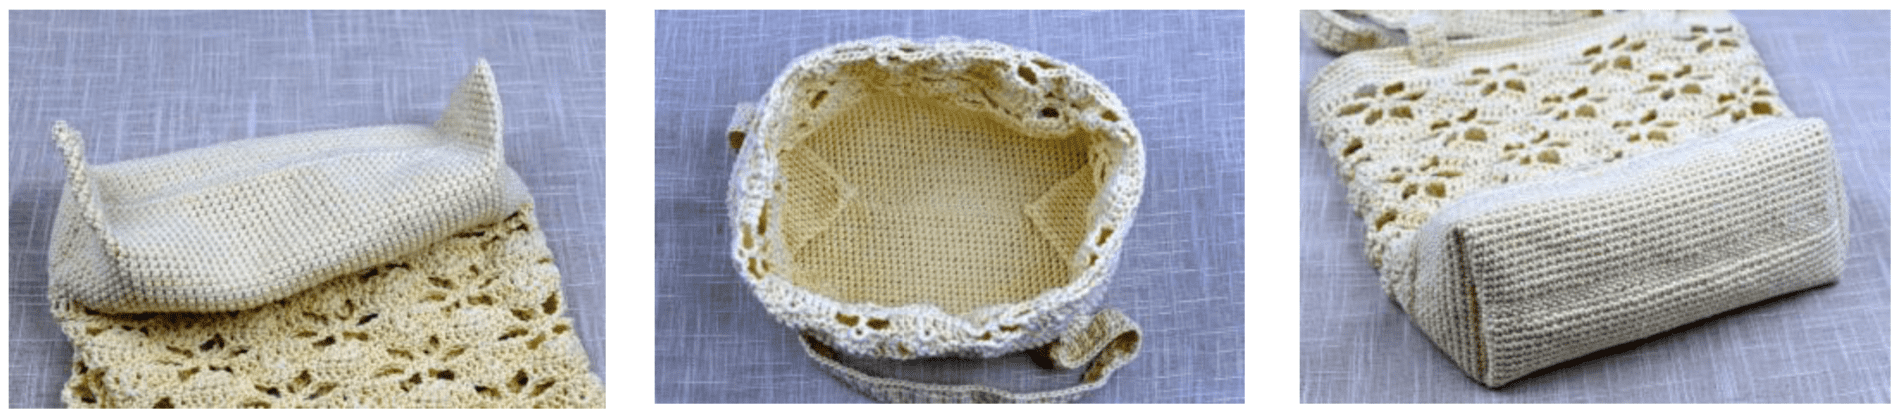
The bag in the photos is not the Summer Retro Tote Bag, but the seaming technique is the same.
Step 1: Turn the bag inside out, lay it flat in front of you.
Step 2: Using a yarn needle and length of yarn approximately 3 times the width of the bag, whipstitch the bottom of the bag closed making sure to work into every stitch. Weave in ends.
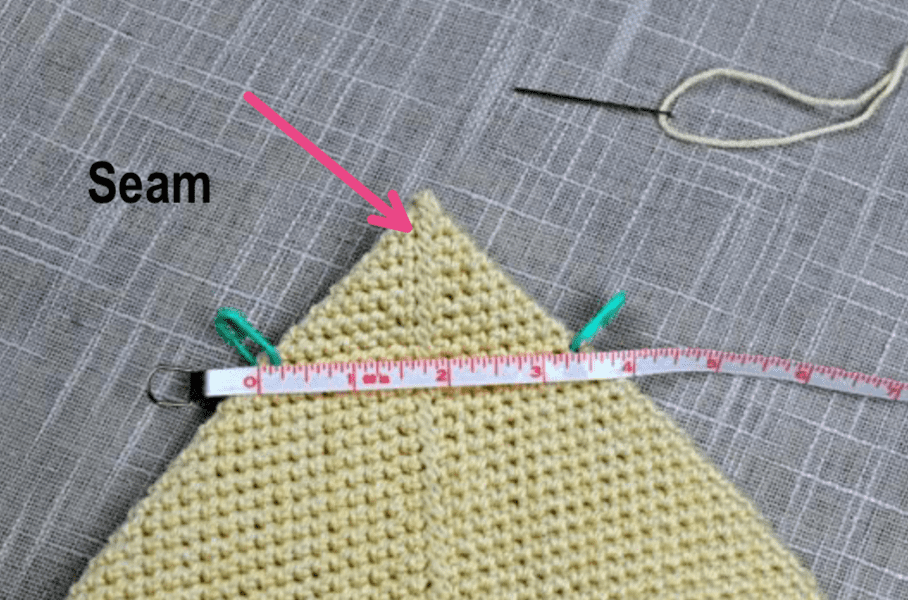
Step 3: Keep your bag inside out and position it so that one corner of the seam becomes the tip of the triangle. Note that
the seam is centered vertically in the triangle
Step 4: Use a measuring tape and find the points on the triangle where it measures 3.5″ across. Mark both the right and left side with a stitch marker.
Step 5: Use a yarn needle and 12″ piece of yarn and sew from one stitch marker to the next, working through both layers of the bag.
Step 6: Turn your bag right side out. The photo above, center shows what the inside of your bag will look like. The photo above, right shows what the bottom of your bag will look like.
Weave in ends. Continue on to the Strap.
Strap
Row 1: Using a 5.00 mm crochet hook & MC, ch 6, sc in the 2nd ch from your hook, sc in each ch across. Turn. (5 sts)
Row 2: Ch 1, sc in each st across. Turn.
Rep Row 2 until strap measures 26″, or desired length.
Do not fasten off. Continue on to Edging.
Edging
Rnd 1: Continuing on from the strap, work 1 sc into the side of each row and st around, but work 1 extra st at each corner. Stitch count isn’t crucial.
Do not join. Continue on to Slip Stitch Edging.
Slip Stitch Edging
Note: Adding the slip stitch edging will help keep your strap from stretching out.
Rnd 1: Continuing on from the Edging, slip stitch in each st around the perimeter of the strap. Adjust your hook size as needed to keep the tension even. Stitch count isn’t crucial. Use Special Join Technique (click HERE for tutorial).
Fasten off. Weave in ends. Continue on Attaching the Strap. Finished size of the strap is approximately 2″ W x 26″ L.
Attaching the Strap.
- Sew 2″ from one end of the strap to each short side of the upper portion of the bag.
- Add a large 1.5″ button on top of each end of the strap, if desired.
Fasten off. Weave in ends.
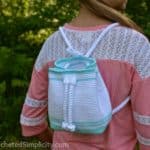
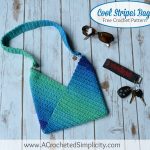
MORE FREE CROCHET BAG PATTERNS FROM A CROCHETED SIMPLICITY
If you enjoy making crochet bags, you may enjoy these other projects as well. And if you just want to browse, you can find all of our free crochet patterns HERE.


Are you intimidated by crocheted cables? Would you love to learn? Take an Annies Video Class with me and let me ease your fears of crocheted cables! Click on the photo below to watch a free preview. You can also see the other 2 classes I have available! (affiliate link)


Absolutely love this design!!
Love this!! I’m adding this to my queue. 🙂
I have saved this pattern and as soon as the shops open so I can get the yarn I will be making one for my summer bag this year ❤️
Gorgeous as always! I’ve added it to my ever growing list!
I love the pops of color!
awesome bag so many color combinations that can be done
I made this to be my summer bag. I added a lining and used wooden buttons where the handles join. I have received many complements , often from people in a store, walking through a parking lot, or even at a drive through window!
So pretty – I think I’m going to try this one
Beautiful bag! I can’t wait to try making this.
I LOVE this retro summer designed tote! I started it last summer but got pulled away. When I returned to crochet —- time for Christmas!! Looking forward to finishing this one FOR ME!!!
I’ve been looking for a tote bag but haven’t found one that would work until I found this one. I like the fact that I can make it larger without too much trouble. I have loved all the patterns and squares you have put out. Love all your designs.
I need to try slip stich joining again. you have given a great tip of using stich markers to hold places. Also reminding it will take time. thank you.
Is there a tutorial for this bag please?
Hi Julie,
Is there something specific I can help you with?
Jennifer