• Skip to primary navigation
  • Skip to main content
  • Skip to primary sidebar

A Crocheted Simplicity

Modern Crochet - Beyond the Basics

  • Patterns
  • Tutorials
  • About
  • Subscribe
  • Nav Social Menu

    • Facebook
    • Instagram
    • Pinterest
    • YouTube
menu icon
go to homepage
  • Patterns
  • Tutorials
  • About
  • Subscribe
    • Facebook
    • Instagram
    • Pinterest
    • YouTube
  • subscribe
    search icon
    Homepage link
    • Patterns
    • Tutorials
    • About
    • Subscribe
    • Facebook
    • Instagram
    • Pinterest
    • YouTube
  • ×

    Home » A Crocheted Simplicity

    How to Make Yarn Tassels

    Feb 10, 2017 by Jennifer Renaud

    Have you ever wanted to add yarn tassels to a project, but didn't know how to make them? If so, follow this simple tutorial to learn how to make yarn tassels! 

    The yarn I used for this tutorial is a worsted weight yarn, but you can use whatever weight yarn you'd like for your yarn tassels. Simply follow the notes below for tips on yarn weights.


    >> CLICK HERE TO SIGN-UP TO RECEIVE OUR NEWSLETTER <<


    Learn how to make yarn tassels with this simple tutorial! #yarntassels #DIYyarntassels #handmade #yarn #crochet #crochettutorial #yarntutorial #freetutorial

    >DON’T FORGET TO PIN IT!<


    Do It Yourself - Yarn Tassels (any yarn, any size) by A Crocheted Simplicity

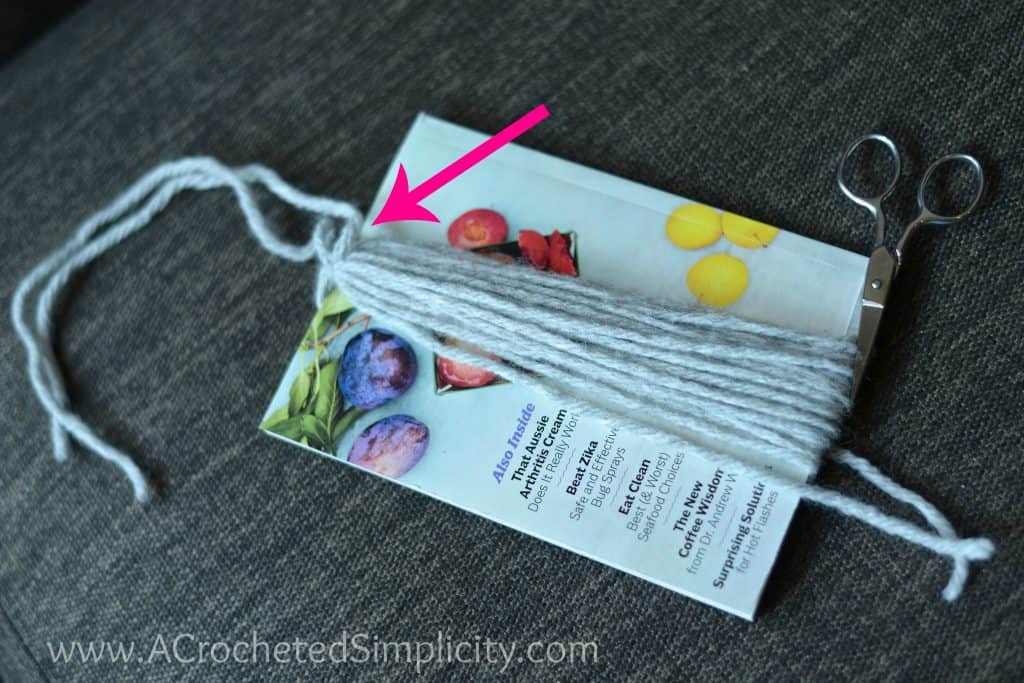
    Step 1 (photo above): Find a household object that is close to the length of the tassels you'd like to make. A few items that work well are: small books, smartphones, or even a small piece of cardboard (you can cut this to whatever length you desire). The small book shown in the photo above measures approximately 6".

    Step 2 (photo above): Wrap the yarn vertically around the item you've chosen to use as a template. Continue to wrap the yarn around the template until your tassel is as full as you'd like. Cut your yarn. *For the tassel shown above, I wrapped the yarn 20 times. For a super bulky yarn, 10 times is plenty. For a lighter weight yarn you may want to wrap it more than 20 times. The key thing to remember here is that the more you wrap, the thicker your tassel will be, and if you overwrap, your tassel may become a bell shape.

    Step 3 (photo above): Cut an 8" piece of yarn. At one end of the template, thread the yarn thru the center of the yarn and tie it in a tight knot. *See Pink Arrow in the photo above.

    Step 4 (photo above): Cut the yarn on the end opposite the knot you just made. Remove the tassel from the cardboard. 
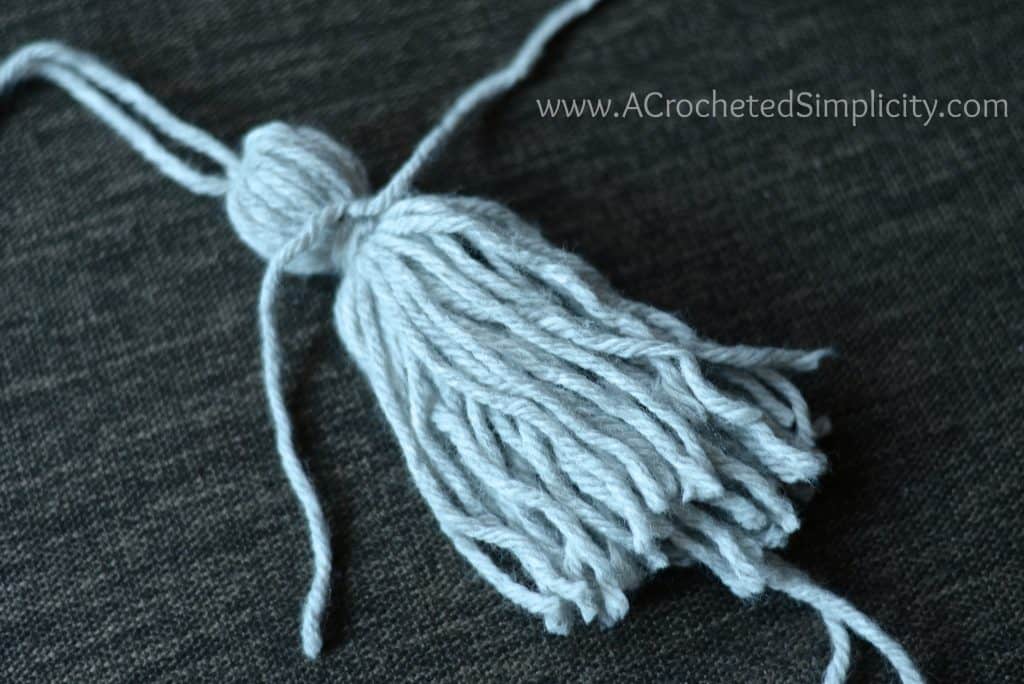
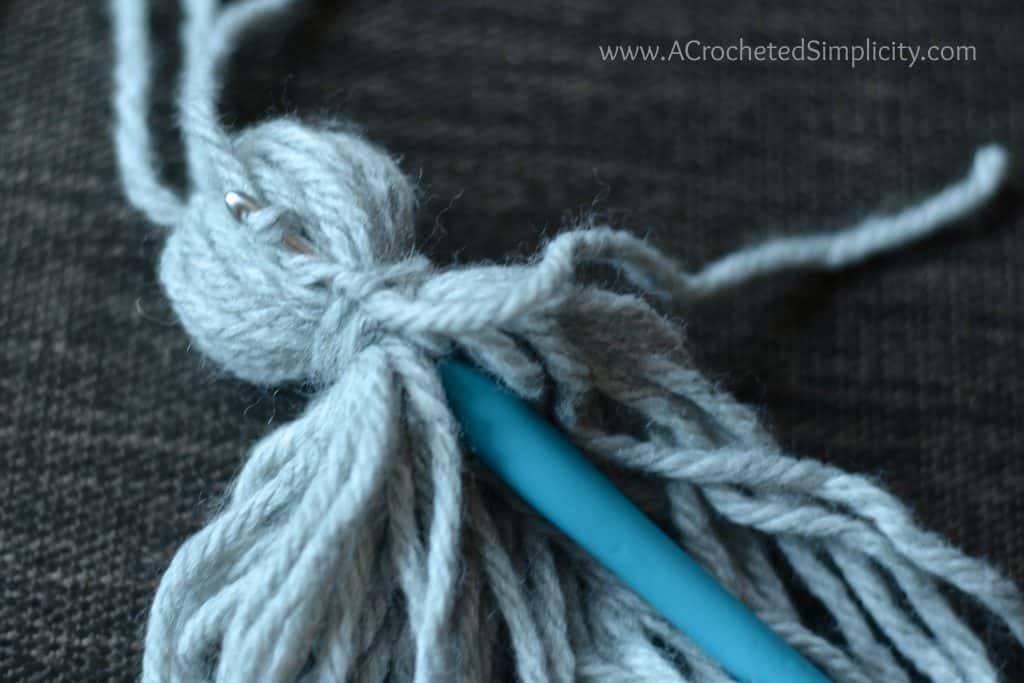
     

    Do It Yourself - Yarn Tassels (any yarn, any size) by A Crocheted Simplicity

    Step 5 (photo above): Cut an 8" piece of yarn. Wrap this piece of yarn around the tassel approximately 1-¼" from the knot at the top. Tie a tight knot then wrap the yarn around the same spot 3-4 times. Knot again and tuck the ends inside the tassel. *See Photos above and below. I like to use a crochet hook to help pull the ends to the center of the tassel.

    Do It Yourself - Yarn Tassels (any yarn, any size) by A Crocheted Simplicity

    Do it Yourself (DIY) - Yarn Tassels (any yarn, any size) by A Crocheted Simplicity

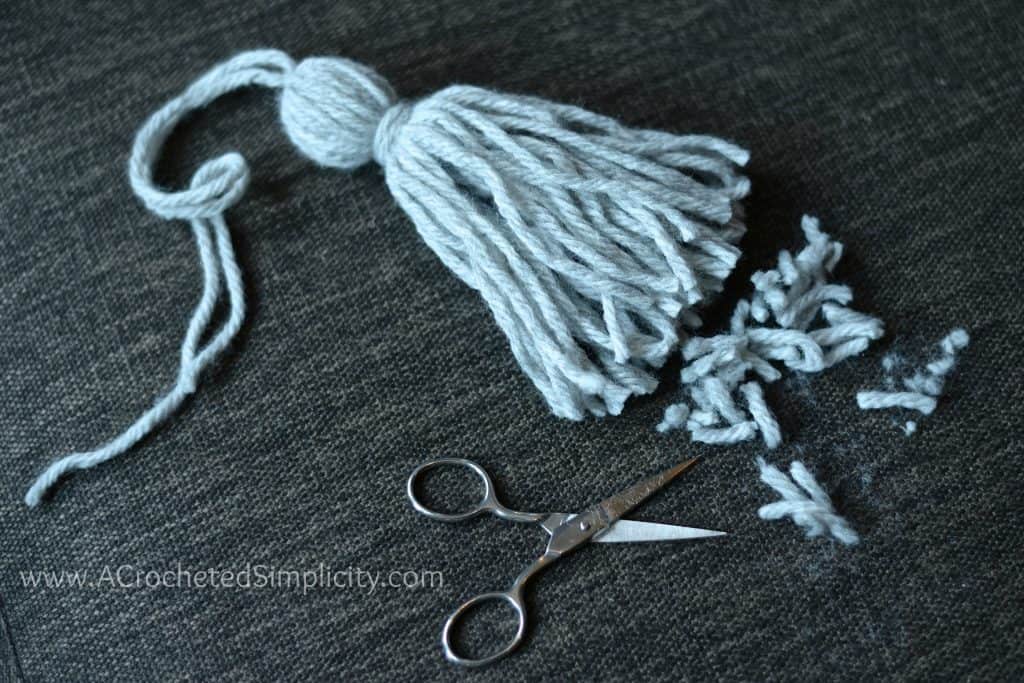
    Step 6 (photo above): Trim the free ends of the tassel to even them out. 

    Step 7: Attach a tassel to your project using the loose ends at the top of the tassel. Tie tight to secure. Lastly, weave in all ends.

    FIND ALL OF MY FREE CROCHET PATTERNS HERE


    Are you intimidated by knit-look crochet? Would you love to learn my tips & tricks? Take an Annies Video Class with me and let me ease your fears and help you increase your skills! Click on the photo below to watch a free preview. You can also see the other 4 video classes I have available!

    Learn Knit-Look Crochet with instructor Jennifer Pionk


    I hope you’ve enjoyed this free tutorial! Check out my Ravelry shop to see all of my designs!

    I LOVE seeing your finished projects! Please feel free to share them in the A Crocheted Simplicity Crochet Community group on Facebook! 

    Happy Crocheting!


    More A Crocheted Simplicity

    • Three short row crochet hats laying with lavender and a yarn bowl.
      Easy Short Row Crochet Hat Pattern
    • Image is of a c2c rectangle and square crocheted using the mini bean stitch
      Crochet C2C Mini Bean Stitch
    • Black and white mini mystery crochet along event graphic.
      Mini-Mystery Crochet Along - March 2023
    • Close up of woman outside wearing chunky crochet hooded cowl.
      Easy Crochet Hooded Cowl

    © Copyright 2023 Jennifer Renaud aka A Crocheted Simplicity. All Rights Reserved. All designs, posts, videos and images are property of Jennifer Renaud and are my own original work. No parts may be reproduced, altered, or distributed in any form, or by any means, without express written permission from Jennifer Renaud. If you want to share this information with someone, share the link to this post. If you want to share on your own blog / website, then you may use the first photo in this post and link back to this post. You may not give away printed copies of this post. Thank you.

    This post may contain affiliate links/ads. If you purchase something from a link in this post, I may be compensated.

    Reader Interactions

    Primary Sidebar

    Hi there, I'm Jennifer! Welcome to my little corner of the internet where I share FREE crochet patterns, tutorials, tips, and more! More About A Crocheted Simplicity

    Subscribe to my YouTube Channel for all video tutorials

    YouTube subscribe button by Skipser

    Follow me on Social Media!

    • Facebook
    • Instagram
    • Pinterest
    • YouTube

    Privacy Policy

    Privacy Policy

    Crocheted with in Michigan

    Copyright © 2023 · Genesis Framework · WordPress · Log in