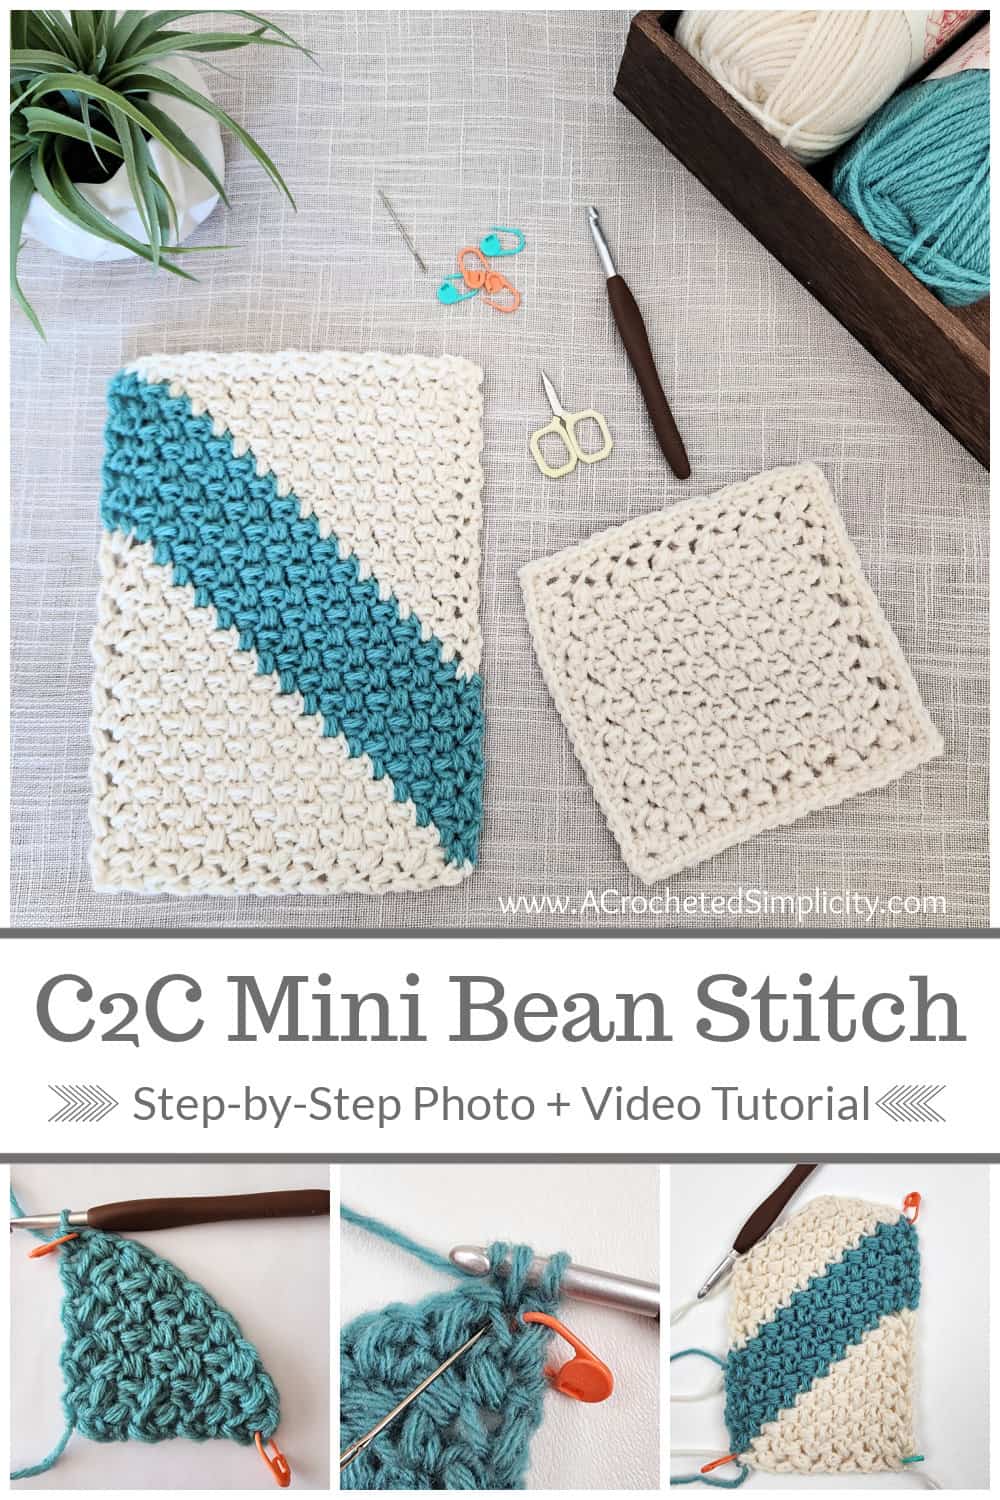
Crochet C2C Mini Bean Stitch


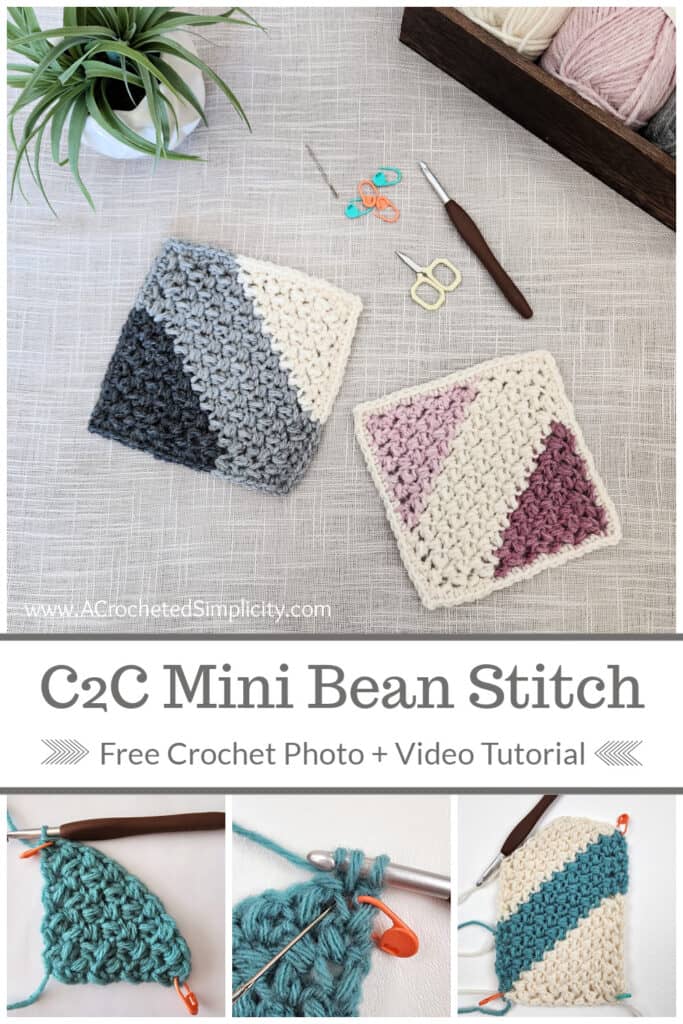
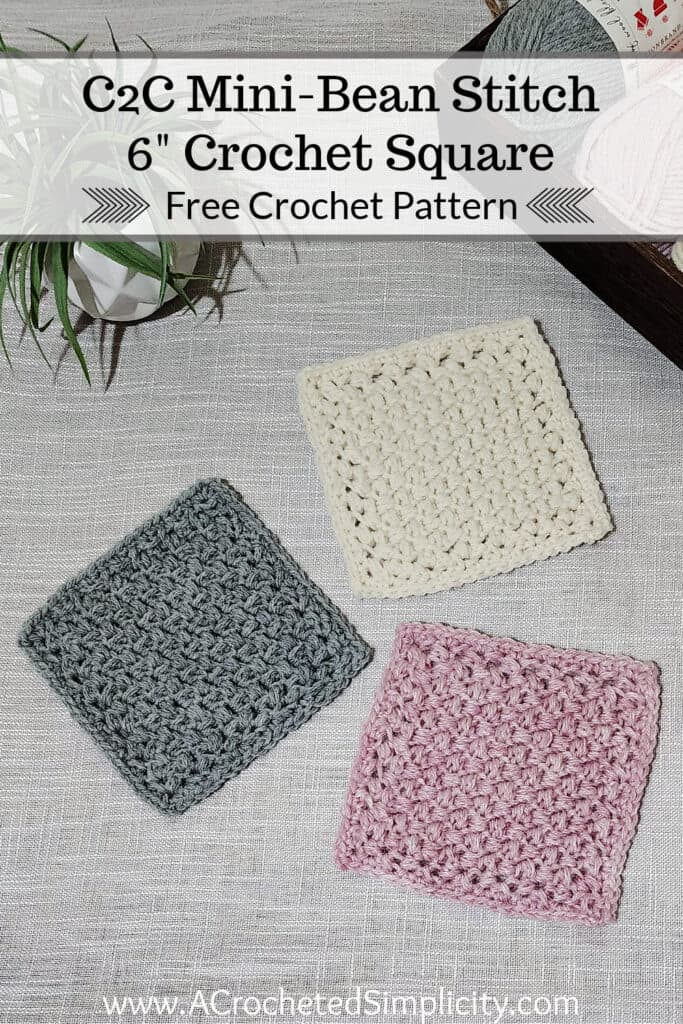
Learn to crochet C2C Mini Bean Stitch, a different corner to corner crochet stitch.
Corner to corner crochet was made wildly popular with the diagonal box stitch, but with a little determination, you can work any crochet stitch from corner to corner.
You can find the free crochet C2C mini bean stitch pattern in this post below, or an ad-free print friendly version (including all photo tutorials) on Love Crafts, Ravelry, or on Etsy (aff).
I’ve also included a step by step photo tutorial below AND a video tutorial to help ensure the tutorial is beginner friendly.
How to Crochet the C2C Mini Bean Stitch
After you’ve mastered a few basic crochet skills, corner to corner crochet (often referred to as C2C) is a fun technique to learn and add to your crochet toolbox.
The technique of working corner to corner crochet is very simple. Choose any crochet stitch, begin your project in one corner and crochet on the bias (on a diagonal… think *triangle*) until your project is the desired width and length. Then, decrease each row until you’ve reached the corner opposite the one you started.
Although corner to corner crochet was made wildly popular with the diagonal box stitch, with a little determination, you can work any crochet stitch from corner to corner.
In the crochet pattern below, you’ll learn how to crochet the Mini Bean Stitch from corner to corner.
The pattern below is written for a 6″ granny square, but I’ve included super easy instructions for how to make any size square or blanket you wish!
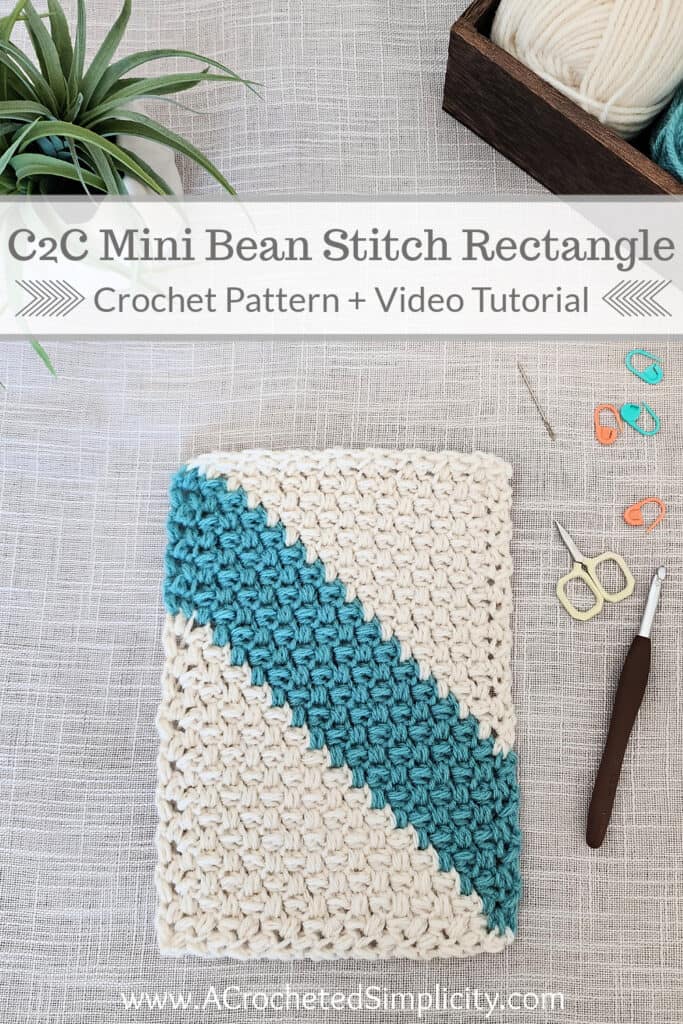
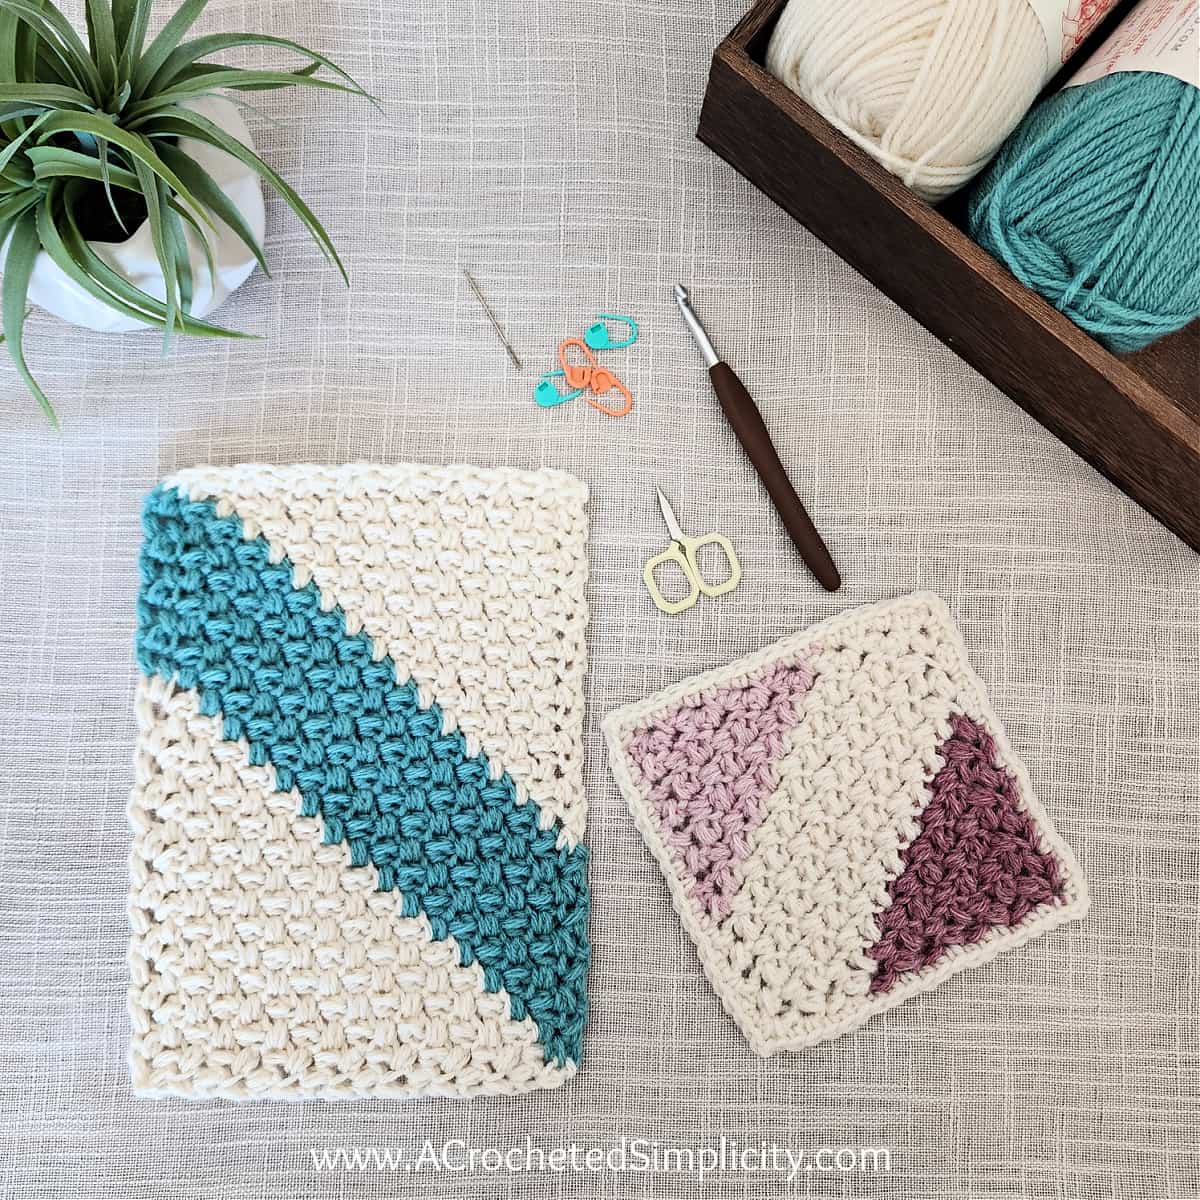
I’ve also included written instructions for how to crochet a C2C Mini Bean Stitch rectangle!
Check out the C2C Mini Bean Stitch Video Tutorial! The video tutorial includes both the C2C square and C2C rectangle instructions.
The C2C Mini Bean Stitch 6″ Square is my contribution to the 2023 Melange Blanket Mystery Crochet Along hosted by Marie from Underground Crafter. Marie has gathered 48 amazing crochet bloggers who have come together to share a new 6″ square pattern weekly on Fridays.
This is going to be a journey of cool techniques, all sorts of textures and innovative patterns, a way of meeting new-to-you designers, and so much more! Find out how to join the Melange Blanket Crochet Along and enter to win several great prizes in Marie’s blog post.
DIFFERENT CORNER TO CORNER CROCHET STITCHES
Do you enjoy working corner to corner crochet and want to learn how to crochet different stitches from corner to corner?
If so, I have several free C2C crochet designs that use stitches and stitch patterns other than the diagonal box stitch.
Click the links below to see my other free Corner-to-Corner Crochet designs that do not use the diagonal box stitch:
- C2C Buffalo Plaid Blanket
- C2C Candy Stripes Blanket
- On the Bias Tote Bag
- Diagonal Ripple Scarf
- Traveling Afghan Square
- On the Bias Square Afghan
- On the Bias Rectangular Afghan
- Diagonal Ripple Lapghan
- Diagonal Chevron Lapghan
- Cuddly Soft C2C Baby Blanket
- Aubergine Afghan
- Diagonal Chevron 12″ Afghan Square
I also have a premium crochet pattern (one of my all-time favorites) that uses corner to corner crochet and does not use the diagonal box stitch. The On the Bias Granny Square Afghan includes schematics to create 6 different afghans using just one square! Check out the crochet pattern HERE.
Crochet Corner to Corner Mini Bean Stitch
First, what is a Mini Bean Stitch?
The mini bean stitch itself closely resembles the single crochet puff stitch except, as you may have guessed, it’s “mini”. It’s a smaller stitch because you work fewer yarn overs than you do with a puff stitch.
To me, the mini bean stitch (also referred to as the Elizabeth Stitch) is a more dainty version of the single crochet puff stitch. It’s not as bulky and the crochet fabric it creates is lighter.
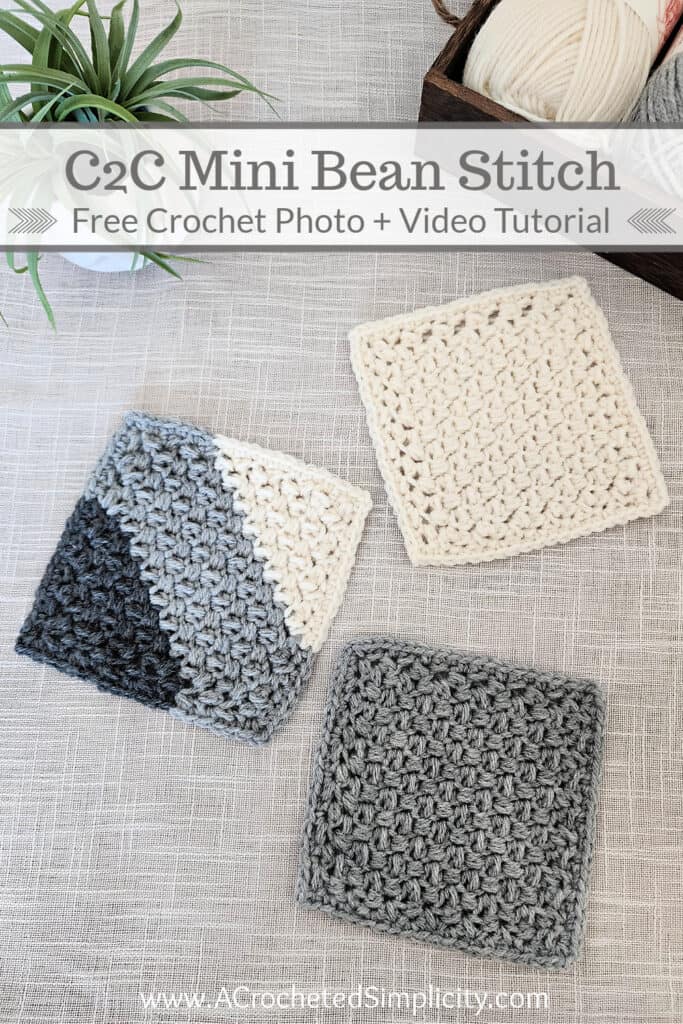
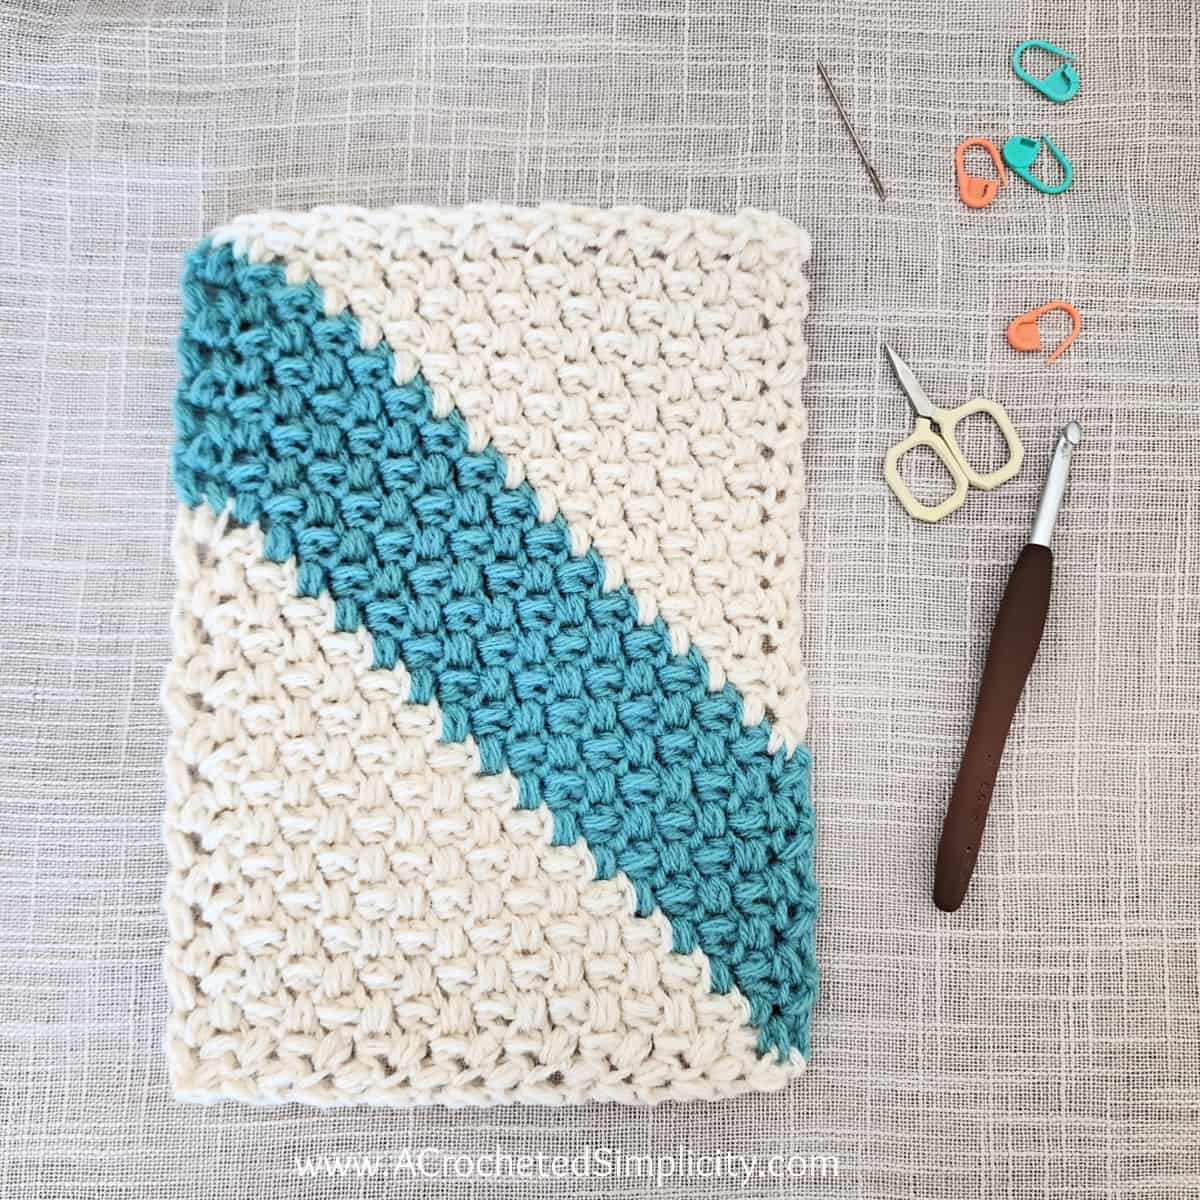
When worked in rows, the mini bean stitch resembles a woven fabric because the stitches from each row lean in opposite directions.
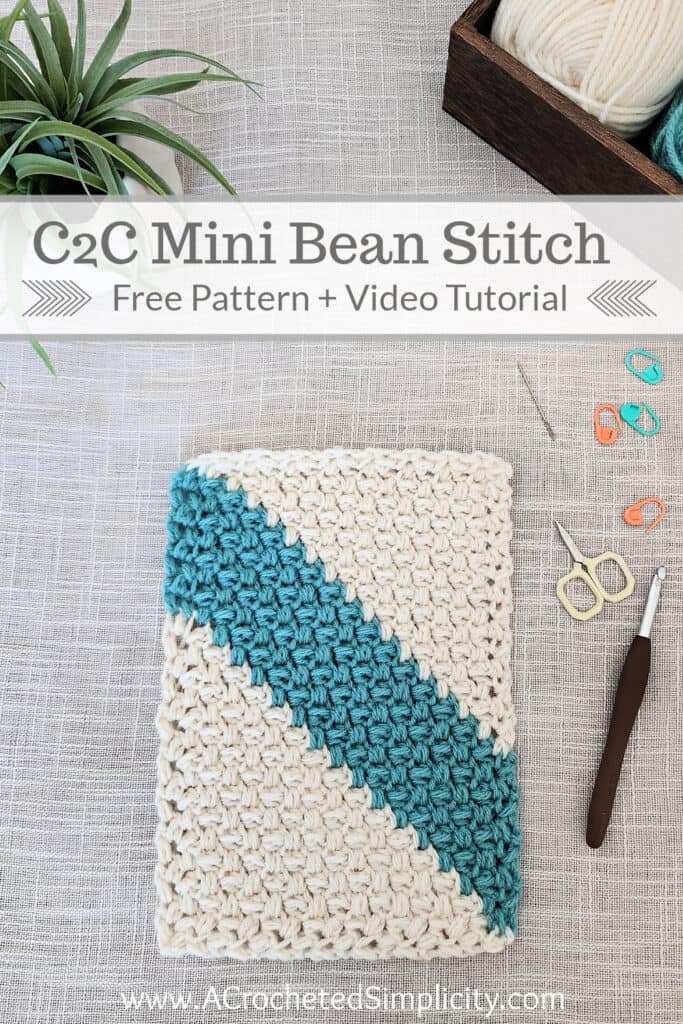
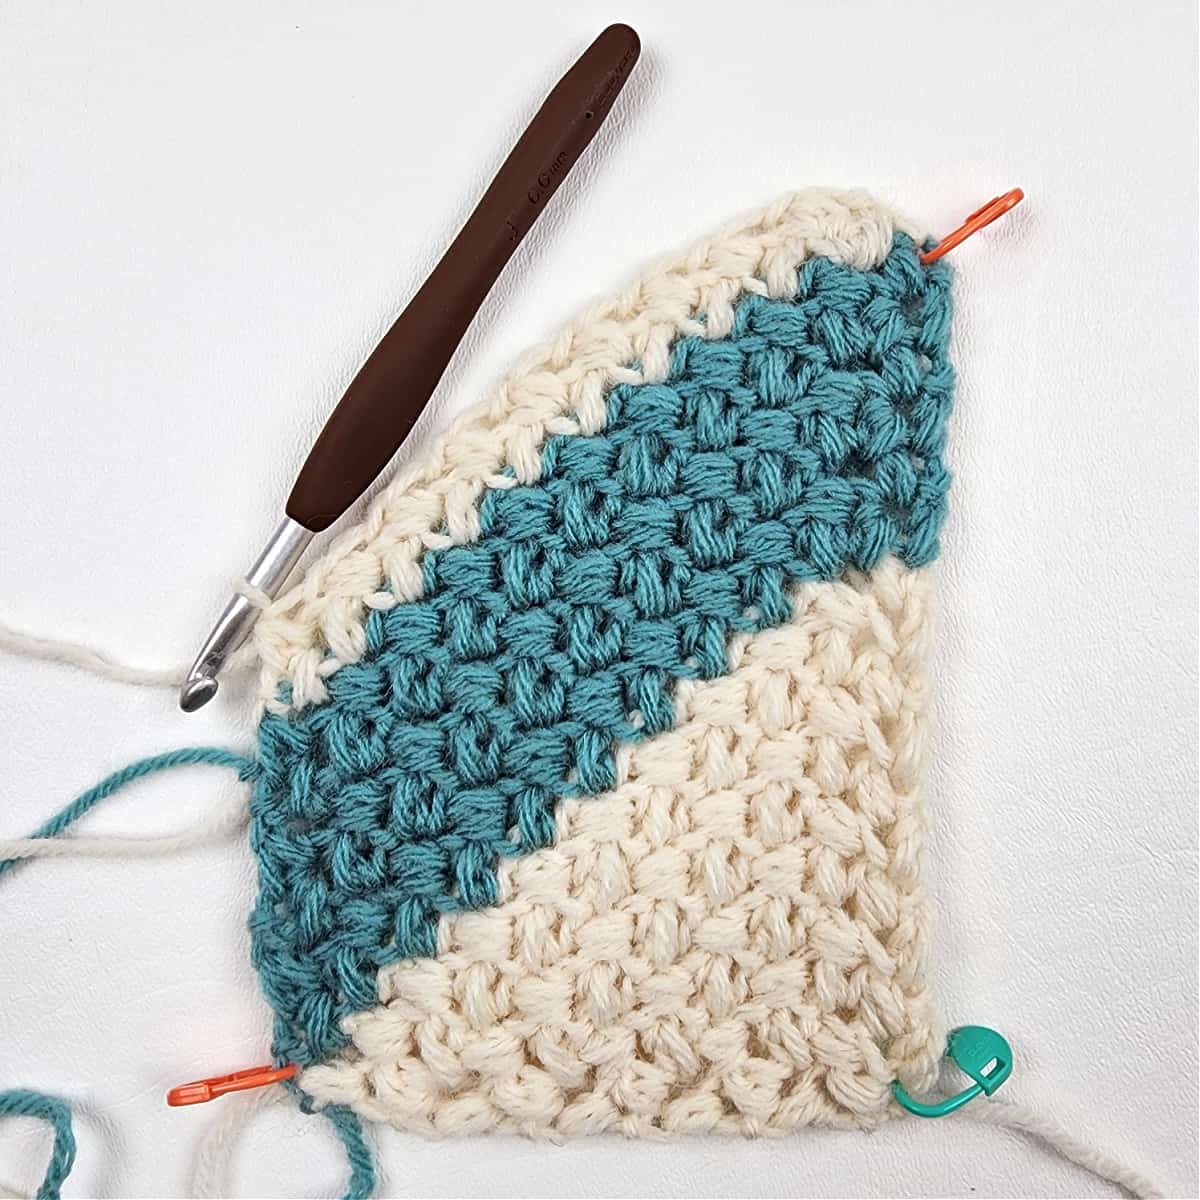
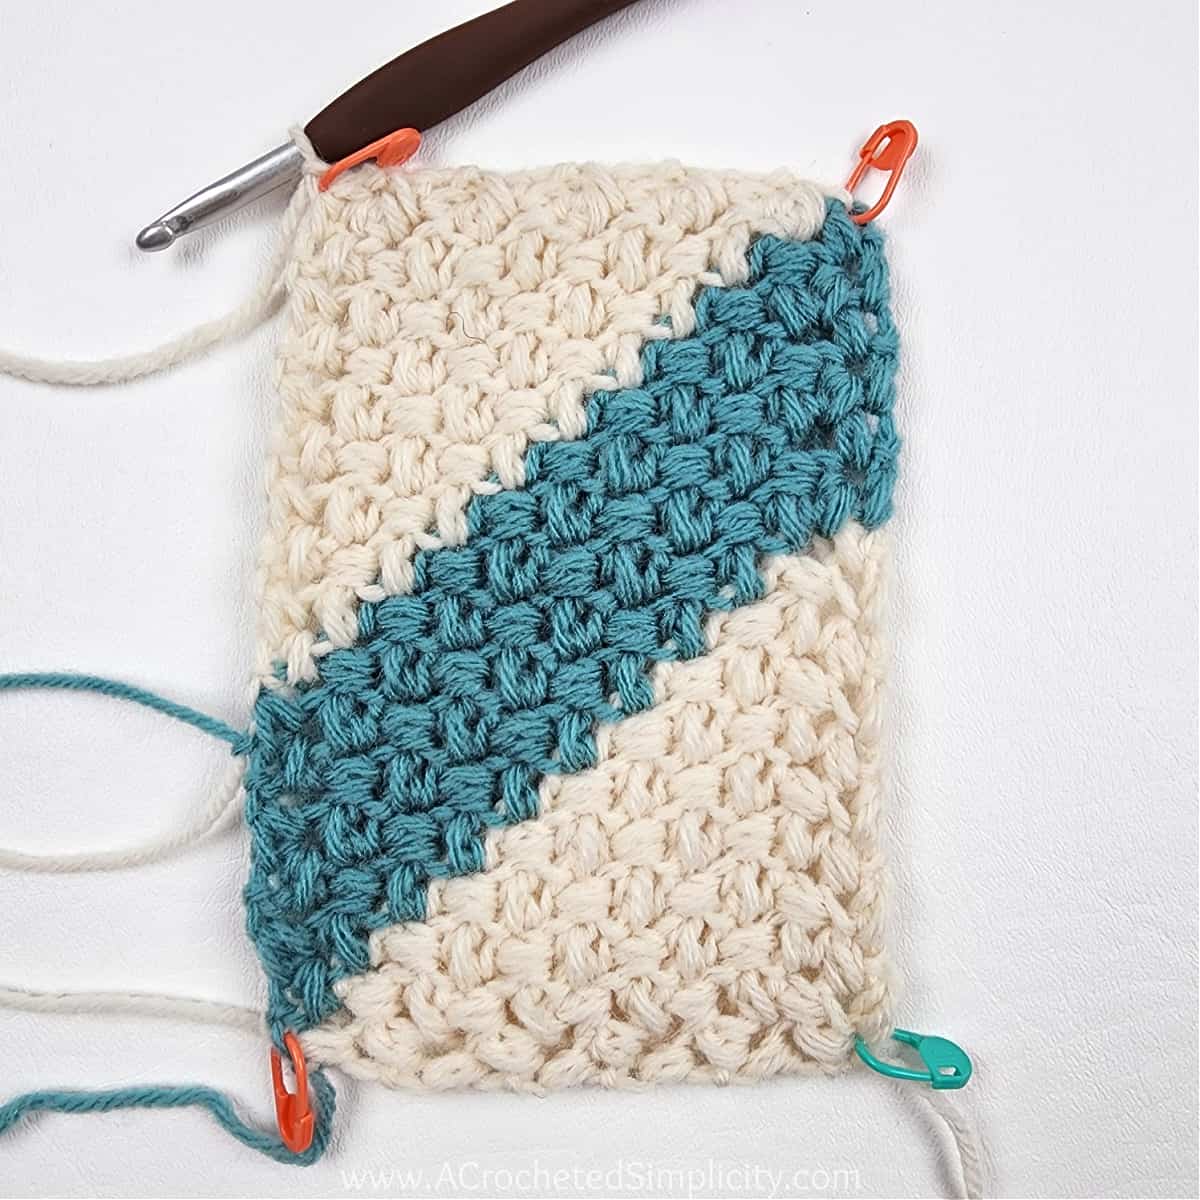
When worked corner to corner, the mini beans appear woven, but they sit perpendicular to one another.
I love the beautiful texture that the crochet mini bean stitch creates and have used it for several projects including a beanie & slouch, a wine cozy, and a 12″ afghan square.
C2C Crochet Mini Bean Stitch 6″ Square, Dishcloth, Blanket & More
Although the written instructions in this blog post below are for a 6″ crochet square for the Melange Blanket Crochet Along, I’ve also included super simple instructions so you can use the C2C Mini Bean Stitch to make ANY size project.
I’ve also included instructions to make a C2C Mini Bean Stitch Rectangle.
Check out the C2C Mini Bean Stitch Video Tutorial!
The C2C Mini Bean Stitch is a beautifully textured crochet stitch pattern that’s perfect for several different projects, including a baby blanket, lapghan, dishcloth and more!
Instructions are included for making a C2C square and a C2C rectangle. The corner to corner rectangle instructions are perfect for making a soft, squishy crochet baby blanket!
Yarn
I used Lion Brand Yarns Wool Ease for the samples shown in this blog post.
Wool Ease is a worsted weight / 4 acrylic & wool blend (3 oz / 85 g / 197 yards / 180 m / 80% acrylic / 20% wool).
Use ANY yarn & crochet hook size you’d like for this pattern!
If you use this tutorial to make a custom size corner to corner crochet blanket, scarf, or another crochet project, please make sure to share photos in our Facebook crochet community!
HOW TO CROCHET CORNER TO CORNER (C2C) Mini Bean Stitch – VIDEO TUTORIAL
Although this is an easy crochet stitch pattern and I’ve included step by step photos below, I have a few tips and tricks to share with you. I felt it was easiest to share them in a YouTube crochet stitch video tutorial.
If you love learning different corner to corner crochet stitches, make sure to check out my other crochet corner to corner video tutorials.
If you love crochet video tutorials, make sure to subscribe to our channel because there are more great tutorials coming your way!
C2C Mini Bean Stitch – FREE CROCHET STITCH PATTERN
The free pattern is below, but if you love to work offline, I’ve got a couple other great options for you.
Purchase the ad-free, printable PDF, including all photo tutorials, on Love Crafts, Ravelry, or on Etsy (aff).
This post contains affiliate links.
MATERIALS
- Yarn: Worsted Weight / 4 / Yarn, (Lion Brand Yarns Wool Ease was used for the samples in the photos) (3 oz / 85 g / 197 yards / 180 m / 80% acrylic / 20% wool).
- Wool Ease is also available on Amazon HERE.
- Yardage Needed: 80 yards per 6″ square.
- Crochet Hook: J/10/6.00mm; or size needed to obtain gauge (My favorite crochet hooks are the Clover Amour Crochet Hooks, I’ve never had an ache in my hand since switching).
- Locking Stitch Markers
- Scissors
- Yarn Needle
 Lion Brand Wool-Ease Yarn, ...Shop on Amazon
  1049/J CROCHET HOOK AMOUR-S...Shop on Amazon
  Fiskars 154110-1001 Non-sti...Shop on Amazon
  Lion Brand Yarn 400-5-5002 ...Shop on Amazon
  Clover Lock Ring Markers, 2...Shop on Amazon
ABBREVIATIONS (US TERMS)
- ch(s): chain(s)
- sl st(s): slip stitch(es)
- st(s): stitch(es)
- sp: space
- sc: single crochet
- MBS: mini bean stitch
- MBS2tog: mini bean stitch decrease
- SM: stitch marker
- Rep: repeat
- Rnd: round
- Join with a standing single crochet
Sizes
- 6″ W x 6″ L – crochet square
- ANY Size C2C Square
- ANY Size C2C Rectangle
Gauge
- With 6.00mm crochet hook, in mini-bean st: 10.5 sts = 3″; 8 rows = 2.5″
Experience Level
- Easy
Notes
- Turning chains are not included in stitch count unless noted otherwise.
- Yarn Notes: I used Lion Brand Yarns Wool Ease. Another comparable worsted weight yarn may be used.
- Lion Brand Wool Ease, 80% Acrylic / 20% Wool (197 yards / 180 m / 85 g / 3 oz).
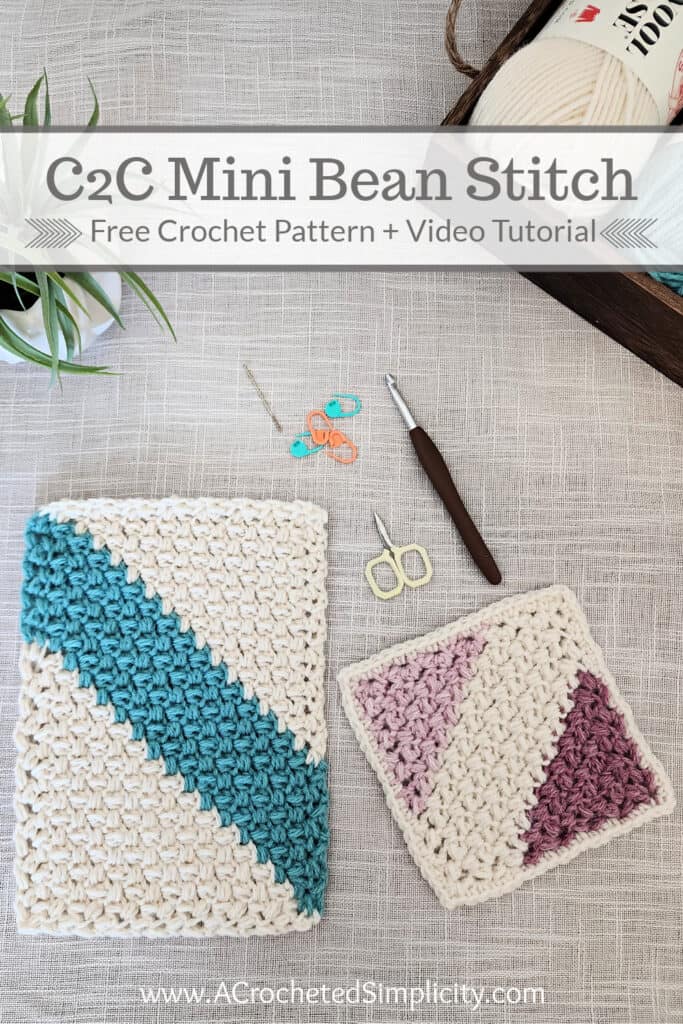
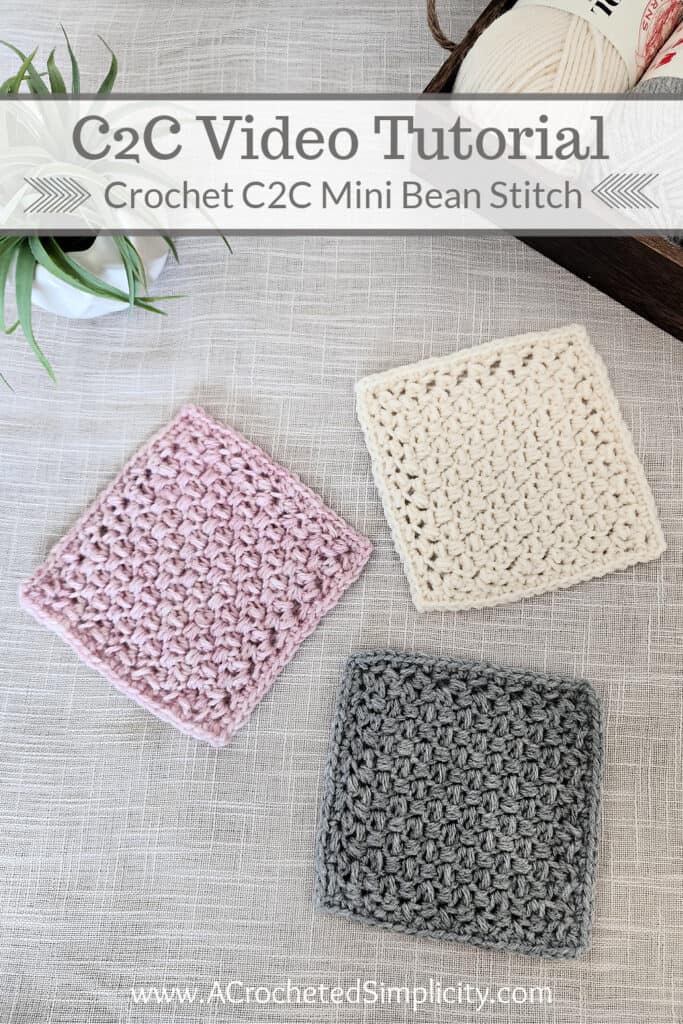
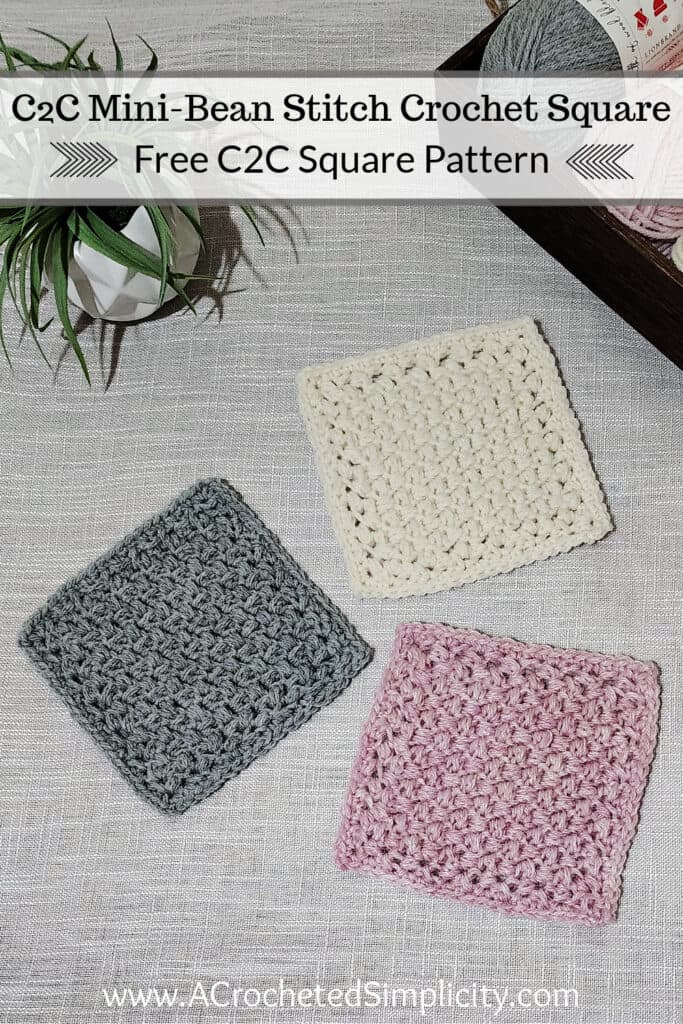
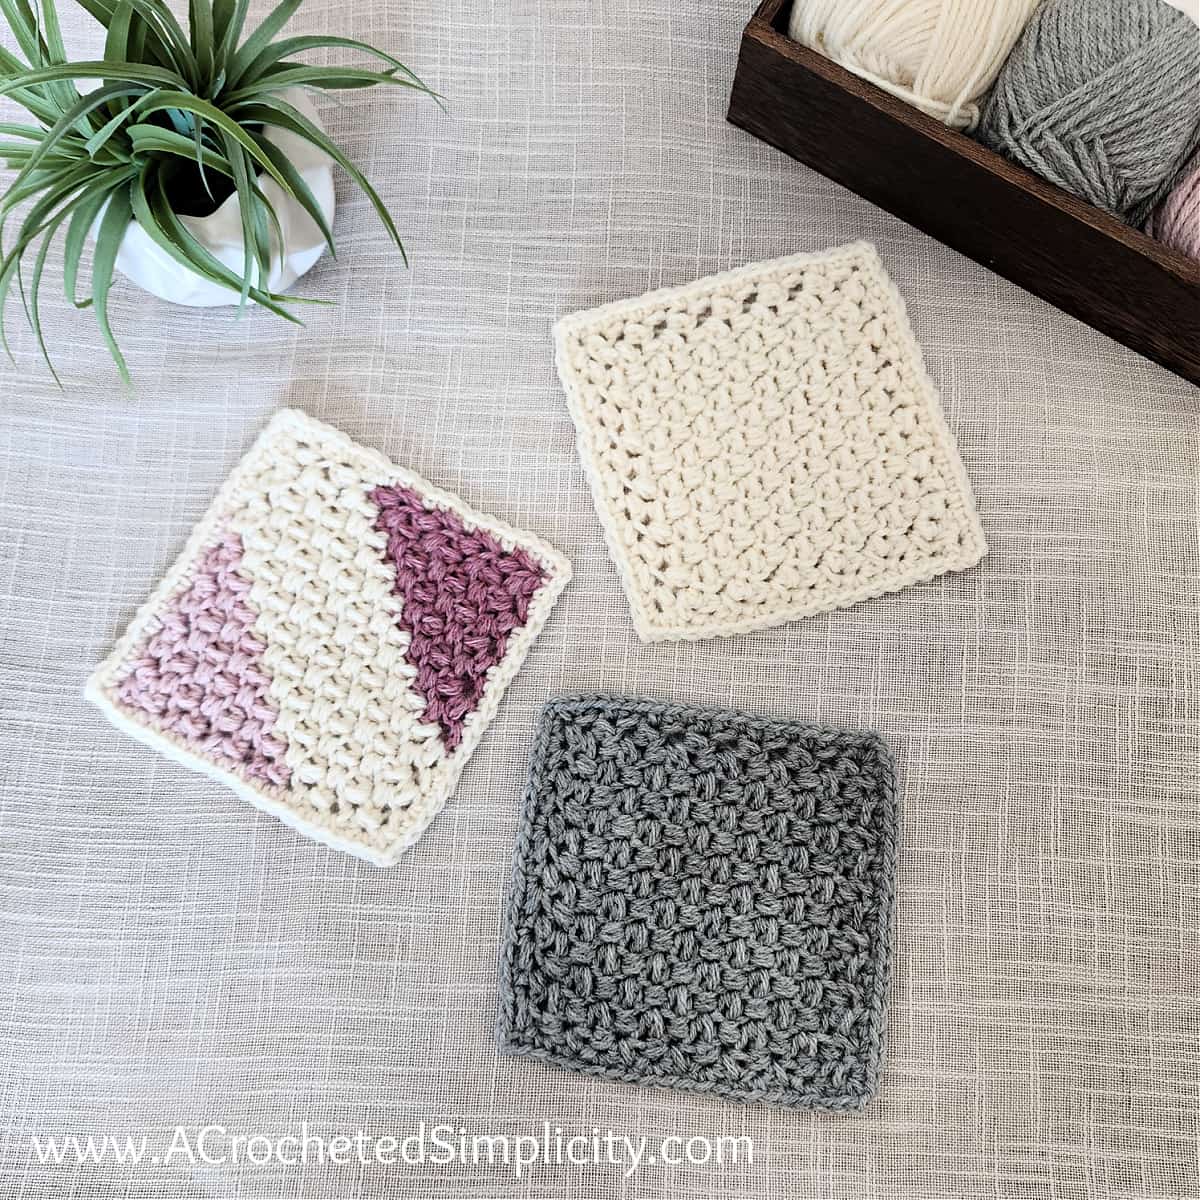
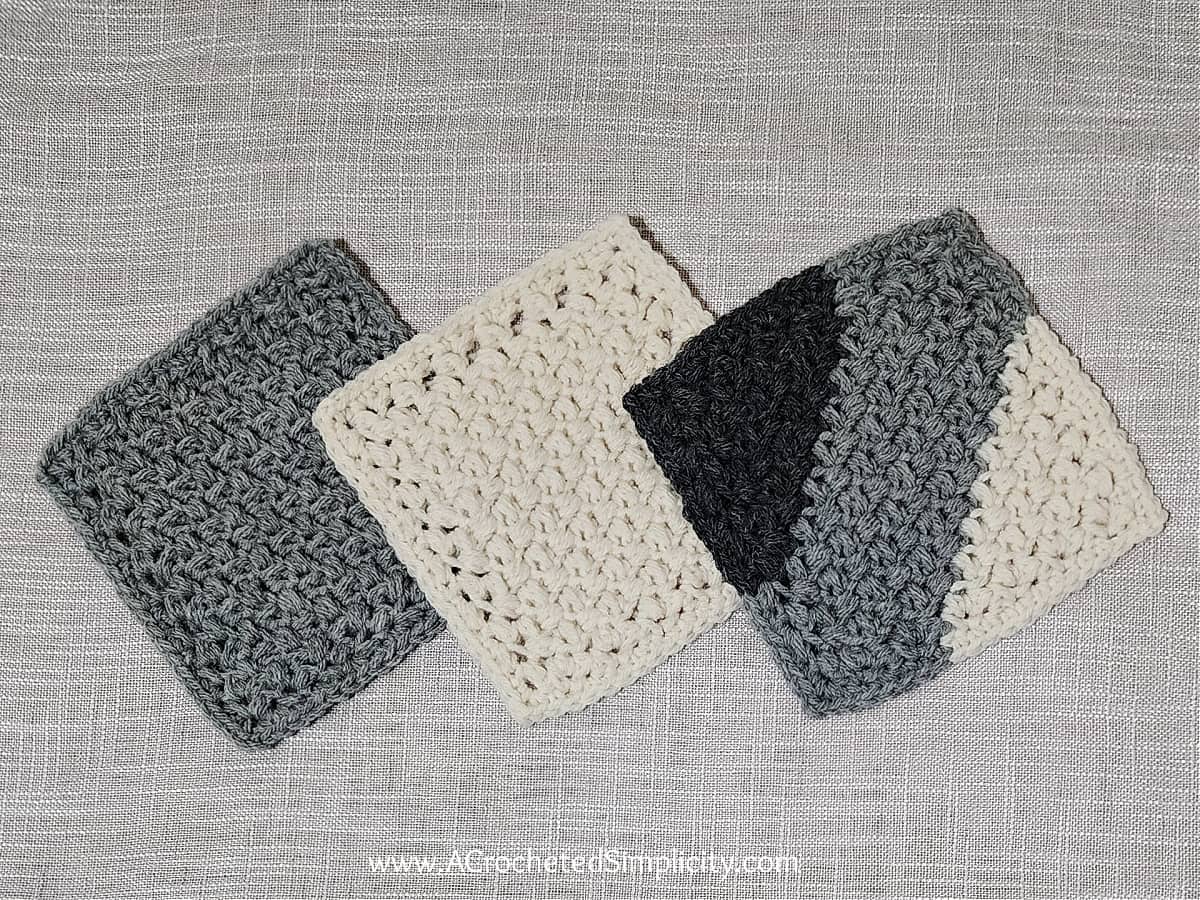
- Color Combinations
- ○ Pink Multi: Dark Rose Heather, Blush Heather, Fisherman
- ○ Grey Multi: Oxford Grey, Fisherman, Light Grey Heather
- ○ Solid Squares: Fisherman (cream); Light Grey Heather, Blush Heather (light pink)
- This 6″ granny square is worked corner to corner (on the bias), using the mini-bean stitch. After completing the center of the square, a simple, single crochet edge is added.
- Check out the C2C Mini Bean Stitch Video Tutorial!
Special Stitches
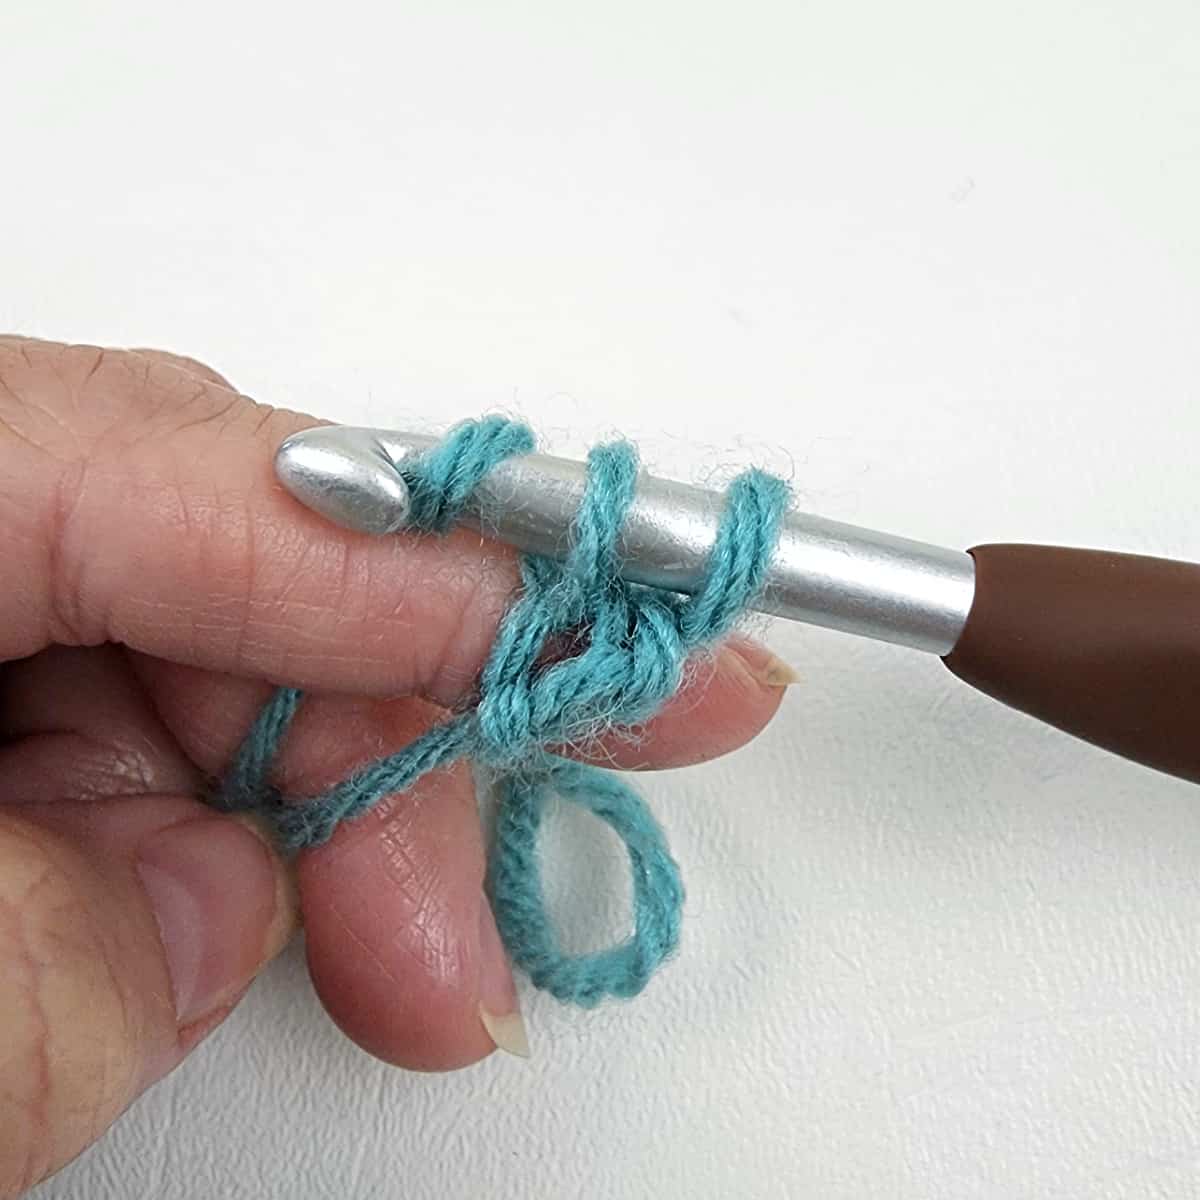
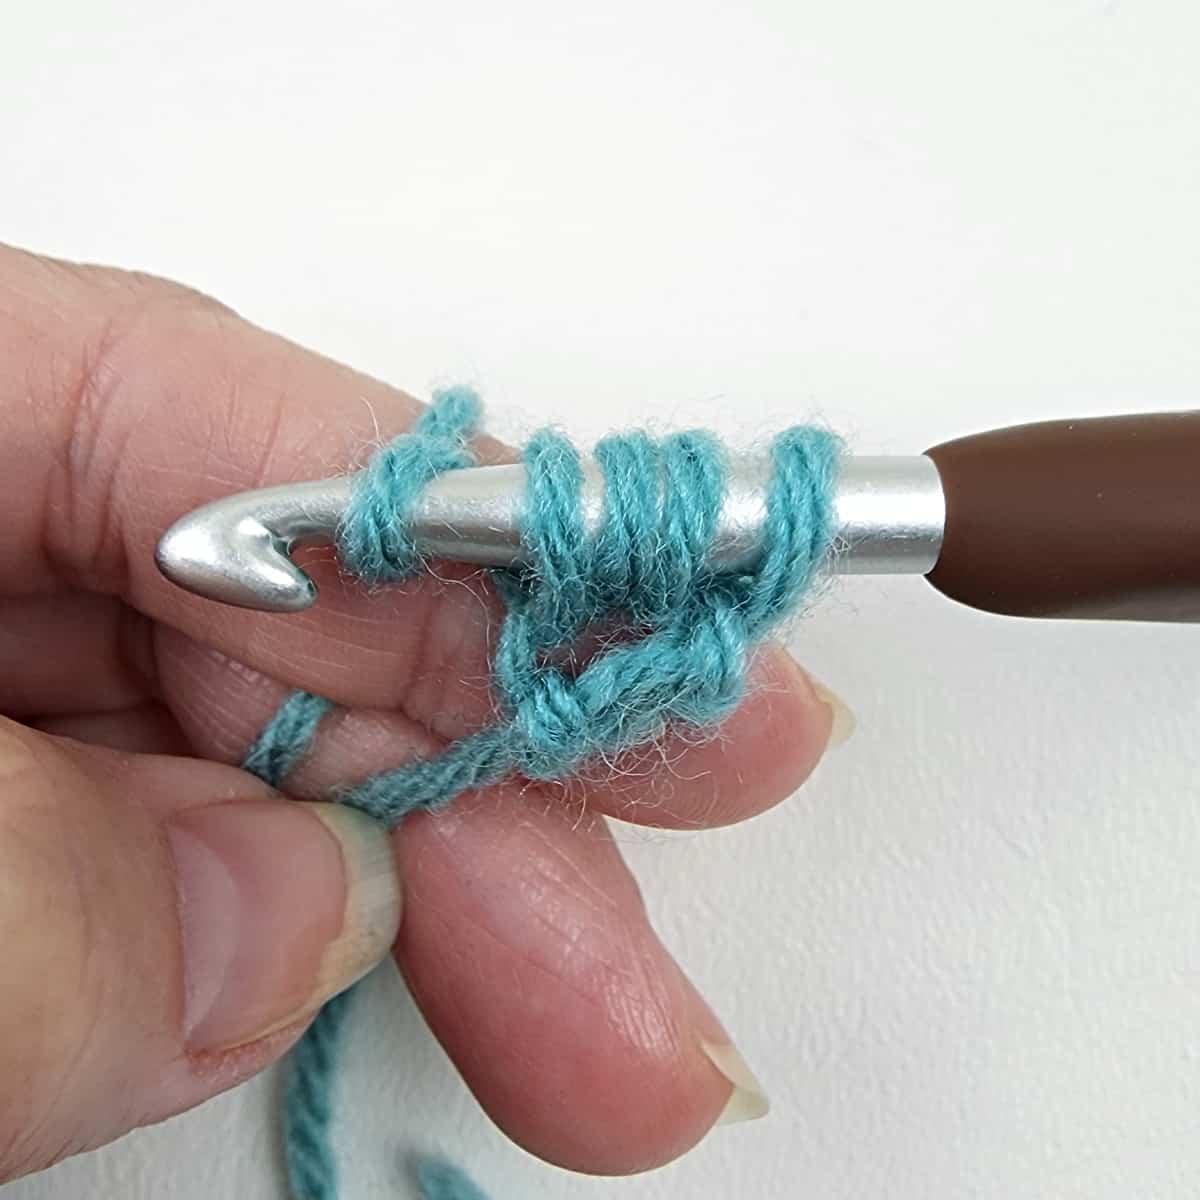
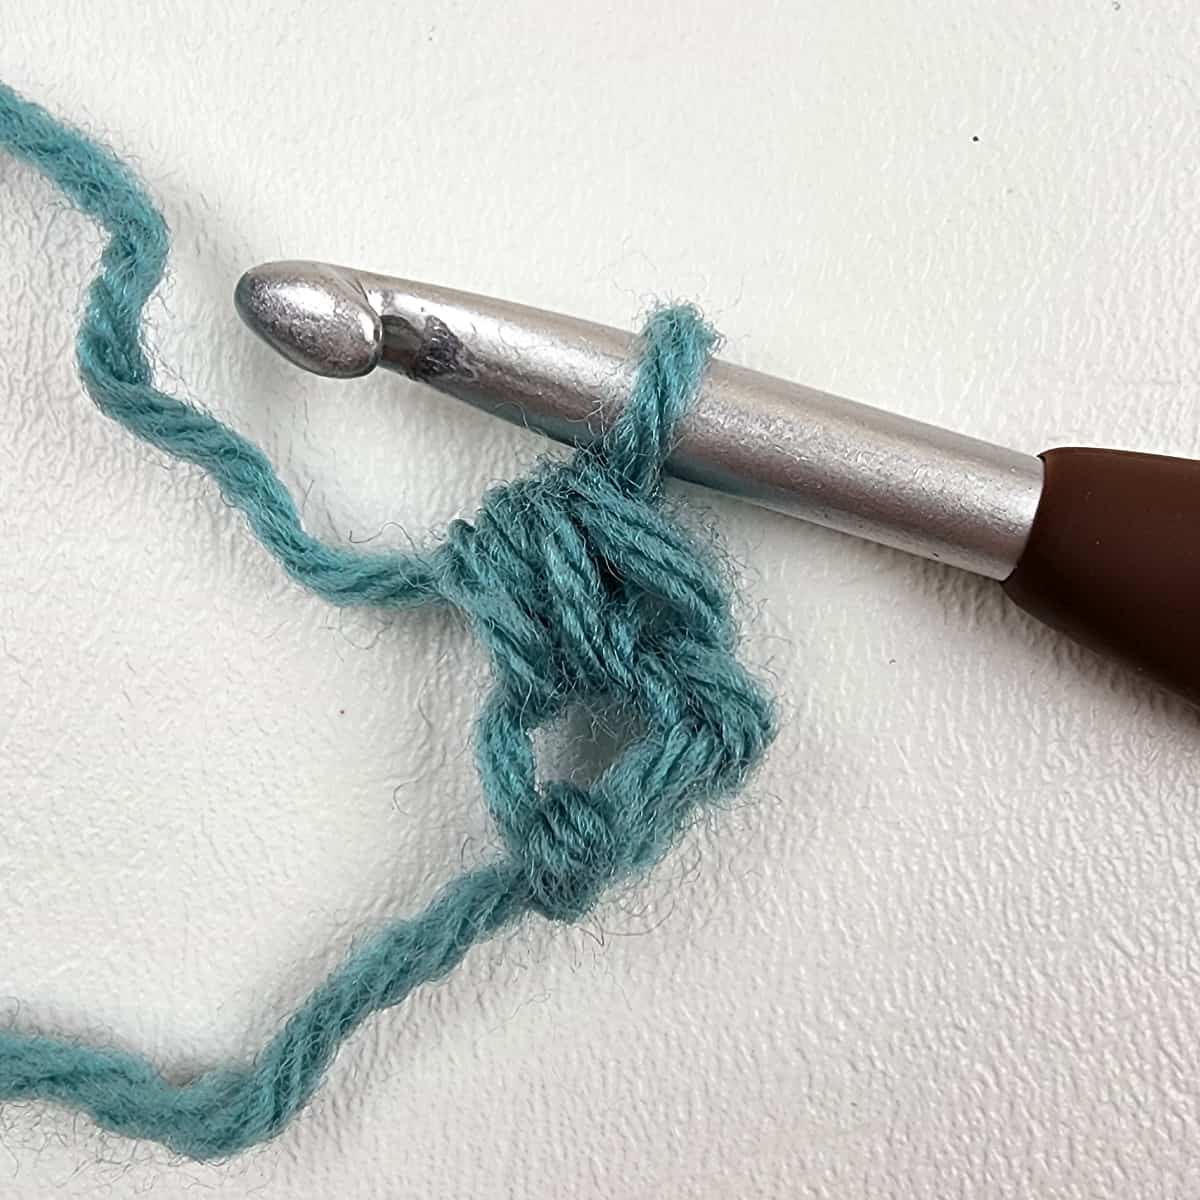
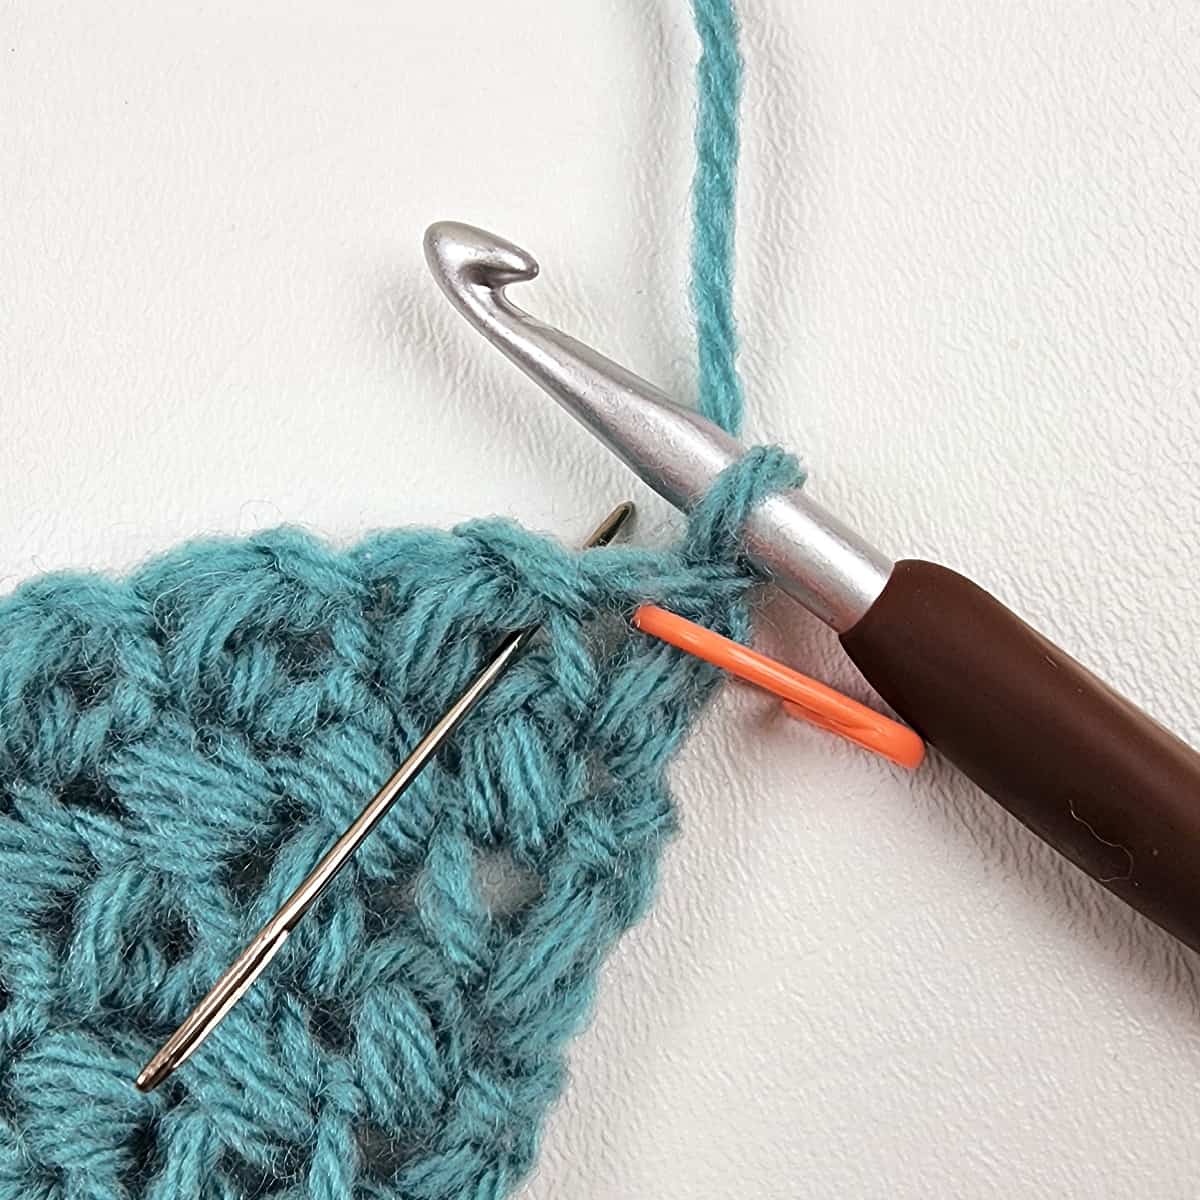
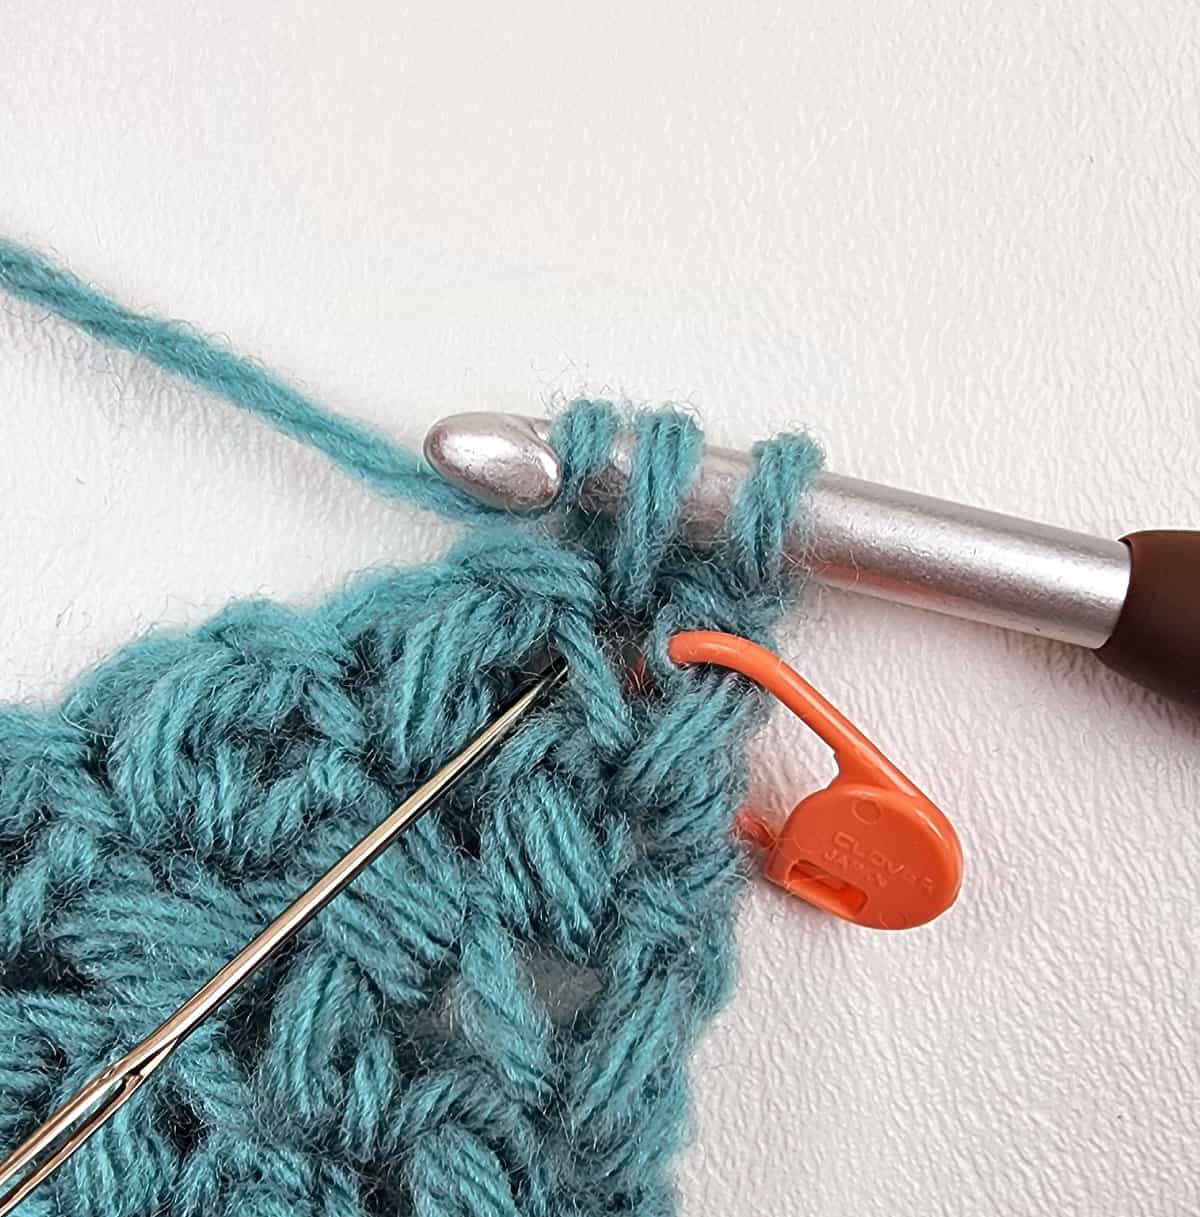
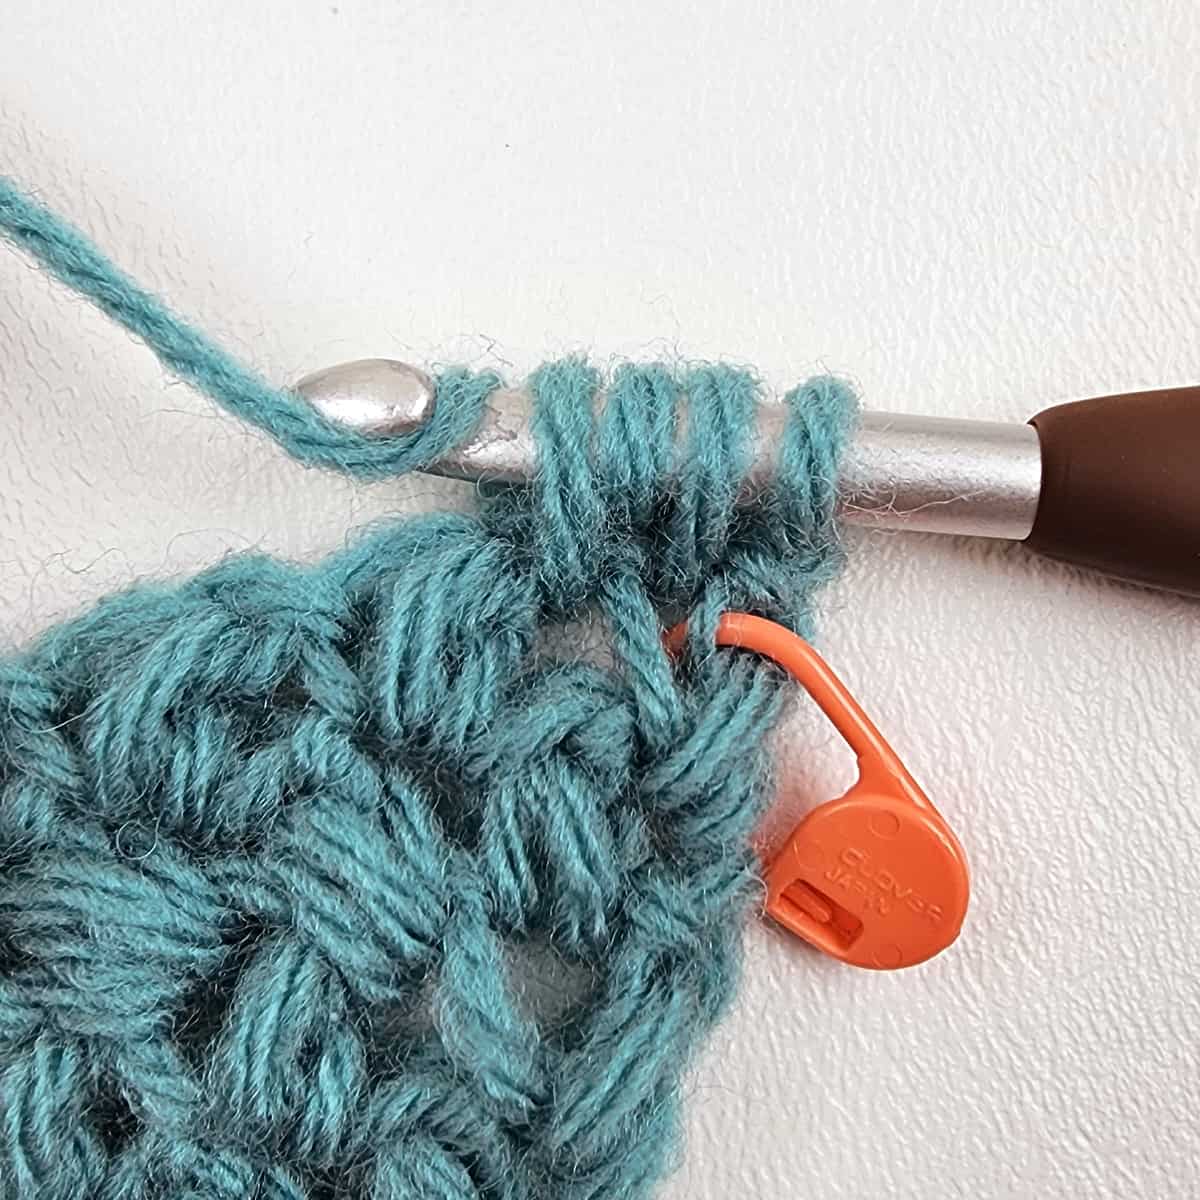
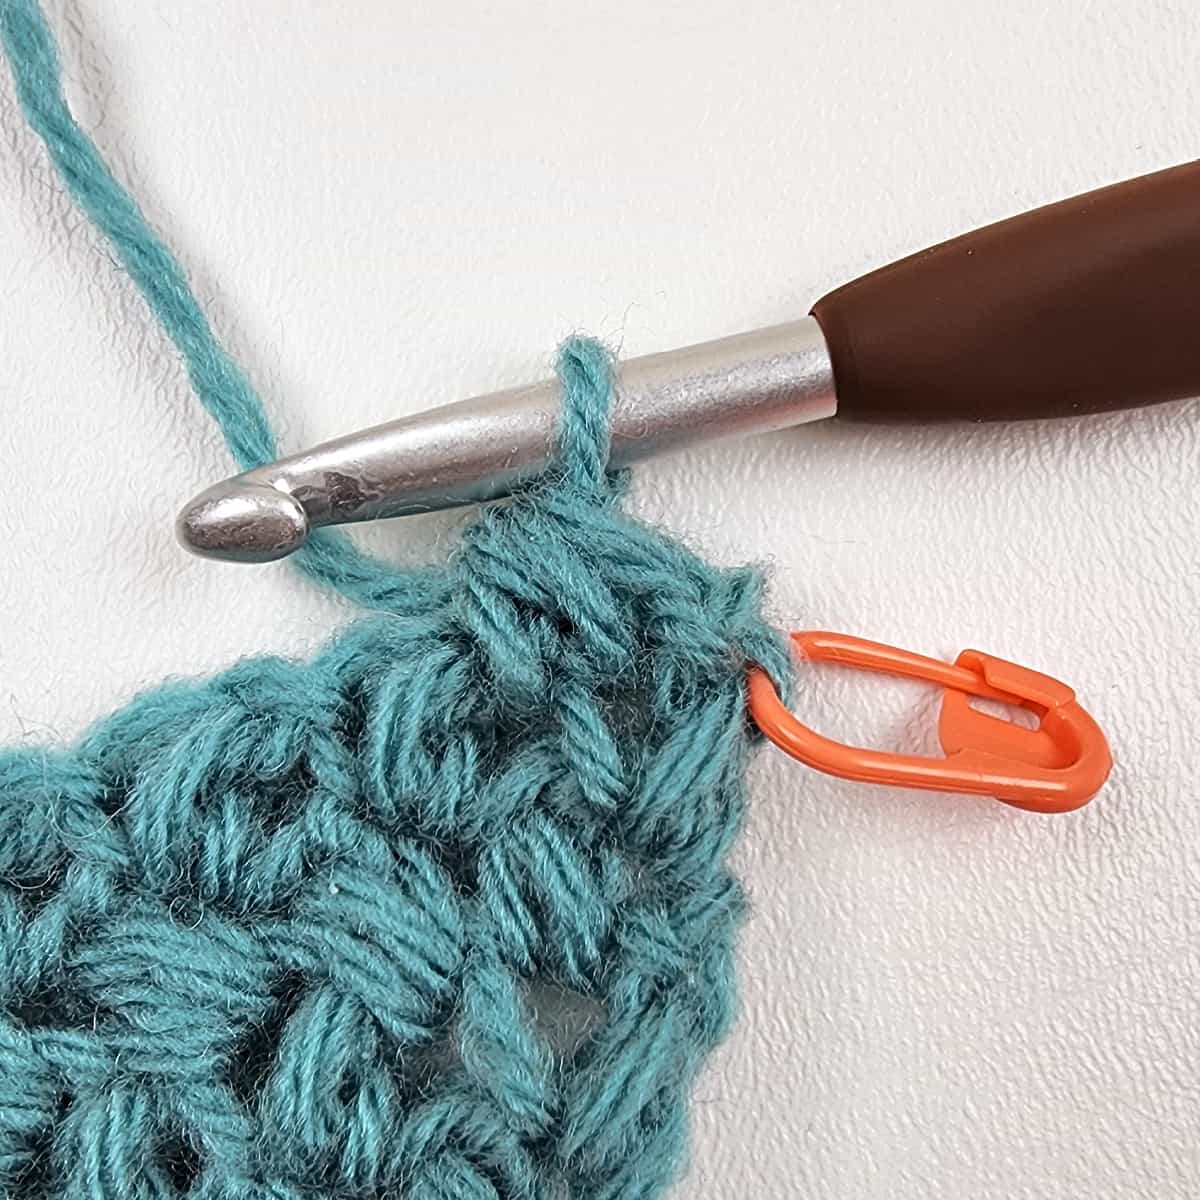
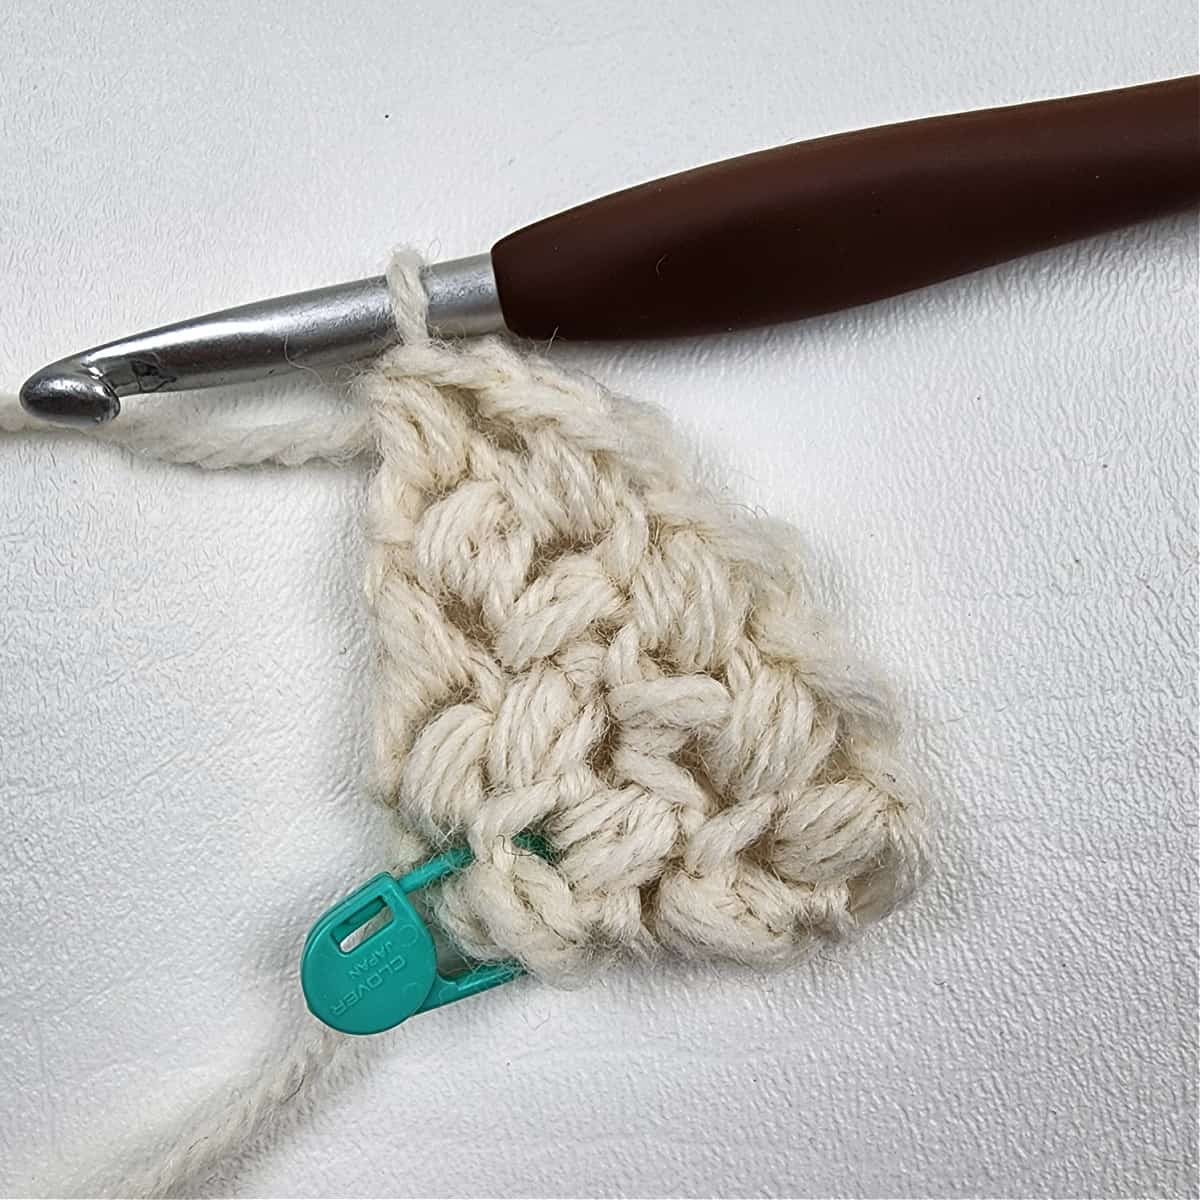
- Mini-Bean Stitch (MBS): Insert your hook into the specified stitch, yo, pull up a loop, yo, insert your hook into the same st, yo, pull up a loop, yo, pull through all 4 loops on your hook. See photo tutorial below.
- Mini-Bean Stitch Decrease (MBS2tog): Insert your hook into the first specified stitch, yo, pull up a loop, yo, insert your hook into the next specified st, yo, pull up a loop, yo, pull through all 4 loops on your hook. See photo tutorial below.
- Join with a standing sc: When instructed to “Join with a standing sc”, begin with a slip knot on your hook. Insert your hook into the stitch or space indicated, yo, pull up a loop, yo and draw thru both loops on hook.
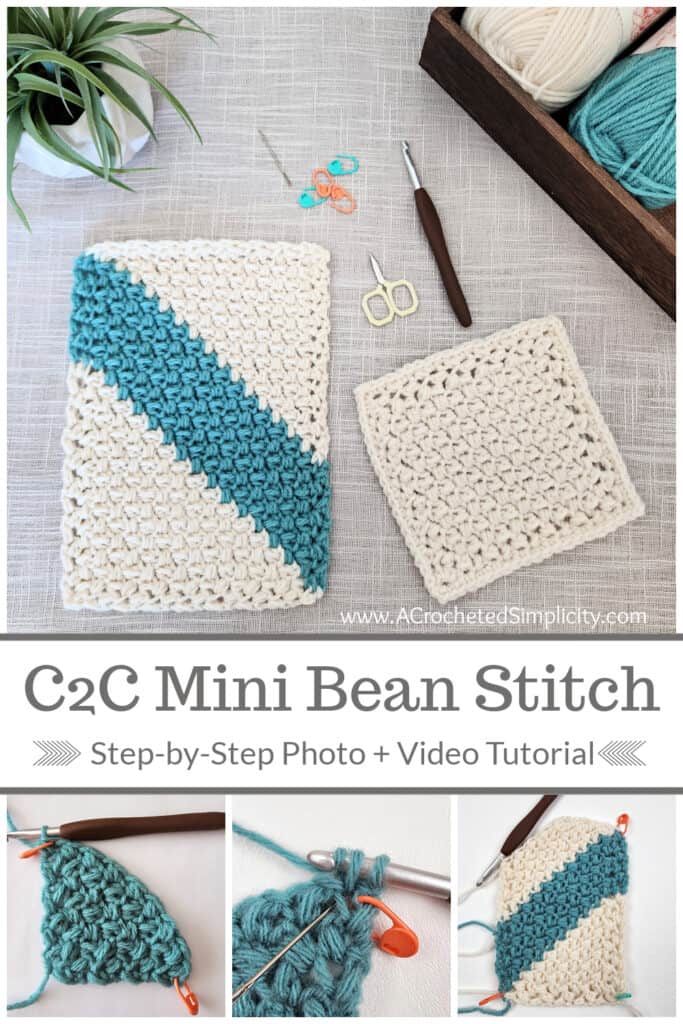
How to Crochet a Mini Bean Stitch
Mini-Bean Stitch (MBS): Insert your hook into the specified stitch, yo, pull up a loop, yo, insert your hook into the same st, yo, pull up a loop, yo, pull through all 4 loops on your hook.

How to Crochet a MBS2tog
Mini-Bean Stitch Decrease (MBS2tog): Insert your hook into the first specified stitch, yo, pull up a loop, yo, insert your hook into the next specified st, yo, pull up a loop, yo, pull through all 4 loops on your hook.
How to Make ANY Size C2C Mini Bean Square
Use these instructions to make square corner to corner projects of any size, using your choice of yarn and hook size. Try different square C2C projects such as dishcloths, crochet baby blankets, crochet lapghans and more!
Check out the C2C Mini Bean Stitch Video Tutorial!
To make a C2C Mini Bean Stitch square of ANY size, follow these simple instructions:
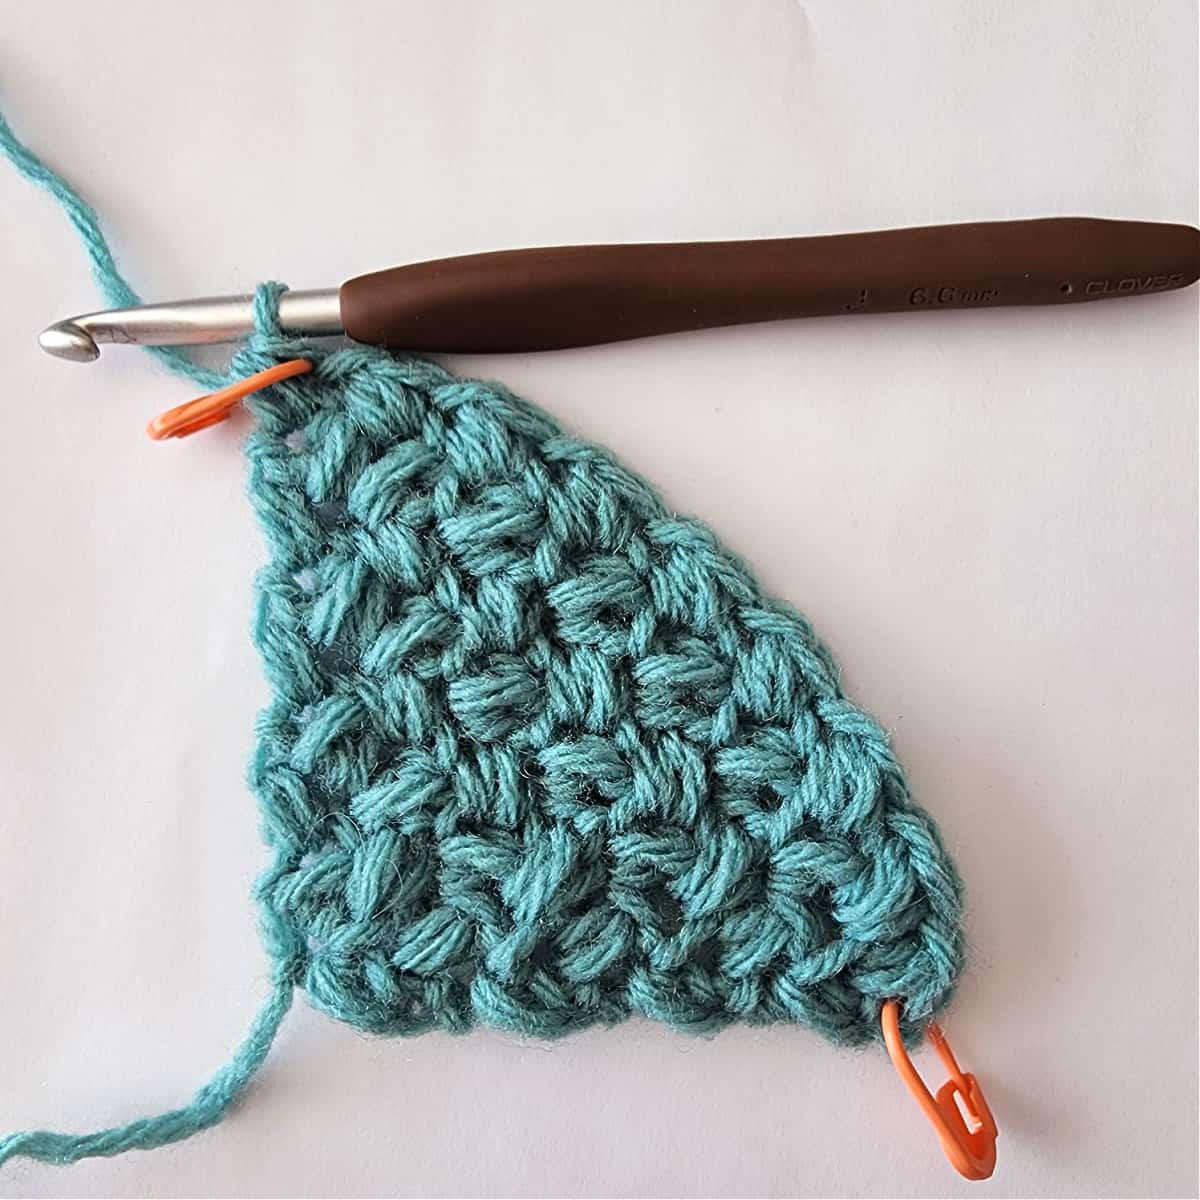
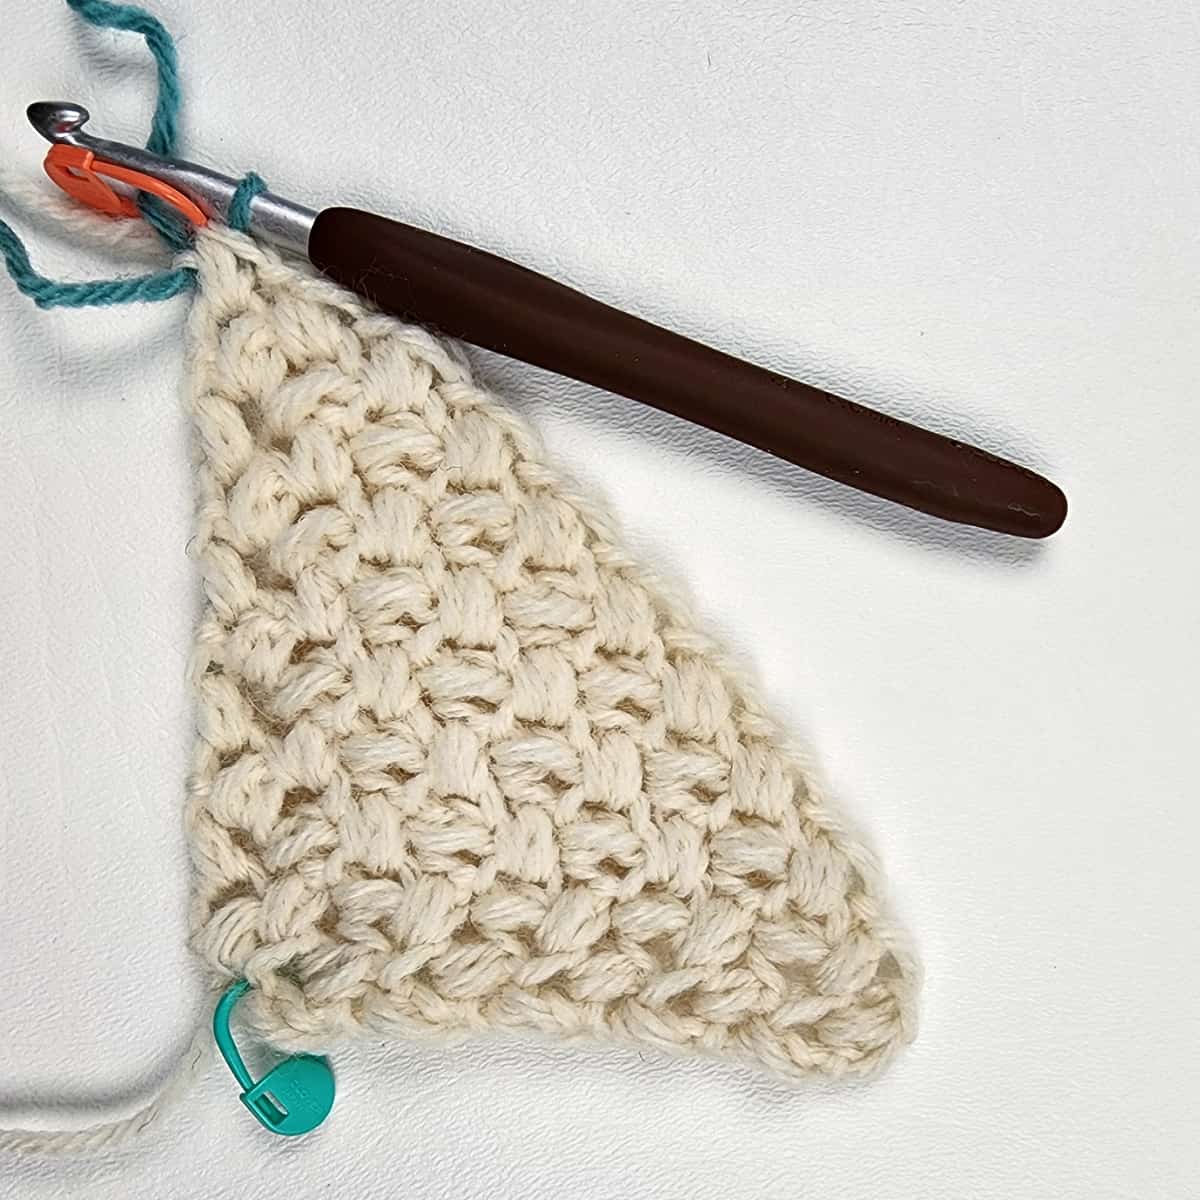
- Step 1: Work Increase Rows 1 – 4.
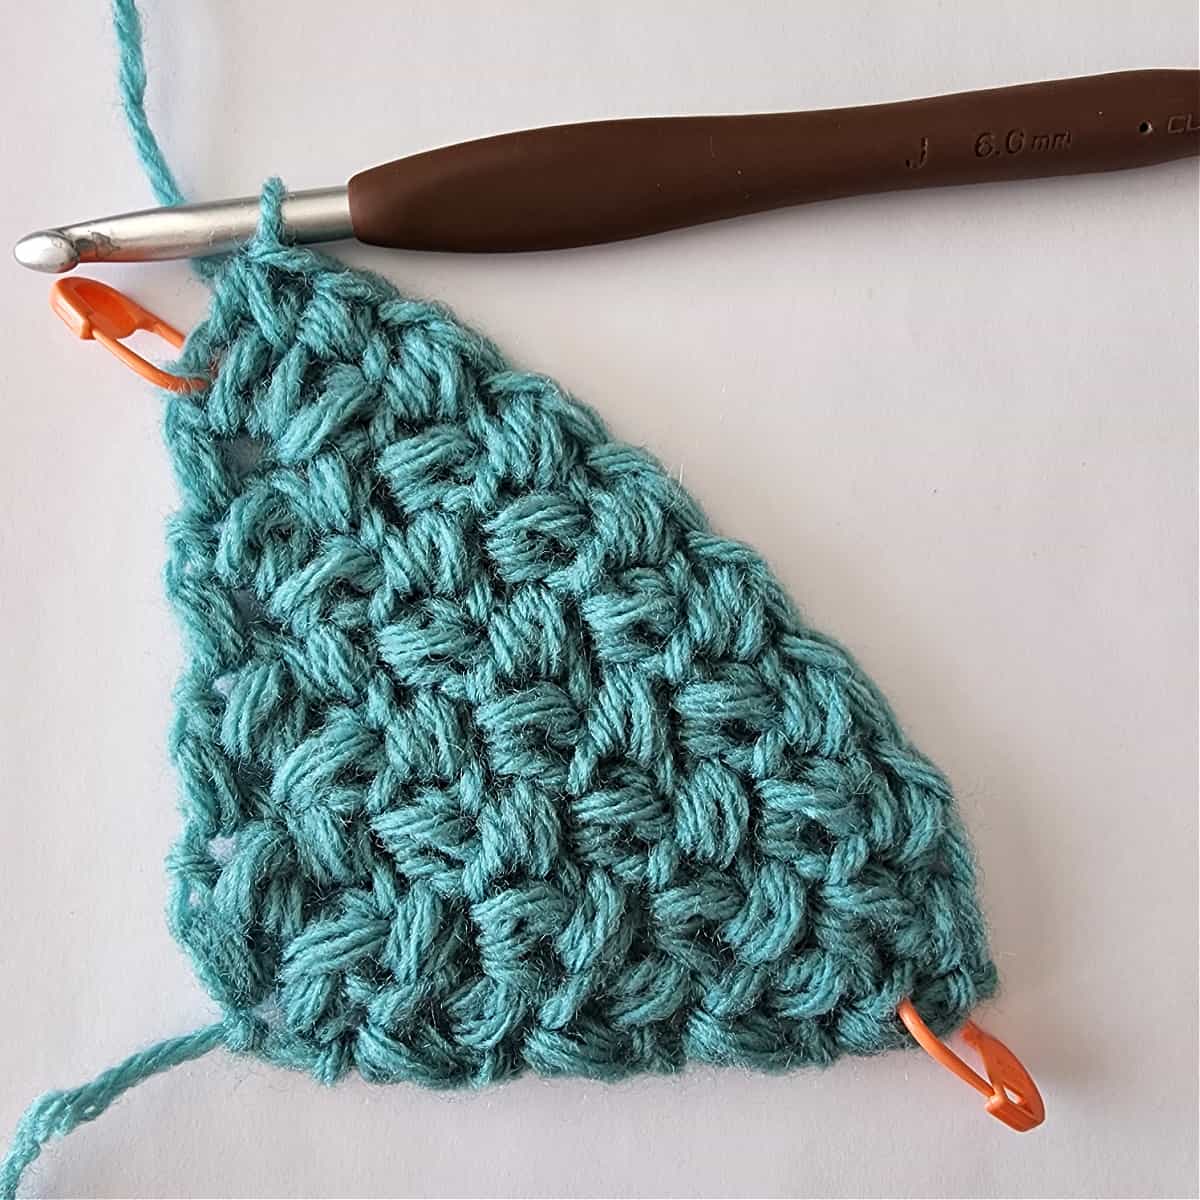
- Step 2: Repeat Increase Row 4 until the edge of your triangle measures the desired width.
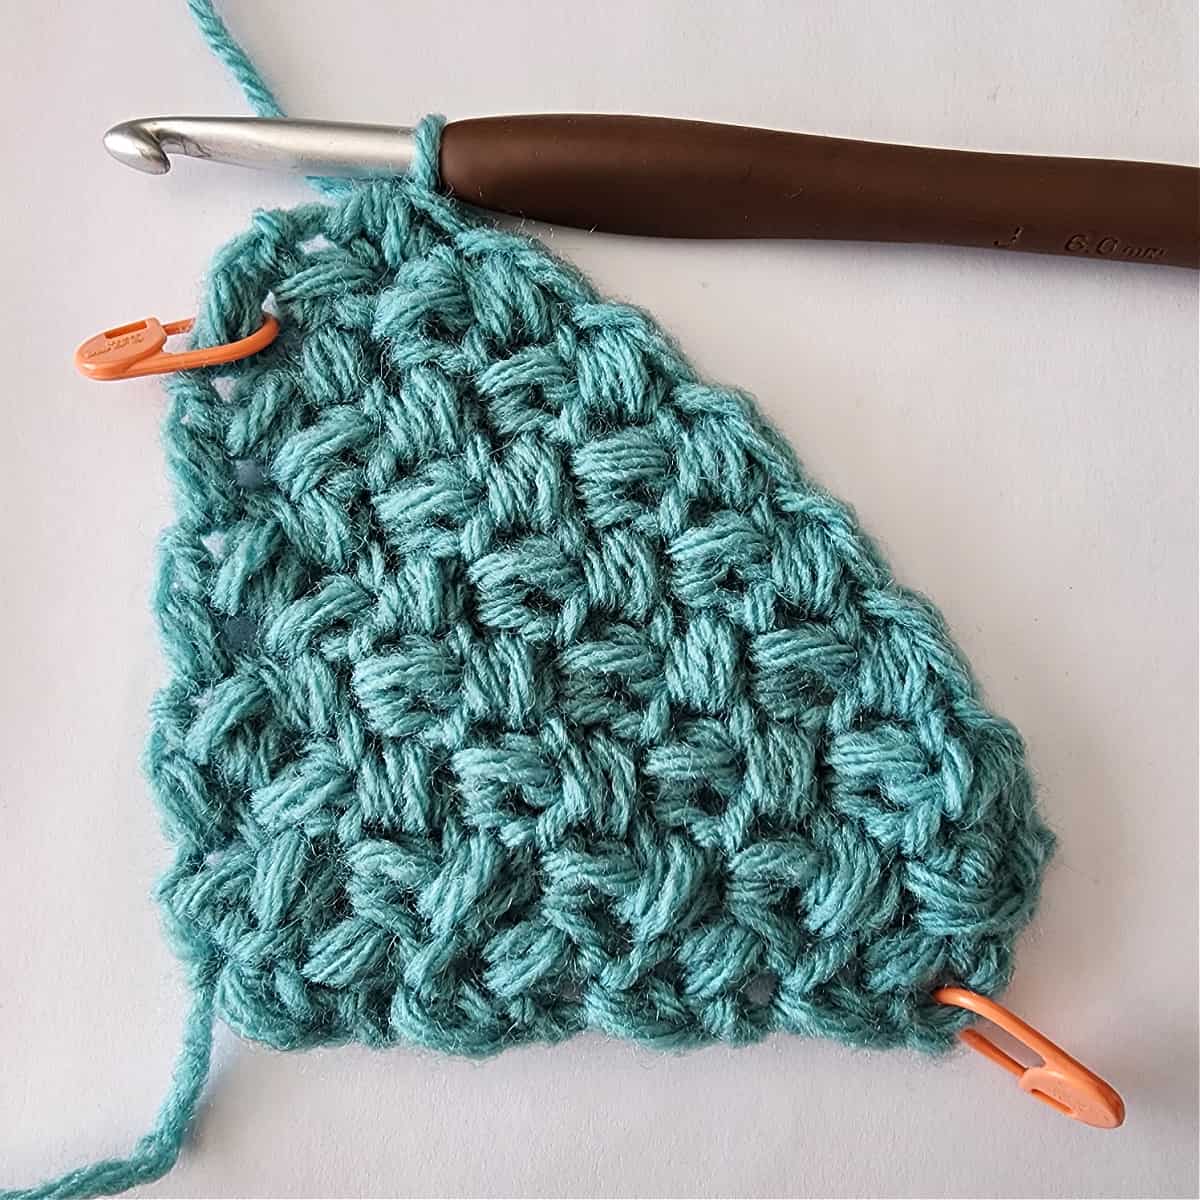
- Step 3: Work Decrease Rows 1 – 2.
- Step 4: Repeat Decrease Rows 1 – 2 until you have only 9 stitches remaining.
- Step 5: Work the Final Rows.
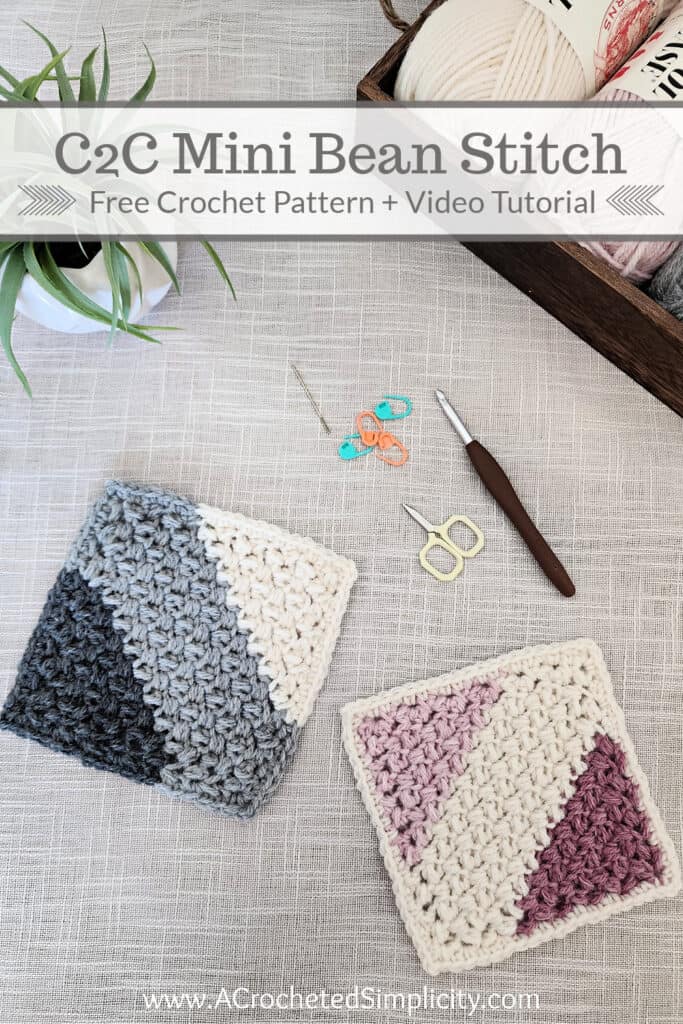
Multi-Color 6″ Squares
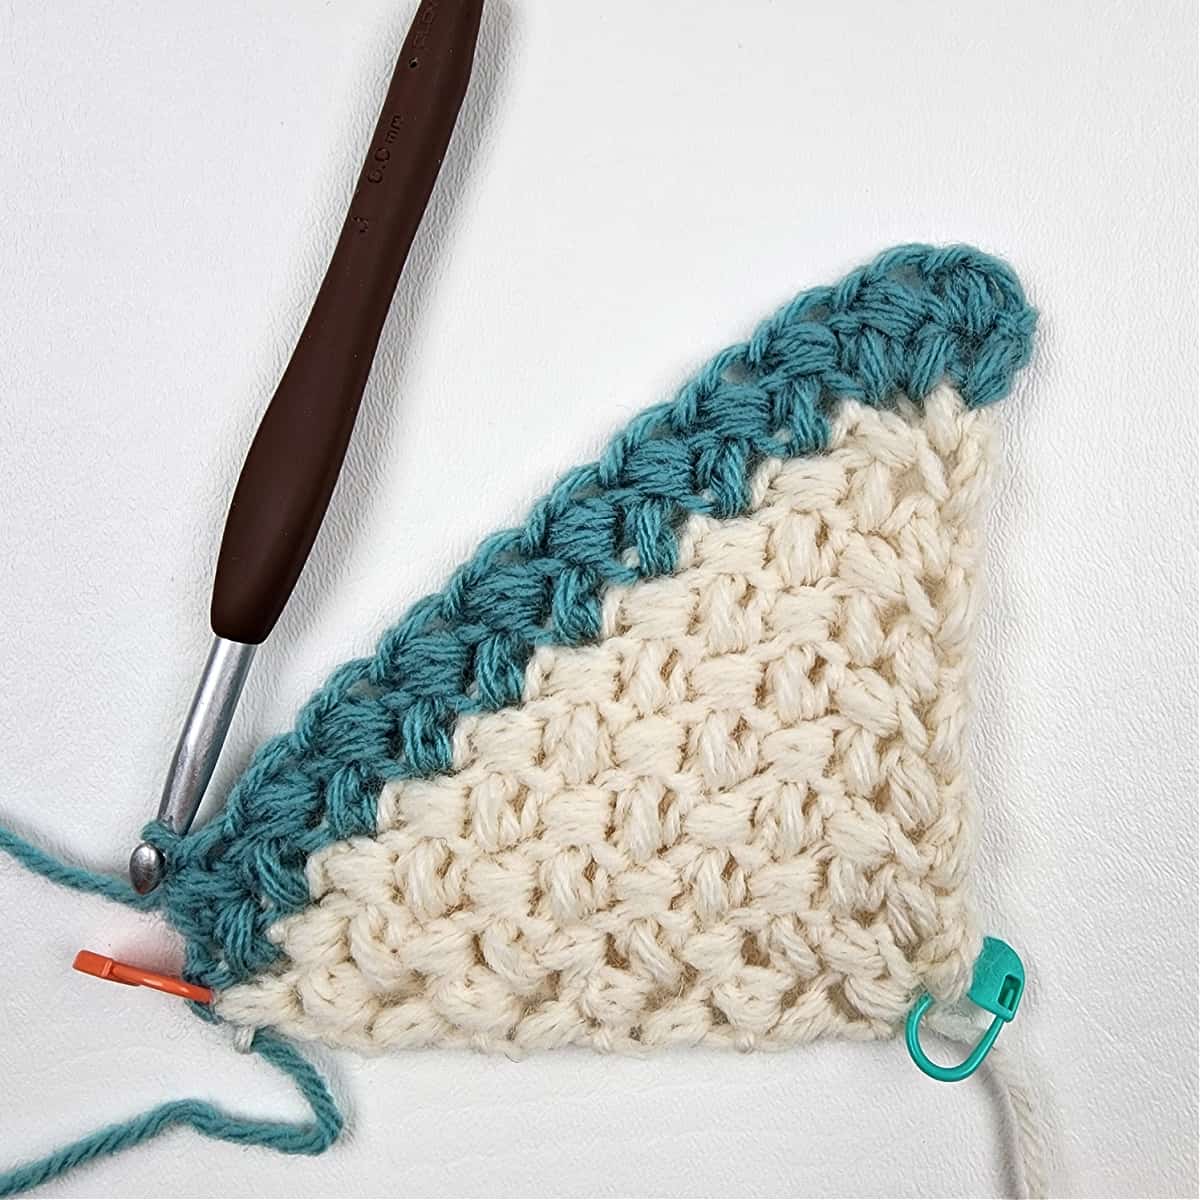
For the multi-colored squares shown, each block of color is 8 rows. The following lists the rows & colors for each multi-colored square:
- Pink Multi: Increase Rows 1 – 8 (Dark Rose Heather); Increase Rows 9 – 12 & Decrease Rows 1 – 4 (Fisherman); Decrease Rows 5 – 8 & Final Rows (Blush Heather)
- Border: The border I worked in fisherman.
- Grey Multi: Increase Rows 1 – 8 (Oxford Grey); Increase Rows 9 – 12 & Decrease Rows 1 – 4 (Fisherman); Decrease Rows 5 – 8 & Final Rows (Light Grey Heather)
- Border: For the border on this 6″ crochet square, I worked color changes and used all 3 colors that I used for the square.
C2C Mini Bean Stitch 6″ Granny Square Instructions
Using the instructions below, along with a 6.00mm crochet hook, and the gauge listed above, will produce a 6″ crochet square.
If you’d like to make a C2C Mini Bean square of ANY size, see ‘How to Make ANY Size C2C Mini Bean Square’ above (listed just below the Notes section).
Check out the C2C Mini Bean Stitch Video Tutorial!
Increase (Inc) Rows
Inc Row 1: With a 6.00mm crochet hook and yarn, ch 2, in 2nd ch from your hook work (MBS, ch 1, MBS). Turn. (3 sts)
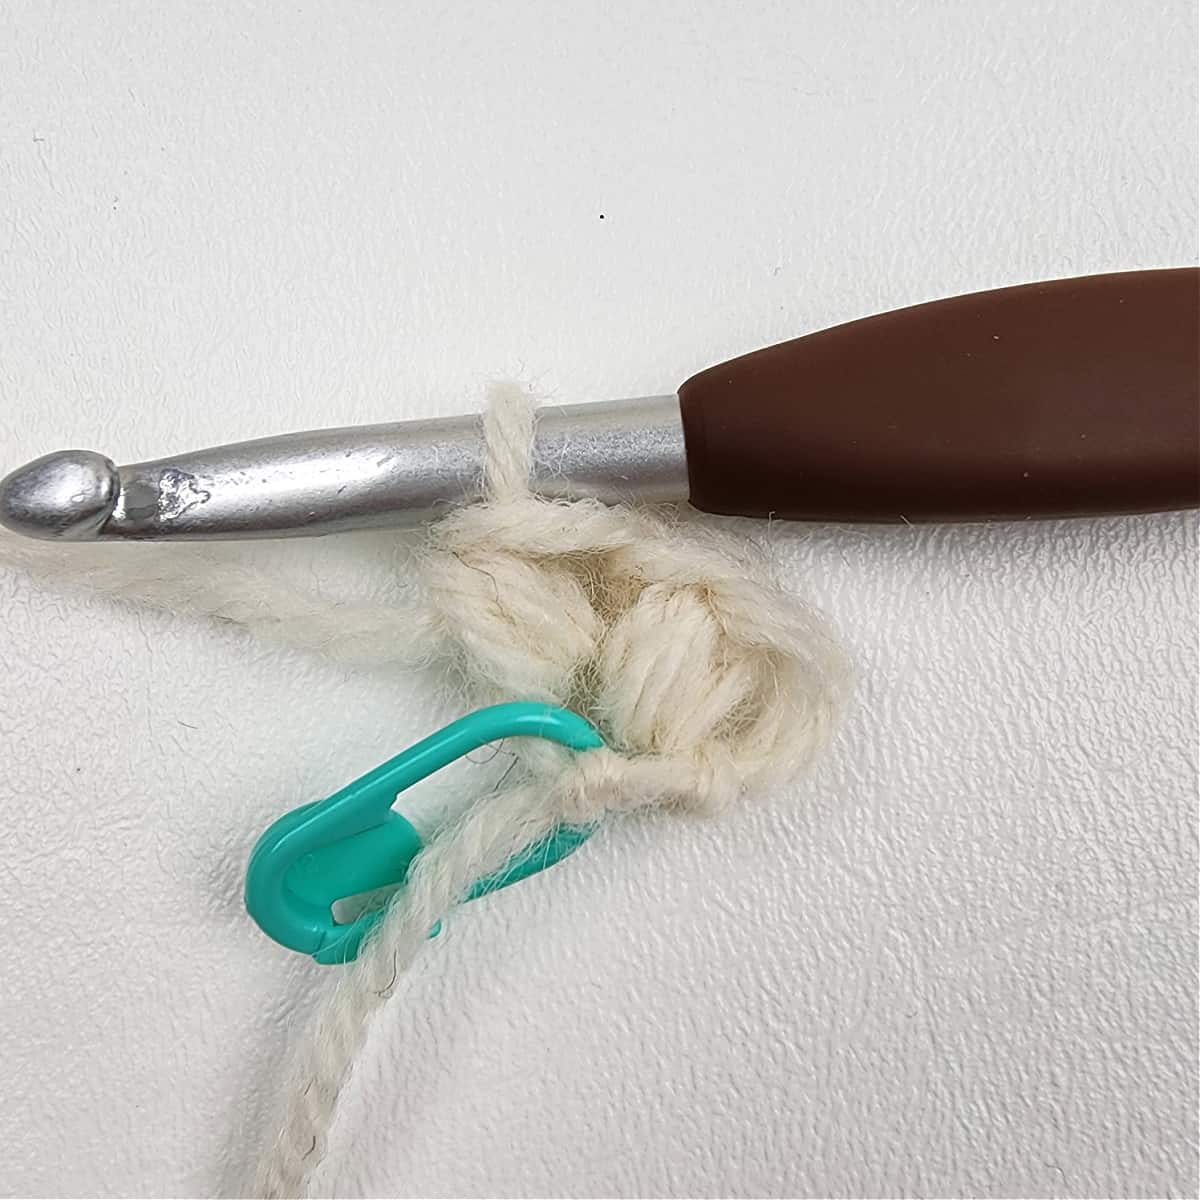
Place a SM in the bottom of the beginning chain to mark the first corner stitch.
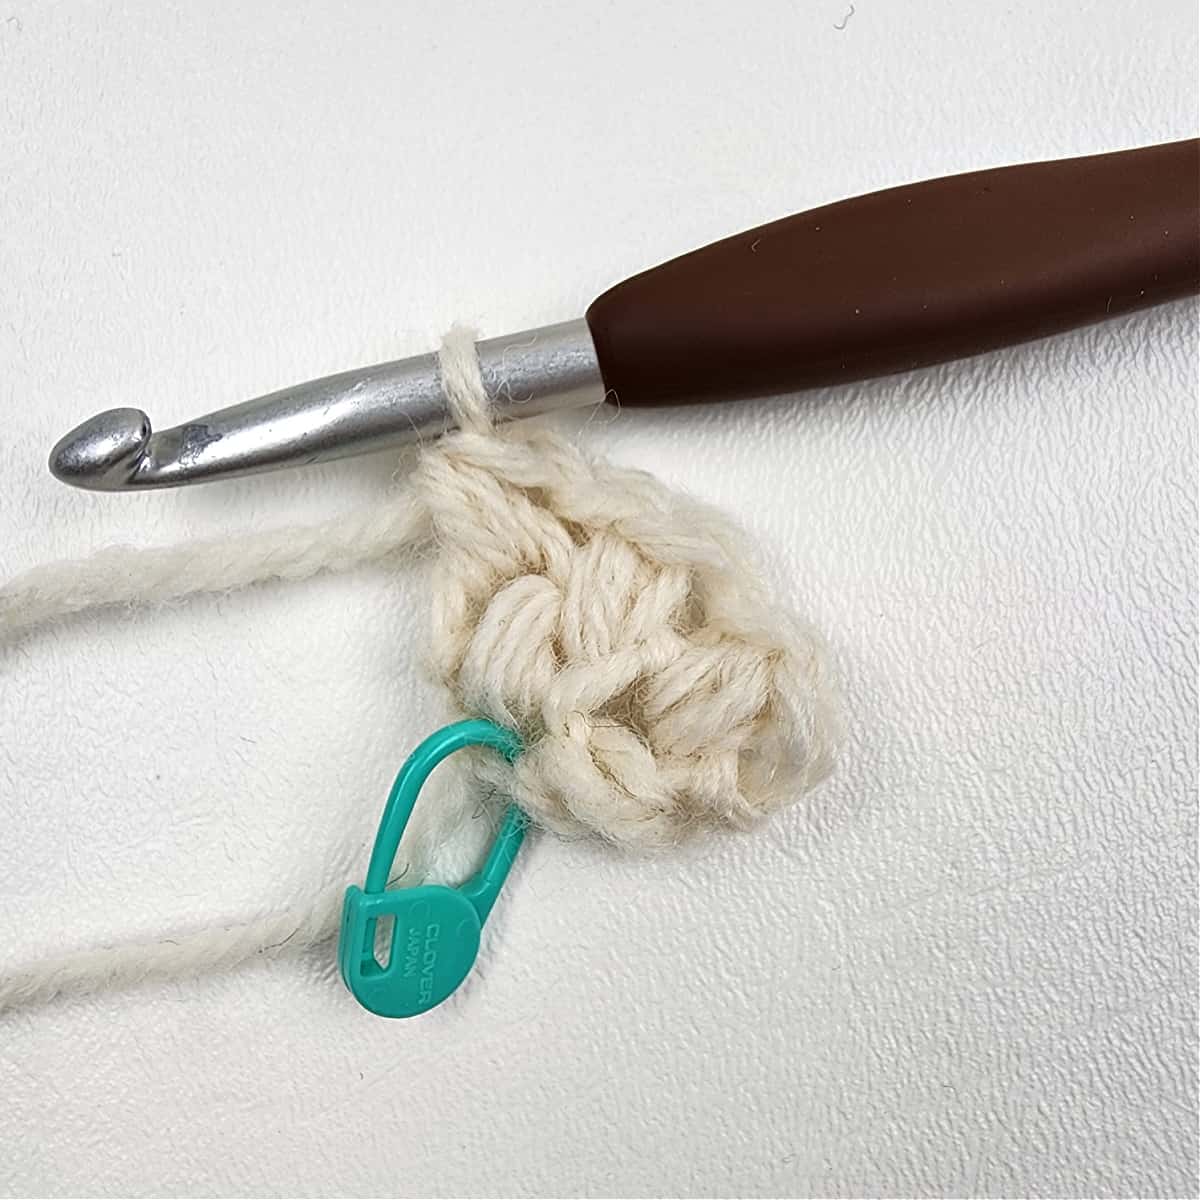
Inc Row 2: Ch 1, MBS in the first MBS, ch 1, MBS in the next ch-1 sp, ch 1, MBS in the next MBS. Turn. (5 sts)
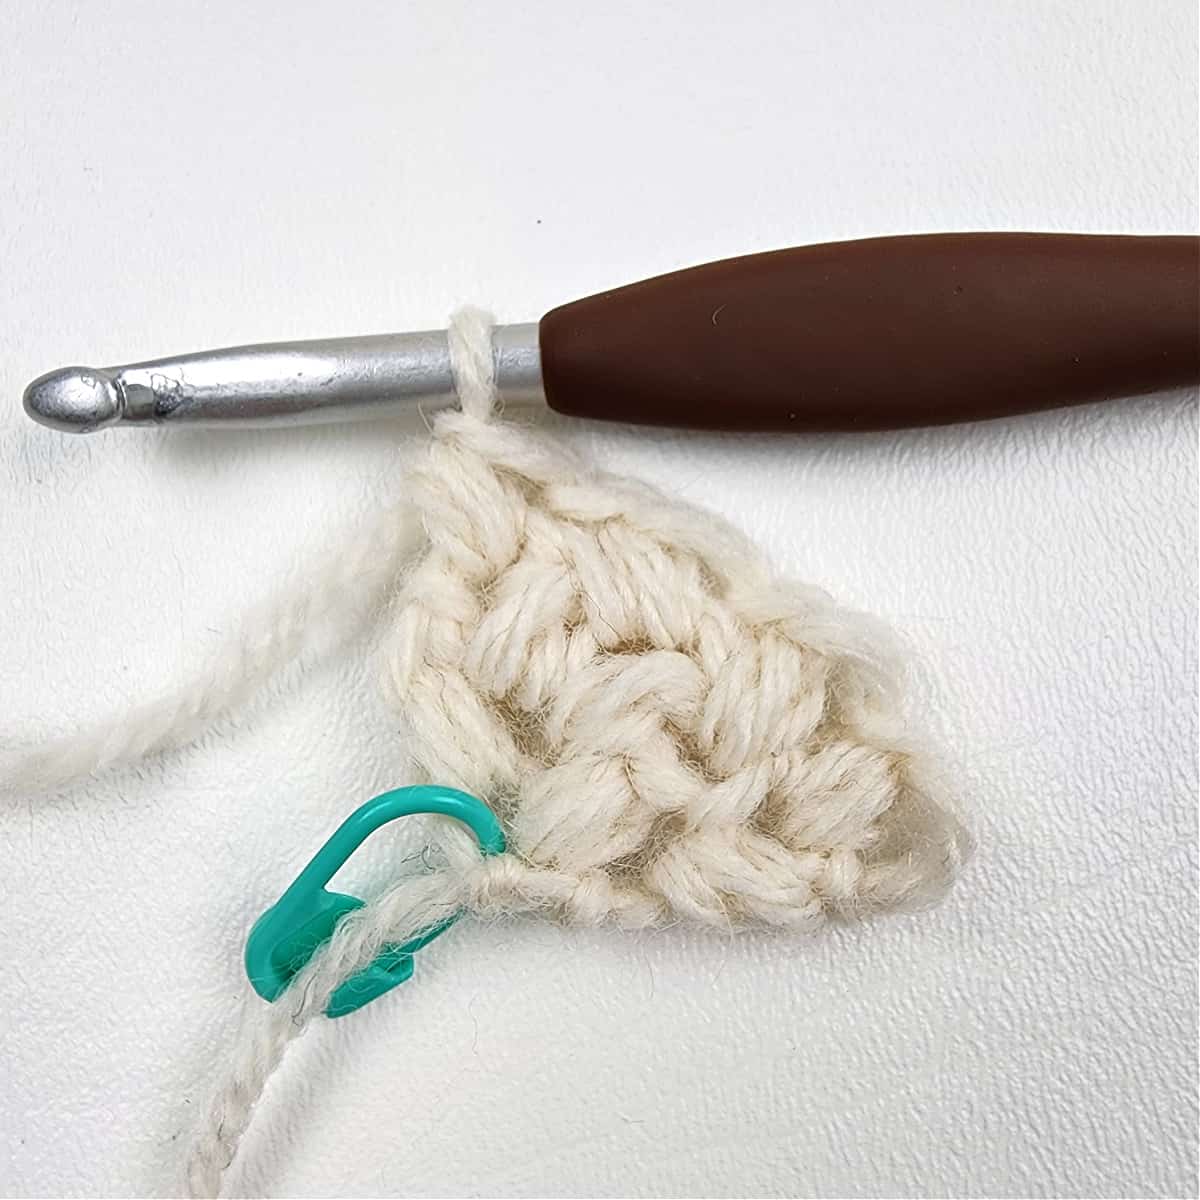
Inc Row 3: Ch 1, MBS in the first MBS, ch 1, MBS in the next ch-1 sp, ch 1, MBS in the next MBS, ch 1, skip the next ch-1 sp, MBS in the last MBS. Turn. (7 sts)
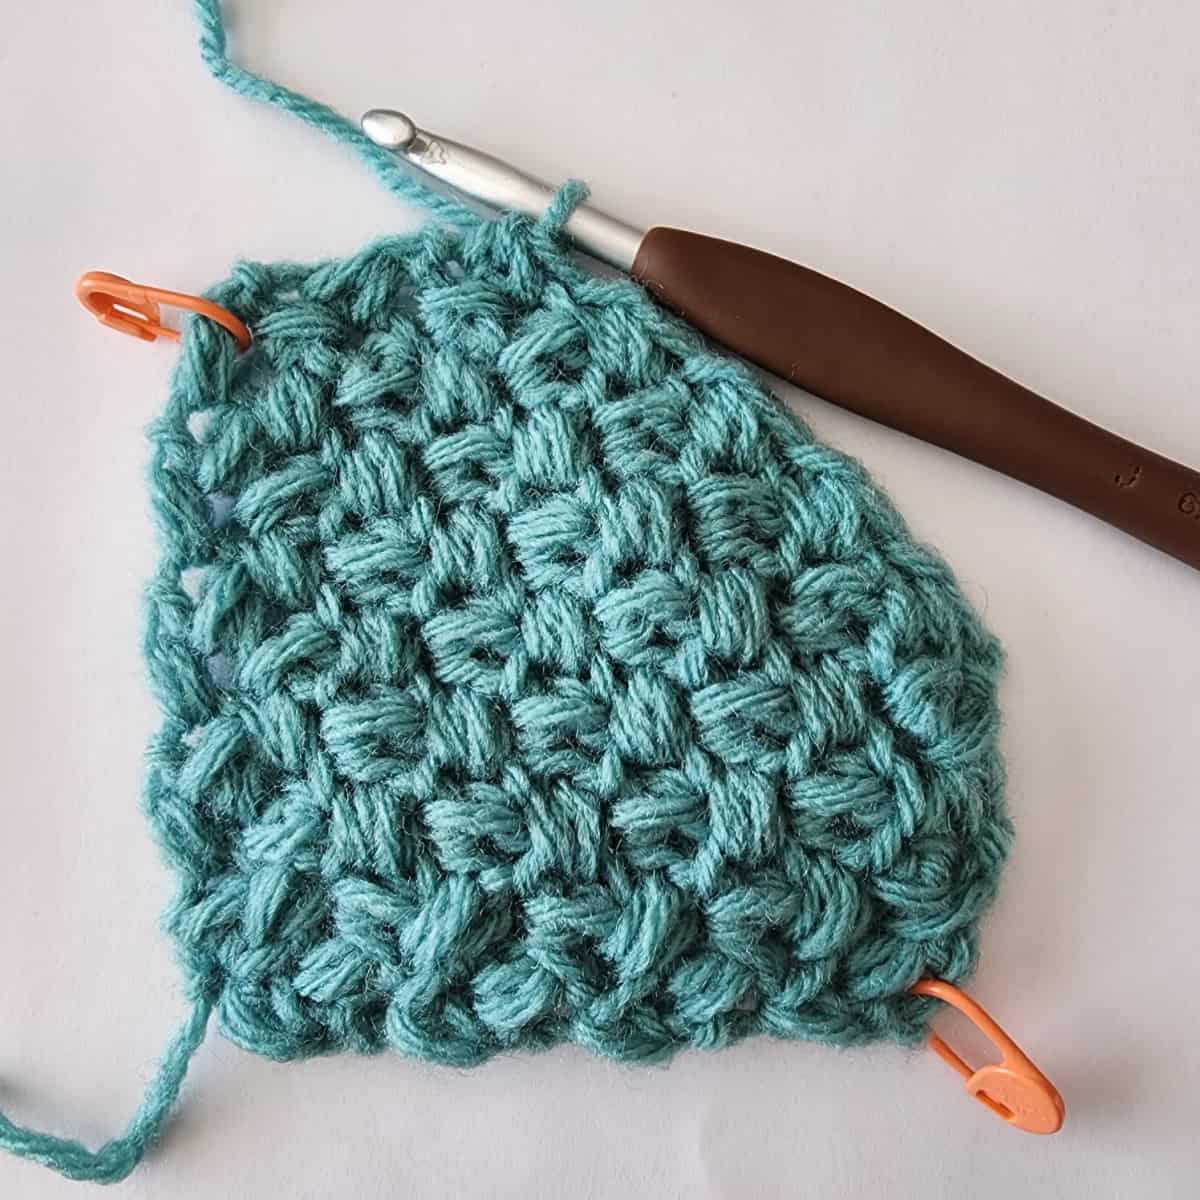
Inc Row 4: Ch 1, MBS in the first MBS, ch 1, MBS in the next ch-1 sp, ch 1, (MBS in the next MBS, ch 1, skip the next ch-1 sp) rep from ( to ) across to the last st, MBS in the last MBS. Turn. Stitch count increases by 2 stitches.
Inc Rows 5 – 12: Repeat Increase Row 4. (25 sts) at the end of Inc Row 12.
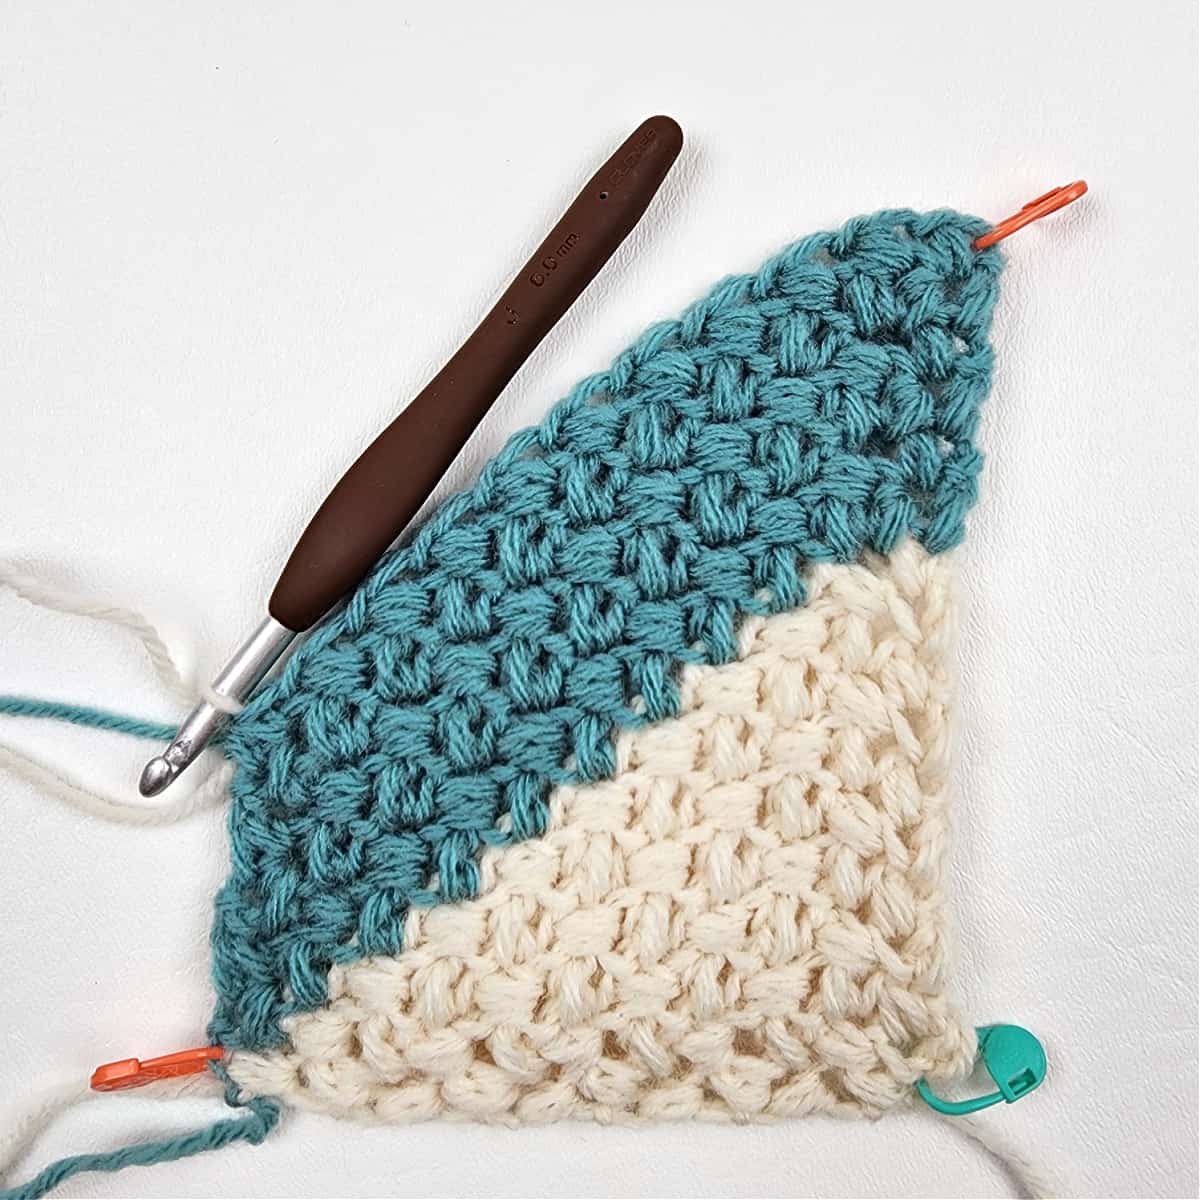
Place a SM in the first and last stitches of Row 12 to mark corners 2 & 3.
Do not fasten off. Continue to Decrease Rows.
Decrease (Dec) Rows
Dec Row 1: Ch 1, MBS2tog in the 1st MBS & 1st ch-1 sp (do not ch 1), (MBS in the next MBS, ch 1, skip the next ch-1 sp) rep from ( to ) across to the last 3 sts, MBS in the next MBS (do not ch 1), MBS2tog in the next ch-1 sp & last MBS. Turn. Stitch count decreases by 2 stitches.
Dec Row 2: Ch 1, MBS2tog in the first 2 MBS, (ch 1, skip the next ch-1 sp, MBS in the next MBS) rep from ( to ) across to the last 3 sts, ch 1, skip the next ch-1 sp, MBS2tog in the last 2 MBS. Turn. Stitch count decreases by 2 stitches.
Dec Rows 3 – 8: Rep Decrease Rows 1 – 2. (9 sts) at the end of Dec Row 8.
Do not fasten off. Continue to Final Rows.
Final Rows
Row 1: Ch 1, MBS2tog in the 1st MBS & 1st ch-1 sp (do not ch 1), (MBS in the next MBS, ch 1, skip the next ch-1 sp) rep from ( to ) across to the last 3 sts, MBS in the next MBS (do not ch 1), MBS2tog in the next ch-1 sp & last MBS. Turn. (7 sts)
Row 2: Ch 1, MBS2tog in the first 2 MBS, ch 1, skip the next ch-1 sp, MBS in the next MBS, ch 1, skip the next ch-1 sp, MBS2tog in the last 2 MBS. Turn. (5 sts)
Row 3: Ch 1, MBS2tog in the 1st MBS & 1st ch-1 sp (do not ch 1), MBS in the next MBS, MBS2tog in the next ch-1 sp and MBS. Turn. (3 sts)
Row 4: Ch 1, MBS2tog in the first MBS & last MBS (skipping the middle MBS). Turn. (1 st)
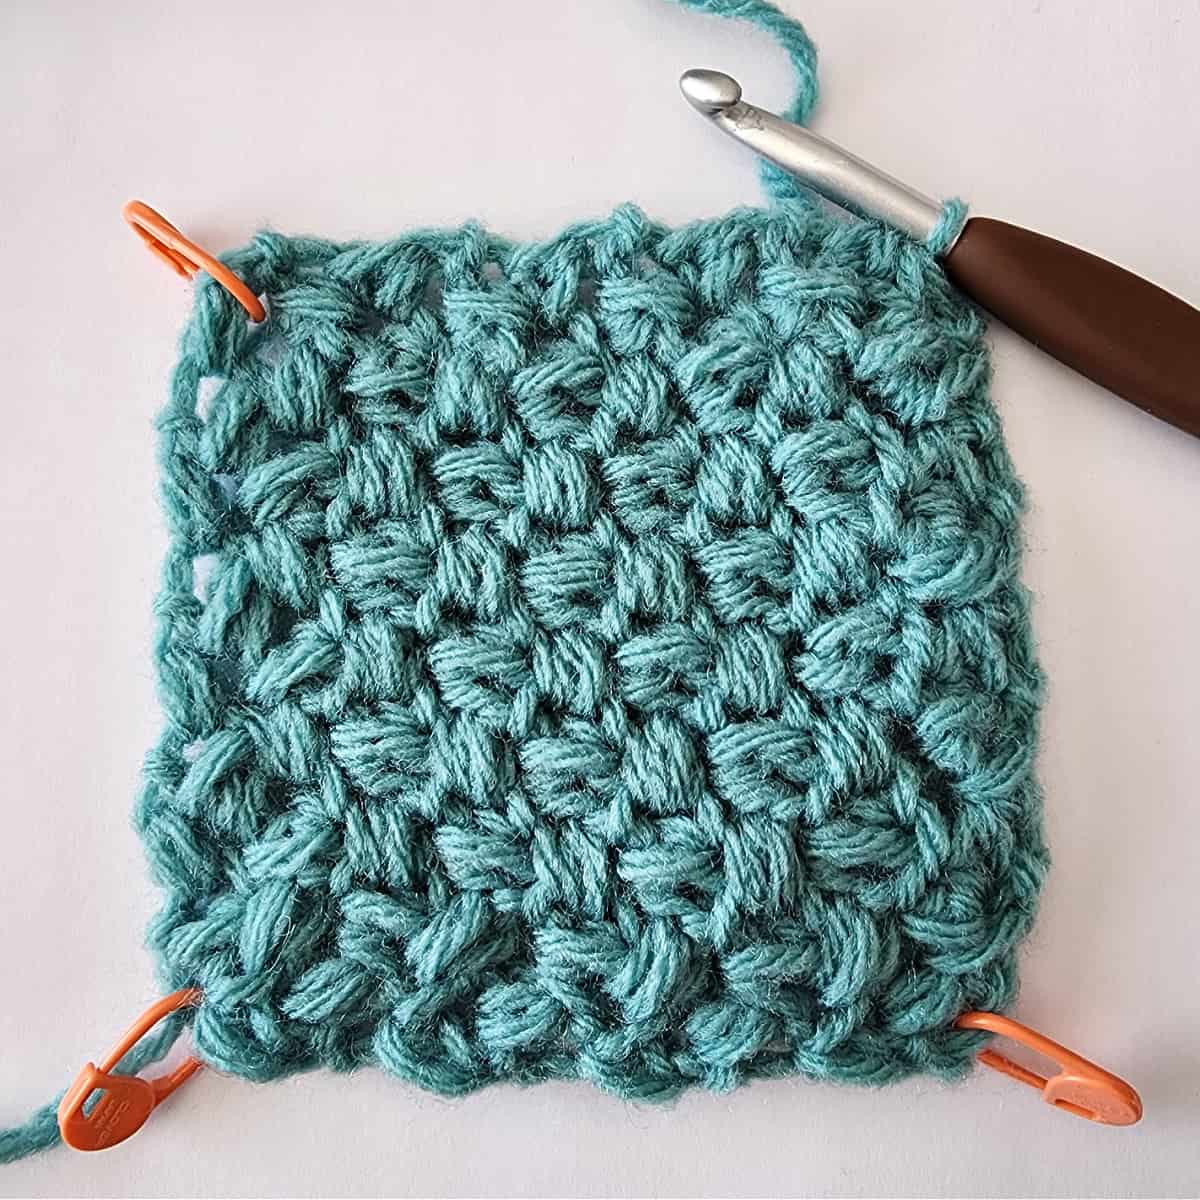
Place a SM in the last st to mark the last corner stitch.
Solid Color Squares: If you are working the edging in the same color that you ended with, do not fasten off. Continue to Edging for Solid Color Squares.
Multi-Color Squares: If you are using a different color for the edging than the one you ended your square with, fasten off and continue to Edging for Multi-Colored Squares.
Edging for Solid Color Squares
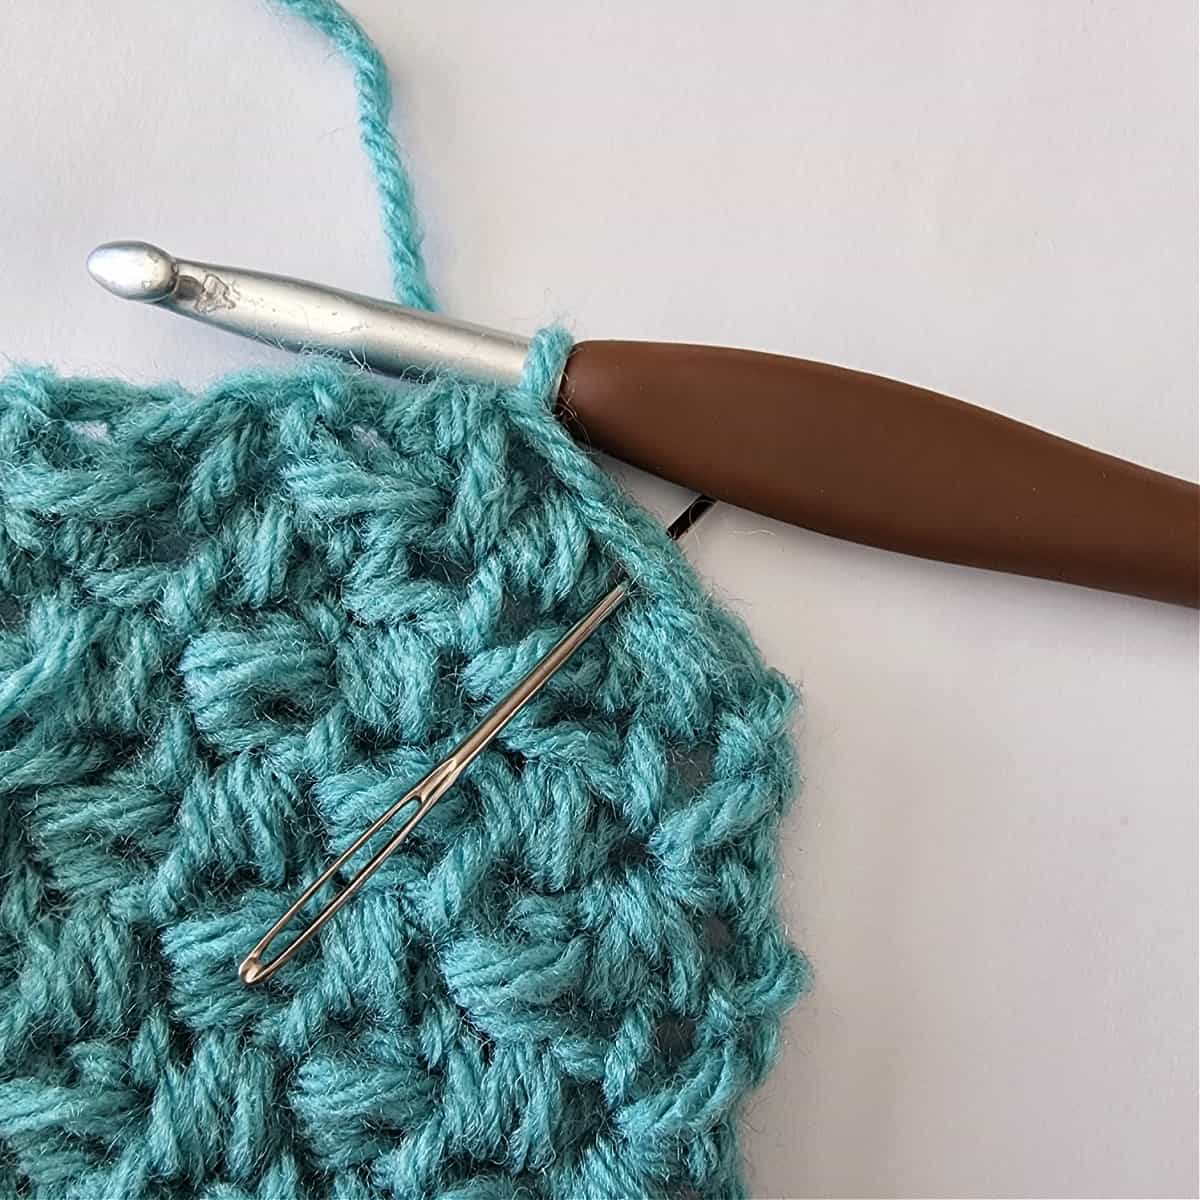
Rnd 1: Ch 1, [ (sc, ch 2, sc) in the next corner st, work 17 sts along the side of the square to the next corner stitch ] work from [ to ] 4 times. Join with a sl st to the 1st sc. (76 sts + 4 ch-2’s)
Edging for Multi-Color Squares
Rnd 1: Join yarn with a standing sc in any corner st, ch 2, sc in the same st, work 17 sts along the side of the square to the next corner stitch, [ (sc, ch 2, sc) in the next corner st, work 17 sts along the side of the square to the next corner stitch ] work from [ to ] 3 times. Join with a sl st to the 1st sc. (76 sts + 4 ch-2’s)
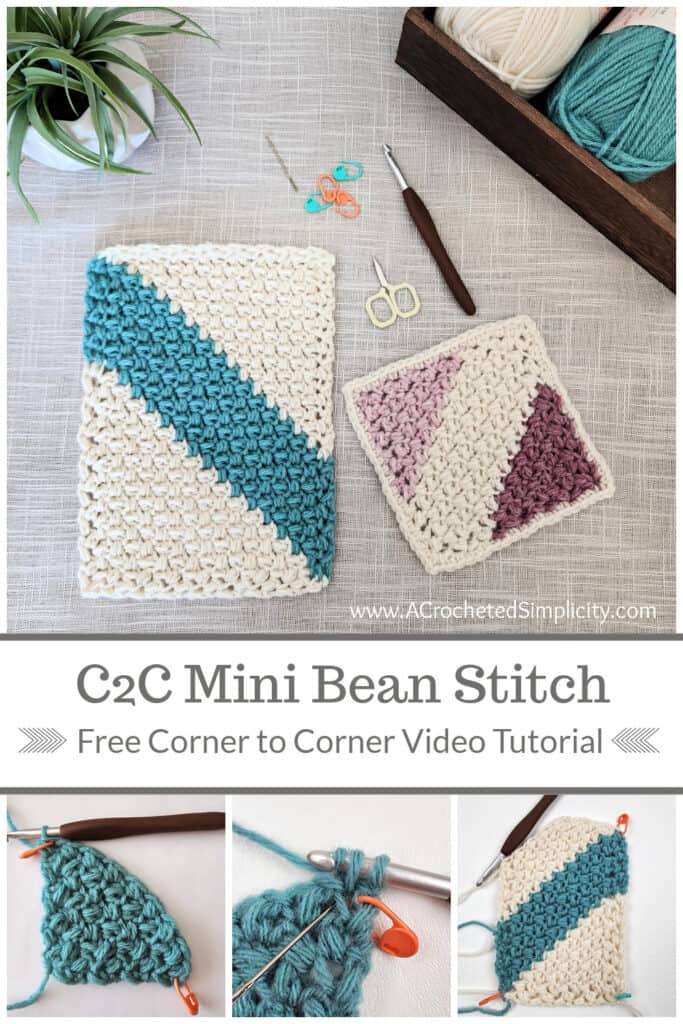
C2C Mini Bean Stitch Rectangle Instructions
The C2C Mini Bean Stitch Rectangle Instructions are great for making beautifully textured crochet C2C baby blankets and corner to corner lapghans.
Check out the C2C Mini Bean Stitch Video Tutorial!
Increase (Inc) Rows
Inc Row 1: With a 6.00mm crochet hook and yarn, ch 2, in 2nd ch from your hook work (MBS, ch 1, MBS). Turn. (3 sts)
Place a SM in the bottom of the beginning chain to mark the first corner stitch.
Inc Row 2: Ch 1, MBS in the first MBS, ch 1, MBS in the next ch-1 sp, ch 1, MBS in the next MBS. Turn. (5 sts)
Inc Row 3: Ch 1, MBS in the first MBS, ch 1, MBS in the next ch-1 sp, ch 1, MBS in the next MBS, ch 1, skip the next ch-1 sp, MBS in the last MBS. Turn. (7 sts)
Inc Row 4: Ch 1, MBS in the first MBS, ch 1, MBS in the next ch-1 sp, ch 1, (MBS in the next MBS, ch 1, skip the next ch-1 sp) rep from ( to ) across to the last st, MBS in the last MBS. Turn. Stitch count increases by 2 stitches.
Repeat Increase Row 4 until your project measures the desired width.
Stitch Marker: Place a SM in the last stitch of the last row you just worked, to mark corner 2.
Do not fasten off. Continue to Rectangle Rows.
Rectangle (Rec) Rows
Rec Row 1: Ch 1, MBS2tog in the 1st MBS & 1st ch-1 sp (do not ch 1), (MBS in the next MBS, ch 1, skip the next ch-1 sp) rep from ( to ) across to the last 3 sts, MBS in the next MBS, ch 1, MBS in the next ch-1 sp (do not ch 1), MBS in the last st. Turn. Stitch count does not decrease.
Rec Row 2: Ch 1, MBS in the first MBS, ch 1, (MBS in the next MBS, ch 1, skip the next ch-1 sp) rep from ( to ) across to the last 2 sts, MBS2tog in the last 2 sts. Turn. Stitch count does not decrease.
Repeat Rectangle Rows 1 – 2, making sure to end with a Rec Row 2, until your project measures the desired length.
Stitch Marker: Place a SM in the FIRST stitch of the last row. This marks the 3rd corner.
Do not fasten off. Continue to Decrease Rows.
Decrease (Dec) Rows
Dec Row 1: Ch 1, MBS2tog in the 1st MBS & 1st ch-1 sp (do not ch 1), (MBS in the next MBS, ch 1, skip the next ch-1 sp) rep from ( to ) across to the last 3 sts, MBS in the next MBS (do not ch 1), MBS2tog in the next ch-1 sp & last MBS. Turn. Stitch count decreases by 2 stitches.
Dec Row 2: Ch 1, MBS2tog in the first 2 MBS, (ch 1, skip the next ch-1 sp, MBS in the next MBS) rep from ( to ) across to the last 3 sts, ch 1, skip the next ch-1 sp, MBS2tog in the last 2 MBS. Turn. Stitch count decreases by 2 stitches.
Repeat Decrease Rows 1 – 2 until you have only 9 sts remaining.

Do not fasten off. Continue to Final Rows.
Final Rows
Row 1: Ch 1, MBS2tog in the 1st MBS & 1st ch-1 sp (do not ch 1), (MBS in the next MBS, ch 1, skip the next ch-1 sp) rep from ( to ) across to the last 3 sts, MBS in the next MBS (do not ch 1), MBS2tog in the next ch-1 sp & last MBS. Turn. (7 sts)
Row 2: Ch 1, MBS2tog in the first 2 MBS, ch 1, skip the next ch-1 sp, MBS in the next MBS, ch 1, skip the next ch-1 sp, MBS2tog in the last 2 MBS. Turn. (5 sts)
Row 3: Ch 1, MBS2tog in the 1st MBS & 1st ch-1 sp (do not ch 1), MBS in the next MBS, MBS2tog in the next ch-1 sp and MBS. Turn. (3 sts)
Row 4: Ch 1, MBS2tog in the first MBS & last MBS (skipping the middle MBS). Turn. (1 st)
Place a SM in the last st to mark the last corner stitch.
Do not fasten off. Continue to Simple Single Crochet Border, if desired.
Simple Single Crochet Border
Rnd 1: Ch 1, [ (sc, ch 2, sc) in the next corner st, sc evenly along the side of the rectangle to the next corner stitch ] work from [ to ] 4 times. Join with a sl st to the 1st sc. Stitch count is not crucial.
Repeat Round 1 as many times as you’d like.
Fasten off. Weave in ends.
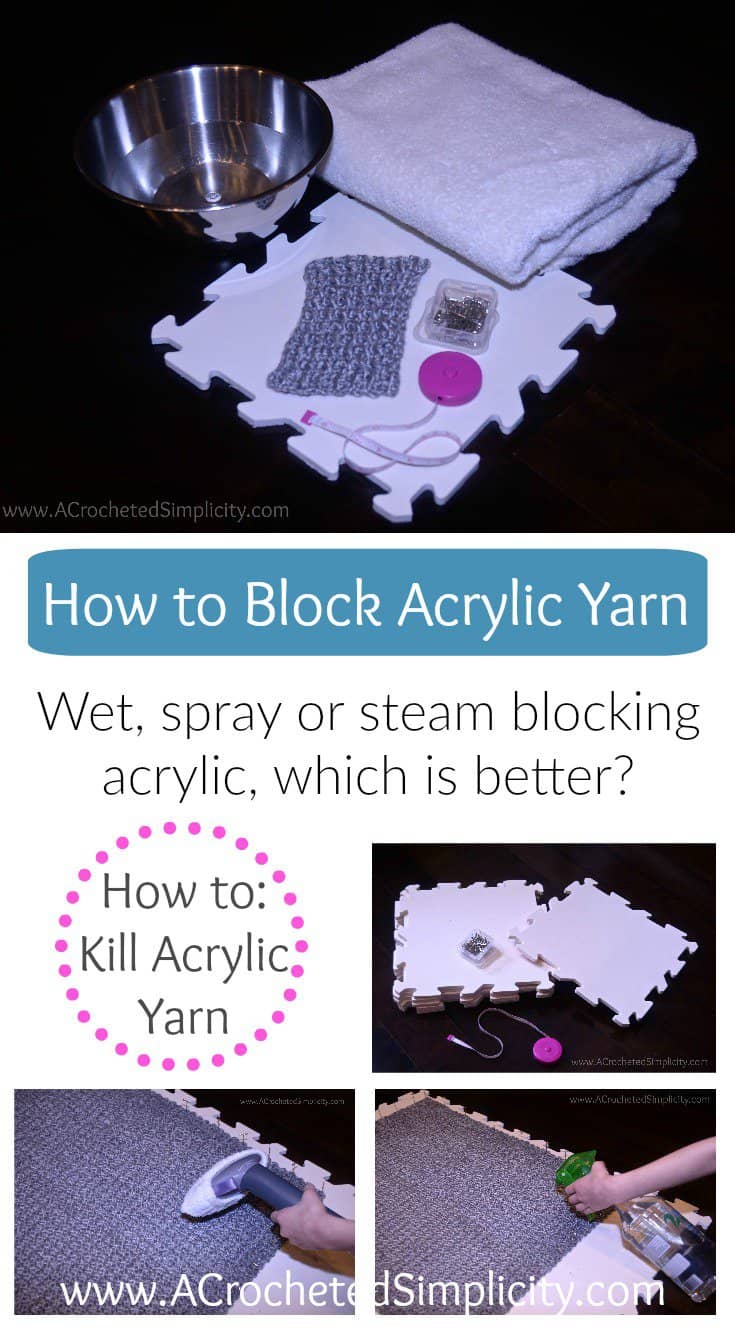
GIVE YOUR WORK A PROFESSIONAL FINISH BY BLOCKING IT! CLICK HERE TO LEARN 3 DIFFERENT WAYS TO BLOCK ACRYLIC YARN. I PREFER TO STEAM BLOCK, WHICH TECHNIQUE WILL YOU CHOOSE?
Are you intimidated by knit-look crochet? Would you love to learn my tips & tricks? Take an Annies Video Class with me and let me ease your fears and help you increase your skills! Click on the photo below to watch a free preview. You can also see the other 4 video classes I have available! (affiliate link)

Please share your finished ACS projects with us in the A Crocheted Simplicity Crochet Community Group on Facebook! Use hashtag #ACrochetedSimplicity when sharing on social media so I can find your posts!
