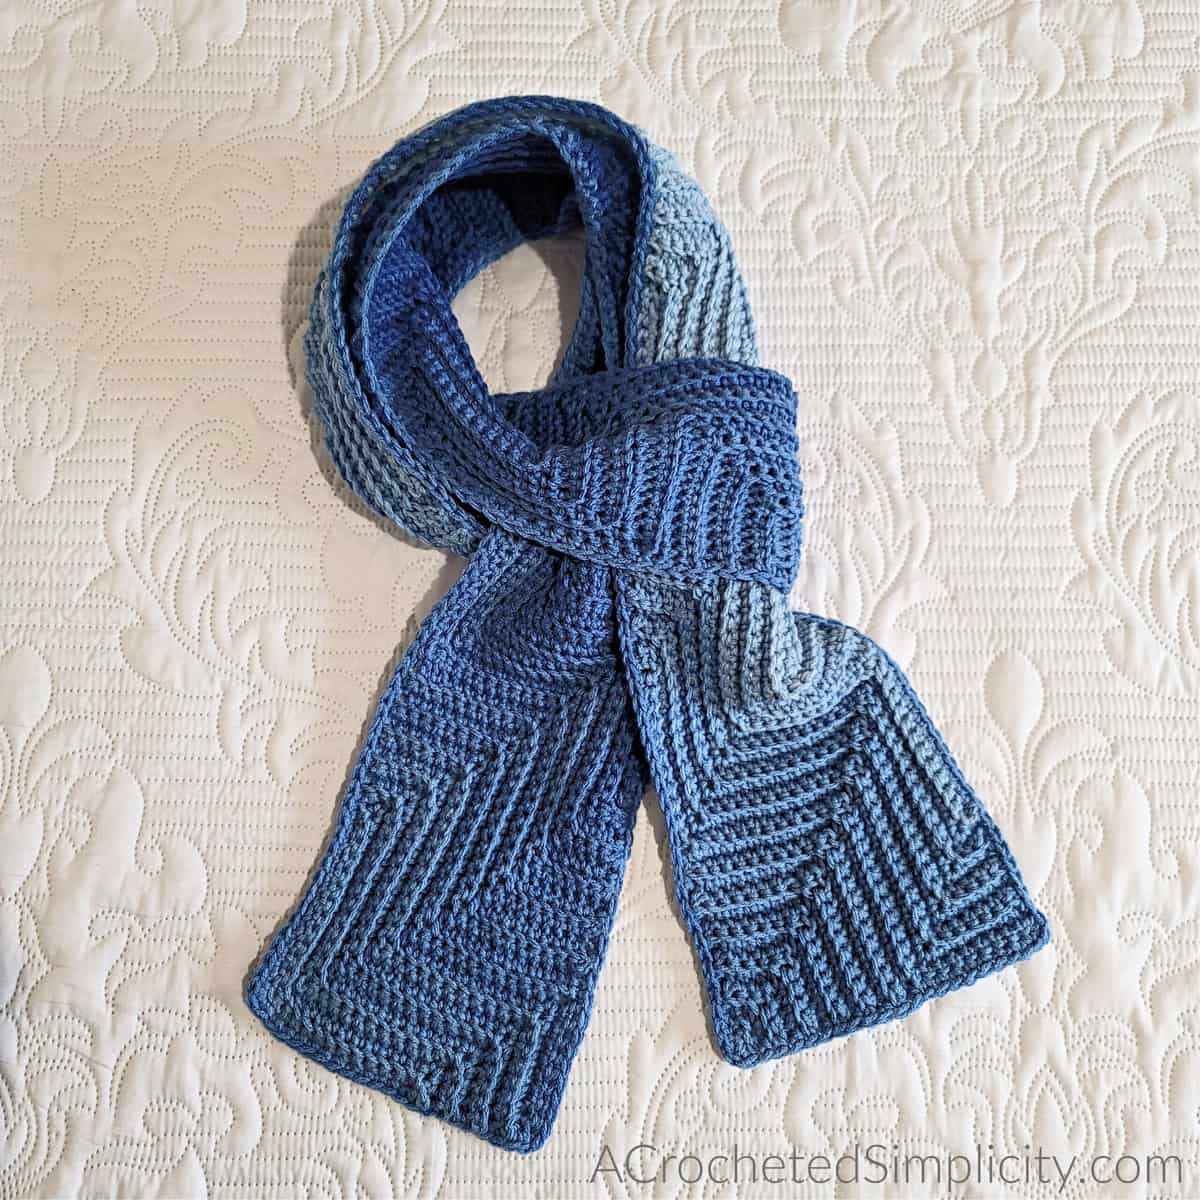
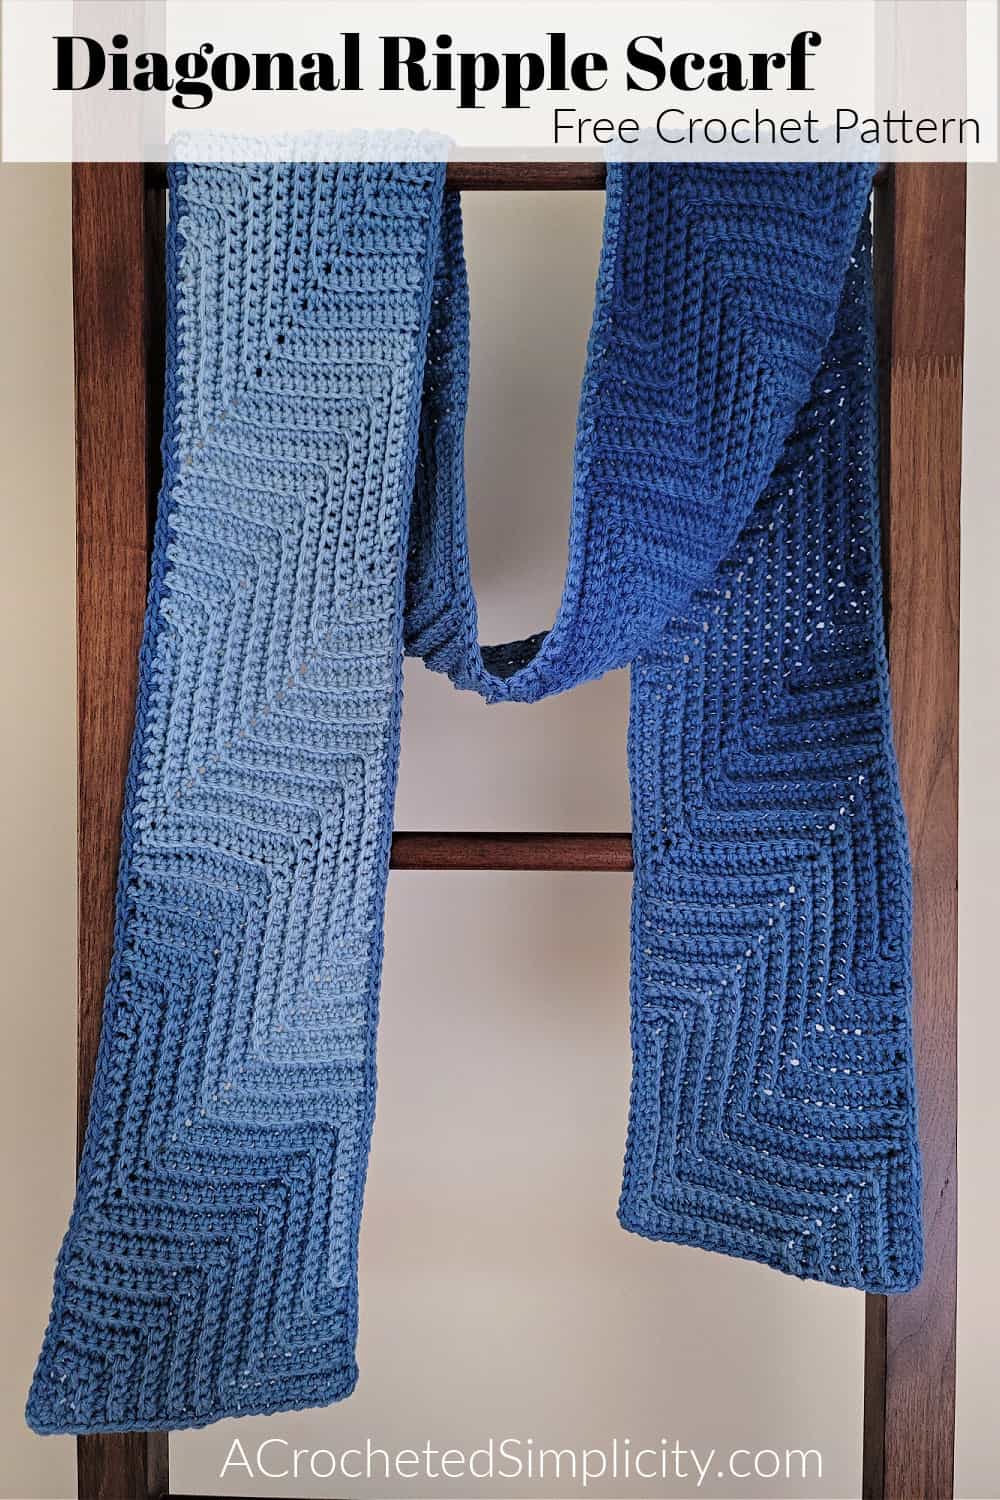
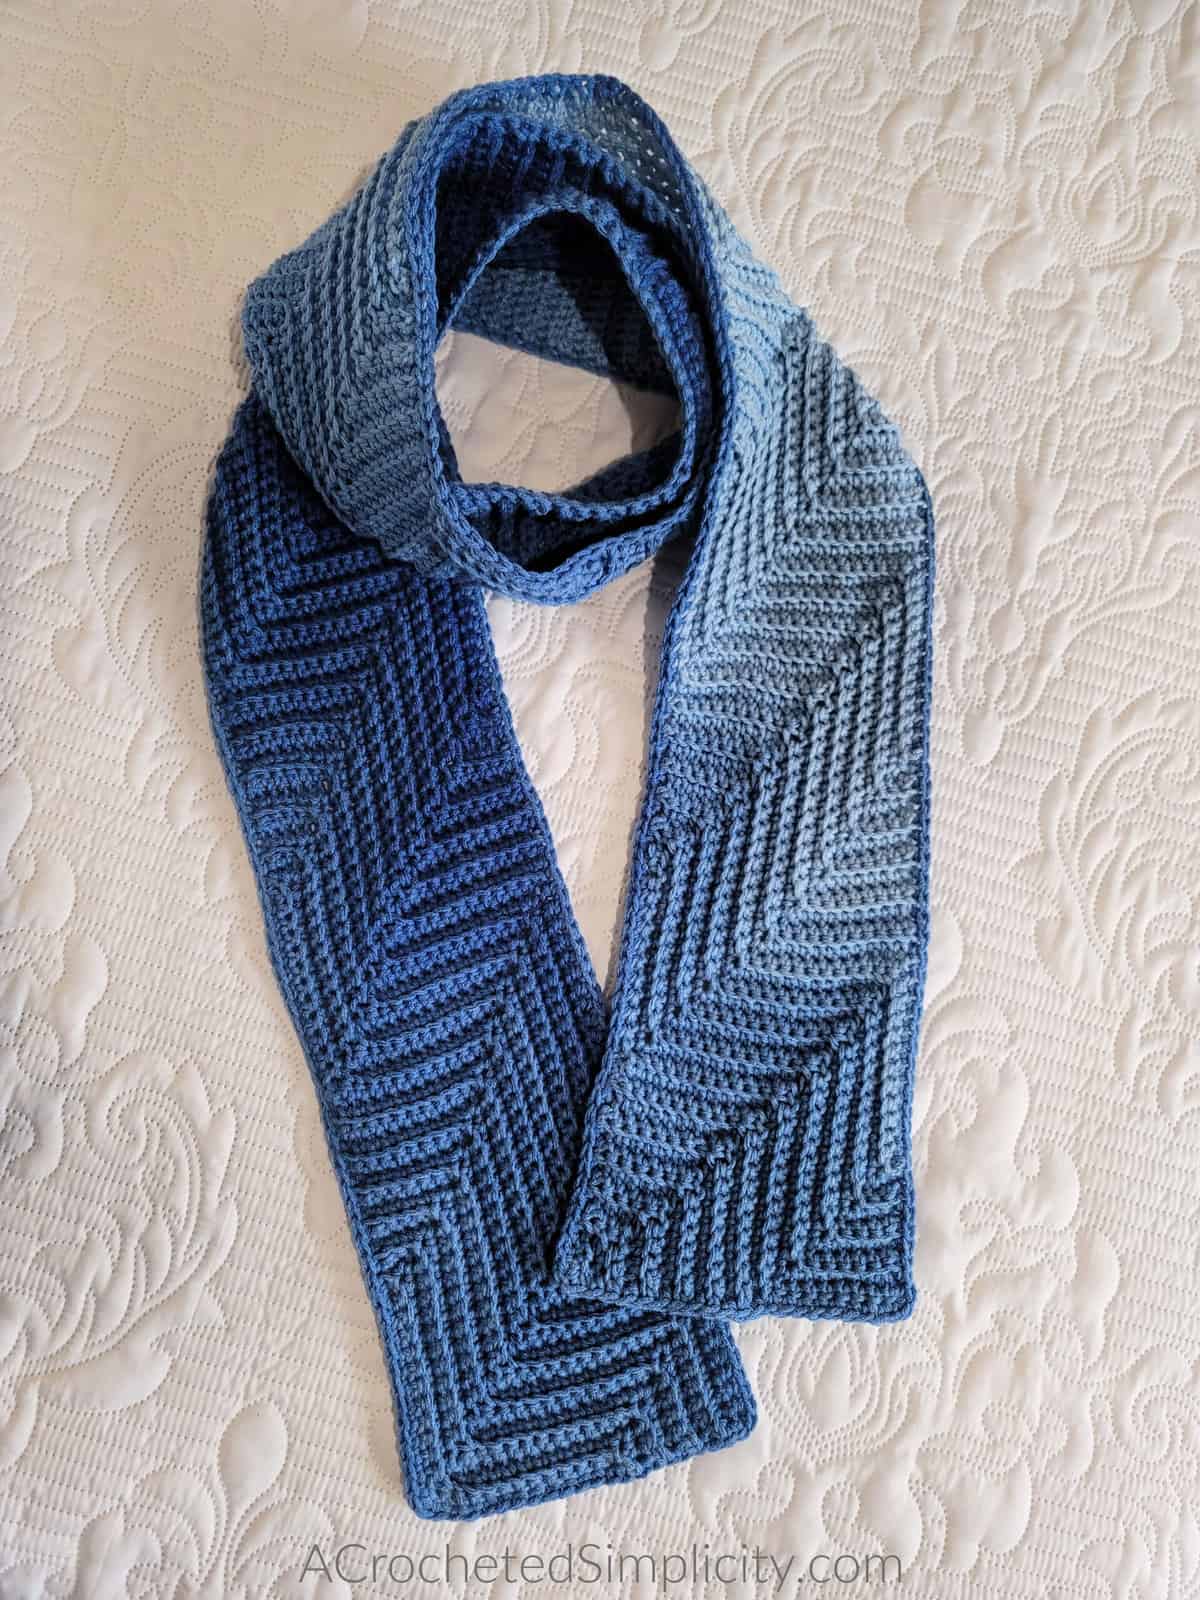
Diagonal Ripple Scarf – Free Crochet Scarf Pattern
While designing the Diagonal Ripple Lapghan, I kept thinking of all of the different projects I could use this on-the-bias crochet stitch pattern for. A scarf was one of them and this was how the Diagonal Ripple Scarf crochet pattern came to be. Many love working the classic crochet ripple pattern in BLO to create a neat ridge effect so I gave it a whirl when working on the bias. If you love to work crochet blankets from corner-to-corner (also known as working on-the-bias), you love crochet chevrons, and you love a good 1 skein project, then you will really enjoy this crochet scarf pattern! If you are intimidated by chevrons and working C2C, no worries because I’ve included several photos to help you along the way.
You can find the free crochet C2C pattern for the Diagonal Ripple Scarf in this post below, or an ad-free print friendly version on Love Crafts here, Ravelry here, or on Etsy here.
>CLICK HERE TO SIGN-UP TO RECEIVE OUR NEWSLETTER!<
Shortly after I taught myself to crochet, I fell in love with crochet chevrons (or crochet ripples as some prefer to refer to them as). Chevrons/Ripples are created using a classic crochet stitch pattern, but even though they’ve been around for decades, this stitch pattern can also be very modern. I love how simply playing around with color placement or working in back loops only, can really individualize a chevron pattern.
YARN
For this crochet C2C scarf, I chose Red Heart Super Saver Ombre in True Blue. I love ombre yarns and I knew there would be plenty of yardage in just 1 skein, making this a 1 skein project! Red Heart Super Saver Ombre is a great worsted weight acrylic yarn that’s available in 23 colors! You’ll have a hard time choosing colors, but this crochet ripple scarf will look great in any and every color.
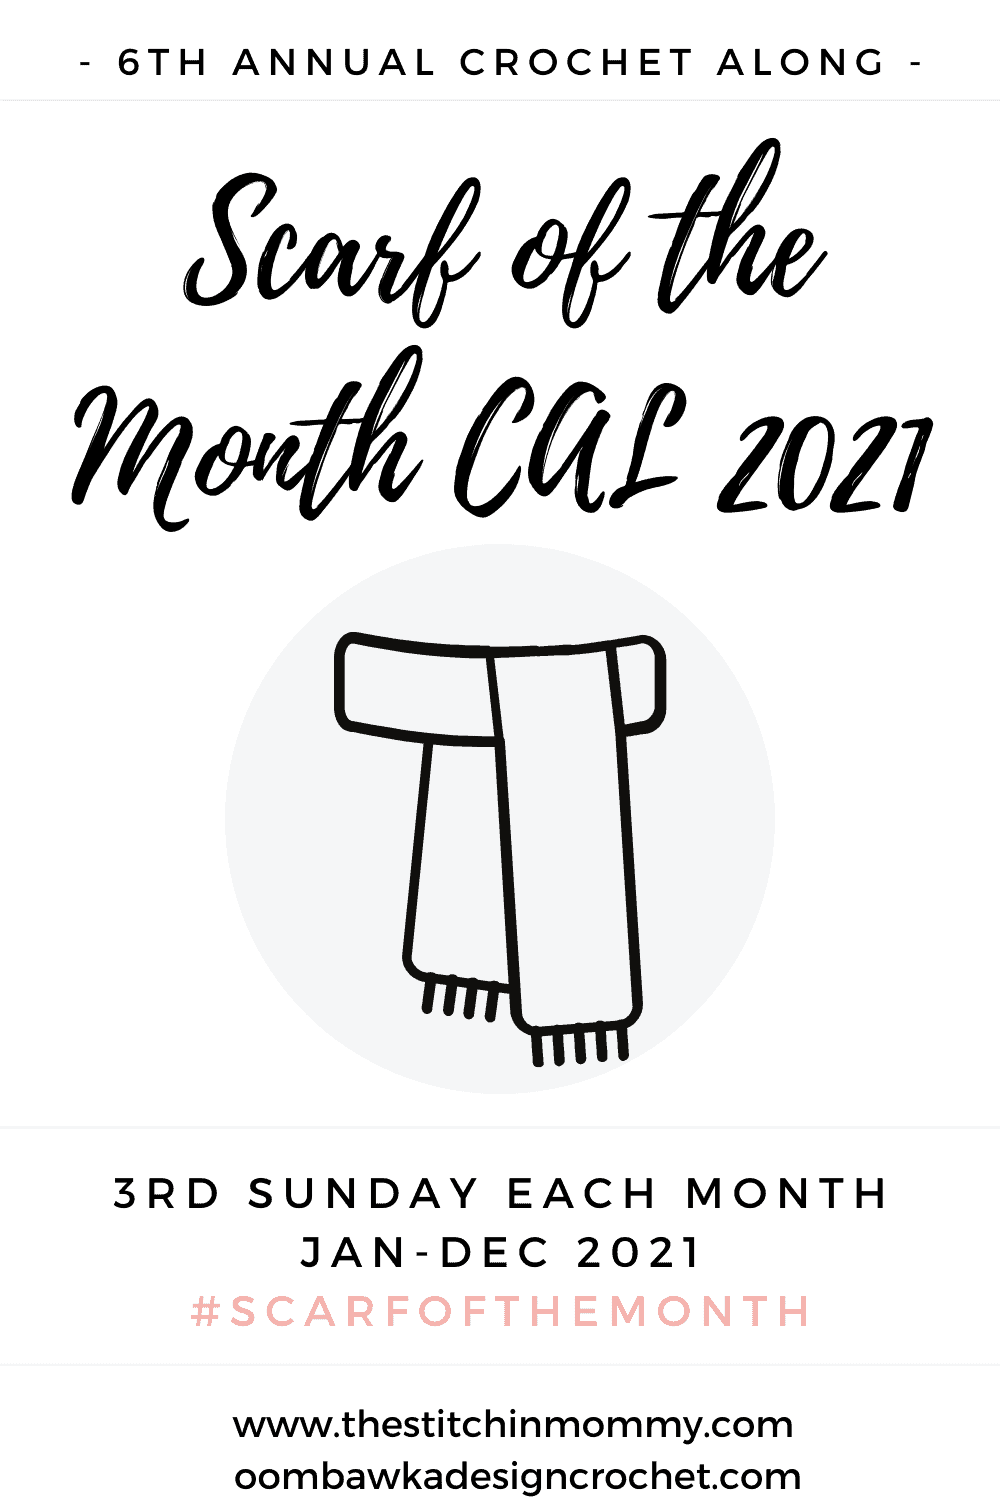
The Diagonal Ripple Scarf free crochet pattern is my contribution to the 6th annual Scarf of the Month Club CAL with Rhondda from Oombawka Design and Amy from The Stitchin’ Mommy.
If you would like to know more about this CAL, including the schedule please visit the links above (or click the picture below).
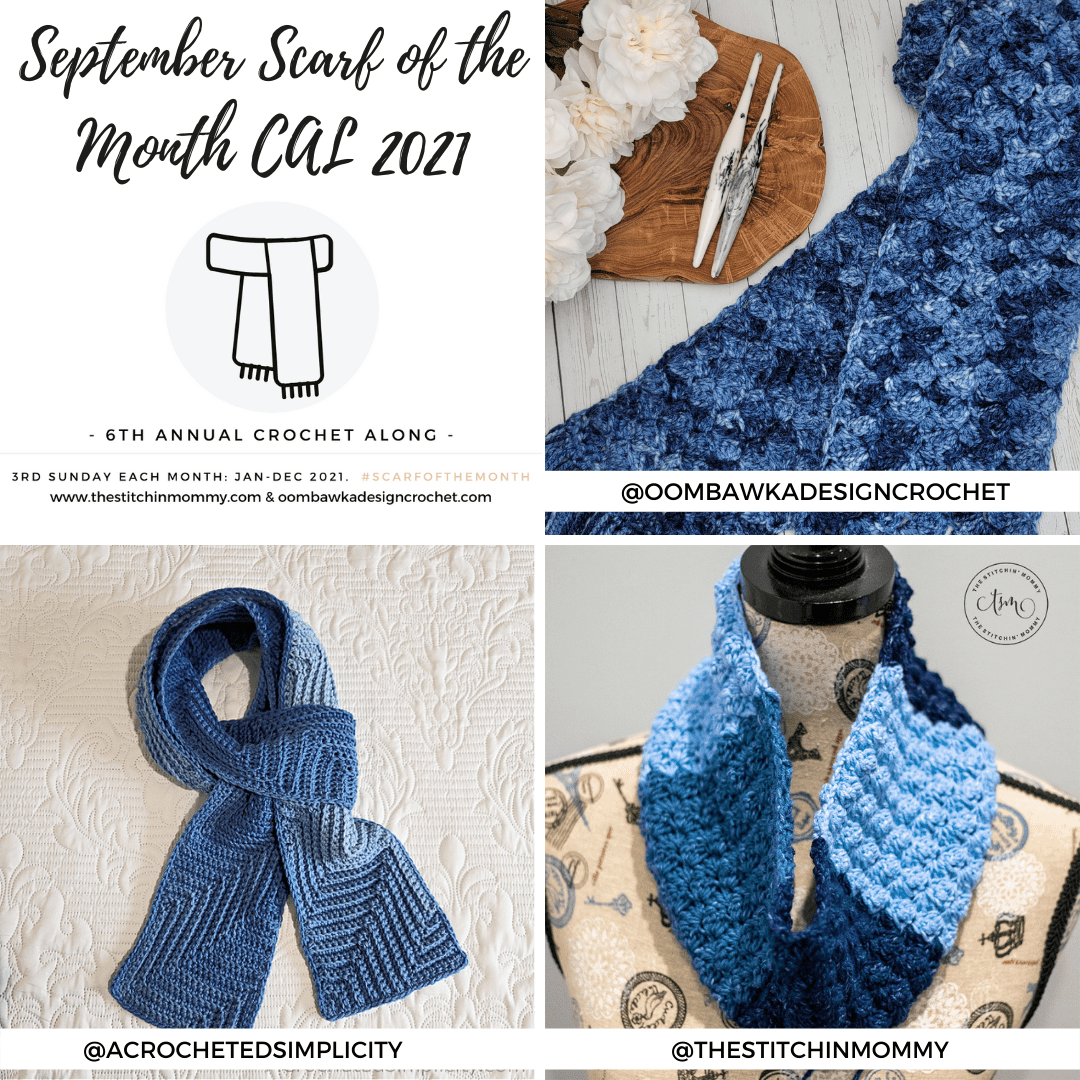
SEPTEMBER PATTERNS FROM THE SCARF OF THE MONTH CLUB 2021:
Diagonal Ripple Scarf (in this post below)
2021 Easy Does it Textured Scarf – Oombawka Design
Oh So Denim Cowl – The Stitching Mommy
DIAGONAL RIPPLE SCARF – FREE CROCHET C2C PATTERN
The free pattern is below, but if you love to work offline, I’ve got a couple other great options for you.
Purchase the ad-free, printable PDF, including all photo tutorials, on Love Crafts here, Ravelry here, or on Etsy here.
Save this pattern to your Ravelry favorites here.
Pin it for later here.
This post contains affiliate links.
Materials
- Yarn: Worsted Weight / 4 yarn, 440 yards, Red Heart Super Saver Ombre, was used for the crochet scarf shown in the photos. (482 yards / 283 g / 10 oz / 440 m / 100% Acrylic)
- True Blue: 1 skein
- Crochet Hook: J/10/6.00mm (My favorite crochet hooks are the Clover Amour Hooks, I’ve never had an ache in my hand since switching)
- Scissors
- Yarn Needle
- Locking stitch marker
Many of these materials are available for purchase through our affiliates below:
 RED Heart E305.3962 Super S...Shop on Amazon
  Clover 1049/J Amour Crochet...Shop on Amazon
  Fiskars 154110-1001 Non-sti...Shop on Amazon
  Lion Brand Yarn 400-5-5002 ...Shop on Amazon
  Clover Lock Ring Markers, 2...Shop on Amazon
Gauge
- In BLO sc: 10 sts = 3″ + 10 rows = 3″
Difficulty Level
- Advanced Beginner / Intermediate
Finished Size
- 6.5″ W x 80″ L *see notes below to easily adjust length
Abbreviations (US Terms)
- ch(s): chain(s)
- st(s): stitch(es)
- sl st(s): slip stitch(es)
- sc: single crochet
- sc2tog: single crochet 2 together
- yo: yarn over
- sp(s): space(s)
- rep: repeat
- RS: right side
- BLO: back loop only
- FLO: front loop only
- SM: stitch marker
- Join with a standing sc: (click here for tutorial)
Notes
- The first stitch of each row is worked in the same stitch as the turning chain, unless stated otherwise.
- Turning chains are not included in stitch count, unless noted otherwise.
- Red Heart Super Saver Ombre in True Blue, worsted weight yarn, was used for the sample shown in the photos. 100% Acrylic, (482 yards / 283 g / 10 oz / 440 m)
- Yardage: approximately 440 yards
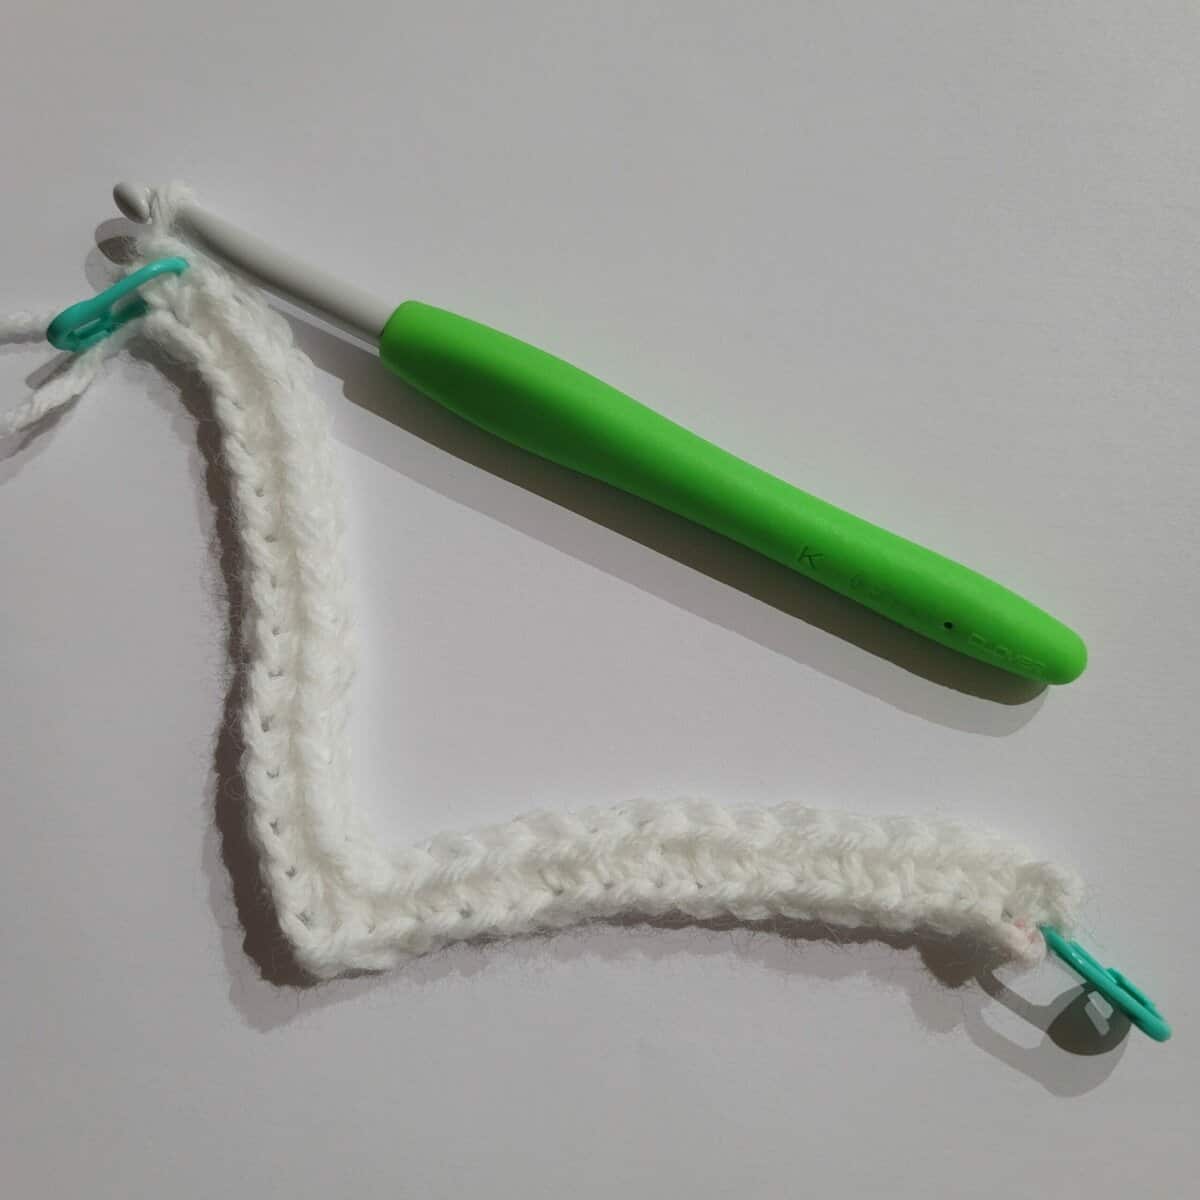
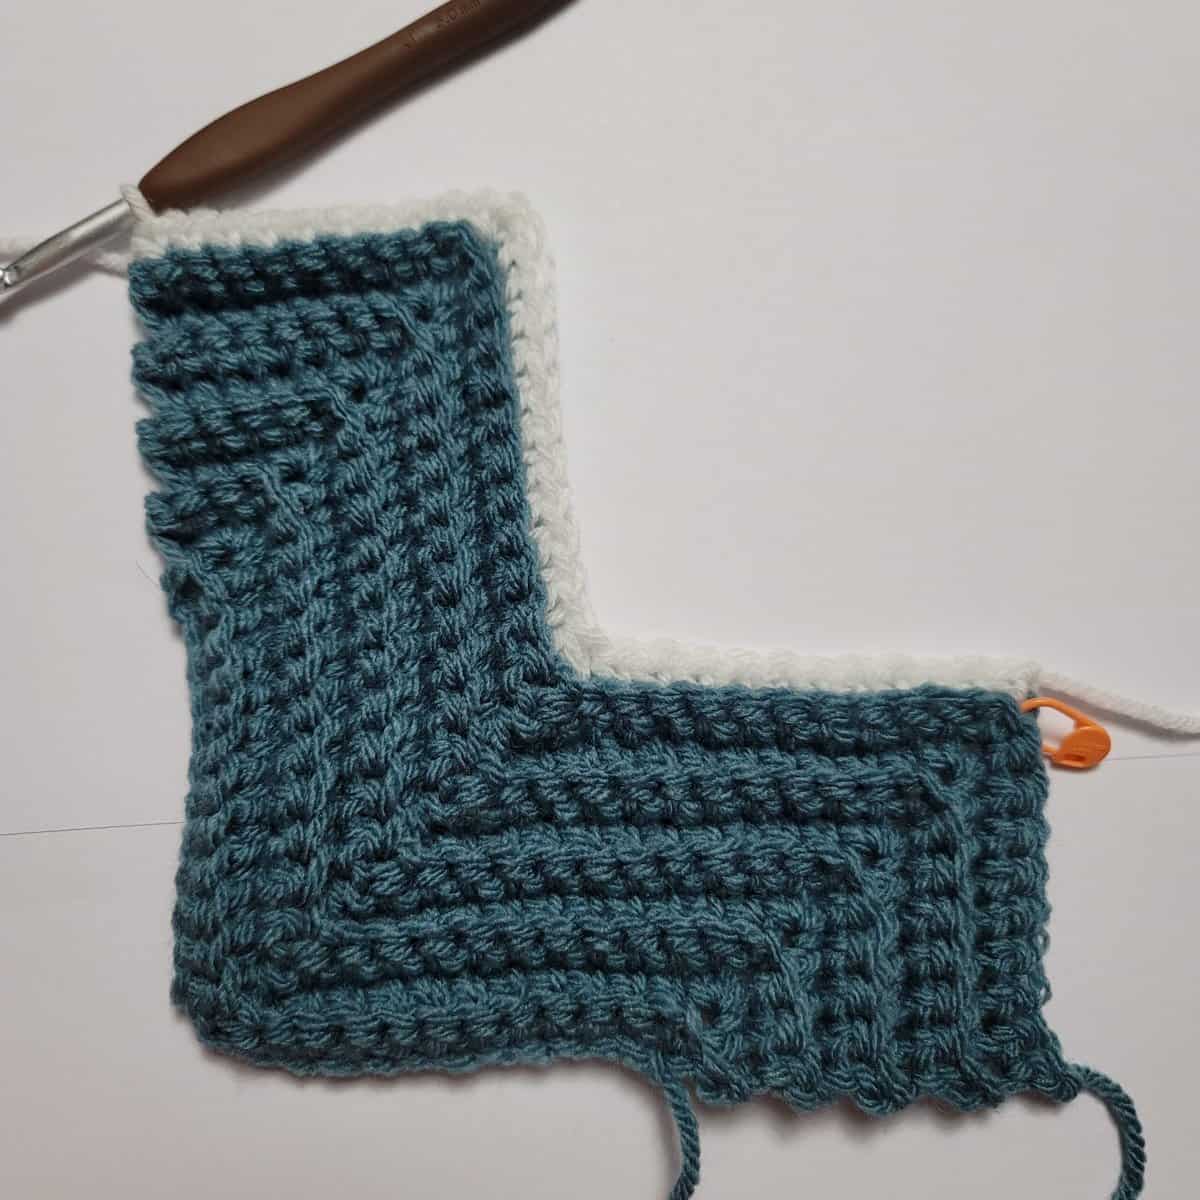
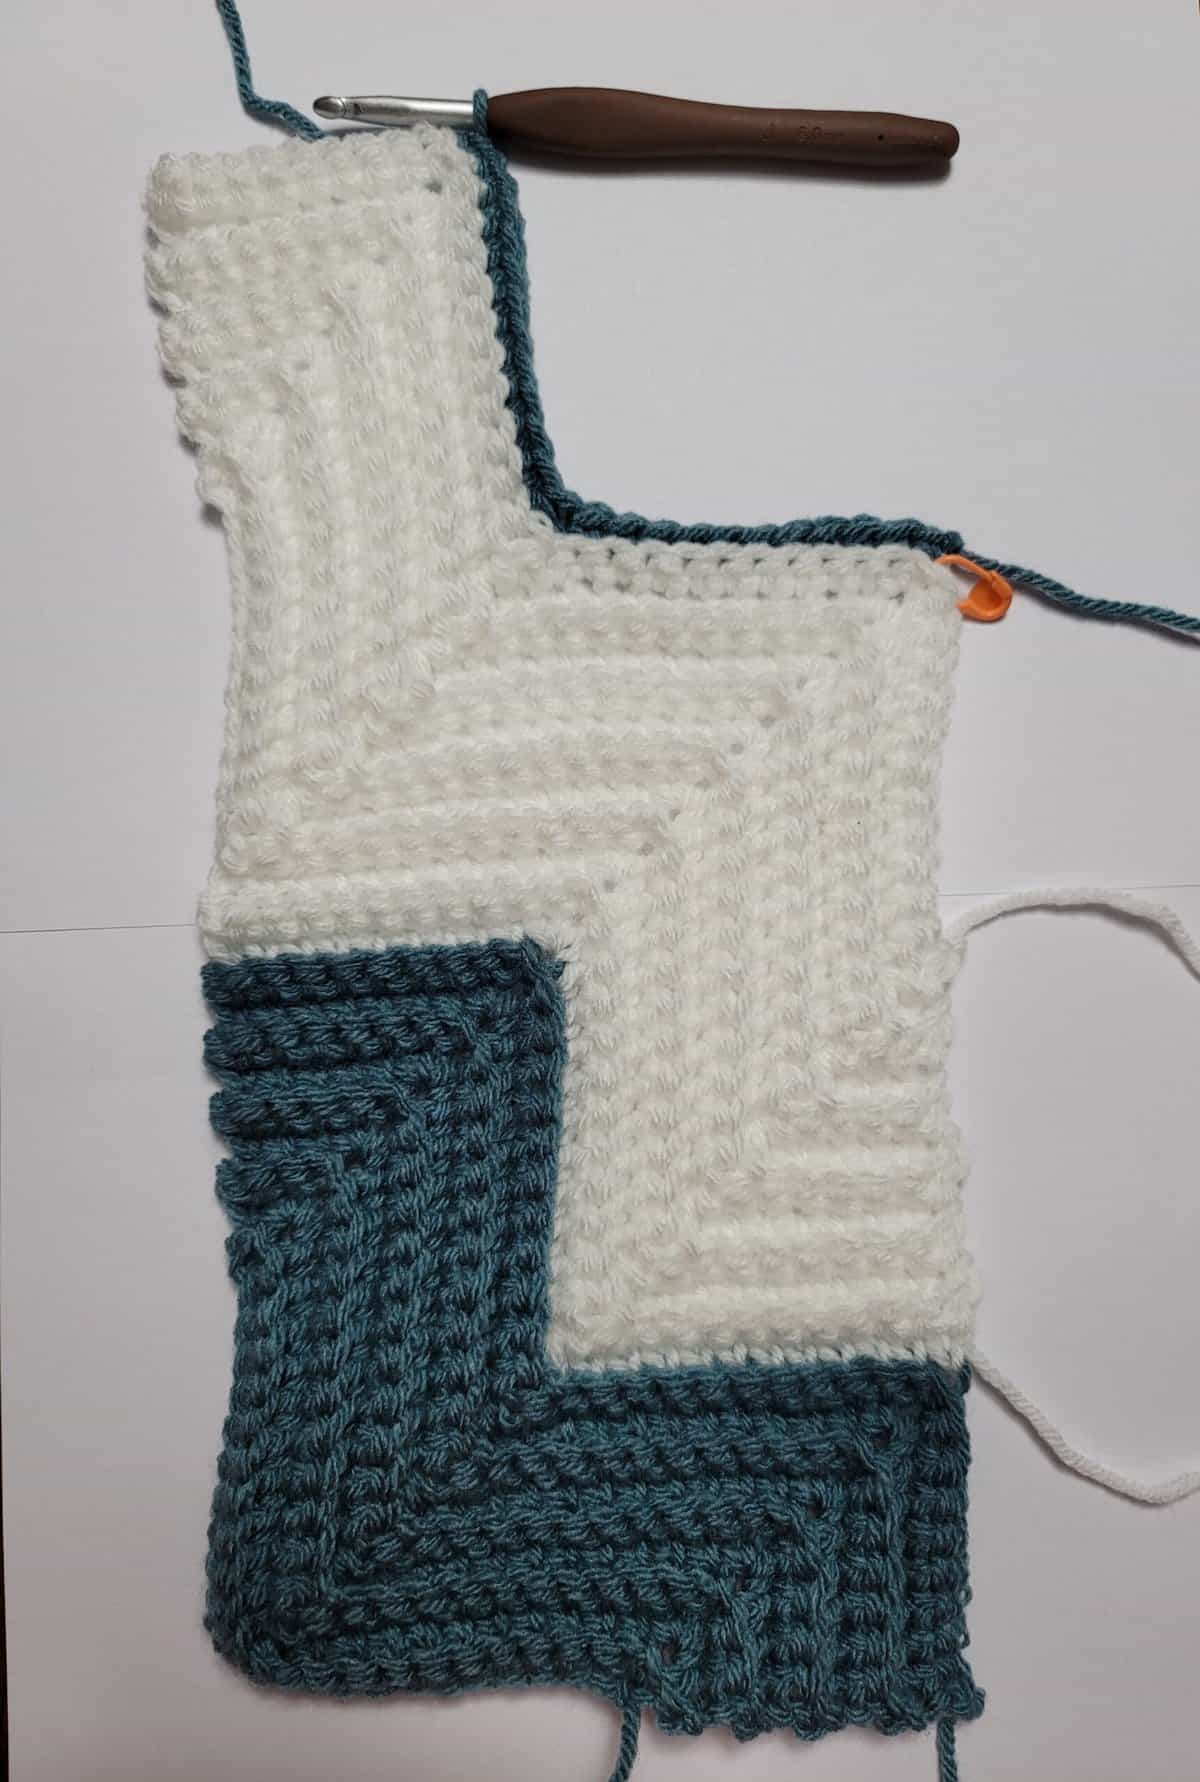
- This scarf is worked on the bias (corner-to-corner) beginning in the lower left corner and finishing in the upper right corner. A simple single crochet border is then added.
- Adjusting Length: To make your scarf shorter, work fewer repeats of Rows 10 – 21. To make your scarf longer, work more repeats of Rows 10 – 21.
Diagonal Ripple Scarf Instructions
This scarf is worked corner-to-corner (on the bias) beginning in the lower left corner, then a simple single crochet border is added.
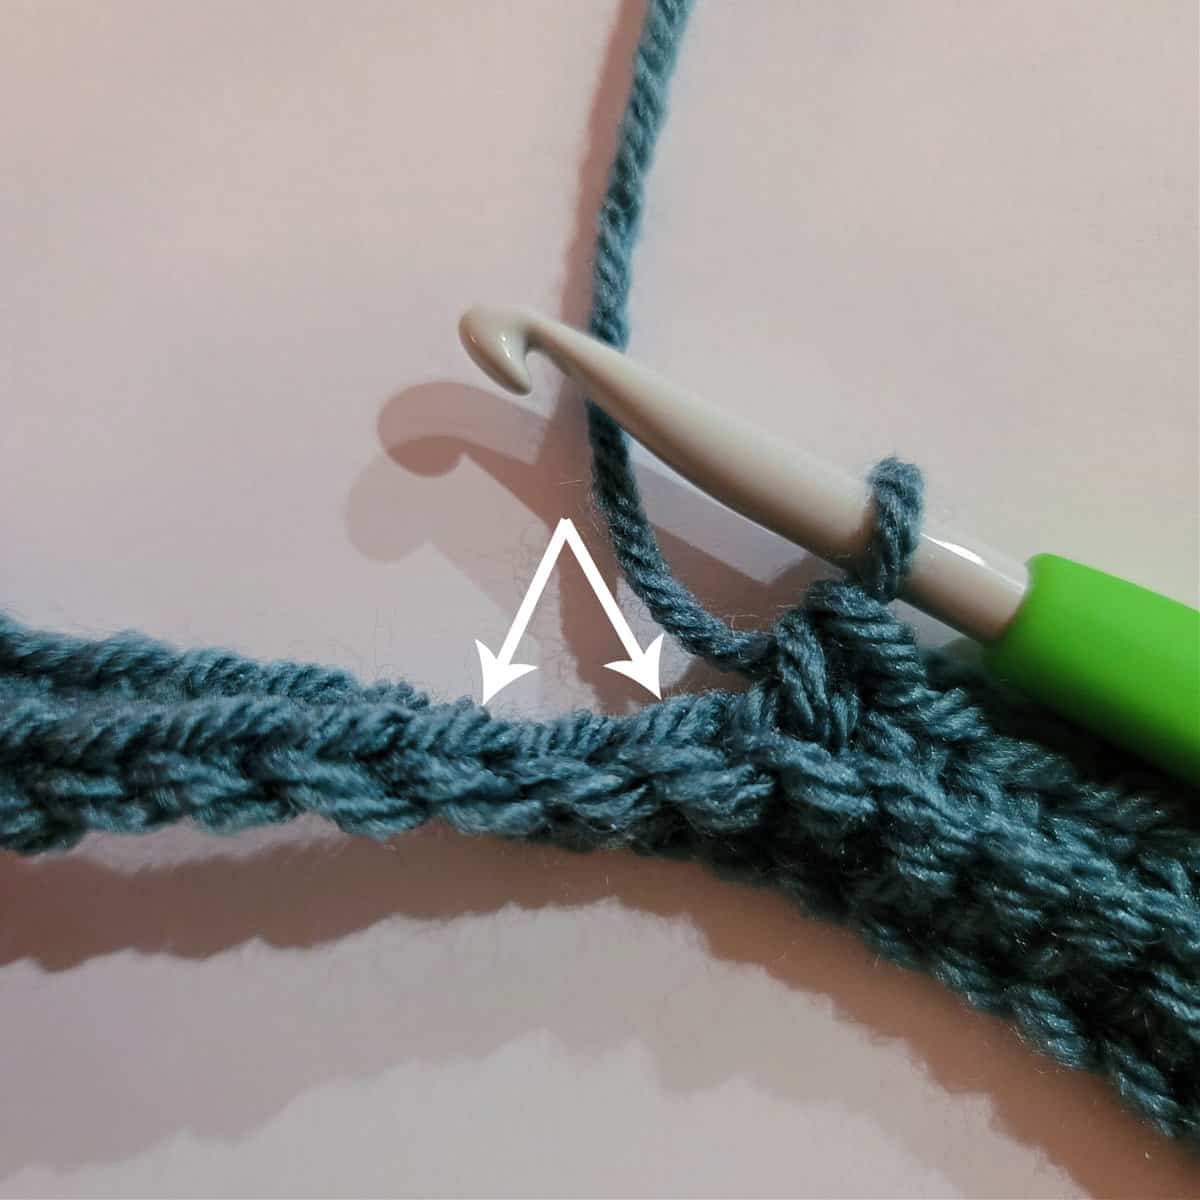
Tip: You may find it helpful to place a SM in the FLO of each ch-1 space and sc2tog to make it easier to find them when working the next row.
Note: Beginning with Row 2, you will work all stitches in the back loop only.
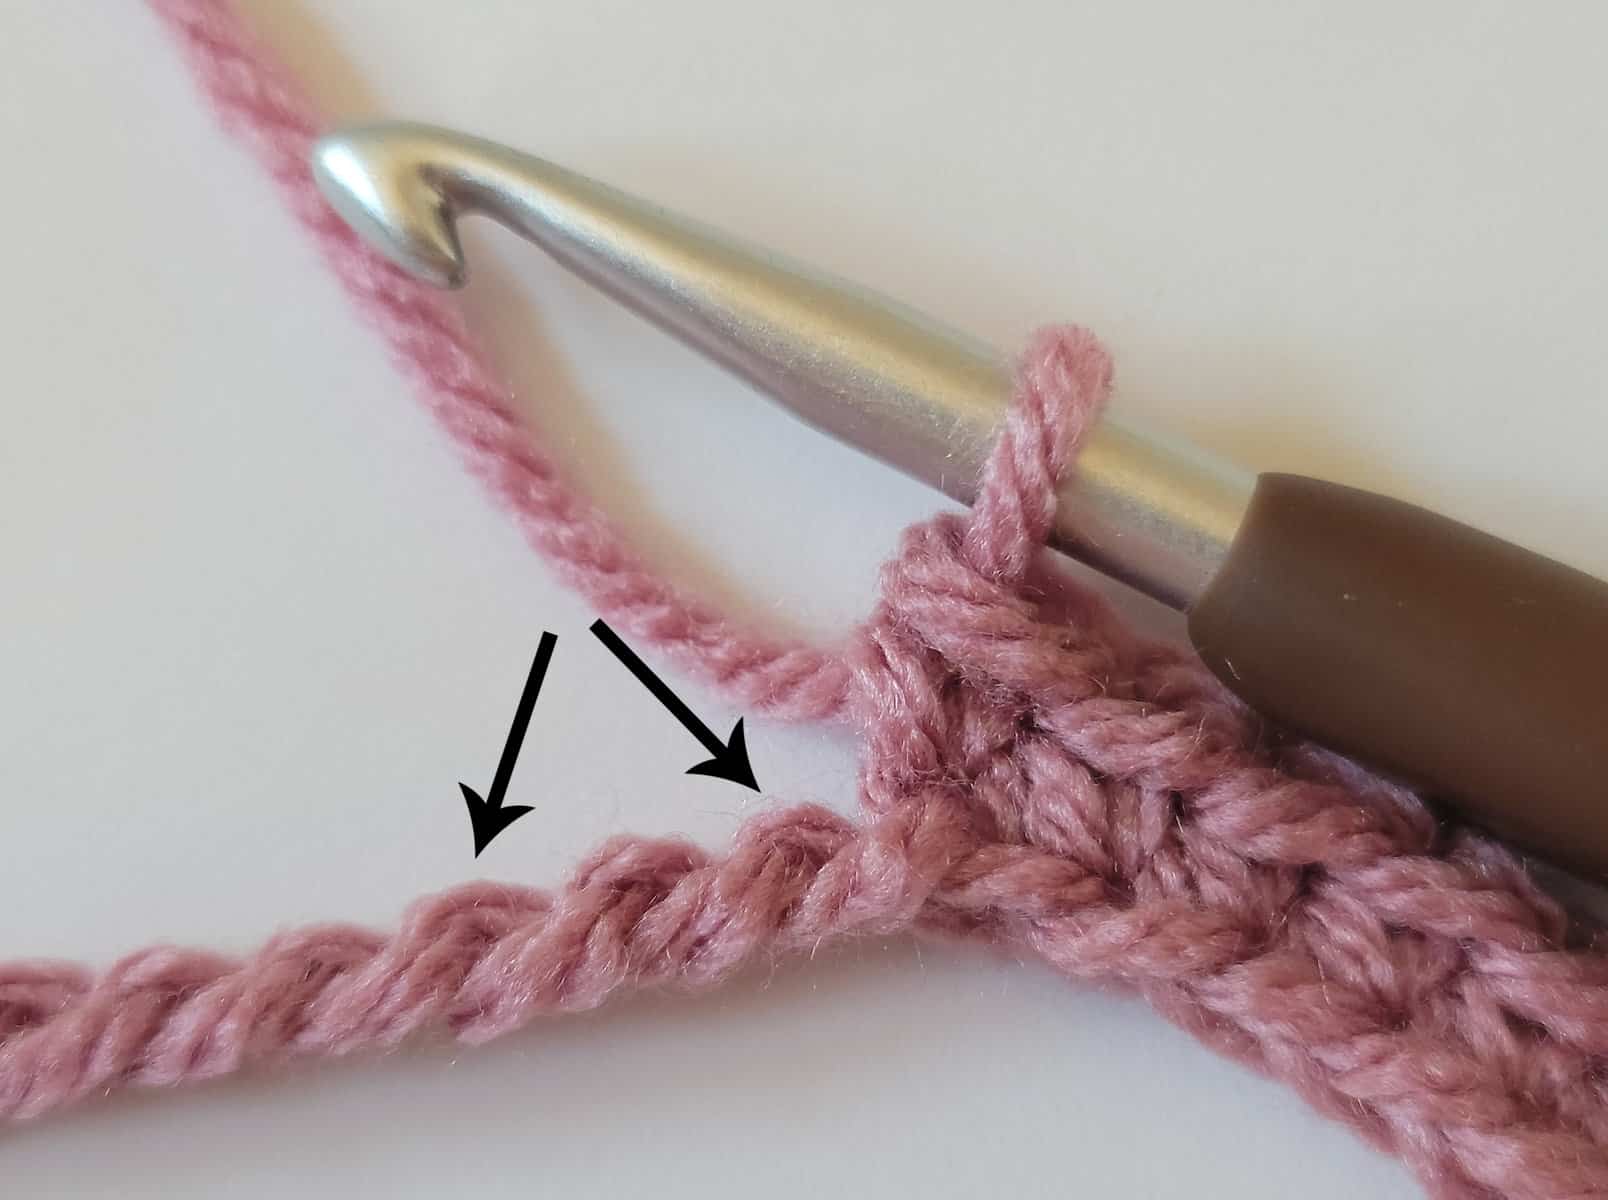
Row 1: With a 6.00mm crochet hook, ch 26, working into the back hump of the ch, [sc, ch 1, sc] in the 2nd ch from your hook, sc in each of the next 10 chs, work a sc2tog in the 1st & 3rd of the next 3 chs (skipping the 2nd ch), sc in each of the next 10 chs, [sc, ch 1, sc] in the last ch. Turn. (25 sts + 2 ch-1’s)
Row 2 (RS): Ch 1, working in BLO, sc in the first st, [sc, ch 1, sc] in the next ch, sc in each of the next 10 sts, sc2tog in the next 2 sc (skipping sc2tog from previous row), sc in each of the next 10 sts, [sc, ch 1, sc] in the next ch, sc in the last st. Turn. (27 sts + 2 ch-1’s)
Row 3: Ch 1, working in BLO, sc in the first st, sc in the next st, [sc, ch 1, sc] in the next ch, sc in each of the next 10 sts, sc2tog in the next 2 sc (skipping sc2tog from previous row), sc in each of the next 10 sts, [sc, ch 1, sc] in the next ch, sc in each of the last 2 sts. Turn. (29 sts + 2 ch-1’s)
Row 4: Ch 1, working in BLO, sc in the first st, sc in each st to the next ch-1, [sc, ch 1, sc] in the next ch, sc in each of the next 10 sts, sc2tog in the next 2 sc (skipping sc2tog from previous row), sc in each of the next 10 sts, [sc, ch 1, sc] in the next ch, sc in each remaining st. Turn. (31 sts + 2 ch-1’s)
Rows 5 – 9: Rep Row 4. Fasten off at the end of Row 9. Stitch count at the end of Row 9 (41 sts + 2 ch-1’s). Place a SM in the FLO of the last ch-1 of row 9.
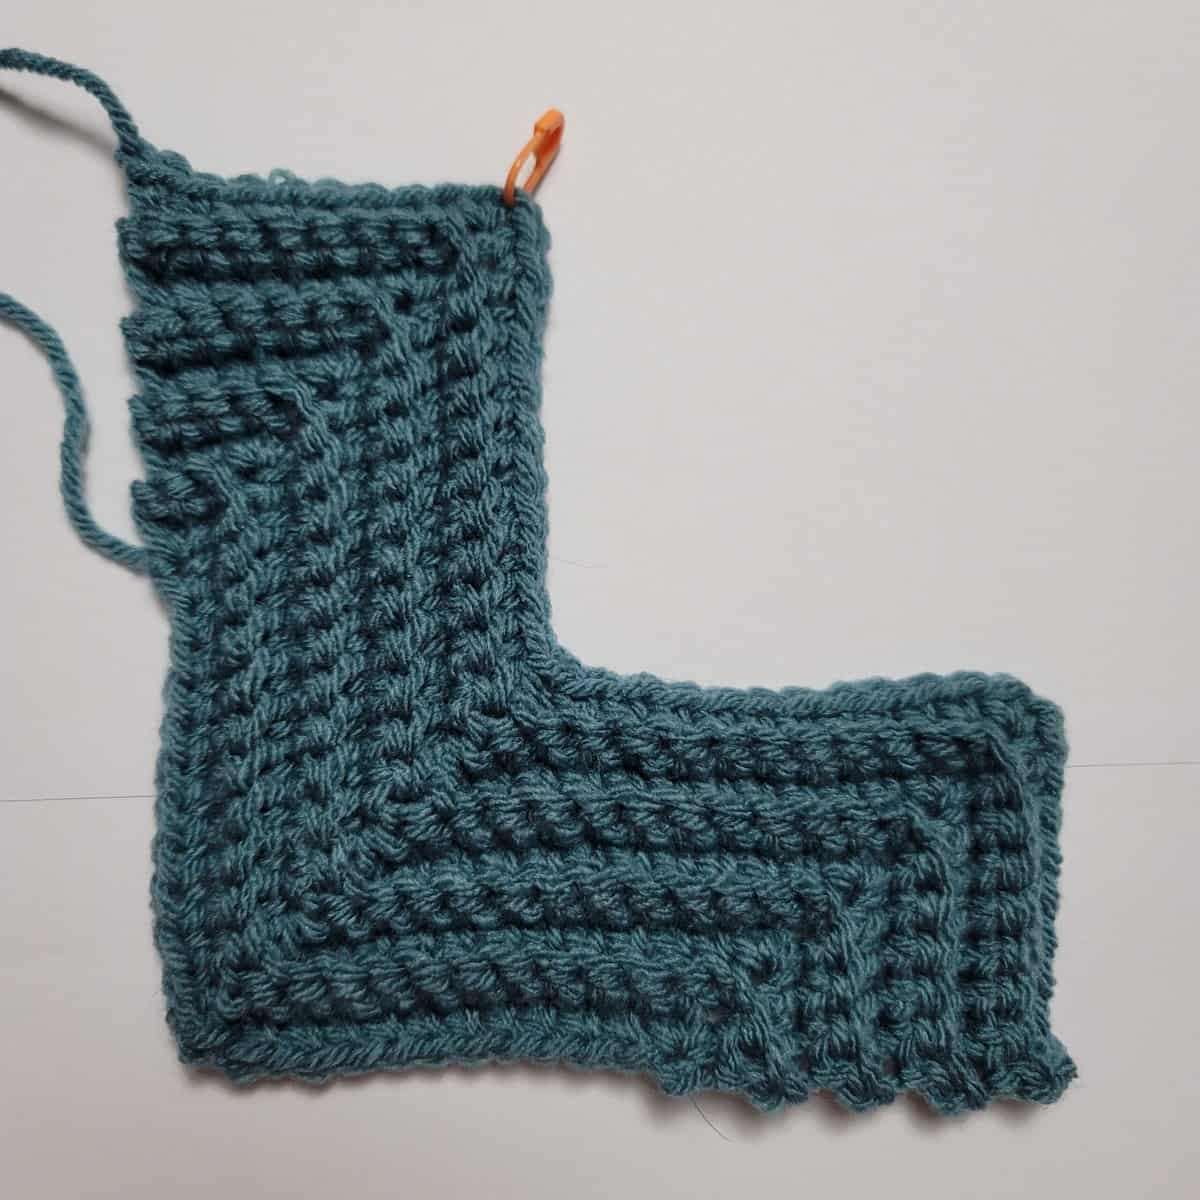
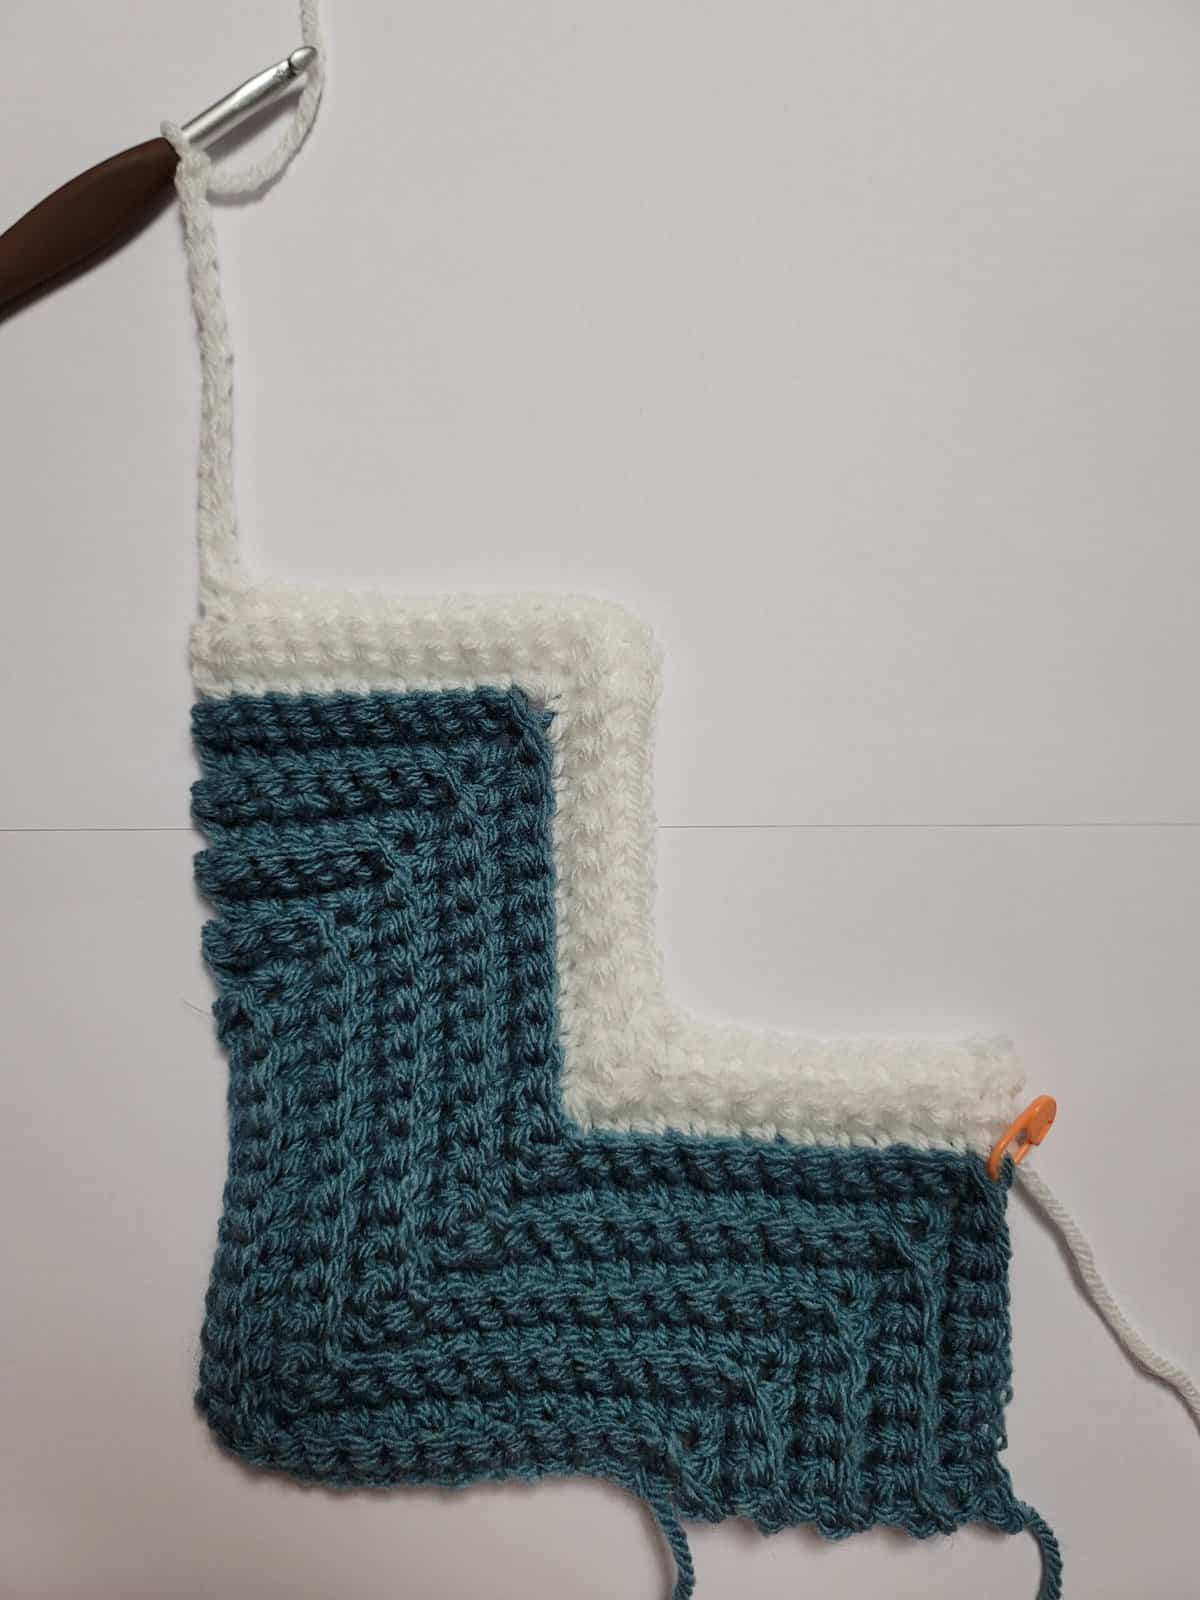
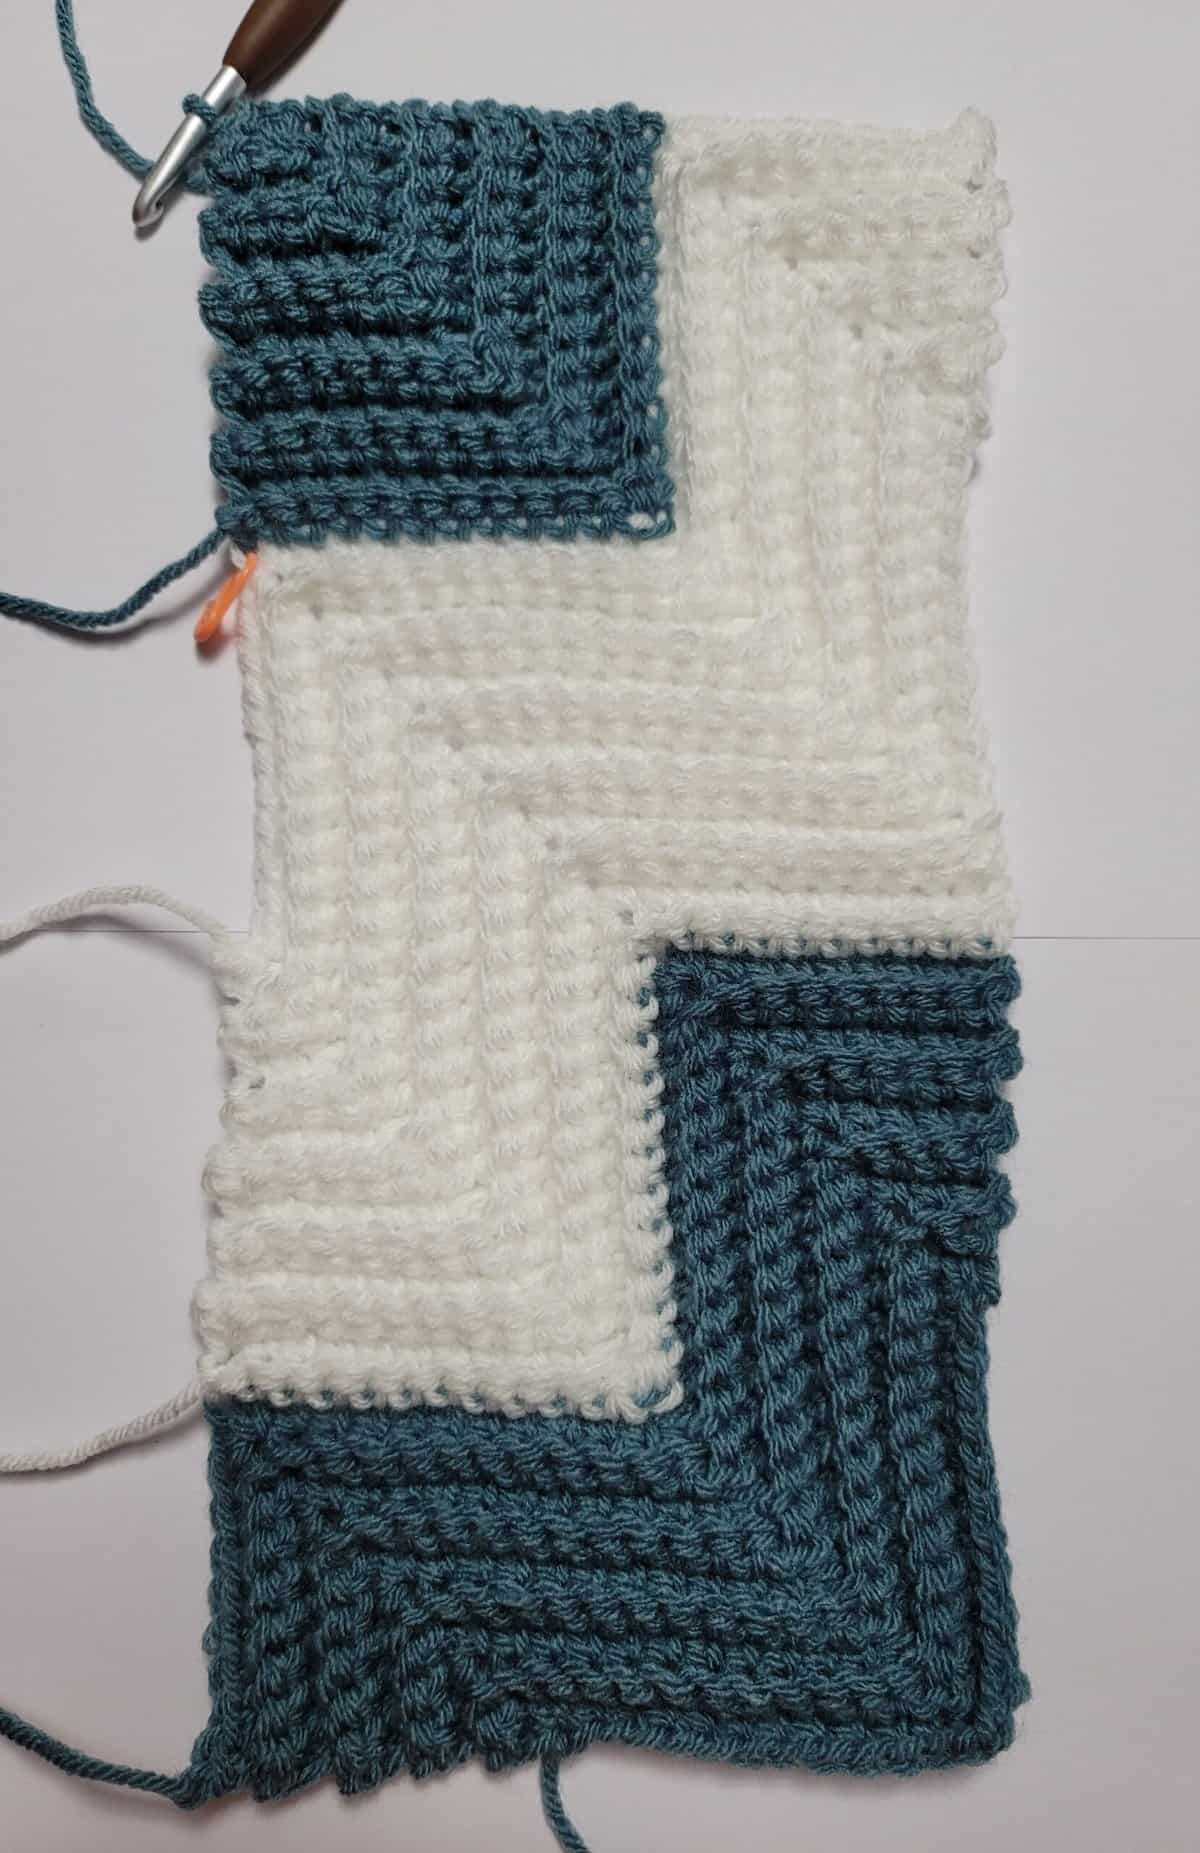
Beginning with Row 10, only one edge of your scarf will increase. This is where your work starts to become a rectangle.
Row 10: Working in BLO, join yarn with a standing sc in the st you marked with a SM in the previous row, sc in each of the next 10 sts, sc2tog in the next 2 sc (skipping sc2tog from previous row), sc in each of the next 10 sts, [sc, ch 1, sc] in the next ch, sc in each of the next 9 sts. Turn. (33 sts + 1 ch-1)
Row 11: Ch 1, working in BLO, sc in the first st, sc in each of the next 9 sts, [sc, ch 1, sc] in the next ch, sc in each of the next 10 sts, sc2tog in the next 2 sc (skipping sc2tog from previous row), sc in each of the next 10 sts. Turn. (33 sts + 1 ch-1)
Row 12: Ch 1, working in BLO, sc in the first st, sc in each of the next 8 sts, sc2tog in the next 2 sc (skipping sc2tog from previous row), sc in each of the next 10 sts, [sc, ch 1, sc] in the next ch, sc in each of the next 11 sts, ch 13. T urn. (33 sts + 1 ch-1 + ch 12 + ch 13) *Stitch count increases by 2 sts + 1 ch 13.
Row 13: Working in BLO, [sc, ch 1, sc] in the 2nd ch from your hook, sc in each of the next 10 chs, work a sc2tog in the next ch & 2nd sc (skipping the 1st sc), sc in each of the next 10 sts, [sc, ch 1, sc] in the next ch, sc in each of the next 10 sts, sc2tog in the next 2 sc (skipping sc2tog from previous row), sc in each of the next 8 sts. Turn. (44 sts + 2 ch-1’s) *Stitch count increases by 11 sts + 1 ch-1.
Row 14: Ch 1, working in BLO, sc in the first st, sc in each of the next 6 sts, sc2tog in the next 2 sc (skipping sc2tog from previous row), sc in each of the next 10 sts, [sc, ch 1, sc] in the next ch, sc in each of the next 10 sts, sc2tog in the next 2 sc (skipping sc2tog from previous row), sc in each of the next 10 sts, [sc, ch 1, sc] in the next ch, sc in the next st. Turn. (44 sts + 2 ch-1’s)
Row 15: Ch 1, working in BLO, sc in the first st, sc in the next st, [sc, ch 1, sc] in the next ch, sc in each of the next 10 sts, sc2tog in the next 2 sc (skipping the sc2tog from previous row), sc in each of the next 10 sts, [sc, ch 1, sc] in the next ch, sc in each of the next 10 sts, sc2tog in the next 2 sc (skipping sc2tog from previous row), sc in each of the next 6 sts. Turn. (44 sts + 2 ch-1’s)
Row 16: Ch 1, working in BLO, sc in the first st, sc in each of the next 4 sts, sc2tog in the next 2 sc (skipping sc2tog from previous row), sc in each of the next 10 sts, [sc, ch 1, sc] in the next ch, sc in each of the next 10 sts, sc2tog in the next 2 sc (skipping sc2tog from previous row), sc in each of the next 10 sts, [sc, ch 1, sc] in the next ch, sc in each of the next 3 sts. Turn. (44 sts + 2 ch-1’s)
Row 17: Ch 1, working in BLO, sc in the first st, sc in each of the next 3 sts, [sc, ch 1, sc] in the next ch, sc in each of the next 10 sts, sc2tog in the next 2 sc (skipping the sc2tog from previous row), sc in each of the next 10 sts, [sc, ch 1, sc] in the next ch, sc in each of the next 10 sts, sc2tog in the next 2 sc (skipping sc2tog from previous row), sc in each of the next 4 sts. Turn. (44 sts + 2 ch-1’s)
Row 18: Ch 1, working in BLO, sc in the first st, sc in each of the next 2 sts, sc2tog in the next 2 sc (skipping sc2tog from previous row), sc in each of the next 10 sts, [sc, ch 1, sc] in the next ch, sc in each of the next 10 sts, sc2tog in the next 2 sc (skipping sc2tog from previous row), sc in each of the next 10 sts, [sc, ch 1, sc] in the next ch, sc in each of the next 5 sts. Turn. (44 sts + 2 ch-1’s)
Row 19: Ch 1, working in BLO, sc in the first st, sc in each of the next 5 sts, [sc, ch 1, sc] in the next ch, sc in each of the next 10 sts, sc2tog in the next 2 sc (skipping the sc2tog from previous row), sc in each of the next 10 sts, [sc, ch 1, sc] in the next ch, sc in each of the next 10 sts, sc2tog in the next 2 sc (skipping sc2tog from previous row), sc in each of the next 2 sts. Turn. (44 sts + 2 ch-1’s)
Row 20: Ch 1, working in BLO, sc in the first st, sc2tog in the next 2 sc (skipping sc2tog from previous row), sc in each of the next 10 sts, [sc, ch 1, sc] in the next ch, sc in each of the next 10 sts, sc2tog in the next 2 sc (skipping sc2tog from previous row), sc in each of the next 10 sts, [sc, ch 1, sc] in the next ch, sc in each of the next 7 sts. Turn. (44 sts + 2 ch-1’s)
Row 21: Ch 1, working in BLO, sc in the first st, sc in each of the next 7 sts, [sc, ch 1, sc] in the next ch, sc in each of the next 10 sts, sc2tog in the next 2 sc (skipping the sc2tog from previous row), sc in each of the next 10 sts, [sc, ch 1, sc] in the next ch, sc in each of the next 10 sts, sc2tog in the next 2 sc (skipping sc2tog from previous row). Turn. (44 sts + 2 ch-1’s) Place a SM in the FLO of the last ch-1 of the row. Fasten off.
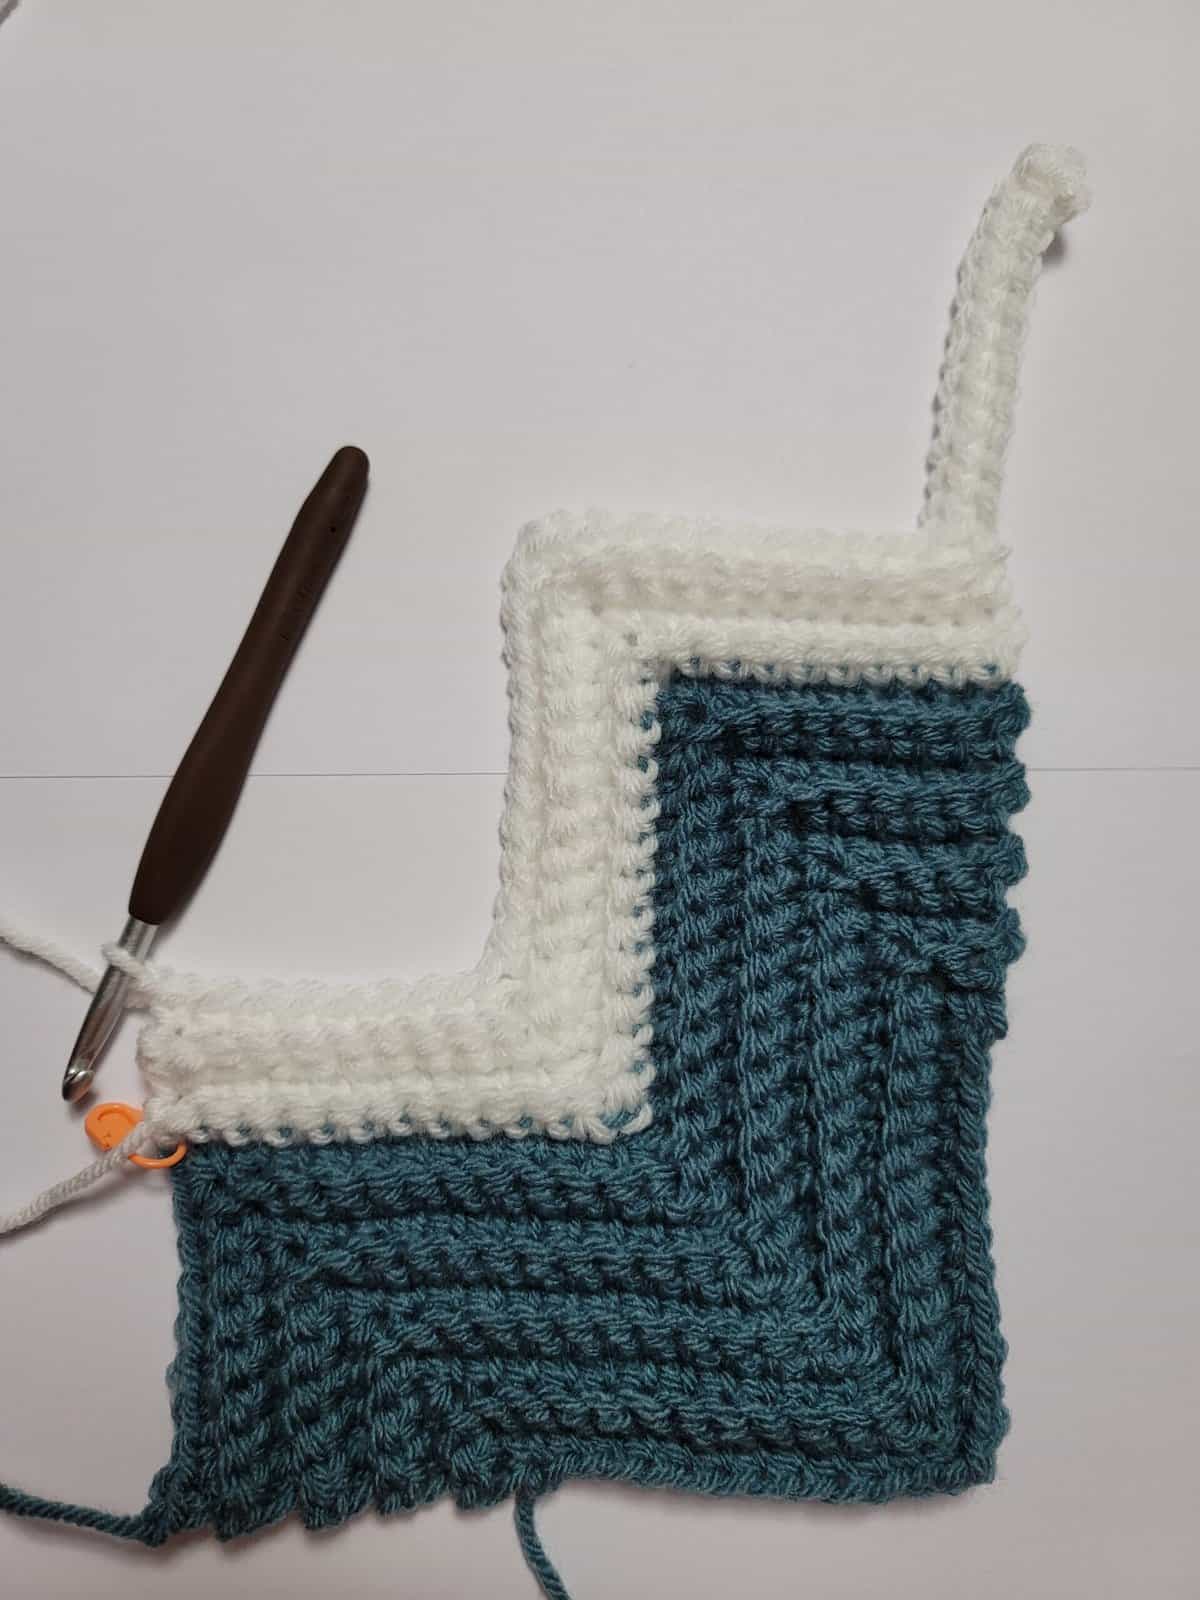
Rows 22 – 117: Rep Rows 10 – 21 (8 times total).
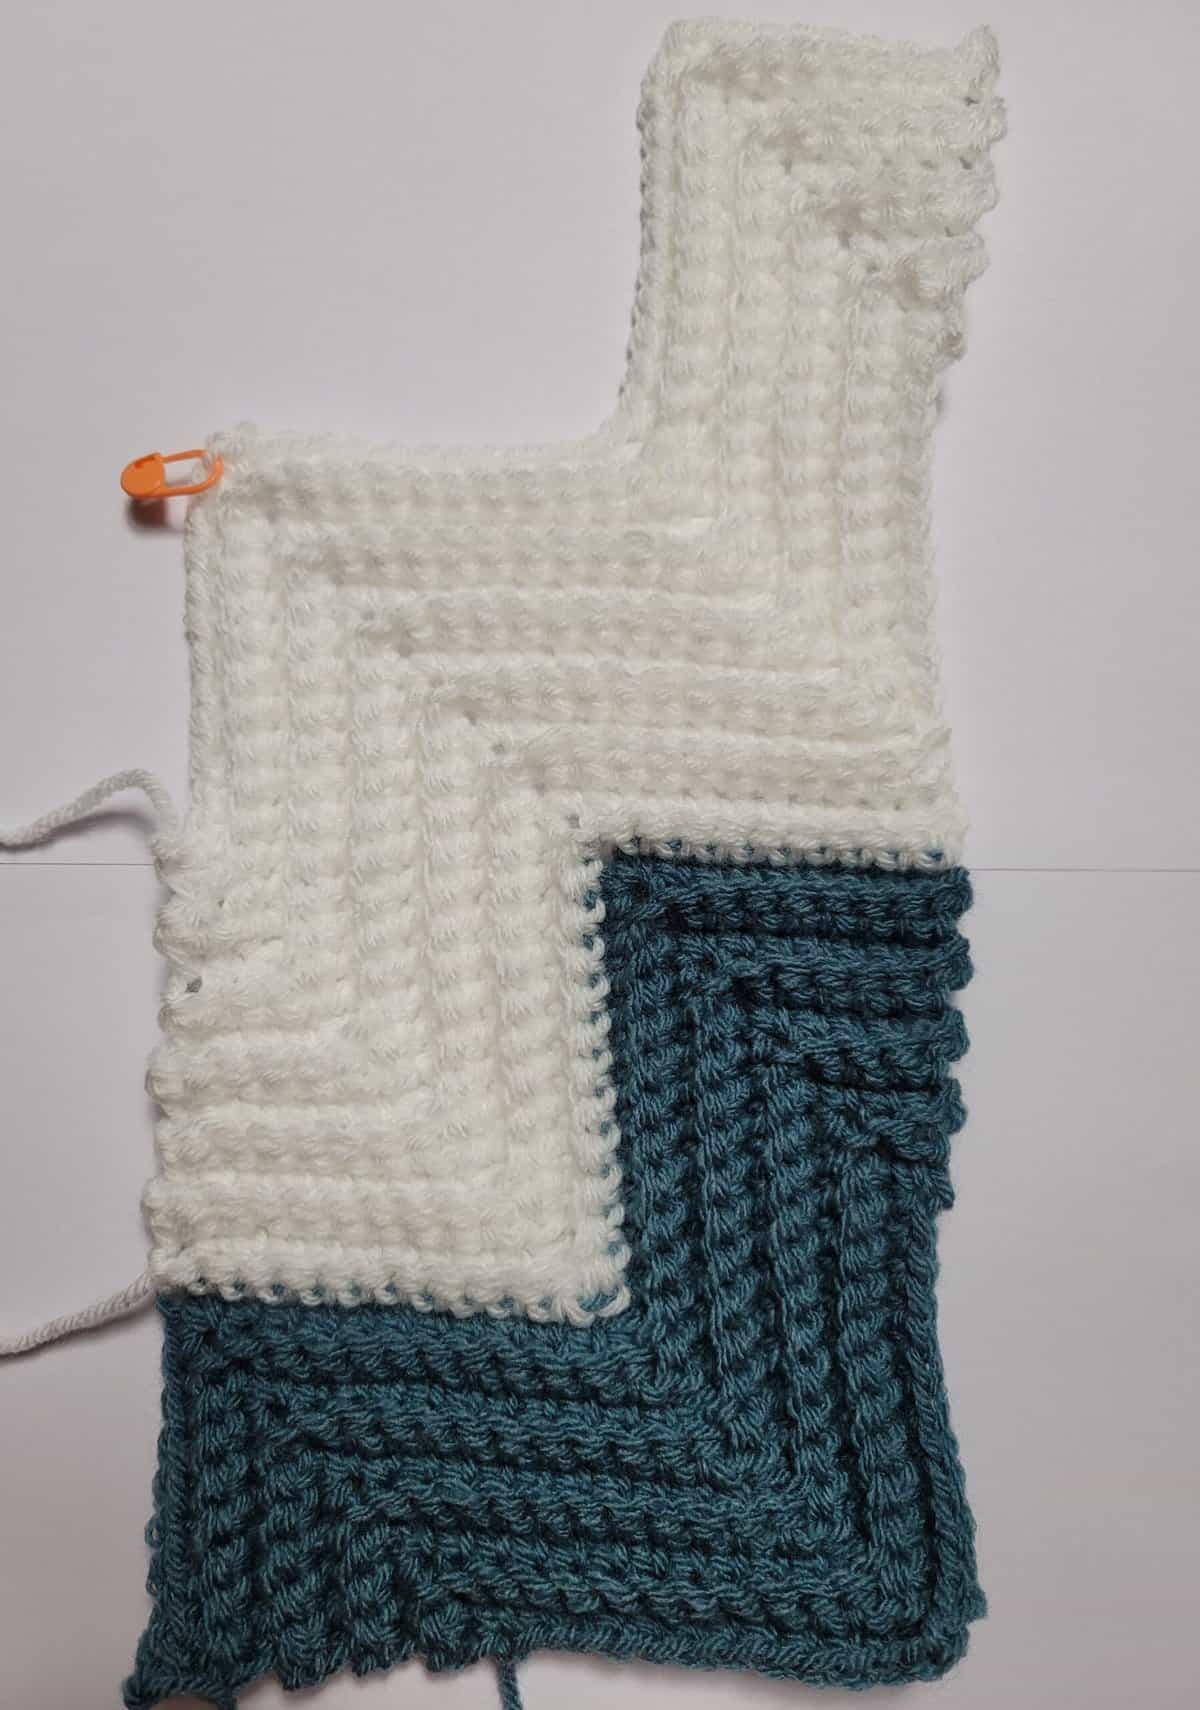
Beginning with Row 118, both edges of your scarf will be decreasing towards the corner opposite the one where you started.
Row 118: Working in BLO, join yarn with a standing sc in the st you marked with a SM in the previous row, sc in each of the next 10 sts, sc2tog in the next 2 sc (skipping sc2tog from previous row), sc in each of the next 11 sts. Turn. (23 sts)
Row 119: Ch 1, working in BLO, sc in the first st, sc in each of the next 9 sts, sc2tog in the next 2 sc (skipping sc2tog from previous row), sc in each of the next 10 sts. Turn. (21 sts)
Row 120: Ch 1, working in BLO, sc in the first st, sc in each of the next 8 sts, sc2tog in the next 2 sc (skipping sc2tog from previous row), sc in each of the next 9 sts. Turn. (19 sts)
Row 121: Ch 1, working in BLO, sc in the first st, sc in each of the next 7 sts, sc2tog in the next 2 sc (skipping sc2tog from previous row), sc in each of the next 8 sts. Turn. (17 sts)
Row 122: Ch 1, working in BLO, sc in the first st, sc in each of the next 6 sts, sc2tog in the next 2 sc (skipping sc2tog from previous row), sc in each of the next 7 sts. Turn. (15 sts)
Row 123: Ch 1, working in BLO, sc in the first st, sc in each of the next 5 sts, sc2tog in the next 2 sc (skipping sc2tog from previous row), sc in each of the next 6 sts. Turn. (13 sts)
Row 124: Ch 1, working in BLO, sc in the first st, sc in each of the next 4 sts, sc2tog in the next 2 sc (skipping sc2tog from previous row), sc in each of the next 5 sts. Turn. (11 sts)
Row 125: Ch 1, working in BLO, sc in the first st, sc in each of the next 3 sts, sc2tog in the next 2 sc (skipping sc2tog from previous row), sc in each of the next 4 sts. Turn. (9 sts)
Row 126: Ch 1, working in BLO, sc in the first st, sc in each of the next 2 sts, sc2tog in the next 2 sc (skipping sc2tog from previous row), sc in each of the next 3 sts. Turn. (7 sts)
Row 127: Ch 1, working in BLO, sc in the first st, sc in the next st, sc2tog in the next 2 sc (skipping sc2tog from previous row), sc in each of the next 2 sts. Turn. (5 sts)
Row 128: Ch 1, working in BLO, sc in the first st, sc2tog in the next 2 sc (skipping sc2tog from previous row), sc in the next st. Turn. (3 sts)
Row 129: Ch 1, working in BLO, sc2tog in the next 2 sc (skipping sc2tog from previous row). Turn. (1 st)
Do not fasten off. Continue on to Border.
Border
Stitch Count: The stitch count for the border is not crucial.
Round 1: Ch 1, working across the first short side of the scarf, 2 sc in the first st (place a SM in the first st), work 1 sc in each st across the first side to the corner st, * work 3 sc in the corner st, work 1 sc in each st across the next side to the corner st, * work from * to * 3 times, work 1 more sc into the beginning corner. Join with a sl st to the 1st st. Stitch count is not crucial.
Fasten off. Use Invisible Join Technique (click HERE for tutorial). Weave in ends & block, if desired.
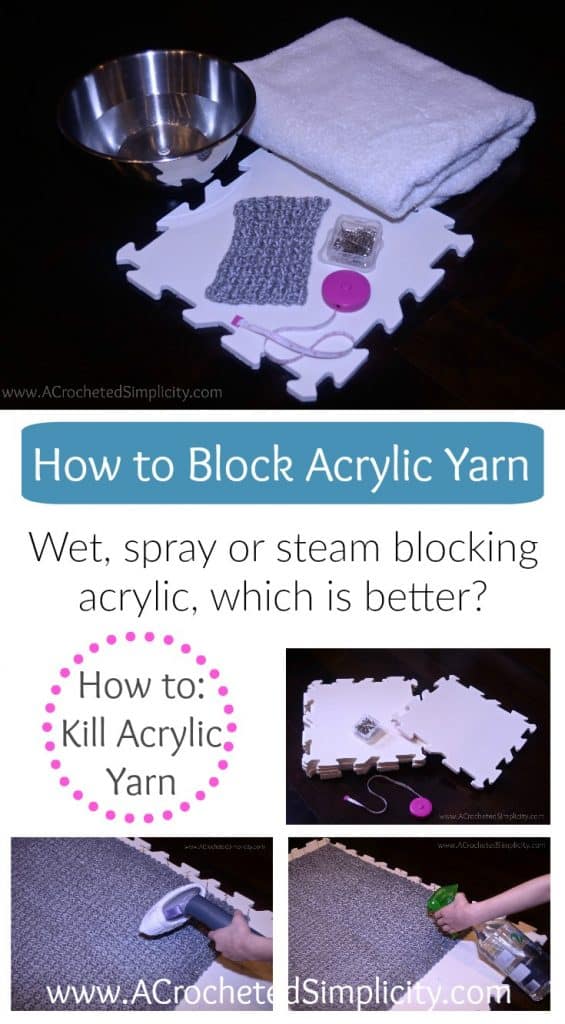
Give your work a professional finish by blocking it! Click here to learn 3 different ways to block acrylic yarn. I prefer to steam block, which technique will you choose?
MORE FREE CROCHET PATTERNS FROM A CROCHETED SIMPLICITY
If you enjoy this crochet C2C pattern, you may enjoy these other projects as well. And if you just want to browse, you can find all of our free crochet patterns HERE.


Are you intimidated by knit-look crochet? Would you love to learn my tips & tricks? Take an Annies Video Class with me and let me ease your fears and help you increase your skills! Click on the photo below to watch a free preview. You can also see the other 4 video classes I have available! (affiliate link)

Please share your finished ACS projects with us in the A Crocheted Simplicity Crochet Community Group on Facebook! Use hashtag #ACrochetedSimplicity when sharing on social media so I can find your posts!

I was looking for something easy to start learning C2C crochet, thank you, I hope it’s easy enough! 😸💜
Thanks for the New Years sweeps for the PDF’s, that would be awesome!
Kat
Hello . Thank you for all your hard work. I joined at first for mitery crochet along as they are small and always a surprise. One of the things I want to learn this year is corner-to -corner at this mey just be my first project to try it out.
Wishing you a beatufull new year with lots of happy moments.