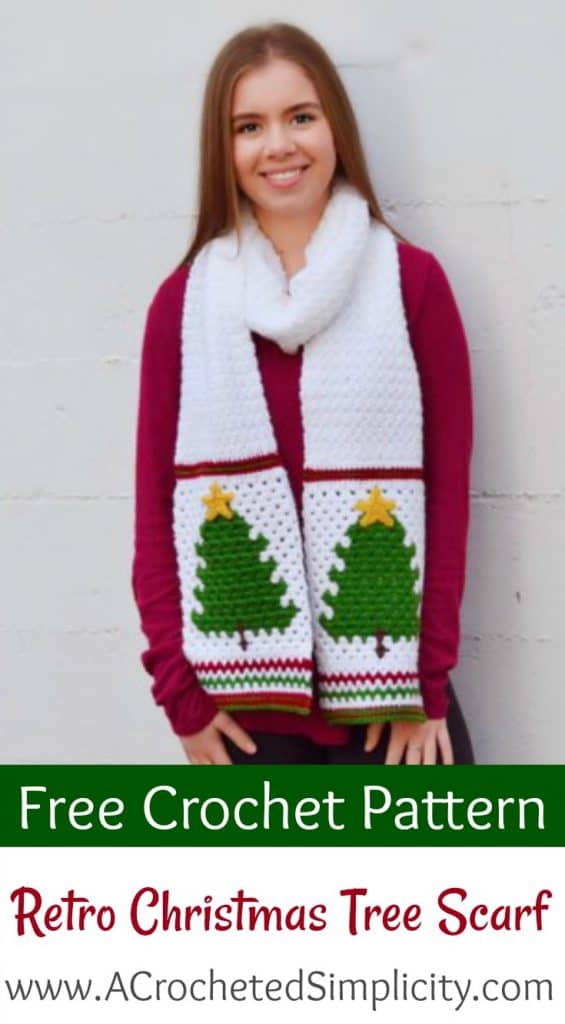
Free Crochet Pattern – Retro Christmas Tree Scarf
Last year I designed the Retro Christmas Tree Towel. This season when I shared it in my Facebook Community Group a few had asked me to make it into a Christmas Tree Scarf. What a great idea! 😉
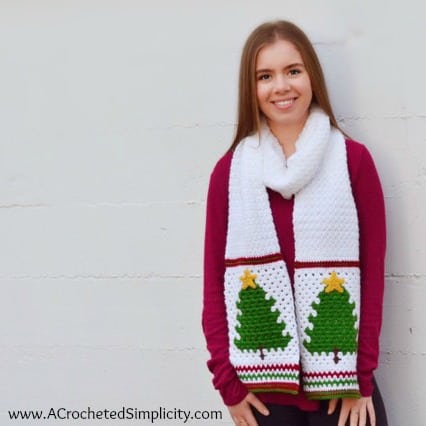
The Retro Christmas Tree Scarf is fun to make, fun to wear, festive for this time of year, and very warm!
For this scarf I chose Lion Brand Yarn’s Vanna’s Choice as this line has a large selection of colors and I was able to find every color I was looking for. Vanna’s Choice yarn is a medium worsted weight acrylic yarn that has a nice sheen to it and is soft enough for accessories worn close to the skin.
~Click HERE to sign-up to receive our weekly newsletter!~
~Don’t lose it, add It To Your Ravelry Favorites or Queue.~
~Don’t forget to Pin It too!~
*Purchase an ad-free PDF of this pattern (including all charts and photo tutorials) on Craftsy or Ravelry*
This post contains affiliate links.
Materials
- Yarn: Worsted Weight / 4 yarn (the yarn pictured in the photos is Lion Brand Vanna’s Choice – 170 yards / 156 m / 3.5oz / 100g ball / 100% acrylic) You’ll need the following colors & amounts: White (MC) (510 yds / 3 balls), Green (CA) (120 yards / 1 ball), Brown (CB) (3 yards / 1 ball), Red (CC) (20 yards / 1 ball), Yellow (CD) (5 yards / 1 ball)
- Crochet Hooks: H/8/5.00mm; G/6/4.00mm (My favorite crochet hooks are the Clover Amour Hooks, I’ve never had an ache in my hand since switching)
- Locking Stitch Marker
- Scissors
- Tapestry Needle
Many of these materials are available for purchase through our affiliates below:
 Lion Brand Yarn Vanna's Choice Yarn, Cranberry") (1 Skein) Lion Brand Yarn V...Shop on Amazon
(1 Skein) Lion Brand Yarn V...Shop on Amazon  Clover 1047/H Deep Blue Amo...Shop on Amazon
  Clover 1045/G Purple Amour ...Shop on Amazon
  Clover Lock Ring Markers, 2...Shop on Amazon
Stitch Abbreviations
- ch(s): chain(s)
- sc: single crochet
- hdc: half double crochet
- dc: double crochet
- sl st: slip stitch
- sc2tog: single crochet decrease
- Alt-ch3(1): alternate chain 3(1) click here for photo tutorial
- st(s): stitch(es)
- yo: yarn over
- sp(s): space(s)
- SM: stitch marker
- MC: main color
- CA, CB, CC, CD: contrasting colors listed in materials list
- RS: right side
- WS: wrong side
- Rep: repeat
- Join w/ a sc: click here for photo tutorial
- Color Change Tutorial & Tips: Click here for photo tutorial
Gauge
- In Granny Stitch pattern: 13 sts x 7.75 rows = 3″
Finished Size
- One Size: 8″ W x 80″ L (approximate length)
Notes
- I tend to crochet on the tighter side, if you crochet more loosely, you may need to go down a hook size or two to meet gauge.
- Beginning ch 3 in motif are counted as a stitch and included in stitch count. Beginning chains in the rest of the scarf are not included in stitch count, unless stated otherwise.
- First stitch of each row is worked into the same stitch as beginning chain, unless stated otherwise. (scarf section)
- Color Changes: Work all color changes on the final pull thru of the last stitch you’re working before the new color. Example: If the last st you’re working before a color change is a double crochet, begin your double crochet by inserting your hook where indicated, yo, pull up a loop, yo, pull thru 2 loops, yo with the NEW color, pull thru remaining 2 loops to complete the stitch. Then continue on with your new color. *Click here for Change Photo Tutorial.
- Other medium worsted weight / 4 yarns can be substituted.
- Make sure to work all color changes on the WS of the motif.
- Carry yarn when working the motif, but do not pull yarn floats tight or your gauge will be greatly affected. See Color Change Photo Tutorial for tips!
- The motif is worked from the white just above the top of the tree to the bottom of the trim. Then you will work the scarf section onto the top of one tree motif, then seam to the top of the other.
Special Stitch
- Alternate Ch-3 (alt-ch3): Complete last st of previous row, take loop off hook, insert hook into the space between the last dc and last 3 dc of previous row, put loop back on hook and pull thru space, turn, ch 3. *Click here for photo tutorial.
Scarf Instructions
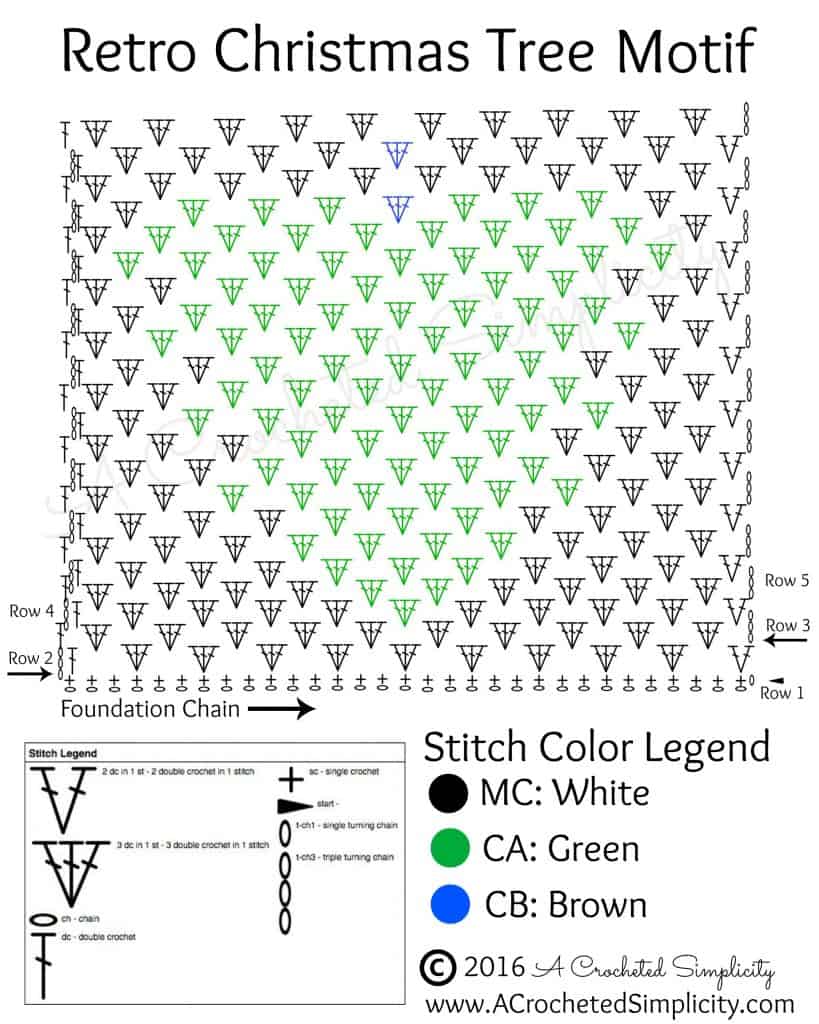
Tree Motif (Make 2)
Row 1: With MC & 5.00mm hook, ch 32, switch to a 4.00mm hook, sc in 2nd ch from hook and in each ch across. Turn. (31 sts)
*Place a SM in the 1st st of Row 1 (before turning).
Row 2 (RS): Ch 3 (counts as 1st dc here & throughout), dc in same st, skip 2 sts, [3 dc in next st, skip next 2 sts] work from [ to ] 9 times, 2 dc in last st. Turn. (31 sts)
Row 3: Ch 3, 3 dc in next 10 sps, dc in top of ch 3. (32 sts)
*Follow color chart below beginning w/ Row 4.
Row 4: Alt-ch3, dc in same sp, 3 dc in next 9 sps, 2 dc in last sp. Turn. (31 sts)
Rows 5 – 23: Rep Rows 3 – 4, ending with a Row 3 rep.
Row 24: Alt-ch1 (similar to Alt-ch3, except only ch1), sc in same sp, sc in each st across to last dc & ch3, sc2tog in last dc & top of ch3. Turn. (31 sts)
Do not fasten off. Continue below to Ric Rac Trim.
Ric Rac Trim
Row 1 (MC): Ch 3 (counts as 1st dc), [2 dc in next st, skip next st] 14 times, 2 dc in next st, dc in last st. Turn. (32 sts)
Row 2 (CC): Ch 3, [ 2 dc in sp of next 2-dc cluster from the previous row ] 15 times, dc in top of ch-3. Turn.
Row 3 (MC): Rep Row 2.
Row 4 (CA): Rep Row 2.
Row 5 (MC): Rep Row 2.
Row 6 (CC): Ch 1, sc in each st across. Turn. (32 sts)
Row 7 (CA): Rep Row 6.
Row 8 (CC): Rep Row 6.
Row 9 (CA): Rep Row 6.
Fasten off. Weave in ends. Make 2nd Tree Motif then continue below to Scarf Section.
Scarf Section
Note: This section is worked on one of the tree motifs only. You can remove the SM from the other motif and set it aside until this section is complete.
Gauge: In pattern stitch from Row 7, 28 sts = 8″
Row 1 (MC): With WS facing you and using a 5.00mm crochet hook, join yarn w/ a sc in st marked with SM, sc in each st across. Turn. (31 sts)
Row 2 (RS) (MC): Ch 1, sc in each st across. Turn.
Row 3 (CC): Ch 1, sc in each st across. Turn.
Row 4 (CA): Ch 1, sc in each st across. Turn.
Row 5 (CC): Ch 1, sc in each st across. Turn.
Row 6 (MC): Ch 1, sc in each of the next 2 sts, sc2tog, sc in each of the next 11 sts, sc2tog, sc in each of the next 10 sts, sc2tog, sc in each of the last 2 sts. Turn. (28 sts)
Row 7 (MC): Ch 1, [sc in the next st, dc in the next st] rep from [ to ] across. Turn.
Rep Row 7 until you have approximately 16″ of MC remaining (scarf section should measure a little over 55″, not including tree motif).
Using a yarn needle and 16″ tail of yarn, whipstitch the last row of the scarf section to the top of your 2nd tree motif. Weave in ends. Continue on to Star, if desired.
Star (Make 2)
Rnd 1: Using a 4.00mm hook & CD, ch 2, sl st in1st ch to form ring, ch 1, work 5 sc into ring. Join w/ a sl st to 1st sc. (5 sts)
Rnd 2: [ *ch 4, sl st in 2nd ch from hook, sc in next ch, hdc in next ch*, sl st in next sc from Rnd 1 ] work from [ to ] 4 times, then work from * to * once more. (5 points)
Fasten off leaving an 8″ tail for sewing. Sew the last point down onto Rnd 1. (You may prefer to sl st it down like the previous 4 points, but I’ve found that it leaves less of a noticeable hump if I sew the last point in place.) Weave in ends. Continue below to Finishing.
Finishing
If you’ve made stars, using a yarn needle and tail of yarn, sew them onto your scarf near the top of each Christmas tree. Weave in ends.
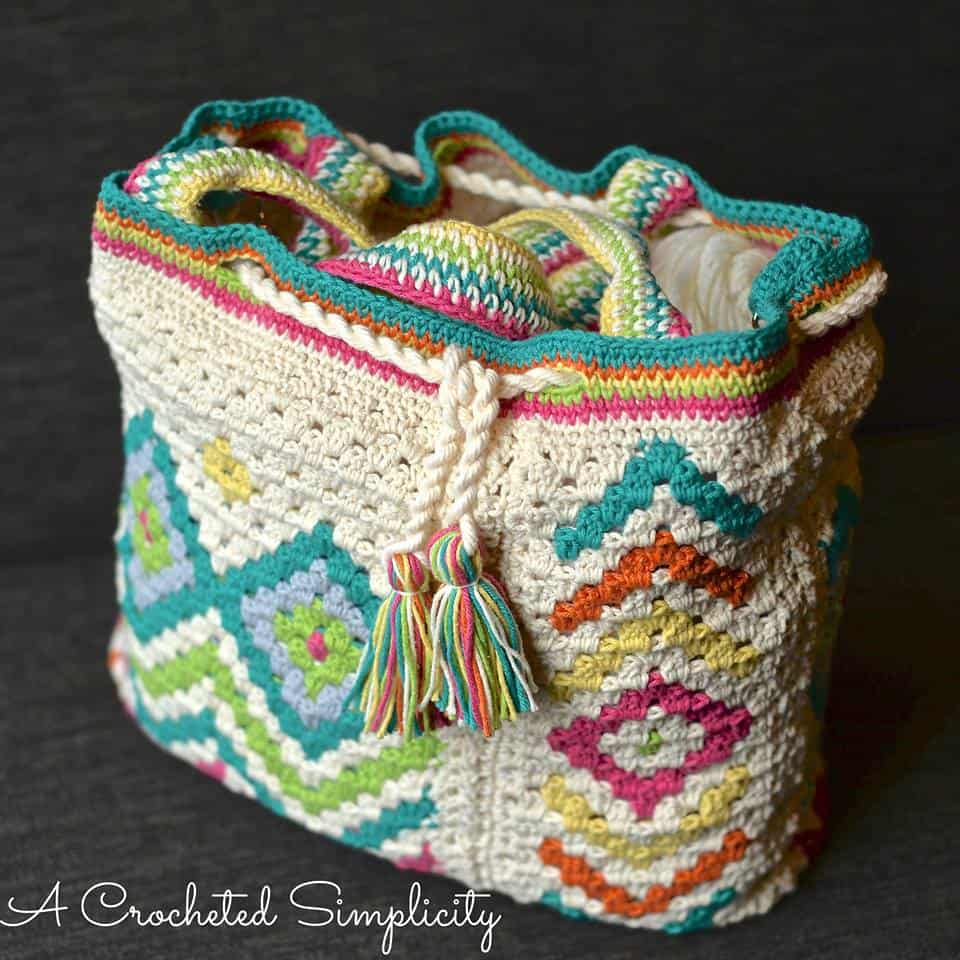
I really hope you’ve enjoyed this free crochet pattern & you’ve learned a new technique or two to add to your crochet toolbox! If you loved these techniques, check out my Ravelry shop for more great designs (such as the “Boho Chic” Mosaic Tote Bag below) to practice your new skills on!
Are you intimidated by crocheted cables? Would you love to learn? Take an Annies Video Class with me and let me ease your fears of crocheted cables! Click on the photo below to watch a free preview. You can also see the other 2 classes I have available! (affiliate link)
Please share your finished ACS projects with us in the A Crocheted Simplicity Crochet Community Group on Facebook!
Happy Crocheting!

Really love Christmas scarf,perfect gifted
So adorable! Adding it to my Ravelry account!