“Winter Poms” 18″ Doll Hat | Photo Tutorial
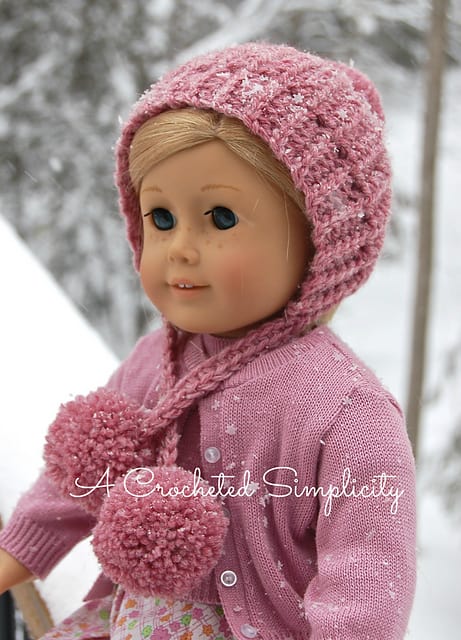
This photo tutorial goes along with the “Winter Poms” 18″ Doll Hat that I designed for my daughter’s American Girl doll. Instructions for the doll hat can be found here: “Winter Poms” 18″ Doll Hat Instructions
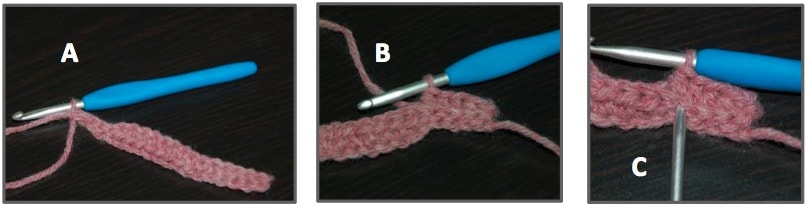
Photo A: Shows Row 1 of the hat completed.
Photo B: Shows the Ch 1, Turn, BLO hdc in next 5 sts, of Row 2 completed.
Photo C: Shows where you will begin working your Mslst2tog. Note: This is the same stitch as your 5th hdc, but the Mslst2tog is worked under both top loops.
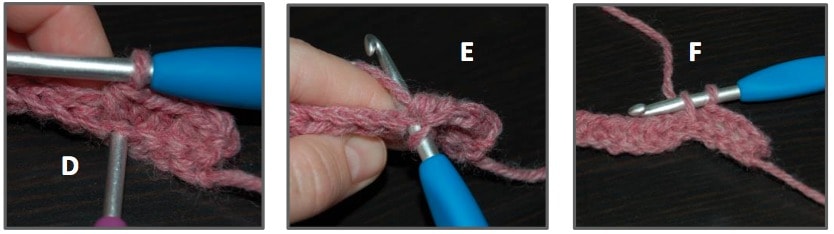
Photo D: Shows another view of photo C to show that you’ll be working your 1st Mslst2tog under BOTH top loops of your 5th hdc.
Photo E: This is where the Mslst2tog begin. Insert hook into the same st as last st worked, yo,
Photo F: Pull up a loop
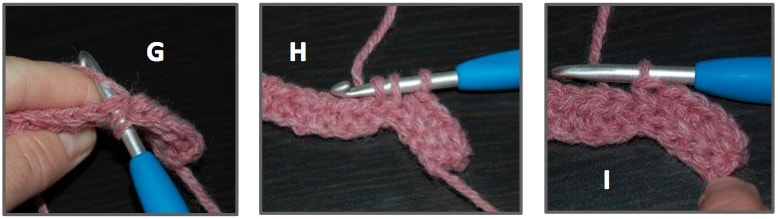
Photo G: Insert hook into NEXT st, yo
Photo H: Pull up a loop
Photo I: Pull thru both loops on hook. 1st Mslst2tog complete.
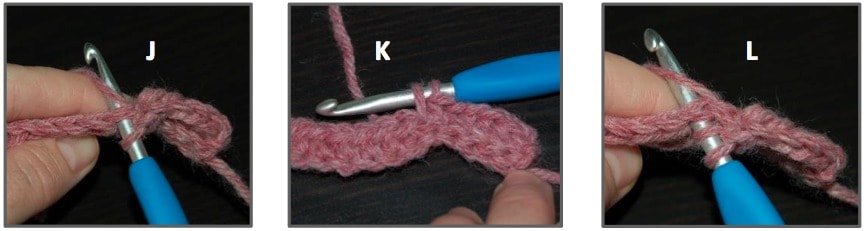
Photo J: Begin next Mslst2tog. Insert hook into SAME st as last st worked, yo,
Photo K: Pull up a loop,
Photo L: Insert hook into NEXT st, yo,
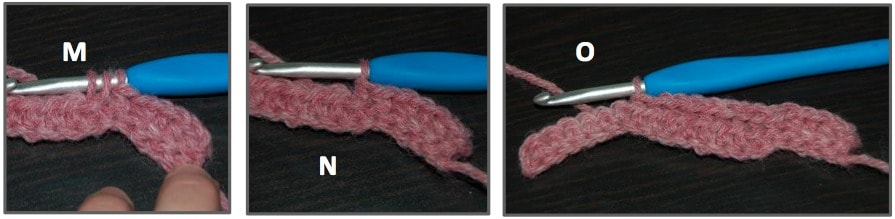
Photo M: Pull up a loop,
Photo N: Pull thru both loops on hook. Next Mslst2tog complete. Repeat from photos J thru N until you’ve completed the required number of Mslst2tog.
Photo O: Shows all Mslst2tog worked up in Row 2.
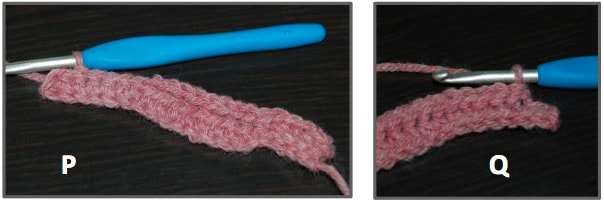
Photo P: Shows sl st in next 7 sts of Row 2. Note: You will leave the last st of the row unworked.
Photo Q: Shows the beginning of Row 3, Ch 1, Turn,
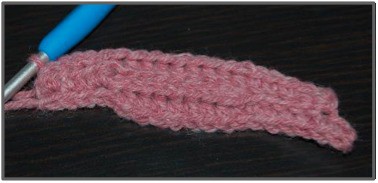
Photo above shows what your work will resemble after Row 3.
I hope this tutorial helps you to create a “Winter Poms” Doll Hat for a special little girl in your life. I’d love to see your finished projects so feel free to share them on my Facebook page!