“Winter Poms” 18″ Crochet Doll Hat – Free Crochet Pattern
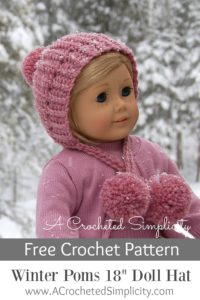
“Winter Poms” 18″ Doll Hat
This cute winter hat was designed for my daughter’s dolls. She had asked for a snowsuit for them for Christmas and needed a hat to coordinate. So what did this crafty momma do? I designed one of course! 🙂 The hat was designed to fit her 18″ American Girl doll, but will fit several smaller dolls as well.
>Pin-it to save it for later!<
Click here for ALL other sizes
This post contains affiliate links.
Materials
- Yarn: Worsted Weight / 4 / Lion Brand Wool Ease (85 yards)
- Crochet Hook: H/8/5.00mm
- Scissors
- Yarn Needle
Many of these materials are available for purchase through our affiliates below:
 Lion Brand Yarn Wool-Ease Y...Shop on Amazon
 Clover 1047/H Deep Blue Amo...Shop on Amazon
 Pom-Pom Maker LargeShop on Amazon
Difficulty
- Easy
Gauge
- In pattern stitch (1 row hdc, 1 row sl st BLO) 8 hdc X 8 rows = 2″
Size
- One Size Fits Most 18″ Dolls
Abbreviations
- ch(s): chain(s)
- sc: single crochet
- hdc: half double crochet
- st(s): stitch(es)
- BLO: back loop only
- FLO: front loop only
- sl st: slip stitch
- yo: yarn over
- RS: right side
- modified slst2tog: see special stitches; Click Here for Photo Tutorial; Click Here for a Video Tutorial
Special Stitches
- (Modified) Slip Stitch 2 Together (Mslst2tog): Insert hook into same st as previous st worked, yo, pull up a loop, insert hook into next st, yo, pull up loop and pull thru both loops on hook. **This st is modified because you begin each one in the previous st worked, therefore, your st count will not decrease. **Note: It will seem as though you’re working these sts along the backside of the previous row of hdc. **See Photo Tutorial Here. **See Video Tutorial Here.
Notes
- The ch-1 at the beginning of each row does not count as a stitch.
- First stitch of each row is worked into the same st as beginning chain, unless noted otherwise.
Doll Hat Instructions
Row 1: Ch 21, (work into back hump of foundation ch), sc in 2nd ch from hook, sc in next 5 chs, hdc in next 9 chs, sl st in last 5 chs. — 20 sts
Row 2 (RS): Ch 1, Turn, BLO hdc in next 5 sts, BOTH LOOPS, beginning in same st as 5th hdc work 9 Mslst2tog (See Photo Tutorial Here or See Video Tutorial Here), BLO sl st in next 5 sts (leave last st unworked).— 19 sts
Row 3: Ch 1, Turn, BLO sc in next 5 sts, BLO hdc in next 9 sts, BLO sl st in last 5 sts. — 19 sts
Row 4: Ch 1, Turn, BLO hdc in next 5 sts, BOTH LOOPS, beginning in same st as 5th hdc work 9 Mslst2tog, BLO sl st in next 4 sts (leave last st unworked). – 18 sts
Row 5: Ch 1, Turn, BLO sc in next 4 sts, BLO hdc in next 9 sts, BLO sl st in last 5 sts. – 18 sts
Row 6: Ch 1, Turn, BLO hdc in next 5 sts, BOTH LOOPS, beginning in same st as 5th hdc work 9 Mslst2tog, BLO sl st in next 3 sts (leave last st unworked). – 17 sts
Row 7: Ch 1, Turn, BLO sc in next 3 sts, BLO hdc in next 9 sts, sl st in last 5 sts. – 17 sts
Row 8: Ch 1, Turn, BLO hdc in next 5 sts, BOTH LOOPS, beginning in same st as 5th hdc work 9 Mslst2tog, BLO sl st in next 3 sts and each unworked st to Row 1. – 20 sts
Row 9: Ch 1, Turn, BLO sc in next 6 sts, BLO hdc in next 9 sts, BLO sl st in last 5 sts. – 20 sts
Rows 10 thru 15: Repeat Rows 2 thru 7.
Row 16: Ch 1, Turn, BLO hdc in next 5 sts, BOTH LOOPS, beginning in same st as 5th hdc work 9 Mslst2tog, BLO sl st in next 3 sts and each unworked st to Row 9. – 20 sts
Row 17: Ch 1, Turn, BLO sc in next 6 sts, BLO hdc in next 9 sts, BLO sl st in last 5 sts. – 20 sts
Rows 18 thru 23: Repeat Rows 2 thru 7.
Row 24: Ch 1, Turn, BLO hdc in next 5 sts, BOTH LOOPS, beginning in same st as 5th hdc work 9 Mslst2tog, BLO sl st in next 3 sts and each unworked st to Row 17. – 20 sts
Row 25: Ch 1, Turn, BLO sc in next 6 sts, BLO hdc in next 9 sts, BLO sl st in last 5 sts. – 20 sts
Rows 26 thru 31: Repeat Rows 2 thru 7.
Row 32: Ch 1, Turn, BLO hdc in next 5 sts, BOTH LOOPS, beginning in same st as 5th hdc work 9 Mslst2tog, BLO sl st in next 3 sts and each unworked st to Row 25. – 20 sts
Row 33: Ch 1, Turn, BLO sc in next 6 sts, BLO hdc in next 9 sts, BLO sl st in last 5 sts. – 20 sts
Rows 34 thru 39: Repeat Rows 2 thru 7.
Row 40: Ch 1, Turn, BLO hdc in next 5 sts, BOTH LOOPS, beginning in same st as 5th hdc work 9 Mslst2tog, BLO sl st in next 3 sts and each unworked st to Row 33. 20 sts Do Not Fasten Off. Go to Seam.
Seam: Ch 1, Turn, with Wrong Side facing out, line up Rows 1 & 40, **Working into the bottom loops of the foundation ch, sl st first 10 sts FLO of Row 40 to first 10 sts BLO of Row 1. Fasten off. Using a yarn needle and 8″ piece of yarn, weave in and out of ends of rows of crown opening, pull tight to close. Weave in ends. Turn right side out.
Pom Ties (Make 2)
- Ch 15, sc in 2nd ch from hook, sc in each ch across. 14 sts Fasten off. Leave an 8″ tail for attaching to the hat.
Poms (Make 3)
- I used a Clover Pom Maker (size 1-5/8″) to make 3 poms.
- Attach 1 pom to the crown of the hat.
- Attach 1 pom to the 1st sc of each pom tie (opposite end of tail). Double knot. Trim ends to match pom. Using a yarn needle and tail of yarn, attach 1 pom tie assembly to each front corner of the hat. Weave in ends.
FIND ALL OF MY FREE CROCHET PATTERNS HERE
Are you intimidated by knit-look crochet? Would you love to learn my tips & tricks? Take an Annies Video Class with me and let me ease your fears and help you increase your skills! Click on the photo below to watch a free preview. You can also see the other 4 video classes I have available!

Please share your finished ACS projects with us in the A Crocheted Simplicity Crochet Community Group on Facebook! Use hashtag #ACrochetedSimplicity when sharing on social media so I can find your posts!

Could you please explain directions in row 9, previous row has 16 stitches, where do the extra stitches come from to have 20 stitches in row nine?
I apologize for the typo. The stitch count at the end of Row 8 is 20 sts. It is now correct. Thank you for pointing that out!
This is an amazing pattern! I have never crocheted a hat like this. Love the finished product. Would love a pattern for bigger heads! My kids would love a hat like this.
Thank you! 🙂 I have a pattern for all sizes through Adult Medium/Large and it can be found here: http://www.ravelry.com/patterns/library/winter-poms-slouch