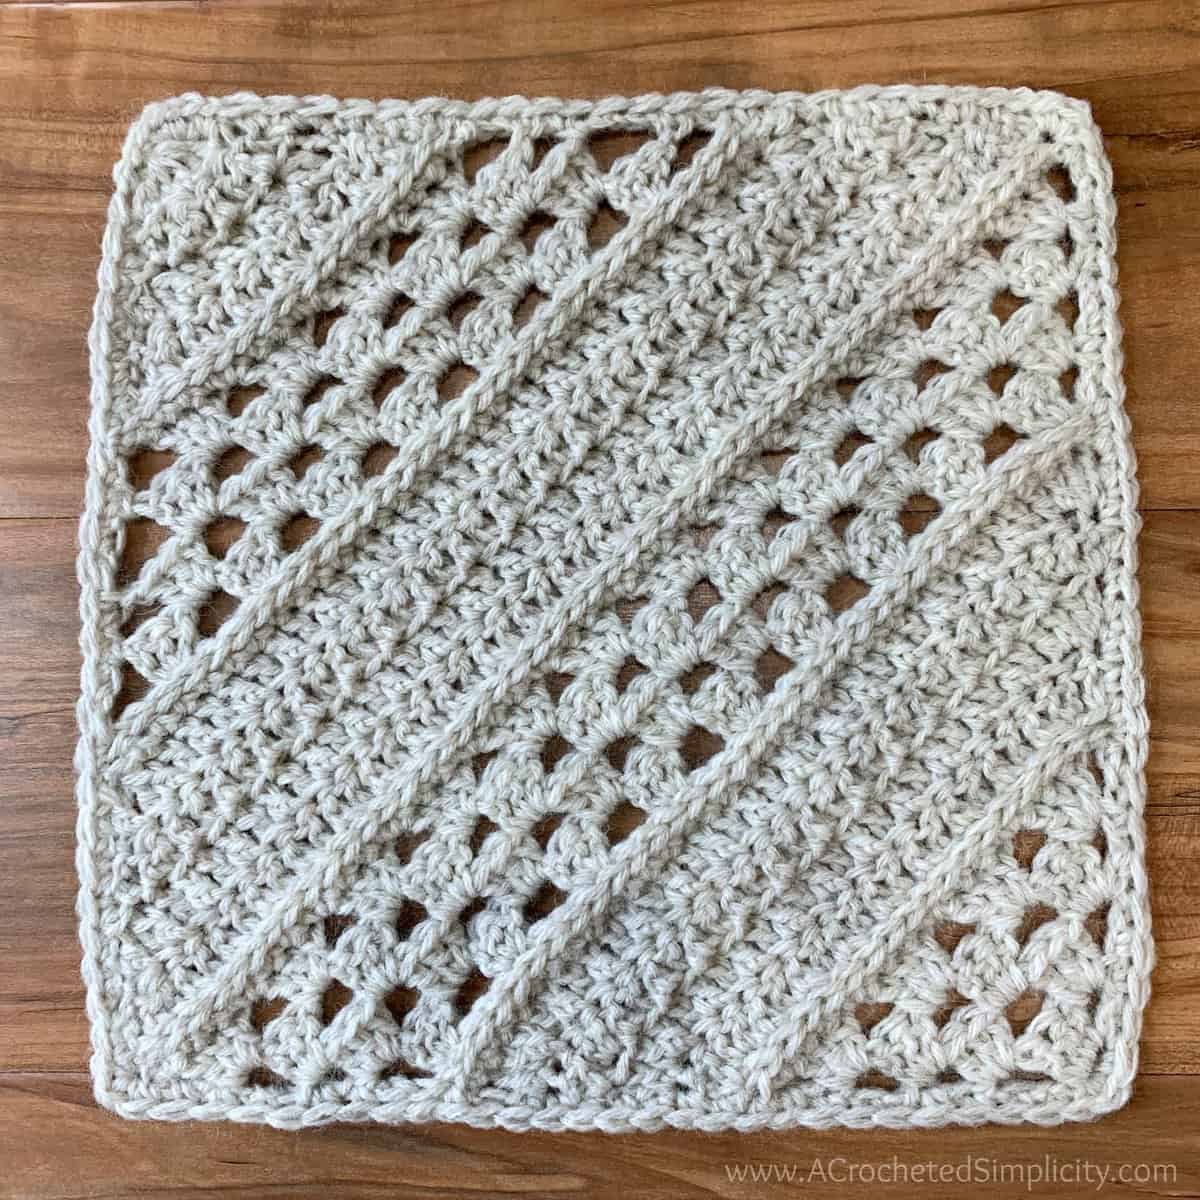
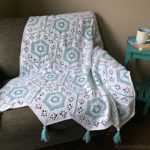
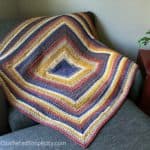
Traveling Afghan Crochet Square #15
This 10″ x 10″ crochet square is the perfect addition to any crochet sampler afghan such as the Lion Brand Yarns Traveling Crochet Afghan. The free crochet pattern is available in this post below or an ad-free print friendly version is available on Love Crafts here, Ravelry here, and Etsy here.
> CLICK HERE TO SIGN-UP TO RECEIVE OUR NEWSLETTER <
Beginners and seasoned crocheters alike will love that this Traveling Afghan Crochet Square pattern uses simple crochet stitch pattern repeats to create the textured design, making it perfect for those days when you need to sit, crochet and decompress. And being worked on the bias lends a little more visual interest to the design.
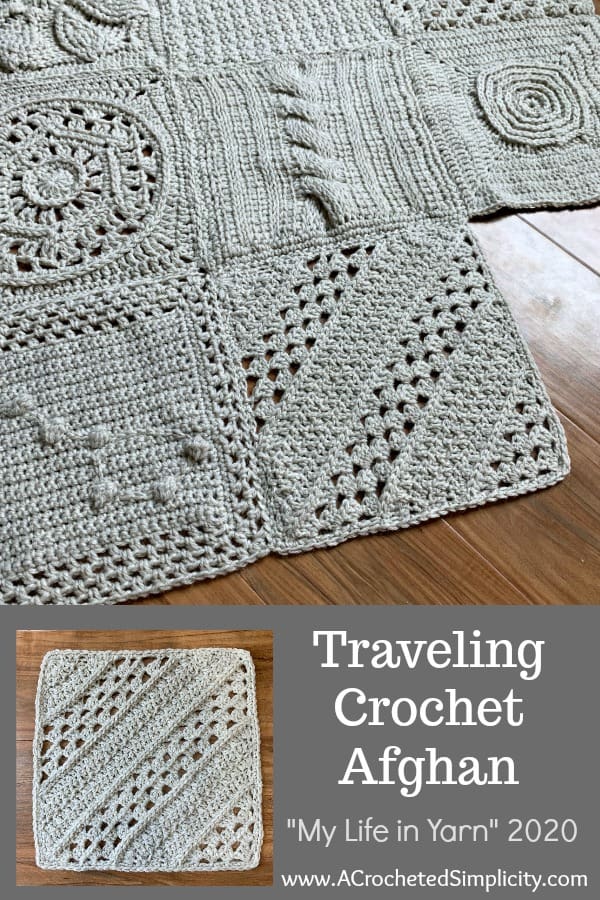
THE TRAVELING AFGHANS – A year long project – “My Life in Yarn” 2020
I’m so excited to be a part of the year-long project sponsored by Lion Brand Yarn called the Traveling Afghans. In conjunction with Lion Brand’s “My Life in Yarn” 2020 campaign, the Traveling Afghans are a collaborative effort amongst 49 knitwear designers and bloggers from seven different countries!
The Traveling Afghans set sail from NYC in January 2020 and have been on a journey around the world, traveling from designer to designer every two weeks. Each designer has created a 10″x10″ square to add to either the knit or crochet blanket before sending it off to the next designer to add theirs. The designers will publish their patterns for free online so YOU can follow along with us and create your own knit or crochet afghan!
How can I participate?
1. Purchase a yarn kit so you’ll have all the yarn you will need. You’ll also need a size J/10/6.00 mm hook. *Purchasing a kit is not mandatory. Feel free to follow along using a similar worsted weight yarn from your stash.
2. Alexandra from Two of Wands has put together a great landing page for the Traveling Afghan project. She has compiled links to each square, a helpful list of FAQs for the project, and really fun world maps that show the afghan’s travels!
3. Share your square & Traveling Afghans progress on social media! Use the hashtags #thetravelingafghans #lionbrandyarn #mylifeinyarn and #thetravelingcrochetafghan.
4. Scroll to the bottom of this post for a complete list of participating designers. Follow these designers on social media to stay in the loop on their pattern releases.
Traveling Afghan Square #15 – Free Crochet Pattern
The free pattern is below, but if you love to work offline, or need to order your yarn, I’ve got a couple other great options for you.
You can purchase the crochet kit for the Traveling Afghan from Lion Brand Yarns HERE. Find out more about the Traveling Crochet Afghan on the Two of Wands blog HERE.
Purchase the ad-free, printable PDF, including all photo tutorials, on Love Crafts here, Ravelry here, and Etsy here.
Save this pattern to your Ravelry favorites here.
Pin it for later here.
This post contains affiliate links.
Materials
- Yarn: Worsted Weight / 4 / Yarn, Lion Brand Wool Ease in Natural Heather was used for the sample in the photos (3 oz / 85g / 197 yd / 180 m / 80% acrylic / 20% wool) per ball.
- Crochet Hook: J/10/6.00mm, (My favorite crochet hooks are the Clover Amour Hooks, I’ve never had an ache in my hand since switching)
- Scissors
- Yarn Needle
Many of these materials are available for purchase through our affiliates below:
 Lion Brand Yarn 620-174B Wo...Shop on Amazon
  Clover 1049/J Amour Crochet...Shop on Amazon
  Fiskars 154110-1001 Non-sti...Shop on Amazon
  Clover 3672 Amour Crochet H...Shop on Amazon
Skill Level
- Easy
Gauge
- Dimensions are included at the end of Row 4 to check beginning gauge.
- In Granny Stitch: 9 dc + 2 ch-1 sps = 2.75″; 4 rows = 2″
- In dc: 8 sts = 2″; 4 rows = 2″
Size
- 10″ x 10″ square
- Check out my Blanket Size Chart HERE, for standard blanket sizes.
Abbreviations (US Terms)
- ch(s): chain(s)
- sl st(s): slip stitch(es)
- st(s): stitch(es)
- sc: single crochet
- dc: double crochet
- sc2tog: single crochet decrease
- dc2tog: double crochet decrease
- yo: yarn over
- sp: space
- FLO: front loop only
- BLO: back loop only
- Rep: repeat
- Rnd: round
- Beg: beginning
Special Stitches
- Alternate Double Crochet (alt-dc): After turning your work, do not ch, instead, insert your hook into the first st, yo, pull up a loop, yo, pull thru both loops, insert your hook between the legs of the st just made, yo, pull up a loop, yo, pull through one loop, yo, pull thru remaining loops. Click HERE for tutorial.
- Double Crochet Decrease (dc2tog): (Yo, insert hook in next st, yo, pull up a loop, yo, pull thru 2 loops on hook) twice, yo, pull thru remaining 3 loops on hook.
Notes
- I tend to crochet on the tighter side. You may need to go down a hook size (or two) to meet gauge if you crochet on the looser side.
- The first stitch of every row is worked into the same stitch as the turning chain, unless stated otherwise.
- Yarn Notes: Lion Brand Wool Ease in Natural Heather (3 oz / 85g / 197 yd / 180 m / 80% acrylic / 20% wool)
- Yardage: 34 g (99 yards)
- Standard Blanket Sizes – Check out my Blanket Size Chart HERE.
- Yarns similar in fiber and weight can be substituted.
- This crochet square is worked on the bias. You’ll begin in the lower right hand corner and finish in the upper left hand corner. You’ll complete the square by adding a simple border.
- I used the Mattress Stitch Seaming Technique to attach my crochet square to the Traveling Afghan. This is my favorite seaming technique.
Traveling Afghan Square #15 Instructions
Beginning Rows
Beg Row 1:With a 6.00mm crochet hook, ch 5 (counts as 1st dc & ch-1), (3 dc, ch 1, dc) in the first ch. Turn. (7 sts) *Ch-1 spaces are included in stitch count.
Beg Row 2: Ch 4 (counts as 1st dc & ch-1), 3 dc in first ch-1 sp, ch 1, skip each of the next 3 dc, 3 dc in the next ch-1 sp, ch 1, dc in the same sp. Turn. (11 sts)
Beg Row 3: Ch 4, (counts as 1st dc & ch-1), 3 dc in the first ch-1 sp, (ch 1, skip each of the next 3 dc, 3 dc in the next ch-1 sp) twice, ch 1, dc in same sp as last 3 dc. Turn. (15 sts)
Beg Row 4: Ch 4, (counts as 1st dc & ch-1), 3 dc in the first ch-1 sp, (ch 1, skip each of the next 3 dc, 3 dc in the next ch-1 sp) across, ch 1, dc in same sp as last 3 dc. Turn. (19 sts). *Approximate Size at this point: 5″ across the top of Row 4 and 2.25″ H from the bottom of Row 1.
Do not fasten off. Continue on to Increase Rows.
Increase Rows
Increase Row 1: Ch 1, sc in each st and ch-1 sp across. Turn. *Stitch count does not increase.
Increase Row 2: Do Not Chain, sl st in each st across. Turn. *Stitch count does not increase.
Increase Row 3: Working into the stitches from Increase Row 1, (Alt-dc, dc) in the first st, FLO 2 dc in the next st, (BLO dc in the next st, FLO dc in the next st) rep across to the last 3 sts, BLO dc in the next st, FLO 2 dc in the next st, BOTH loops 2 dc in the last st. (23 sts)
Increase Rows 4 – 6: (Alt-dc, dc) in the first st, FLO 2 dc in the next st, (BLO dc in the next st, FLO dc in the next st) rep across to the last 3 sts, BLO dc in the next st, FLO 2 dc in the next st, BOTH loops 2 dc in the last st. *Stitch count increases by 4 stitches each row. (35 sts at the end of Increase Row 6)
Increase Row 7: Ch 1, turn, sc in each st across. Turn. *Stitch count does not increase.
Increase Row 8: Do Not Chain, sl st in each st across. Turn. *Stitch count does not increase.
Increase Row 9: Ch 4, (counts as 1st dc & ch-1), working into the stitches from Increase Row 7, skip the first st, (3 dc in the next st, ch 1, skip each of the next 3 sts) rep across to the last 2 sts, 3 dc in the next st, ch 1, dc in the last st. Turn. (39 sts)
Increase Rows 10 – 12: Ch 4, (counts as 1st dc & ch-1), 3 dc in the first ch-1 sp, (ch 1, skip each of the next 3 dc, 3 dc in the next ch-1 sp) across, ch 1, dc in same sp as last 3 dc. Turn. *Stitch count increases by 4 stitches each row. (51 sts). *Approximate Size at this point: 14″ across the top of Row 12.75 and 6″ H from the bottom of Row 1. Each shorter edge (along the sides of the rows) should be approximately 9″ at this point.
Do not fasten off. Continue on to Transition Rows.
Transition Rows
Row 1: Ch 1, sc in each st and ch-1 sp across. Turn. *Stitch count does not increase.
Row 2: Do Not Chain, sl st in each st across. *Stitch count does not increase.
Do not fasten off. Continue on to Decrease Rows.
Decrease Rows
Decrease Row 1: Working into the stitches from Transition Row 1, skip the first st, alt-dc in the next st, dc2tog, (BLO dc in the next st, FLO dc in the next st) rep across to the last 5 sts, BLO dc in the next st, (dc2tog) twice. (47 sts)
Decrease Rows 2 – 4: Skip the first st, alt-dc in the next st, dc2tog, (BLO dc in the next st, FLO dc in the next st) rep across to the last 5 sts, BLO dc in the next st, (dc2tog) twice. *Stitch count decreases by 4 stitches each row. (35 sts at the end of Decrease Row 4)
Decrease Row 5: Ch 1, turn, sc2tog, sc in each st across to the last 2 sts, sc2tog. Turn. (33 sts)
Decrease Row 6: Do Not Chain, sl st in each st across. Turn. *Stitch count does not decrease.
Decrease Row 7: Ch 4 (counts as 1st dc & ch-1), working into the stitches from Decrease Row 5, skip each of the first 3 sts, (3 dc in the next st, ch 1, skip each of the next 3 sts) rep across to the last st, dc in the last st. Turn. (31 sts)
Decrease Rows 8 – 10: Ch 4 (counts as 1st dc & ch-1), skip the first ch-1 sp & next 3 dc, (3 dc in next ch-1 sp, ch 1, skip each of the next 3 dc) rep across to the last ch-1 sp, dc in the last ch-1 sp. Turn. *Stitch count decreases by 4 stitches each row. (19 sts)
Decrease Row 11: Ch 1, skip the first st, sc in the next ch-1 sp, sc in each st and ch-1 sp across to the last ch-1 sp & ch-3, skip the next ch-1 sp, sc in the top of ch 3. Turn. (17 sts)
Decrease Row 12: Do Not Chain, sl st in each st across. Turn. *Stitch count does not decrease.
Do not fasten off. Continue on to Ending Rows.
Ending Rows
End Row 1: Working into the stitches from Decrease Row 11, skip the first st, alt-dc in the next st, dc2tog, (BLO dc in the next st, FLO dc in the next st) rep across to the last 5 sts, BLO dc in the next st, (dc2tog) twice. (13 sts)
End Row 2: Skip the first st, alt-dc in the next st, dc2tog, (BLO dc in the next st, FLO dc in the next st) rep across to the last 5 sts, BLO dc in the next st, (dc2tog) twice. (9 sts)
End Row 3: Skip the first st, alt-dc in the next st, dc2tog, BLO dc in the next st, (dc2tog) twice. (5 sts)
End Row 4: Ch 2, dc5tog. (1 st)
Do not fasten off. Weave in any loose ends. Square should be approximately 9″ x 9″ (unblocked) at this point. Continue on to Border.
Border
Tip! If your edge starts to become wavy, go down a hook size or two until it’s nice and flat.
Rnd 1 (RS): Continuing on from the final end row, ch 1, rotate to work along the edge, * work 2 sc into the side of each dc, alt-dc or ch-3, work 1 sc into each sl st row, work 3 sc into each corner, rotate to work along the next edge, rep from * around entire afghan. Join with a sl st to the 1st st. (26 sts along each side + 3 sts in each corner = 116 sts)
Fasten off. Weave in ends. Block your finished square to be 10″ x 10″. Click HERE for my Super Easy Blocking Tutorial.
Attach Your Traveling Afghan Square #15
I chose to use the Mattress Stitch Seam Technique to attach my square to the Traveling Crochet Afghan. You can find a complete tutorial of this seaming technique HERE.
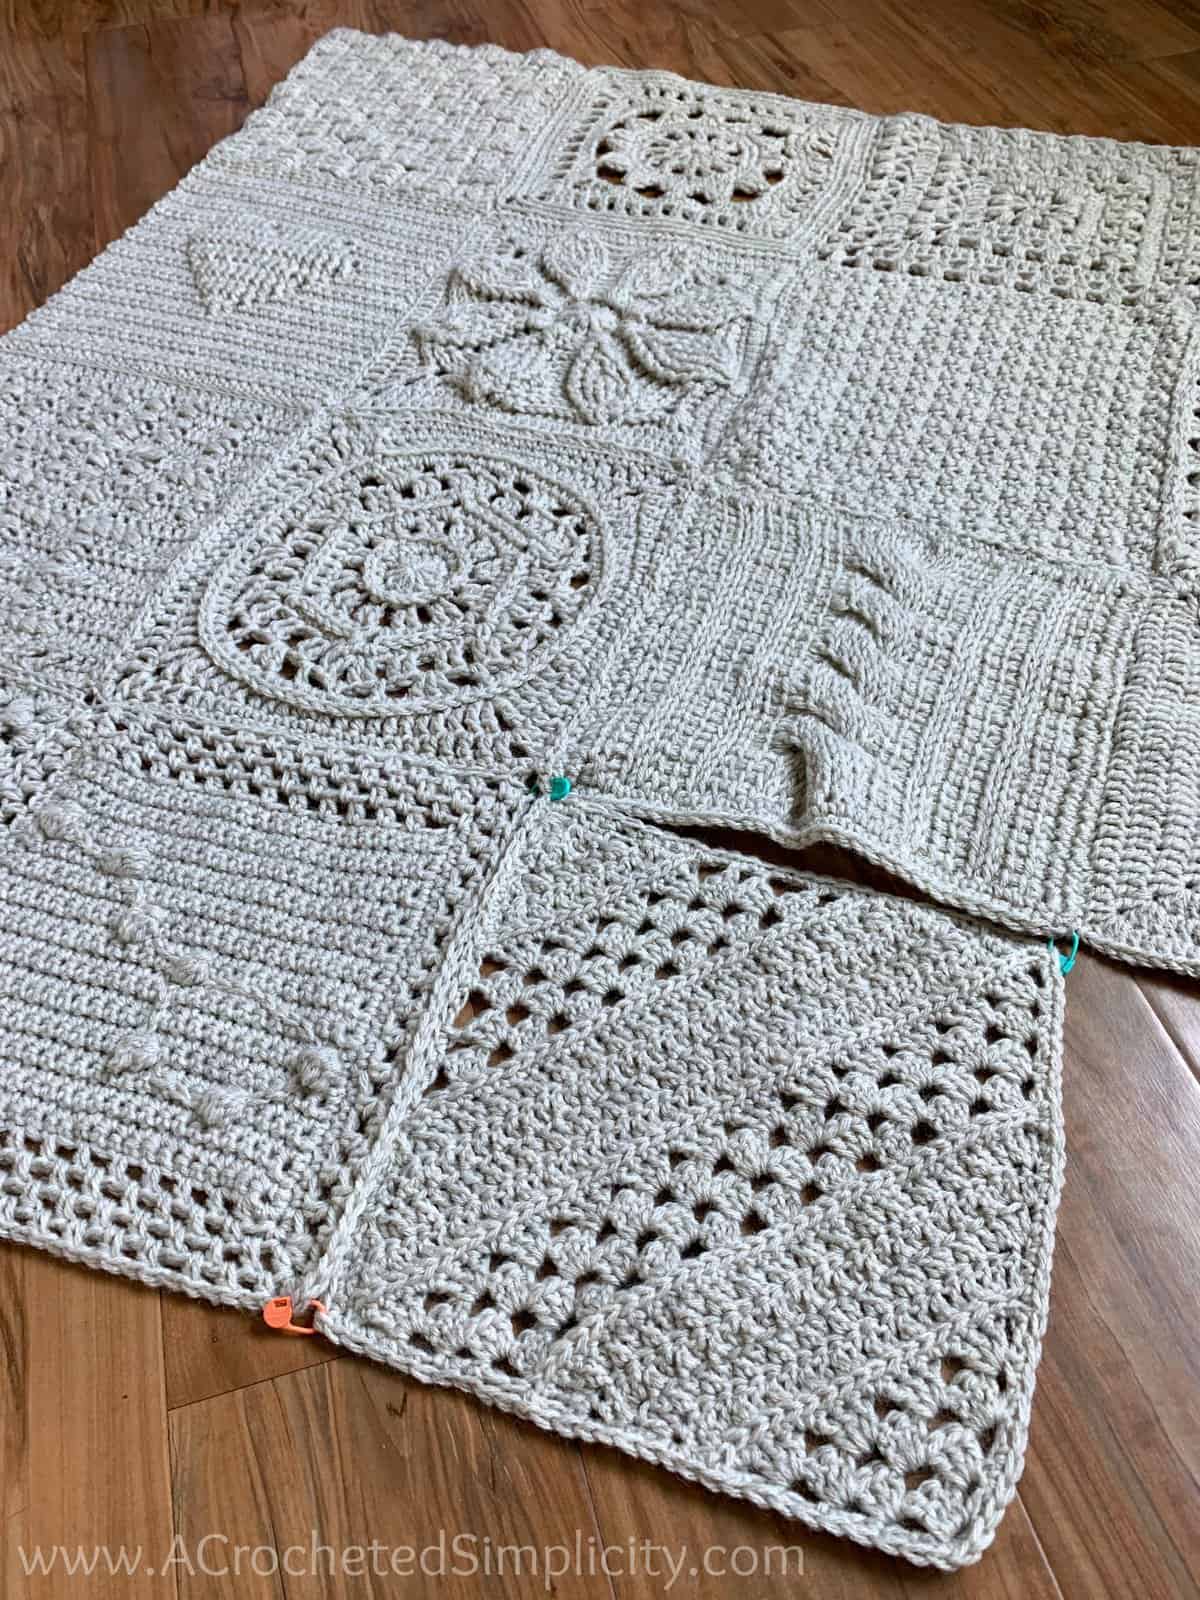
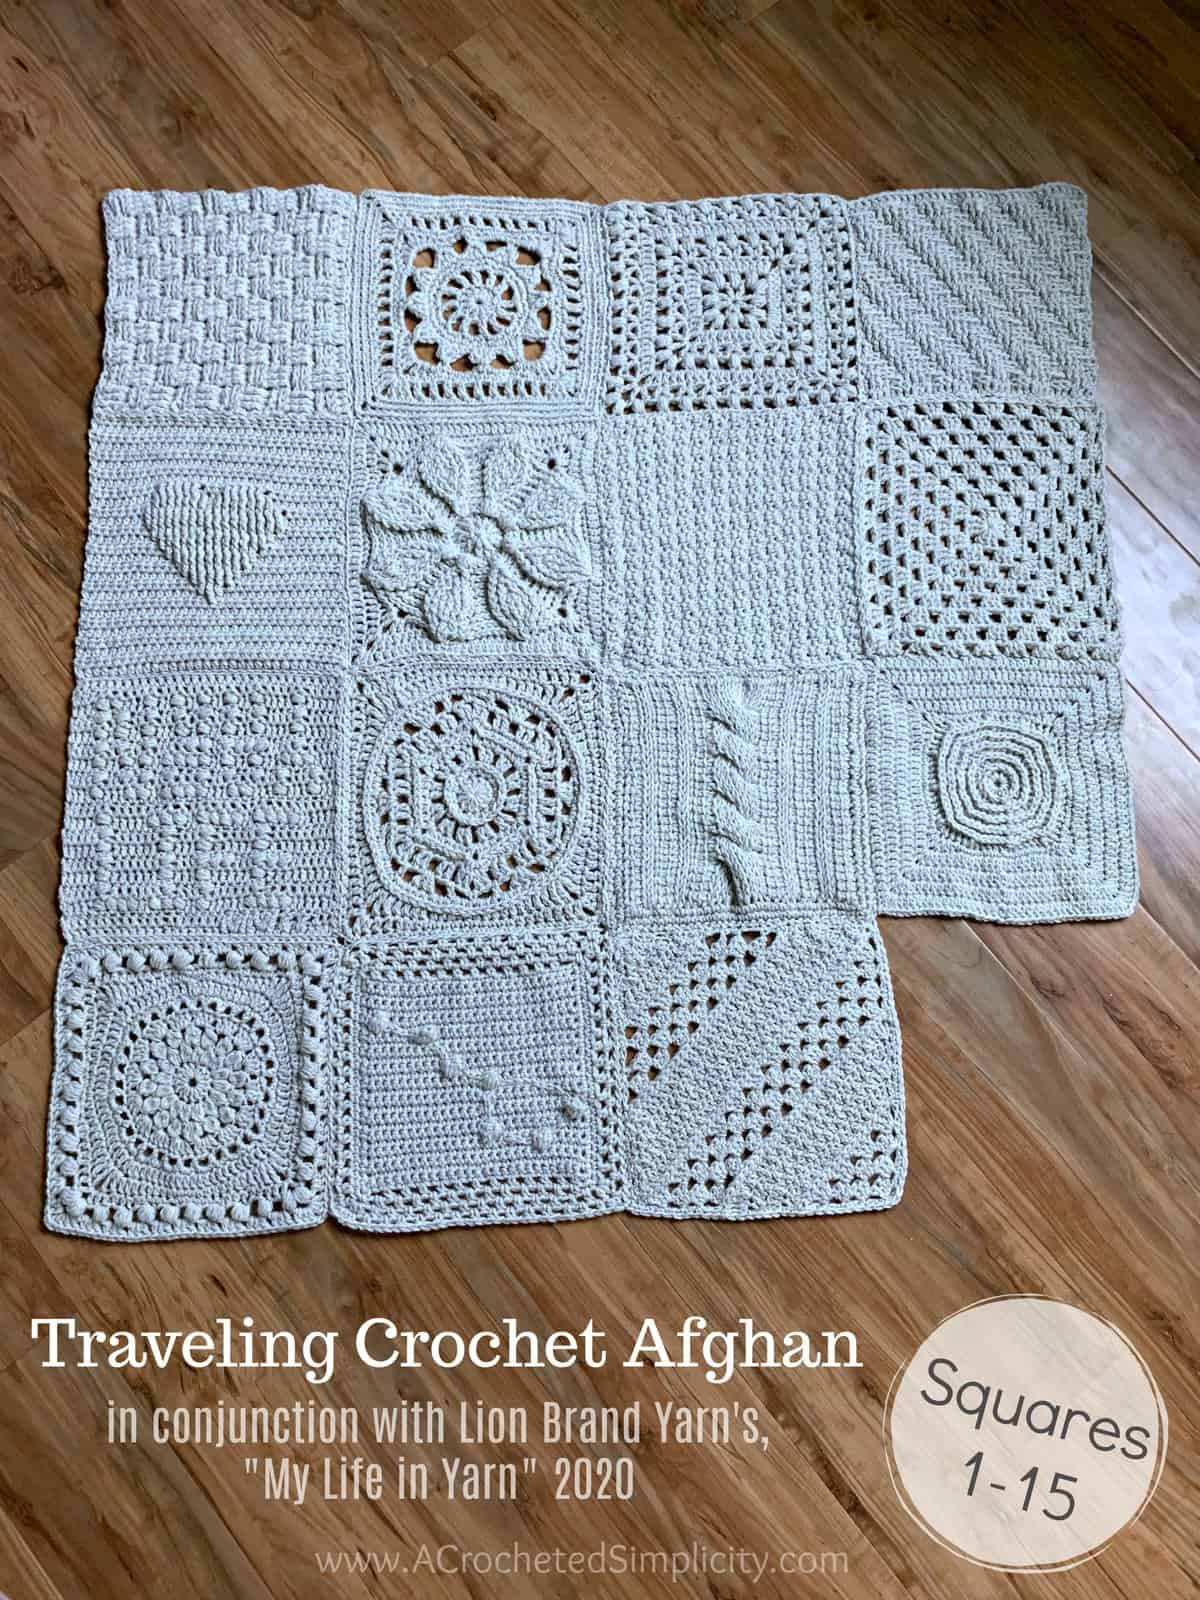
Traveling Crochet Afghan Progress to Date!
Below is a photo of the first 15 crochet squares complete and sewn together!
This has been a really FUN project to be a part of. I’m a little sad to box up the Traveling Afghan and send it to Melissa of Woods and Wool, but I’m very excited to see her crochet square!
Find the Rest of The Free Crochet Pattern Squares at the Links Below
#1 – 11/1-1/13 – New York City, USA – Alexandra Tavel of Two of Wands
#2 – 1/15-1/28 – Barcelona, Spain – Cecilia Losada of Mamma DIY
#3 – 1/29-2/11 – Utrecht, The Netherlands – Wilma Westenberg of Wilmade
#4 – 2/12-2/25 – Gloucestershire, UK – Lindsey Newns of Lottie and Albert
#5 – 2/26-3/10 – New Brunswick, Canada – Kimberley Giggie of Lakeside Loops
#6 – 3/11-3/24 – Ontario, Canada – Lee Sartori of Coco Crochet Lee
#7 – 3/25-4/7 – Alberta, Canada – Janine Myska of Knits n’ Knots
#8 – 4/8-4/21 – Alberta, Canada – Abigail Ellazar of Knits and Knots by AME
#9 – 4/22-5/5 – California, USA – Arica Presinal of Skeinsnsticks
#10 – 5/6-5/19 – California, USA – Meghan Ballmer of Meghan Makes Do
#11 – 5/20-6/2 – California, USA – Nicole Riley of Nicki’s Homemade Crafts
#12 – 6/3-6/16 – Arizona, USA – Bailey Williams of Hooked on Tilly
#13 – 6/17-6/30 – Colorado, USA – Jess Coppom of Make & Do Crew
#14 – 7/1-7/14 – Kansas, USA – Emily Davies of Hooked Hazel
#15 – 7/15-7/28 – Michigan, USA – Jennifer Pionk of A Crocheted Simplicity (above in this post)
#16 – 7/29-8/11 – Michigan, USA – Melissa Fisher of Woods and Wool
#17 – 8/12-8/25 – Ohio, USA – Toni Lipsey of TL Yarn Crafts
#18 – 8/26-9/8 – Georgia, USA – Vincent Williams of Visuvio’s Crafts
#19 – 9/9-9/22 – North Carolina, USA – Tia Edwards of Simple Things Crochet
#20 – 9/23-10/6 – North Carolina, USA – Ashleigh Kiser of Sewrella
#21 – 10/7-10/20 – North Carolina, USA – Rohn Strong of Rohn Strong
#22 – 10/21-11/3 – Pennsylvania, USA – Jessica Benvenuto of Fly the Distance
#23 – 11/4-11/17 – New York, USA – Brianna Iaropoli of Life and Yarn
#24 – 11/18-12/1 – New York City, USA – Teresa Carter of Debrosse
#25 – 12/2-12/16 – New Jersey, USA – ChiWei Ranck of 1 Dog Woof
MORE FREE CROCHET PATTERNS FROM A CROCHETED SIMPLICITY
If you enjoyed this crochet blanket pattern, you may enjoy these other projects as well. And if you just want to browse, you can find all of our free crochet patterns HERE.
Are you intimidated by knit-look crochet? Would you love to learn my tips & tricks? Take an Annies Video Class with me and let me ease your fears and help you increase your skills! Click on the photo below to watch a free preview. You can also see the other 4 video classes I have available!

Please share your finished ACS projects with us in the A Crocheted Simplicity Crochet Community Group on Facebook! Use hashtag #ACrochetedSimplicity when sharing on social media so I can find your posts!

so fun doing it
thanks a lot
I’m having so much trouble with “Increase Row 3”. Do you have any video for it?
I love this pattern!
WOW – wish I’d seen this crochet along soon.. Some really awesome squares. Can’t wait to try this one.
This pattern looks amazing!!!
This Afghan block or square is beautiful!!! Thank you for this pattern! I can’t wait to crochet this!!!
Love this but needed a smaller square; skipped increase row 9 through decrease row 6 & added another row or so to the border for a ~7” square.
Hi Liz,
That’s a great idea! This square can easily be adapted to any size you need, even a full size blanket. 🙂
Happy Crocheting,
Jennifer