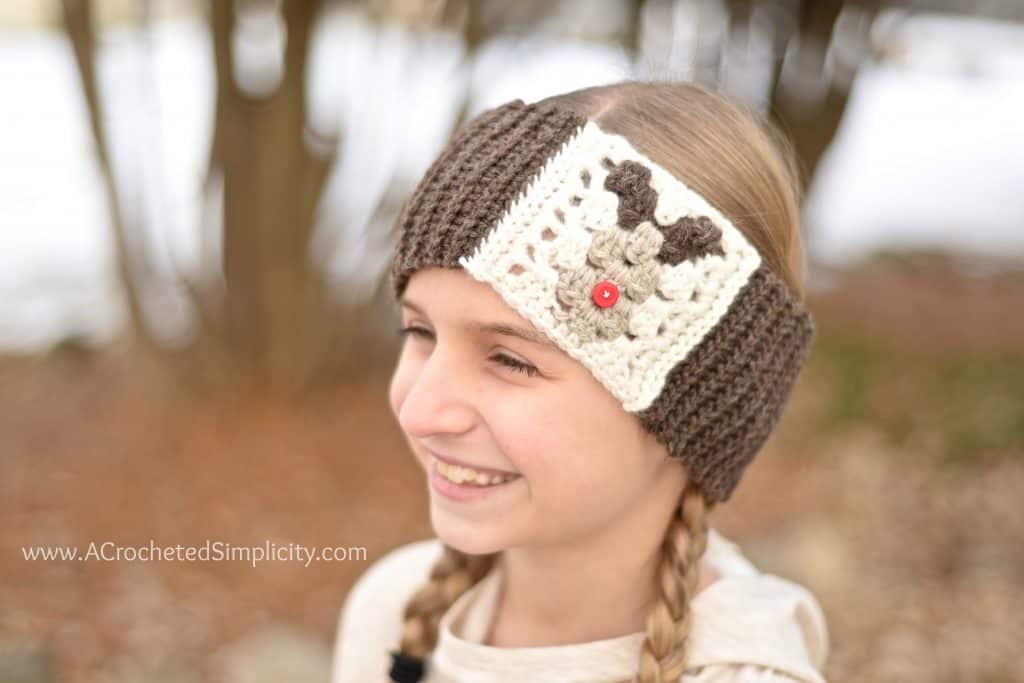
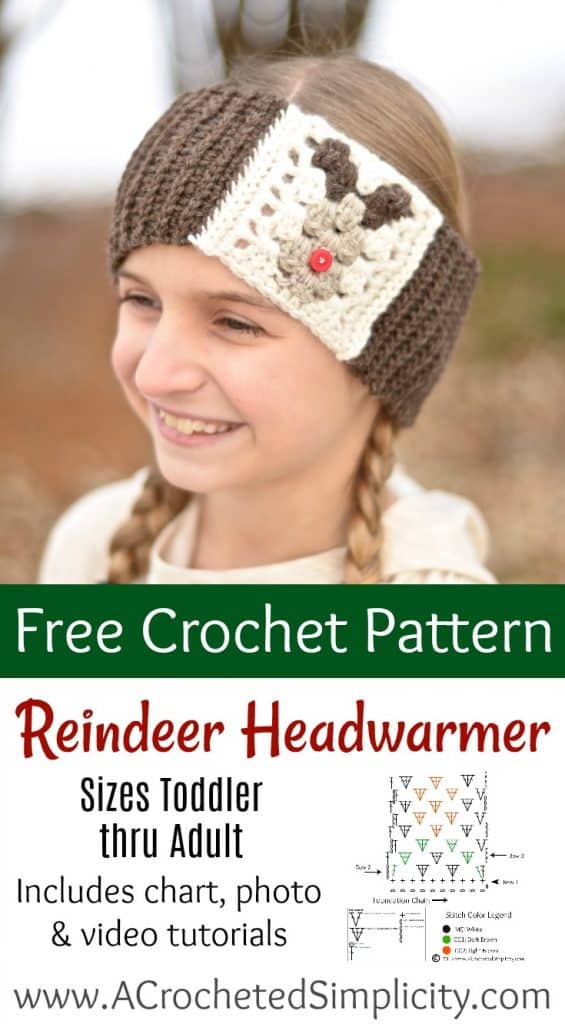
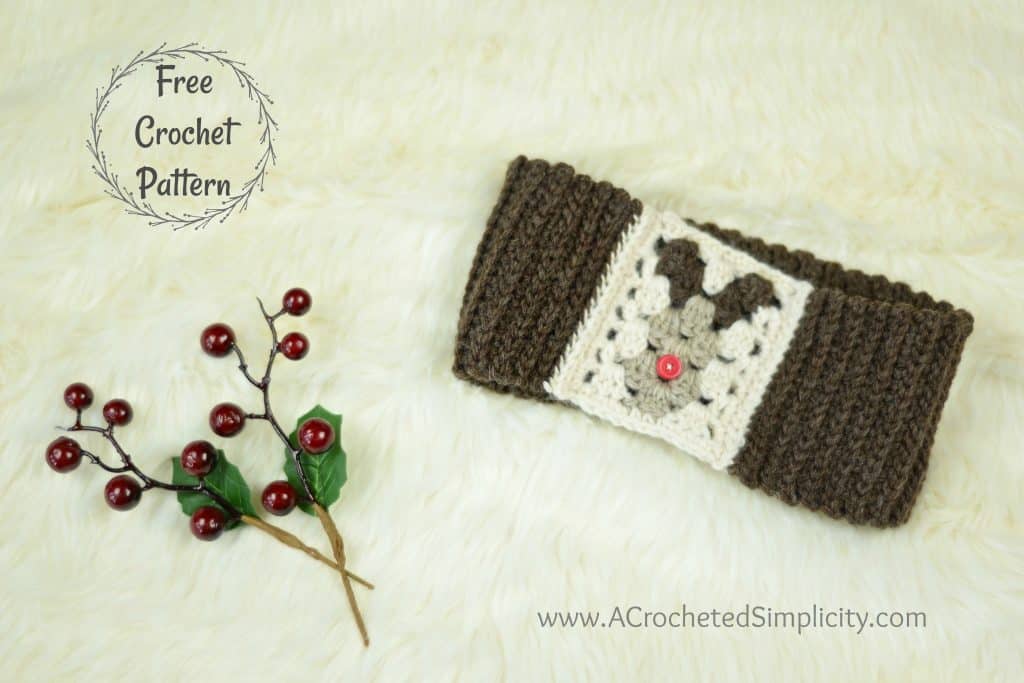
Free Crochet Pattern – Reindeer Headwarmer
Are you looking for last minute gifts to make this holiday season? The Reindeer Headwarmer is perfect for all ages!
Not only is it a great stash buster project, but it’s also a quick one! I hope you enjoy the pattern and learn a fun technique or two along the way. ?
~Click HERE to sign-up to receive our weekly newsletter!~
~Don’t lose it, add It To Your Ravelry Favorites or Queue.~
~Don’t forget to Pin It too!~
*Purchase an ad-free PDF of this pattern (including all charts and photo tutorials) on Craftsy or Ravelry*
This post contains affiliate links.
Materials
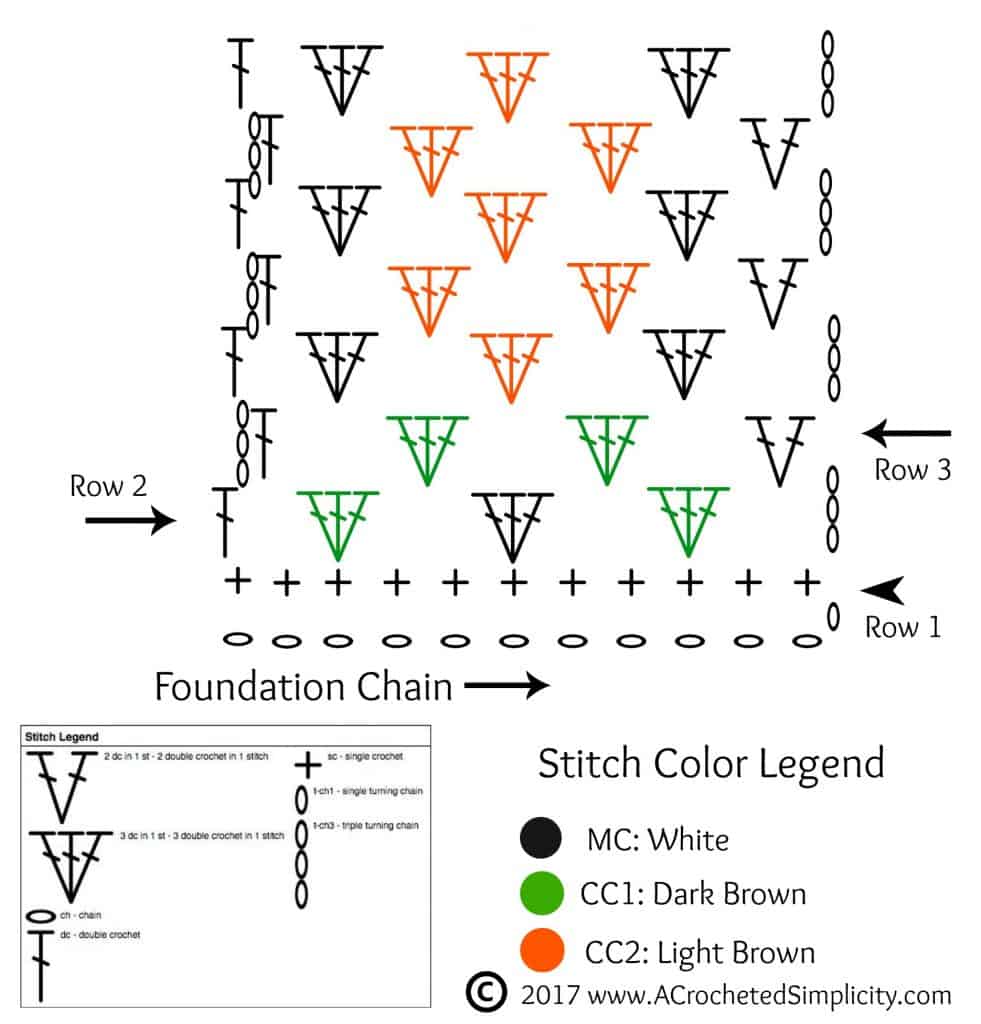
- Yarn: Worsted Weight / 4 yarn (the yarn pictured in the photos is Lion Brand Fisherman’s Wool & Lion Brand Wool Ease, I used partial skeins of what I had on hand ) You’ll need the following amounts of each color: Cream (MC / 8 yds), Dark Brown (CC1 / 40-60 yards), Light Brown (CC2 / 4 yards)
- Crochet Hooks: G/6/4.00mm; H/8/5.00mm (My favorite crochet hooks are the Clover Amour Hooks, I’ve never had an ache in my hand since switching)
- Locking Stitch Marker (2)
- Scissors
- Yarn Needle
- Red Button (1) 3/8″ (optional)
- Needle & Thread if using a button
Many of these materials are available for purchase through our affiliates below:
 Lion Brand Yarn Fisherman's...Shop on Amazon
  Clover 1045/G Purple Amour ...Shop on Amazon
  Clover Lock Ring Markers, 2...Shop on Amazon
  Clover Amour Crochet Hook: ...Shop on Amazon
Stitch Abbreviations
- ch(s): chain(s)
- sc: single crochet
- dc: double crochet
- sc2tog: single crochet decrease
- sl st(s): slip stitch(es)
- Alt-ch3(1): alternate chain 3(1) click here for photo tutorial
- st(s): stitch(es)
- yo: yarn over
- MC: main color (Cream)
- CC1: contrasting color (Dark Brown)
- CC2: contrasting color (Light Brown)
- RS: right side
- WS: wrong side
- Rep: repeat
- BLO: back loop only
- FLO: front loop only
- Join w/ a sc: click here for photo tutorial
- Color Change Tutorial & Tips: Click here for photo tutorial
Gauge
- See individual sizes for gauge.
Sized to Fit Head Sizes
- Toddler: 17″ – 19″ circumference
- Child: 19″ – 21″ circumference
- Teen / Adult Small: 21″ – 22″ circumference
- Adult Medium / Large: 22.5″ – 24″ circumference
Notes
- I tend to crochet on the tighter side, if you crochet more loosely, you may need to go down a hook size or two to meet gauge.
- Beginning chain 3 in motif are counted as a stitch. Beginning chain 1 in the rest of the pattern are not counted as stitches.
- First stitch of each row is worked into the same stitch as beginning chain, unless stated otherwise.
- Color Changes: Work all color changes on the final pull thru of the last stitch you’re working before the new color. Example: If the last st you’re working before a color change is a double crochet, begin your double crochet by inserting your hook where indicated, yo, pull up a loop, yo, pull thru 2 loops, yo with the NEW color, pull thru remaining 2 loops to complete the stitch. Then continue on with your new color. *Click here for Color Change Photo Tutorial.
- Other lighter worsted weight / 4 yarns can be substituted as long as you match gauge.
- Make sure to work all color changes on the WS of the motif.
- Carry yarn when working the motif, but do not pull yarn floats tight or your gauge will be greatly affected. See Color Change Photo Tutorial for tips!
Special Stitch
- Alternate Ch-3 (alt-ch3): Complete last st of previous row, take loop off hook, insert hook into the space between the last dc and last 3 dc of previous row, put loop back on hook and pull thru space, turn, ch 3. *Click here for photo tutorial.
Toddler & Child Size Instructions
Deer Motif
Gauge: In granny stitch pattern: 11 sts = 2.5″; 7 rows = 3″
Note: The motif is worked upside down, from the antlers to his chin.
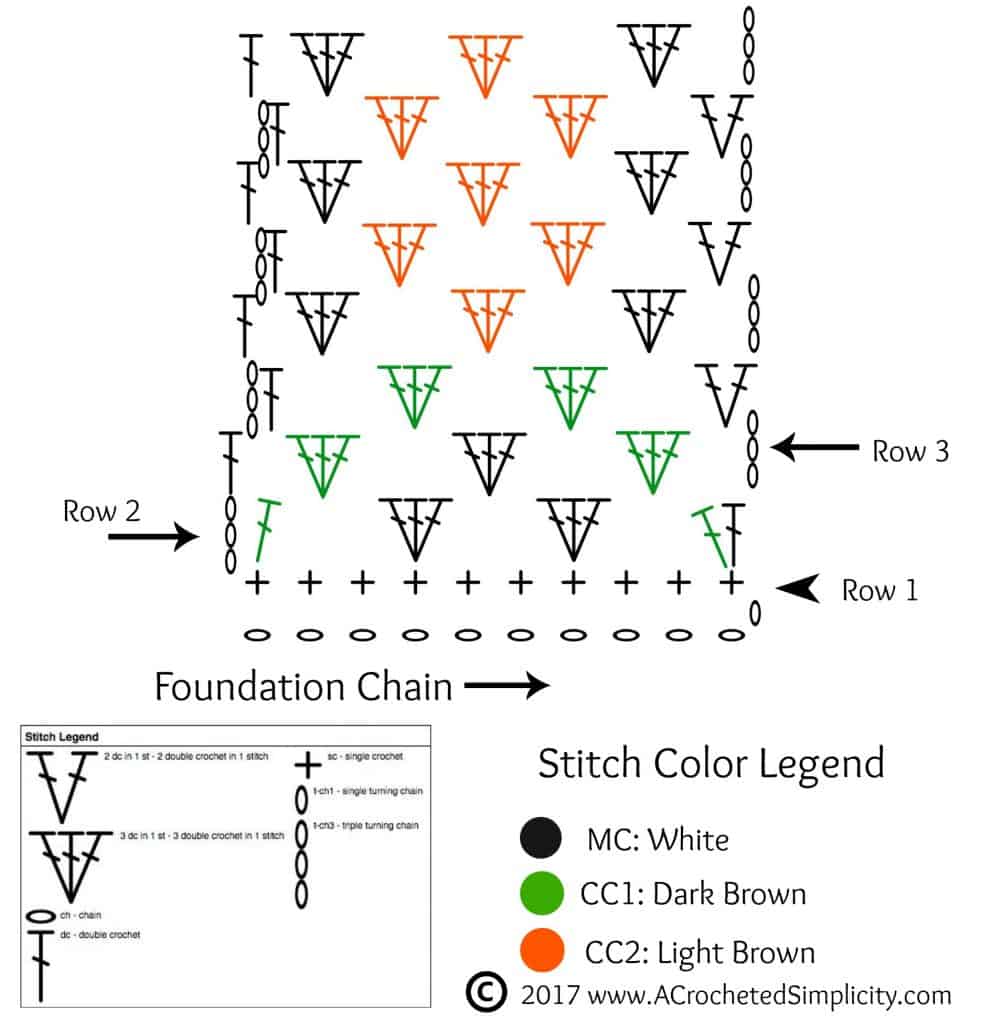
Row 1 (RS): With MC & 4.00mm hook, ch 12, sc in 2nd ch from hook and in each ch across. Turn. (11 sts) *Place a SM in the first st of Row 1 (before turning).
*Follow color chart below beginning w/ Row 2. Note that Row 2 is the WS. Make sure your color changes are worked on the WS.
Row 2: Ch 3 (counts as 1st dc here & throughout), skip the first 2 sts, [3 dc in next st, skip next 2 sts] work from [ to ] twice, 3 dc in next st, skip next st, dc in the last st. Turn. (11 sts)
Row 3: Alt-ch3, dc in same sp, 3 dc in each of the next 2 sps, 2 dc in last sp. Turn. (10 sts)
Row 4: Ch 3, 3 dc in each of the next 3 sps, dc in the top of ch 3. (11 sts)
Rows 5 – 8: Rep Rows 3 – 4.
Row 9: Ch 1, sc in each st across. Turn. (11 sts)
Do not fasten off. Continue below to Stretchy Ribbing.
Motif dimensions: 2-1/2″ W x 3-1/2″ H.
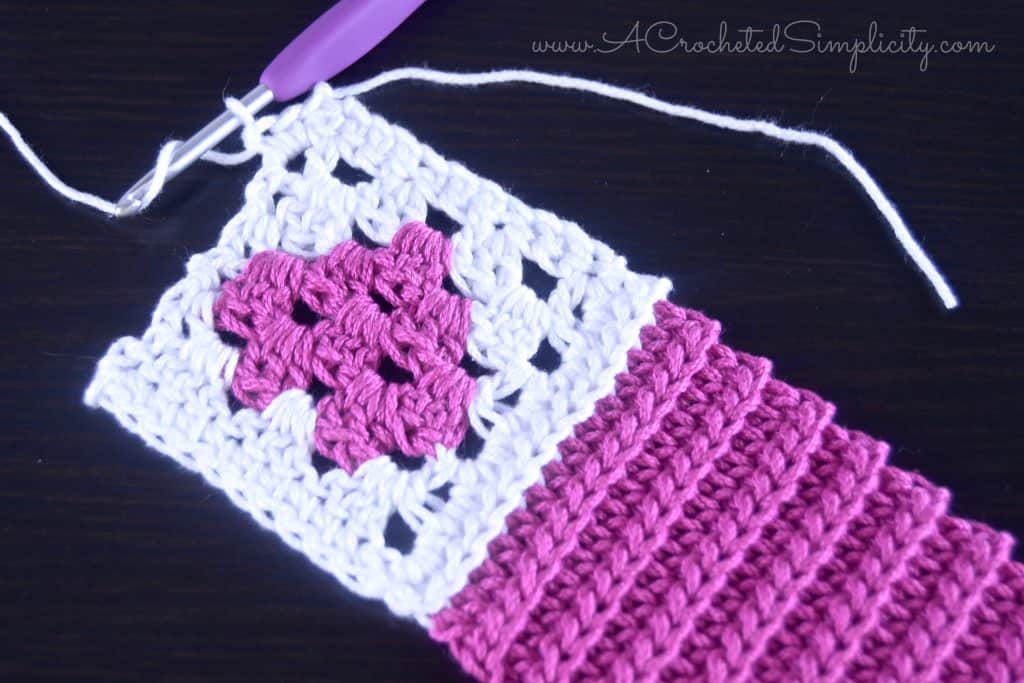
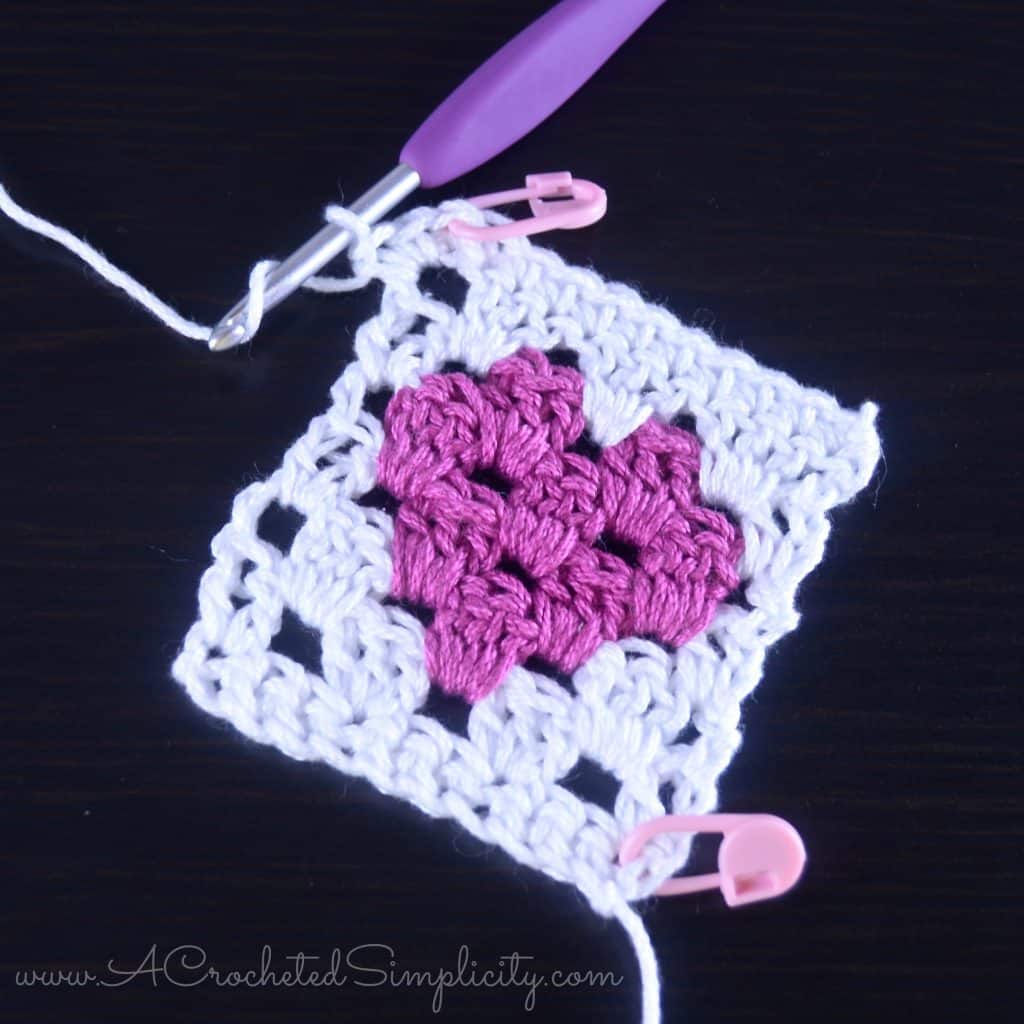
Note: The photos below are of the heart motif, from my Love at First Sip Coffee Sleeve, but the techniques shown are the same for this one.
Stretchy Ribbing (Toddler & Child Sizes)
Gauge with 4mm crochet hook: 17 sts = 3″
Row 1 (MC): RS facing you, rotate to work along the long edge, ch 1 (place a SM in the ch-1 to make it easier to find at the end of row 2), work 1 sc into the side of Row 9 of motif, work 2 sc into the side of each dc row, then work 1 sc into the side of Row 1. Turn. (16 sts) *See Photo Above.
Row 2: Ch 1, working in the BLO sl st in each st across, then sl st into the BLO of the ch-1 from Row 1. Fasten off MC and weave in ends. Turn. (17 sts)

Row 3: Join CC1 w/ a sc into the BLO of the 1st st, working in the BLO sc in each st across. Turn. (17 sts) *See Photo Above.
Row 4: Ch 1, working in the BLO sl st in each st across. Turn. (17 sts)
Row 5: Ch 1, working in the BLO sc in each st across. Turn. (17 sts)
Repeat Rows 4 – 5 (ending w/ a Row 5 rep) until the entire length of your headwarmer measures approximately: Toddler (15″); Child (16″).
Fasten off and weave in ends. Continue below to Right Side Motif Edging.
Right Side Motif Edging
Row 1: With RS facing you, join MC w/ a sc in the st with the SM from Row 1 of the deer motif, work 1 more sc into the same st, work 2 sc into the side of each dc row and 1 sc into the side of the sc row. Turn. (17 sts) *See Photo Above.
Row 2: Ch 1, working in the BLO, sl st in each st across. (17 sts)
Fasten off leaving a 10″ tail of yarn. Continue below to Seam.
Seam
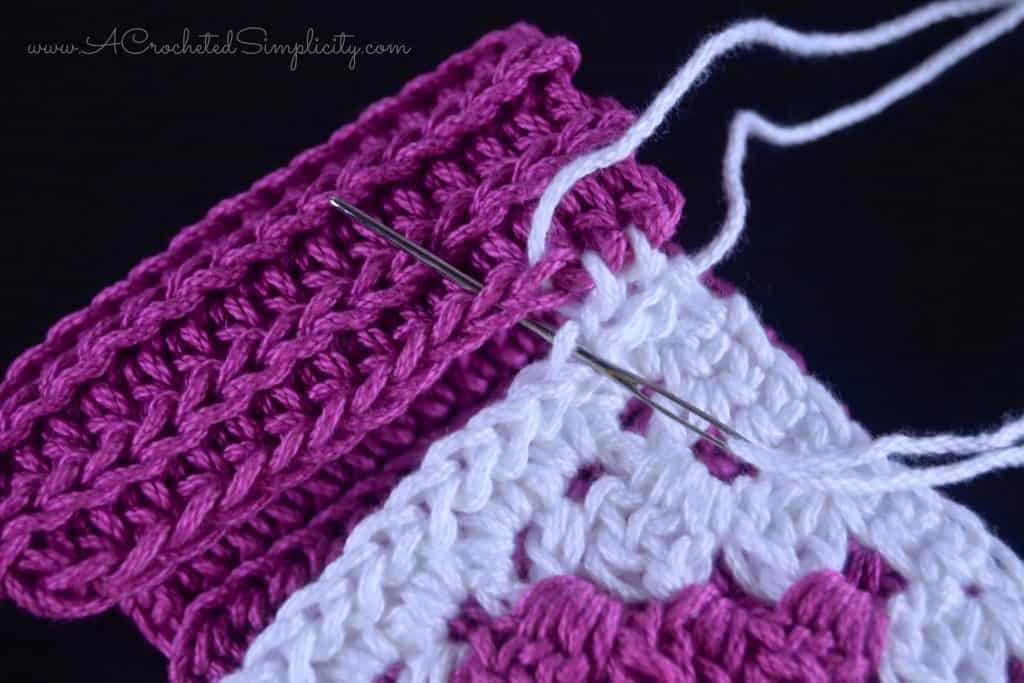
With RS facing, use a yarn needle and the tail of yarn, whipstitch the BLO of Row 2 of the right side motif edging to both loops of the last row of the stretchy ribbing. Weave in ends. *See Photo Above.
Button (optional)
Using a needle and thread, sew the button on as shown in the photos.
Teen/Adult Small & Adult Medium/Large Size Instructions
Deer Motif
Gauge: In granny stitch pattern: 11 sts = 3″; 6.5 rows = 3″
Note: The motif is worked upside down, from the antlers to his chin.
Row 1: With MC & 5.00mm hook, ch 11, sc in 2nd ch from hook and in each ch across. Turn. (10 sts) *Place a SM in the last st of Row 1 (before turning).
*Follow color chart below beginning w/ Row 2.
Row 2 (RS): Ch 3 (counts as 1st dc here & throughout), dc in same st, skip 2 sts, [3 dc in next st, skip next 2 sts] work from [ to ] twice, 2 dc in last st. Turn. (10 sts)
Row 3: Ch 3, 3 dc in next 3 sps, dc in top of ch 3. (11 sts)
Row 4: Alt-ch3, dc in same sp, 3 dc in next 2 sps, 2 dc in last sp. Turn. (10 sts)
Rows 5 – 9: Rep Rows 3 – 4, ending with a Row 3 rep.
Row 10: Alt-ch1 (similar to Alt-ch3, except you only ch1), sc in same sp, sc in each st across to last dc & ch3, sc2tog in last dc & top of ch3. Turn. (10 sts)
Do not fasten off. Continue below to Stretchy Ribbing.
Finished Size: 3″ W x 4-1/4″ H.
Note: The photos below are of the heart motif, from my Love at First Sip Coffee Sleeve, but the techniques shown are the same for this one.
Stretchy Ribbing (Teen/Adult Small & Adult Medium/Large Sizes)
Gauge w/ 5mm hook: 19 sts = 4-1/4″
Row 1 (MC): RS facing you, rotate to work along the long edge, ch 1 (place a SM in the ch-1 to make it easier to find at the end of row 2), work 1 sc into the side of Row 10 of motif, work 2 sc into the side of each dc row, then work 1 sc into the side of Row 1. Turn. (18 sts) *See Photo Above.
Row 2: Ch 1, working in the BLO sl st in each st across, then sl st into the BLO of the ch-1 from Row 1. Fasten off MC and weave in ends. Turn. (19 sts)
Row 3: Join CC1 w/ a sc into the BLO of the 1st st, working in the BLO sc in each st across. Turn. (19 sts) *See Photo Above.
Row 4: Ch 1, working in the BLO sl st in each st across. Turn. (19 sts)
Row 5: Ch 1, working in the BLO sc in each st across. Turn. (19 sts)
Repeat Rows 4 – 5 (ending w/ a Row 5 rep) until the entire length of your headwarmer measures approximately: Teen/Ad Sm (18″), Ad Med/Lg (19″).
Fasten off and weave in ends. Continue below to Right Side Motif Edging.
Right Side Motif Edging
Row 1: With RS facing you, join MC w/ a sc in the st with the SM from Row 1 of the deer motif, work 1 more sc into the same st, work 2 sc into the side of each dc row and 1 sc into the side of the sc row. Turn. (19 sts) *See Photo Above.
Row 2: Ch 1, working in the BLO, sl st in each st across. (19 sts)
Fasten off leaving a 10″ tail of yarn. Continue below to Seam.
Seam
With RS facing, use a yarn needle and the tail of yarn, whipstitch the BLO of Row 2 of the right side motif edging to both loops of the last row of the stretchy ribbing. Weave in ends. *See Photo Above.
Button (optional)
Using a needle and thread, sew the button on as shown in the photos.
Find all of my FREE crochet patterns HERE
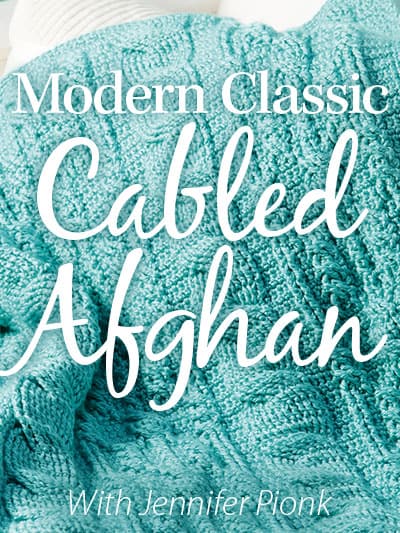
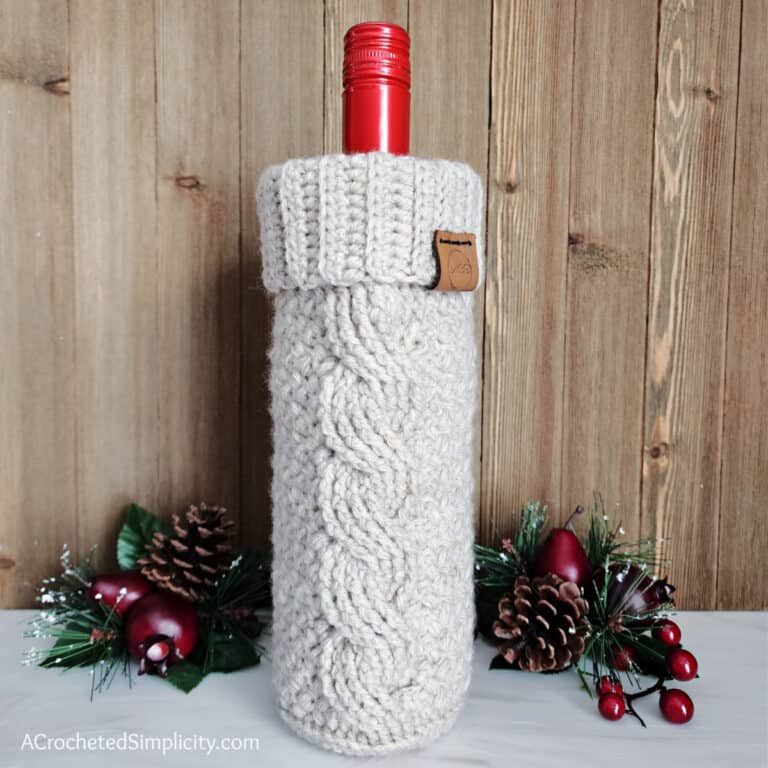
Are you intimidated by crocheted cables? Would you love to learn? Take an Annies Video Class with me and let me ease your fears of crocheted cables! Click on the photo below to watch a free preview. You can also see the other 2 classes I have available! (affiliate link)
Please share your finished ACS projects with me in the A Crocheted Simplicity Crochet Community Group on Facebook!
Happy Crocheting!


One Comment