Crochet Plant Pot Cover – Hearts Full of Love
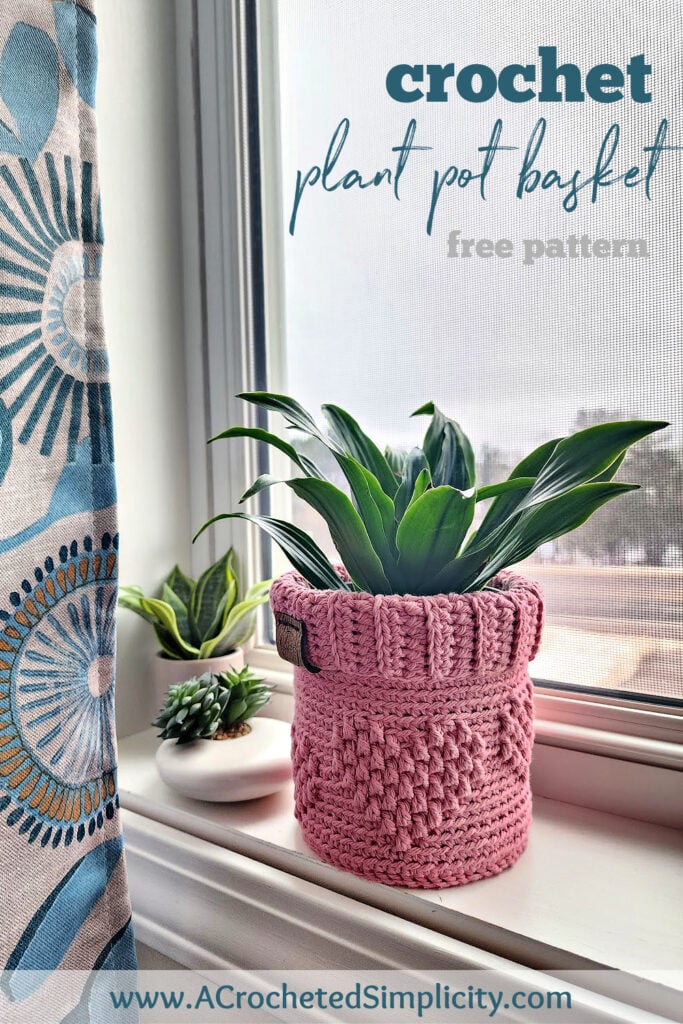
Learn to crochet a crochet plant pot cover that has several more uses than just a plant basket.
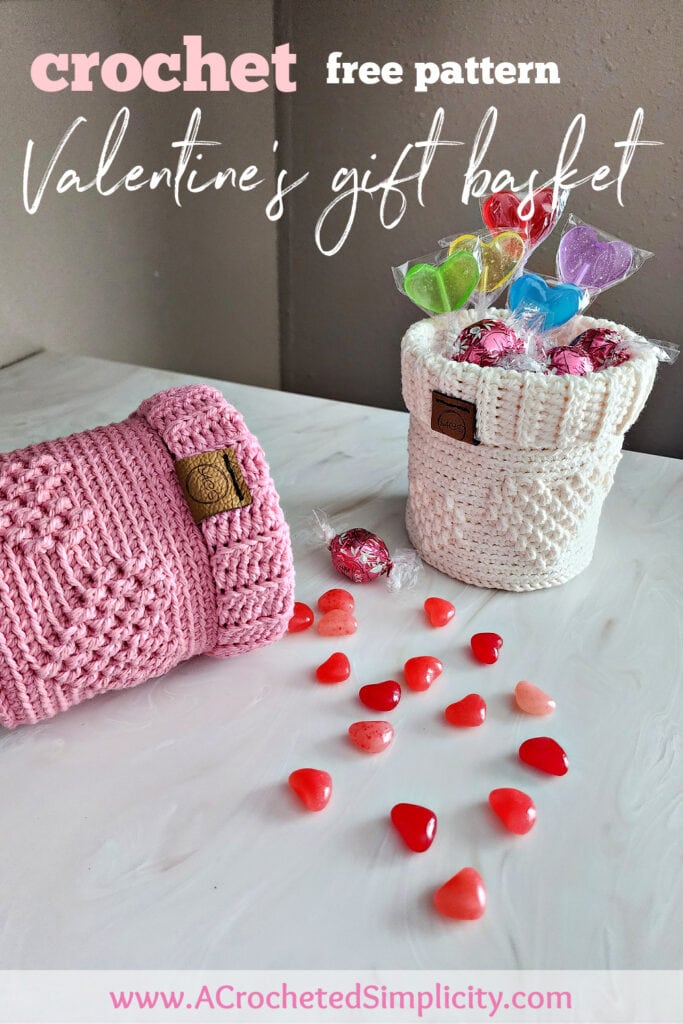
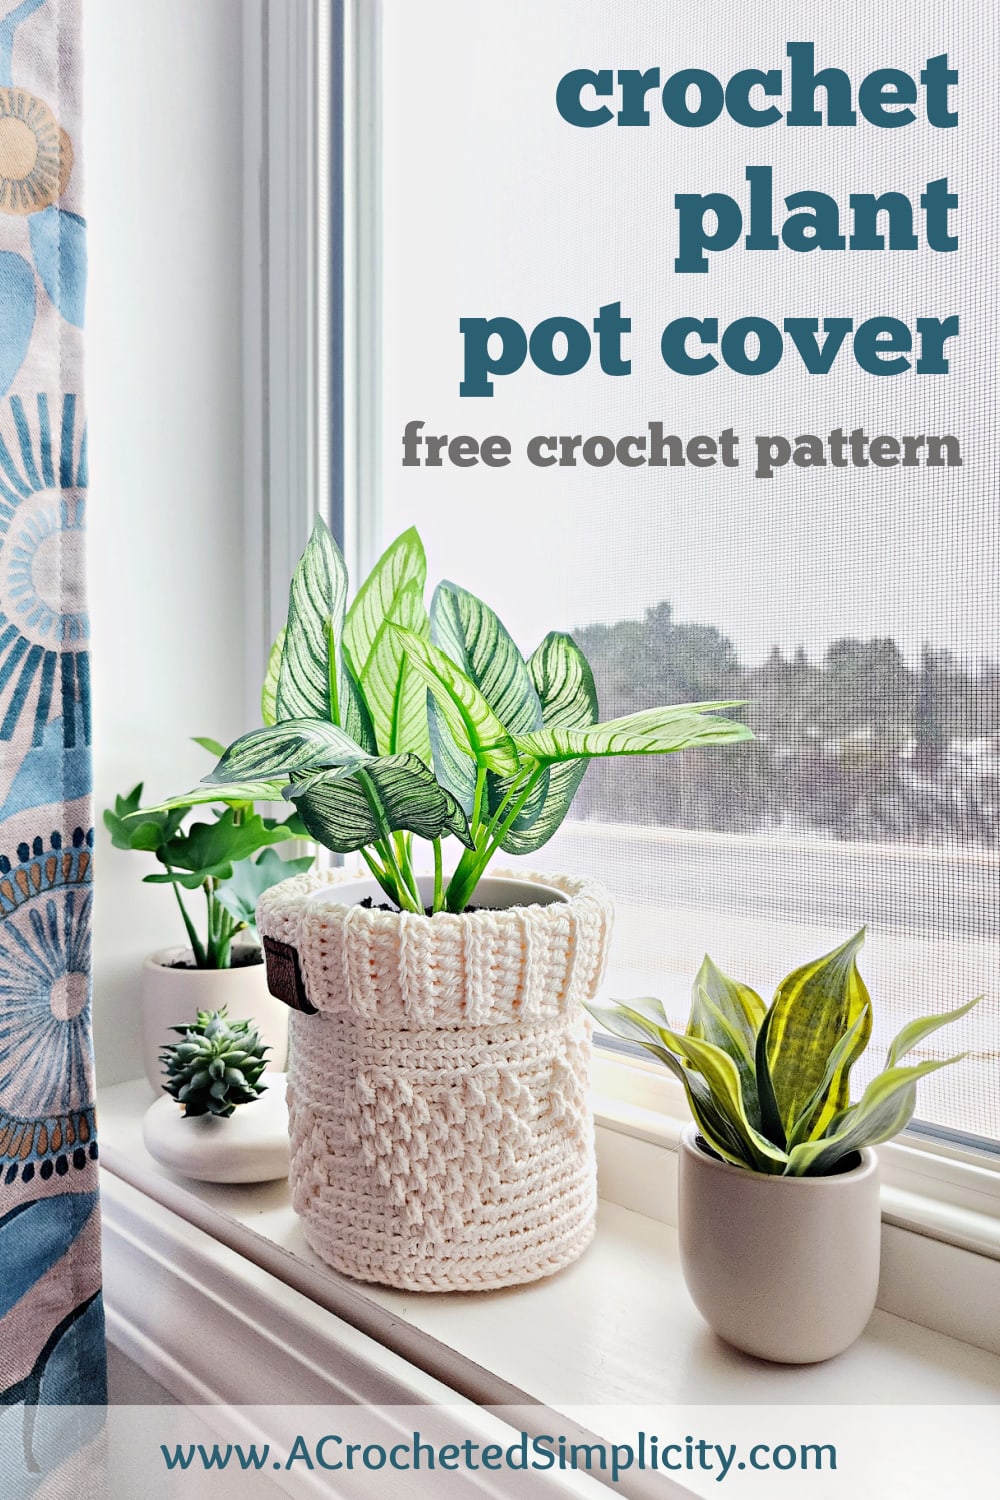
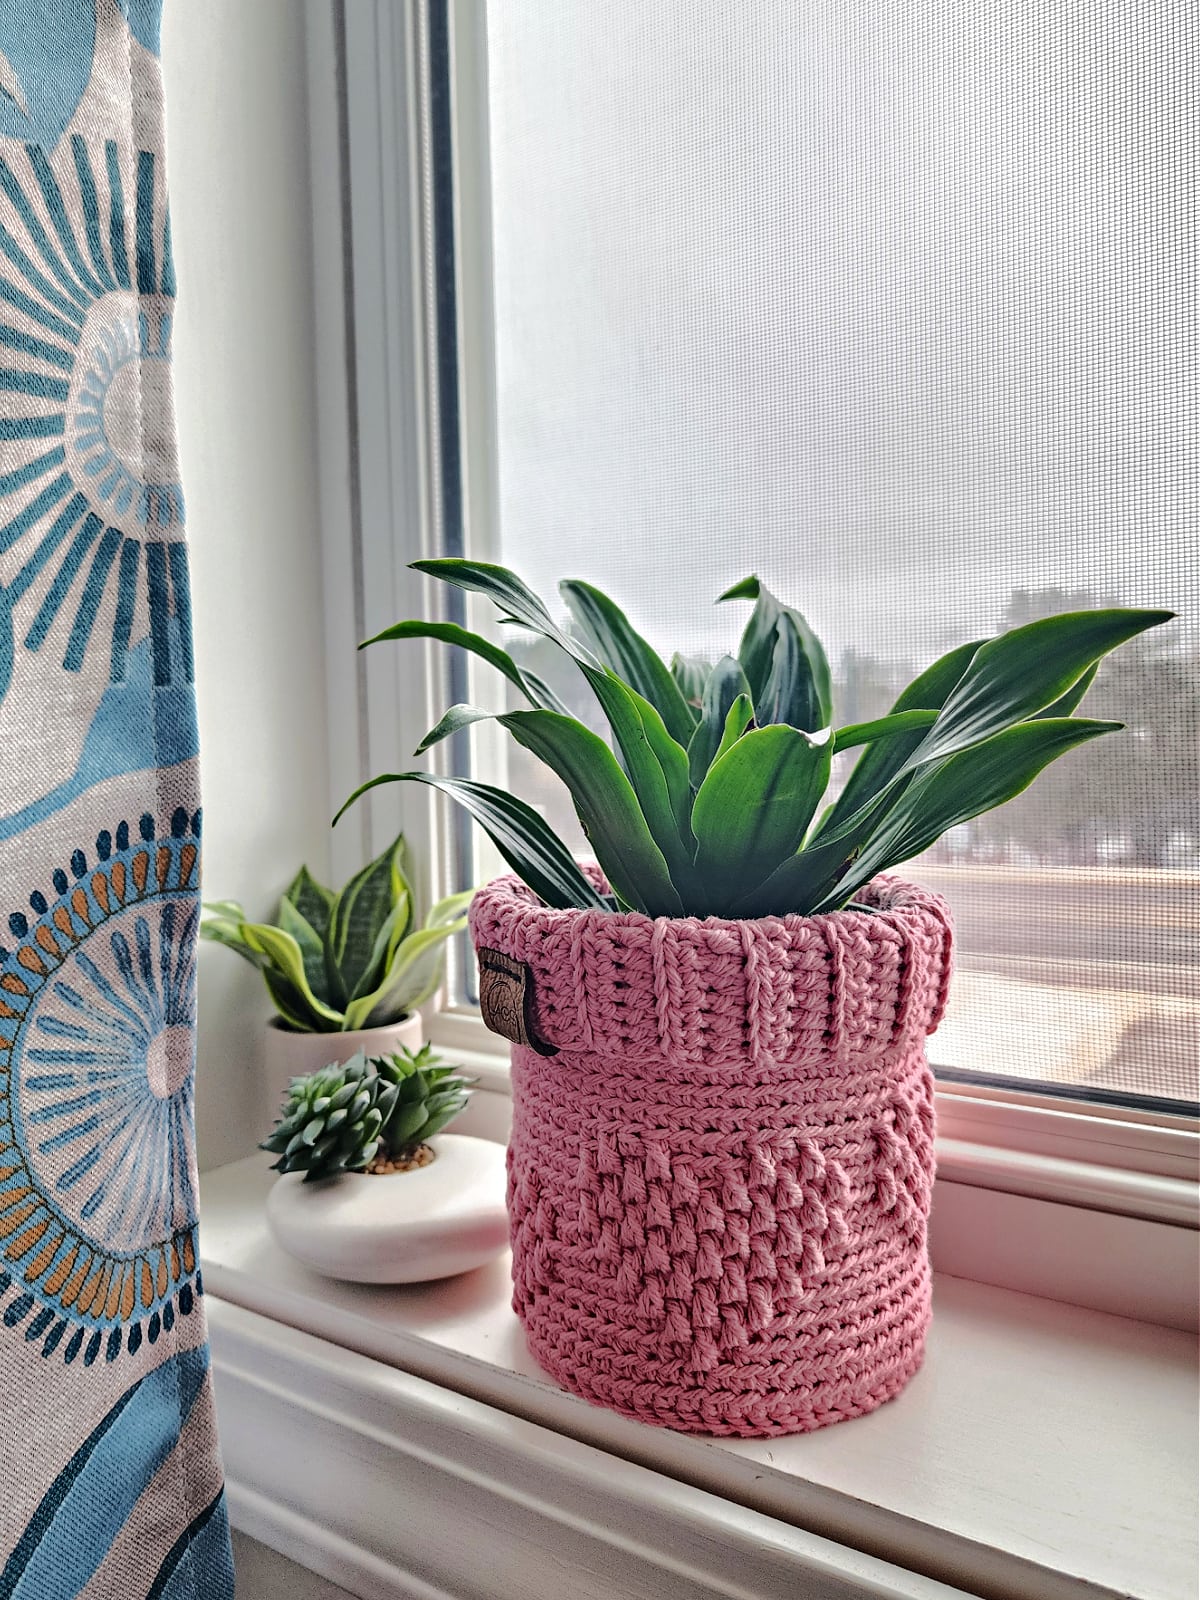
The Hearts Full of Love Crochet Basket uses less than one ball of yarn and makes a great indoor plant basket, mason jar cozy, crochet candle holder, and gift baskets for Valentine’s Day!
You’ll find the free crochet plant pot cover pattern below, or an ad-free print friendly PDF (including all photo tutorials) on Ravelry, or on Etsy (aff).
The Hearts Full of Love Crochet Basket was designed as a mini-mystery crochet along project for January. My original intentions for this pattern for crochet basket were for it to be a Valentine’s basket to use as a candy bowl or a crochet plant cover pattern.
In reality, there are SO many more uses for this small decorative basket!
I like to make quick crochet projects that I can pair with a homemade recipe mix in a mason jar, a small store bought item such as a jar candle, or the recipient’s favorite candy.
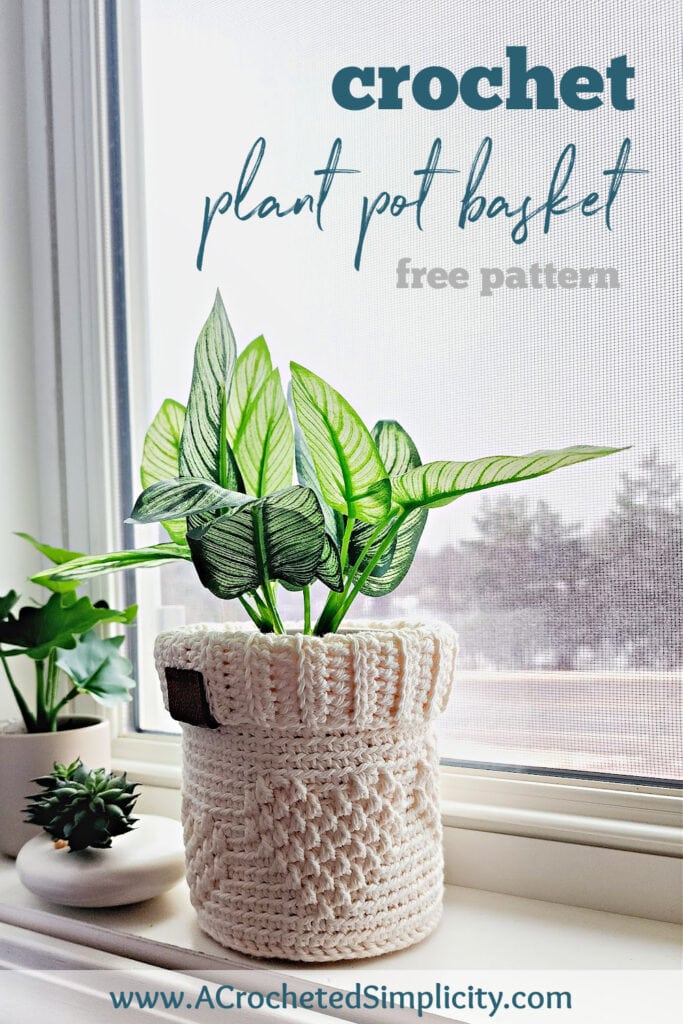
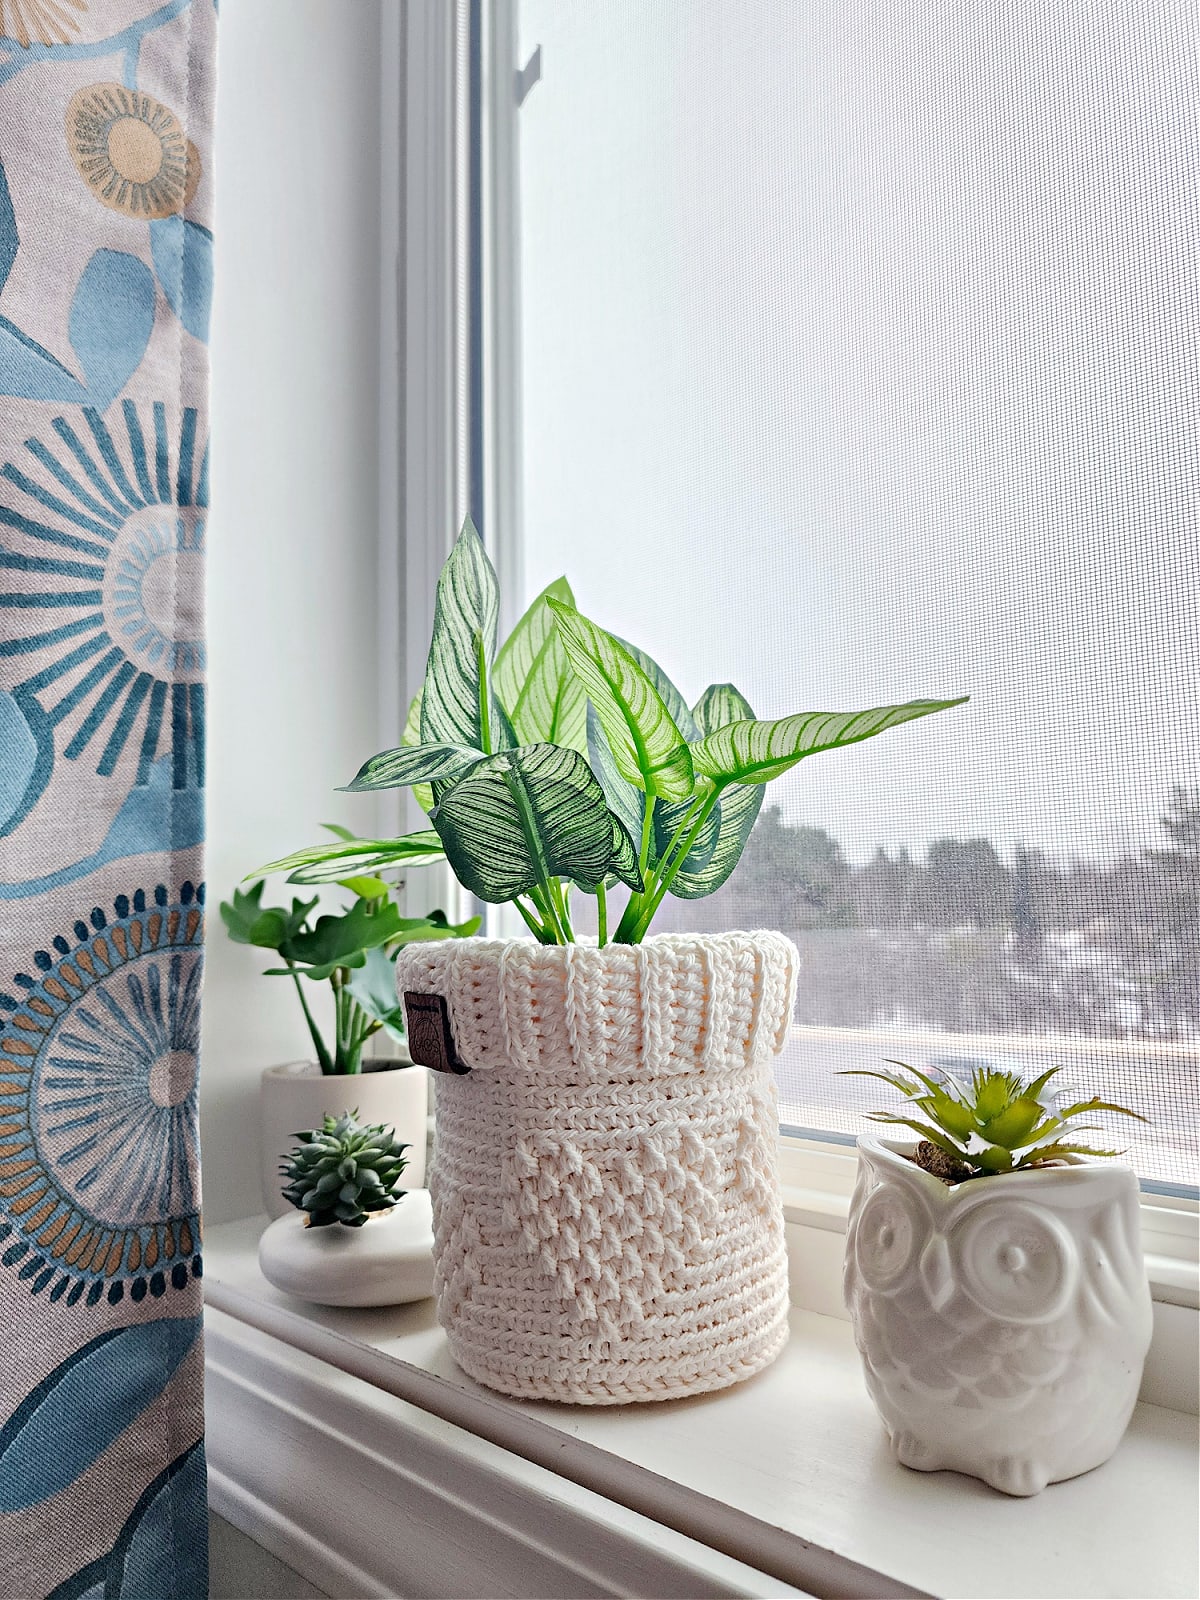
The plant pot covers fit standard size mason jars and make a great mason jar cozy. Add fresh flowers to the mason jar and you’ll have a Valentine’s Day crochet flower pot holder.
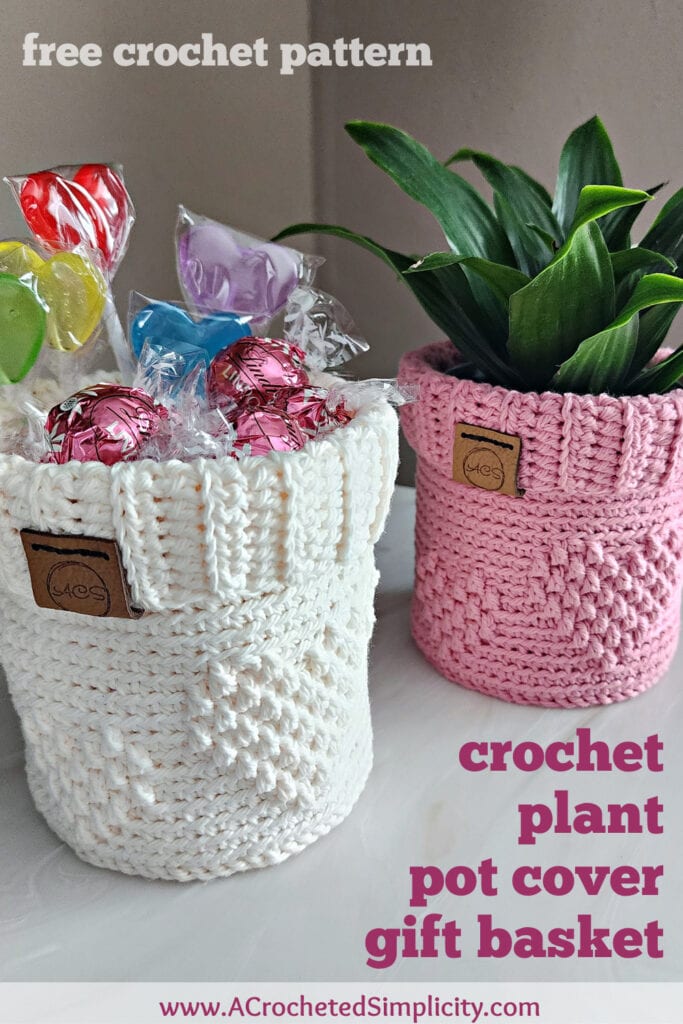
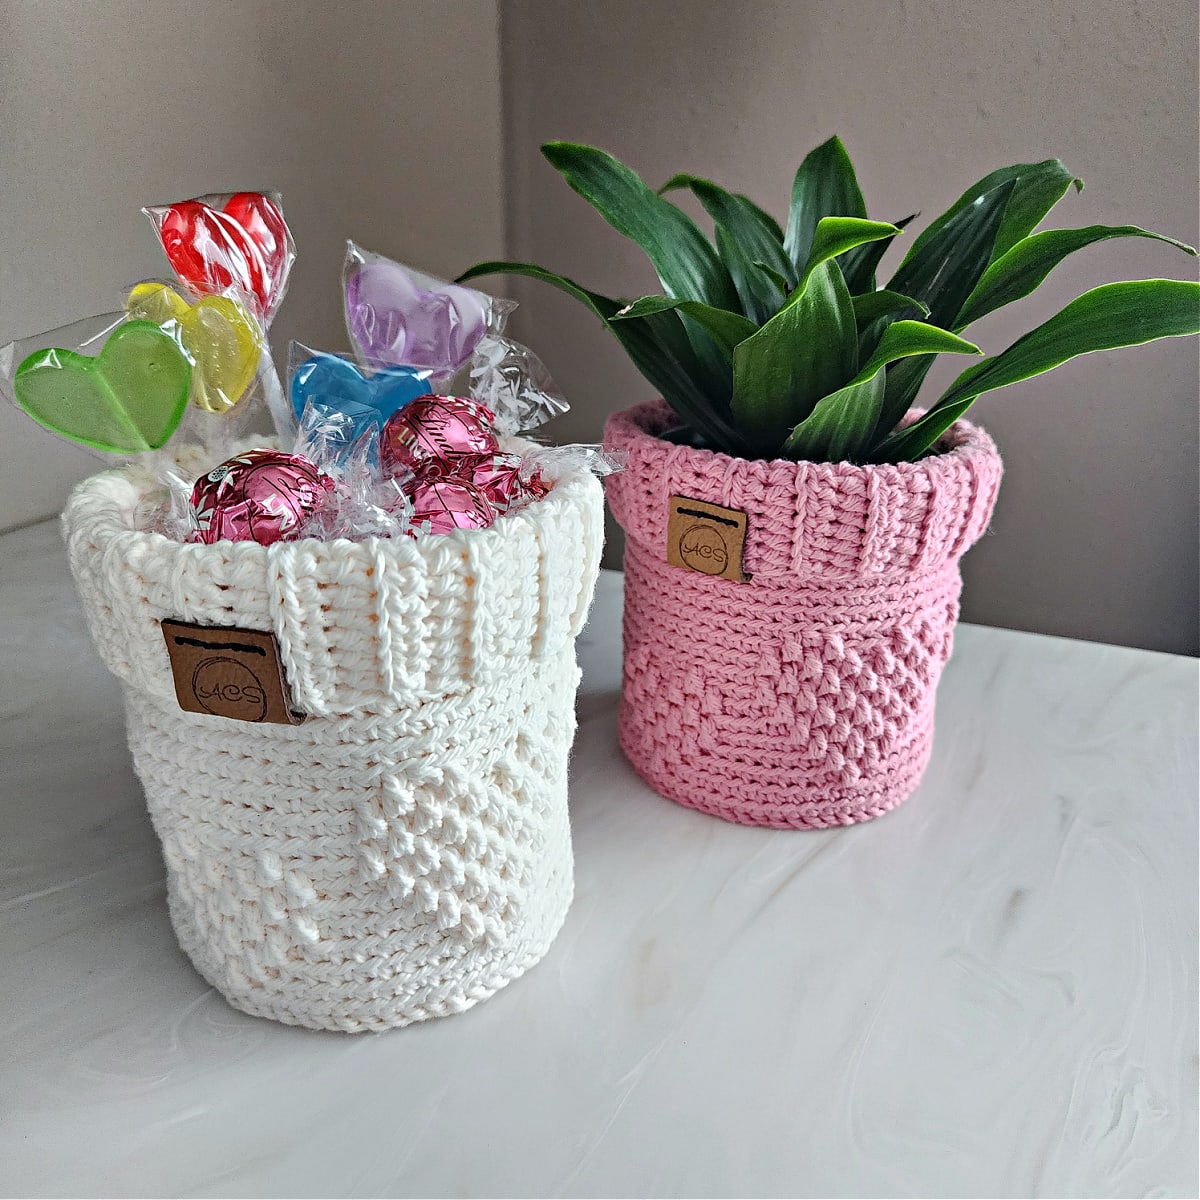
Fill it with candy or a candle in a jar and you’ll have a fun Valentine’s Day gift basket.
They also make a great candy bowl for office.
Plant Pot Cover, Candle Cozy, Candy Basket
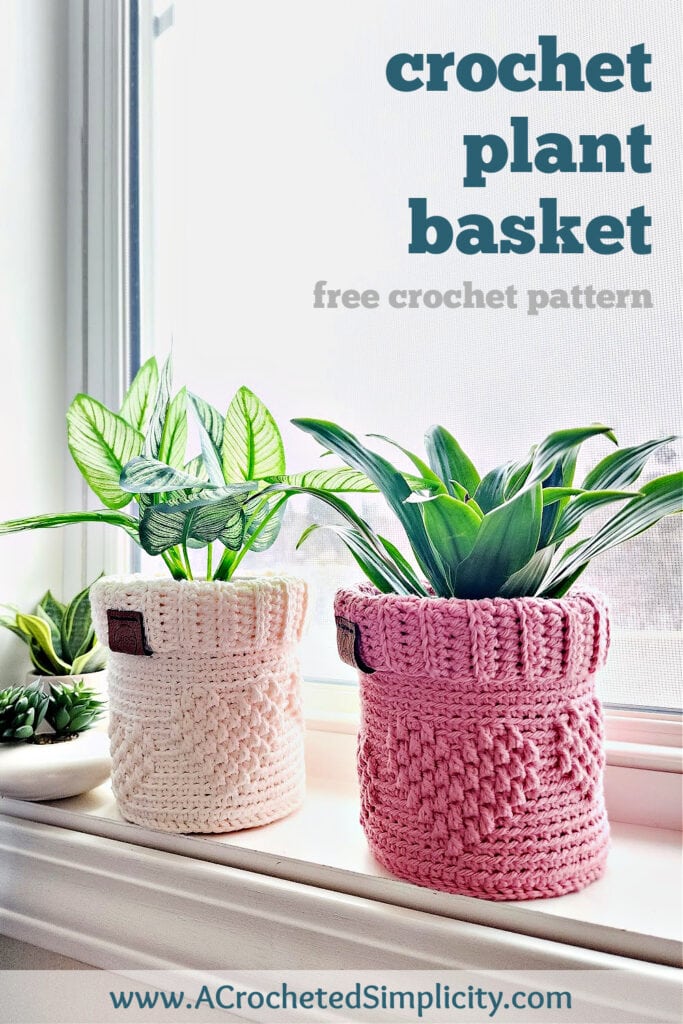
The Hearts Full of Love Crochet Basket has several different uses. The photos in this blog post show you three of them.
Certainly, the most common use for this crochet pattern is a crochet flower basket. But, it also makes a beautiful crochet candle cozy or a fun mason jar cozy.
Crochet Plant Pot Cover – Crochet Flower Basket & More
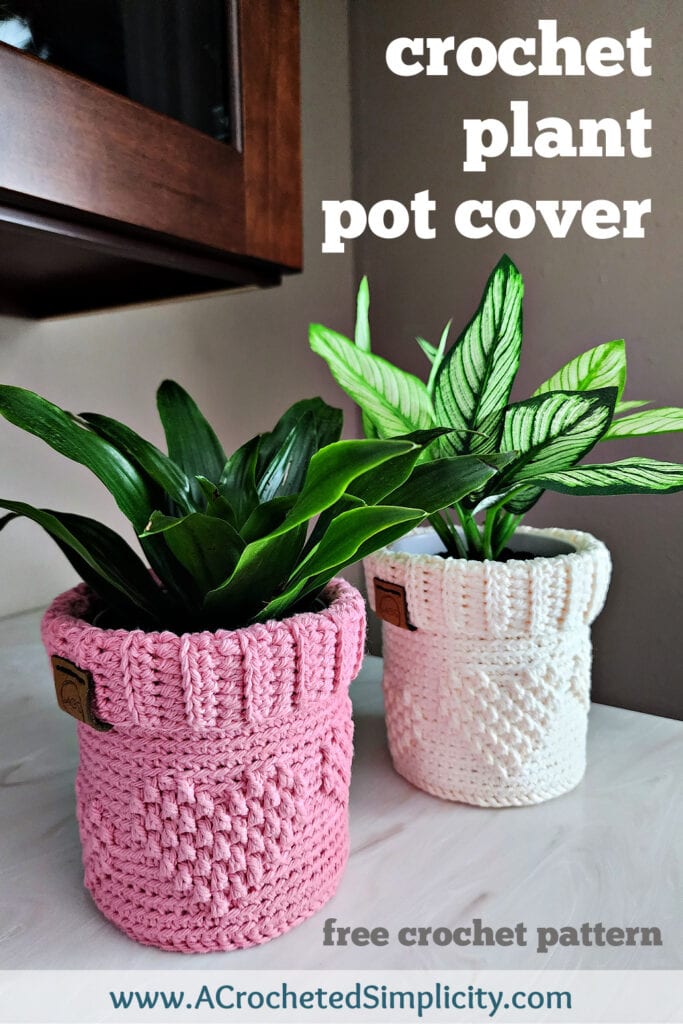
Now, just because I’ve added embossed crochet hearts to this crochet basket pattern, this doesn’t mean that it’s only a Valentine’s crochet pattern. This one is perfect for year round use, especially if you have boho home decor and make it in a neutral color.
The small crochet heart basket would also make a great centerpiece for a bridal or baby shower. Fill them with dinner mints for decorative candy bowls.
Plant Pot Cover – Finishing Touches
Add the perfect finishing touch to your handmade crochet gifts with custom labels from All This Wood on Etsy.
For Leather, Cork, and Wooden Labels, I HIGHLY RECOMMEND ALL THIS WOOD.
What Size Jar Candle
I purchased a large jar Yankee Candle from a local store, but you can also find large jar candles, such as Yankee Candles, on Amazon.
Look for jar candles that are similar in size to a quart size mason jar. The large jar candle I purchased is 22 oz.
One of my favorites for the winter season is Yankee Candle’s Balsam & Cedar. You can find them on Amazon.
Related: If you love the textured heart design on this crochet pot cover, you may also love my other designs that use the same technique: My Love Beanie & Slouch, Valentine Treat Bags, and Argyle Beanie & Slouch.
How to Crochet a Plant Pot Cover
This crochet plant pot holder is worked from the bottom up.
First, you’ll crochet a base for the basket. The base is worked in rounds.
To start the sides of the basket, you’ll work a round of back post single crochet (bpsc). The bpsc stitches help to turn the sides upward.
Next, you’ll crochet the sides of the plant basket. This section is worked in a spiral (aka continuous rounds). Make sure to use a scrap piece of yarn to mark the beginning and end of each round. Also in this section, you’ll crochet the embossed heart design. You can follow the written instructions or the color chart that’s included below.
Lastly, you’ll add a fold over ribbed crochet cuff to the top edge of the basket.
Yarn
Lily Sugar’n Cream cotton yarn is a natural, 100% USA-grown cotton yarn. It’s a versatile worsted weight yarn, that’s great for small projects like dishcloths and hand towels, to home décor, and even accessories. I love to use it for crochet bags!
This yarn is a little stiffer so it makes a perfect cotton yarn for this free crochet plant pot cover pattern, especially if you intend to use it as a crochet gift basket.
Available in a wide variety of colors, including neutrals, brights, and pastels. It’s machine washable and dryable for easy care.
Hearts Full of Love – Free Crochet Plant Pot Cover Pattern
The free crochet plant pot pattern is below, but if you love to work offline, I’ve got a couple other great options for you.
Purchase the ad-free, printable PDF, including all charts & photo tutorials, on Ravelry, or on Etsy (aff).
This post contains affiliate links.
Materials
- Yarn: Worsted Weight / 4 / Yarn, I used Lily Sugar n’ Cream cotton yarn for the sample, 100% Cotton (120 yards / 109 m / 71 g / 2.5 oz).
- Yardage: 110 yards
- Crochet Hook: G/6/4.00mm
- Scissors
- Yarn Needle
- Measuring Tape
- Locking Stitch Markers or scrap piece of yarn
- Quart Size Mason Jar
- Large Jar Candle
- Optional Pots: I found these pots on Amazon and they come in a variety of sizes!
Abbreviations (US Terms)
- ch(s): chain(s)
- st(s): stitch(es)
- sl st(s): slip stitch(es)
- sc: single crochet
- hdc: half double crochet
- hdc2tog: half double crochet 2 together
- dc: double crochet
- Alt-dc: alternate double crochet
- bpsc: back post single crochet
- BLO: back loop only
- FLO: front loop only
- RS: Right Side
- Rep: repeat
- Rnd: round
- SM: stitch marker
- yo: yarn over
Experience Level
- Easy
Gauge
- Base of Plant Basket: dimensions given at the end of each round
- In BLO sc: 6 sts = 1.25″; 6 rounds = 1.25″
Size
- One Size: Fits a quart size mason jar
- 11.5″ circumference x 5″ H
- Fits a 4″ diameter flower pot
Pattern Notes
- Turning chains are not included in stitch count, unless noted otherwise.
- The majority of the pattern is worked in continuous rounds (a spiral). I suggest using a stitch marker or scrap of yarn to keep track of the round you’re on.
- Yarn Notes: Lily Sugar n’ Cream worsted weight cotton yarn was used for the sample, 100% Cotton (120 yards / 109 m / 71 g / 2.5 oz).
- Yardage: 110 yards
- Pot Cover Construction: This crochet plant pot holder is worked from the bottom up. You’ll first make the crochet basket base, then crochet the sides with the embossed crochet hearts, and lastly, finish with a fold over ribbed crochet cuff.
- This crochet plant holder can also be used as a candle cozy, a mason jar cozy, a small candy dish, or a decorative basket for your home. It also makes a great crochet gift basket.
Special Stitches
- Back Post Single Crochet (bpsc): Insert hook from back to front to back around the post of the designated stitch, yo, pull up a loop, yo, pull thru both loops on hook.
- Alternate Double Crochet (alt-dc): After turning your work, do not ch, instead, insert your hook into the first st, yo, pull up a loop, yo, pull thru both loops, insert your hook between the legs of the st just made, yo, pull up a loop, yo, pull through one loop, yo, pull thru remaining loops.
- Half Double Crochet 2 Together (hdc2tog): (Yo, insert hook into next stitch, yo, pull up a loop) twice, yo, pull through all loops on your hook.
Crochet Plant Pot Cover Pattern
Crochet Basket Base
Rnd 1: With yarn & a 4mm crochet hook, ch 3 (does not count as a st), work 12 dc into the 3rd ch from your hook. Join with a sl st to the 1st dc. (12 sts) The diameter of your circle should be approximately 1″.
Rnd 2: Alt-dc in the first st, work 1 more dc in the same st, 2 dc in each remaining st around. Join. (24 sts) The diameter of your circle should be approximately 1.8″.
Rnd 3: Alt-dc in the first st, work 1 more dc in the same st, dc in the next st, * 2 dc in the next st, dc in the next st, rep from * around. Join. (36 sts) The diameter of your circle should be approximately 2.75″.
Rnd 4: Alt-dc in the first st, work 1 more dc in the same st, dc in each of the next 2 sts, * 2 dc in the next st, dc in each of the next 2 sts, rep from * around. Join. (48 sts) The diameter of your circle should be approximately 3.5″.
Rnd 5: Ch 1, sc in the first st, work 1 more sc in the same st, sc in each of the next 3 sts, * 2 sc in the next st, sc in each of the next 3 sts, rep from * around. Join. (60 sts) The diameter of your circle should be approximately 4″.
Do not fasten off. Continue on to the Sides of the Basket.
Sides of the Basket
The section is worked in continuous rounds. I strongly suggest using a scrap piece of yarn to keep track of the beginning and ending of each round.
Rnd 1: Ch 1, bpsc in each st around. Do not join. (60 sts)
Rnd 2: Sc in each st around. (60 sts)
Rnd 3: BLO sc in each st around. (60 sts)
Do not fasten off. Continue on to the Triple Heart Design.
Triple Heart Design
This section is worked in continuous rounds. I strongly suggest using a scrap piece of yarn to keep track of the beginning and ending of each round.
*See The Chart Below For a Visual of the Triple Heart Design*
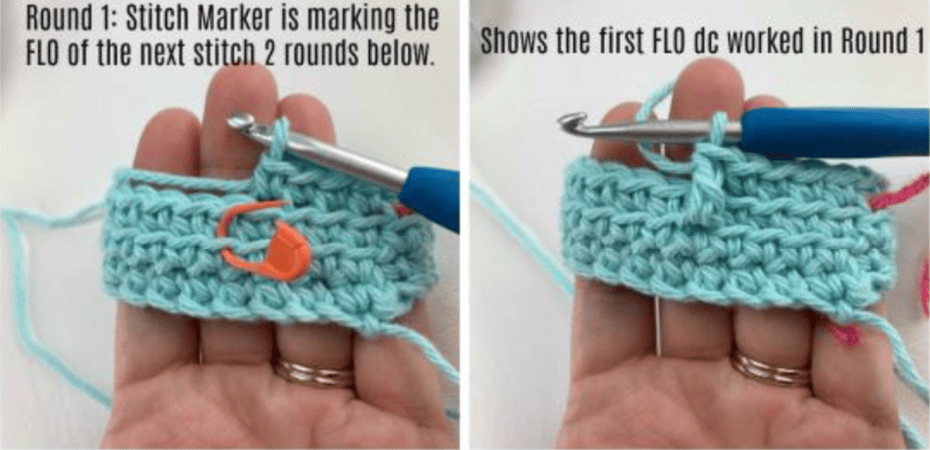
Rnd 1: BLO sc in each of the next 40 sts, FLO dc in the next st 2 rnds below, BLO sc in each remaining st around. (60 sts)
Rnd 2: BLO sc in each of the next 29 sts, FLO dc in the next st 2 rnds below, BLO sc in each of the next 9 sts, FLO dc in the next st 2 rnds below, BLO sc in the next st, FLO dc in the next st 2 rnds below, BLO sc in each remaining st around. (60 sts)
Rnd 3: BLO sc in each of the next 28 sts, FLO dc in the next st 2 rnds below, BLO sc in the next st, FLO dc in the next st 2 rnds below, BLO sc in each of the next 7 sts, FLO dc in the next st 2 rnds below, (BLO sc in the next st, FLO dc in the next st 2 rnds below) 2 times, BLO sc in each remaining st around. (60 sts)
Rnd 4: BLO sc in each of the next 27 sts, FLO dc in the next st 2 rnds below, (BLO sc in the next st, FLO dc in the next st 2 rnds below) 2 times, BLO sc in each of the next 5 sts, FLO dc in the next st 2 rnds below, (BLO sc in the next st, FLO dc in the next st 2 rnds below) 3 times, BLO sc in each remaining st around. (60 sts)
Rnd 5: BLO sc in each of the next 18 sts, FLO dc in the next st 2 rnds below, BLO sc in each of the next 7 sts, FLO dc in the next st 2 rnds below, (BLO sc in the next st, FLO dc in the next st 2 rnds below) 3 times, BLO sc in each of the next 5 sts, FLO dc in the next st 2 rnds below, (BLO sc in the next st, FLO dc in the next st 2 rnds below) 2 times, BLO sc in each remaining st around. (60 sts)
Rnd 6: BLO sc in each of the next 17 sts, FLO dc in the next st 2 rnds below, BLO sc in the next st, FLO dc in the next st 2 rnds below, BLO sc in each of the next 5 sts, FLO dc in the next st 2 rnds below, (BLO sc in the next st, FLO dc in the next st 2 rnds below) 4 times, BLO sc in each of the next 3 sts, FLO dc in the next st 2 rnds below, (BLO sc in the next st, FLO dc in the next st 2 rnds below) 3 times, BLO sc in each remaining st around. (60 sts)
Rnd 7: BLO sc in each of the next 16 sts, FLO dc in the next st 2 rnds below, (BLO sc in the next st, FLO dc in the next st 2 rnds below) 2 times, BLO sc in each of the next 3 sts, FLO dc in the next st 2 rnds below, (BLO sc in the next st, FLO dc in the next st 2 rnds below) 5 times, BLO sc in each of the next 3 sts, FLO dc in the next st 2 rnds below, BLO sc in each of the next 3 sts, FLO dc in the next st 2 rnds below, BLO sc in each remaining st around. (60 sts)
Rnd 8: BLO sc in each of the next 15 sts, FLO dc in the next st 2 rnds below, (BLO sc in the next st, FLO dc in the next st 2 rnds below) 3 times, BLO sc in each of the next 3 sts, FLO dc in the next st 2 rnds below, (BLO sc in the next st, FLO dc in the next st 2 rnds below) 4 times, BLO sc in each remaining st around. (60 sts)
Rnd 9: BLO sc in each of the next 16 sts, FLO dc in the next st 2 rnds below, (BLO sc in the next st, FLO dc in the next st 2 rnds below) 2 times, BLO sc in each of the next 3 sts, FLO dc in the next st 2 rnds below, (BLO sc in the next st, FLO dc in the next st 2 rnds below) 5 times, BLO sc in each remaining st around. (60 sts)
Rnd 10: BLO sc in each of the next 15 sts, FLO dc in the next st 2 rnds below, (BLO sc in the next st, FLO dc in the next st 2 rnds below) 3 times, BLO sc in each of the next 3 sts, FLO dc in the next st 2 rnds below, FLO hdc in the next st 1 rnd below, FLO dc in the next st 2 rnds below, BLO sc in each of the next 3 sts, FLO dc in the next st 2 rnds below, FLO hdc in the next st 1 rnd below, FLO dc in the next st 2 rnds below, BLO sc in each remaining st around. (60 sts)
Rnd 11: BLO sc in each of the next 16 sts, FLO dc in the next st 2 rnds below, BLO sc in each of the next 3 sts, FLO dc in the next st 2 rnds below, BLO sc in each remaining st around. (60 sts)
Rnds 12 – 14: BLO sc in each st around. (60 sts) Join with a sl st at the end of Rnd 14.
Do not fasten off. Continue on to the Ribbed Cuff. Approximate height at this point is 4″ H.
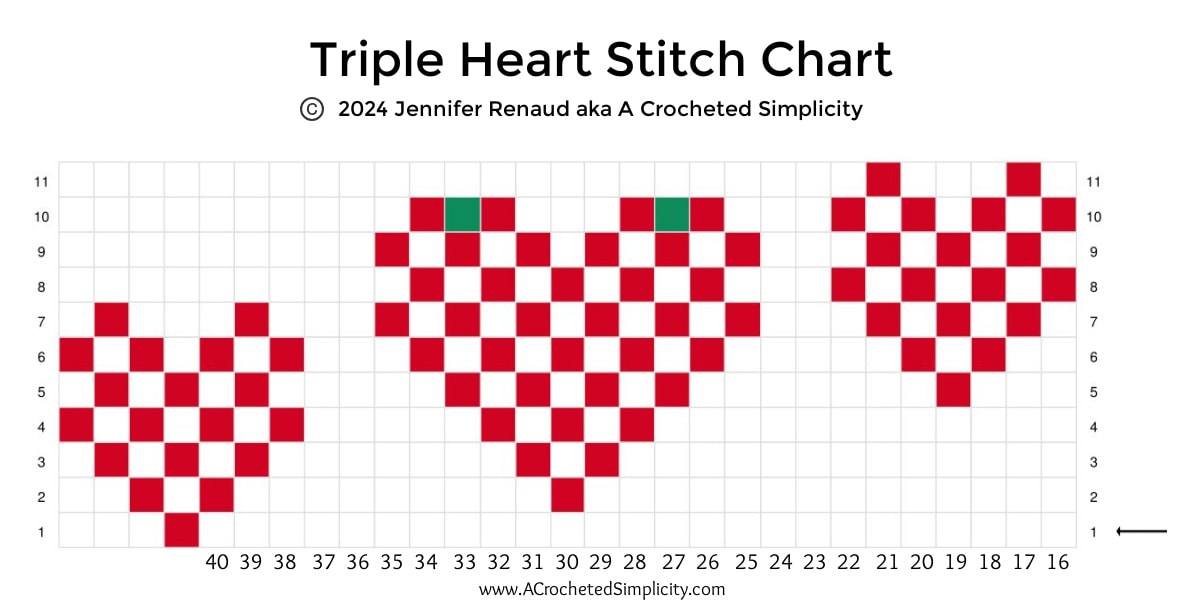
How To Read The Chart Above
- Read the chart from right to left, bottom to top.
- The Red squares indicate when you’ll work a dc. The Green squares indicate when you’ll work a hdc.
- Make sure to work the dc in the front loops of stitches 2 rounds below the current round.
- Make sure to work the hdc in the front loops of stitches 1 round below the current round.
- The horizontal numbers along the bottom of the chart are stitch numbers.
- The vertical numbers indicate the round you’re on. Begin following the chart and working a dc in round 1 of the Triple Heart Design.
- After working Round 11, continue with Round 12 of the written instructions above.
Related: I think the Triple Heart Design would also look cute on the My Love Beanie, instead of just a single heart.
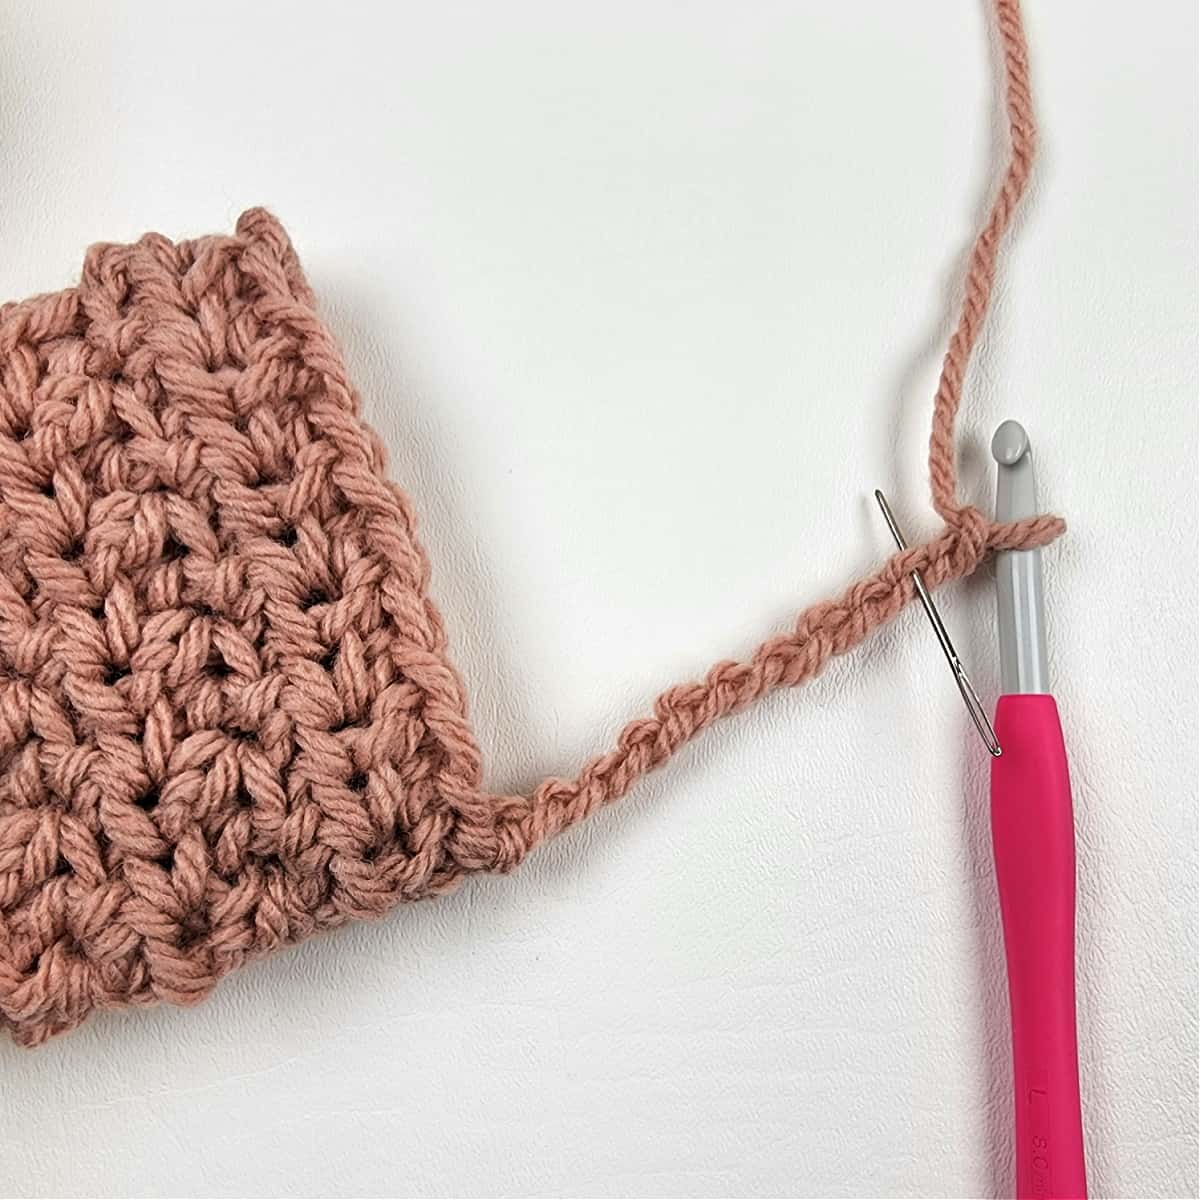
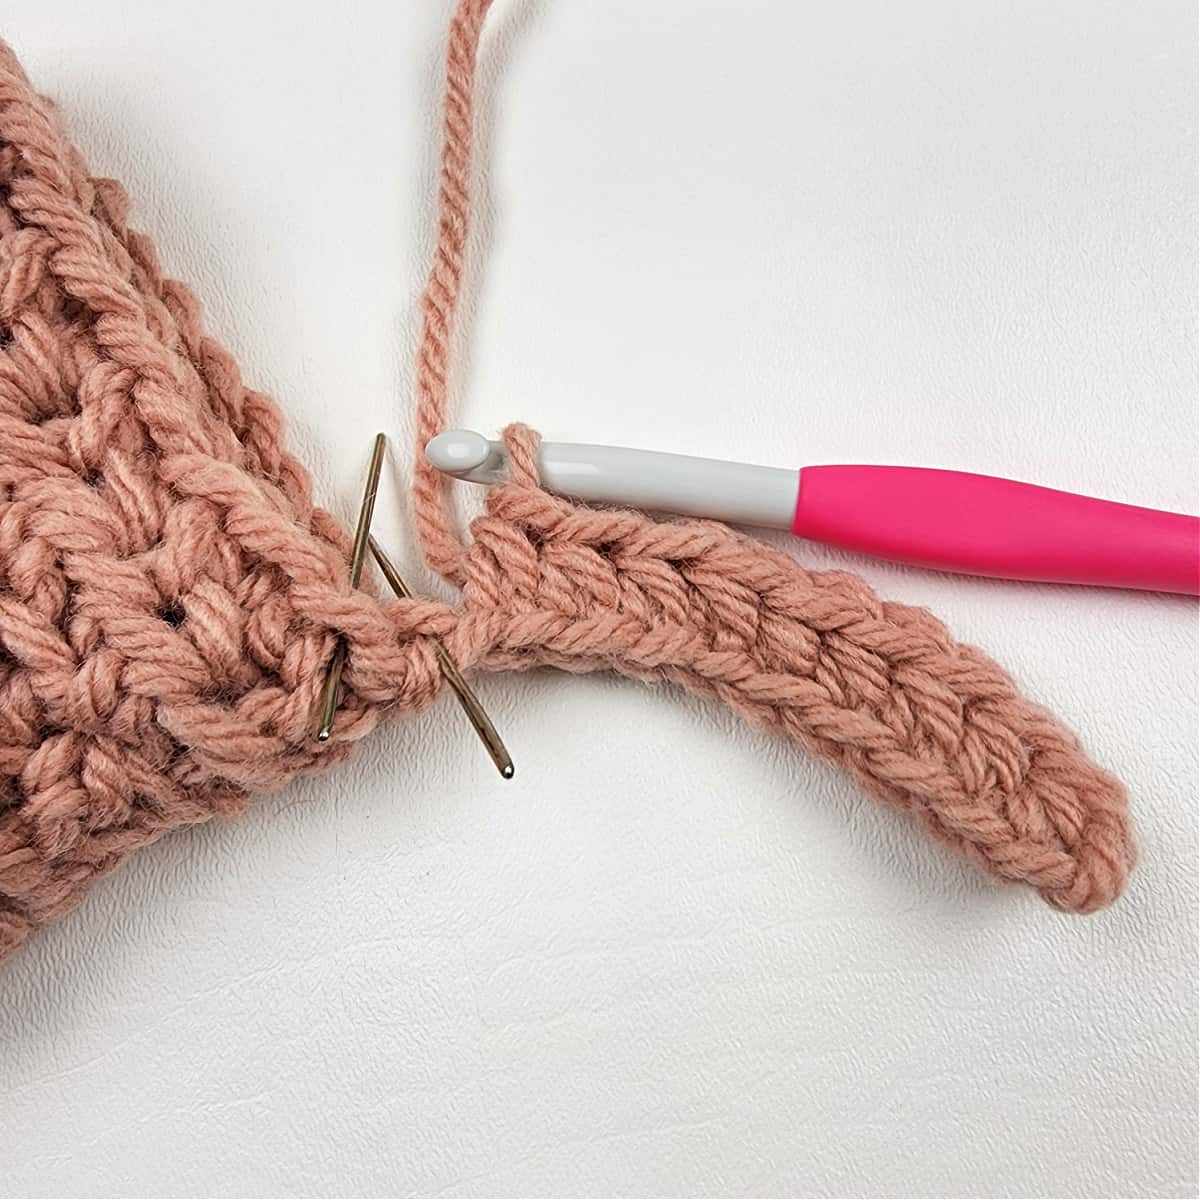
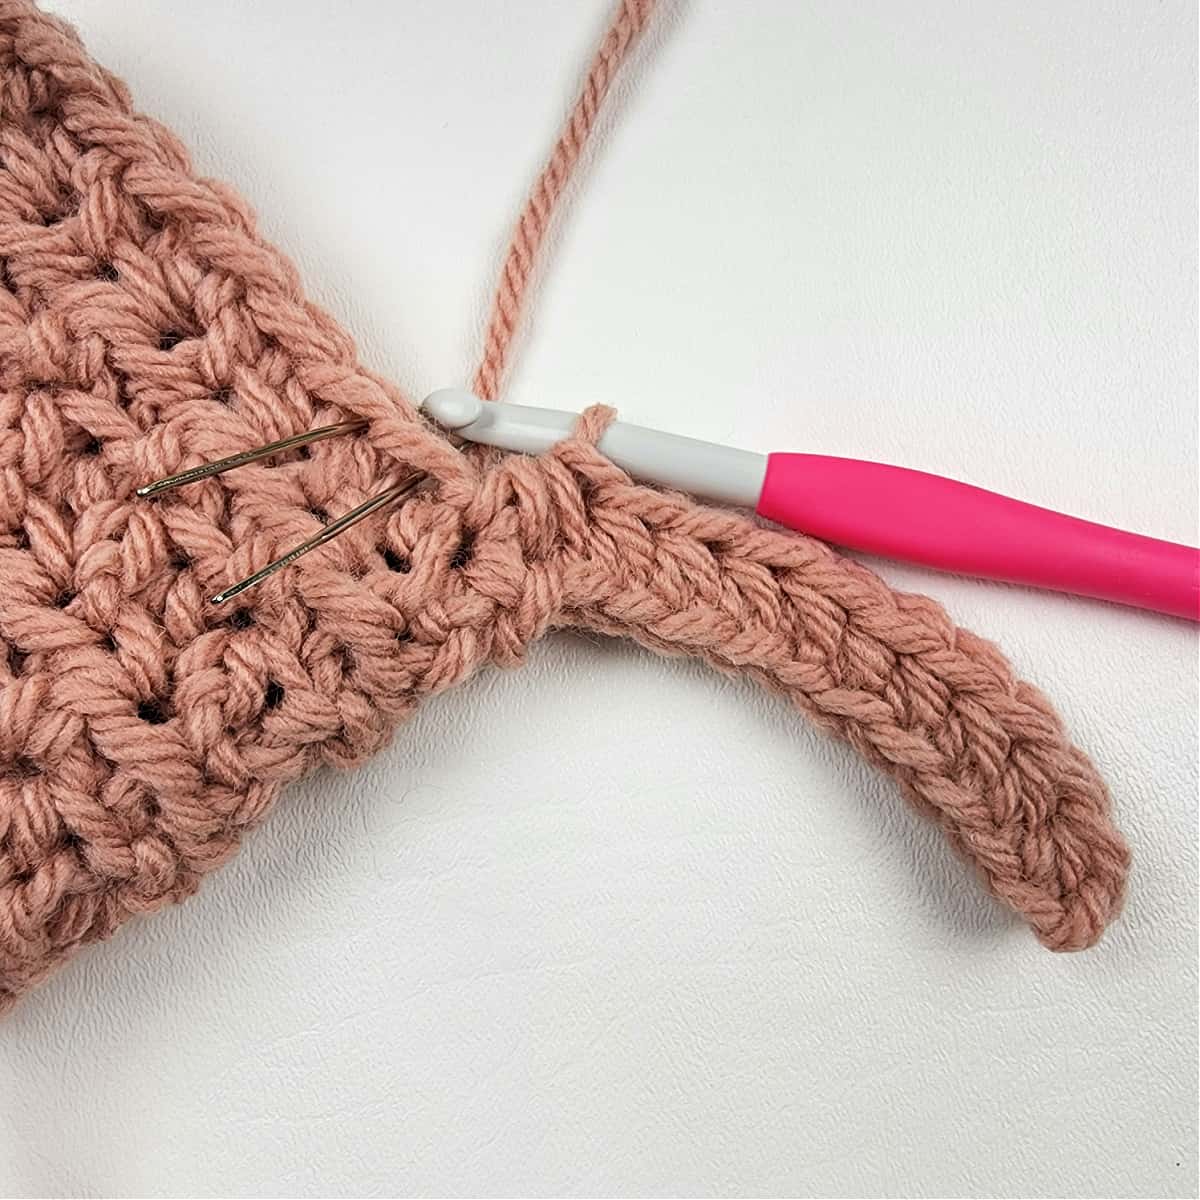
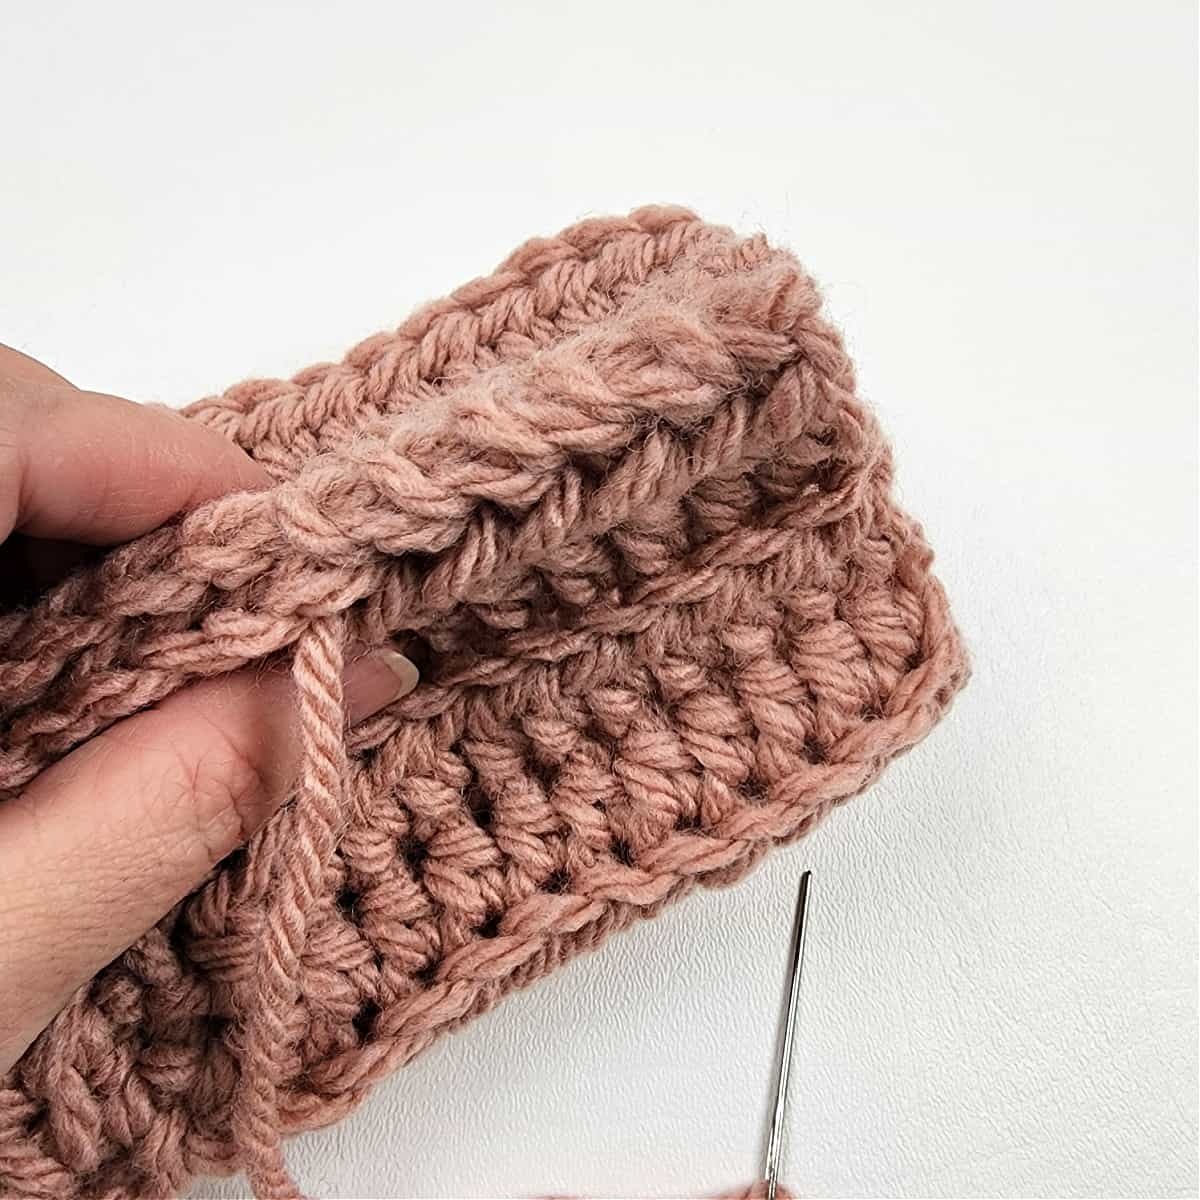
Ribbed Crochet Cuff
Do not count stitches in the photos below. These photos are from another design, but the crochet technique is exactly the same.
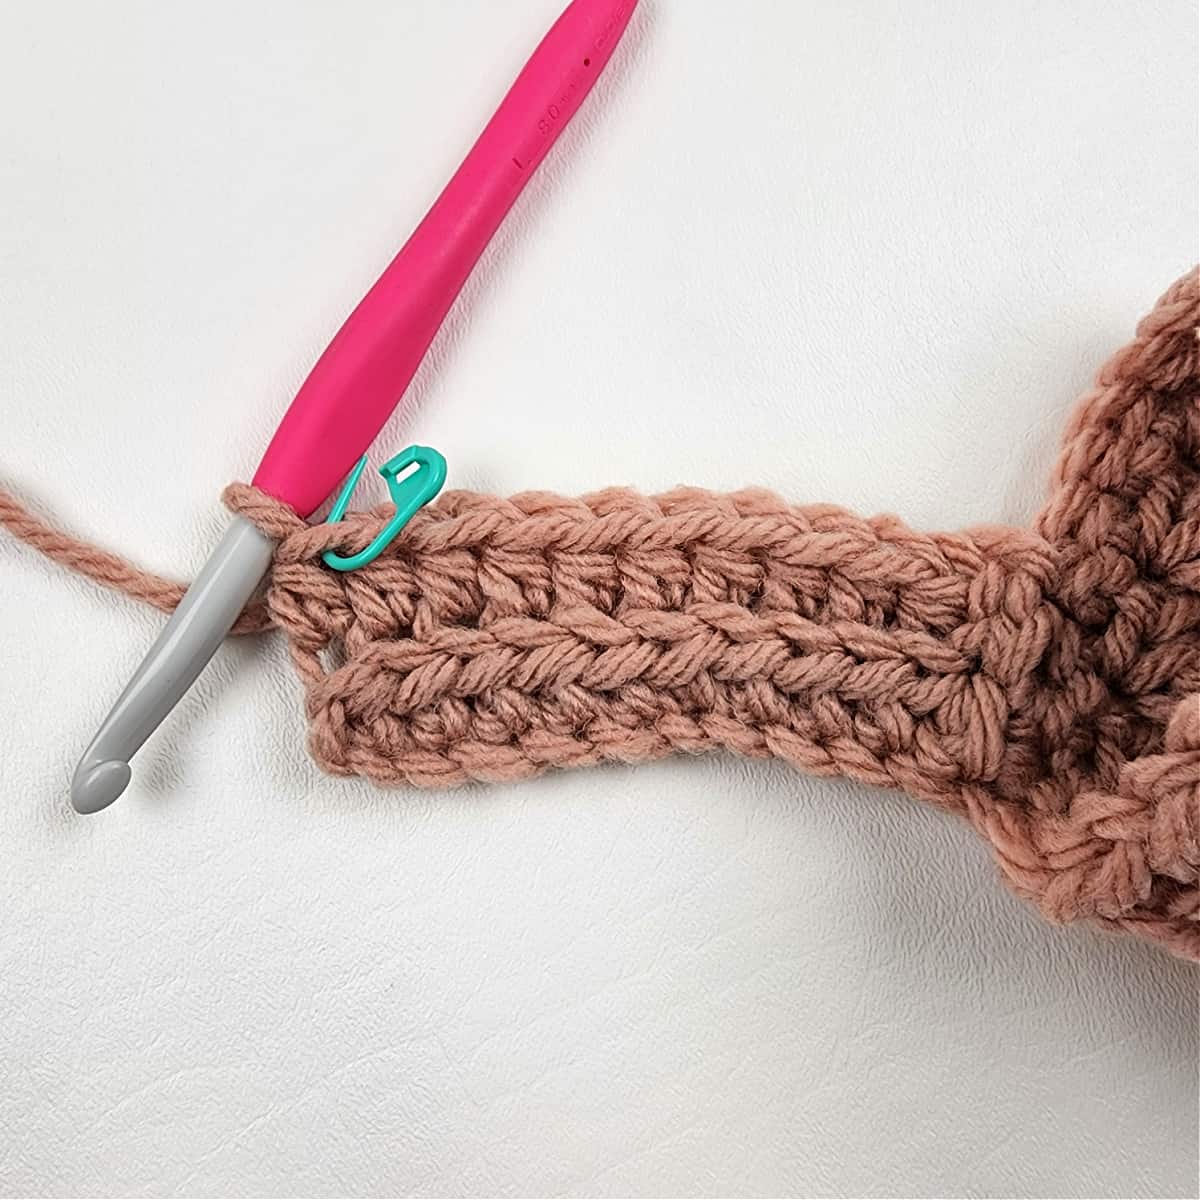
Row 1: Continuing on from the triple heart design, ch 13, working into the back humps of the ch, hdc in the 2nd ch from your hook, hdc in each of the next 10 sts, hdc2tog in next st and same st as ch 13. Do not turn yet. (12 sts)
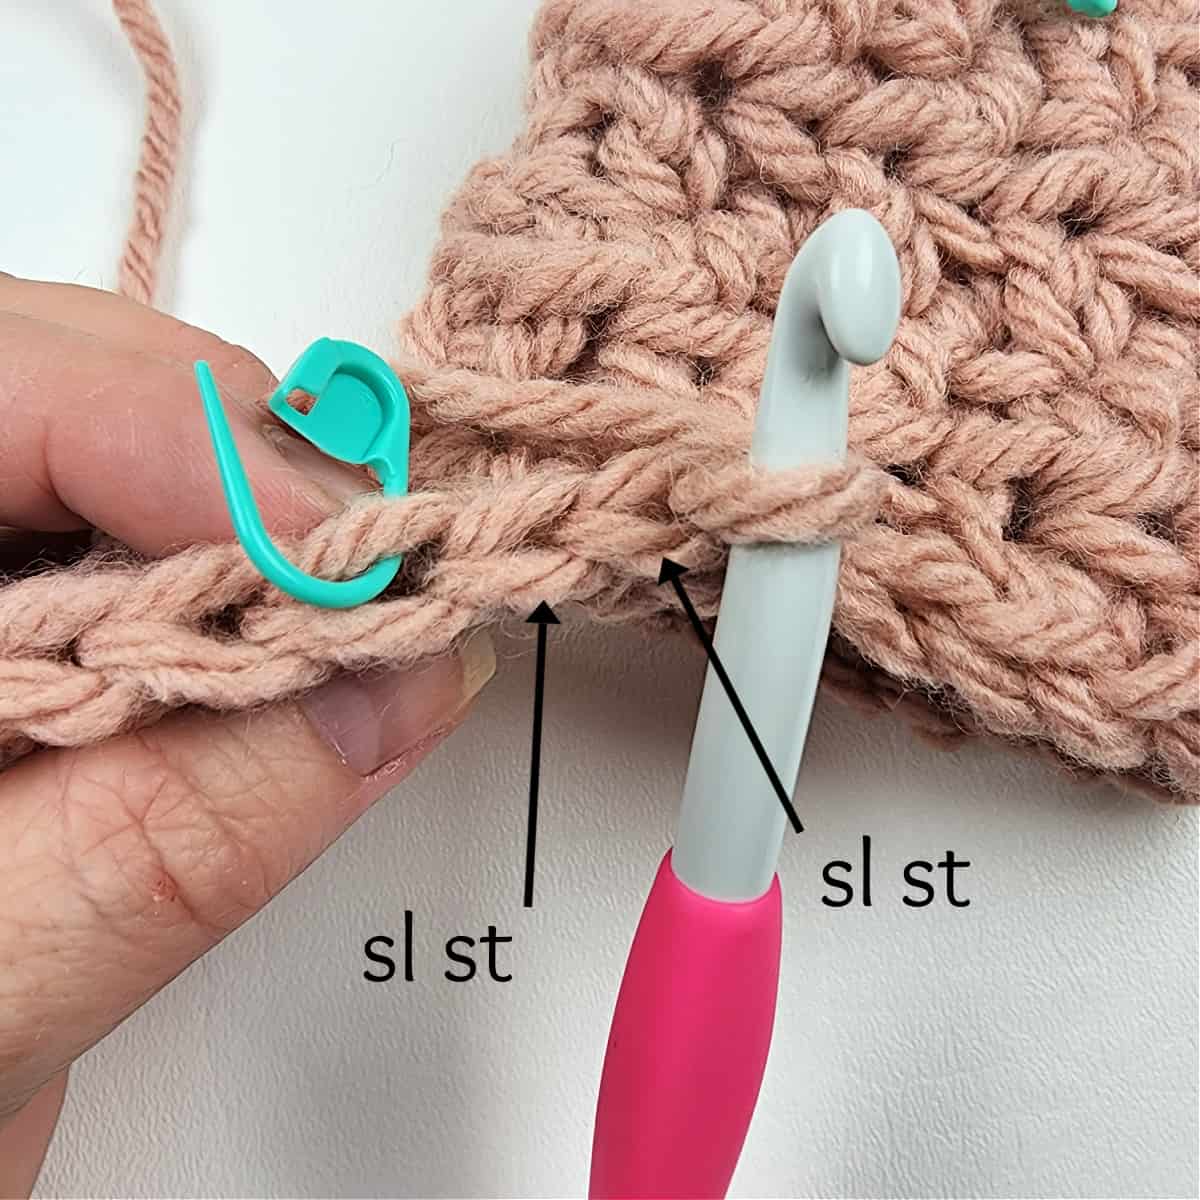
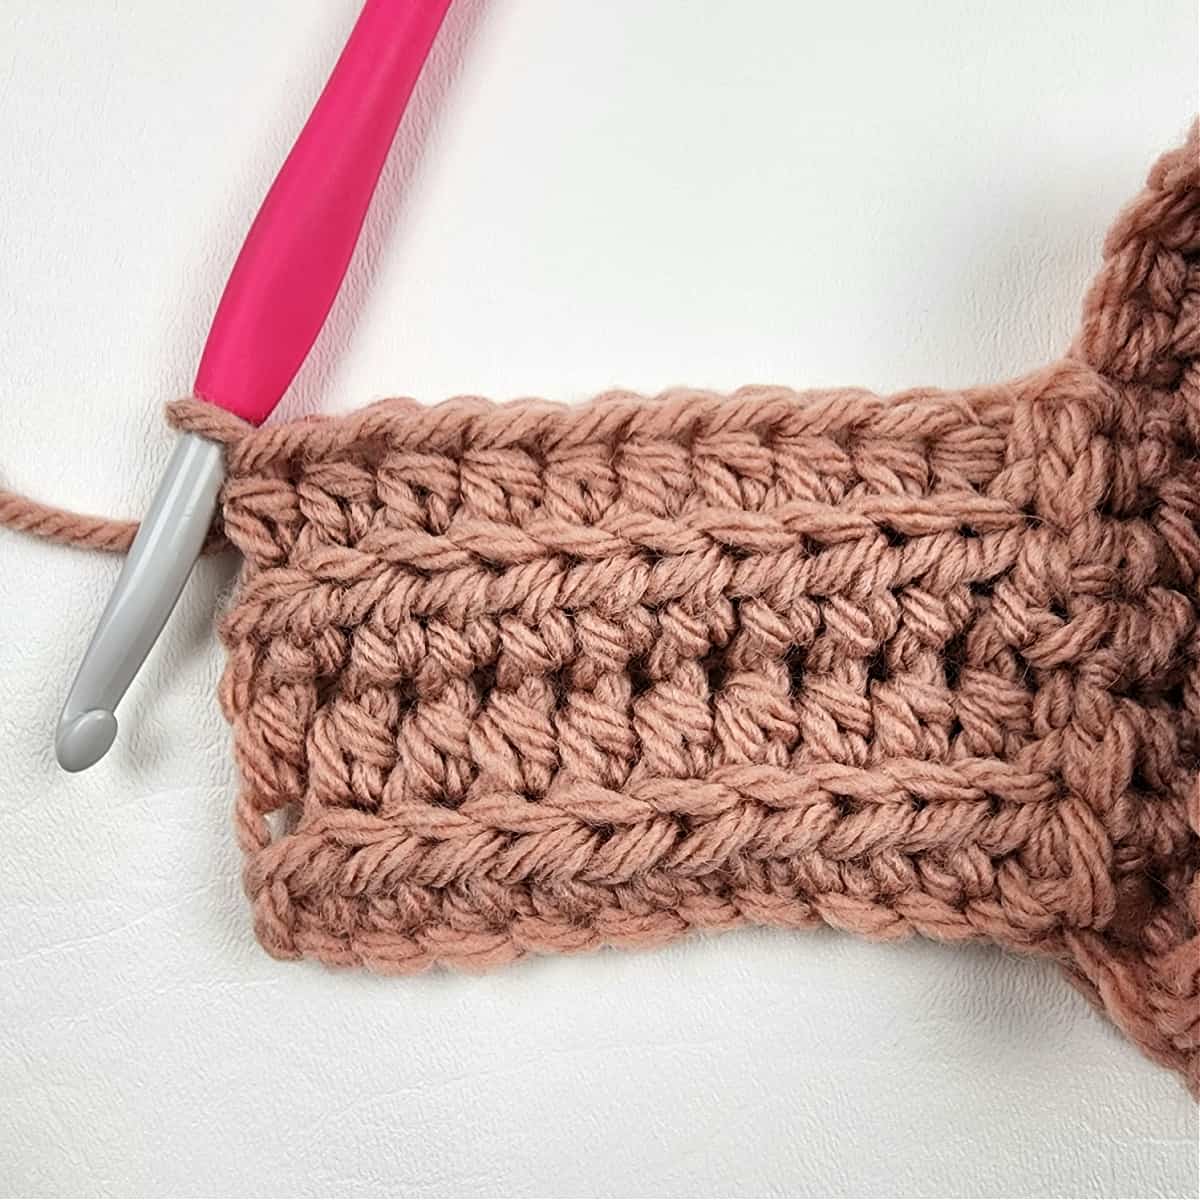
Row 2: ( Sl st into the NEXT st along the top edge of the cozy ) 2 times, Turn, BLO hdc in each of the next 12 sts. Turn. (12 sts)
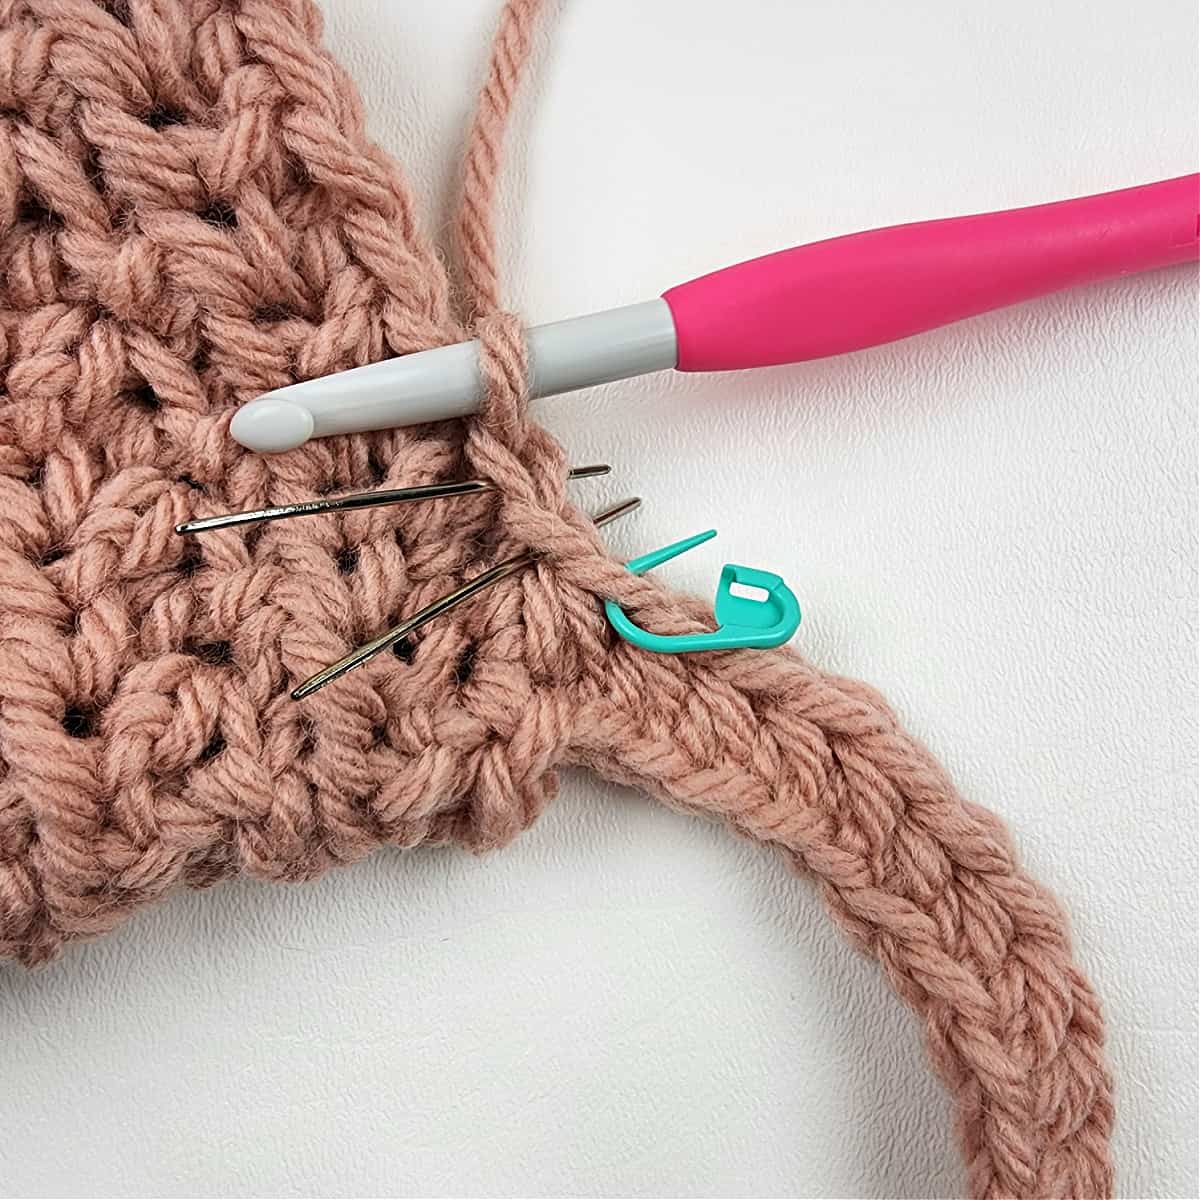
Row 3: Ch 1, BLO hdc in the first st, BLO hdc in each of the next 10 sts, BLO hdc2tog in the next st and the NEXT st along the top edge of the cozy. (12 sts)


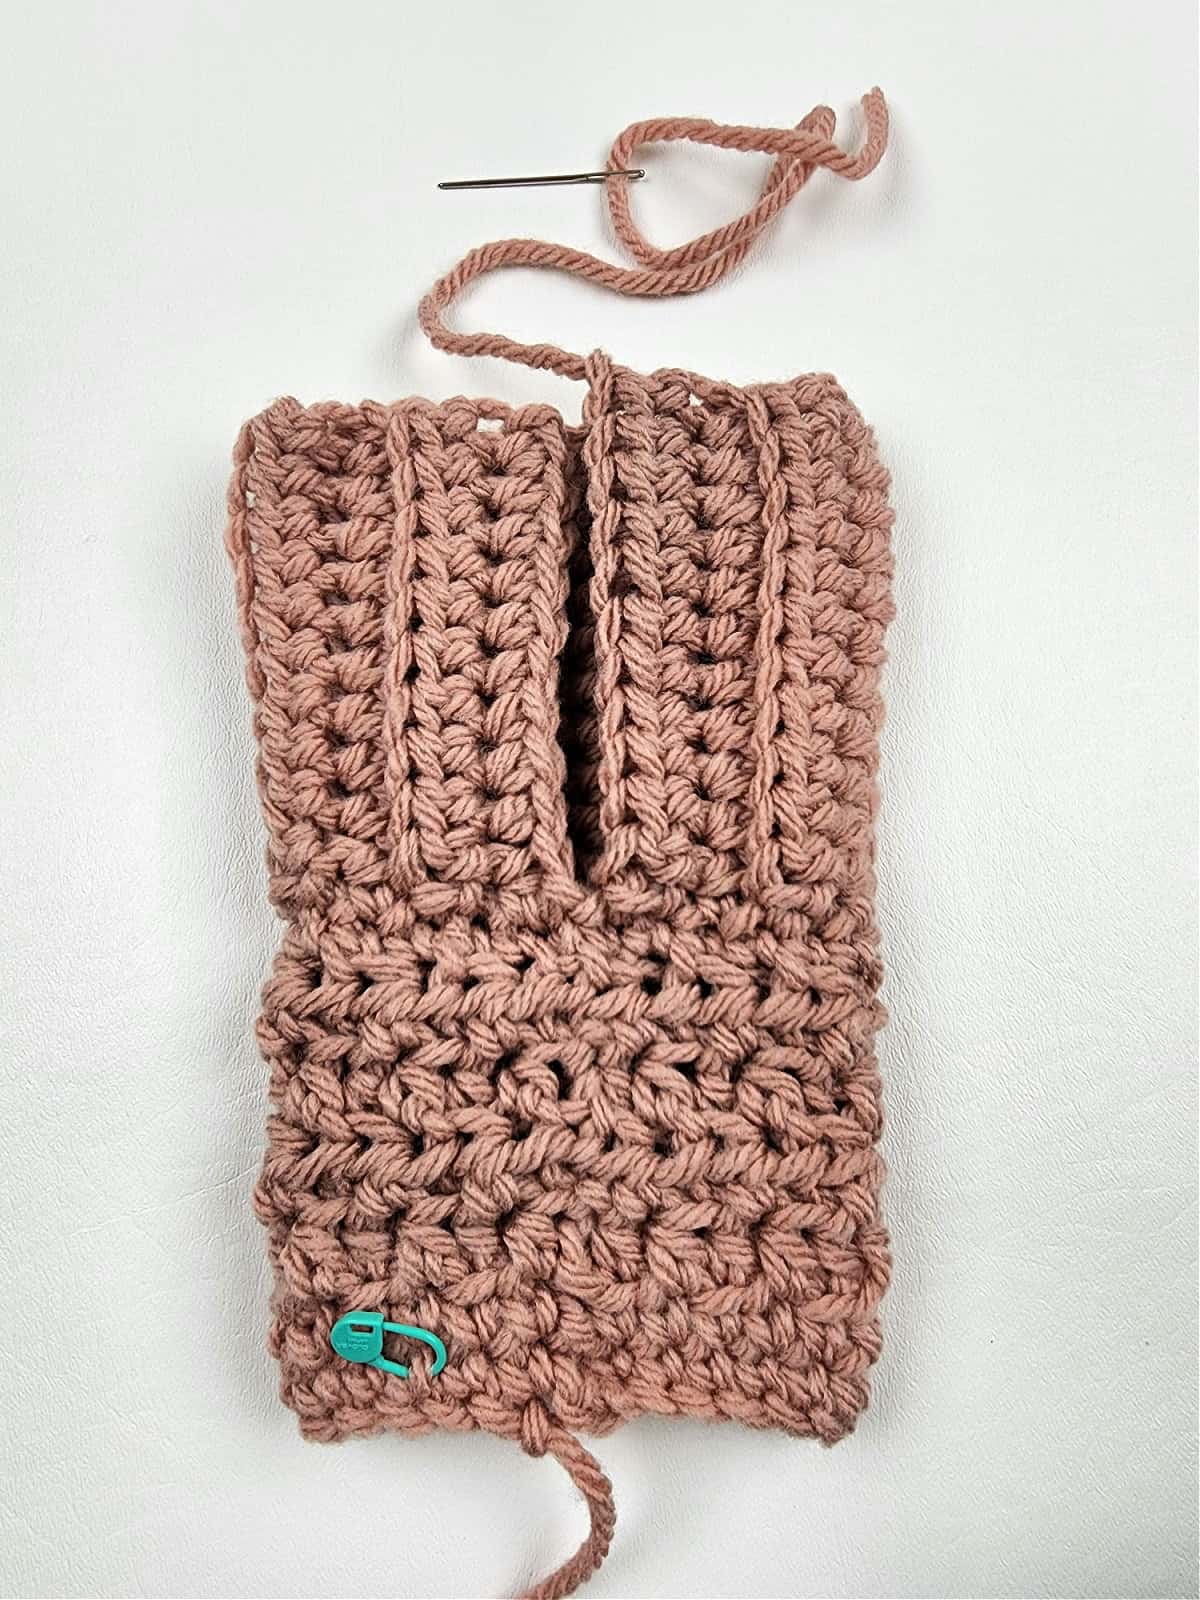
Rows 4 – 39: Rep Rows 2 – 3.
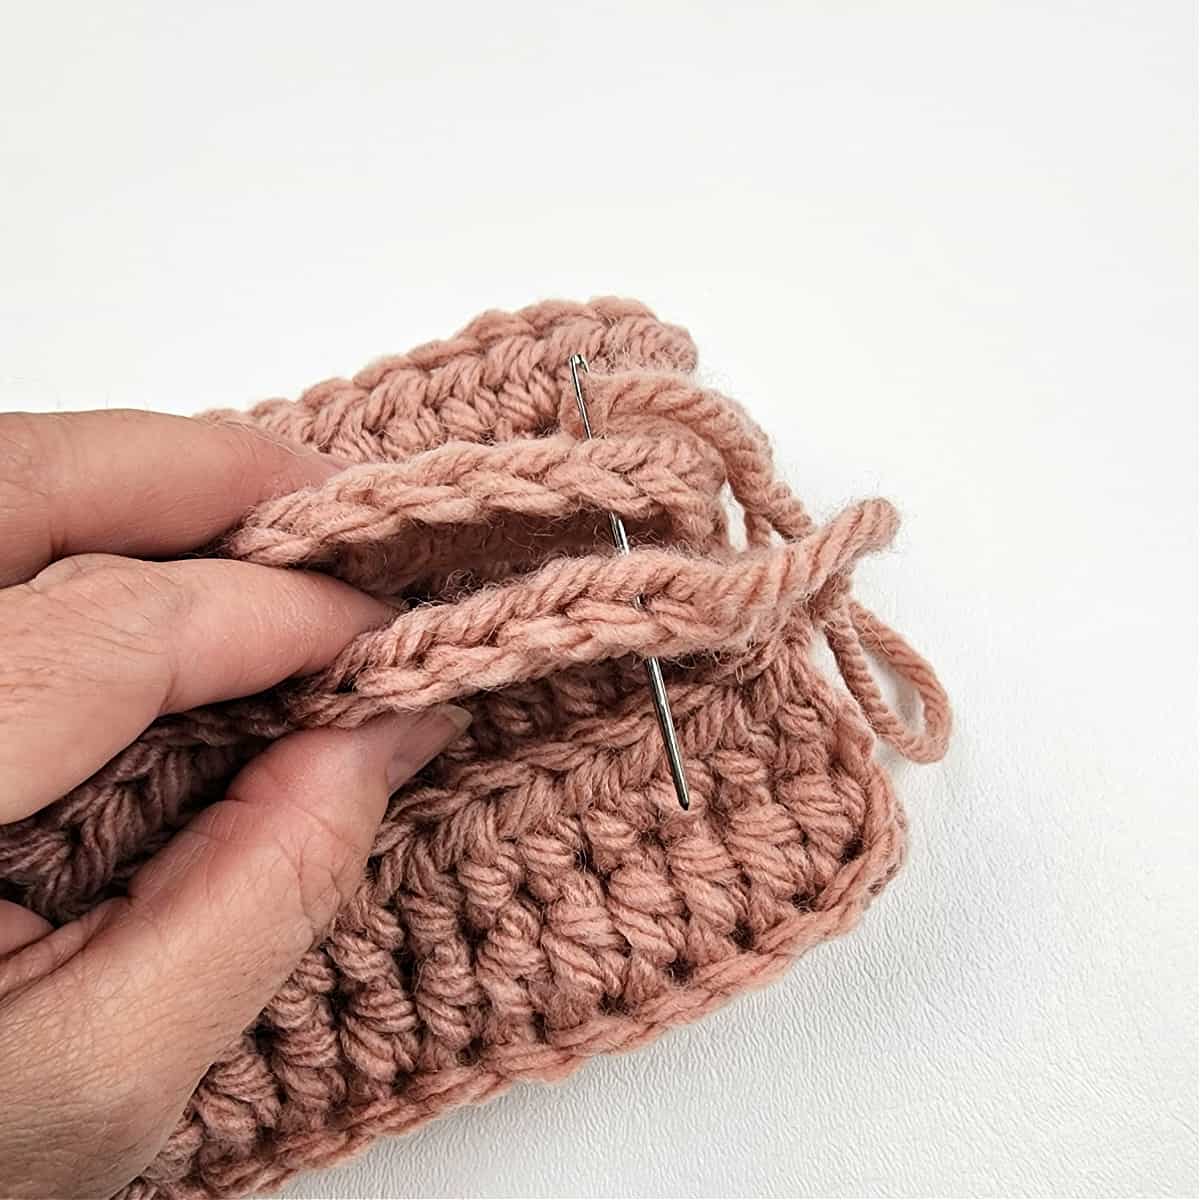
Fasten off leaving a 12″ tail of yarn. Using a yarn needle and the tail of yarn, whipstitch the last row to the first row. Weave in ends. Fold the cuff in half to finish the look.

Questions Crocheters Frequently Ask About Crochet Plant Pot Covers
If you have any questions that I haven’t answered below, always feel free to reach out to me, (e-mail me: ACrochetedSimplicity at Gmail dot Com), and I’ll do my best to help!
What is the best yarn for a house plant basket?
Cotton yarn plant pot covers are my favorite things to use to cover plant pots. Cotton yarn is absorbent which is great for holding live houseplants. Cotton is also machine washable and dryable for easy care.
How do you crochet a sturdy plant pot cover?
There are several different ways you can make sure that the plant pot cover you’re making is sturdy, but the easiest way to stiffen up your yarn is to use a crochet hook that is much smaller than the suggested hook size on the yarn label.
You can also crochet with two strands of yarn, instead of one.
Can I used recycled containers inside my plant basket?
Absolutely! Empty cans from canned goods work great inside plant baskets as do yogurt cups and mason jars, just to name a few.
I MADE IT! NOW WHAT?
Pin this post!: Save this crochet plant pot cover crochet pattern to your Pinterest boards so that you can come back and make it again.
Leave a comment below: We love to hear your feedback.
Share Your Finished Projects on Facebook or Instagram: I love to see your finished projects! Share with us on social media and tag me @acrochetedsimplicity or use the hashtag #ACrochetedSimplicity so I can find your posts.
JOIN US IN THE FACEBOOK COMMUNITY GROUP!
Come share your finished projects with us in the A Crocheted Simplicity Crochet Community Group on Facebook. Join us for fun community events such as crochet alongs, join in on crochet conversations, ask questions, get advice, and share your love for crochet!

More Crochet Patterns for Home Decor I Think You’ll Love
More Valentine’s Crochet Ideas
Are you looking for more free Valentine’s crochet patterns? We have several more patterns for Valentine’s gifts such as accessories, small Valentine’s for kids, and kitchen decor.
A beautiful pattern! Thank you.
Thank you, Darlene!