Candy Stripes Crochet C2C Blanket
Combine beautiful texture and vibrant stripes with neutrals in between and you’ll get this crochet c2c blanket!
It works up quickly in increases and then decreases and if you use a variegated yarn in between, you won’t have to think about what color to choose next when switching. The yarn does all the thinking for you!
You’ll find the crochet c2c blanket pattern free below, or you can find an ad-free printable PDF (including all photo tutorials) on Ravelry, or on Etsy (aff).
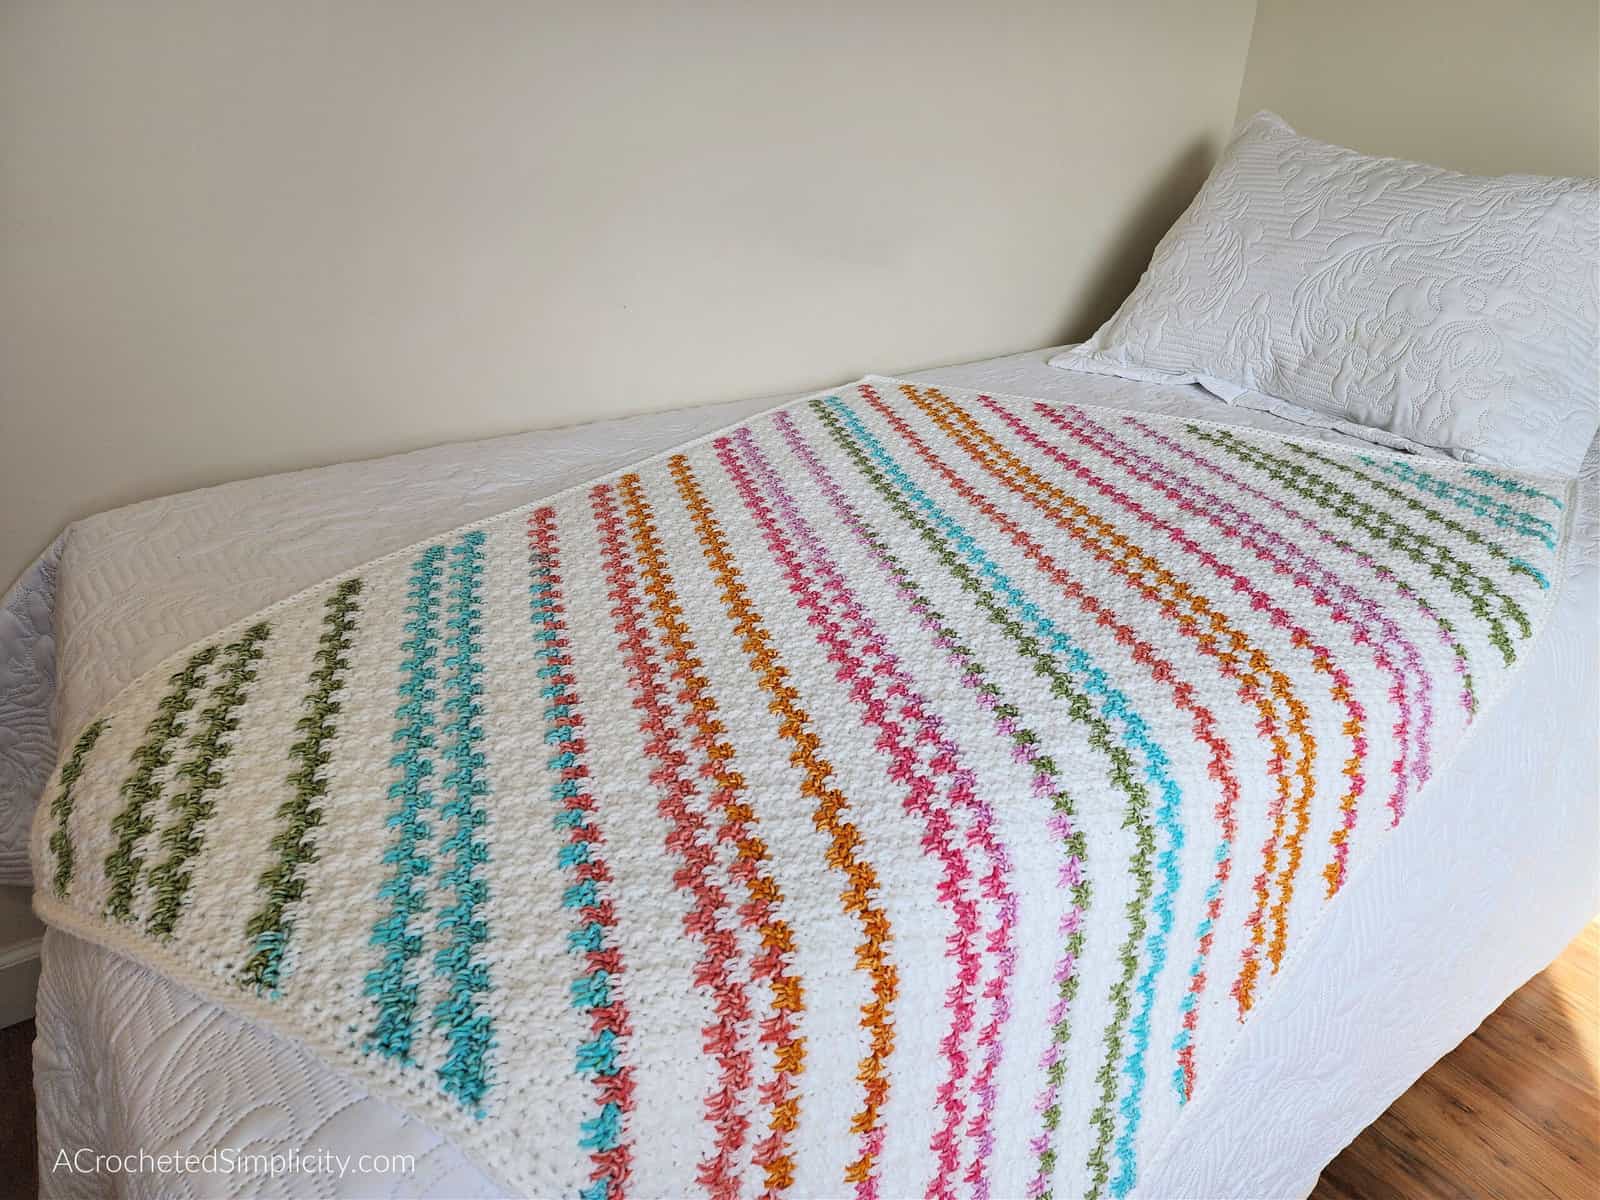
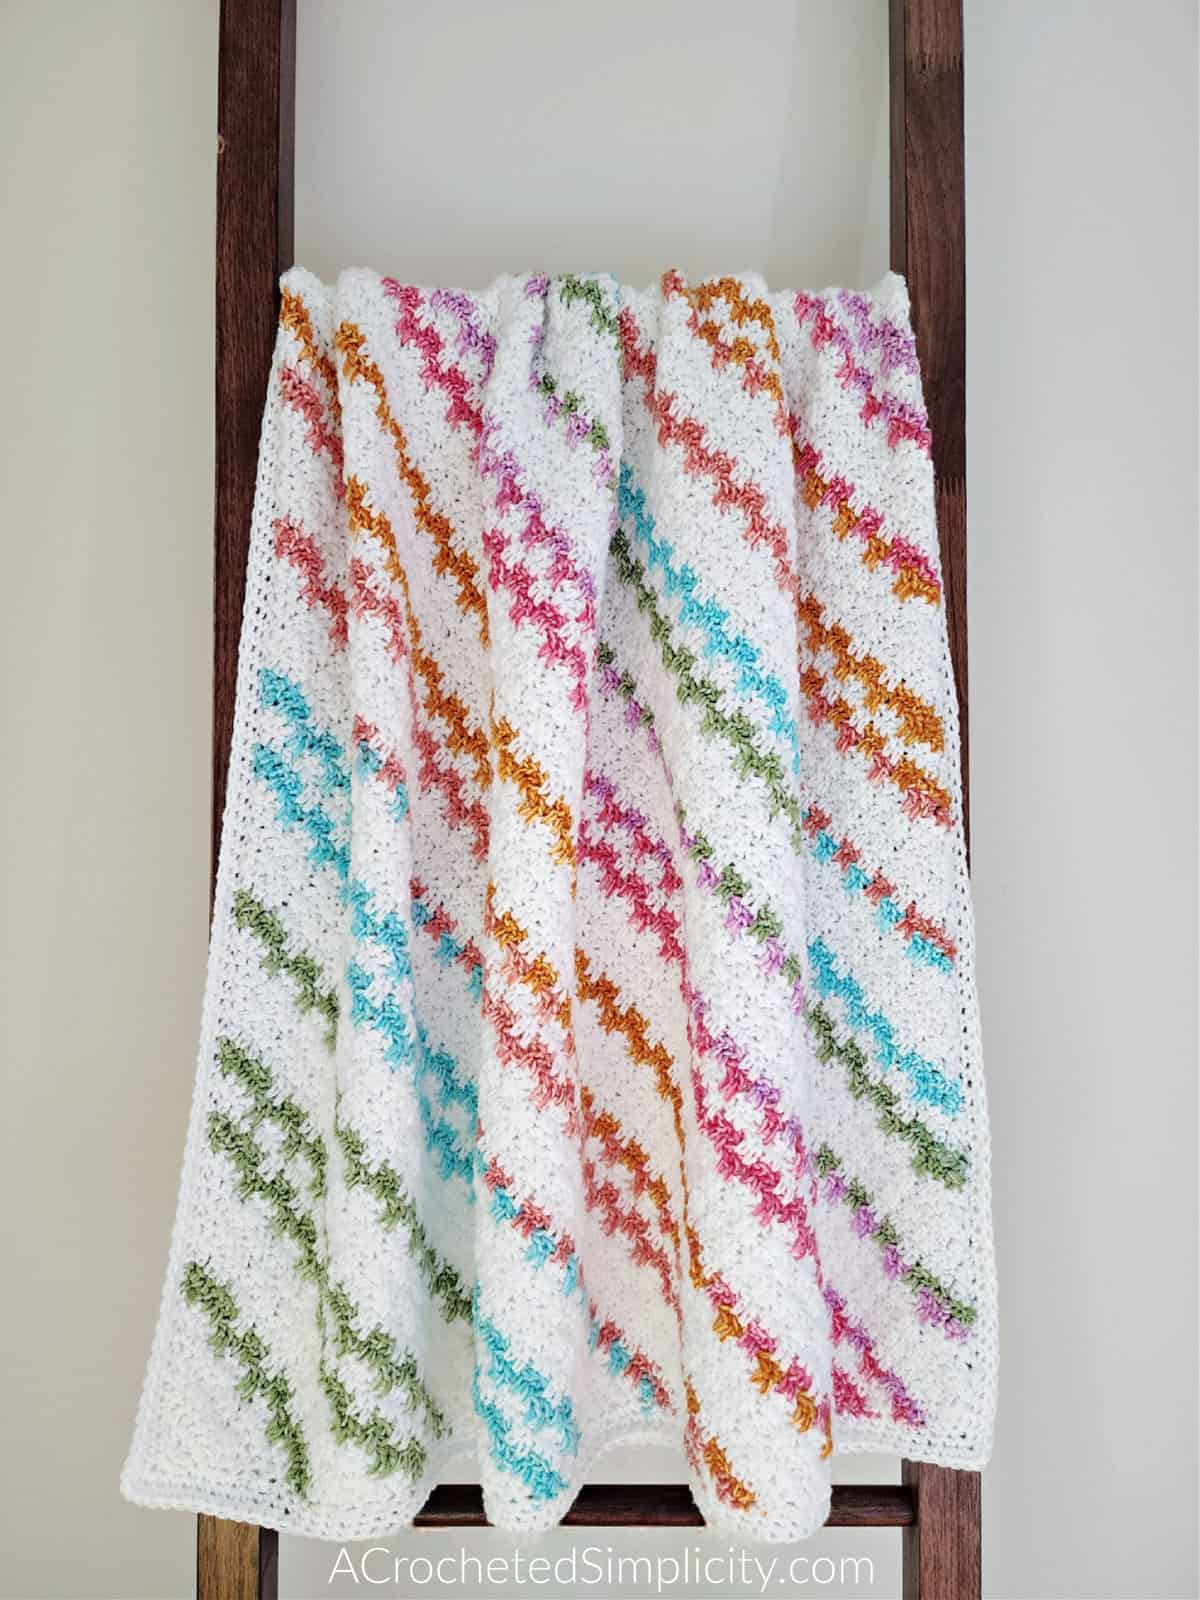
The Candy Stripes Afghan is crocheted corner-to-corner (also known as on the bias) and alternates between a solid yarn and self-striping one. You can also choose to crochet this up in one type of yarn, without switching in between, but I think the pops of color add so much charm to the final look of the blanket.
While I sat and crocheted the Candy Stripes Blanket, I kept looking at it and thinking “this reminds me of something”. Every once in a while, I would lay it all out on my lap and stare at it.
One day, it finally dawned on me. My new blanket reminded me of Fruit Stripes Gum, a favorite gum from my childhood! And that’s where its name comes from.
Related: If you want to practice the chevron technique next, make sure to check out my Agate Beach Chevron Blanket Pattern.
How to Crochet a C2C Blanket
The Candy Stripes Blanket is crocheted on the bias which is also known as C2C or corner to corner crochet. The two major benefits of such blankets is that you can easily increase the width and length of your blanket as you’re crocheting it and they seem to work up more quickly than blankets crocheted in horizontal rows or in rounds.
For this crochet c2c blanket, you’ll be crocheting increases first, then adding to the length of the piece, before you decrease. After your blanket is the intended length, you’ll finish it off by crocheting a border around the perimeter.
How To Get The
Candy Stripes Blanket Pattern
Option 1: Scroll down for the free easy crochet c2c blanket pattern right here in this blog post.
Option 2: Purchase the ad-free printable PDF from one of my shops:
Adjusting the Size of Your Blanket
The crochet blanket pictured is lapghan size. The written crochet pattern includes instructions to make a crochet lapghan blanket. You can easily increase or decrease the length and width of your blanket by crocheting more rows.
For help determining what size to make your crocheted blanket, check out my Standard Blanket Size Chart.
Yarn
For the Candy Stripes Crochet C2C Blanket, I chose Lion Brand Yarns Pound of Love in White and Mandala Ombre in Happy. Both of these are acrylic yarns and have beautiful shades with Pound of Love offering solids while Mandala Ombre comes in variegated shades.
Pound of Love is the perfect yarn for large crochet projects because the yardage in one ball is incredible at 1,020 yards, making it affordable too! And if you want to make a bright blanket without changing your yarn throughout, a variegated cake of yarn like Mandala Ombre is perfect. It is available in 12 beautiful self-striping colorways.
These yarns are machine-washable and highly-durable, ideal for blankets that have a lot of wear in them.
How to Style a Crochet Blanket
1. Living Room: Drape it over the back of your sofa or an armchair for a chic yet inviting look.
2. Bedroom: Layer it at the foot of your bed for added warmth and a luxurious aesthetic.
3. Reading Nook: Pair it with a comfy chair, a good book, and a cup of tea for the ultimate cozy corner.
4. Seasonal Decor: Use crochet blankets in warm, earthy tones for fall and winter or light pastels for spring and summer.
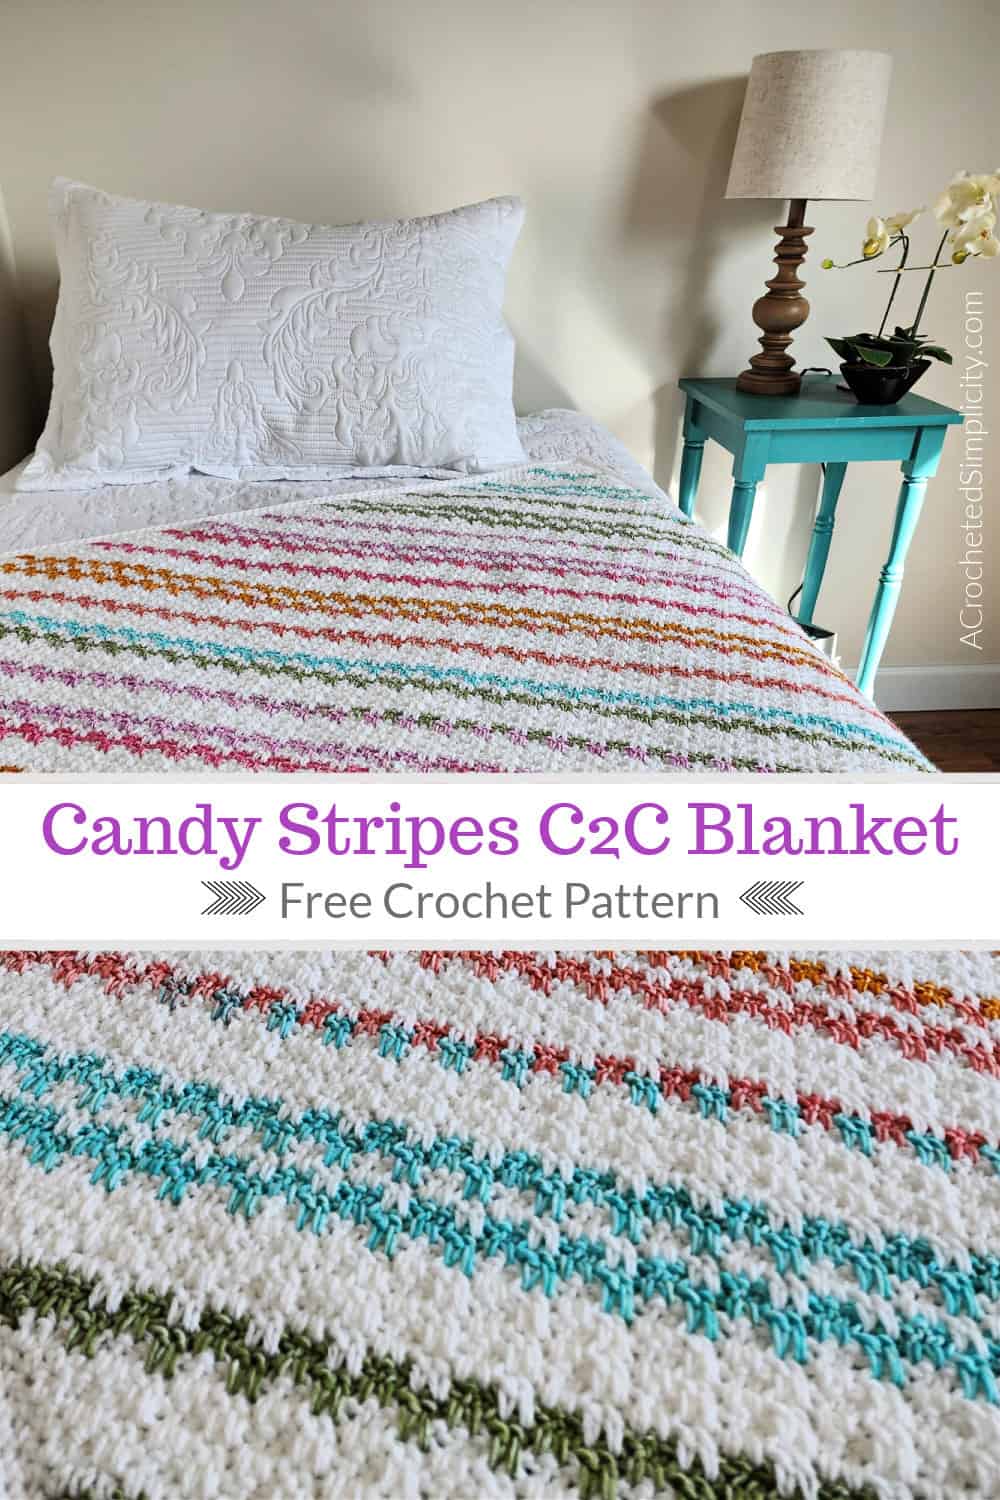
Candy Stripes Crochet C2C Blanket – Free Pattern
The easy crochet c2c blanket pattern is free below, but if you love to work offline, I’ve got a couple other great options for you.
Purchase the ad-free, printable PDF, (including all photo tutorials) on Ravelry, or on Etsy (aff).
Purchase the Candy Stripes Crochet C2C Blanket (aff): Lion Brand has a full kit of the Candy Stripes Lapghan, available on their website. The kit includes your choice of color and a digital copy of the crochet pattern.
This post contains affiliate links.
Materials
- Yarn: Worsted Weight / 4 / Yarn, Lion Brand Yarns Pound of Love and Lion Brand Yarns Mandala Ombre was used for the crochet c2c blanket shown in the photos.
- Yardage & Colors:
- White (MC): 2 balls / 2,040 yards
- Tranquil (CC): 2 cakes / 688 yards
- Crochet Hooks: K/10.5/6.50mm; or size needed to obtain gauge (My favorite crochet hooks are the Clover Amour Crochet Hooks, I’ve never had an ache in my hand since switching).
- Measuring Tape
- Scissors
- Yarn Needle
- Locking Stitch Markers
Abbreviations (US Terms)
- ch(s): chain(s)
- sl st(s): slip stitch(es)
- st(s): stitch(es)
- sc: single crochet
- dc: double crochet
- ext sc: extended single crochet
- extsc2tog: extended single crochet decrease
- Alt-dc: alternate double crochet
- yo: yarn over
- sp: space
- Rep: repeat
- Rnd: round
- RS: right side
- MC: Main Color
- CC: Contrasting Color
- SM: stitch marker
Experience Level
- Easy
Gauge
- In extended double moss stitch: 10 sts = 3″; 8 rows = 3″
- Gauge isn’t crucial.
Sizes
- 44″ W x 54″ L
- Instructions are given to make ANY size crochet corner to corner blanket.
Special Stitches
- Extended Single Crochet (ext sc): Insert hook into stitch indicated, yo, pull up a loop, yo, pull thru 1 loop on hook, yo, pull thru remaining two loops on hook.
- Extended Single Crochet Decrease (extsc2tog): Insert hook into stitch indicated, yo, pull up a loop, yo, pull thru 1 loop on hook, insert hook into next st, yo, pull up a loop, yo, pull thru 1 loop on hook, yo, pull thru remaining loops on hook.
- Alternate Double Crochet (alt-dc): Do not ch, instead, insert your hook into the first st, yo, pull up a loop, yo, pull thru both loops, insert your hook between the legs of the st just made, yo, pull up a loop, yo, pull thru one loop, yo, pull thru remaining loops.
- Extended Double Moss Stitch: This crochet C2C blanket is simply the Extended Double Moss Stitch pattern crocheted corner to corner (on the bias). See Swatch #2 in the photo tutorial.
Pattern Notes
- Turning chains are not included in stitch count, unless noted otherwise.
- The first stitch of each row is worked into the same stitch as the turning chain, unless noted otherwise.
- Yarn Notes: Lion Brand Yarns Pound of Love in White and Lion Brand Yarns Mandala Ombre in Happy were used for the sample shown in the photos.
- Pound of Love: 100% Premium Acrylic, (1,020 yards / 454 g / 16 oz / 932 m).
- Lion Brand Yarns Mandala Ombre: 100% Acrylic, (344 yards, 150 g, 5.3 oz, 315 m).
- Yardage & Color
- White (MC): 2 balls / 2,040 yards
- Tranquil (CC): 2 cakes / 688 yards
- This pattern includes easy instructions to make this blanket ANY width and length you’d like. However, the yardage listed above is for a blanket the same size as the sample.
- Color Changes: Join your new color, on the last pull thru, of the last stitch of the row before working the new color.
- Construction Notes: The body of this blanket is worked on the bias, or more well-known as crochet corner to corner. A simple border is then added by crocheting around the perimeter of the blanket.
Candy Stripes C2C Blanket – Written Pattern
Color Sequence
Beginning with the main color, I worked the following color sequence throughout my entire blanket.
- Main Color: 6 Rows
- Contrasting Color: 2 Rows
- Main Color: 6 Rows
- Contrasting Color: 2 Rows
- Main Color: 2 Rows
- Contrasting Color: 2 Rows
Main Color: I did not fasten off the MC when I switched to CC. I simply carried the MC up along the edge of the blanket so I had less ends to weave in.
Contrasting Color: I DID fasten off the CC when I switched to MC.
Tip: If you choose to carry your MC along the edge of the blanket (as I did), make sure you do not pull the yarn too tight when you pick it back up, or it will cinch one edge of your blanket.
Beginning Rows
Row 1: With MC & a 6.50mm crochet hook, ch 3, work 4 dc in the 1st ch. Turn. (4 sts)
Stitch Marker: Place a SM in the bottom of the 1st ch to mark the first corner. This will come in handy when working the crochet border.
Row 2: Ch 1, (alt-dc, dc) in the first st, 2 dc in each remaining st across. Turn. (8 sts)
Row 3: Ch 1, 2 ext sc in the first st, ch 2, skip each of the next 2 sts, ext sc in each of the next 2 sts, ch 2, skip each of the next 2 sts, 2 ext sc in the last st. Turn. (10 sts)
Row 4: Ch 1, 2 ext sc in the first st, ext sc in the next st, dc in each of the next 2 sts 2 rows below, ch 2, skip each of the next 2 sts, dc in each of the next 2 sts 2 rows below, ext sc in the next st, 2 ext sc in the last st. Turn. (12 sts)
Row 5: Ch 1, 2 ext sc in the first st, ext sc in each of the next 2 sts, ch 2, skip each of the next 2 sts, dc in each of the next 2 sts 2 rows below, ch 2, skip each of the next 2 sts, ext sc in each of the next 2 sts, 2 ext sc in the last st. Turn. (14 sts)
Row 6: Ch 1, 2 ext sc in the first st, ext sc in the next st, (ch 2, skip each of the next 2 sts, dc in each of the next 2 sts 2 rows below) 2 times, ch 2, skip each of the next 2 sts, ext sc in the next st, 2 ext sc in the last st. Turn. (16 sts)
Do not fasten off. Continue on to Increase Rows.
Make sure to follow the color scheme noted above and to switch yarns when needed.
Increase (Inc) Rows
In this section, you will be increasing the width of your blanket. You will work an increase at the beginning and end of each row. The stitch count for each row increases by 2 stitches.
Inc Row 1: Ch 1, 2 ext sc in the first st, (ch 2, skip each of the next 2 sts, dc in each of the next 2 sts 2 rows below) rep from ( to ) across to the last 3 sts, ch 2, skip each of the next 2 sts, 2 ext sc in the last st. Turn.
Inc Row 2: Ch 1, 2 ext sc in the first st, ext sc in the next st, (dc in each of the next 2 sts 2 rows below, ch 2, skip each of the next 2 sts) rep from ( to ) across to the last 4 sts, dc in each of the next 2 sts 2 rows below, ext sc in the next st, 2 ext sc in the last st. Turn.
Inc Row 3: Ch 1, 2 ext sc in the first st, ext sc in each of the next 2 sts, (ch 2, skip each of the next 2 sts, dc in each of the next 2 sts 2 rows below) rep from ( to ) across to the last 5 sts, ch 2, skip each of the next 2 sts, ext sc in each of the next 2 sts, 2 ext sc in the last st. Turn.
Inc Row 4: Ch 1, 2 ext sc in the first st, ext sc in the next st, (ch 2, skip each of the next 2 sts, dc in each of the next 2 sts 2 rows below) rep from ( to ) across to the last 4 sts, ch 2, skip each of the next 2 sts, ext sc in the next st, 2 ext sc in the last st. Turn.
Rep Inc Rows 1 – 4 until your blanket measures the desired width. I worked until my blanket measured approximately 42″ from Row 1, along either edge. Continue on to Rectangle Rows.
Stitch Marker: Place a SM in the last stitch of the last row you just worked. This marks the 2nd corner.
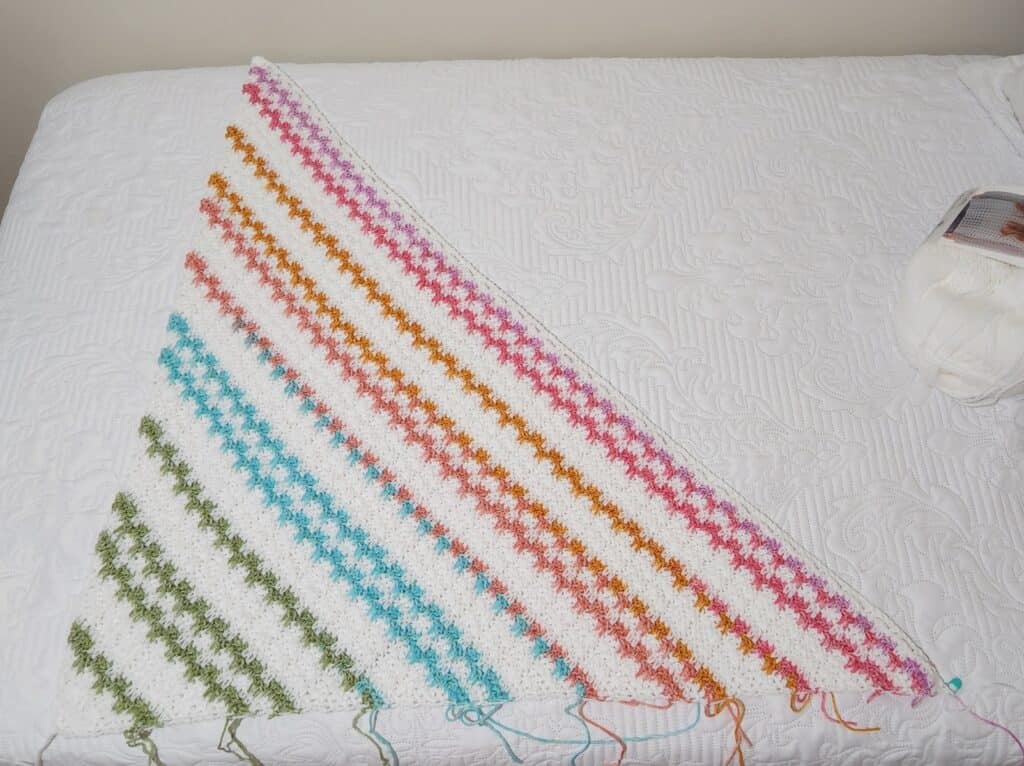
Rectangular (Rec) Rows
In this section, you will be increasing the length of your blanket. Your work will transition from a triangle and begin to resemble something more of a rectangle. Along one side of your blanket, you will work decreases and along the opposite side of your blanket, you will work increases. The stitch count for each row in this section does not increase.
Rec Row 1: Ch 1, extsc2tog, ext sc in the next st, (dc in each of the next 2 sts 2 rows below, ch 2, skip each of the next 2 sts) rep from ( to ) across to the last st, 2 ext sc in the last st. Turn.
Rec Row 2: Ch 1, 2 ext sc in the first st, ext sc in the next st, (dc in each of the next 2 sts 2 rows below, ch 2, skip each of the next 2 sts) rep from ( to ) across to the last 6 sts, dc in each of the next 2 sts 2 rows below, ext sc in each of the next 2 sts, extsc2tog. Turn.
Rec Row 3: Ch 1, extsc2tog, ext sc in the next st, ch 2, skip each of the next 2 sts, (dc in each of the next 2 sts 2 rows below, ch 2, skip each of the next 2 sts) rep from ( to ) across to the last 3 sts, ext sc in each of the next 2 sts, 2 ext sc in the last st. Turn.
Rec Row 4: Ch 1, 2 ext sc in the first st, ext sc in the next st, (ch 2, skip each of the next 2 sts, dc in each of the next 2 sts 2 rows below) rep from ( to ) across to the last 2 sts, extsc2tog. Turn.
Rep Rec Rows 1 – 4 until your blanket measures the desired length. I worked until my blanket measured approximately 52″ from Row 1, along the longest edge. Continue on to Decrease Rows.
Stitch Marker: Place a SM in the FIRST st of the last row. This marks the 3rd corner.
Decrease (Dec) Rows
In this section, you will be decreasing both ends of each row to complete the missing triangular section of your blanket and work towards the last corner. The stitch count for each row decreases by 2 stitches.
Dec Row 1: Ch 1, extsc2tog, ext sc in the next st, (dc in each of the next 2 sts 2 rows below, ch 2, skip each of the next 2 sts) rep from ( to ) across to the last 5 sts, dc in each of the next 2 sts 2 rows below, ext sc in the next st, extsc2tog. Turn.
Dec Row 2: Ch 1, extsc2tog, (ch 2, skip each of the next 2 sts, dc in each of the next 2 sts 2 rows below) rep from ( to ) across to the last 4 sts, ext sc in each of the next 2 sts, extsc2tog. Turn.
Dec Row 3: Ch 1, extsc2tog, ext sc in the next st, (ch 2, skip each of the next 2 sts, dc in each of the next 2 sts 2 rows below) rep from ( to ) across to the last 2 sts, extsc2tog. Turn.
Dec Row 4: Ch 1, extsc2tog, ext sc in the next st, (dc in each of the next 2 sts 2 rows below, ch 2, skip each of the next 2 sts) rep from ( to ) across to the last 4 sts, dc in each of the next 2 sts 2 rows below, extsc2tog. Turn.
Dec Row 5: Ch 1, extsc2tog, ext sc in the next st, (dc in each of the next 2 sts 2 rows below, ch 2, skip each of the next 2 sts) rep from ( to ) across to the last 6 sts, dc in each of the next 2 sts 2 rows below, ext sc in each of the next 2 sts, extsc2tog. Turn.
Dec Row 6: Ch 1, extsc2tog, ext sc in the next st, (ch 2, skip each of the next 2 sts, dc in each of the next 2 sts 2 rows below) rep from ( to ) across to the last 4 sts, ext sc in each of the next 2 sts, extsc2tog. Turn.
Rep Dec Rows 3 – 6, ending with a Row 4 when you have only 9 sts remaining.
Do not fasten off. Continue on to the Ending Rows.
Ending Rows
In this section, you will continue decreasing to crochet the 4th corner.
Row 1: Ch 1, extsc2tog, ext sc in the next st, (dc in each of the next 2 sts 2 rows below, ch 2, skip each of the next 2 sts) rep from ( to ) across to the last 2 sts, extsc2tog. Turn. (7 sts)
Row 2: Alt-dc in the first st, (dc2tog) work from ( to ) 3 times. Turn. (4 sts)
Row 3: Ch 2, dc4tog. (1 st)
Stitch Marker: Place a SM in the last stitch of the last row. This marks the 4th corner.
Do not fasten off. Continue on to the Border.
Border
Tip: As you’re working each round, remove the SM from the corner stitches and place them in the “new” corner stitches.
Rnd 1: Ch 1, working around the perimeter of the blanket, work 3 sc in each marked corner stitch, work 2 sc into the side of each dc, and work 1 sc into the side of each sc. Join. Stitch count isn’t crucial.
Rnd 2: Ch 1, work 3 sc in each marked corner stitch, and 1 sc in each st around. Join.
Rep Rnd 2 as many times as you prefer. I worked 3 rounds for my border.
Fasten off. Weave in ends & block, if desired.
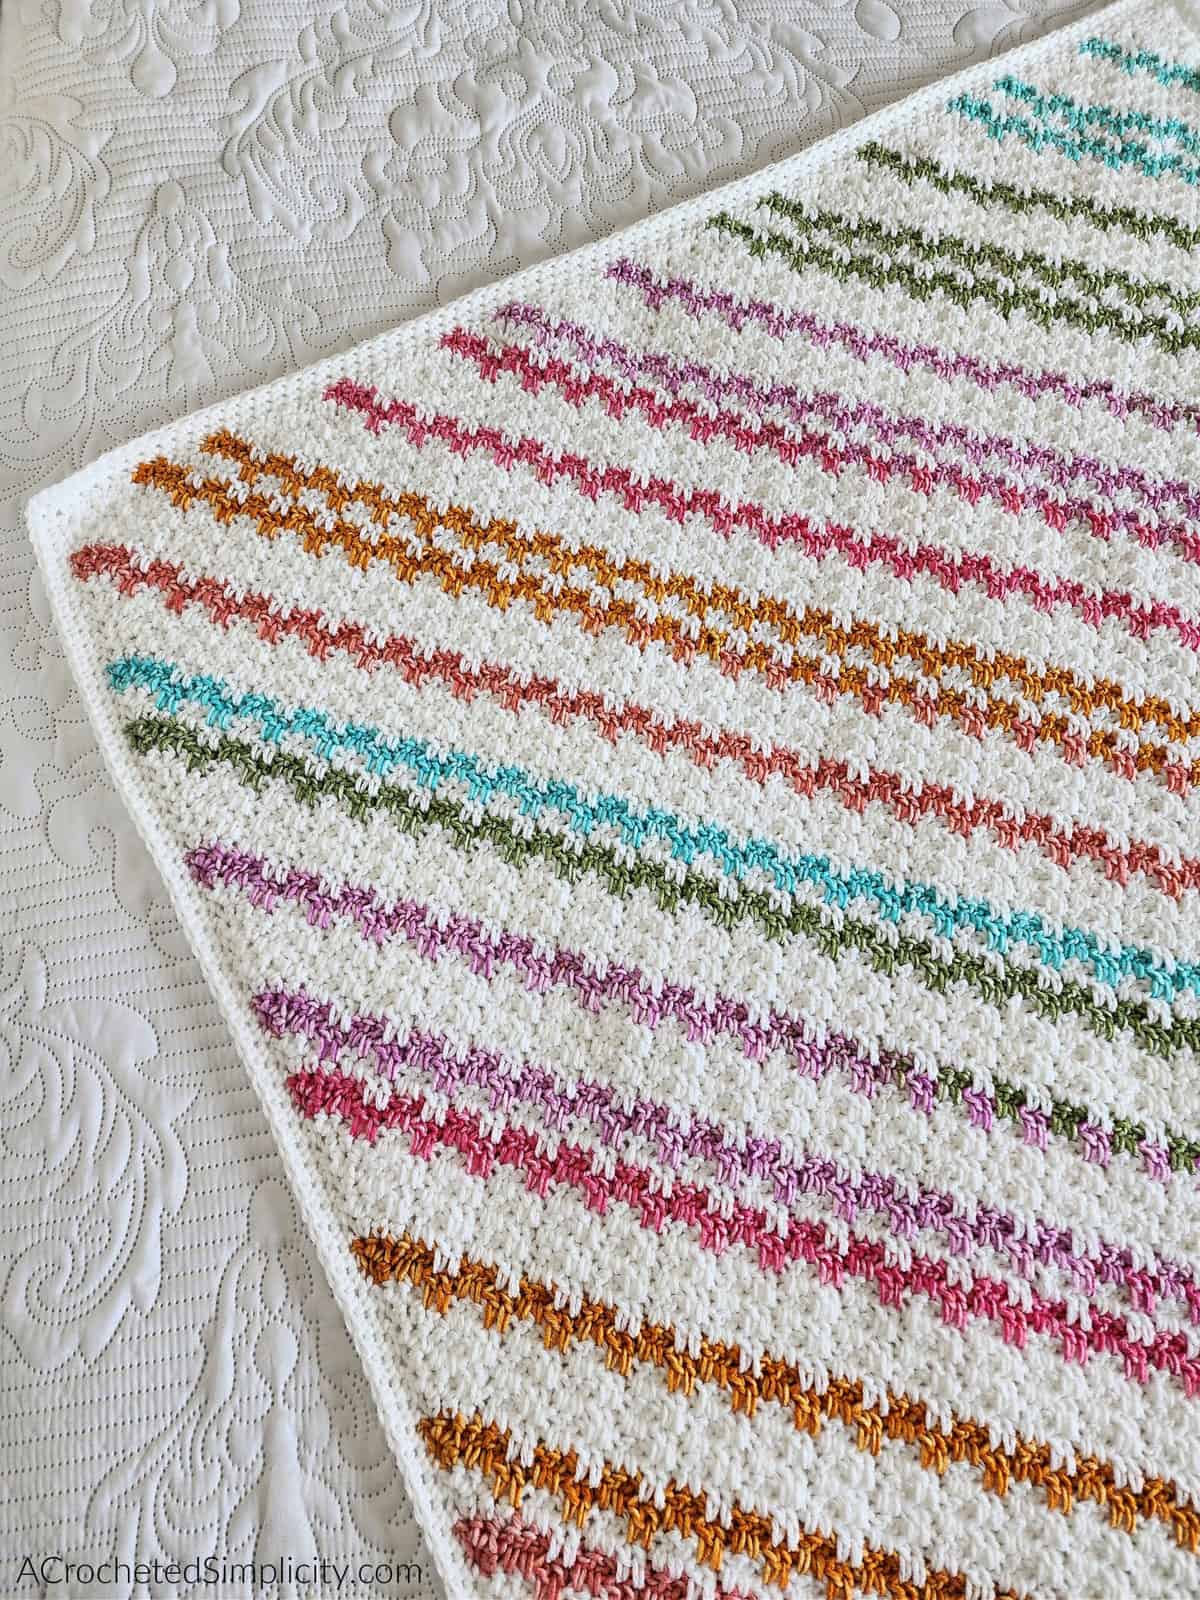
The Candy Stripes Crochet C2C Blanket is more than just a warm blanket; it’s a piece of art that adds personality and warmth to any living space, especially with the balance of color and neutrals. Whether you’re making one for yourself or to gift to someone you love, these blankets are sure to be cherished for years to come.
I Made It! Now What?
Pin this post! Save this crochet c2c blanket pattern to your Pinterest boards so that you can come back and make it again.
Leave a comment below: We love to hear your feedback.
Share Your Finished Projects on Facebook or Instagram: I love to see your finished projects! Share with us on social media and tag me @acrochetedsimplicity or use the hashtag #ACrochetedSimplicity so I can find your posts.
Join us in the Facebook Community Group!
Come share your finished projects with us in the A Crocheted Simplicity Crochet Community Group on Facebook. Join us for fun community events such as crochet alongs, join in on crochet conversations, ask questions, get advice, and share your love for crochet!
More Crochet Corner to Corner Patterns I Think You’ll Love
More Crochet Blanket Patterns Free
Are you looking for more free crochet blanket patterns? We have several more free crochet patterns for a crochet throw blanket pattern, hexagon crochet blanket, crochet baby blanket patterns, and more.
If you’re looking for how to crochet a granny square, you’ll also find several crochet squares for blanket.

I love doing C2C blankets and this one is so pretty. Thanks for sharing.
I love the colors and design of this blanket. Been wanting to make it for awhile.
Looking forward to trying this in 2024.
I don’t really get what you’re saying because at first you say the lapghan is done in extended dc but then most of the pattern says use extended singe crochets so I’m confused
Hi Ruth,
In the beginning of the pattern, I stated that the blanket is worked in the “Extended Double Moss Stitch” stitch pattern (not to be confused with the extended double crochet stitch). I have a stitch pattern tutorial for the extended moss stitch that you can see here. This may help you with a visual: https://www.acrochetedsimplicity.com/how-to-crochet-the-extended-moss-stitch/
The “double” in Extended Double Moss Stitch comes from working pairs of 2 stitches (2 sts, 2 chs). Whereas the Extended Moss Stitch is worked with single sts (1 st, 1 ch).
Going a little further… the extended single crochet “stitch” is part of the Extended Moss Stitch Pattern.
So you’re not working extended double crochet stitches, you’re working the extended double moss stitch crochet stitch pattern.
Does that make sense?
Jennifer