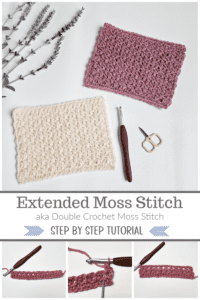
How to Crochet the Extended Moss Stitch
Learn how to crochet the extended moss stitch with this step-by-step photo tutorial.
Basic Stitches Create a Beautiful Texture
- The extended moss stitch uses a double crochet stitch in place of a single crochet stitch.
- The double crochet stitches are worked into the double crochet stitches from 2 rows below, whereas the single crochet are worked into the chain space from the previous row.
I love the classic crochet moss/linen stitch pattern (and I’ve used it in many crochet designs) but, I really like the change in texture that’s produced by switching from single crochet stitches to double crochet stitches.
>CLICK HERE TO SIGN-UP TO RECEIVE OUR NEWSLETTER!<
Colorwork
I love working this stitch pattern in only one color, but to add more variation to this great crochet stitch pattern, try using an ombre or self-striping yarn. One more way to switch it up and create a totally different look is to change colors. Try working every other row in a different color, or even every 2 rows. There are so many ways you can personalize the extended moss stitch (double crochet moss stitch).
In Jossalyn’s Afghan, I worked 2 rows of each color for the border. You can see how I worked the color changes HERE.
In this crochet stitch tutorial, you’ll learn how to successfully work the extended moss stitch in both a 2 & 4 stitch variation! Before we begin, let’s go over a few stitch abbreviations.
Materials
- Yarn: You can use 1 or 2 colors of any weight yarn you’d like. I used the worsted weight/4 yarn Lion Brand Yarns Wool Ease in Fisherman, Dark Rose Heather, and Grey Heather.
- Crochet Hook: J/10/6.00mm (or hook size to match the weight of yarn you chose)
- Scissors
- Tapestry Needle
These items are available through our affiliates below.
 Lion Brand Yarn Wool-Ease Y...Shop on Amazon
  Clover 1049/J Amour Crochet...Shop on Amazon
  Lion Brand Yarn 400-5-5002 ...Shop on Amazon
  Fiskars All Purpose Scissor...Shop on Amazon
Abbreviations (US Terms)
- ch(s): chain(s)
- sc: single crochet
- dc: double crochet
- ext sc: extended single crochet (click here for tutorial)
- yo: yarn over
- st(s): stitch(es)
- Rep: repeat
- RS: right side
- WS: wrong side
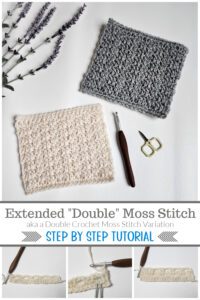
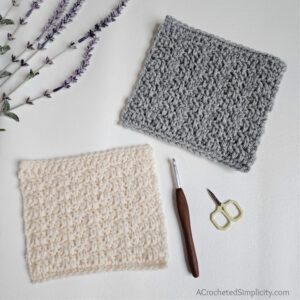
2 Similar Yet Different Swatches
I’ve worked up two separate swatches using the extended moss stitch. In the first swatch, I worked the classic 2 stitch repeat of 1 double crochet followed by 1 chain. In the second swatch, I worked a 4 stitch repeat of 2 double crochet followed by 2 chains. I love the textures of both. Each is unique. Make both swatches and let me know which one is your favorite!
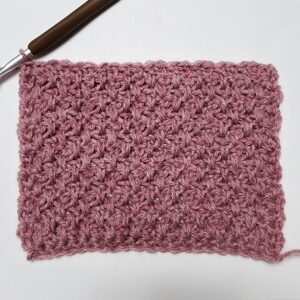
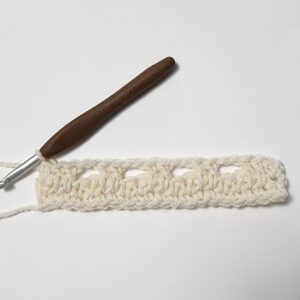
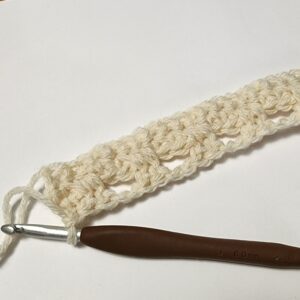
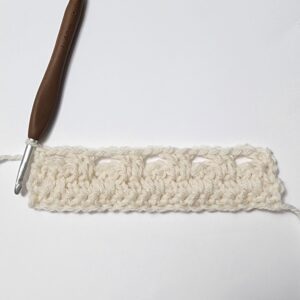
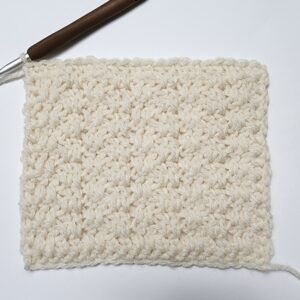
Swatch #1 – a classic 2 stitch repeat
This first swatch was made using the classic 2 stitch pattern repeat of: (dc in the next skipped st 2 rows below, ch 1, skip the next st).
Multiples: The following swatch is worked in multiples of 2 + 1 + 1.
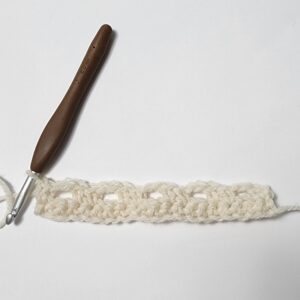
Row 1: With a 6.00mm crochet hook and yarn, ch 22, working into the back hump of the foundation ch, sc in the 2nd ch from your hook, sc in each ch across. Turn. (21 sts)
Row 2: Ch 1, ext sc in the first st, (ch 1, skip the next st, ext sc in the next st) rep across. Turn.

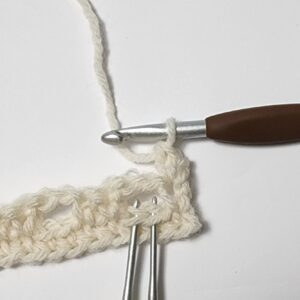
Row 3: Ch 1, ext sc in the first st, dc in the next skipped st 2 rows below, (ch 1, skip the next st, dc in the next skipped st 2 rows below) rep across to the last st, ext sc in the last st. Turn.
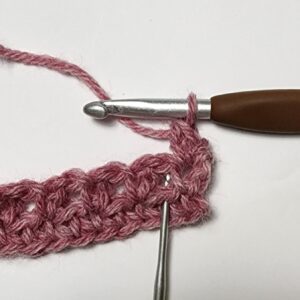

Row 4: Ch 1, ext sc in the first st, (ch 1, skip the next st, dc in the next skipped st 2 rows below) rep across to the last 2 sts, ch 1, skip the next st, ext sc in the last st. Turn.
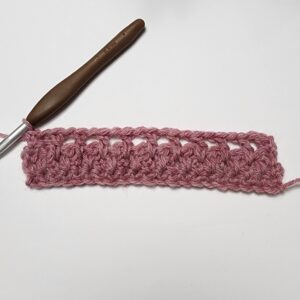
Rows 5 – 15: Rep Rows 3 – 4, ending with a Row 3 rep.
Row 16: Ch 1, ext sc in the first st, (ext sc in the next st, dc in the next skipped st 2 rows below) rep across to the last 2 sts, ext sc in each of the last 2 sts. Turn.
Row 17: Ch 1, sc in each st across.
Fasten off. Weave in ends.

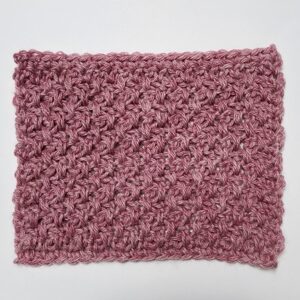
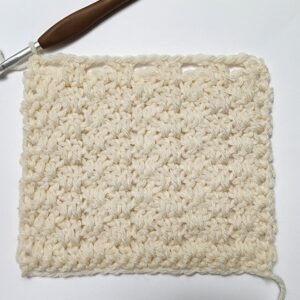
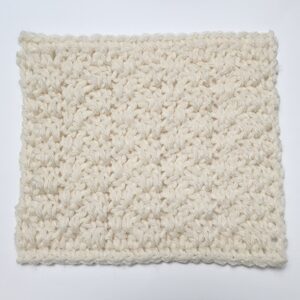
Swatch #2 – a variation of the classic, a 4 stitch repeat
This second swatch was made using a variation of the extended moss stitch. I used the following 4 stitch pattern repeat, instead of a 2 stitch repeat: (dc in each of the next 2 skipped sts 2 rows below, ch 2, skip each of the next 2 sts).
Multiples: The following swatch is worked in multiples of 4 + 1.
Row 1: With a 6.00mm crochet hook and yarn, ch 21, working into the back hump of the foundation ch, sc in the 2nd ch from your hook, sc in each ch across. Turn. (20 sts)
Row 2: Ch 1, ext sc in the first st, ch 2, skip each of the next 2 sts, (ext sc in each of the next 2 sts, ch 2, skip each of the next 2 sts) rep across to the last st, ext sc in the last st. Turn.
Row 3: Ch 1, ext sc in the first st, dc in each of the next 2 skipped sts 2 rows below, (ch 2, skip each of the next 2 sts, dc in each of the next 2 skipped sts 2 rows below) rep across to the last st, ext sc in the last st. Turn.
Row 4: Ch 1, ext sc in the first st, ch 2, skip each of the next 2 sts, (dc in each of the next 2 skipped sts 2 rows below, ch 2, skip each of the next 2 sts) rep across to the last st, ext sc in the last st. Turn.
Rows 5 – 15: Rep Rows 3 – 4, ending with a Row 3 rep.
Row 16: Ch 1, ext sc in the first st, (ext sc in each of the next 2 sts, dc in each of the next 2 skipped sts 2 rows below) rep across to the last 3 sts, ext sc in each of the last 3 sts. Turn.
Row 17: Ch 1, sc in each st across.
Fasten off. Weave in ends.
MORE FREE CROCHET STITCH TUTORIALS FROM A CROCHETED SIMPLICITY
If you enjoy this crochet stitch tutorial, you may enjoy these others as well. And if you just want to browse, you can find all of our free crochet patterns HERE.

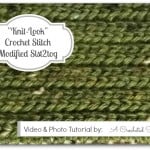

Are you intimidated by knit-look crochet? Would you love to learn my tips & tricks? Take an Annies Video Class with me and let me ease your fears and help you increase your skills! Click on the photo below to watch a free preview. You can also see the other 4 video classes I have available!

Please share your finished ACS projects with us in the A Crocheted Simplicity Crochet Community Group on Facebook! Use hashtag #ACrochetedSimplicity when sharing on social media so I can find your posts!
