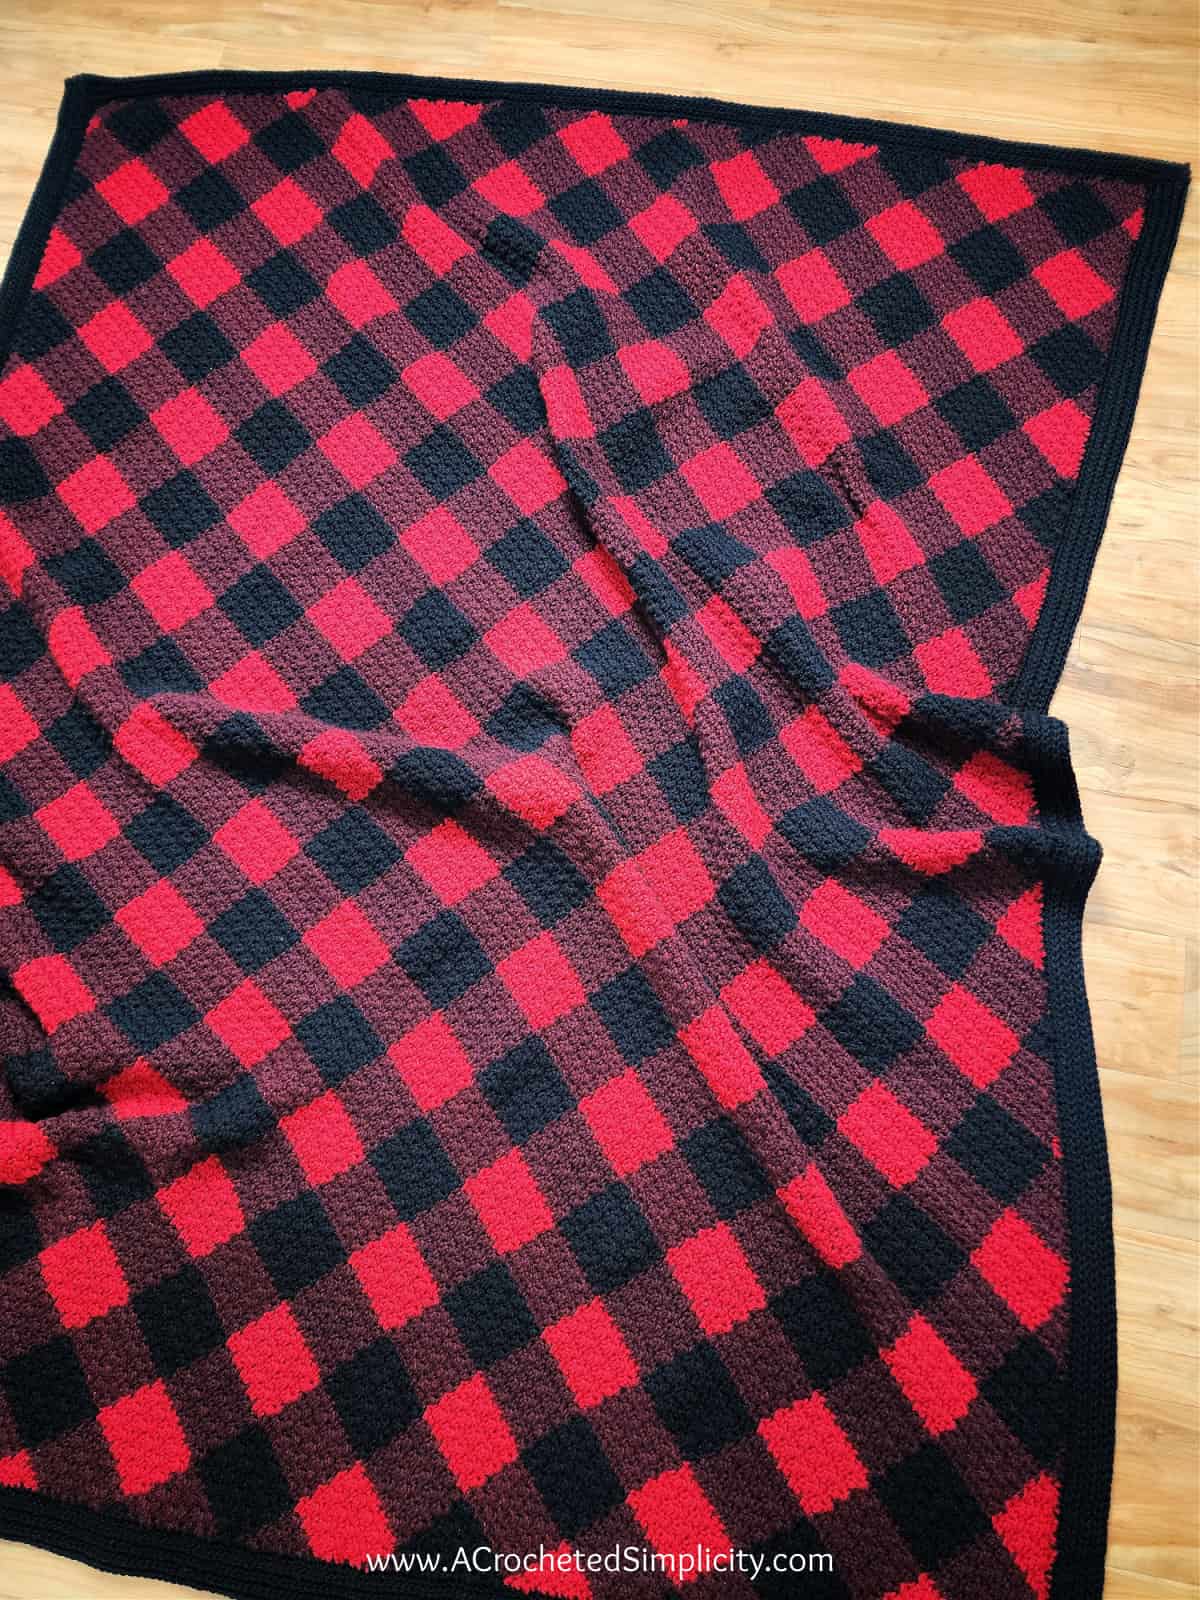
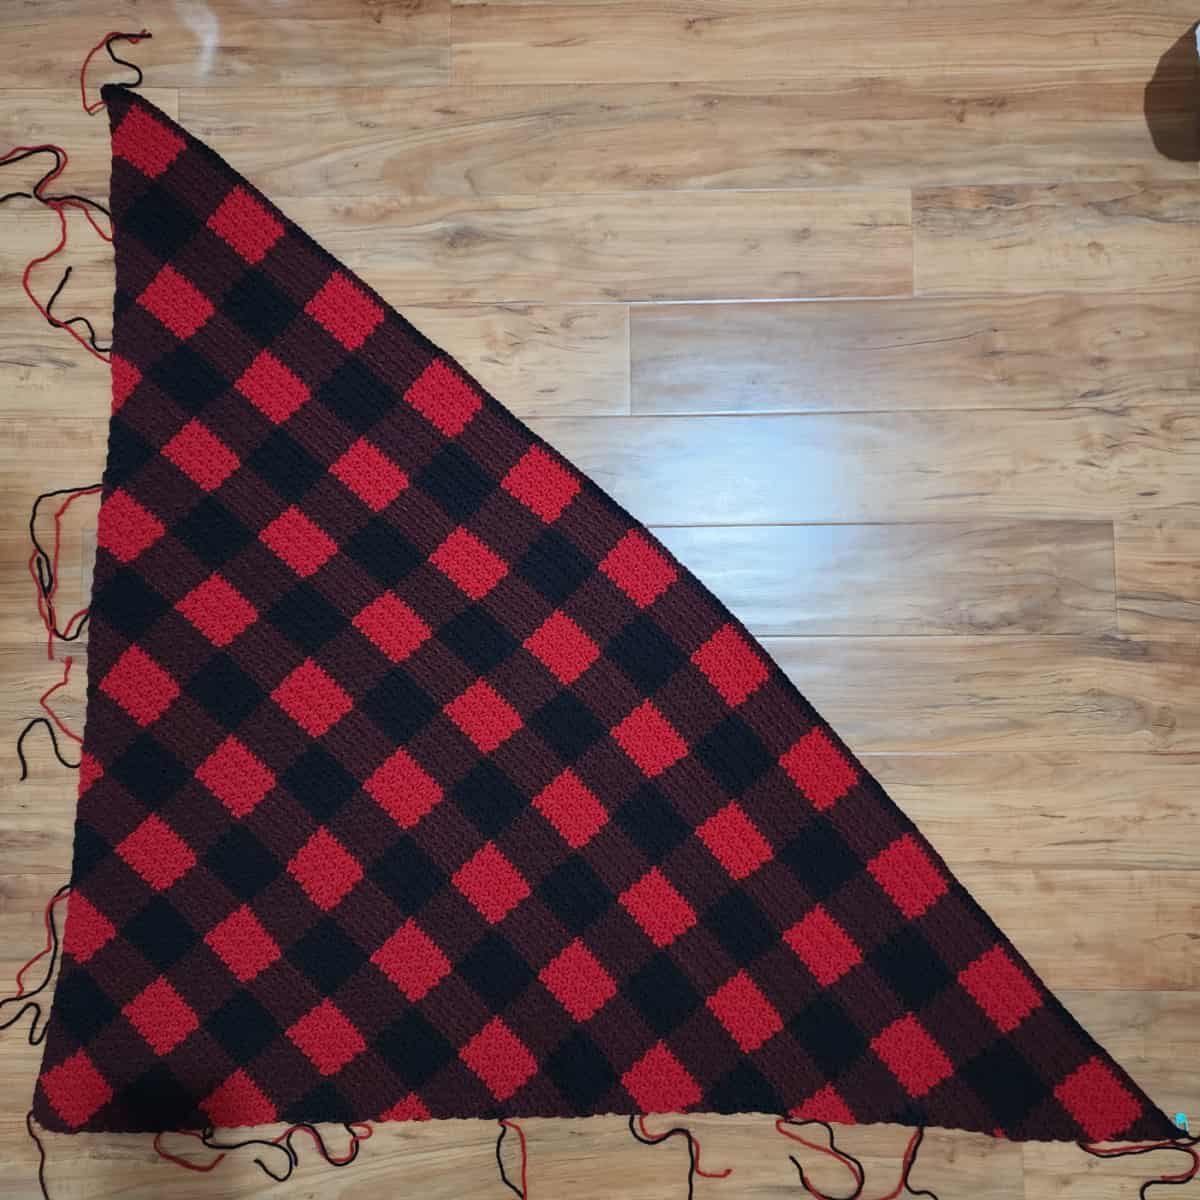
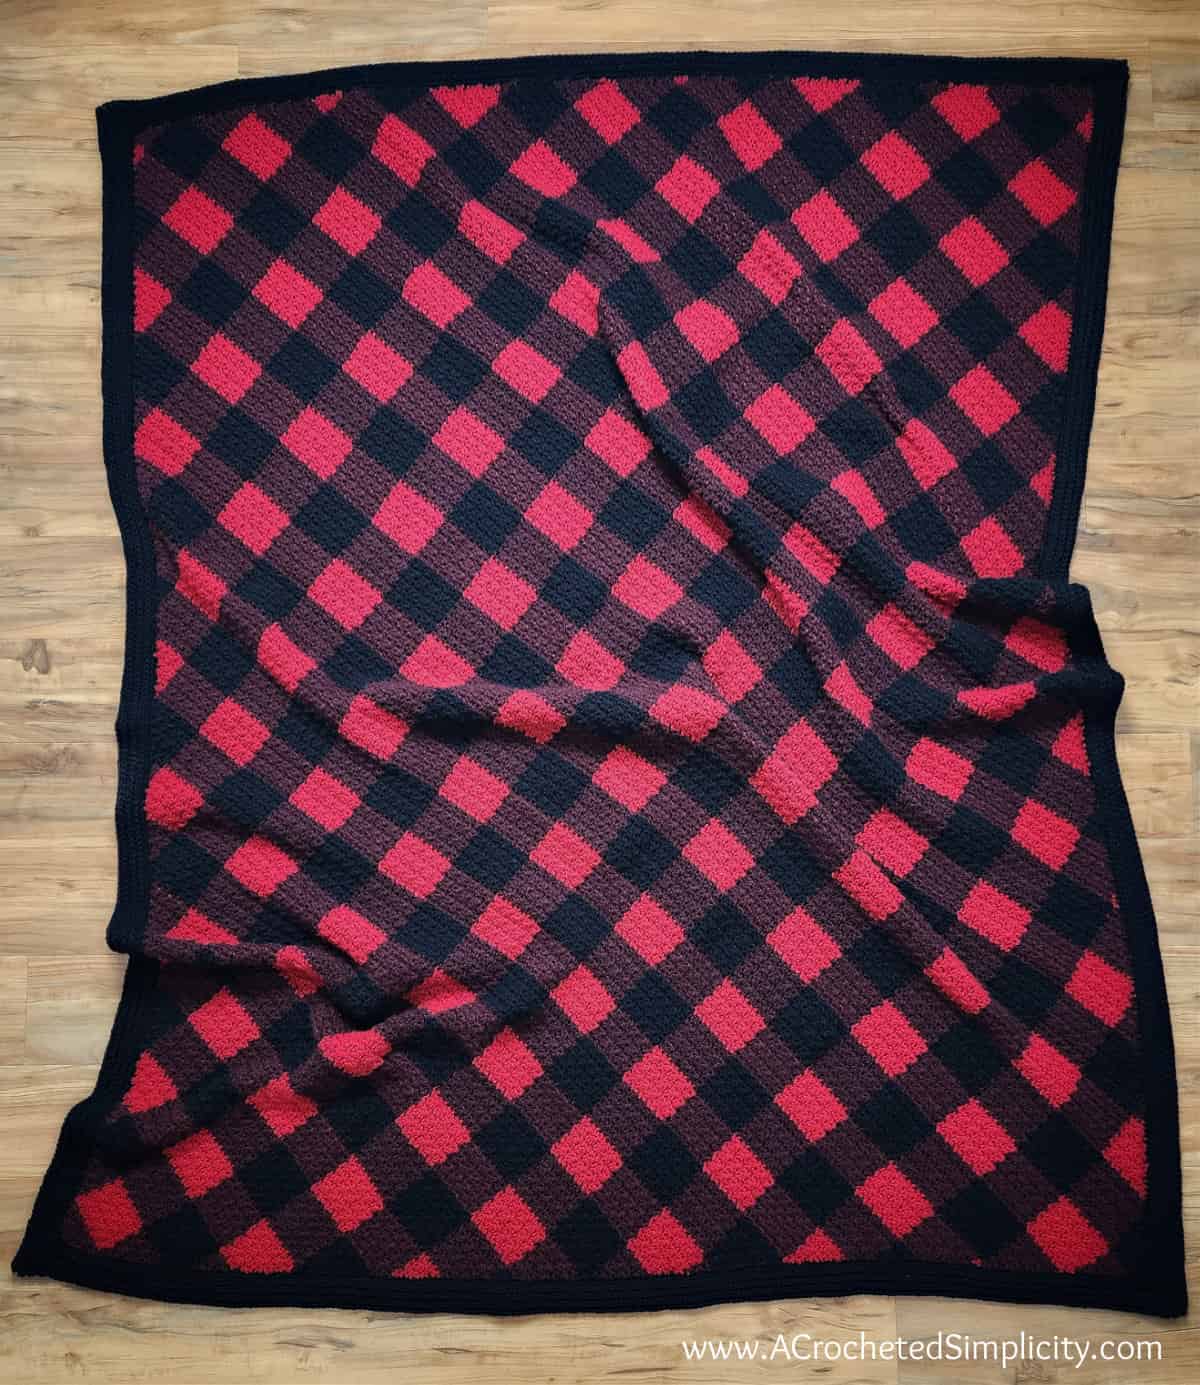
C2C Crochet Buffalo Plaid Blanket
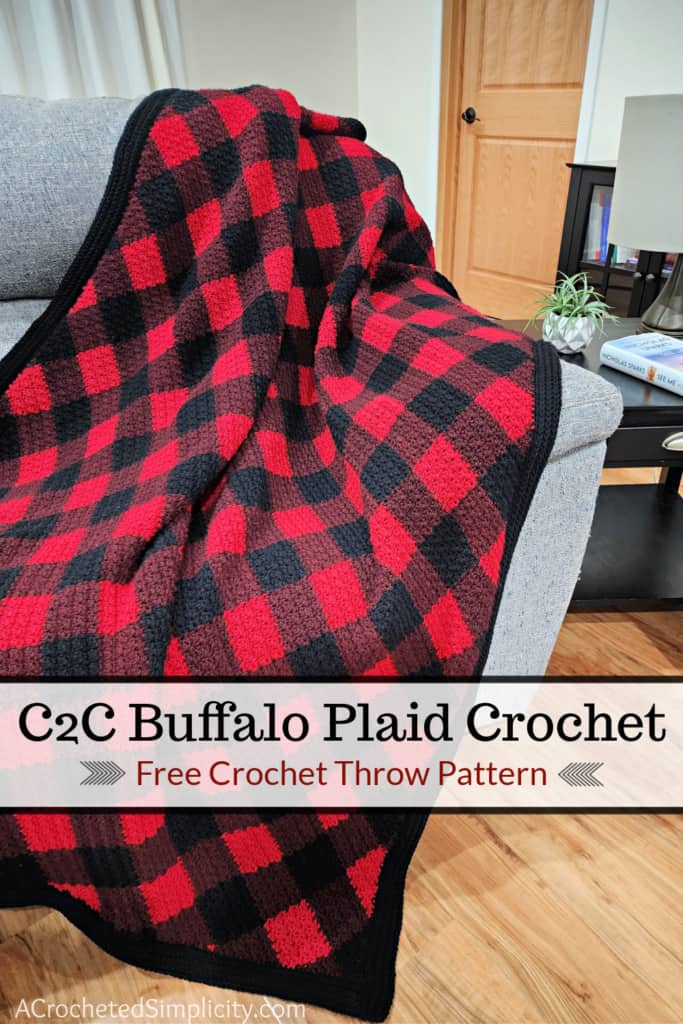

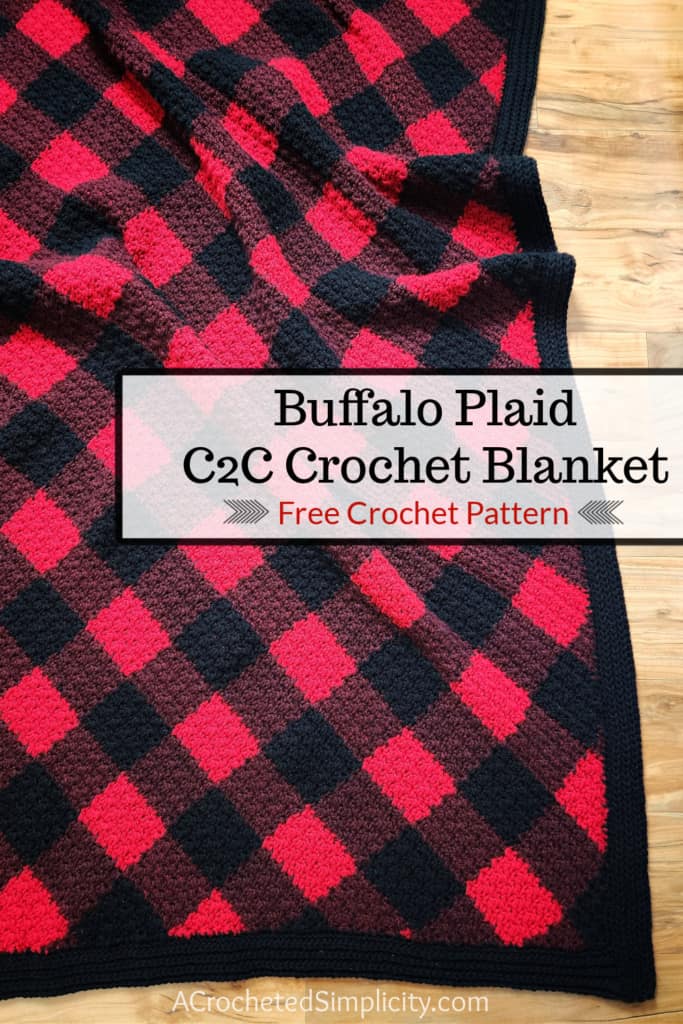
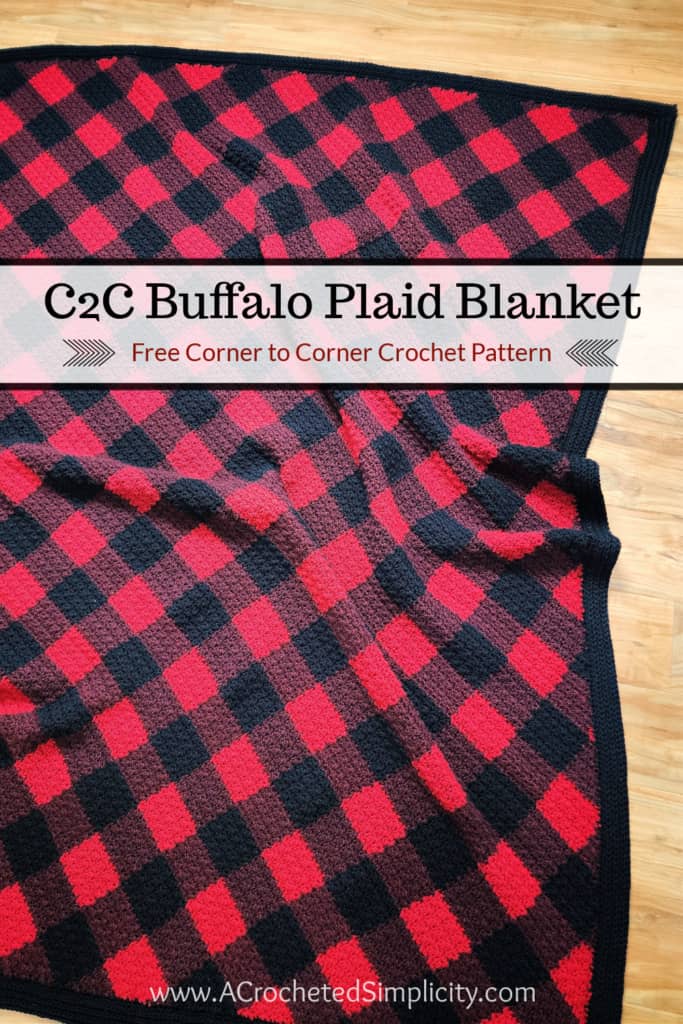
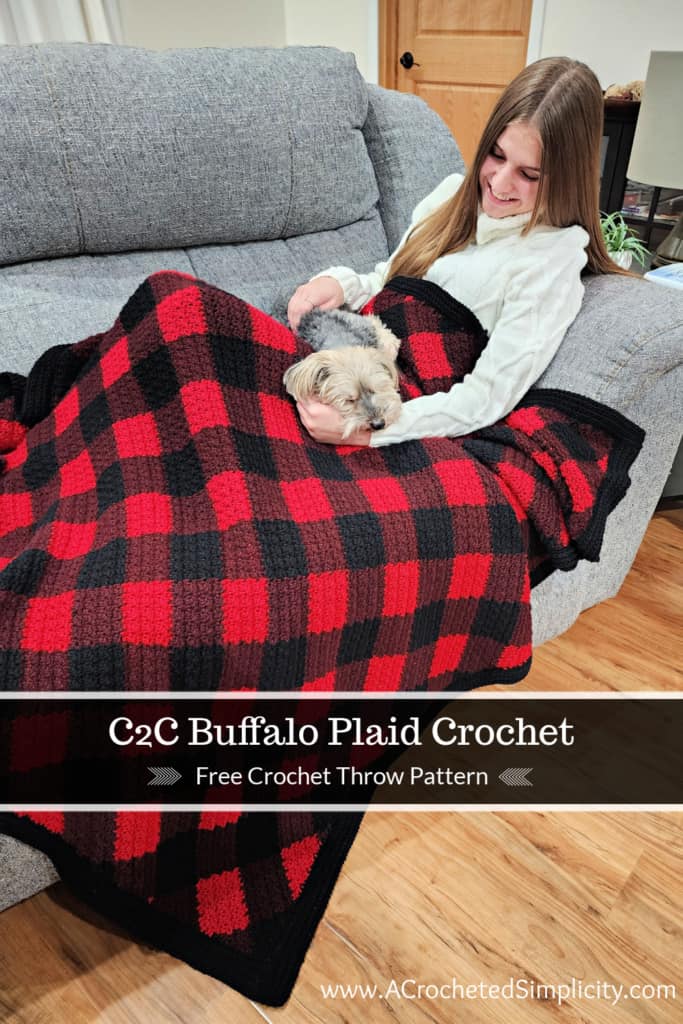
The C2C Crochet Buffalo Plaid Blanket is created using the corner to corner crochet technique with the griddle stitch and tapestry crochet colorwork.
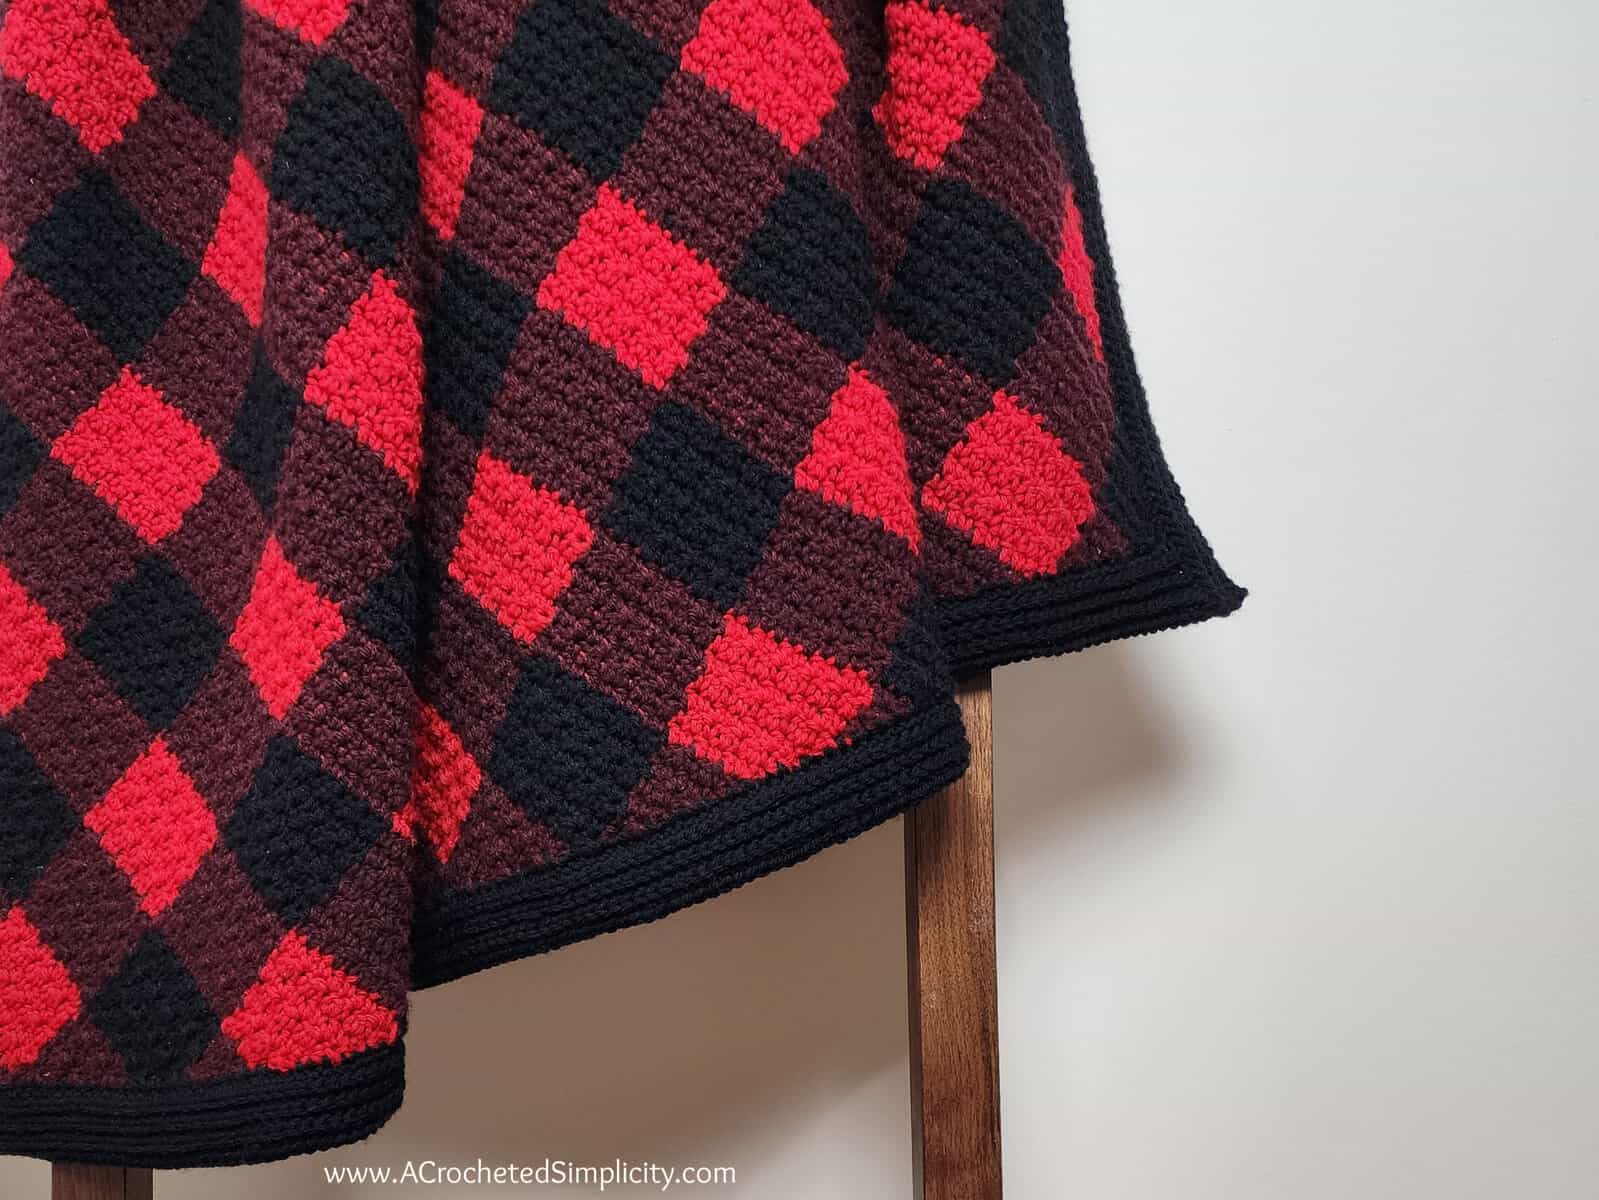
After crocheting the center of your C2C plaid blanket, you will then add an easy log cabin crochet border.
You can find the free crochet blanket pattern for the C2C Buffalo Plaid Blanket in this post below, or an ad-free print friendly version (including a step by step photo tutorial & the printable stitch and color chart PDF) on Love Crafts, Ravelry, or on Etsy (aff).
This crochet buffalo plaid throw is worked on the bias (also known as C2C or corner to corner crochet). I love to crochet C2C blankets for the following reasons:
- You can easily increase the width and length of your blanket as you’re crocheting it.
- They seem to work up more quickly than blankets crocheted in horizontal rows or in rounds.
- Last, but not least, almost every row changes a little bit as you work. This helps to keep me from getting bored. (I can’t be the only one with crochet A.D.D. when working on big projects. 😉 )
Corner to Corner Crochet Technique
After mastering a few basic crochet skills, corner to corner crochet (often referred to as C2C and working on the bias) is a fun technique to learn and add to your crochet toolbox.
Working the corner to corner crochet technique is very simple. Using any crochet stitch, begin your project in one corner and crochet on the bias (on a diagonal… think *triangle*) until your project is the desired width and length. Then, decrease each row until you’ve reached the corner opposite the one you started.
Corner to corner crochet was made wildly popular with the diagonal box stitch, but with a little persistence, you can work any crochet stitch from corner to corner!
In the C2C Crochet Buffalo Plaid Blanket pattern, you’ll learn how to crochet the C2C Griddle Stitch / C2C Lemon Peel Stitch.
Crocheting on the bias is my favorite technique to make crochet blankets. I love how I’m able to easily adjust the width and length of my blanket as I’m crocheting, without having to rip out hours and hours of work and starting over.
MORE CORNER TO CORNER CROCHET DESIGNS
If you enjoy working corner to corner crochet and want to learn how to crochet other stitches on the bias, I have several free C2C crochet designs that you’ll love!
The following are my free Corner-to-Corner Crochet designs that do not use the diagonal box stitch:
- Candy Stripes Lapghan
- On the Bias Tote Bag
- Diagonal Ripple Scarf
- Traveling Afghan Square
- On the Bias Square Afghan
- On the Bias Rectangular Afghan
- Diagonal Ripple Lapghan
- Diagonal Chevron Lapghan
- Cuddly Soft C2C Baby Blanket
- Aubergine Afghan
- Diagonal Chevron 12″ Afghan Square
I also have a premium crochet pattern (one of my all-time favorites) that uses corner to corner crochet and does not use the popular diagonal box stitch. The On the Bias Granny Square Afghan pattern includes layout schematics to create 6 different afghans using just one square!
Crochet Griddle Stitch
The texture in this crochet C2C blanket comes from a super easy crochet stitch pattern, the griddle stitch.
The crochet griddle stitch is also referred to as the crochet lemon peel stitch and seed stitch, along with a few other names. It is a very simple, beginner-friendly crochet stitch pattern.
After you’ve learned just a couple basic stitches, such as single crochet and double crochet, you’ll be able to add this beautifully textured crochet stitch pattern to your crochet toolbox!
The griddle stitch is simply a single crochet in the next stitch, followed by a double crochet in the next stitch, repeated across the row. Then, when you turn and work the next row, you’ll work a single crochet into a double crochet and a double crochet into a single crochet. And that’s it!
Easy, right?!
The crochet griddle stitch creates a nice solid crochet fabric that doesn’t have a lot of small holes like so many others. This makes it the perfect crochet stitch pattern to make a nice warm blanket!
The trickiest part of this C2C crochet blanket pattern is the colorwork, but even that becomes easier after working the first 10 – 17 rows. I created a video tutorial to help make it even easier.
How to Create Buffalo Plaid Crochet
How to Choose Colors for Buffalo Plaid Crochet
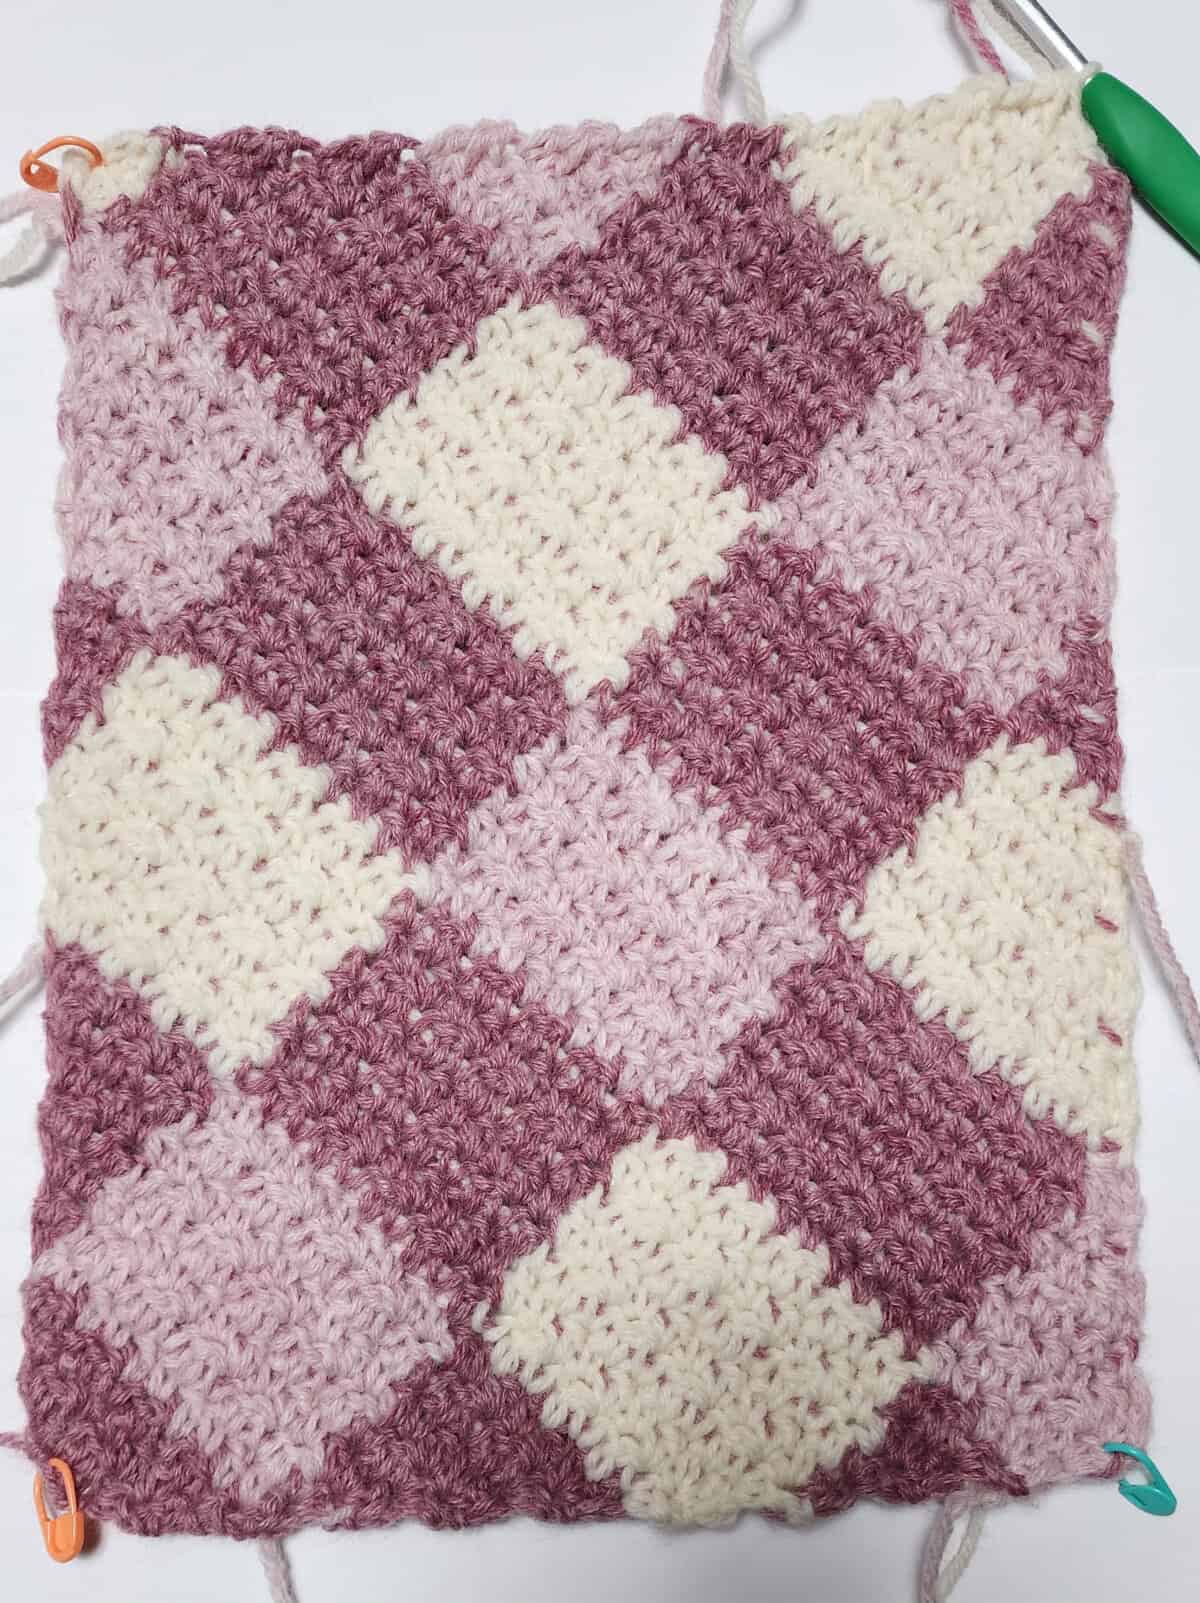
Buffalo plaid crochet is created by using 3 colors of yarn. You’ll first choose one neutral color (such as black or white). Then choose 2 shades of another color, 1 darker shade and 1 lighter/brighter shade.
The darker shade of your chosen color becomes your Main Color (MC). I refer to it as the glue that pulls the buffalo plaid color scheme together.
Your MC will be used in every row of your plaid blanket, except the border.
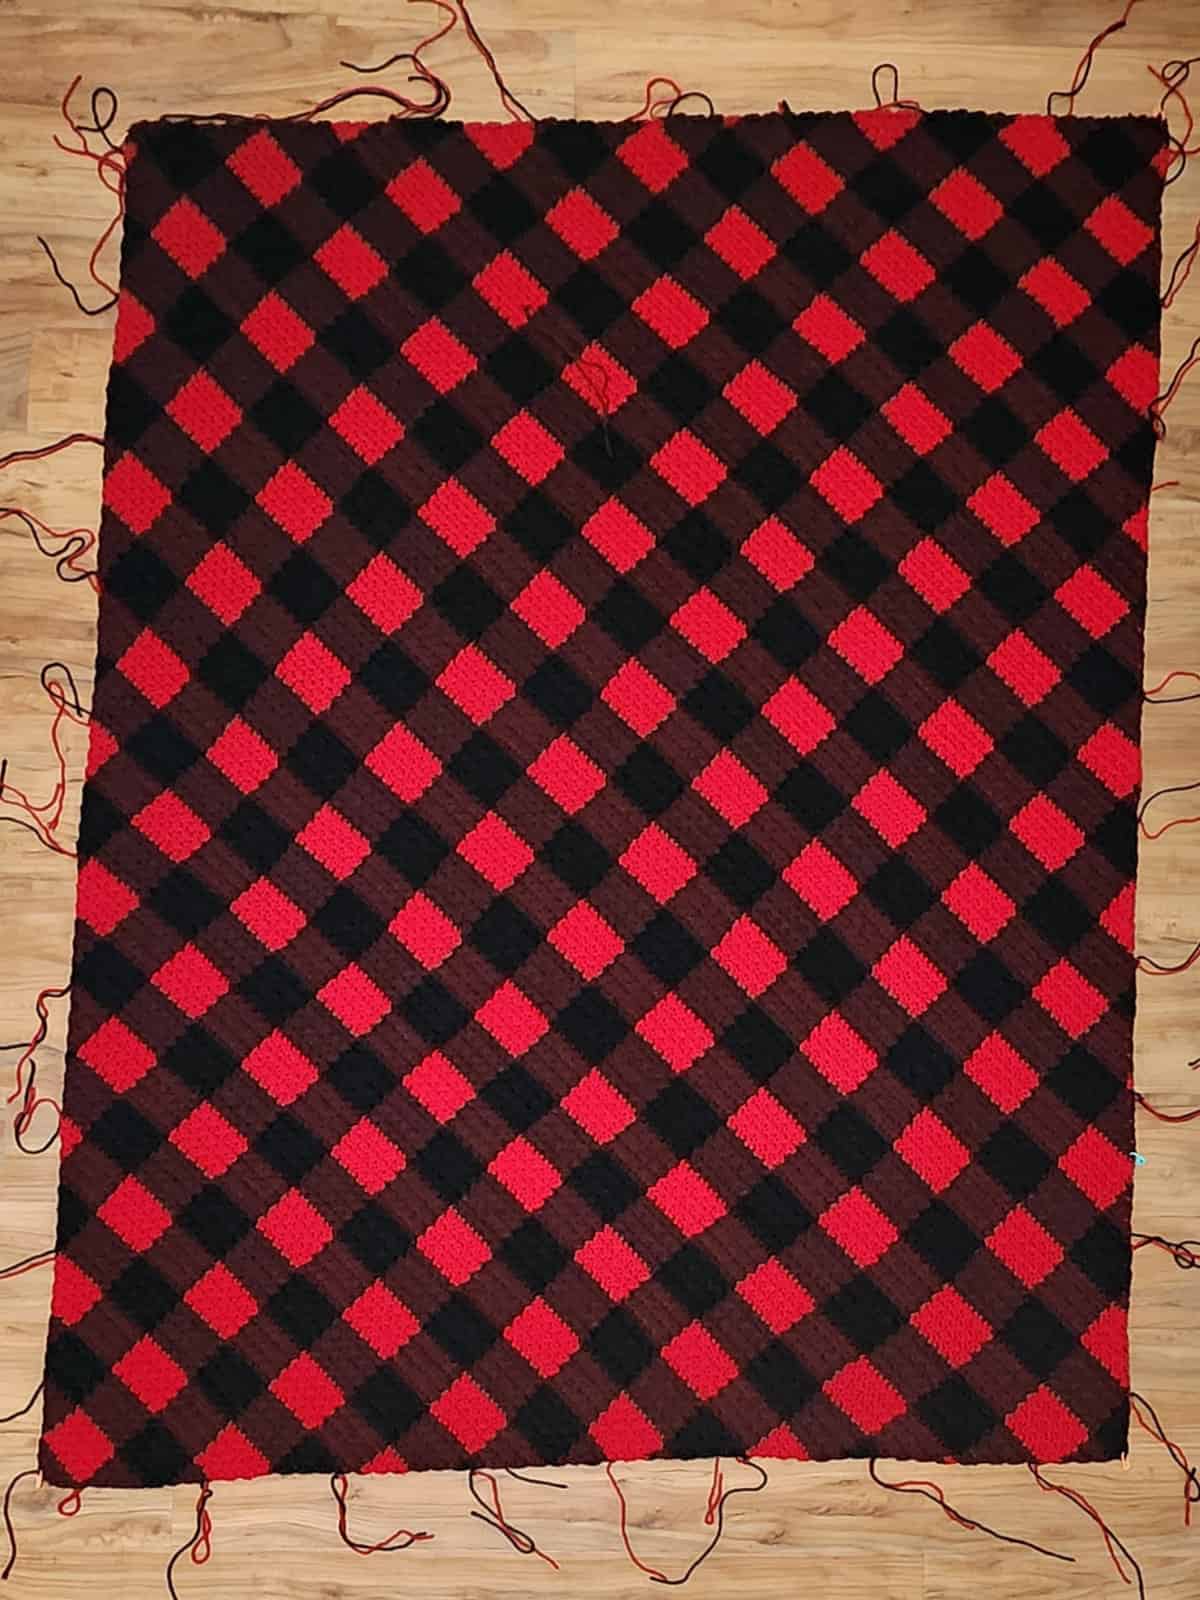
- Example: For this red & black buffalo check blanket pattern, I chose black as my neutral color. I then chose 2 shades of red, claret (one darker) and cherry (one lighter/brighter).
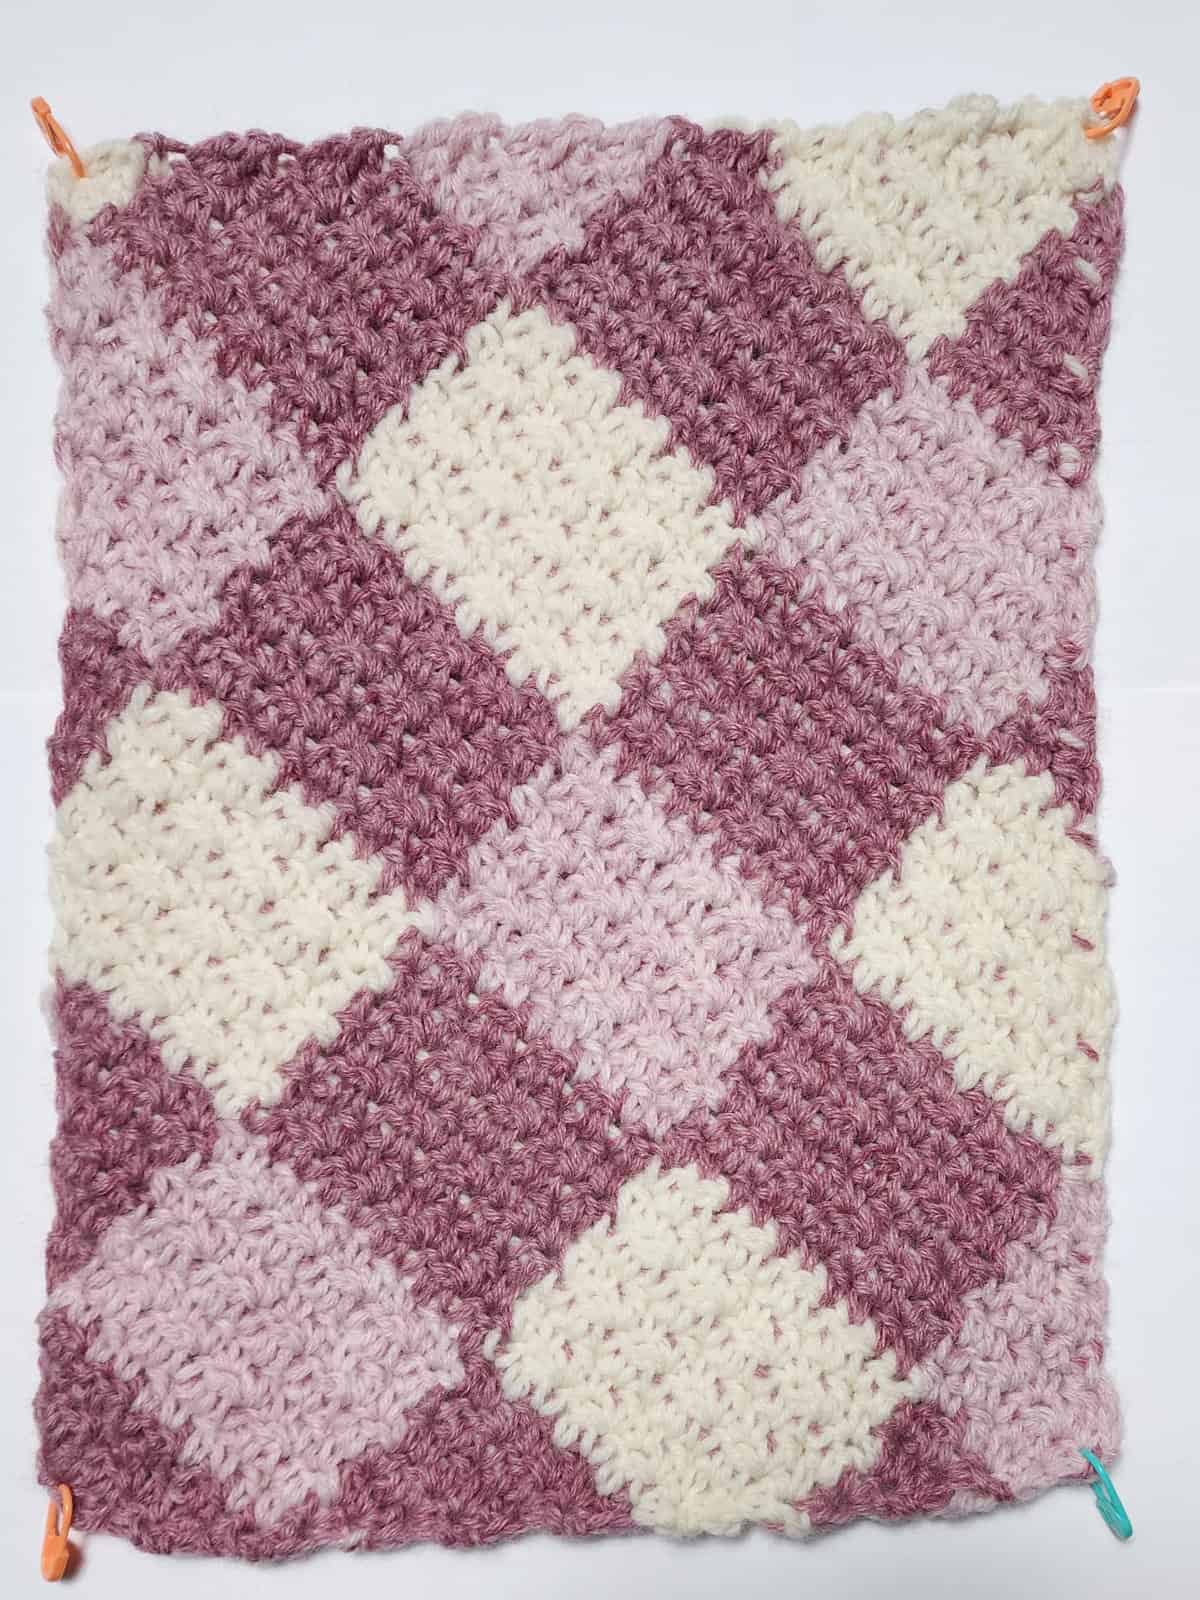
- Second Example: For the step-by-step crochet photo tutorial below, I chose a lighter color scheme to make it easier to see. I chose cream for my neutral color (CC2). I then chose both a dark pink (MC) and a light pink (CC1).
Changing Colors
All color changes are worked in the last pull thru of the last stitch of the previous color. If you prefer visuals, refer to my color change tutorial for tapestry crochet colorwork.
Colorwork – Carrying & Working over the yarn
This crochet buffalo plaid design is created using tapestry crochet colorwork. It is an easy crochet colorwork technique.
You’ll only ever work with 2 colors per row (refer to the color charts & photos in the post below for a visual). Of the 2 colors you’re working with for any given row, carry the unused yarn with you and work over it as you go along.
I share my details in the step by step photo tutorial below and in the video tutorial.
Colorwork for the Buffalo Plaid C2C Crochet Blanket is no harder than changing colors when working in horizontal rows. The only difference is that you will work increases or decreases at the beginning and end of every row. And sometimes you will change colors during the increases and decreases to keep the buffalo check pattern square.
If you love buffalo check as much as I do, you will also love these free crochet buffalo plaid designs.
4 Visual Aids to Help You Crochet C2C Plaid
I created four visual aids to help you successfully crochet a C2C Crochet Buffalo Plaid Blanket:
- Graphic Below – This red & black buffalo plaid graphic shows how each section works together to create the rectangle C2C blanket.
- Step-by-step Photo Tutorial: – I’ve created a step by step photo tutorial that includes over 40 pictures to help!
- Video Tutorial: For those who are more visual learners and prefer to see it done before tackling a larger project, watch the video tutorial companion that’s available on my YouTube channel. Crochet a swatch along with me!
- C2C Buffalo Plaid Stitch & Color Layout Chart
- Get this FREE printable PDF stitch & color chart sent straight to your inbox when you subscribe to my newsletter using this form
- OR, purchase the Ad-Free PDF (which includes all charts & tutorials) on Love Crafts, Ravelry, or Etsy (aff).

YARN
For this c2c buffalo plaid crochet blanket, I chose Lion Brand Yarns Pound of Love. This yarn is a 100% premium acrylic yarn that is available in 28 gorgeous colors. For my buffalo check blanket, I chose the colors Claret, Cherry, and Black.
Although Pound of Love is classified as a Craft Yarn Council 4 / worsted weight yarn, I’ve found that it is on the lighter side of most worsted weight yarns.
I’ve heard many crocheters say that they don’t like the feel of acrylic yarns, but Pound of Love becomes SO incredibly soft after a quick wash and dry! It’s the perfect yarn for many different projects and the yardage in one ball is incredible at 1,020 yards. This makes it a great choice for tapestry crochet colorwork.
YARN SUBSTITUTIONS
Because we’re making a c2c crochet blanket and not a crochet garment or accessory that needs to fit our bodies, we can easily substitute yarns.
I recommend sticking with a worsted weight yarn for your plaid blanket, but if the yarn you choose is a lighter or heavier worsted than Lion BrandYarns Pound of Love, you’ll likely need to adjust your hook size a bit.
For example, if you choose a lighter yarn and stick with a 6.00mm crochet hook, then you will have a lot of color bleeding through from the tapestry crochet colorwork. The good news is we’re making a blanket, so it’s easy to adjust hook size to suit the yarn you’re using.
Lion Brand Yarns Vanna’s Choice in Cranberry (MC), Scarlet (CC1), & Black (CC2) is a great choice for a yarn substitution.
How to Adjust the Size of your C2C Crochet Blanket
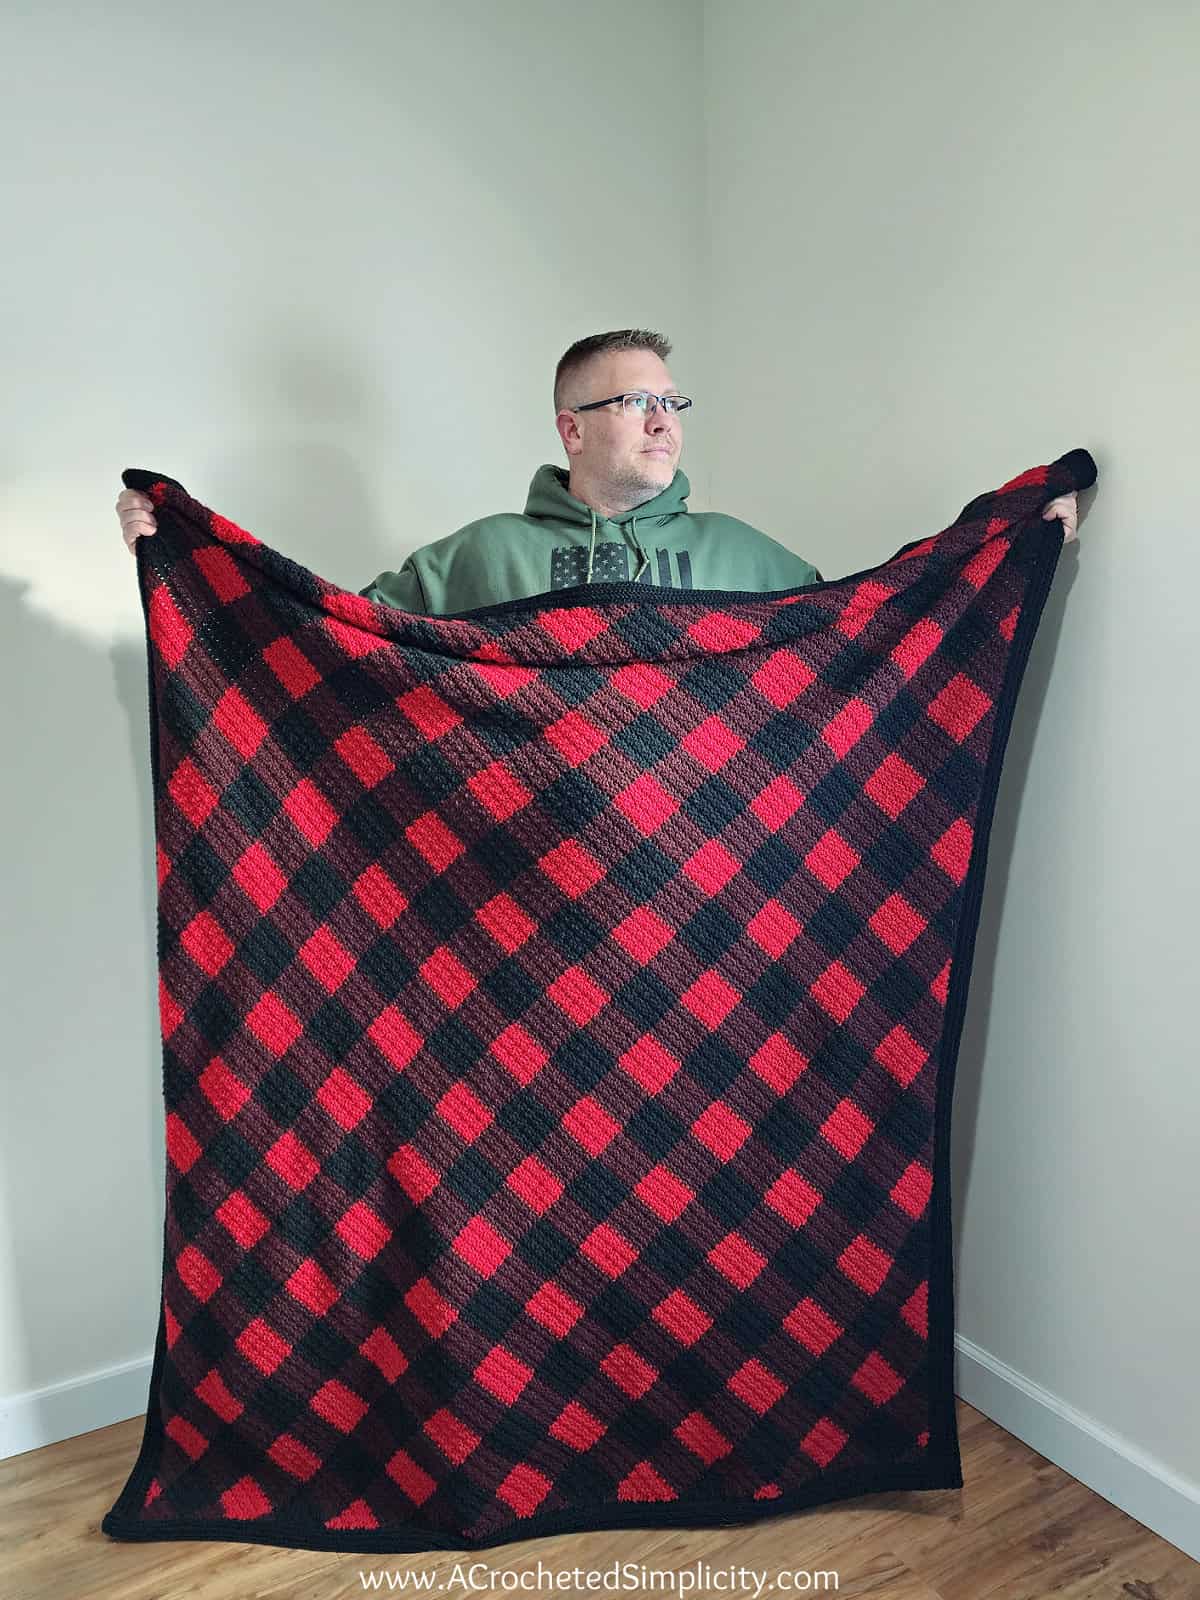
I made this buffalo plaid crochet blanket for my husband who’s 6′-1″ so I needed to make it larger than a standard size crochet lapghan. The corner to corner crochet blanket shown in the photos is a standard crochet throw blanket size.
I know others may want to make their buffalo check crochet blanket smaller or larger so I’ve included instructions how to make it in ANY size, from a standard size for crochet baby blanket up to king sized afghan!
Use my Standard Crochet Blanket Sizes Chart to figure out measurements for a crochet blanket.
How to Crochet a Custom Size C2C Buffalo Plaid Blanket
Note: Keep in mind that the Ribbed Log Cabin Border will add 3″ to width and length (1.5″ on each side).
Step One: Complete the Beginning Rows section.
Step Two: Continue to the Increase Rows section. Repeat Increase Rows 1 – 2, (making sure to end with a Inc Row 2), until your corner to corner plaid blanket is the width you’d like it to be.
Step Three: Once your c2c plaid crochet blanket is the width you’d like it to be, continue to the Rectangular Rows section. Repeat Rectangle Rows 1 – 2, making sure to end with a Rec Row 2, until your c2c blanket is the length you’d like it to be.
Step Four: Once your crochet c2c blanket is the length you’d like it to be, continue to the Decrease Rows section. Repeat Decrease Rows 1 – 2 until you have only 4 stitches remaining. Then continue to the Final Row.
Step Five: Crochet the Final Row.
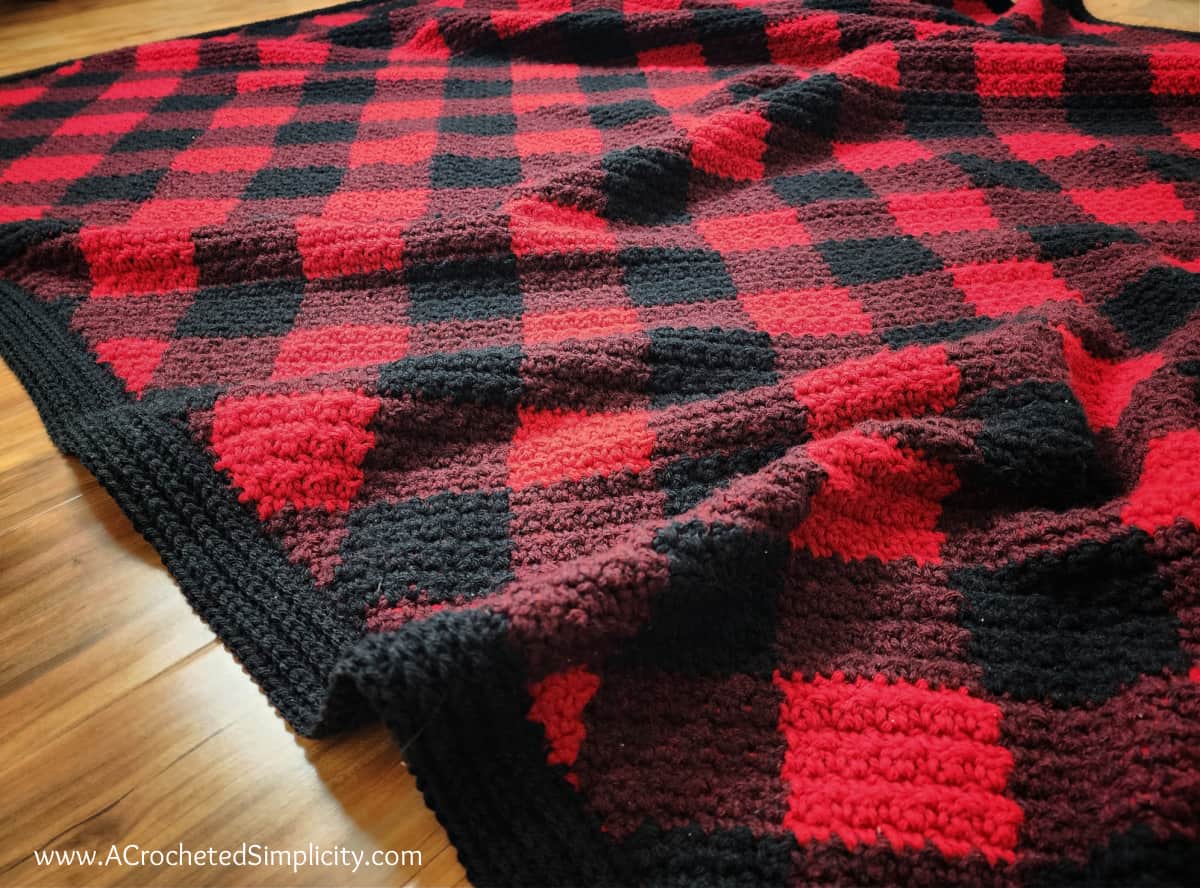
Step Six: Crochet the Ribbed Log Cabin Border.
How to Crochet a Corner to Corner Rectangle Blanket
I made the C2C chart below, as a visual aid, to help you understand how to crochet this corner to corner buffalo plaid blanket pattern.
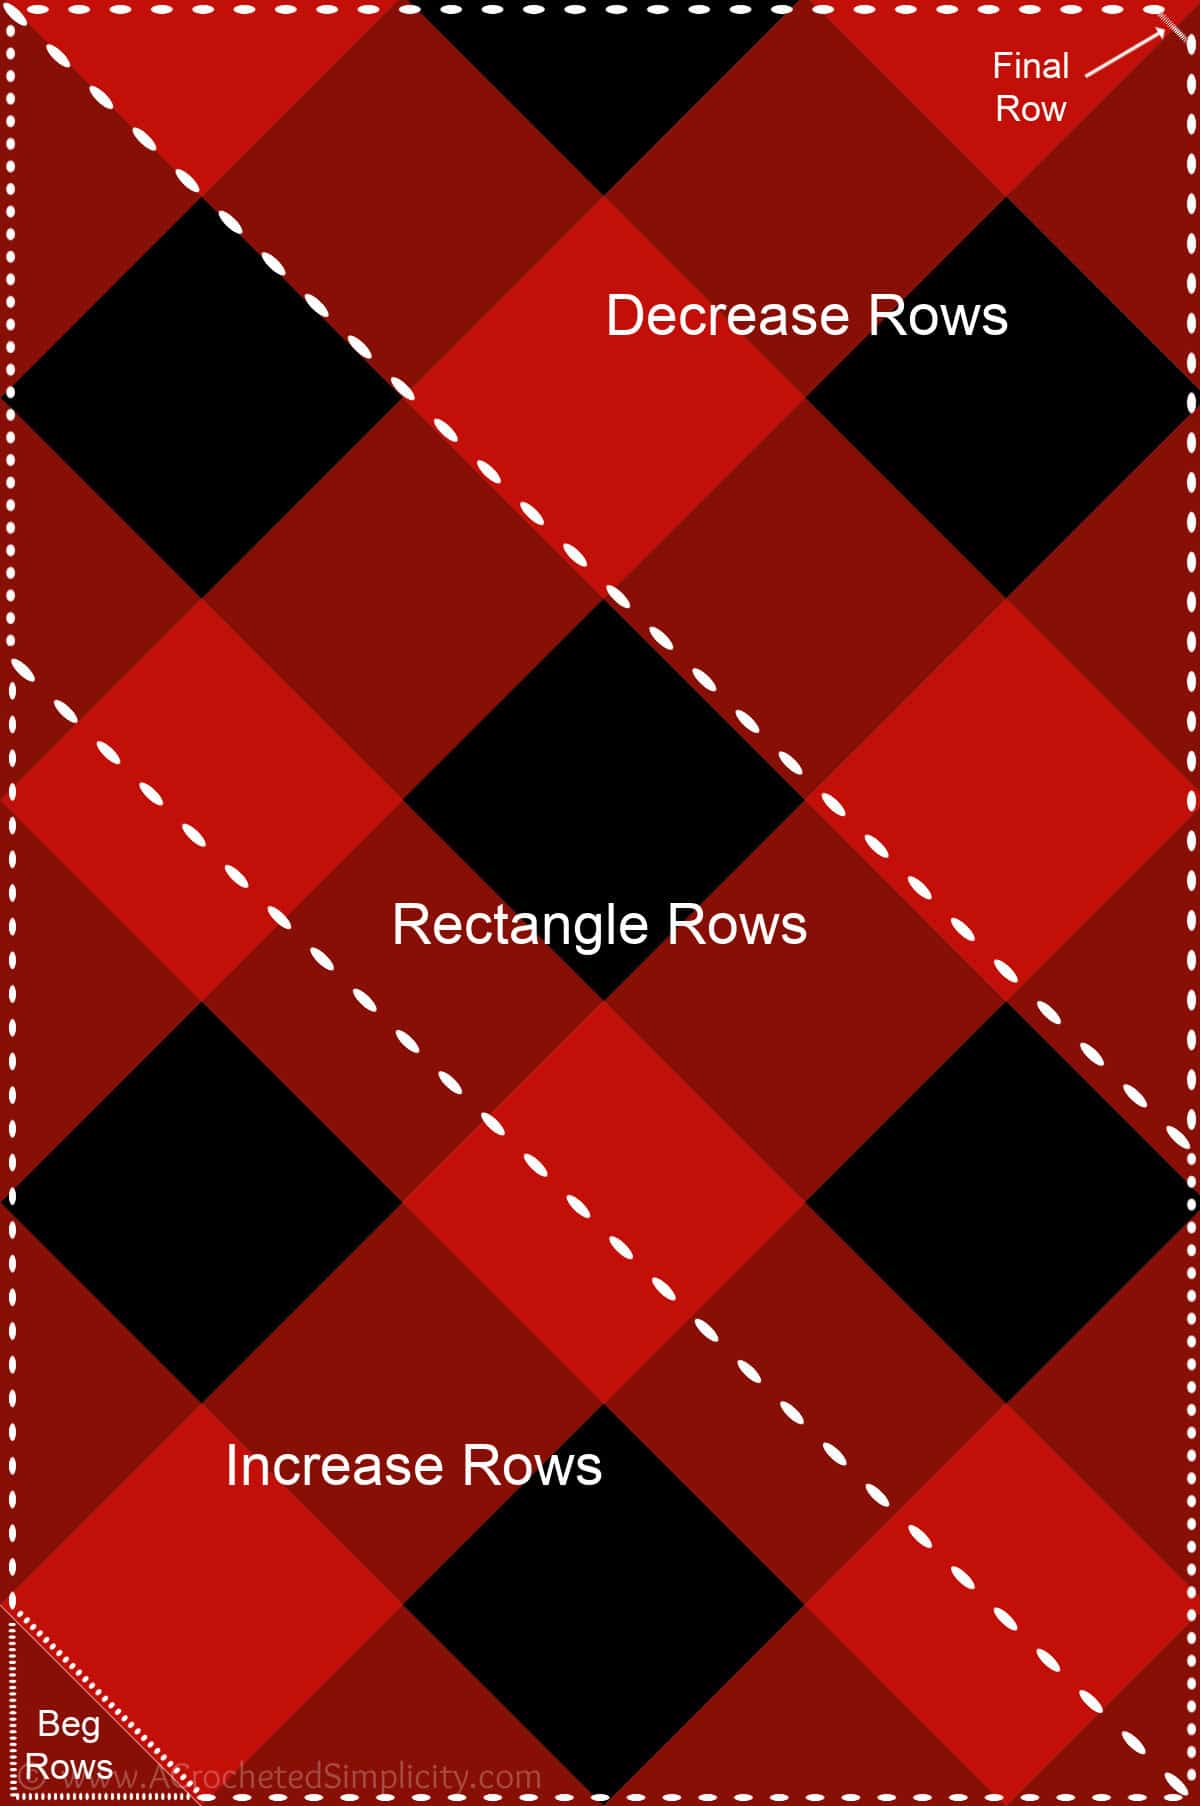
The plaid square design on the graphic above is NOT to scale. This graphic is only to show you how the blanket is constructed.
How to Crochet the C2C Buffalo Plaid Blanket Video Tutorial
Even though I’ve included a step-by-step photo tutorial below that includes 40+ photos, I realize that sometimes there are things that are just better explained with a video. (If you’re someone who loves crochet video tutorials, make sure to subscribe to our channel because we have more great tutorials coming your way!)


C2C CROCHET BUFFALO PLAID BLANKET – FREE CROCHET PATTERN
The free C2C plaid crochet blanket pattern is below, but if you love to work offline, I’ve got a couple other great options for you.
Purchase the ad-free, printable PDF, including photo tutorials, on Love Crafts, Ravelry, or on Etsy (aff).
Purchase the crochet blanket kit! Lion Brand has a full kit of the C2C Crochet Buffalo Plaid Blanket, available on their website. The kit includes your choice of colors and a digital copy of the C2C plaid crochet blanket pattern below.
Save this pattern to your Ravelry favorites.
Subscribe to my YouTube Channel!
This post contains affiliate links.
MATERIALS
- Yarn: Worsted Weight / 4 yarn, Lion Brand Yarns Pound of Love was used for the corner to corner buffalo plaid crochet blanket shown in the photos.
- MC: Claret – 2 balls / 1,900 yards
- CC1: Cherry Red – 1 ball / 950 yards
- CC2: Black – 2 balls / 1,300 yards
- Crochet Hooks: J/10/6.00mm; H/8/5.50mm (My favorite crochet hooks are the Clover Amour Hooks, I’ve never had an ache in my hand since switching)
- Scissors
- Yarn Needle
- Locking Stitch Markers
Many of these materials are available for purchase through our affiliates below:
 Lion Brand Pound of Love Ya...Shop on Amazon
  1049/J CROCHET HOOK AMOUR-S...Shop on Amazon
  Amour Crochet Hook: 5.50mmShop on Amazon
  Clover Quick Locking Stitch...Shop on Amazon
EXPERIENCE LEVEL
- Easy / Intermediate
GAUGE
- With 6.00mm hook, (sc in next st, dc in next st), 20 sts = 5.75″; 14 rows = 5.75″
SIZE
- 58″ W x 70″ L
- Instructions are included to make ANY size C2C buffalo plaid blanket.
ABBREVIATIONS (US TERMS)
- ch(s): chain(s)
- sl st(s): slip stitch(es)
- st(s): stitch(es)
- sp: space
- sc: single crochet
- dc: double crochet
- sc2tog: single crochet decrease by 1 st
- sc4tog: single crochet decrease by 3 sts
- Alt-dc: alternate double crochet
- Alt-dc2tog: alternate double crochet decrease
- BLO: back loop only
- yo: yarn over
- Rep: Repeat
- Rnd: round
- MC: Main Color
- CC1 / CC2: Contrasting Colors 1 & 2
- Join yarn with a standing sc
NOTES
- Turning chains are not included in stitch count, unless noted otherwise.
- Yarn Notes: Lion Brand Yarns Pound of Love, worsted weight / 4, 100% Premium Acrylic, (1,020 yards / 454 g / 16 oz / 932 m) was used for this crochet c2c plaid blanket.
- Yardage
- MC: Claret – 2 balls / 1,900 yards
- CC1: Cherry Red – 1 ball / 950 yards
- CC2: Black – 2 balls / 1,300 yards
- This pattern includes easy instructions to make this blanket ANY width and length you’d like. However, the yardage listed above is for a blanket the same size as the sample.
- If you’d like to make a larger crochet afghan, checkout the Standard Crochet Blanket Sizes Chart. Click Here
- Any weight yarn can be substituted as long as you adjust your hook size for the yarn weight you’re using.
- Gauge isn’t crucial for this project, but you may need to adjust your hook to get the desired look with your tapestry crochet colorwork.
- This blanket is worked corner to corner (on the bias), using the crochet griddle stitch and tapestry crochet colorwork to create the buffalo plaid design. After completing the main portion of the blanket, a simple, ribbed log cabin border is added. See the chart above for a visual of how the C2C plaid blanket is constructed.
- Don’t forget to check out the video tutorial companion!
Special Stitches
- Join with a standing sc: When instructed to “Join with a standing sc”, begin with a slip knot on your hook. Insert your hook into the stitch or space indicated, yo, pull up a loop, yo and draw thru both loops on hook.
- Alternate Double Crochet (alt-dc): Do not ch, instead, insert your hook into the first st, yo, pull up a loop, yo, pull thru both loops, insert your hook between the legs of the st just made, yo, pull up a loop, yo, pull thru one loop, yo, pull thru remaining loops.
- Alternate Double Crochet Decrease (Alt-dc2tog): After turning your work, do not ch, instead, insert your hook into the first st, yo, pull up a loop, yo, pull thru both loops, insert your hook between the legs of the st just made, yo, pull up a loop, yo, pull thru one loop, yo, insert your hook into the next st indicated, yo, pull up a loop, yo, pull through 2 loops, yo, pull through remaining 3 loops.
Print Your Own – Purchase an Ad-Free, printable PDF
C2C Buffalo Plaid Colorwork Basics
- Color changes begin with Increase Row 3.
- Each row uses only two colors. You’ll crochet 7 rows using MC & CC1, or 7 rows using MC & CC2.
- Fasten off the unused color and rejoin when needed.
- Your Main Color will be used in EVERY row of your blanket.
- You will alternate your Contrasting Colors CC1 & CC2, every 7 rows.
- To clarify, you will work 7 rows using MC & CC1, then crochet 7 rows using MC & CC2. Then repeat the sequence.
- Even though you use MC for every row, you will alternate its’ placement. Meaning, a block of MC, when working rows of MC & CC1, will be diagonal to a block of MC when working rows of MC & CC2. This will create a checkerboard effect.
- Each colored block is 10 sts wide x 7 rows high.
- Change colors every 10 sts within each row. A single block of color is no more than 10 sts wide.
- Change from CC1 to CC2 (or vice versa) after you’ve worked 7 rows of either color combination (MC & CC1 / MC & CC2).
C2C Buffalo Plaid Stitch & Color Layout Chart
How Can I Get My Own Printable Chart?
- Get the FREE printable PDF buffalo plaid stitch & color chart sent straight to your inbox when you subscribe to my newsletter using this form.
- OR, purchase the Ad-Free PDF (which includes all charts & tutorials) on Love Crafts, Ravelry, or Etsy (aff).
I created this chart to help you get started working color changes, especially as you’re working the increase rows. When getting started, you can use it to count stitches and rows.
- Crochet a Swatch: I suggest using it to make a swatch. Working this small swatch will really help you to get a grasp on the colorwork, increasing and decreasing. I promise it really is much more simple than it looks at first glance!
- I used the chart to crochet the swatch I made on camera in the Video Tutorial.
- Note: The stitch and row counts are correct, but the height of the blocks of buffalo plaid on the chart aren’t shown to scale.
C2C Crochet Buffalo Plaid Blanket Instructions
Scroll down past the written instructions for the step-by-step photo tutorial.
Watch the Video Tutorial Companion on YouTube!
- Crochet a swatch with me using the C2C Buffalo Plaid Stitch & Color Layout Chart. Subscribe to receive yours FREE!
- I suggest printing it out to keep beside you as you crochet. It’s an excellent visual aid!
Beginning Rows
The beginning rows are simply how we get the blanket started. They are pretty straight forward.
Row 1: With a 6.00 mm hook & MC yarn, ch 3 (does not count as a st), work (dc, sc, dc, sc) into the 3rd ch from your hook. Turn. (4 sts) Place a SM in the bottom of the beginning ch 3 to mark the first corner stitch.
Row 2: Ch 1, (sc, dc) in the first st, sc in the next st, dc in the next st, (sc, dc) in the last st. Turn. (6 sts)
Do not fasten off. Continue on to Increase Rows.
Increase (Inc) Rows
In this section, you will be increasing the width of your blanket by repeating 2 simple rows. You’ll work an increase in the first and last stitch of every row.
The stitch count for each row increases by 2 stitches.
Each block of color in this pattern is only 10 sts wide. So, because the stitch count at the end of Inc Row 2 is 10 sts, we will begin working rows of MC & CC1 in Inc Row 3 (the 5th row of your blanket).
Inc Row 1: (Alt-dc, sc) in the first st, (dc in the next st, sc in the next st) rep from ( to ) across to the last st, (dc, sc) in the last st. Turn. Tip: Work the last sc of the row a little loosely to help keep the side from cinching. Stitch count increases by 2 sts.
Note: Make sure not to pull the ch-1 at the beginning of Inc Row 2 too tightly or it will cause the edge of your blanket to cinch.
Inc Row 2: Ch 1, (sc, dc) in the first st, (sc in the next st, dc in the next st) rep from ( to ) across to the last st, (sc, dc) in the last st. Turn. Stitch count increases by 2 sts.
Begin colorwork with Inc Row 3. See the photo tutorial below.
Inc Rows 3 – 110: Rep Inc Rows 1 – 2 (make sure you end with a Inc Row 2).
Custom Sizing: See How to Crochet a Custom Size C2C Buffalo Plaid Blanket above, if you’d like to make a smaller or larger blanket.
Do not fasten off. Place a SM in the last stitch of the last Inc Row 2 repeat, before continuing to the rectangle rows. This will mark a corner stitch. Continue on to Rectangle Rows.
Rectangle (Rec) Rows
In this section, you will be increasing the length of your blanket only.
Your work will transition from a triangle and begin to resemble something more of a rectangle (scroll down to see progression photos).
Along one side of your blanket, you will work decreases and along the opposite side of your blanket, you will work increases.
The stitch count for each row in this section does not change.
Rec Row 1: Alt-dc2tog, sc in the next st, (dc in the next st, sc in the next st) rep from ( to ) across to the last st, (dc, sc) in the last st. Turn. Stitch count does not decrease.
Rec Row 2: Ch 1, (sc, dc) in the first st, (sc in the next st, dc in the next st) rep from ( to ) across to the last 3 sts, sc in the next st, sc2tog. Turn. Stitch count does not decrease.
Inc Rows 3 – 28: Rep Rec Rows 1 – 2 (make sure you end with a Rec Row 2).
Custom Sizing: See How to Crochet a Custom Size C2C Buffalo Plaid Blanket above, if you’d like to make a smaller or larger blanket.
Do not fasten off. Place a SM in the first stitch of the last Rec Row 2 repeat, before continuing to the decrease rows. This will mark a corner stitch. Continue on to Decrease Rows.
Decrease (Dec) Rows
In this section, you will be decreasing both ends of each row to complete the missing triangular section of your blanket and work towards the last corner.
The stitch count for each row decreases by 2 stitches.
Dec Row 1: Alt-dc2tog, sc in the next st, (dc in the next st, sc in the next st) rep from ( to ) across to the last 3 sts, dc in the next st, dc2tog. Turn. Stitch count decreases by 2.
Dec Row 2: Ch 1, sc2tog, dc in the next st. (sc in the next st, dc in the next st) rep from ( to ) across to the last 2 sts, sc2tog. Turn. Stitch count decreases by 2.
Rep Dec Rows 1 – 2, until only 4 sts remain.
Do not fasten off. Continue on to Final Row.
Final Row
Final Row: Ch 1, sc4tog. (1 st)
Place a SM in the last stitch to mark the last corner.
Fasten off. Weave in ends. Continue on to the Preparing the Perimeter for a Border.
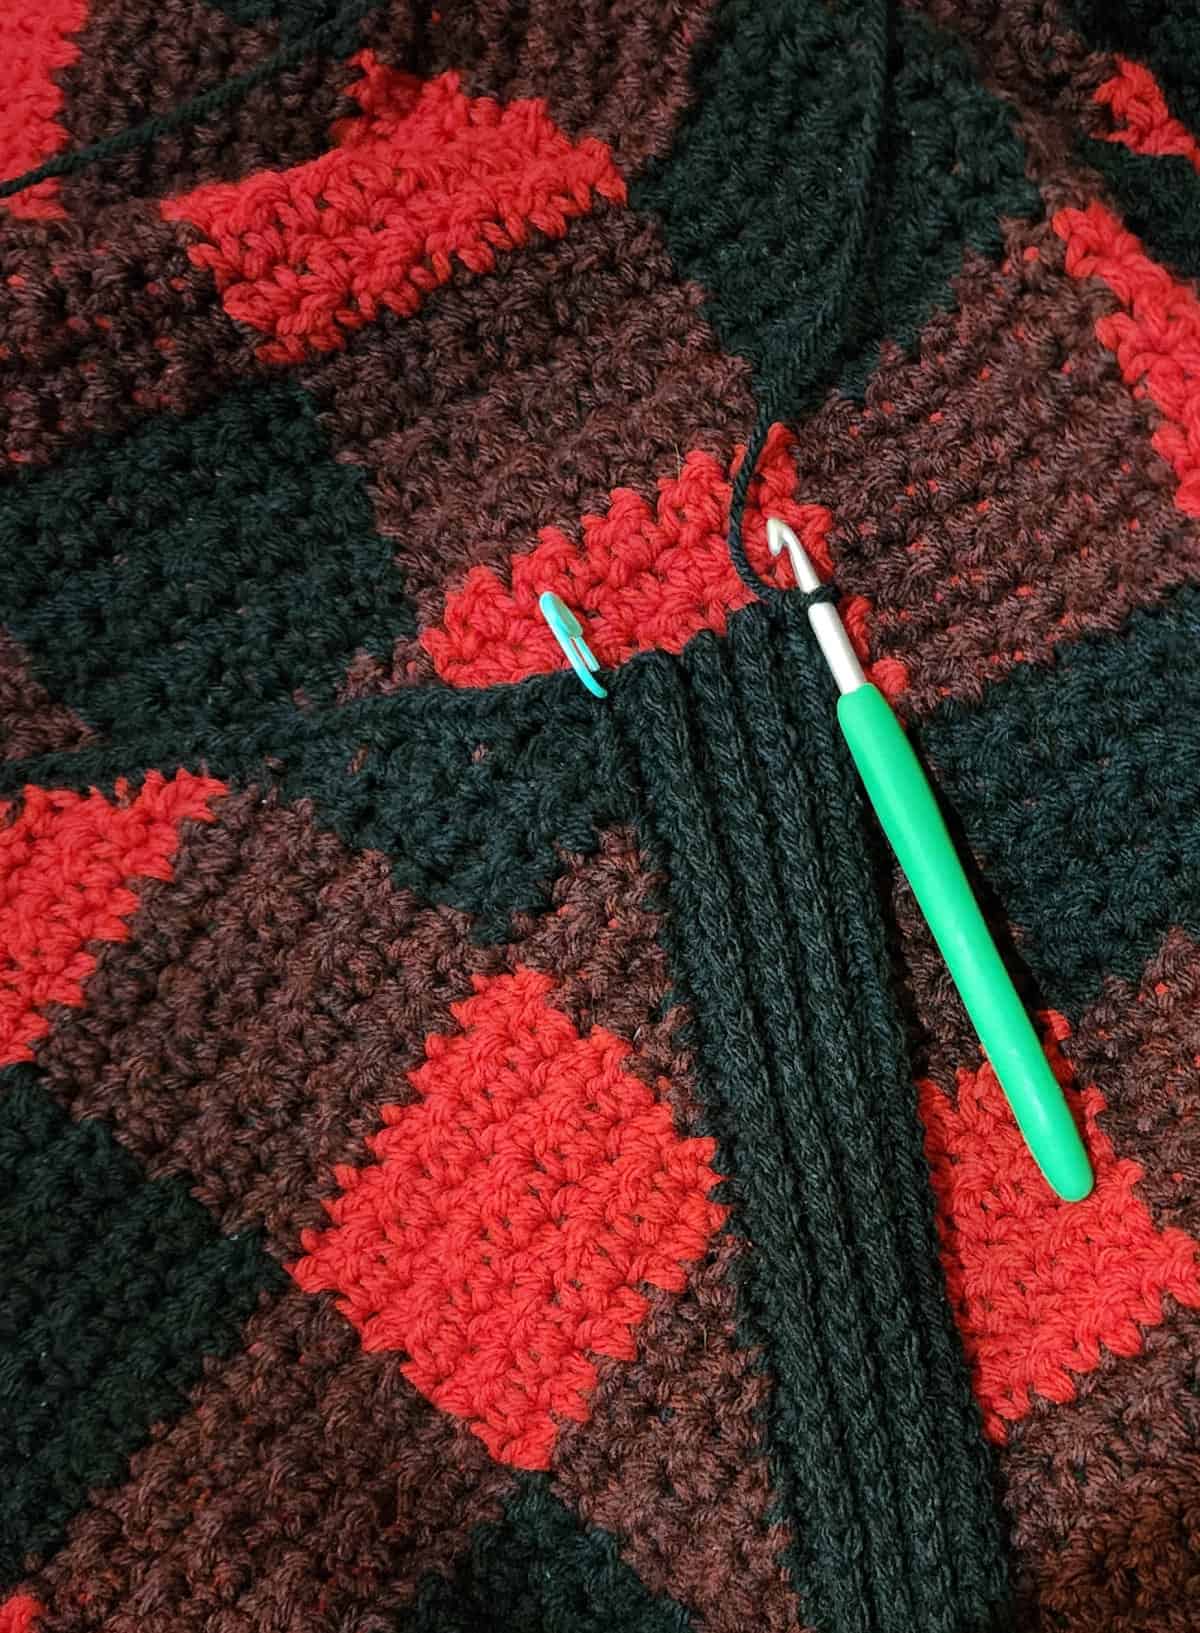
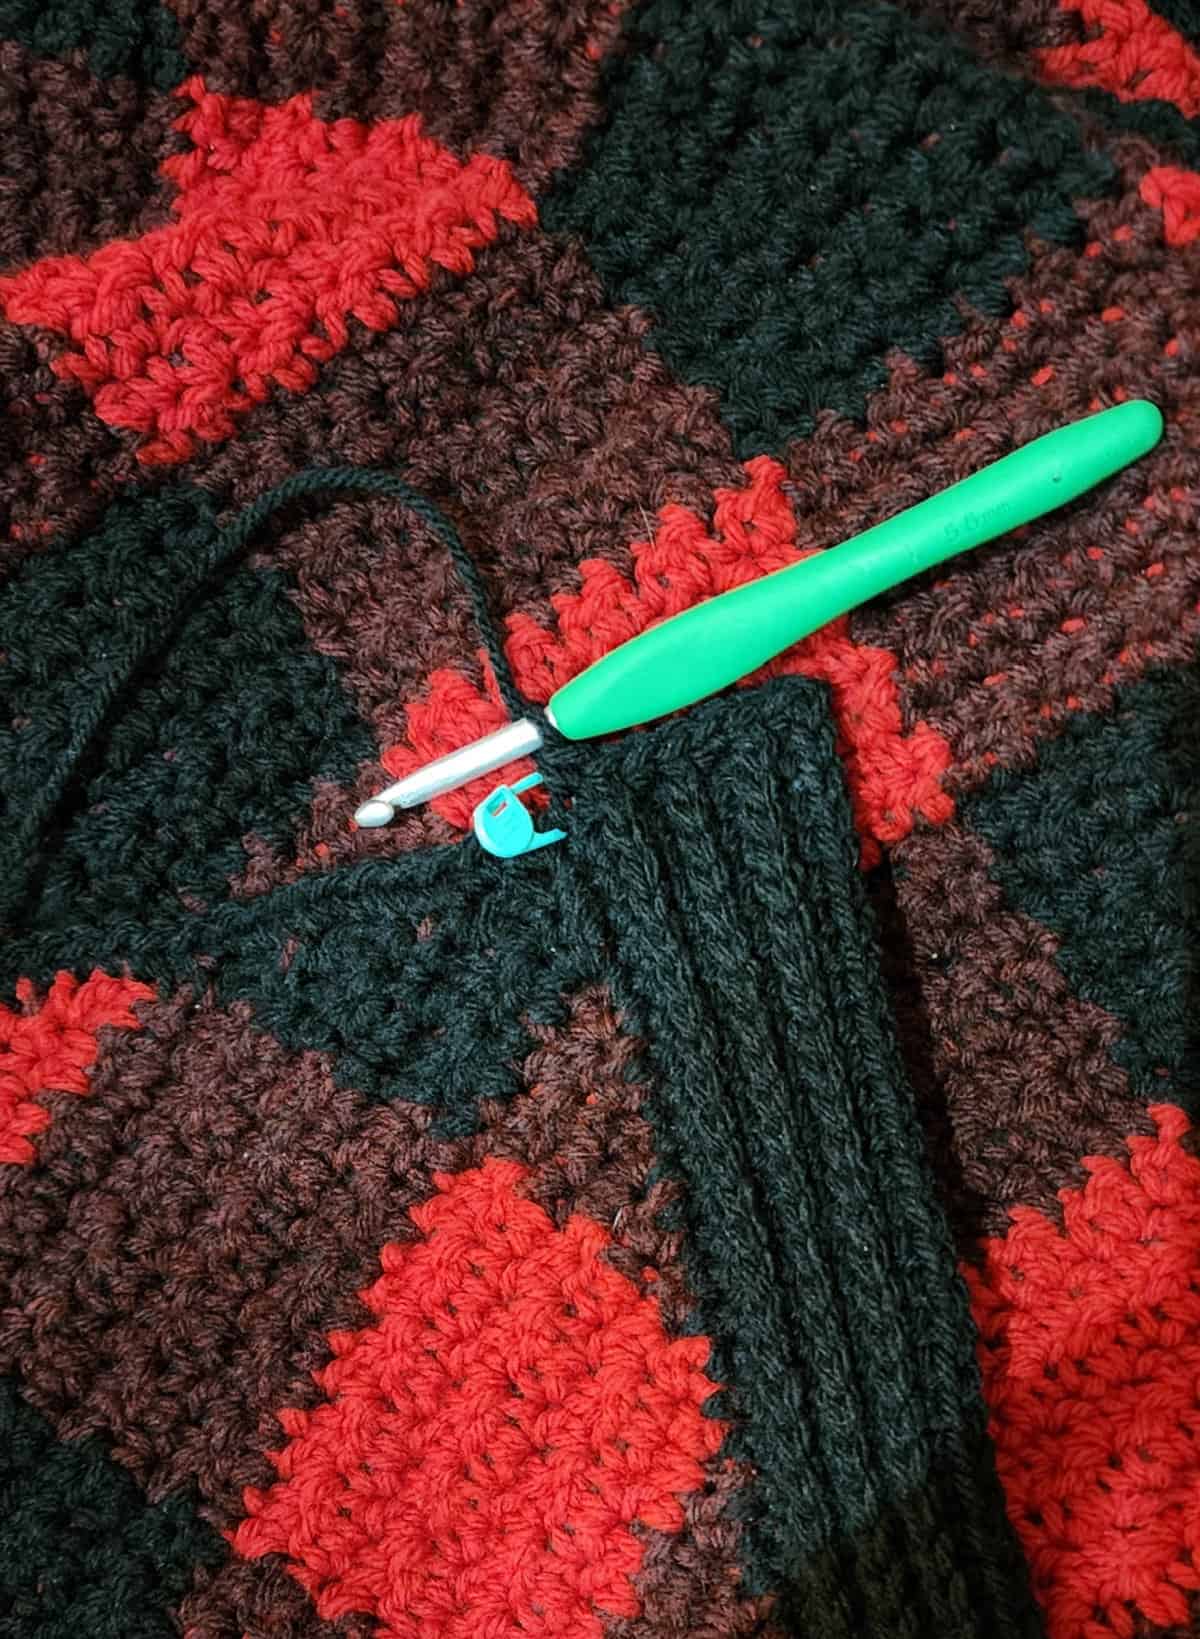
Preparing the Perimeter for a Border
Note: I went down to a 5.50mm crochet hook to keep my edges flat. It doesn’t matter what hook size you use for your border. The most important thing to keep in mind is that you want your border to lay flat.
If your border starts to get wavy, drop down a hook size or two. If your border starts to cinch inward, go up a hook size or two.
Border Color: I chose to use my neutral color for my border. Choose the color you think will look best for your buffalo plaid crochet blanket.
STITCH COUNT IS NOT CRUCIAL
Rnd 1: With Black yarn and a 5.50mm crochet hook (or whatever size is needed to keep from having a wavy border), join yarn with a standing sc in any marked corner stitch, then [ work along the side of the blanket and work 1 sc into each sc row, 2 sc into each dc row, until you reach the next corner st, (sc, ch 1, sc) into the next corner st, work from [ to ] 3 times, then work along the last side of the blanket and work 1 sc into each sc and 2 sc into each dc until you reach the corner where you joined your yarn to begin this round, work a (sc, ch 1) in the corner st where you joined your yarn. Join with a sl st to the first st. Stitch count isn’t crucial.
Move all 4 SM up to the middle ch-1 of each corner as you complete each round. Do not fasten off. Continue on to the Ribbed Log Cabin Border.
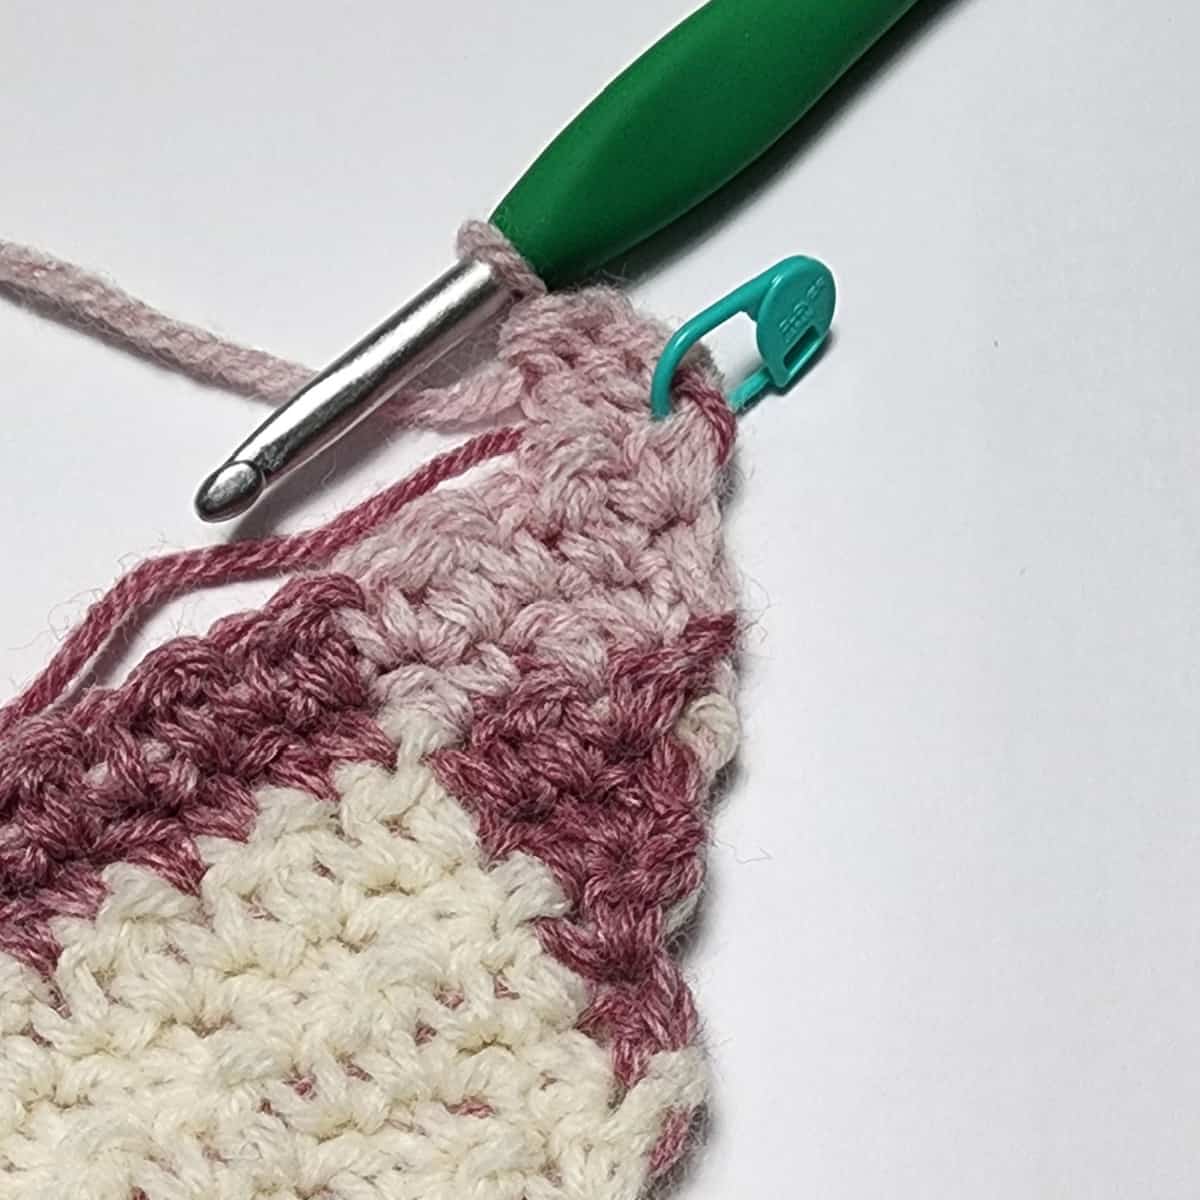
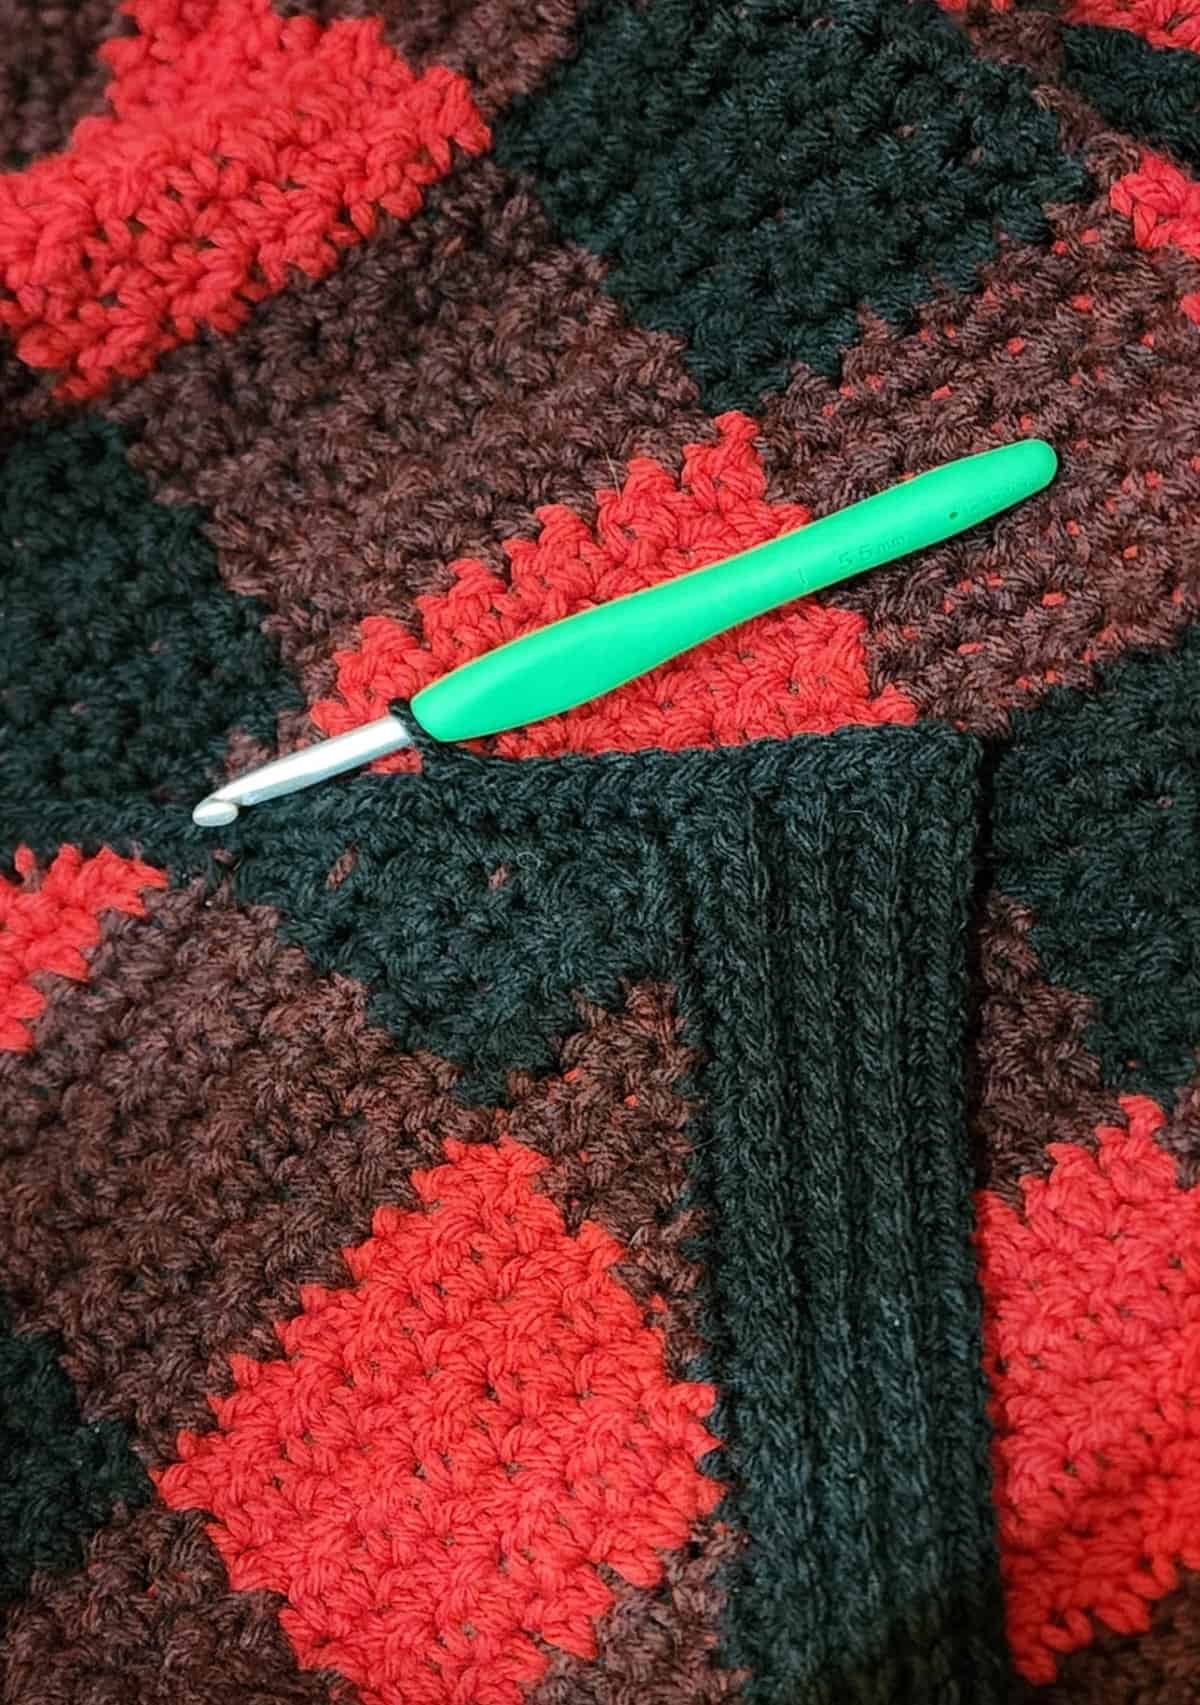
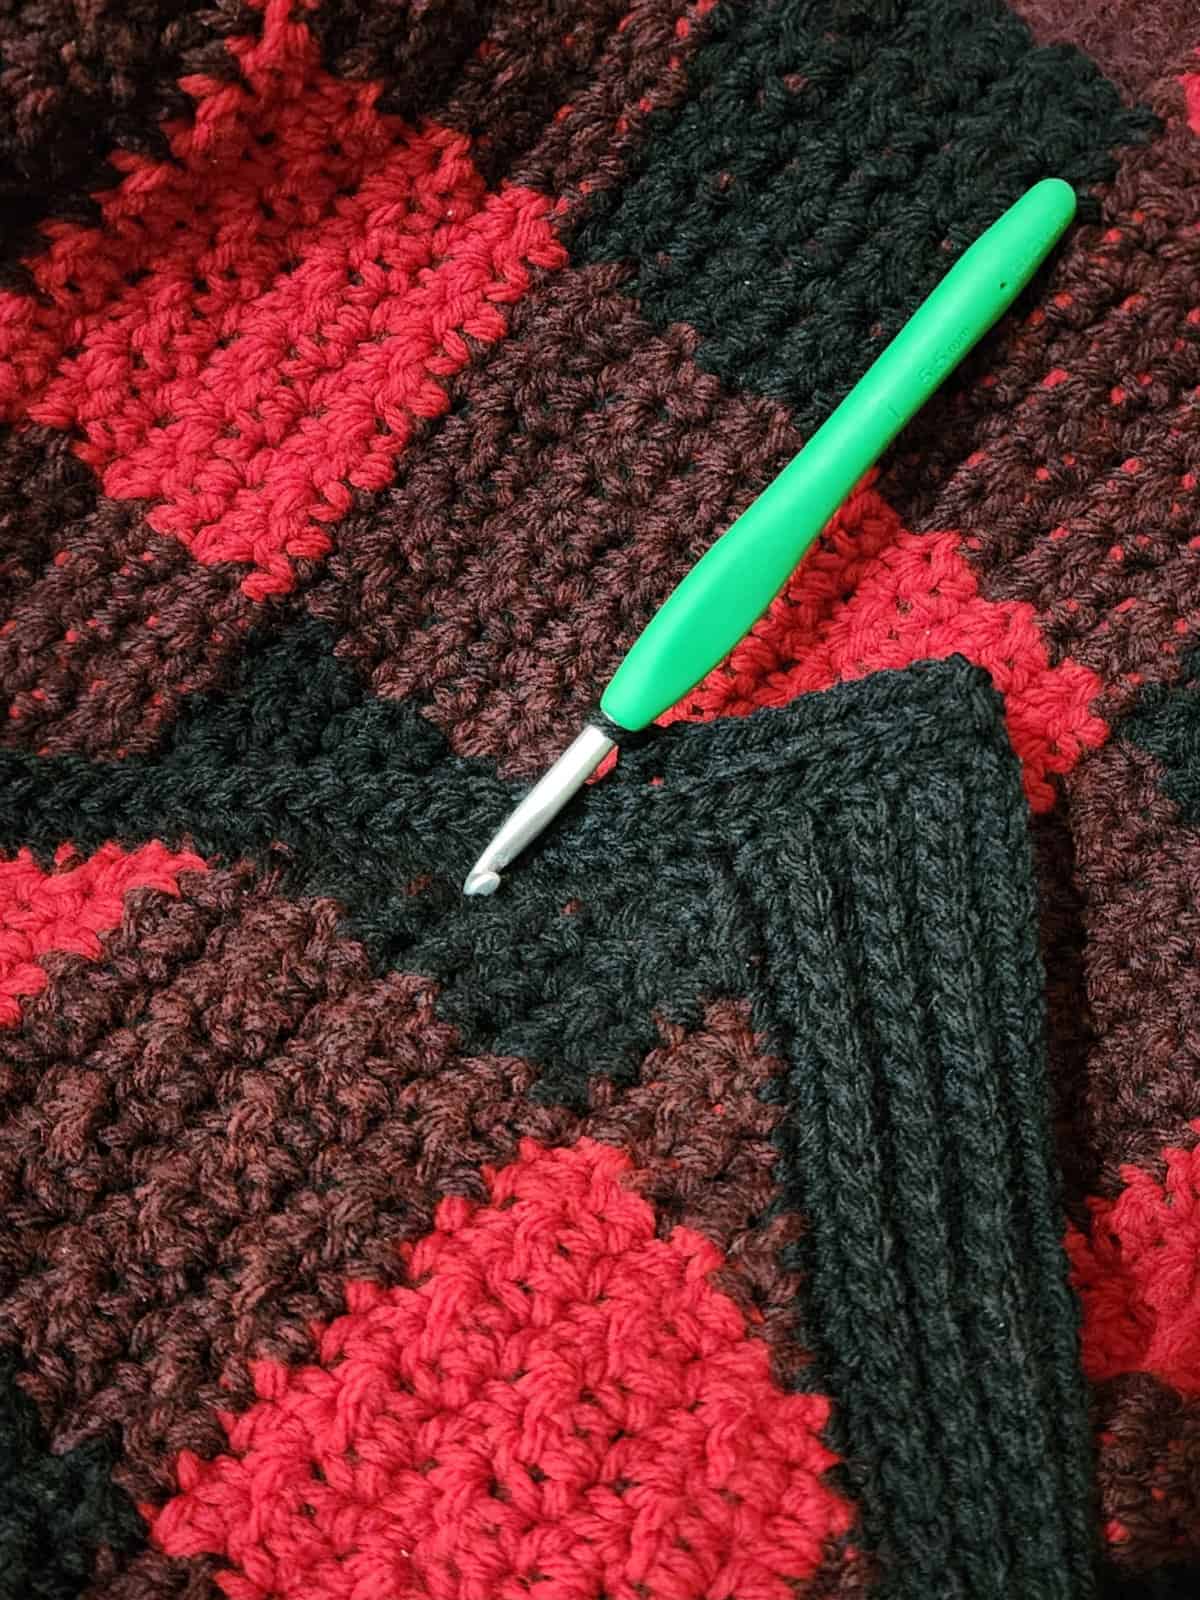
Ribbed Log Cabin Border
Continue on from the previous round and work into the stitches along the next side.
Side 1
Row 1: Ch 1, sc in each st across to the next corner marked with a SM, work the last sc of the row into the marked corner st. Turn.
Row 2: Ch 1, BLO sl st in each st across. Turn.
Row 3: Ch 1, BLO sc in each st across. Turn.
Rows 4 – 7: Rep Rows 2 – 3.
Do not fasten off. Continue on to Sides 2 & 3.
Sides 2 & 3
Continuing on from the previous side, rotate your blanket to work along the next side.
Row 1: Ch 1, work 1 sc into each row of the ribbing from the previous side, sc in the corner st, sc in each st across to the next corner st, work the last sc of the row into the next marked corner stitch. Turn.
Row 2: Ch 1, BLO sl st across, then work 1 sl st into the BLO of the turning chain. Turn.
Row 3: Ch 1, BLO sc in each st across. Turn.
Row 4: Ch 1, BLO sl st across. Turn.
Rows 5 – 7: Rep Rows 3 – 4, ending with a Row 3.
Do not fasten off. Repeat once for Side #3, then continue on to Side 4.
Side 4
Continuing on from Side 3, rotate your blanket to work along the last side.
Row 1: Ch 1, work 1 sc into each row from the ribbing of the previous section, sc in the corner st, sc in each st across to the next corner st, sc in the corner st, then work 1 sc into each row from the ribbing section of Side 1. Turn.
Row 2: Ch 1, BLO sl st across, then work 1 sl st into the BLO of the turning chain. Turn.
Row 3: Ch 1, BLO sc in each st across. Turn.
Row 4: Ch 1, BLO sl st across. Turn.
Rows 5 – 7: Rep Rows 3 – 4, ending with Row 3.
Fasten off. Weave in ends. Block, if desired.
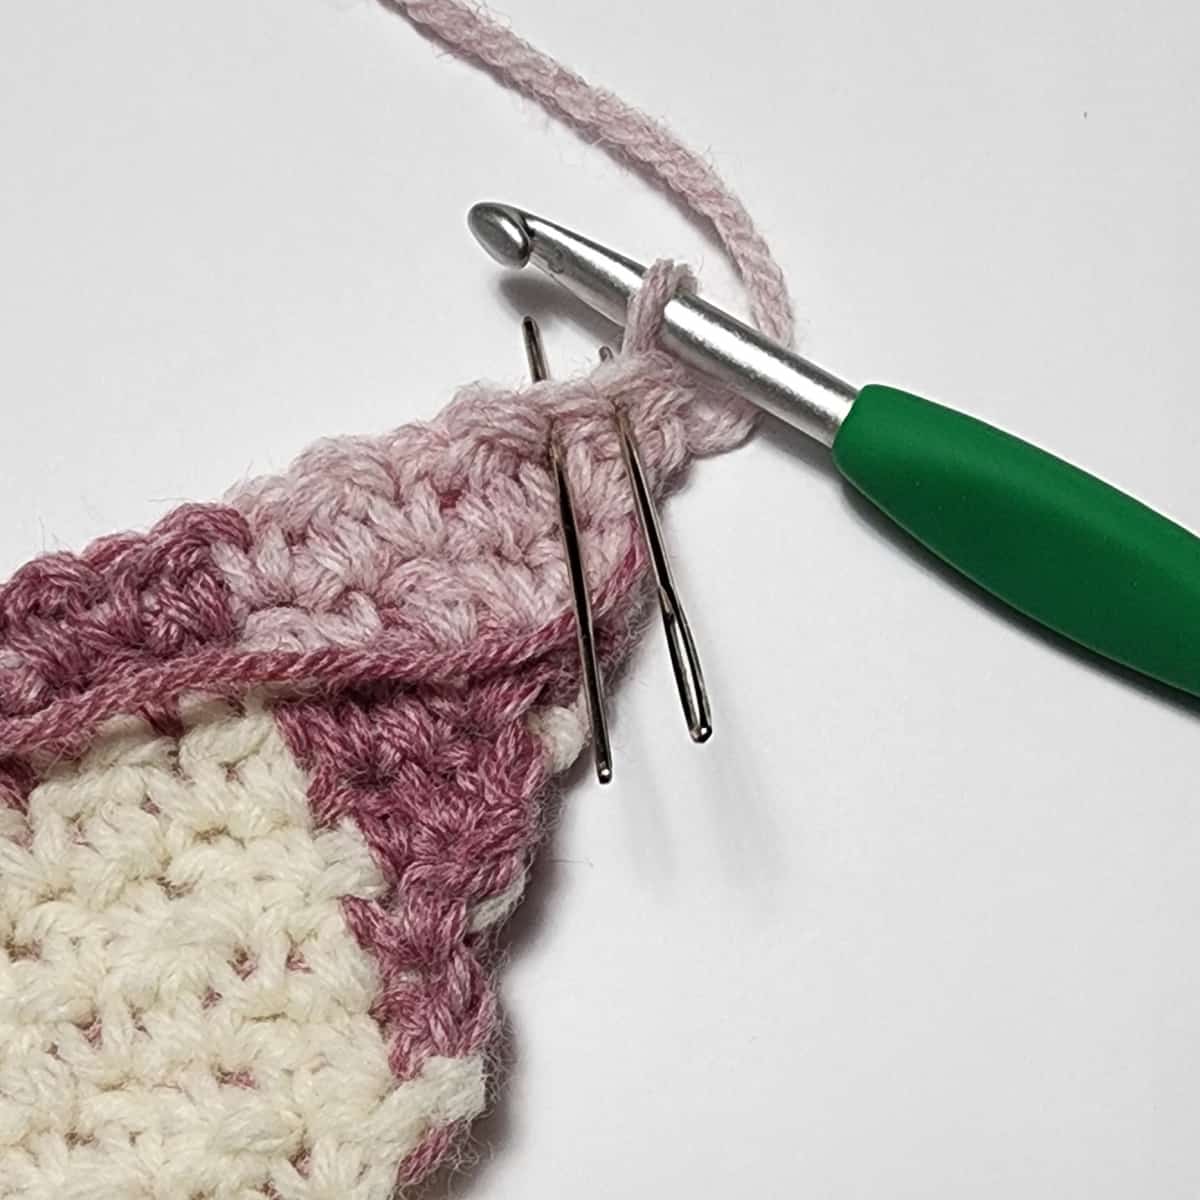
Step-by-Step Photo Tutorial
Beginning Rows
The beginning rows are simply how we get the blanket started. They are pretty straight forward.
Grab your hook and MC and crochet the beginning two rows.
Increase (Inc) Rows
In this section, you will be increasing the width of your blanket by repeating 2 simple rows. You’ll work an increase in the first and last stitch of every row. The stitch count for each row increases by 2 stitches.
Each block of color in this pattern is only 10 sts wide. So, because the stitch count at the end of Inc Row 2 is 10 sts, we will begin working rows of MC & CC1 in Inc Row 3 (the 5th row of your blanket).
If you haven’t yet done so, subscribe to my e-mail list to receive the Free printable stitch & color chart so you can follow along and count stitches and rows.

Begin Plaid Colorwork as you Increase
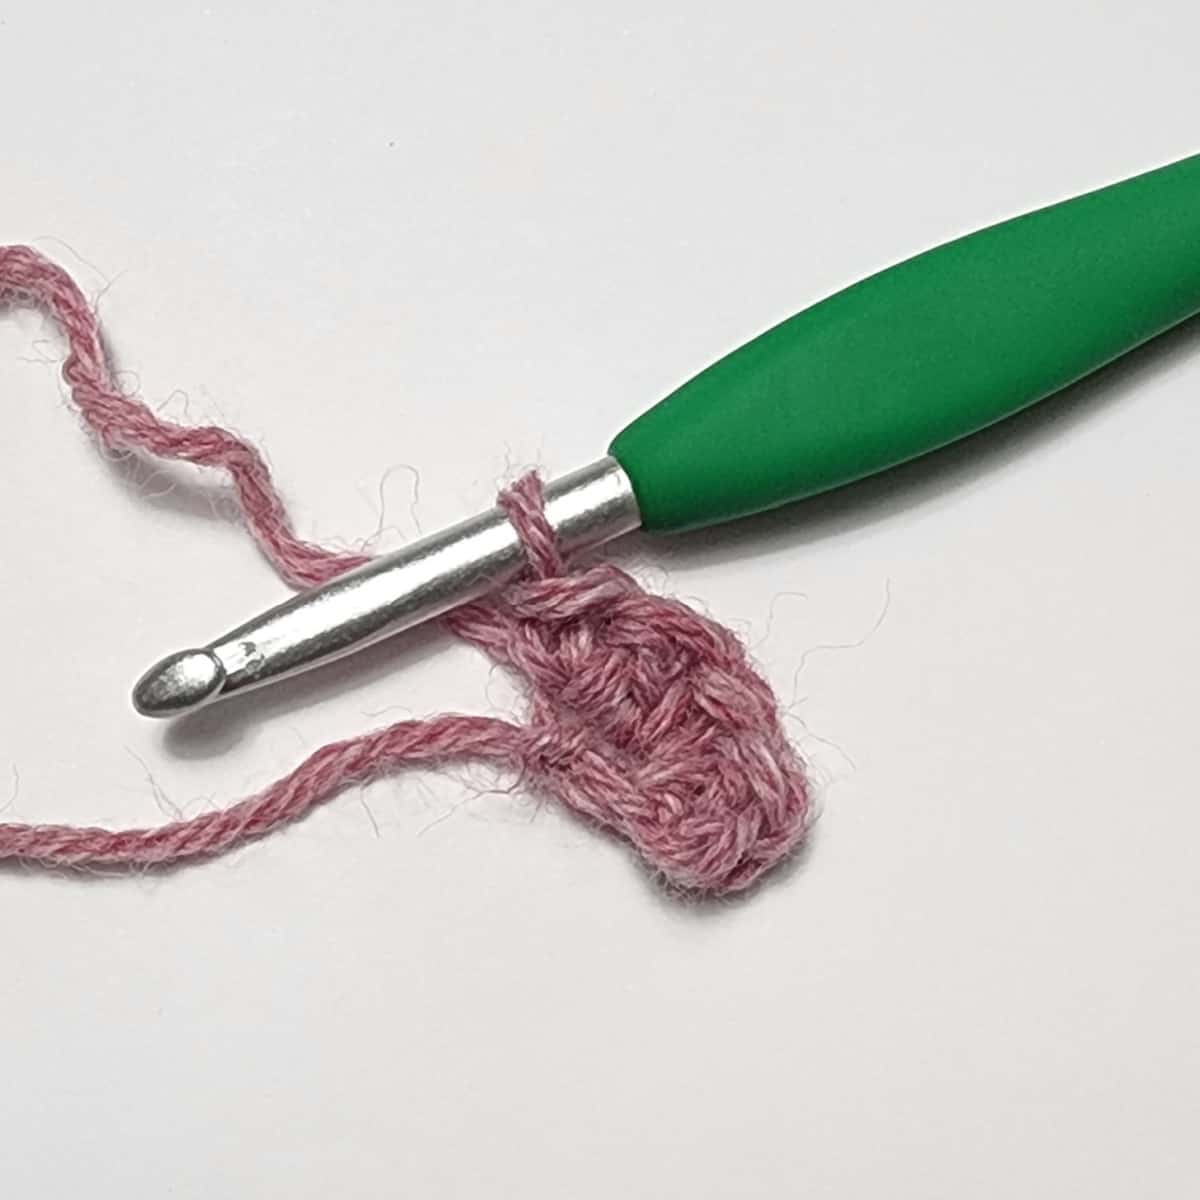
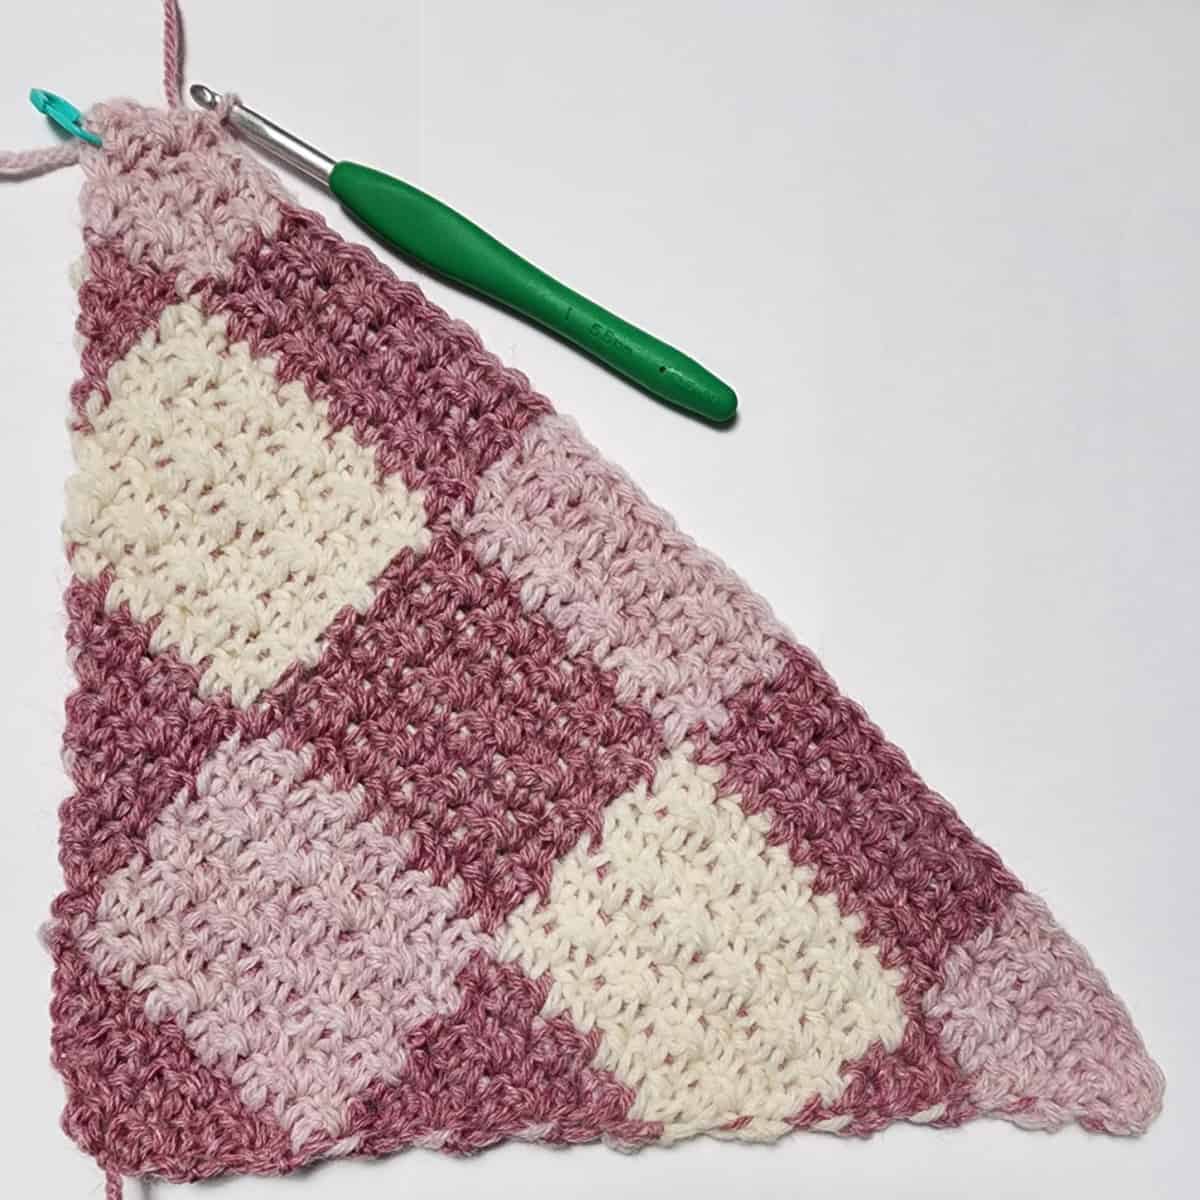
Inc Row 3 will end with 12 sts. The first and last sts of the row are worked with MC, the 10 sts in the middle of the row are worked with CC1.
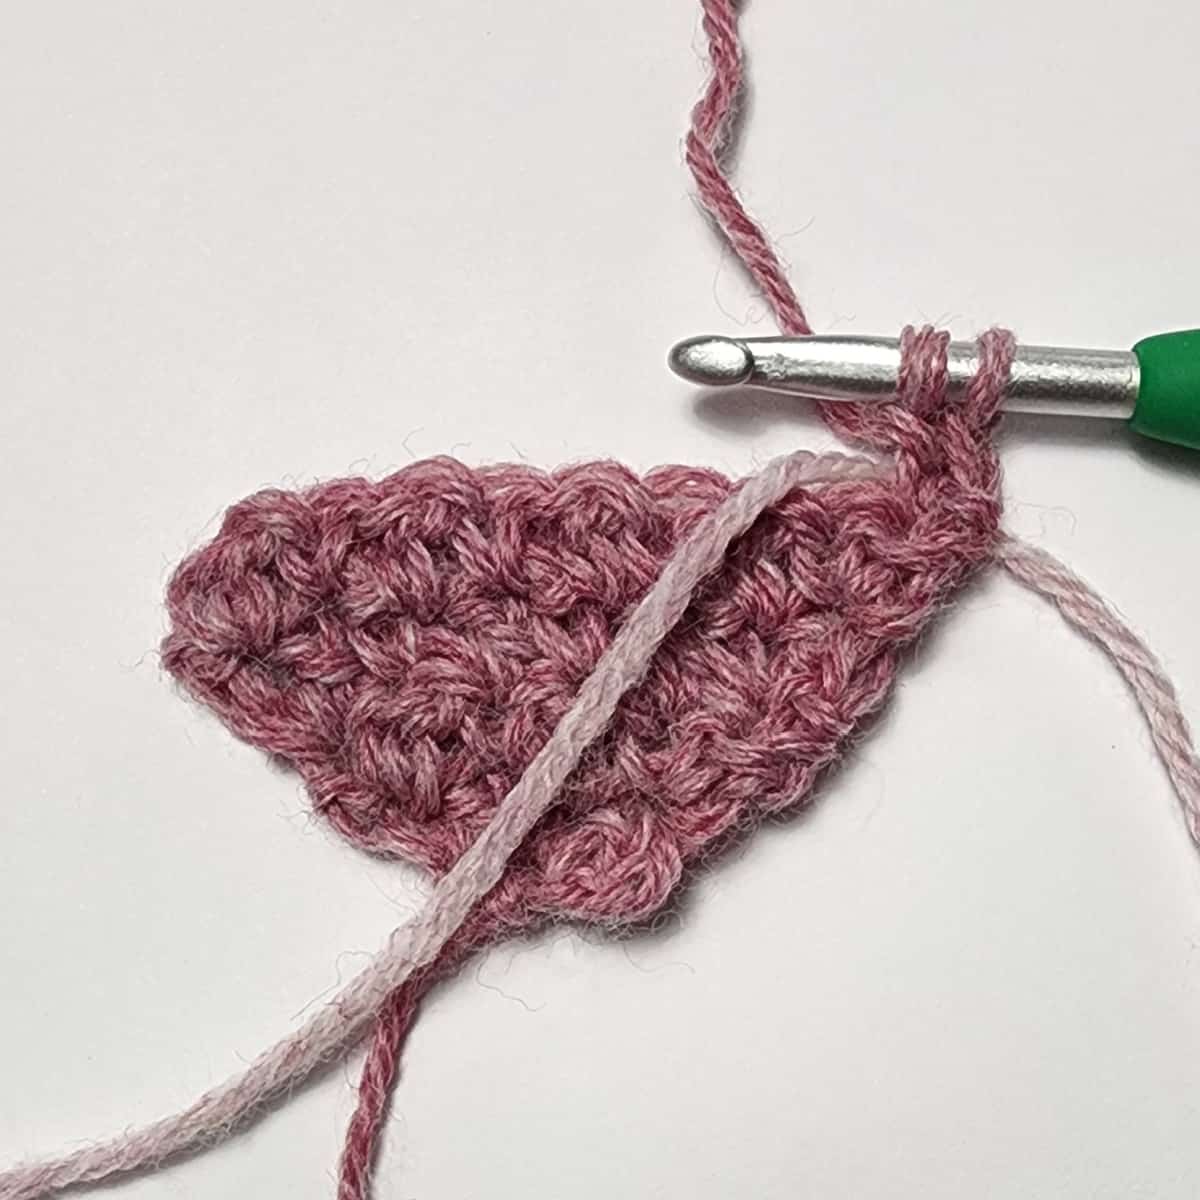
Photo Above, Inc Row 3: Work the first st in MC, an Alt-dc in the first st.
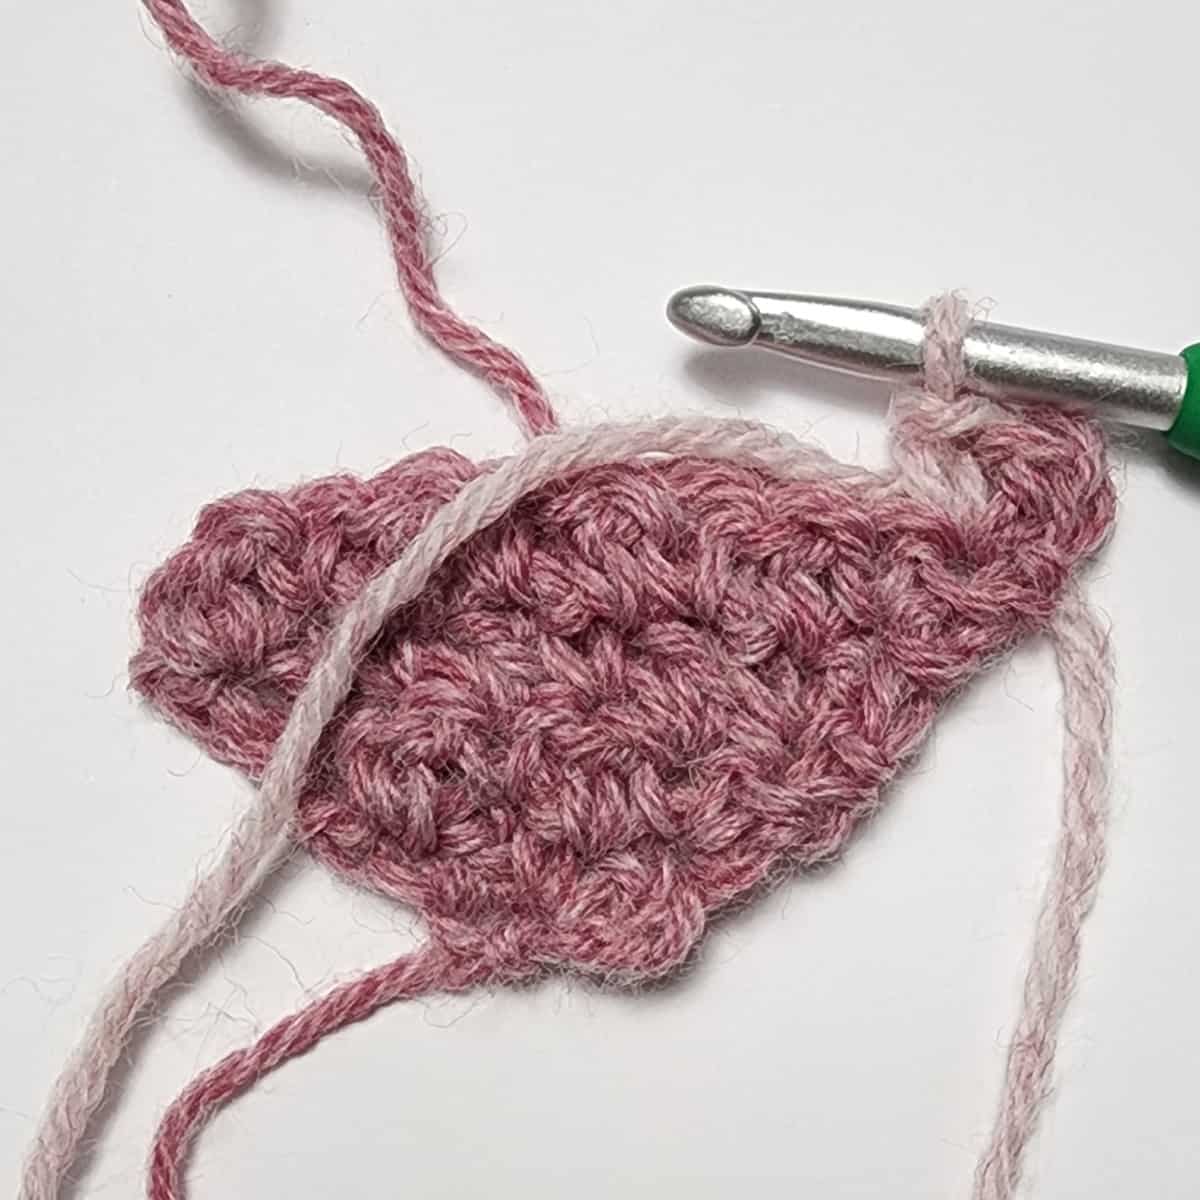
Photo Above, Inc Row 3: Work the next st in CC1, a sc in the same st.
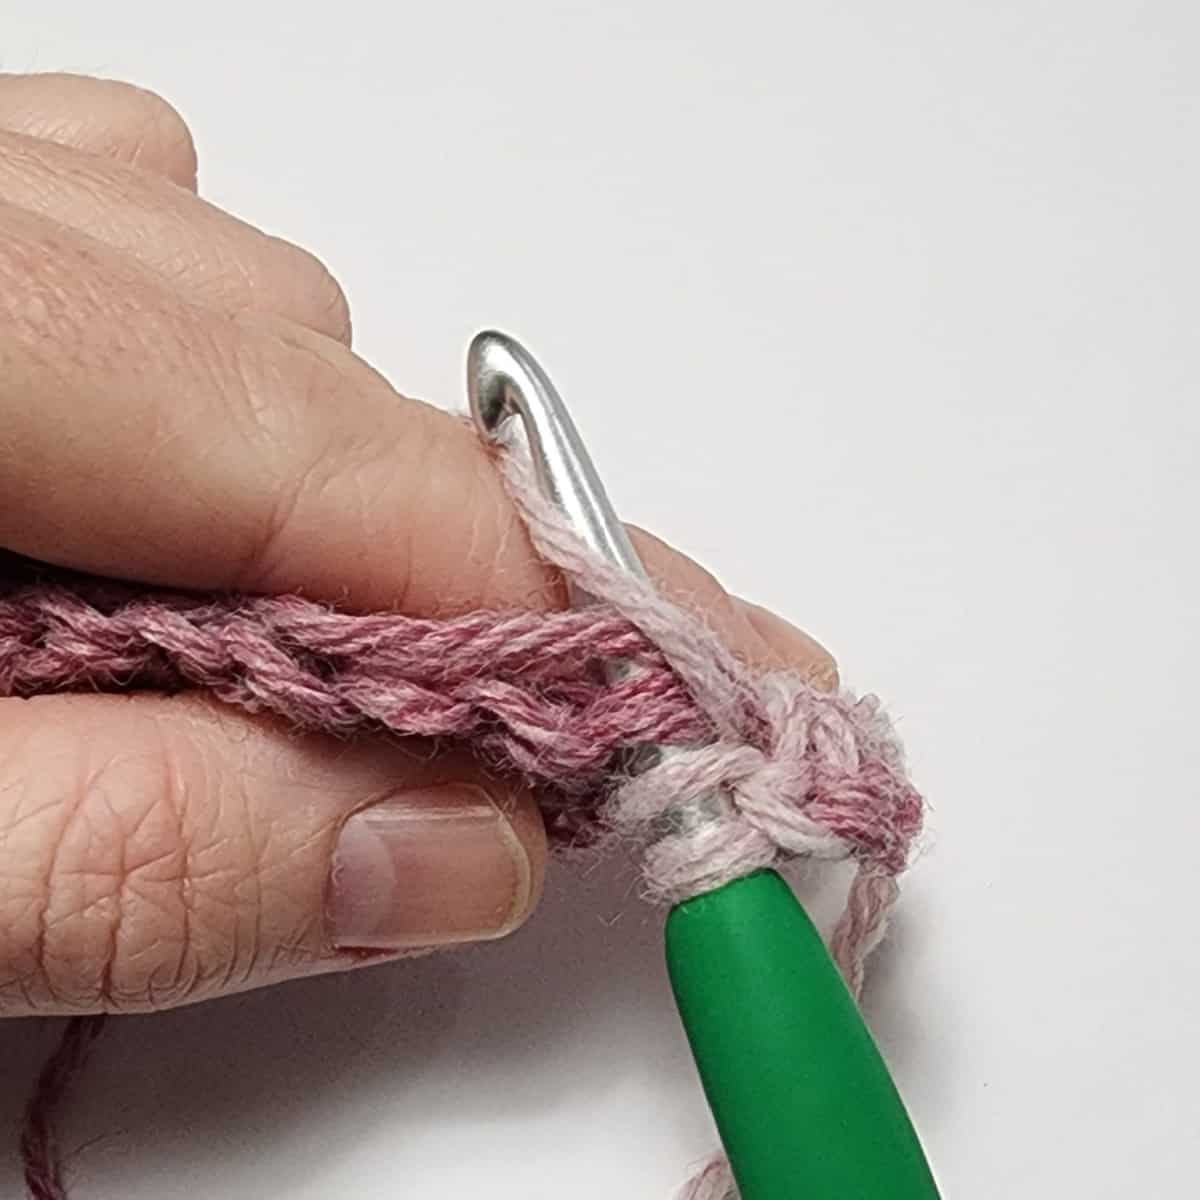
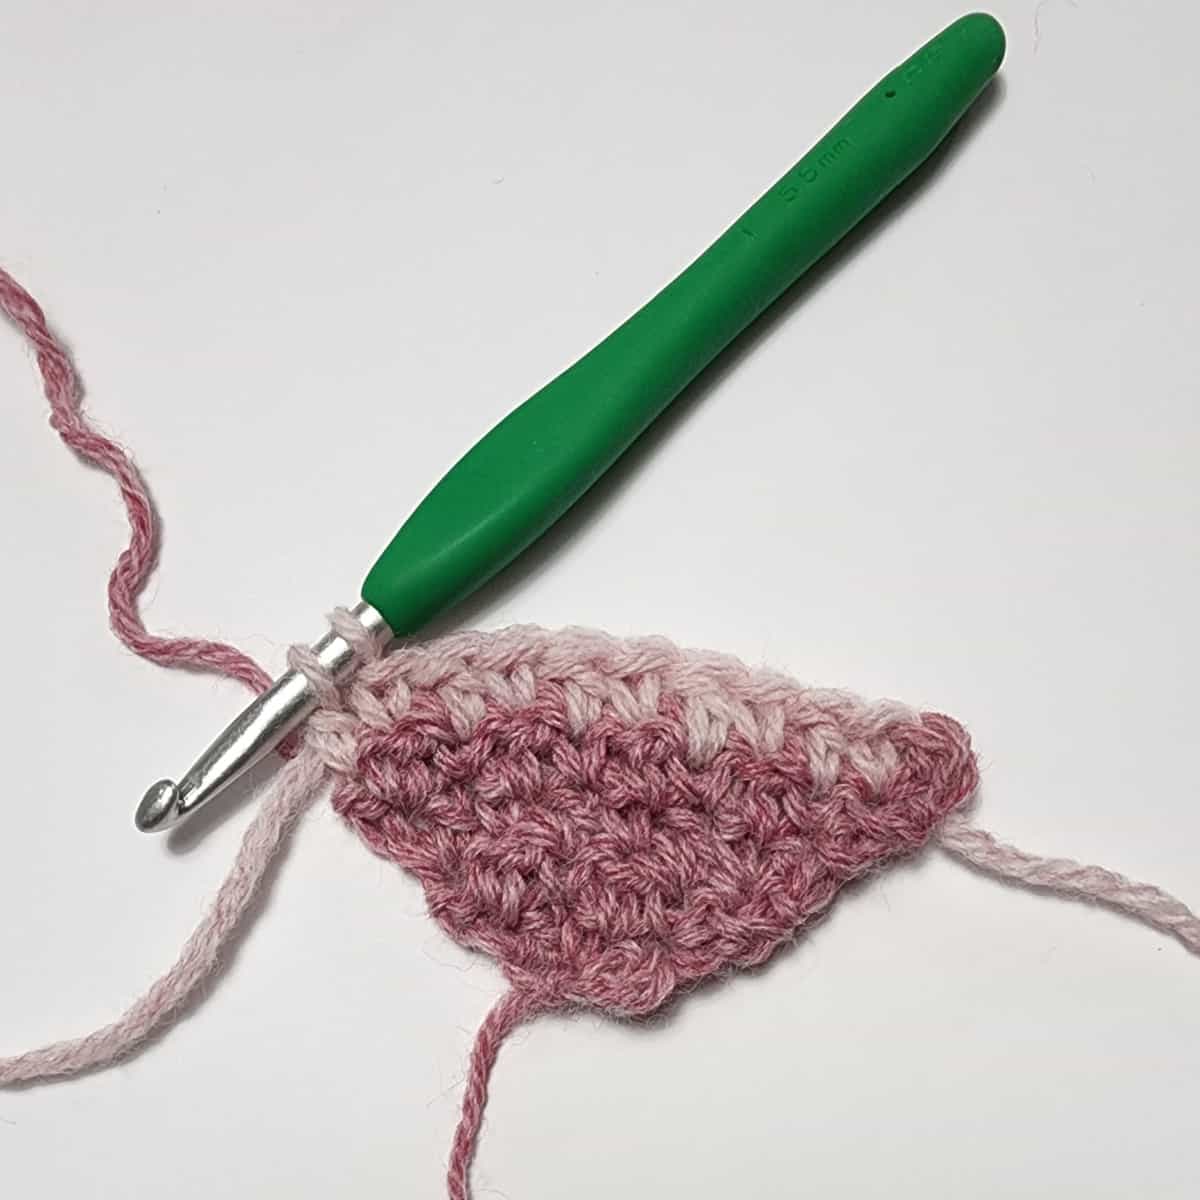
Photo Above, Inc Row 3: Photo shows the next 10 sts of the row being worked in CC1.
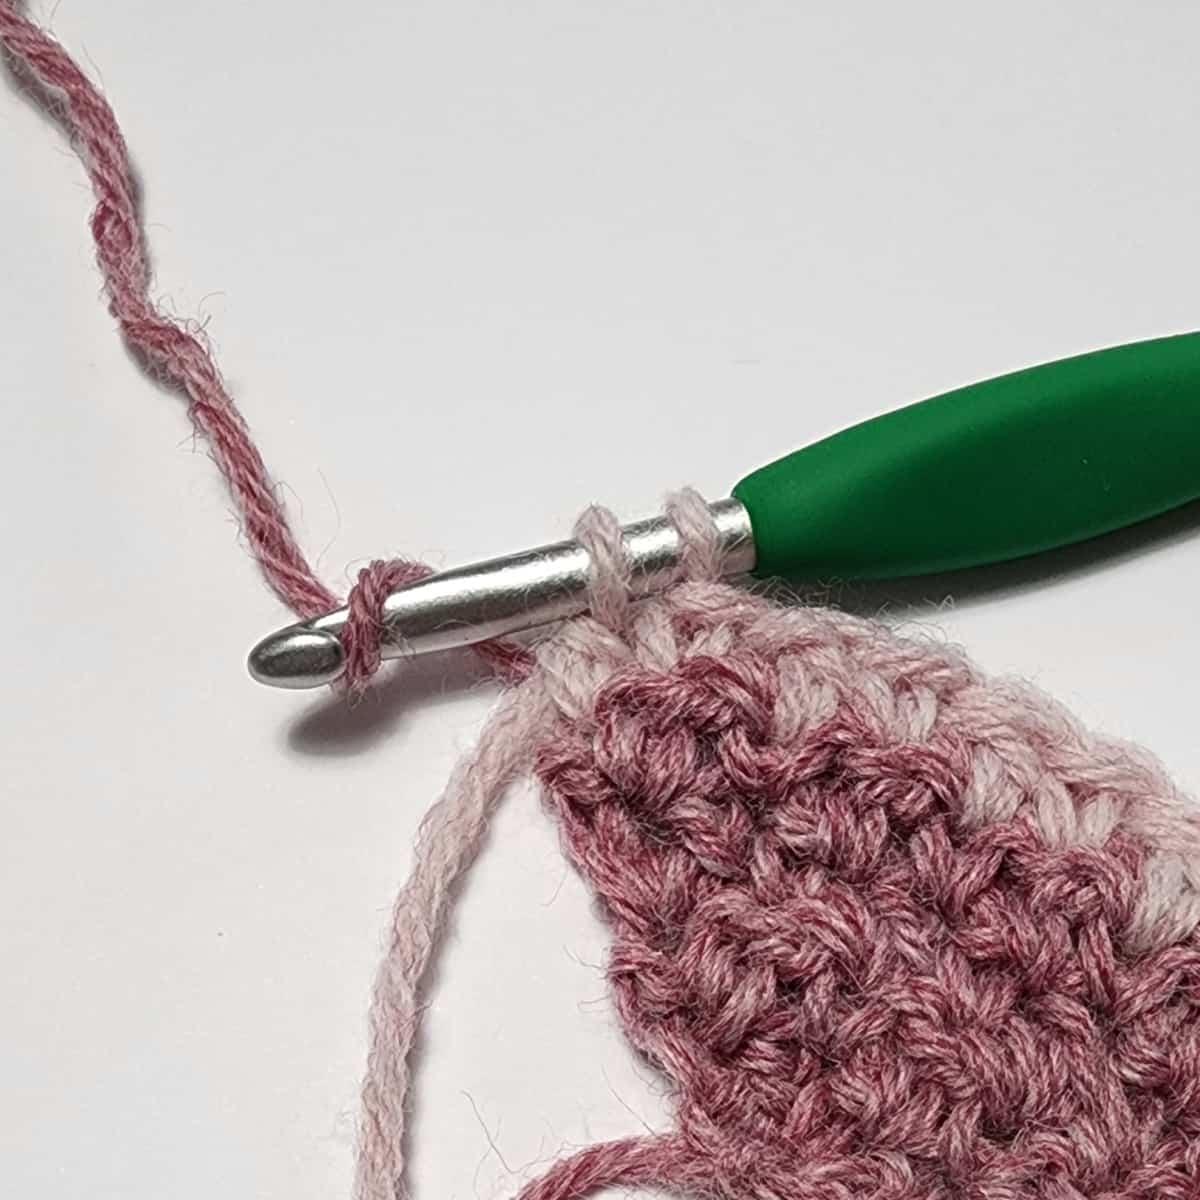
Photo Above, Inc Row 3: Work the last st of the row in MC (this is half of the increase in the last stitch).
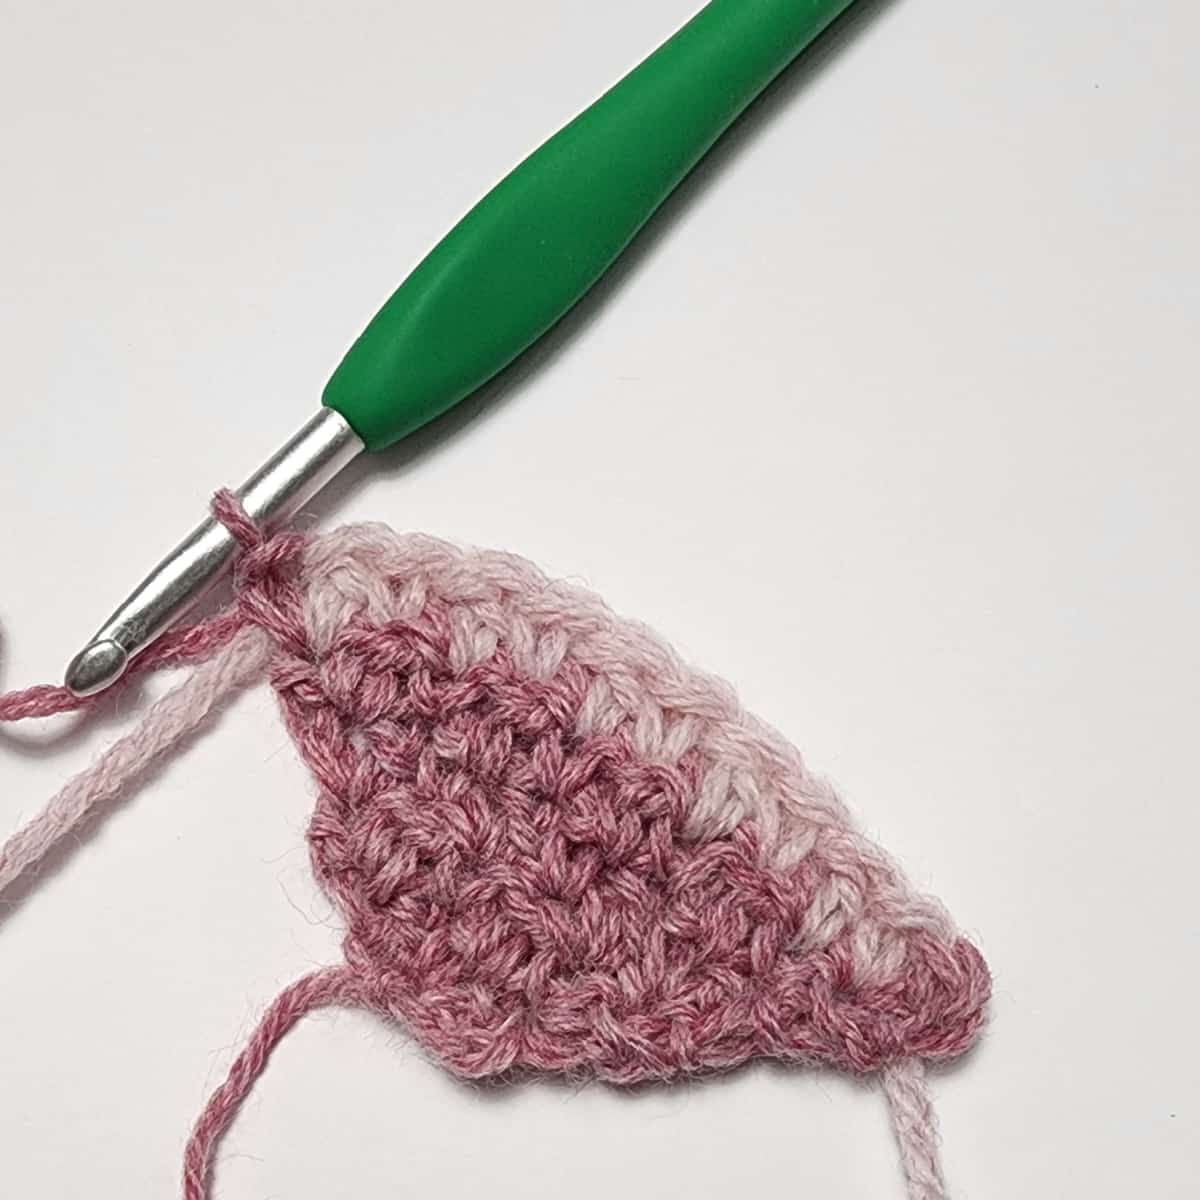
Photo Above: Shows Inc Row 3 complete.
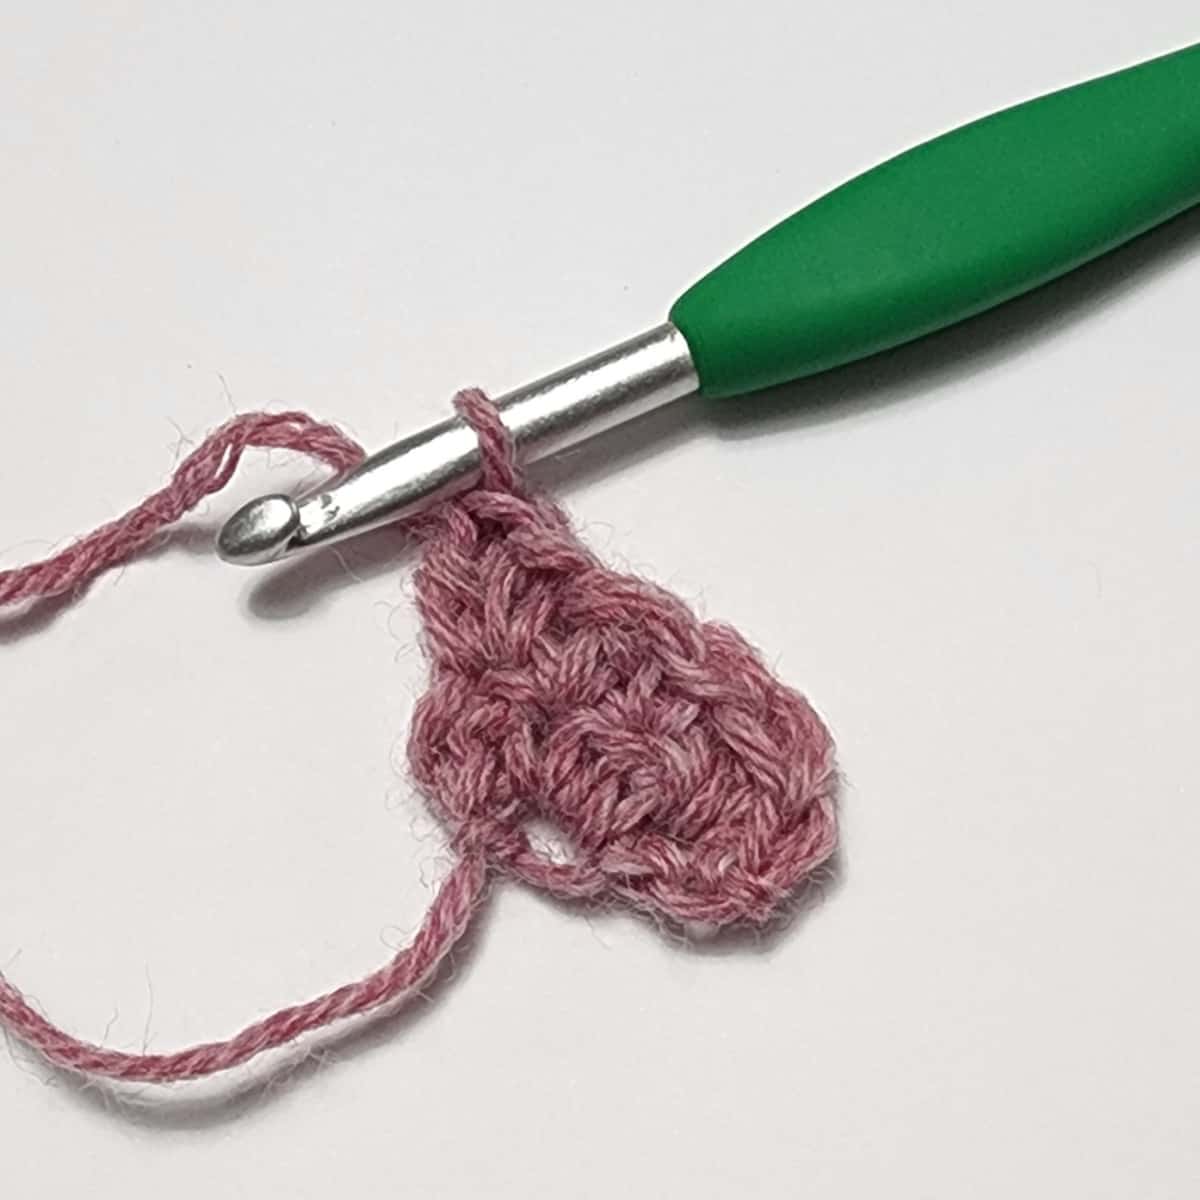
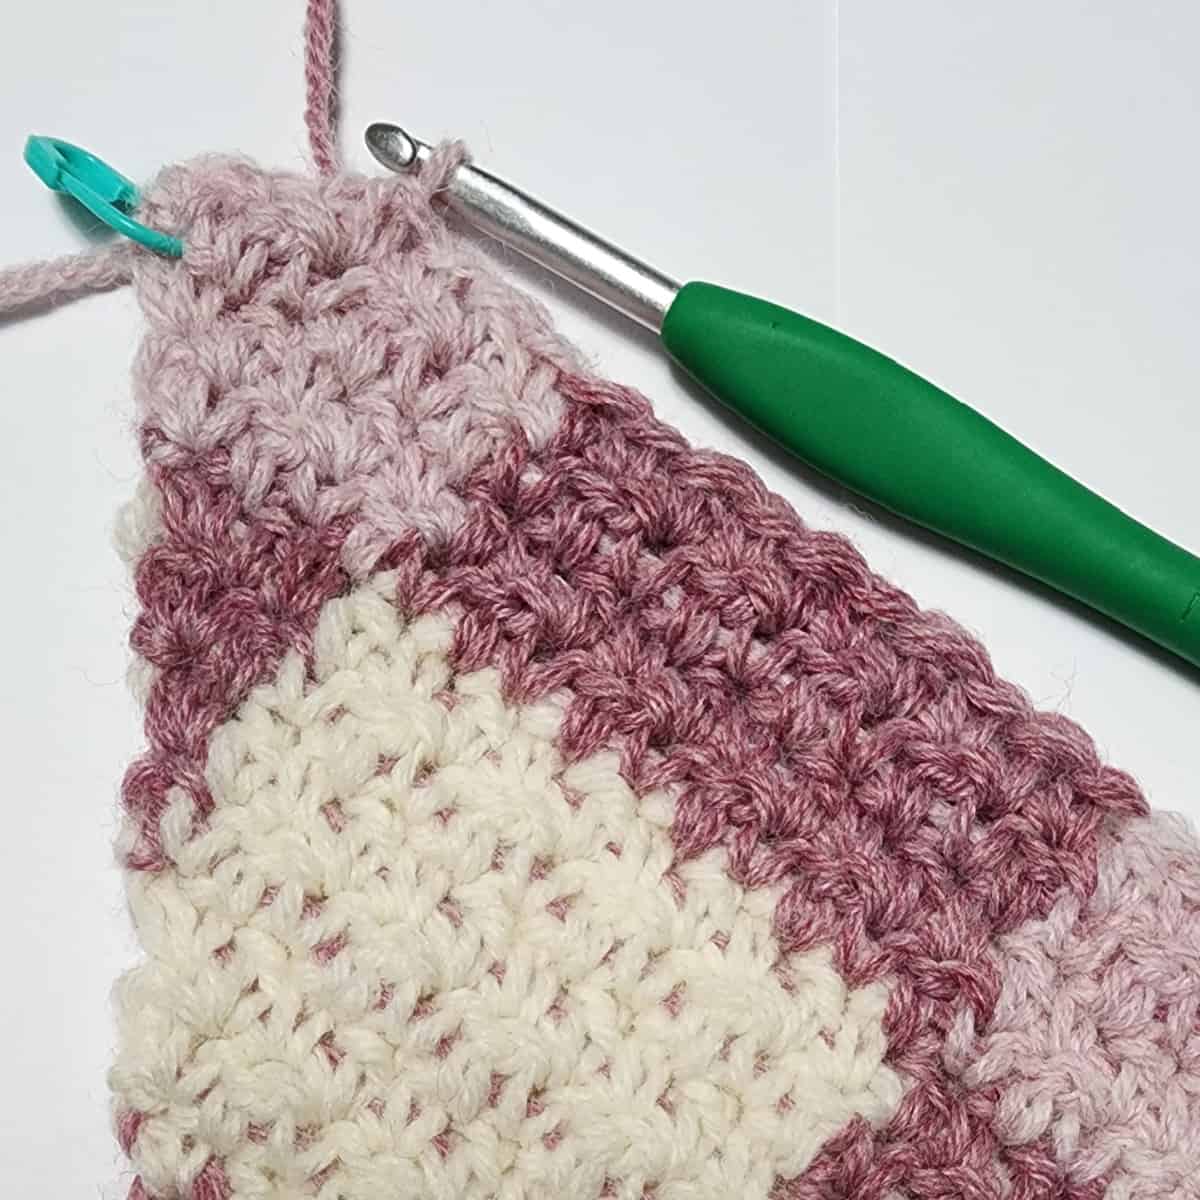
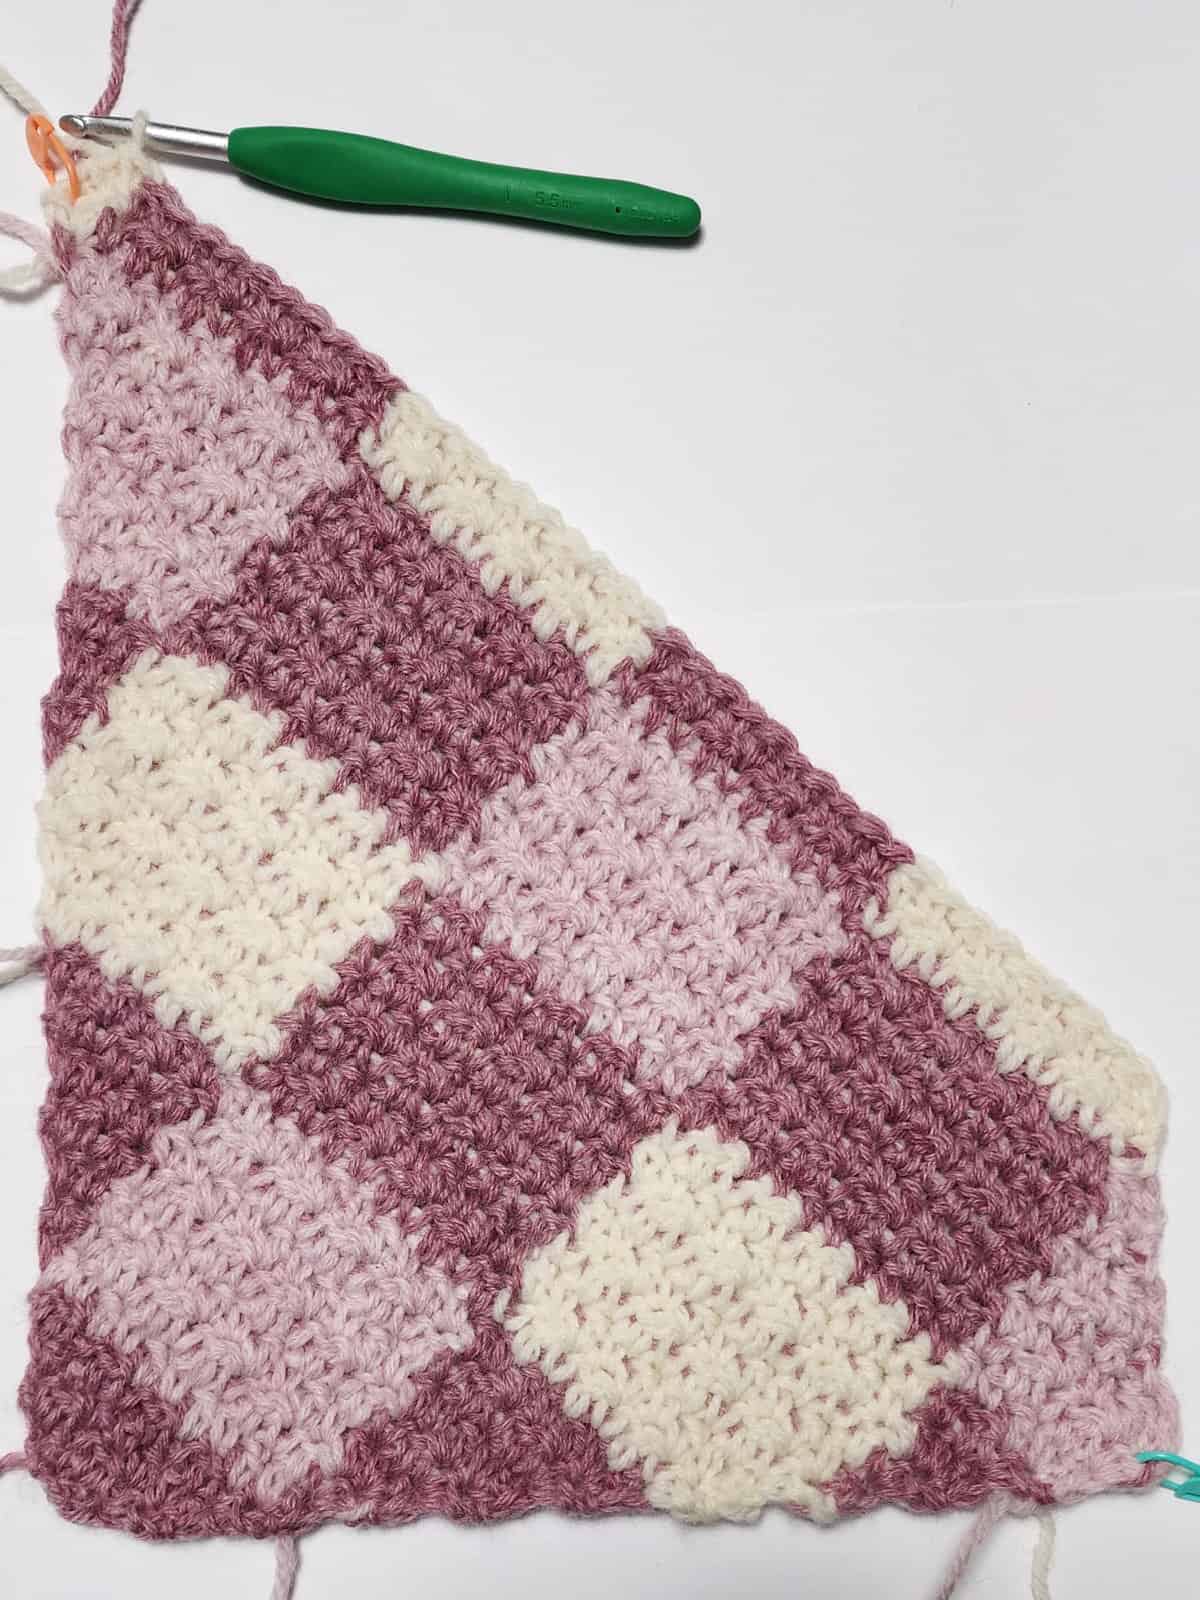
Continue Increasing
As you continue to work each increase row, you are adding 1 stitch to the beginning of each row and 1 stitch to the end of each row.
Continue to increase using the same color stitches until you have another set of 10 new stitches at the beginning and 10 new stitches at the end, of each row, OR until you’ve worked 7 rows with the next color scheme.
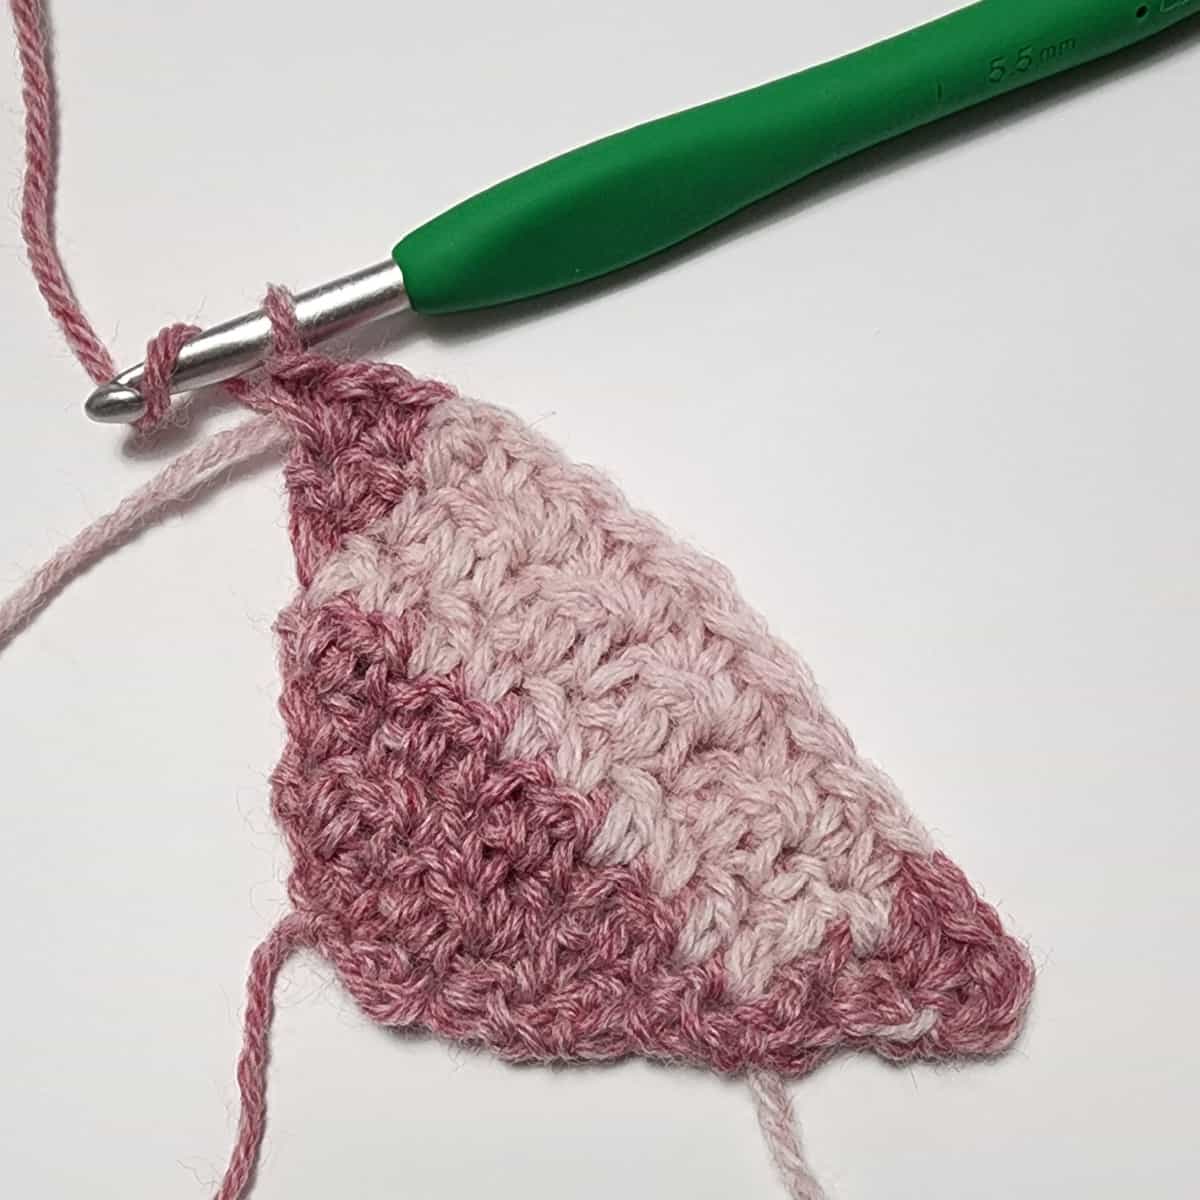
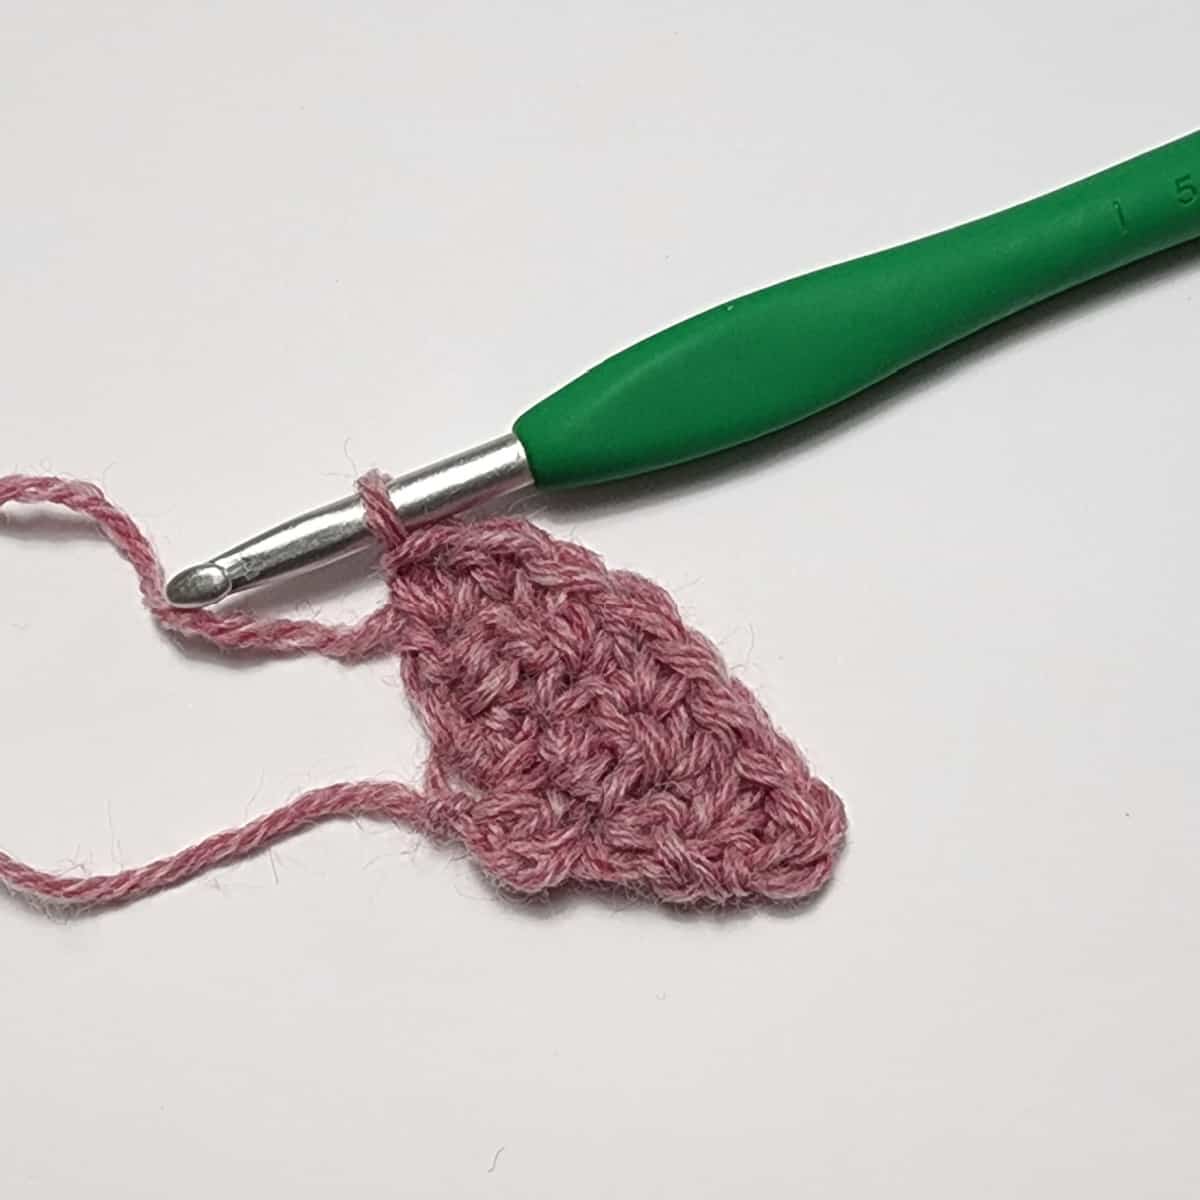
Photo Above: Shows Inc Row 5. The first 3 sts & last 3 sts are worked in MC.
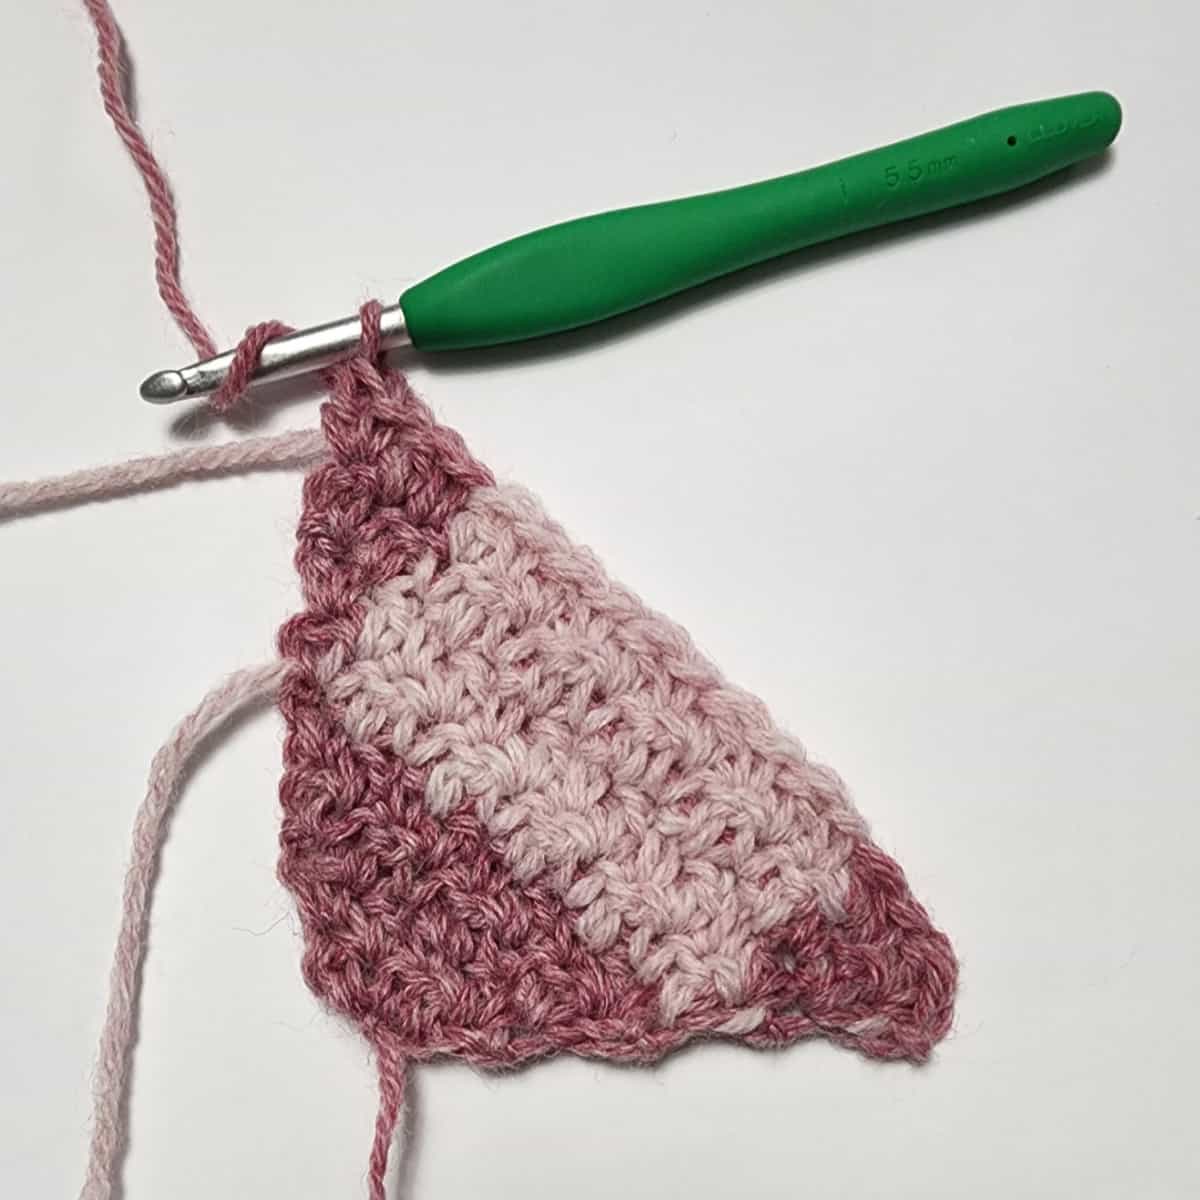
Photo Above: Shows Inc Row 6. The first 4 sts & last 4 sts are worked in MC.
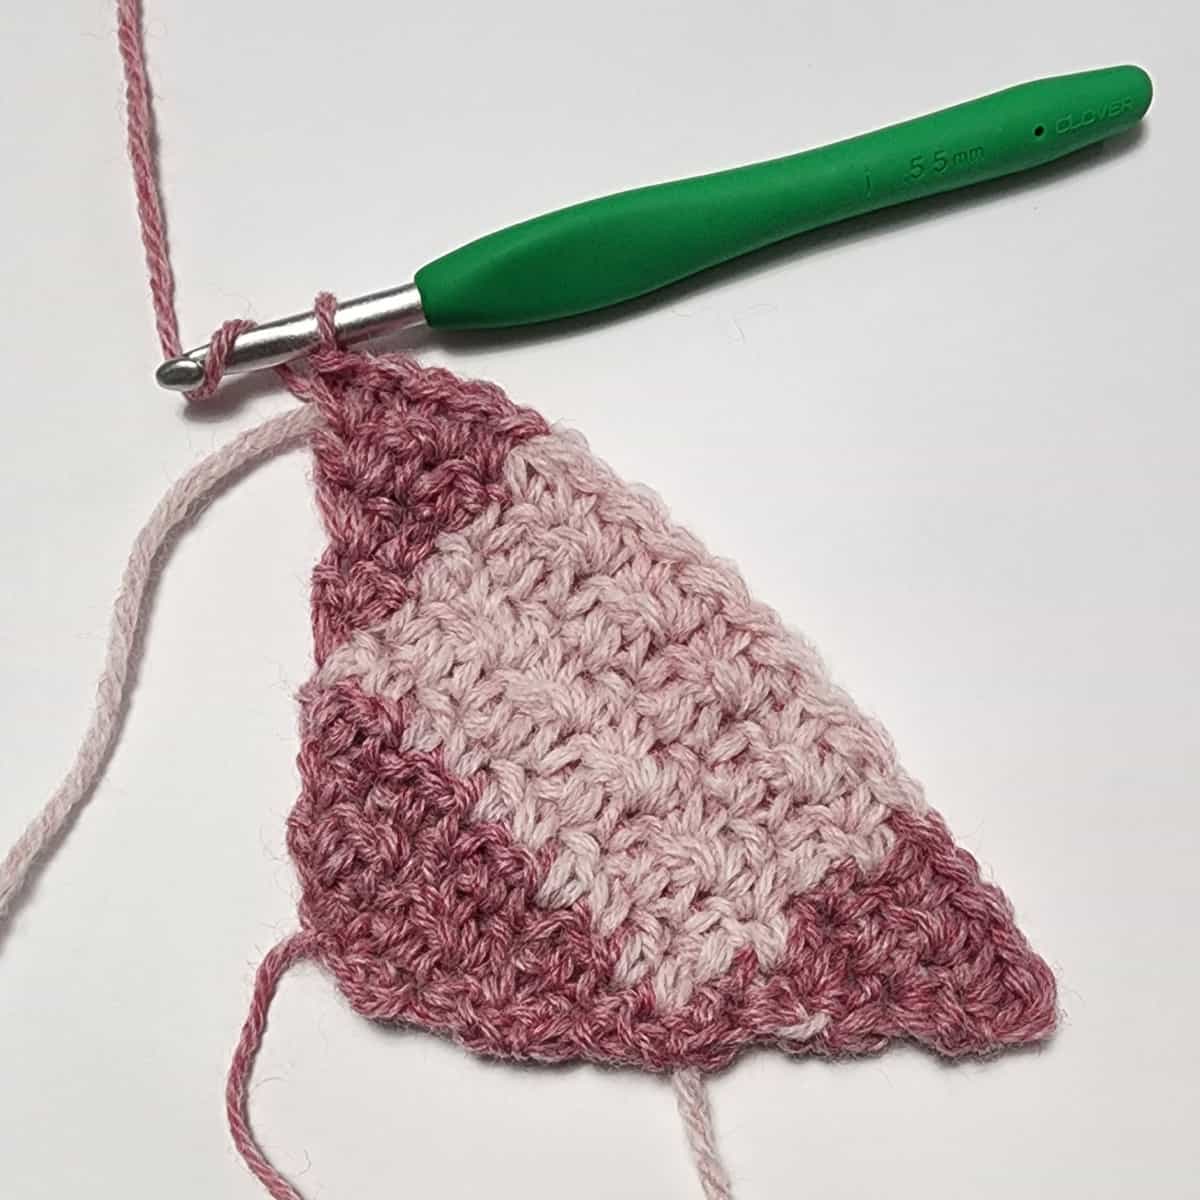
Photo Above: Shows Inc Row 7. The first 5 sts & last 5 sts are worked in MC.
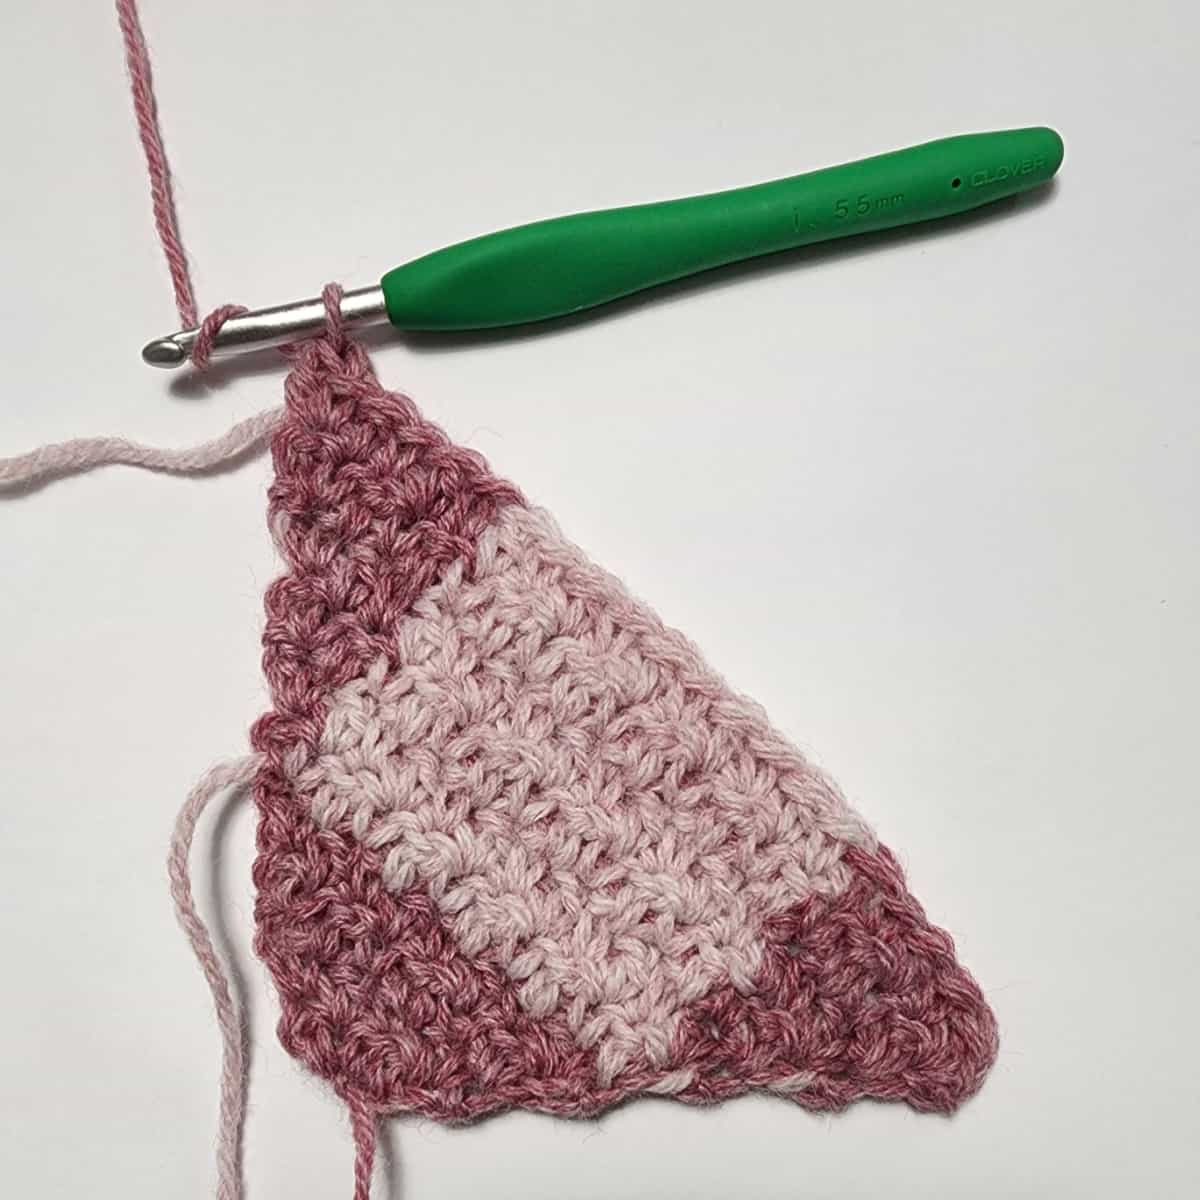
Photo Above: Shows Inc Row 8. The first 6 sts & last 6 sts are worked in MC.
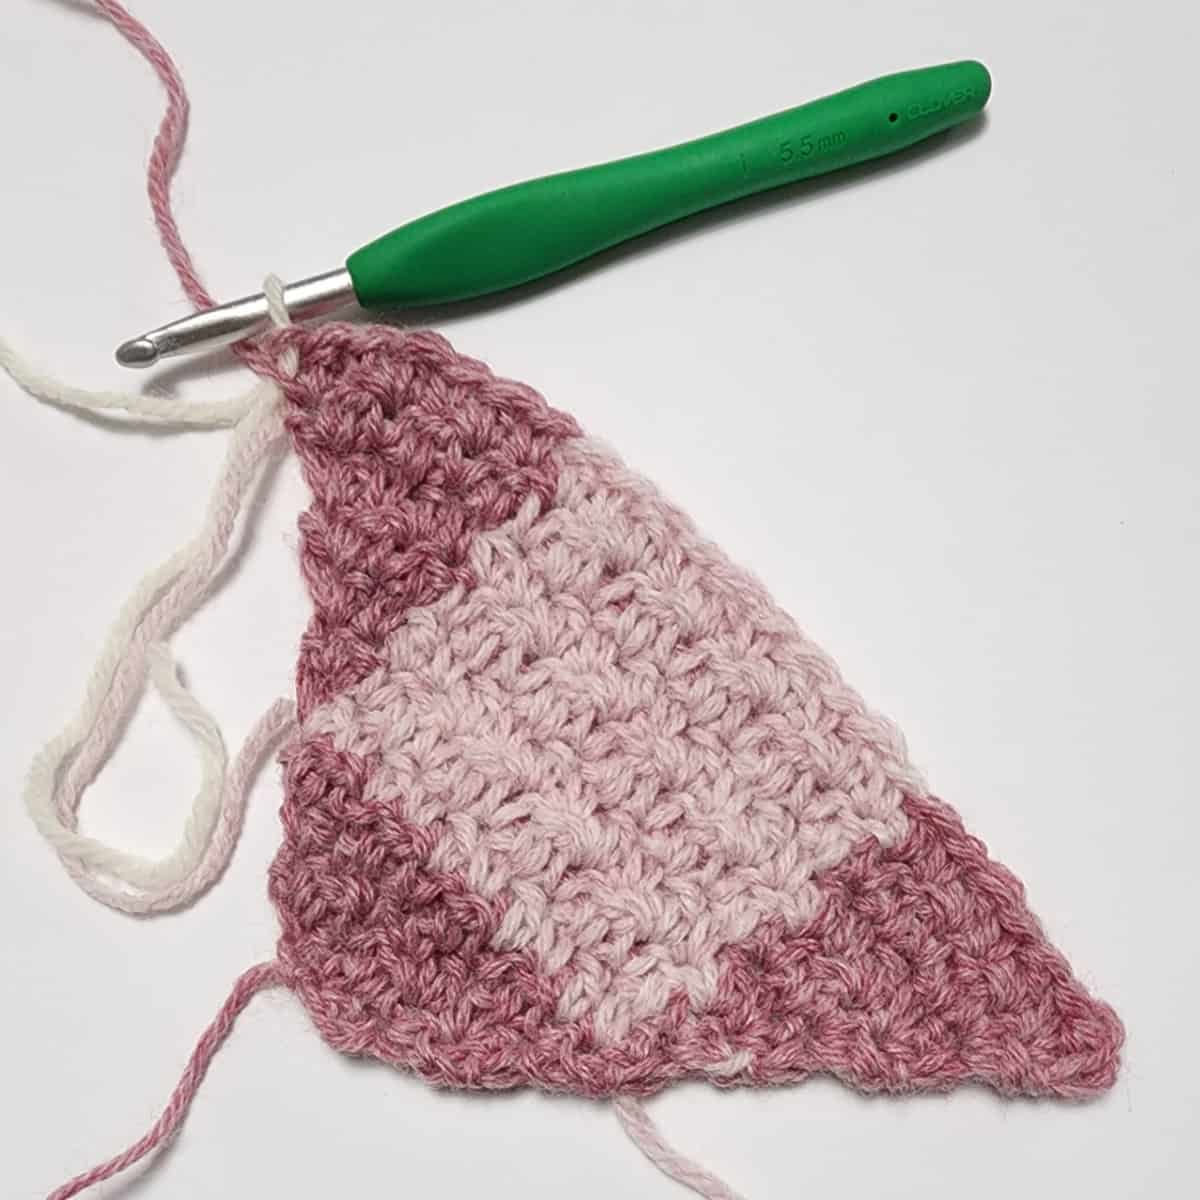
Photo Above: Shows Inc Row 9. The first 7 sts & last 7 sts are worked in MC.
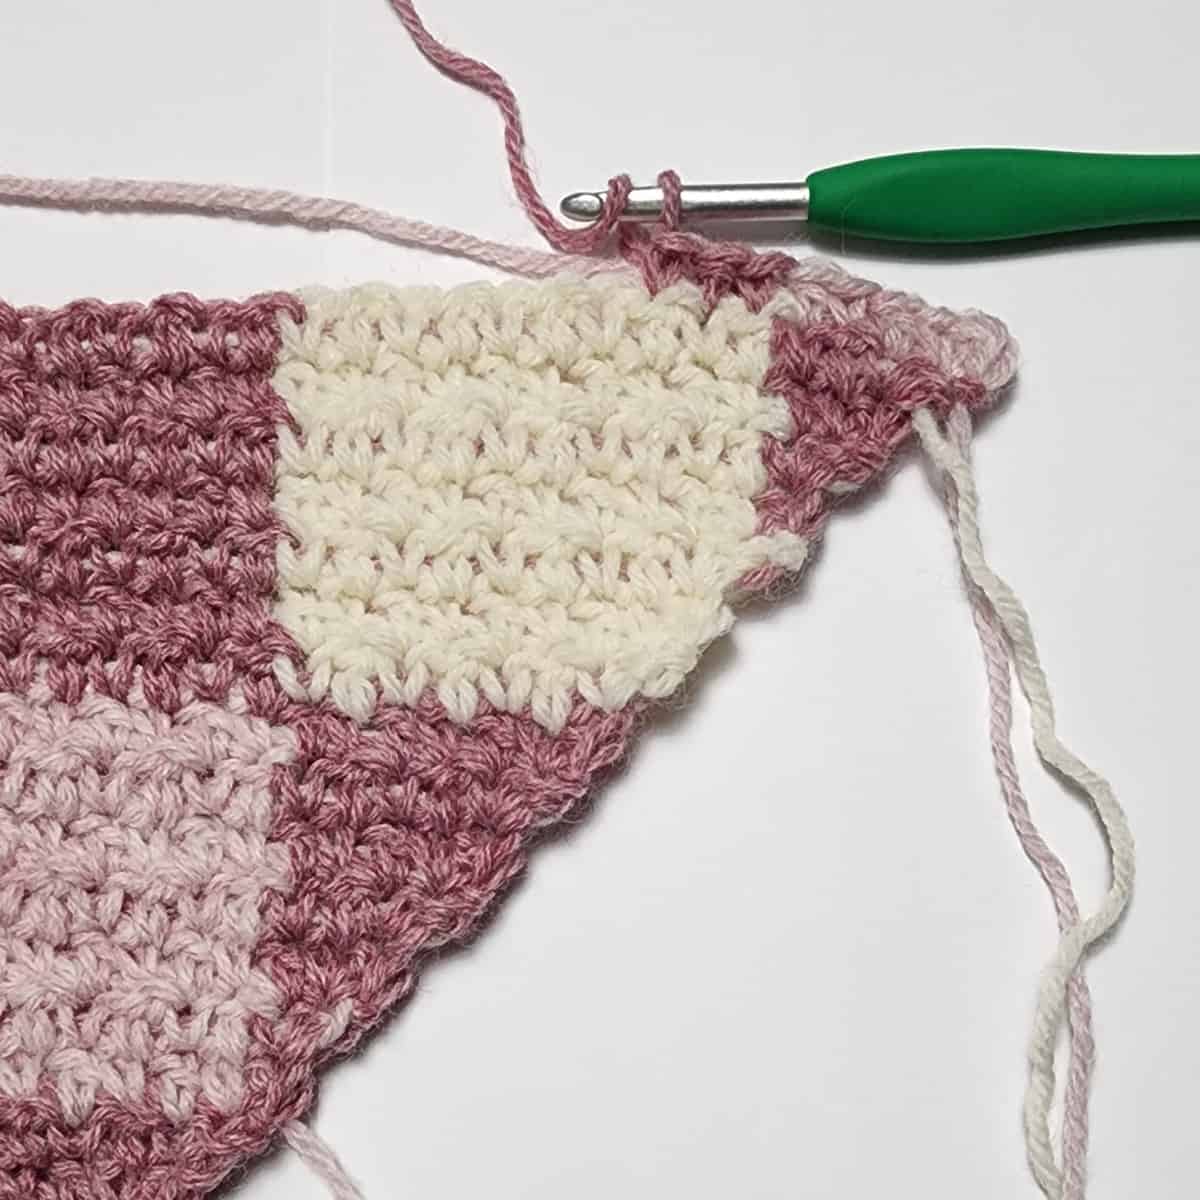
Time to Change Colors!
You just completed 7 rows in MC & CC1 so it’s time to work the next 7 rows in MC & CC2. Fasten off CC1. Join CC2 in the last st of the row.
Note: Every time you switch to the next color sequence, make sure to move your MC sts over the block of CC stitches you just finished. Remember, we’re creating a checkerboard effect. See photos below.
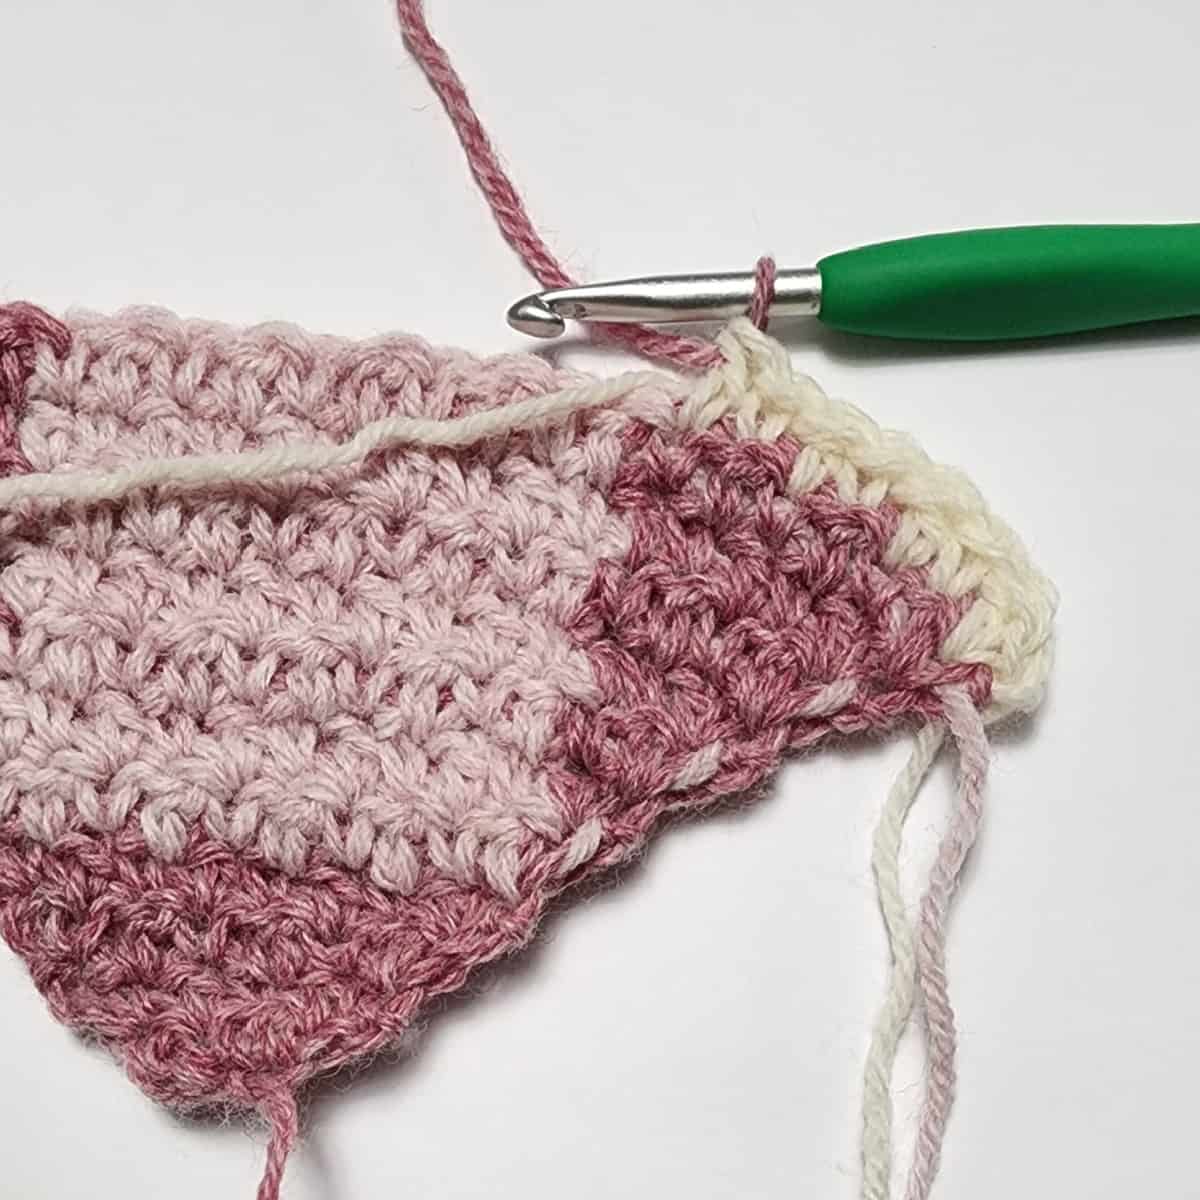
Photo Above: Shows the beginning of the next color sequence being worked. 7 rows of MC & CC2.
Make sure to move the MC sts over the blocks of CC sts you just finished.
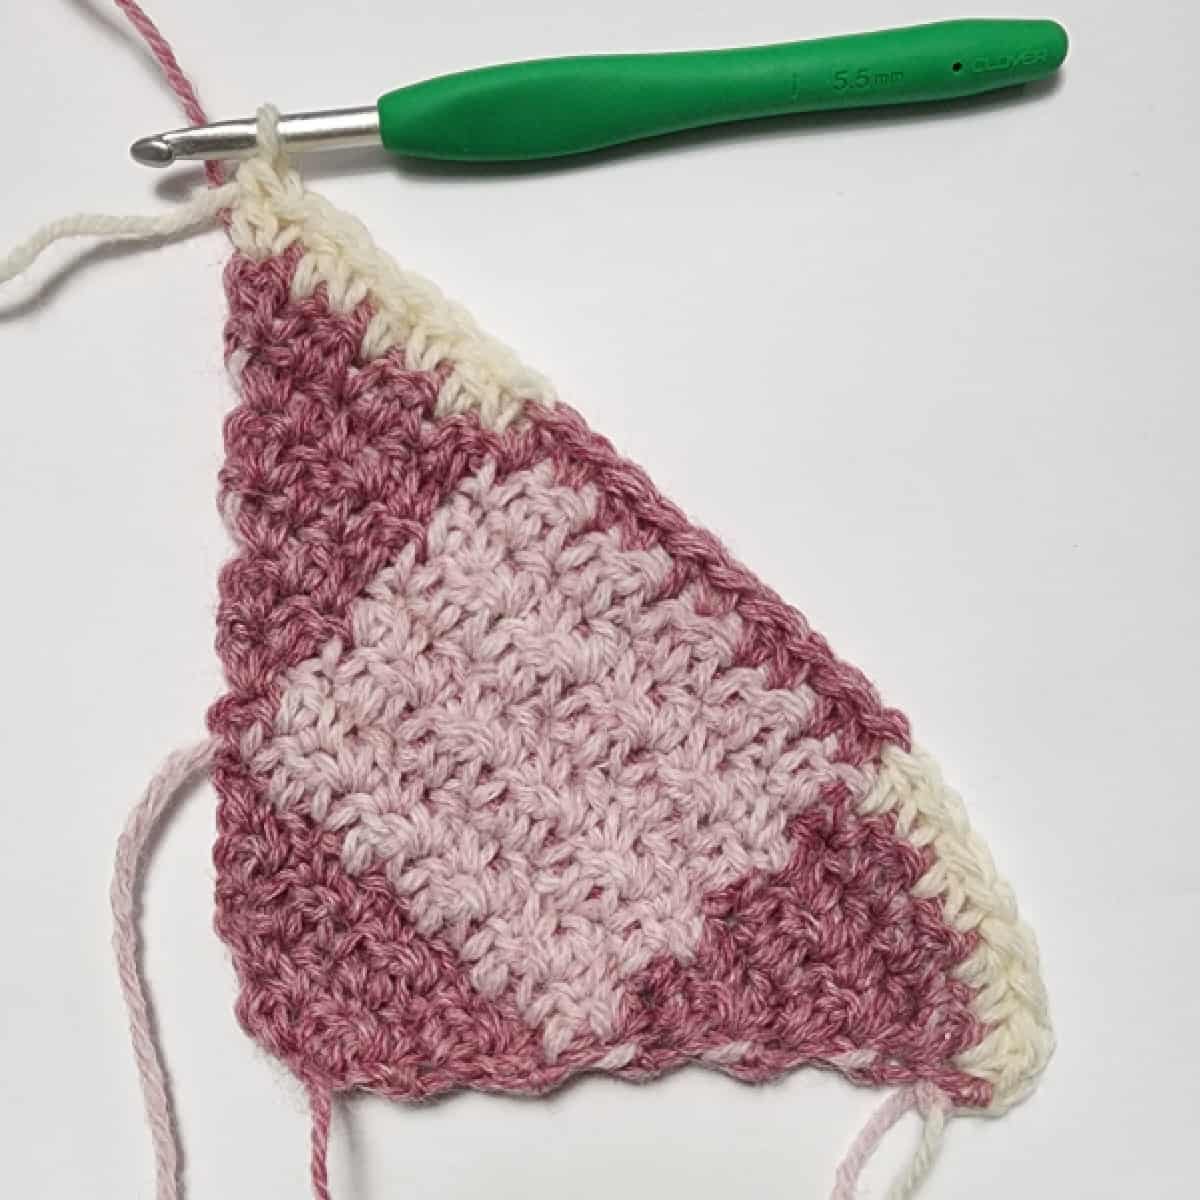
Photo Above: Shows the first row in MC & CC2 complete.
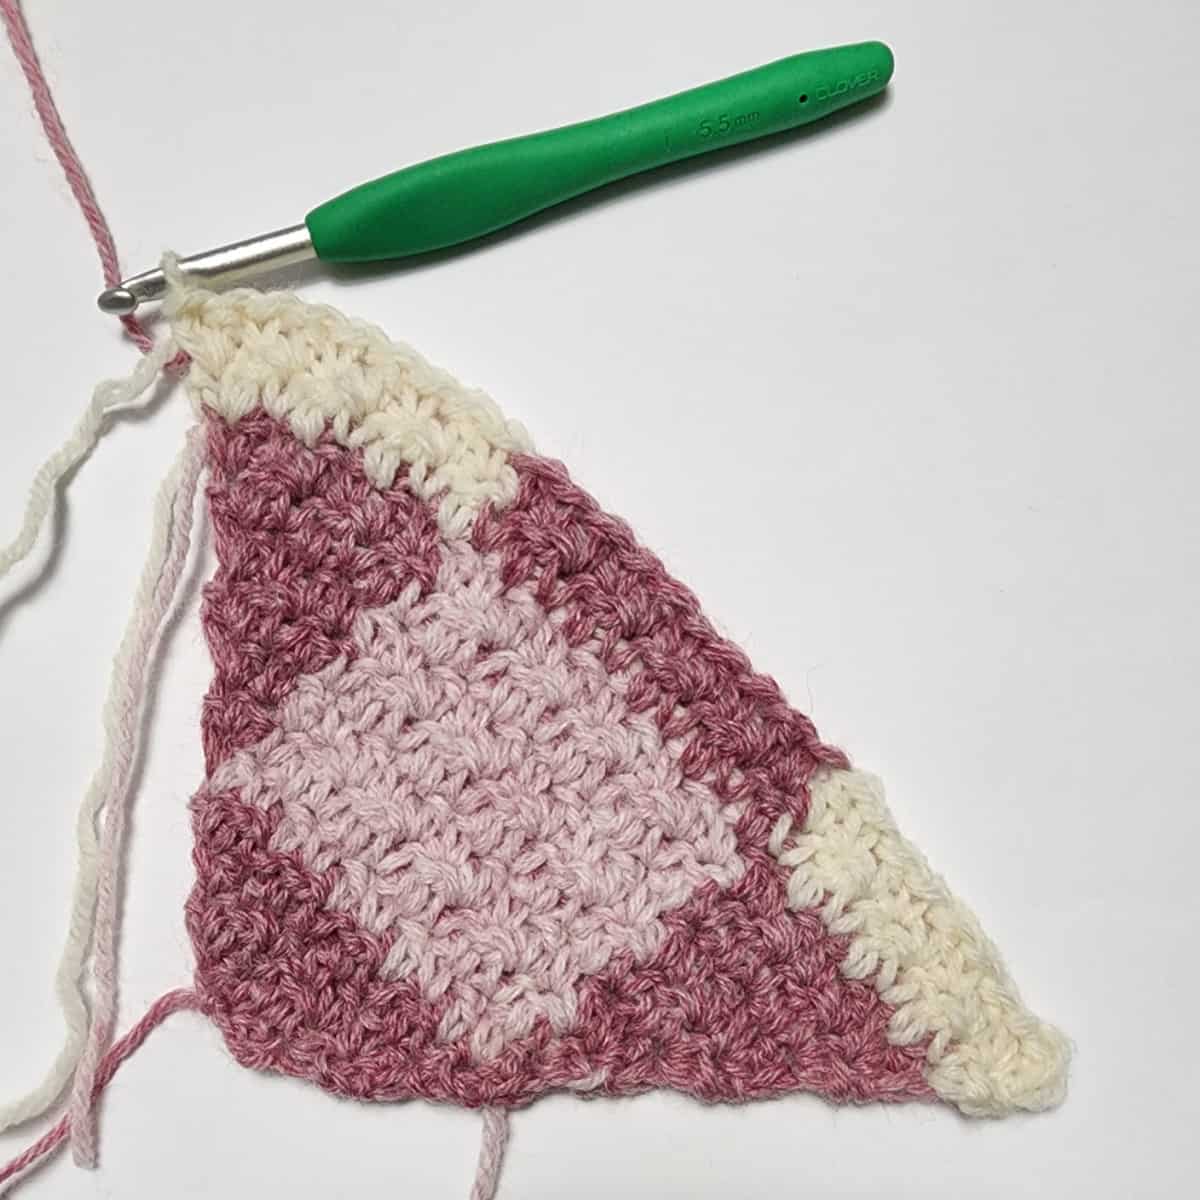
Photo Above: Shows 2 rows of the MC & CC2 color sequence complete.
In the photo above, there are now 10 sts of CC2 at each end of the row.
Remember when you reach 10 sts, it’s time to begin another section of color at the beginning and end of the row.
Begin and end the next row with a MC st.
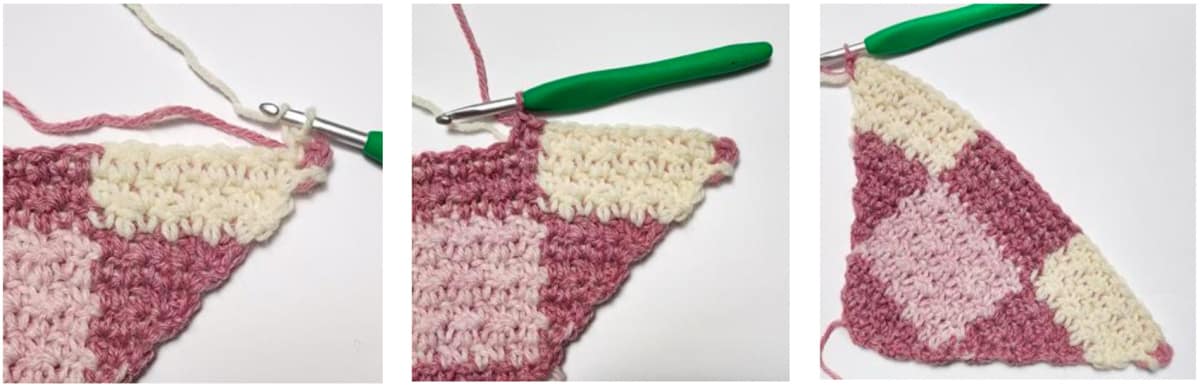

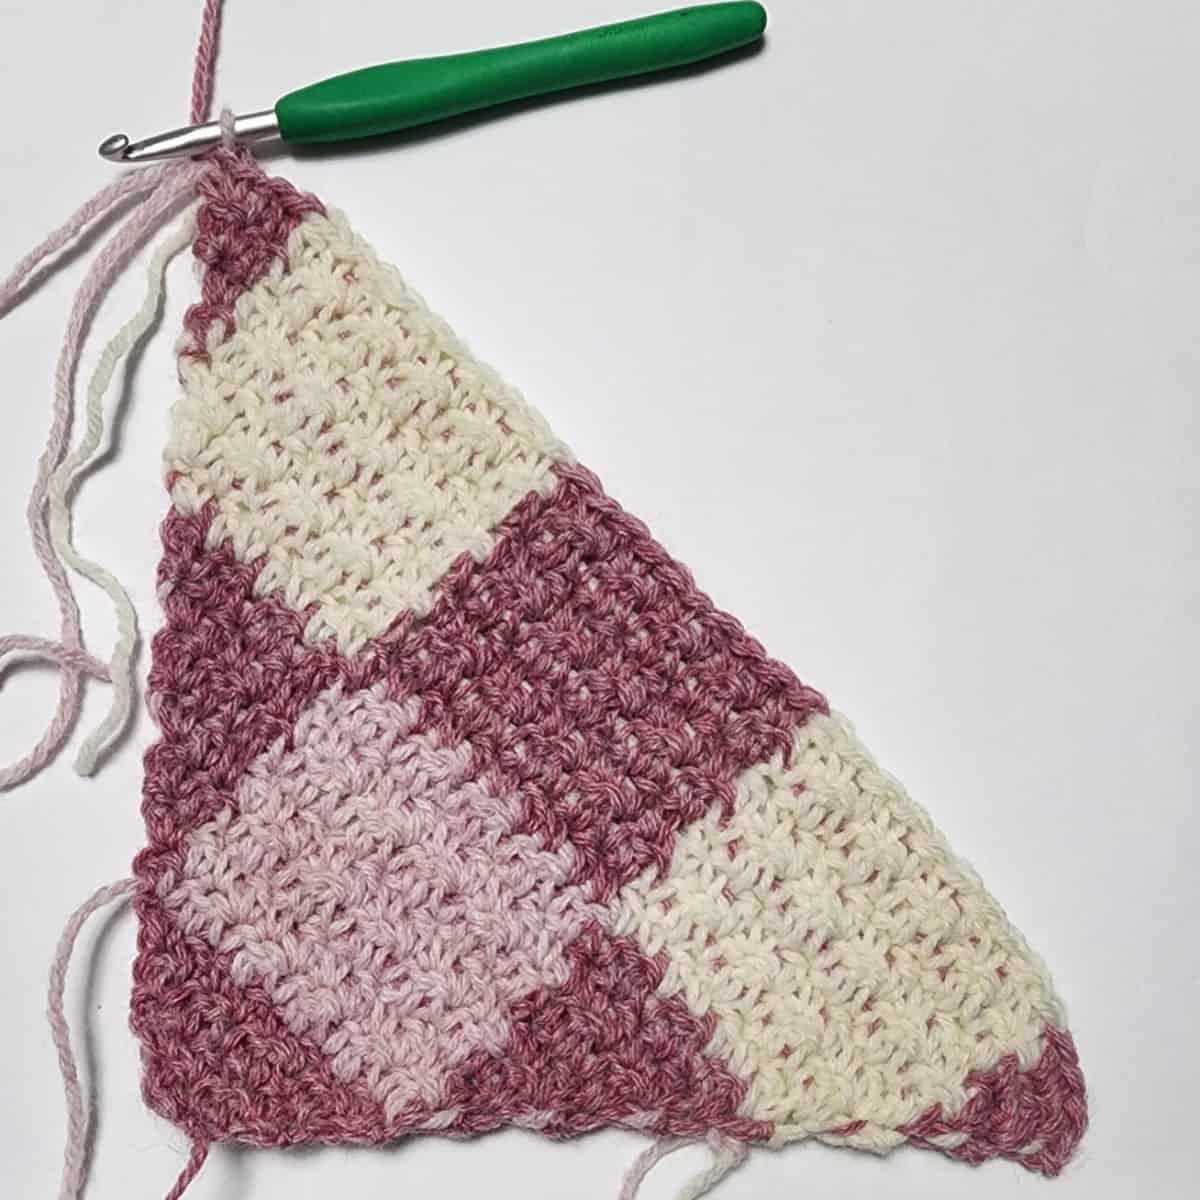
Photo Above: Shows 7 rows of MC & CC2 complete. Begin the next sequence of 7 rows of MC & CC1. Shows CC1 added at the end of the row.
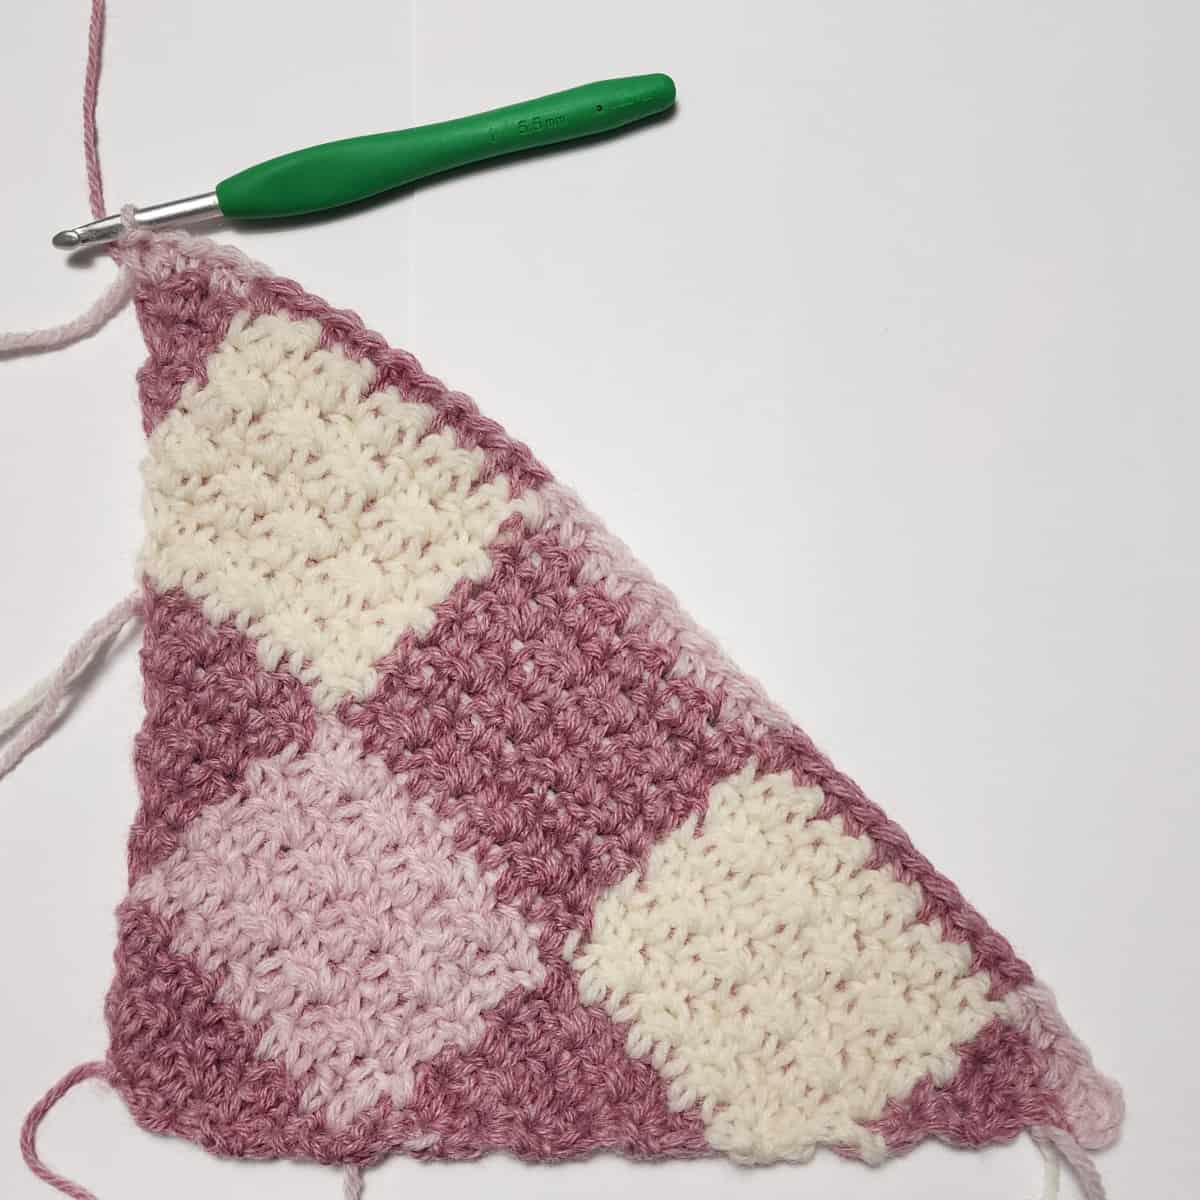
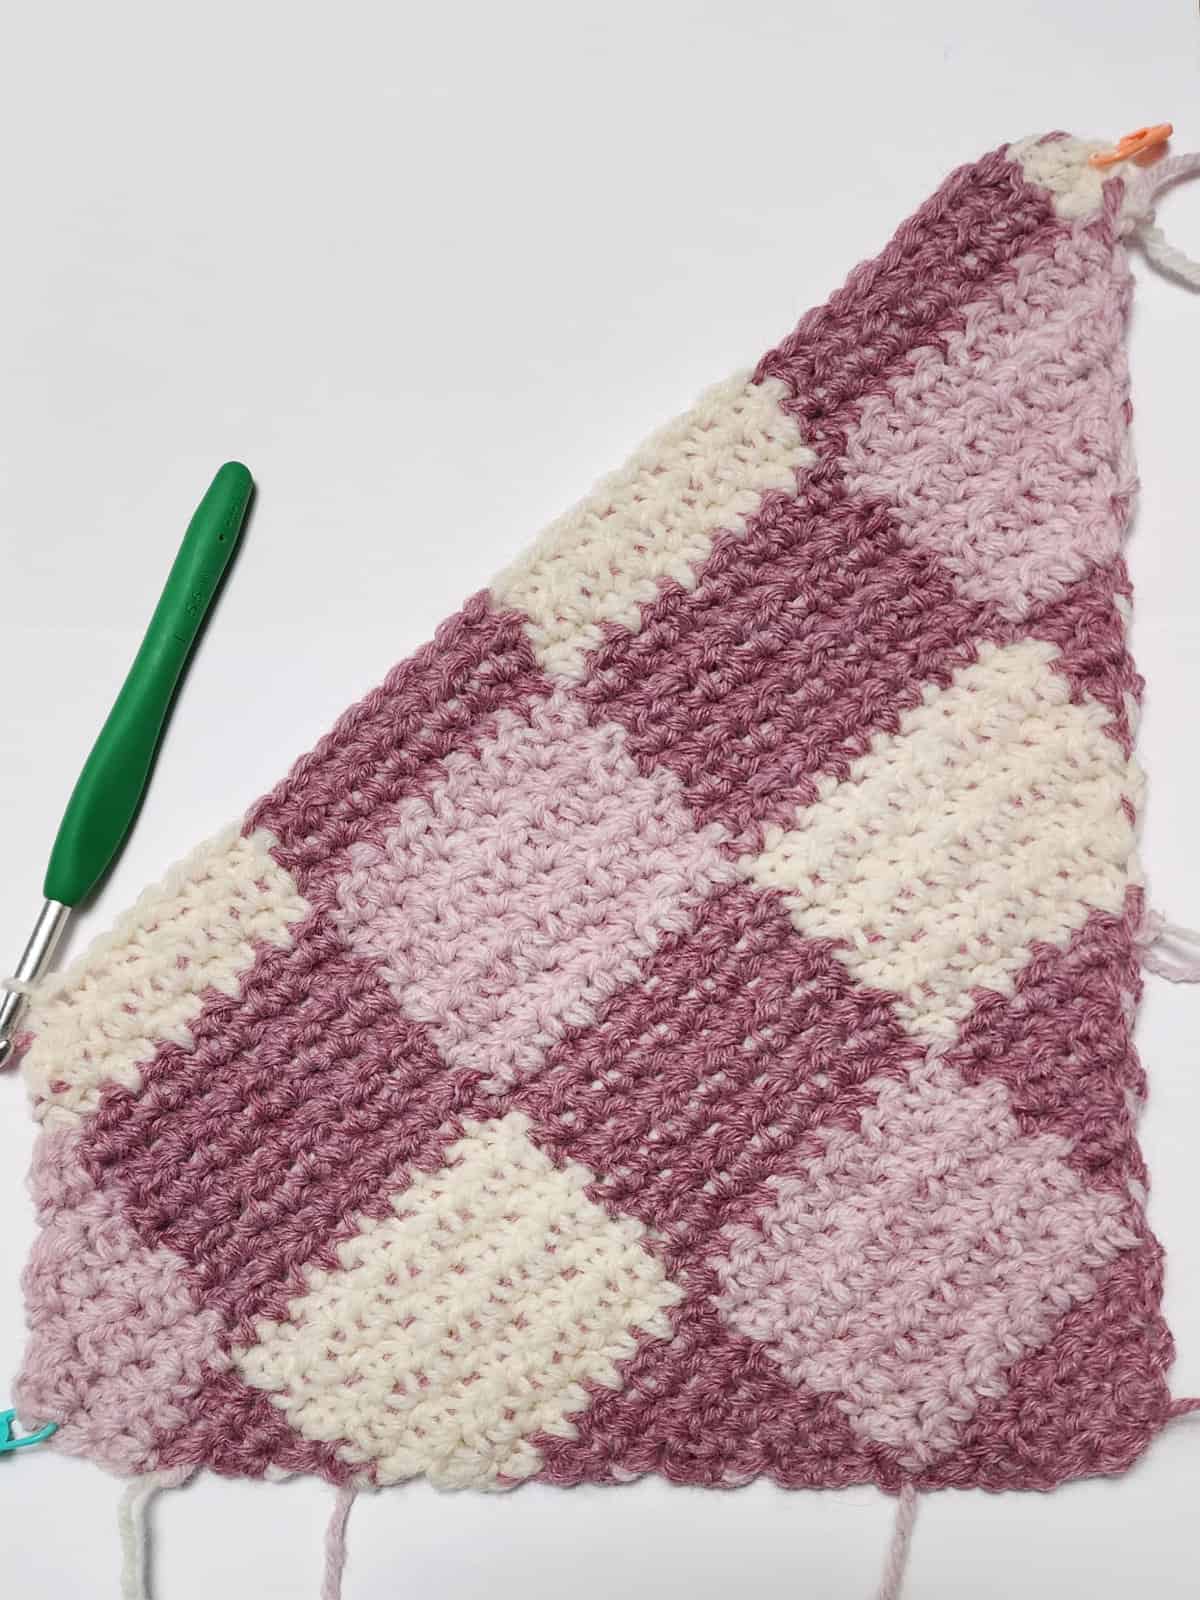
Continue Increasing & Working Color Changes
- Continue repeating Increase Rows 1 – 2, until your blanket reaches the desired width. (I worked 110 Increase Rows for my blanket)
- Remember, when you reach 10 sts of any color at both ends of the row, add sts of the next color in the following row, to begin a new color block.
- Make sure to follow the color scheme: work 7 rows of MC & CC1, then 7 rows of MC & CC2.
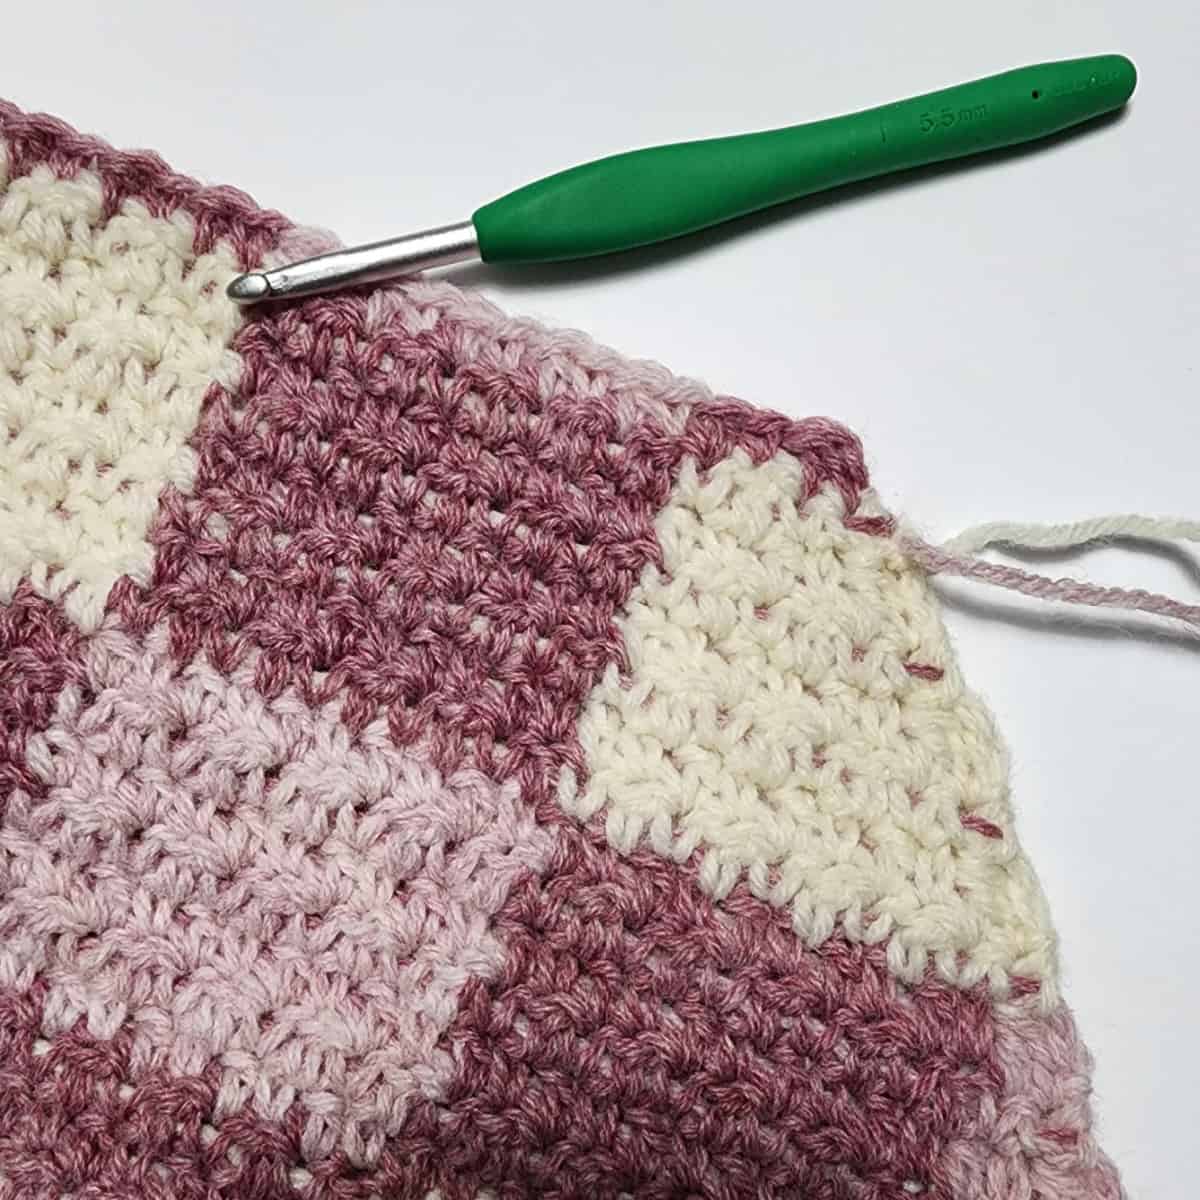
Once You’ve Reached the Desired Width
Stop increasing the width of your blanket when you reach the desired width. (measured along one of the sides, not along the diagonal row).
Make sure to end with a Inc Row 2. Place a SM in the last st of the last increase row you work to make a corner st.
Note: It doesn’t matter where you’re at in your color scheme when you transition from increasing to decreasing. As long as you continue to work color blocks 10 sts wide and 7 rows high.
Continue on to Rectangle Rows.
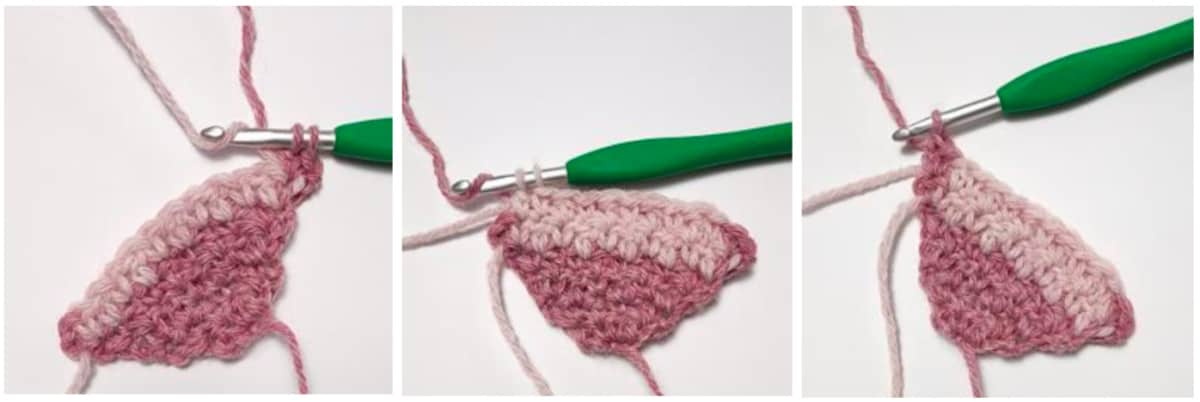
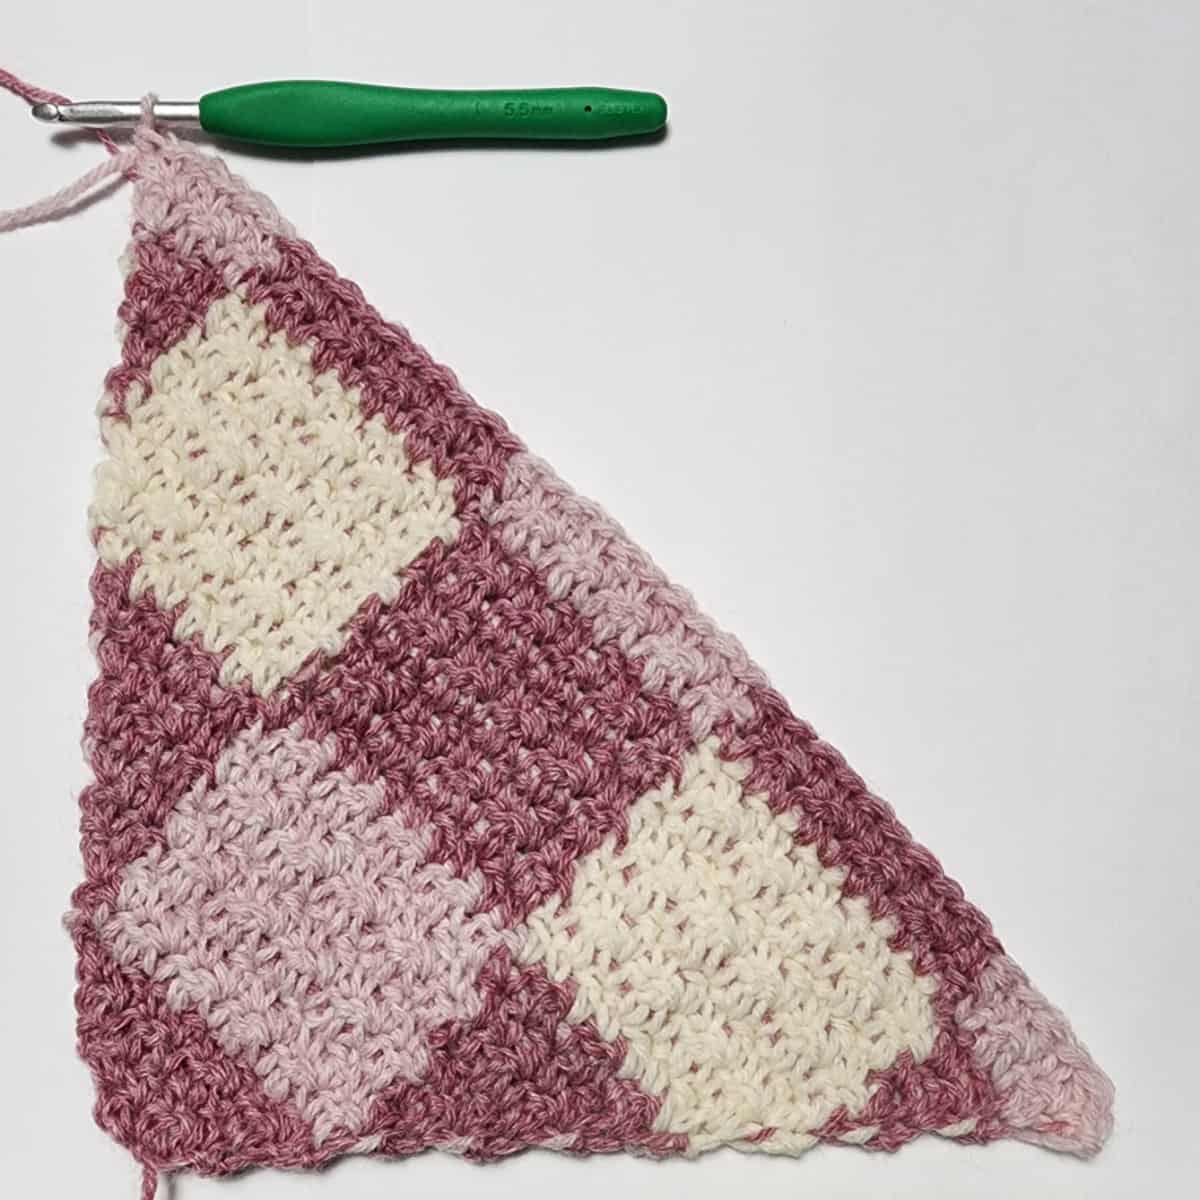
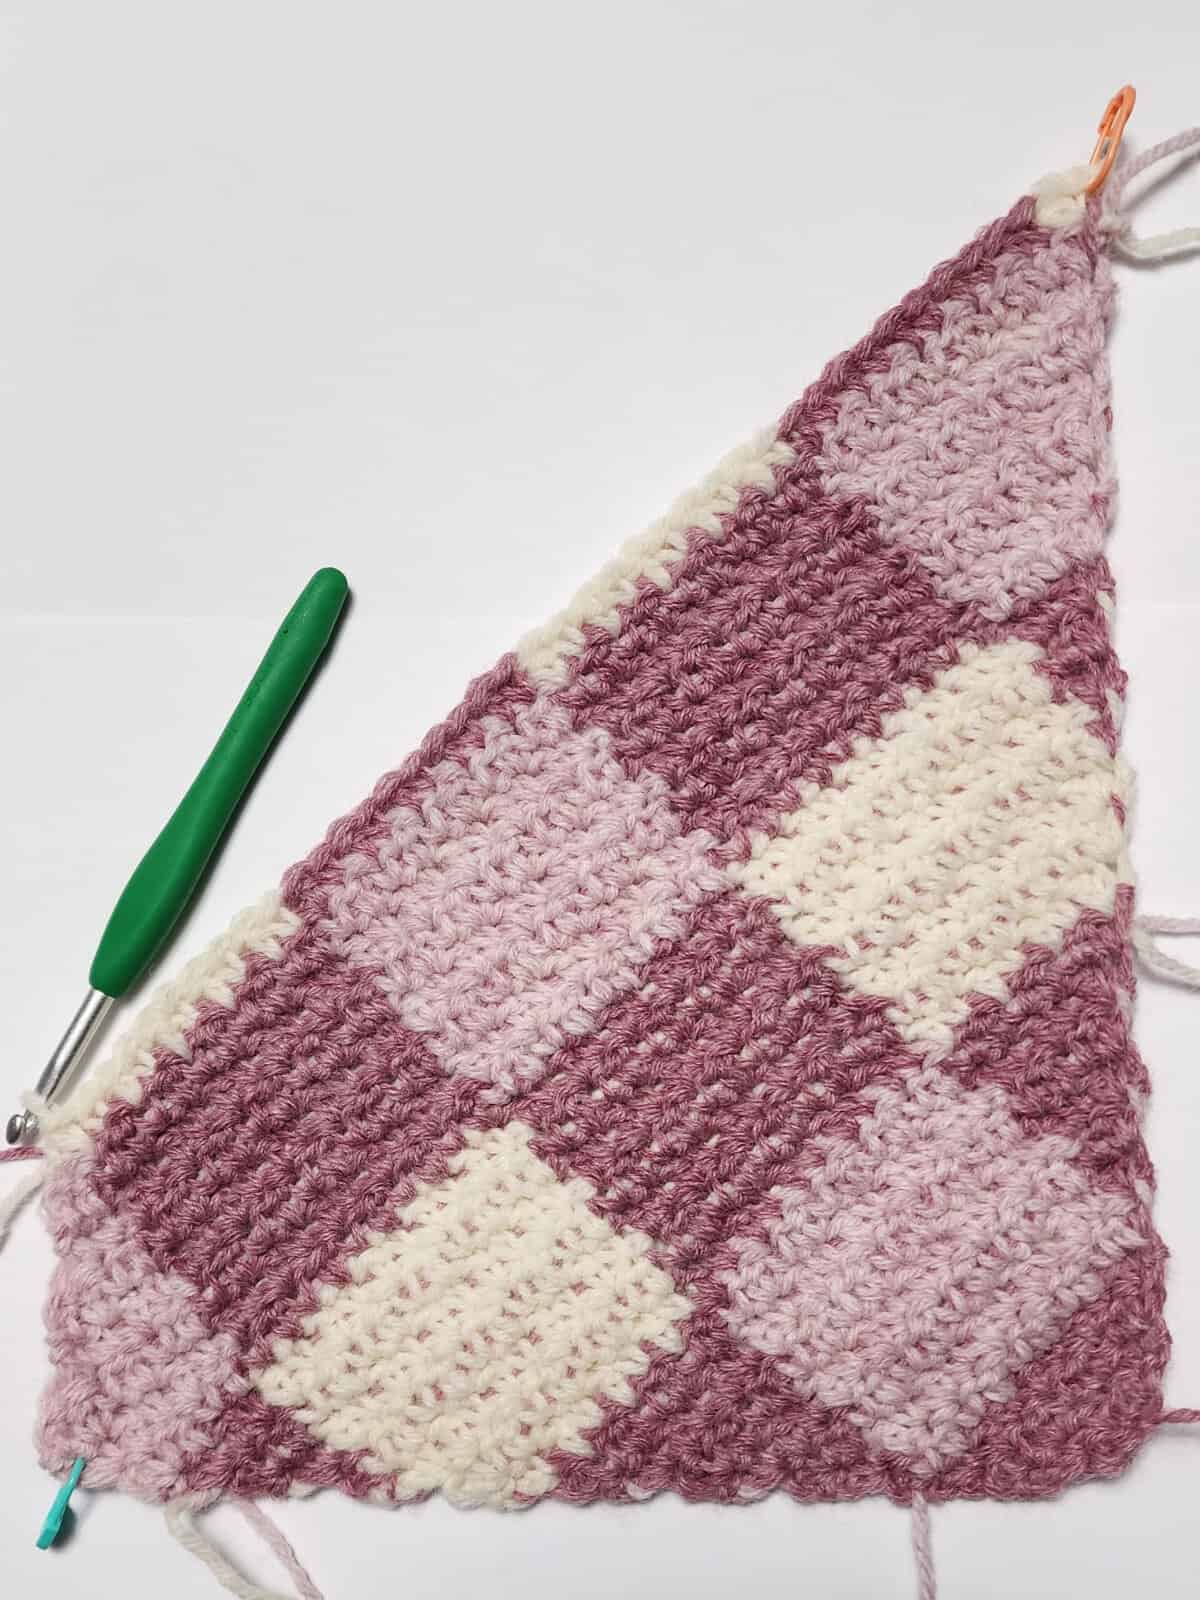
Rectangle (Rec) Rows
In this section, you will be increasing the length of your blanket only. Your work will transition from a triangle and begin to resemble something more of a rectangle. Along one side of your blanket, you will work decreases and along the opposite side of your blanket, you will work increases. The stitch count for each row in this section does not increase.
In this section, simply repeat Rectangle Rows 1 – 2 while continuing to work the color changes as you’ve done previously. Continue to work blocks of color 10 sts wide and 7 rows high.
To learn how to crochet the Alt-dc2tog, refer to my Alt-dc2tog tutorial for step by step photos.
The photo above shows Rec Row 1 complete.
Note: The row decreases on the right and increases on the left.
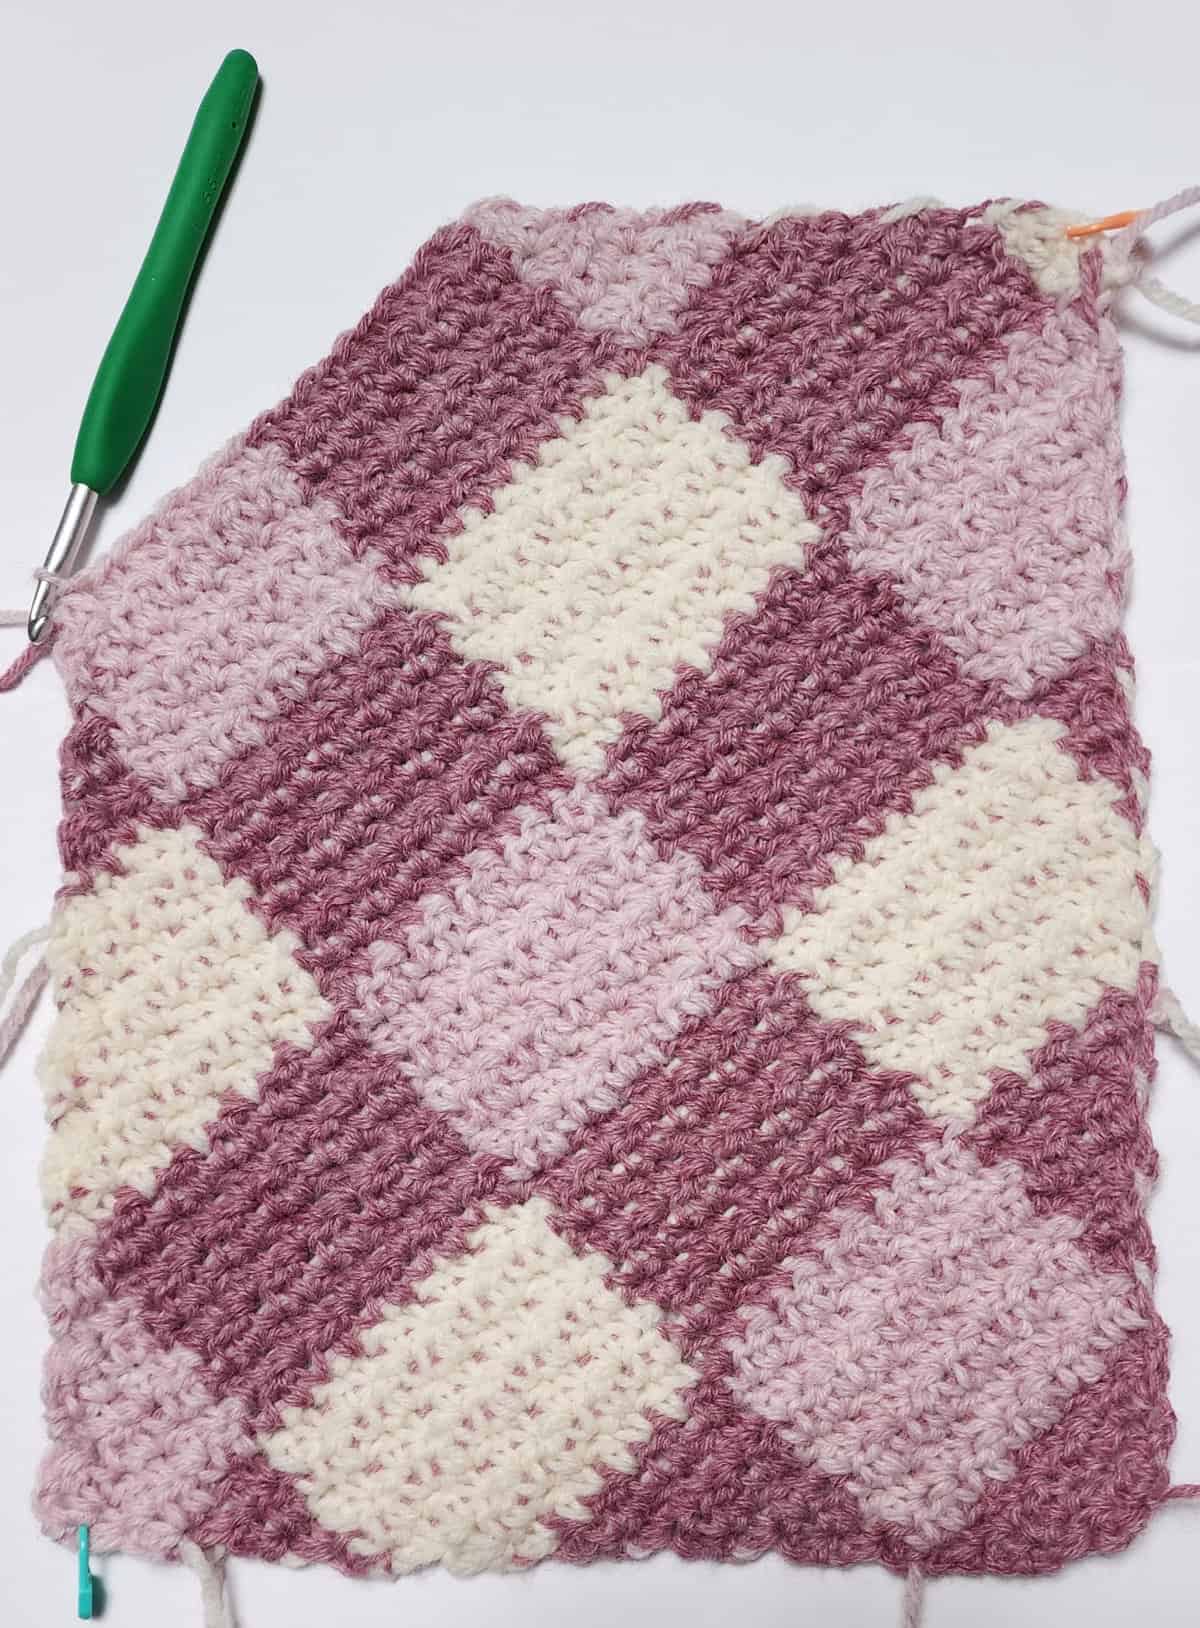
Continue Repeating Rectangle Rows 1 – 2 & Working Color Changes
- Continue repeating Rectangle Rows 1 – 2, until your blanket reaches the desired length. (I worked 28 Rectangle Rows for my buffalo plaid blanket)
- Remember, when you reach 10 sts of a color at the end of the row you’re still increasing, add sts of the next color in the following row, to begin a new color block.
- Make sure to follow the color scheme: work 7 rows of MC & CC1, then 7 rows of MC & CC2.
Remember to switch to the next color scheme after you’ve completed 7 rows of any section MC & CC1 or MC & CC2.
Once You’ve Reached the Desired Length
Stop working Rectangle Row repeats once your blanket reaches the desired length (measured along the longest edge, not along the diagonal row).
Make sure to end with a Rec Row 2.
Place a SM in the first stitch of the last Rec Row 2 repeat you worked, before continuing to the decrease rows. This will mark a corner stitch.
Note: It doesn’t matter where you’re at in the color scheme. As long as you continue to work color blocks 10 sts wide and 7 rows high.
Continue on to Decrease Rows.
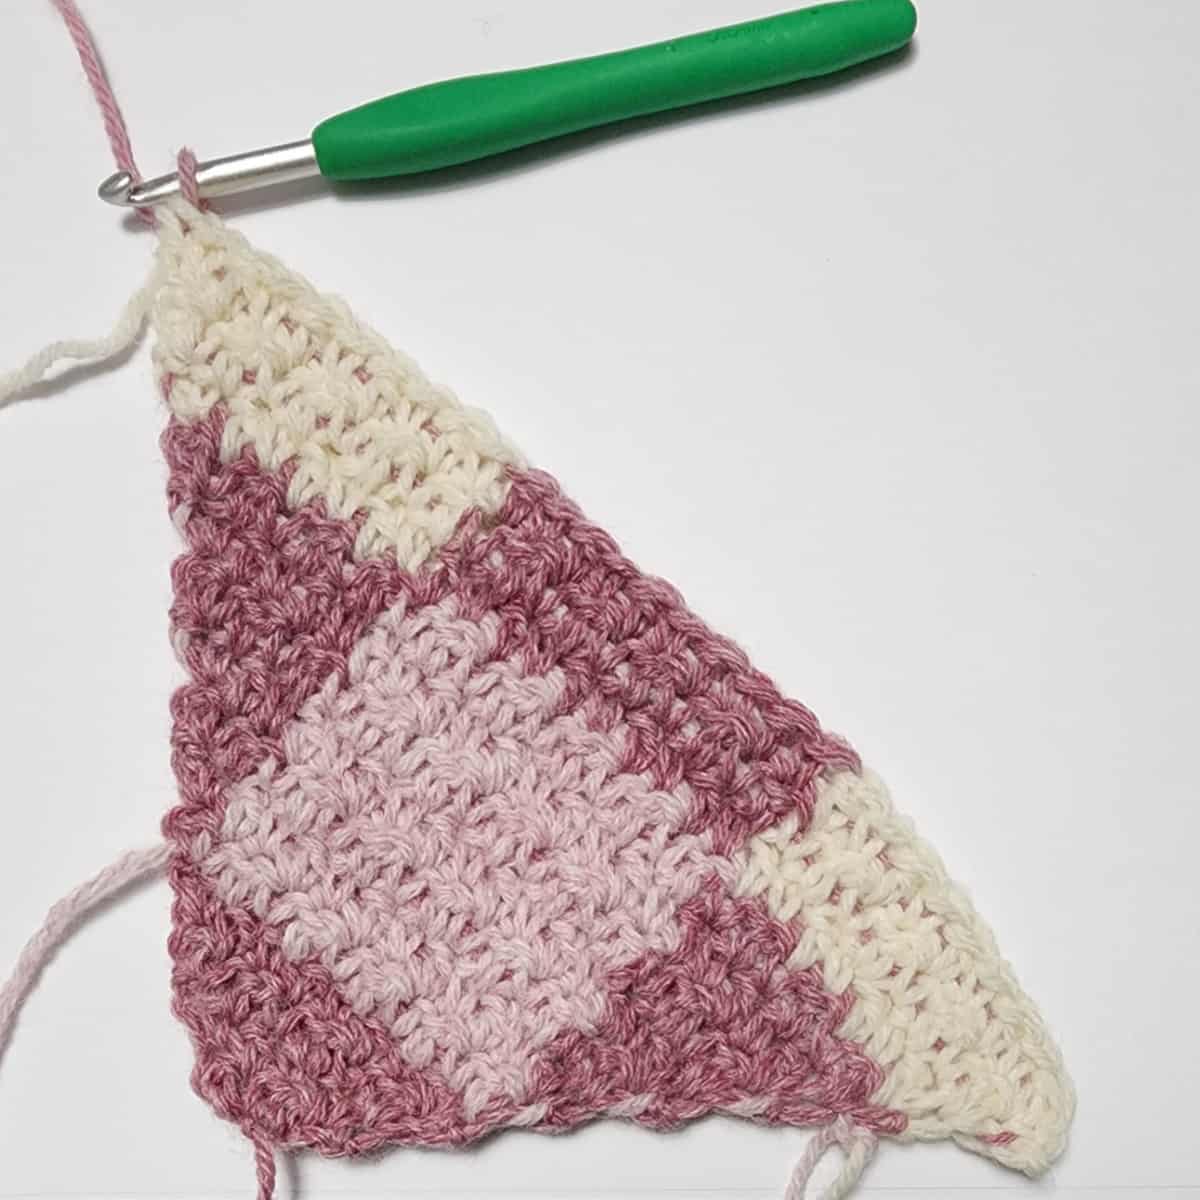
Decrease (Dec) Rows
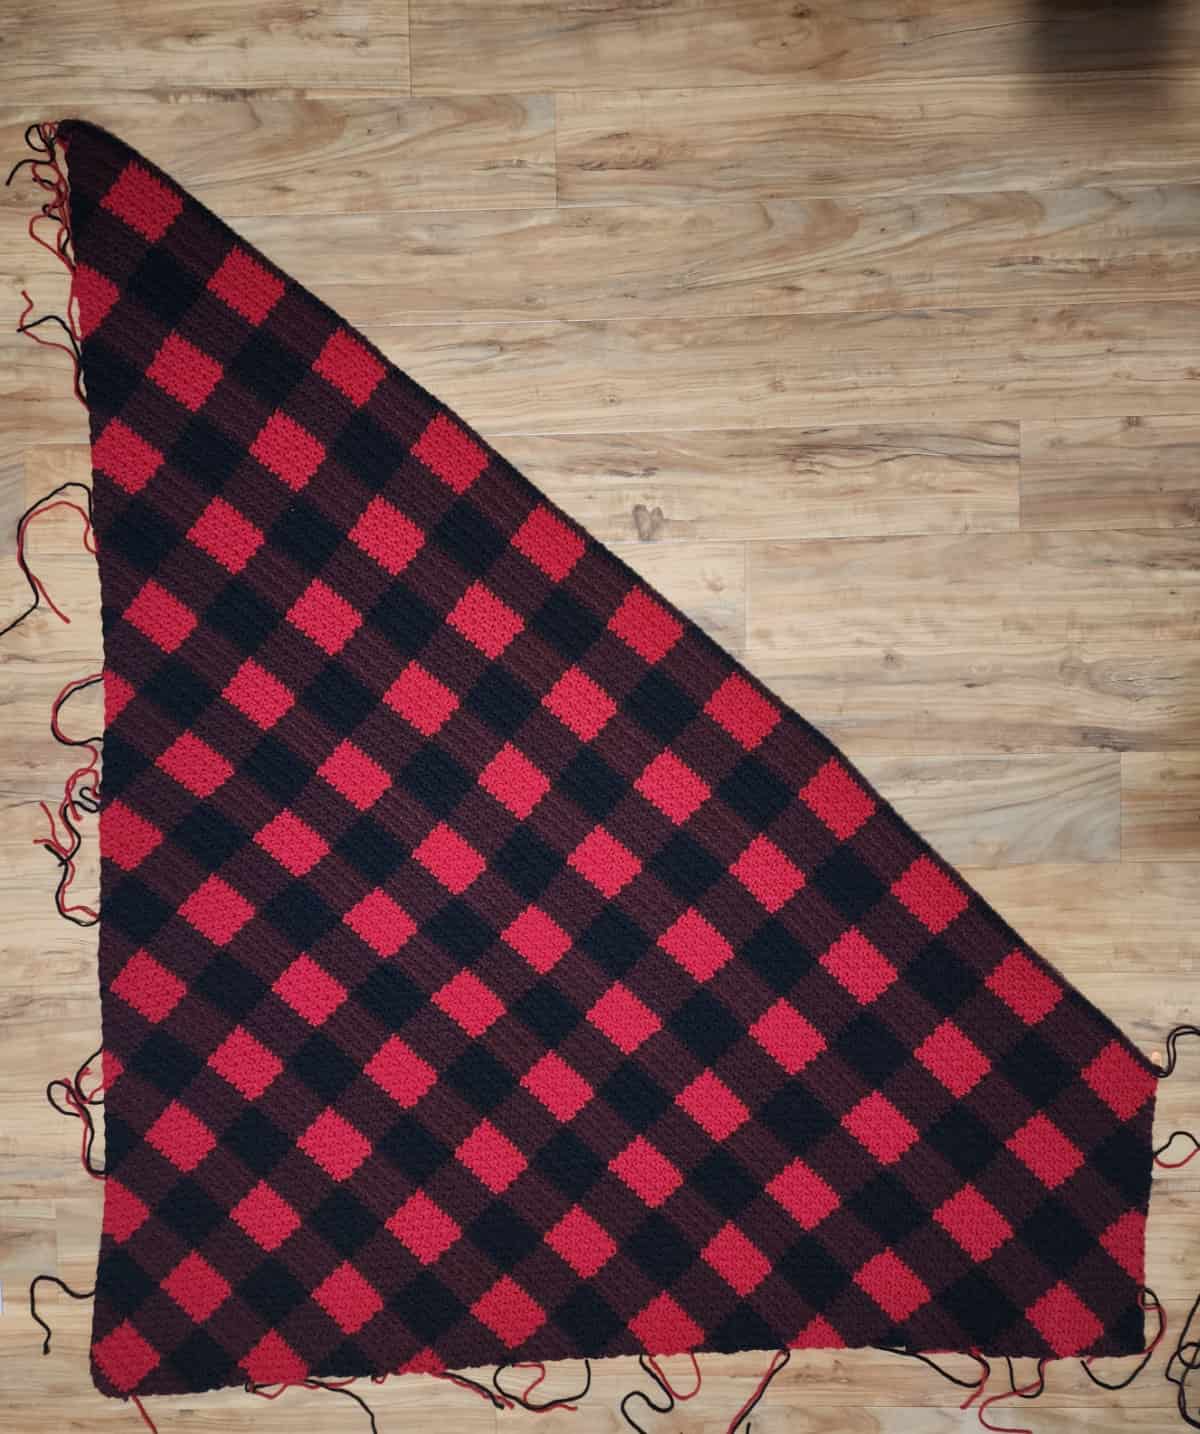
In this section, you will decrease both ends of each row to complete the remaining triangular section of your blanket and work towards the last corner.
The stitch count for each row decreases by 2 stitches.
In this section, simply repeat Decrease Rows 1 – 2 while continuing to work the color changes as you’ve done previously. Continue to work blocks of color 10 sts wide and 7 rows high.
Continue to repeat the decrease rows until you have only 4 sts remaining.
Continue to repeat the decrease rows until you have only 4 sts remaining. The photo above shows only 4 stitches remaining. Continue on to the Final Row!
Preparing the Perimeter for the Border
Note: I went down to a 5.50mm crochet hook to keep my edges flat. It doesn’t matter what hook size you use for your border. The most important thing to keep in mind is that you want your border to lay flat.
If your border starts to get wavy, drop down a hook size or two. If your border starts to cinch inward, go up a hook size or two.
Border Color: I chose to use my neutral color for my border. Choose the color you think will look best for your buffalo plaid crochet blanket.
STITCH COUNT IS NOT CRUCIAL
Rnd 1: With Black yarn and a 5.50mm crochet hook (or whatever size is needed to keep from having a wavy border), join yarn with a standing sc in any marked corner stitch, then [ work along the side of the blanket and work 1 sc into each sc row, 2 sc into each dc row, until you reach the next corner st, (sc, ch 1, sc) into the next corner st, work from [ to ] 3 times, then work along the last side of the blanket and work 1 sc into each sc and 2 sc into each dc until you reach the corner where you joined your yarn to begin this round, work a (sc, ch 1) in the corner st where you joined your yarn. Join with a sl st to the first st. Stitch count isn’t crucial.
Move all 4 SM up to the middle ch-1 of each corner as you complete each round. Do not fasten off. Continue on to the Ribbed Log Cabin Border.
Ribbed Log Cabin Border
Continue on from the previous round and work into the stitches along the next side. Stitch count is not crucial.
Side 1
Row 1: Ch 1, sc in each st across to the next corner marked with a SM, work the last sc of the row into the marked corner st. Turn.
Row 2: Ch 1, BLO sl st in each st across. Turn.
Row 3: Ch 1, BLO sc in each st across. Turn.
Rows 4 – 7: Rep Rows 2 – 3.
Do not fasten off. Continue on to Sides 2 & 3.
Sides 2 & 3
Continuing on from the previous side, rotate your blanket to work along the next side.
Row 1: Ch 1, work 1 sc into each row of the ribbing from the previous side, sc in the corner st, sc in each st across to the next corner st, work the last sc of the row into the next marked corner stitch. Turn.
Row 2: Ch 1, BLO sl st across, then work 1 sl st into the BLO of the turning chain. Turn.
Row 3: Ch 1, BLO sc in each st across. Turn.
Row 4: Ch 1, BLO sl st across. Turn.
Rows 5 – 7: Rep Rows 3 – 4, ending with a Row 3.
Do not fasten off. Repeat once for Side #3, then continue on to Side 4.
Side 4
Continuing on from Side 3, rotate your blanket to work along the last side.
Row 1: Ch 1, work 1 sc into each row from the ribbing of the previous section, sc in the corner st, sc in each st across to the next corner st, sc in the corner st, then work 1 sc into each row from the ribbing section of Side 1. Turn.
Row 2: Ch 1, BLO sl st across, then work 1 sl st into the BLO of the turning chain. Turn.
Row 3: Ch 1, BLO sc in each st across. Turn.
Row 4: Ch 1, BLO sl st across. Turn.
Rows 5 – 7: Rep Rows 3 – 4, ending with Row 3.
Fasten off. Weave in ends & block, if desired.
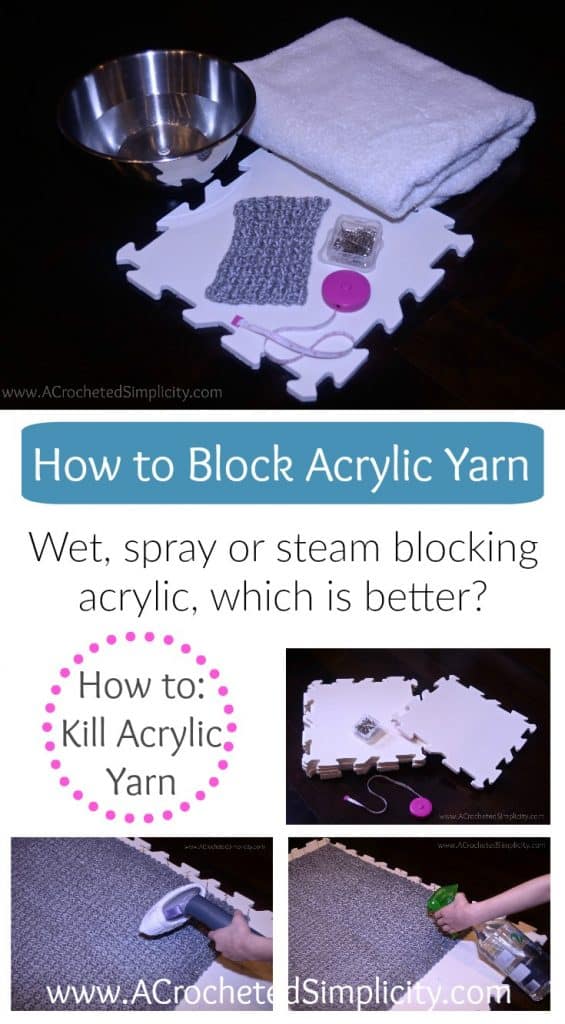
GIVE YOUR WORK A PROFESSIONAL FINISH BY BLOCKING IT!
Learn 3 Different Ways to Block Acrylic Yarn in this tutorial!
I prefer to steam block, which technique is your favorite?
Are you intimidated by knit-look crochet? Would you love to learn my tips & tricks? Take an Annies Video Class with me and let me ease your fears and help you increase your skills! Click on the photo below to watch a free preview. You can also see the other 4 video classes I have available! (affiliate link)

Please share your finished ACS projects with us in the A Crocheted Simplicity Crochet Community Group on Facebook! Use hashtag #ACrochetedSimplicity when sharing on social media so I can find your posts!

I just love the look of this plaid blanket. I might just have to bite the bullet and try my hand at C2C using this pattern. Thank you.
Hi Anna,
I hope you love it! It’s a fun one!
Jennifer
Hi Anna,
I’m glad to hear my design is inspiring you to try something new!
Jennifer
i am an absolute SUCKER for buffalo plaid, but i’ve never really dabbled too much in the corner to corner method. THIS LOOKS ABSOLUTELY AWESOME, thank you so much for sharing, and i will definitely be making one!!
Hi Ashley,
I’m glad to hear it!!!
Jennifer
Hi Lori,
This isn’t a standard C2C blanket using the diagonal box stitch so the edging will be different than you’ve worked before.
The reason you only work 1 sc into the side of a SC row, but 2 SC into the side of a DC row is because of stitch height. The DC is taller than a SC so in order to keep your edge flat, you’ll need to work less stitches into a SC and more into a DC.
Does this make sense?
Jennifer
This is lovely, and I’m going to put it on my to-do list! The last time I tried C2C, I was a little disappointed, as there were openings in the fabric and the edges appeared a little wonky. Your technique and stitches used look much better, and the effect is really pretty. Thank you so much for sharing this pattern. It took time and effort to write out all those details! I look forward to making this.
I absolutely love this blanket pattern! I think the Buffalo Plaid is just fun!
love this! Working on it rn.
Love the plaid blanket it will match the rest of my grandsons collection.
Have often thought about doing this pattern – just read through the page and am blown away at the amount of detail you have included in the pattern. Amazing!
Love this pattern! The finished product is beautiful. I have looked through the details of the pattern and it is very well written and uses new techniques it will be fun to learn.
I have admired this blanket pattern for quite some time and this coming year plan to make it. Thank you for this pattern!
I love C2C and the plaid is a must try.
love that it is different
this is my project I MUST complete
I love the C2C stitch and plaid. I’m adding this to my 2024 make list. Thank you!