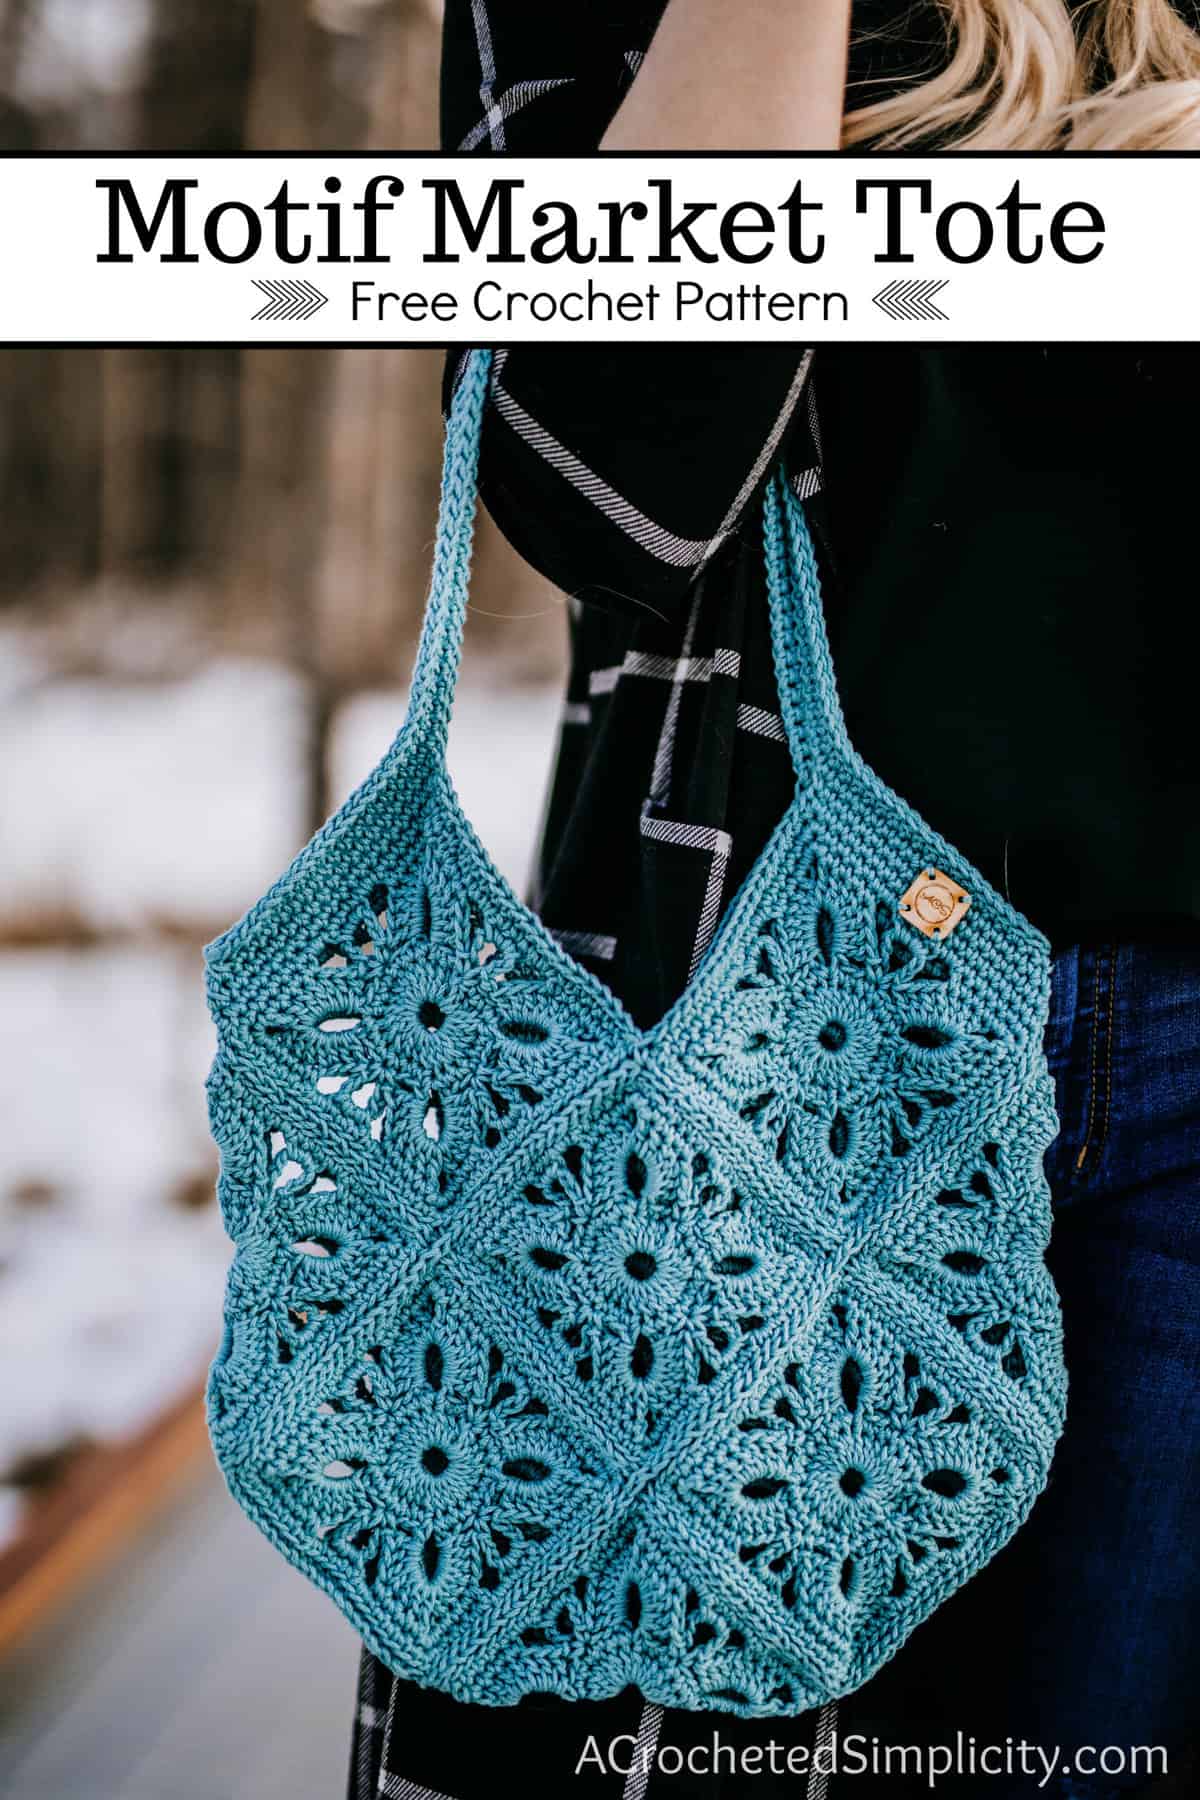
Motif Crochet Market Tote
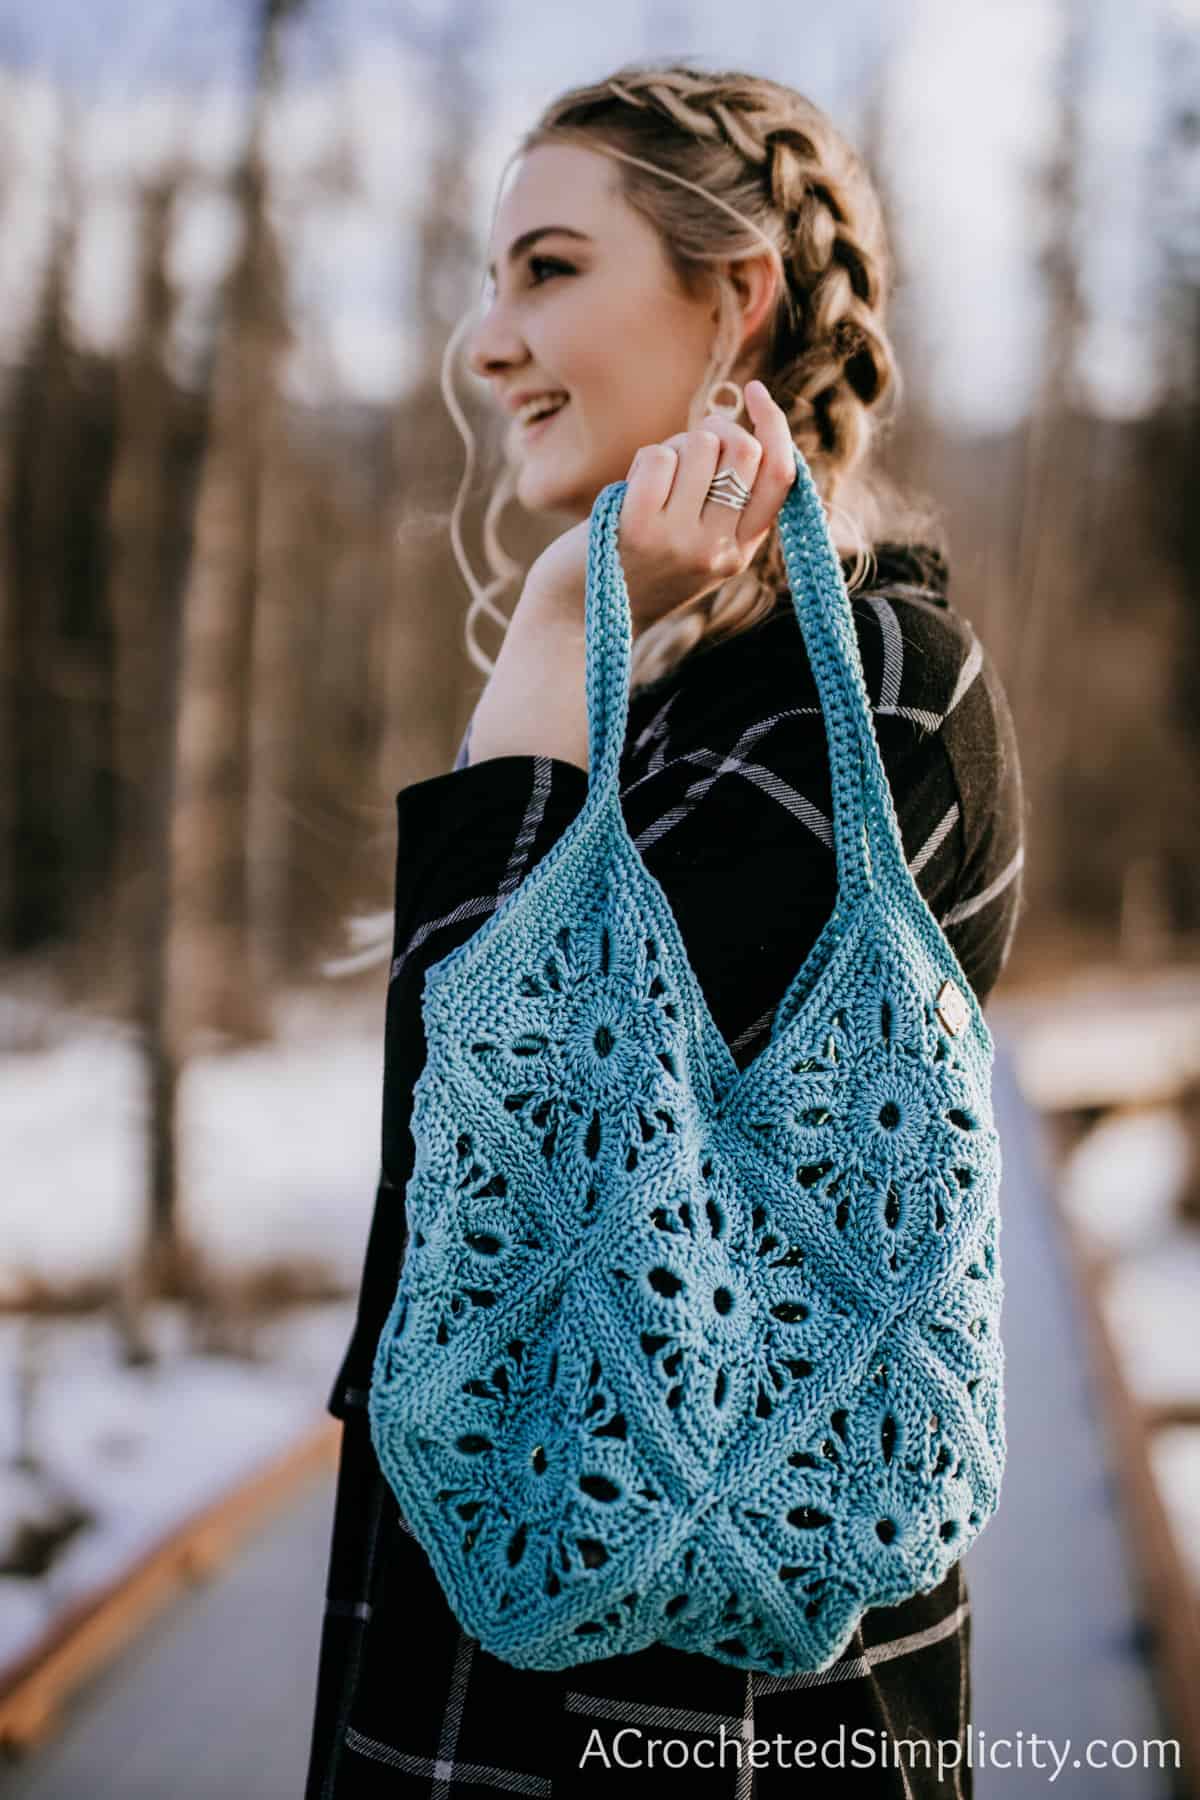
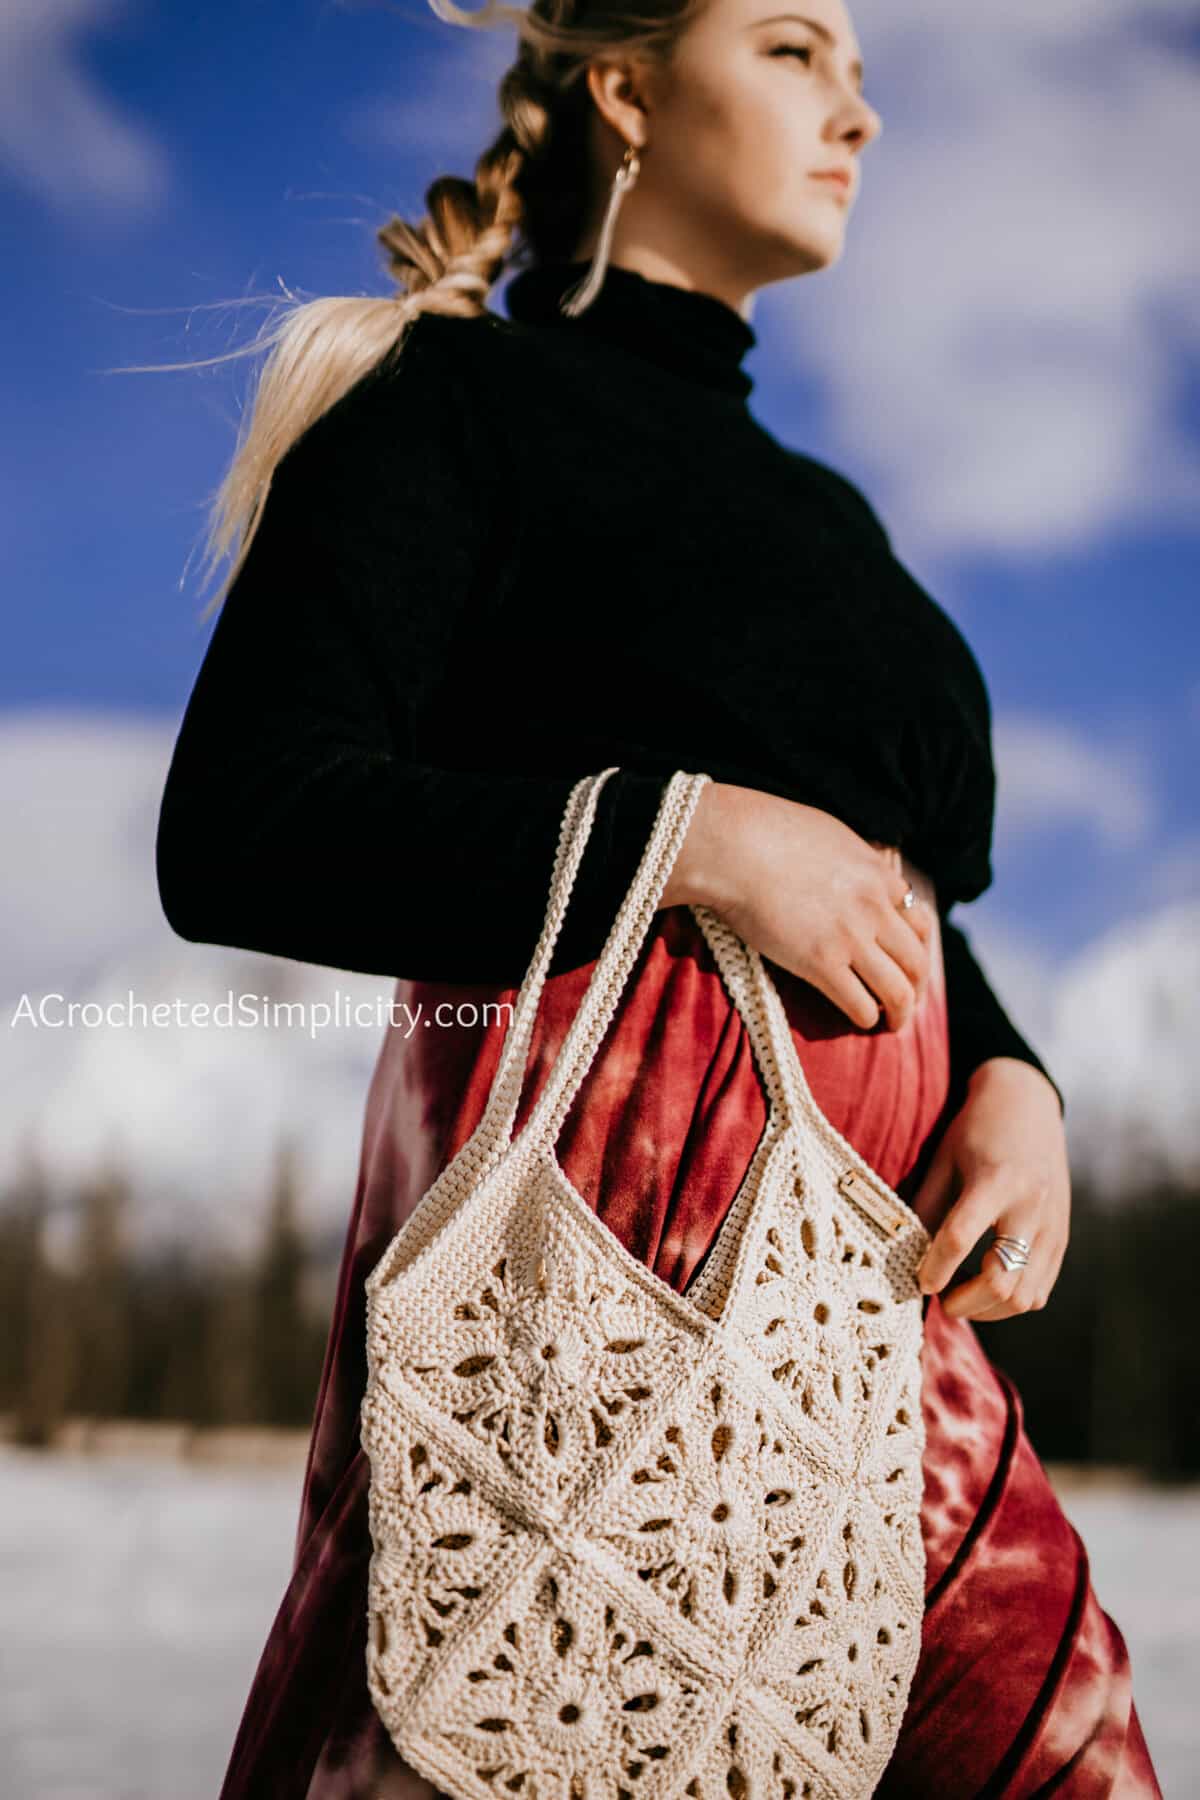
This bespoke crocket market tote is made with a floral granny square motif that both beginners and experienced crocheters alike will enjoy working up. The visual appeal comes from the openwork design which makes this the perfect tote bag for spring and summer, especially for runs to the market to hold fresh produce, packets of cheese, jars of pickled vegetables, and more.
And of course you can use it for other purposes as well! It makes a fabulous beach bag with its capacity to hold larger items and can be an everyday tote too for your daily errands.
You’ll find the free crochet market tote bag pattern in the post below, or you can find an ad-free printable PDF (that includes all photo tutorials), on Ravelry, or Etsy (aff).
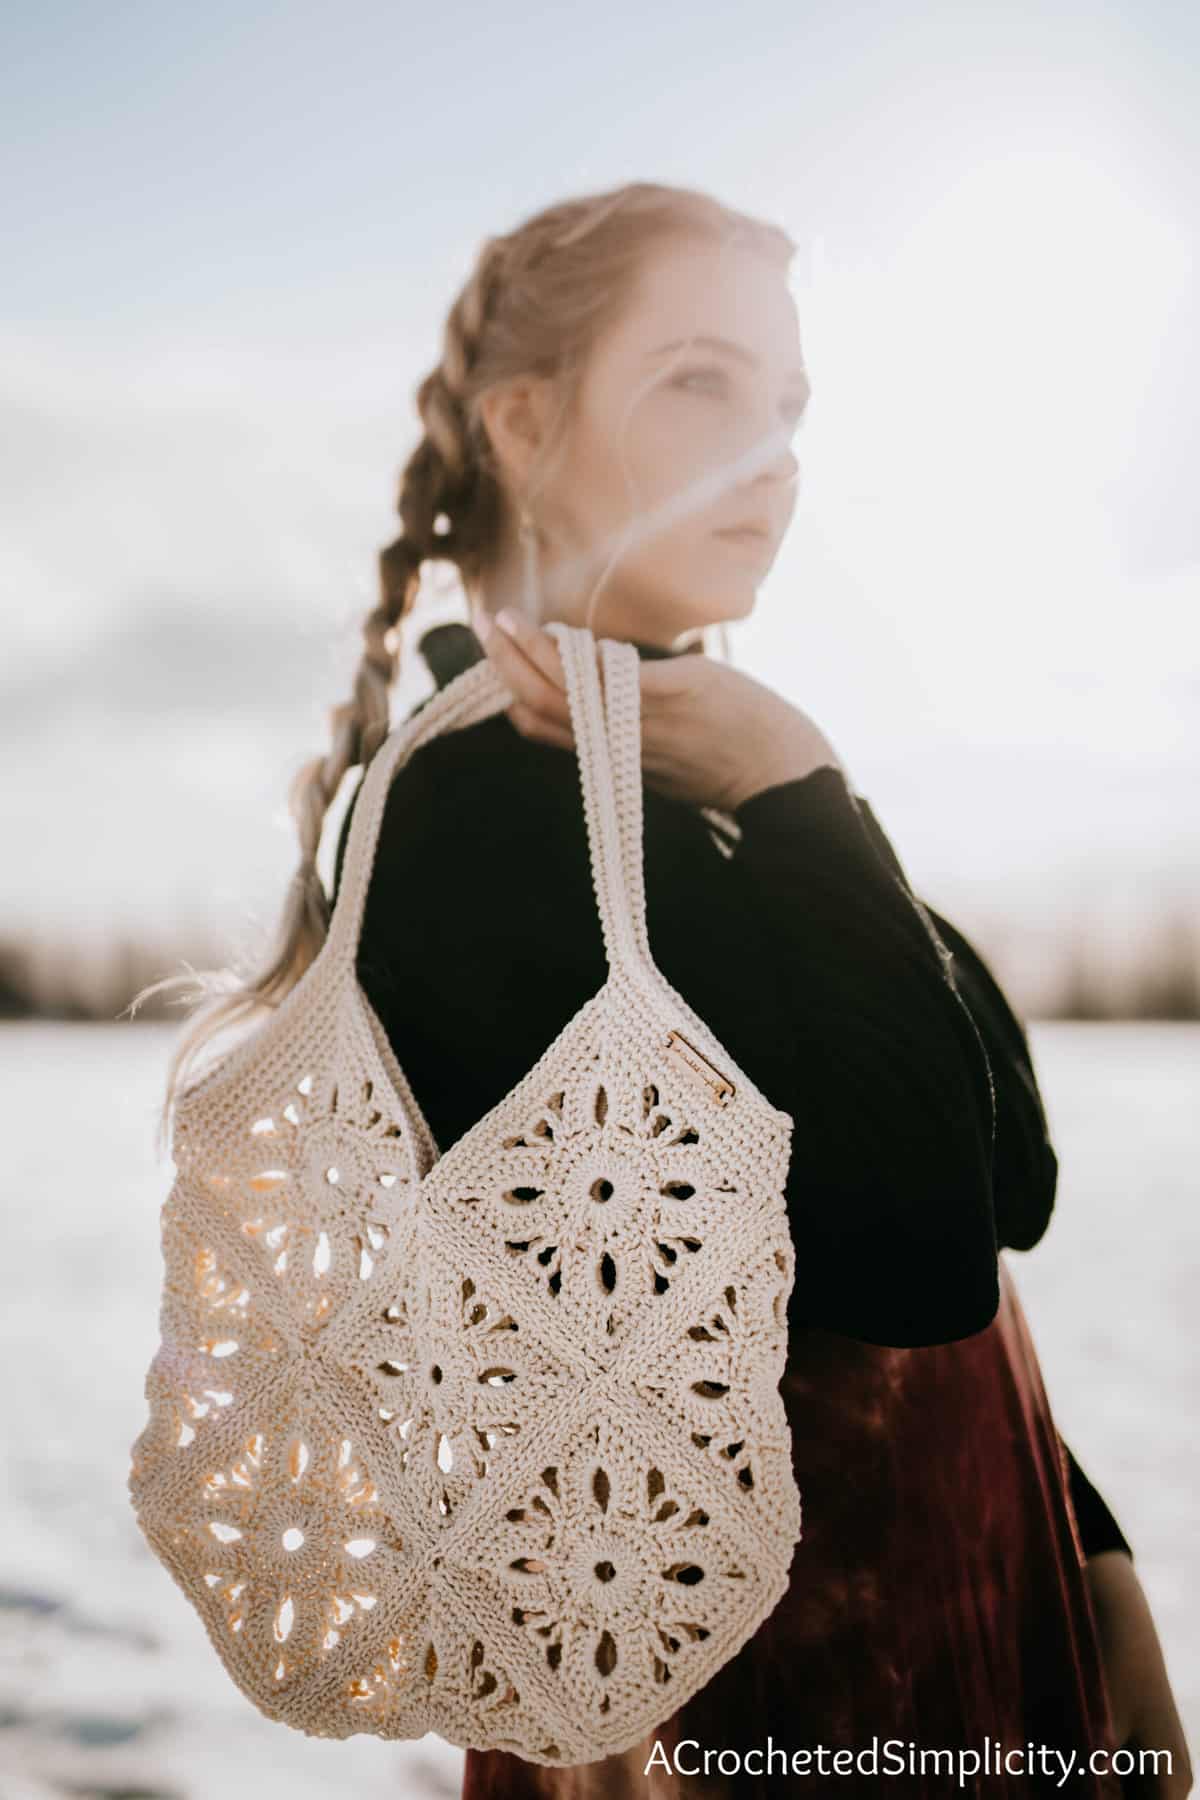
Since this bag is crocheted with granny squares, you don’t have to lug around the entire project while you make it. You can work on the crochet floral motifs as you go about your day, even while riding the subway or waiting for your appointments, and then seam them all together once you have enough.
That also allows you to explore different color combinations although I made my versions in solid colors. You can use a variegated yarn or turn this into a stashbusting project by crocheting squares in various skeins. The choice is yours!
Related: If you’d like a smaller crossbody bag to add to your collection, work up the Boho Crochet Sling Bag next.
How to Crochet a Market Tote Bag
This crochet market tote bag is constructed by first crocheting 13 motif squares in exactly the same way. You can choose to block them once they’re done if you’d like a neater finish.
Once the squares are all ready, you’ll lay them out as directed and seam them together with the flat slip stitch seam. Lastly, you’ll add a top edge and strap. You can choose to further embellish your tote with beaded tassels, bag charms, etc. I added a personalized tag to make this market tote bag truly mine. It gives such a professional touch to the finished piece!
How To Get The
Motif Market Tote Pattern
Option 1: Scroll down for the free crochet market tote bag pattern right here in this blog post.
Option 2: Purchase the ad-free printable PDF from one of my shops:
Best Yarn for Crochet Bags
I typically recommend using 100% cotton yarn for a crochet bag for several reasons:
- Cotton yarns are soft and durable.
- Cotton yarns don’t pill easily.
- They hold up well to several washes in a washing machine.
- They show crochet stitch definition really well.
- They keep their shape.
- They don’t snag easily.
- They’re fairly inexpensive.
My second favorite yarn to crochet a bag with is 100% worsted weight wool, but keep in mind that animal fibers have a tendency to felt. And my third choice is double stranded acrylic yarn with a smaller hook than what’s recommended on the yarn label (because acrylic is stretchier).
If you’re going to line the crochet market tote bag with fabric, you can use any yarn you’d like because the fabric will bear the weight of the items you place in the bag.
Related: If you want to keep your sunglasses from getting scratched up when you store them in your bag, you can make yourself a Hexagon Eyeglass Case.
Yarn
Since I love to use cotton for crochet bags, for the Motif Crochet Market Tote, I chose Lion Brand Yarn 24/7 Cotton which is 100% mercerized cotton. For the bags shown in the photos, I used the shades Ecru and Succulent. This collection is known for both its sheen and structure which remain no matter how much you wash and wear out your project. Since it’s machine washable, your handmade tote bag can easily get a lot of use before you clean it.
The weight of this yarn give it a firmness and density that help the bag hold its shape better compared to lighter yarns. If you choose to use a yarn with a different fiber content, such as an acrylic like Lion Brand Vanna’s Choice, you can certainly do so. Just remember that the acrylic will be stretchier so I would suggest making the straps a tad bit shorter to compensate.
Motif Market Tote – Free Pattern
The crochet market tote bag pattern is free below, but if you love to work offline, I’ve got a couple other great options for you.
Purchase the ad-free, printable PDF, (that includes all photo tutorials), on Ravelry, or on Etsy (aff).
Save this pattern to your Ravelry favorites.
Purchase the Motif Market Tote Crochet Kit (aff): Lion Brand has a full kit of the Motif Crochet Market Tote, available on their website. The includes your choice of color and a digital copy of the crochet pattern.
This post contains affiliate links.
Materials
- Yarn: Worsted Weight / 4 / Yarn, Lion Brand Yarn 24/7 Cotton [100% Mercerized Cotton (186 yds / 170 m / 100 g / 3.5 oz)] was used for the sample in the photos.
- Yardage and Color: 420 yds
- Ecru #761 – 098C
- Succulent #761-116E
- Crochet Hook: H/8/5.00mm; or size needed to obtain gauge (My favorite crochet hooks are the Clover Amour Crochet Hooks, I’ve never had an ache in my hand since switching).
- Measuring Tape
- Locking Stitch Markers
- Scissors
- Yarn Needle
- Personalized Tags
Abbreviations (US Terms)
- ch(s): chain(s)
- sl st(s): slip stitch(es)
- st(s): stitch(es)
- sp(s): space(s)
- sc: single crochet
- dc: double crochet
- RS/WS: right side / wrong side
- Rep: repeat
- Rnd(s): round(s)
- yo: yarn over
- Join with a standing sc
Experience Level
- Easy
Gauge
- Motif Square: 4.5″ x 4.5″
Sizes
- One Size: 12.75″ W x 12.5″ H (not including the strap)
Special Stitches
- Join with a standing single crochet: Begin with a slip knot on your hook, insert your hook into the stitch or space indicated, yo, pull up a loop, yo and draw thru both loops on hook.
Pattern Notes
- I tend to crochet on the tighter side. You may need to go down a hook size (or two) to meet gauge if you crochet on the looser side.
- Yarn Notes: Lion Brand Yarn 24/7 Cotton (3.5oz / 100 g / 186 yards / 170 meters / 100% mercerized cotton) was used for the samples. Another comparable worsted weight yarn may be substituted.
- Yardage & Color: 420 yds
- Ecru #761 – 098C
- Succulent #761-116E
- Construction Notes: This tote bag is constructed by first crocheting 13 motif squares. You’ll then lay the squares out as shown in the pattern and seam them together. Lastly, you’ll add a top edge and strap.
Motif Crochet Market Tote – Written Pattern
4.5″ – Motif Square Instructions (Make 13)
Tip: I highly suggest using locking stitch markers where noted. They will help to keep you on track while you crochet and they come in very handy when seaming the motifs together.
Rnd 1 (RS / MC): With yarn and a 5.00mm crochet hook, begin with a magic ring, sl st into the magic ring then ch 2 (does not count as a stitch), work 24 dc into the magic ring. Do not join. (24 sts)
Rnd 2: Sc in each of the next 3 sts, * (sc, ch 7, sc) in the next st, sc in each of the next 5 sts, work from * for a total of 3 times, then (sc, ch 7, sc) in the next st, sc in each of the last 2 sts. Do not join. (28 sts + 4 ch-7’s)
Rnd 3: * (sc, ch 7, sc) in the next st, skip each of the next 3 sc, (7 dc, ch 3, 7 dc) in the next ch-7 sp, skip each of the next 3 sc, work from * for a total of 4 times. Join with a sl st to the 1st sc. (64 sts, + 4 ch-7 sps + 4 ch-3 sps)
Fasten off. Continue on to Motif Square Border.
Motif Square Border
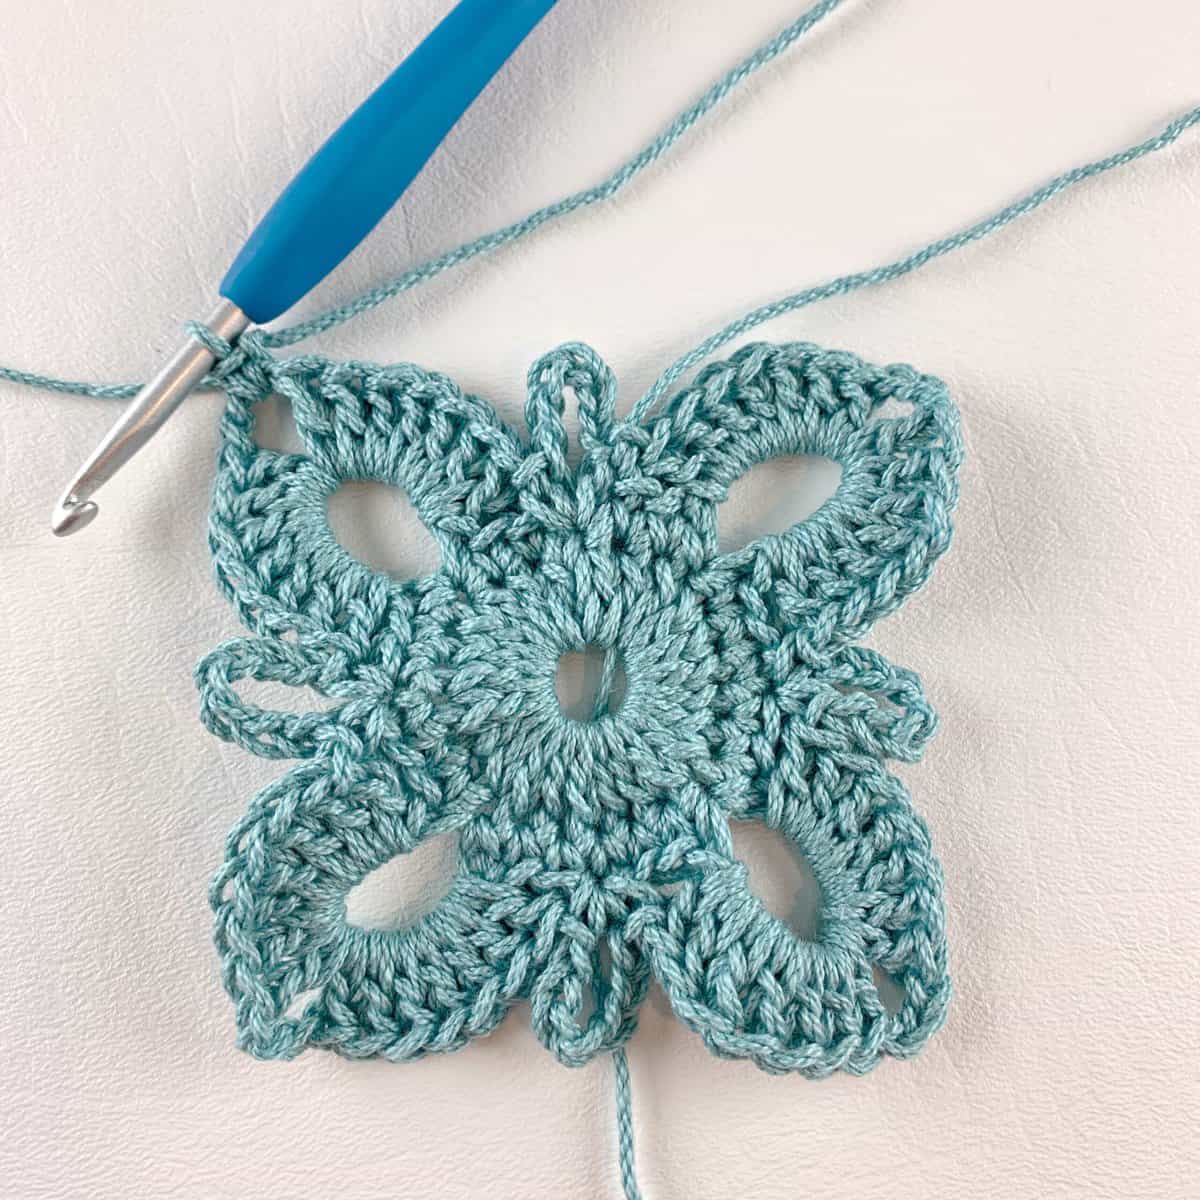
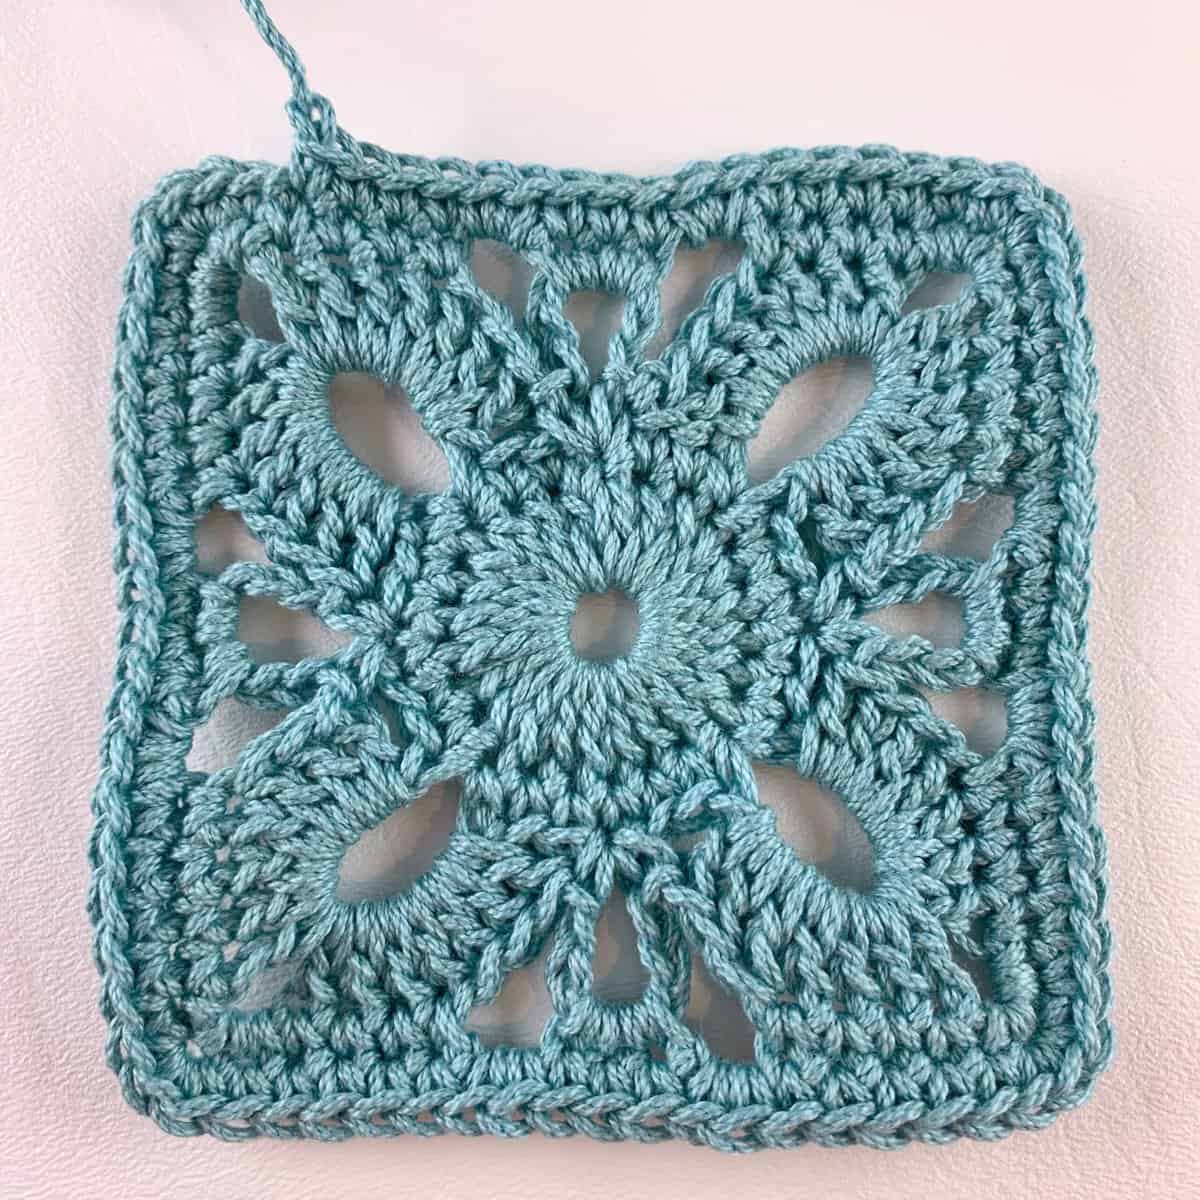
Rnd 1 (RS): With a 5.00mm crochet hook, join yarn with a standing sc in a ch-3 sp at a corner, work 2 more sc in the same ch-3 sp, * sc in each of the next 4 dc, ch 2, skip each of the next 3 dc, work 3 sc in the next ch-7 sp, ch 2, skip each of the next 3 dc, sc in each of the next 4 dc, 3 sc in the next ch-3 sp, work from * a total of 3 times, then sc in each of the next 4 dc, ch 2, skip each of the next 3 dc, work 3 sc in the next ch-7 sp, ch 2, skip each of the next 3 dc, sc in each of the next 4 dc. Do not join. (56 sts + 8 ch-2 sps)
Rnd 2: Sc in the next st, * 3 sc in the next st, sc in each of the next 5 sts, 2 sc in the next ch-2 sp, sc in each of the next 3 sts, 2 sc in the next ch-2 sp, sc in each of the next 5 sts, work from * a total of 3 times, then 3 sc in the next st, sc in each of the next 5 sts, 2 sc in the next ch-2 sp, sc in each of the next 3 sts, 2 sc in the next ch-2 sp, sc in each of the last 4 sts. Do not join. (80 sts)
Fasten off. Weave in ends. After you’ve completed all 13 motifs, continue on to Layout and Seaming Motifs.
Layout & Seaming Motifs
Step 1: Use the layout shown in the photo below to arrange your motif squares with the right sides facing up.
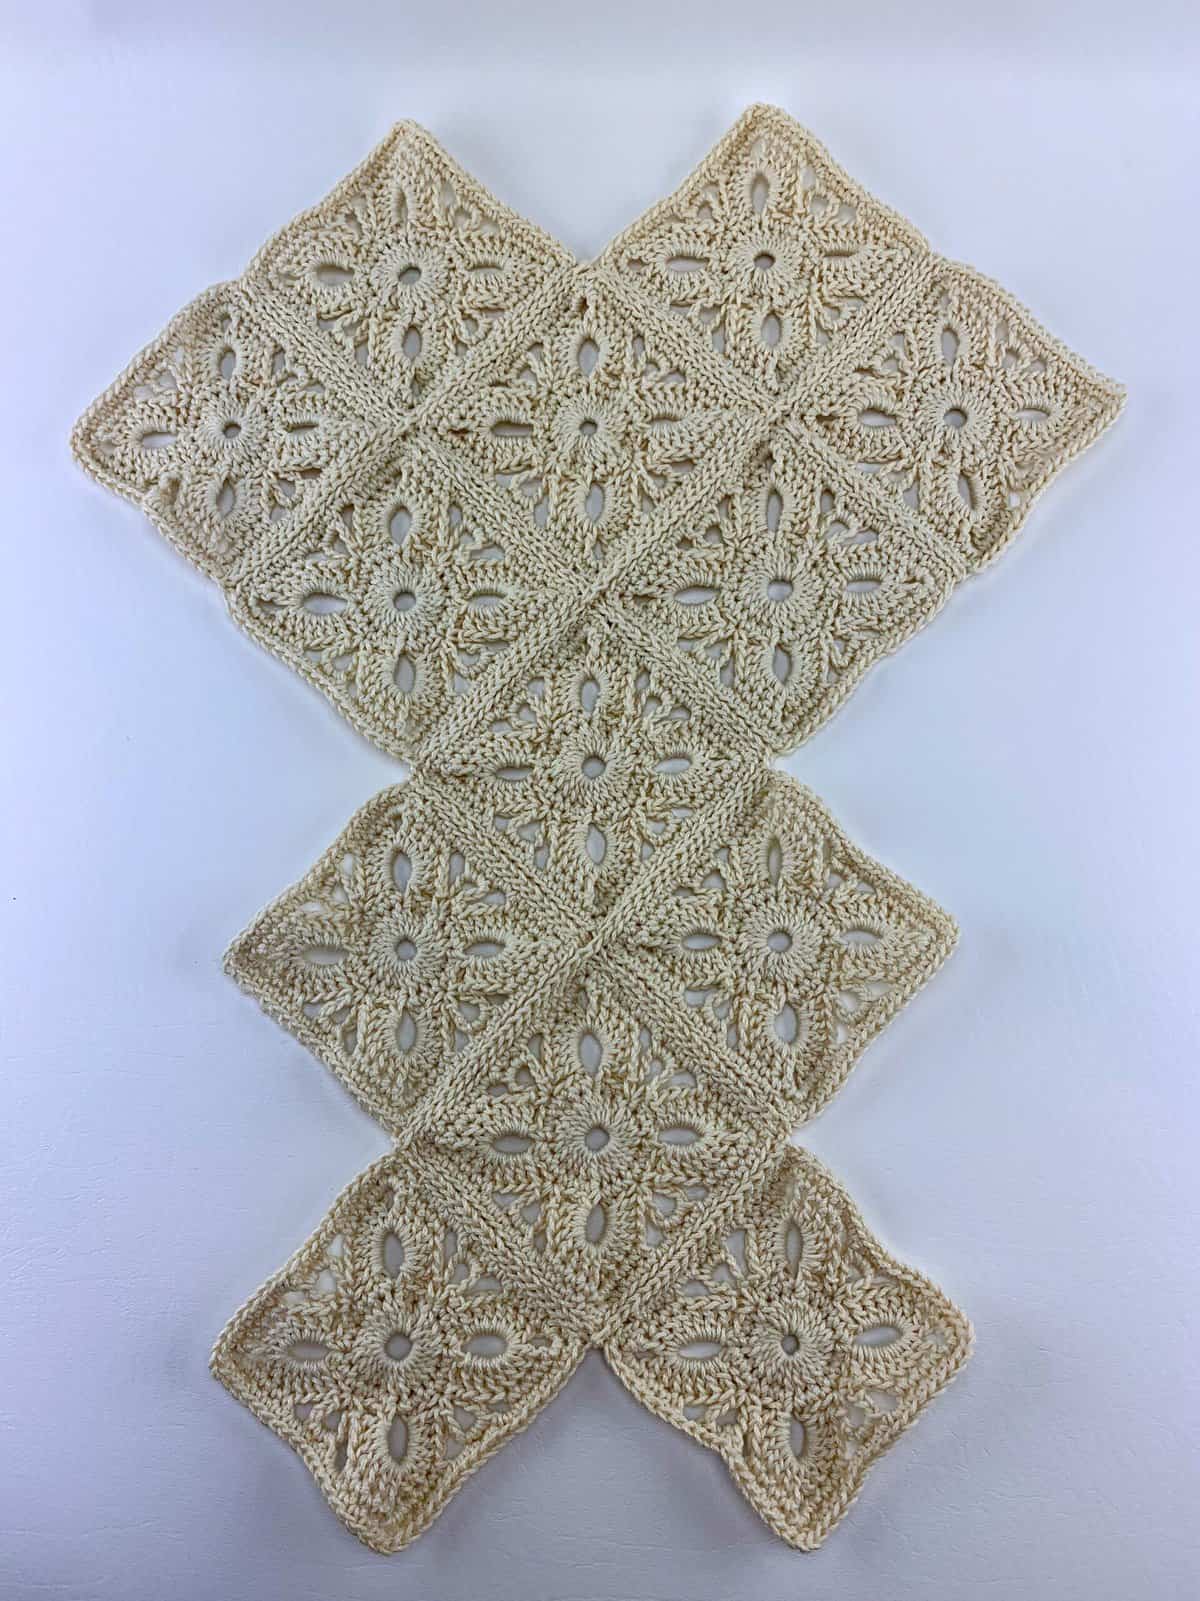
Step 2: Use locking stitch markers or scrap pieces of yarn to hold the squares together while you seam. Make sure to place the stitch markers in the middle single crochet at each corner to keep your squares lined up straight.
Step 3: Use a 5.00mm crochet hook to work a Flat Slip Stitch Seam, work all seams horizontally. When you get to the end of a row, fasten off and continue on to the next row that needs to be seamed.
Weave in all ends. Continue on to Folding & Seaming.
Folding & Seaming
Step 1: Flip the seamed squares over so that the right side is facing down.
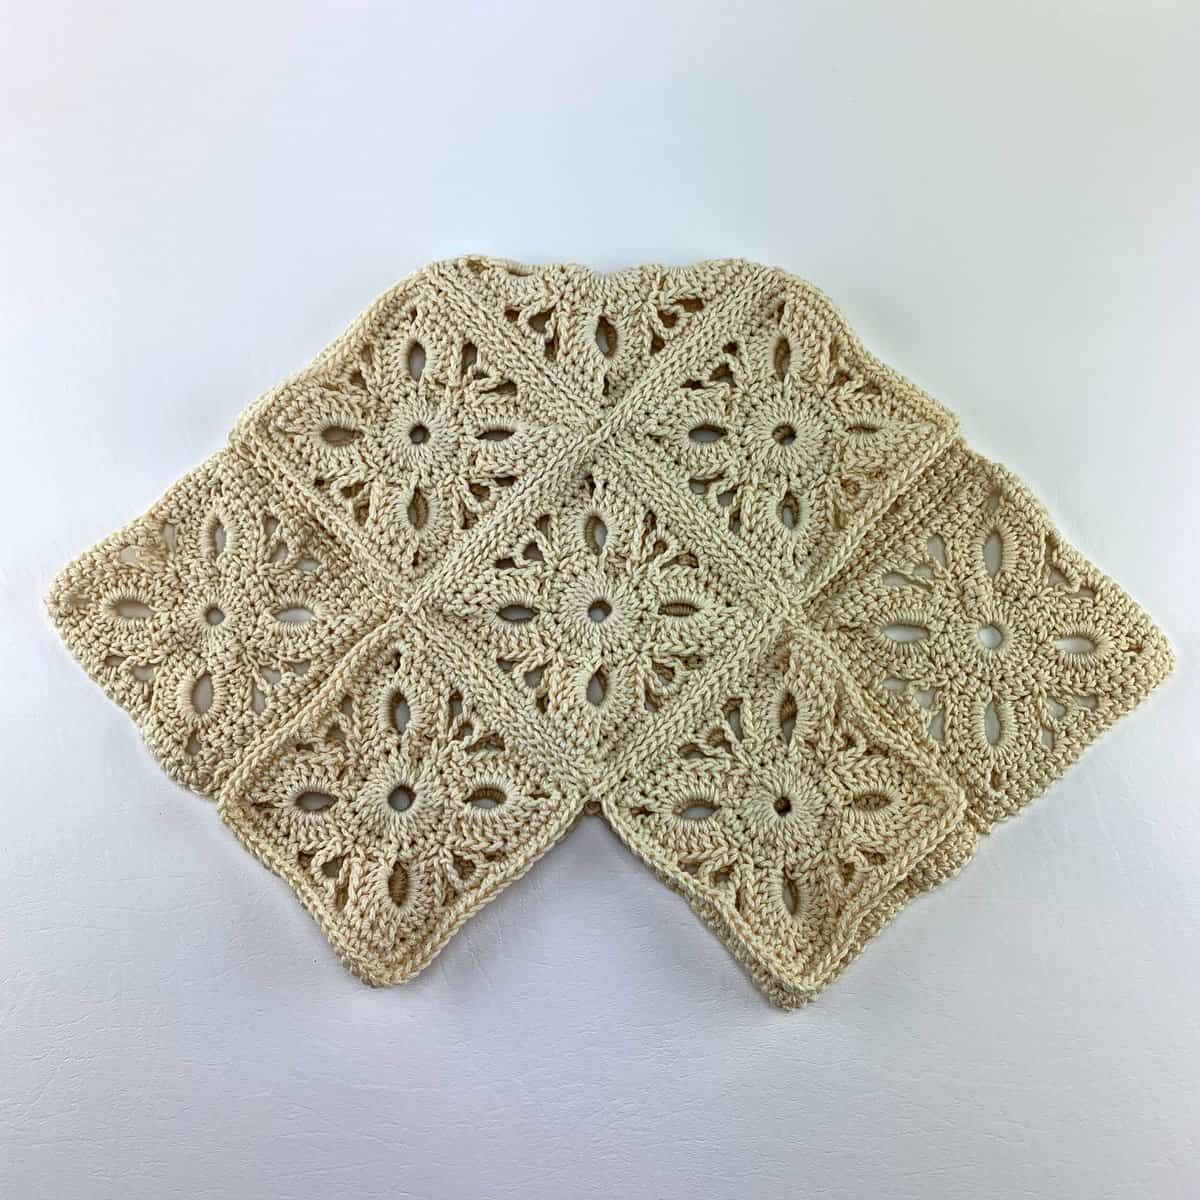
Step 2: Fold the seamed squares down matching the top 2 peaks with the bottom 2 peaks.
Step 3: Now fold the most outer left and right squares over towards the center of the bag so that they fit into the zig zag space.
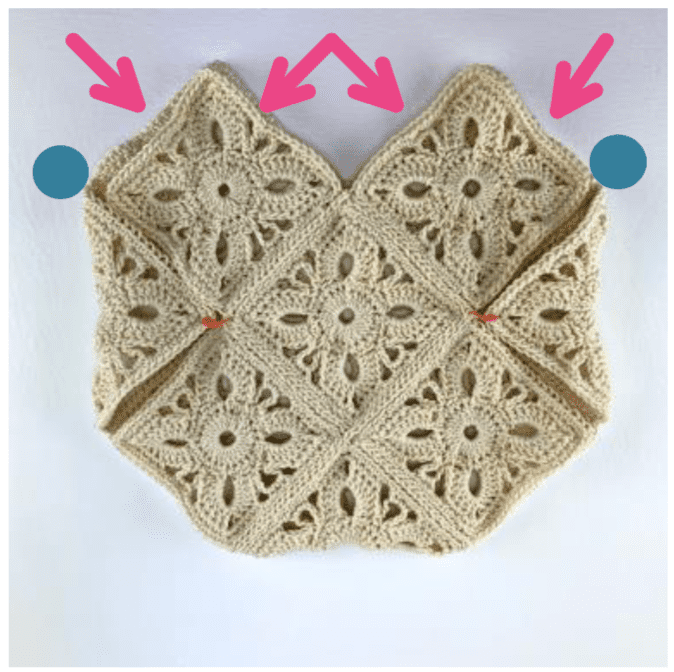
Step 4: Use a 5.00mm crochet hook to work a flat slip stitch seam (working on a zig zag) from the BLUE dots to the bottom of the bag. Make sure not to seam the edges where the pink arrows are pointing.
Weave in ends. Continue on to Top Edging & Straps.
Top Edging & Straps
Rnd 1 (RS): With a 5.00mm crochet hook, join yarn with a standing sc in the st to the left of a valley on either side of the tote bag, working up and down the peaks and valleys that form the top edge of the bag, sc in each st around, working 3 sc into the top st at each of the 4 peaks. Do not join. Stitch count isn’t crucial.
Rnd 2: Sc in each st to middle sc in next peak, ch 60 (to create handle), skip across to the middle sc in the next peak, sc in sc at peak, sc in each st down to the 3 center sts in the next valley, sc3tog in valley, sc in each st up to middle sc in next peak, ch 60, skip across to the middle sc in the next peak, sc in the middle sc of the next peak, sc in each st down to the 3 center sts in the next valley, sc3tog in valley. Do not join.
Rnd 3: Sc in each st and ch around and work sc3tog in the bottom 3 sts in each valley. Do not join.
Rnd 4: Sc in each st around and work a sc3tog in the bottom 3 sts in each valley. Do not join.
Rnd 5: Sl st in each st around. Join using Special Join Technique.
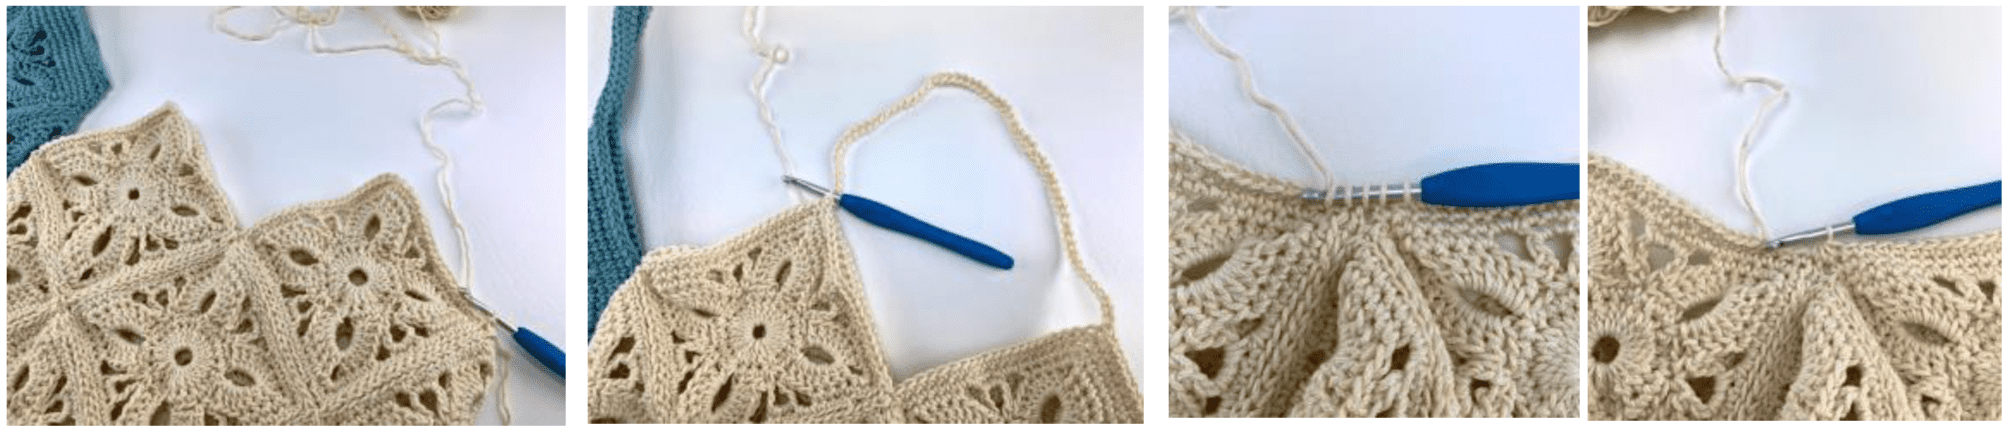
Fasten off. Weave in ends. Block, if desired.
I MADE IT! NOW WHAT?
Pin this post!: Save this crochet market tote bag pattern to your Pinterest boards so that you can come back and make it again.
Leave a comment below: We love to hear your feedback.
Share Your Finished Projects on Facebook or Instagram: I love to see your finished projects! Share with us on social media and tag me @acrochetedsimplicity or use the hashtag #ACrochetedSimplicity so I can find your posts.
Join us in the Facebook Community Group!
Come share your finished projects with us in the A Crocheted Simplicity Crochet Community Group on Facebook. Join us for fun community events such as crochet alongs, join in on crochet conversations, ask questions, get advice, and share your love for crochet!

More Free Patterns for Crochet Bags
More Crochet Patterns for Crochet Totes & Handbags
Are you looking for more crocheted purse patterns? We have several more free and premium crochet patterns for bags, backpacks, purses, and totes. We have a variety of free crochet bag patterns and premium crochet bag patterns.

This bag is beautiful!
I love this bag! I haven’t crocheted since 2018 but this may be the project that gets me crocheting again!
I have this beautiful tote in progress! I am making it in red for a fundraiser for the Texas Society of the Daughters of the American Revolution.
I purchased everything I need to make this fabulous bag. However when I read the directions I am a little confused. Is this basically a continuous round for the squares? Just don’t want to be frustrated when I actually start it.
Hi Bobbi Jo,
Yes and no. Rounds 1 & 2 of the motif state do not join at the end of the rounds. Round 3 of the motif tells you to join. As long as you follow what’s written, you’ll be golden. 🙂
Let me know if you get stuck any where as you crochet them.
Happy Crocheting,
Jennifer
I finally finished the crocheting part of the bag. I did add 2 rows on the inside of the strap to finish off the squares and also to widen the strap. I need to weave in my ends and then I will be sewing a lining with fabric I purchased at JoAnn’s (RIP) prior to the closing sales. This was actually easier than I thought it would be.