Argyle Beanie & Slouch – Free Crochet Hat Pattern
Last year, I designed the Chevron Peaks Slouch for the Hat Not Hate campaign and I really loved the technique & crochet stitches that created the design and texture of the hat. I loved it so much that I came up with an argyle design for last year’s crochet Christmas stocking pattern. Then, after completing the argyle stocking, I knew that the design would make a great hat, but I ran out of time last winter to release the Argyle Beanie & Slouch. Everything works out the way it’s supposed to though, right? It did. It became the perfect project for a Mini-Mystery Crochet Along.
You can find the free crochet pattern in this post below, or an ad-free print friendly version on Ravelry, or on Etsy.
I’ve had so many crocheters reach out to tell me that they LOVED my Chevron Peaks Slouch. I was pleasantly shocked because it was one of those designs that I really didn’t think would garner much attention. All of the positive messages I received were the reason I used the same technique for the argyle stocking and this crochet beanie pattern. I’ve got a couple more fun designs coming your way with this technique too!
Aren’t personalized leather tags such a great finishing touch to add to our crochet items? I ordered these ones and a couple different wooden ones from an awesome online maker. You can find links to where I purchased and a tutorial on how to attach all of them HERE.
THE YARN
DESCRIPTION
Options, options, options!
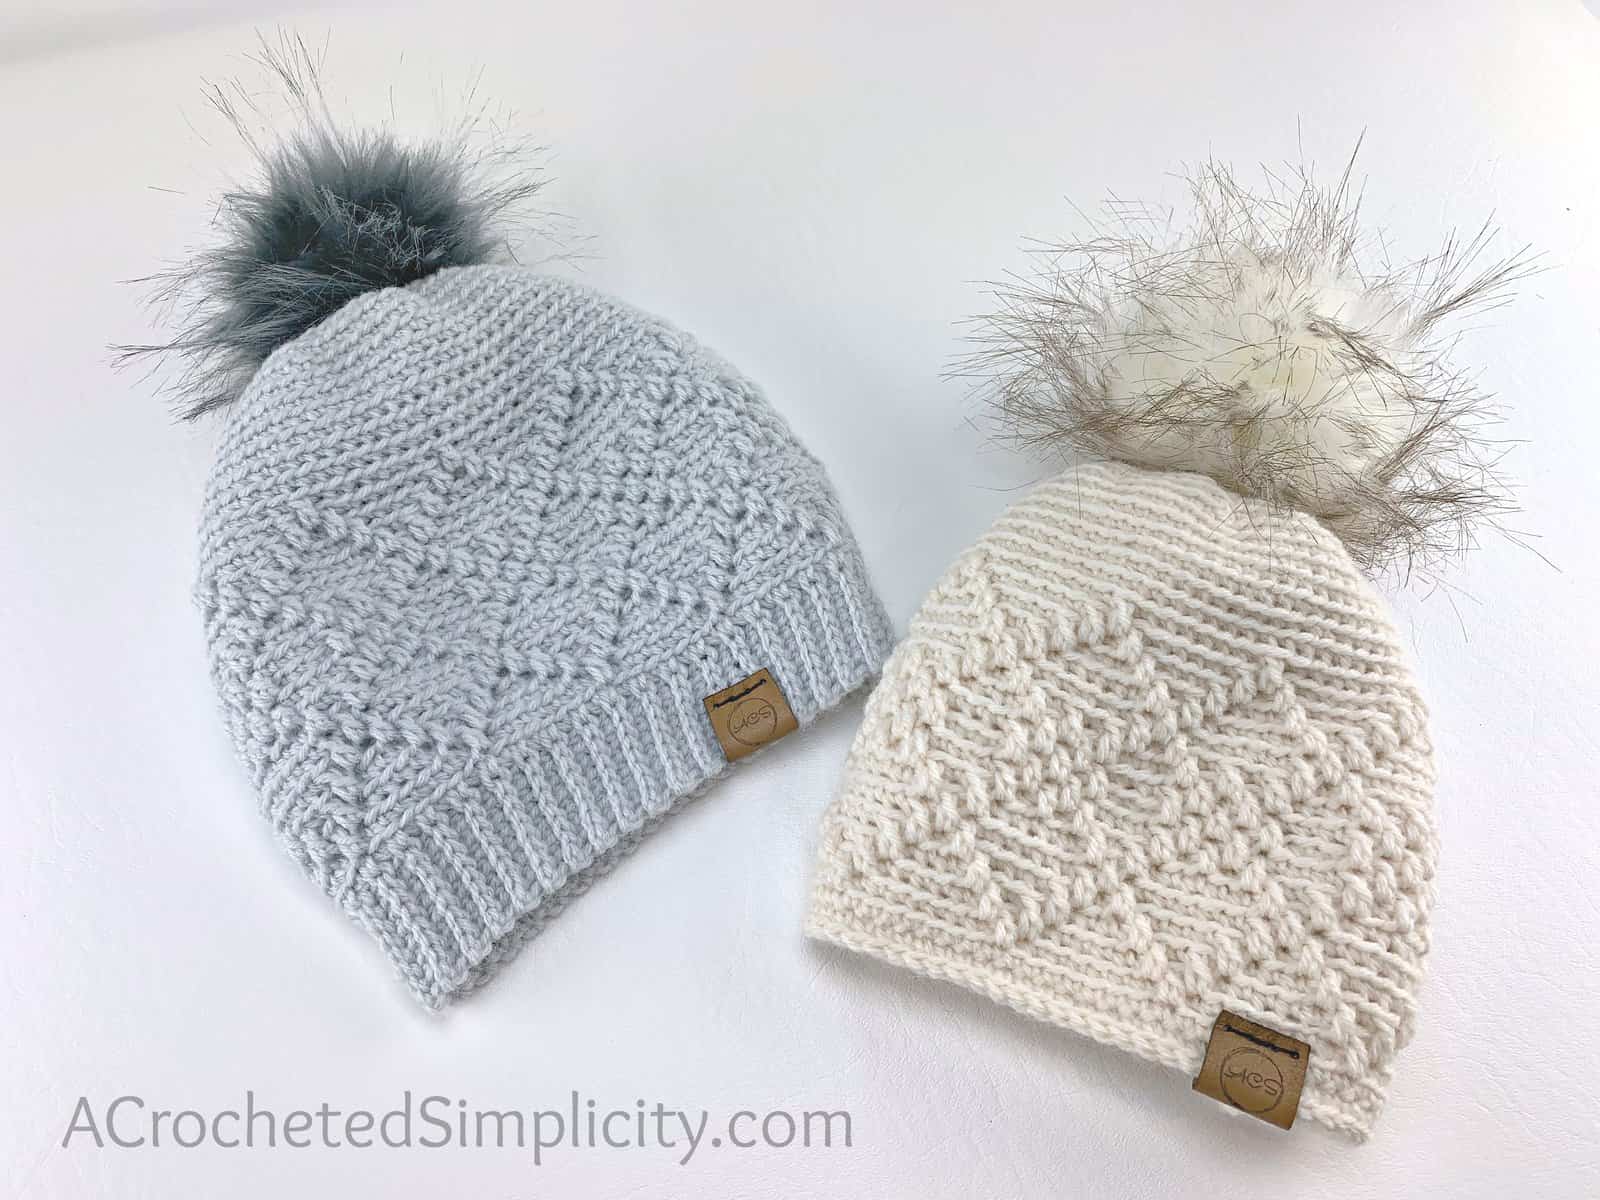
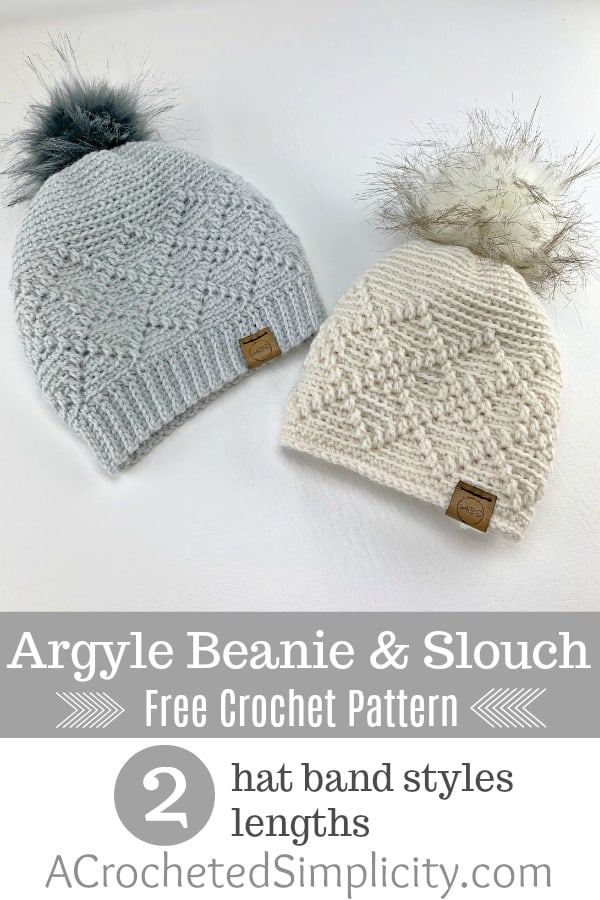
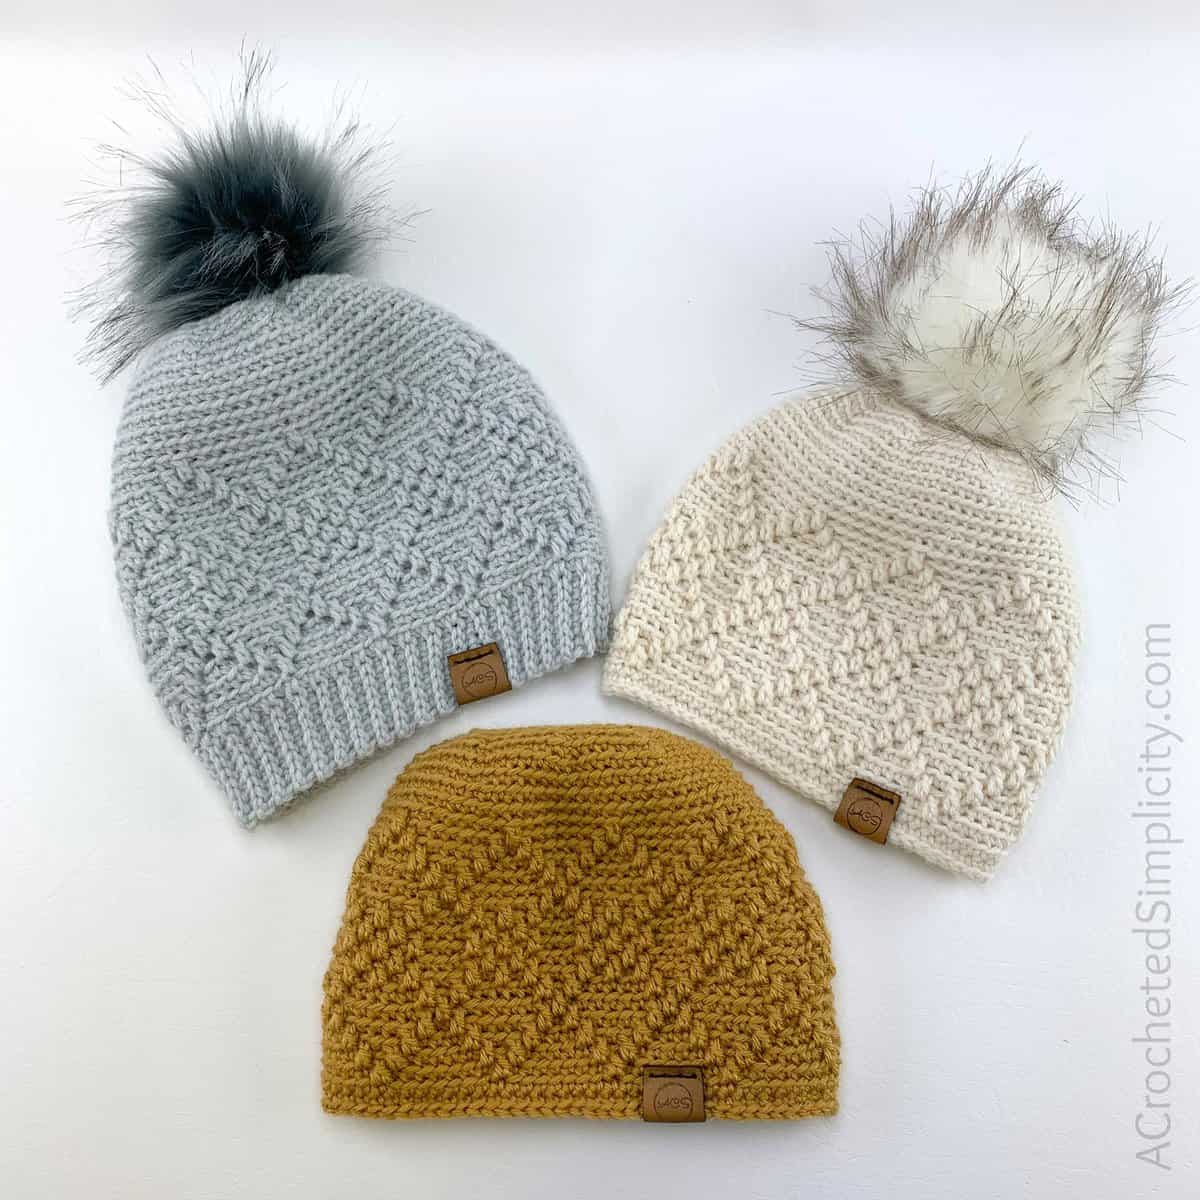
The Argyle Beanie & Slouch crochet pattern includes 2 hat band options (Stretchy Hat Band of Simple Hat Band) and 2 lengths (Beanie or Slouch). Both styles are crocheted from the bottom up. First, choose and crochet the style hat band you’d like. Then, continue on to crochet the length of the hat you love. Each option is clearly written.
The grey sample was made using the stretchy hat band and slouch length. The cream sample was made using the simple hat band and beanie length.
ARGYLE BEANIE & SLOUCH – SCROLL DOWN
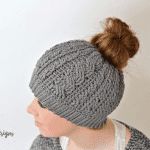
ARGYLE CROCHET MESSY BUN – CLICK HERE
ARGYLE BEANIE & SLOUCH – CROCHET HAT PATTERN FREE
The free crochet beanie pattern is below, but if you love to work offline, or need to order your yarn, I’ve got a couple other great options for you.
Purchase the ad-free, printable PDF, including all photo tutorials, on Ravelry, or Etsy.
Save this pattern to your Ravelry favorites.
This post contains affiliate links.
MATERIALS
- Yarn: Worsted Weight Yarn / 4 / Any Color
- Yardage: See “Fits Head Size” below for yardage of all sizes.
- I made 2 samples and used Lion Brand Yarns Pound of Love in Elephant Grey for one and Lion Brand Yarns Wool Ease in Fisherman for the other.
- Crochet Hooks: G/6/4.00mm, H/8/5.00mm (My favorite crochet hooks are the Clover Amour Hooks, I’ve never had an ache in my hand since switching)
- Scissors
- Yarn Needle
- Scrap piece of yarn or stitch marker
- Faux Fur Pom (optional – I LOVE these poms!)
Gauge
- In hat band stitch pattern: 6 sts = 1.25″; 14 rows = 3″
- Body of Hat in sc: 11.5 sts = 3″; 11 rows = 3″
Fits Head Size
- Toddler: 16″ – 17-1/2″ circ. (120 yards)
- Kids: 18″ – 20″ circ. (140 – 210 yards)
- Teen / Adult Small: 20-1/2″ – 22-1/2″ circ. (160 – 220 yards)
- Adult Medium / Large: 23″ – 24-1/2″ circ. (180 – 230 yards)
STYLES
- Argyle Beanie & Slouch Pattern – Click HERE
- Argyle Messy Bun Pattern – Scroll Down
Abbreviations (US Terms)
- ch(s): chain(s)
- sl st(s): slip stitch(es)
- st(s): stitch(es)
- sc: single crochet
- dc: double crochet
- inv sc2tog: invisible single crochet decrease
- RS: Right Side
- BLO: back loop only
- FLO: front loop only
- Rep: repeat
- Rnd: round
- yo: yarn over
- circ: circumference
Notes
- Turning chains are not included in stitch count unless noted otherwise.
- The majority of the pattern is worked in continuous rounds (a spiral). I suggest using a stitch marker to keep track of the round you’re on.
- Yarn Notes: Lion Brand Yarns Wool Ease & Pound of Love were used for the samples. Another comparable light worsted weight yarn may be used as long as gauge is met.
- Lion Brand Pound of Love in Elephant Grey, 100% Acrylic (1020 yards / 932 m / 454 g / 16 oz).
- Lion Brand Yarns Wool Ease in Fisherman: 80% Acrylic / 20% Wool (197 yds / 180 m / 85 g / 3 oz)
- Pattern Repeats: In the crochet instructions you’ll see: rep from ( to ) around. The instructions written within the ( ) parentheses are one full pattern repeat. You are to repeat these around the entire hat. The stitch pattern will repeat evenly so you should not have any stitches remaining at the end of each round.
- Changes for sizes are written as follows: Toddler (Child, Teen/Adult Small, Adult Medium/Large).
- Options
- Stretchy Hat Band
- Simple Hat Band
- Slouch
- Beanie
- Construction
- Step 1: Choose your Hat Band option.
- Step 2: Crochet the Body of Hat to the height specified for the length option you choose (Beanie or Slouch).
Special Stitches
- Invisible Single Crochet Decrease (inv sc2tog): Insert hook into the BLO of stitch indicated, insert hook into BLO of next stitch, yo, pull up a loop, yo, pull thru all loops on hook.
Argyle Beanie & Slouch Instructions
- Step 1: Choose your Hat Band option (Simple or Stretchy). Crochet the hat band.
- Step 2: Crochet the Body of Hat to the height specified for the length option you choose (Beanie or Slouch).
Simple Hat Band
Gauge: Using a 5mm hook: 11.5 sc = 3″ (stitch height isn’t crucial)
Note: This entire project is worked in a spiral (continuous rounds). I strongly suggest using a scrap piece of yarn to keep track of the beginning of each round.
Set-up: Using a 5mm crochet hook, ch 60 (68, 78, 86), being careful not to twist the ch, join w/ a sl st to the 1st ch.
Rnd 1 (RS): Ch 1, working into the back hump of the foundation ch, sc in each ch around. Do not join. (60, 68, 78, 86 sts) *Begin using a stitch marker or scrap piece of yarn to keep track of the beginning of each round as you work.
Rnd 2 Note: In Rnd 2 you will increase 2 – 4 stitches. You can place these extra stitches wherever you’d like. Stitch placement is not crucial.
Rnd 2: Work 64 (72, 80, 88) sc evenly around. Do not join. (64, 72, 80, 88 sts)
Rnd 3: BLO sc in each st around. Do not join.
Do not fasten off. Continue on to Argyle Design – Body of Hat.
Stretchy Hat Band
Stretchy Band
Gauge: In stitch pattern as the pattern is written, using a 4mm hook: 6 sts = 1.25″; 14 rows = 3″
Row 1 (RS): Using a 4mm crochet hook, ch 8 (8, 9, 9), working into the back hump of the foundation ch, sc in the 2nd ch from your hook and in each ch across. Turn. (7, 7, 8, 8 sts)
Row 2: Ch 1, BLO, sl st in each st across. Turn.
Row 3: Ch 1, BLO, sc in each st across. Turn.
Rows 4 – 59 (67, 77, 85): Rep Rows 2 – 3.
Approximate length at this point (un-stretched): 12.75″ (14.35″, 16.5″, 18.25″)
Row 60 (68, 78, 86) – Seam Row: With RS facing out, bring the first row up to meet the last row (the first row should be in front if you kept the RS facing out). Position your working yarn so that it’s on the inside of the hat band (if needed, click HERE and scroll down to the seam photos in the tutorial). Ch 1, slip stitch the rows together using the following method: insert your hook (from front to back) into the FLO of the 1st stitch of Row 1, insert your hook (from back to front) into the BLO of the 1st stitch of the last row, yo, pull thru all loops on your hook. Continue in this way across the hat band to complete the seam. (7, 7, 8, 8 sts)
Do not fasten off. Continue on to Prep Body of Hat.
Prep Body of Hat
Gauge: With 5mm hook, in sc: 11.5 sts = 3″; 11 rows = 3″
The remainder of this project is worked in a spiral (continuous rounds). I strongly suggest using a scrap piece of yarn to keep track of the beginning of each round.
Rnd 1 Note: In Rnd 1 you will increase 2 – 4 stitches from the number of rows worked in the hat band. You can place these extra stitches wherever you’d like. Stitch placement is not crucial.
Rnd 1 (RS): Using a 5mm crochet hook and working into the sides of the rows of the stretchy hat band, ch 1, work 64 (72, 80, 88) sc evenly around. Do not join. (64, 72, 80, 88 sts) *Begin using a stitch marker or scrap piece of yarn to keep track of the beginning of each round as you work.
Rnd 2: BLO sc in each st around.
Do not fasten off. Continue on to Argyle Design – Body of Hat.
Argyle Design – Body of Hat
The remainder of this project is worked in a spiral (continuous rounds). I strongly suggest using a scrap piece of yarn to keep track of the beginning and ending of each round.
See Argyle Chart Below
Rnd 1: (BLO sc in each of the next 4 sts, FLO dc in the next st 2 rnds below, BLO sc in each of the next 3 sts) rep from ( to ) around. (64, 72, 80, 88 sts)
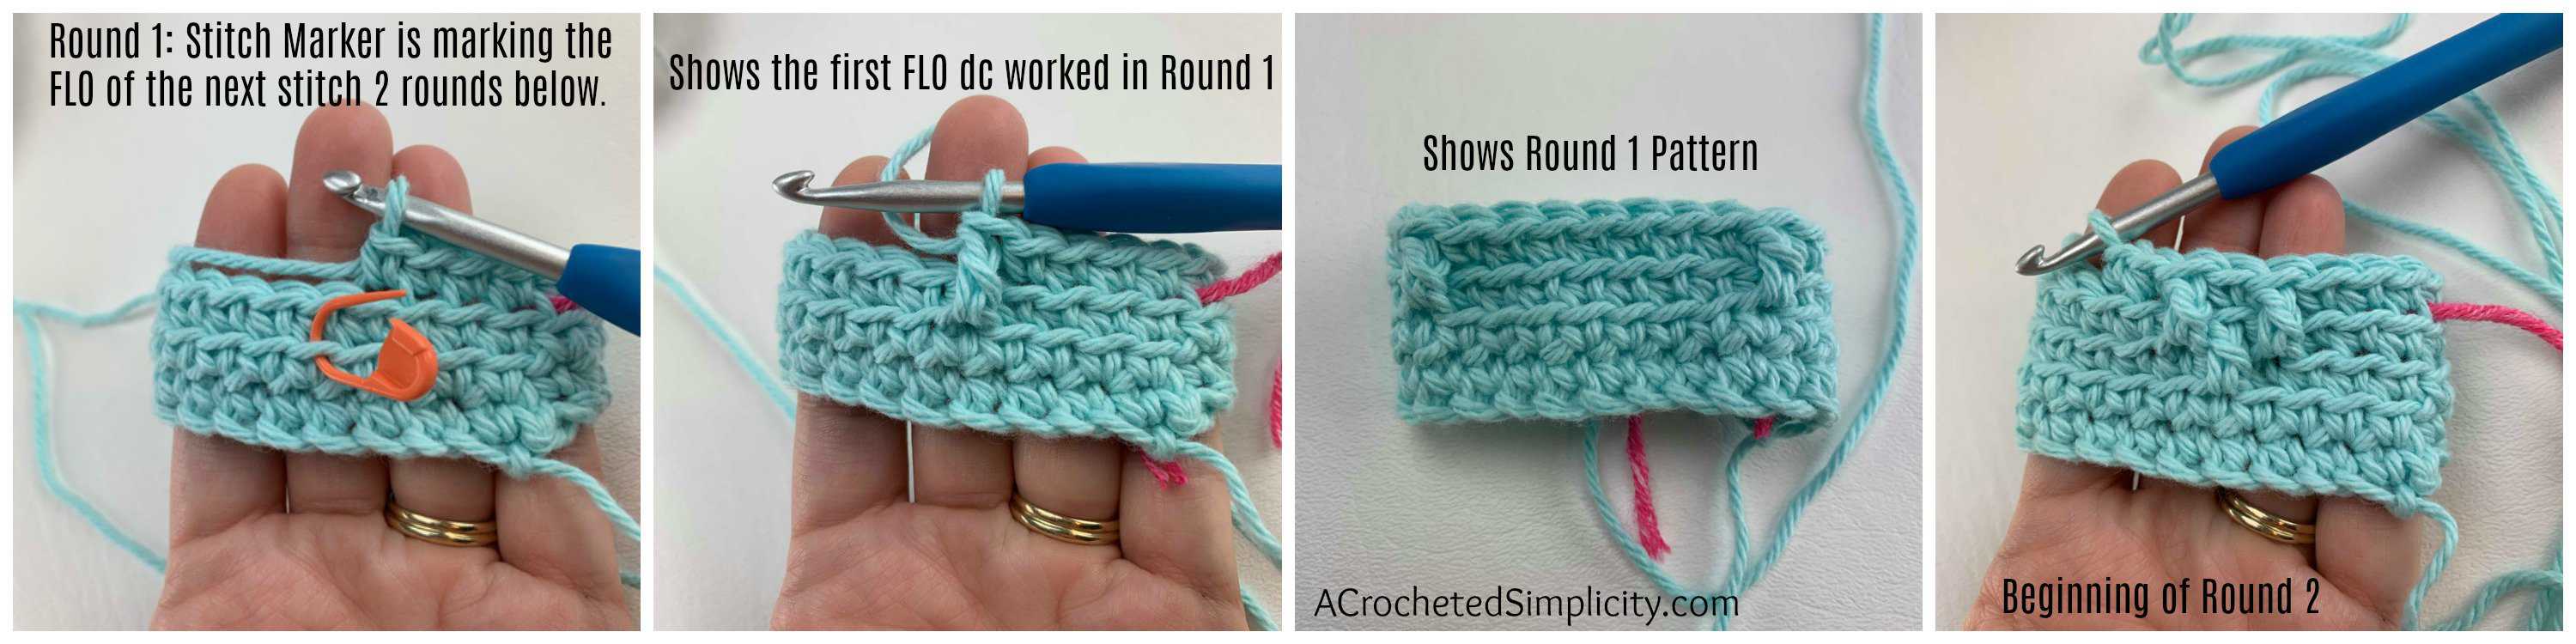
Rnd 2: (BLO sc in each of the next 3 sts, FLO dc in the next st 2 rnds below, BLO sc in the next st, FLO dc in the next st 2 rnds below, BLO sc in each of the next 2 sts ) rep from ( to ) around.
Rnd 3: (BLO sc in each of the next 2 sts, FLO dc in the next st 2 rnds below, BLO sc in each of the next 3 sts, FLO dc in the next st 2 rnds below, BLO sc in the next st) rep from ( to ) around.
Rnd 4: (BLO sc in the next st, FLO dc in the next st 2 rnds below, BLO sc in each of the next 5 sts, FLO dc in the next st 2 rnds below ) rep from ( to ) around.
Rnd 5: (FLO dc in the next st 2 rnds below, BLO sc in each of the next 7 sts) rep from ( to ) around.
Rnd 6: Rep Rnd 4. *Note: Some FLO dc will be worked into the FLO of other dc 2 rnds below.
Rnd 7: *BLO sc in each of the next 2 sts, (FLO dc in the next st 2 rnds below, BLO sc in the next st) 3 times, rep from * around.
Rnd 8: Rep Rnd 2.
Rnd 9: Rep Rnd 7.
Rnd 10: Rep Rnd 2.
Rnd 11: Rep Rnd 7.
Rnd 12: Rep Rnd 4.
Rnd 13: Rep Rnd 5.
Rnd 14: Rep Rnd 4.
Rnd 15: Rep Rnd 3.
Rnd 16: Rep Rnd 2.
Rnd 17: Rep Rnd 1.
Rnd 18: BLO sc in each st around.
Beanie: Repeat Round 18 until your hat measures 5″ (6″, 6.25″, 6.75″) from the bottom edge of the hat band.
Slouch: Repeat Round 18 until your hat measures 7″ (7.75″, 8.5″, 8.75″) from the bottom edge of the hat band.
Do not fasten off. Continue on to Crown Shaping.
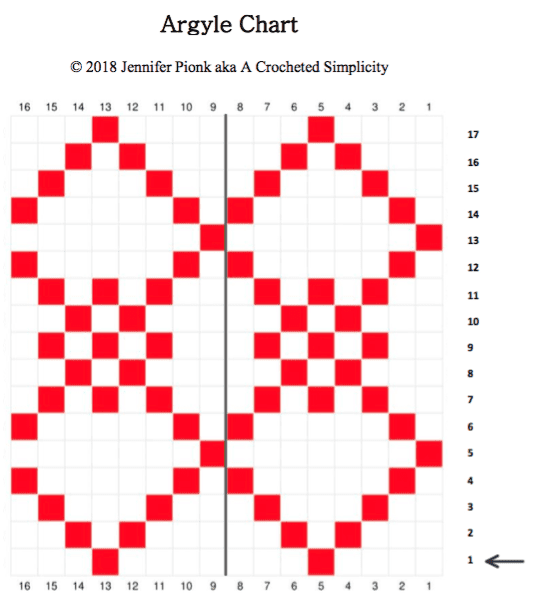
How to read the chart above:
- Read the chart from right to left, bottom to top.
- The Red squares indicate when you’ll work a dc.
- Make sure to work the dc in the front loops of stitches 2 rounds below the current round.
- The vertical numbers indicate the round you’re on. Begin following the chart and working long dc in round 1 of Argyle Design – Body of Hat.
- The horizontal numbers represent the stitch number. This stitch pattern is a multiple of 8 stitches.
- After working Round 17, continue with Round 18 above.
Crown Shaping
Rnd 1: (BLO inv sc2tog, BLO sc in each of the next 6 sts) rep from ( to ) around. (56, 63, 70, 77 sts)
Rnd 2: (BLO inv sc2tog, BLO sc in each of the next 5 sts) rep from ( to ) around. (48, 54, 60, 66 sts)
Rnd 3: (BLO inv sc2tog, BLO sc in each of the next 4 sts) rep from ( to ) around. (40, 45, 50, 55 sts)
Rnd 4: (BLO inv sc2tog, BLO sc in each of the next 3 sts) rep from ( to ) around. (32, 36, 40, 44 sts)
Rnd 5: (BLO inv sc2tog, BLO sc in each of the next 2 sts) rep from ( to ) around. (24, 27, 30, 33 sts)
Rnd 6: (BLO inv sc2tog, BLO sc in the next st) rep from ( to ) around. (16, 18, 20, 22 sts)
Rnd 7: (BLO inv sc2tog) rep from ( to ) around. (8, 9, 10, 11 sts)
Fasten off leaving an 8″ tail of yarn. Using a yarn needle, weave the tail of yarn in and out of the stitches from the last round, pull tail to cinch the crown of the hat closed, knot to secure and weave in ends.
Beanie: If you made a Simple Hat Band, continue on to Finishing. If you made a Stretchy Hat Band, your hat is complete! Finished hat height should be approximately 7″ (7.75″, 8.25″, 8.75″).
Slouch: If you made a Simple Hat Band, continue on to Finishing. If you made a Stretchy Hat Band, your hat is complete! Finished hat height should be approximately 8.5″ (9.25″, 10″, 10.5″).
Simple Hat Band Finishing
Note: Make sure not to work this part too tightly or you can greatly affect the fit of your hat. Adjust your hook size to get the perfect fit, as needed.
Rnd 1: Join yarn in stitch closest to the first st of Rnd 1 of hat band, sl st in each st around the bottom of your hat band. Use the Special Join Technique (click HERE for tutorial), to join.
Fasten off. Weave in ends. Your argyle beanie is complete!
Now that you’ve finished crocheting your Argyle Beanie or Slouch hat, add your own finishing touches using one of these fun options!
Find the Argyle Messy Bun Pattern HERE
MORE FREE CROCHET PATTERNS FROM A CROCHETED SIMPLICITY
If you enjoy this crochet beanie & slouch pattern, you may enjoy these other projects as well. And if you just want to browse, you can find all of our free crochet patterns HERE.


Join us in the Facebook Community Group!
I hope you’ve enjoyed this crochet gingerbread man candy cane holder and made many crocheted Christmas gifts!
Come share your finished projects with us in the A Crocheted Simplicity Crochet Community Group on Facebook. Join us for fun community events such as crochet alongs, join in on crochet conversations, ask questions, get advice, and share your love for crochet!

On my third try I got to the end of the diamons and realized it was way too big for a hat, but it was the right size for a cowl. So i did one row of sc and then finished with a row of slip stitch. It finally measured 28 inches around and 6.5 inches in width. It’s just a perfect cowl. I think you could say it’s good for a hat and/or a cowl depending on the yarn and hook size. I chose an aran yarn, thinking it was a wosted. I’m very happy with the results. Pictures posted on ravelry.
Hi Cheri,
I almost made my second hat into a cowl instead. I think that’s a great idea! 🙂
Thank you for adding your project to Ravelry.
Jennifer
Is there a picture of this?
Hi Karen,
I’ll be posting one soon. It’s been raining all week and I’ve had terrible lighting and need to re-take pics.
In the meantime, if you’d like to pop over to my Facebook group (link at the bottom of the blog post), you’ll see lots of pics of finished hats from the MMCAL. There are some gorgeous ones!!
Jennifer
I’m still trying to learn how to read a pattern, what does “rep from (to) around” mean?
Hi Carrie,
I’ve just added a “Pattern Repeat” note in the Notes section. Please check this out and let me know if you have any further questions. I’m more than happy to help. 🙂
Jennifer
How do you attach the pom poms with the little elastic loop on them?
Hi Stephanie,
I know some like to add buttons and make them removable, but I have always just sewn mine on using the same yarn as I used for my hat. I begin by attaching the pom pom with the little loop that it comes with, but then I insert my yarn needle into the bottom of the pom, approximately 1/2″ from the loop, and then come out the pom about 1″ from where I inserted my yarn needle, then go into the hat to attach it. I do this a few times, rotating a little each time, until I feel my pom is secured nice and tight.
Jennifer
That sounds nice and secure with no wobbling. How do the pom poms do in the washing machine?
I love this hat and I’m so disappointed in myself that I can’t seem to get it right. I have ripped it about five times now in frustration. I always seem to mess up at round 5 for some reason. My stitches always seem off.
Congratulations on a beautiful design!
Hi Julie,
Please try once more! I don’t think you were doing anything wrong at all! I think it may just be confusing you a little with working in continuous rounds because the first time that the designs “meet” is at the end of Rnd 5. Try one more time and continue past where you think you’ve messed up because I don’t think you have. 🙂
Please let me know if I can help any further. You can always e-mail me, if you prefer: [email protected]
Jennifer
Hi Jennifer,
I loved the hat that much that I did try again and I did it!!!!
Thanks so much for the pattern and for replying 😁
Hi Jennifer,
I loved the hat that much that I did try again and I did it!!!!
Thanks so much for the pattern and for replying 😁
This pattern is fantastic… AND… I loved loved loved the graph!! Thank you!!
You’re so welcome, Kimberly!
Thank you so much for the beautiful pattern. I tried it with a #2 yarn and just added more stitches (made sure it was a multiple of 16), and it worked up beautifully! Would it be alright for us to sell products from this pattern?
Hi Em,
I’m so glad to hear that you love this pattern! Of course you can sell anything you make from my patterns! 🙂
Jennifer
I live in the Upper Peninsula of Michigan too! This hat will be nice and warm for our winters. Thanks for the free pattern.
Hi Cindy!
Yes, it is! My 12 year old daughter already claimed the beanie and my little sister claimed the slouch so I need to make a new one for myself. lol
Stay Warm!
Jennifer
These look lovely thank you for sharing
Thank you for this pattern!!! I have tried several that uses the graph and yours was the first one I’ve ever understood ❤️
Hi Ann,
I’m so glad that you were able to successfully complete a project with a chart! Yay for small crafting victories!
Merry Christmas,
Jennifer
I love your patterns! The instructions are always clear, I just have a doubt about toddler size, is it good for a 9-12 months baby? I’m making one, from my understanding the finished size should be 16 inches around, correct?
Hi Josephine,
The child’s head should be between 16″ – 17.5″ in circumference. The finished hat should be 1-2″ smaller so that it hugs the head.
I hope this helps.
Jennifer
I would love a video tutorial on this one! I’m such a visual learner and that would just help so much. I’m trying my best to get through this pattern, though!
Hi Liana,
I’ve got the video tutorial all filmed, but I need to edit and post it. I’m hoping to get it finished up during Christmas break. Please stop back by or make sure you’re signed up for my newsletter so you don’t miss out! 🙂
Jennifer
Wonderful, can’t wait!!
Also wondering if the video was ever posted. I’ve not been able to find it on your YouTube channel, but I might be missing it. Appreciate any help you can give.
Hi Stephanie,
It’s very ironic that you acked this tonight because I just found the SD card with the video footage on it! I had moved and misplaced it a few years ago! I’ll try to get it up in the next couple of weeks.
Happy New Year,
Jennifer
I just wanted to let you know that this hat pattern is perfect! This is a well written and easy to understand pattern. This hat turned out cute and classy. Thank you for sharing this pattern! Well done!
Hi Kristianna,
Thanks so much for taking the time to stop by and let me know you love it!!!
Jennifer
Dear Jennifer,
I just recently found this and it is a great pattern!! The chart is super helpful.
I have a question, not sure if I am doing something wrong or not. At about Round 5 of the pattern I noticed I had 2 FLOdc that looked like they were next to each other with no stitch in between. I thought I had counted wrong but I hadn’t. Then I noticed that the issue was that the pattern seemed to sit one row higher on one side of the start than the other, so the diamonds didn’t quite match up. Not sure if this is a mistake or just the result of crocheting in spiral rounds.
Can you help?
Thank you so much!!
Hi!
Yes, that does happen for Round 5, but I chose to work the pattern in continuous rounds and have that one small blip than to have a notceable seam up the back of the entire hat. It’s just personal preference. 🙂
Jennifer
Oh gosh, I just ripped it out thinking I messed it up lol.
I’m excited to try your hat pattern. Thank you! I also live in the Upper Peninsula. These hats will be perfect for the cold winters we get!
Yes, it certainly is!
I’ve purchased a bunch of your patterns over the last couple years. This is one of my favorites. If anybody is wondering, the PDFs are incredibly detailed and 100% worth buying. Mine have their own special binder. 🙂
These are so stylish. Look pretty difficult but are lovely.
rnd 1 of the argyle is 88 stitches for the large. the patter is 9 stitches per repeat. which would be 9 x around but leaves 7 stitches. how do we reconcile that?
Hi Melinda,
The pattern for the repeat is only 8 sts. If you take a peek at the chart, you’ll see there is one stitch that is shared by two “diamonds”.
Happy Crocheting,
Jennifer
My last name is Argyle, so of course I had to make one of these hats. It came out great! Thanks for such a cute, clear, and easy pattern!
That’s awesome! Thank you for taking the time to stop by and share such kind words!
Happy Crocheting,
Jennifer
PATTERN IS ONE I WANT TO MAKE!!!!!!
I absolutely love this pattern. Made it first for my sister for her birthday and loved it so much that I made another one for myself too! Anytime I want to make a hat for someone, I think I’ll come back to this one. Such an easy pattern and it makes a lovely design!
I’m so glad you love it! 🙂
Happy Crocheting,
Jennifer