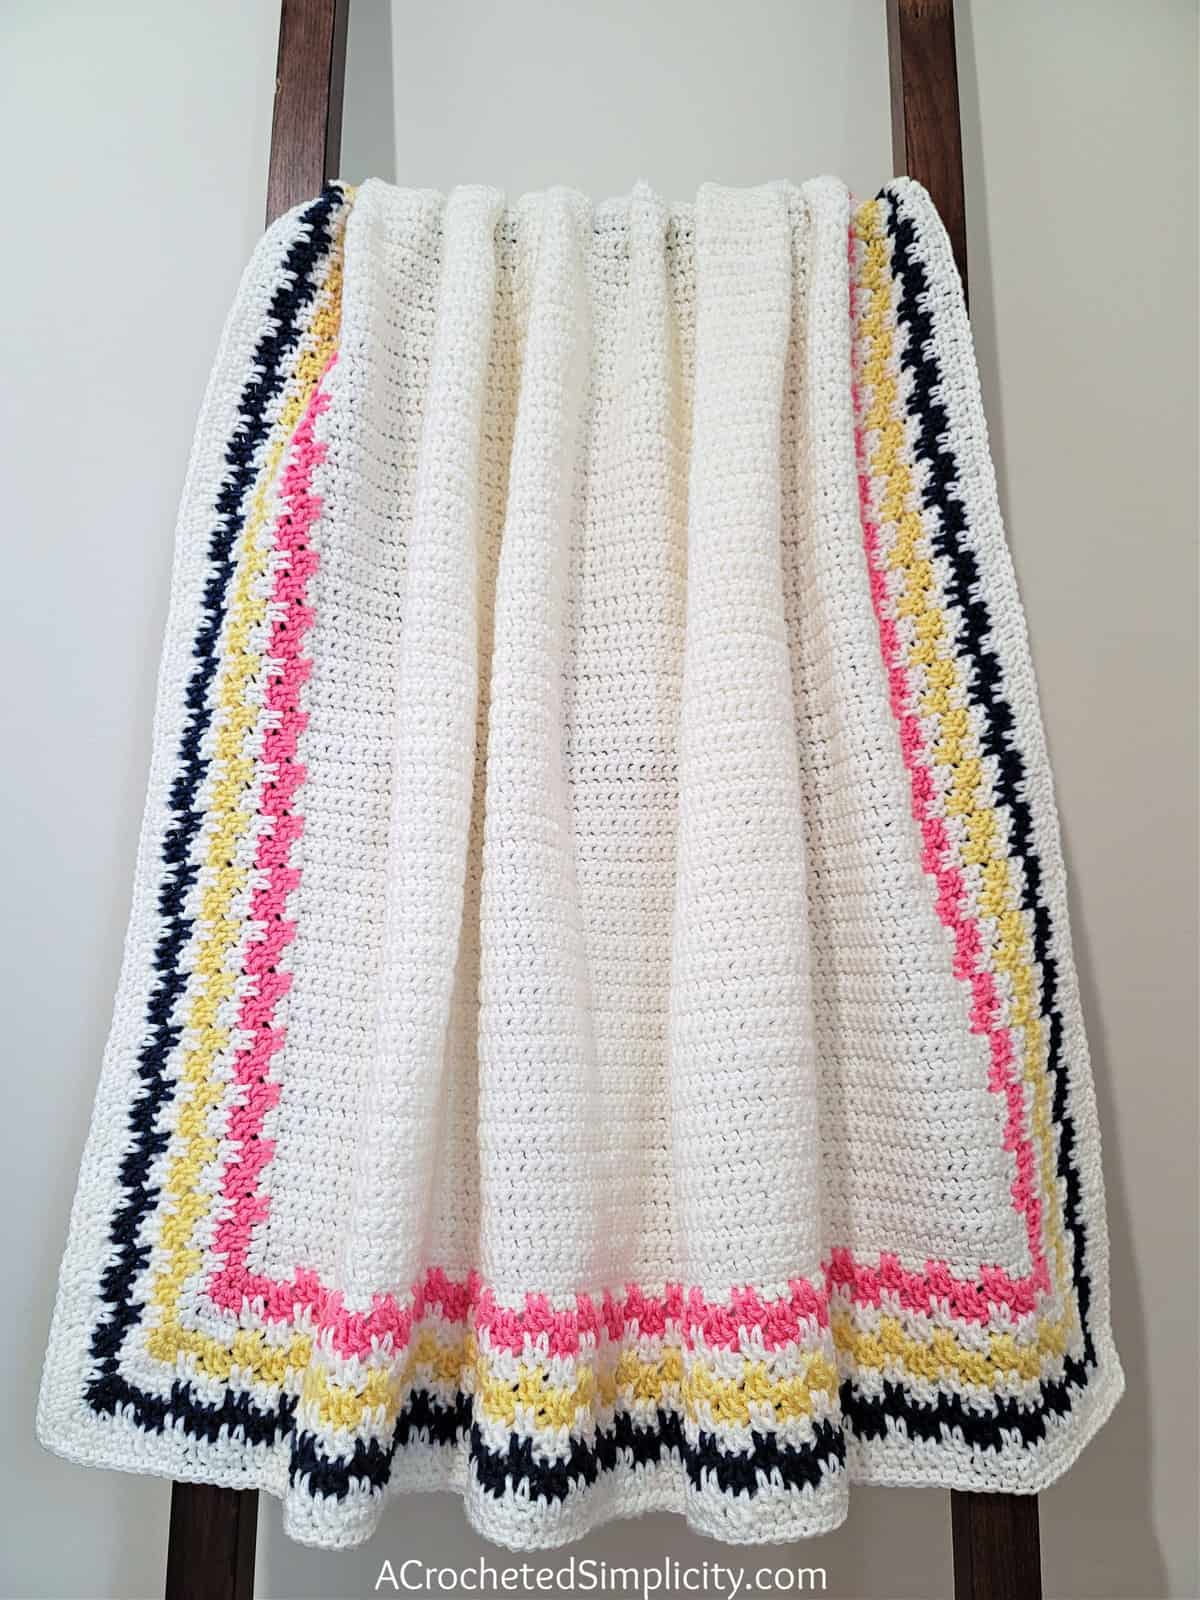
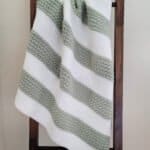
Jossalyn’s Afghan – Free Crochet Blanket Pattern
After designing Elayna’s Afghan for my oldest granddaughter, Elayna, I knew I had to make a new afghan for each of my grandbabies. Jossalyn’s Afghan was designed for my youngest granddaughter, Jossalyn. I chose Lion Brand Yarns Schitt’s Creek for this crochet afghan for two reasons: 1 because I wanted a soft afghan with the perfect pop of color and 2 I wanted a nice acrylic that would hold up well to many washings as Joss likes to tote her blankets around with her. Both the yarn choice and simple crochet stitch patterns combine to make Jossalyn’s Afghan the perfect trans seasonal afghan. Lightweight for cooler summer nights, yet warm enough to take the chill off during the fall.
You can find the free crochet blanket pattern for Jossalyn’s Afghan in this post below, or an ad-free print friendly version on Love Crafts here, Ravelry here, or on Etsy here.
>CLICK HERE TO SIGN-UP TO RECEIVE OUR NEWSLETTER!<
YARN
For this crochet afghan, I chose Lion Brand Yarns Schitt’s Creek in Hide Your Diamonds (white), Moira’s Rose (pink), Fold in the Cheese (yellow) & Bob’s Garage (blue). Schitt’s Creek Yarn is a great worsted weight acrylic yarn that’s available in 16 colorways! You’ll have a hard time choosing colors, but this crochet blanket will look great in nearly any color combination.

JOSSALYN’S AFGHAN – FREE CROCHET BLANKET PATTERN
The free pattern is below, but if you love to work offline, I’ve got a couple other great options for you.
Purchase the ad-free, printable PDF, including all photo tutorials, on Love Crafts here, Ravelry here, or on Etsy here.
Purchase the kit here! Lion Brand also has a full kit of the Jossalyn’s Afghan, available on their website. The kit includes your choice of color and a digital copy of the pattern below.
Save this pattern to your Ravelry favorites here.
Pin it for later here.
This post contains affiliate links.
Materials
- Yarn: Worsted Weight / 4 yarn, 2,240 yards, Lion Brand Yarns Schitt’s Creek, was used for the crochet blanket shown in the photos. 100% Acrylic (372 yards / 340 m / 200 g / 7 oz)
- Hide Your Diamonds (white) (MC): 5 balls (1,760 yards)
- Moira’s Rose (pink) (CC1): 1 ball (140 yards)
- Fold in the Cheese (yellow) (CC2): 1 ball (160 yards)
- Bob’s Garage (blue) (CC3): 1 ball (180 yards)
- Crochet Hooks: K/10.5/6.50mm;
 Comfy Cotton Blend Yarn, Whipped Cream") Lion Brand Yarn (1 Skein) C...Shop on Amazon“>J/10/6.00mm (My favorite crochet hooks are the Clover Amour Hooks, I’ve never had an ache in my hand since switching)
Lion Brand Yarn (1 Skein) C...Shop on Amazon“>J/10/6.00mm (My favorite crochet hooks are the Clover Amour Hooks, I’ve never had an ache in my hand since switching) - Scissors
- Yarn Needle
- Scrap piece of yarn or stitch marker
 Comfy Cotton Blend Yarn, Whipped Cream")
Many of these materials are available for purchase through our affiliates below:
 Lion Brand Yarn Schitt's Cr...Shop on Amazon
  Clover Amour Crochet Hook: ...Shop on Amazon
  Fiskars 154110-1001 Non-sti...Shop on Amazon
  Lion Brand Yarn 400-5-5002 ...Shop on Amazon
Gauge
- In pattern stitch (one row of ext sc, then one row of sc ): 15 sts = 5″; 20 rows = 6″
Difficulty Level
- Easy
Finished Size
- 47″ W x 52″ L (easily adjustable)
Abbreviations (US Terms)
- ch(s): chain(s)
- sl st(s): slip stitch(es)
- st(s): stitch(es)
- sc: single crochet
- ext sc: extended single crochet (click here for video tutorial)
- yo: yarn over
- sp(s): space(s)
- rep: repeat
- Rnd: round
- RS: right side
- MC: Main Color
- CC: Contrasting Color
- Extended Double Moss Stitch (click here for photo tutorial)
- Join yarn with a standing ext sc – see notes below
Notes
- Turning chains are not included in stitch count, unless noted otherwise.
- The first stitch of each row is worked into the same stitch as the turning chain, unless noted otherwise.
- Yarn Notes: Lion Brand Yarns Schitt’s Creek, worsted weight yarn, was used for the sample shown in the photos. 100% Acrylic (372 yards / 340 m / 200 g / 7 oz)
- Yardage: 8 balls (approximately 2,240 yards)
- Hide Your Diamonds (white) (MC): 5 balls (1,760 yards)
- Moira’s Rose (pink) (CC1): 1 ball (140 yards)
- Fold in the Cheese (yellow) (CC2): 1 ball (160 yards)
- Bob’s Garage (blue) (CC3): 1 ball (180 yards)
- Yarns similar in fiber and weight can be substituted.
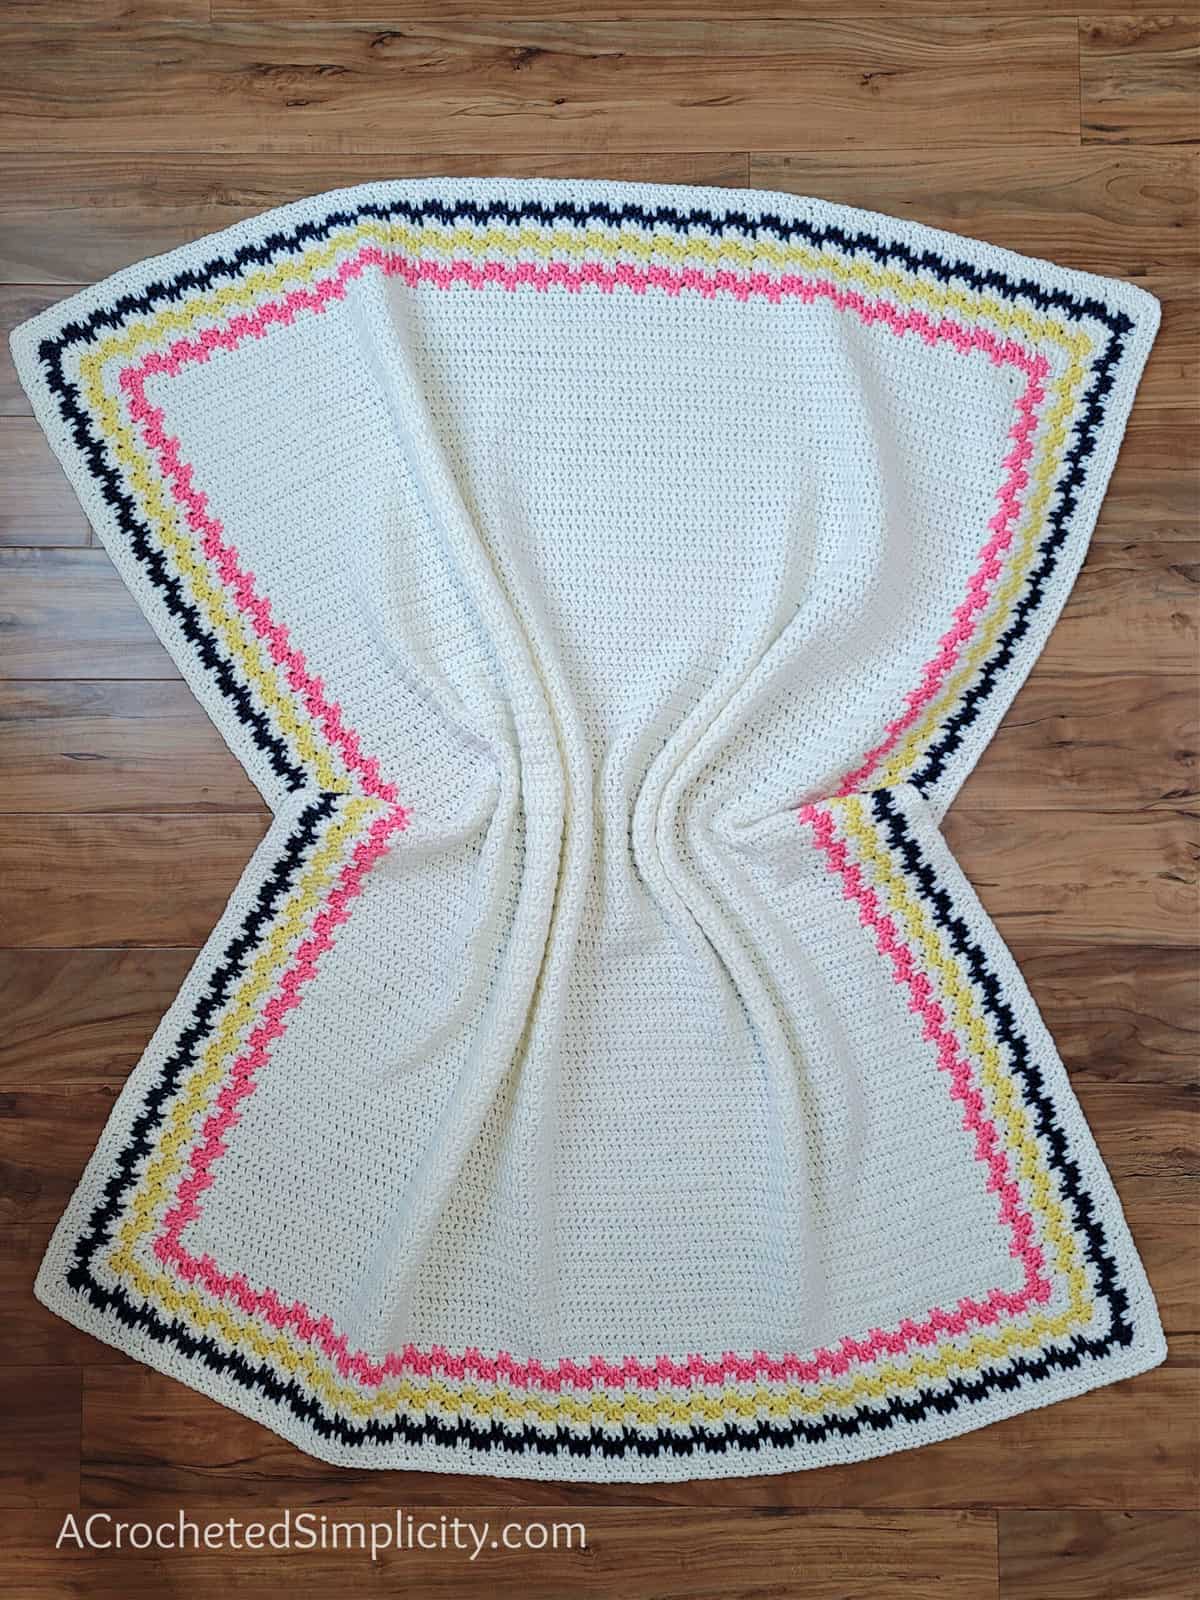
- The center of the afghan is worked back and forth in rows to create a rectangle. You will then add a wide striped border by working around the perimeter of the afghan.
- The border is 4.5″ wide and adds approximately 9″ to the width and length of the afghan.
Special Stitches
- Extended Single Crochet (ext sc): Insert hook into stitch indicated, yo, pull up a loop, yo, pull thru 1 loop on hook, yo, pull thru remaining two loops on hook. (click here for video tutorial)
- Long Double Crochet (long dc): In the Striped Border you will have to work long dc’s. A long dc is simply a dc that is worked into the stitches 2 rounds below the current round which makes it longer than a typical dc. See photo tutorial in the pattern below.
- Join with a standing extended single crochet: Join with a standing ext sc is begun the same was as a standing sc. Begin with a slip knot on your hook, insert your hook into the stitch or space indicated, yo, pull up a loop, yo, pull through one loop, yo, pull through both loops on your hook. (click here for tutorial to join with a standing sc)
Jossalyn’s Afghan Instructions
Set-Up: With a 6.50mm crochet hook and MC yarn, ch 115.
Row 1: Switch to a 6.00mm crochet hook, working into the back hump of the foundation ch, ext sc in the 2nd ch from your hook and in each ch across . Turn. (114 sts)
Row 2: Ch 1, sc in the first st, sc in each remaining st across. Turn.
Row 3: Ch 1, ext sc in the first st, ext sc in each remaining st across. Turn.
Rows 4 – 134: Rep Rows 2 – 3, ending with a Row 2.
Approximate length at this time: 43.75″.
Do not fasten off. Continue on to the Striped Border.
Striped Border
Note: As you crochet Round 1 of the Striped Border, place a locking SM in the middle sc at each corner.
Tip: Make sure to keep your ch-2’s loose or your work will cinch inwards.
Rnd 1 (RS): With MC yarn, ch 1, 2 sc in the first st, sc in each st across to the last st (112 sts), 3 sc in the last st, rotate to work along the long edge, work 1 sc into the side of each row to the next corner (132 sts), 3 sc in the next corner, rotate to work along the next short edge, sc in each st across to the last st (112 sts), 3 sc in the last st, rotate to work along the next long edge, work 1 sc into the side of each row to the beginning corner (132 sts), work 1 last sc in the same st as the beginning 2 sc. Join with a sl st to the 1st st. (500 sts) *Place a SM in each corner st. The first st of the round is the 1st corner st.
Rnd 2: Ch 1, [ 3 ext sc in the corner st, ext sc in each of the next 2 sts, (ch 2, skip each of the next 2 sts, ext sc in each of the next 2 sts) rep across to the next corner st ] work from [ to ] 4 times. Join. (508 sts)
Fasten off MC.
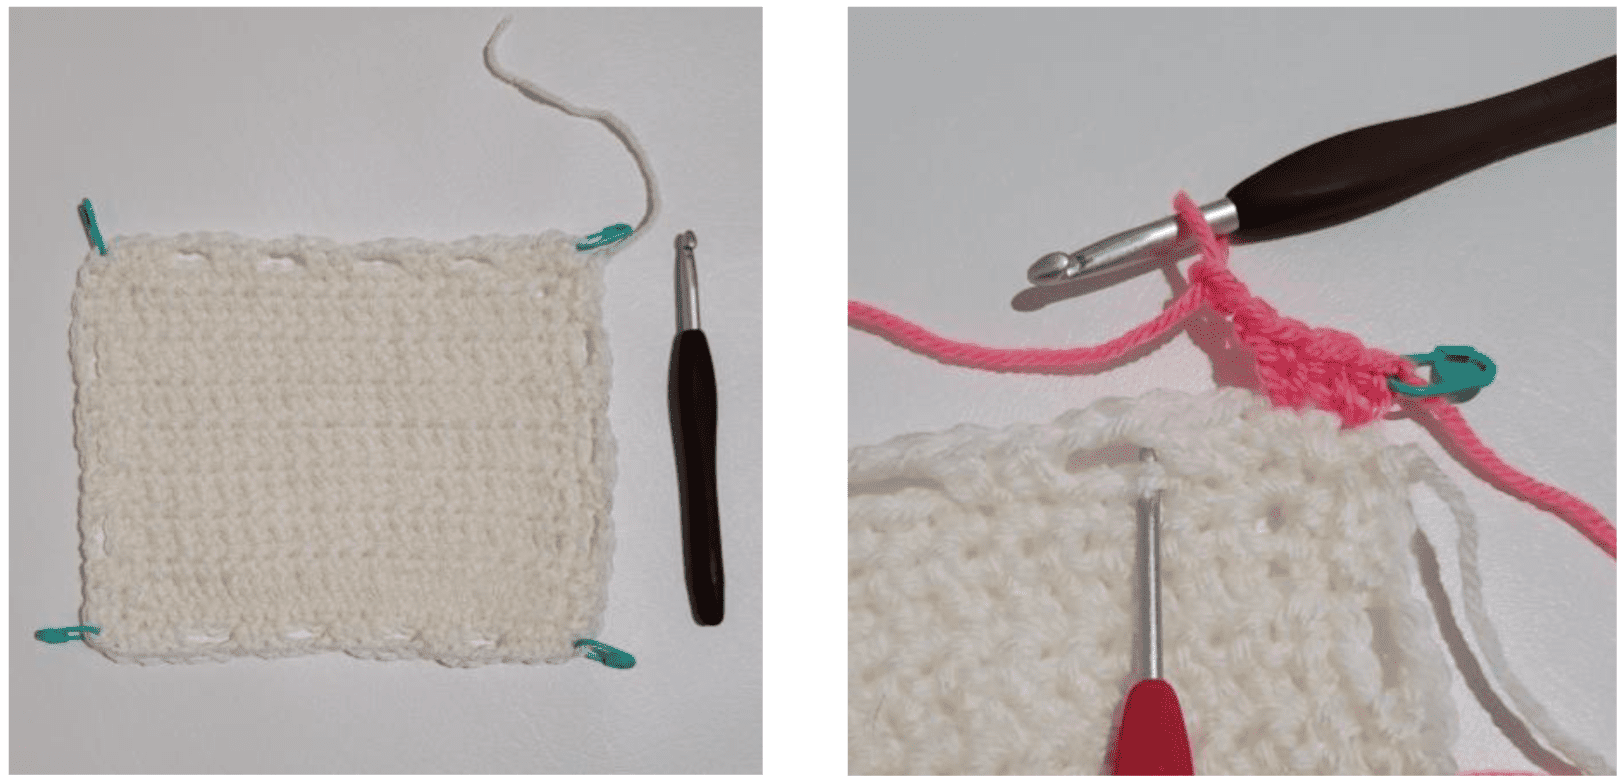
Photo Above Left: This photo shows Rnds 1 & 2 of the Striped Border complete. Make sure to place a SM in each of the 4 corner stitches.
Photo Above Right: This photo shows the beginning of Rnd 3. Join CC1 with a standing ext sc in any marked corner st, work 1 more ext sc in the same st, ext sc in the next st, ch 2, skip each of the next 2 sts… Continue the stitch pattern by working over the chains and into the unworked stitches from 2 rounds below (marked with the red crochet hook). When you work the dc over the chains, the chains will be enclosed in the dc (see photo below right).
Rnd 3: Join CC1 with a standing ext sc in any marked corner st, work 1 more ext sc in the same st, ext sc in the next st, ch 2, skip each of the next 2 sts, (long dc in each of the next 2 sts 2 rounds below, ch 2, skip each of the next 2 sts) rep across to st before marked corner st, ext sc in the next st, [ 3 ext sc in the next corner st, ext sc in the next st, ch 2, skip each of the next 2 sts, (long dc in each of the next 2 sts 2 rounds below, ch 2, skip each of the next 2 sts) rep across to st before marked corner st, ext sc in the next st ] work from [ to ] 3 times, ext sc in the same st as the beginning 2 sts. Join. (516 sts)
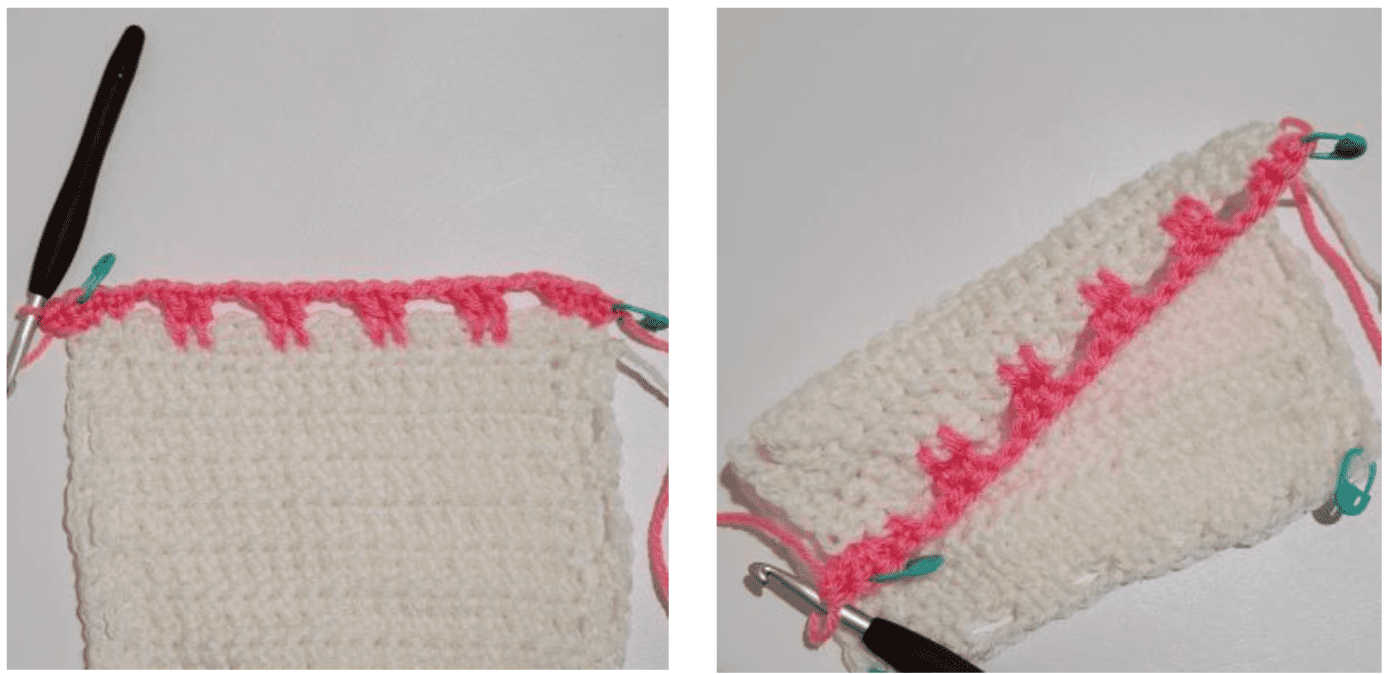
Photo Above Left: Shows stitches from Rnd 3 worked along the first edge. Make sure to move the SM as you work each round.
Photo Above Right: This photo shows what the backside of your striped border will look like.
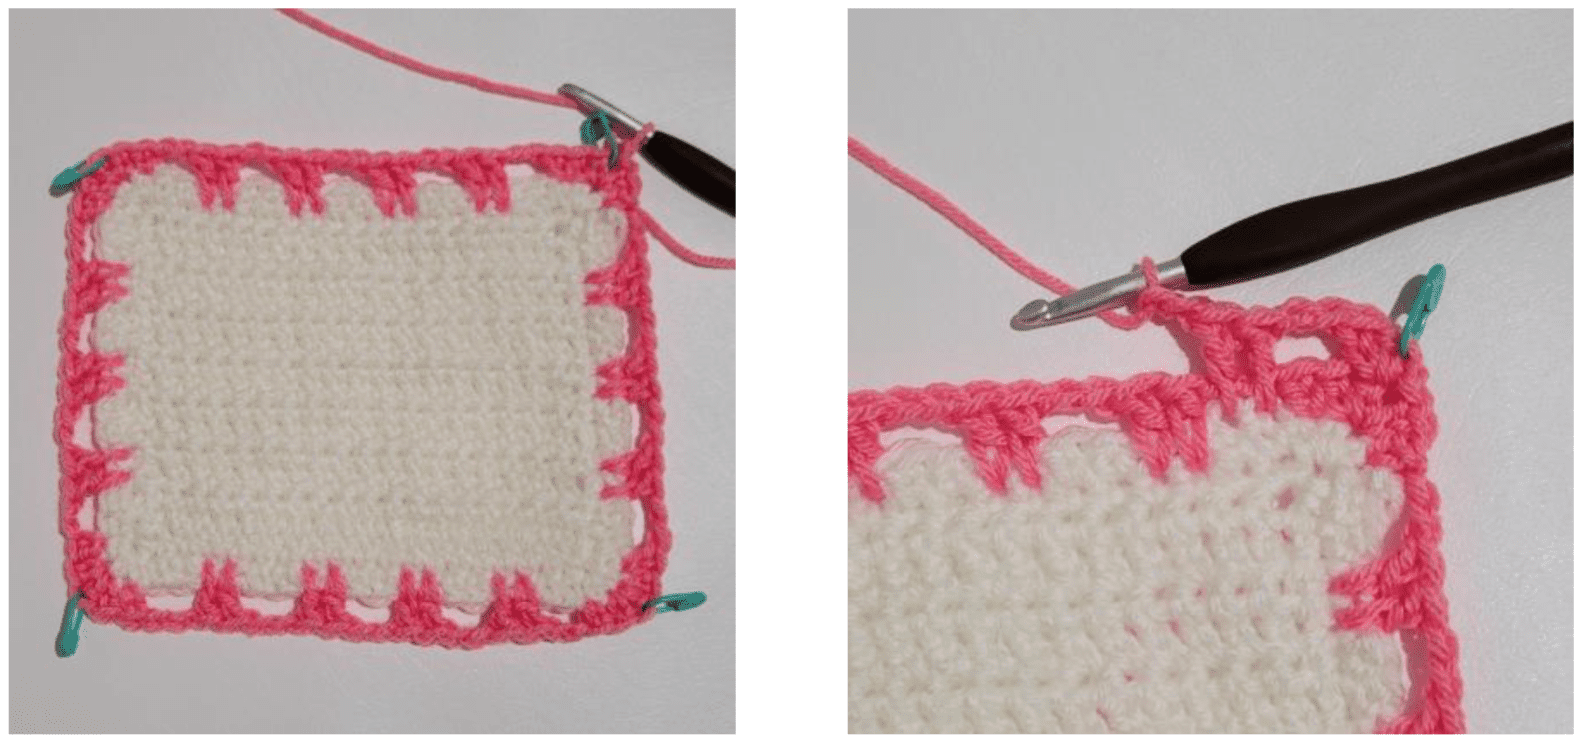
Photo Above Left: This photo shows Rnd 3 of the Striped Border complete.
Photo Above Right: This photo shows the beginning of Rnd 4.
Rnd 4: With CC1, ch 1, 2 ext sc in the first st, [ ch 2, skip each of the next 2 sts, (long dc in each of the next 2 sts 2 rounds below, ch 2, skip each of the next 2 sts) rep across to the next corner st, 3 ext sc in the next corner st ] work from [ to ] 3 times, then ch 2, skip each of the next 2 sts, (long dc in each of the next 2 sts 2 rounds below, ch 2, skip each of the next 2 sts) rep across to the next corner st, work 1 more ext sc in the same st as the beginning st. Join. (524 sts)
Fasten off CC1.
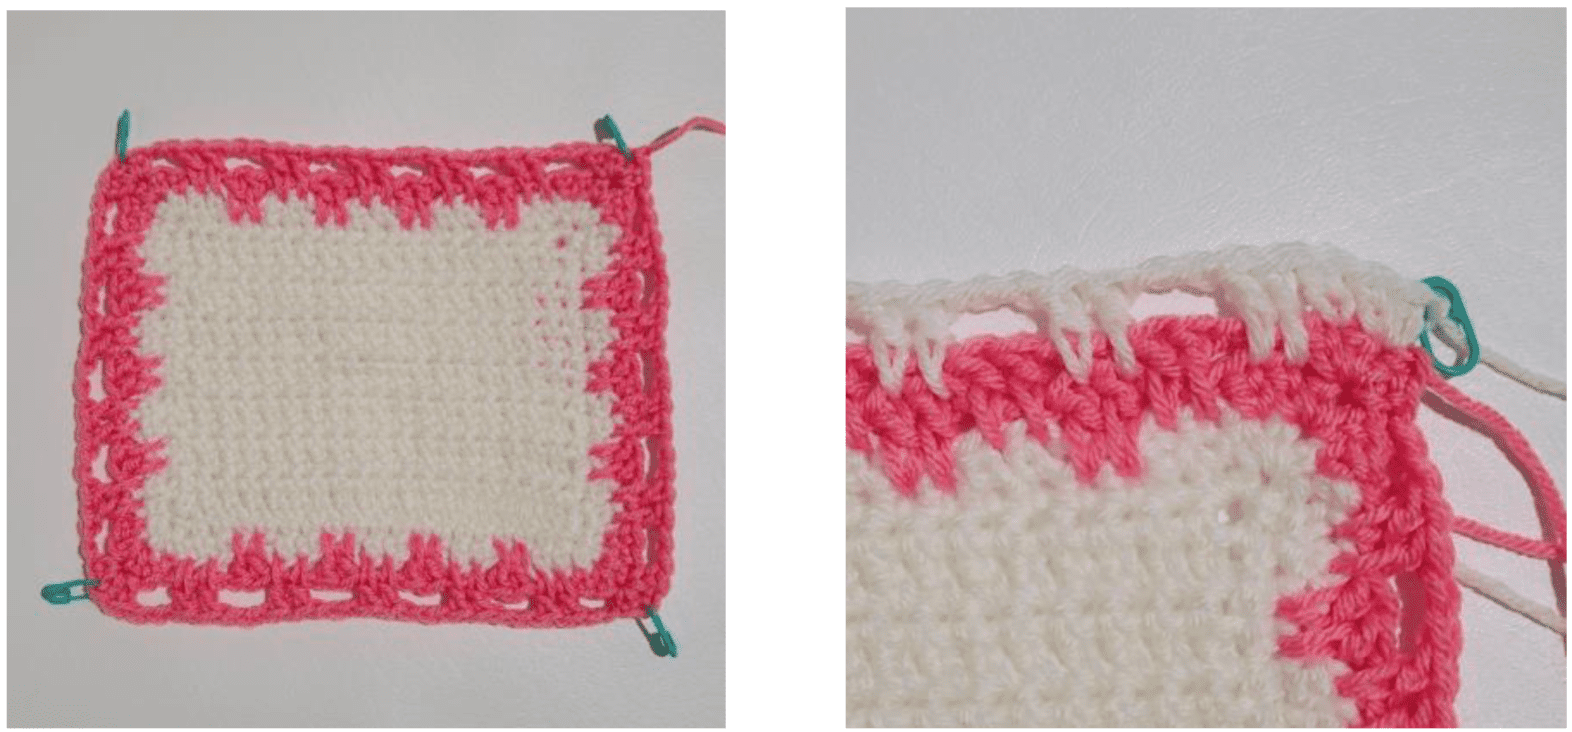
Photo Above Left: This photo shows Rnd 4 of the Striped Border complete.
Photo Above Right: This photo shows the beginning of Rnd 5.
Rnd 5: Join MC with a standing ext sc in the 1st st of the previous round, work 1 more ext sc into the same st, ext sc in the next st, long dc in each of the next 2 sts 2 rounds below, (ch 2, skip each of the next 2 sts, long dc in each of the next 2 sts 2 rounds below) rep across to the st before the marked corner st, ext sc in the next st, [ 3 ext sc in the next corner st, ext sc in the next st, long dc in each of the next 2 sts 2 rounds below, (ch 2, skip each of the next 2 sts, long dc in each of the next 2 sts 2 rounds below) rep across to the st before the marked corner st, ext sc in the next st ] work from [ to ] 3 times, ext sc in the same st as the beginning 2 sts. Join. (532 sts)
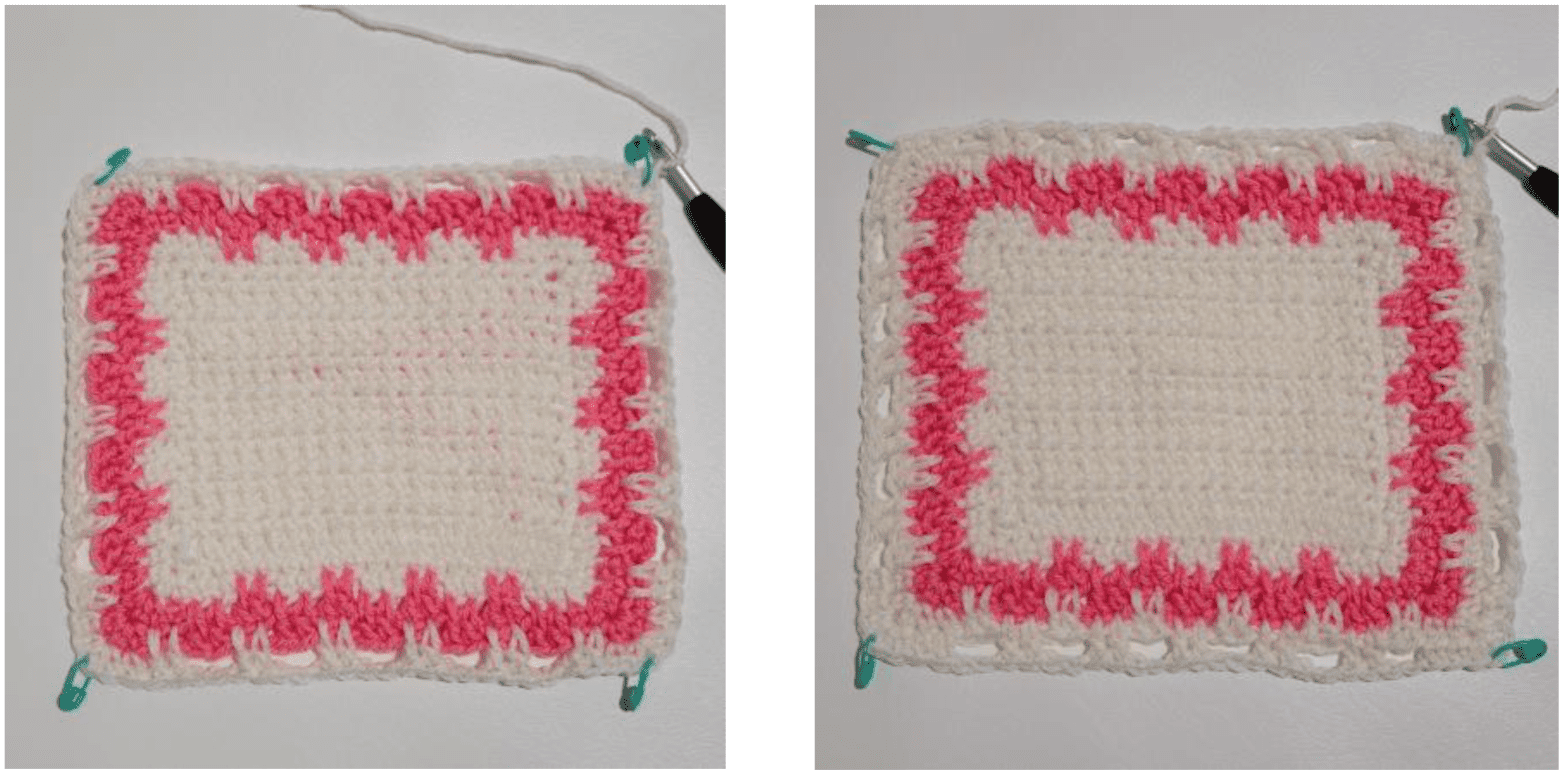
Photo Above Left: This photo shows Rnd 5 of the Striped Border complete.
Photo Above Right: This photo shows Rnd 6 of the Striped Border complete.
Rnd 6 (MC): Ch 1, 2 ext sc in the first st, [ ext sc in each of the next 2 sts, ch 2, skip each of the next 2 sts, (long dc in each of the next 2 sts 2 rounds below, ch 2, skip each of the next 2 sts) rep across to 2 sts before the next corner st, ext sc in each of the next 2 sts, 3 ext sc in the next corner st ] work from [ to ] 3 times, then ext sc in each of the next 2 sts, ch 2, skip each of the next 2 sts, (long dc in each of the next 2 sts 2 rounds below, ch 2, skip each of the next 2 sts) rep across to 2 sts before the next corner st, ext sc in each of the next 2 sts, then work 1 more ext sc in the same st as beginning st. Join. (540 sts)
Fasten off MC.
Rnd 7: With CC2 yarn, rep round 3. (548 sts)
Rnd 8: With CC2 yarn, rep round 4. (556 sts)
Fasten off CC2.
Rnd 9: With MC yarn, rep round 5. (564 sts)
Rnd 10: With MC yarn, rep round 6. (572 sts)
Fasten off MC.
Rnd 11: With CC3 yarn, rep round 3. (580 sts)
Rnd 12: With CC3 yarn, rep round 4. (588 sts)
Fasten off CC3.
Rnd 13: With MC yarn, rep round 5. (596 sts)
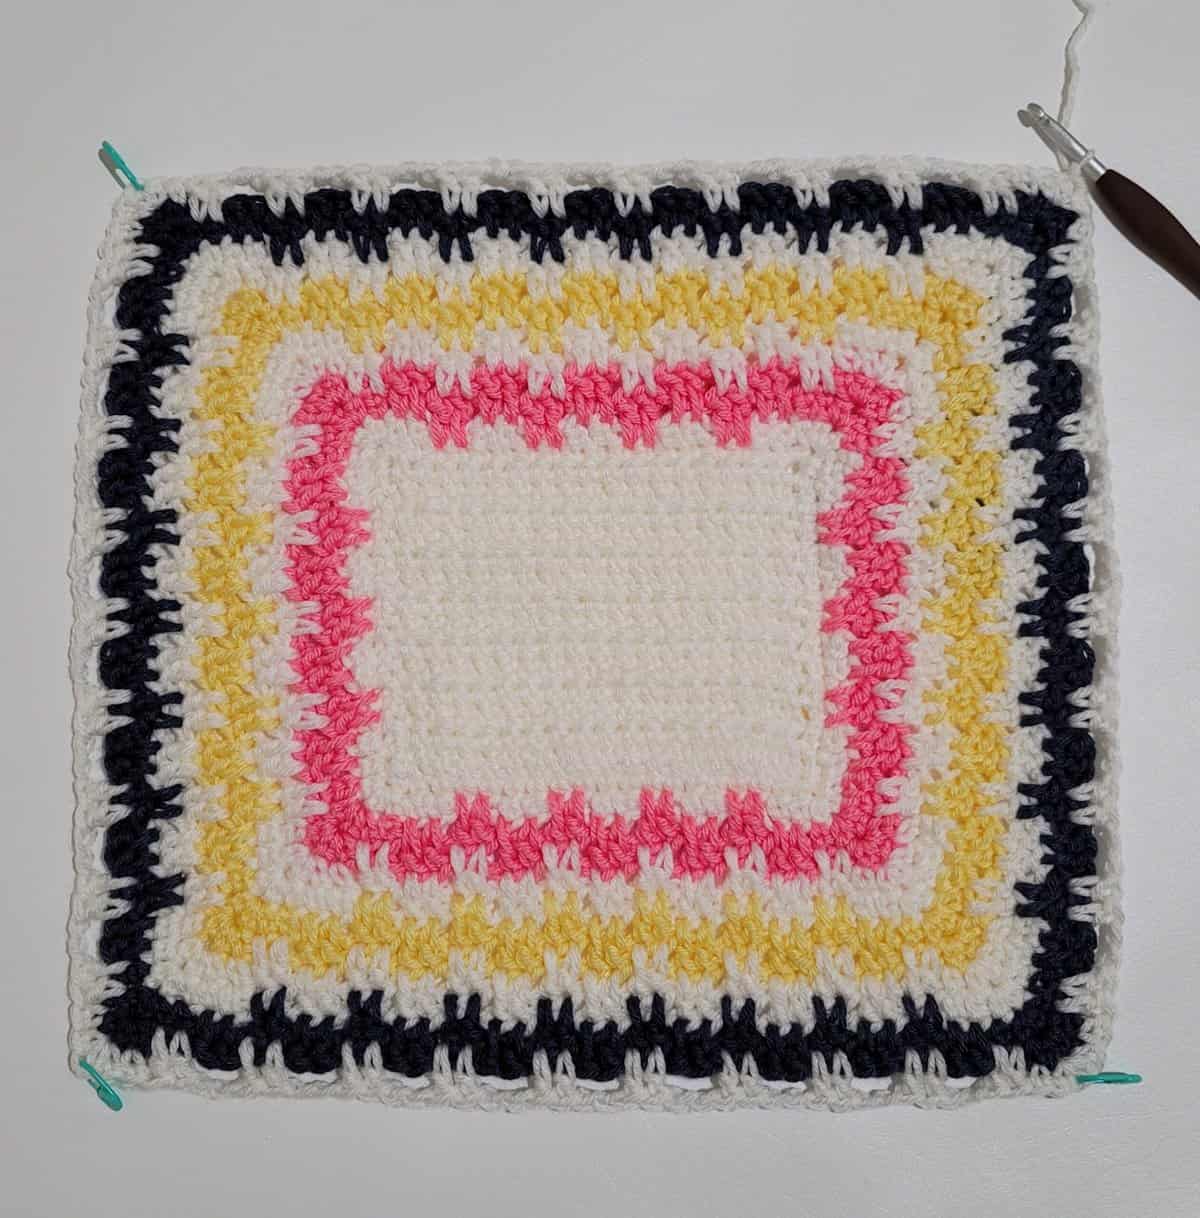
Photo Above: This photo shows Rnds 1 – 13 of the Striped Border complete.
Rnd 14 (MC): Ch 1, 2 ext sc in the first st, [ ext sc in each of the next 4 sts, (long dc in each of the next 2 sts 2 rounds below, ext sc in each of the next 2 sts) rep across to 2 sts before the next corner st, ext sc in each of the next 2 sts, 3 ext sc in the next corner st ] work from [ to ] 3 times, then ext sc in each of the next 4 sts, (long dc in each of the next 2 sts 2 rounds below, ext sc in each of the next 2 sts) rep across to 2 sts before the next corner st, ext sc in each of the next 2 sts, work 1 more ext sc in the same st as the beginning st. Do not join. (604 sts)
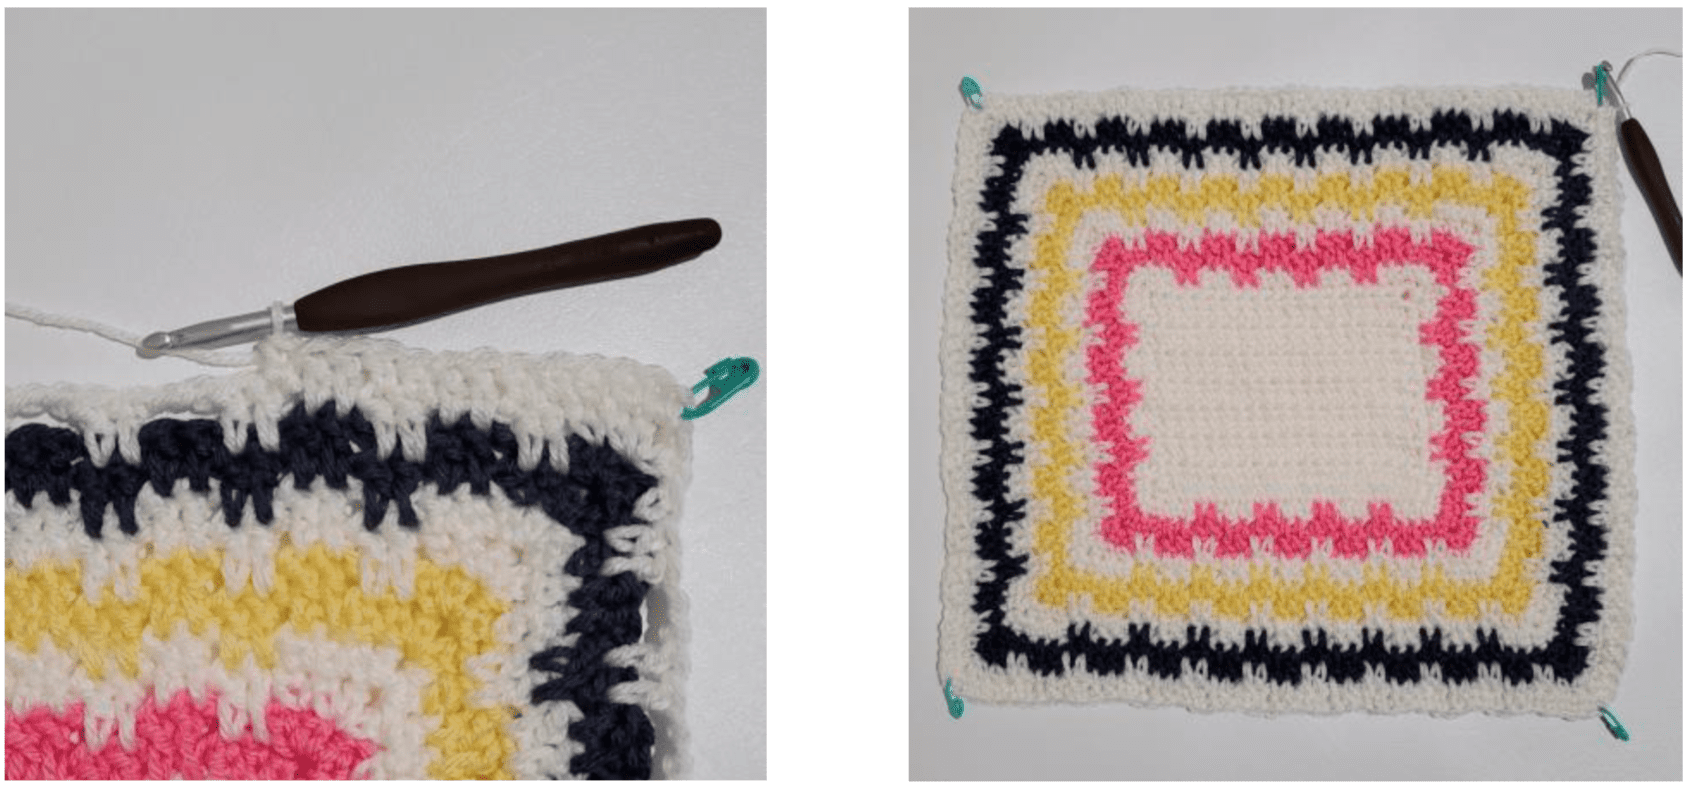
Photo Above Left: This photo shows the beginning of Rnd 14.
Photo Above Right: This photo shows Rnd 14 of the Striped Border complete.
Rnd 15 (MC): (3 sc in the corner st, sc in each st across to the next corner st) 4 times, Join. (612 sts)
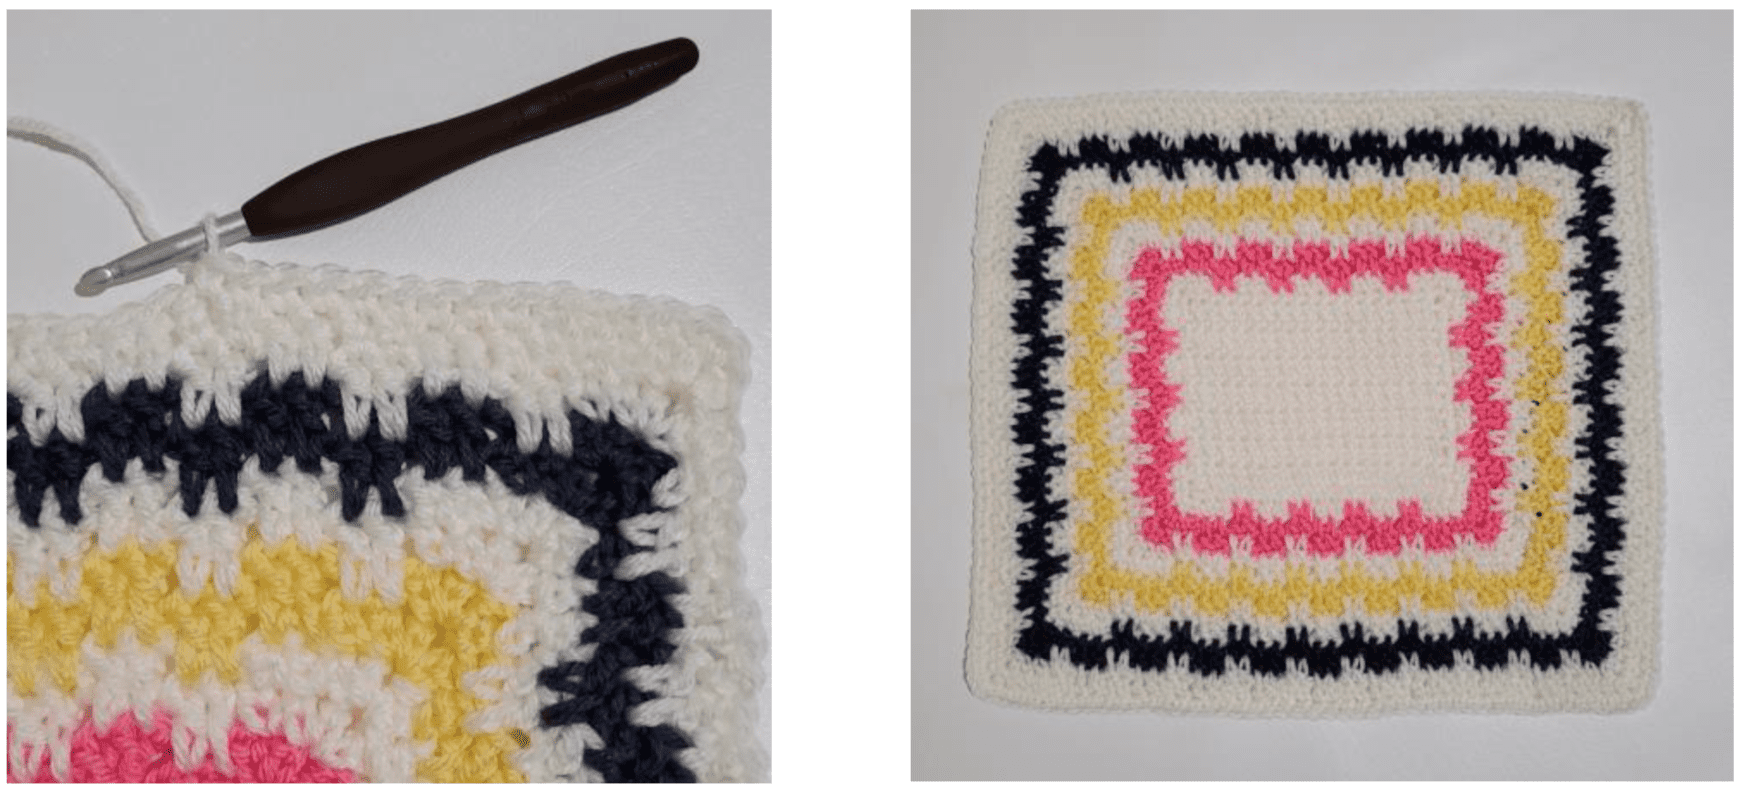
Photo Above Left: This photo shows the beginning of Rnd 15.
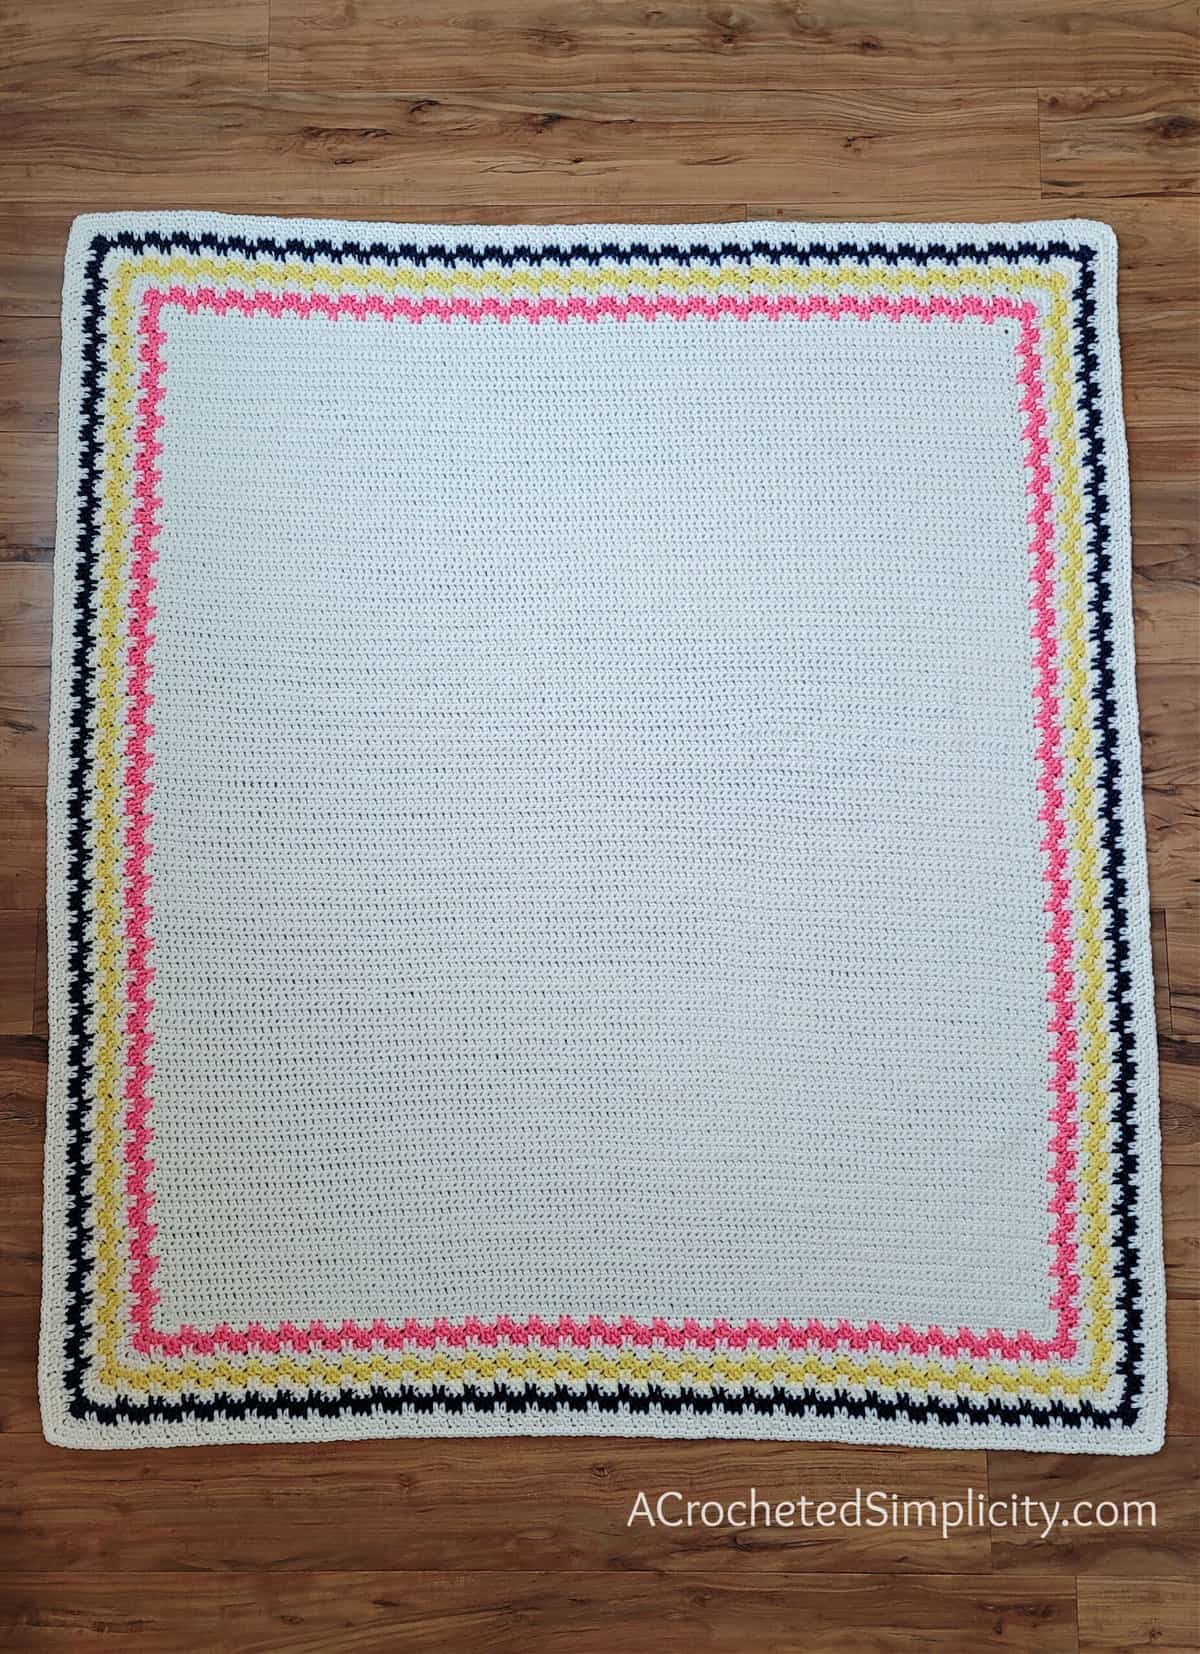
Photo Above Right: This photo shows the Striped Border complete.
Fasten off. Weave in ends & block, if desired.
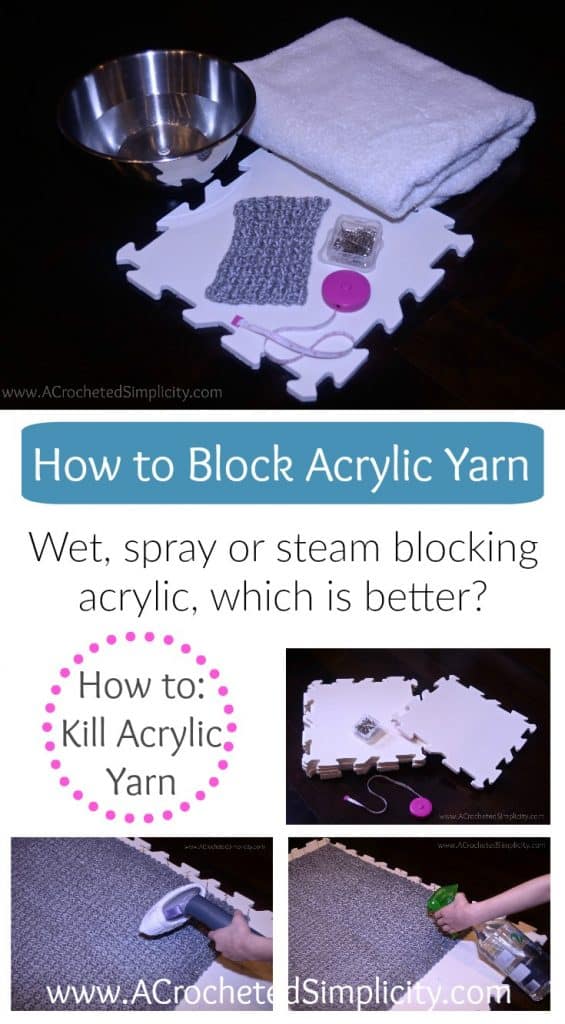
Give your work a professional finish by blocking it! Click here to learn 3 different ways to block acrylic yarn. I prefer to steam block, which technique will you choose?
If you’ve enjoyed working the extended double moss stitch border, learn how to crochet it in rows in this photo tutorial HERE.
MORE FREE CROCHET PATTERNS FROM A CROCHETED SIMPLICITY
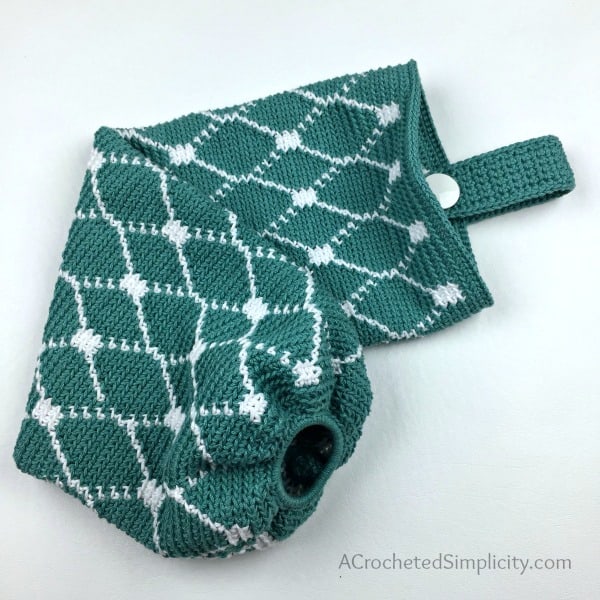
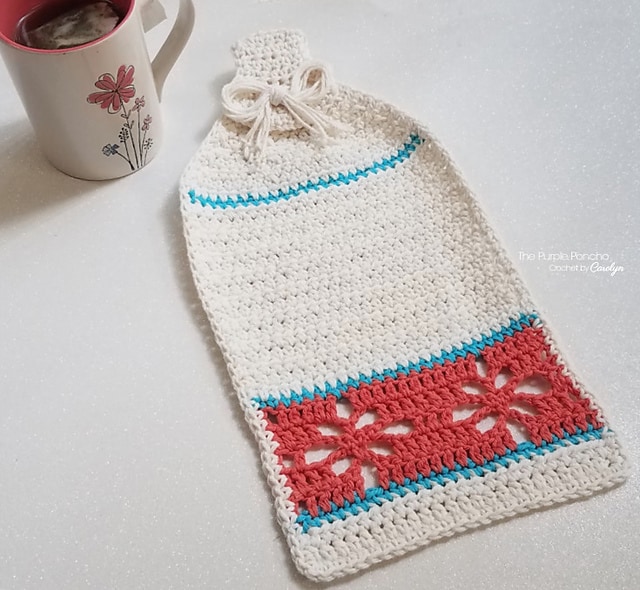
If you enjoy this crochet afghan pattern, you may enjoy these other projects as well. And if you just want to browse, you can find all of our free crochet patterns HERE.
Are you intimidated by knit-look crochet? Would you love to learn my tips & tricks? Take an Annies Video Class with me and let me ease your fears and help you increase your skills! Click on the photo below to watch a free preview. You can also see the other 4 video classes I have available! (affiliate link)

Please share your finished ACS projects with us in the A Crocheted Simplicity Crochet Community Group on Facebook! Use hashtag #ACrochetedSimplicity when sharing on social media so I can find your posts!