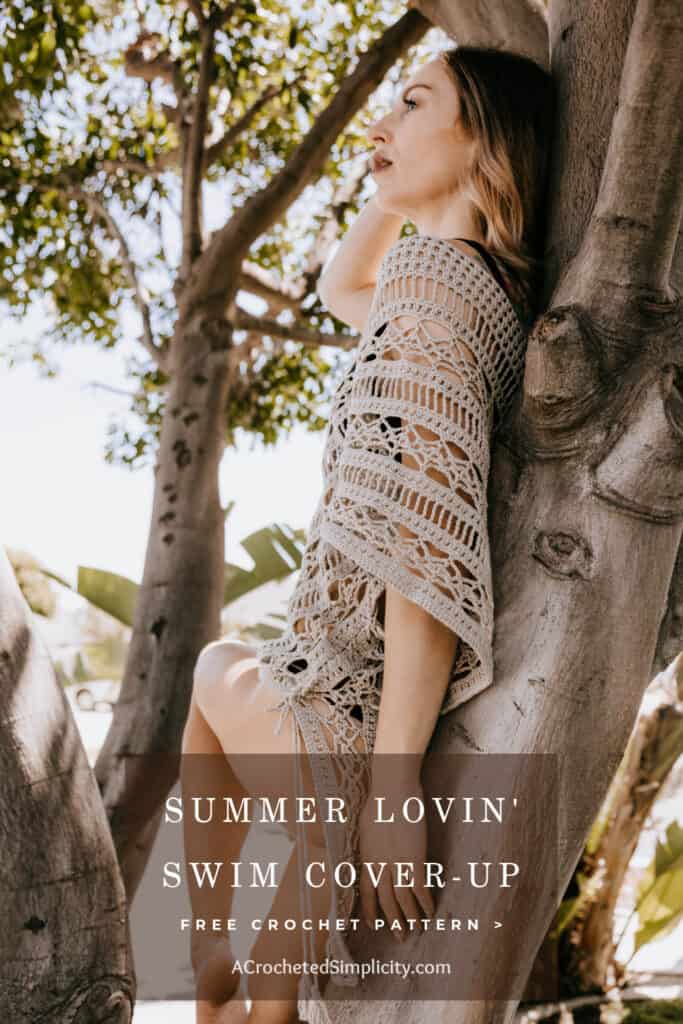
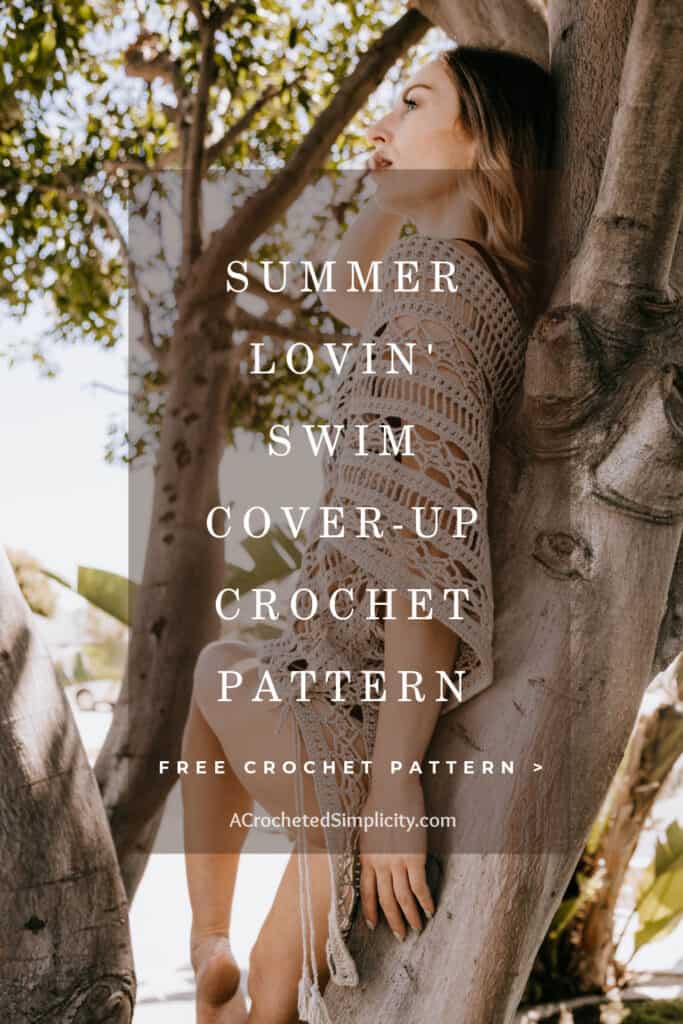
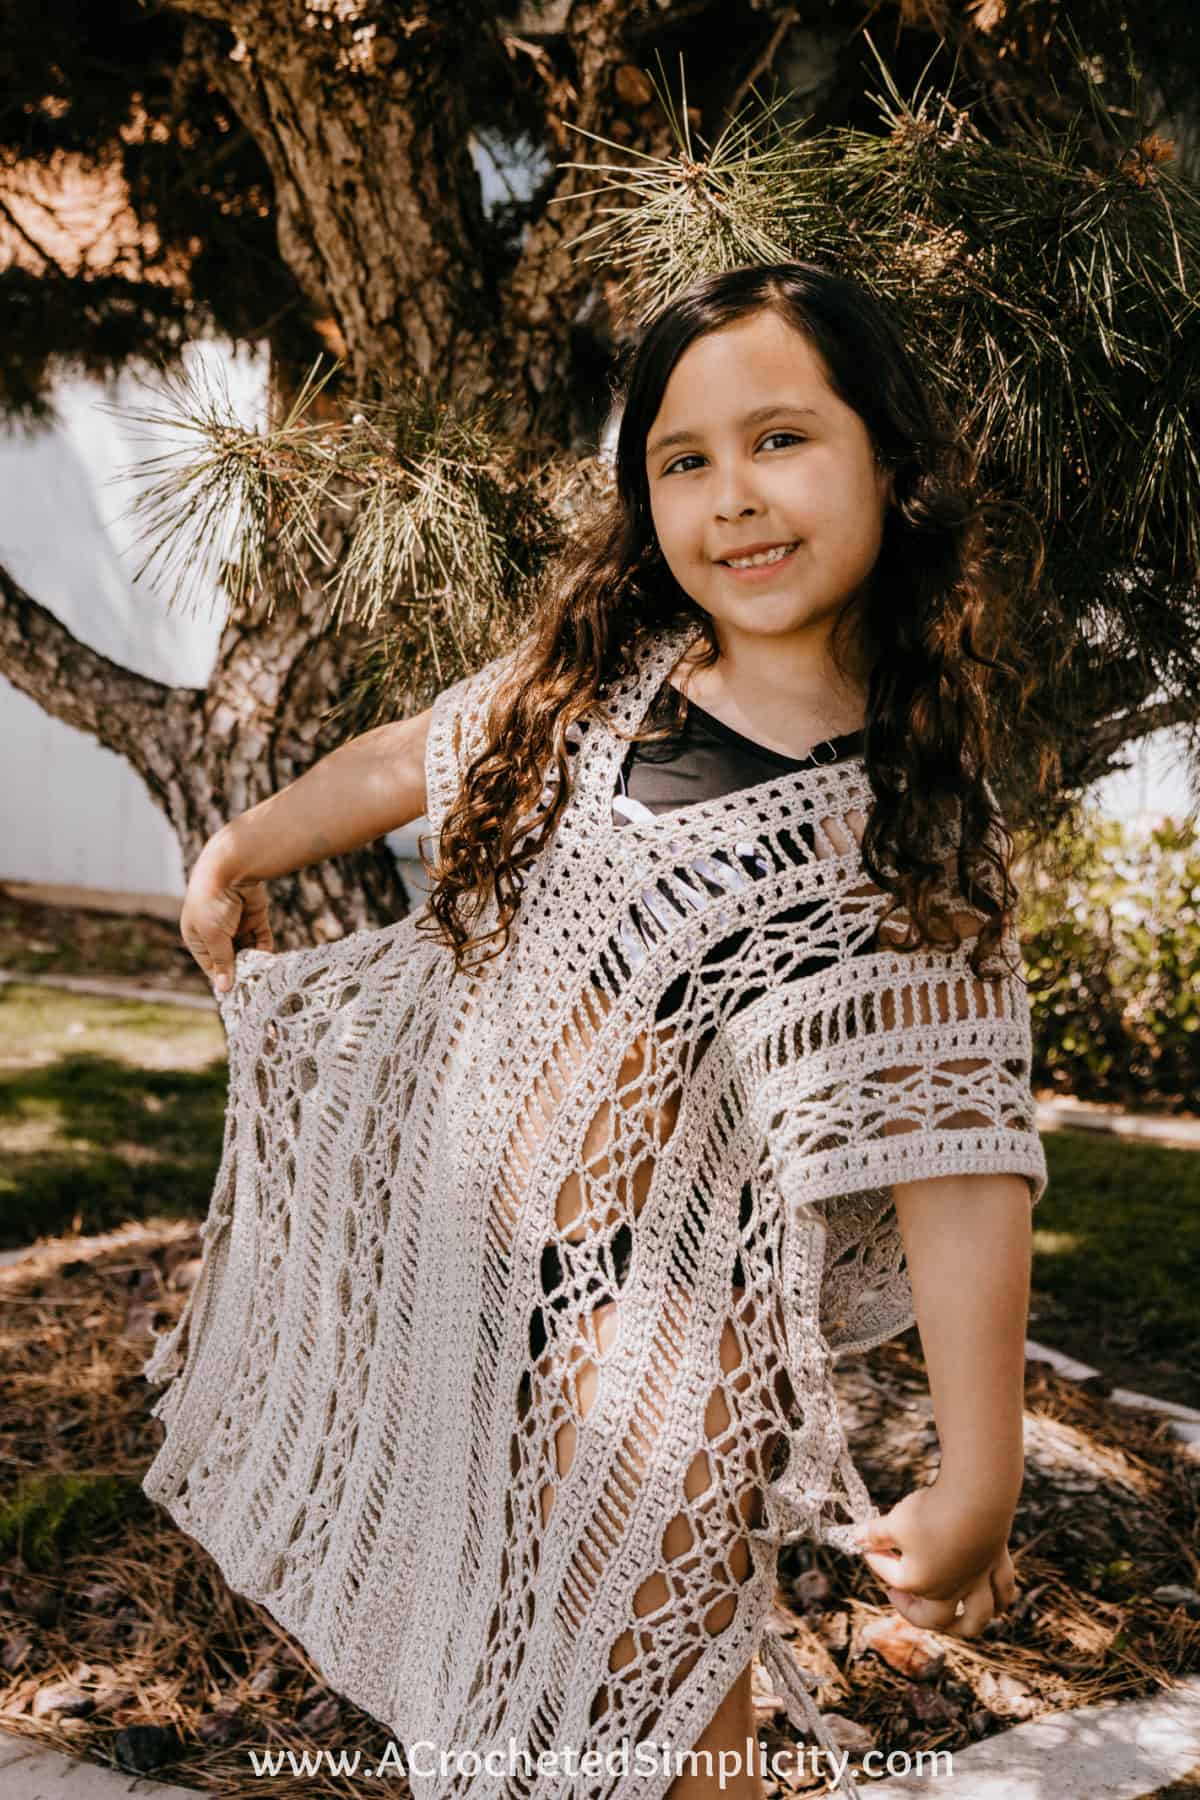
Summer Lovin’ Crochet Cover Up Pattern
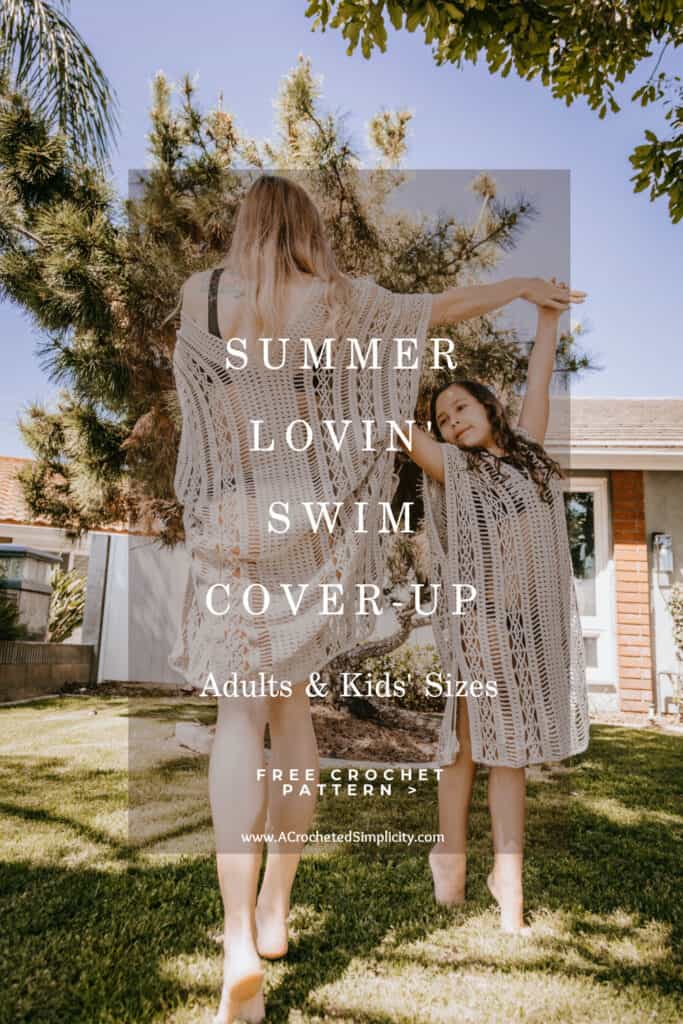
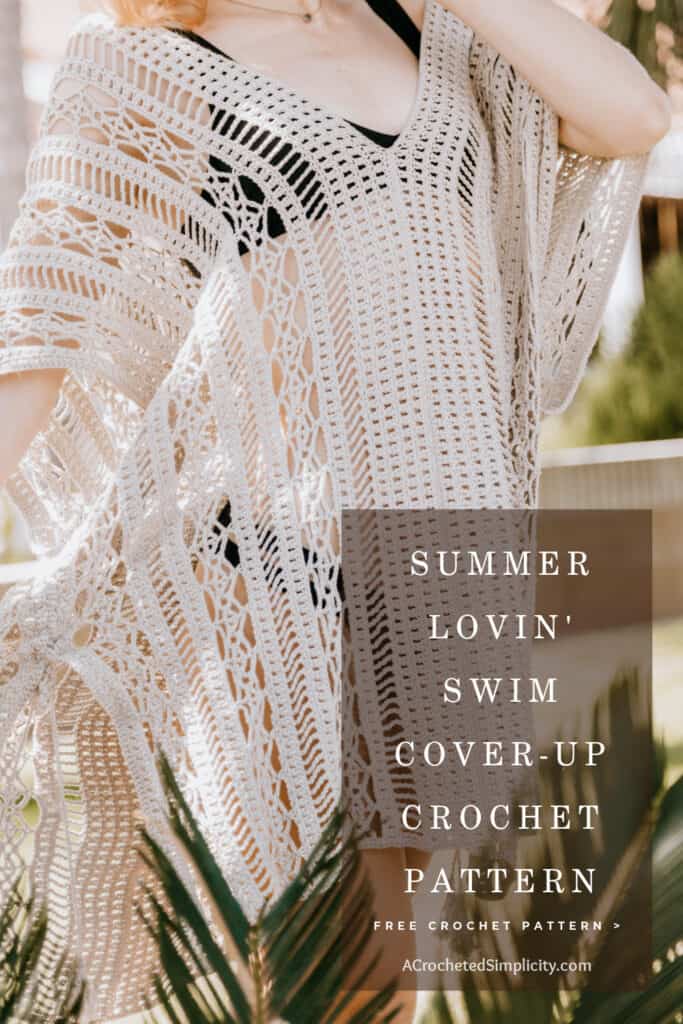

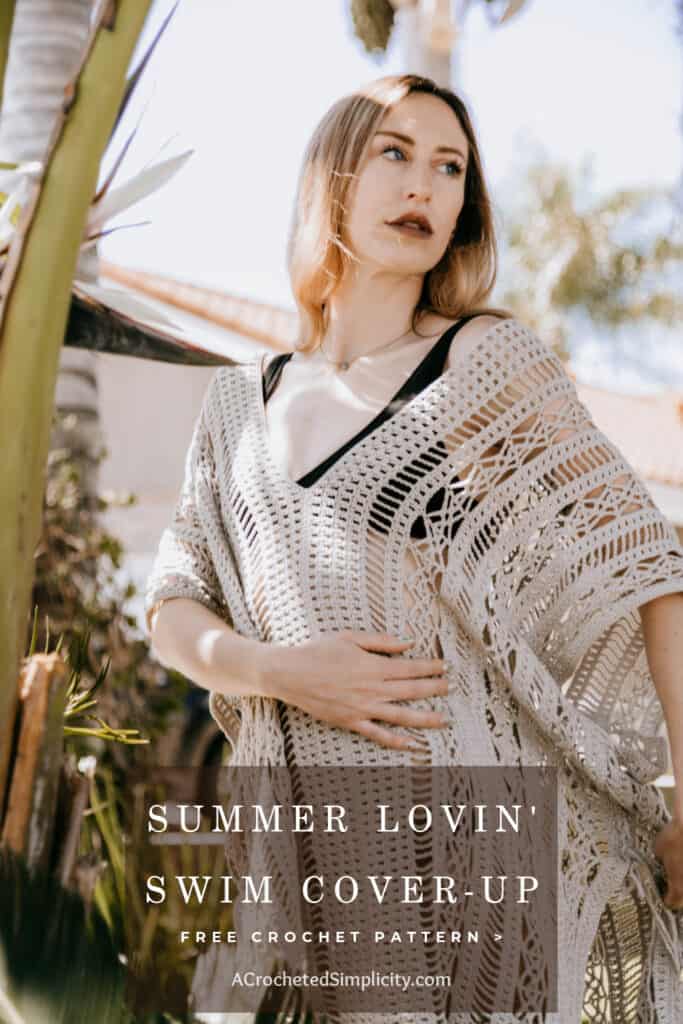
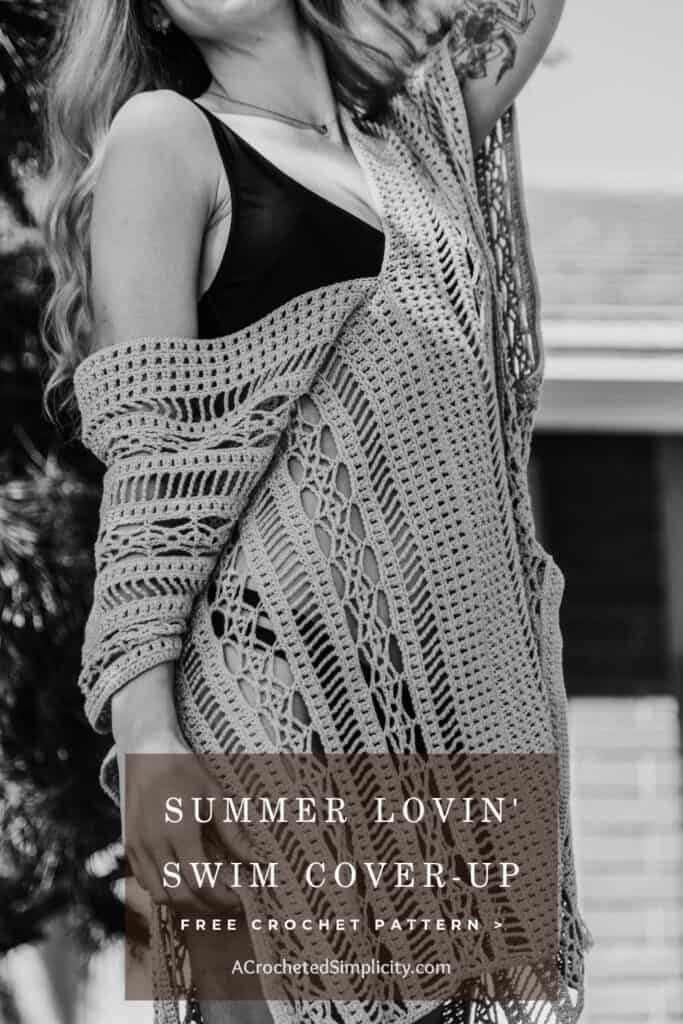
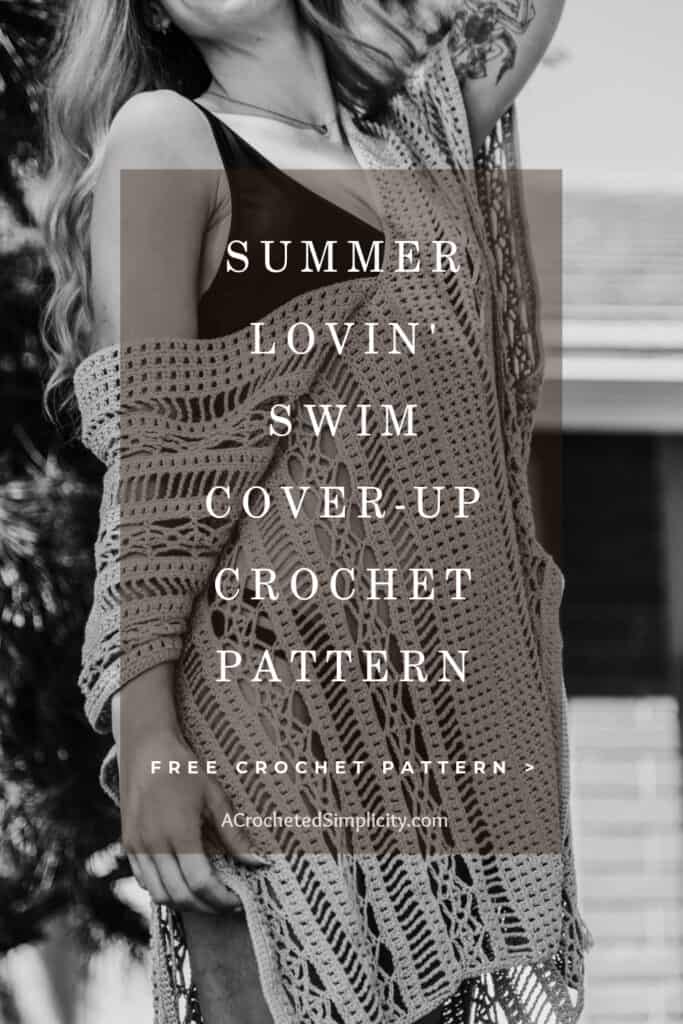
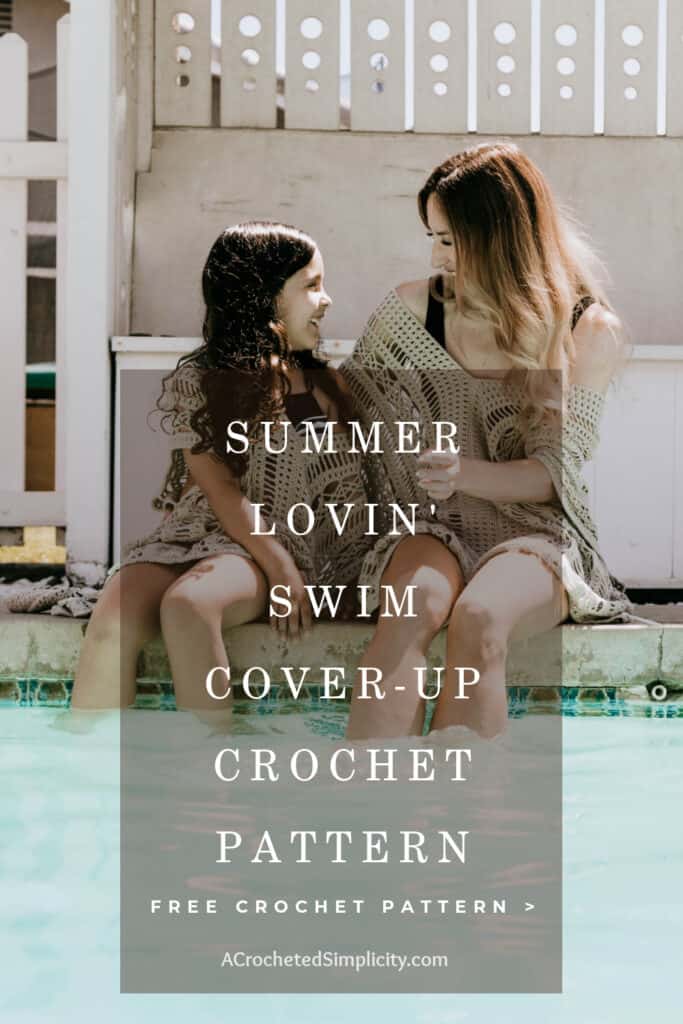


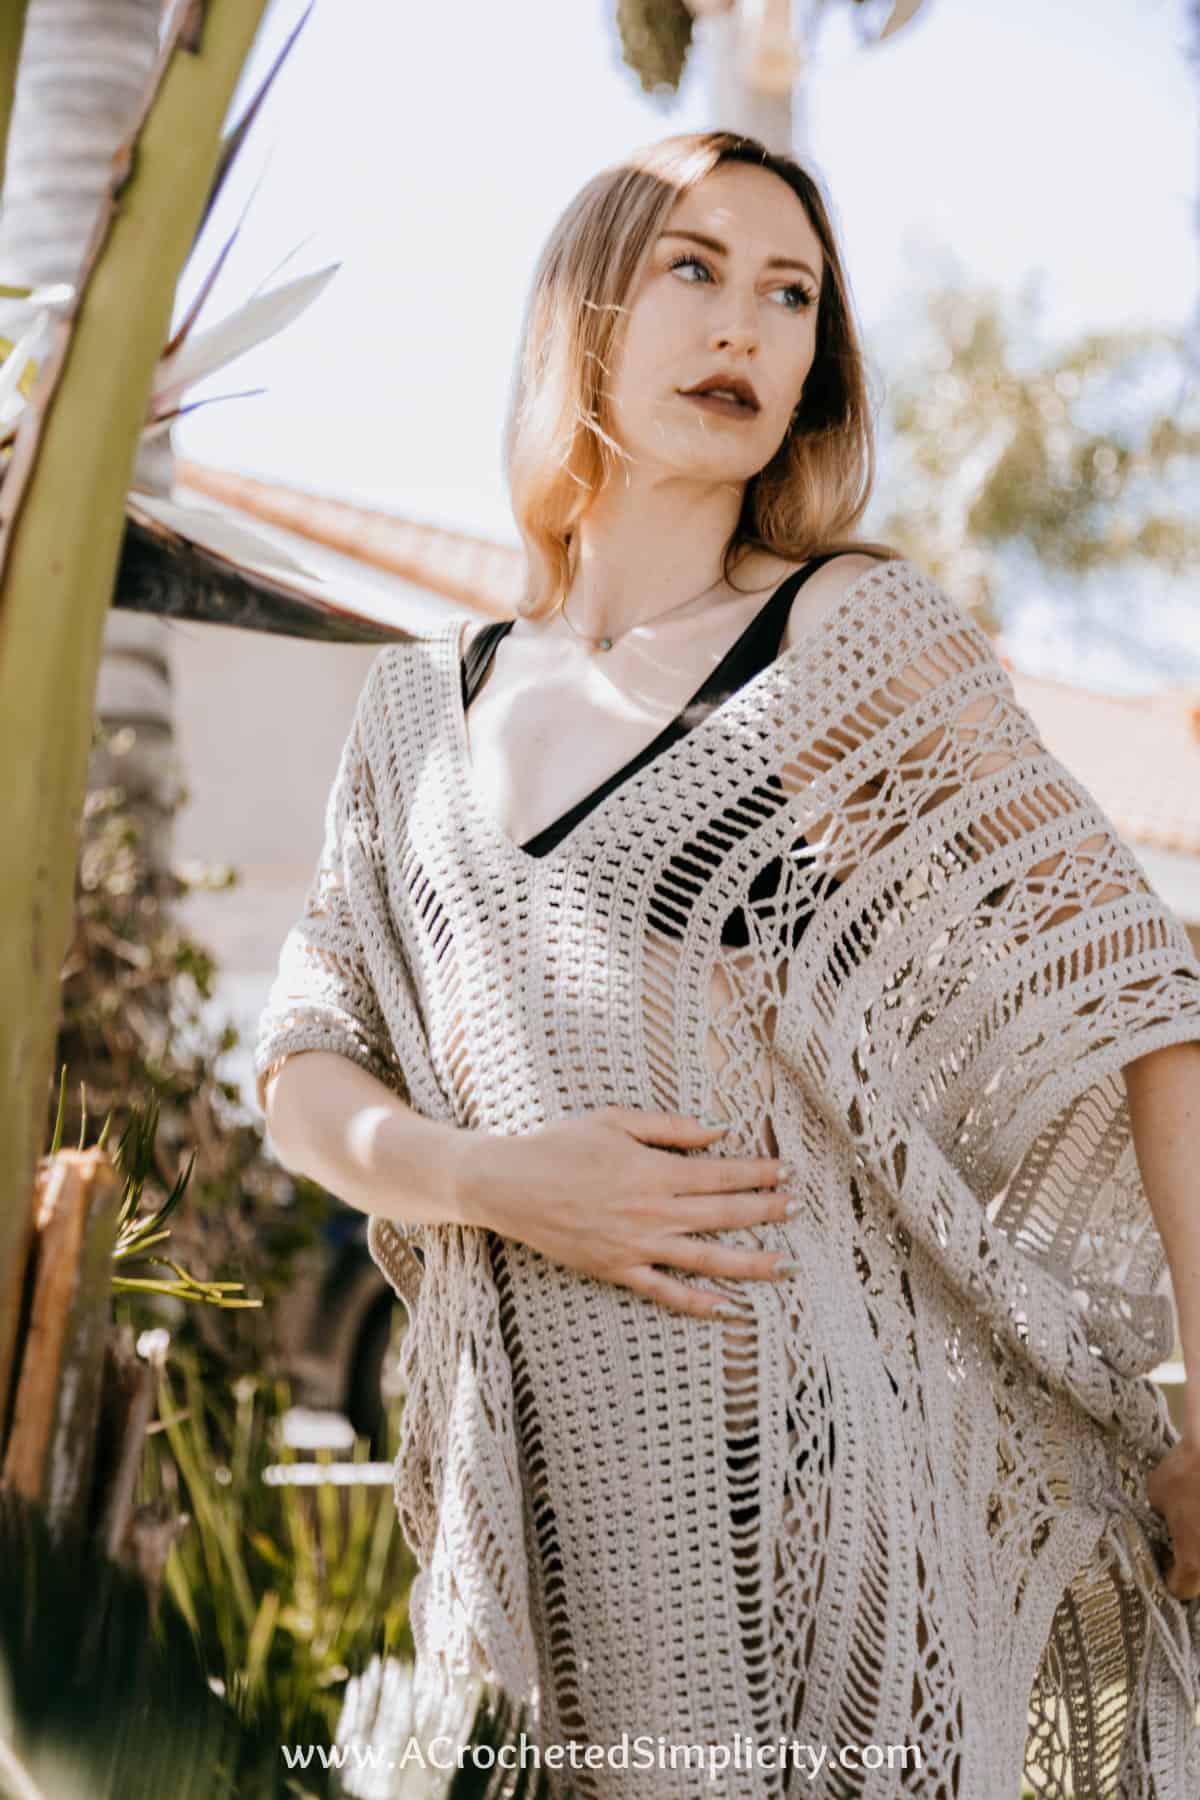
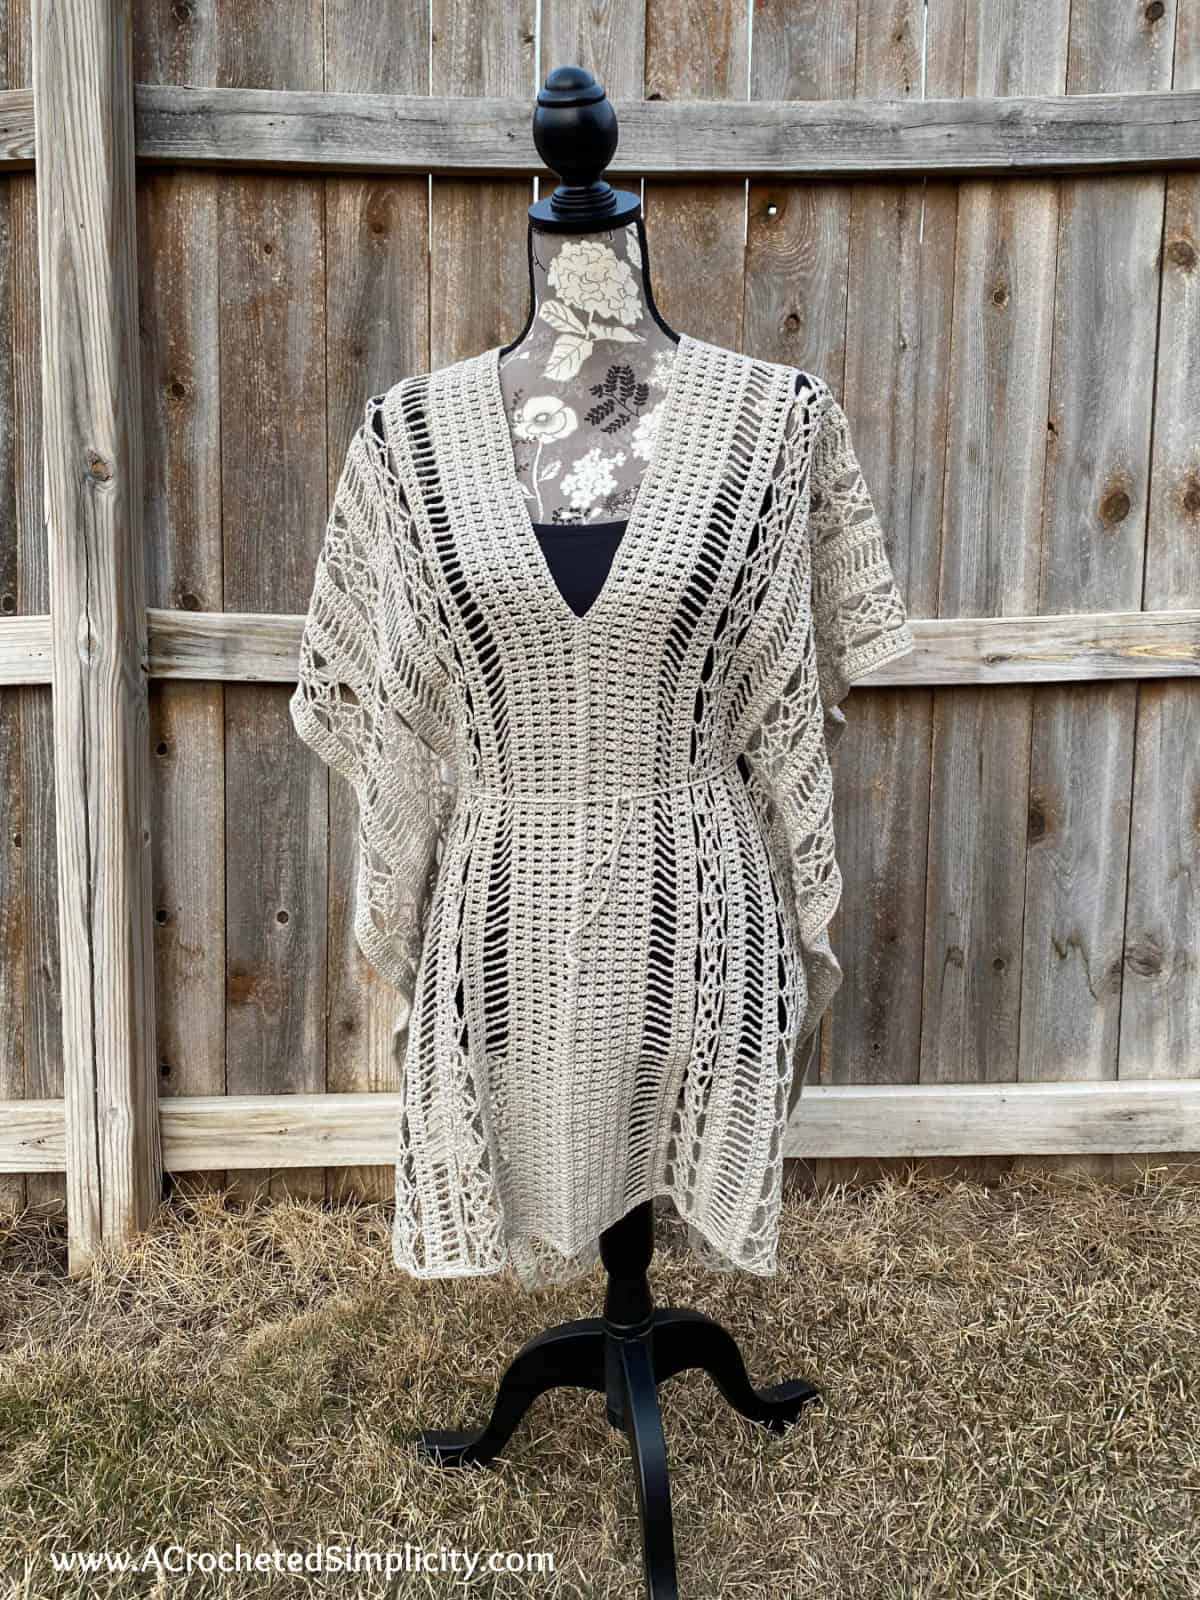
A lightweight, fashionable crochet cover up is a must have summer essential!
Make your own crochet beach cover up and show off your personal style at the beach or poolside this summer.
You can find the free Summer Lovin’ Swim Cover Up crochet pattern in this post below, or an ad-free print friendly version (including all photo tutorials) on Ravelry, or on Etsy (aff).

Beach cover ups are fashionable, functionable, fun to crochet, and come in a variety of styles. From crochet wraps to crochet tunics, crochet skirts to crochet sarongs, there’s a free crochet beach cover up pattern out there to match your style!
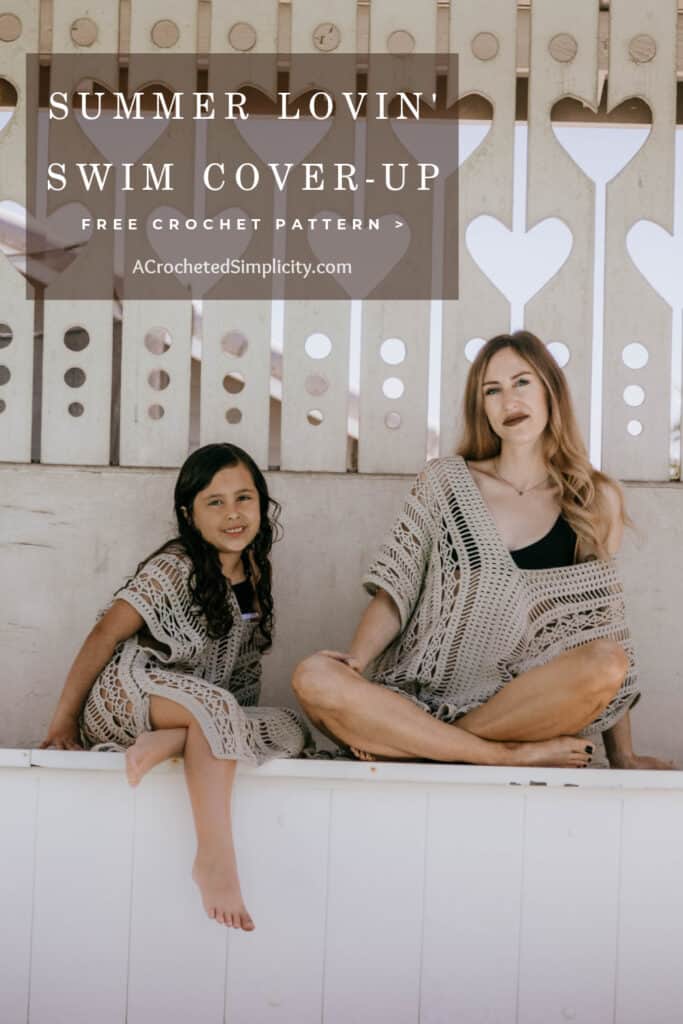
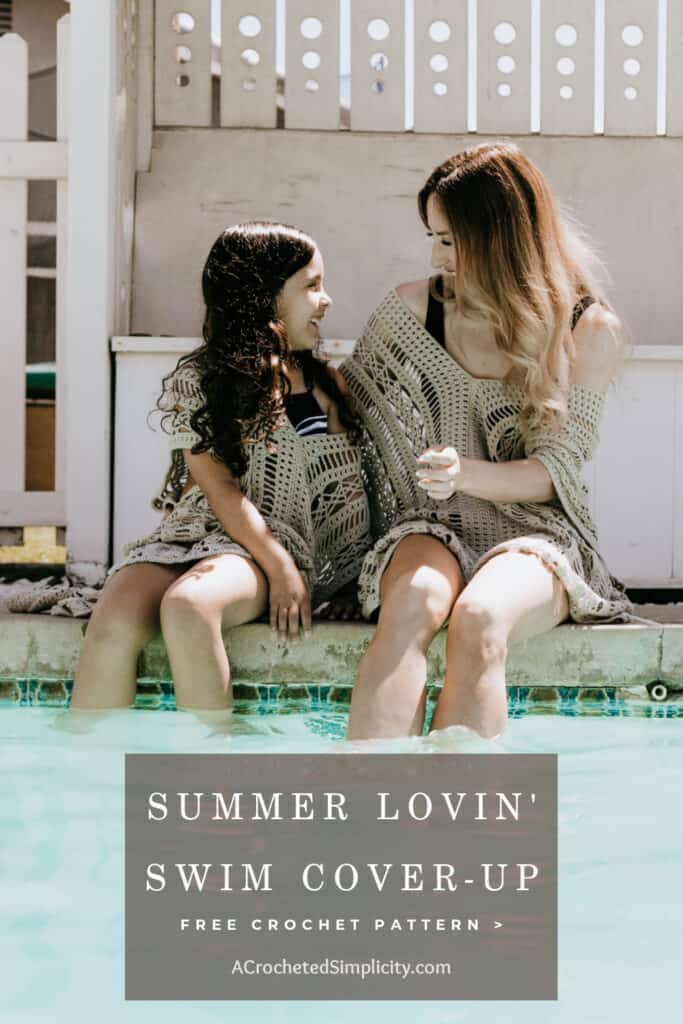
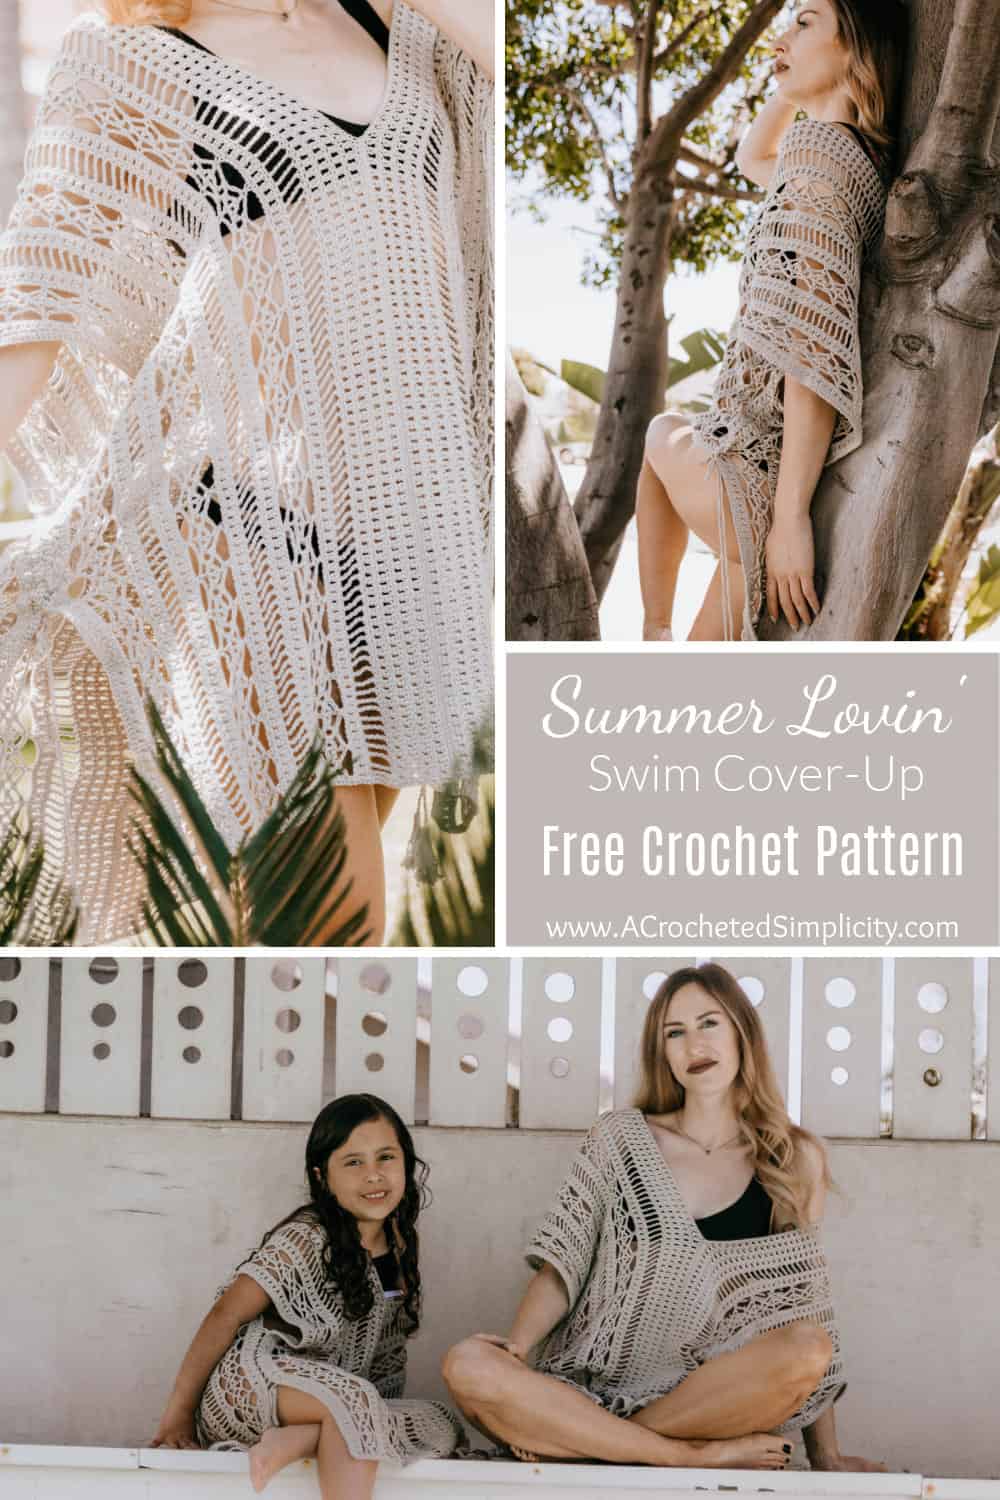
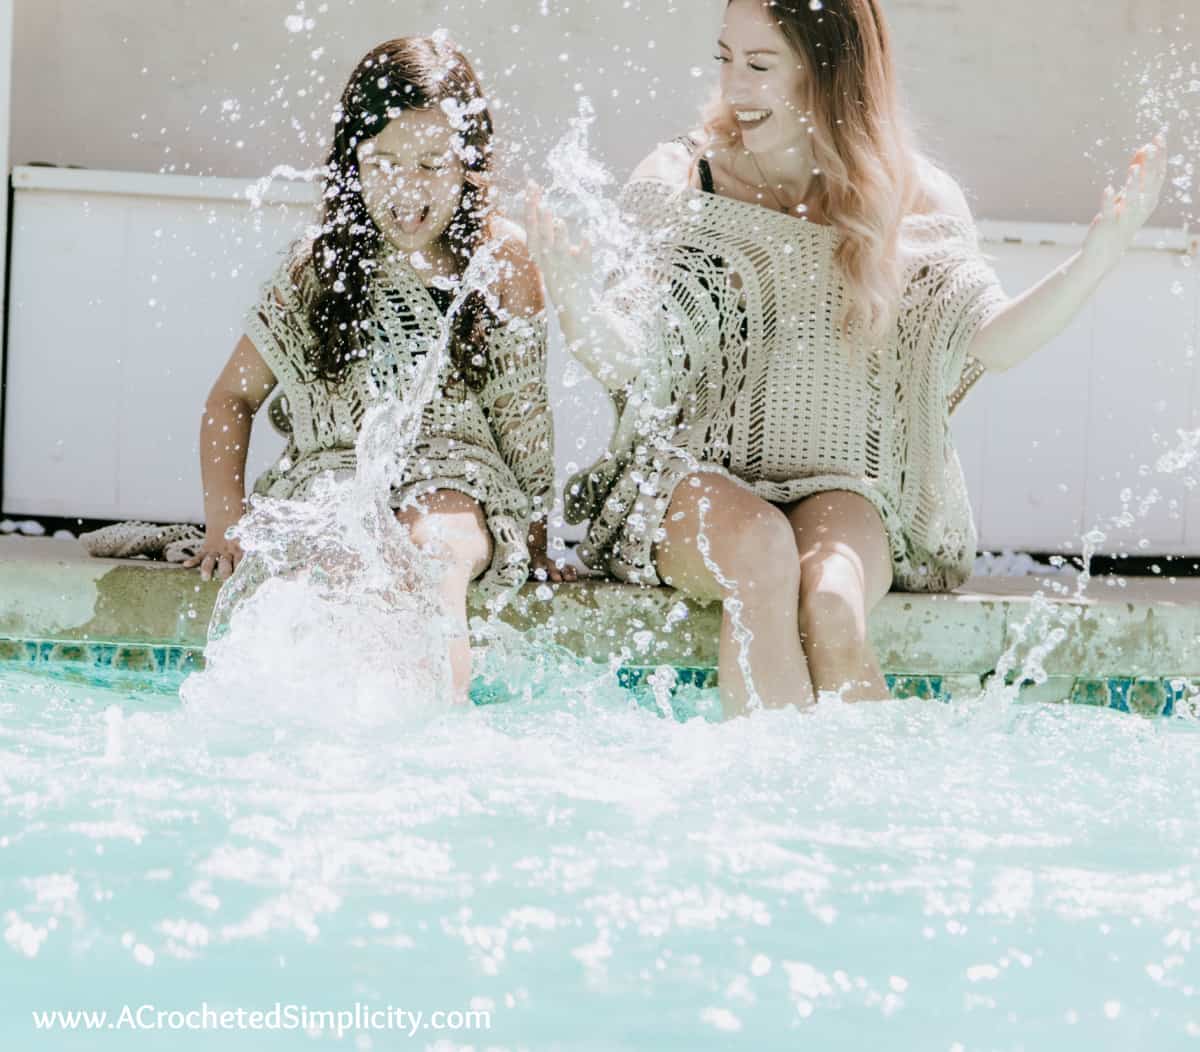
Both adult and kids sizes are included so you can make a matching mommy & Me set!
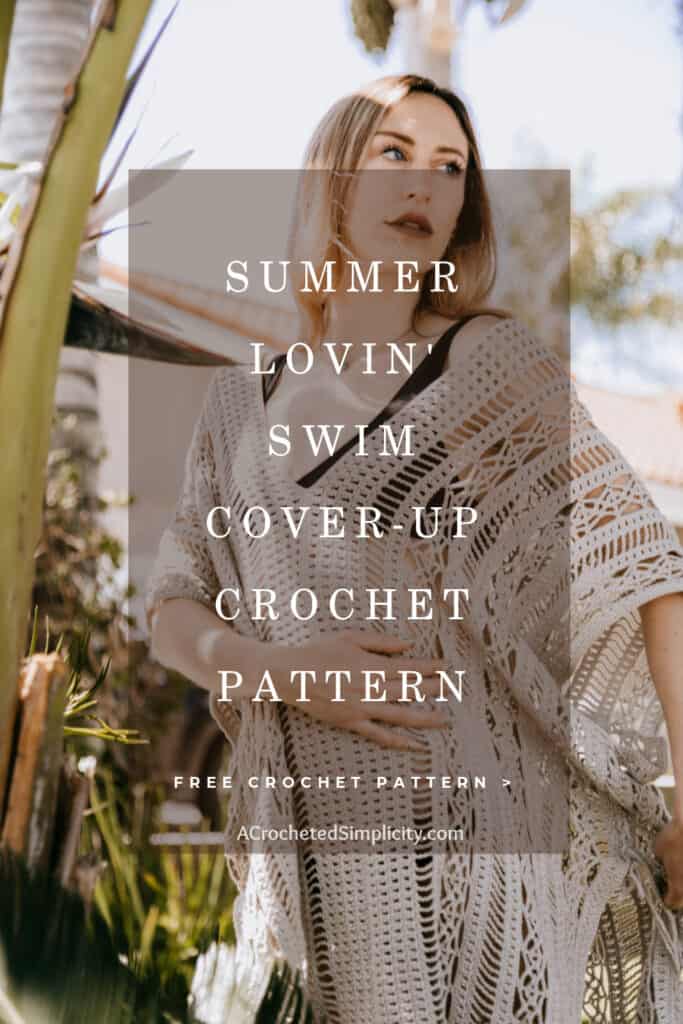
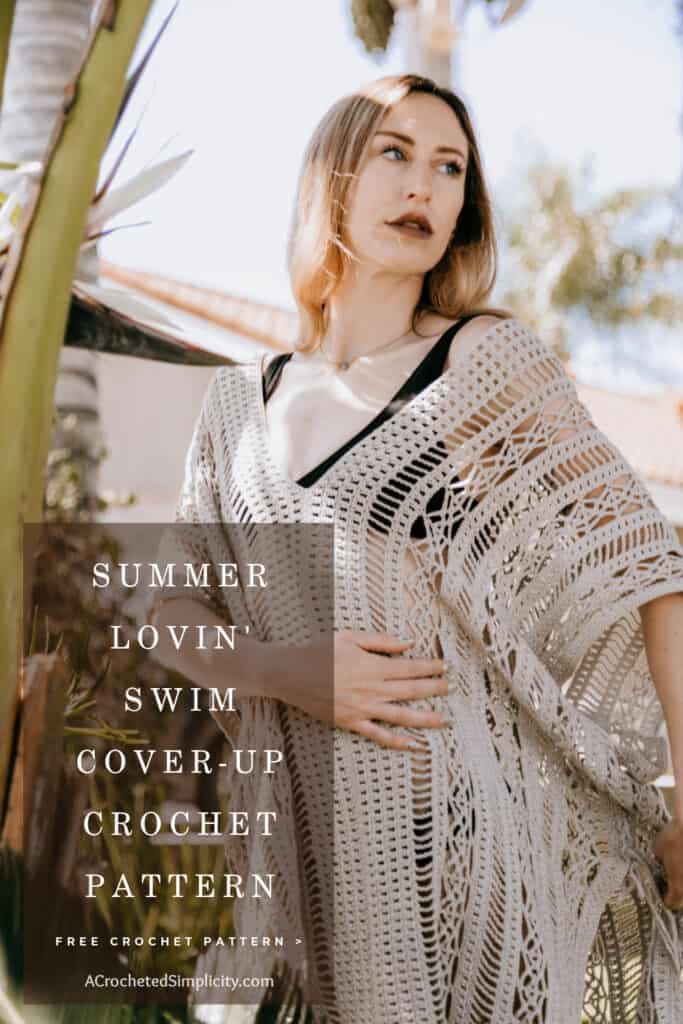
Summer is here, and nothing says effortless beach style like a handmade crochet cover-up. Whether you’re lounging poolside, heading to a tropical vacation, or enjoying a sunny day at the lake, a lightweight crochet cover-up is a must-have summer essential. In this post, I’m sharing everything you need to know about crocheting your own stylish and breezy cover-up—even if you’re a beginner!
🏖️ Style It Your Way
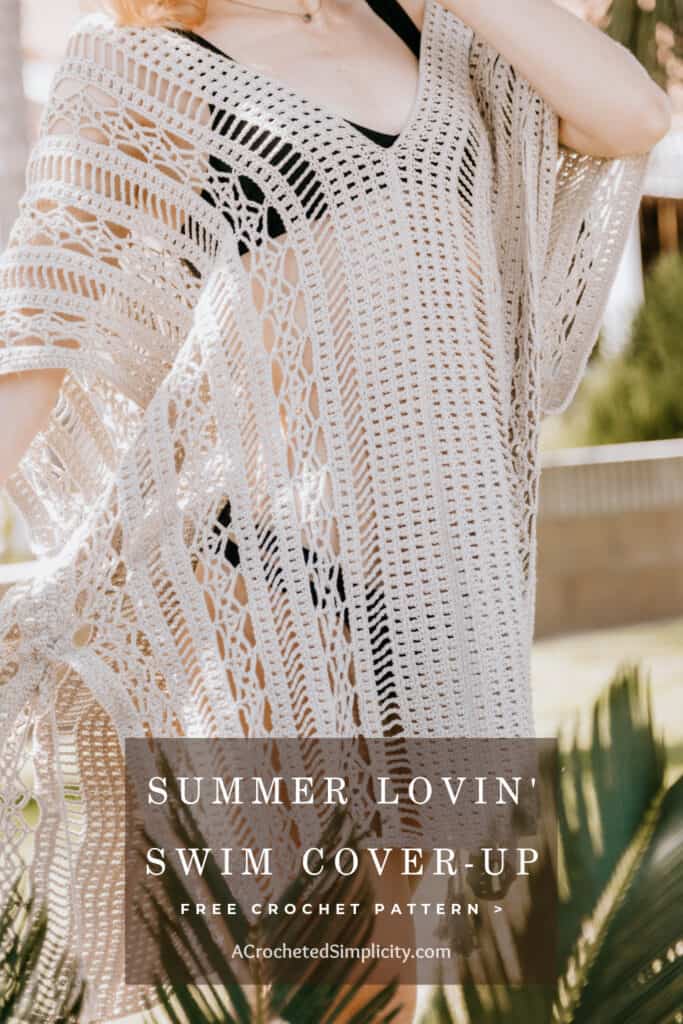
This crochet swimsuit cover-up is versatile enough to wear as:
- A beach dress over your bikini
- A tunic with shorts and sandals
- A breezy festival top with a bralette underneath
Choose a neutral color for timeless style or go bold with vibrant summer shades!
If you prefer the style of a crochet tunic, like the Summer Lovin’ Swim Cover Up, you may also like my Sunny Days Crochet Beach Cover up.
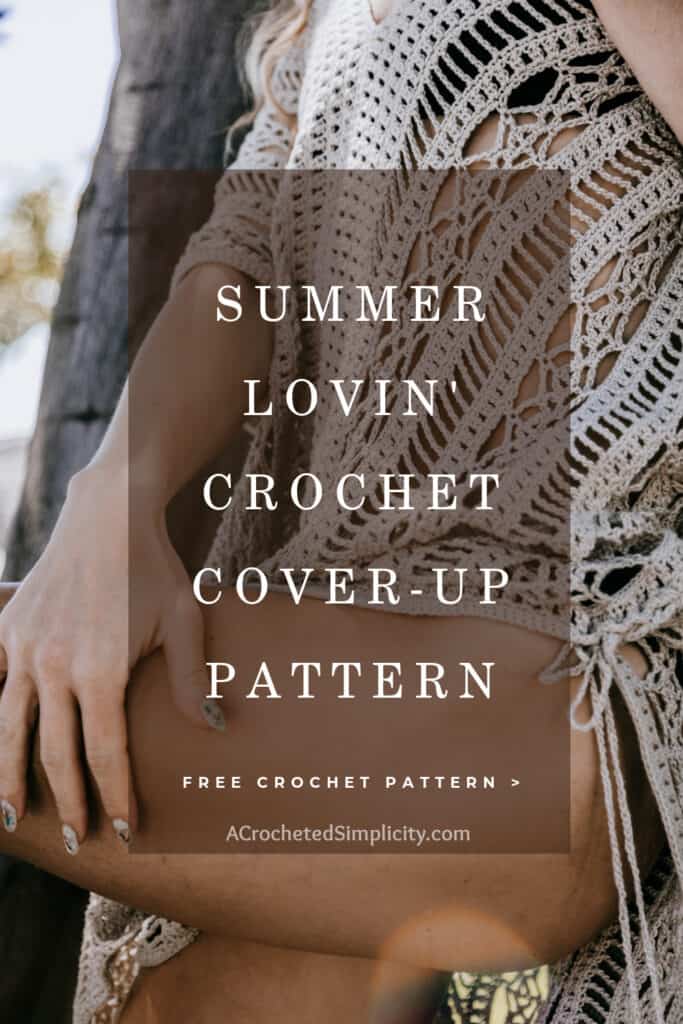
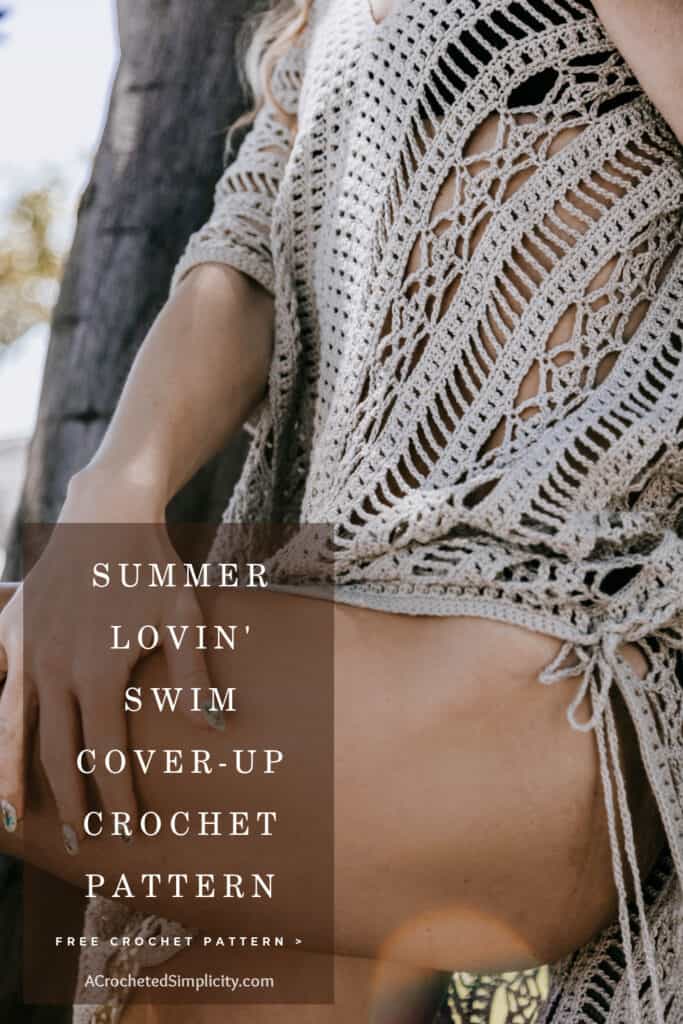
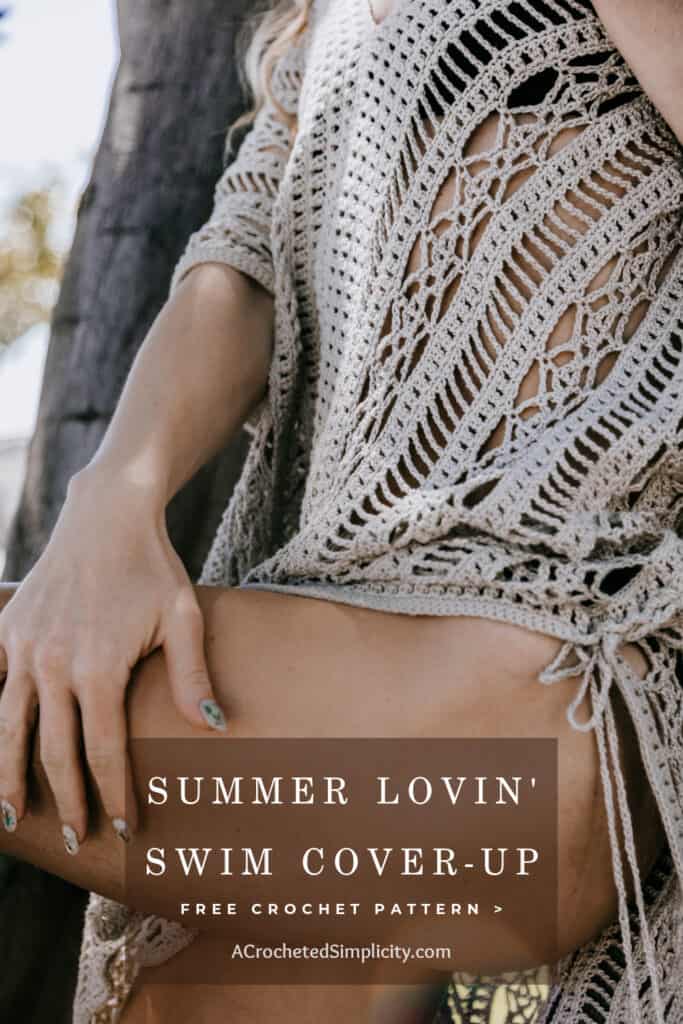
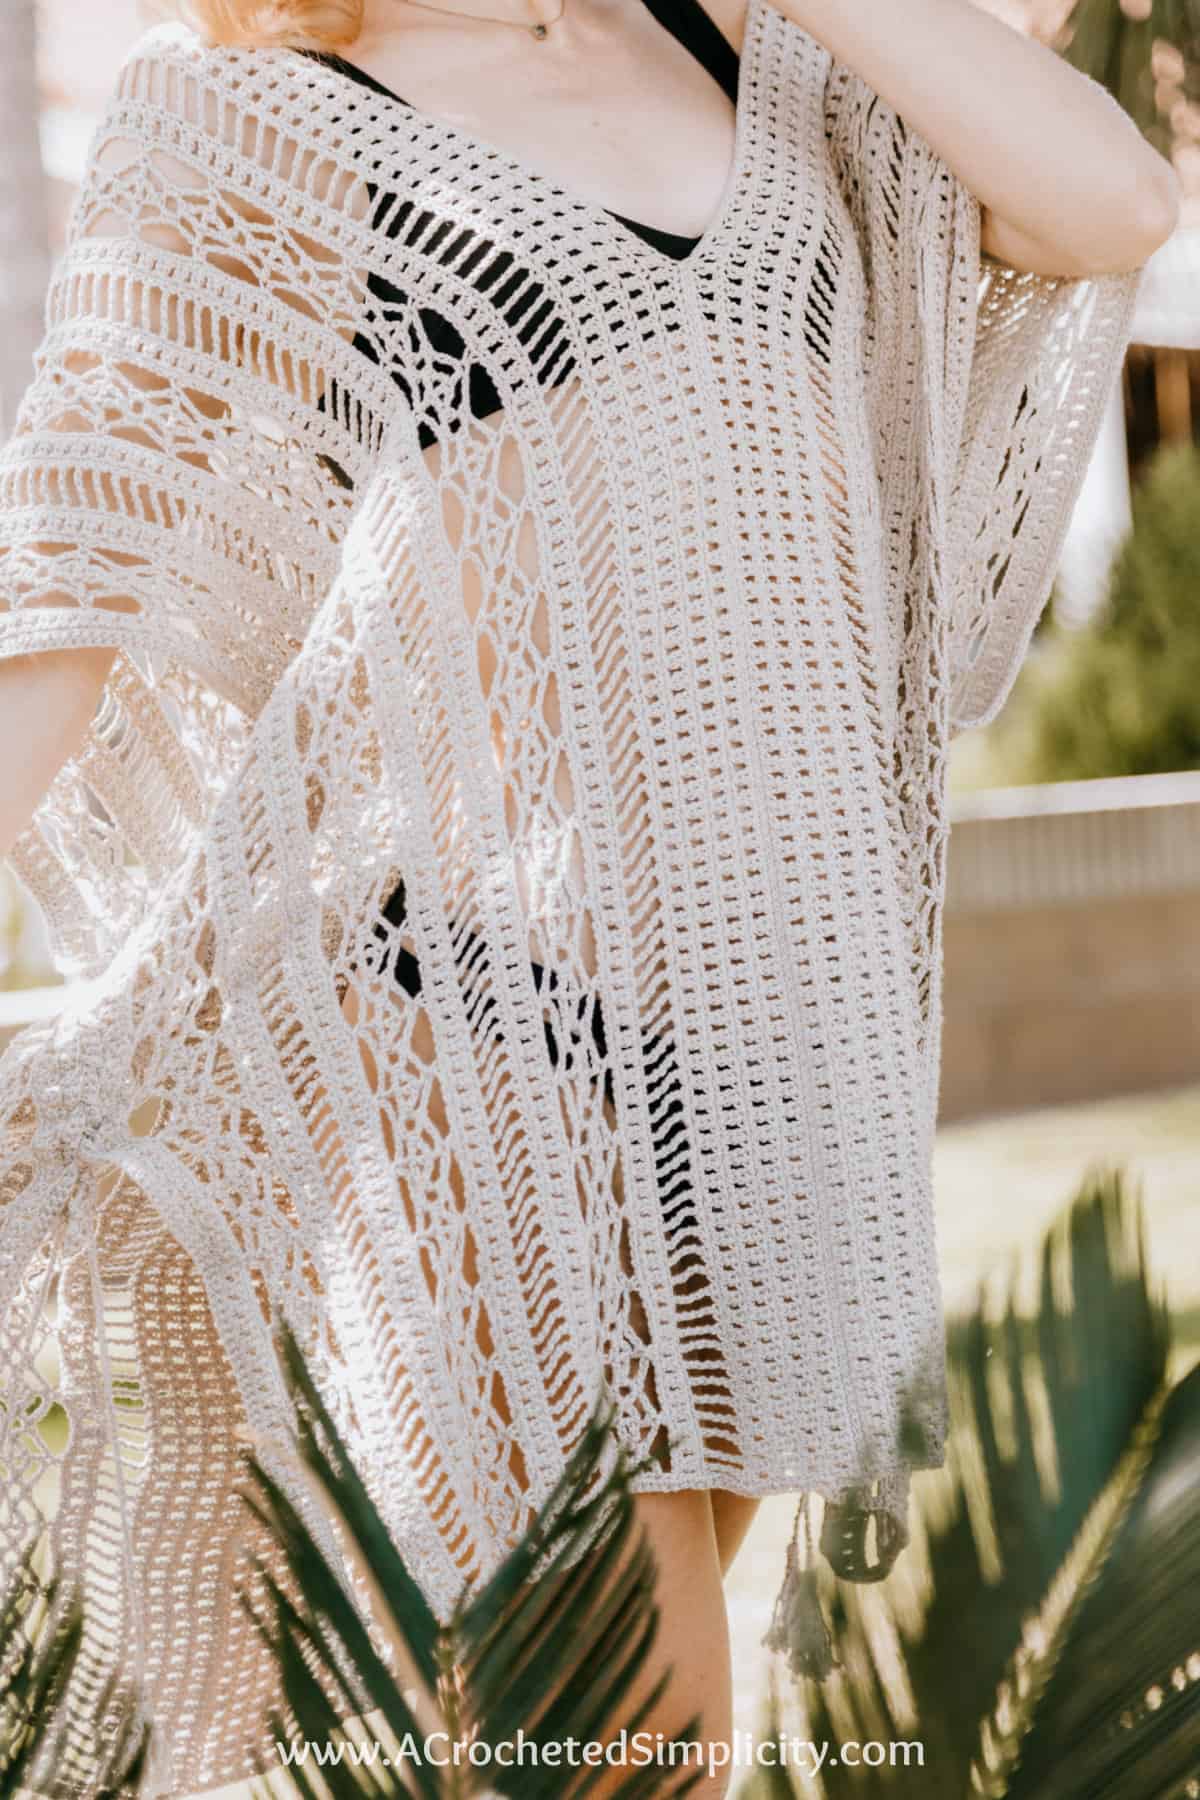
Crochet Cover Up Construction
This easy crochet cover up is constructed using two identical, rectangular panels.
These two panels are then seamed together, leaving a neck opening.
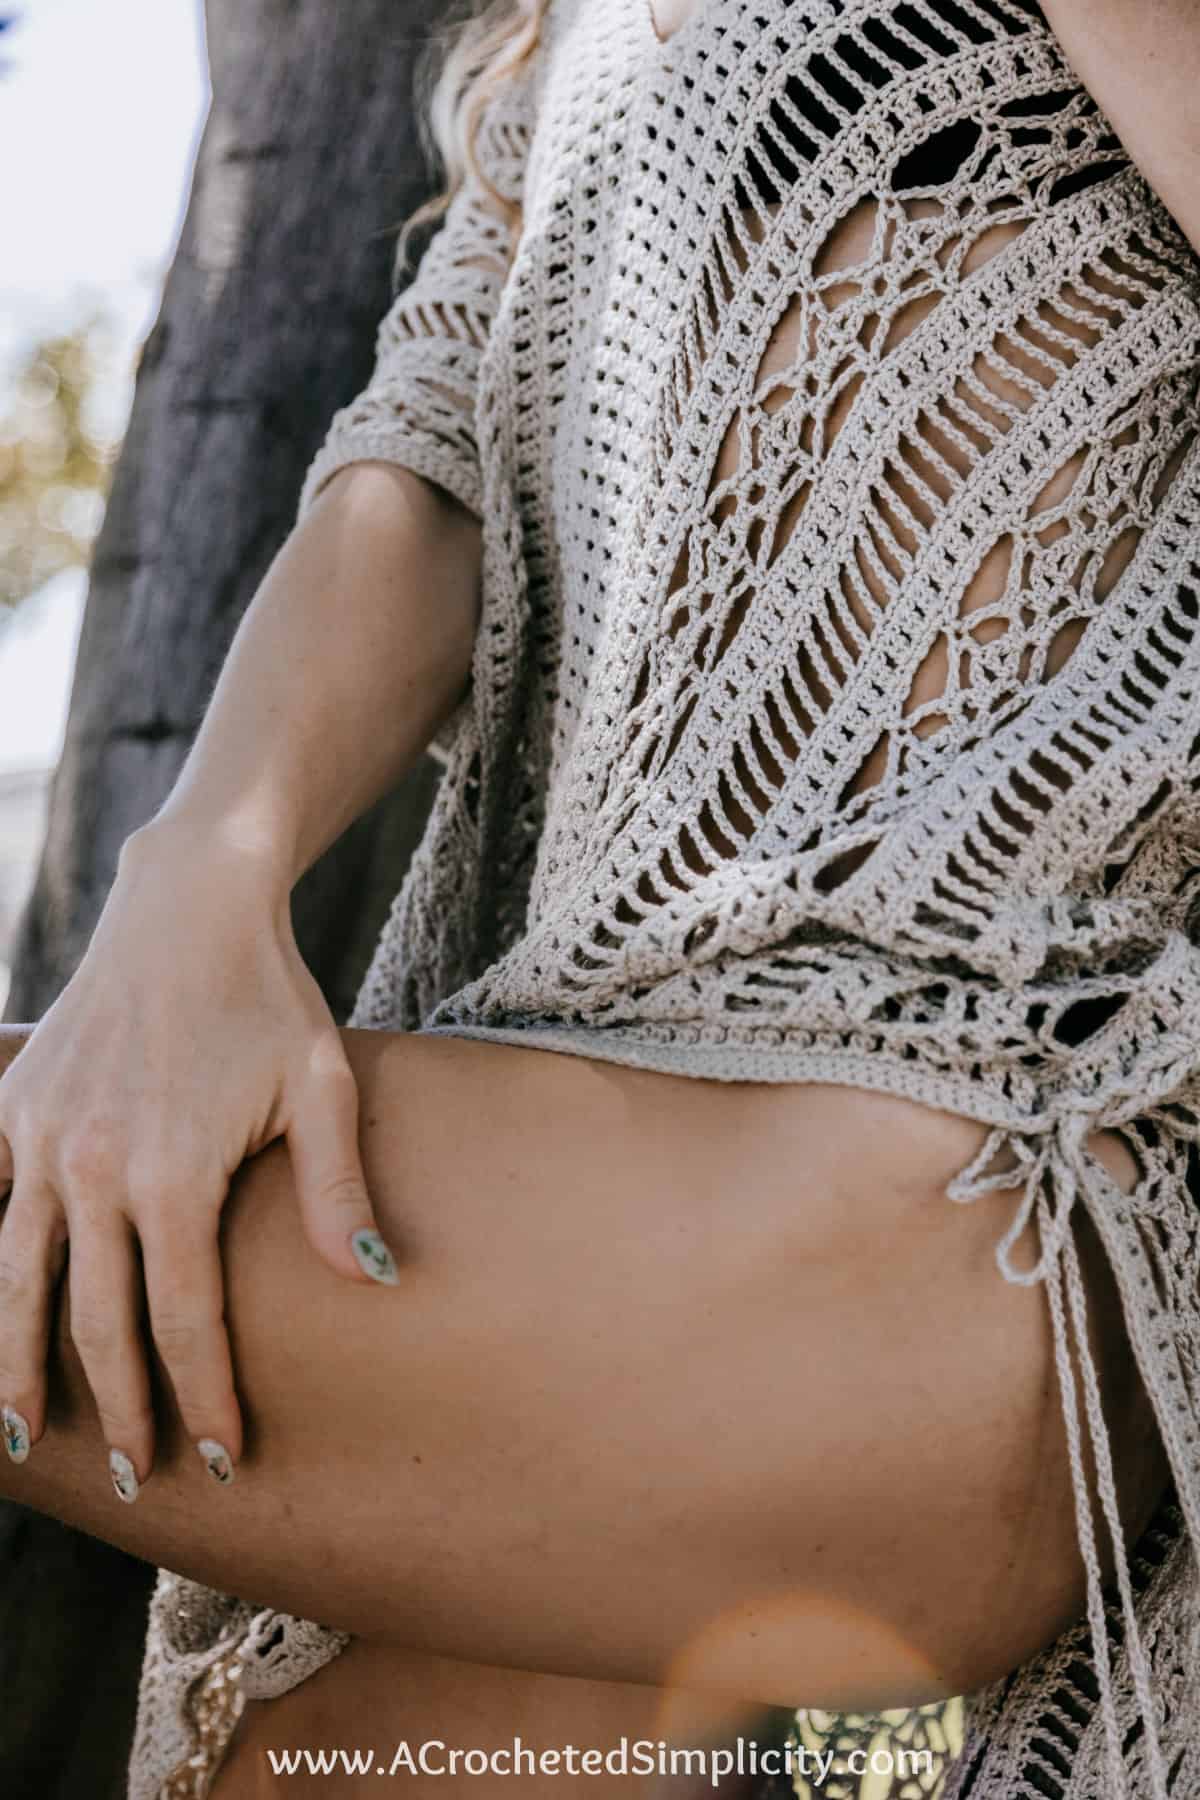
You’ll then crochet a simple edging around the perimeter, crochet simple ties, and use the ties to partially lace the sides of the beach cover up.
💡 Crochet Cover-Up Tips
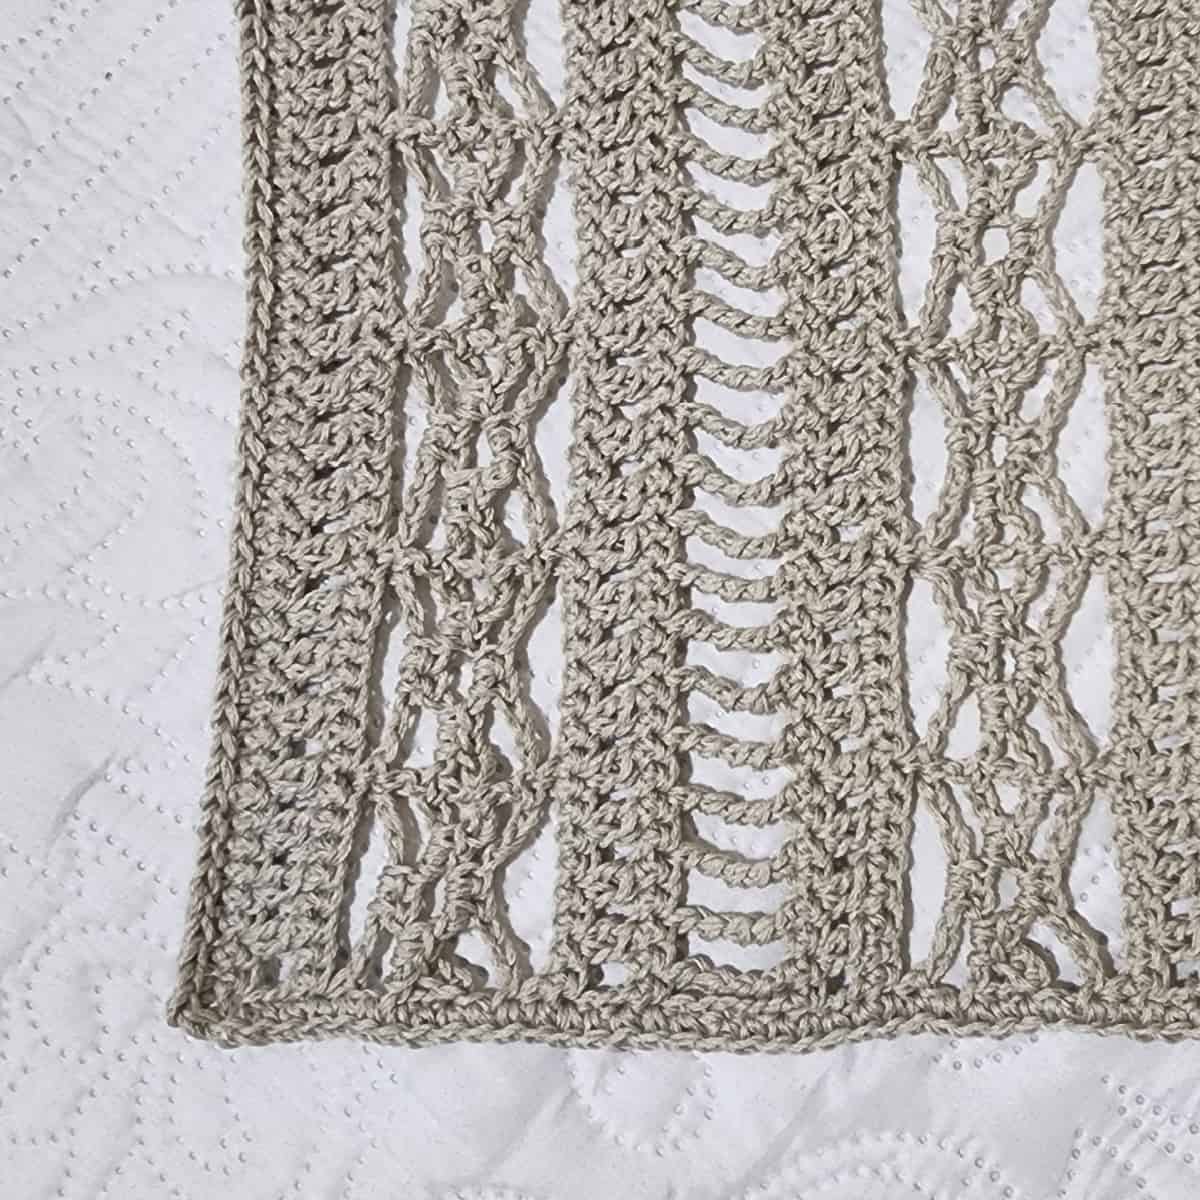
- Block your panels to give the openwork stitches a polished finish.
- Use cotton yarn for breathability and comfort.
- Make it longer for extra coverage or shorter for a chic mini length.
- Add tassels or fringe to the hem for a boho touch.
How to Get The
Summer Lovin’ Crochet Cover-Up Pattern
Option 1: Scroll down for the free crochet swimsuit cover-up pattern right here in this blog post.
Option 2: Purchase the ad-free printable PDF from one of my shops:
Choosing Which Size to Crochet
As a general rule, crochet beach cover up patterns have much more positive ease built-in than most other crochet garments because they are designed to be worn very oversized.
Because of the amount of positive ease built into this design, I’ve grouped sizes together as shown in the size charts below.
To choose your size, look over the size charts below.
- Start by choosing the size from the chart that fits your chest size.
- Then to confirm this is the right size for you, measure the finished width dimension across the front of your chest and down your arms.
- If the finished width measurement is wider than you prefer, simple choose a smaller size from the chart.
Kid’s Size Chart
Note: Finished Width & Finished Length are of a completed crochet swim cover up laid flat.
| Size | Fits Size | Fits Chest | Finished Width | Finished Length | Yardage |
| Toddler | 3T – 5T | 21″ – 23″ | 20″ | 22″ | 1,000 yards |
| Child Small | 6 – 9 years | 24″ – 25″ | 22″ | 28″ | 1,300 yards |
| Child Large | 10 – 12 years | 26″ – 28″ | 28″ | 32″ | 1,800 yards |
Adult’s Size Chart
Note: Finished Width & Finished Length are of a completed crochet beach cover up laid flat.
| Size | Fits Chest | Finished Width | Finished Length | Yardage |
| XS / S / M | 28″ – 38″ | 30″ | 34″ | 2,125 yards |
| L / XL / 2XL | 40″ – 50″ | 36″ | 35″ | 2,625 yards |
| 3XL / 4XL / 5XL | 52″ – 62″ | 44″ | 36″ | 2,950 yards |
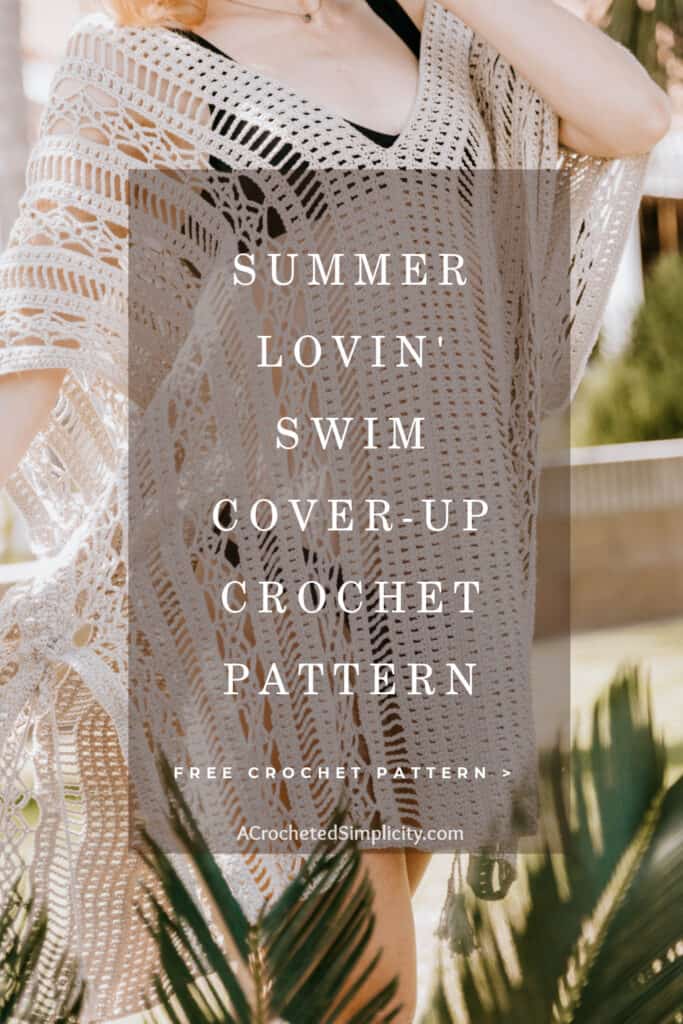
Yarn
Made using Lion Brand Collection Cotton Bamboo Linen, you’ll feel like you’re wrapped in a little piece of heaven when wearing the Summer Lovin’ Crochet Swim Cover-Up.
Lion Brand Collection Cotton Bamboo Linen is a craft yarn council #2, sport weight yarn comprised of cotton, bamboo, and linen (as you may have guessed by the name). The combination of these three natural fibers give this yarn a unique softness, beautiful drape, and durability.
I chose this yarn because it’s a sport weight and the fibers are perfect for a crochet cover up, but another great feature is that it’s machine washable! That’s a win-win!
Yarn Substitutions
Another sport weight yarn can be substituted as long as you meet gauge.
I personally recommend a sport weight yarn that is a cotton blend. I feel they are less dense than 100% cotton yarns. The more dense the yarn, the heavier the crochet beach cover up will be when it gets wet.
Summer Lovin’ Swimsuit Cover Up – Free Crochet Cover Up Pattern
The crochet swimsuit cover up pattern is free below, but if you love to work offline, I’ve got a couple other great options for you.
Purchase the ad-free, printable PDF, including all photo tutorials, on Ravelry, or on Etsy (aff).
Purchase the crochet swim cover up kit HERE! (aff) Lion Brand has a full kit of the Summer Lovin’ Swim Cover Up, available on their website. The kit includes your choice of colors and a digital copy of the pattern.
This post contains affiliate links.
Materials
- Yarn: Sport Weight / 2 / Yarn, (Lion Brand Collection Cotton Bamboo Linen in Shale was used for the samples in the photos) (50 g / 1.75oz / 164 yards / 150 m / 40% cotton / 35% bamboo / 25% linen).
- Yardage: See Size Charts Above
- Crochet Hooks: E/3.50mm; D/3.25mm; or size needed to obtain gauge (My favorite crochet hooks are the Clover Amour Crochet Hooks, I’ve never had an ache in my hand since switching).
- Locking Stitch Markers
- Scissors
- Yarn Needle
Abbreviations (US Terms)
- ch(s): chain(s)
- sl st(s): slip stitch(es)
- st(s): stitch(es)
- yo: yarn over
- sp: space
- sc: single crochet
- dc: double crochet
- 2 dc-cl: 2 double crochet cluster
- Trtr: triple treble crochet
- Alt-dc: alternate double crochet
- Alt-Trtr: alternate triple treble
- Join with a standing single crochet
- SM: stitch marker
- Rep: repeat
- RS: Right Side
Experience Level
- Easy to Intermediate
Gauge
- With 3.25mm in sc: 33 sts = 6″
- See swatch instructions below.
Sizes
- Kids: Toddler, Child Small, Child Large
- Adult: (XS / S / M); (L / XL / 2XL); (3XL / 4XL / 5XL)
- See Charts Above
Special Stitches
- 2 Double Crochet Cluster (2dc-cl): Yo, insert hook where indicated, yo, pull up a loop, yo, pull thru 2 loops, yo, insert hook in same st, yo, pull up a loop, yo, pull thru 2 loops, yo, pull thru remaining loops.
- Alternate Double Crochet (alt-dc): After turning your work, do not ch, instead, insert your hook into the first st, yo, pull up a loop, yo, pull thru both loops, insert your hook between the legs of the st just made, yo, pull up a loop, yo, pull through one loop, yo, pull thru remaining loops.
- Alternate Triple Treble Crochet (alt-Trtr): After turning your work, do not ch, instead, insert your hook into the first st, yo, pull up a loop, yo, pull thru both loops, (insert your hook between the legs of the st just made, yo, pull up a loop, yo, pull thru both loops) 4 times, insert your hook between the legs of the st just made, yo, pull up a loop, yo, pull through one loop, yo, pull thru remaining loops.
- Triple Treble Crochet (Trtr): yo 4 times, insert hook into designated stitch, yo, pull up a loop, (yo, pull thru 2 loops) 5 times.
- Join with a standing single crochet: begin with a slip knot on your hook, insert your hook into the stitch or space indicated, yo, pull up a loop, yo and draw thru both loops on hook.
Pattern Notes
- Turning chains are not included in stitch count, unless noted otherwise.
- The first stitch of each row is worked into the same stitch as the beginning chain, unless noted otherwise.
- Yarn Notes: Lion Brand Collection Cotton Bamboo Linen in Shale was used for the samples shown in the photos. Another comparable worsted sport yarn may be used as long as gauge is met.
- Lion Brand Cotton Bamboo Linen (50 g / 1.75oz / 164 yards / 150 m / 40% cotton / 35% bamboo / 25% linen).
- Yardage: See the size charts above.
- Changes for Sizes are Written as Follows:
- Kid Sizes: Toddler (Child Small, Child Large)
- Adult Sizes: XS/S/M (L/XL/2XL, 3XL/4XL/5XL)
- Construction: First, you’ll create two, identical, rectangular panels. These two panels are then seamed together, leaving a neck opening. You’ll then add a simple edging around the perimeter, crochet simple ties, and use the ties to partially lace the sides.
- Alternate Option: There is an alternate option to the side ties shown in a photo at the end of the post.
Swatch Instructions
Crochet a small swatch to check gauge so your crochet beach cover up comes out the correct size.
Row 1 (RS): With a 3.50mm crochet hook and yarn, ch 34, switch to a 3.25mm crochet hook, working in the back humps of the foundation ch, sc in the 2nd ch from your hook, sc in each ch across. Turn. (33 sts)
Gauge Check: The width of your completed Row 1 should be approximately 6″.
Row 2: Ch 1, sc in the first st and in each st across. Turn. (33 sts)
Row 3: Alt-dc in the first st, ch 1, skip the next st, (2dc-cl in the next st, ch 1, skip the next st) rep from ( to ) across to the last st, dc in the last st. Turn. (17 sts + 16 ch-1’s)
Row 4: Ch 1, sc in the first st and in each st across. Turn. (33 sts)
Row 5: Ch 1, sc in the first st, (ch 7, skip each of the next 7 sts, sc in the next st) rep from ( to ) across. Turn. (5 sc + 4 ch-7’s)
Row 6: Alt-dc in the first st, (ch 4, 2 sc in the next ch-7 sp, ch 4, dc in the next sc) rep from ( to ) across. Turn. (13 sts + 8 ch-4’s)
Row 7: Alt-dc in the first st, (ch 2, 2 sc in the next ch-4 sp, ch 3, skip each of the next 2 sc, 2 sc in the next ch-4 sp, ch 2, dc in the next dc) rep from ( to ) across. Turn. (21 sts + 8 ch-2’s + 4 ch-3’s)
Row 8: Alt-dc in the first st, (ch 3, skip each of the next 2 sc, 2 sc in the next ch-3 sp, ch 3, skip each of the next 2 sc, dc in the next dc) rep from ( to ) across. Turn. (13 sts + 8 ch-3’s)
Row 9: Ch 1, sc in the first st, (ch 7, skip each of the next 2 sc, sc in the next dc) rep from ( to ) across. Turn. (5 sc + 4 ch-7’s)
Row 10: Ch 1, sc in the first st and in each st across. Turn. (33 sts)
Row 11: Alt-dc in the first st, ch 1, skip the next st, (2dc-cl in the next st, ch 1, skip the next st) rep from ( to ) across to the last st, dc in the last st. Turn. (17 sts + 16 ch-1’s)
Row 12: Ch 1, sc in the first st and in each st across. Turn. (33 sts)
Row 13: Alt-Tr-tr in the first st, Tr-tr in the next st, ( ch 1, skip the next st, Tr-tr in the next st) rep from ( to ) across to the last st, Tr-tr in the last st. Turn. (17 sts + 16 ch-1’s)
Row 14: Ch 1, sc in the first st and in each st across. Turn. (33 sts)
Row 15: Alt-dc in the first st, ch 1, skip the next st, (2dc-cl in the next st, ch 1, skip the next st) rep from ( to ) across to the last st, dc in the last st. Turn. (17 sts + 16 ch-1’s)
Row 16: Ch 1, sc in the first st and in each st across. Turn. (33 sts)
Gauge Check: The height of your completed Rows 1 – 16 should be approximately 4.75″.
Fasten off. Completed swatch should be 6″ W x 4.75″ H.
Kid Size Instructions
Cover-Up Panel (Make 2)
Row 1 (RS): With a 3.50mm crochet hook and yarn, ch 242 (306, 354), switch to a 3.25mm crochet hook, working in the back humps of the foundation ch, sc in the 2nd ch from your hook, sc in each ch across. Turn. (241, 305, 353 sts)
Gauge Check: The width of your completed Row 1 should be approximately 44″ (56″, 64″).
Row 2: Ch 1, sc in the first st and in each st across. Turn. (241, 305, 353 sts)
Row 3: Alt-dc in the first st, ch 1, skip the next st, (2dc-cl in the next st, ch 1, skip the next st) rep from ( to ) across to the last st, dc in the last st. Turn. (121 sts + 120 ch-1’s) (153 sts + 152 ch-1’s) (177 sts + 176 ch-1’s)
Row 4: Ch 1, sc in the first st and in each st across. Turn. (241, 305, 353 sts)
Row 5: Ch 1, sc in the first st, (ch 7, skip each of the next 7 sts, sc in the next st) rep from ( to ) across. Turn. (31 sc + 30 ch-7’s) (39 sc + 38 ch-7’s) (45 sc + 44 ch-7’s)
Row 6: Alt-dc in the first st, (ch 4, 2 sc in the next ch-7 sp, ch 4, dc in the next sc) rep from ( to ) across. Turn. (91 sts + 60 ch-4’s) (115 sts + 76 ch-4’s) (133 sts + 88 ch-4’s)
Row 7: Alt-dc in the first st, (ch 2, 2 sc in the next ch-4 sp, ch 3, skip each of the next 2 sc, 2 sc in the next ch-4 sp, ch 2, dc in the next dc) rep from ( to ) across. Turn. (151 sts + 60 ch-2’s + 30 ch-3’s) (191 sts + 76 ch-2’s + 38 ch-3’s) (221 sts + 88 ch-2’s + 44 ch-3’s)
Row 8: Alt-dc in the first st, (ch 3, skip each of the next 2 sc, 2 sc in the next ch-3 sp, ch 3, skip each of the next 2 sc, dc in the next dc) rep from ( to ) across. Turn. (91 sts + 60 ch-3’s) (115 sts + 76 ch-3’s) (133 sts + 88 ch-3’s)
Row 9: Ch 1, sc in the first st, (ch 7, skip each of the next 2 sc, sc in the next dc) rep from ( to ) across. Turn. (31 sc + 30 ch-7’s) (39 sc + 38 ch-7’s) (45 sc + 44 ch-7’s)
Row 10: Ch 1, sc in the first st and in each st across. Turn. (241, 305, 353 sts)
Row 11: Alt-dc in the first st, ch 1, skip the next st, (2dc-cl in the next st, ch 1, skip the next st) rep from ( to ) across to the last st, dc in the last st. Turn. (121 sts + 120 ch-1’s) (153 sts + 152 ch-1’s) (177 sts + 176 ch-1’s)
Row 12: Ch 1, sc in the first st and in each st across. Turn. (241, 305, 353 sts)
Row 13: Alt-Tr-tr in the first st, Tr-tr in the next st, ( ch 1, skip the next st, Tr-tr in the next st) rep from ( to ) across to the last st, Tr-tr in the last st. Turn. (121 sts + 120 ch-1’s) (153 sts + 152 ch-1’s) (177 sts + 176 ch-1’s)
Row 14: Ch 1, sc in the first st and in each st across. Turn. (241, 305, 353 sts)
Row 15: Alt-dc in the first st, ch 1, skip the next st, (2dc-cl in the next st, ch 1, skip the next st) rep from ( to ) across to the last st, dc in the last st. Turn. (121 sts + 120 ch-1’s) (153 sts + 152 ch-1’s) (177 sts + 176 ch-1’s)
Row 16: Ch 1, sc in the first st and in each st across. Turn. (241, 305, 353 sts)
Gauge Check: The height of your completed Rows 1 – 16 should be approximately 4.75″.
Do not fasten off. Continue on to the instructions for the size you’re making.
Toddler
Rows 17 – 28: Rep Rows 5 – 16.
Do not fasten off. Continue on to the Ending Rows.
Child Small
Rows 17 – 28: Rep Rows 5 – 16.
Do not fasten off. Continue on to the Ending Rows.
Child Large
Rows 17 – 28: Rep Rows 5 – 16.
Rows 29 – 40: Rep Rows 5 – 16.
Do not fasten off. Continue on to the Ending Rows.
Ending Rows – All Kids Sizes
Row 1: Alt-dc in the first st, ch 1, skip the next st, (2dc-cl in the next st, ch 1, skip the next st) rep from ( to ) across to the last st, dc in the last st. Turn. (241, 305, 353 sts)
Row 2: Ch 1, sc in the first st and in each st across. Turn. (241, 305, 353 sts)
Size Toddler: Rows 3 – 4: Rep Rows 1 – 2.
Size Child Small: Rows 3 – 6: Rep Rows 1 – 2.
Size Child Large: Rows 3 – 4: Rep Rows 1 – 2.
Fasten off. Weave in ends. Complete the second panel. Block panels to dimensions below. Then continue on to Seam Panels below (past the Adult Panel instructions).
If you have never blocked a crochet project before, check out my post on 3 blocking methods!
Kid’s Finished Panel Sizes
- Toddler: 44″ W x 10″ H
- Child Small: 56″ W x 11″ H
- Child Large: 64″ W x 14″ H
Adult Size Instructions
Cover-Up Panel (Make 2)
Row 1 (RS): With a 3.50mm crochet hook and yarn, ch 378 (386, 394), switch to a 3.25mm crochet hook, working in the back humps of the foundation ch, sc in the 2nd ch from your hook, sc in each ch across. Turn. (377, 385, 393 sts)
Gauge Check: The width of your completed Row 1 should be approximately 68.5″ (70″, 71.5″).
Row 2: Ch 1, sc in the first st and in each st across. Turn. (377, 385, 393 sts)
Row 3: Alt-dc in the first st, ch 1, skip the next st, (2dc-cl in the next st, ch 1, skip the next st) rep from ( to ) across to the last st, dc in the last st. Turn. (189 sts + 188 ch-1’s) (193 sts + 192 ch-1’s) (197 sts + 196 ch-1’s)
Row 4: Ch 1, sc in the first st and in each st across. Turn. (377, 385, 393 sts)
Row 5: Ch 1, sc in the first st, (ch 7, skip each of the next 7 sts, sc in the next st) rep from ( to ) across. Turn. (48 sc + 47 ch-7’s) (49 sc + 48 ch-7’s) (50 sc + 49 ch-7’s)
Row 6: Alt-dc in the first st, (ch 4, 2 sc in the next ch-7 sp, ch 4, dc in the next sc) rep from ( to ) across. Turn. (142 sts + 94 ch-4’s) (145 sts + 96 ch-4’s) (148 sts + 98 ch-4’s)
Row 7: Alt-dc in the first st, (ch 2, 2 sc in the next ch-4 sp, ch 3, skip each of the next 2 sc, 2 sc in the next ch-4 sp, ch 2, dc in the next dc) rep from ( to ) across. Turn. (236 sts + 94 ch-2’s + 47 ch-3’s) (241 sts + 96 ch-2’s + 48 ch-3’s) (246 sts + 98 ch-2’s + 49 ch-3’s)
Row 8: Alt-dc in the first st, (ch 3, skip each of the next 2 sc, 2 sc in the next ch-3 sp, ch 3, skip each of the next 2 sc, dc in the next dc) rep from ( to ) across. Turn. (142 sts + 94 ch-3’s) (145 sts + 96 ch-3’s) (148 sts + 98 ch-3’s)
Row 9: Ch 1, sc in the first st, (ch 7, skip each of the next 2 sc, sc in the next dc) rep from ( to ) across. Turn. (48 sc + 47 ch-7’s) (49 sc + 48 ch-7’s) (50 sc + 49 ch-7’s)
Row 10: Ch 1, sc in the first st and in each st across. Turn. (377, 385, 393 sts)
Row 11: Alt-dc in the first st, ch 1, skip the next st, (2dc-cl in the next st, ch 1, skip the next st) rep from ( to ) across to the last st, dc in the last st. Turn. (189 sts + 188 ch-1’s) (193 sts + 192 ch-1’s) (197 sts + 196 ch-1’s)
Row 12: Ch 1, sc in the first st and in each st across. Turn. (377, 385, 393 sts)
Row 13: Alt-Tr-tr in the first st, Tr-tr in the next st, ( ch 1, skip the next st, Tr-tr in the next st) rep from ( to ) across to the last st, Tr-tr in the last st. Turn. (189 sts + 188 ch-1’s) (193 sts + 192 ch-1’s) (197 sts + 196 ch-1’s)
Row 14: Ch 1, sc in the first st and in each st across. Turn. (377, 385, 393 sts)
Row 15: Alt-dc in the first st, ch 1, skip the next st, (2dc-cl in the next st, ch 1, skip the next st) rep from ( to ) across to the last st, dc in the last st. Turn. (189 sts + 188 ch-1’s) (193 sts + 192 ch-1’s) (197 sts + 196 ch-1’s)
Row 16: Ch 1, sc in the first st and in each st across. Turn. (377, 385, 393 sts)
Gauge Check: The height of your completed Rows 1 – 16 should be
approximately 4.75″.
Do not fasten off. Continue on to the instructions for the size you’re making.
Size XS / S / M
Rows 17 – 28: Rep Rows 5 – 16.
Rows 29 – 40: Rep Rows 5 – 16.
Do not fasten off. Continue on to the Ending Rows.
Size L / XL / 2XL
Rows 17 – 28: Rep Rows 5 – 16.
Rows 29 – 40: Rep Rows 5 – 16.
Rows 41 – 52: Rep Rows 5 – 16.
Do not fasten off. Continue on to the Ending Rows.
Size 3XL / 4XL / 5XL
Rows 17 – 28: Rep Rows 5 – 16.
Rows 29 – 40: Rep Rows 5 – 16.
Rows 41 – 52: Rep Rows 5 – 16.
Rows 53 – 64: Rep Rows 5 – 16.
Do not fasten off. Continue on to the Ending Rows.
Ending Rows – All Adult Sizes
Row 1: Alt-dc in the first st, ch 1, skip the next st, (2dc-cl in the next st, ch 1, skip the next st) rep from ( to ) across to the last st, dc in the last st. Turn. (377, 385, 393 sts)
Row 2: Ch 1, sc in the first st and in each st across. Turn. (377, 385, 393 sts)
Size XS / S / M: Rows 3 – 6: Rep Rows 1 – 2.
Size L /XL / 2XL: Rows 3 – 4: Rep Rows 1 – 2.
Size 3XL / 4XL / 5XL: Rows 3 – 4: Rep Rows 1 – 2.
Fasten off. Weave in ends. Complete the second panel. Block panels to dimensions below. Then continue on to Seam Panels.
If you have never blocked a crochet project before, check out my post on 3 blocking methods!
Adult Finished Panel Sizes
- XS / S / M: 68.5″ W x 15″ H
- L / XL / 2XL: 70″ W x 18″ H
- 3XL / 4XL / 5XL: 71.5″ W x 22″ H
Seam Panels (All Sizes)
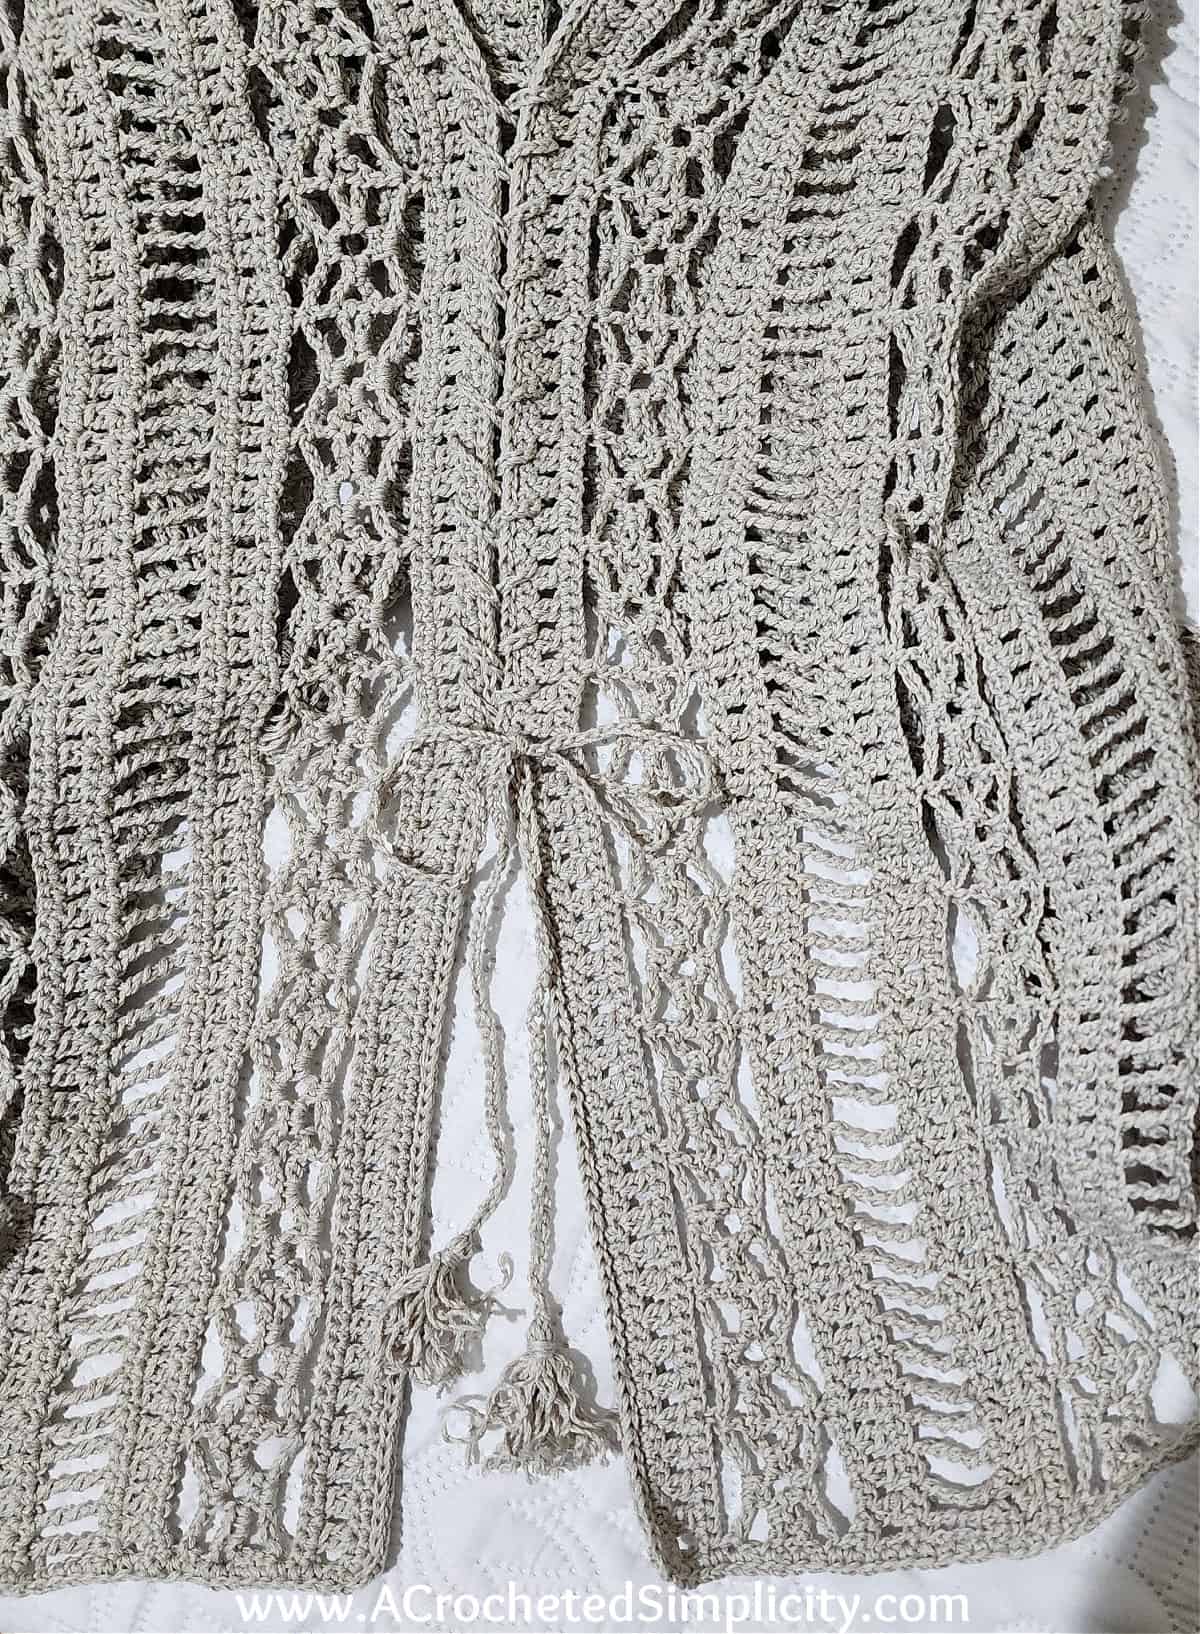
Step 1: Lay panels on a flat surface with the RS facing up and the last row of each panel touching. (See photo below, but note that these panels were not blocked yet.)
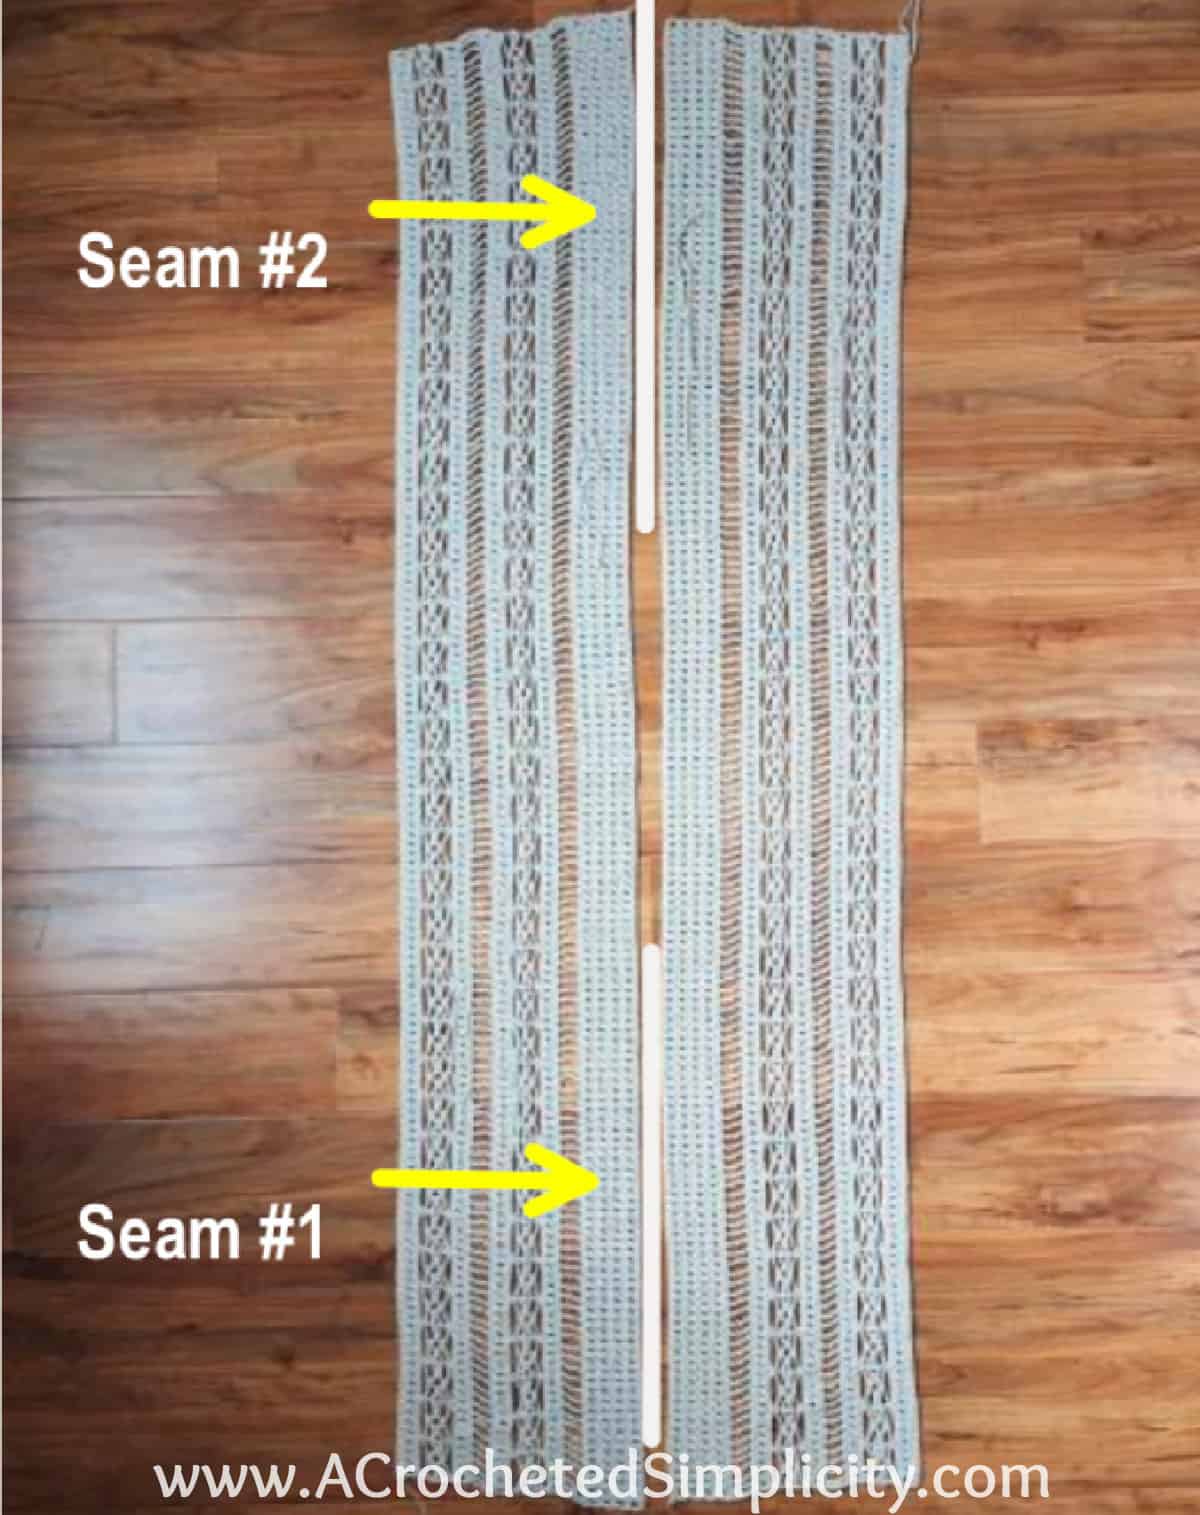
| Size | Seam #1 | Seam #2 |
| Toddler | 18″ | 18″ |
| Child Small | 21″ | 25″ |
| Child Large | 23″ | 29″ |
| XS / S / M | 21″ | 31″ |
| L / XL / 2XL | 22″ | 32″ |
| 3XL / 4XL / 5XL | 23″ | 33″ |
Step 2: Using a yarn needle and length of yarn at least twice the seam length, whipstitch the panels together using the seam lengths from the chart above, for the size you’re making.
After creating both seams, weave in all ends. Continue on to Edging.
Edging (All Sizes)
Round 1 (RS): With yarn & 3.25mm crochet hook, join yarn with a standing sc in any corner so that you can begin working along the short edge of the cover-up, sc evenly across the short edge of the cover-up (st count is not crucial), rotate and sl st in each st along the long edge of the cover-up until you reach the next corner, rotate and sc evenly across the next short edge, rotate and sl st in each st along the last long edge of the cover-up. Stitch count is not crucial.
Fasten off. Weave in ends. Continue on to Ties.
Ties (Make 2)
Row 1: With yarn & a 3.50mm crochet hook, ch until you have a 60″ long ch. Fasten off. Repeat for the second tie.
Create Side Seams with Ties
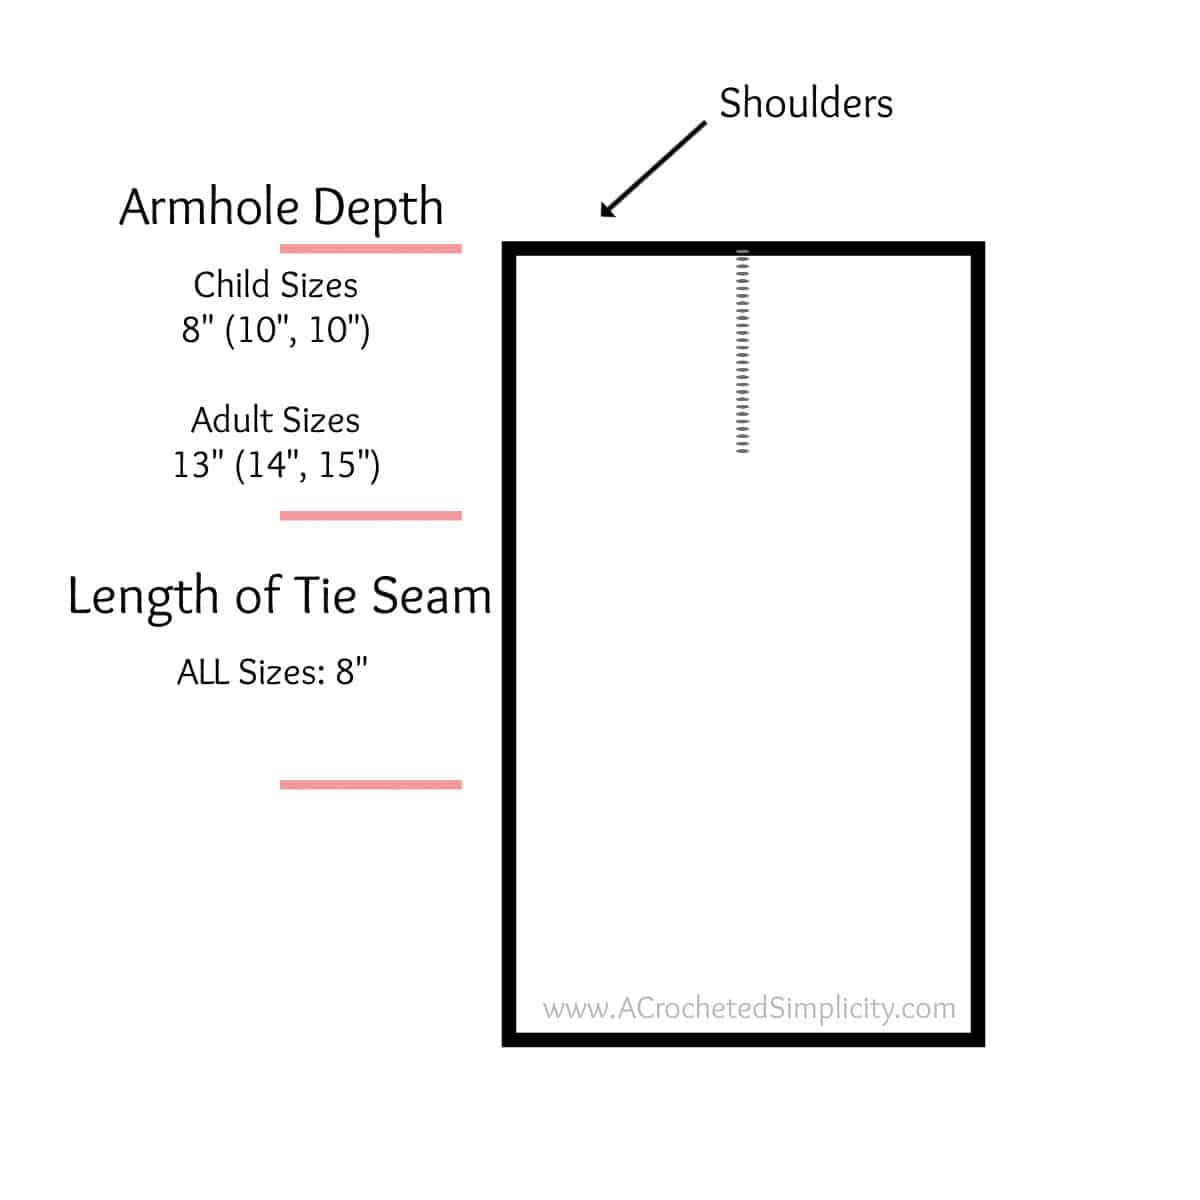
Refer to the photo above and the graphic below, while creating the side seams.
Step 1: Fold your swim cover-up in half.
Step 2: Measure down from the shoulder, the Armhole Depth listed in the graphic to the below, for the size you’re making.
Step 3: Use a yarn needle and a tie and beginning at the bottom of the armhole opening, lace the side of the cover-up like a shoe, working through the stitches from Row 3. Continue to lace the sides together and create a side seam that is approximately 8″ long.
Alternate Tie Option
Michelle made a tie for the waist (instead of the sides). She wove it through the center of the cover-up (not around the entire thing).
*There are no side seams with this option.
Frequently Asked Questions – FAQ’s
What is a crochet cover up?
A crochet cover up is a lightweight, fashionable summer wardrobe essential that has several purposes.
Many wear them over a swimsuit for extra coverage while hanging out in the sun or for walking from one point to the next. Others wear them to enhance their summer look. Some wear them for both reasons.
Most simply wear them as a lightweight layer to keep the sun off, without overheating.
What is the best yarn for a crochet beach cover up?
The best yarn to use for a crochet beach cover up is a cotton or a cotton blend that includes either bamboo, linen, or both. These are yarns that will breathe in the hot summer sun and not make you overheat.
Two yarns to avoid using for a crochet swim cover up are acrylic and wool.
Acrylic yarns will really soak up the water, get very heavy, and take a really long time to dry out.
How do you crochet a cover up?
If you’ve been wanting to crochet a garment, but have been hesitant, a crochet swimsuit cover up is the perfect place to start.
There are many different crochet swimsuit cover up patterns out there, all made using different shapes, but the most common is made using only two rectangles that you seam together.
Some styles require you to make a tie for around the waist and others have ties to lace up the sides. Some are simply crochet pullovers that are oversized and airy.
I made it!? Now what?
Pin this post!: Save this crochet tank top pattern to your Pinterest boards so that you can come back and make it again.
Leave a comment below: We love to hear your feedback.
Share Your Finished Projects on Facebook or Instagram: I love to see your finished projects! Share with us on social media and tag me @acrochetedsimplicity or use the hashtag #ACrochetedSimplicity so I can find your posts.
Join us in the Facebook Community Group!
Come share your finished projects with us in the A Crocheted Simplicity Crochet Community Group on Facebook. Join us for fun community events such as crochet alongs, join in on crochet conversations, ask questions, get advice, and share your love for crochet!

More Free Crochet Summer Top Patterns I Think You’ll Love
- Chantilly Summer Crochet Top
- Lakelyn Crochet Tank Top
- Lakeshore Crochet Tank Top
- Honeycomb Mesh Crochet Top
- Summer Splendor Crochet Cardigan
- Wandering Free Crochet Summer Top
More Summer Crochet Top Patterns
Are you looking for more crochet summer top patterns free? We have several more patterns for women’s crochet tops, including tops, cardigans, and beach cover-ups.
We also have a few premium summer crochet top patterns as well.
Very Pretty.
Thank you.
Laura
You’re welcome!
THANK YOU FOR A GREAT PATTERN. i ORDER THIS FROM LOVE CRAFT.
You’re welcome! I hope you enjoy it!
this is absolutely stunning as are all your patterns 🤗 thank you for sharing your beautiful talent 🤗💐
is there anyway to adjust to use weight 3 yarn?
Hi Erin,
If you’re comfortable using your own gauge to adjust a pattern, yes, you can adjust this one to use a DK/3 weight yarn, if that’s what you prefer. I recommend using the included gauge swatch instructions, along with the yarn and hook size you’d like to use and make a swatch. Then refer to the pattern where I’ve added “Gauge Check” info to find the measurement you’ll need for the overall width of the panel. Then you can use the swatch you made to help figure out the length of your foundation chain. As far as the height of the panels, you can simply work fewer rows that what’s written.
Happy Crocheting,
Jennifer
Hello, this pattern is beautiful, but I was wondering if I could use 100% animal fiber instead of cotton?
Thank you
Carol
Hi Carol,
I chose a cotton blend because it’s a summer garment, but you use whatever fiber you’d like for yours as long as you’re happy with it. 🙂
Happy Crocheting,
Jennifer