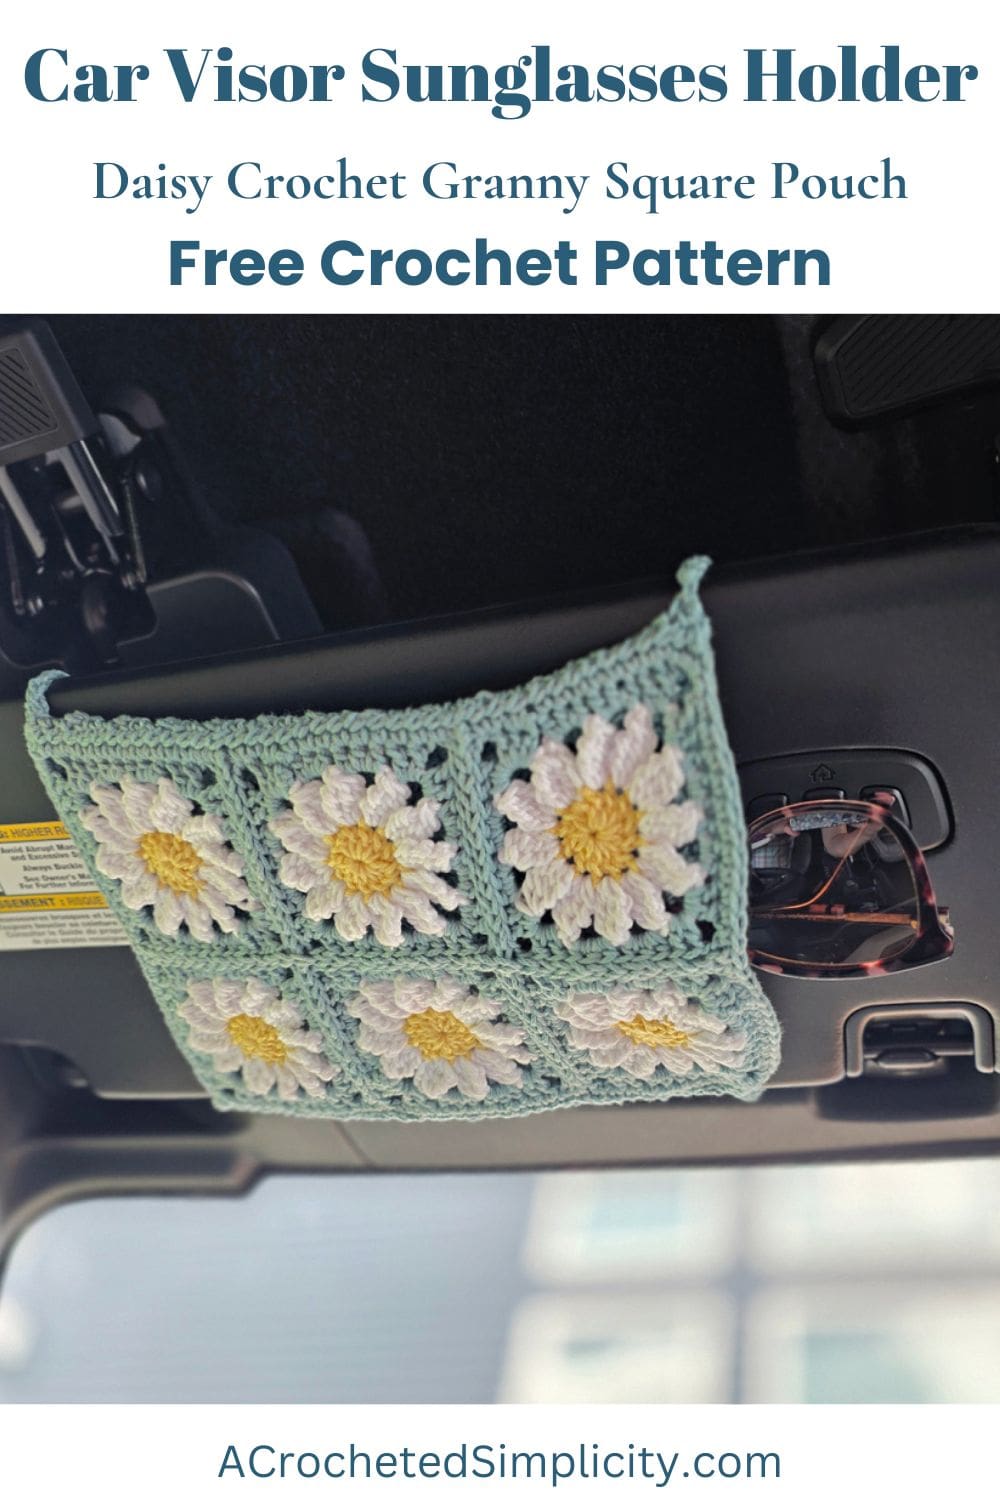
Daisy Crochet Car Visor Sunglasses Holder
Are you always searching around for your sunglasses when you sit in the car and the sun is beating down on you? You won’t have to worry about that anymore if you have a crochet car visor sunglasses holder on hand.
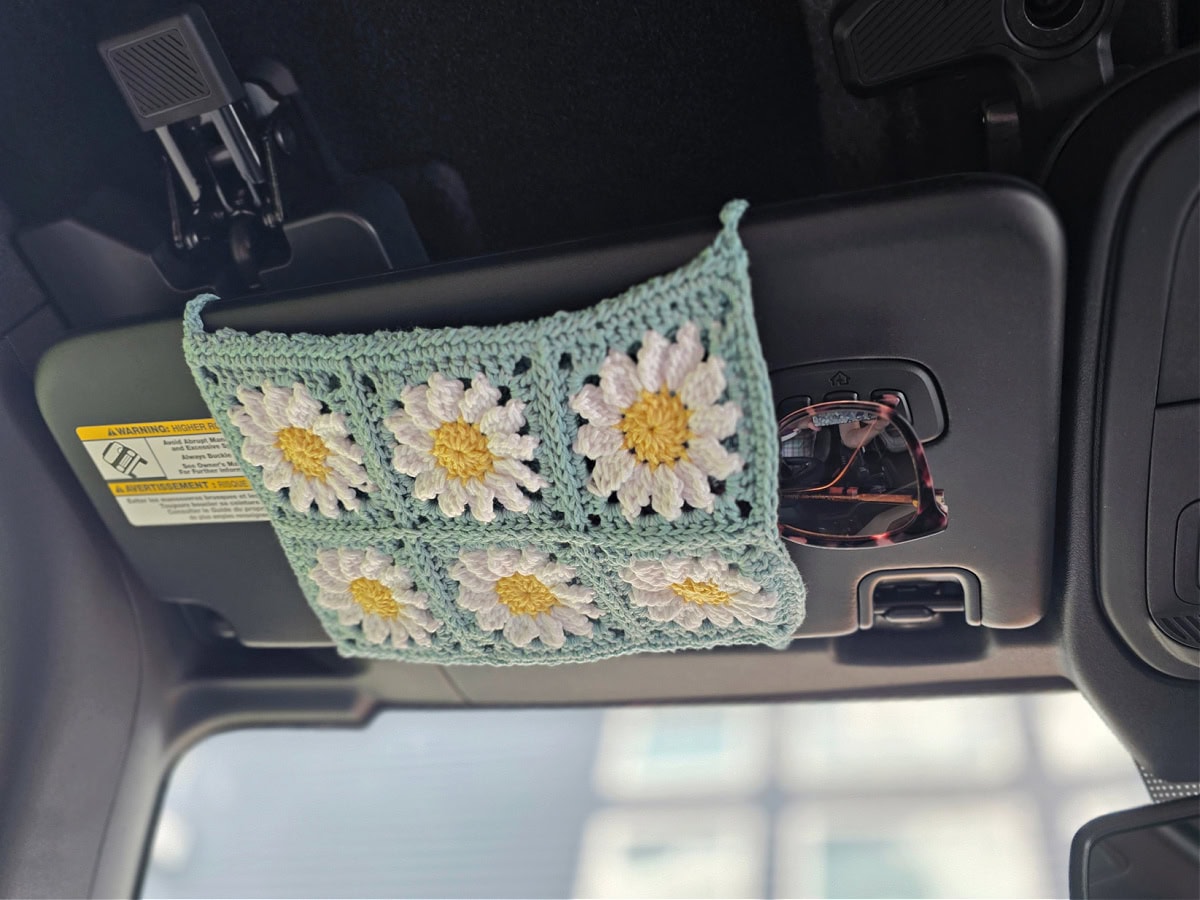
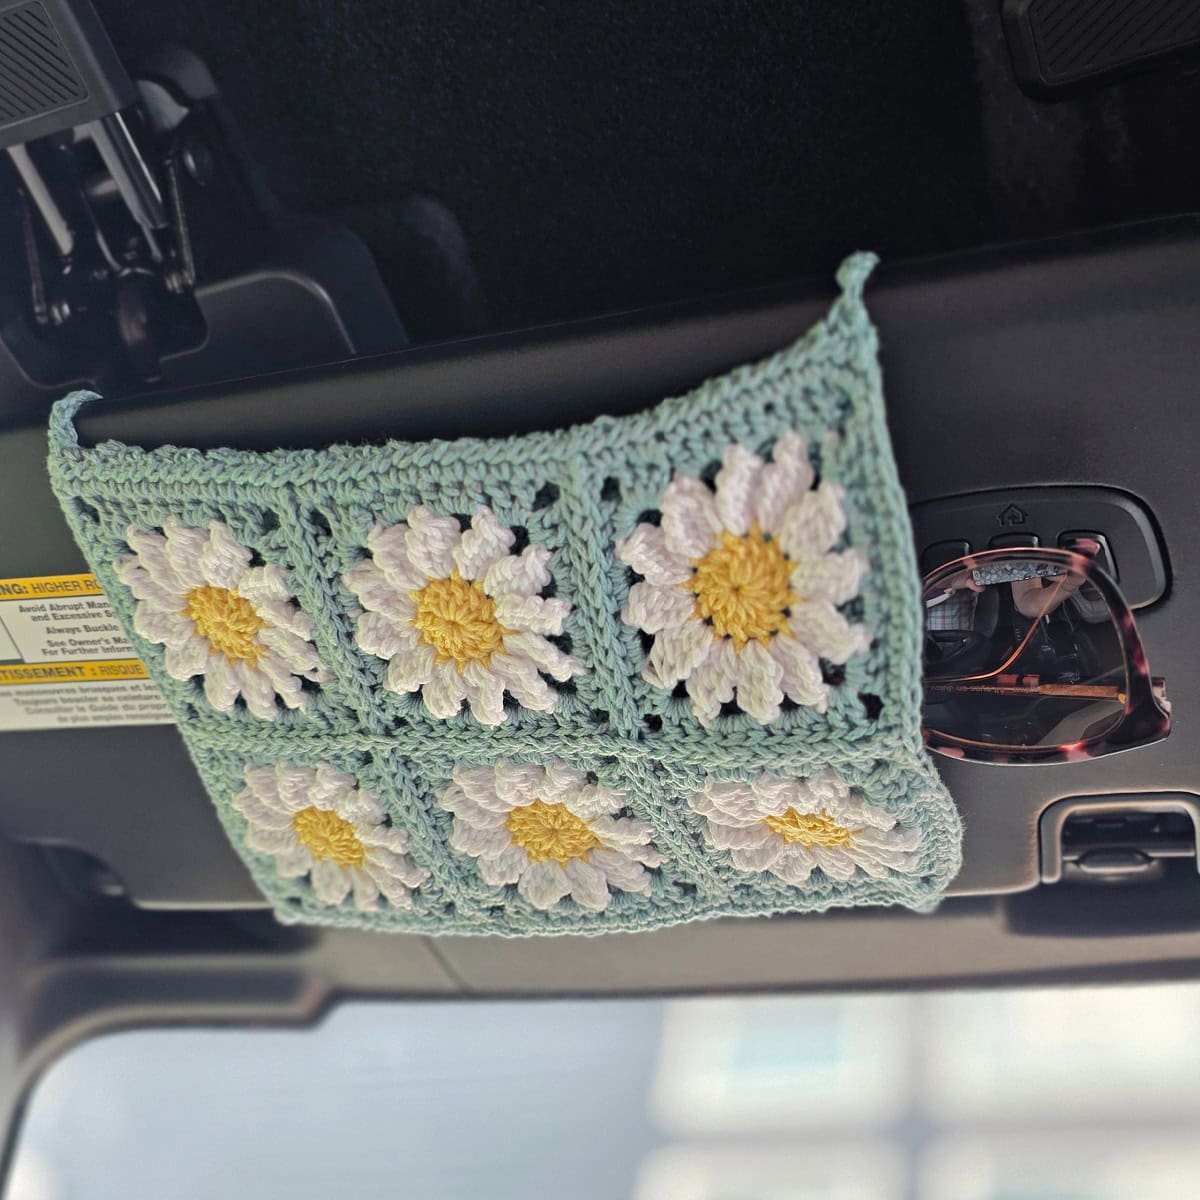
Attach this to your car’s sun visor to add a pop of color and personality to your car while keeping your glasses and sunglasses in one place too. It’s a win-win!
You’ll find the free crochet car visor sunglasses holder pattern in the post below, or you can find an ad-free printable PDF (that includes all photo tutorials), on Ravelry, or Etsy (aff).
If you love the traditional granny square, you’ll enjoy making this daisy variant of it. It’s a great way to use up your scrap yarn as well if you decide to crochet up the squares in different colors.
The squares can be worked on while you’re doing your daily commute or watching your favorite TV show. Once you get the hang of making them, they’re quite simple and easy to do. And the back of the pouch is made from the classic granny stitch which is beginner-friendly too. This is a fun and relaxing project that serves as a nice break from the more complex ones.
How to Crochet a Car Visor Sunglasses Holder
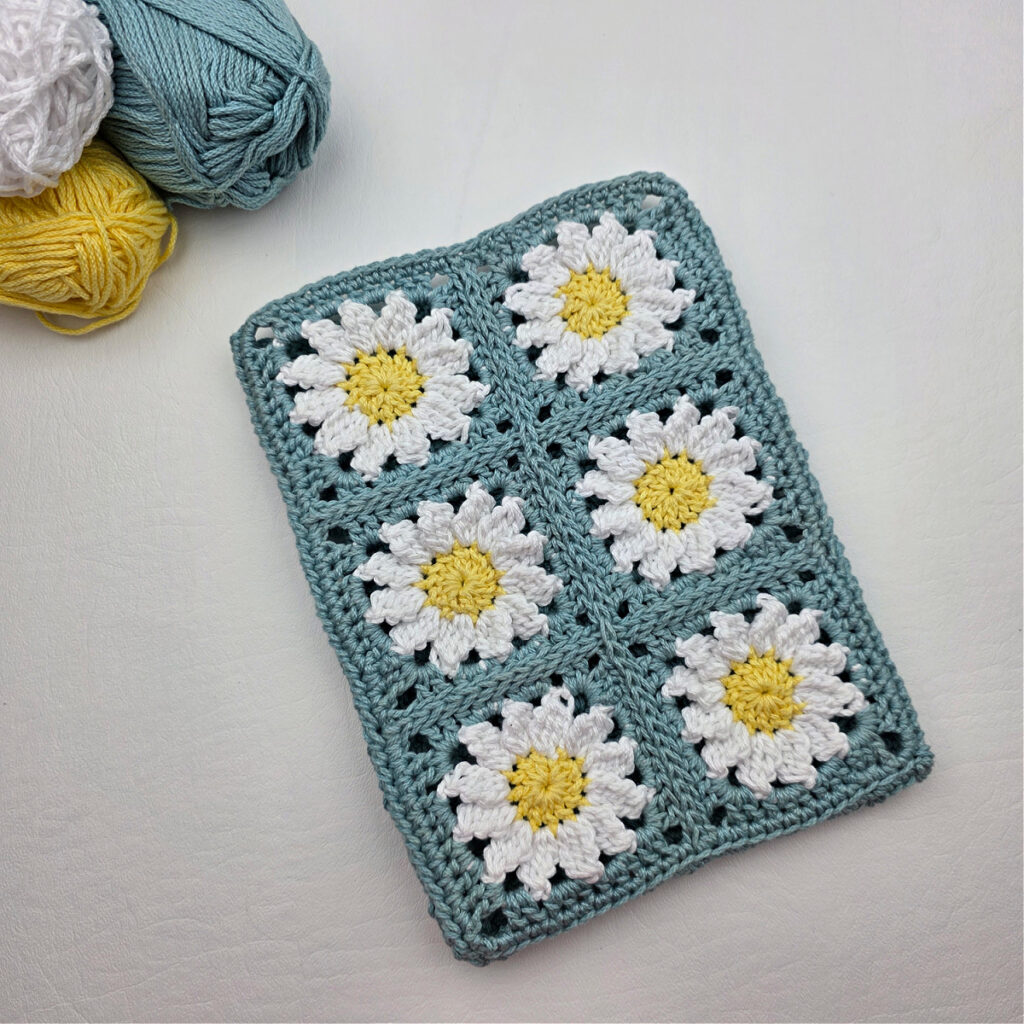
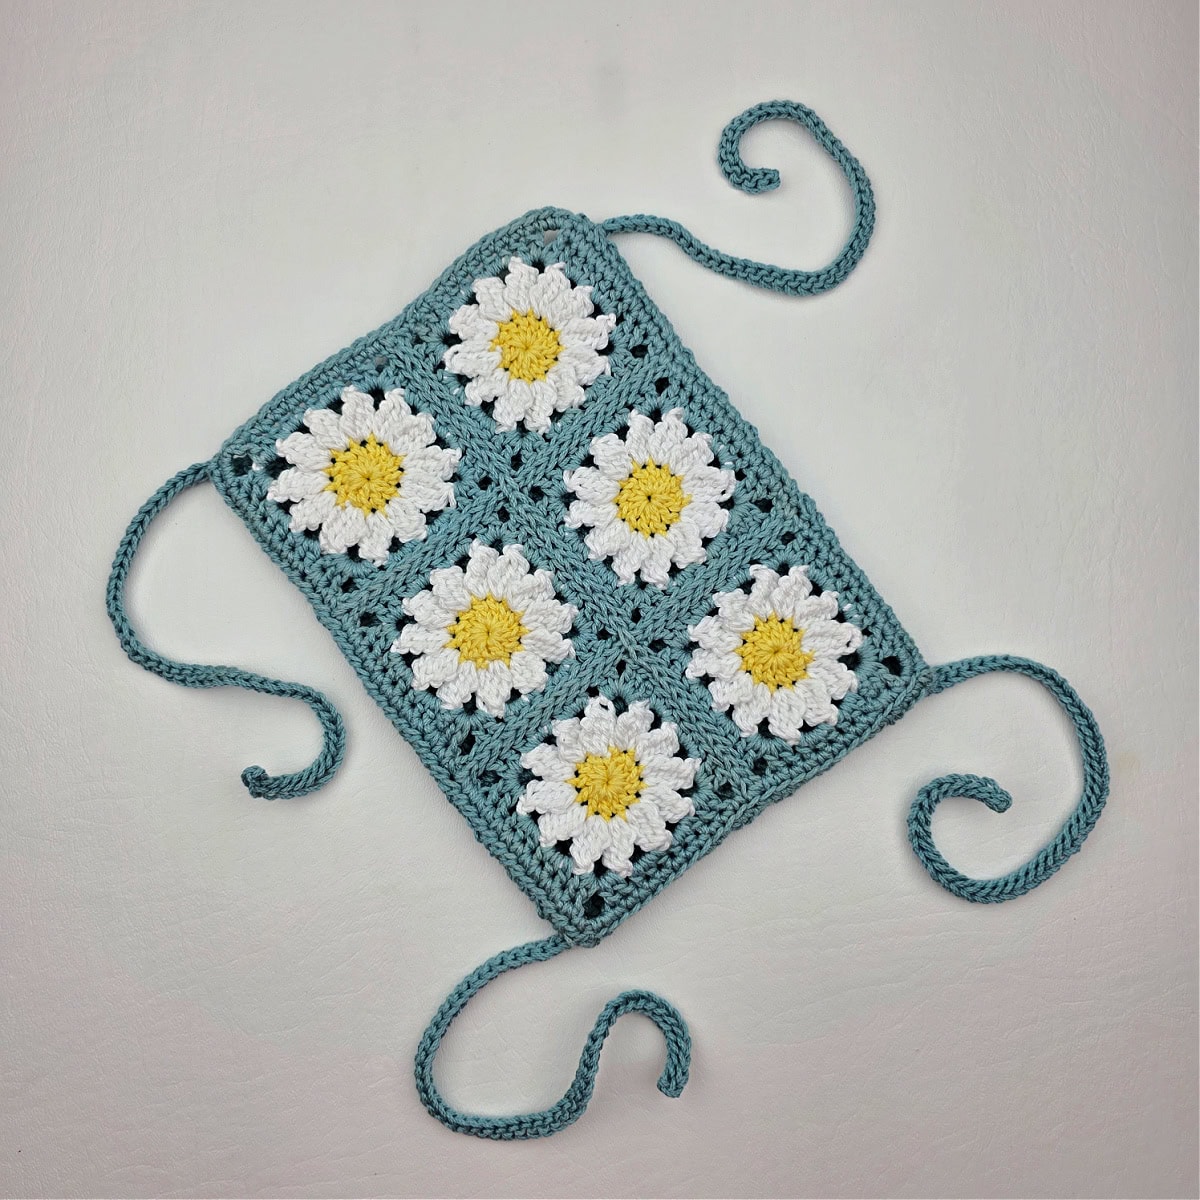
This crochet car visor sunglasses holder is made by first crocheting and joining six daisy crochet granny squares which are quite easy to make. If you like the look of them, you can include them in your other projects too.
Next, you’ll crochet a border around the daisy squares that brings them together neatly. Once that’s done, you’ll begin working the crochet granny stitch along one of the short ends to form the back of the pouch.
You’ll continue crocheting the granny stitch until this panel is as long as the size of joined squares. Whipstitch the two long sides of the granny squares to the granny stitch rectangle.
Lastly, crochet four ties and attach them to the back side of your crochet sunglasses pouch, one at each corner, which you’ll use to secure it to the car sun visor.
How To Get The
Daisy Car Visor Sunglasses Holder
Option 1: Scroll down for the free crochet car visor sunglasses holder pattern right here in this blog post.
Option 2: Purchase the ad-free printable PDF from one of my shops:
Best Yarn for Crochet Sunglasses Holders
You have the option to choose whatever type of yarn you want for your handmade sunglasses carrier and there might be a bit of variety if you decide to bust your stash. However, I highly recommend you use a cotton yarn, like I did, because it is durable, easy to wash, and holds its shape well.
Cotton yarn also has an element of softness to it which will keep your lenses from getting scratched. With the protection from a cotton pouch, your glasses will remain clean, and if your pouch gets dirty, you can wash, dry, and hang it back up in a jiffy.
Daisy Car Visor Sunglasses Holder – Free Pattern
The crochet car visor sunglasses holder pattern is free below, but if you love to work offline, I’ve got a couple other great options for you.
Purchase the ad-free, printable PDF, (that includes all photo tutorials), on Ravelry, or on Etsy (aff).
This post contains affiliate links.
Materials
- Yarn: Worsted Weight / 4 / Yarn, Lion Brand Yarns 24/7 Cotton was used for the sample in the photos [100% Mercerized Cotton (186 yds / 170 m / 100 g / 3.5 oz)].
- Yardage:
- See Pattern Notes below for a list of all colors shown.
- See Pattern Notes below for specific yardage for each color.
- Crochet Hook: G/6/4.00mm or size needed to obtain gauge (My favorite crochet hooks are the Clover Amour Crochet Hooks, I’ve never had an ache in my hand since switching).
- Measuring Tape
- Scissors
- Yarn Needle
- Locking Stitch Markers
Abbreviations (US Terms)
- ch(s): chain(s)
- sl st(s): slip stitch(es)
- st(s): stitch(es)
- sc: single crochet
- hdc: half double crochet
- dc: double crochet
- 3tr-cl: 3 treble crochet cluster
- Alt-ch3: alternate chain 3
- Rep: repeat
- RS: right side
- SM: stitch marker
- Rnd: round
- yo: yarn over
- sp: space
- MC: main color
- BLO back loop only
- Join yarn with a standing sc
Experience Level
- Easy
Gauge
- Measurements given throughout pattern.
Sizes
- One Size: 6-1/4″ W x 9″ L (not including ties)
Special Stitches
- 3 Treble Crochet Cluster (3tr-cl): Yo twice, insert hook where indicated, yo, pull up a loop, (yo, pull thru 2 loops) twice, [ yo twice, insert hook in same st, yo, pull up a loop, (yo, pull thru 2 loops) twice ] work from [ to ] 2 times, yo, pull through remaining 4 loops.
- Alternate Ch-3 (Alt-ch3): Complete the last dc of a row, take the loop off your hook, insert your hook into the space between the last dc and the last 3 dc of the row you just finished, put the loop back on your hook and pull through the space, turn, then ch 3.
- Join with a standing single crochet: Begin with a slip knot on your hook, insert your hook into the stitch or space indicated, yo, pull up a loop, yo and draw thru both loops on hook.
Pattern Notes
- Turning chains are not included in stitch count unless noted otherwise.
- Yarn Notes: Lion Brand Yarn 24/7 Cotton was used for the samples. (3.5oz / 100 g / 186 yards / 170 meters / 100% mercerized cotton). Another comparable worsted weight yarn may be substituted.
- Yardage & Colors:
- Succulent (Main Color): #761-116E (124 yards)
- Lemon: #761-157D (10 yards)
- White: #761-100 (36 yards)
- Construction Notes: This crochet car visor sunglasses holder is made by first crocheting and joining six daisy crochet granny squares. Next, you’ll crochet a border around the daisy squares. Then, you’ll begin working the crochet granny stitch along one of the short ends. You’ll continue crocheting the granny stitch until this panel is as long as the size of your joined squares. Whipstitch the two long sides of the granny squares to the granny stitch rectangle. Lastly, crochet four ties and attach them to the back side of your crochet sunglasses pouch, one at each corner.
Daisy Car Visor Sunglasses Holder – Written Pattern
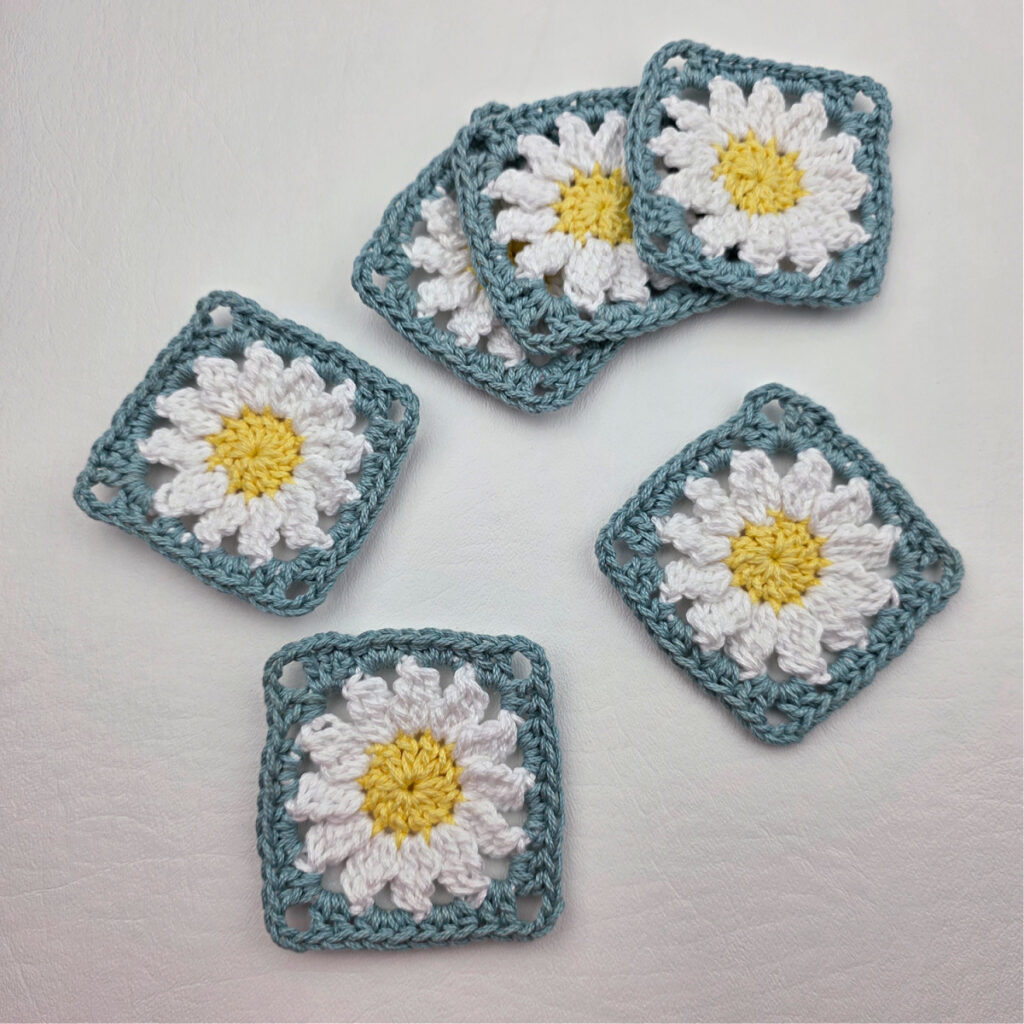
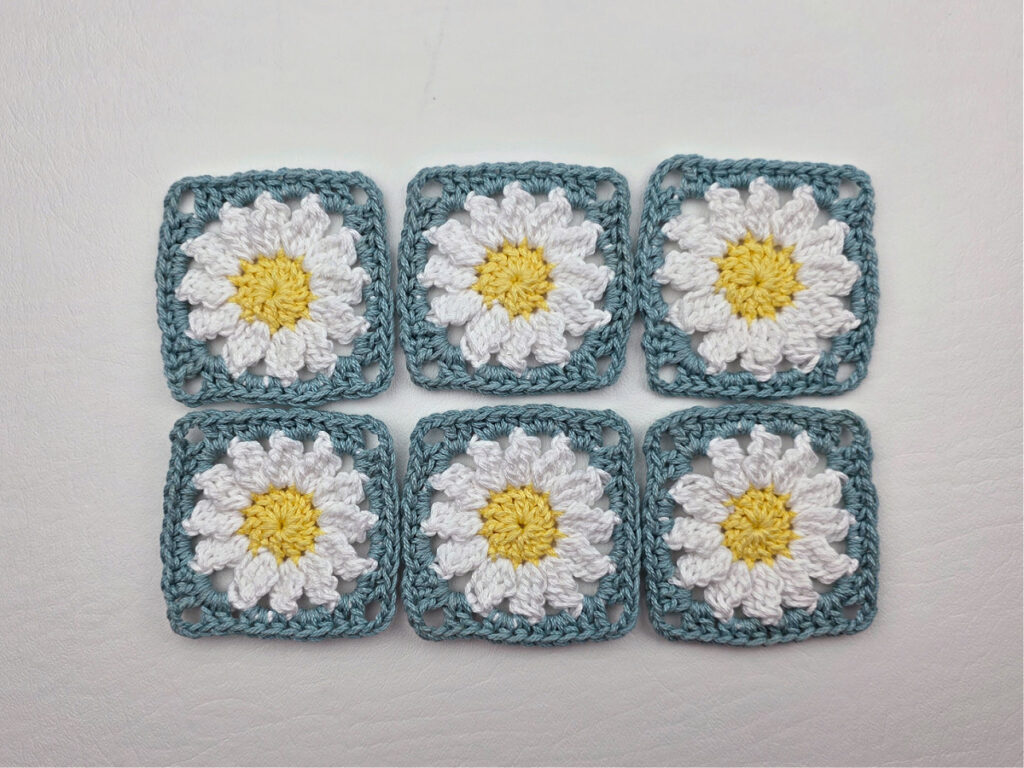
3″ Daisy Granny Square – Make 6
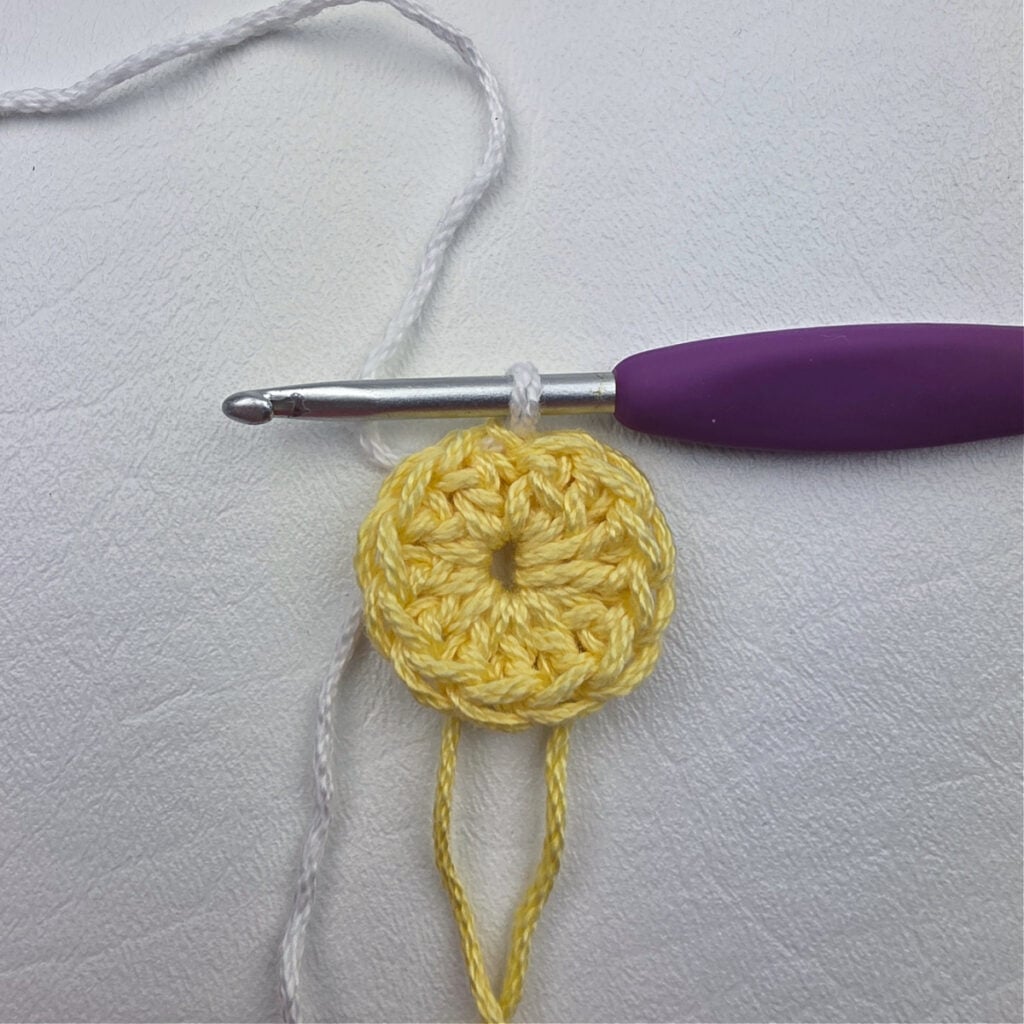
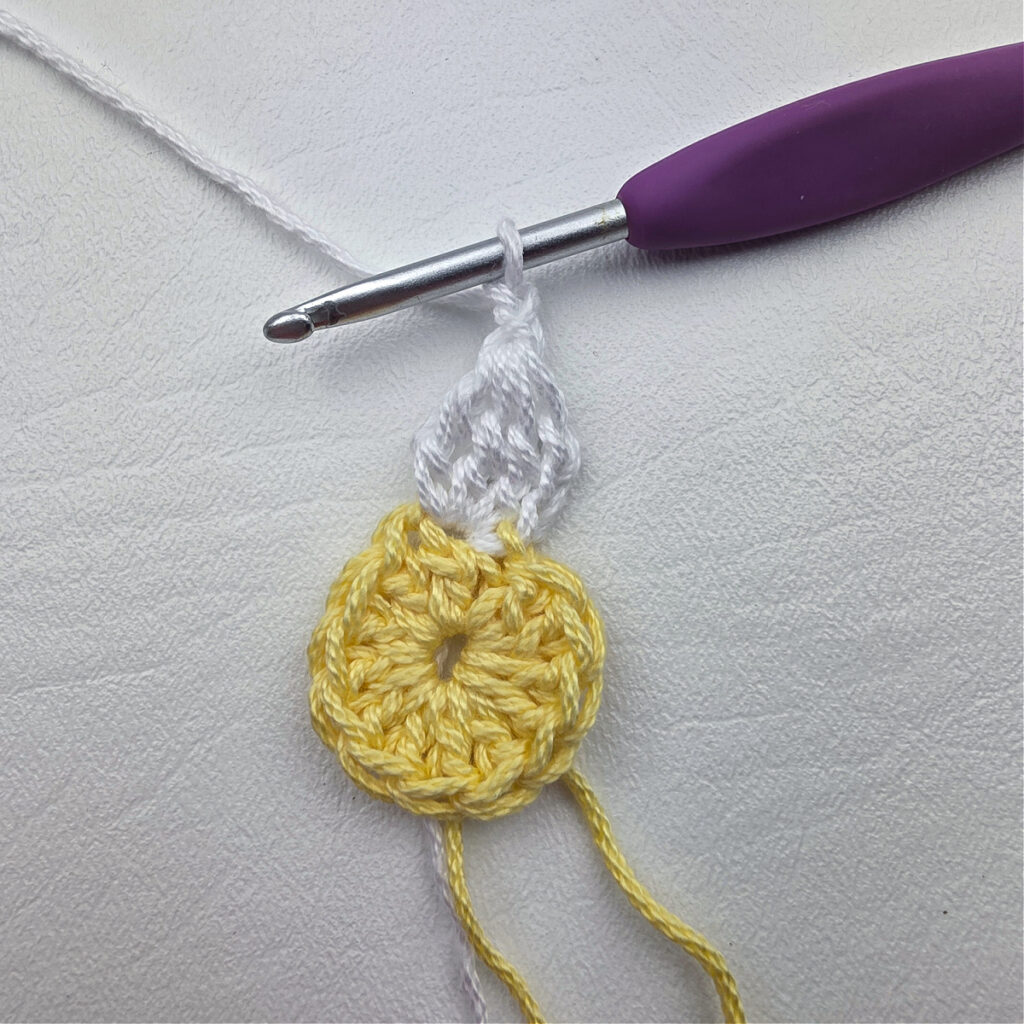
Rnd 1: With yellow yarn and a 4.00mm crochet hook, ch 3, work 12 dc into the 3rd ch from your hook. Join yarn with a sl st to the 1st dc. Switch to white yarn when you slip stitch to join the end of the round. (12 sts)
Fasten off yellow.
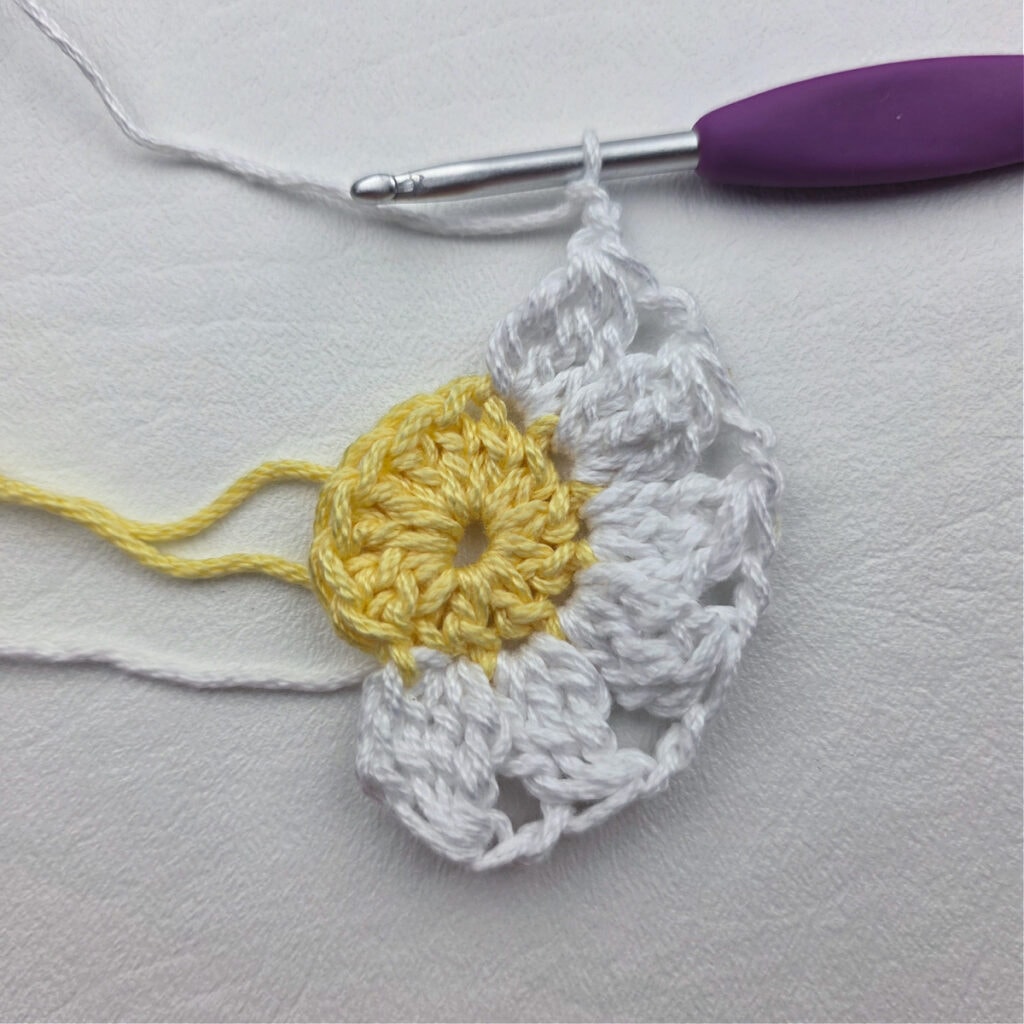
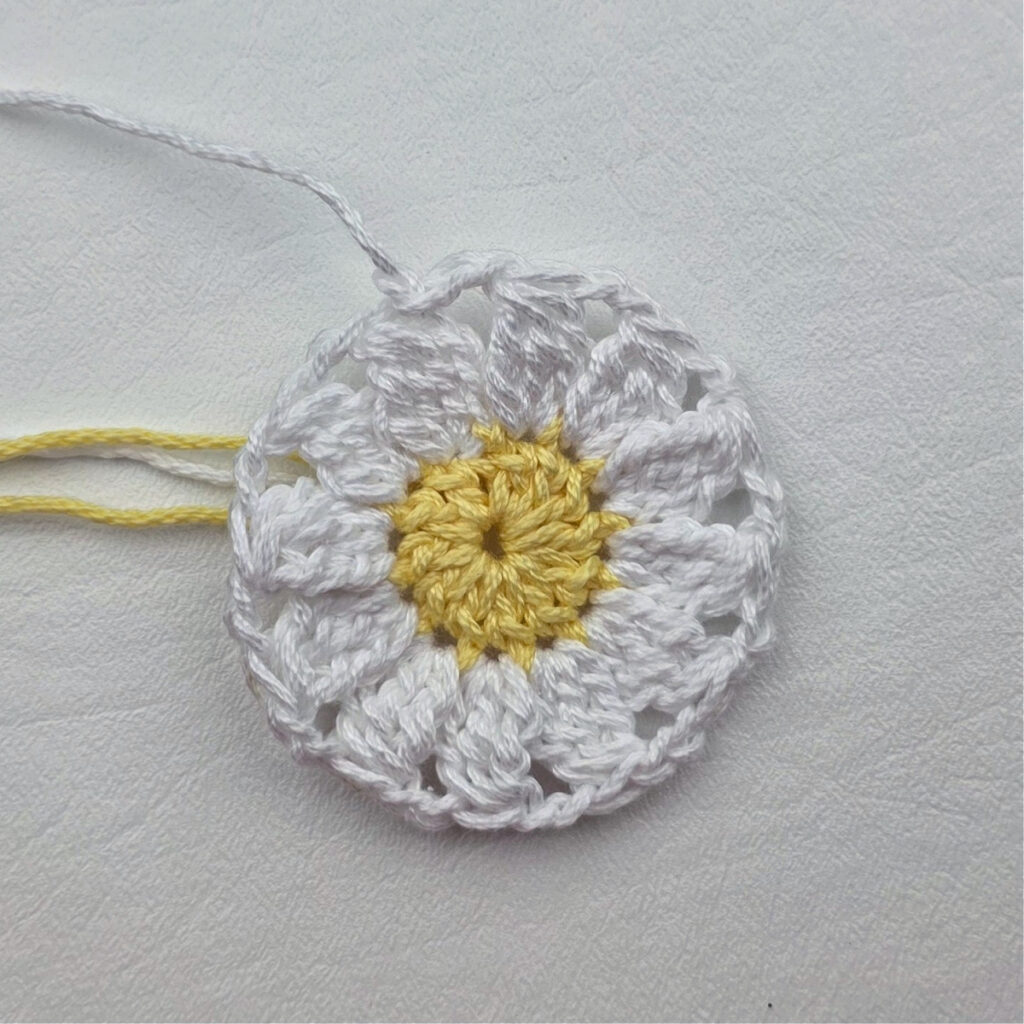
Rnd 2: With white yarn, ch 3 (does not count as st), work (3tr-cl, ch 2) in each st around. Join yarn with a sl st to the 1st 3tr-cl. (12 3tr-cl’s + 12 ch-2’s)
Fasten off white.
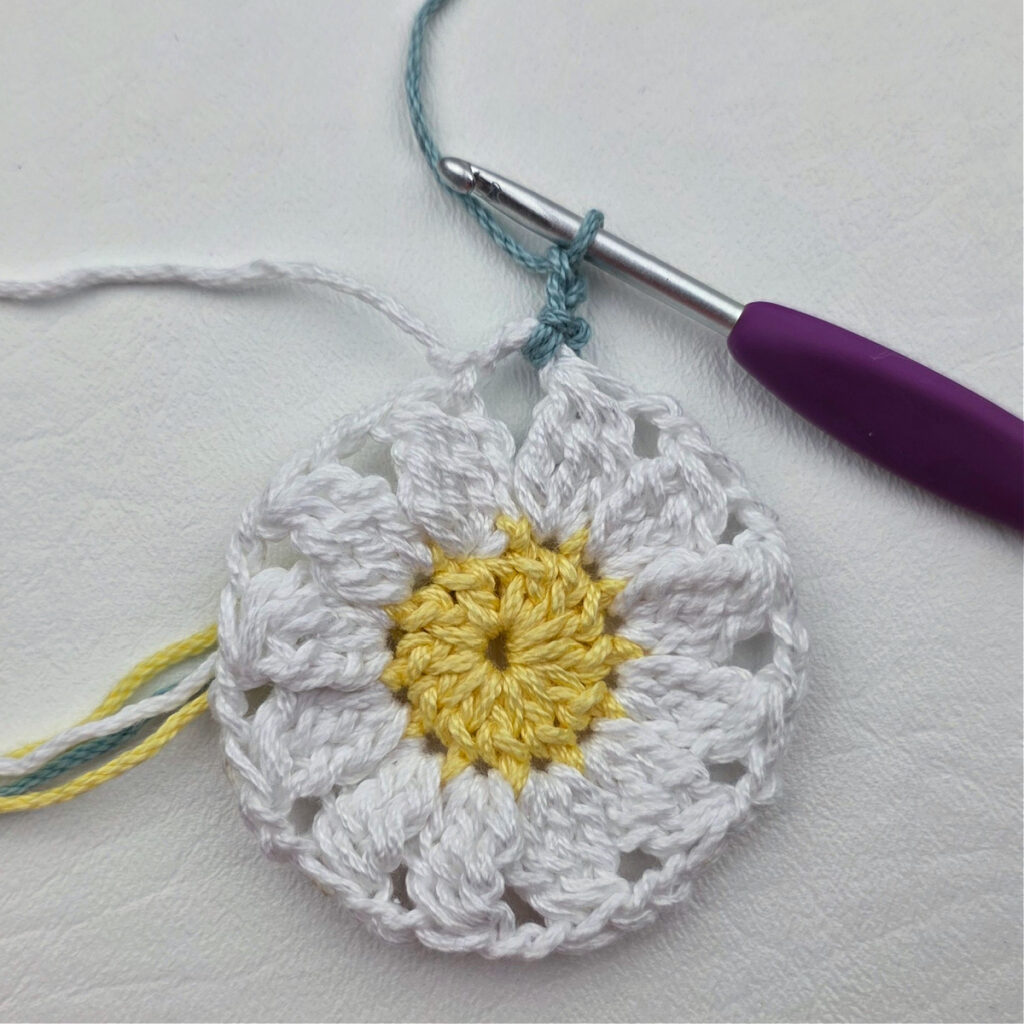
Rnd 3: With your MC yarn and a 4.00mm crochet hook, join yarn with a sl st in any ch-2 sp, ch 2 (does not count as st), work (2 dc, ch 3, 2 dc) in the same ch-2 sp, 3 hdc in each of the next 2 ch-2 sps, * (2 dc, ch 3, 2 dc) in the next ch-2 sp, then 3 hdc in each of the next 2 ch-2 sps, work from * 3 times. Join yarn with a sl st to the 1st dc. (16 dc + 24 hdc + 4 ch-3’s)
Fasten off. Weave in ends. Complete all 6 crochet daisy granny squares, then continue on to Joining the Crochet Squares.
Completed Daisy Motif should be approximately 3″ x 3″.
Progression Photos – Daisy Granny Squares
Joining the Crochet Squares
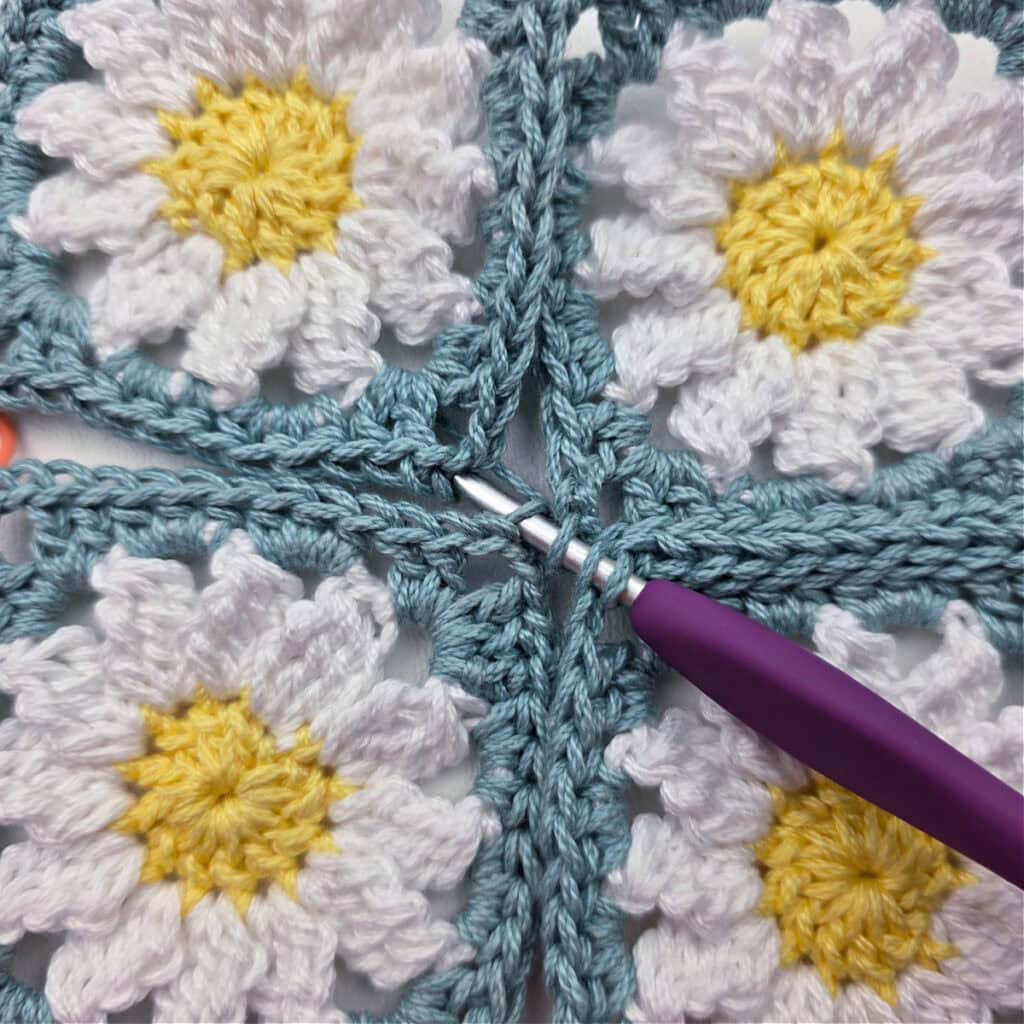
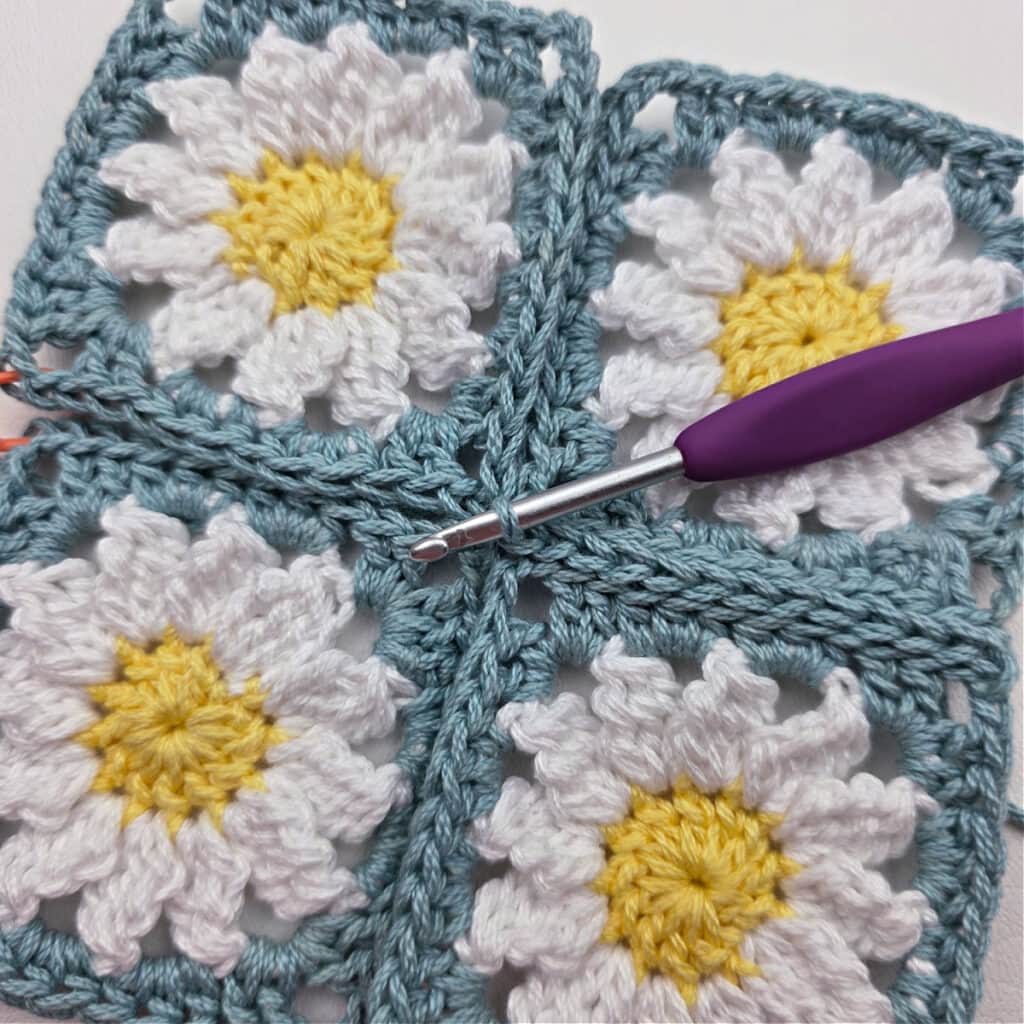
For this section, choose ANY method you’d like to join your granny squares. You can use a basic whipstitch, the mattress stitch seam, or my favorite, and the method I used for the sample, the flat slip stitch seam.
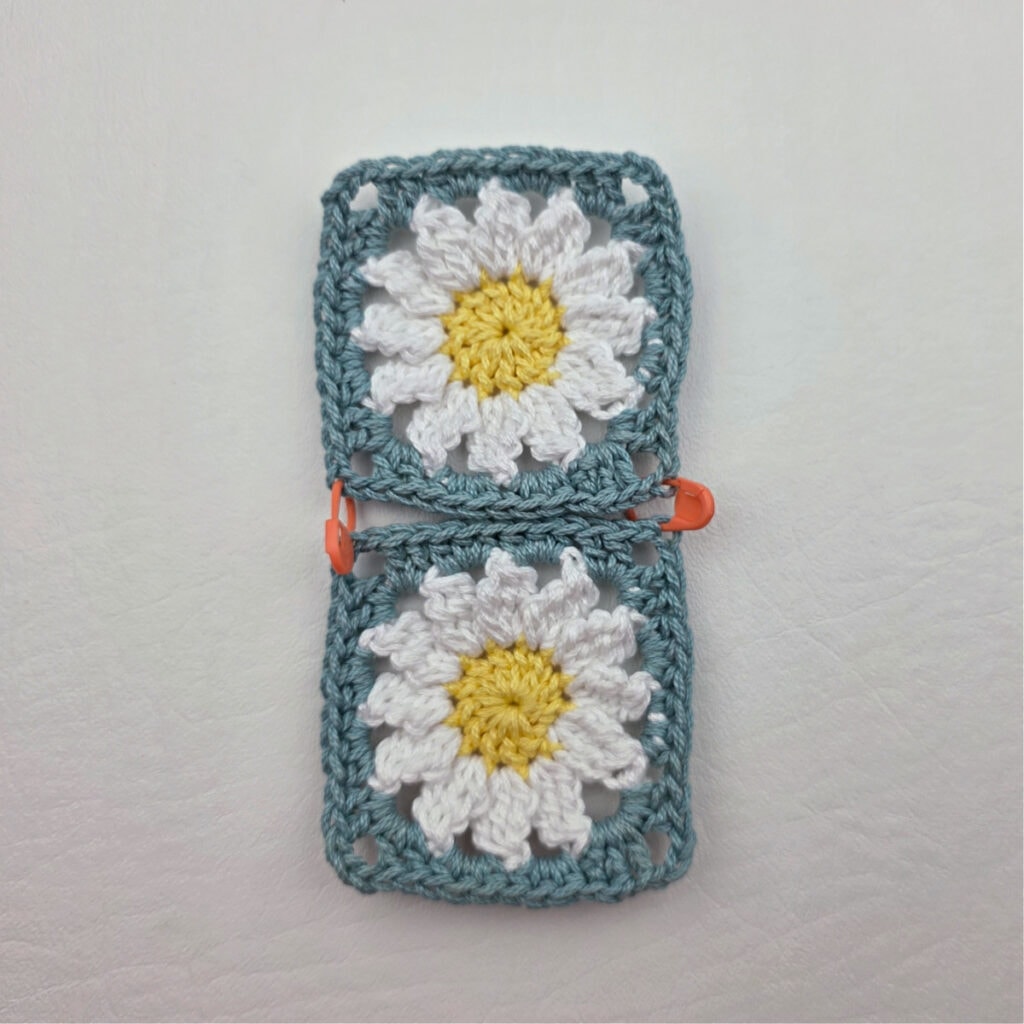
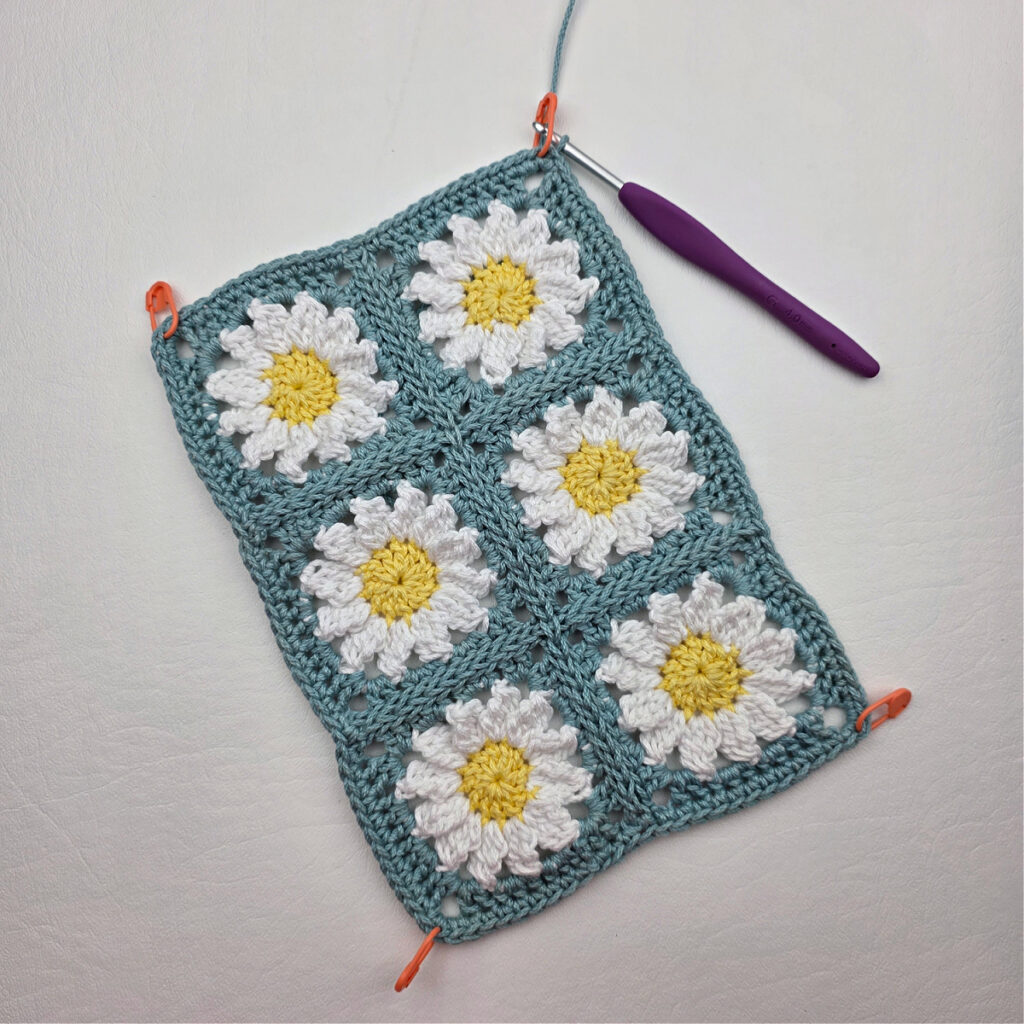
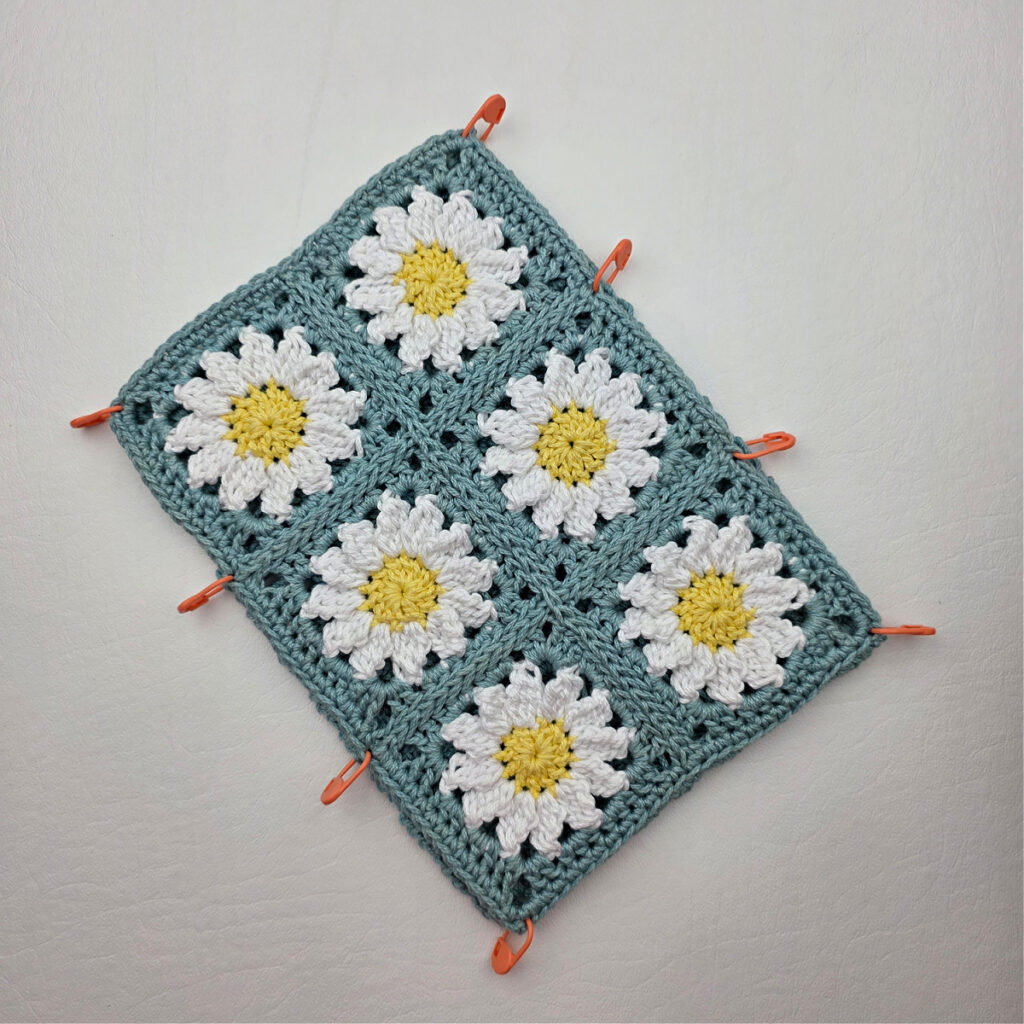
Arrange your granny squares so that you have 2 rows of 3 squares. Use locking SM to hold the squares together while seaming. Place locking SM in the middle chain from each ch-3 corner of the square. Seam the motifs together with MC yarn and a flat slip stitch seam, or your favorite technique to seam granny squares.
Weave in ends. Continue on to Daisy Motif Edging.
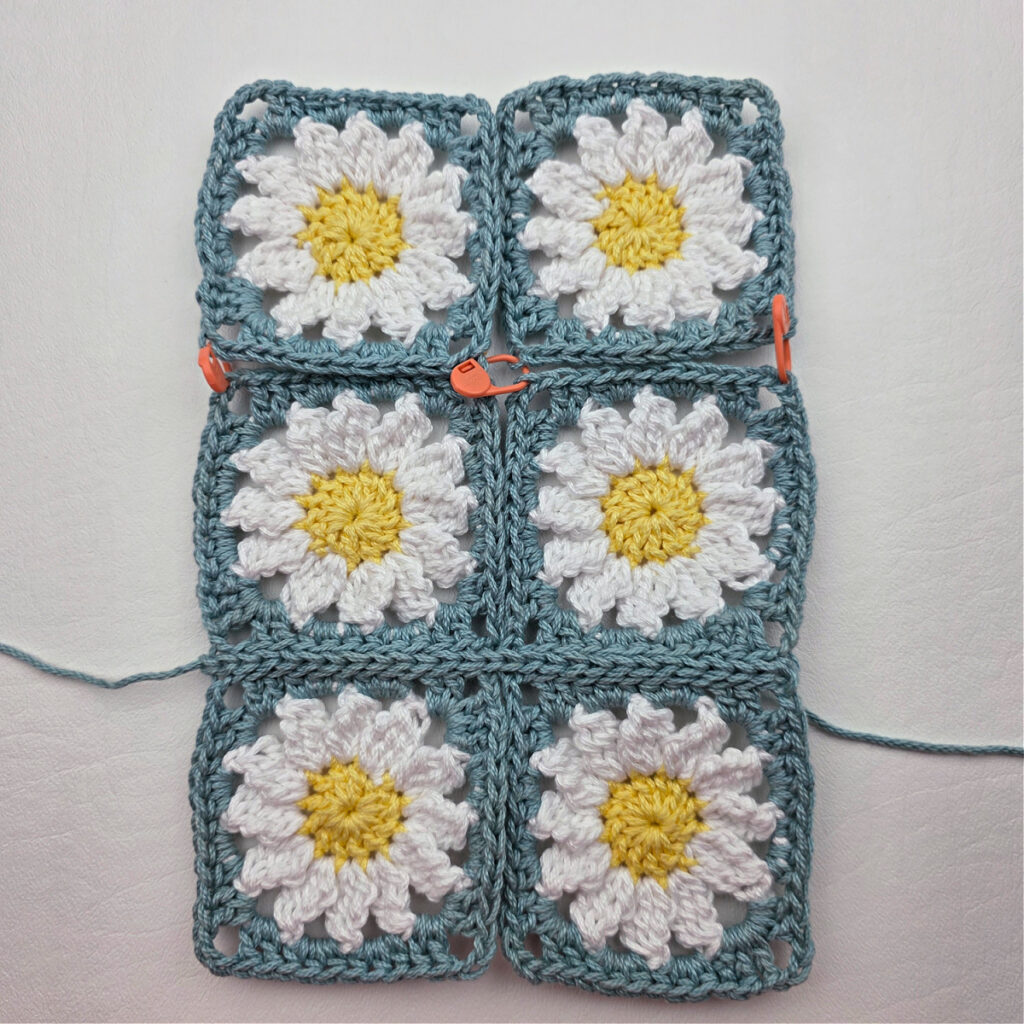
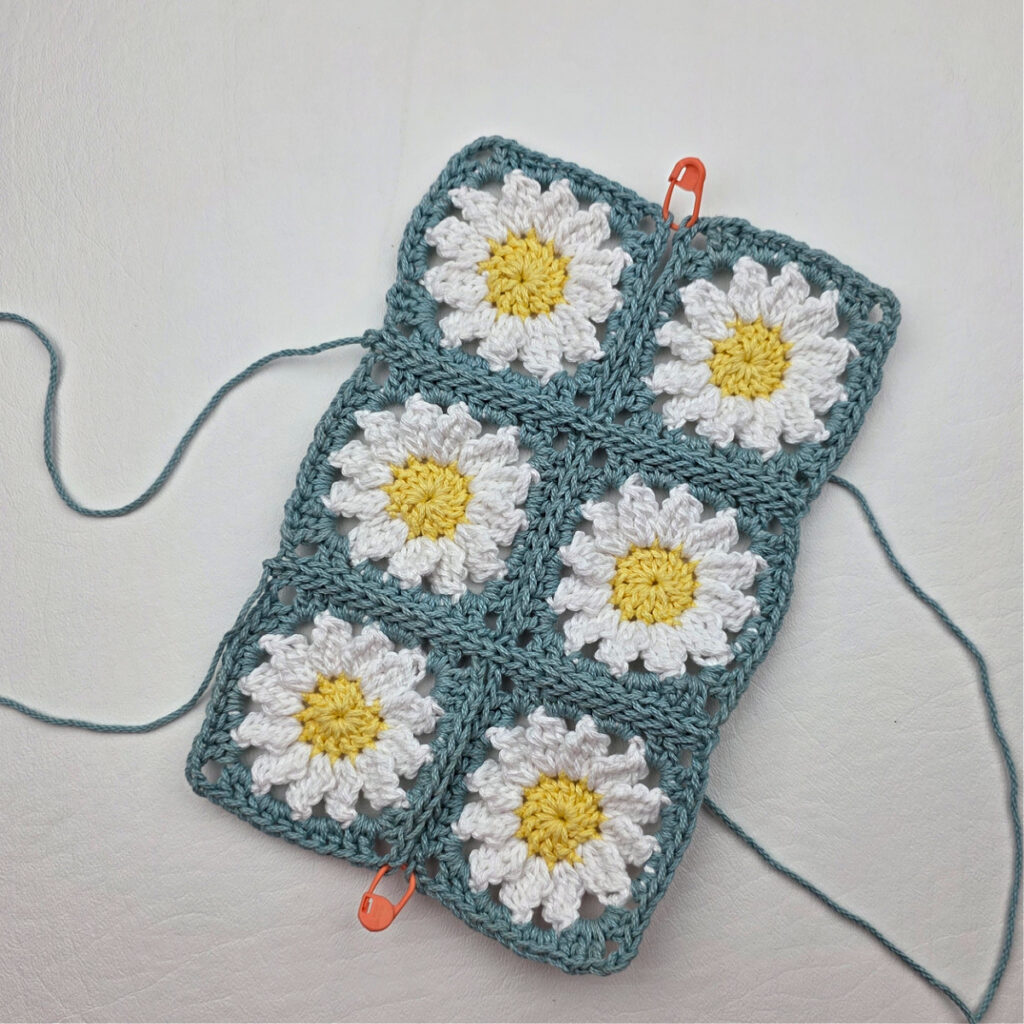
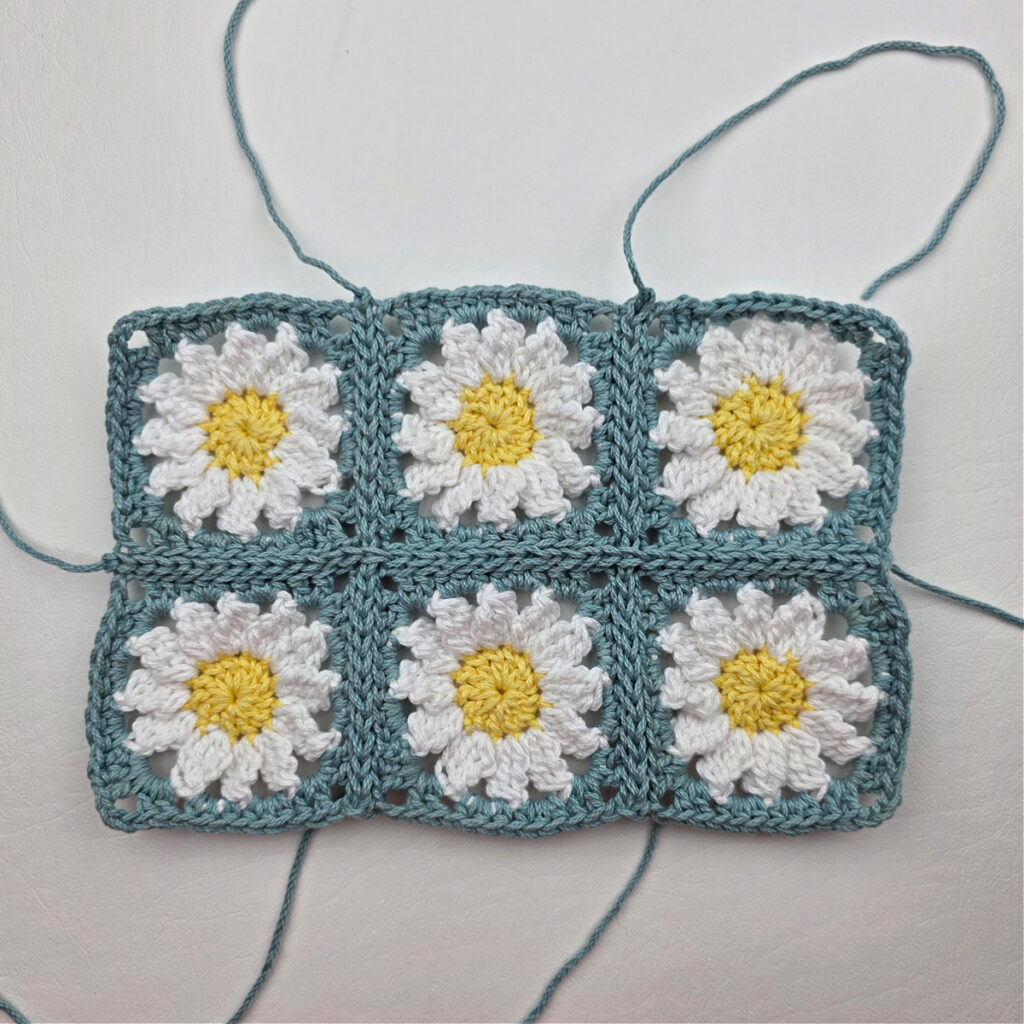
Progression Photos – Joining the Crochet Squares
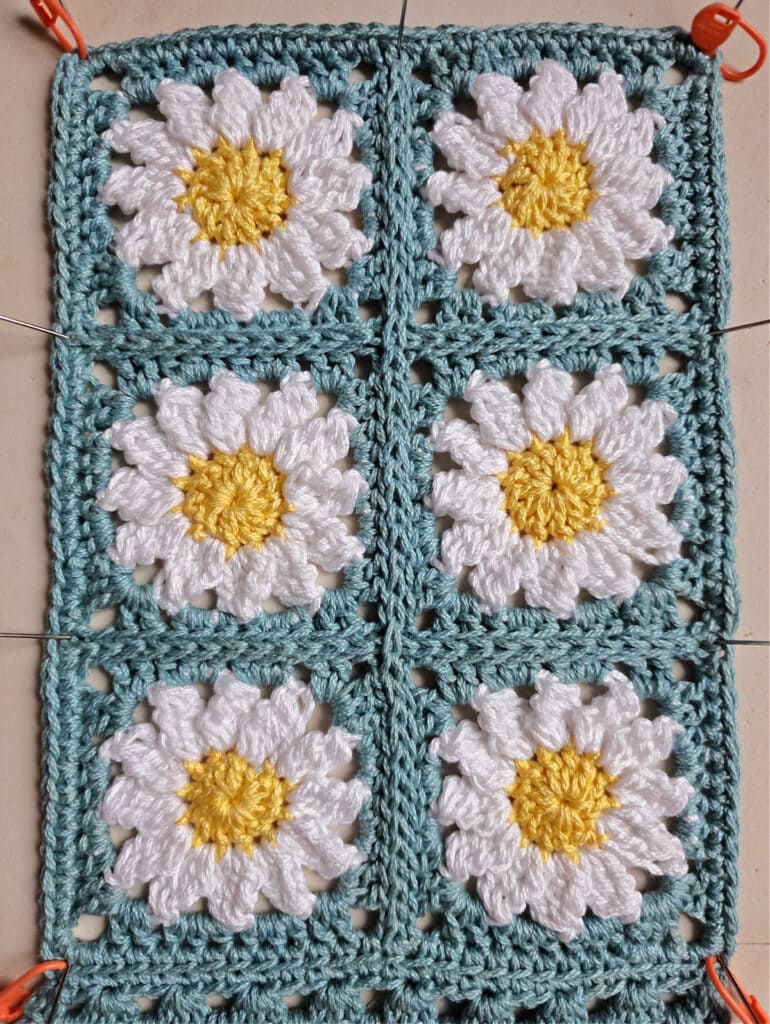
The photos below show the layout and seaming of the six daisy granny squares. The bottom right photo shows my six seamed motifs on blocking boards. I decided to lightly steam block them.

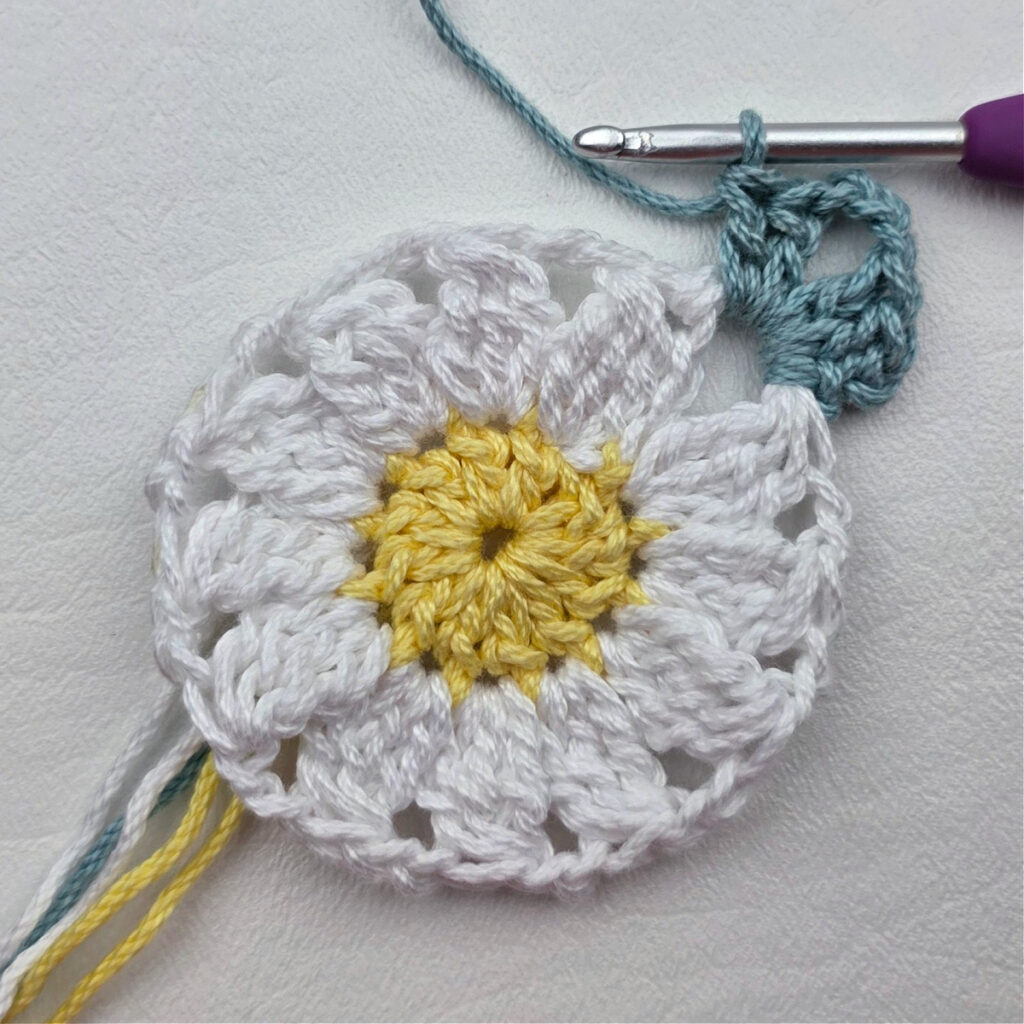
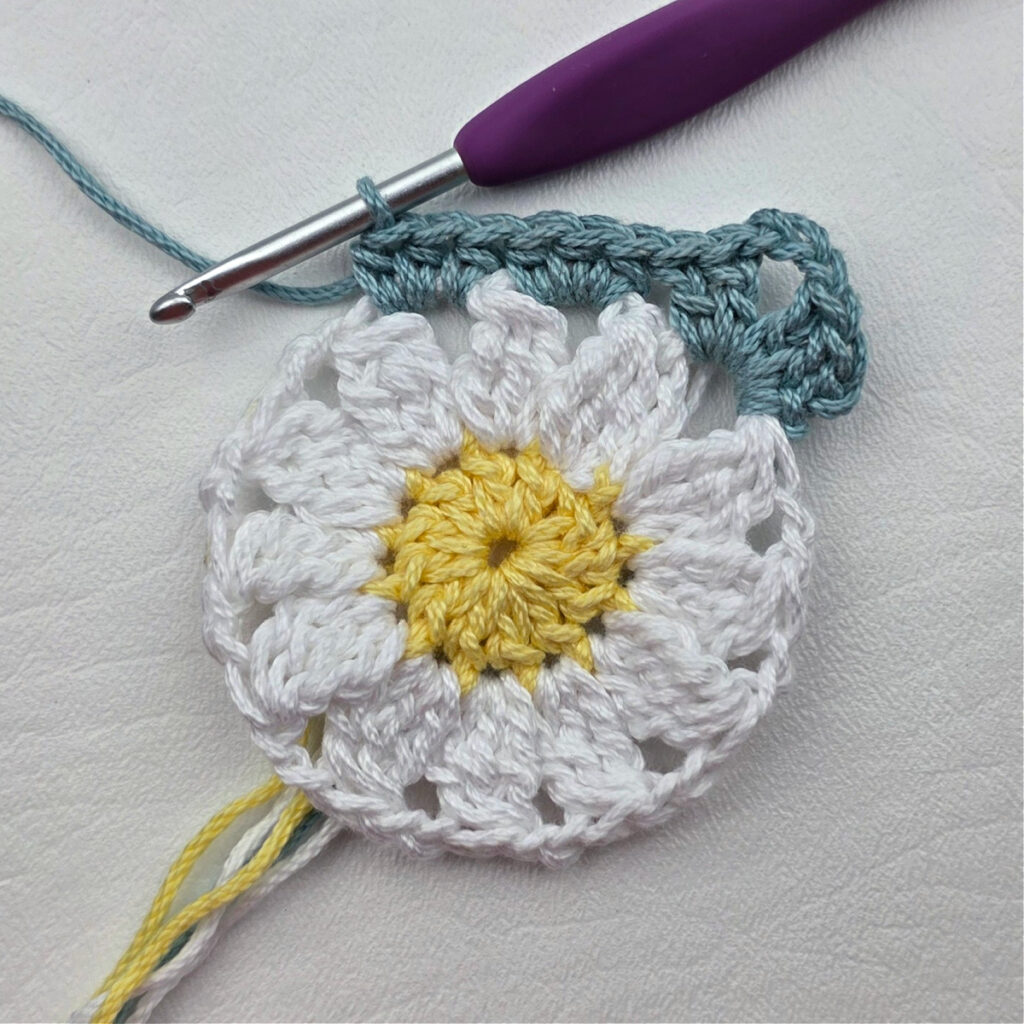
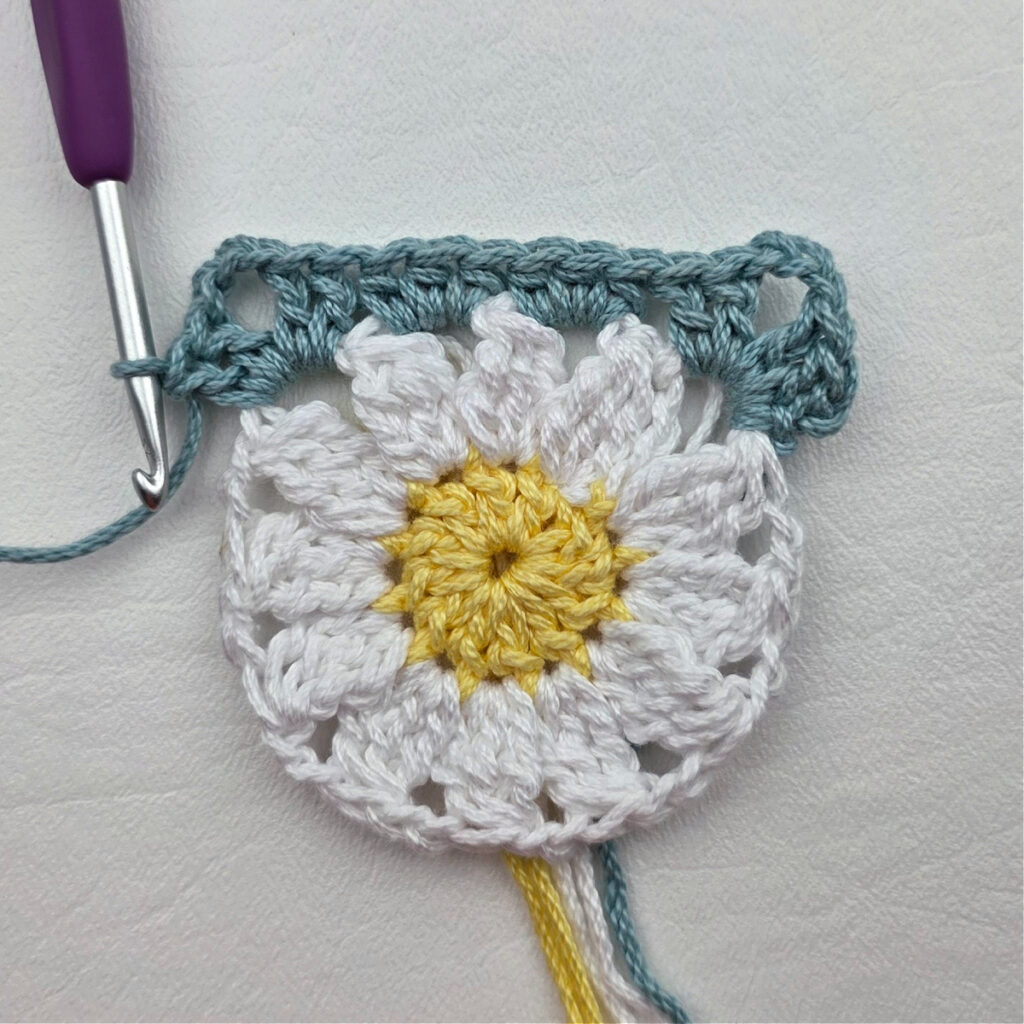
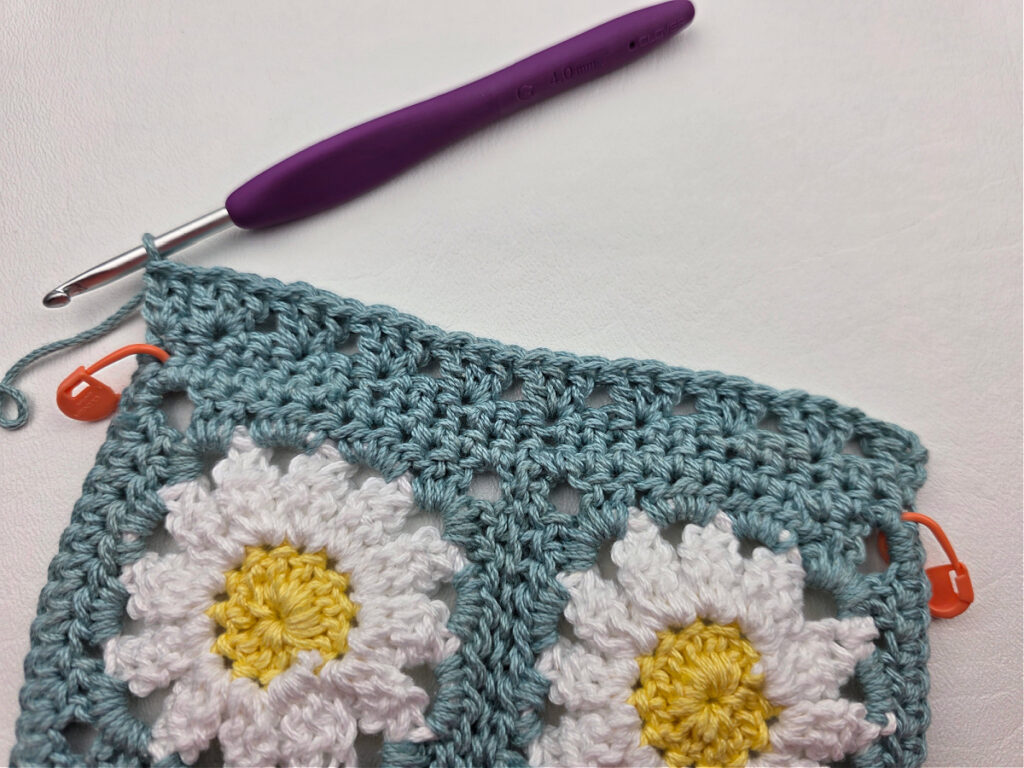
Daisy Motif Edging
In this section, you’ll crochet a single crochet edging around the seamed squares.
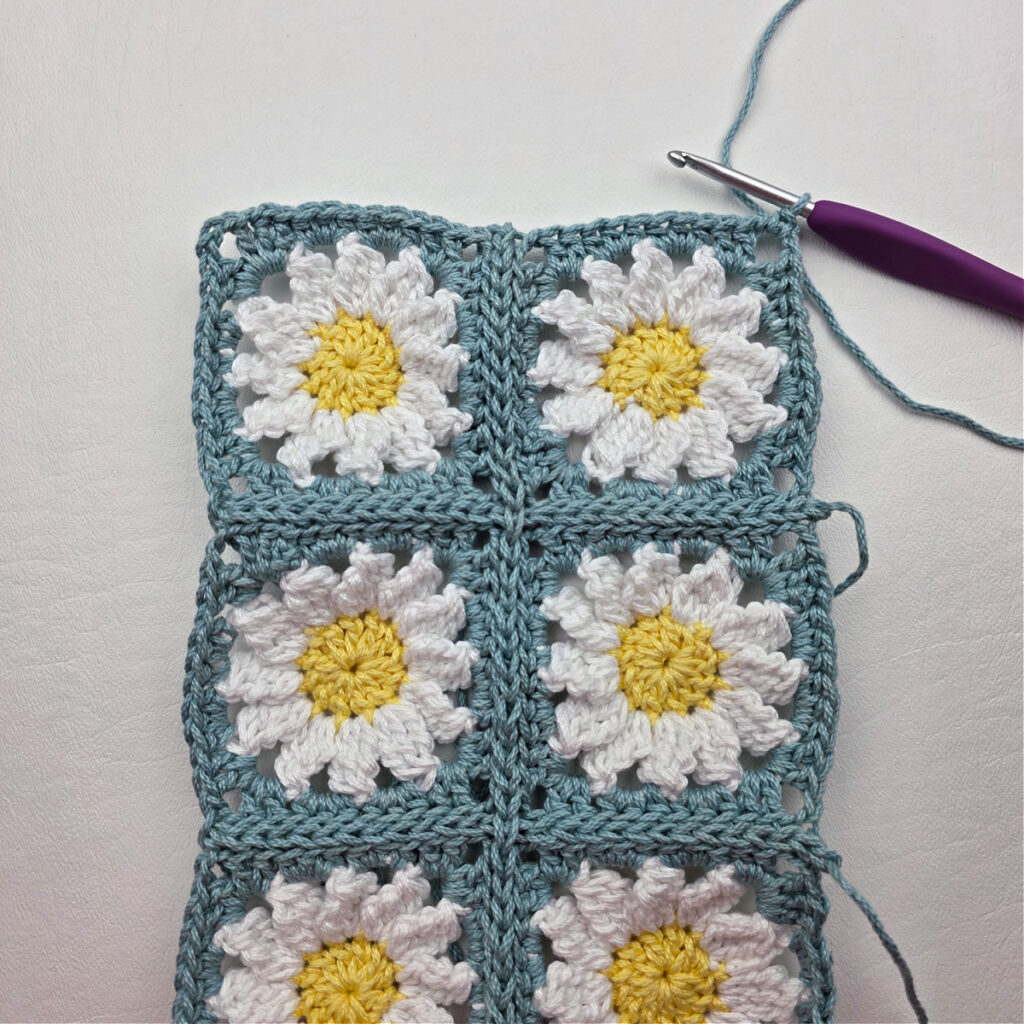
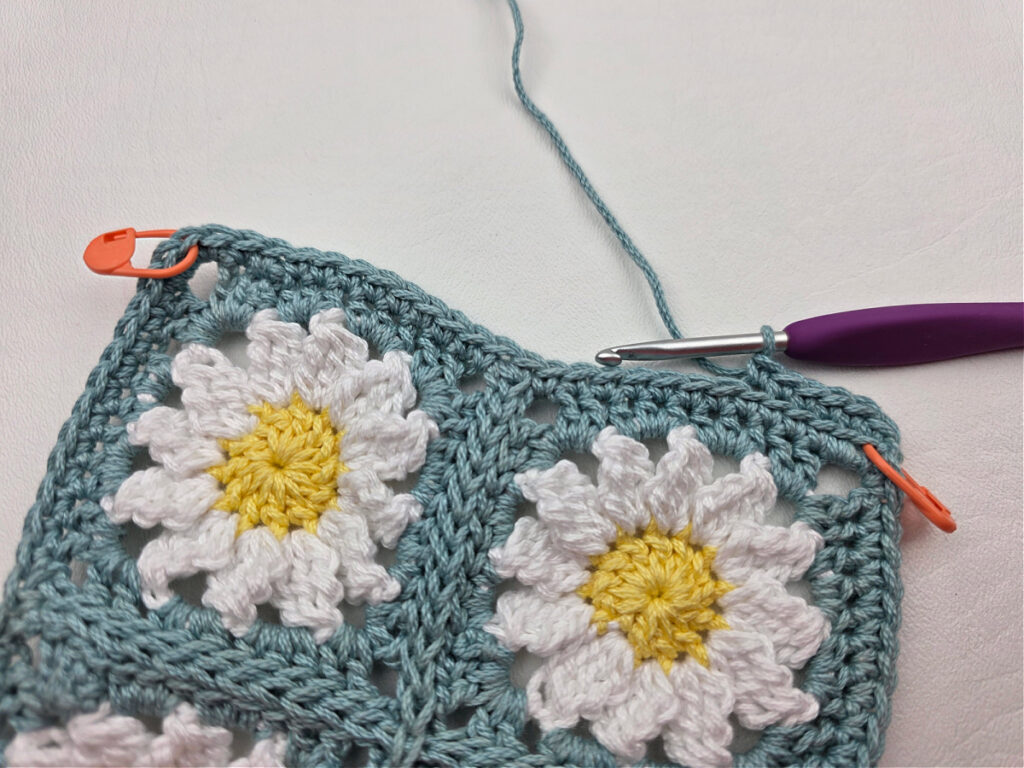
Rnd 1 (RS): With a 4.00mm crochet hook and MC yarn, join yarn with a standing sc in a ch-3 sp in a right corner along a short edge, work 1 more sc in the same ch-3 sp, (sc in each st across to the next ch-3 sp (making sure to work in the seams as well), sc in the next ch sp, sc in the seam, sc in the next ch sp) 2 times, sc in each of the next 12 sts, 3 sc in the next corner ch-3, sc in each of the next 12 sts, 3 sc in the next corner ch-3, (sc in each of the next 12 sts, sc in the next ch sp, sc in the seam, sc in the next ch sp) 2 times, sc in each of the next 12 sts, 3 sc in the next corner ch-3, sc in each of the next 12 sts. Join with a sl to to the 1st st. (130 sts)
Place a locking SM in the middle sc in each corner.
Do not fasten off. Continue on to the Granny Stitch Panel.
Progression Photos – Daisy Motif Edging
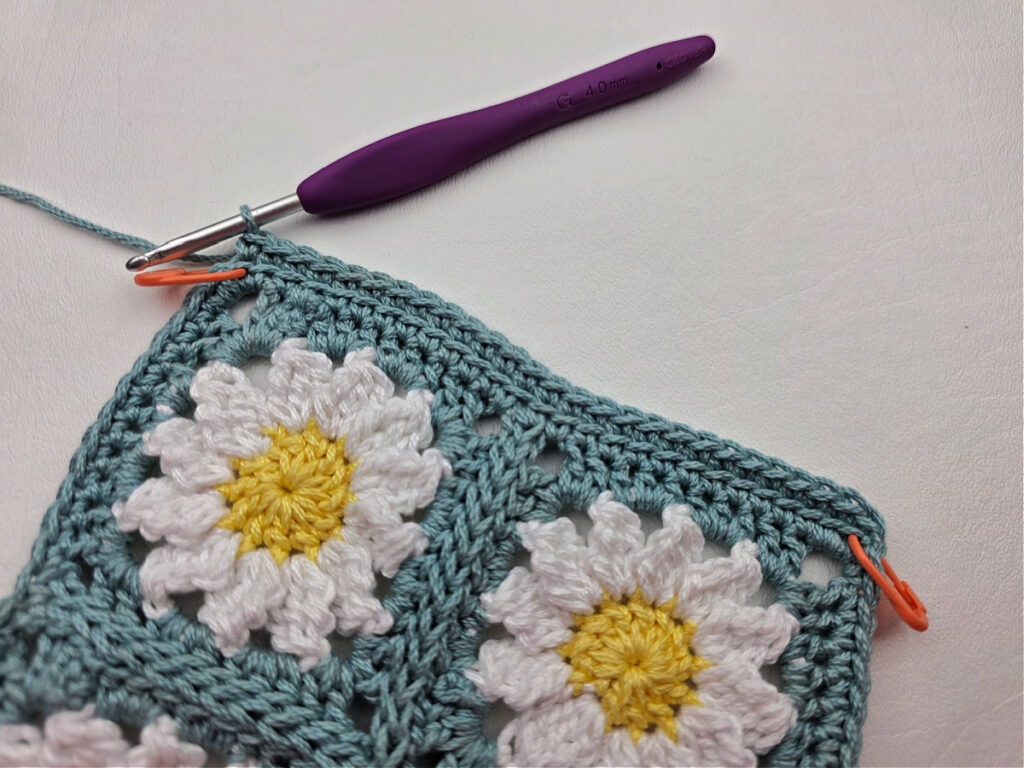
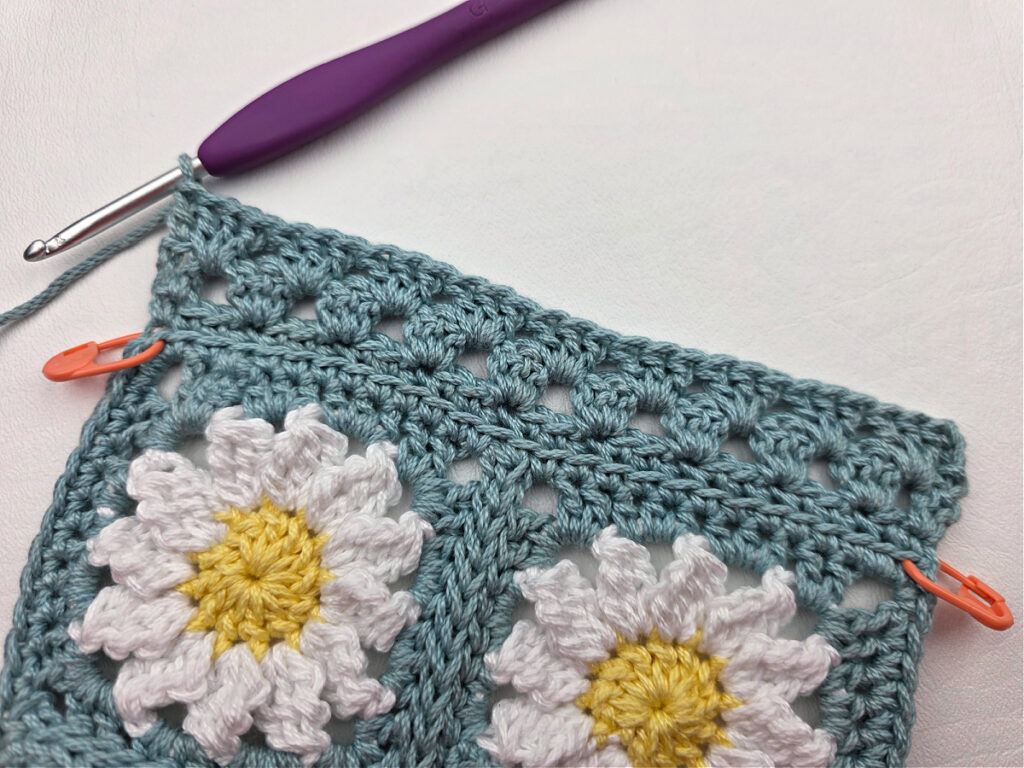
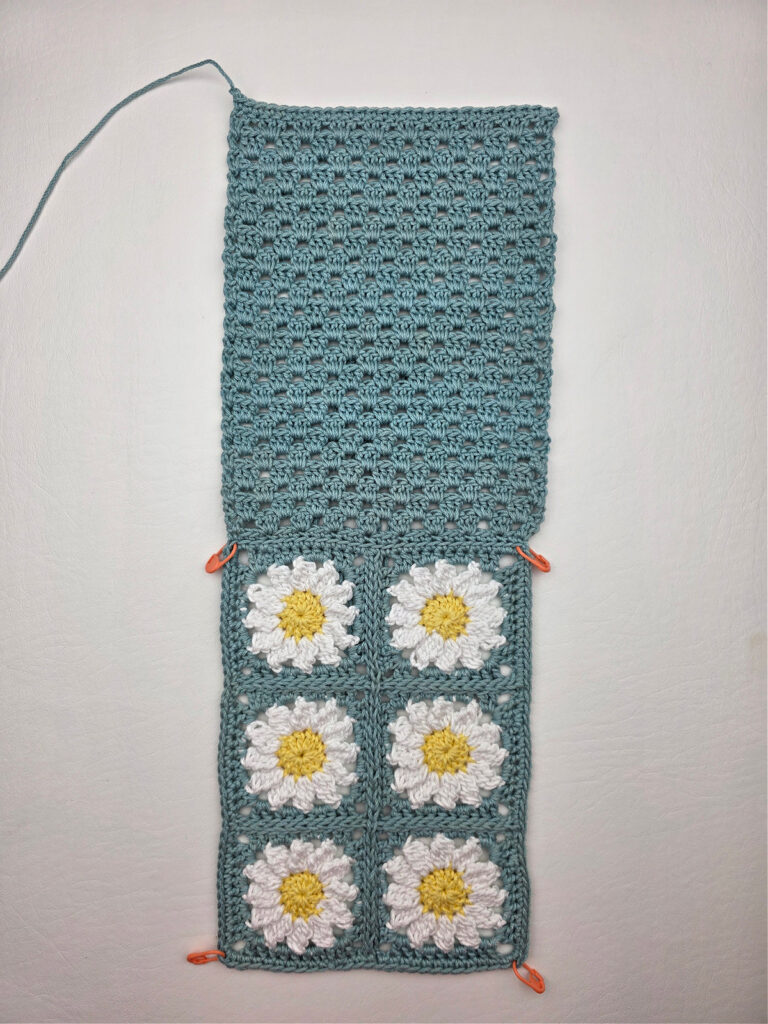
Granny Stitch Panel
Gauge: In granny stitch: 18 sts = 4″; stitch height isn’t crucial.
In this section, you’ll crochet the granny stitch back and forth in rows to create a panel that’s the same size as your joined motif squares. This panel is the back side of your car visor sunglasses holder.
Row 1 (RS): Ch 1, working in the BLO only, sc in the first st and in each st across to the next SM, sc in the marked st. (27 sts)
Row 2: Ch 3 (counts as a st), turn, dc in the same st as ch 3, (skip each of the next 2 sts, 3 dc in the next st) work from ( to ) 8 times, skip the next st, 2 dc in the last st. (28 sts)
Row 3: Ch 3 (counts as a st), turn, 3 dc in each of the next 9 sps, dc in the top of ch 3. (29 sts)
Row 4: Alt-ch3, dc in the same sp, 3 dc in each of the next 8 sps, 2 dc in the last sp. (28 sts)
Rep Rows 3 – 4 until your granny stitch panel, when folded behind the daisy squares, measures approximately the same length as the motif panel.
Last Row: Ch 1, sc in each st across. (28 sts)
Fasten off. Weave in ends. Continue on to the Ties.
Progression Photos – Granny Stitch Panel
Ties (Make 4)
Gauge: gauge isn’t crucial.
Row 1: With MC yarn and a 4.00mm crochet hook, loosely make a chain that is approximately 10″ L, working into the back humps of the ch, sl st into the 2nd ch from your hook and in each ch across. Stitch count is not crucial.
Fasten off leaving a tail of yarn. After making all four ties, continue on to Assembly.
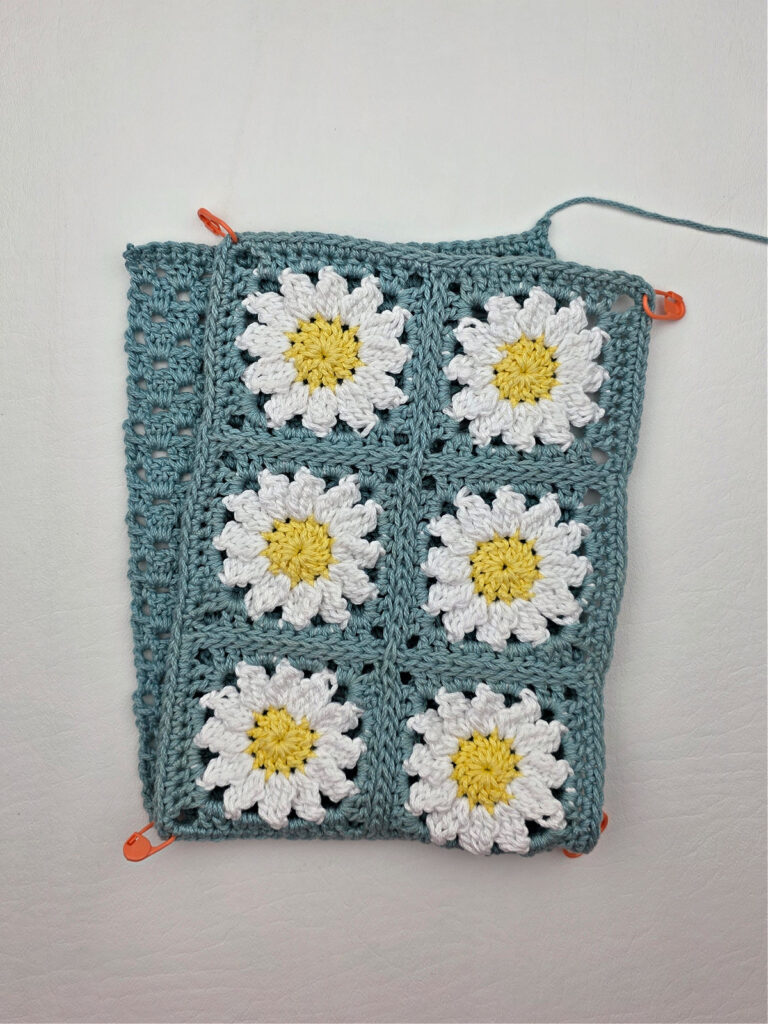
Assembly
Step 1: With the RS facing out, fold the granny stitch panel back behind the motifs. Use locking stitch markers to hold the two panels together.
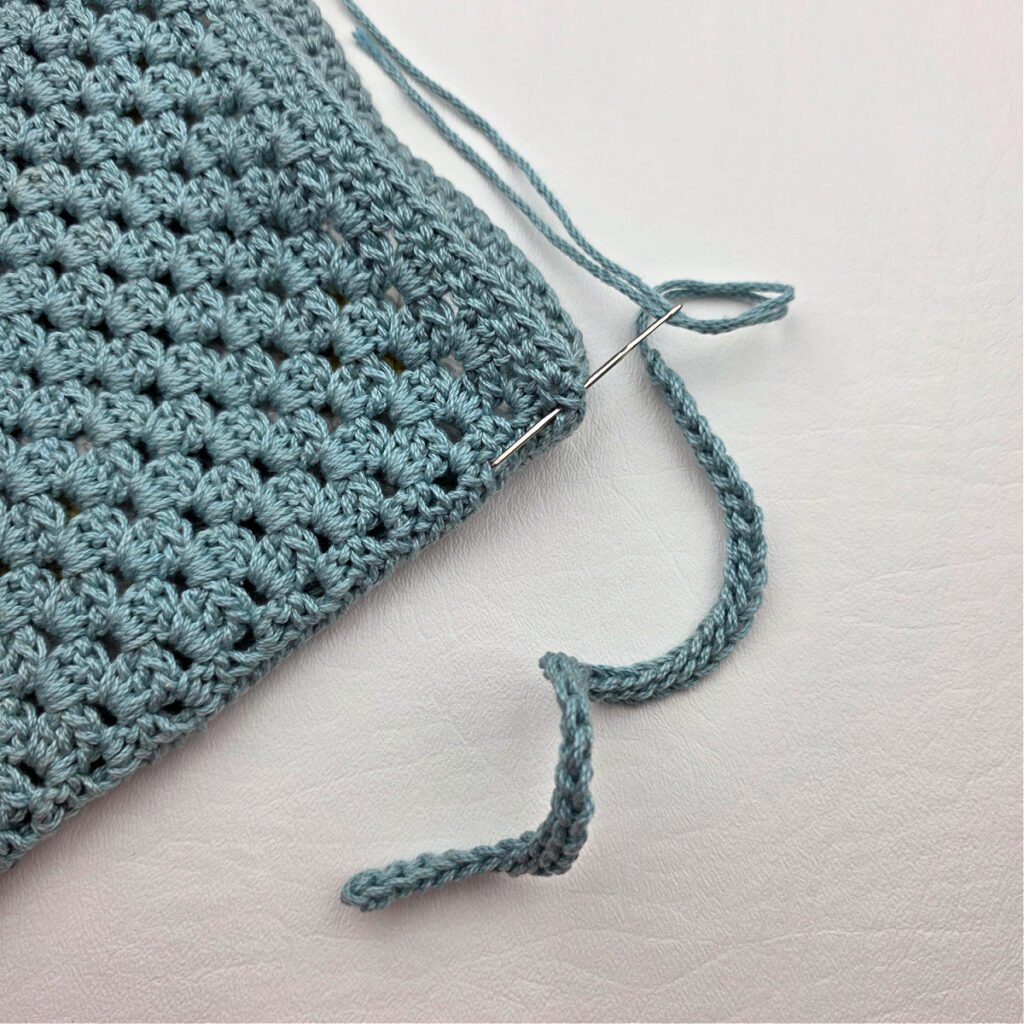
Step 2: With a piece of yarn 3 – 4 times the length of the pouch, whipstitch both long edges together from corner to corner. Repeat for the opposite long edge. Weave in ends.
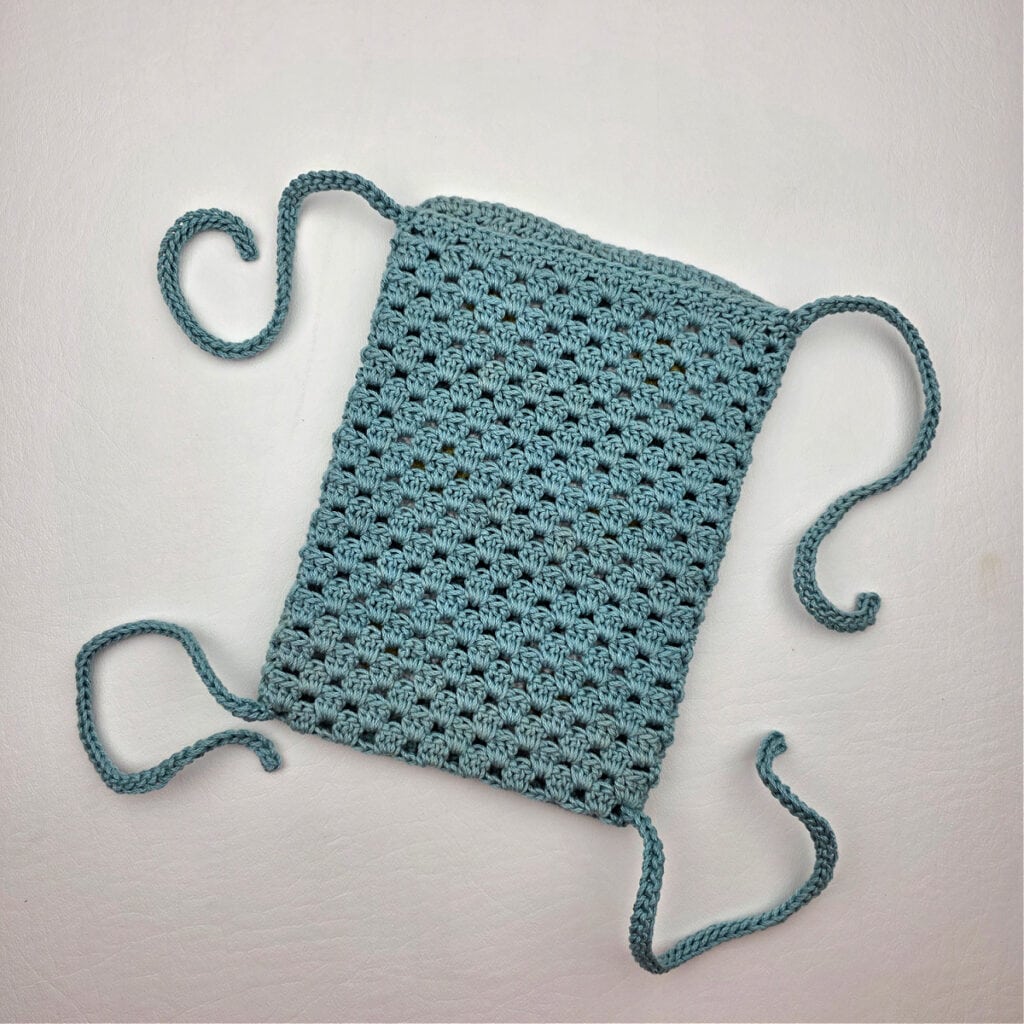
Step 3: With the back side facing you, attach one tie near each of the four corners.
Weave in ends. You Daisy Crochet Car Visor Sunglasses Holder is ready to be tied onto your car’s sun visor!
Progression Photos – Assembly
The photos below show the whipstitch seaming of the long edges and the crochet ties and assembly.

I MADE IT! NOW WHAT?
Pin this post!: Save this crochet car visor sunglasses holder pattern to your Pinterest boards so that you can come back and make it again.
Leave a comment below: We love to hear your feedback.
Share Your Finished Projects on Facebook or Instagram: I love to see your finished projects! Share with us on social media and tag me @acrochetedsimplicity or use the hashtag #ACrochetedSimplicity so I can find your posts.
Join us in the Facebook Community Group!
Come share your finished projects with us in the A Crocheted Simplicity Crochet Community Group on Facebook. Join us for fun community events such as crochet alongs, join in on crochet conversations, ask questions, get advice, and share your love for crochet!

More Crochet Patterns For Bags & Pouches I Think You’ll Love
More Free Summer Crochet Patterns
Are you looking for your next summer crochet project? We have several more free crochet patterns for summer lovin’.
You’ll find plenty of summer crochet ideas, from an easy crochet summer top and beach bags to summer crochet projects for kids!