Crochet Reindeer Candy Cane Holder Ornament
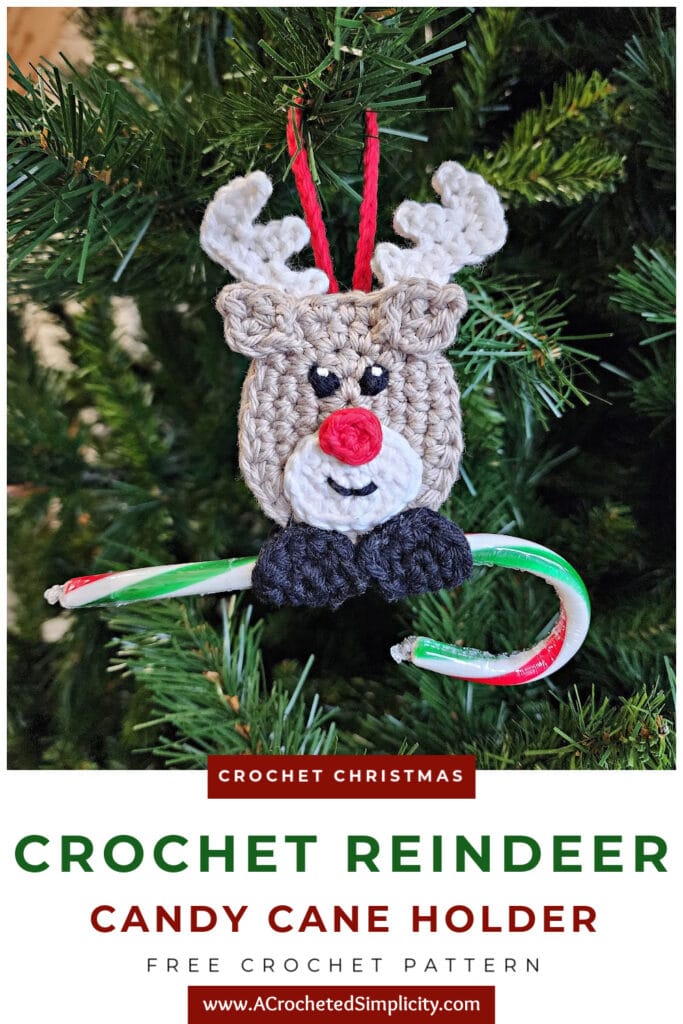
Need a last minute gift? Make a Crochet Reindeer Candy Cane Holder!
This cute (and super quick) crochet Christmas ornament also doubles as a fun DIY Christmas gift tag!
The crochet reindeer candy cane holder pattern is free in the post below, or you can find an ad-free print friendly version (that includes all photo tutorials) on Ravelry, or on Etsy (aff).
Whether you’re making Christmas decorations for your home and Christmas tree, or you want to add little handmade touches to gift bags and presents this year, this reindeer ornament is perfect!
All you need to make a reindeer candy cane holder is a little bit of yarn and less than an hour of your time and you’ll be adding to your reindeer Christmas decor in no time at all.
Do you like to DIY your own Christmas Gift Tags? This cute little reindeer candy cane holder is perfect for that! We also have a Gingerbread Boy & Girl and a Snowman!
Christmas Traditions
When I was a young girl, my grandparents started a family tradition for all of us grandkids. Each year for our birthdays and Christmas season, they would make and gift us a handmade Christmas ornament.
My grandpa would cut and sand the shapes out of wood and my grandma would hand paint the ornaments. I loved having my very own ornaments to hang on our family’s Christmas tree with each year.
My grandparents’ goal was that each of us would have a set of Christmas ornaments for our own Christmas tree someday, after we moved out of our parents’ house.
This year, I decided to start crocheting ornaments for my own grandkids so when they are fully grown, they too will have a set of Christmas memories for their own tree.
So far this, year I’ve made three different ornaments for them, the crochet gingerbread man candy cane holder, a candy cane snowman ornament, and this reindeer ornament. They are all fun, quick crochet projects!
How do you Make a Candy Cane Holder?
This free crochet reindeer candy cane holder is made by crocheting a few small pieces and then assembling them all together. Because the reindeer has two layers, there’s no need to weave in all the ends you’ll have from adding all of the little details. When you join the two layers of the reindeer’s head are joined, all those ends will be hidden. This will save you quite a bit of time.
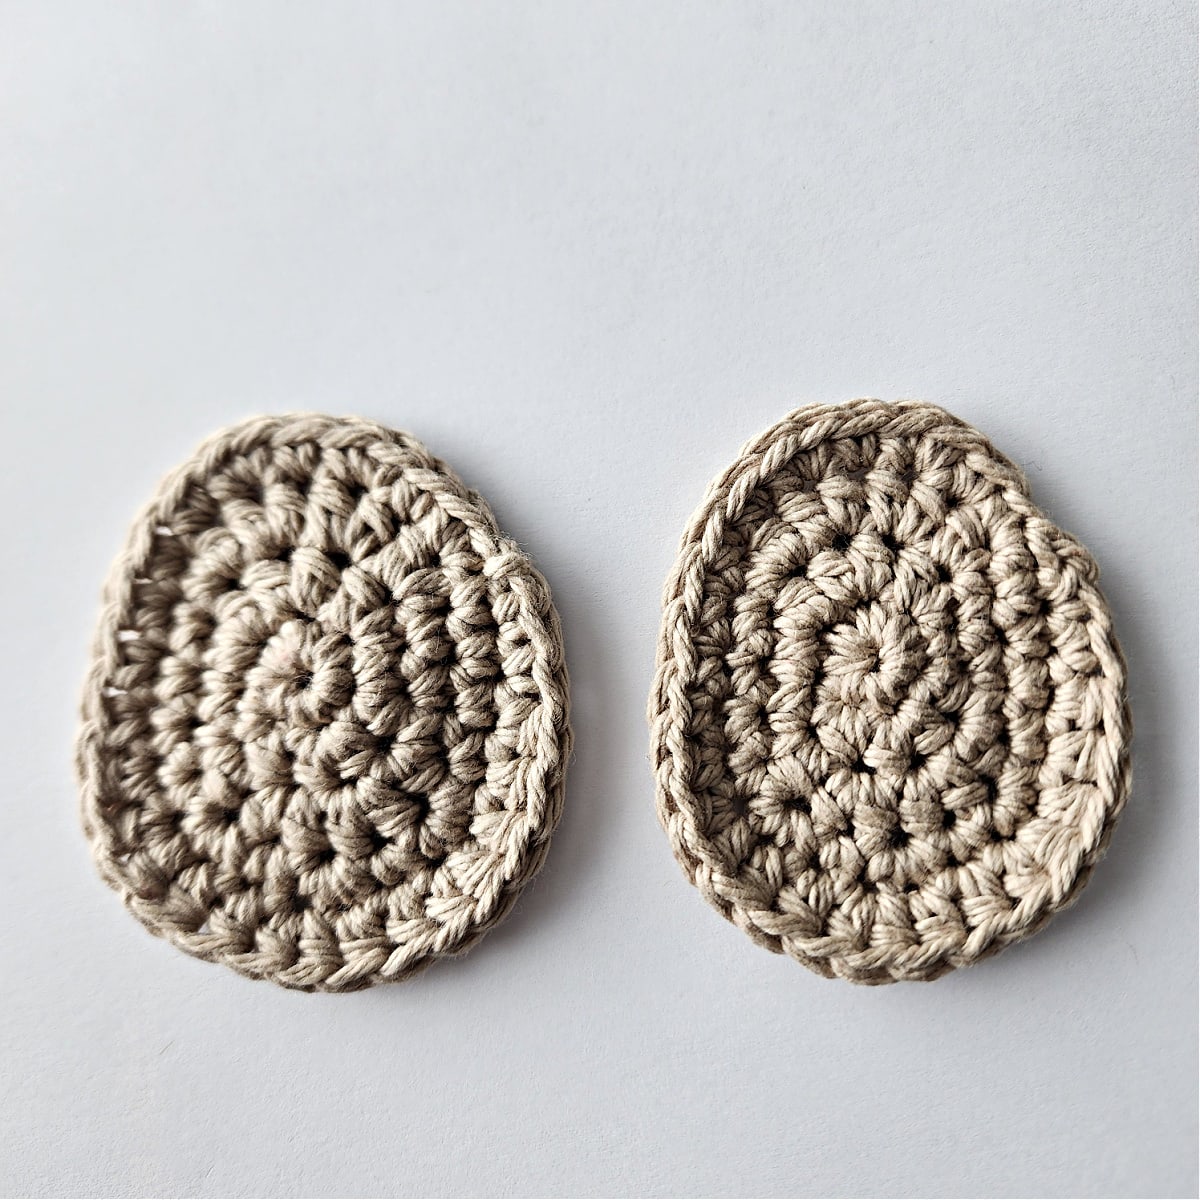
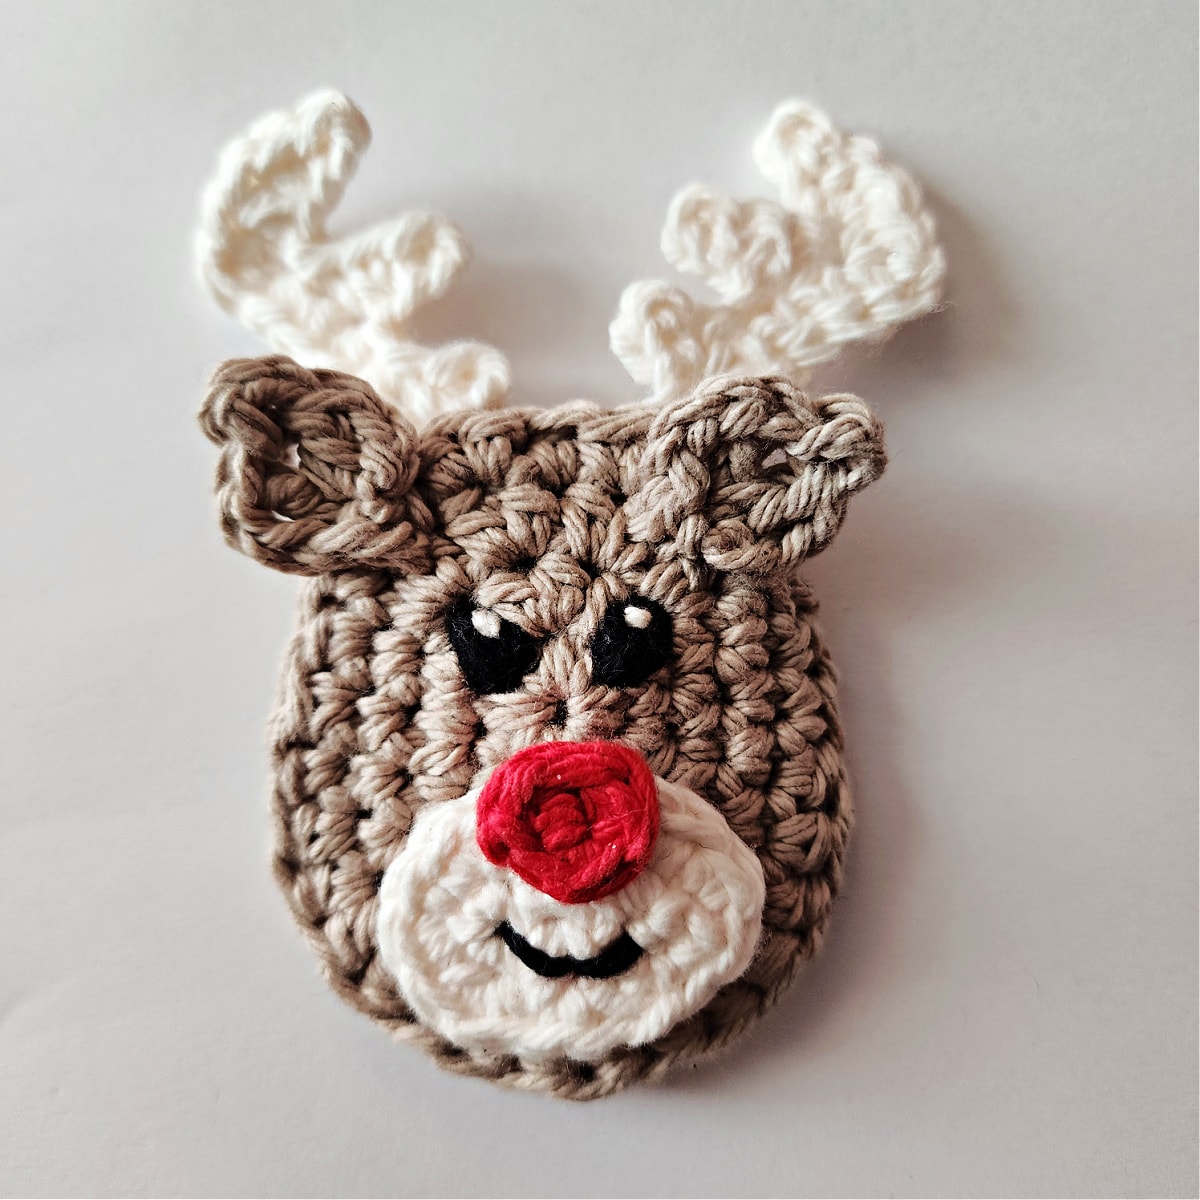
First, you’ll crochet two egg shaped heads for the reindeer. You’ll make a front and a back.
Next, you’ll crochet antlers, ears, a muzzle, red nose, and hooves.
After that, you’ll attach the muzzle, nose, antlers and ears to the reindeer’s head.
Then you’ll embroider eyes and a small mouth onto the reindeer’s face.
Next, make a simple crochet chain for a hanging loop and attach it to one of the reindeer’s heads. Then, join the two reindeer heads (hiding all of the ends).
Lastly, you’ll attach the candy cane holder hooves to the bottom edge of the reindeer Christmas ornament.
Yarn
I used Lily Sugar n’ Cream for my reindeer crochet candy cane holder pattern. I love the color choices available in the Lily Sugar n’ Cream line and it’s easy to mix and match with Peaches and Cream and Bernat Handicrafter. All 3 are very similar cotton yarns.
Although I chose a 100% cotton yarn for my crochet candy cane holder, you can use most any other fiber. Acrylic, wool, and even acrylic, wool, or cotton blends will work great for your reindeer Christmas tree decorations.
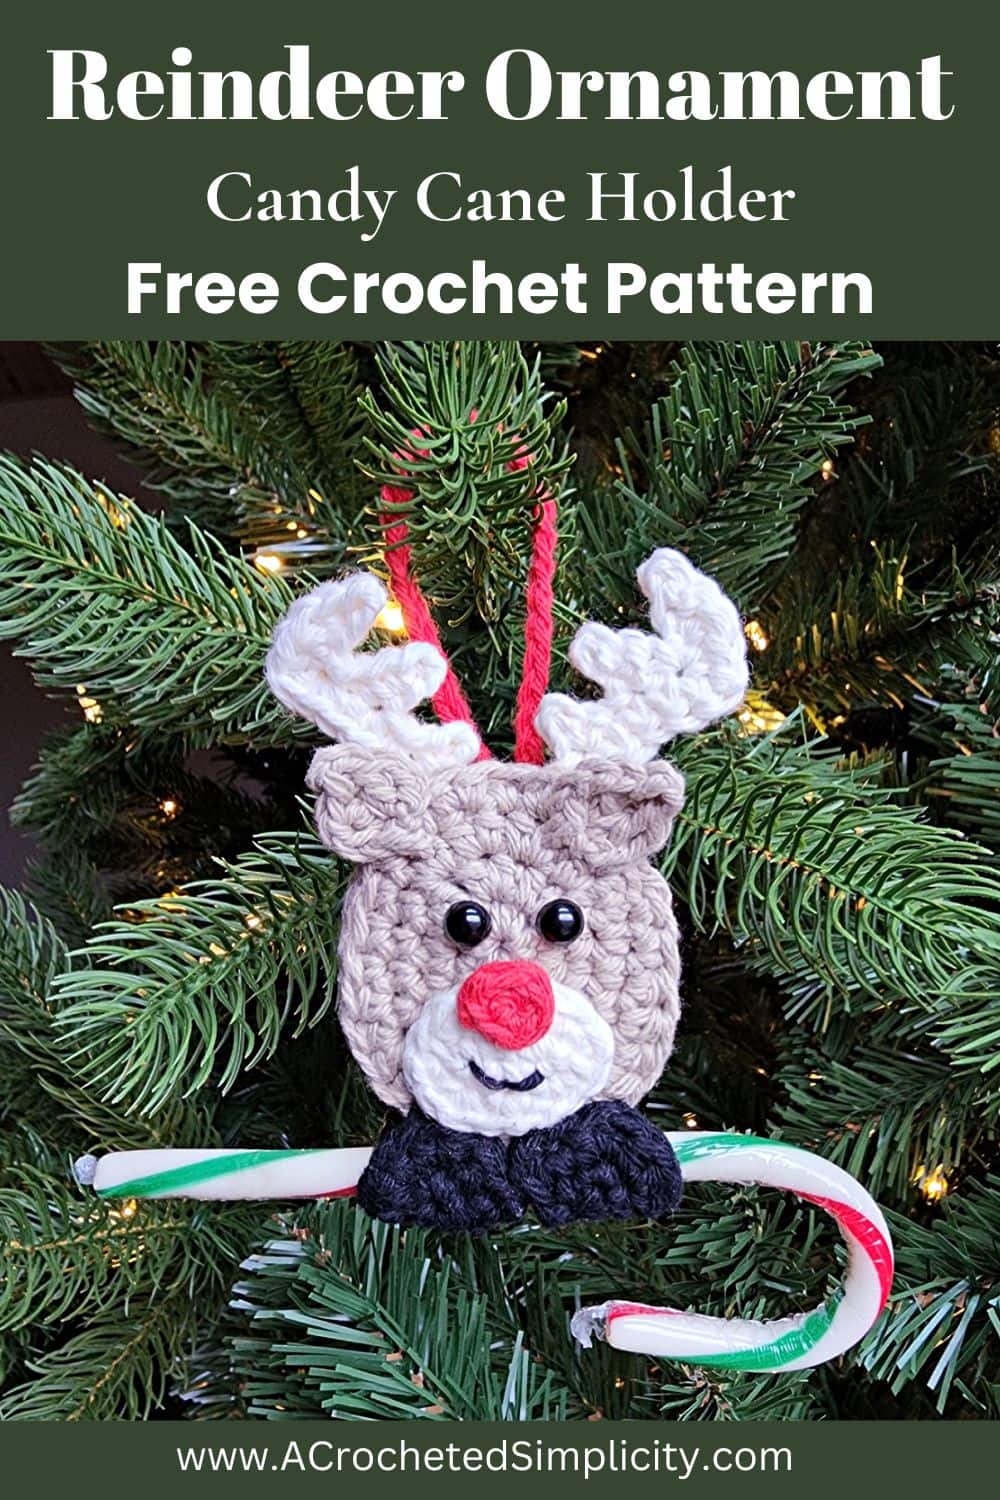
Reindeer Candy Cane Holder – Free Crochet Ornament Pattern
The crochet reindeer candy cane holder is free below, but if you love to work offline, I’ve got a couple other great options for you.
Purchase the ad-free, printable PDF, including all photo tutorials on Ravelry, or on Etsy (aff).
This post contains affiliate links.
Materials
- Yarn: Worsted Weight / 4 / Yarn, Lily Sugar n’ Cream was used for the sample in the photos, (70.9 g / 2.5 oz / 120 yards / 109 m / 100% cotton).
- See Yarn Notes above for alternative suggestions.
- Brown (Jute): 34 yards
- Black: 5 yards
- Soft Ecru (cream): 5 yards
- Red: 1 yard
- Crochet Hook: G/6/4.00mm; or size needed to obtain gauge (My favorite crochet hooks are the Clover Amour Crochet Hooks, I’ve never had an ache in my hands since switching).
- Locking Stitch Markers
- Scissors
- Yarn Needle
- (2) 6mm Black Plastic Safety Eyes (optional, includes instructions for embroidered eyes)
- Candy Canes
- Christmas pencils would also be a fun option for kids
Abbreviations (US Terms)
- ch(s): chain(s)
- sl st(s): slip stitch(es)
- st(s): stitch(es)
- sp: space
- sc: single crochet
- hdc: half double crochet
- Rnd: round
- RS: right side
- WS: wrong side
- SM: stitch marker
- yo: yarn over
- Join yarn with a standing sc
Experience Level
- Easy
Gauge
- Measurements are given throughout the pattern.
Size
- One Size: 4.5″ H x 2.5″ W (not including hanging loop)
Special Stitches
- Extended Single Crochet (ext sc): Insert hook into stitch indicated, yo, pull up a loop, yo, pull thru 1 loop on hook, yo, pull thru remaining two loops on hook.
Pattern Notes
- Turning chains are not included in stitch count unless noted otherwise.
- Yarn Notes: Lily Sugar n’ Cream was used for the sample pictured in the photos. Another comparable worsted weight yarn may be used as long as gauge is met.
- Lily Sugar n’ Cream Yarn (70.9 g / 2.5 oz / 120 yards / 109 m / 100% cotton).
- Yardage & Colors
- Brown (Jute): 34 yards
- Black: 5 yards
- Soft Ecru (cream): 5 yards
- Red: 1 yard
- Crochet Candy Cane Holder Construction: This reindeer crochet candy cane holder pattern is constructed by crocheting a few small pieces and then assembling them. First, you’ll crochet two heads for the reindeer. Then you’ll crochet antlers, ears, a muzzle, red nose, and hooves. Next, you’ll attach the muzzle, nose, antlers and ears to the reindeer’s head. Then you’ll embroider eyes onto the face and add a small mouth. Then, crochet a simple crochet chain for a hanging loop and attach it to one of the reindeer’s heads. Join the two reindeer heads. Lastly, you’ll attach the candy cane holder hooves to the bottom edge of the crochet reindeer.
Crochet Reindeer Candy Cane Holder Pattern
Reindeer’s Head
Make 2: You will make two heads (a front and a back). Because the reindeer has two layers, you don’t need to weave in all the ends you’ll have from adding all of the little details. When you join the two layers, all those ends will be hidden.
Note: The reindeer’s head is worked in continuous rounds to keep from having an unsightly seam. Do not join at the end of each round, instead use a scrap piece of yarn to keep track of the beginning of each round. Move the scrap of yarn up as you complete each round.
Rnd 1 (RS): With brown yarn & a 4.00mm crochet hook, ch 2, work 6 sc in the 2nd ch from your hook. Do not join. (6 sts)
Rnd 2: [ (sc, hdc) in the next st, 2 hdc in the next st, (hdc, sc) in the next st ] work from [ to ] 2 times. Do not join. (12 sts)
Rnd 3: [ sc in the next st, (sc, hdc) in the next st, 2 hdc in each of the next 2 sts, (hdc, sc) in the next st, sc in the next st ] work from [ to ] 2 times. Do not join. ( 20 sts)
At this point, your oval should measure approximately 1.375″ W x 1.75″ H.
Rnd 4: [ sc in each of the next 3 sts, (2 sc in the next st, sc in the next st) 3 times ] work from [ to ] 2 times, sc in each of the next 2 sts. Do not join. (26 sts)
At this point, your oval should measure approximately 1.75″ W x 2.25″ H.
Note: Row 5 is a partial row. It is not worked around the entire head.
Row 5: sc in each of the next 2 sts, hdc in the next st, (2 hdc in the next st, hdc in each of the next 2 sts) 3 times, hdc in the next st, sc in each of the next 2 sts. Do not join. (18 sts)
Approximate size of the egg shaped head should be approximately 2.125″ W (at the widest point) x 2.625″ H.
Fasten off. Weave in ends. Make a second Reindeer Head, then continue on to the Antlers.
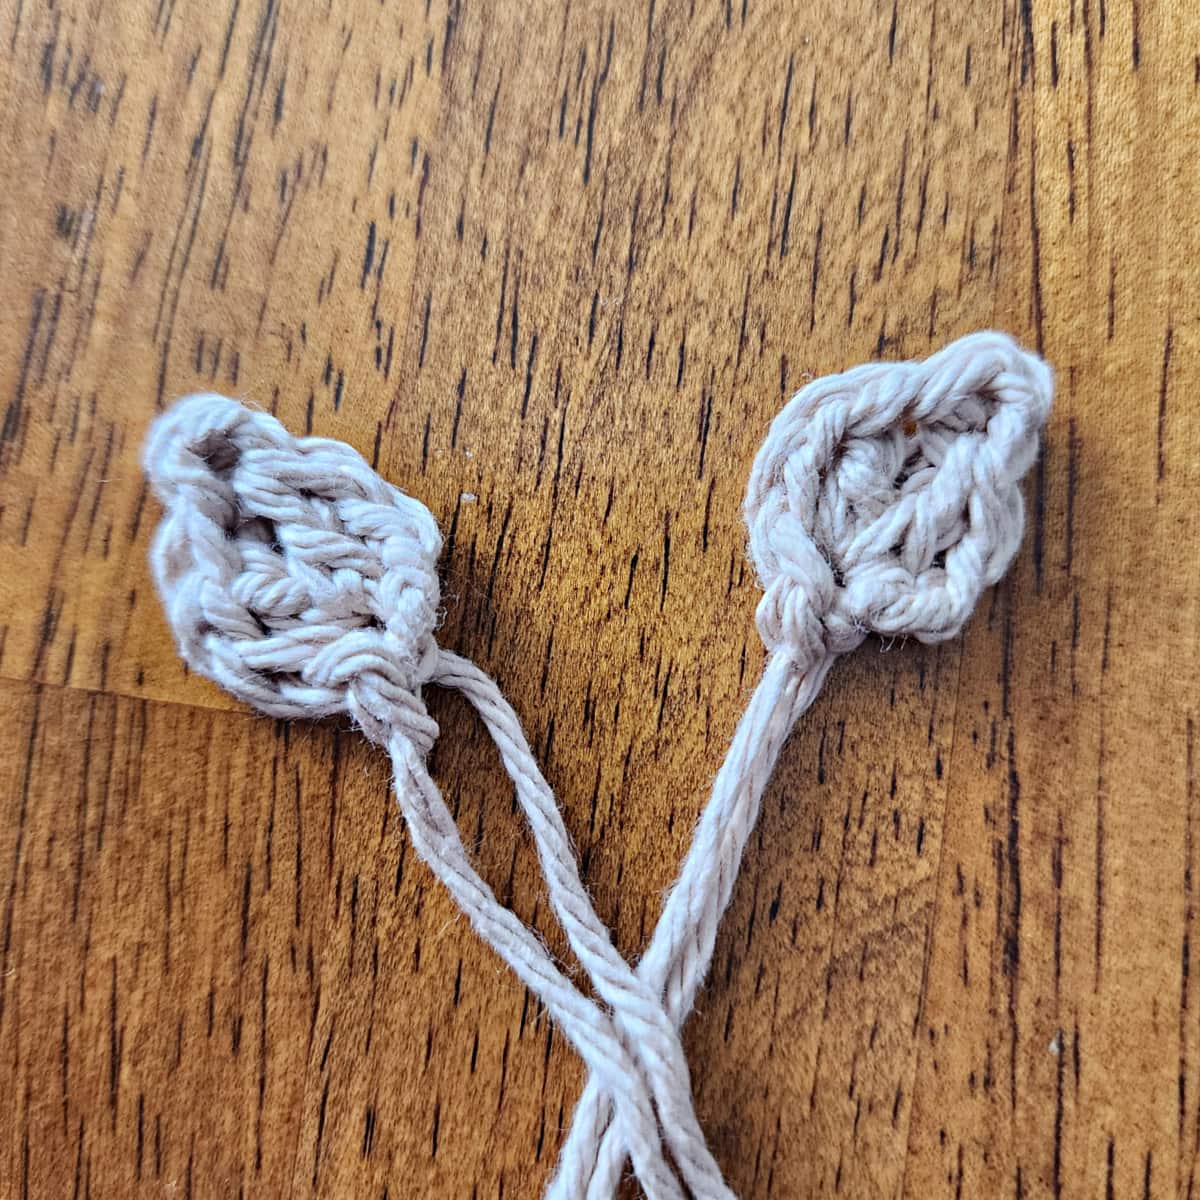
Reindeer’s Antlers – Make 2
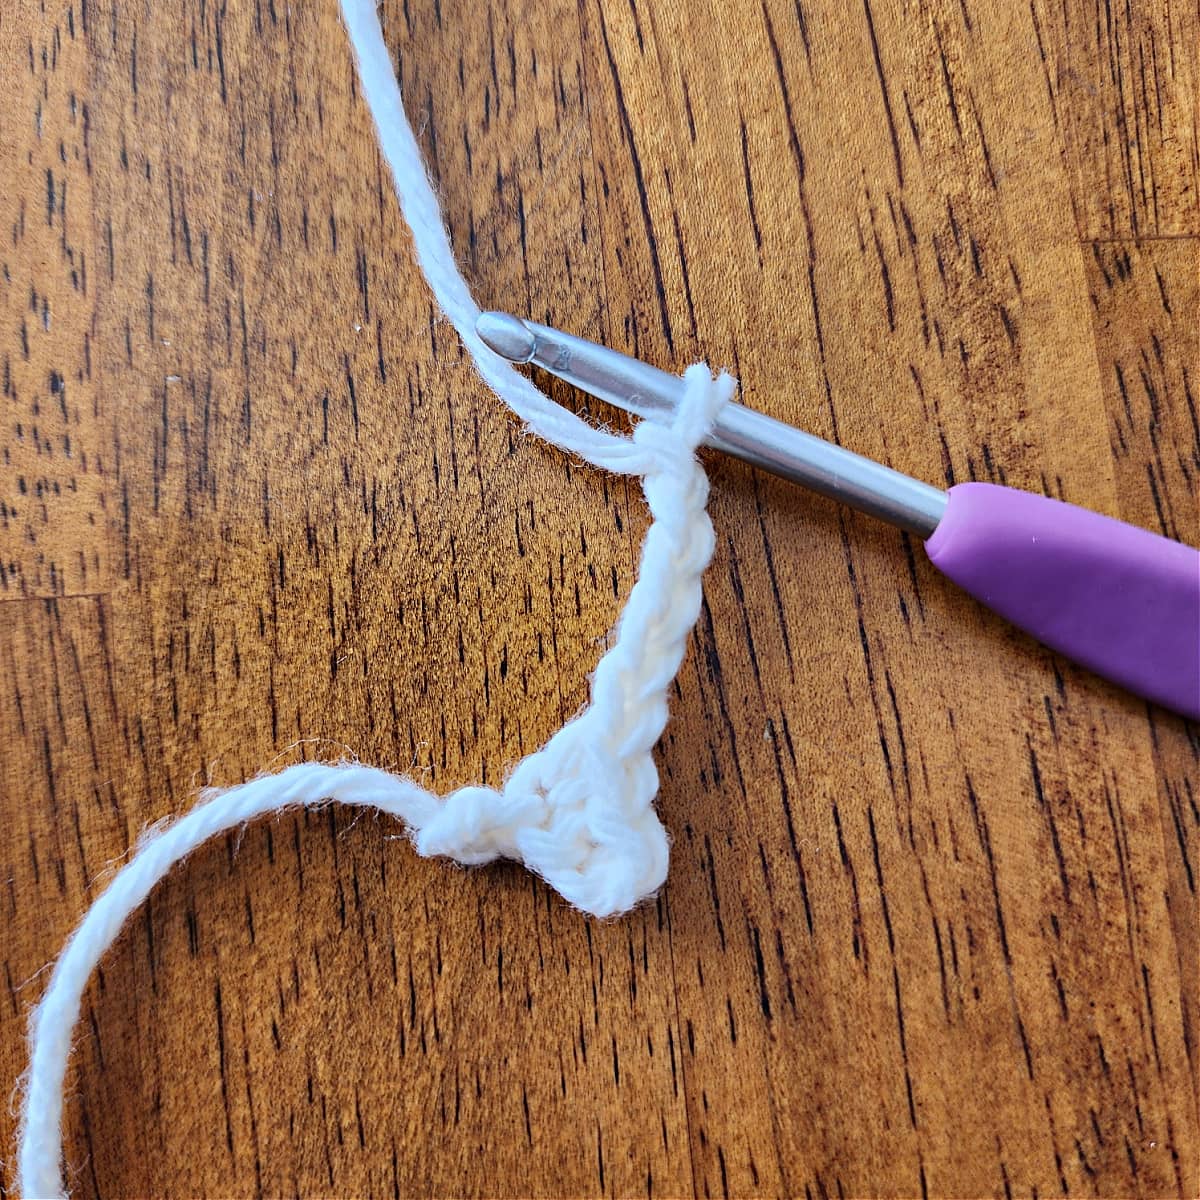
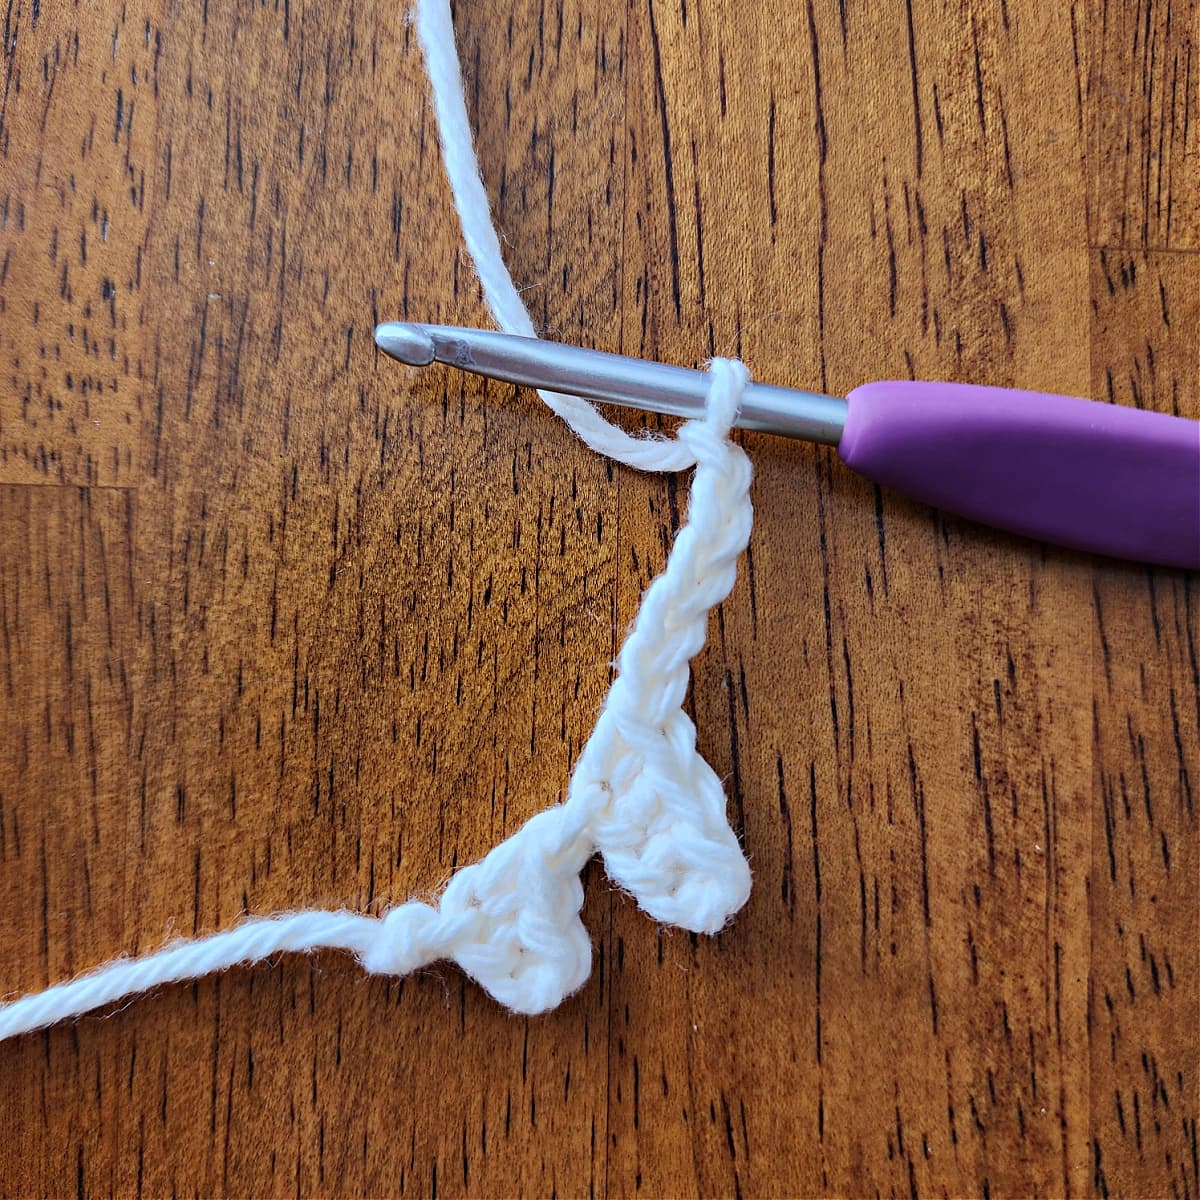
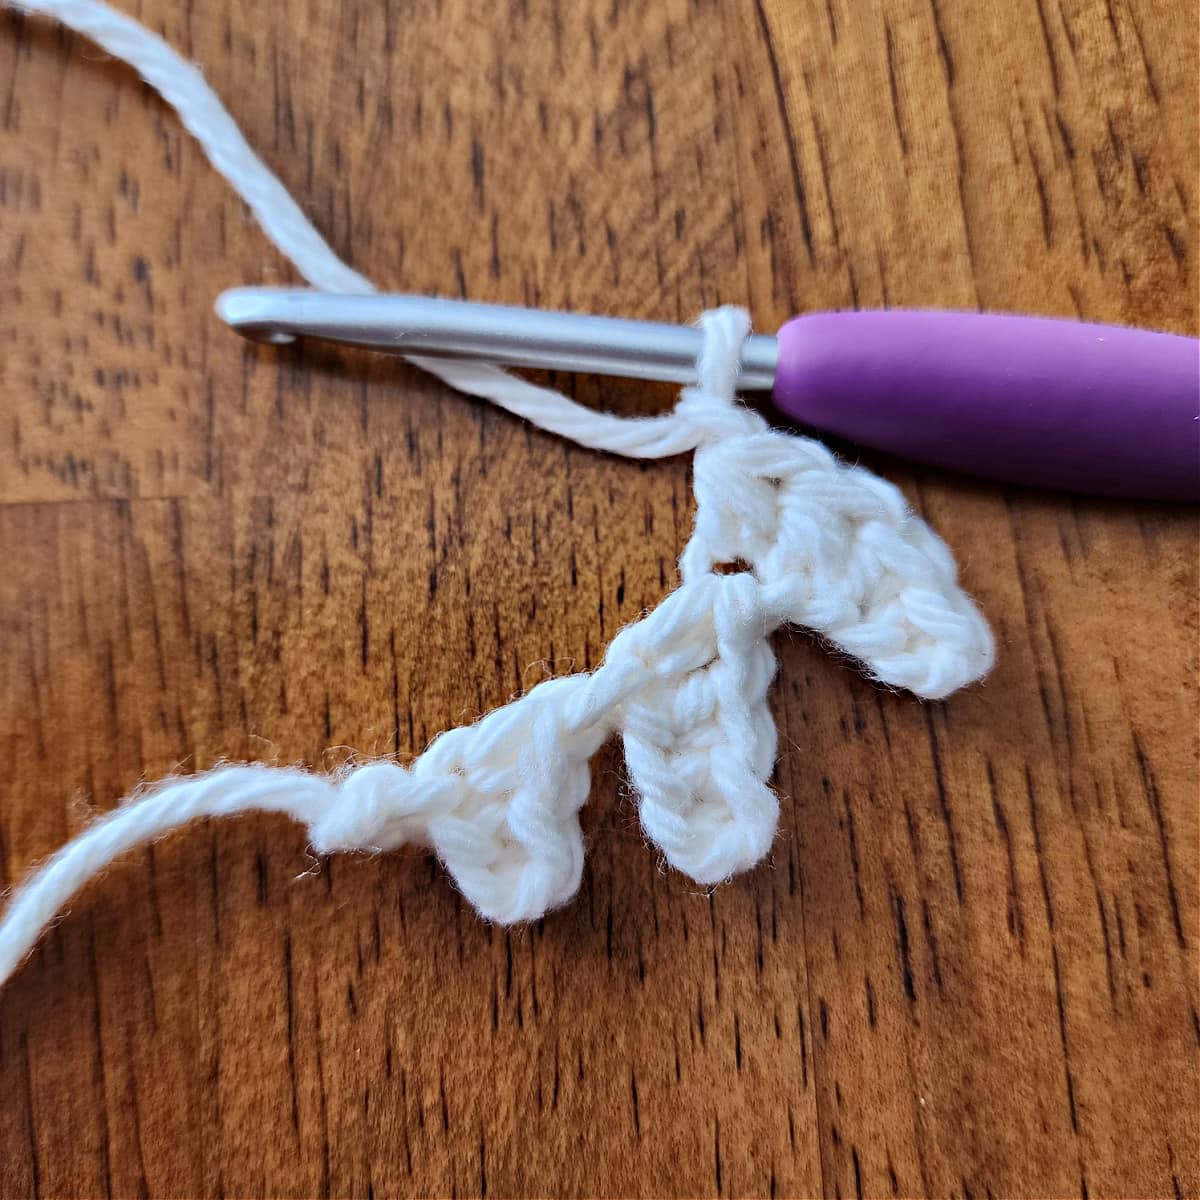
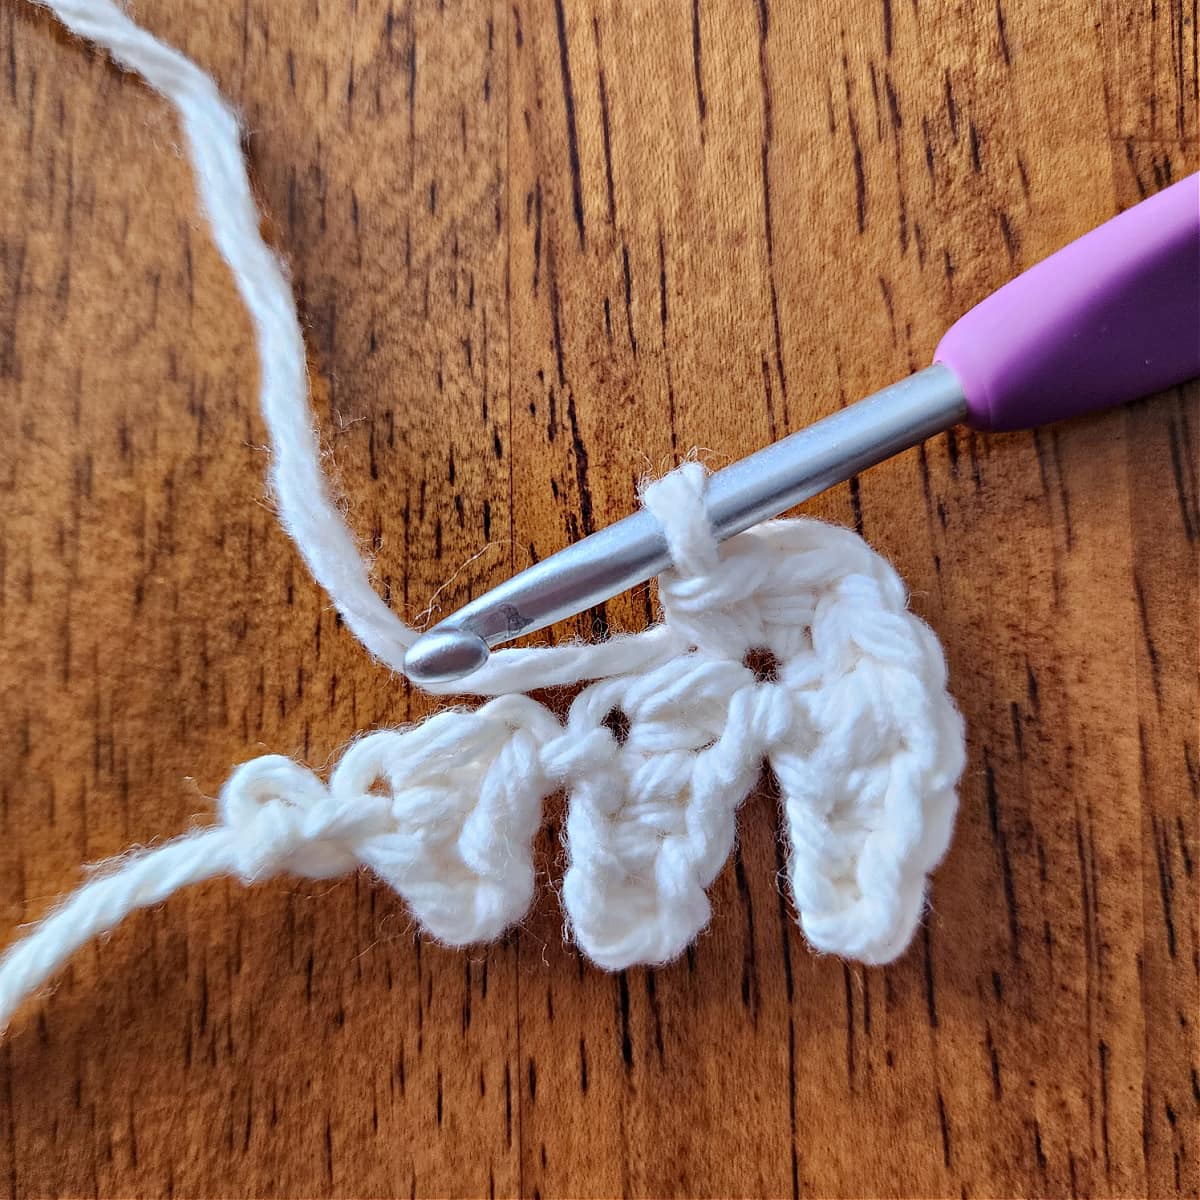
Row 1 (RS): With 4.00mm crochet hook & cream yarn, ch 4, working into the back hump of the foundation ch, sl st in the 2nd ch from your hook, sc in the next ch, ch 5, sl st in the 2nd ch from your hook, sc in each of the next 2 chs, ch 5, sl st in the 2nd ch from your hook, sc in the next ch, hdc in each of the next 2 chs, ch 1, rotate to work into the sides of the sts, work 1 sc into the side of the hdc, sc in the next ch, (sc in the side of the next sc, sc in each of the next 2 chs) 2 times.
Fasten off. Weave in ends. Antler’s should be approximately 1.75″ W x 1″ H (at tallest point). Make a second Antler, then continue on to the Ears.

Reindeer Ears – Make 2
Row 1 (RS): With 4.00mm crochet hook and light brown yarn, ch 3, dc into the 3rd ch from your hook, ch 2, sl st into the 2nd ch from your hook, dc into the same ch as previous dc, ch 2, sl st into same ch as dc’s.
Fasten off leaving a tail of yarn to sew the ears onto the face. Ears should be approximately .875″ W x .75″ H. Make a second Ear, then continue on to the Muzzle.
Muzzle
Note: Muzzle is worked in continuous rounds (spiral). I suggest using a scrap of yarn as a stitch marker to help keep track of rounds.
Rnd 1 (RS): With 4.00mm crochet hook and cream yarn, ch 4, 3 sc in 2nd ch from your hook, sc in the next ch, 3 sc in the last ch, rotate to work on the opposite side of the ch, sc in the next ch. Do not join. (8 sts)
Begin using a scrap piece of yarn to keep track of the beginning and ending of rounds.
Rnd 2: (2 sc in each of the next 3 sts, sc in the next st) twice. (14 sts)
Fasten off leaving a tail of yarn to sew the muzzle onto the face.
Muzzle should be approximately 1.375″ W x .875″ H.
Continue on to the Red Nose.
Red Nose
Rnd 1 (RS): With a 4.00 mm crochet hook and red yarn, ch 2, work 4 sc in the 2nd ch from your hook. Join with a sl st to the 1st st. (4 sts)
Fasten off leaving a tail of yarn to sew the nose onto the face. Nose should be approximately .5″ across. Continue on to the Hooves.
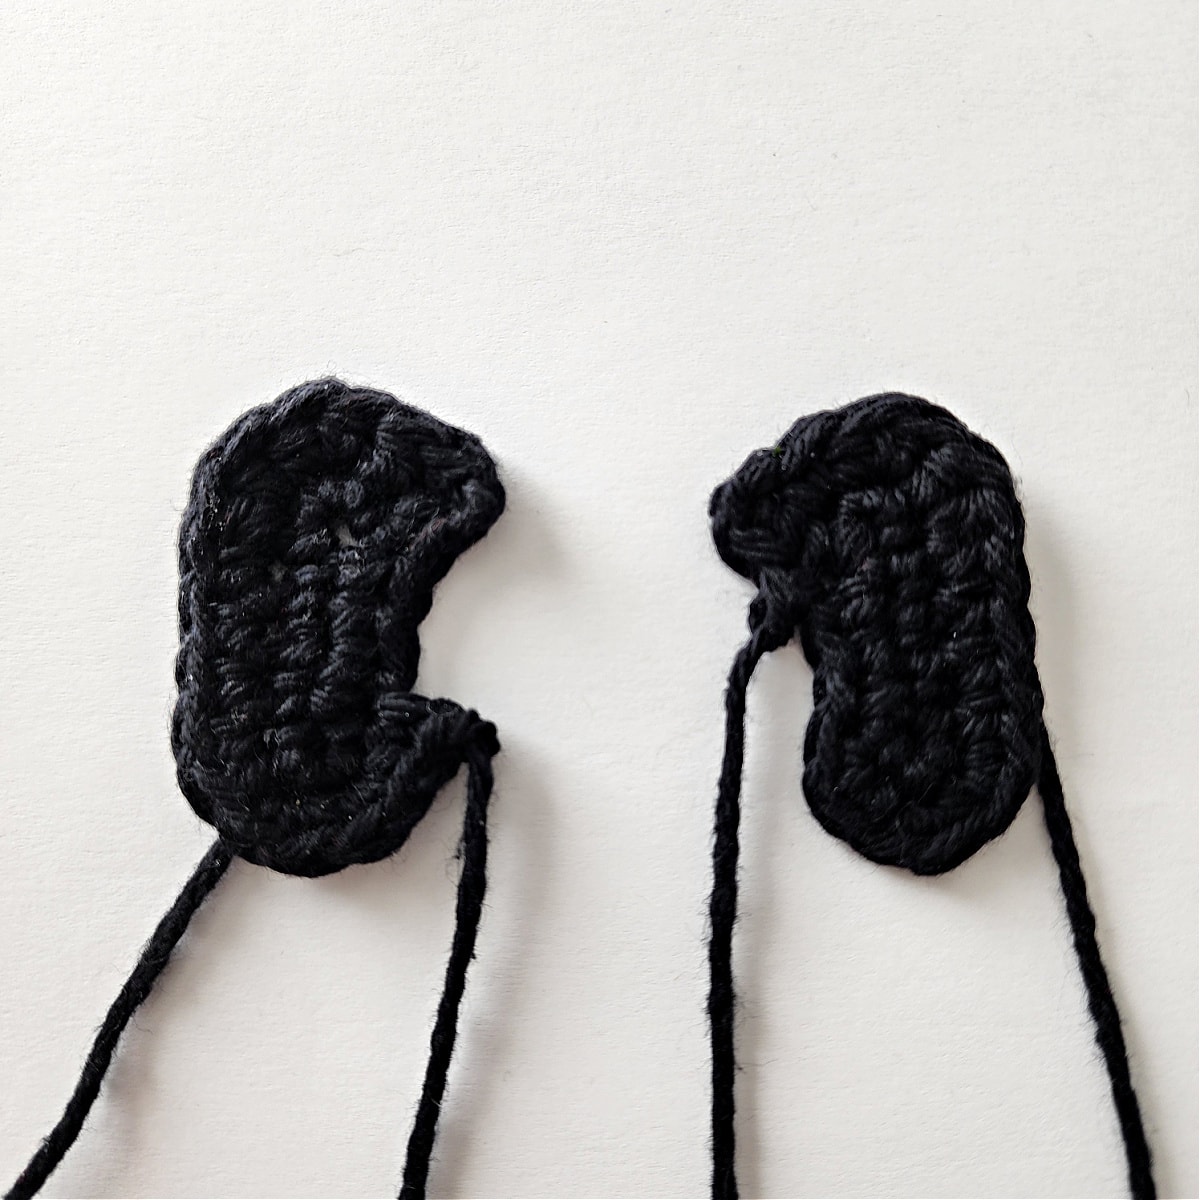
Hooves
Note: Hooves are worked in continuous rounds (spiral). I suggest using a scrap of yarn as a stitch marker to help keep track of rounds. There is a Right Hoof & Left Hoof.
Reindeer’s Right Hoof
Rnd 1 (RS): With 4.00mm crochet hook and black yarn, ch 6, work 3 sc in the 2nd ch from your hook, sc in each of the next 3 chs, 3 sc in the last ch, rotate to work on the opposite side of the ch, sc in each of the last 3 chs. Do not join. (12 sts)
Begin using a scrap piece of yarn to keep track of the beginning and ending of rounds.
Rnd 2: Sc in the next st, ch 2, sc in the 2nd ch from your hook, hdc in the same st as the 1st sc of the round, 2 hdc in each of the next 2 sts, sc in each of the next 3 sts, 2 sc in each of the next 3 sts, sc in the next st, skip each of the last 2 sts. (17 sts)
Fasten off leaving a tail of yarn to sew the hoof onto the head. Hoof should be approximately 1.25″ W (at widest point) x 2″ L. Continue on to the Left Hoof.
Reindeer’s Left Hoof
Rnd 1 (RS): With 4.00mm crochet hook and black yarn, ch 6, work 3 sc in the 2nd ch from your hook, sc in each of the next 3 chs, 3 sc in the last ch, rotate to work on the opposite side of the ch, sc in each of the last 3 chs. Do not join. (12 sts)
Begin using a scrap piece of yarn to keep track of the beginning and ending of rounds.
Rnd 2: 2 sc in each of the first 3 sts, sc in each of the next 3 sts, 2 hdc in each of the next 2 sts, sc in the next st, ch 2, sc in the 2nd ch from your hook, sl st in the next st. (16 sts) The stitch counts for the hooves are different because of shaping. This is intentional.
Fasten off leaving a tail of yarn to sew the hoof onto the head. Hoof should be approximately 1.25″ W (at widest point) x 2″ L. Continue on to the Facial Features.
Facial Features
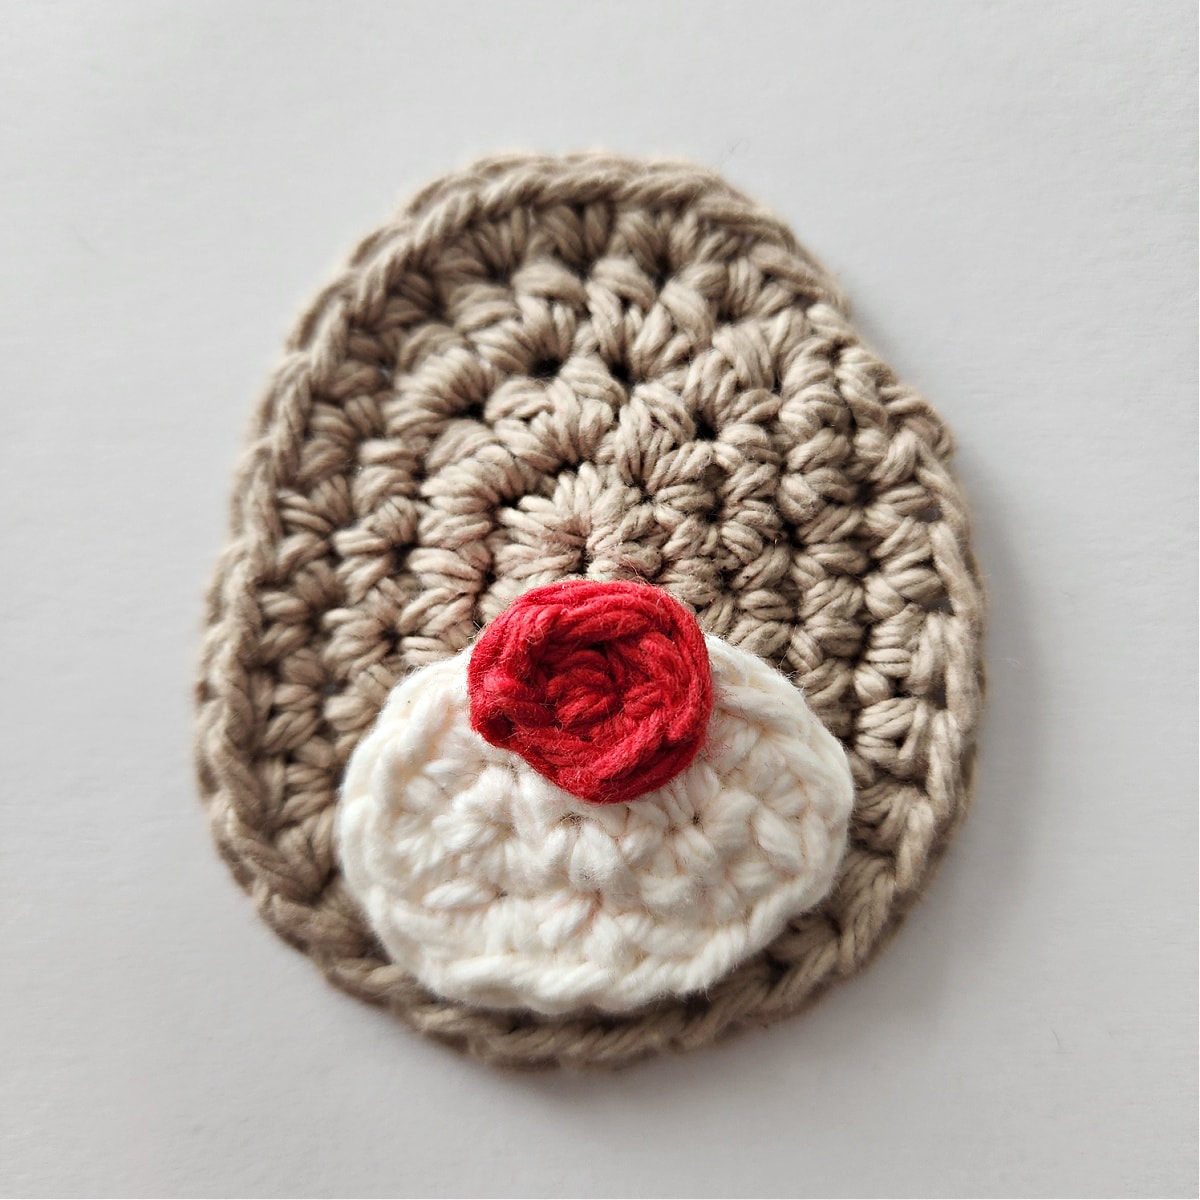
Muzzle & Red Nose
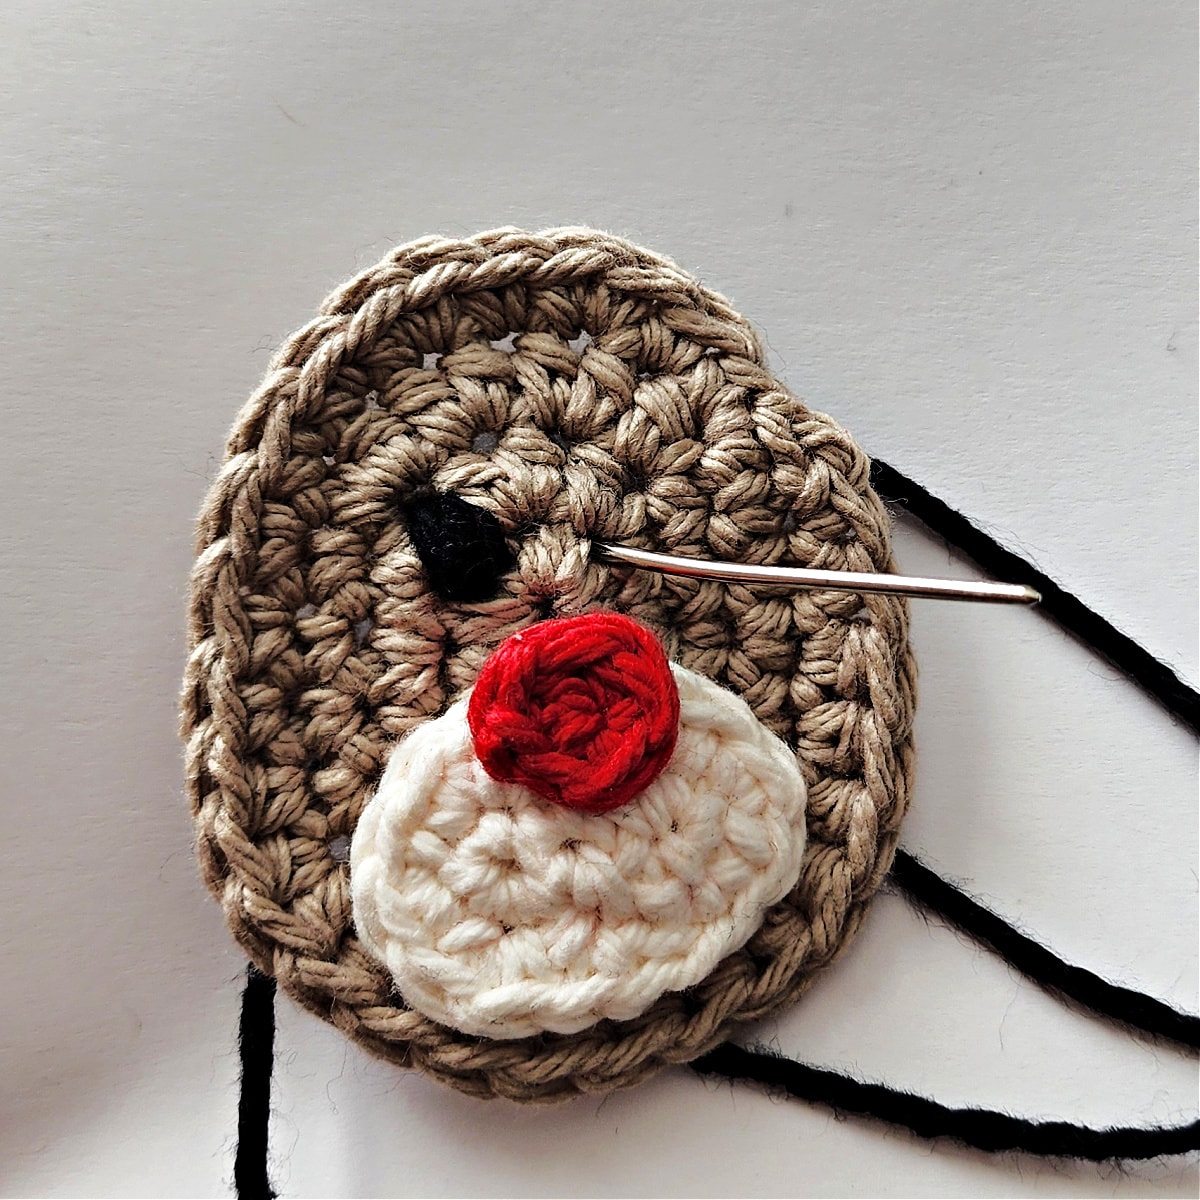
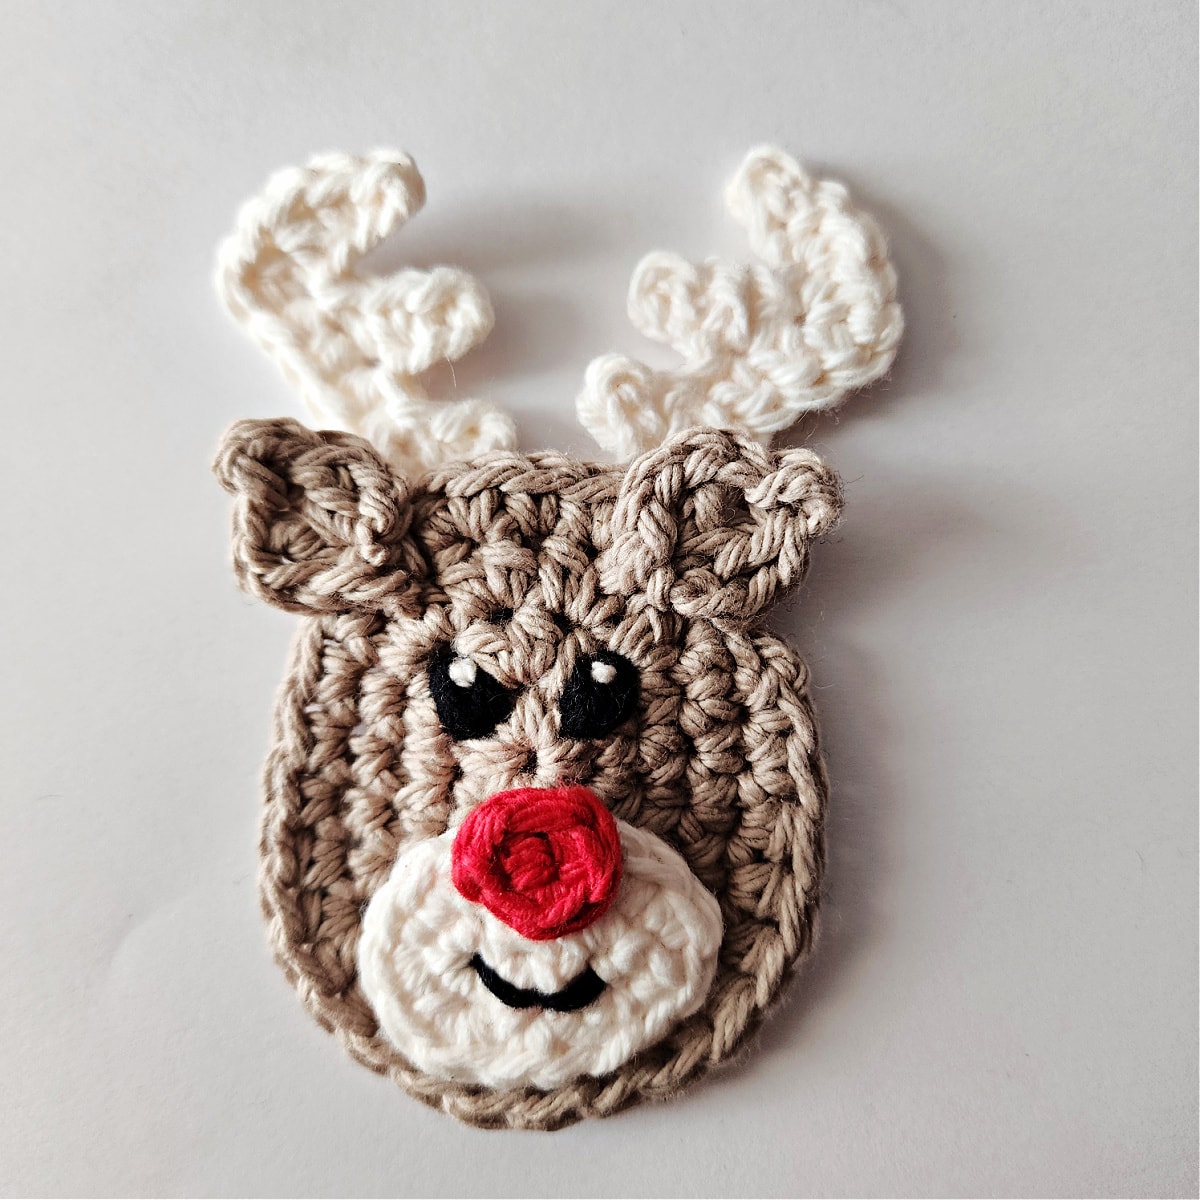
With a yarn needle and tail of red yarn, sew the red nose onto the muzzle as shown in the photo below.
Then, with a tail of cream yarn, sew the muzzle onto the face (on the wider end), as shown in the photo below. Make sure not to stitch the muzzle over the stitches along the very bottom edge because you will use these stitches to join the two heads later.
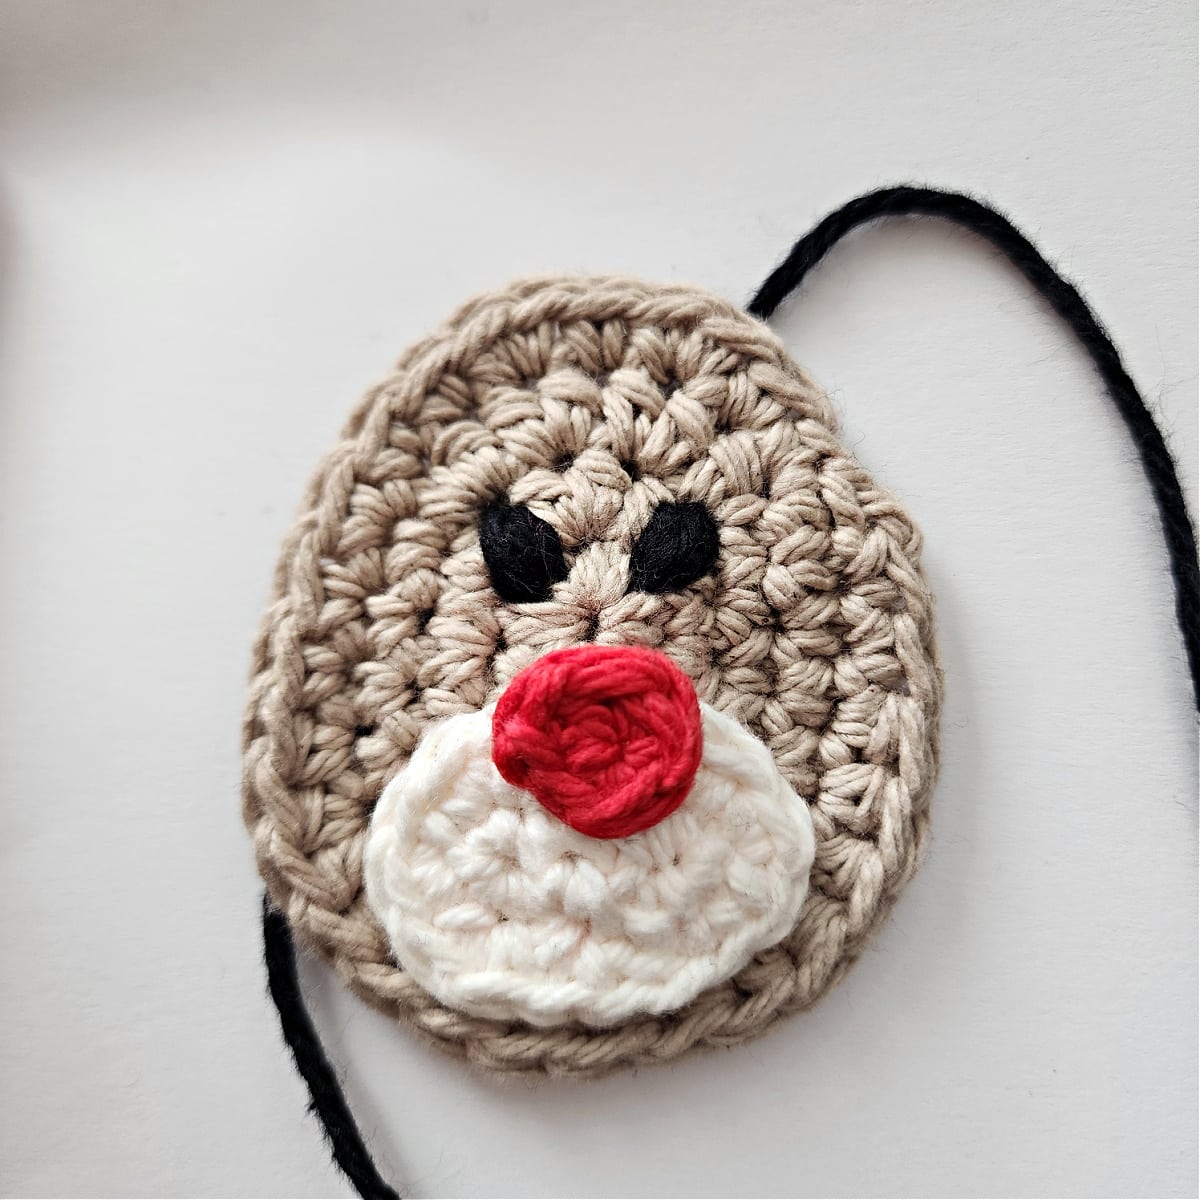
Reindeer’s Eyes
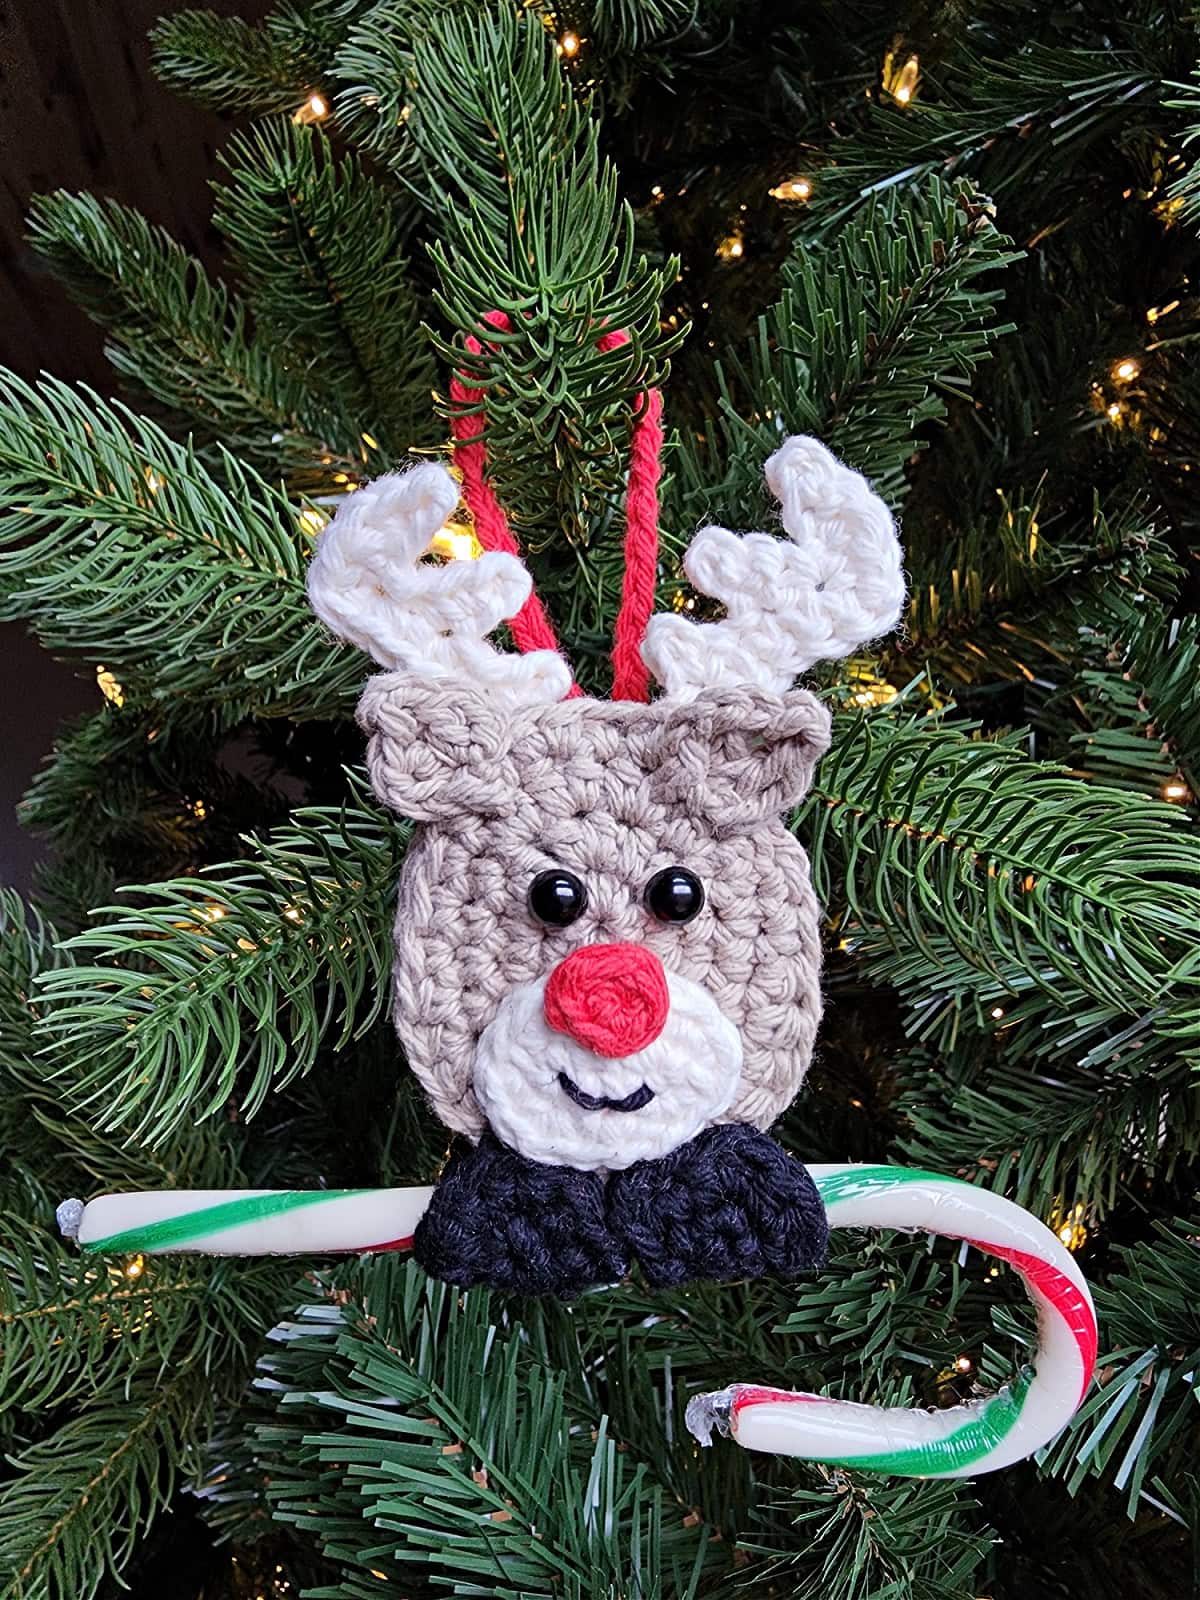
I chose to use 6mm black safety eyes for one of my Reindeer. If you’re doing the same, position them as shown in the photos above and secure them to the reindeer’s face.
Yarn Option: If you’re going to use yarn to make your eyes, with an 18″ piece of black yarn and yarn needle, embroider eyes on the reindeer’s face as shown below. I looped the yarn around a stitch, 6 times, near the center of the face.
Optional: With a white or cream piece of yarn, come up through the black part of the eye and go down really close to the same spot to create the little white speck. See a photo of this below.
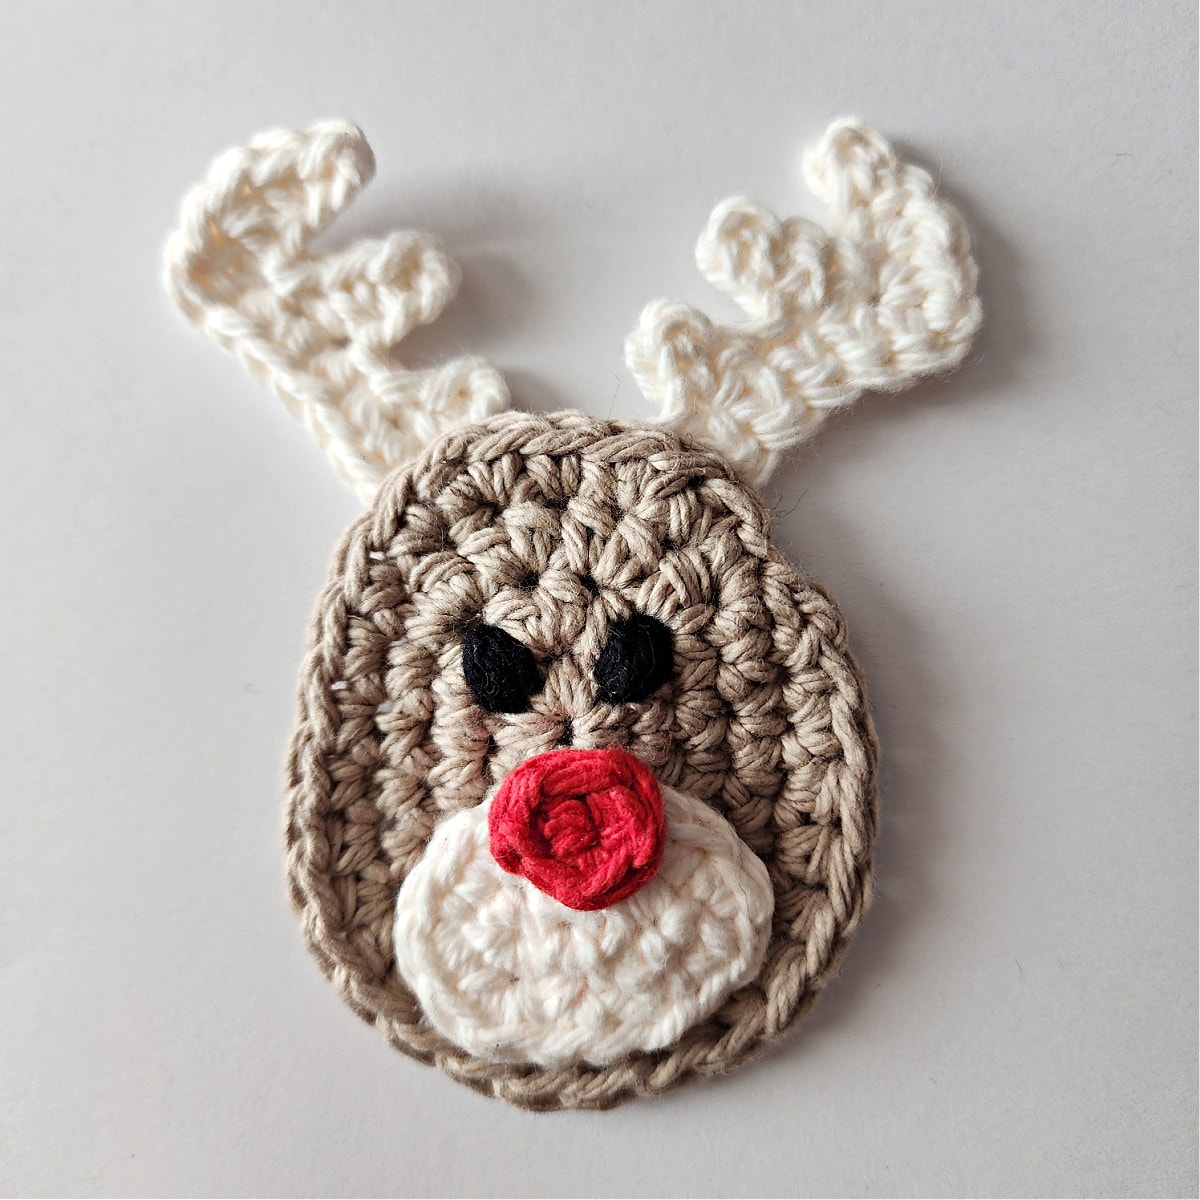
Attach the Antlers
With an 18″ piece of brown yarn and yarn needle, attach antlers to the back side of the reindeer’s head as shown in the photo below.
Attach the Ears
With a yarn needle and tail of brown yarn, sew the ears onto the reindeer’s head as shown in the photo below.
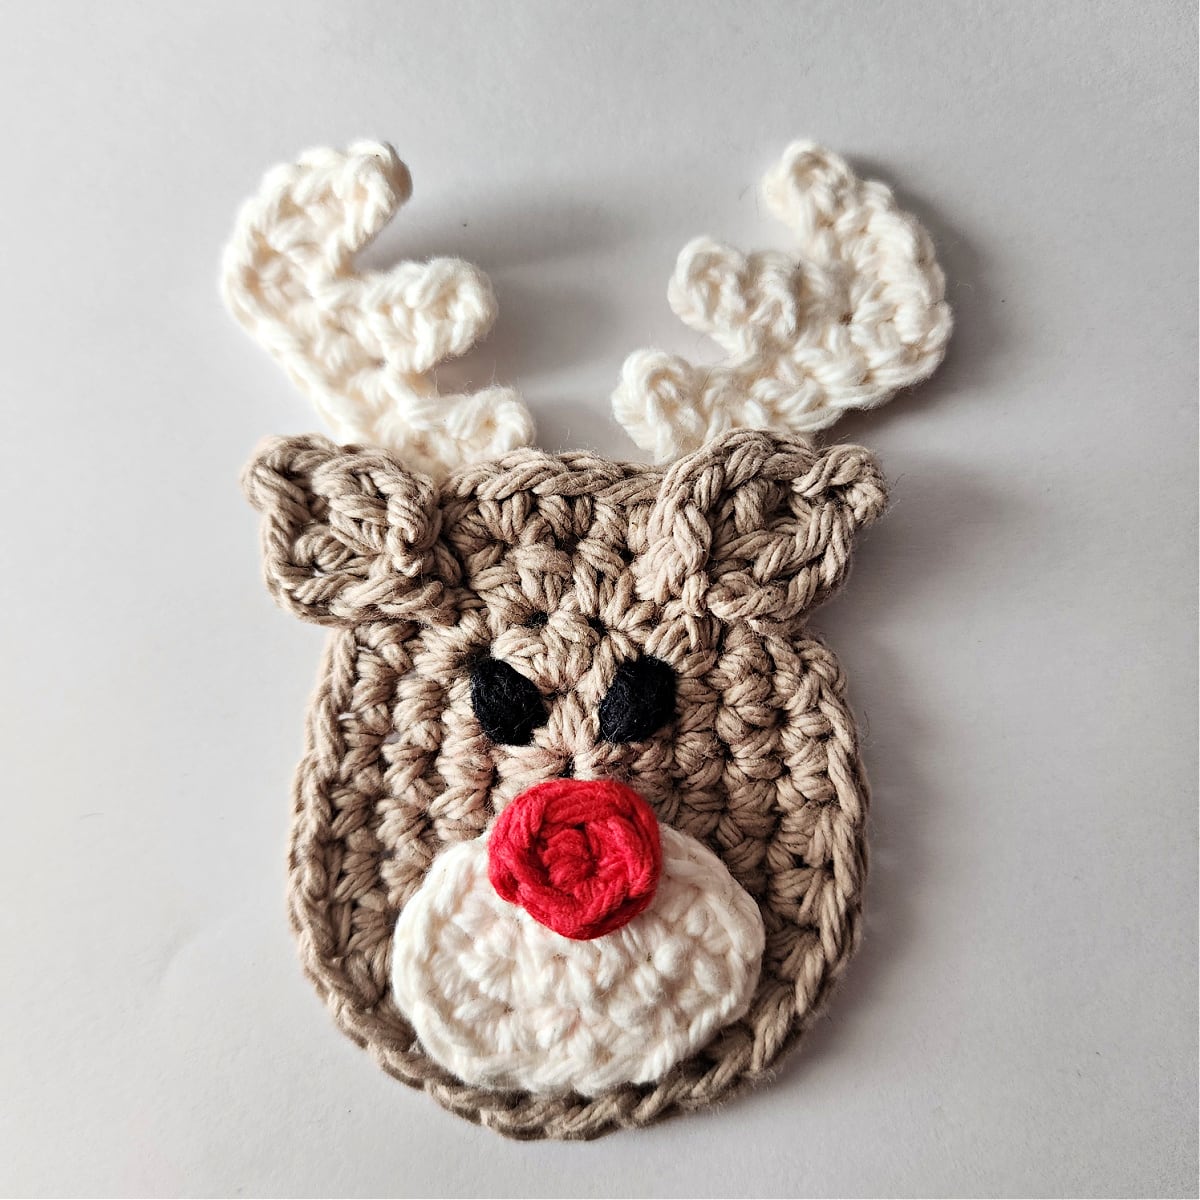
Mouth
Using a yarn needle and 6″ piece of cotton black yarn, create a small smile on the reindeer’s muzzle.
You can also see the little white dots that I added to his eyes.
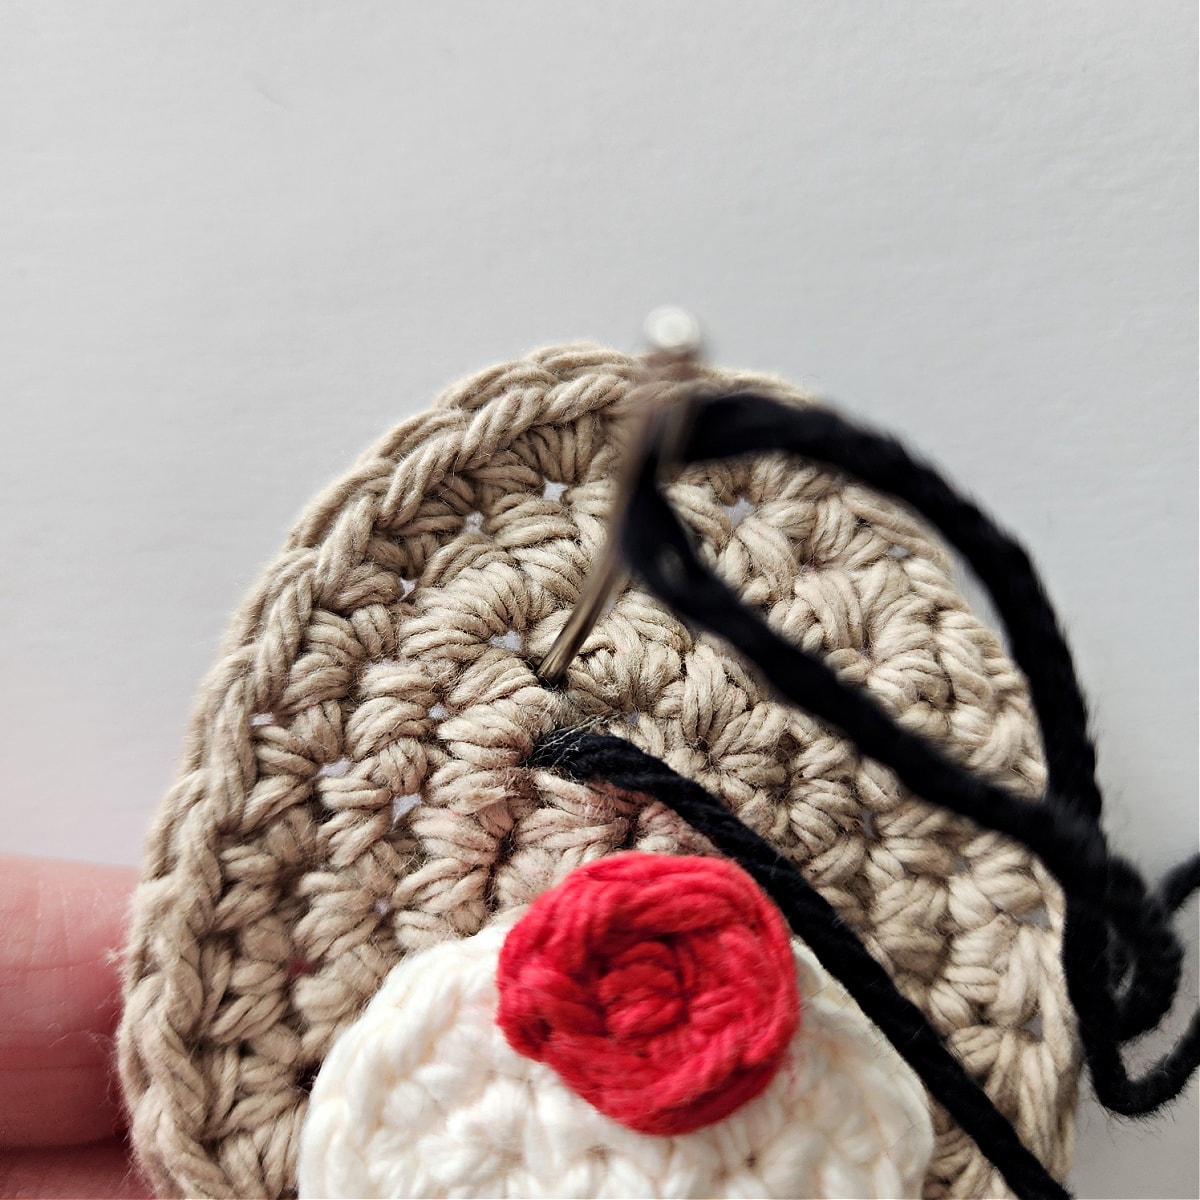
Hanging Loop
With any color yarn & a 4.00mm crochet hook, create a chain that is 6″ long. Join with a sl st to the 1st ch.
Fasten off, leaving a tail of yarn. With a yarn needle and tail of yarn, sew the hanging loop onto the back of the reindeer’s head, between the antlers. Weave in ends.
Hanging Loop Alternative
You could also use a 6″ piece of ribbon as a hanging loop, instead.
Then attach it to the back of the reindeer’s head, between the antlers, with a needle and thread.
Continue on to Joining the Reindeer’s Heads.
Joining the Reindeer’s Heads
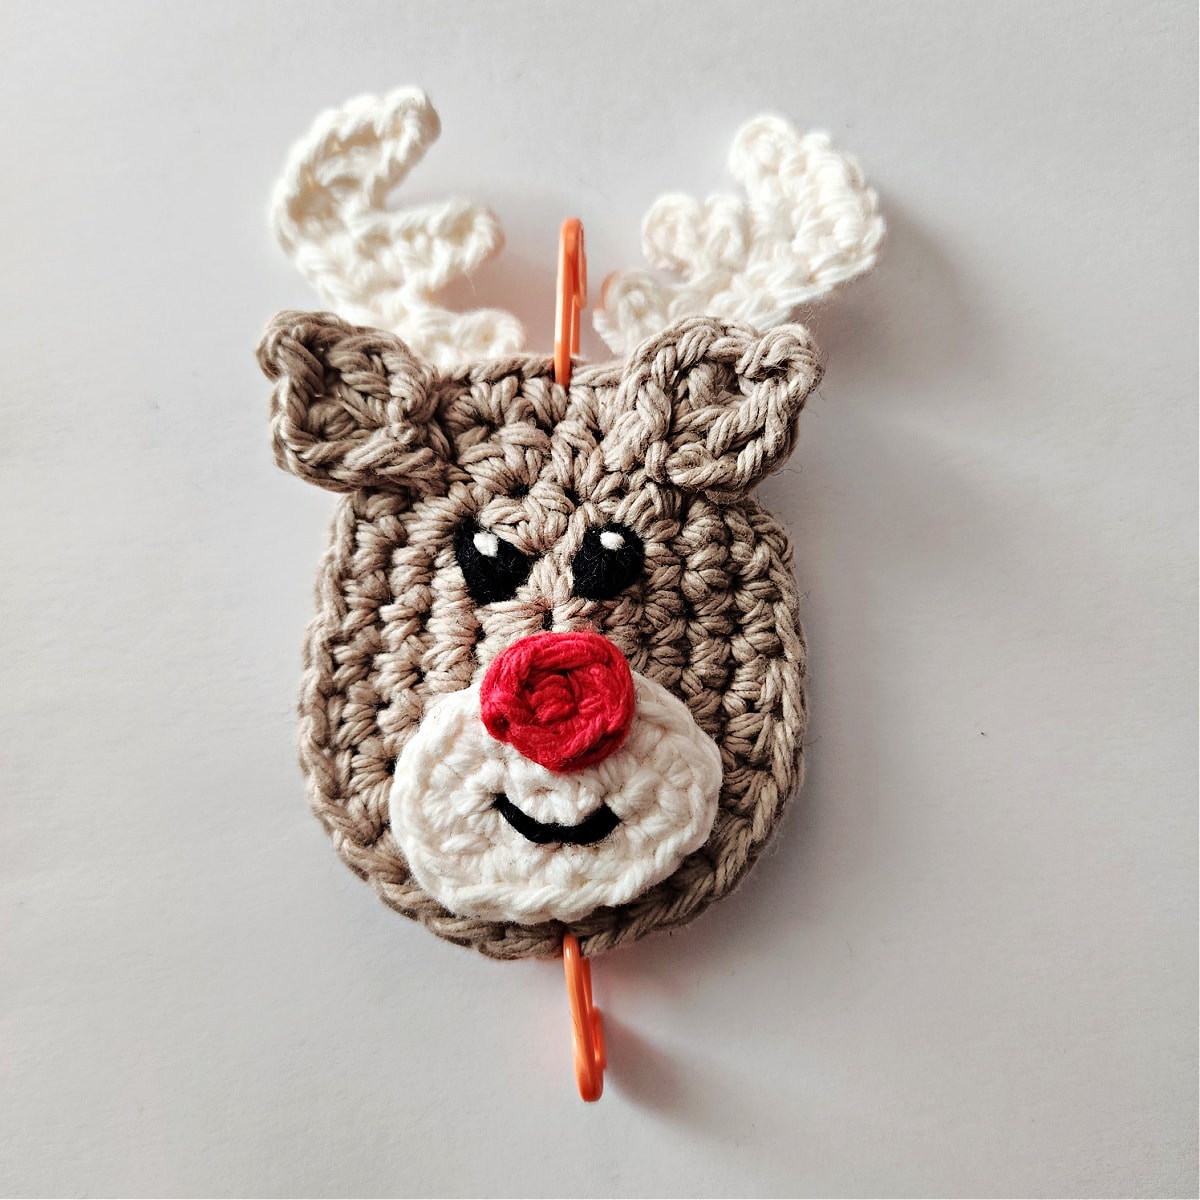
Step One: With the wrong sides together, lay your reindeer’s heads on top of each other. Use locking stitch markers to help hold the two heads together while you join them.
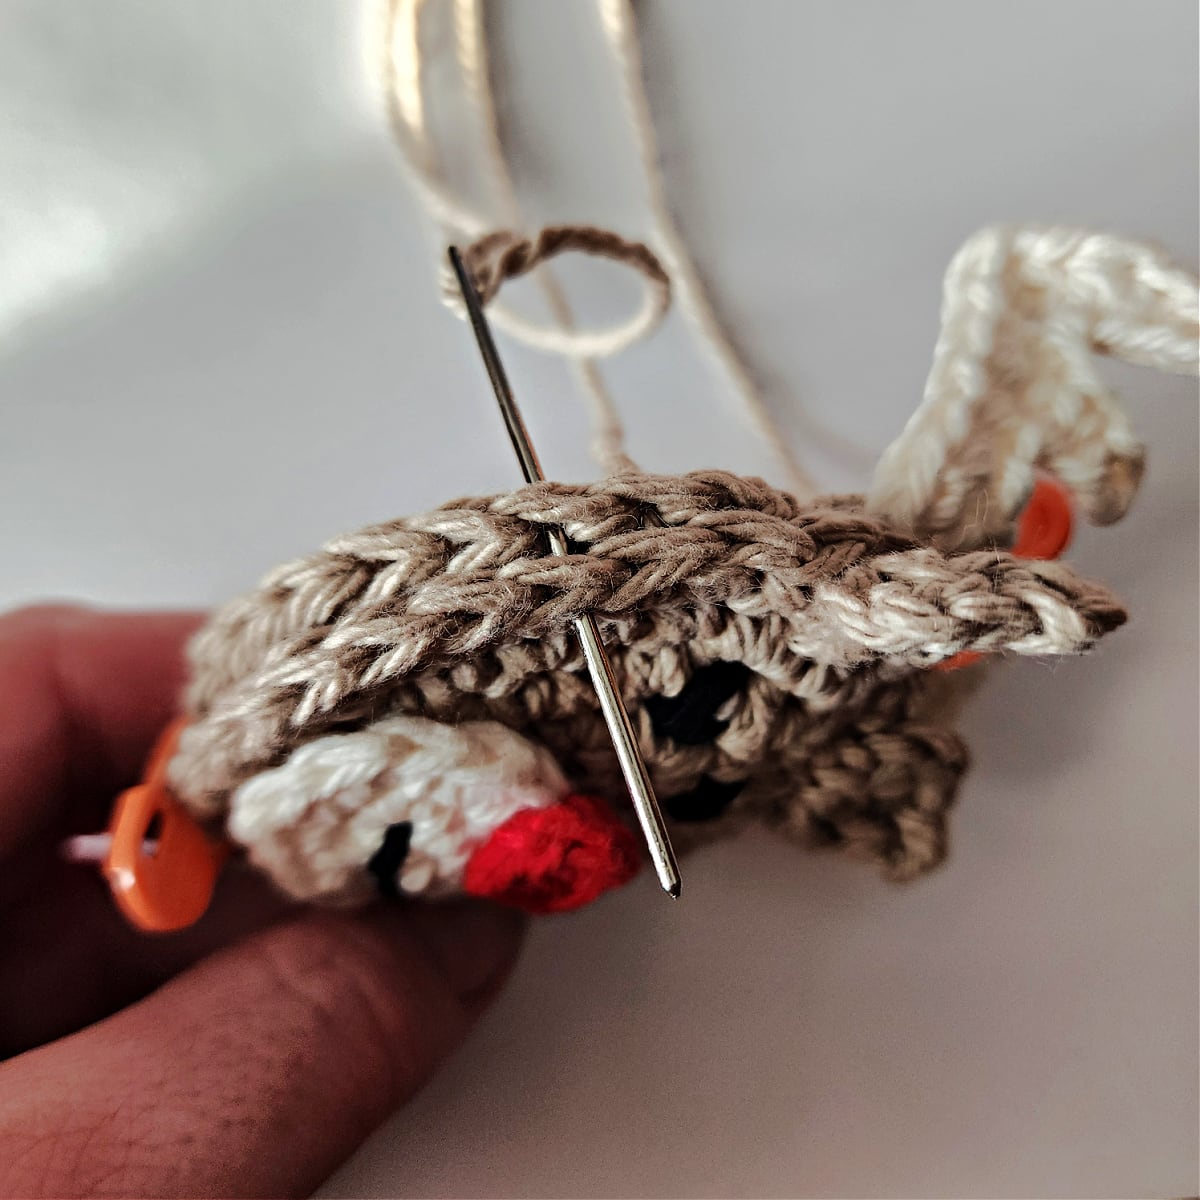
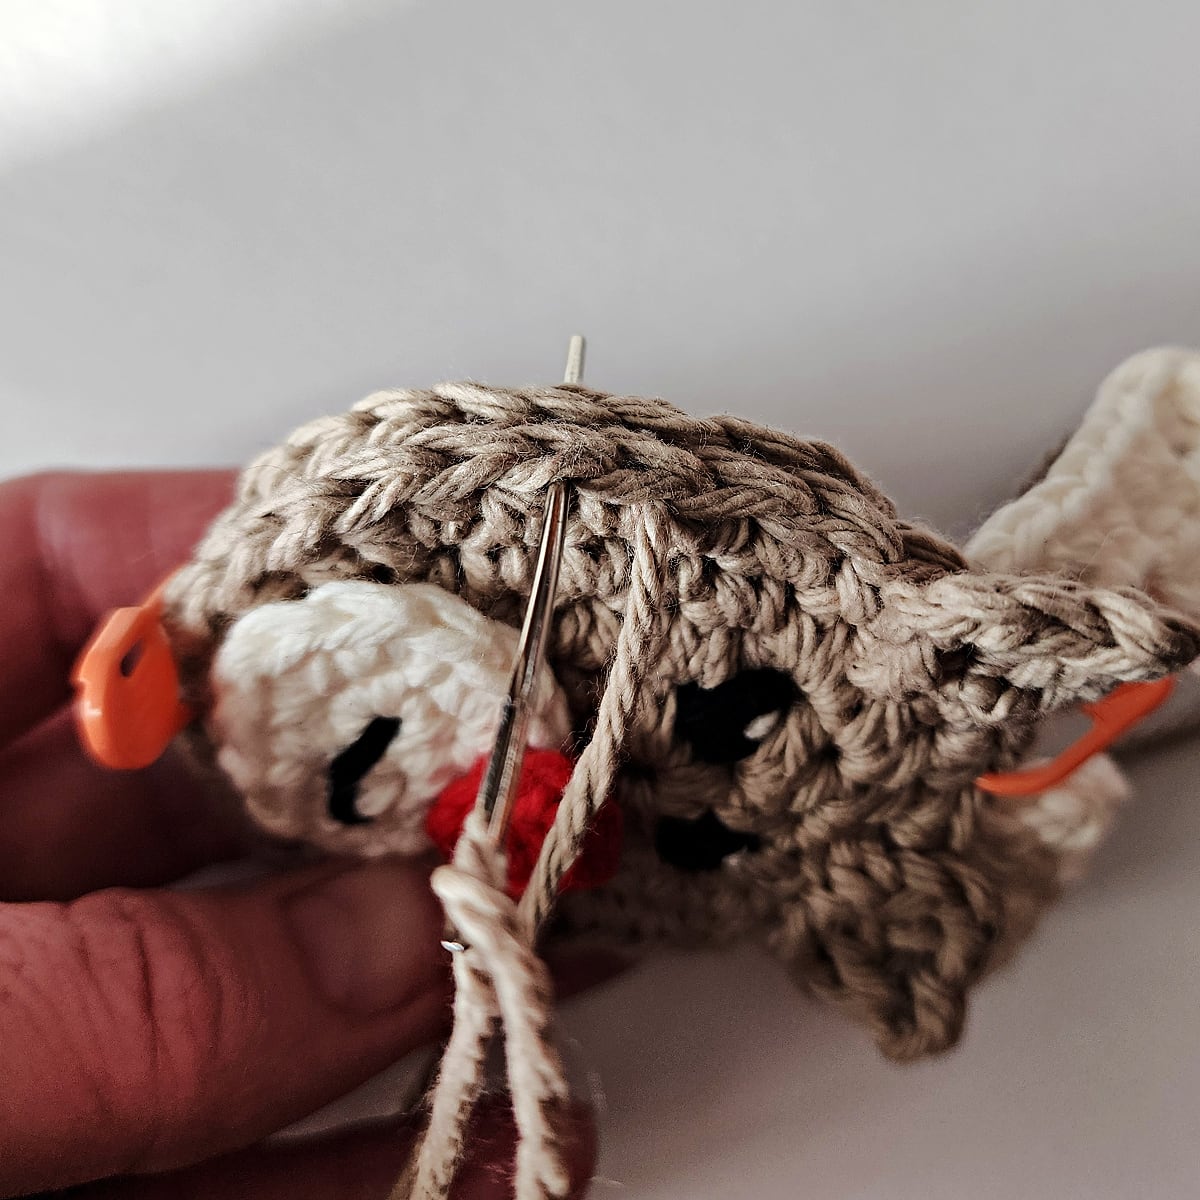
Step Two: With a brown piece of yarn, that is 4 times the perimeter of the reindeer’s head, and a yarn needle, join the two reindeer heads by inserting your yarn needle up through one stitch along the perimeter and down through the next stitch. Repeat this all the way around the edge of the reindeer’s head.
Weave in ends. Continue on to Attaching Candy Cane Holder Hooves.
Attaching the Candy Cane Holder Hooves
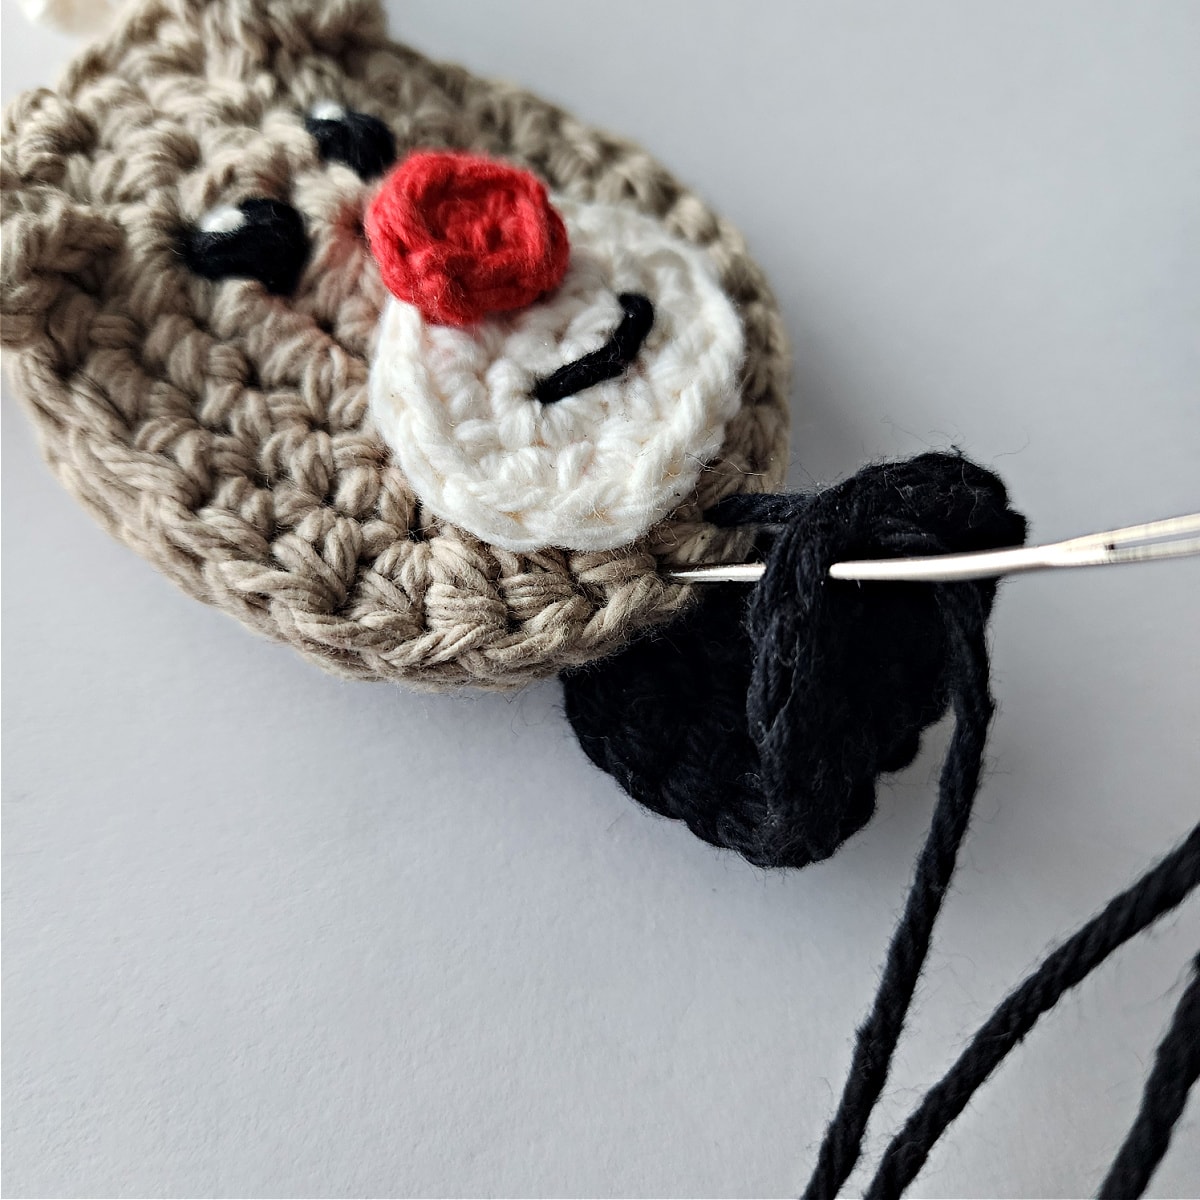
Note: Make sure to sew the hoof as close to the bottom, outside edge of the reindeer’s head as possible to make sure the candy cane will fit through.
Tip! If you feel the candy cane holder hooves will be a smidge tight, you can gently pull on them to stretch them out.
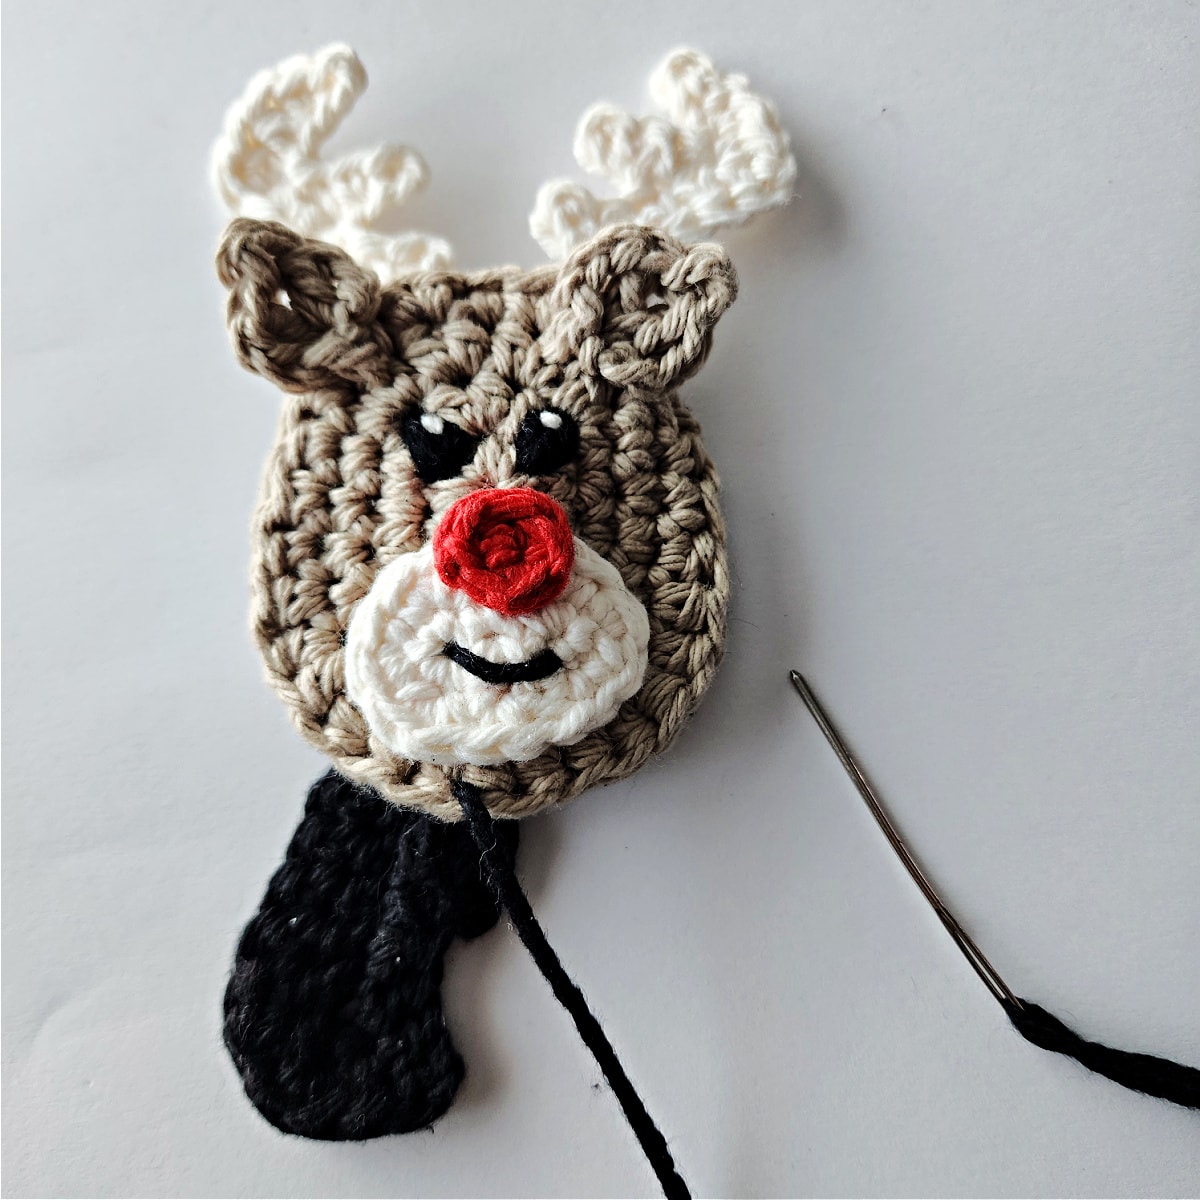
Step One: Lay your reindeer face up. Position the narrow end of the reindeer’s right hoof under the head, as shown in the photo below.
Step Two: With a yarn needle and tail of yarn, sew the narrow end of the hoof onto the back edge of the reindeer’s head.
Step Three: With a yarn needle and tail of yarn, sew the wide end of the hoof onto the front edge of the reindeer’s head.
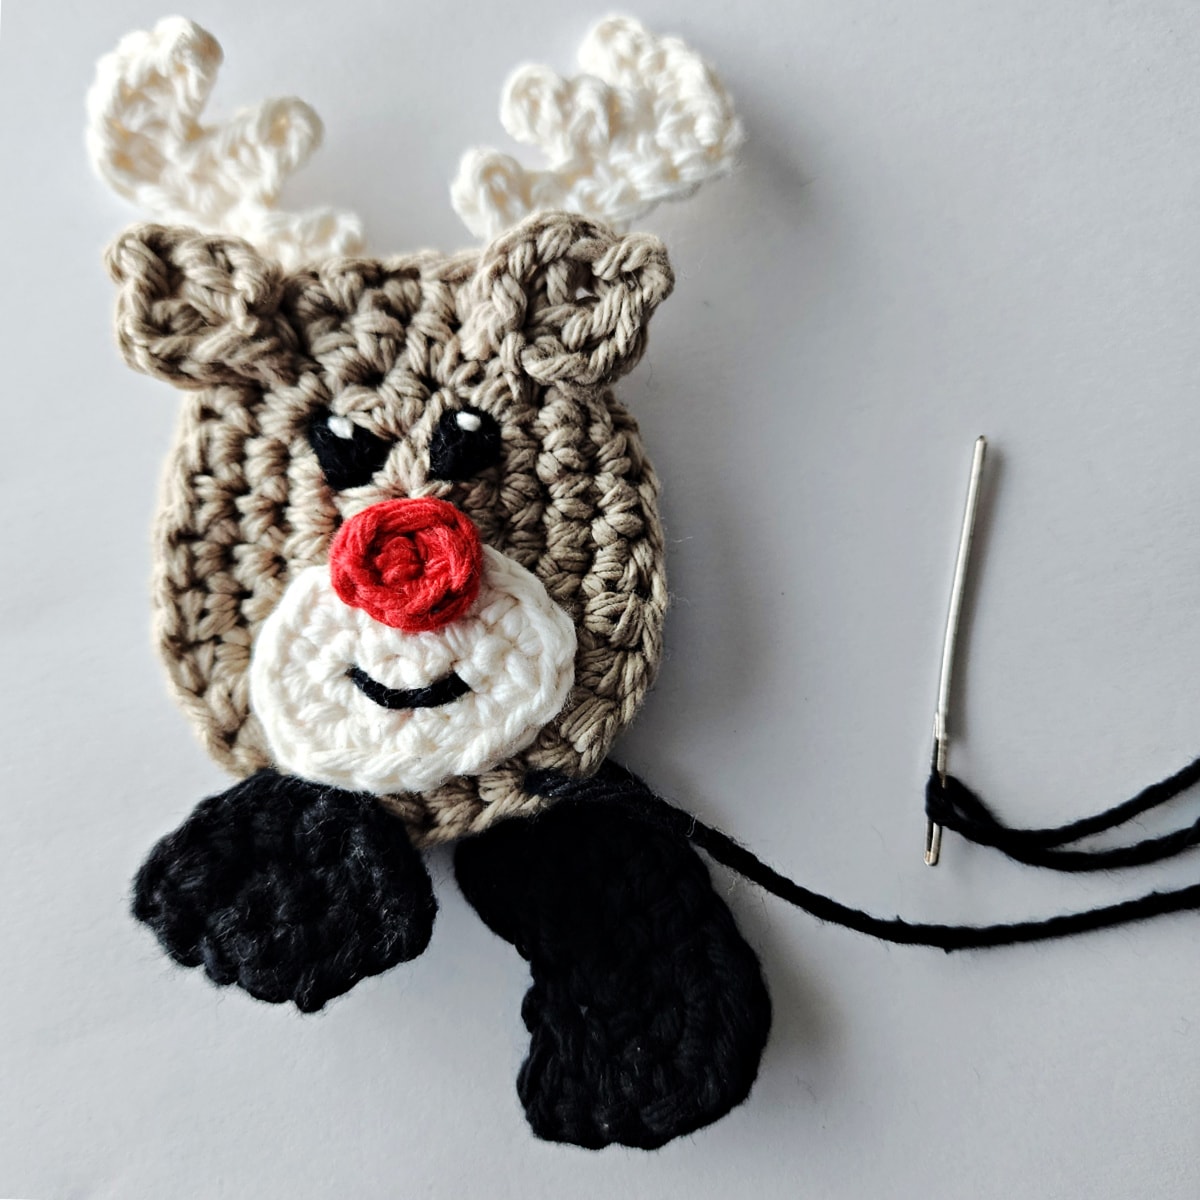
Repeat Steps One – Three for the left hoof.
Weave in ends.

Related: If you enjoyed making this reindeer Christmas ornament, I think you’ll love the Gingerbread Boy & Girl Candy Cane Holder Ornaments and Snowman Candy Cane Ornament!
I MADE IT! NOW WHAT?
Pin this post! Save this reindeer candy cane holder to your Pinterest boards so that you can come back and make it again.
Leave a comment below: We love to hear your feedback.
Share Your Finished Projects on Facebook or Instagram: I love to see your finished projects! Share with us on social media and tag me @acrochetedsimplicity or use the hashtag #ACrochetedSimplicity so I can find your posts.
JOIN US IN THE FACEBOOK COMMUNITY GROUP!
I hope you’ve enjoyed this crochet reindeer candy cane holder and made many crocheted Christmas gifts!
Come share your finished projects with us in the A Crocheted Simplicity Crochet Community Group on Facebook. Join us for fun community events such as crochet alongs, join in on crochet conversations, ask questions, get advice, and share your love for crochet!

Crochet Ideas for Christmas I Think You’ll Love
More Crochet Christmas Decor
Are you looking for more free crochet patterns for Christmas?
We have a variety of crochet Christmas patterns such as crochet stockings, wine cozies, Christmas scarves, holiday towels, and more!
Love these little guys. I wanted to make a comment on your tree skirt post, but did not see a spot. I’ll be making this reindeer and the poinsettias on the tree skirt pattern. Love them! thanks.
I love these candy cane holders! Way cuter than just hanging the canes on the tree (plus less breakage)!
Reindeers are one of my favorite Christmas items, so how could I resist!?! I’ll be making them along with the other candy cane holders ’cause they’re just too cute! Thank you for sharing your creations with us. Happy New Year!🥳🧨🎉