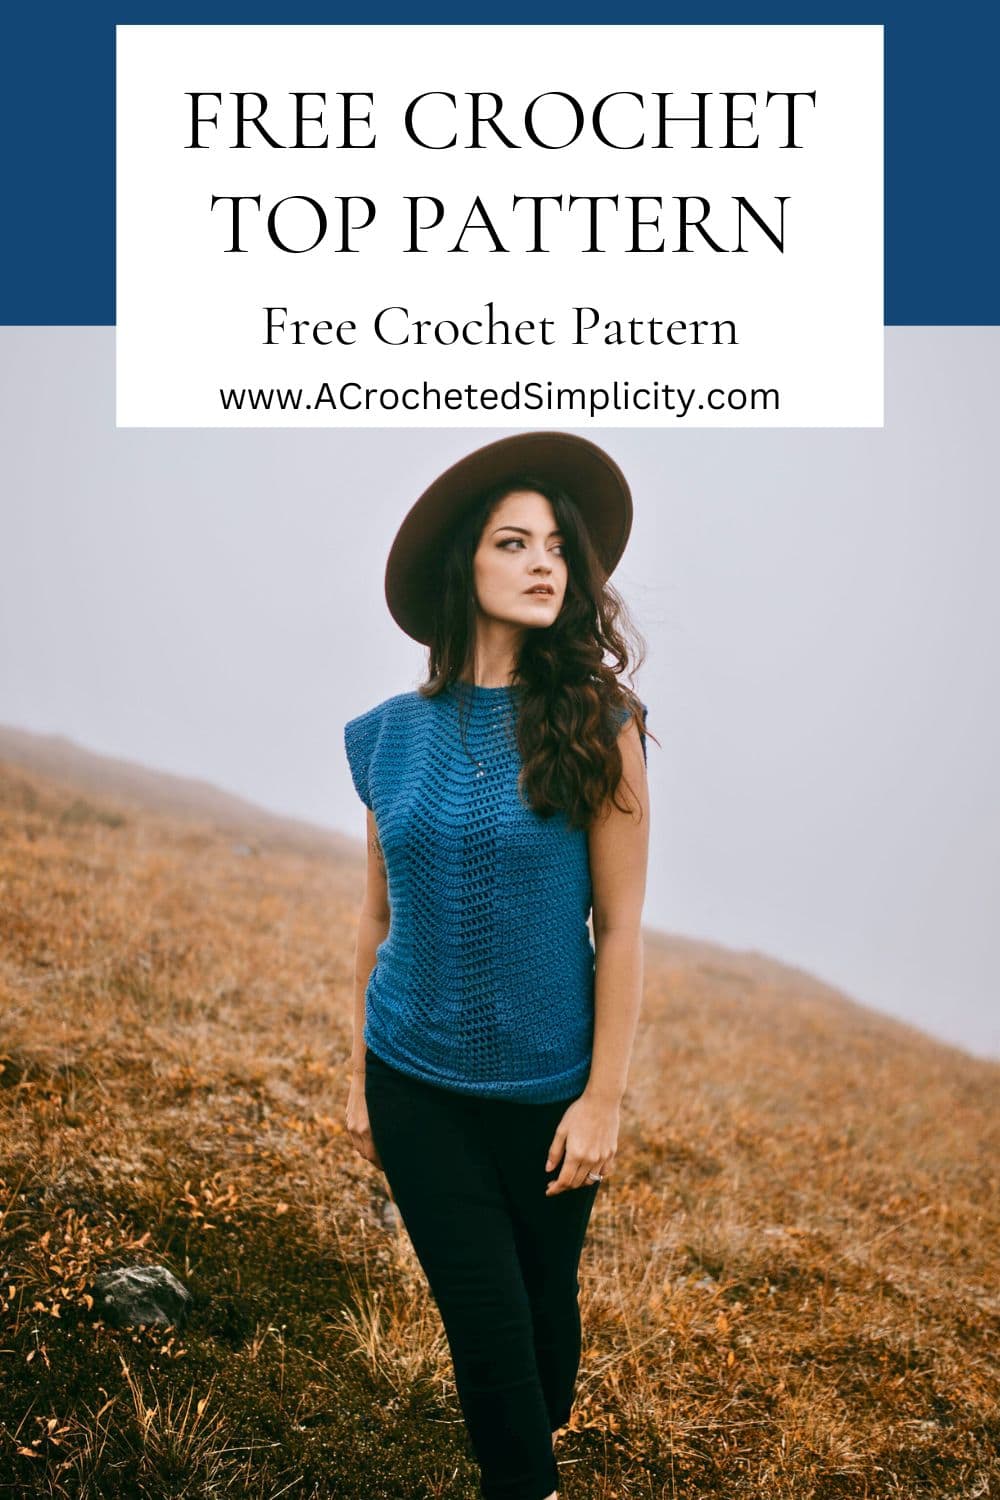
Wandering Free Summer Crochet Top
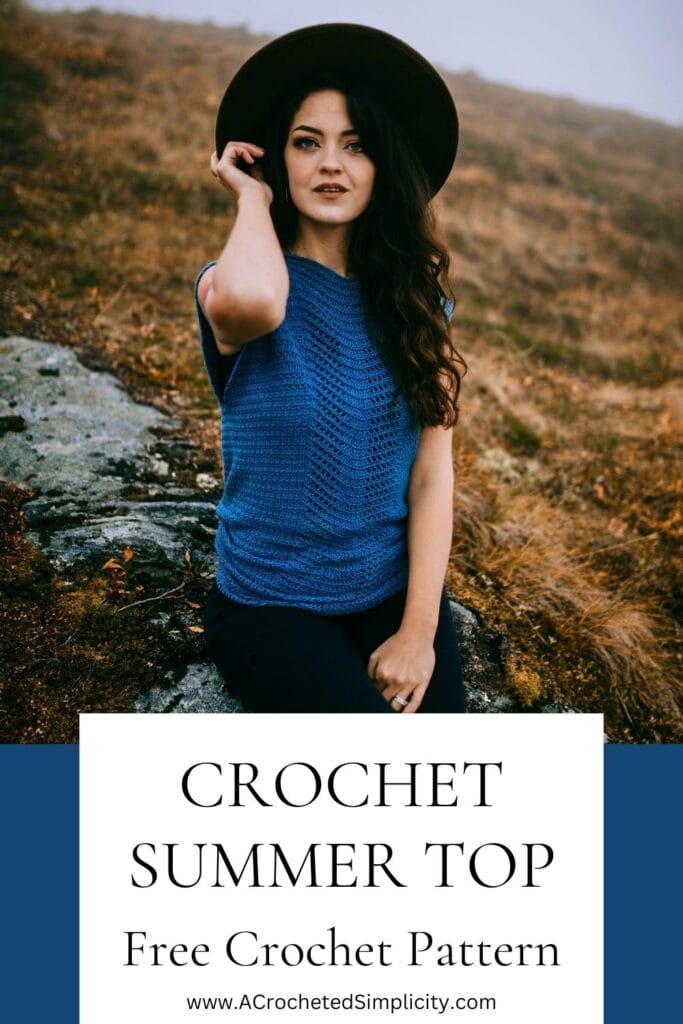
Embrace the spirit of summer with a versatile and stylish summer crochet top.
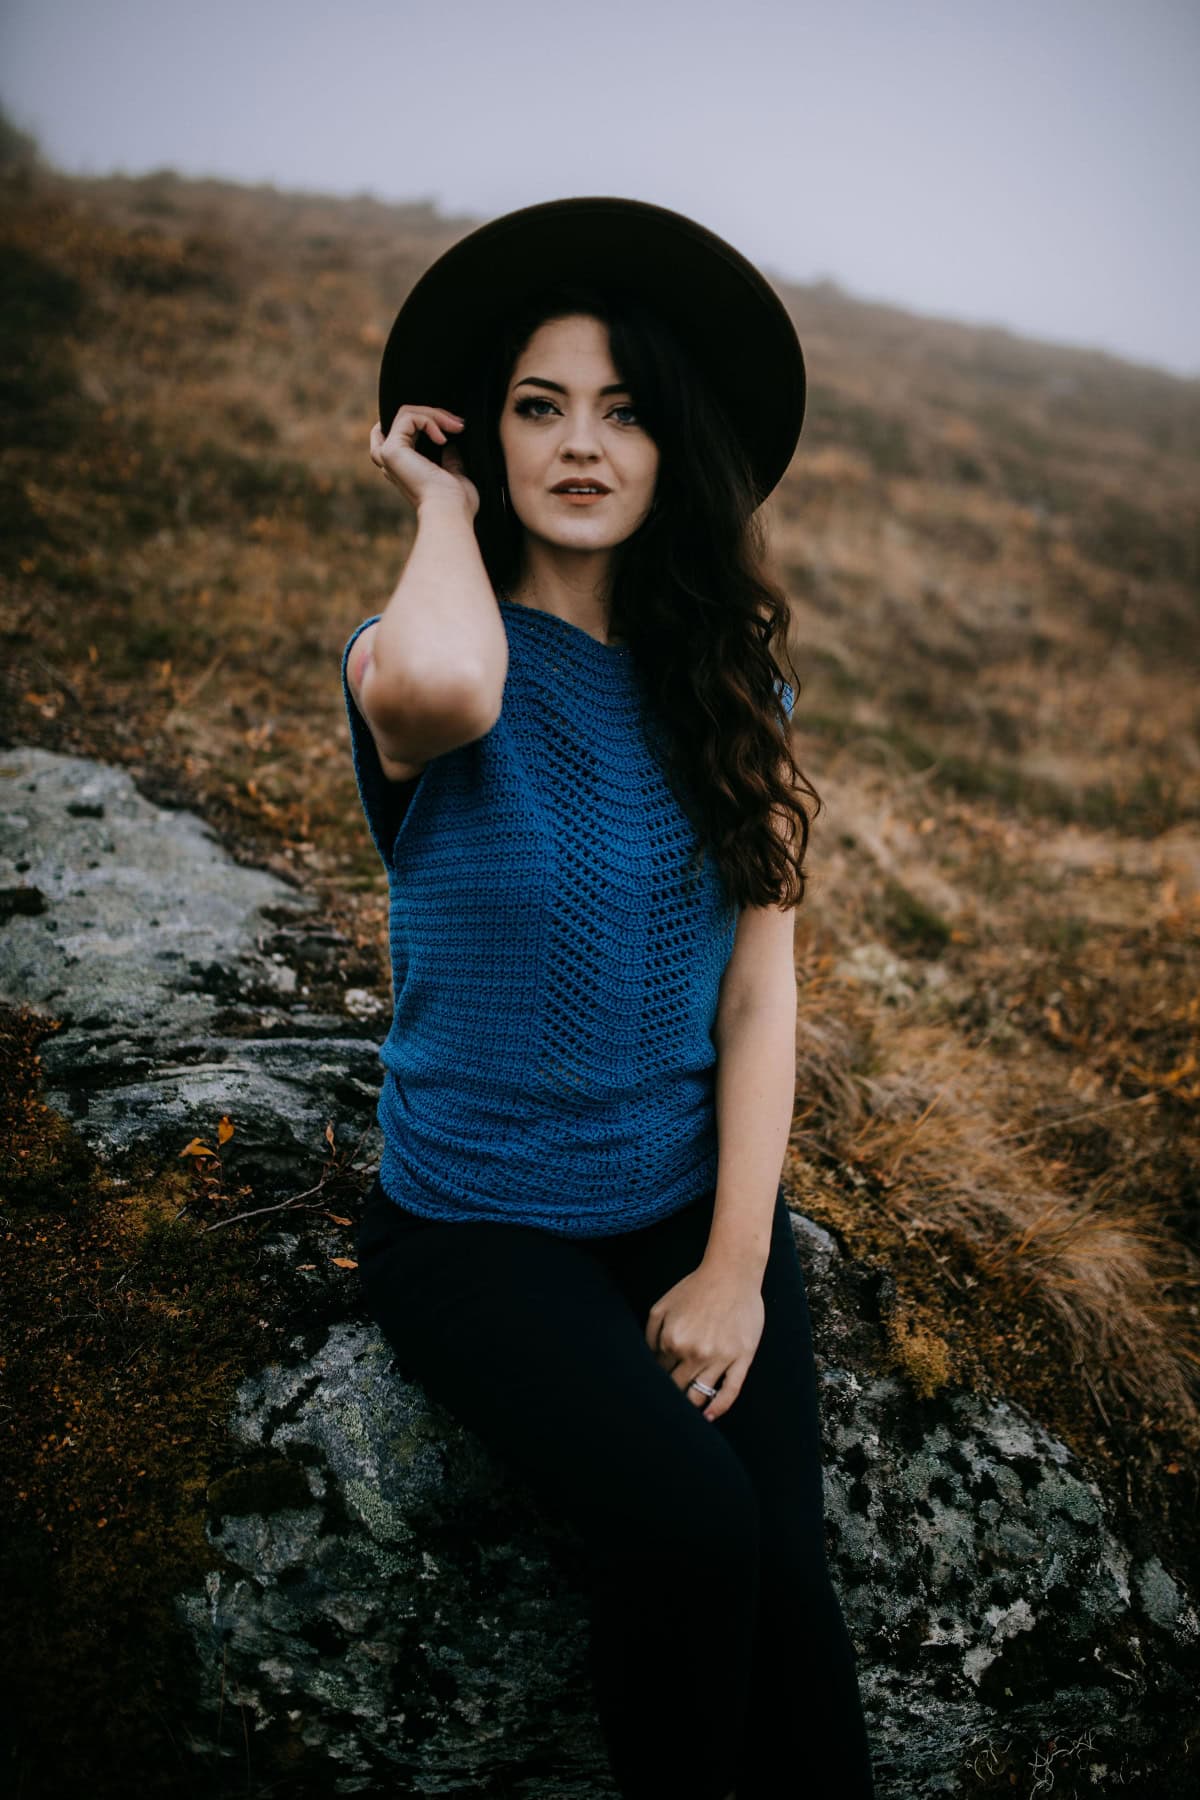
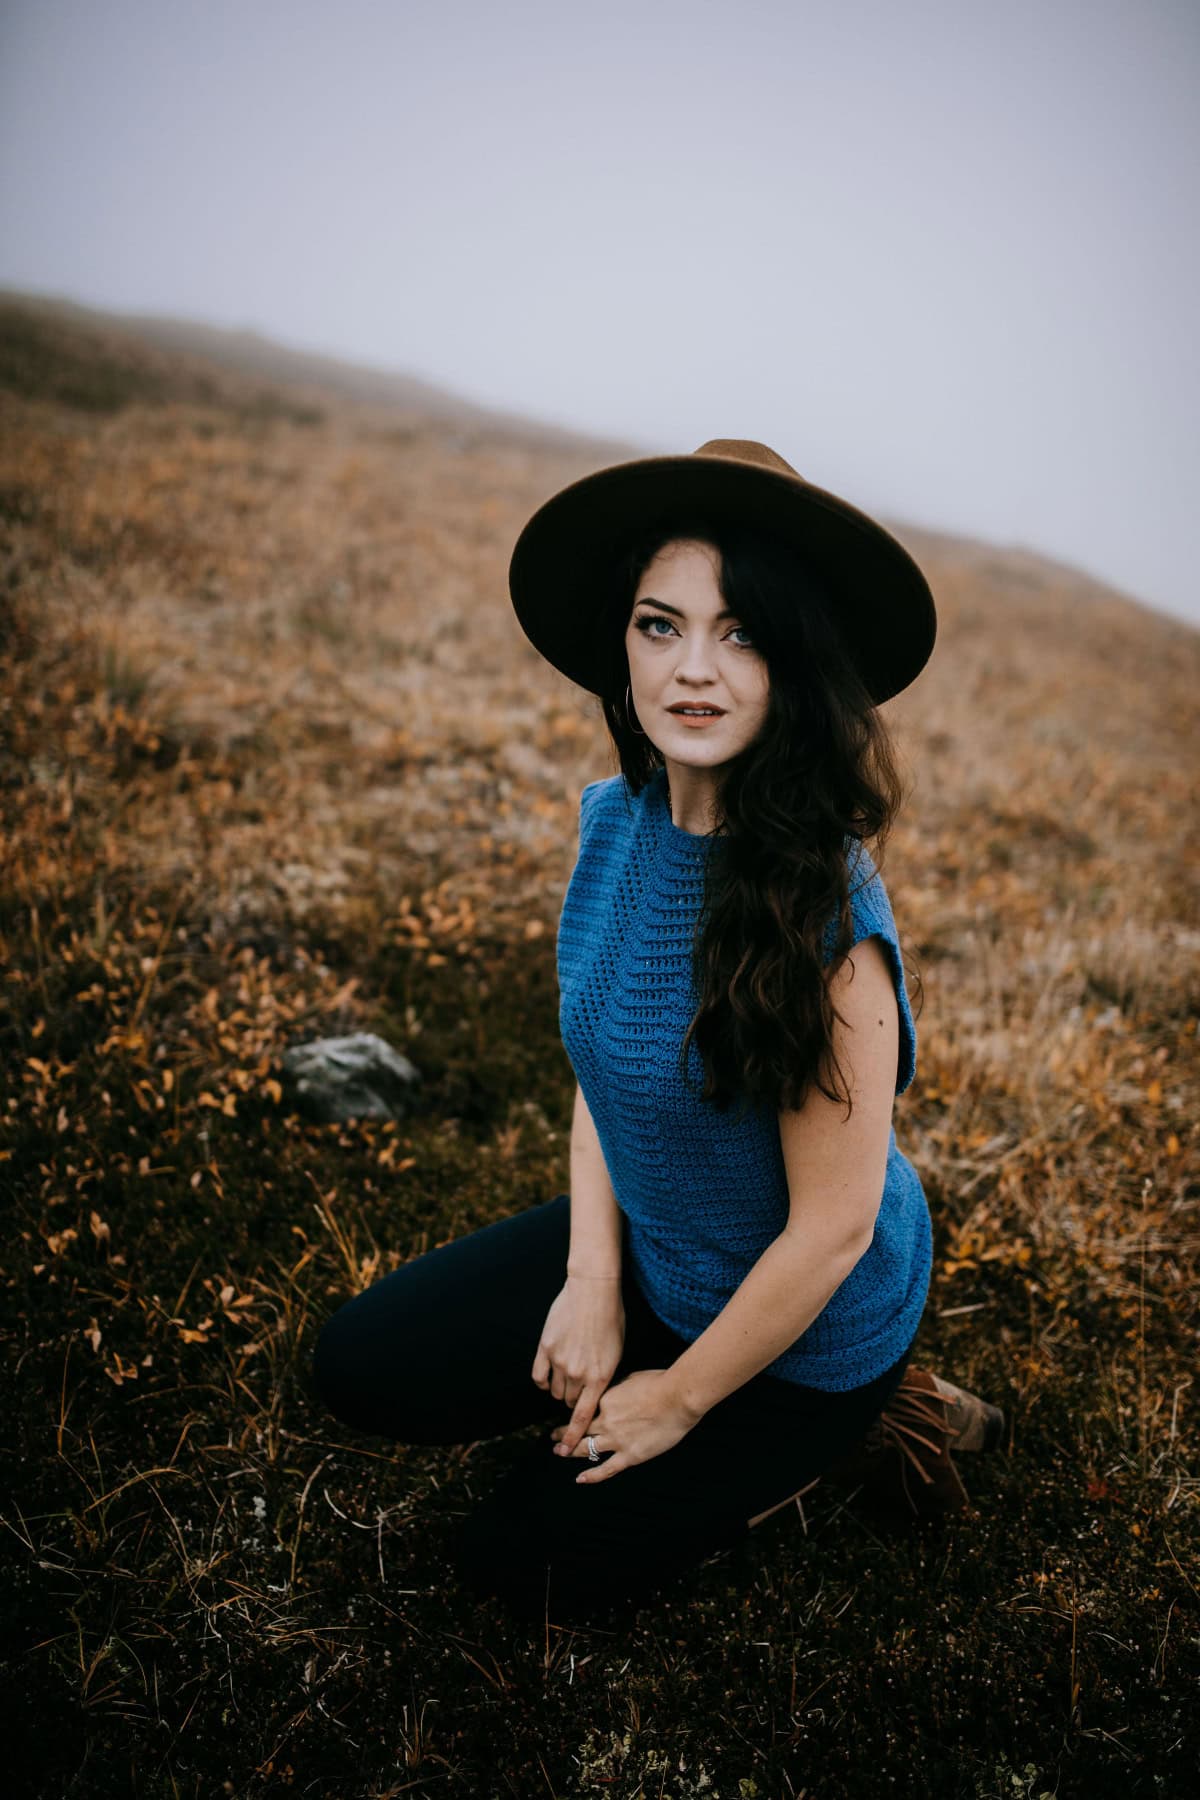
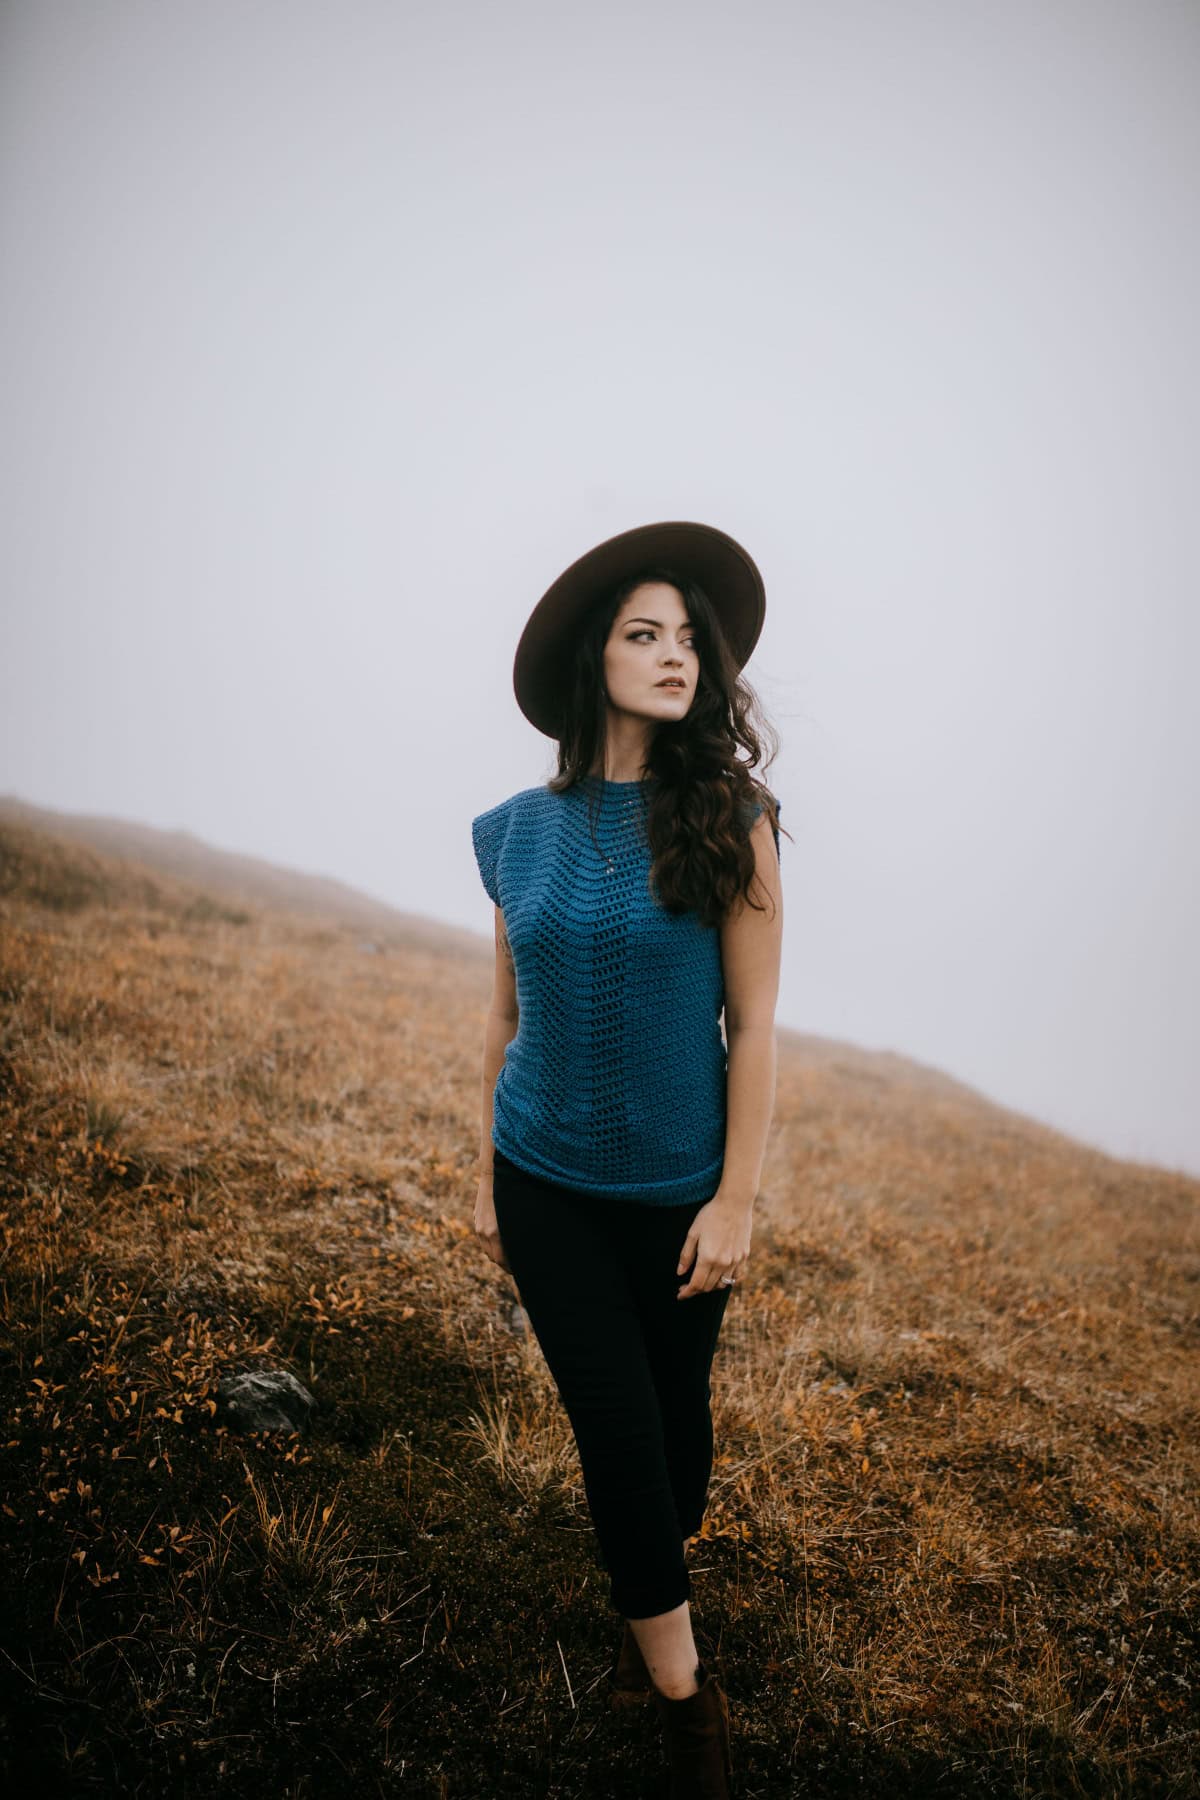
The Wandering Free Summer Crochet Top will make the perfect addition to your spring & summer wardrobe. It’s got an amazing drape and is very lightweight… perfect for our hot summer days!
You can find the free crochet summer top pattern in this post below, or an ad-free printable PDF (that includes all photo tutorials) on Ravelry, and Etsy.
The spring and summer months are almost upon us here in the great white north and I couldn’t be more excited! While I love winter, I love changing seasons because it means changing wardrobes. I’m beyond ready to break out my shorts, sleeveless crochet tops and strappy sandals and this year I’ve added the Wandering Free Summer Top to my wardrobe.
Pair it with your favorite shorts or a flowy skirt for a breezy, effortless look that’s perfect for beach outings, casual gatherings, or evening strolls.
Skills & Techniques You’ll Use
This crochet pattern for summer top is worked in joined and turned rounds.
Crochet skills you’ll practice:
- Chainless Single Crochet
- Alternate Double Crochet (Alt-dc)
- Extended Half Double Crochet (ext hdc)
- Making a Gauge Swatch
- Mattress Stitch Seam
- Blocking Your Garment (if desired)
Choosing Which Size to Crochet
Model wears a women’s size medium and is modeling a size medium summer crochet top.
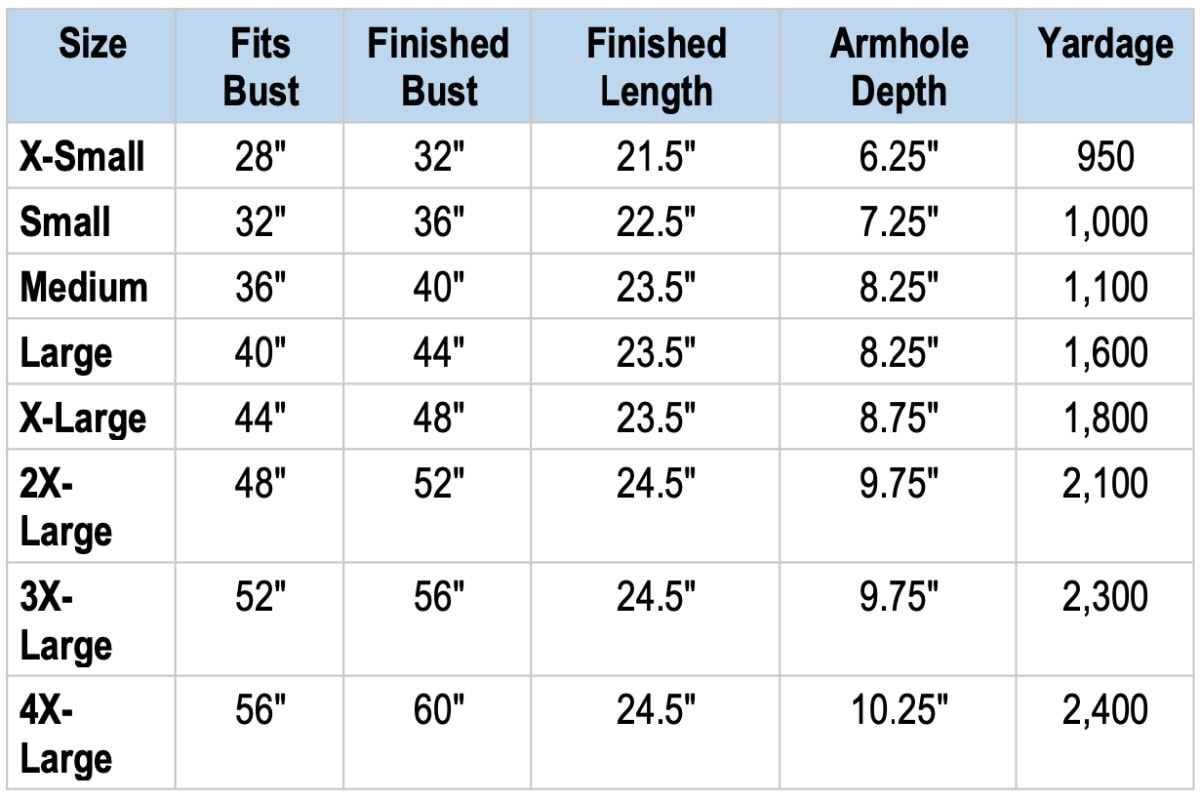
To choose your size, look over the size chart below.
- ‘Fits Bust’ measurement is the measurement of the intended wearer, not the garment’s finished measurement.
- Finished Bust, Finished Length, and Armhole Depth are measurements of the finished garment.
- This summer crochet top has 4″+ of positive ease built in for a classic fit.
- If you prefer a more loosely fitted summer top, I would suggest making one size larger than bust size.
- If you prefer a more fitted look, I would suggest sizing down (as long as your bust size fits range of the smaller size).
- Finished length is measured from the top of the shoulder to the bottom edge of the top.
- Adjusting Top Length: See the notes at the end of the Body of Top section for adjusting the length of your top. If you choose to adjust the length of your crochet top, you may need more or less yarn than what is listed in the chart below.
Size & Yardage Chart
The notes above refer to this size chart.
Yarn
When I began designing the Wandering Free Summer Crochet Top, I immediately knew that I wanted to use a fingering weight yarn that would provide a beautiful drape and make it feel as though you were wearing a top that was as light as a feather. After all, it’s a summer crochet top and who wants to wear anything heavier?
I ultimately chose Woolike by Loops & Threads and it is the perfect yarn for this summer crochet top. Woolike is a machine washable and dryable yarn that is 85% acrylic and 15% nylon. It is available in several beautiful shades and can be purchased at Michaels craft stores or online at their website.
Wandering Free – Crochet Summer Top Pattern
The crochet summer top free pattern is below, but if you love to work offline, or need to order your yarn, I’ve got a couple other great options for you.
Purchase the ad-free, printable PDF, including all photo tutorials, on Ravelry, or Etsy.
This post contains affiliate links.
Materials
- Yarn: Super Fine Weight Yarn / Fingering Weight Yarn / 1; Loops & Threads Woolike in Teal was used for the top in the photos.
- Yardage: See size chart above
- Crochet Hook: G/6/4.00mm (My favorite crochet hooks are the Clover Amour Hooks, I’ve never had an ache in my hand since switching)
- Scissors
- Yarn Needle
- Scrap piece of yarn or stitch marker
Experience Level
- Easy / Intermediate
Gauge
See Swatch instructions below: 20 sts = 4″; 10 rows = 2.5″
Sizes
- Women’s XS (S, M, L, XL, 2XL, 3XL, 4XL)
- See Size Chart above
Abbreviations (US Terms)
- ch(s): chain(s)
- sl st(s): slip stitch(es)
- st(s): stitch(es)
- sp(s): space(s)
- sc: single crochet
- dc: double crochet
- Alt-dc: alternate double crochet
- dc2tog: double crochet decrease
- ext hdc: extended half double crochet
- hdslst: half double slip stitch
- csc: chainless single crochet
- RS: right side
- FLO: front loop only
- SM: stitch marker
- Rep: repeat
- Rnd: round
- yo: yarn over
Pattern Notes
- Beginning chain(s) are not included in stitch count, unless noted otherwise.
- Loops & Threads Woolike in Teal was used for the sample on page 1. Super Fine, Fingering Weight (1) Weight Yarn / 85% Acrylic/15% Nylon (678 yards / 620 m / 3.5 oz / 100 g)
- Other comparable yarns may be used as long as gauge is met.
- Changes for sizes written as follows: XS (S, M, L, XL, 2XL, 3XL, 4XL)
- Stitch Counts for sizes written as follows: (XS, S, M, L, XL, 2XL, 3XL, 4XL)
- This crochet summer top is worked from the bottom up and then the shoulders are seamed.
Special Stitches
- Double Crochet Decrease (dc2tog): (Yo, insert hook in next st, yo, pull up a loop, yo, pull thru 2 loops on hook) twice, yo, pull thru remaining 3 loops on hook.
- Alternate Double Crochet (alt-dc): After turning your work, do not ch, instead, insert your hook into the first st, yo, pull up a loop, yo, pull thru both loops, insert your hook between the legs of the st just made, yo, pull up a loop, yo, pull thru one loop, yo, pull thru remaining loops.
- Extended Half Double Crochet (ext hdc): Yo, insert hook into stitch indicated, yo, pull up a loop, yo, pull thru 1 loop on hook, yo, pull thru remaining loops on hook.
- Half Double Slip Stitch (hdslst): Yo, insert your hook into the stitch indicated, yo, pull up a loop and pull that loop through all loops on your hook.
Gauge Swatch
Gauge: 20 sts = 4″; 10 rows = 2.5″
Note: When checking row height gauge, only measure rows 2 – 11.
Row 1: Using a 4.00mm crochet hook, csc 23. Turn. (23 sts)
Row 2: Alt-dc, ext hdc in each st across. Turn.
Row 3: Ch 1, sc in the first st, *ch 1, skip the next st, sc in the next st, rep from * across. Turn.
Row 4: Alt-dc, ext hdc in each st and ch-1 sp across. Turn.
Rows 5 – 11: Rep Rows 3 – 4, ending with a Row 3 repeat.
Body of Top
Changes for sizes written as follows: XS (S, M, L, XL, 2XL, 3XL, 4XL)
Note about Set-Up: Instead of working a set-up round of csc, you can ch 1 more than the stated csc below, work into the back hump of the foundation ch, sc in the 2nd ch and in each ch across. Join with a sl st to the 1st st.
Set-Up: Using a 4.00mm crochet hook (or hook size needed to obtain gauge), csc 165 (187 , 205, 227, 245, 267, 285, 307). Join with a sl st to 1st st (make sure not to twist work). (165, 187, 205, 227, 245, 267, 285, 307 sts) *You may have a small gap between the first and last stitches. Use the tail of yarn to sew this gap closed.
Row 1 (RS): Alt-dc in first st, ext hdc in each of the next 24 (30, 34, 40, 44, 50, 54, 60) sts, 3 dc in the next st, (ch 1, skip the next st, dc in the next st) 6 times, [ (dc2tog) twice, dc in the next st] twice, (ch 1, skip the next st, dc in the next st) 5 times, ch 1, skip the next st, 3 dc in the next st, ext hdc in each remaining st around. Join. Turn. (165, 187, 205, 227, 245, 267, 285, 307 sts)
Row 2: Ch 1, sc in the first st, [ch 1, skip the next st, sc in the next st] 52 (60, 67, 75, 82, 90, 97, 105) times, working in FLO hdslst in each of the next 35 sts & chs, working under BOTH loops, sc in the next st, [ch 1, skip the next st, sc in the next st] 12 (15, 17, 20, 22, 25, 27, 30) times. Join. Turn. (165, 187, 205, 227, 245, 267, 285, 307 sts)
Row 3: Alt-dc in first st, ext hdc in each of the next 24 (30, 34, 40, 44, 50, 54, 60) sts & ch-1 sps, 3 dc in the next st, (ch 1, skip the next st, dc in the next st) 6 times, [ (dc2tog) twice, dc in the next st] twice, (ch 1, skip the next st, dc in the next st) 5 times, ch 1, skip the next st, 3 dc in the next st, ext hdc in each remaining st & ch-1 sp around. Join. Turn. (165, 187, 205, 227, 245, 267, 285, 307 sts)
Rows 4 – 62 (4 – 62) (4 – 62) (4 – 62) (4 – 60) (4 – 60) (4 – 60) (4 – 58): Rep Rows 2 – 3, ending with a Row 2. (165, 187, 205, 227, 245, 267, 285, 307 sts)
Do not fasten off. Continue on to Upper Front Panel.
Height at this point should be approximately: 15.25″ (15.25″, 15.25″, 15.25″, 14.75″, 14.75″, 14.75″, 14.25″). Try it on for fit. This portion is the bottom hem to the underarm opening. If you’d like a longer top, rep rows 2 – 3, in multiples of 2, ending with a Row 2. If your top is too long, pull out rows in multiples of 2. Take the top’s drape into account before adding or subtracting length.
Upper Front Panel
Row 1 (RS): Alt-dc in first st, ext hdc in each of the next 24 (30, 34, 40, 44, 50, 54, 60) sts & ch-1 sps, 3 dc in the next st, (ch 1, skip the next st, dc in the next st) 6 times, [ (dc2tog) twice, dc in the next st] twice, (ch 1, skip the next st, dc in the next st) 5 times, ch 1, skip the next st, 3 dc in the next st, ext hdc in each of the next 25 (31, 35, 41, 45, 51, 55, 61) sts & ch-1 sps. Place a SM in the next st to mark Back Panel. Turn. (85, 97, 105, 117, 125, 137, 145, 157 sts)
Row 2: Ch 1, sc in the first st, [ch 1, skip the next st, sc in the next st] 12 (15, 17, 20, 22, 25, 27, 30) times, working in FLO hdslst in each of the next 35 sts & chs, working under BOTH loops, sc in the next st, [ch 1, skip the next st, sc in the next st] 12 (15, 17, 20, 22, 25, 27, 30) times. Turn. (85, 97, 105, 117, 125, 137, 145, 157 sts)
Rows 3 – 25 (3 – 29) (3 – 33) (3 – 33) (3 – 35) (3 – 39) (3 – 39) (3 – 41): Rep Rows 1 – 2, ending with a Row 1. (85, 97, 105, 117, 125, 137, 145, 157 sts)
Fasten off. Weave in ends. Continue on to Upper Back Panel.
Height of Upper Front Panel should be approximately: 6.25″ (7.25″, 8.25″, 8.25″, 8.75″, 9.75″, 9.75″, 10.25″). Try it on for fit. If you’d like the armhole opening deeper, rep rows 1 – 2, in multiples of 2, ending with a Row 1. If the armhole opening is too deep, pull out rows in multiples of 2.
Upper Back Panel
Row 1 (RS): Join yarn with a sl st in st marked with SM, alt-dc in same st, ext hdc in each of the next 79 (89, 99, 109, 119, 129, 139, 149) sts & ch-1 sps. Turn. (80, 90, 100, 110, 120, 130, 140, 150 sts)
Row 2: Ch 1, sc in the first st, sc in the next st, [ch 1, skip the next st, sc in the next st] 39 (44, 49, 54, 59, 64, 69, 74) times. Turn.
Row 3: Alt-dc in the first st, ext hdc in each of the next 79 (89, 99, 109, 119, 129, 139, 149) sts & ch-1 sps. Turn. (80, 90, 100, 110, 120, 130, 140, 150 sts)
Rows 4 – 25 (4 – 29) (4 – 33) (4 – 33) (4 – 35) (4 – 39) (4 – 39) (4 – 41): Rep Rows 2 – 3.
Fasten off. Weave in ends. Continue on to Shoulder Seams.
Shoulder Seams
Line up the corners of your upper and back panels, use the mattress stitch to seam each shoulder.
Seam each shoulder the following width: 3.5″ (3.5″, 4″, 5″, 5″, 6″, 7″, 7″).
Weave in ends. Block your crochet top for a professional finish.
I MADE IT! NOW WHAT?
Pin this post!: Save this crochet cable cardigan pattern to your Pinterest boards so that you can come back and make it again.
Leave a comment below: We love to hear your feedback.
Share Your Finished Projects on Facebook or Instagram: I love to see your finished projects! Share with us on social media and tag me @acrochetedsimplicity or use the hashtag #ACrochetedSimplicity so I can find your posts.
Join us in the Facebook Community Group!
Come share your finished projects with us in the A Crocheted Simplicity Crochet Community Group on Facebook. Join us for fun community events such as crochet alongs, join in on crochet conversations, ask questions, get advice, and share your love for crochet!

More Free Summer Crochet Top Patterns I Think You’ll Love
More Summer Crochet Top Patterns
Are you looking for more summer crochet top patterns free? We have several more patterns for women’s crochet tops, including tops, cardigans, and beach cover-ups.
We also have a few premium crochet summer top patterns as well.