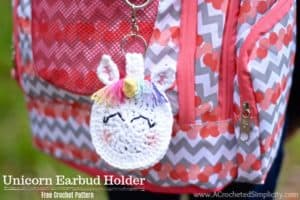
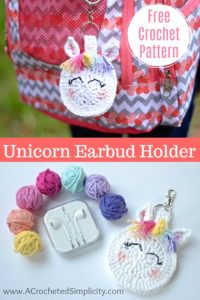
Unicorn Earbud Holder – Free Crochet Pattern
Did you join us for our 3rd Mini-Mystery Crochet Along? We made the very first Earbud Holder that I designed (click here to see it). Don’t use earbuds? Not a problem! This small project is perfect for holding many things such as chapstick, scent sachets for the car, chargers, fidget spinners, and more!
>>CLICK HERE TO SIGN-UP TO RECEIVE OUR NEWSLETTER!<<
I hadn’t even gotten the photos edited from the first one and Claire was already asking if I could make her a unicorn one. I don’t know how it went in your house, but here school shopping this year went a little like this “Ooo, I like this unicorn t-shirt” and “Oh! Can I please, please, please get this unicorn sweatshirt?” and “Oh look mom! They even have unicorn glue sticks!” Do you have a young girl and can relate to this? I can now say with confidence that I know how my mom felt when I was Claire’s age and the Cabbage Patch Kids came out! 😉
For this project I chose to use Lily Sugar n’ Cream cotton yarn that I had in my stash. You can use colors similar to the ones I chose, or choose any color for your unicorn’s mane. You do not need to use a cotton yarn for this project. To be honest with you, I chose the cotton yarn simply because it was a worsted weight and I happened to have all the colors I needed. You can use an acrylic, cotton or wool blend yarn if you’d like.
>> DON’T LOSE IT! ADD IT TO YOUR RAVELRY FAVORITES OR QUEUE. <<
>> DON’T FORGET TO PIN-IT TOO! <<
*PURCHASE AN AD-FREE PDF OF THIS PATTERN (INCLUDING ALL SIZES, CHARTS, AND PHOTO TUTORIALS) ON CRAFTSY OR RAVELRY*
This post contains affiliate links.
MATERIALS
- Yarn: Worsted Weight / 4 Cotton Yarn / 25 yards; I used Lily Sugar n’ Cream cotton yarn (colors I used are listed in the notes below)
- Crochet Hook: G/6/4.0mm (My favorite crochet hooks are the Clover Amour Hooks, I’ve never had an ache in my hand since switching)
- Scissors
- Yarn Needle
- Locking Stitch Markers (5)
- Key Ring (1″ + or -) or Key Ring w/ a Lobster Clasp (If you do not have a key ring handy, let’s brainstorm about an item we can use that we may have sitting around the house. I have an idea for one in particular.)
Many of these materials are available for purchase through our affiliates below:
 Clover 1045/G Purple Amour ...Shop on Amazon
  Fiskars 154110-1001 Non-sti...Shop on Amazon
  Clover Lock Ring Markers, 2...Shop on Amazon
  WXJ13 Swivel Lobster Clasp ...Shop on Amazon
ABBREVIATIONS
- ch(s): chain(s)
- sl st(s): slip stitch(es)
- st(s): stitch(es)
- sp(s): space(s)
- sc: single crochet
- dc: double crochet
- yo: yarn over
- RS: right side
- Rep: repeat
- Rnd: round
- SM: stitch marker
- Alt-dc: alternate double crochet (click here for tutorial)
- Special Join Technique (click here for tutorial)
- Invisible Join Technique (click here for tutorial)
- Join yarn ww/ a hdc: (click here for tutorial)
Experience Level
- Easy
Gauge
- Gauge is not crucial for this project.
Finished Size
- One Size: 3-38″ diameter
Special Stitches
-
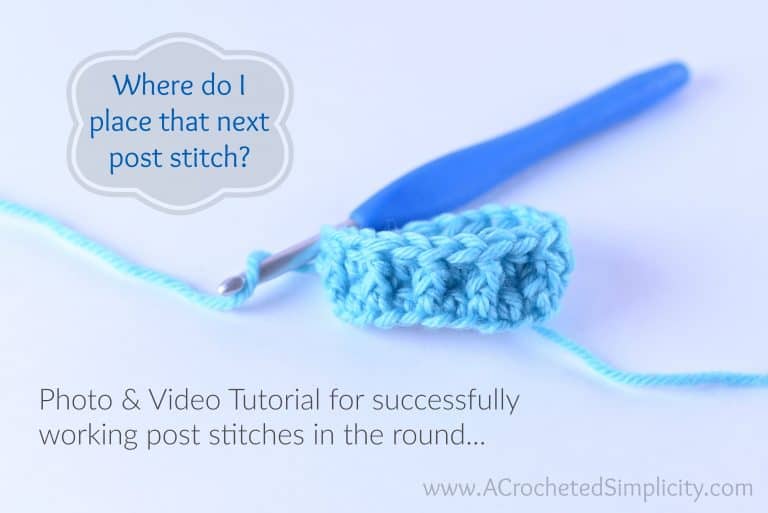
Alternate Double Crochet (alt-dc): After turning your work, do not ch, instead, insert your hook into the first st, yo, pull up a loop, yo, pull thru both loops, insert your hook between the legs of the st just made, yo, pull up a loop, yo, pull thru one loop, yo, pull thru remaining loops.
Notes
- Yarn Notes: The colors I used for my project are: White (24 yards); Pink (2 yards); Yellow (2 yards). Rainbow Hair: miscellaneous scrap of 7 colors (7″ long each).
- Choose ANY colors you’d like! This will look great in 1 – 3 colors.
- Turning chains are not included in stitch count unless noted otherwise.
Face
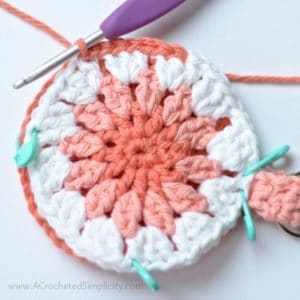
Rnd 1 (RS): Using a 4.00mm crochet hook & white yarn, ch 2, work 6 sc into the 2nd ch from your hook. Join w/ a sl st to the 1st st. (6 sts)
Rnd 2: Alt-dc in the first st (click here for tutorial), work 1 more dc in the first st w/ the alt-dc, work 2 dc in each remaining st around. Join. (12 sts) Approximate size: 1-1/2″ diameter.
Rnd 3: Alt-dc in the first st, work 1 more dc in the first st w/ the alt-dc, work 2 dc in each remaining st around. Join. (24 sts)
Rnd 4: Alt-dc in the first st, work 1 more dc in the first st w/ the alt-dc, work 2 dc in each remaining st around. Join. (48 sts)
Fasten off. Weave in ends. Use Invisible Join Technique. Continue on to Back Piece. Approximate size: 3-3/8″ diameter.
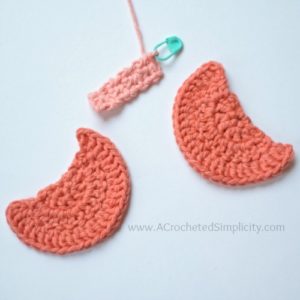
Back Piece (Make 2)
Row 1: Using a 4.00mm crochet hook & white yarn, ch 2, work 4 sc into the 2nd ch from your hook. Do not join. Turn. (4 sts)
Row 2 (RS): Alt-dc in the first st, work 1 more dc in the first st w/ the alt-dc, work 2 dc in each remaining st around. Turn. (8 sts)
Row 3: Alt-dc in the first st, work 2 dc in each of the next 6 sts, work 1 dc in the last st. Turn. (14 sts)
Row 4: Alt-dc in the first st, work 1 more dc in the first st w/ the alt-dc, work 2 dc in each remaining st around. Turn. (28 sts)
Fasten off. Weave in ends. Make one more, then continue on to Strap. Approximate size: 3-3/8″ W x 1-7/8″ H.
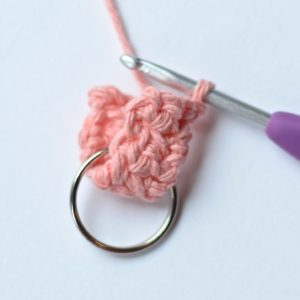
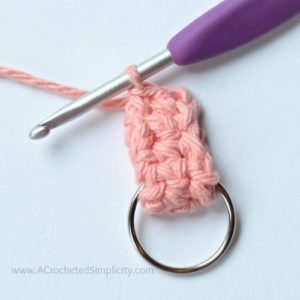
Strap
Row 1: Using a 4.00mm crochet hook & Color B, ch 3, sc in the 2nd ch from your hook, sc in the next ch. Turn. (2 sts)
Rows 2 – 8: Ch 1, sc in each st across. Turn. (2 sts)
Do not fasten off. Continue on to Strap Assembly. Approximate length: 2-1/2″.
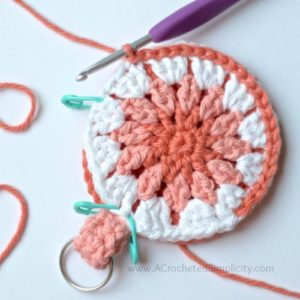
Strap Assembly
Step 1: Insert the strap through the key ring and fold it in half (see photos below).
Step 2: Ch 1, working through both layers to secure the strap on the key ring, sc in each st across. (2 sts)
Fasten off. Weave in ends. Continue on to Eyes.
Eyes
For the eyes I used an 18″ length of black embroidery floss and a yarn needle. I chose the embroidery floss because it was easier to work with. I tried using 2 plies of the black cotton yarn, but it made a black fuzzy mess on my face.
I first created the arch of the eye. I did this in 4 short sections to make it appear more rounded. The arch is approximately 3/4″ wide (not including the little lashes) and 3/8″ tall.
After I finished the arch, I then made 2 small lashes on the outer corners of the eye. The little lashes are approximately 1/4″ long.
The distance between the 2 eyes is 1/4″.
After completing the eyes, continue on to Horn.
Horn
The entire Horn is worked in continuous rounds.
Rnd 1 (RS): With a 4.00mm crochet hook & yellow yarn, begin w/ a Magic Ring, work 2 sc into the magic ring. Do not join. (2 sts)
Rnd 2: Work 2 sc in each st around. (4 sts)
Rnd 3: Sc in each st around. (4 sts)
Rep Rnd 3 until your horn is approximately 1-1/8″ tall.
Fasten off leaving an 8″ tail of yarn to use for sewing. Continue on to Ears.
Ears (Make 2)
Row 1 (RS): With a 4.00mm crochet hook & light pink yarn, ch 3, working into the back hump of the ch, sl st in the 2nd ch from your hook, sl st in the next ch. Turn. (2 sts)
Fasten off pink yarn.
Row 2 (RS): Join white yarn w a hdc (click here for tutorial) in the bottom of the last st from row 1, work 1 more hdc into that same st, hdc in the next st, ch 3, sl st in the 2nd ch from your hook, sc in the next ch, hdc in the next st, 2 hdc in the last st. (8 sts)
Fasten off leaving an 8″ tail of yarn for sewing.
Continue on to Earbud Holder Assembly.
Earbud Holder Assembly
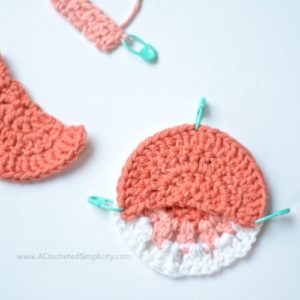
Photo Above: With WS together, line up one back piece on the front motif. I add a locking SM in any stitch along the top edge of the back piece. Then, carefully lining up the stitches, place a SM in the first and last stitches of the back piece. You should have 20 stitches left between the stitch markers on the sides.

Photo Above: Lay the second back piece on top of the assembly, opposite the first piece. Secure the second piece to the assembly using the SM on the side.
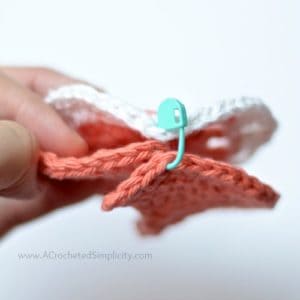
Photo Above: To make sure that the second piece is in the correct position, you will secure it in the 4th stitch from each end.
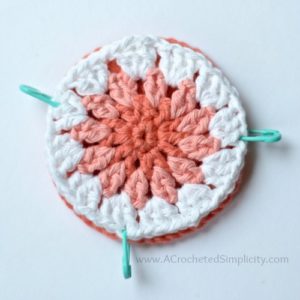
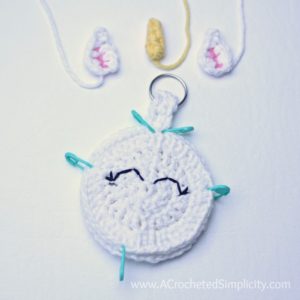
Photo Above: This photo shows what your assembly should look like from the RS after securing both back pieces.
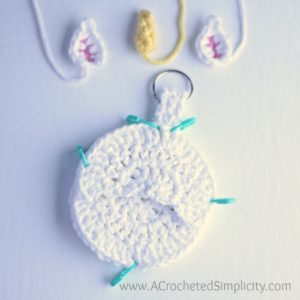
Photo Above: Locate stitches #10 & #11 that were left from the first assembly photo. Insert the strap assembly between the front motif and back piece. Use stitch markers to secure the strap to stitches #10 & #11 of the holder assembly.
Joining
Now we’re going to join the pieces together using the surface crochet technique, or slip stitch join. If you need a more detailed explanation on surface crochet, click HERE for the tutorial. This tutorial also includes tips.
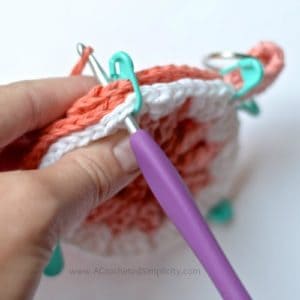
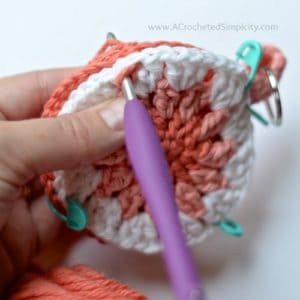
Photos Above: Working from the RS, you can begin the surface crochet in any stitch around the edge of the assembly.

Photos Above: Continue surface crocheting in each stitch around the assembly to join all of the pieces together. Make sure you are working through all layers (there are 3 layers in a few areas). End by fastening off using the special join technique, click here for tutorial. Weave in all ends. Attach a lobster clasp if you have one.
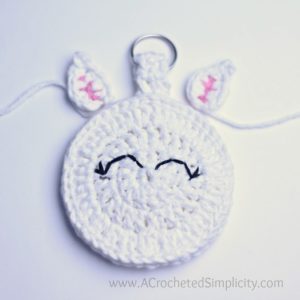
Photo Above: Sew each of the ears onto the assembled earbud holder. I left a space that is 2 stitches wide between the strap and ears.
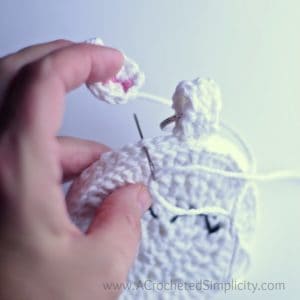
Photo Above: Using a yarn needle and tail of yarn, sew the ear onto the assembled earbud holder. I sewed mine to the top loops of the stitches from the back piece.

Photo Above: Using a yarn needle and tail of yarn, sew the horn onto the face. I centered mine on the face and sewed onto the stitches just below the slip stitch join. I had to place a couple fingers from my left hand inside the earbud holder as I did this.
Hair
- Cut 7 strands of yarn approximately 7″ long.
- I used 7 different colors.


Photos Above: I attached the hair like I attach fringe. I attached 4 pieces to the left of the horn and 3 pieces to the right (left & right when facing you). Insert a smaller hook into the loops from the sl st join, fold the strand of hair in half and grab it with the hook, pull it thru the stitch.

Photo Above: Insert the cut ends of the yarn through the loop you just made and pull to tighten.
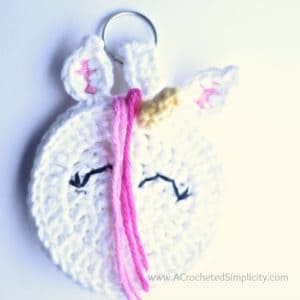
Photo Above: Attach the remaining strands of hair.

Photo Above: To make it easier to manipulate, trim the hair to around eye level. Then begin separating the plies of yarn to give it a fuller and slightly wavy look.
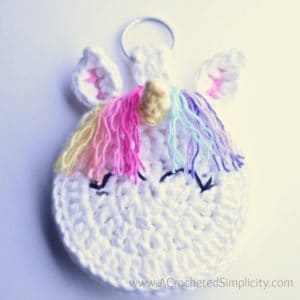
Photo Above: After you’ve separated all of the plies of yarn, trim the hair one last time to the length you prefer. Mine ended up being around 1″ long. See photo below.

Final Touch: Use a make-up brush and add a little blush to the cheeks. See photo above.
These make great party favors for kids’ birthday parties & stocking stuffers!

FIND ALL OF MY FREE CROCHET PATTERNS HERE
Are you intimidated by knit-look crochet? Would you love to learn my tips & tricks? Take an Annies Video Class with me and let me ease your fears and help you increase your skills! Click on the photo below to watch a free preview. You can also see the other 4 video classes I have available!

Please share your finished ACS projects with me in the A Crocheted Simplicity Crochet Community Group on Facebook!
HAPPY CROCHETING!


5 Comments