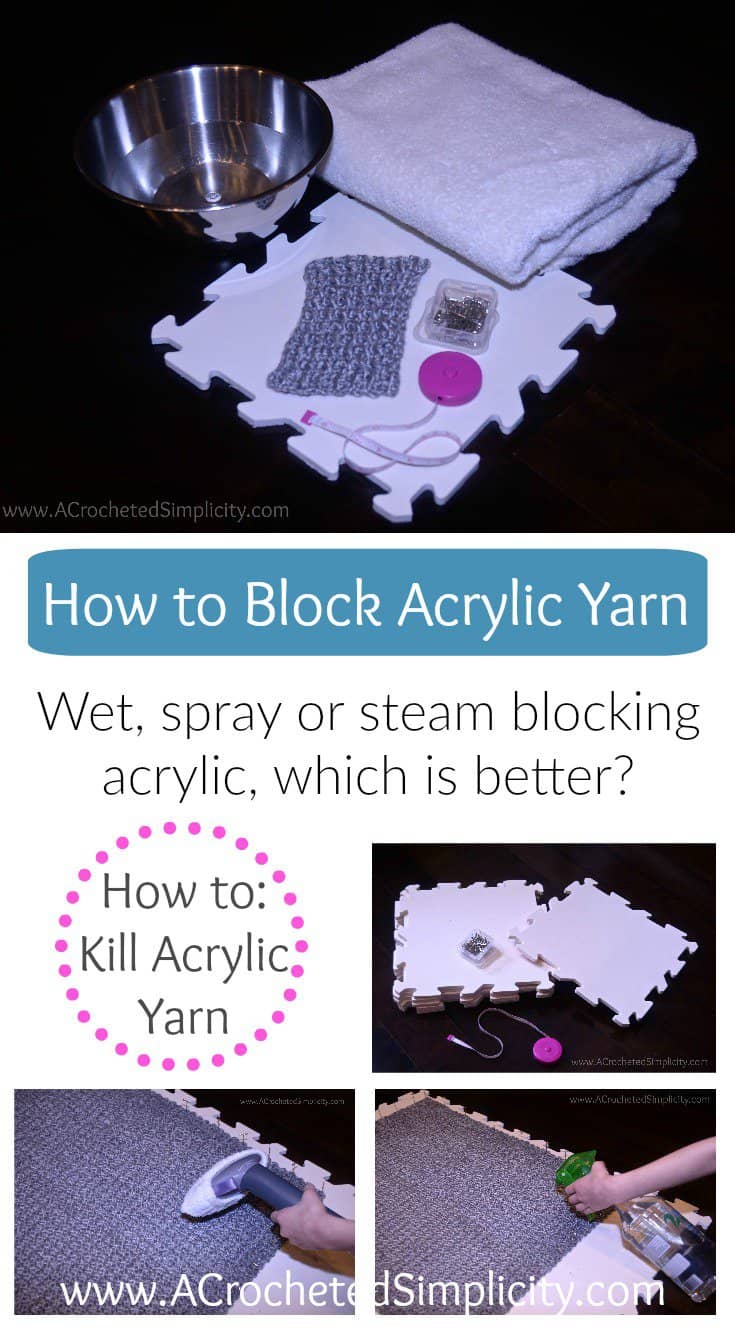
How to Block Acrylic Yarn: How to Block Crochet 5 Ways
Learn how to block acrylic yarn & 5 different ways how to block crochet!
Has anyone ever said to you, “You can’t block acrylic yarn!” ? Well, if they have, ignore what they said because acrylic yarn CAN BE BLOCKED! You heard that correctly, it can be blocked… and it should be blocked!
You don’t need a huge toolkit to block your yarn creations—just a few simple supplies and a little patience. Blocking might seem optional, but once you see the difference in drape, stitch definition, and overall finish, you’ll wonder how you ever skipped it.
Have you previously avoided projects that called for you to block them because you have a fear of blocking and think that it’s hard?
Blocking your crochet is easy and fun and there are several different methods you can use.
In this blog post, I’m going to share with you all that I know about wet, spray, and steam blocking in hopes of making your life a little easier and your crochet and knit projects a whole lot neater!
Why You Should Be Blocking Your Crochet (and How to Do It!)
If you’ve ever poured hours into a beautiful crochet project only to find that it looks a little… off—maybe it’s curling at the edges, the stitches seem uneven, or the shape just isn’t quite right—then it’s time to talk about blocking.
Blocking is one of those finishing touches that can transform a good crochet project into a great one. If you’re not blocking your work yet, you’re missing out on one of the best-kept secrets of polished, professional-looking crochet.
What Is Blocking, Anyway?
Blocking is the process of shaping and setting your finished crochet piece using moisture (or just heat) and gentle manipulation. It helps the fibers relax, the stitches open up, and the project take on its intended shape. Think of it as a spa day for your crochet.
There are a few main methods:
- Wet blocking: Soaking the piece in water, gently squeezing it out, and pinning it to shape.
- Steam blocking: Using steam from an iron or steamer to lightly set the stitches.
- Spray blocking: Spritzing with water and pinning to shape.
I’ll also share a couple less common methods of blocking.
Why You Should Block Your Crochet
Here’s why blocking is worth your time:
1. It Evens Out Stitches
Blocking helps even out inconsistencies in your tension, making your stitches look uniform and smooth. This is especially helpful with lace, motifs, or garments where precision matters.
2. It Sets the Shape
Whether you’re working with granny squares, sweaters, shawls, or doilies, blocking ensures that your project holds the shape it was meant to have. No more wonky corners or uneven edges!
3. It Enhances Stitch Definition
Blocking opens up stitch patterns—especially lace—so the design really shines. Those intricate details you worked so hard on? Blocking helps them stand out.
4. It Helps with Assembly
If you’re joining squares or motifs, blocking them first makes the assembly process way easier. Matching sizes and edges becomes much simpler when everything is properly shaped.
5. It Adds That “Finished” Look
There’s a noticeable difference between a project fresh off the hook and one that’s been blocked. Blocking gives your crochet a polished, professional appearance. It’s like ironing your clothes—it just looks better.
When Not to Block
There are a few exceptions. Some synthetic yarns, like acrylic, don’t respond well to wet blocking. In those cases, steam blocking or gentle shaping is more effective. And if you like the natural texture of your piece as-is—say, a chunky blanket with lots of loft—blocking might not be necessary.
5 Methods of Blocking Crochet Projects (and When to Use Each One)
You’ve finished your crochet project—congrats! But before you sew in the ends or snap that final photo, there’s one step that can take your piece from good to gorgeous: blocking.
Blocking helps shape, smooth, and set your stitches for a more polished and professional look. But did you know there’s more than one way to block your crochet?
In this post, we’ll go over five popular blocking methods, when to use each one, and tips for getting the best results.
Scroll down for specific photos for each method and additional information on each.
1. Wet Blocking
Best for: Natural fibers like wool, cotton, bamboo, and blends. Great for lace, garments, and projects that need a lot of reshaping.
How it works:
- Soak your finished project in cool or lukewarm water for 15–30 minutes.
- Gently squeeze out excess water (don’t wring!).
- Lay it flat on a blocking mat or clean towel, shape it to size, and pin in place.
- Let it dry completely before unpinning.
Why use it: This method gives you the most control over shaping and stitch definition. It’s ideal for lace shawls, garments, and intricate patterns that need to open up.
2. Steam Blocking
Best for: Acrylic yarns and some wool blends. Also good when you need a quick set without soaking the project.
How it works:
- Lay your project flat and pin it to shape.
- Hold a steamer or steam iron just above the fabric (do NOT press the iron directly on the yarn).
- Gently steam the surface, letting the heat relax the fibers.
- Let it dry in place.
Why use it: Steam blocking is quick and effective for synthetic yarns. It won’t give as much stretch as wet blocking, but it can tame curling edges and smooth out inconsistencies.
3. Spray Blocking
Best for: Light shaping on delicate or color-sensitive yarns. Great for small items like motifs or squares.
How it works:
- Pin your dry project into the desired shape on a blocking surface.
- Use a spray bottle to mist it evenly with water.
- Let it dry thoroughly while pinned.
Why use it: A gentler alternative to wet blocking that’s perfect for pieces that don’t need major reshaping. It’s also ideal for delicate items where full soaking might distort the fabric or fade the color.
4. “Killing” Acrylic Yarn
Best for: Acrylic projects that will not be washed and don’t need to bounce back (think wall hangings, decorative pieces, etc.).
How it works:
- Pin your acrylic project to shape.
- Gently steam it with an iron just above the surface.
- The heat slightly melts the fibers, permanently flattening and shaping them.
Caution: This is permanent. The fabric loses its elasticity and “memory,” so use this method only when you want a super flat, drapey finish.
Why use it: Great for permanently shaping acrylic doilies, lace, or projects you want to lie completely flat.
5. No-Pin Blocking (Flat Drying)
Best for: Projects that need only minimal shaping, like garments or blankets that just need to relax a bit.
How it works:
- Lay your damp (washed or misted) project flat on a clean towel.
- Gently pull into shape by hand.
- Let it dry naturally—no pins required.
Why use it: Simple and low-effort. While not as precise as pinning, it works well for relaxed shaping or when you want to preserve texture (like puff stitches or cables).
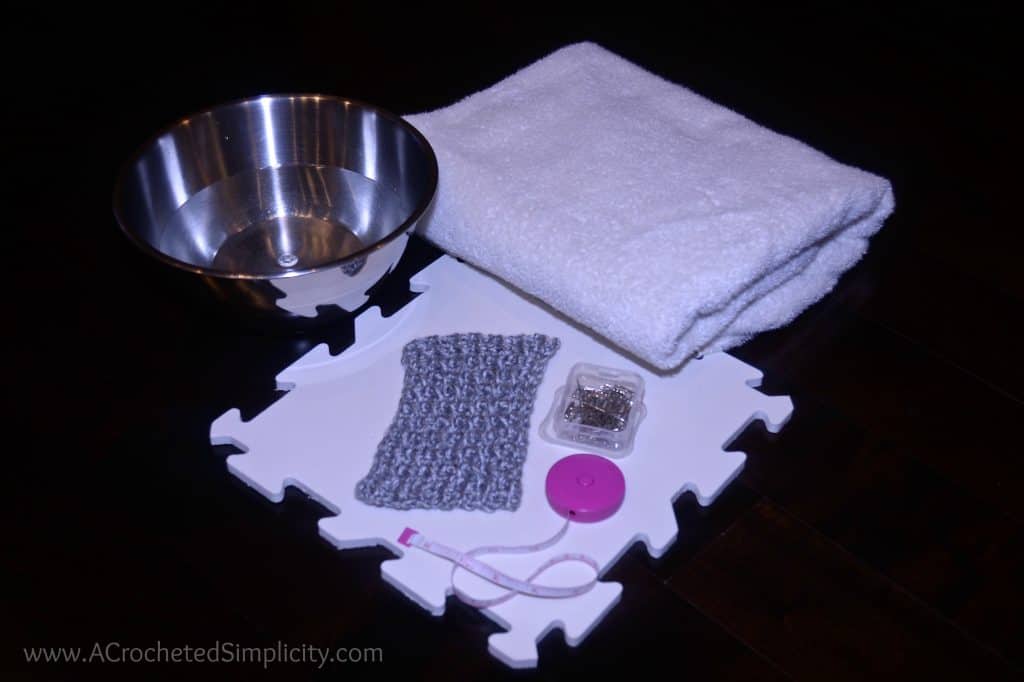
Essential Materials You Need for Blocking Yarn Projects
You’ve finished your crochet (or knit) project and now it’s time for that final, magical step: blocking. Whether you’re a beginner or just need a refresher, one of the most common questions is: What exactly do I need to block my yarn project properly?
Don’t worry—you don’t need a lot of fancy equipment to start blocking, but having the right tools can make a big difference in your results. Here’s a breakdown of the essential materials you’ll want to have on hand.
🧼 1. Water Source
Depending on your blocking method, you’ll need water in some form:
- Wet Blocking – A sink or basin for soaking.
- Spray Blocking – A spray bottle filled with clean water.
- Steam Blocking – A steamer or iron with a steam setting.
💡 Pro Tip: Use lukewarm water for natural fibers and cool water for delicate yarns.
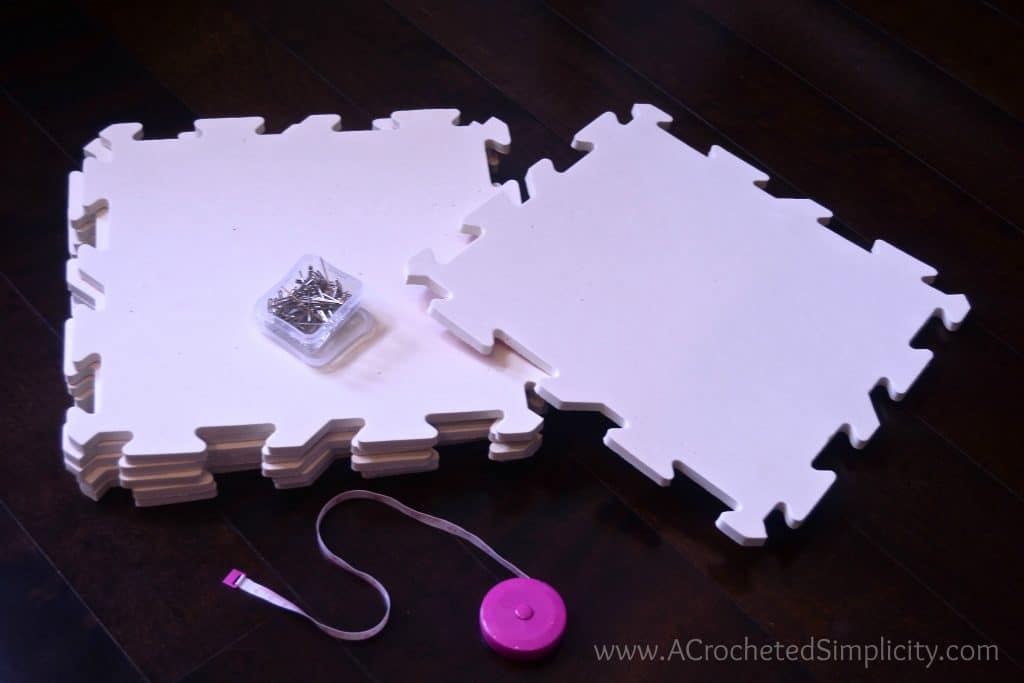
📌 2. Blocking Mats
These provide a clean, padded surface to pin your project into shape. You can use:
- Foam blocking mats (like interlocking kids’ play mats)
- Thick towels or yoga mats (for smaller pieces)
Look for mats that:
- Won’t absorb water excessively
- Are firm enough to hold pins
- Have grid lines (optional, but great for accuracy!)
📍 3. Rustproof Pins or T-Pins
Pins are crucial for holding your project in place while it dries. Make sure to use rustproof pins so they don’t stain your yarn.
- T-pins are especially good for larger projects or thicker yarns.
- Regular sewing pins work fine for lighter projects.
🧷 Blocking combs (also known as knit blockers) are another great option for quick, even pinning.
🧴 4. Spray Bottle (Optional)
If you’re doing spray blocking, a simple spray bottle filled with water is all you need. This is especially useful for light shaping or refreshing pieces that were already blocked.
🧺 5. Towels
Soft, absorbent towels are useful for:
- Rolling up wet projects to remove excess water
- Flat drying smaller items
- Laying under your project to protect surfaces
💨 6. Steamer or Steam Iron
If you’re steam blocking (especially acrylic), a garment steamer or a steam iron can do the job. Just be sure to:
- Never touch the iron directly to your project
- Use a pressing cloth if you’re unsure
⚠️ Be cautious when steam blocking synthetic yarns to avoid over-melting or “killing” them unless that’s your goal.
✨ Bonus Tools (Nice to Have)
- Measuring tape or ruler – For accurate shaping
- Blocking wires, or t-pins – Great for straight edges and lacework
- Grid board – Helps keep symmetry in check
- Lint roller – Removes fuzz or stray fibers post-blocking
You don’t need a huge toolkit to block your yarn creations—just a few simple supplies and a little patience.
Photos of Spray & Steam Blocking
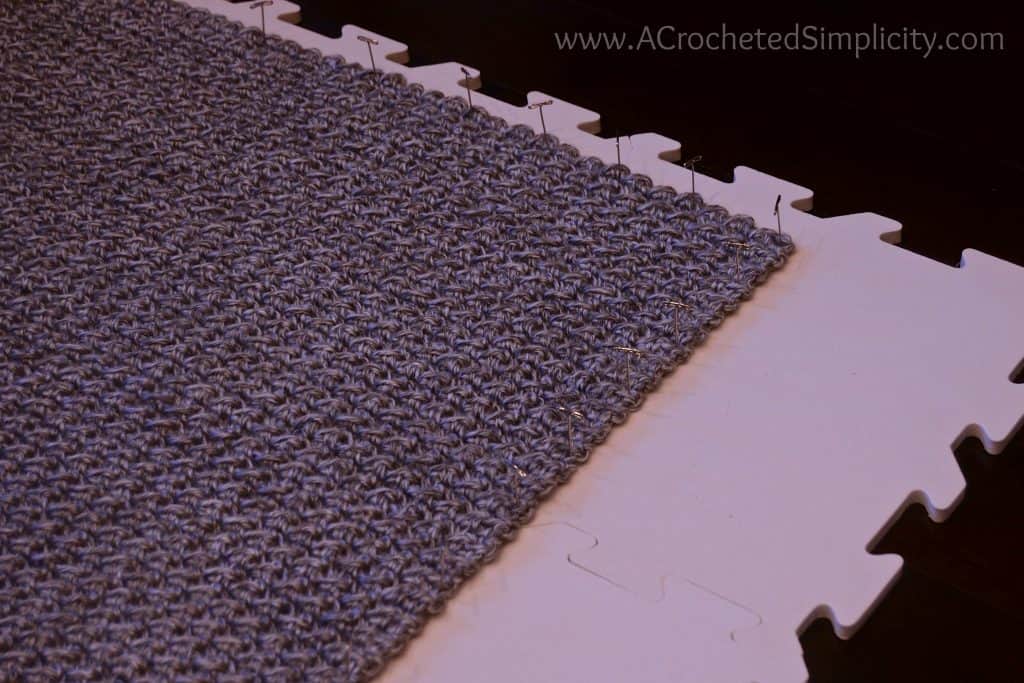
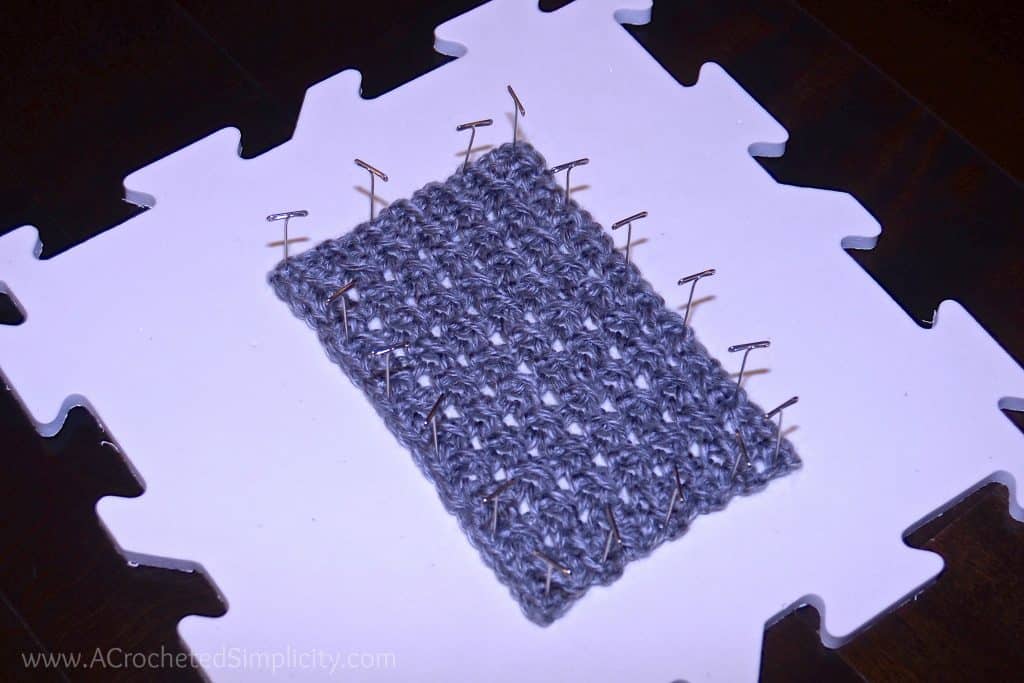
First, set up your foam blocking boards (or whatever you’re pinning to). Make sure that the surface is slightly larger than the measurements your piece needs to be blocked to are. Grab your tape measure and rust-proof t-pins.
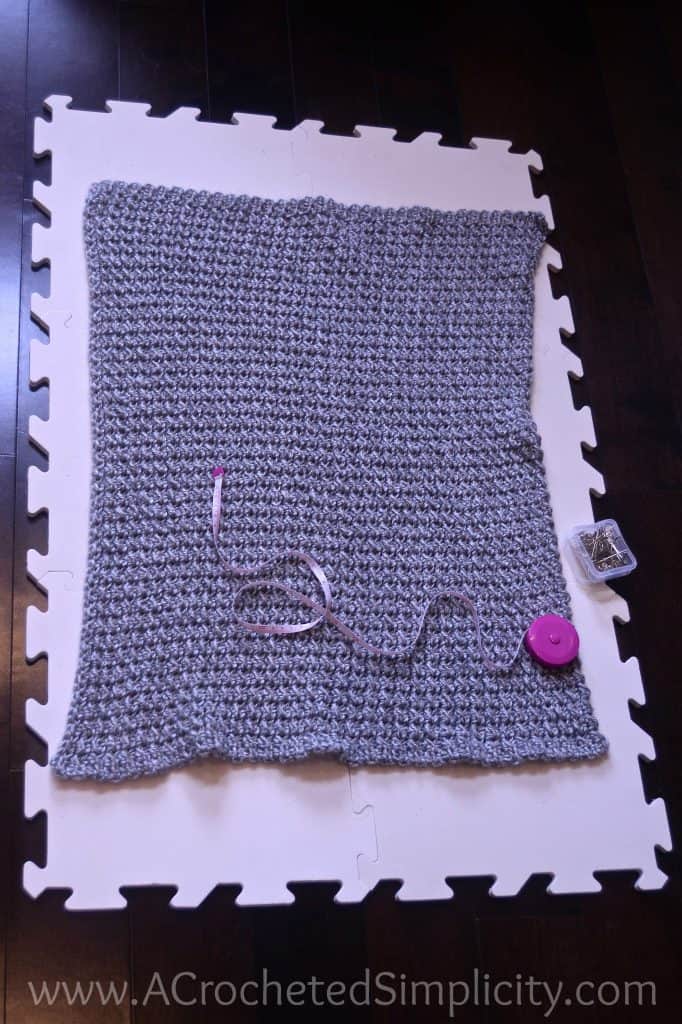
If you’re working with a piece that has a lot of texture or cables, you’ll want to pin it right side up. If your piece isn’t very textured, wrong side up works just fine.
If you’re working with a square or rectangular piece, you can double check yourself by measuring from corner-to-corner. As long as both measurements are the same, then you can rest assured that your piece is square! (see one of the wet blocking photos near the bottom of the post for a visual of measuring corner to corner)
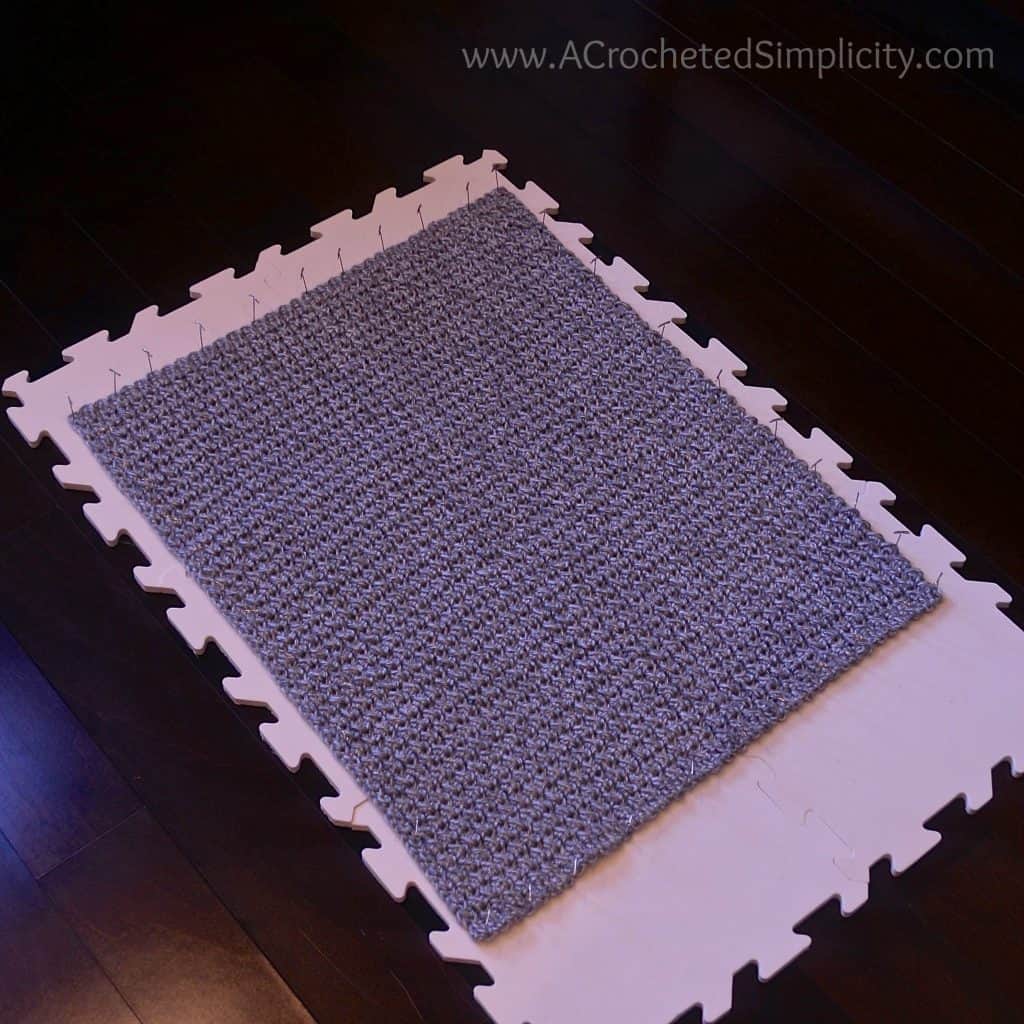
Use as many pins as you need around the perimeter. In some instances, less is more, but in some cases more is necessary. This is something you’ll get a better feel for once you’ve done it a few times. (did you see what I did there? I planted a seed…you’re going to do it more than once. 😉 )
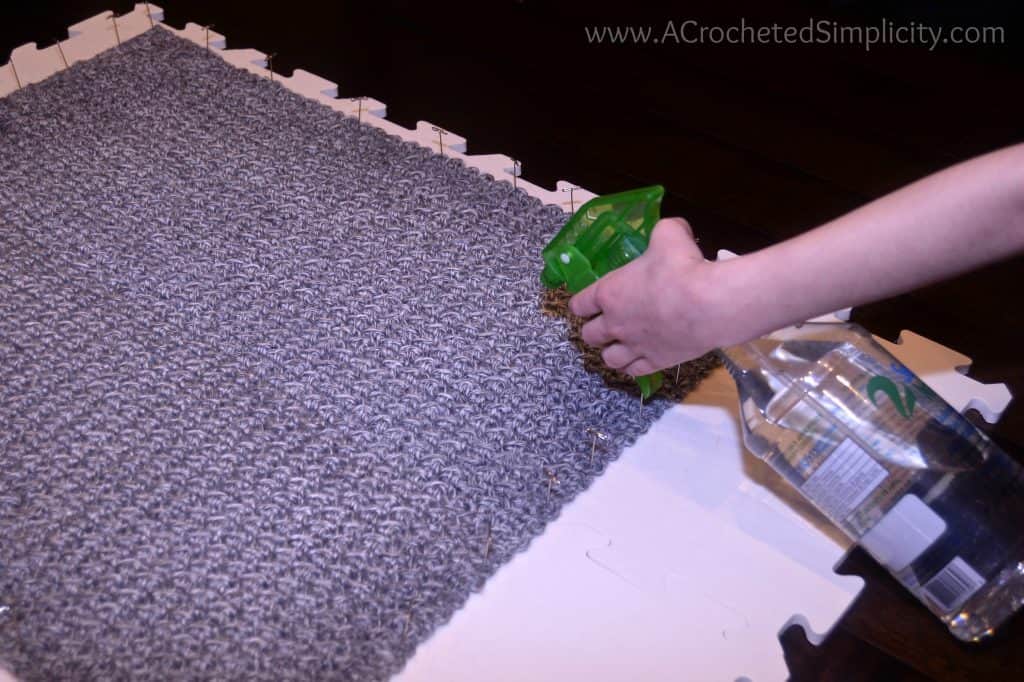
Let’s Talk Spray Blocking
Spray blocking your crochet is pretty simple. All you need is a spray bottle filled with water (cold tap water works just fine). Begin spraying your piece and continue spraying until the entire piece is saturated. Once it is saturated, you’re done! Now you just need to wait for it to dry completely…which can take a while.
Pros of Spray Blocking: Can be done any where in the home because it doesn’t require the use of anything that needs to be plugged into an outlet.
Cons of Spray Blocking: Takes the longest to dry because the piece is saturated with water and not squeezed out before pinning (like it is with wet blocking as you’ll learn below).
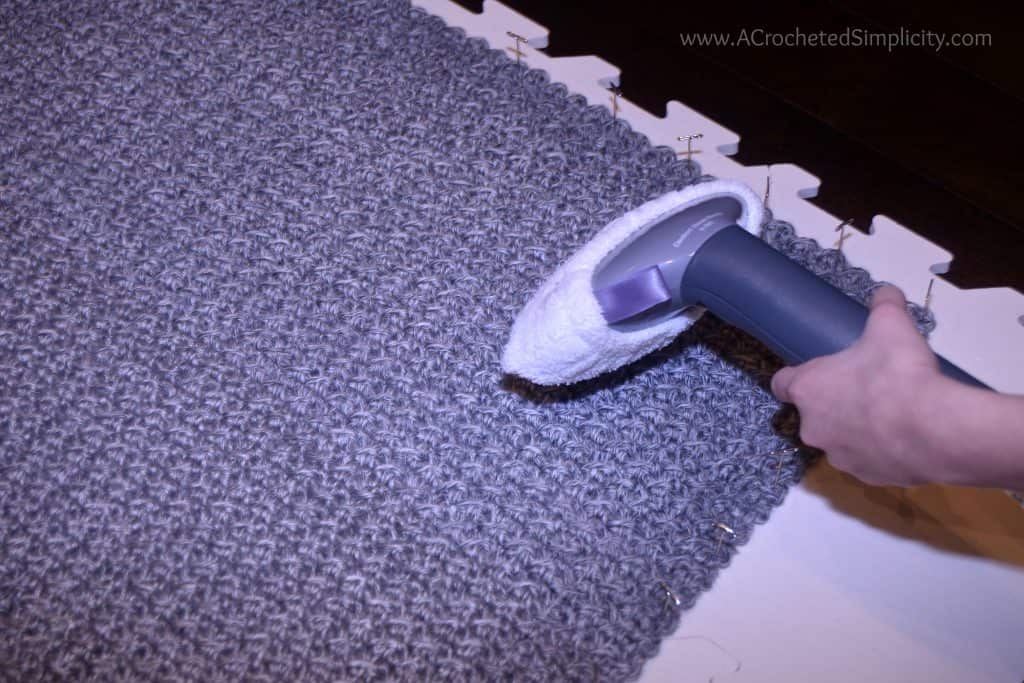
Let’s Talk Steam Blocking
Steam blocking can be done with a garment steamer or an iron on the steam setting. I have the Shark Portable Garment Steamer (shown in the photo below) and LOVE it for steam blocking! You can certainly use your iron on a steam setting, but be very careful not to touch the fabric with your iron or it will melt…and then you’ll cry…and we don’t want that. 😉
To steam block your fabric simply hover over it with the steam (approximately 1/2″ above it). I continuously move back and forth so that I do not over-steam my fabric. (If you over-steam & overheat acrylic, you can “kill it”. We’ll talk about that in a bit.) As you’re steaming, you’ll notice that the fabric will become damp and begin to soften up a bit.
While steaming, you can gently manipulate the fabric if you have any bumps that need to be smoothed out, but do not rub or push on the fabric as you can stretch out your stitches where you don’t want them stretched out. Once your project seems to be damp all over, allow it to cool and dry completely to complete the blocking process.
Pros of Steam Blocking: It will soften up scratchy yarn. You can “kill acrylic yarn” by over-steaming and overheating it and add a wonderful drape to your project.
Cons of Steam Blocking: You may need to invest in an iron with a steam setting or a garment steamer. You can over-steam and kill the acrylic and cause your fabric to have too much drape for the project. You can also melt your yarn if you accidentally touch it with the iron.
Last, but not least: Wet Blocking
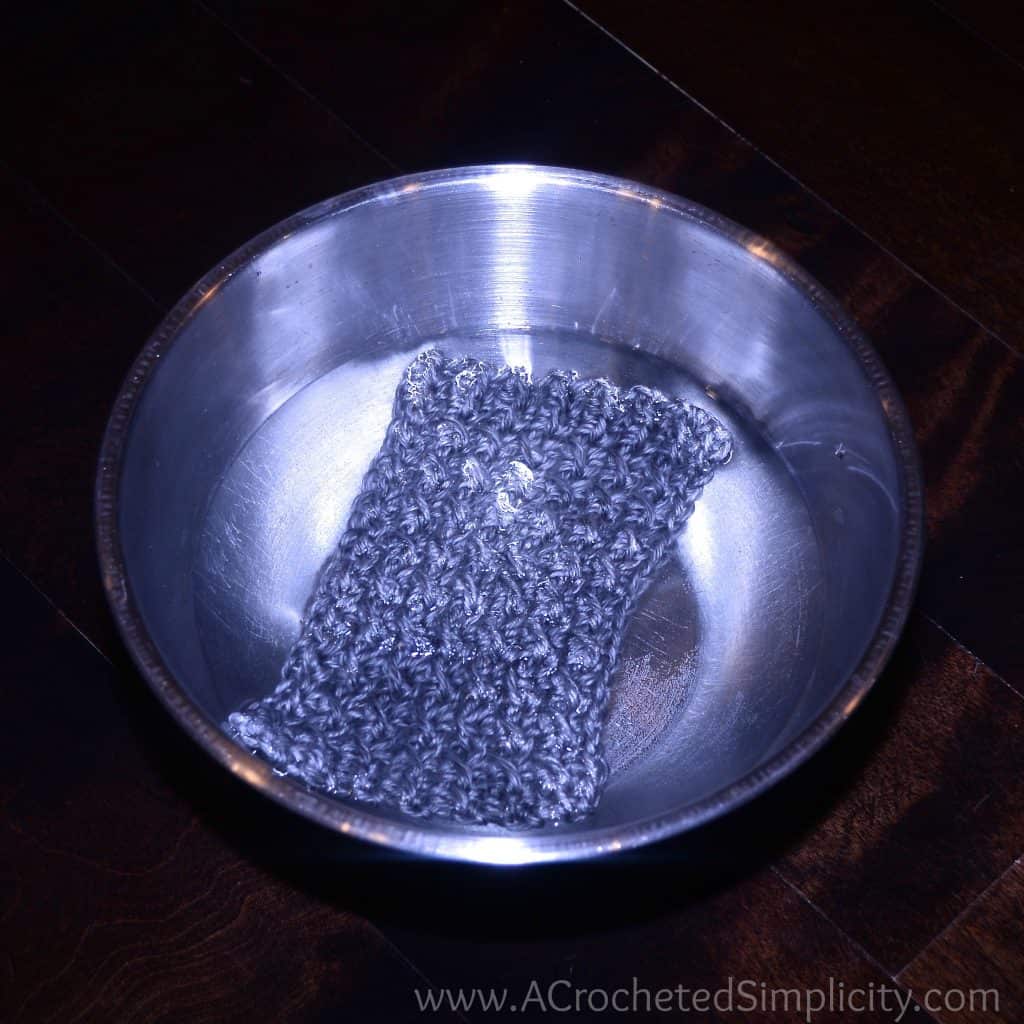
For wet blocking you’ll need a bowl big enough to hold water and your crochet project, or sink full of water and a couple towels to remove excess water from your piece.
Begin by placing your fabric in the bowl of water. Don’t just dunk it in the water and call it good. You need to let it sit in the water for approximately 10 minutes so that it can really soak up the water and the yarn can relax.
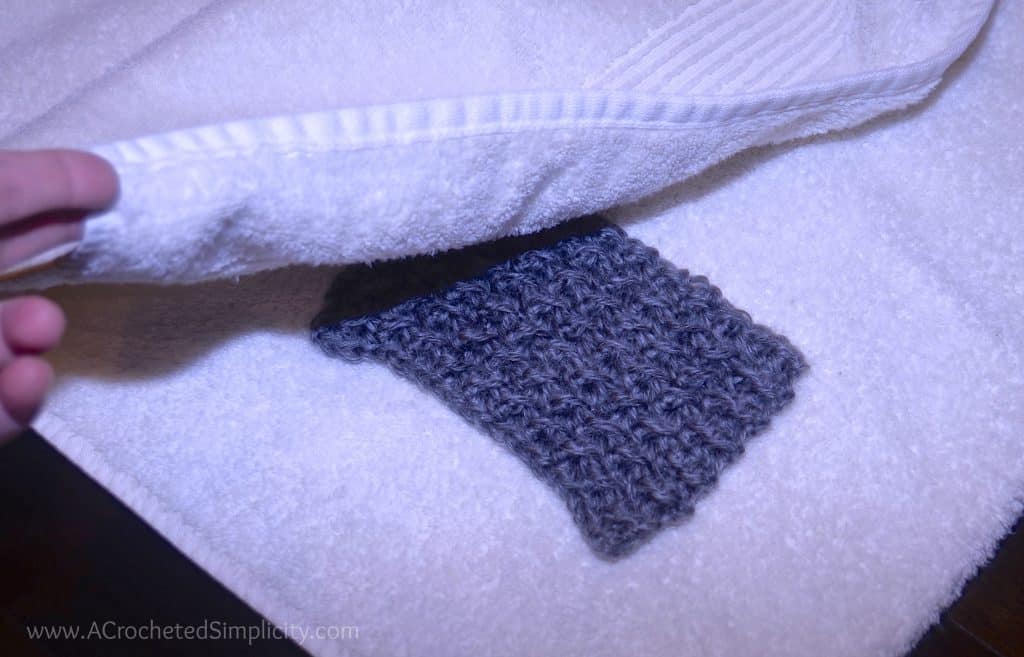
After your fabric is done soaking, gently squeeze out the excess water (do not wring or twist the fabric). Lay it between two layers of a towel and gently press to remove more of the water.
After you’ve removed a lot of the excess water, it’s time to pin it to your boards to the measurements specified in the pattern.
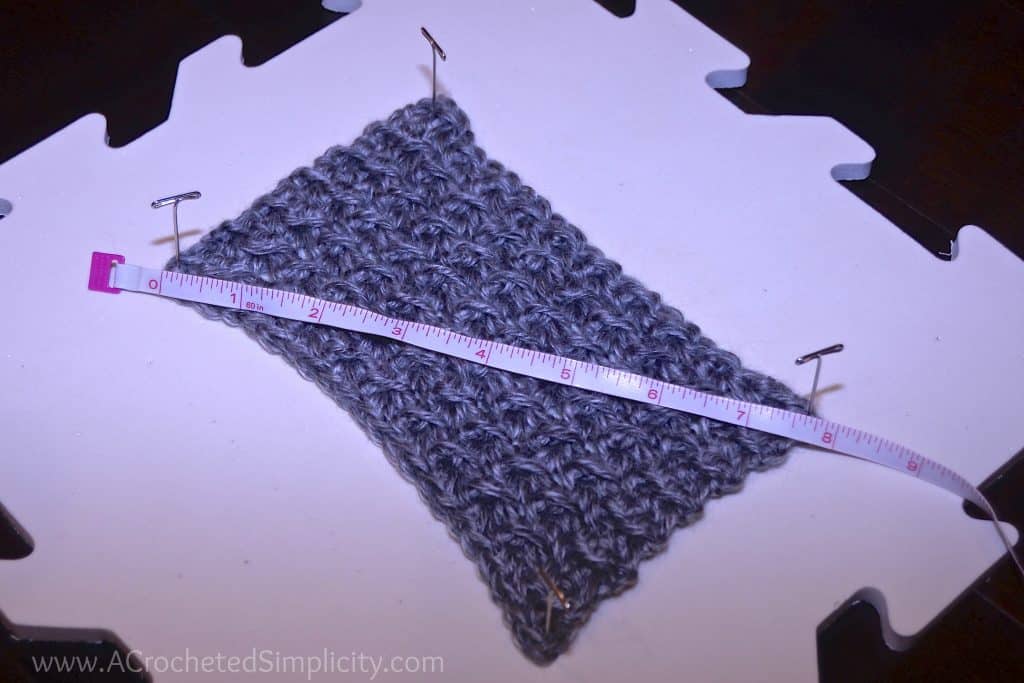
Measure corner to corner to make sure your piece is square (if working with a square or rectangle piece). Continue to add more pins around the perimeter of your fabric. Once it is completely dry the blocking process is complete.
Pros of Wet Blocking: Dries more quickly than spray blocking because you remove excess water before pinning.
Cons of Wet Blocking: If you’re working with a larger project, you may not have a sink large enough to sufficiently soak it and it can become cumbersome trying to remove excess water.
❓ Most Commonly Asked Questions About Blocking Yarn
These are some of the most commonly asked questions crocheters ask about blocking.
Closing Summary
Wet & spray blocking acrylic yarn are great methods for blocking a project to a specified shape or measurement. Steam blocking is great for permanently softening up a project and adding drape when needed.
Blocking isn’t a one-size-fits-all process—and that’s the beauty of it. With the right method, you can enhance your stitch definition, fix uneven edges, and ensure your finished project looks as fabulous as you imagined.
So gather your materials, give your project the spa day it deserves, and enjoy the transformation!
Blocking might seem optional, but once you see the difference in drape, stitch definition, and overall finish, you’ll wonder how you ever skipped it.
JOIN US IN THE FACEBOOK COMMUNITY GROUP!
If you’ve tried this crochet technique on a project, I’d love to see it!
Come share your finished projects with us in the A Crocheted Simplicity Crochet Community Group on Facebook. Join us for fun community events such as crochet alongs, join in on crochet conversations, ask questions, get advice, and share your love for crochet!

Thanks for the email on blocking. I think that may explain why my sisters sweater I made her – stretched out terribly after she washed it – bet her dryer was too hot and she killed the acrylic. The label says it can be machine washed and dryed, but I am sure at a lower temp than she did. I have never thought about blocking before I sewed the peice together, think I’ll try that next time. I bought a hand steamer and have tried that but I don’t know how long you’re supposed to house it over the fabric and I see you steam after it’s pinned, I tried it before… Gonna try again. thanks
Hi Meri~ I would suggest making a small swatch of the fabric in the pattern and steaming it too see how the yarn steams and to get a feel for how long you need to steam. 🙂
Thank you for this article, cant wait to try this. Im trying the steam blocking 1st
So, if I want an acrylic shawl to loosen up and drape better, could I just throw it in the washer and dryer?
Washing and drying acrylic yarn can loosen up / soften up the stitches and yarn. I’d just make sure not to wash or dry it on hot. 🙂
I just finished my Ohio State afghan. It is made of Vanna`s Choice Lion Brand 100% Acrylic. I want to know if I should steam block BOTH SIDES. Blocking one side, letting it dry and then doing the other side ?? I am using my steam iron. Thanks
Hi Lynn ~ Blocking one side is sufficient. 🙂
I don’t have any t-pns, but I am hoping it will work if I use straight pins? I did a word chart (Rainbow Dolphin) and my tension was so far off at first, then I got tighter as I tried to crochet in the different color tails, Needless to say, it’s wavy! I did a border of shells, but will try to block it to see if that takes care of it. I bought a garment steamer at Walmart. Hope I know when enough steam is enough. I’m using I Love This Yarn.
Nanc
Hi Nancy,
As long as your straight pins are stainless, you can definitely use them. If you have a small swatch of the yarn lying around that you can practice steaming on, I would suggest beginning there. It is really easy to steam and as long as you take it slow, you should be just fine. You can steam a small area and check it. You’ll be able to feel the fabric change as you steam it. It shouldn’t take much to steam the yarn you used. 🙂
Jennifer
The one thing I didn’t ask was, do I just steam the edges or the entire blanket? I did the edges all around it. I had to quit, though. I had cataract surgery on Tuesday and and forgot I wasn’t supposed to bend. I tried keeping my head up and doing it. Now it sits on my floor. I had to use safety pins) as straight pins wouldn’t pull it enough. They are stainless steel. This blanket was so far off I did the best I could.
Now I”m worried that I probably should have done it all. Will do that tomorrow, if it’s not too late.
Nanc
You can steam as much or as little of the project as needed. There have been many projects that I’ve had to steam in sections simply because I didn’t have the space to steam the entire thing at once. Doing so will not be an issue at all.
thanks for the helpful article ~ I’ve never blocked anything I’ve made…
I did a crochet graphed shape with center single crochet ~ I cut the yarn at the end, and started each row on the same side ~ sadly, this created a left slant.
will blocking it let me straighten out the slant?
the shape is a truck, so the vertical lines are supposed to be vertical, not slanted!
Blocking will help, but it may not make it 100% straight. The main reason is because of the anatomy of the stitch… they tend to naturally lean a little to the left.
Hello Jennifer: I just received my blocking squares and blocking pins. I finished a beby blanket that is 100% acrylic. There are 16 squares, knit all at once, no seaming required. If blocking is not permanent, do I need to block at all? I will wash and dry it before giving as a gift. Or should I wash and dry then block? Each square has a bear motif. One square has the bear in garter stitch with the area around the bear in Stockinette. The next square has the bear in stockinette and the area around it in garter stitch alternating squares across the blanket. I want the blanket to lay flatter.
So,if I block then wash and the blocking washes out it seems like a wasted effort. I would appreciate any advice you have for me.
Hi Susan – Blocking acrylic isn’t permanent if you’re just blocking to square things up and make it easier to join all of the squares. But, if you steam block, and you steam just past the blocking stage (before killing the acrylic…only slightly killing it), it will be permanent. I am working on an afghan now and I love how steaming can change the drape of the fabric…plus it softens it up nicely. 🙂
Hi Jennifer
Thanks so much for this post, it’s really handy.
I’m currently making a baby blanket in acrylic which is knit in 4 sections of mitered squares. These are then sewn together before adding a border. I planned to block the sections before sewing together (so I can line up the squares better). having read your blog though im wondering if I want to ‘kill’ my blanket once it’s finished so it’s soft and big or if actually it’s better to retain some elasticity? I guess I will need to block after the border is attached too?
I guess the person will machine wash it to clean so I suppose it’ll die then anyway?
Any advice would be appreciated! 🙂
Hi Kim, I apologize for the delayed response. I was out of state all last week. My response may be too late, but personally I would lightly block the squares to prepare them for seaming and then after you added the border you could steam more heavily to soften it up. My thought is that if you were to kill it before seaming, it may make it harder to manipulate and seam easily. I hope this makes sense. – Jennifer
Great article. I would like to steam block and am looking to purchase a garmet steamer. Any advice or recommendations? Thank you!
Hi Carol – I’ve linked to the steamer I purchased in the very first paragraph about steaming. 🙂 Let me know if you are unable to find it. Jennifer
Blocking is very new to me. I am wondering for an accessory bag and headband I made. So for the accessory bag it has a single crochet border so I should block before I put the border on it after? The same with me headband, block it before I see ends together or after? Thank you !
Hi Kay-Lynn – It sounds like it would be much easier to block the headband before it’s seamed. I would block as closely to the end of the project that you can.
Jennifer
I still haven’t seen you answer the question of blocking completely and then giving it as a gift what will happen when they machine wash and dry it or should you advise them against this
Hi Lilly – I answered that question in an e-mail as I was away from my computer when I received it and it was easier to respond via e-mail. I do that all the time…and then forget to update comments. I’m sorry about that!
As far as machine washing and drying, I would only do this with acrylic yarns. When you machine wash wool, your project will end up felting and shrinking.
It all depends on the fiber content, but generally you will want to re-block a garment after washing just as you would more delicate store bought garments. If it’s an afghan, blocking always adds so much to an item, but it’s not required. If it were a lacey afghan, you would lose a little of the detail when washing if not re-blocking, but it’s not a necessity.
Jennifer
What are your thoughts on blocking ribbing? On a mostly acrylic yarn (10% wool). I’d read not to block ribbing as it will loose it’s elasticity, however acrylic blocking won’t be permanent so…?
Hi Karyn – You are correct. Blocking acrylic will not be permanent (unless you happen to kill it, which then I can see it would lose any elasticity). If you’re making a gift and want it to look nice for the presentation, I’d lightly block up making sure not to stretch it at all. ~Jennifer
Hello
I had a round baby shawl knitted in acrylic that hasn’t been blocked so the shawl doesn’t lay flat. Can I block it still? Or will washer and dryer do the trick? If so what settings do I use for the washer and dryer?
Thank you.
Hi Barb – I’d check the yarn label to make sure, but you should be able to wash and dry on warm if you do not want to block it. Jennifer
I blocked a hat and probably overdid it, it is a little bigger than i want, i did not kill it. Can i undo blocking and try again??
Hi Debbie – It depends onthe fiber content of your yarn.
HI,
I found this article by chance through Google. I have a shawlette that I knitted a while ago in 100% acrylic yarn which I want to gift to a friend who”s just given birth to a baby girl. Hoping that steaming it would create some drape for this shawl that would be nice and soft to the baby’s touch.
Thank you for this article.
You’re welcome!
Can I purposefully “kill” an acrylic sweater to increase the size of it permanently? How would I go about that? Thank you!
Hi Sam,
You can, however, as an acrylic sweater is worn, it will naturally stretch out and I’m afraid that killing it will greatly increase the natural stretch it would have over time.
I would suggest making a swatch in the same yarn and timing how long it takes until the fabric becomes really limp. There is an obvious change in the way it feels after killing it.
I hope this helps.
Jennifer
I’m making a scarf. No fancy stitches just a long rectangle. My problem is the sides aren’t straight. It’s not horrible just comes and goes. If I block it will it go back to not straight when my son wears it? The yarn is Yarnspirations Caron Jumbo. It says machine wash and dry. Will the sides always be wonky?
Hi Vanessa,
You can block and it should stay until it gets wet or washed.
Jennifer
Hello,
Wondering about a yarn that says do not iron. Would that include steaming too? Thanks.
Hi Hannah,
Typically it is still okay to steam, but I have to say it depends on the fibers.
Jennifer
Good article. I am experiencing some of these issues
as well..
Hi Jennifer,
I saw your article about blocking acrylic yarn and I had a question about a sweater that I am making with Red Heart Supper Saver yarn.
In the pattern you have to sew the shoulder seams then knit the neckband around the front and back pieces of the sweater.
My question is should a block the front and back pieces then sew the shoulder seams and then knit the neckband around this?
Or just sew the shoulder seams knit the neckband and then block the two pieces that are now attached to each other on top of each other? I am not sure which would be better….What would you suggest.
Donna
I’m very new to crocheting. I made a baby blanket (crib size) for a friends new grand baby. When I fold it in half the sides don’t line up very well on one side. A friend said it’s because my tension wasn’t consistent. It’s 100% acrylic.
1. Will blocking help with this?
2. If so what happens after they wash it? It’s a baby blanket so I’m assuming it will be washed pretty frequently and they’ll probably want to throw it in the dryer.
3. Should I invest in the foam mats? I plan on making several blankets, but some will be a lot larger.
4. I had to buy 2 different brands of yarn to get the colors I wanted. They are both 100% acrylic but one says it can go in the dryer on low and one says do not put in the dryer. Do you think it’s OK to put it in the dryer?
Thank you in advance!
Hi Jennifer…I am knitting an afghan for my grandson. The pattern is on revelry…”New York Yankees” by Deborah Gardner. I am using Red Heart Super Saver yarn and the finished size is 48×72. It’s a pretty challenging pattern for me (intarsia and fair isle) but it’s coming along nicely. I will probably back it with flannel to hide all the color change stitches, etc. but before I do that, I think I should block it. I am wondering since it’s acrylic, could I wash it in the washing machine to wet it and then block it? I would think that it would be sufficiently wet to block. But before I mess up what is a labor of love, I wanted your expert opinion! Thank you.
Hi Chriss,
Even though you’ve done colorwork, your stitches will still be locked into place. Washing will not harm them, but I always like to err on the side of caution and wash on the delicate cycle. Washing Red Heart Super Saver will also soften it up a lot, which is great! 🙂
Jennifer
Thank you so much for this great description of blocking method a and their pros and cons!
Hello! Great article! I am wondering how to block a pillow cover I made in 4 pieces. It’s made with Wool ease, 90% acrylic, 10% wool. Each piece is half ribbed, half garter stitch. I would like to block out the ribbing (top half) to match the garter stitch (bottom half) to make a nice looking rectangle so I can seam them all together, and not sure if I should wet block by soaking it, spray block, or steam block? I’ve read quite a few articles but am still having trouble deciding! I think I’ll make a sample but I’m almost out of that yarn. Any advice?
Hi Cindy,
My favorite is steaming, but it also depends on how much you need to shape your pieces. If you’d like to e-mail me a couple photos, I can give you a more direct answer. My e-mail is: [email protected]
Jennifer
Hello,
Quick question about blocking thicker projects. I made a scarf using a double knitting technique that essentially makes the design double sided but also twice as thick as normal. I’m thinking of trying to slightly kill the yarn since the length is a bit shorter than I want it and pretty stiff. Do you think I would need to steam both sides of the scarf or would one side be enough?
Thanks!
Kristie
Hi Kristie,
If the steam goes all the way through, you may be able to get away with steaming just one side, but I would guess you’ll need to steam both sides to make sure to kill the yarn equally. If you only successfully kill it on one side, the second side may cause a weird pucker.
Jennifer