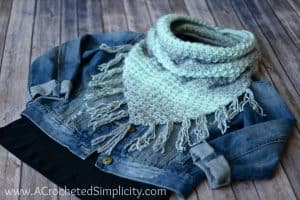
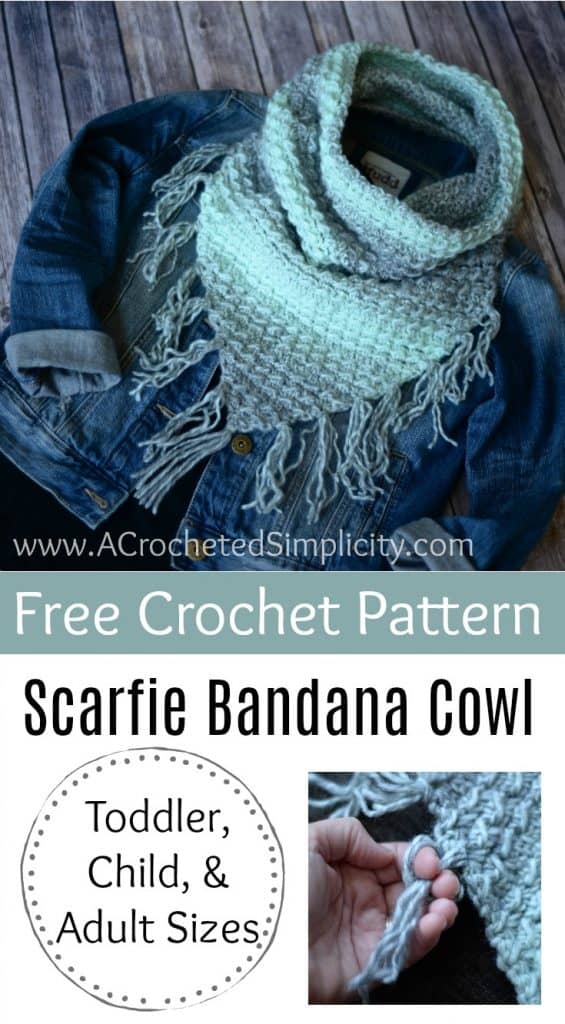
Free Crochet Triangular Cowl Pattern – Scarfie Bandana Cowl
One skein crochet projects are perfect for several reasons. I personally like them because they help to use up random balls of leftover yarn from larger projects. They also make great last minute crochet gifts and they are the perfect size crochet projects to take with you on long car rides. The Scarfie Bandana Cowl is the perfect one skein crochet triangular cowl pattern to take on the road with you!
You can find the free crochet triangular cowl pattern for the Scarfie Bandana Cowl in this post below, or an ad-free print friendly version on Love Crafts here, Ravelry here, or on Etsy here.
>> CLICK HERE TO SIGN-UP TO RECEIVE OUR NEWSLETTER <<
When I began designing the Scarfie Bandana Cowl, I only had intentions on making it in adult sizes until I received a request for child sizes as well. She said she really wanted to make a mommy and me set so that’s when I decided to add in the toddler and child sizes.
I had been dying to use one of Lion Brand Scarfie’s latest colorways, Mint/Silver, ever since it came out so I grabbed the yarn, grabbed my hook and off I went to swatch. As I was swatching I fell more and more in love with this self-striping yarn and knew it was the perfect yarn to bring my vision to life. If you haven’t crocheted with Lion Brand Scarfie yet, you really should go pick up a ball today!
THE YARN
SCARFIE BANDANA COWL – FREE CROCHET TRIANGULAR COWL PATTERN
The free pattern is below, but if you love to work offline, I’ve got a couple other great options for you.
Purchase the ad-free, printable PDF, including all photo tutorials, on Love Crafts here, Ravelry here, or on Etsy here.
Save this pattern to your Ravelry favorites here.
Pin it for later here.
This post contains affiliate links.
Materials
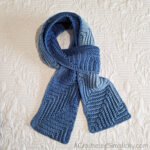
- Yarn: Yarn used for the sample shown above is Lion Brand Yarn Scarfie in Mint/Sliver; 5 / Bulky Weight Yarn; 1 ball (312 yards / 285 m / 5.3 oz / 150 g / 78% acrylic, 22% wool)
- Crochet Hook: K/10.5/6.5mm (my favorite hooks are Clover Amour Hooks, I’ve never had an ache in my hand since switching)
- Scissors
- Tapestry Needle
Many of the materials are available for purchase through our affiliates:
 Clover 1053/K Amour Crochet...Shop on Amazon
  Scarfie Bulky Yarn, Mint/Silver") Lion Brand Yarn (1 Skein) S...Shop on Amazon
Lion Brand Yarn (1 Skein) S...Shop on Amazon  Fiskars 154110-1001 Non-sti...Shop on Amazon
Abbreviations (US Terms)
- ch(s): chain
- st(s): stitch(es)
- sl st(s): slip stitch(es)
- sc: single crochet
- hdc: half double crochet
- ext sc: extended single crochet *Click here for video tutorial
- RS: right side
- sp(s): space(es)
- Rep: repeat
- Rnd: round
Gauge
- 9 sts x 10 rows = 3″
Finished Sizes
• Toddler Size: 8-1/2″ W x 12-1/4″ H (240 yards)
• Child Size: 10-1/4″ W x 16-1/4″ H (270 yards)
• Adult Size: 15-1/2″ W x 20″ H (312 yards)
Notes
- Beginning chain(s) are not included in stitch count unless noted otherwise.
- I tend to crochet on the tighter side. You may find yourself needing to go down a hook size (or two) to properly meet gauge, but gauge isn’t as crucial with this crochet cowl pattern.
- First stitch of each row is worked into the same stitch as turning chain, unless stated otherwise.
- 1 ball of Lion Brand Scarfie in Mint/Silver was used for the sample. (312 yards / 285 m / 5.3 oz / 150 g / 78% acrylic, 22% wool)
- Yarn Substitution: Many have made this crochet cowl using a heavier worsted or aran weight yarn and it’s turned out beautifully.
- Note: If you’re planning to add fringe to your cowl, begin with Fringe. If you’re not planning to add fringe to your cowl, begin with Triangle.
- Tip: Do not pull yarn directly from the skein while working. Instead, have a small pile of yarn laying loosely in a pile next to you that you work from. This will help to keep your slip stitches and ch-1’s loose enough so they do not affect gauge.
Special Stitches
• Extended Single Crochet (ext sc): Insert hook into stitch indicated, yo, pull up a loop, yo, pull thru 1 loop on hook, yo, pull thru remaining two loops on hook. Click here for video tutorial
Scarfie Bandana Cowl Instructions
Toddler & Child Sizes
If you’re going to add fringe to your cowl, begin with the Fringe first so that you are sure to have enough yarn. If you’re not planning to add fringe, simply skip that section and begin with Triangle.
Fringe
- Cut (33) 10″ strands of yarn. Each fringe uses 3 strands of yarn. Set fringe aside. Continue on to Triangle.
Triangle Section
Changes for sizes as follows: Toddler (Child)
Tip: When beginning all even numbered rows, make a tight turning chain to help keep your triangle from leaning too much to the left. If there is a slight slant (less than 2″), it won’t be noticeable when worn.
Row 1: Using a 6.5mm crochet hook, leave a 7″ tail of yarn (if adding fringe, as you can work this yarn tail into the fringe and avoid having an end to weave in), ch 2, work 2 hdc in the 2nd ch from your hook. Turn. (2 sts)
Row 2 (RS): Ch 1, (sc, ch 1, sc) in the first st, ch 1, sc in the last st. Turn. (5 sts)
Row 3: Ch 1, hdc in the first sc, *sl st in the next ch-1 sp, hdc in the next sc, rep from * across. Turn. (5 sts)
Row 4: Ch 1, (sc, ch 1, sc) in the first st, ch 1, skip the next sl st, sc in the next hdc, ch 1, skip the next sl st, (sc, ch 1, sc) in the last st. Turn. (9 sts)
Row 5: Rep Row 3. (9 sts)
Row 6: Ch 1, 3 ext sc in the first st, ext sc in each st across to the last st, 1 ext sc in the last st. Turn. (11 sts)
Row 7: Rep Row 3. (11 sts) Note: After a row of ext sc, you will rep Row 3, but work your sl sts into sts instead of ch-1 sps.
Row 8: Ch 1, (sc, ch 1, sc) in the first st, *ch 1, skip the next sl st, sc in the next hdc, rep from * across to the last 2 sts, ch 1, skip the next sl st, (sc, ch 1, sc) in the last st. Turn. (15 sts)
Row 9: Rep Row 3. (15 sts) Stitch count increases by 0 with each Row 3 rep.
Row 10: Rep Row 8. (19 sts) Stitch count increases by 4 with each Row 8 rep.
Row 11: Rep Row 3. (19 sts)
Row 12: Rep Row 6. (21 sts) Stitch count increase by 2 with each Row 6 rep.
Row 13: Rep Row 3. (21 sts)
Row 14: Rep Row 8. (25 sts)
Rows (15 – 18) (15 – 24): Rep Rows 9 – 14, ending with a Row 12 rep. (31, 41 sts) at the end of Row 18 (24) / Approximately 6″ – (8″ ) from Rows 1 – 18 (1 – 24).
Do not fasten off. Continue on to Cowl. Do not turn at the end of Row 18 (24).
Crochet Cowl Section
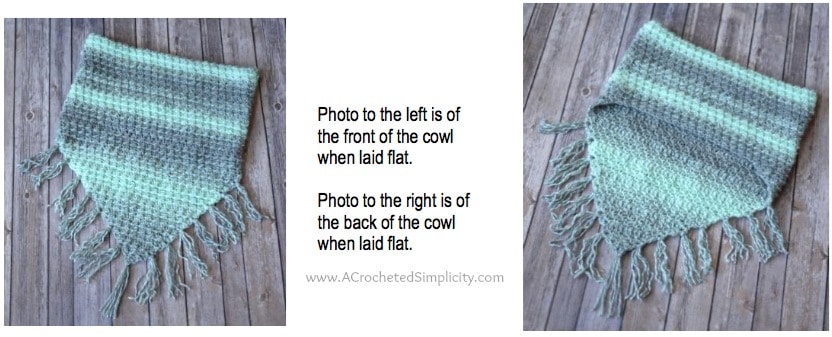
See the photos at the bottom of this page if you need a visual at the end of Rnd 1.
Rnd 1 (RS): Continuing on from Row 18 (24), loosely ch 20 (20) (If you’d like a looser cowl, simply increase your ch in multiples of 2. If you’d like a tighter cowl decrease your ch in multiples of 2.). Join with a sl st to the 1st st of Row 19 (25). Turn. (51, 61 sts)
Rnd 2: Ch 1, hdc in the first ch, *sl st in the next ch, hdc in the next ch, rep from * across the ch, *sl st in the next ch-1 st, hdc in the next st, rep from * across. Join. Turn. (51, 61 sts)
Rnd 3: Ch 1, sc in the first st, *ch 1, skip the next sl st, sc in the next hdc, rep from * around. Join. Turn. (51, 61 sts)
Rnd 5: Rep Rnd 3.
Rnd 6: Rep Rnd 4.
Rnd 7: Ch 1, ext sc in each st around. Join. Turn. (51, 61 sts)
Rnd 8: Rep Rnd 4.
Rnd 9: Rep Rnd 3.
Rnd 10: Rep Rnd 4.
Both Sizes: Rep Rnds 5 – 10, ending with a Rnd 6 rep, until you reach desired height or a minimum of 6″ – 8″. (51, 61 sts) Fasten off. Continue below to Adding Fringe.
Adult Instructions
If you’re going to add fringe to your cowl, begin with the Fringe first so that you are sure to have enough yarn. If you’re not planning to add fringe, simply skip that section and begin with Triangle.
Fringe
• Cut (45) 12″ strands of yarn. Each fringe uses 3 strands of yarn. Set fringe aside. Continue on to Triangle.
Triangle Section
Tip: When beginning all even numbered rows, make a tight turning chain to help keep your triangle from leaning too much to the left. If there is a slight slant (less than 2″), it won’t be noticeable when worn.
Row 1: Using a 6.5mm crochet hook, leave a 7″ tail of yarn (if adding fringe, as you can work this yarn tail into the fringe and avoid having an end to weave in), ch 2, work 2 hdc in the 2nd ch from your hook. Turn. (2 sts)
Row 2 (RS): Ch 1, (sc, ch 1, sc) in the first st, ch 1, sc in the last st. Turn. (5 sts)
Row 3: Ch 1, hdc in the first sc, *sl st in the next ch-1 sp, hdc in the next sc, rep from * across. Turn. (5 sts)
Row 4: Ch 1, (sc, ch 1, sc) in the first st, ch 1, skip the next sl st, sc in the next hdc, ch 1, skip the next sl st, (sc, ch 1, sc) in the last st. Turn. (9 sts)
Row 5: Rep Row 3. (9 sts)
Row 6: Ch 1, 3 ext sc in the first st, ext sc in each st across to the last st, 1 ext sc in the last st. Turn. (11 sts)
Row 7: Rep Row 3. (11 sts) Note: After a row of ext sc, you will rep Row 3, but work your sl sts into sts instead of ch-1 sps.
Row 8: Ch 1, (sc, ch 1, sc) in the first st, *ch 1, skip the next sl st, sc in the next hdc, rep from * across to the last 2 sts, ch 1, skip the next sl st, (sc, ch 1, sc) in the last st. Turn. (15 sts)
Row 9: Rep Row 3. (15 sts) *Stitch count increases by 0 with each Row 3 rep.
Row 10: Rep Row 8. (19 sts) *Stitch count increases by 4 with each Row 8 rep.
Row 11: Rep Row 3. (19 sts)
Row 12: Rep Row 6. (21 sts) *Stitch count increase by 2 with each Row 6 rep.
Row 13: Rep Row 3. (21 sts)
Row 14: Rep Row 8. (25 sts)
Rows 15 – 36: Rep Rows 9 – 14, ending with a Row 12 rep. (61 sts at the end of Row 36) Approximately 11″ from Row 1 – 36. Do not fasten off. Continue on to Cowl. Do not turn at the end of Row 36.
Crochet Cowl Section
See the photos at the bottom of this page, if you need a visual of the end of Rnd 1.
Rnd 1 (RS): Continuing on from Row 36, loosely ch 34 (If you’d like a looser cowl, simply increase your ch in multiples of 2. If you’d like a tighter cowl decrease your ch in multiples of 2.). Join with a sl st to the 1st st of Row 36. Turn. (95 sts)
Rnd 2: Ch 1, hdc in the first ch, *sl st in the next ch, hdc in the next ch, rep from * across the ch, *sl st in the next ch-1 st, hdc in the next st, rep from * across. Join. Turn. (95 sts)
Rnd 3: Ch 1, sc in the first st, *ch 1, skip the next sl st, sc in the next hdc, rep from * around. Join. Turn. (95 sts)
Rnd 4: Ch 1, hdc in the first st, *sl st in the next ch-1 sp, hdc in the next sc, rep from * around. Join. Turn. (95 sts)
Rnd 5: Rep Rnd 3.
Rnd 6: Rep Rnd 4.
Rnd 7: Ch 1, ext sc in each st around. Join. Turn. (95 sts)
Rnd 8: Rep Rnd 4.
Rnd 9: Rep Rnd 3.
Rnd 10: Rep Rnd 4.
Rnds 11 – 30 (or until you run out of yarn): Rep Rnds 5 – 10, ending with a Rnd 6 rep. (95 sts) Approximate 9″ from Rnd 1.
Fasten off. Continue below to Adding Fringe.
Adding Fringe
• Add 1 fringe to the center point. Then add 7 fringe to one angled side. I started by adding 1 fringe at the end of Row 5 and then added 1 every 4th row after that. After you add fringe to one side, mirror what you did on the opposite side of the point. See photos below for how to secure fringe. Note: For Toddler & Child Sizes I only added 5 fringe to each angled side.
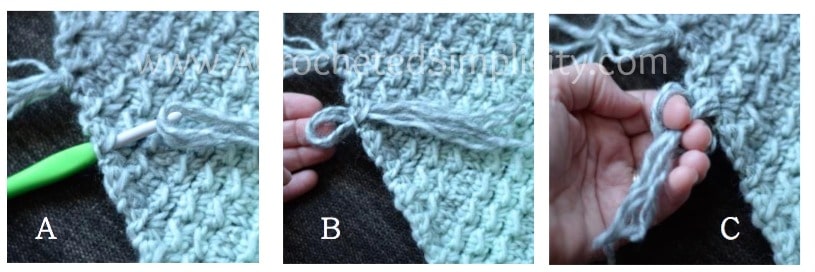
Photo A: Insert your hook from back to front into a stitch along the cowl. Take 3 strands of yarn and fold them in half. Place them on the hook.
Photo B: Pull a loop of the yarn thru to the backside of the cowl.
Photo C: Using your fingers, pull the loose ends of the yarn thru the loop you just made.
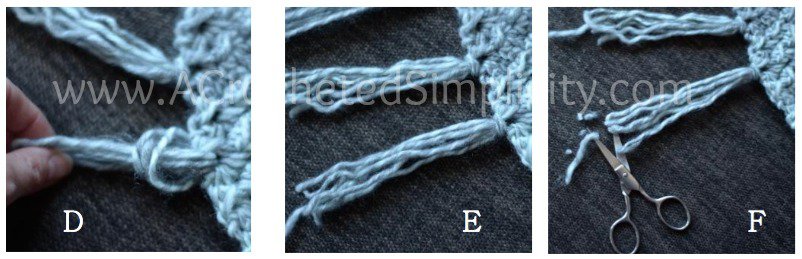
Photo D: Make sure the loose ends are still even and pull on them to tighten the knot.
Photo E: Finger complete.
Photo F: Trim the loose ends of the fringe to even them up.
Now that you’ve finished your Scarfie Bandana Cowl, it’s time to go show it off!

MORE FREE CROCHET PATTERNS FROM A CROCHETED SIMPLICITY
If you enjoy making this textured crochet triangular cowl, you may enjoy these other projects as well. And if you just want to browse, you can find all of our free crochet patterns HERE.


Are you intimidated by knit-look crochet? Would you love to learn my tips & tricks? Take an Annies Video Class with me and let me ease your fears and help you increase your skills! Click on the photo below to watch a free preview. You can also see the other 4 video classes I have available!

Please share your finished ACS projects with us in the A Crocheted Simplicity Crochet Community Group on Facebook! Use hashtag #ACrochetedSimplicity when sharing on social media so I can find your posts!

Love your presentation of patterns!! This is sure to be a hit!
Thanks Jennifer for all your awesome work!!
#MyHumpDayWIP
what if I dont have any bulky (5) yarn? can i use worsted weight or should I Double it?
You can definitely use a worsted weight yarn. Several have made theirs using a worsted and they’ve turned out great!
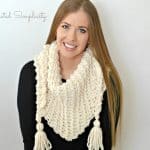
The picture that is shown, is it a child size or adult? Trying to determine how much yarn I need for an adult size
It is adult size.
Love this! But I’m having an issue with the triangle being too narrow. Would you explain what is meant by ‘first stitch of each row is worked into the same stitch as turning chain’? Thanks
Since the turning chains are not counted as stitches, you will work the first st (or sts) of each row into the very first st.
My cousin found your pattern on Pinterest and fell in love with it. She can sew up a storm, but can’t handle yarn (lol)…so she asked me to make her one. She has bright, brilliant dark red hair…any suggestions on a good color for her? Oh and blue eyes (its the Irish side of our family :-)!!)
Ooo, what about Lion Brand Scarfie in Cream/Teal?
I have a granddaughter with red hair and blue eyes (and a sister) and they look amazing in teal!
I’m a color analysis and I have red heads myself. Yellow undertones are what they wear. They can wear dark tones with yellow undertones: Autumn are dark tones and wear color great!
Teal, Gold, Pumpkin, Oranges, Tans, Beiges, Browns, Army Green or Yellow Greens are their basics.
Many blacks, and hispanics are winters therefore they wear Blue or Pink undertones according to how you view colors: Reds that are without yellows, Pinks, Purples, Blue and Blue Greens, They wear from the darkest colors to the icy colors.
Hope this help you.
I don’t understand why I have to turn my work for the cowl portion. Should I just keep working around and layer the rounds that way?
You turn your work to keep the texture of the stitch pattern consistent.
I love the look of this bandana but I am having trouble. I am new to crocheting and know the ch, sc and sl st, but what is a st? You use 2 at the end of fist row,
Thanks
Sonya
Oh dear ,I just figured out what the sts means! Lol
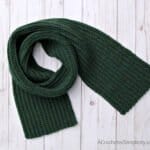
Any possibility of a hat pattern to match? I love the way this works up….
There sure is! 😉 I’ll try and finish it soon. In the meantime, check out the Chic Textures Headwarmer, it was designed to match. Here’s a link: https://www.acrochetedsimplicity.com/free-crochet-pattern-chic-textures-headwarmer/
Hey, I love this pattern! Thanks so much for taking the time to share it. I wanted to let you know, I tried signing up to receive emails about free patterns, giveaways, etc and it appears that the link must be broken. Just wanted to give you a head up in case you were unaware 😉
Hi Kristen, Thank you for letting me know about the newsletter sign-up glitch. I’ve got it all fixed! ~ Jennifer
Hi I have been trying to follow the adult patten but got stuck on row 13 (a repeat of row 3) of the triangle. It says to slip stitch into chain- 1 spaces from the row below, however row 12 (a repeat of row 6) includes no chains! An I reading it incorrectly? Can you please clarify? Thank you! I really want to make this cowl…
Hi Belinda,
You will sl st into the next st from the previous row. I hope this helps.
Jennifer
I love this cowl! I can’t wait to try it.
Love the bandana style💓