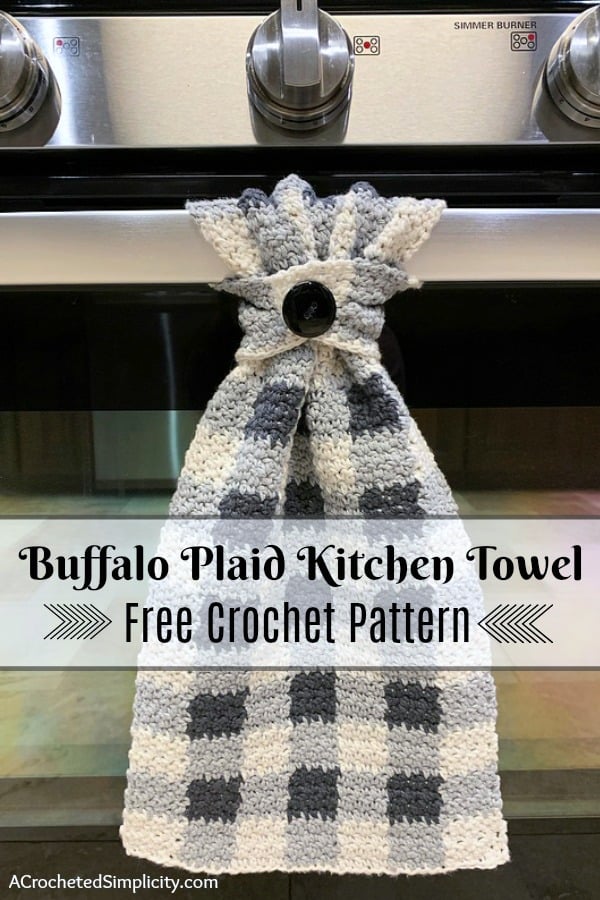
Buffalo Plaid Kitchen Towel – Free Crochet Towel Pattern
I’ve been meaning to make a couple new crochet kitchen towels, but I wanted something a little less traditional in style. Having to constantly pick up the towels off the floor and wash them because they’ve slipped off the oven handle yet again, gets old in a quick hurry. One day as I was scrolling my Pinterest feed, a pin popped up for a sewing pattern for a towel that was a simple rectangle, yet the way it was attached to the oven handle was genius. I knew right away that I needed to make a couple for myself and this is how the Buffalo Plaid Kitchen Towel crochet pattern came to be. I then designed the Farmhouse Striped Kitchen Towel (click HERE for that free crochet pattern). You can find the free crochet towel pattern in this post below, or an ad-free print friendly version on Love Crafts here, Ravelry here, or on Etsy here.
>> CLICK HERE TO SIGN-UP TO RECEIVE OUR NEWSLETTER <<
This pattern is part of the 2019 Christmas Kitchen Crochet Along!

I’ve teamed up with 3 of my designer friends to bring you another fun community event!
Click HERE to find ALL of the Crochet Along details.

THE YARN & Choosing Colors
Buffalo Plaid Kitchen Towel – FREE CROCHET TOWEL PATTERN
The free pattern is below, but if you love to work offline, or need to order your yarn, I’ve got a couple other great options for you.
Purchase the ad-free, printable PDF that includes all photo tutorials, on Love Crafts here, Ravelry here, or Etsy here.
Save this pattern to your Ravelry favorites here.
Pin it for later here.
This post contains affiliate links.
MATERIALS
- Yarn: Knit Picks CotLin / DK / 3 Weight Cotton Yarn – 3 colors / 1 ball of each (for buffalo plaid) / 2 balls of 1 color (for a solid color towel)
- Yardage: approximately 230 yards total – Silver (115 yards), Swan (60 yards), Ash (55 yards)
- You can also substitute a worsted weight / 4 cotton yarn. See Yarn note above.
- Crochet Hook: G/6/4.00mm (My favorite crochet hooks are the Clover Amour Hooks, I’ve never had an ache in my hand since switching)
- Button: 1″ – 1-1/4″ (1)
- Scissors
- Yarn Needle
Many of these materials are available for purchase through our affiliates below:
 Lion Brand Yarn Re-Up Cotton Yarn, Aqua") (1 Skein) Lion Brand Yarn R...Shop on Amazon
(1 Skein) Lion Brand Yarn R...Shop on Amazon  Clover 1045/G Purple Amour ...Shop on Amazon
  Fiskars 154110-1001 Non-sti...Shop on Amazon
  Lion Brand Yarn 400-5-5002 ...Shop on Amazon
Gauge
- In pattern stitch (sc in next, dc in next): 6 sts = 3″; 10.5 rows = 3″
Size
- One Size: 8.5″ W x 19″ L
Abbreviations (US Terms)
- ch(s): chain(s)
- st(s): stitch(es)
- sc: single crochet
- dc: double crochet
- RS: Right Side
- Rep: repeat
- MC: Silver
- CC1: Cream (Swan)
- CC2: Dark Grey (Ash)
- standing sc: click HERE for tutorial
Notes
- Turning chains are not included in stitch count unless noted otherwise.
- Yarn Notes: Knit Picks CotLin was used for the sample. Another comparable DK/3 weight yarn may be used as long as gauge is met.
- Knit Picks CotLin, 70% Tanguis Cotton / 30% Linen (123 yards / 50 g ).
- Yardage – 230 yards of a single color OR:
- MC: Silver (115 yards)
- CC1: Cream (60 yards)
- CC2: Dark Grey (55 yards)
- This crochet dish towel is worked in rows from the bottom up. I chose to work color changes and create a buffalo plaid dish towel, but you can choose to make a solid or striped dish towel. Once you near the top edge, an easy buttonhole is created.
Buffalo Plaid Dish Towel Instructions
Buffalo Check Color Pattern – See Chart Below
- Pattern Stitch: (sc in the next st, dc in the next st)
- Color Pattern for Rows 1 – 4 & 9 – 12: 6 sts CC1, (6 sts MC, 6 sts CC1) work from ( to ) 3 times.
- Color Pattern for Rows 5 – 8: 6 sts MC, (6 sts CC2, 6 sts MC) work from ( to ) 3 times.
Solid Color Towel: If you’re planning to use a solid color for your dish towel, the repeat is simple: (sc in the next st, dc in the next st) rep across. Repeat until your dish towel measures at least 18″ L, then follow the instructions for Creating a Buttonhole.
Changing Colors: For all color changes, you’ll change colors on the last pull through of the last stitch in each colored section.
Colorwork – Carrying & Working over the yarn: You’ll be working with only 2 colors per row. Except for the first and last 6 stitches, carry the unused yarn with you and work over it as you go along. For the first and last 6 sts of every row, there’s no need to work over the unused yarn. Simply let it hang on the wrong side of the towel and pick it back up for the 7th stitch of the next row and drop it after you work the final color change of the same row.
Set-Up: With a 4mm hook & CC1 (cream) color yarn, ch 43. Turn.
Row 1 (RS): Working into the back hump of the foundation chain with CC1, sc in the 2nd ch from your hook, dc in the next ch, (sc in the next ch, dc in the next ch) twice, * switch to MC, (sc in the next ch, dc in the next ch) 3 times, switch to CC1, (sc in the next ch, dc in the next ch) 3 times, rep from * across. Turn. (42 sts)
Rows 2 – 4: Ch 1, CC1, sc in the first st, dc in the next st, (sc in the next st, dc in the next st) twice, * MC (sc in the next st, dc in the next st) 3 times, CC1 (sc in the next st, dc in the next st) 3 times, rep from * across. Turn.
Fasten off CC1 & MC.
Row 5: Join MC with a standing sc in the first st, dc in the next st, (sc in the next st, dc in the next st) twice, * CC2 (sc in the next st, dc in the next st) 3 times, MC (sc in the next st, dc in the next st) 3 times, rep from * across. Turn.
Rows 6 – 8: Ch 1, MC, sc in the first st, dc in the next st, (sc in the next st, dc in the next st) twice, * CC2 (sc in the next st, dc in the next st) 3 times, MC (sc in the next st, dc in the next st) 3 times, rep from * across. Turn.
Fasten off MC & CC2.
Rows 9: Join CC1 with a standing sc in the first st, dc in the next st, (sc in the next st, dc in the next st) twice, * MC (sc in the next st, dc in the next st) 3 times, CC1 (sc in the next st, dc in the next st) 3 times, rep from * across. Turn.
Rows 10 – 12: Ch 1, CC1, sc in the first st, dc in the next st, (sc in the next st, dc in the next st) twice, * MC (sc in the next st, dc in the next st) 3 times, CC1 (sc in the next st, dc in the next st) 3 times, rep from * across. Turn.
Fasten off CC1 & MC.
Rows 13 – 64: Rep Rows 5 – 12, ending with a Row 8 rep. Do not fasten off. Continue on to Creating the Buttonhole.
Fasten off. Continue on to Creating the Buttonhole.
Buffalo Plaid Dish Towel – Color Chart

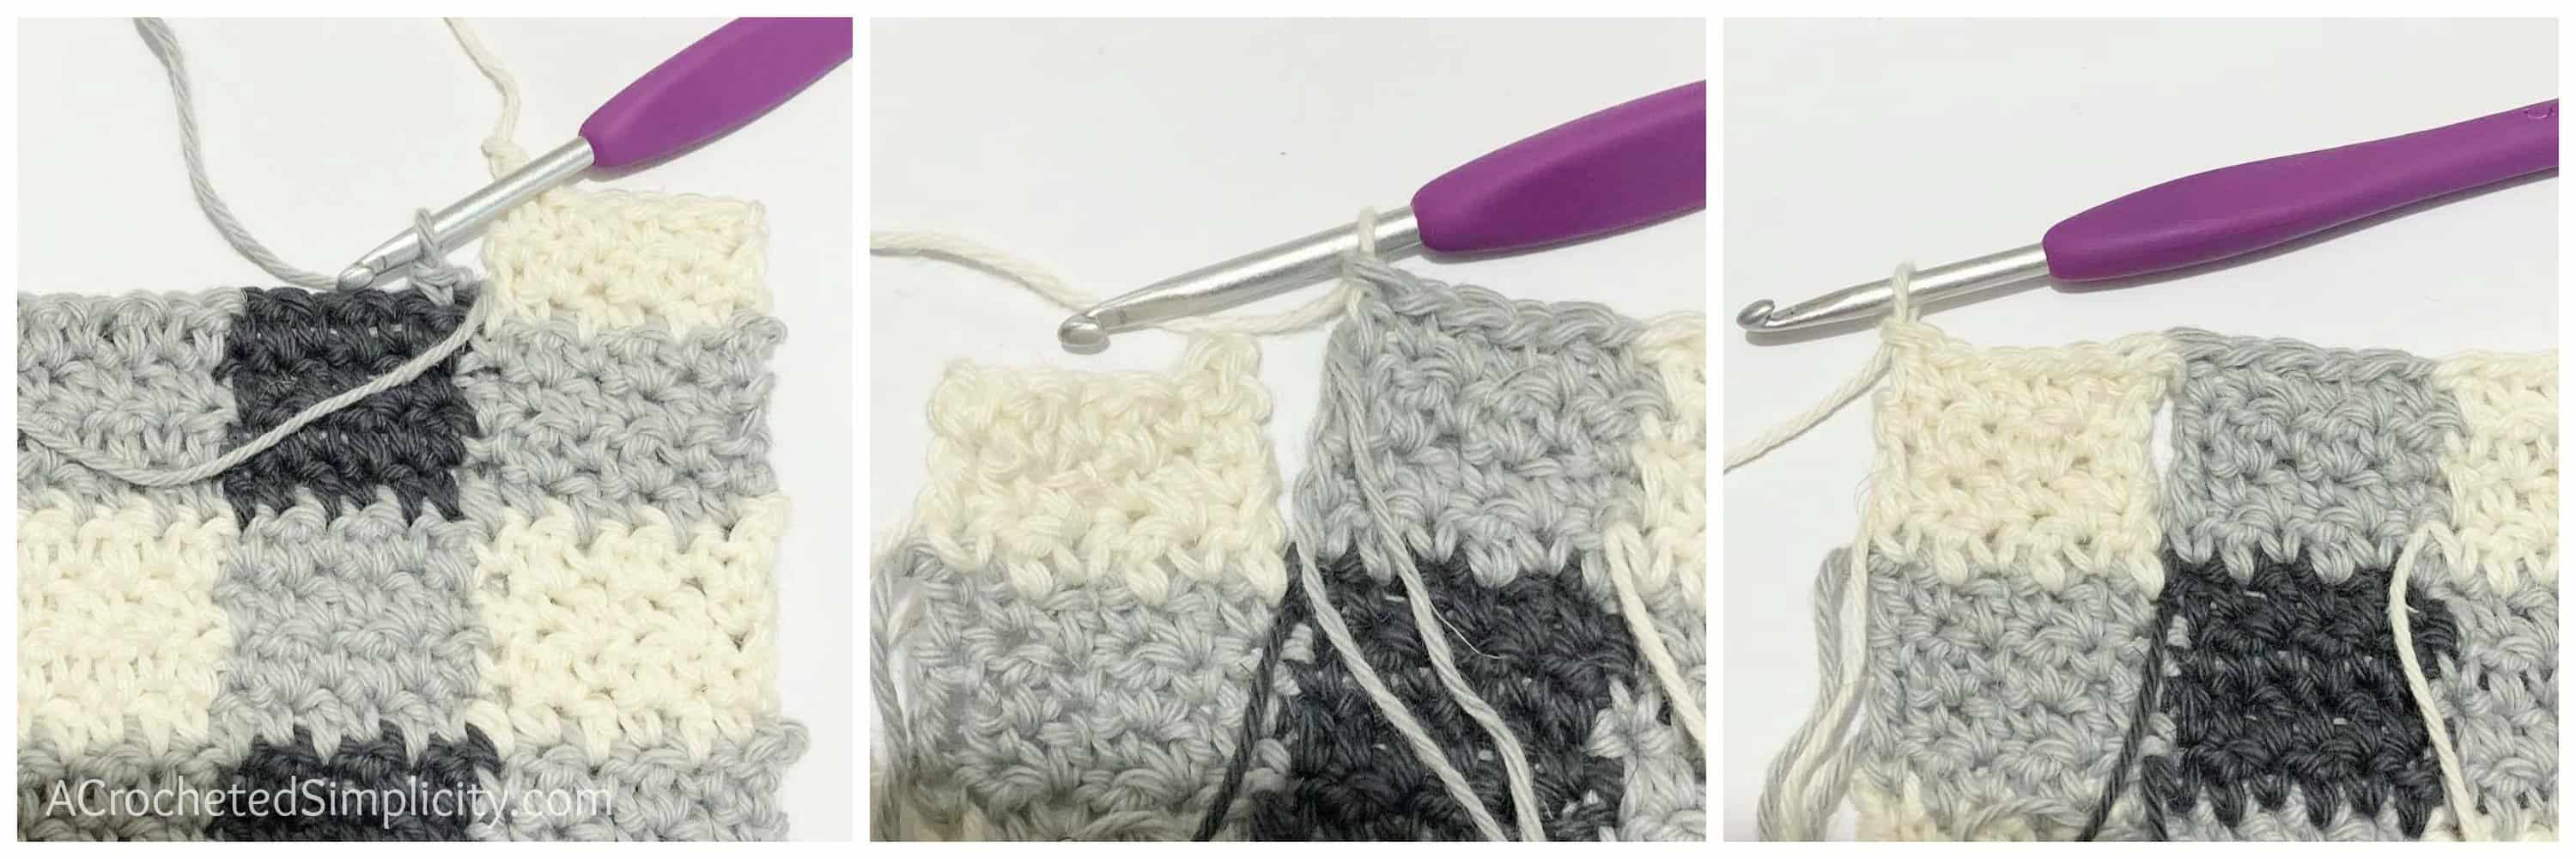
Creating the Buttonhole
Instead of working another 4 rows in the buffalo plaid pattern, you’ll break up the 4 rows as shown in the photos below. First, you’ll work 3 rows of 6 CC1 sts. Fasten off, then join yarn w/ a standing sc in the next st to the left of the CC1 you just worked. See the photo below, left. Then you’ll work 3 rows of colorwork across the top of the remaining sts from Row 64. For the last row, you’ll work across the entire row, in all 42 sts.
Narrow Tab
Row 1 (RS): Join CC1 with a standing sc in the first st, dc in the next st, (sc in the next st, dc in the next st) twice. Place a stitch marker in the next stitch to mark the beginning of the Wide Tab. Turn. (6 sts)
Rows 2 – 3: Ch 1, CC1 (sc in the next st, dc in the next st) 3 times. Turn.
Fasten off CC1. Continue on to Wide Tab.
Wide Tab
Row 1 (RS): Join MC with a standing sc in the st where you placed a stitch marker next to the narrow tab, dc in the next st, (sc in the next st, dc in the next st) twice, * CC1 (sc in the next st, dc in the next st) 3 times, MC (sc in the next st, dc in the next st) 3 times, rep from * across to the last 6 sts, CC1 (sc in the next st, dc in the next st) 3 times. Turn. (36 sts)
Row 2: Ch 1, CC1, sc in the first st, dc in the next st, (sc in the next st, dc in the next st) twice, * MC (sc in the next st, dc in the next st) 3 times, CC1 (sc in the next st, dc in the next st) 3 times, rep from * across to the last 6 sts, then, MC (sc in the next st, dc in the next st) 3 times Turn. (36 sts)
Row 3: Ch 1, MC, sc in the first st, dc in the next st, (sc in the next st, dc in the next st) twice, * CC1 (sc in the next st, dc in the next st) 3 times, MC (sc in the next st, dc in the next st) 3 times, rep from * across to the last 6 sts, then, CC1 (sc in the next st, dc in the next st) 3 times Turn. (36 sts)
Do not fasten off. Continue on to Closing the Buttonhole.
Closing the Buttonhole
This is your 4th row of the last section. You’ll work all the way across the Wide Tab and then pick up stitches from the Narrow Tab and work across it. See the photos above.
Row 1 (RS): Ch 1, CC1, sc in the first st, dc in the next st, (sc in the next st, dc in the next st) twice, * MC (sc in the next st, dc in the next st) 3 times, CC1 (sc in the next st, dc in the next st) 3 times, rep from * across. Turn. (42 sts)
Row 2: Ch 1, sc in each st across.
Fasten off. Weave in ends. Continue on to Attaching the Button.
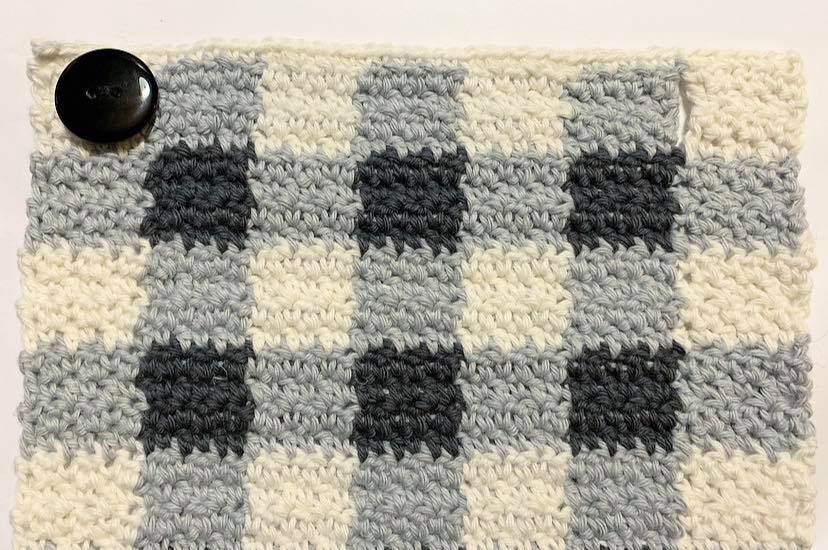
Attaching the Button
Notice that the buttonhole is on the right. Sew the button onto the towel as shown (side opposite the buttonhole).
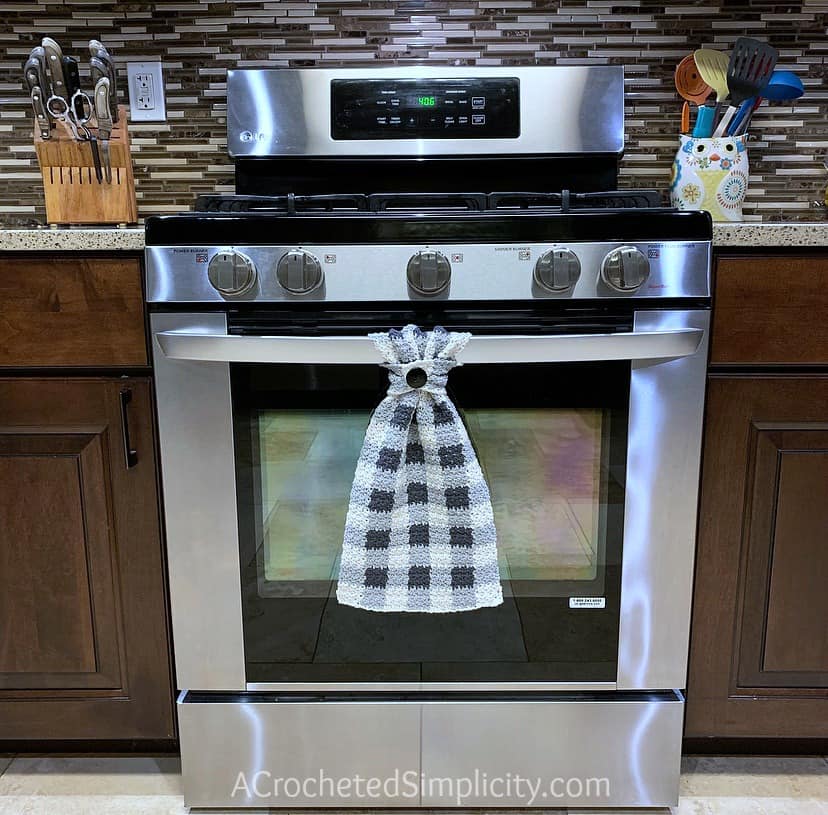
Now that I’ve completed my Buffalo Plaid Kitchen Towel, how do I hang it up?
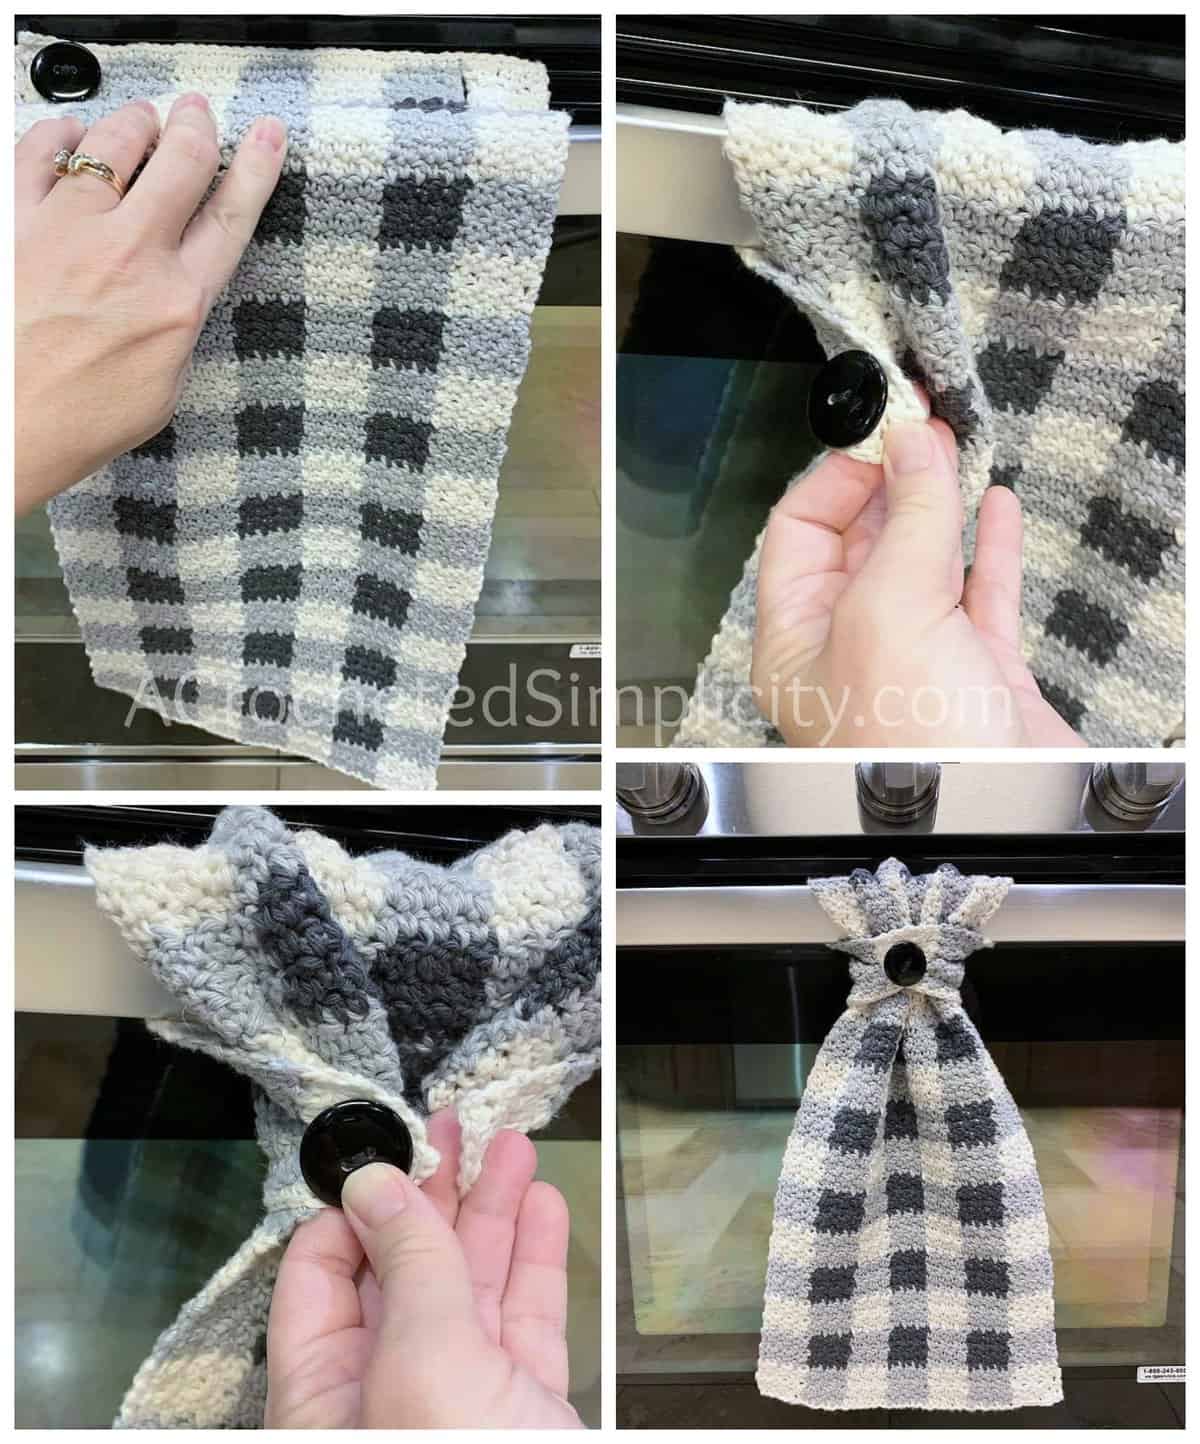
Step 1 (photo top, left): With the right side of the towel facing you, fold the top edge (with the button and buttonhole) over and around the oven door handle.
Step 2 (photo top, right): Bring the corner of the towel with the button, around to the front, from the left side. Bring the corner of the towel with the buttonhole, around to the front, from the right side.
Step 3 (photo bottom, left): Put the button through the buttonhole to secure it.
Step 4 (photo bottom, right): Step back and enjoy your talents!
MORE FREE CROCHET PATTERNS FROM A CROCHETED SIMPLICITY
If you enjoy this crochet pattern for your home, you may enjoy these other projects as well. And if you just want to browse, you can find all of our free crochet patterns HERE.


Are you intimidated by knit-look crochet? Would you love to learn my tips & tricks? Take an Annies Video Class with me and let me ease your fears and help you increase your skills! Click on the photo below to watch a free preview. You can also see the other 4 video classes I have available!

Please share your finished ACS projects with us in the A Crocheted Simplicity Crochet Community Group on Facebook! Use hashtag #ACrochetedSimplicity when sharing on social media so I can find your posts!
Click on the links below to get to the other patterns in this CAL:
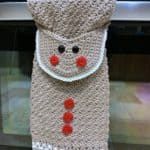
Snowman Belly Pot Holder – Blackstone Designs
Hairpin Lace Table Runner – Crystalized Designs
Farmhouse Apron – Sincerely Pam
Buffalo Plaid Kitchen Towel – A Crocheted Simplicity

TY for the patterns – can you tell me more about the range that you have in the picture of the plaid kitchen towel ??? Looks like it has gas burners – an electric oven or gas ??? And is the oven digital control or knob ??? Are the gas burners knob or digital control?? Is that a bottom drawer or broiler ??? If drawer, is it very deep ??? Hold very much ??? I’ve been looking at all kinda ranges, can you tell, LOL !! Haven’t been able to ask many peeps about the ones that they have, thus when I saw this picture, just hadta ASK ya about it, hope you not mind :))
Hi Lisa,
You’re the 3rd one to ask. 😉 lol Here are the details: LG, all Gas, Oven – digital control, Burners – knob control, Bottom – drawer (broiler built in oven at the top) about 7″-ish deep. Purchased at Lowes.
I hope that helps. 🙂
Jennifer
I love the hanger on this!!!
Thank you!!
TYVM for info. on ur range – sorry I didn’t see the info. or replies to other peeps asking about it anywhere on here prior to asking you about it – as you say, 3rd person to ask, LOL :)) Have heard, have no idea if true or not, that gas ovens don’t bake as evenly as electric ovens – have you experienced uneven baking w/ur gas oven at all ?? TY again missy :))
The others who asked were on Facebook. I just thought it was funny that so many asked. lol I have not heard that gas ovens do not back as evenly as electric ones. That has not been my experience. I have always preferred a gas oven over electric.
Do you leave yarn on or do you cut it each change of color
Hi Pamela,
I cut the yarn every 4 rows.
Jennifer
This is beautiful! Looking forward to making a few for Christmas gifts. Love the way it hangs!
I’m glad you love it, Audra!
If you love this one, check out my Farmhouse Striped Kitchen Towel too. It uses the same hanging technique.
Jennifer
I’m looking for a little more information on how you did the colour changes? Did you carry it through or use bobbins? Or is there another method I’m missing?
Hi Tammy,
I’ve just added a more detailed note to the pattern, just above the set-up. I hope this clears things up.
Jennifer
Hi, I’ve made several of these and love the pattern. I just can’t seem to get the presentation right when I put it on the oven handle. It just never looks like yours… any tips?
Hi Katie,
If you could e-mail me a photo of yours, maybe I can offer a suggestion. 🙂
Jennifer
I love the idea of this. I have created round holes for my towels to go through but they don’t last long. I can’t wait to try this one! thanks!
Hi Jennifer, I haven’t tried any of your patterns yet, but I’ve been watching on FB for at least a year and have always admired your work. I especially love the kitchen towels and now that the stress of the holidays is over I think I need to dive in and give one of them a try. Thank you for sharing your talents.