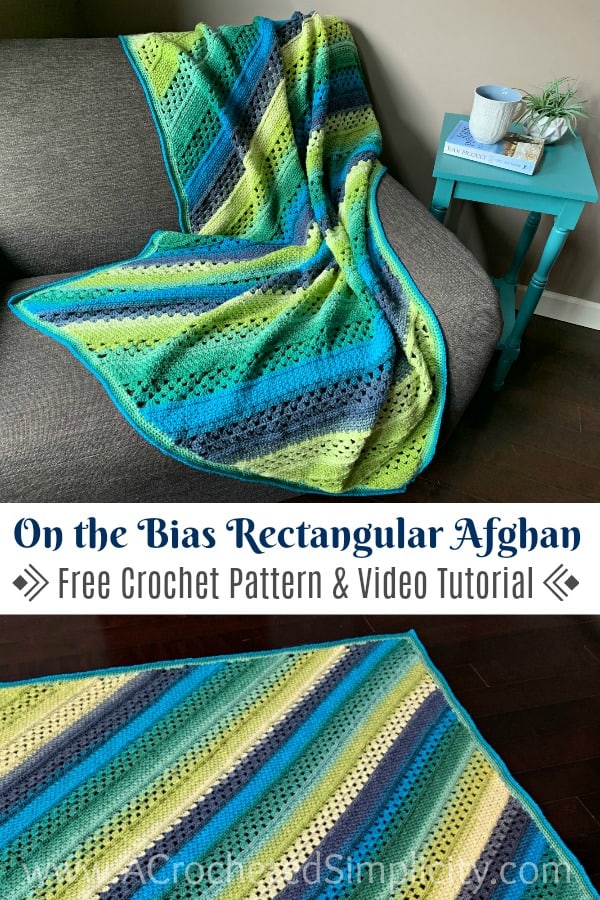
On the Bias Rectangular Afghan – Free Crochet Blanket Pattern
While I was working on my Centaur Mandala Afghan, my first crochet blanket using a self-striping yarn, I decided that it wasn’t going to be my last! I absolutely LOVED using simpler stitch patterns and watching the yarn do all of the colorwork for me. I found that it also motivated me to crochet more quickly so that I could see the next color change.
I found it was even more fun to watch the color changes come to life in this crochet C2C blanket pattern.
You can find the free crochet C2C blanket pattern in this post below, or an ad-free print friendly version on Love Crafts here, Ravelry here, and Etsy here.
> CLICK HERE TO SIGN-UP TO RECEIVE OUR NEWSLETTER <
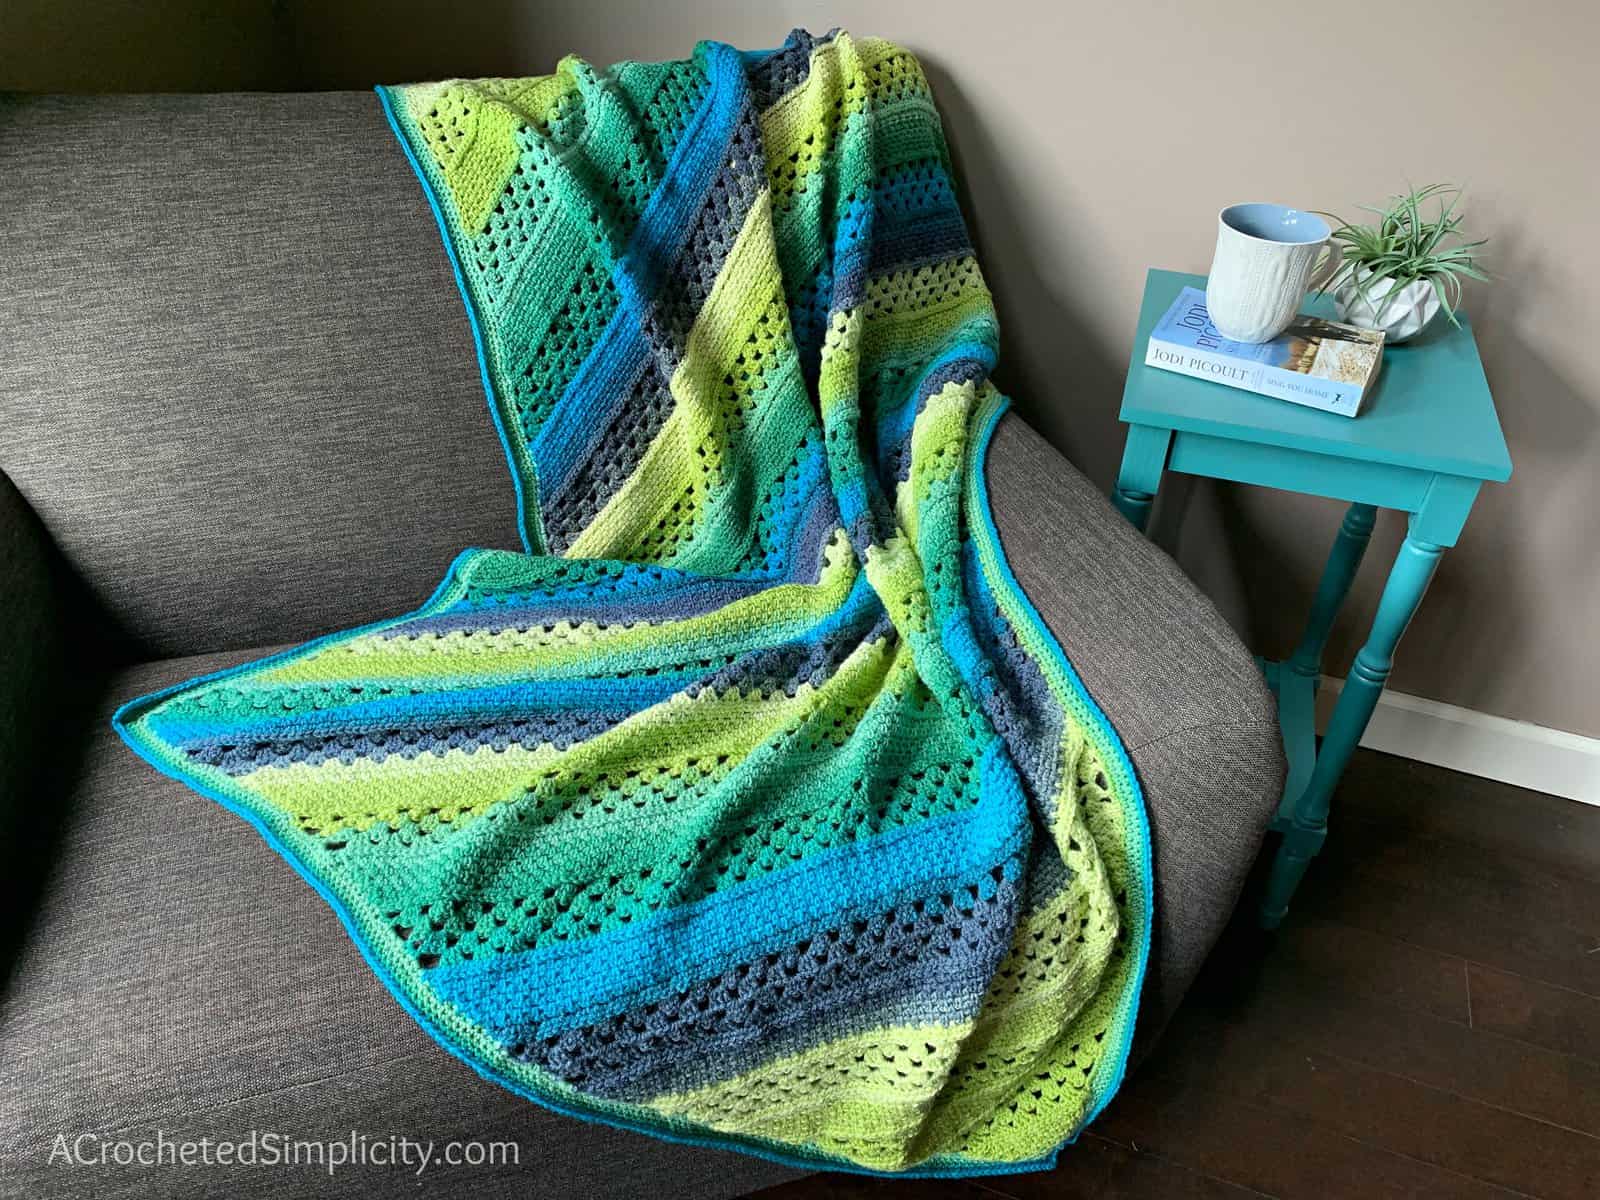
Beginners and seasoned crocheters alike will love that the On the Bias Rectangular Afghan pattern uses simple crochet stitch pattern repeats to create the textured design, making it perfect for those days when you need to sit, crochet and decompress. If working on the bias (or corner-to-corner as it’s more widely known) is intimidating, no worries! I’ve created a video tutorial to help.
Pair this crochet C2C blanket pattern with Lion Brand Yarns Mandala or Wool Ease Cakes, self-striping yarns, and all of the colorwork is done for you making this a perfect crochet project for binge watching your favorite TV show. And I don’t know about you, but my favorite part of self-striping yarns is that I’m not left with a bunch of ends to weave in!
THE YARN
For this crochet corner to corner blanket, I chose Lion Brand Yarns Wool Ease Cakes in Poseidon, which is a DK weight, self-striping yarn. All of the colorwork was done for me which made this a perfect crochet project for binge watching my favorite TV shows. And I don’t know about you, but my favorite part about this yarn is that I wasn’t left with a bunch of ends to weave in!
Earlier this year I was trying to use up some of the Lion Brand cake yarns I had in my yarn stash. The following are projects I’ve completed with cake yarns so far.
THE YARNS & COLORWAYS I’VE USED SO FAR ARE:
- Gnome: Girls Butterfly Mandala Vest and matching 18″ doll 5 piece set
- Genie: Water’s Edge Shawl
- Griffin: Griffin Shawl & Triangular Scarf
- Centaur: Centaur Mandala Afghan & Wasilla Poncho for Women
- Chimera: Chimera Triangular Scarf
- Aquarius (Mandala Sparkle): Wasilla Poncho for Girls
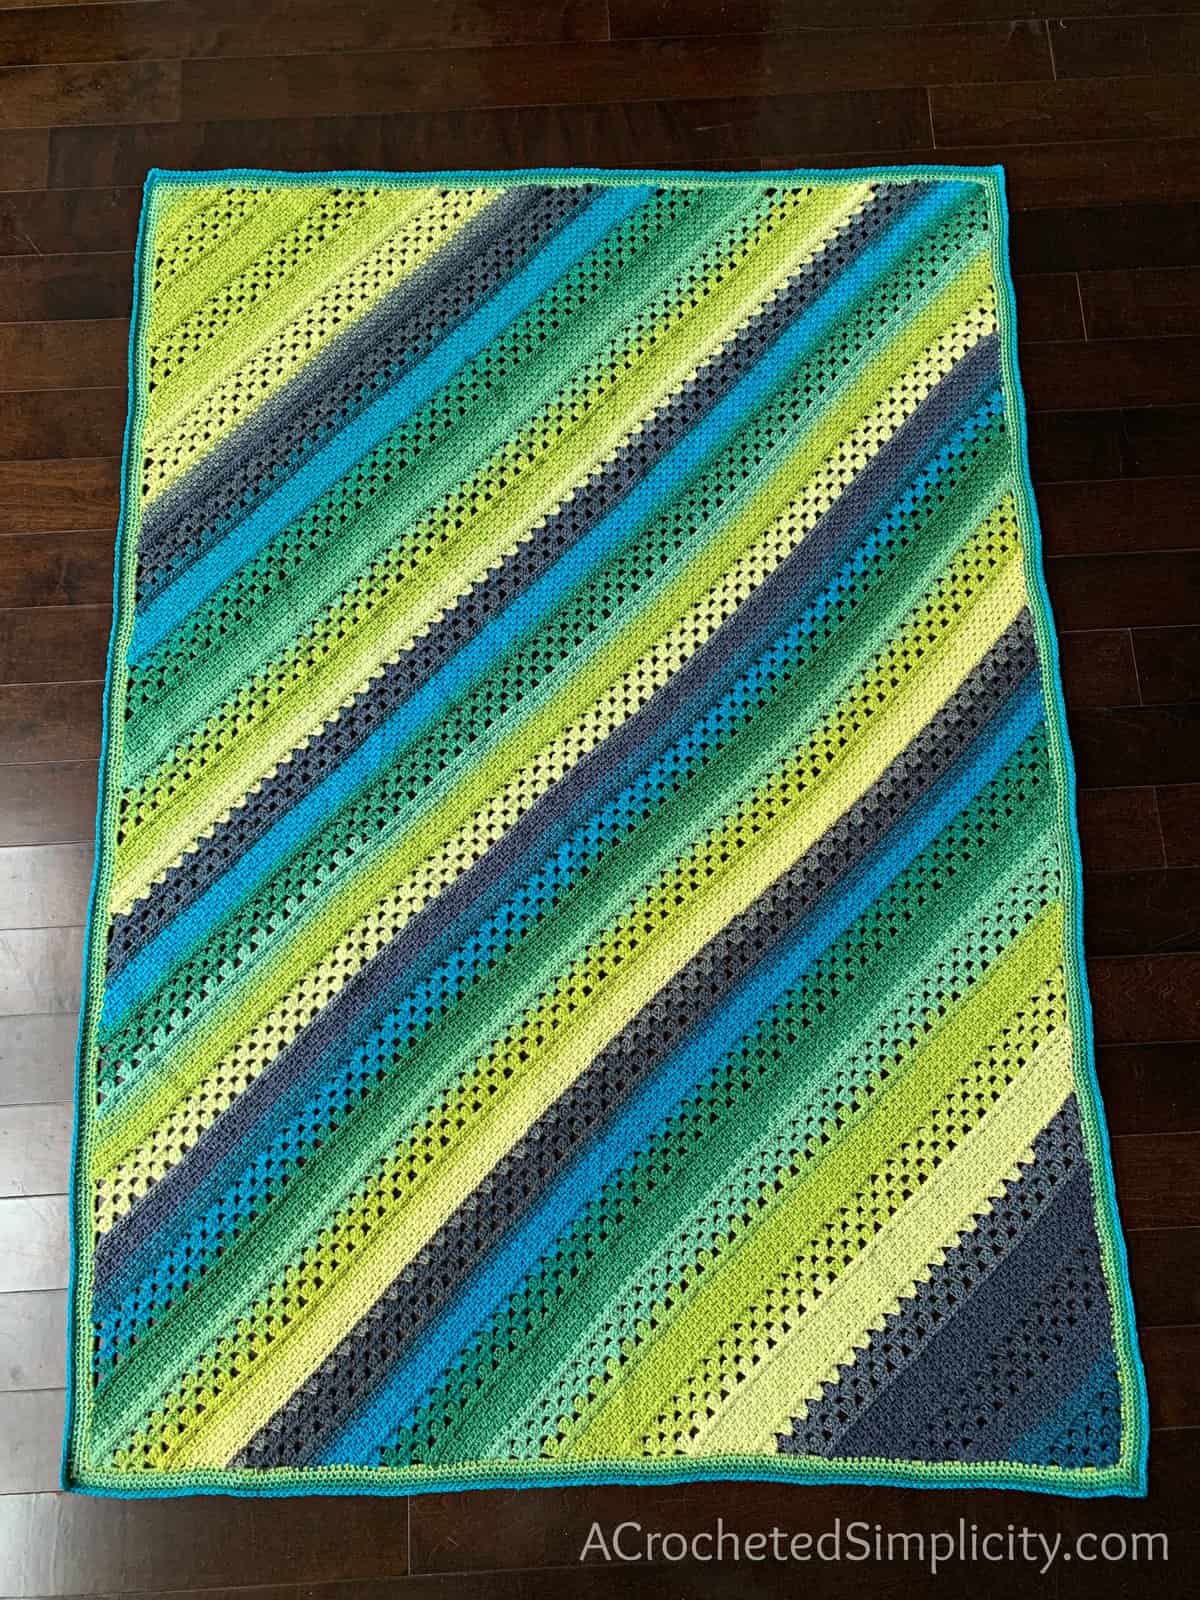
For the On the Bias Rectangular Afghan, I’ve combined several simple crochet stitches to give it a nice texture and drape. The size is easily customizable so you can make it smaller for a baby shower gift or larger for a wedding gift! Check out my Blanket Size Chart HERE, for standard blanket sizes.
On the Bias Rectangular C2C Afghan – Free C2C Crochet Pattern
The free pattern is below, but if you love to work offline, or need to order your yarn, I’ve got a couple other great options for you.
Purchase the ad-free, printable PDF, including all photo tutorials, on Love Crafts here, Ravelry here, and Etsy here.
- BONUS Crochet Stitch Chart & Stitch Count Charts Included in the ad-free PDF!
Save this pattern to your Ravelry favorites here.
Pin it for later here.
Click HERE for the Video Tutorial.
This post contains affiliate links.
Materials
- Yarn: DK Weight / 3 / Yarn (Lion Brand Yarns Wool Ease Cakes in Poseidon was used for the sample in the photos) (150 g / 5.3oz / 590 yards / 540 meters / 80% acrylic / 20% Wool) per cake – You’ll need approximately 4 cakes (2,300 yards) to make a 49.5″ W x 68″ L crochet afghan (size shown in the photos).
- This yarn is available on Amazon & the Lion Brand Yarns website.
- Crochet Hook: J/10/6.00mm (My favorite crochet hooks are the Clover Amour Hooks, I’ve never had an ache in my hand since switching)
- Scissors
- Yarn Needle
Many of these materials are available for purchase through our affiliates below:
 Lion Brand Yarn Wool-Ease C...Shop on Amazon
  Clover Amour Crochet Hook: ...Shop on Amazon
  Fiskars 154110-1001 Non-sti...Shop on Amazon
Skill Level
- Easy
Gauge
- Dimensions are included at the end of Row 5 to check beginning gauge. Gauge isn’t crucial for this project.
- In Granny Stitch: 9 dc + 2 ch-1 sps = 2.75″; 4 rows = 2.4
- In (sc, ch 1, skip 1): 11.5 sts = 3″; 7 rows = 1.5″
Size
- Any Size – Easily Adjustable
- Check out my Blanket Size Chart HERE, for standard blanket sizes.
- Blanket in the photos is 49.5″ W x 68″ L
Abbreviations (US Terms)
- ch(s): chain(s)
- sl st(s): slip stitch(es)
- st(s): stitch(es)
- sc: single crochet
- dc: double crochet
- sc2tog: single crochet decrease
- yo: yarn over
- sp: space
- Rep: repeat
- Rnd: round
- Beg: beginning
Notes
- I tend to crochet on the tighter side. You may need to go down a hook size (or two) to meet gauge if you crochet on the looser side.
- The first stitch of every row is worked into the same stitch as the turning chain, unless stated otherwise.
- Yarn Notes: Lion Brand Yarns Wool Ease Cakes in Poseidon, 80% Acrylic / 20% Wool (590 yards / 540 m / 150 g / 5.3 oz).
- Yardage: 4 cakes (2,300 yards) made a 49.5″ W x 68″ L size afghan.
- Standard Blanket Sizes – Check out my Blanket Size Chart HERE.
- Yarns similar in fiber and weight can be substituted.
- Designer Tip! Use ANY weight yarn you’d like. I suggest using a hook size at least 1mm larger than what’s listed on the ball band of the yarn you’d like to use. Adjust hook size until you get the drape you’d like for your afghan. If you use a different yarn and hook size, your gauge may not match what’s written.
- Crochet Stitch Chart – If you love stitch charts, I’ve included one in the ad-free PDF.
- Stitch Count Chart – I’ve included a complete stitch count chart in the ad-free PDF as a bonus. This stitch count chart shows the counts for a variety of blanket sizes.
- Video Tutorial – Click HERE to Watch

On the Bias Rectangular Afghan Instructions
Beginning Rows
Note: Make sure to keep your ch-1’s loose in the linen stitch rounds (sc in the next ch-1 sp, ch 1, skip the next st), or your work will cinch.
Beg Row 1:With a 6.00mm crochet hook, ch 5 (counts as 1st dc & ch-1), (3 dc, ch 1, dc) in the first ch. Turn. (7 sts) *Ch-1 spaces are included in stitch count.
Beg Row 2: Ch 4 (counts as 1st dc & ch-1), 3 dc in first ch-1 sp, ch 1, skip each of the next 3 dc, 3 dc in the next ch-1 sp, ch 1, dc in the same sp. Turn. (11 sts)
Beg Row 3: Ch 4, (counts as 1st dc & ch-1), 3 dc in the first ch-1 sp, (ch 1, skip each of the next 3 dc, 3 dc in the next ch-1 sp) twice, ch 1, dc in same sp as last 3 dc. Turn. (15 sts)
Beg Row 4: Ch 4, (counts as 1st dc & ch-1), 3 dc in the first ch-1 sp, (ch 1, skip each of the next 3 dc, 3 dc in the next ch-1 sp) across, ch 1, dc in same sp as last 3 dc. Turn. (19 sts)
Beg Row 5: Ch 4, (counts as 1st dc & ch-1), 3 dc in the first ch-1 sp, (ch 1, skip each of the next 3 dc, 3 dc in the next ch-1 sp) across, ch 1, dc in same sp as last 3 dc. Turn. (23 sts) *Approximate Size at this point: 5.75″ across the top of Row 5 and 3″ H from the bottom of Row 1.
Do not fasten off. Continue on to Increase Rows.
*Gauge Check at the end of the first Increase Row 12 (afghan’s 17th row): 10″ W across the top of the 17th row and 5.25″ H from the bottom of Row 1, perpendicular to the last row.
Increase Rows
Increase Row 1: Ch 1, sc in each st and ch-1 sp across. Turn. *Stitch count does not increase.
Increase Row 2: Do Not Chain, sl st in each st across. Turn. *Stitch count does not increase.
Increase Row 3: Ch 1, working into the stitches from Increase Row 1, sc in the first st, ch 1, (sc in the next st, ch 1, skip the next st) rep across to the last 2 sts, sc in the next st, ch 1, sc in the last st. Turn. *Stitch count increases by 2 stitches.
Increase Rows 4 – 10: Ch 1, sc in the first st, ch 1, (sc in the next ch-1 sp, ch 1, skip the next st) rep across to the last 2 sts, sc in the next ch-1 sp, ch 1, sc in the last st. Turn. *Stitch count increases by 2 stitches each row
Increase Row 11: Ch 1, sc in each st and ch-1 sp across. Turn. *Stitch count does not increase. Increase Row 12: Do Not Chain, sl st in each st across. Turn. *Stitch count does not increase.
Increase Row 13: Ch 4, (counts as 1st dc & ch-1), working into the stitches from Increase Row 11, skip the first st, (3 dc in the next st, ch 1, skip each of the next 3 sts) rep across to the last 2 sts, 3 dc in the next st, ch 1, dc in the last st. Turn. *Stitch count increases by 4 stitches.
Increase Rows 14 – 16: Ch 4, (counts as 1st dc & ch-1), 3 dc in the first ch-1 sp, (ch 1, skip each of the next 3 dc, 3 dc in the next ch-1 sp) across, ch 1, dc in same sp as last 3 dc. Turn. *Stitch count increases by 4 stitches each row.
Repeat Increase Rows 1 – 16 until your blanket reaches the desired width. Then continue on to Rectangular Rows.
For the crochet blanket shown in the photos, I worked Increase Rows 1 – 16 a total of 7 times. See the flat lay photo at the bottom of this post.
Rectangular Rows
Note: Your stitch count will not increase or decrease in this section.
Rec Row 1: Ch 1, sc in each st and ch-1 sp across. Turn.
Rec Row 2: Do Not Chain, sl st in each st across. Turn.
Rec Row 3: Ch 1, working into the stitches from Rec Row 1, skip the first st, (sc in the next st, ch 1, skip the next st) rep across to the last 2 sts, sc in the next st, ch 1, sc in the last st. Turn.
Rec Row 4: Ch 1, sc in the first st, ch 1, (sc in the next ch-1 sp, ch 1, skip the next st) rep across to the last 2 sts (ch-1 sp & st), sc2tog in the next ch-1 sp & last st. Turn.
Rec Row 5: Ch 1, sc2tog in the first st & next ch-1 sp, ch 1, skip the next st, (sc in the next ch-1 sp, ch 1, skip the next st) rep across to the last 2 sts, sc in the next ch-1 sp, ch 1, sc in the last st. Turn.
Rec Rows 6 – 10: Rep Rows 4 – 5, ending with a Rec Row 4 repeat.
Rec Row 11: Ch 1, sc2tog in the first st & next ch-1 sp, sc in each st and ch-1 sp across to the last st, 2 sc in the last st. Turn.
Rec Row 12: Do Not Chain, sl st in each st across. Turn.
Rec Row 13: Ch 4 (counts as 1st dc & ch-1), working into the stitches from Rec Row 11, skip each of the first 4 sts, (3 dc in the next st, ch 1, skip each of the next 3 sts) rep across to the last 3 sts, 3 dc in the next st, ch 1, skip the next st, dc in the last st. Turn.
Rec Row 14: Ch 4, (counts as 1st dc & ch-1), 3 dc in the first ch-1 sp, (ch 1, skip each of the next 3 dc, 3 dc in the next ch-1 sp) across to the last 3 dc & ch-1 sp, ch 1, skip each of the next 3 dc, dc in the last ch-1 sp. Turn.
Rec Row 15: Ch 4 (counts as 1st dc & ch-1), skip the first ch-1 sp & next 3 dc, (3 dc in next ch-1 sp, ch 1, skip each of the next 3 dc) rep across to the last ch-1 sp, (3 dc, ch 1, dc) in the last ch-1 sp. Turn.
Rec Row 16: Rep Rec Row 14.
Rep Rec Rows 1 – 16 until your blanket has reached your desired length.
Do not fasten off. Continue on to Transition Rows.
Transition Rows
Row 1: Ch 1, sc in each st and ch-1 sp across. Turn. *Stitch count does not increase.
Row 2: Do Not Chain, sl st in each st across. Turn. *Stitch count does not increase.
Do not fasten off. Continue on to Decrease Rows.
Decrease Rows
Decrease Row 1: Ch 1 (working into the stitches from Transition Row 1 or Decrease Row 15), sc2tog, ch 1, skip the next st, (sc in the next st, ch 1, skip the next st) rep across to the last 2 sts, sc2tog. Turn. *Stitch count decreases by 2 stitches.
Decrease Rows 2 – 8: Ch 1, sc2tog in the first st & next ch-1 sp, ch 1, skip the next st, (sc in the next ch-1 sp, ch 1, skip the next st) rep across to the last 2 sts (ch-1 sp & st), sc2tog in the next ch-1 sp & last st. Turn. *Stitch count decreases by 2 stitches each row.
Decrease Row 9: Ch 1, sc2tog in the first st & next ch-1 sp, sc in each st and ch-1 sp across to the last 2 sts (ch-1 sp & st), sc2tog in the next ch-1 sp & last st. Turn. *Stitch count decreases by 2 stitches.
Decrease Row 10: Do Not Chain, sl st in each st across. Turn. *Stitch count does not decrease.
Decrease Row 11: Ch 4 (counts as 1st dc & ch-1), working into the stitches from Decrease Row 9, skip each of the first 4 sts, (3 dc in the next st, ch 1, skip each of the next 3 sts) rep across to the last st, dc in the last st. Turn. *Stitch count decreases by 2 stitches.
Decrease Rows 12 – 14: Ch 4 (counts as 1st dc & ch-1), skip the first ch-1 sp & next 3 dc, (3 dc in next ch-1 sp, ch 1, skip each of the next 3 dc) rep across to the last ch-1 sp, dc in the last ch-1 sp. Turn. *Stitch count decreases by 4 stitches each row.
Decrease Row 15: Ch 1, sc in each st and ch-1 sp across (last 2 sts are worked in ch-1 and top of ch 3). Turn. *Stitch count does not decrease.
Decrease Row 16: Do Not Chain, sl st in each st across. Turn. *Stitch count does not decrease.
Repeat Decrease Rows 1 – 16, until you reach the end of a Row 14 repeat and have 23 sts remaining.
Do not fasten off. Continue on to Ending Rows.
Ending Rows
End Row 1: Ch 1, sc2tog in the first st & next ch-1 sp, sc in each st and ch-1 sp across to the last 2 sts (ch-1 sp & st), sc2tog in the next ch-1 sp & last st (last st is the 3rd ch from the ch 4). Turn. (21 sts) *Stitch count decreases by 2 stitches.
End Row 2: Do Not Chain, sl st in each st across. Turn. *Stitch count does not decrease.
End Row 3: Ch 1 (working into the stitches from End Row 1), sc2tog, ch 1, skip the next st, (sc in the next st, ch 1, skip the next st) rep across to the last 2 sts, sc2tog. Turn. (19 sts) *Stitch count decreases by 2 stitches.
End Rows 4 -10: Ch 1, sc2tog in the first st & next ch-1 sp, ch 1, skip the next st, (sc in the next ch-1 sp, ch 1, skip the next st) rep across to the last 2 sts (ch-1 sp & st), sc2tog in the next ch-1 sp & last st. Turn. (5 sts) at the end of Row 10 *Stitch count decreases by 2 stitches each row.
End Row 11: Ch 1, sc2tog in the first st & next ch-1 sp, ch 1, skip the next st, sc2tog in the next ch-1 sp & last st. Turn. (3 sts)
End Row 12: Ch 1, sc2tog in the first & last sts (skipping over the middle ch-1 sp). (1 st)
Do not fasten off. Weave in any ends. Continue on to Border.
Border
Tip! If your edge starts to become wavy, go down a hook size or two until it’s nice and flat.
Note: If your tension is off a little, the sides of the rows of your linen stitch sections (sc in next st, ch 1, skip next st) may be narrower than the granny sections. If this is the case, you may want to try using a hdc, instead of sc, when working into those linen stitch sections, and still use a sc for the sides of the granny stitch sections.
Rnd 1: Continuing on from the final decrease row, ch 1, work 3 sc into each corner, work 1 sc into the side of each sc and alternate working 2 sc or 3 sc into the side of each dc (ch-3) around entire afghan. Do not join. *Stitch count isn’t crucial.
Rnd 2: Ch 1, work 1 sc in each st around and 3 sc in each corner. Join. *Stitch count isn’t crucial.
Rep Round 2 as many times as you’d like.
Fasten off. Weave in ends. Professionally finish your corner to corner afghan by blocking it. Click HERE for my Super Easy Blocking Tutorial.
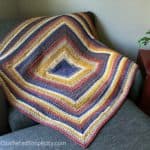
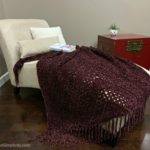
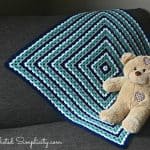
MORE FREE CROCHET PATTERNS FROM A CROCHETED SIMPLICITY
If you enjoyed this corner to corner crochet blanket pattern, you may enjoy these other projects as well. And if you just want to browse, you can find all of our free crochet patterns HERE.
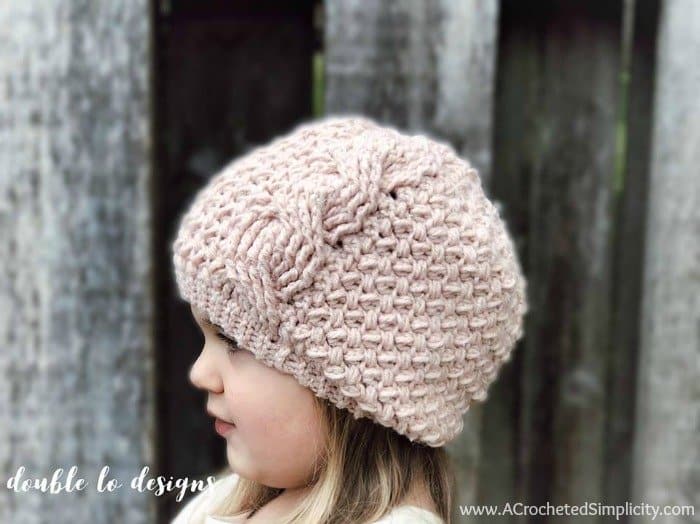
Are you intimidated by knit-look crochet? Would you love to learn my tips & tricks? Take an Annies Video Class with me and let me ease your fears and help you increase your skills! Click on the photo below to watch a free preview. You can also see the other 4 video classes I have available!

Please share your finished ACS projects with us in the A Crocheted Simplicity Crochet Community Group on Facebook! Use hashtag #ACrochetedSimplicity when sharing on social media so I can find your posts!


Lovely, thank you.