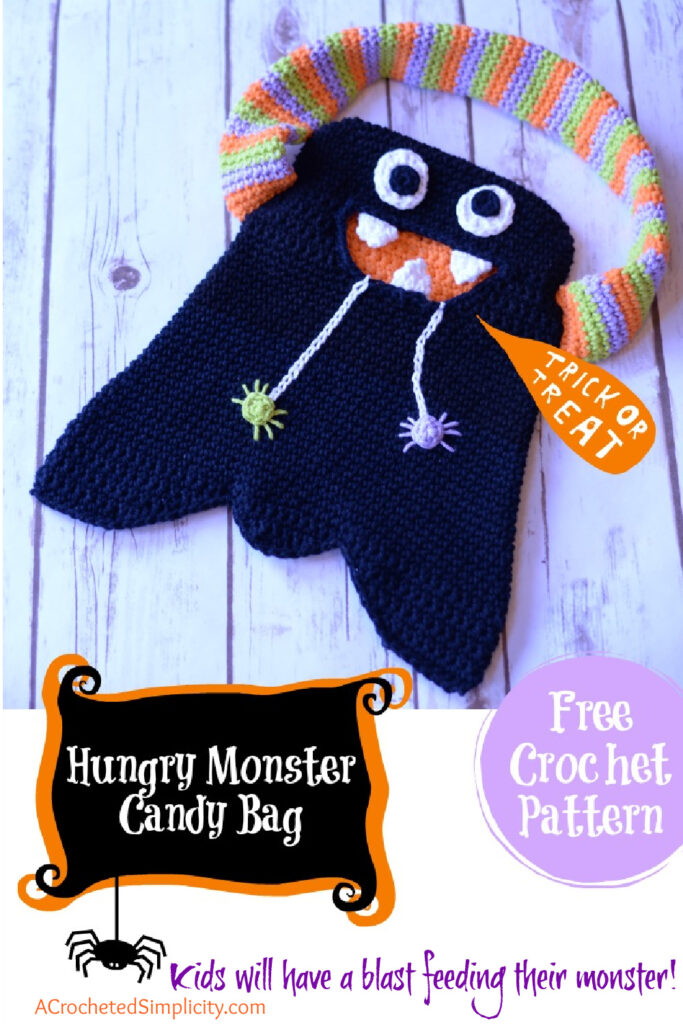
Hungry Monster Crochet Trick or Treat Bag
Let’s talk about how much personality this crochet trick or treat bag has! With a sturdy colorful handle, a wide toothy grin, and spiders hanging from its mouth, it’s the perfect handmade Halloween bag.
It can carry plenty of candy and other goodies while accompanying the little ones on their trick-or-treating adventures. All of the little details can be worked up by busting your stash!
You’ll find the crochet trick or treat bag free below, or you can find an ad-free printable PDF (including all photo tutorials) on Ravelry, or on Etsy (aff).
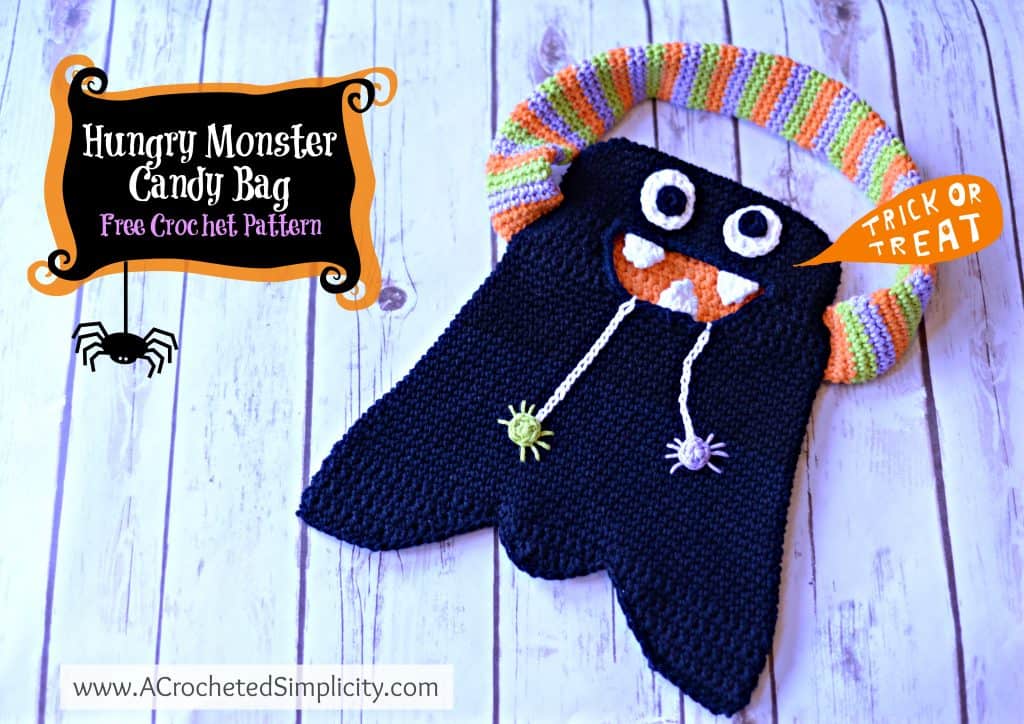
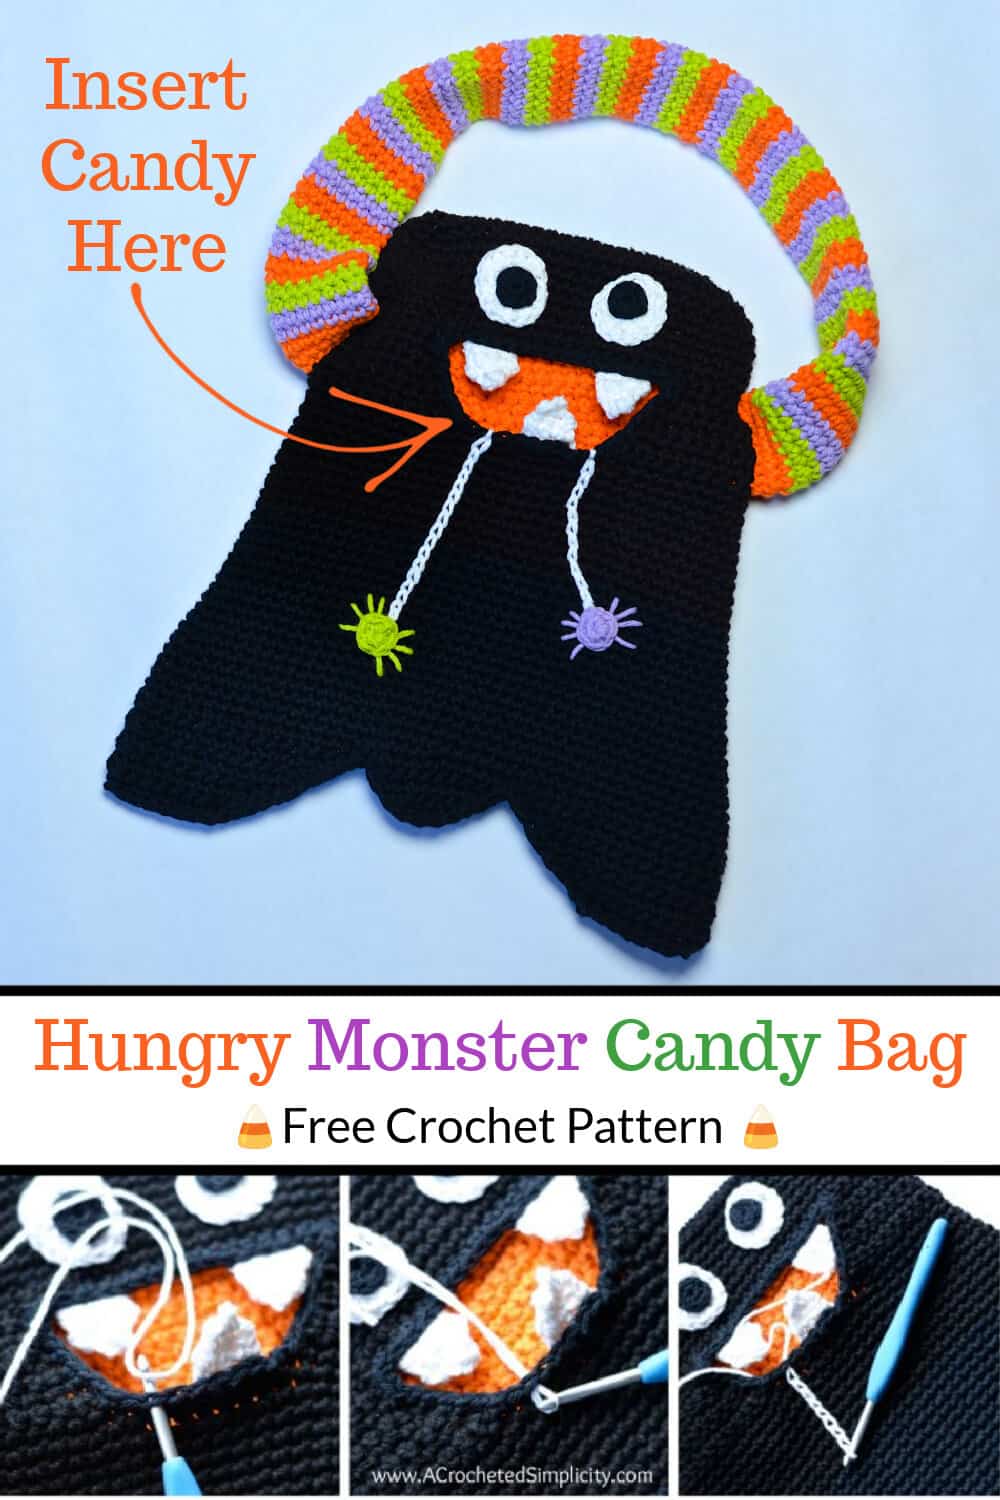
Although this DIY trick or treat bag is in the shape of a hungry monster, he’s very cute and friendly! You just have to make sure you give him a continuous supply of the best candy and he’ll be very happy. The mouth opening acts as the insert where you put candy into so it really seems like he’s gobbling it all up!
If you’re looking for a treat bag for another occasion, I also have the Valentine Treat Bag and Bunny Treat Bag.
How to Crochet a Trick or Treat Bag
This crochet trick or treat bag is fairly easy to work up although it has a few parts which have to be seamed. You’ll start by making the top of the monster’s head in continuous rounds. Then you’ll create the mouth opening where the candy is inserted from before finishing the body of the monster.
Once the body of the bag is done, you’ll add the wavy edges and seam them together to close the bag. After working the mouth edging, you’ll crochet up the little details including the eyes, mouth panel, teeth, arms, and spiders.
Following the instructions, you’ll finish off the bag by sewing these parts on to the bag at the places specified. And that’s your Hungry Monster Crochet Trick or Treat Bag ready to go!
How To Get The
Hungry Monster Trick or Treat Bag
Option 1: Scroll down for the free crochet candy bag pattern right here in this blog post.
Option 2: Purchase the ad-free printable PDF from one of my shops:
Yarn
I highly recommend using 100% cotton yarns for bags of all kinds because they maintain their shape well, are durable, and easily washable. There are several wonderful cotton yarns out there that would be perfect for this crochet candy bag, and you can use up bits from your stash as well to crochet the details.
For my version, I chose to use Lily Sugar n’ Cream 100% cotton (worsted weight) yarn. Lily Sugar n’ Cream is available in 39 amazing colors so I was able to find just the right ones for this project within the same yarn line.
Lion Brand Yarns 24/7 Cotton is another excellent choice!
Hungry Monster Trick or Treat Bag – Free Crochet Bag Pattern
The crochet trick or treat bag is free below, but if you love to work offline, I’ve got a couple other great options for you.
Purchase the ad-free, printable PDF, (including all photo tutorials) on Ravelry, or on Etsy (aff).
This post contains affiliate links.
Materials
- Yarn: Aran / Worsted Weight / 4 / Yarn, Lily Sugar n’ Cream (100% cotton / 120 yards / 70.9 g / 109 m / 2.5 oz )
- Yardage and Colors:
- Black: 240 yards
- White: 15 yards
- Orange: 40 yards
- Green: 45 yards
- Purple: 30 yards
- Crochet Hook: H/8/5.00mm; or size needed to obtain gauge (My favorite crochet hooks are the Clover Amour Crochet Hooks, I’ve never had an ache in my hand since switching).
- Measuring Tape
- Scissors
- Yarn Needle
Abbreviations (US Terms)
- ch(s): chain
- st(s): stitch(es)
- sl st(s): slip stitch(es)
- sc: single crochet
- hdc: half double crochet
- yo: yarn over
- SM: stitch marker
- FLO: front loop only
- BLO: back loop only
- RS: right side
- WS: wrong side
- Rep: repeat
- Join yarn with a standing single crochet
- Invisible Join Technique
- Surface Crochet
Experience Level
- Easy
Gauge
- In sc: 7.25 sts = 2″; 7.75 rows = 2″
Finished Size
- Top to Bottom (without handle): 7.5″ to 11″ W x 13.5″ H
Pattern Notes
- Beginning chains are not included in stitch count unless noted otherwise.
- The first stitch of each row is worked into the same stitch as the turning chain, unless stated otherwise.
- I tend to crochet on the tighter side. You may find yourself needing to go down a hook size (or two) to properly meet gauge, but gauge isn’t critical for this project.
- Use the invisible join technique when fastening off all round pieces.
Hungry Monster Crochet Candy Bag – Written Pattern
Top of Monster’s Head
Note: The Top of Monster’s Head is worked in continuous rounds. I highly suggest the use of a stitch marker to mark the beginning/end of each round. As you complete a round, move the stitch marker up.
Rnd 1 (MC): Using a 5.00mm crochet hook, ch 21, 3 sc in 2nd ch from your hook, sc in each of the next 18 chs, 3 sc in last ch, rotate to work along the bottom of the foundation ch, sc in each of the next 18 chs. (42 sts)
Rnd 2: [2 sc in each of the next 3 sts, sc in each of the next 18 sts] work from [ to ] twice. (48 sts)
Rnd 3: [ (2 sc in the next st, sc in the next st) 3 times, sc in each of the next 18 sts] work from [ to ] twice. (54 sts)
Rnd 4: sc in each of the next 4 sts, 2 sc in the next st, sc in each of the next 26 sts, 2 sc in the next st, sc in the next 22 sts. (56 sts)
Rnds 5 – 9: Sc in each st around. (56 sts)
Do not fasten off. Continue on to Creating the Mouth Opening.
Creating the Mouth Opening
Row 1 (RS): *This is a partial row. Sc in each of the next 13 sts. Turn. (13 sts)
Row 2: Ch 1, sc in each of the next 40 sts. Turn. (40 sts)
Row 3: Ch 1, sc in each of the next 5 sts, 2 sc in each of the next 2 sts, sc in each of the next 26 sts, 2 sc in each of the next 2 sts, sc in each of the next 5 sts. Turn. (44 sts)
Rows 4 – 5: Ch 1, 2 sc in the same st as ch 1, sc in each st across to the last st, 2 sc in the last st. Turn. (48 sts) at the end of Row 5.
Rows 6 – 7: Ch 1, sc in each st across. Turn. (48 sts)
Row 8: Ch 1, 2 sc in the same st as ch 1, sc in each st across to the last st, 2 sc in the last st. Turn. (50 sts)
Row 9: Ch 1, 2 sc in the same st as ch 1, sc in each st across to the last st, 2 sc in the next st, loosely ch 8, skip over the gap created by the mouth and join yarn with a standing sc in the next st (first st of this rnd). (52 sts + 8 chs + sc join)
Do not fasten off. Do not Turn. Continue on to Body of Monster.
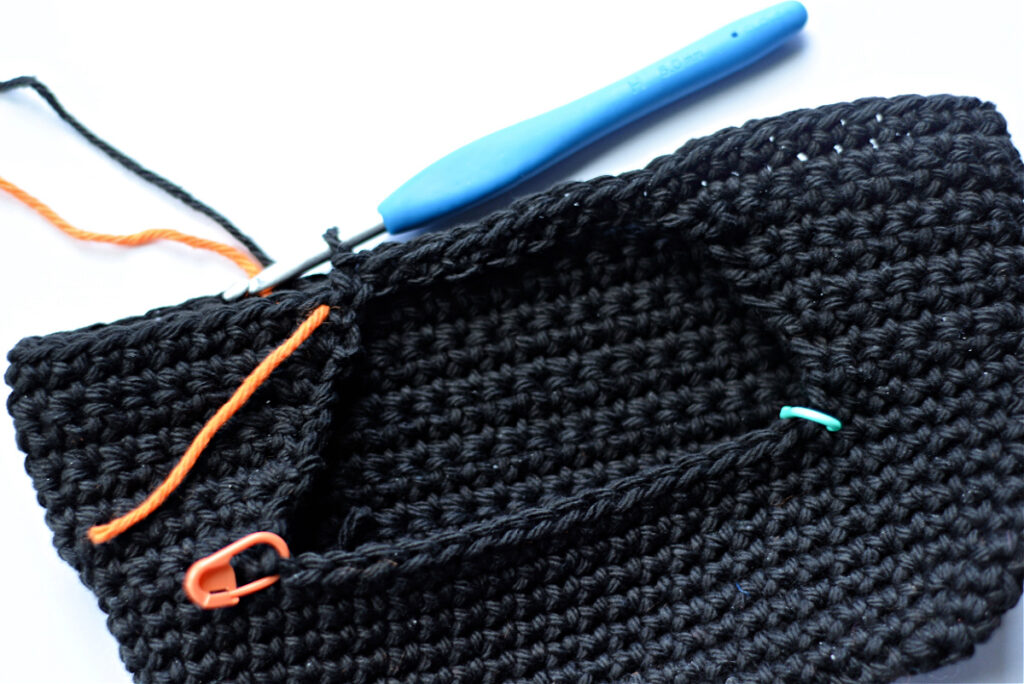
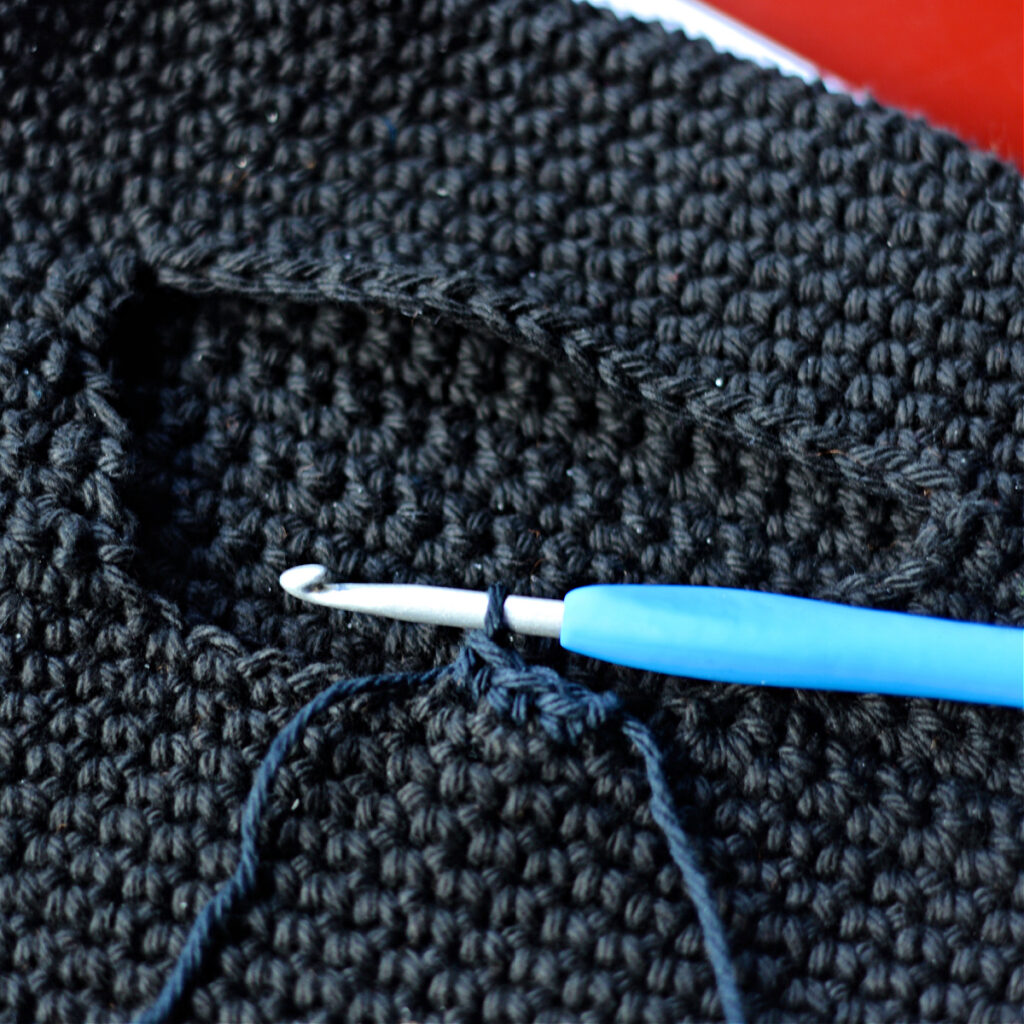
Body of Monster
Note: Go back to working in continuous rounds. Make sure to move your stitch marker up as you complete each round.
Rnd 1 (RS): Sc in each st and ch around. (60 sts) See photo above.
Rnd 2: Sc in each of the next 9 sts, 2 sc in the next st, sc in each of the next 30 sts, 2 sc in the next st, sc in each of the next 19 sts. (62 sts)
Rnd 3: Sc in each st around. (62 sts)
Rnd 4: Sc in each of the next 10 sts, 2 sc in the next st, sc in each of the next 31 sts, 2 sc in the next st, sc in each of the next 19 sts. (64 sts)
Rnd 5: Sc in each st around. (64 sts)
Rnd 6: Sc in each of the next 11 sts, 2 sc in the next st, sc in each of the next 32 sts, 2 sc in the next st, sc in each of the next 19 sts. (66 sts)
Rnd 7: Sc in each st around. (66 sts)
Rnd 8: Sc in each of the next 12 sts, 2 sc in the next st, sc in each of the next 33 sts, 2 sc in the next st, sc in each of the next 19 sts. (68 sts)
Rnd 9: Sc in each st around. (68 sts)
Rnd 10: Sc in each of the next 13 sts, 2 sc in the next st, sc in each of the next 34 sts, 2 sc in the next st, sc in each of the next 19 sts. (70 sts)
Rnd 11: Sc in each st around. (70 sts)
Rnd 12: Sc in each of the next 14 sts, 2 sc in the next st, sc in each of the next 35 sts, 2 sc in the next st, sc in each of the next 19 sts. (72 sts)
Rnd 13: Sc in each st around. (72 sts)
Rnd 14: Sc in each of the next 15 sts, 2 sc in the next st, sc in each of the next 36 sts, 2 sc in the next st, sc in each of the next 19 sts. (74 sts)
Rnd 15: Sc in each st around. (74 sts)
Rnd 16: Sc in each of the next 16 sts, 2 sc in the next st, sc in each of the next 37 sts, 2 sc in the next st, sc in each of the next 19 sts. (76 sts)
Rnd 17: Sc in each st around. (76 sts)
Rnd 18: Sc in each of the next 17 sts, 2 sc in the next st, sc in each of the next 38 sts, 2 sc in the next st, sc in each of the next 19 sts. (78 sts)
Rnd 19: Sc in each st around. (78 sts)
Rnd 20: Sc in each of the next 18 sts, 2 sc in the next st, sc in each of the next 39 sts, 2 sc in the next st, sc in each of the next 19 sts. (80 sts)
Rnd 21: Sc in each st around. (80 sts)
Rnd 22: Sc in each of the next 19 sts, 2 sc in the next st, sc in each of the next 40 sts, 2 sc in the next st, sc in each of the next 19 sts. (82 sts)
Rnd 23: Sc in each st around. (82 sts)
Rnd 24: Sc in each of the next 20 sts, 2 sc in the next st, sc in each of the next 41 sts, 2 sc in the next st, sc in each of the next 19 sts. (84 sts)
Rnd 25: Sc in each st around. (84 sts)
Rnd 26: Sc in each of the next 21 sts, 2 sc in the next st, sc in each of the next 42 sts, 2 sc in the next st, sc in each of the next 19 sts. (86 sts)
Rnd 27: Sc in each st around. (86 sts)
Do not fasten off. Continue on to Wavy Edges.
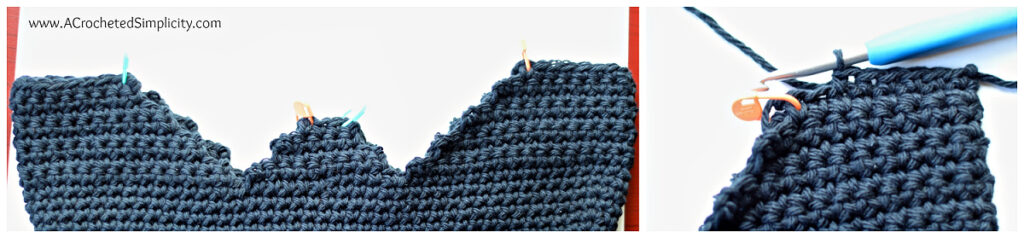
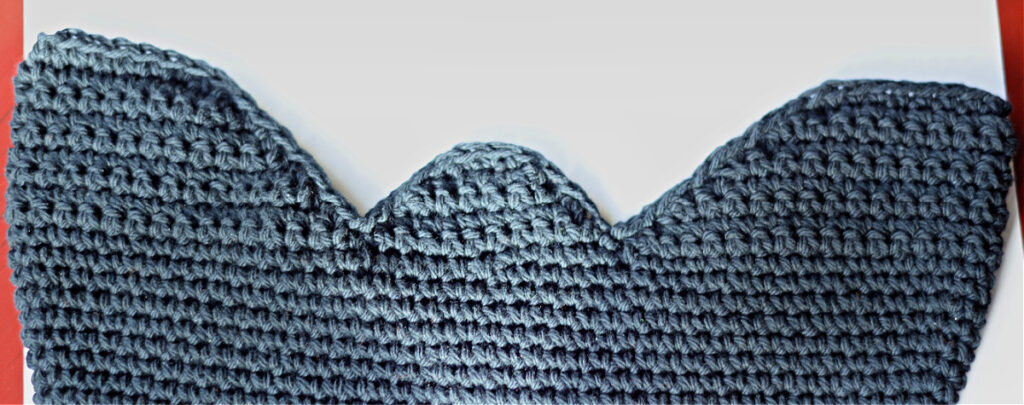
Wavy Edges
Set-up: BLO sl st in each of the next 6 sts. Does not count in stitch count and is only done to move the beginning of the rows over without having to fasten off and weave in more ends. Make sure to move your SM over.
First Wave
Row 1: Sc in each of the next 32 sts. Turn. (32 sts)
Rows 2 – 9: Ch 1, skip the first st, sc in each st across to the last st, (skip the last st). Turn. (16 sts at the end of Row 9)
Fasten off. Continue on to Second Wave.
Second Wave
Row 1: Join yarn with a standing sc into the next st on Row 27 of the Body of Monster, sc in each of the next 10 sts. Turn. (11 sts)
Rows 2 – 5: Ch 1, skip the first st, sc in each st across to the last st, (skip the last st). Turn. (3 sts at the end of Row 5)
Fasten off. Continue on to Third Wave.
Third Wave
Row 1: Join yarn with a standing sc into the next st of Row 27 of the Body of Monster, sc in each of the next 31 sts. Turn. (32 sts)
Rows 2 – 9: Ch 1, skip the first st, sc in each st across to the last st, (skip the last st). Turn. (16 sts at the end of Row 9)
Fasten off. Continue on to Fourth Wave.
Fourth Wave
Row 1: Join yarn with a standing sc into the next st of Row 27 of the Body of Monster, sc in each of the next 10 sts. Turn. (11 sts)
Rows 2 – 5: Ch 1, skip the first st, sc in each st across to the last st, (skip the last st). Turn. (3 sts at the end of Row 5)
Fasten off. Weave in all ends. Continue on to Seam to Join the Waves.
Seam to Join the Waves
Lay the bag flat with the front facing you. Join yarn with a standing sc through both layers, in the st furthest to the right, sc in each st across the bottom of the bag working down and up the waves. Stitch count isn’t crucial. Fasten off. Weave in ends. Continue on to Edging the Mouth Opening.
Edging the Mouth Opening
Join yarn with a standing sc in any st around the mouth opening, sc in each st and side of each row around the opening. Join with a sl st to the 1st st. Stitch count isn’t crucial. Fasten off. Weave in ends. Continue on to Inside Mouth Panel.
Inside Mouth Panel
Row 1 (orange): Ch 21, sc in the 2nd ch from your hook and in each ch across. Turn. (20 sts)
Row 2: Ch 1, sc in each st across. Turn. (20 sts) Rep Row 2 until panel measures a minimum of 3″.
Fasten off. Weave in ends. Continue on to Teeth.
Teeth (Make 3)
Row 1 (white): Ch 5, sc in the 2nd ch from your hook and in each ch across. Turn. (4 sts)
Rows 2 – 4: Ch 1, skip the 1st st, sc in each remaining st across. Turn. (1 st) at the end of Row 4.
Fasten off. Weave in ends. Make as many teeth as you’d like. Continue on to Whites of the Eyes.
Whites of the Eyes (Make 2)
Eyes are worked in continuous rounds.
Rnd 1 (white): Ch 4, sl st into 4th ch to form a ring, ch 1, work 8 sc into ring. (8 sts)
Rnd 2: [2 sc into each of the next 2 sts, 2 hdc into each of the next 2 sts] work from [ to ] twice. Join with a sl st to the 1st st. (16 sts)
Fasten off leaving a 10″ tail of yarn for sewing. Continue on to Pupils.
Pupils (Make 2)
Rnd 1 (black): Ch 2, work 6 sc into the 2nd ch from your hook. Join with a sl st to the 1st st. (6 sts)
Fasten off leaving an 8″ tail of yarn for sewing. Continue on to Arms.
Arms (Handle)
Arms are worked in continuous rounds.
Color scheme: 2 rounds orange, 2 rounds purple, 2 round green. I started with and ended with 2 rounds of orange.
Rnd 1 (orange): Ch 17, sc in the 2nd ch from your hook and in each ch across. (16 sts)
Rnd 2 (orange): Bring the last st from Rnd 1 to meet the 1st st from Rnd 1, begin Rnd 2 by working the 1st st from Rnd 2 into the 1st st from Rnd 1, sc in each st around.
Rnds 3 – 80 (or until length reaches 21″): Sc in each st around. Switch colors every other round.
Fasten off. Stitch gap closed between the first and last stitches of Rnd 1. Weave in ends. Continue on to Spider’s Body.
Spiders
Make as many as you wish!
Rnd 1 (green, orange, or purple): Ch 2, work 6 sc into the 2nd ch from your hook. Join with a sl st to the 1st st. (6 sts)
Fasten off leaving an 12″ tail of yarn for sewing & making legs. Continue on to Finishing.
Finishing
Weave in any ends that are left.
Eyes: Using a yarn needle and black yarn tail, sew 1 pupil to each white eye. Using a yarn needle and white yarn, sew the eyes onto the bag above the mouth opening. See photos below.
Teeth: Using a yarn needle and black yarn, sew teeth onto the inside edge of the mouth opening in any position you’d like. See photos below for ideas.
Inside Mouth Panel: Position the panel inside the monster’s mouth, long edge of the panel in a horizontal position, just above the top edge of the mouth opening (and above where you sewed the teeth on). Using a yarn needle and black yarn, sew the panel to the inside of the bag. Sew the top edge of the panel only.
Arms: Position one short end of the arm on the side of the head with top edge of the arm lined up with the top edge of the mouth. Using a yarn needle and 14-18″ piece of orange yarn, sew that end onto the head. Before sewing the opposite side on, twist the arm halfway around (this will help it lay more nicely) and then sew it onto the other side of the head. See photos below.
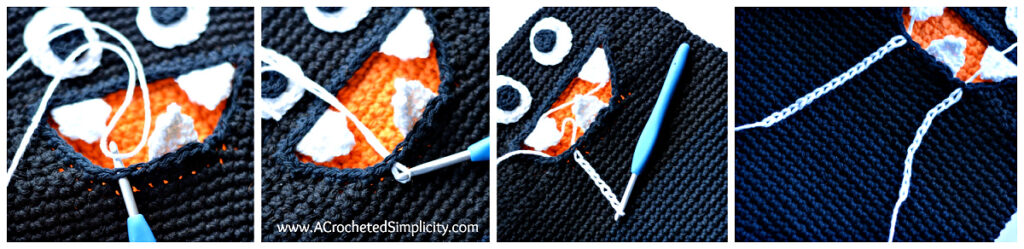
Spider Web Strings: Add strings of spider webbing using white yarn and a surface crochet coming from the monster’s mouth. Make them each different lengths. Weave in ends. The ends nearest his mouth I wrapped around the edge of the mouth opening to make them appear as if coming out of his mouth. See photos below.
Spiders: Using a yarn needle and tail of yarn, sew 1 spider on the bag at the end of each spider web string. After attaching the spider’s body, use the extra yarn to make little legs (the legs on mine are approximately 1/2″ long). If you choose to make more than a couple spiders, sew them on wherever you’d like. See photos below.
Optional: If the top of his head leans forward or backwards, simply tack stitch his arms to the side of his head about 1.5″ up from where you attached them.
Progression Photos – Attaching Teeth
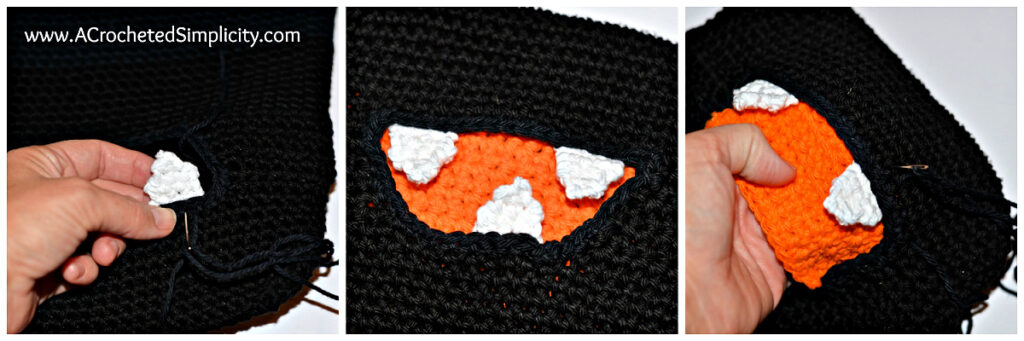

And that’s all there is to it! The overall look of a friendly, hungry monster has been achieved with just a few extra parts and a sturdy main body! And while I’ve only added two spiders to my bag, you can add as many as you want to make him as spooky as you’d like.
I Made It! Now What?
Pin this post! Save this crochet trick or treat bag pattern to your Pinterest boards so that you can come back and make it again.
Leave a comment below: We love to hear your feedback.
Share Your Finished Projects on Facebook or Instagram: I love to see your finished projects! Share with us on social media and tag me @acrochetedsimplicity or use the hashtag #ACrochetedSimplicity so I can find your posts.
Join us in the Facebook Community Group!
Come share your finished projects with us in the A Crocheted Simplicity Crochet Community Group on Facebook. Join us for fun community events such as crochet alongs, join in on crochet conversations, ask questions, get advice, and share your love for crochet!

More Halloween Crochet I Think You’ll Love
- Ghost Kitchen Towel
- Frankenstein Candy Bowl
- “Ghostly Lights” Necklace and Tree Ornament
- Frankenstein’s Monster Dish Scrubby
- Ghost Dish Scrubby
- Black Cat Dish Scrubby
More Halloween Crochet Patterns
Are you looking for more free crochet Halloween patterns? We have several more free crochet patterns on the blog as well as some crochet alongs that feature patterns from different designers. Check them out!