Yura Crochet Wrap
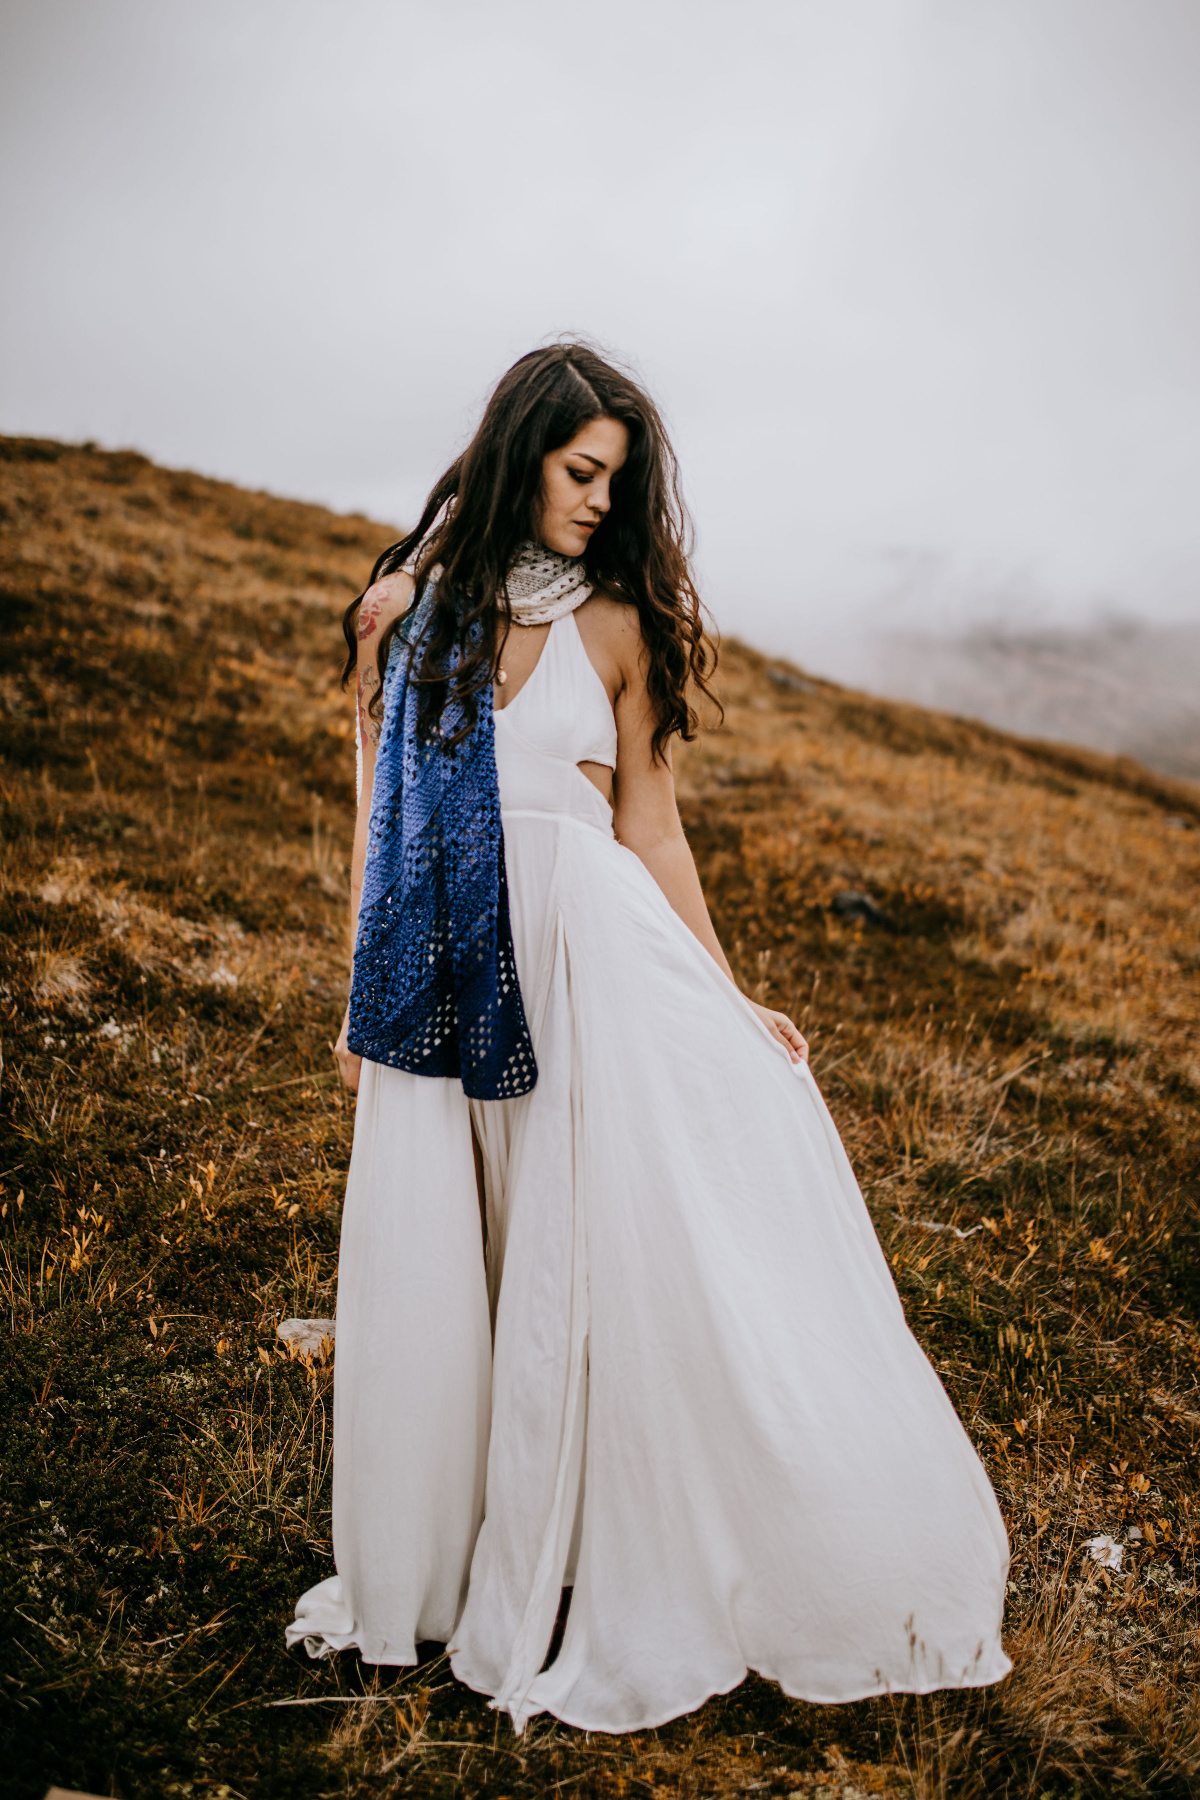
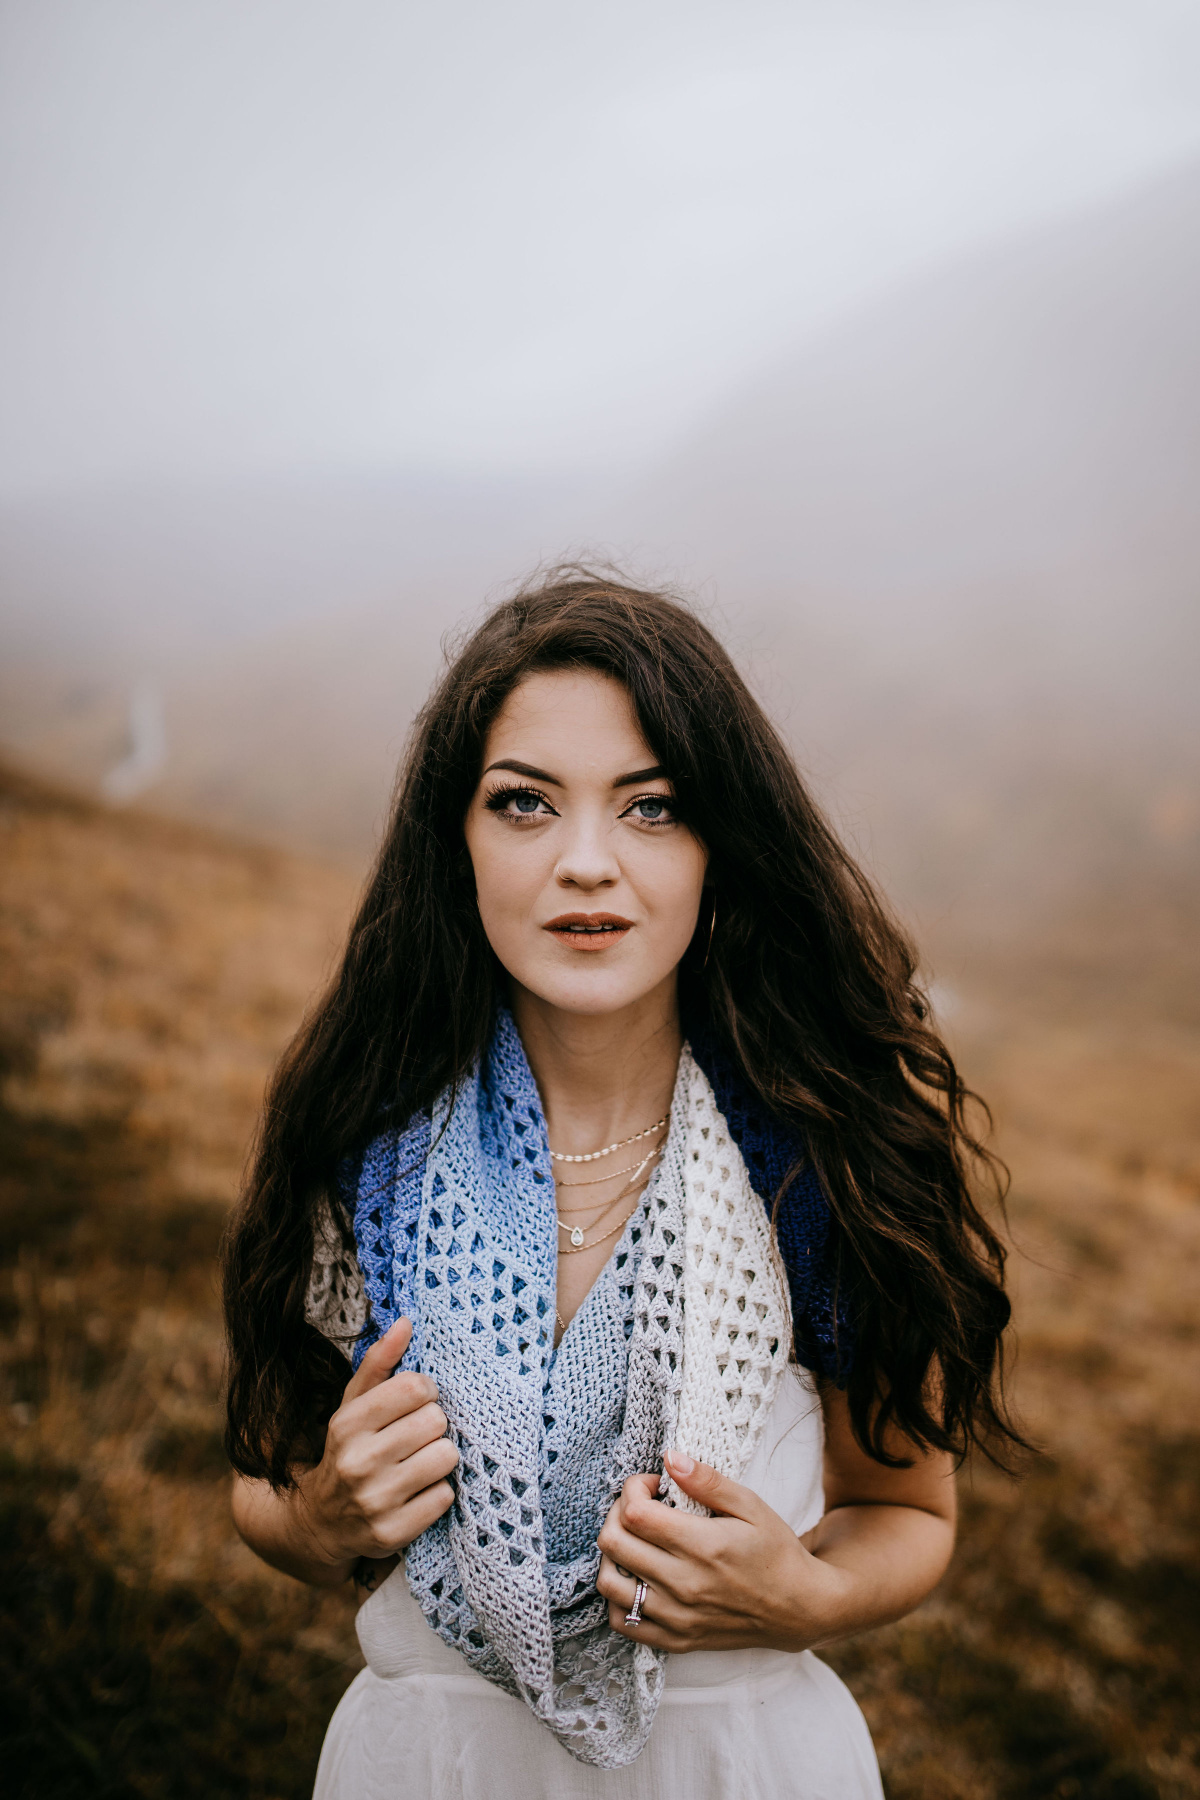
There’s nothing like a lightweight crochet wrap to add the perfect finishing touch to your outfit. No matter the season or occasion, the Yura Wrap is your companion for an effortlessly fashionable look.
There are so many ways in which you can style this crochet shawl. Throw it over your shoulders, wrap it around your neck, or pin it to the side with a dazzling brooch – need I say more?
You have the creative liberty to do whatever you want with your handmade wrap. Dress it up, dress it down, let your individuality shine through!
You’ll find the free crochet wrap pattern in the post below, or you can find an ad-free printable PDF (that includes all photo tutorials + stitch chart) on Ravelry, or Etsy (aff).
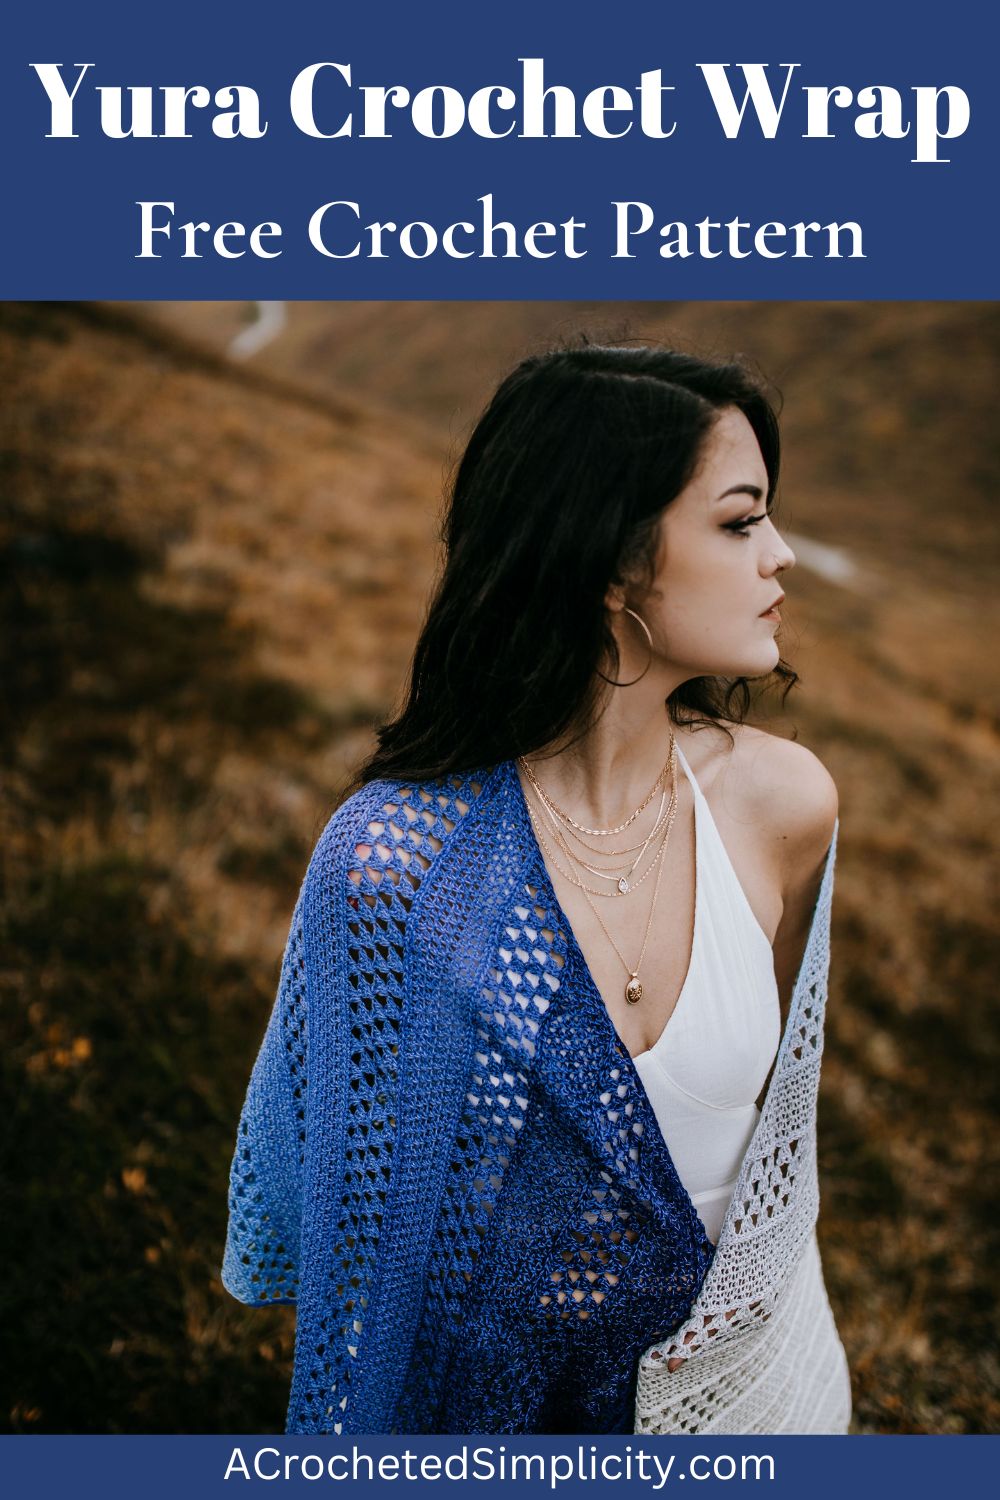
By using a gradient option or any variegated yarn, you’ll be able to match this shawl with many different outfit choices. You can also keep it in one solid color, whether you prefer neutrals or bold vibrant shades, depending on your style preference.
When gifting to a friend or family member, crochet it up in their favorite color to show them how much they matter. Handmade crochet gifts carry so much sentimental value and are always heartwarming to receive!
Why Crochet a Rectangular Wrap?
A rectangular shawl is not only fashionable but also incredibly practical. Here are a few reasons why you should consider making one:
- Easy to Make: This pattern is great for beginners and experienced crocheters alike, requiring only basic stitches and a few special stitches that are explained below.
- Customizable: Choose your favorite yarn and color to match your personal style.
- Perfect for Any Season: Make it with lightweight yarn for spring and summer. It’s great for layering all year round.
Looking for more lightweight crochet shawls? The Coachella Shawl and Water’s Edge Shawl are gorgeous crochet wraps where you can learn different stitch combinations.
How to Crochet a Wrap
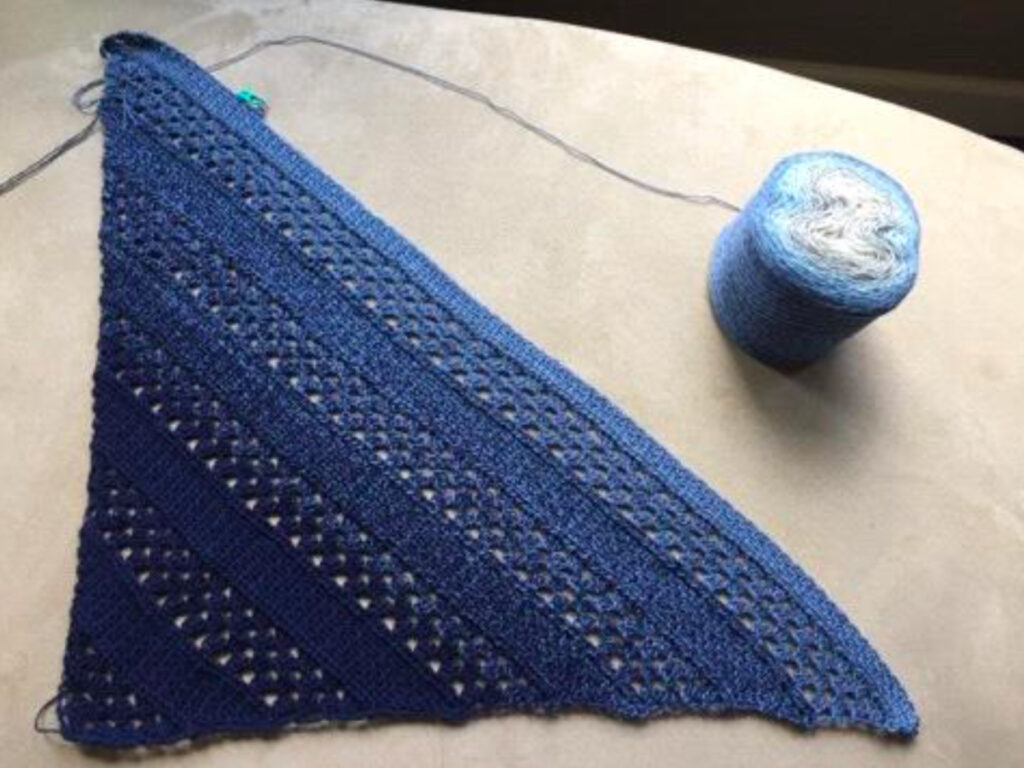
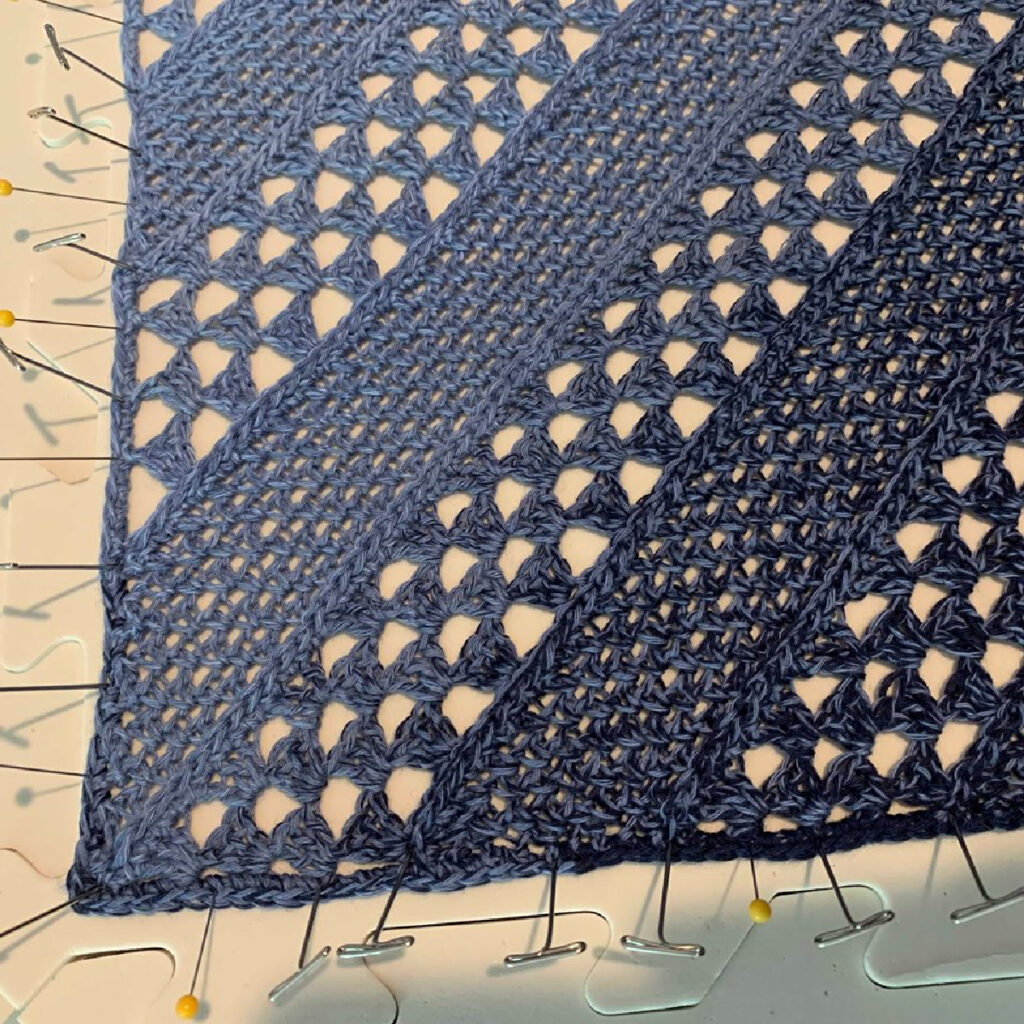
This crochet wrap pattern is worked in a non-traditional way but the construction is seamless as it’s worked all in one piece.
You’ll be crocheting on the bias (also known as working from corner-to-corner), starting from the corner of the wrap to first attain the width and then work the length. You will reserve a few yards of each colored section of Whirl yarn (if that’s what you’re using) for the final edging step.
You can add tassels to your wrap if you prefer, however, I kept mine without.

How To Get The
Yura Crochet Wrap Pattern
Option 1: Scroll down for the free shawl crochet pattern right here in this blog post.
Option 2: Purchase the ad-free printable PDF from one of my shops:
Yarn
I used Scheepjes Whirl in Blueberry BamBam and Scheepjes Whirlette in Ice for my version of the Yura Wrap. The gradient in Scheepjes Whirl is beautiful because the transitions aren’t sharp. I love how the colors effortlessly flow into one another. Both yarns are an acrylic and cotton blend which makes them warm, machine washable, and durable.
Most other fingering weight yarns can easily be substituted for this shawl, especially since it isn’t a garment where gauge is critical. However, if you choose to go with a thicker yarn, remember that it will alter the size, drape, and final look of your crochet wrap.
Crochet Wrap Pattern
The Yura Crochet Wrap Pattern is a free pattern below, but if you love to work offline, I’ve got a couple other great options for you.
Purchase the ad-free, printable PDF (that includes all photo tutorials + stitch chart), on Ravelry, or on Etsy (aff).
This post contains affiliate links.
Materials
- Yarn: Superfine / Fingering Weight / 1 / Yarn, Scheepjes Whirl in Blueberry BamBam and Scheepjes Whirlette in Ice were used for the wrap shown in the photos. Yarns similar in fiber and weight can be substituted.
- Yardage and Type:
- Whirl: 1,090 yards
- Whirlette: 380 yards
- Crochet Hooks: G/6/4.00mm; or size needed to obtain gauge (My favorite crochet hooks are the Clover Amour Crochet Hooks, I’ve never had an ache in my hand since switching).
- Measuring Tape
- Scissors
- Yarn Needle
Abbreviations (U.S. Terms)
- ch(s): chain(s)
- sl st: slip stitch
- st(s): stitch(es)
- sc: single crochet
- dc: double crochet
- sc2tog: single crochet decrease
- yo: yarn over
- sp: space
- Rep: repeat
- Rnd: round
- Beg: beginning
Gauge
- Dimensions are included at the end of Rows 5 & 17 to check gauge.
- In Granny Stitch: 9 dc + 2 ch-1 sps = 2″; 4 rows = 1.625″
- In Linen Stitch: 16 sts = 3″; 7 rows = 1.25″
Experience Level
- Easy
Size
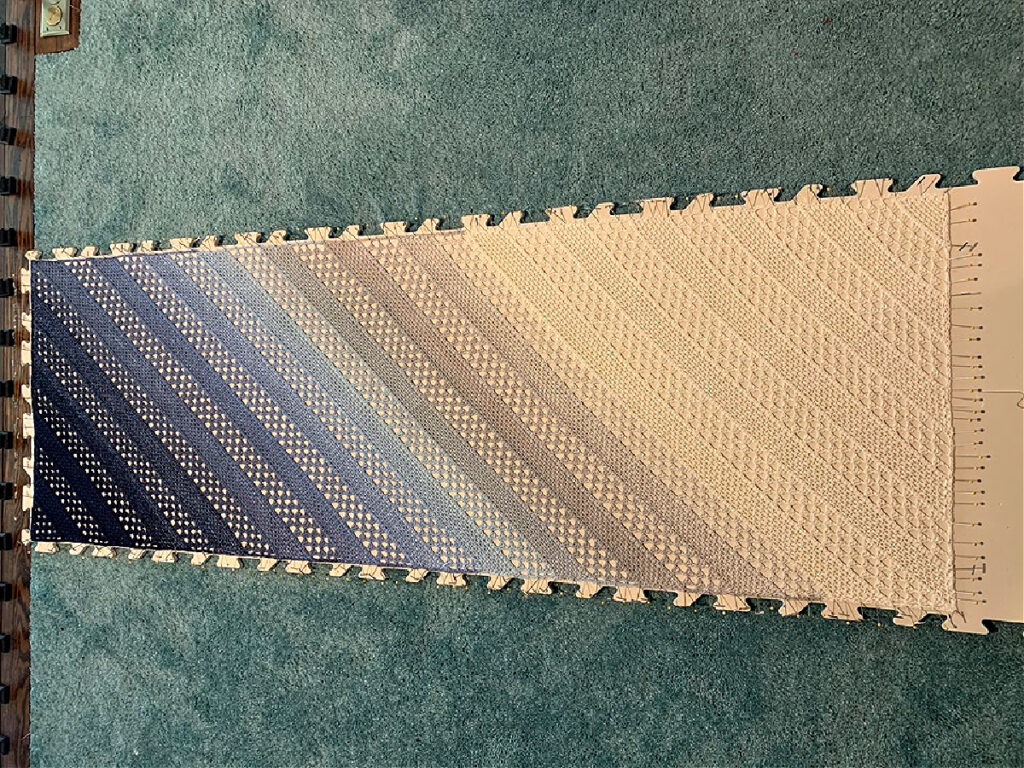
- 21.5″ W x 62.5″ L (blocked)
Pattern Notes
- I tend to crochet on the tighter side. You may need to go down a hook size (or two) to meet gauge if you crochet on the looser side.
- The first stitch of every row is worked into the same stitch as the turning chain, unless stated otherwise.
- Yarn Notes: Scheepjes Whirl in Blueberry BamBam, 60% Cotton / 40% Acrylic (1,094 yds / 1,000m / 220g / 7.75 oz). Scheepjes Whirlette in Ice, 60% Cotton / 40% Acrylic (498 yards / 455m / 100g / 3.5 oz). Yarns similar in fiber and weight can be substituted.
- Yardage: Whirl (1,090 yards); Whirlette (380 yards)
- Construction Notes: The Yura Wrap is crocheted on the bias. You will reserve a few yards of each colored section of Whirl yarn for the final edging step.
- Please Read the “Important Notes” below before beginning. These notes go over how you will reserve yarn to add to the edging at the end of the wrap.
Important Notes
Keep these notes in mind while working your wrap. They will ensure you have enough yarn left over to do the edging at the end.
- One of my favorite features of this design is that it has an edging, but I spent a little bit more time with the details to give it an edging that wouldn’t stick out like a sore thumb. What I mean by that is, I didn’t want to edge the Blueberry Whirl with the Ice whirl. The white on blue would stick out and the wrap wouldn’t be as elegant looking.
- Now, this is my personal preference. You can surely edge your wrap however you please. I just wanted to share with you, my process of edging/finishing. But don’t worry! It’s a really simple process.
- In a nutshell, what I did was reserve several yards of each color in the Blueberry Bambam as I was crocheting the wrap. So as I crocheted the edging, I simply changed colors to the color I had reserved that matched the color I was crocheting into.
- You can find more instructions and pictures for reserving yarn at the end of this pattern.
Yura Wrap – Free Crochet Wrap Pattern
Yarn Transitions: Begin your Yura wrap with the darkest shade of the Whirl cake. Make sure to reserve yarn for the edging as you go along. After you’ve used up nearly all of your Whirl cake, transition to the Whirlette.
Adjusting the Length: Adjusting the length of your wrap is simple. At the end of the Rectangular Rows section, you simply repeat rows 1-16 until your wrap is the desired length.
Beginning Rows
Note: Make sure to keep your ch-1’s loose in the linen stitch rows (sc in next, ch 1, skip next st), or your work will cinch.
Beg Row 1: With Whirl and a 4.00mm crochet hook, ch 5 (counts as 1st dc & ch-1), (3 dc, ch 1, dc) in the first ch. Turn. (7 sts) *Ch-1 spaces are included in stitch count.
Beg Row 2: Ch 4 (counts as 1st dc & ch-1), 3 dc in first ch-1 sp, ch 1, skip each of the next 3 dc, 3 dc in the next ch-1 sp, ch 1, dc in the same sp. Turn. (11 sts)
Beg Row 3: Ch 4, (counts as 1st dc & ch-1), 3 dc in the first ch-1 sp, (ch 1, skip each of the next 3 dc, 3 dc in the next ch-1 sp) twice, ch 1, dc in same sp as last 3 dc. Turn. (15 sts)
Beg Row 4: Ch 4, (counts as 1st dc & ch-1), 3 dc in the first ch-1 sp, (ch 1, skip each of the next 3 dc, 3 dc in the next ch-1 sp) across, ch 1, dc in same sp as last 3 dc. Turn. (19 sts)
Beg Row 5: Ch 4, (counts as 1st dc & ch-1), 3 dc in the first ch-1 sp, (ch 1, skip each of the next 3 dc, 3 dc in the next ch-1 sp) across, ch 1, dc in same sp as last 3 dc. Turn. (23 sts)
*Approximate Size at this point: 4.25″ across the top of Row 5 and 2.5″ H from the bottom of Row 1.
Do not fasten off. Continue on to Increase Rows.
Increase Rows
Stitch Count Note: At the end of each increase row, I’ve added a note as to whether the stitch count increases, or stays the same for that row. You can use these notes to keep track of your stitch count as you crochet each increase row.
*Gauge Check at the end of the first Increase Row 12 (wrap’s 17th row): 7.5″ W across the top of the 17th row and 4″ H from the bottom of Row 1, perpendicular to the last row.
Increase Row 1: Ch 1, sc in each st and ch-1 sp across. Turn. *Stitch count does not increase.
Increase Row 2: Do Not Chain, sl st in each st across. Turn. *Stitch count does not increase.
Increase Row 3: Ch 1, working into the stitches from Increase Row 1, sc in the first st, ch 1, (sc in the next st, ch 1, skip the next st) rep across to the last 2 sts, sc in the next st, ch 1, sc in the last st. Turn. *Stitch count increases by 2 stitches.
Increase Rows 4 – 10: Ch 1, sc in the first st, ch 1, (sc in the next ch-1 sp, ch 1, skip the next st) rep across to the last 2 sts, sc in the next ch-1 sp, ch 1, sc in the last st. Turn. *Stitch count increases by 2 stitches each row.
Increase Row 11: Ch 1, sc in each st and ch-1 sp across. Turn. *Stitch count does not increase.
Increase Row 12: Do Not Chain, sl st in each st across. Turn. *Stitch count does not increase.
Increase Row 13: Ch 4, (counts as 1st dc & ch-1), working into the stitches from Increase Row 11, skip the first st, (3 dc in the next st, ch 1, skip each of the next 3 sts) rep across to the last 2 sts, 3 dc in the next st, ch 1, dc in the last st. Turn. *Stitch count increases by 4 stitches.
Increase Rows 14 – 16: Ch 4, (counts as 1st dc & ch-1), 3 dc in the first ch-1 sp, (ch 1, skip each of the next 3 dc, 3 dc in the next ch-1 sp) across, ch 1, dc in same sp as last 3 dc. Turn. *Stitch count increases by 4 stitches each row.
Rows 17 – 64: Repeat Increase Rows 1 – 16, 3 times. (151 sts at the end of Row 64)
Do not fasten off. Continue on to Rectangular Rows.
Rectangular Rows
Note: Your stitch count will not increase or decrease in this section.
Rec Row 1: Ch 1, sc in each st and ch-1 sp across. Turn. (151 sts)
Rec Row 2: Do Not Chain, sl st in each st across. Turn.
Rec Row 3: Ch 1, working into the stitches from Rec Row 1, skip the first st, (sc in the next st, ch 1, skip the next st) rep across to the last 2 sts, sc in the next st, ch 1, sc in the last st. Turn.
Rec Row 4: Ch 1, sc in the first st, ch 1, (sc in the next ch-1 sp, ch 1, skip the next st) rep across to the last 2 sts (ch-1 sp & st), sc2tog in the next ch-1 sp & last st. Turn.
Rec Row 5: Ch 1, sc2tog in the first st & next ch-1 sp, ch 1, skip the next st, (sc in the next ch-1 sp, ch 1, skip the next st) rep across to the last 2 sts, sc in the next ch-1 sp, ch 1, sc in the last st. Turn.
Rec Rows 6 – 10: Rep Rows 4 – 5, ending with a Rec Row 4 repeat.
Rec Row 11: Ch 1, sc2tog in the first st & next ch-1 sp, sc in each st and ch-1 sp across to the last st, 2 sc in the last st. Turn.
Rec Row 12: Do Not Chain, sl st in each st across. Turn.
Rec Row 13: Ch 4 (counts as 1st dc & ch-1), working into the stitches from Rec Row 11, skip each of the first 4 sts, (3 dc in the next st, ch 1, skip each of the next 3 sts) rep across to the last 3 sts, 3 dc in the next st, ch 1, skip the next st, dc in the last st. Turn.
Rec Row 14: Ch 4, (counts as 1st dc & ch-1), 3 dc in the first ch-1 sp, (ch 1, skip each of the next 3 dc, 3 dc in the next ch-1 sp) across to the last 3 dc & ch-1 sp, ch 1, skip each of the next 3 dc, dc in the last ch-1 sp. Turn.
Rec Row 15: Ch 4 (counts as 1st dc & ch-1), skip the first ch-1 sp & next 3 dc, (3 dc in next ch-1 sp, ch 1, skip each of the next 3 dc) rep across to the last ch-1 sp, (3 dc, ch 1, dc) in the last ch-1 sp. Turn.
Rec Row 16: Rep Rec Row 14.
Rep Rec Rows 1 – 16 until your wrap has reached approximately 60″, or your desired length.
Do not fasten off. Continue on to Transition Rows.
Transition Rows
Row 1: Ch 1, sc in each st and ch-1 sp across. Turn. *Stitch count does not increase.
Row 2: Do Not Chain, sl st in each st across. Turn. *Stitch count does not increase.
Do not fasten off. Continue on to Decrease Rows.
Decrease Rows
Decrease Row 1: Ch 1 (working into the stitches from Transition Row 1 or Decrease Row 15), sc2tog, ch 1, skip the next st, (sc in the next st, ch 1, skip the next st) rep across to the last 2 sts, sc2tog. Turn. *Stitch count decreases by 2 stitches.
Decrease Rows 2 – 8: Ch 1, sc2tog in the first st & next ch-1 sp, ch 1, skip the next st, (sc in the next ch-1 sp, ch 1, skip the next st) rep across to the last 2 sts (ch-1 sp & st), sc2tog in the next ch-1 sp & last st. Turn. *Stitch count decreases by 2 stitches each row.
Decrease Row 9: Ch 1, sc2tog in the first st & next ch-1 sp, sc in each st and ch-1 sp across to the last 2 sts (ch-1 sp & st), sc2tog in the next ch-1 sp & last st. Turn. *Stitch count decreases by 2 stitches.
Decrease Row 10: Do Not Chain, sl st in each st across. Turn. *Stitch count does not decrease.
Decrease Row 11: Ch 4 (counts as 1st dc & ch-1), working into the stitches from Decrease Row 9, skip each of the first 4 sts, (3 dc in the next st, ch 1, skip each of the next 3 sts) rep across to the last st, dc in the last st. Turn. *Stitch count decreases by 2 stitches.
Decrease Rows 12 – 14: Ch 4 (counts as 1st dc & ch-1), skip the first ch-1 sp & next 3 dc, (3 dc in next ch-1 sp, ch 1, skip each of the next 3 dc) rep across to the last ch-1 sp, dc in the last ch-1 sp. Turn. *Stitch count decreases by 4 stitches each row.
Decrease Row 15: Ch 1, sc in each st and ch-1 sp across (last 2 sts are worked in ch-1 and top of ch 3). Turn. *Stitch count does not decrease.
Decrease Row 16: Do Not Chain, sl st in each st across. Turn. *Stitch count does not decrease.
Repeat Decrease Rows 1 – 16, until you reach the end of a Row 14 repeat and have 23 sts remaining.
Do not fasten off. Continue on to Ending Rows.
Ending Rows
End Row 1: Ch 1, sc2tog in the first st & next ch-1 sp, sc2tog in the next 2 sts, sc in each st and ch-1 sp across to the last 4 sts (2 sts, ch-1 sp & last st), sc2tog in the next 2 sts, sc2tog in the next ch-1 sp & last st (last st is the 3rd ch from the ch 4). Turn. (19 sts)
End Row 2: Do Not Chain, sl st in each st across. Turn. (19 sts)
End Row 3: Ch 1 (working into the stitches from Dec Row 5), sc2tog, ch 1, skip the next st, (sc in the next st, ch 1, skip the next st) rep across to the last 2 sts, sc2tog. Turn. (17 sts)
End Rows 4 – 9: Ch 1, sc2tog in the first st & next ch-1 sp, ch 1, skip the next st, (sc in the next ch-1 sp, ch 1, skip the next st) rep across to the last 2 sts (ch-1 sp & st), sc2tog in the next ch-1 sp & last st. Turn. (5 sts) at the end of Row 13.
End Row 10: Ch 1, extsc3tog in the 1st, middle, & last sts (skipping over the ch-1 sps). (1 st)
Fasten off. Weave in ends. Continue on to Border.
Border
Tip: If your edge starts to become wavy, go down a hook size or two until it’s nice and flat.
Color Changes: Remember that this is where you’ll use the yarn you reserved to work color changes as you get to each different colored section while edging your wrap.
Rnd 1: Continuing on from the last ending row, ch 1, work 3 sc into each corner, work 1 sc into the side of each sc and alternate working 2 sc or 3 sc into the side of each dc (ch-3) around entire wrap. Join. *Stitch count isn’t crucial.
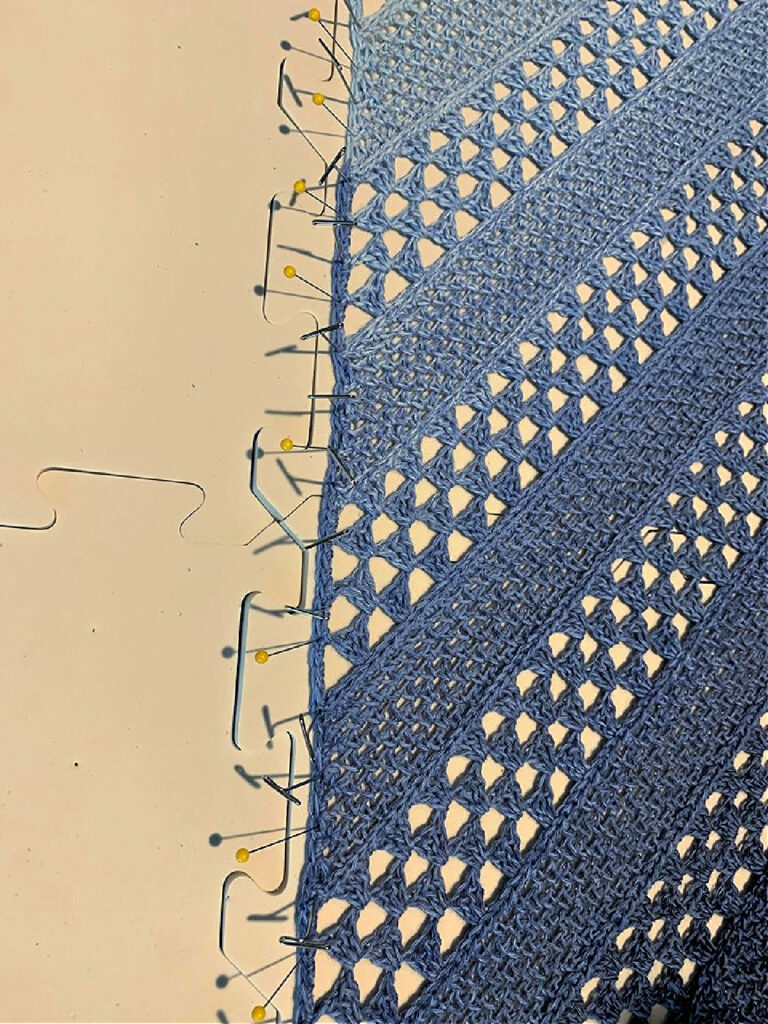
Fasten off. Weave in ends. Complete your wrap by blocking it to give it a nice professional finish.
Reserving Yarn Instructions
Figuring out how much yarn you need to reserve is really simple, but you’ll need to remember that you have to double the amounts because you’ll have corresponding edging in the same colors on the opposite side of the shawl.
How To: As you’re crocheting your wrap and nearing a pretty significant color change, you’ll need to cut the yarn, measure out the proper yardage to reserve, set that aside, and then re-join the yarn to your wrap again, to continue on.
Tip: I stopped at the ends of rows (not mid row). It was easiest to re-join the yarn and less noticeable when weaving in ends.
How much yarn do I cut and reserve? You’ll need approximately 4.25 yards (2.125 yards per side) to edge 2 full pattern repeats. Meaning, 2.125 yards will edge 2 granny stitch & 2 linen stitch sections, plus leave you with enough yarn to weave in ends.
Notice how there is more of the navy blue to edge? Make sure to reserve yarn based on the information I’ve stated above. You will need to reserve the most of the first color of your wrap.
I MADE IT! NOW WHAT?
Pin this post!: Save this crochet wrap pattern to your Pinterest boards so that you can come back and make it again.
Leave a comment below: We love to hear your feedback.
Share Your Finished Projects on Facebook or Instagram: I love to see your finished projects! Share with us on social media and tag me @acrochetedsimplicity or use the hashtag #ACrochetedSimplicity so I can find your posts.
Join us in the Facebook Community Group!
Come share your finished projects with us in the A Crocheted Simplicity Crochet Community Group on Facebook. Join us for fun community events such as crochet alongs, join in on crochet conversations, ask questions, get advice, and share your love for crochet!

Looking for More Crochet Patterns?
Check out our other free crochet patterns for scarves/shawls, hats, and cozy accessories.