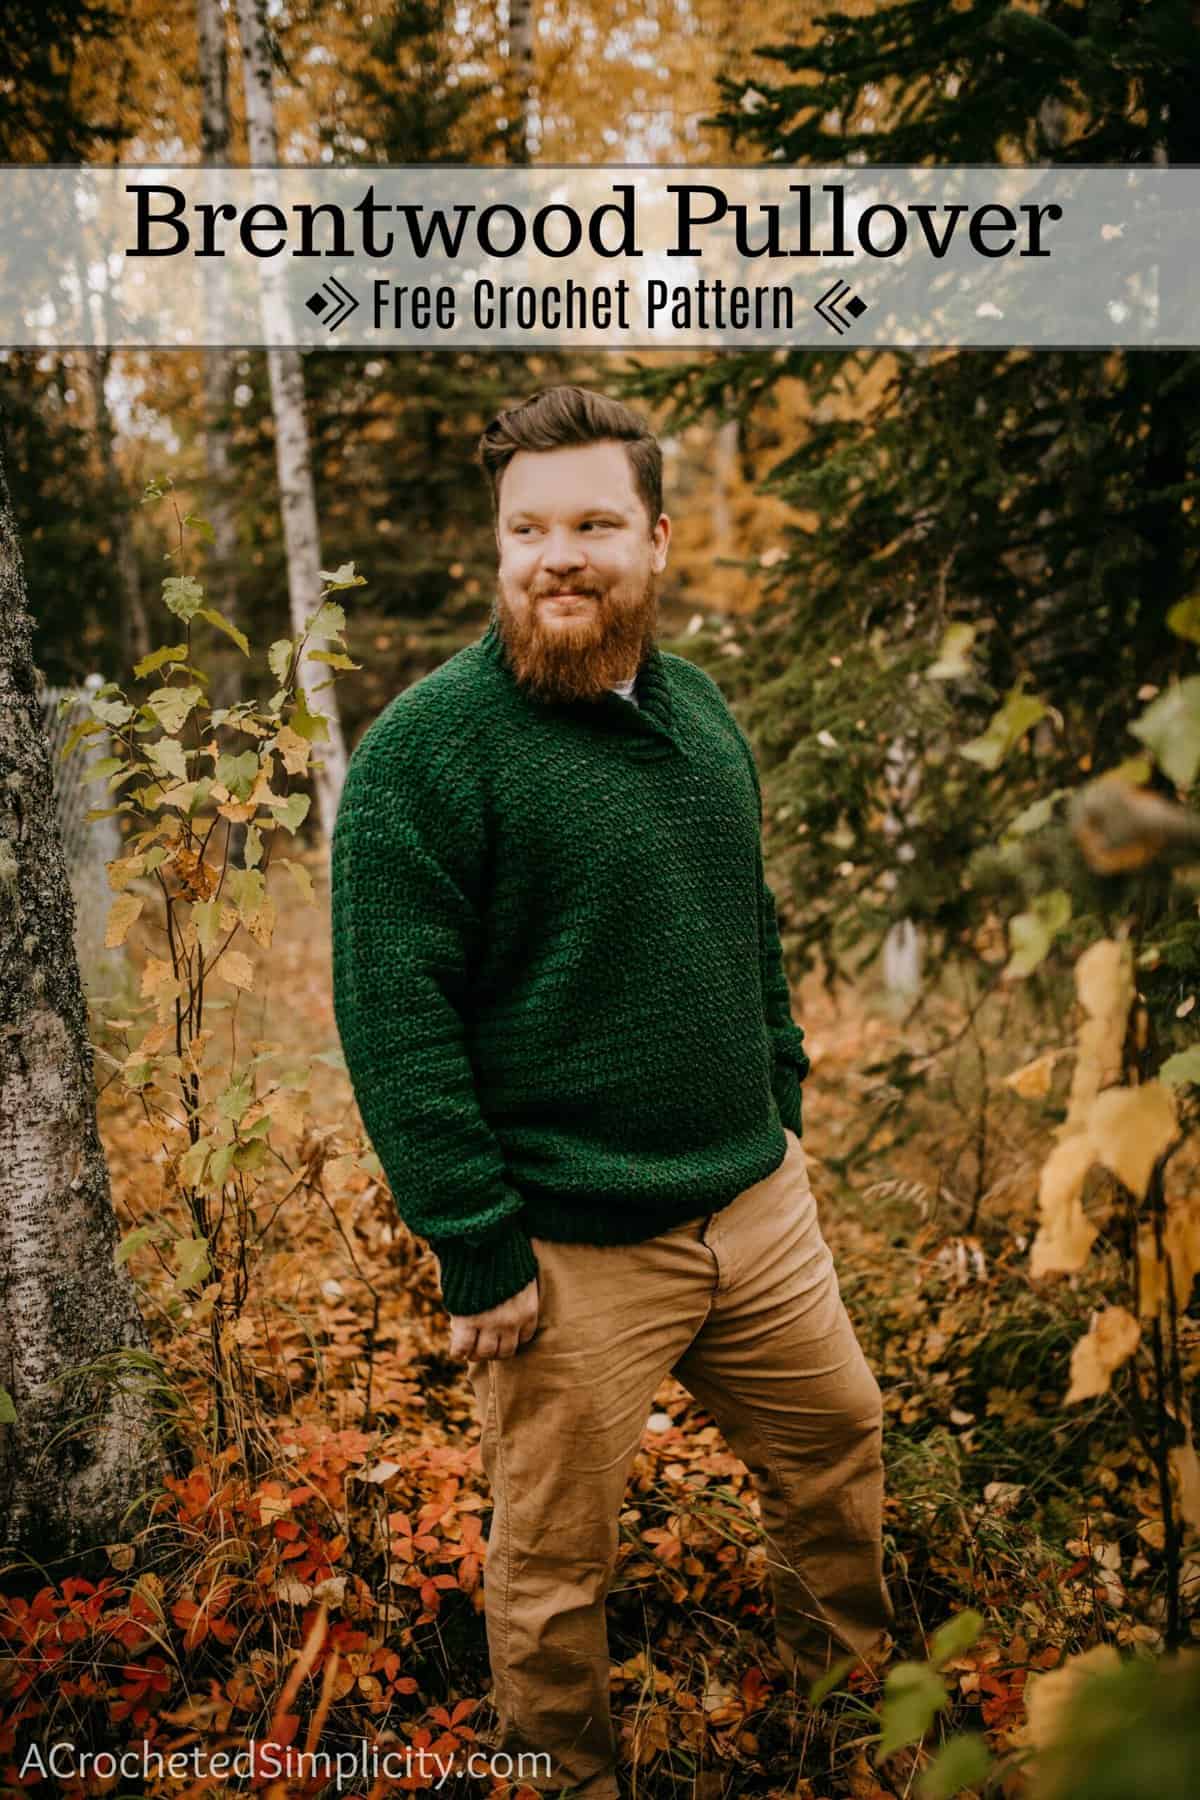
Brentwood Crochet Shawl Collar Men’s Sweater
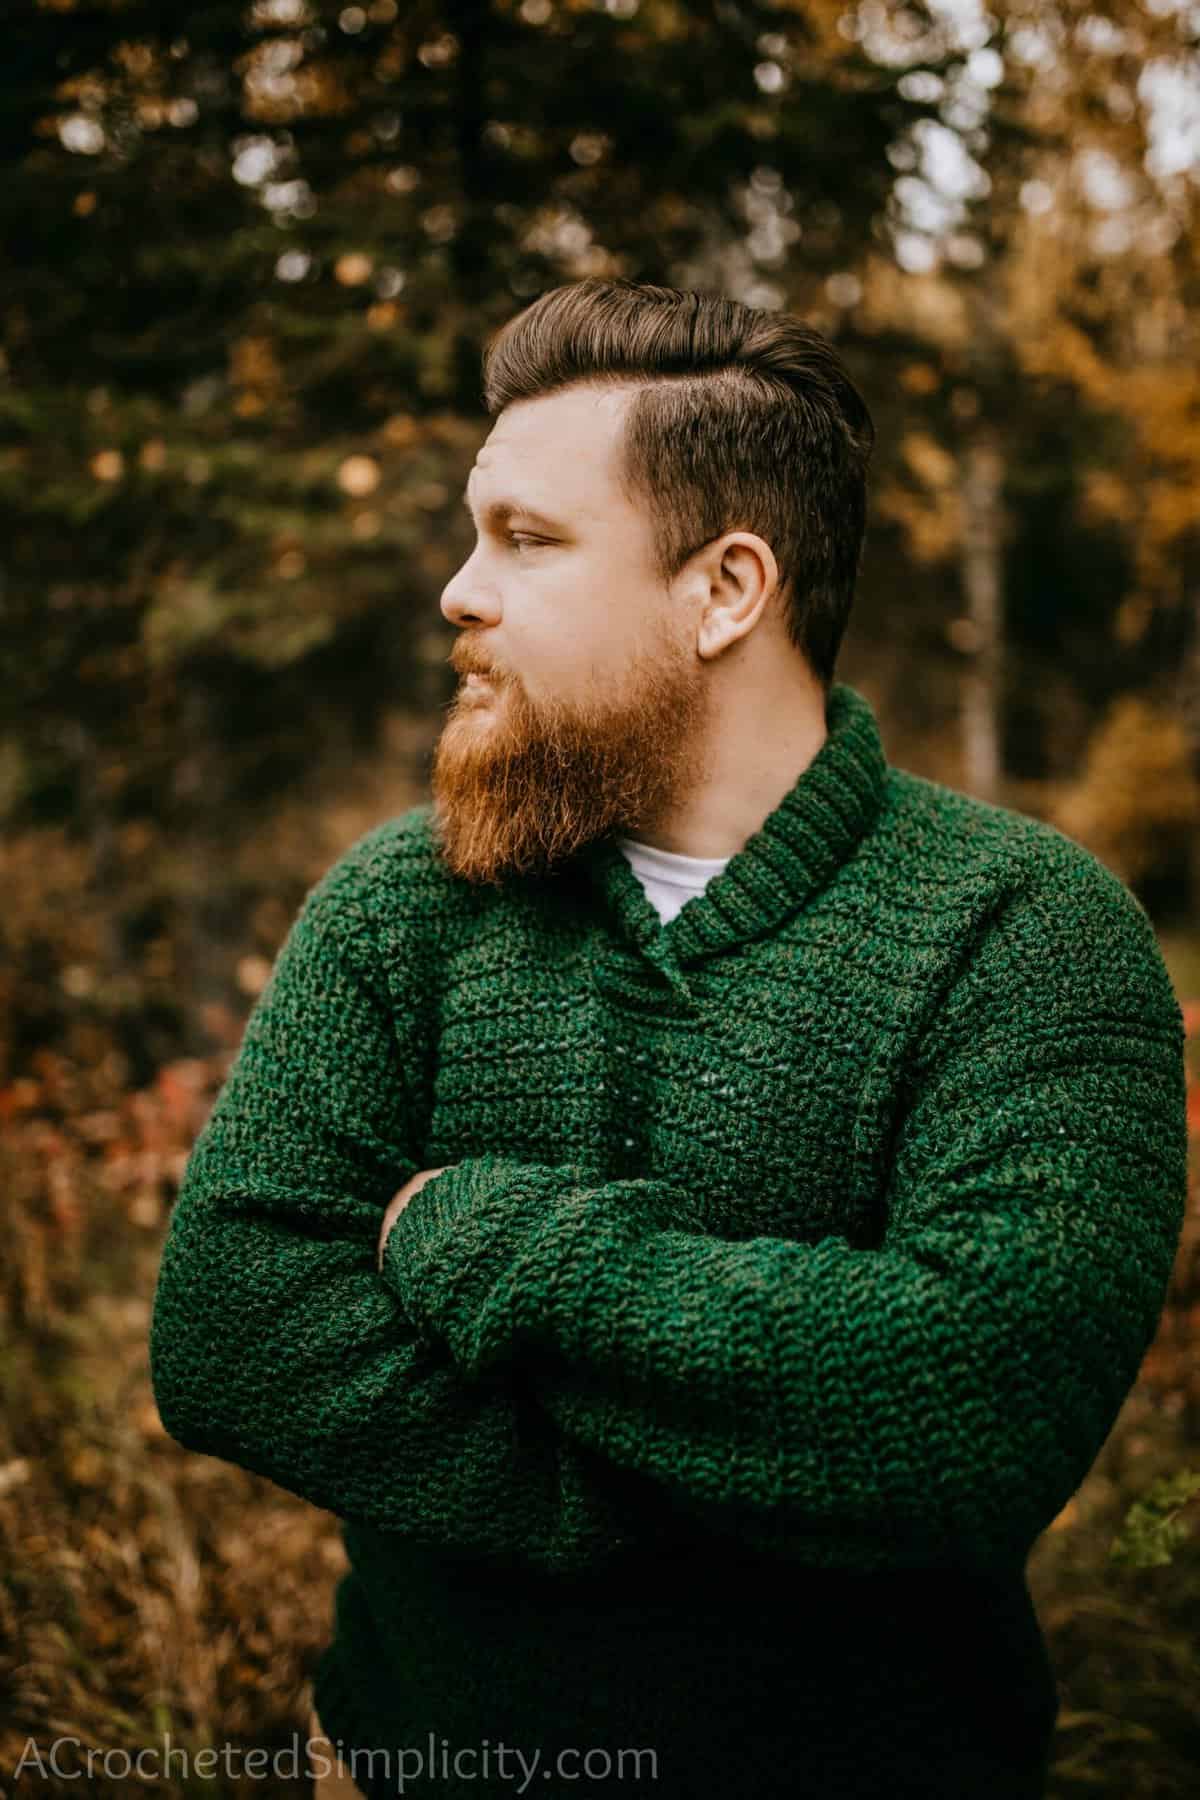
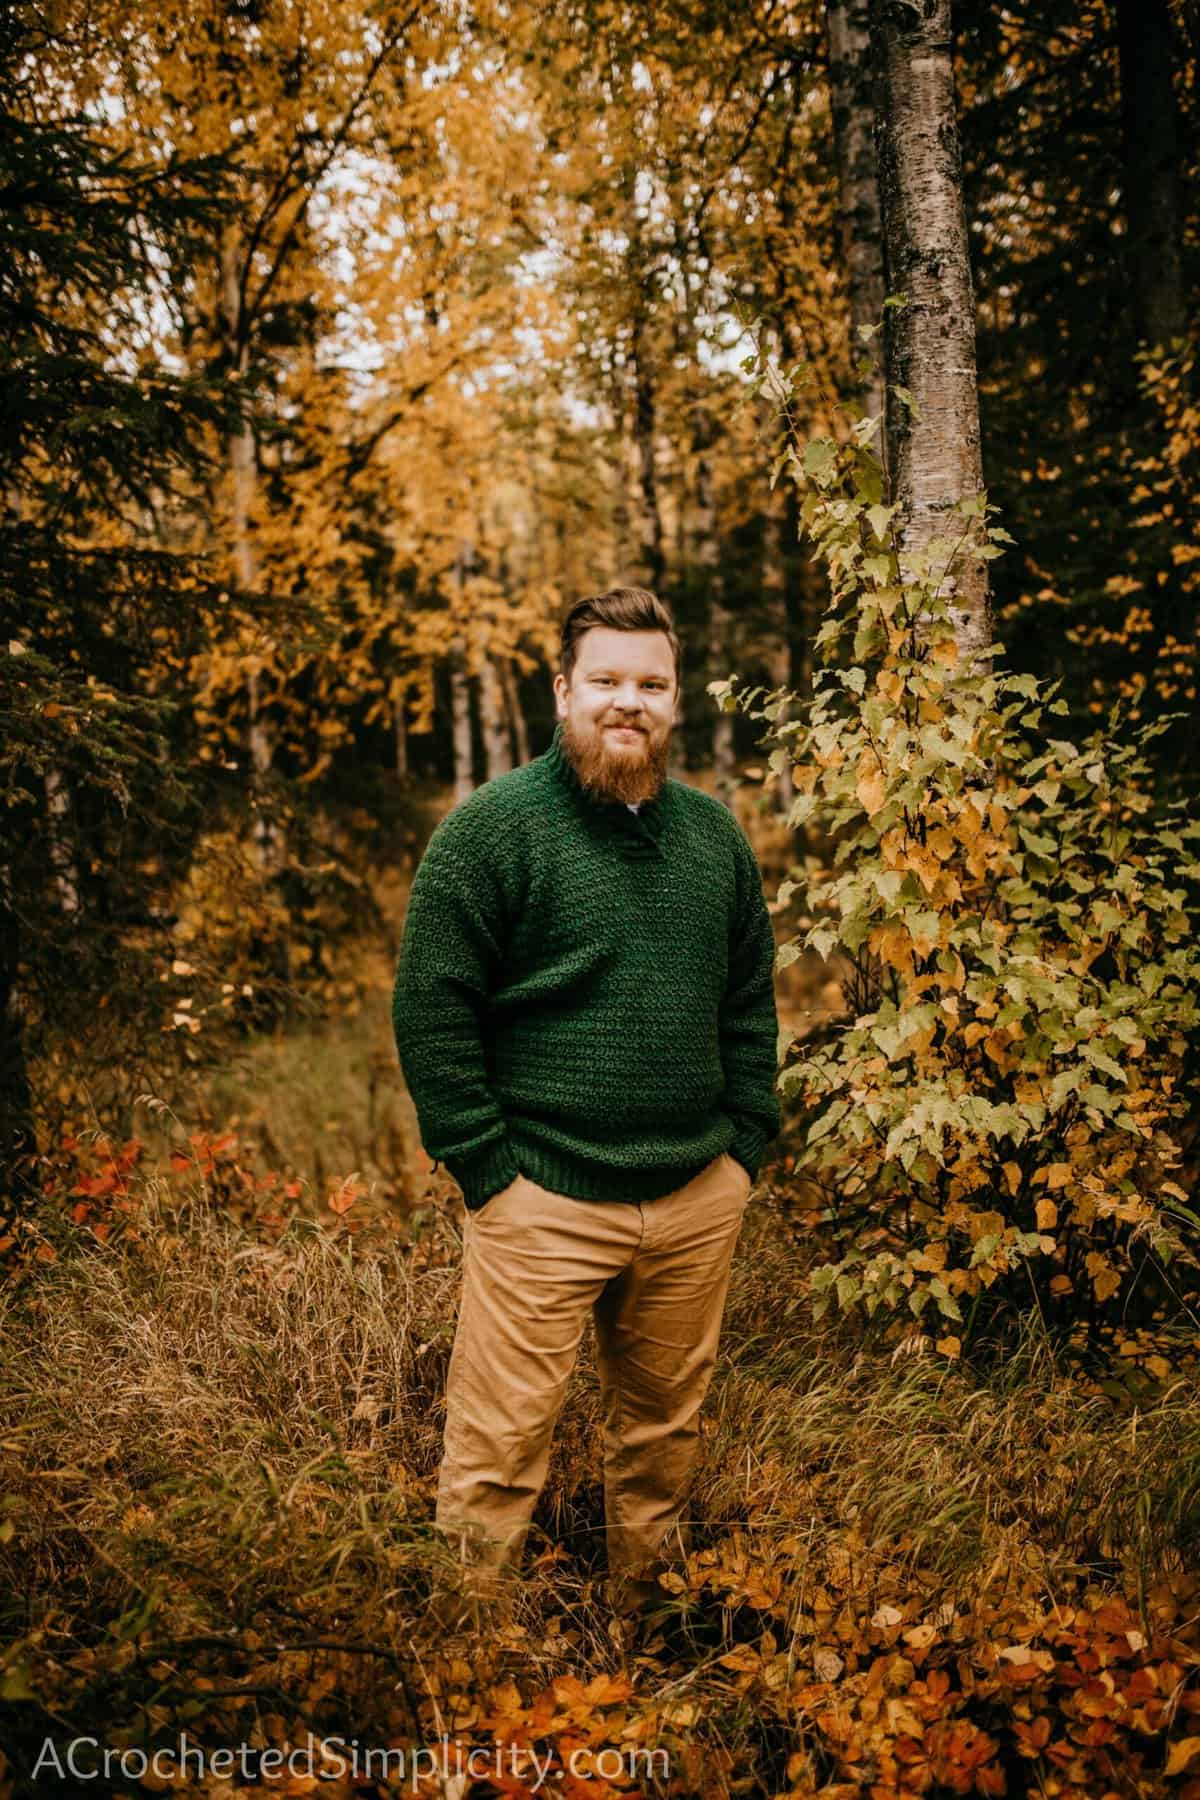
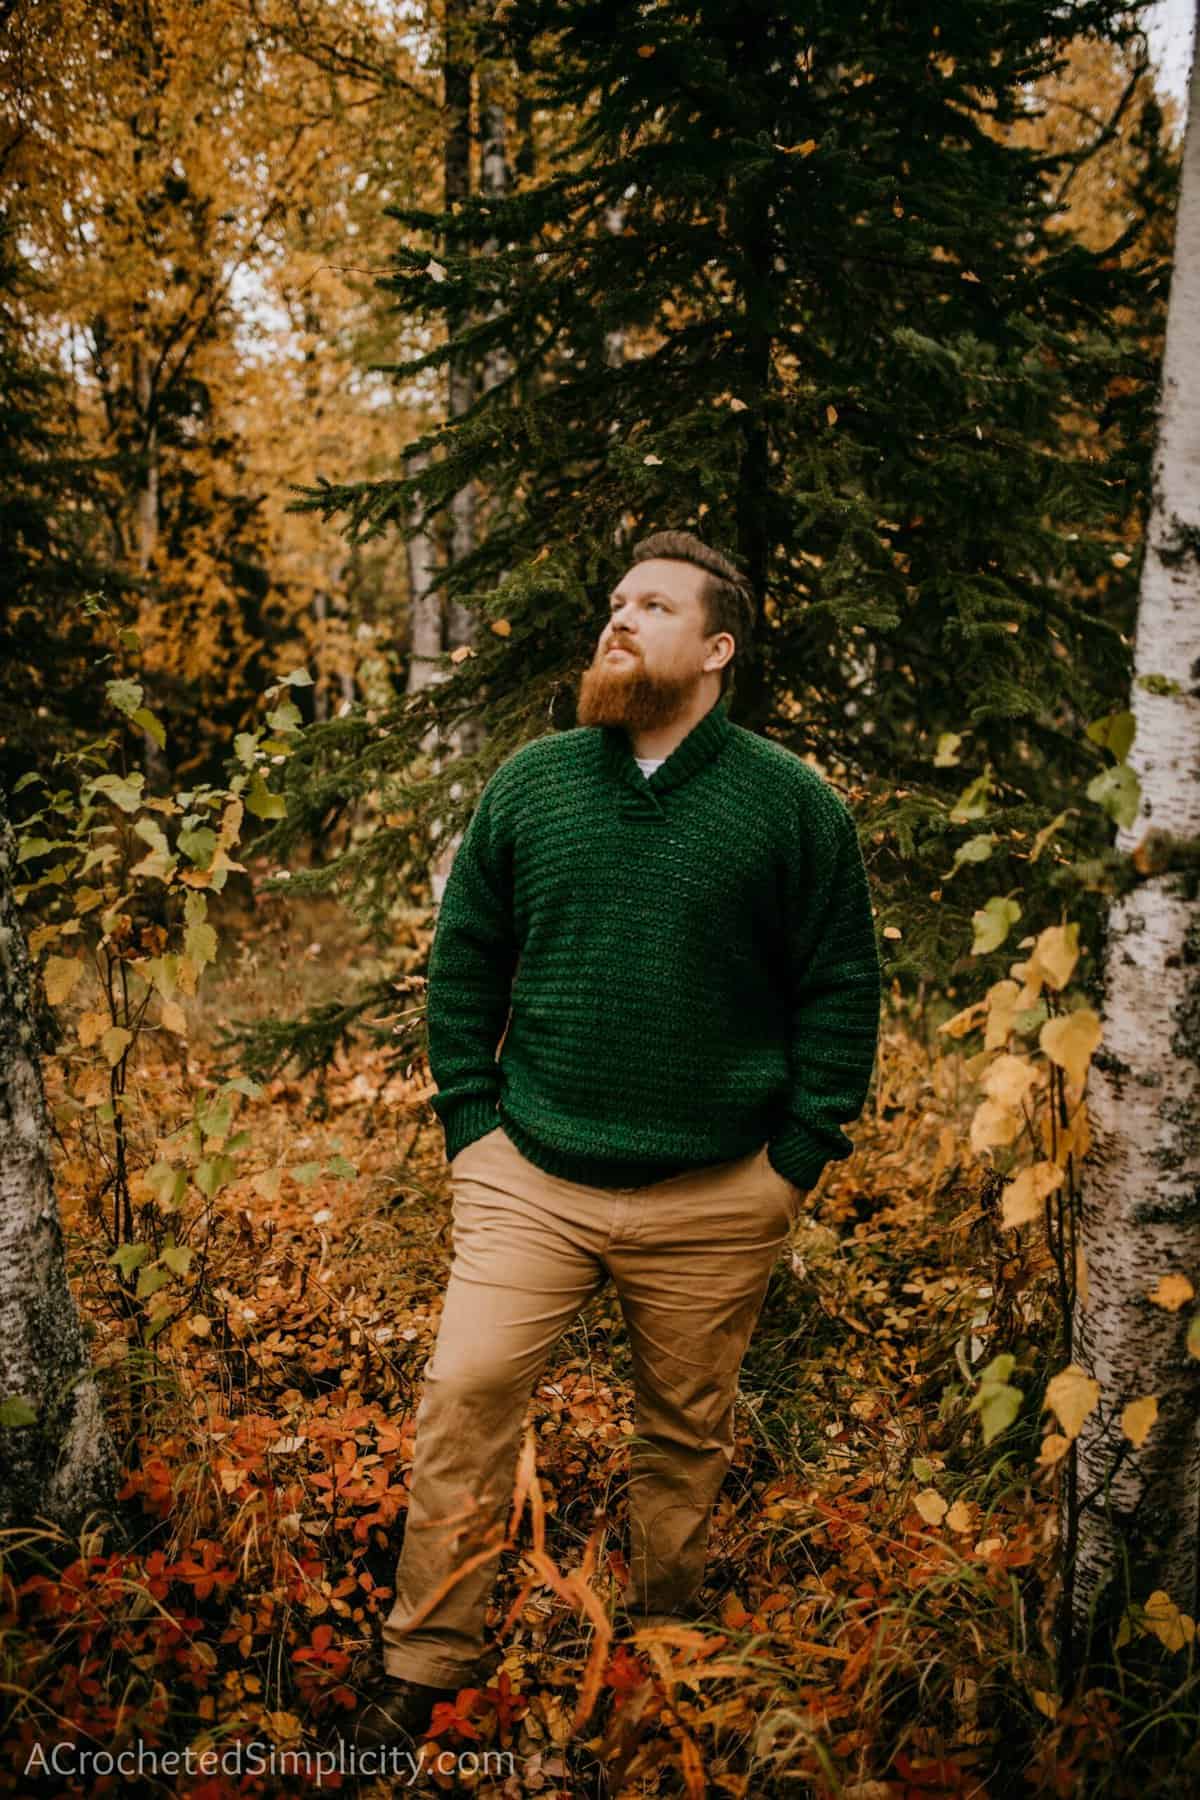
The Brentwood Pullover is a classic crochet shawl collar men’s sweater that can be worn for years to come because of its durable make. Pair it with dress slacks for a more formal look, or with jeans for a casual vibe.
It’s made mostly in one piece with minimal seaming and features a nice thick collar to add warmth around the neck area. With easy-to-follow pattern instructions and simple construction, this pattern will fast become a favorite in your library.
You’ll find the free crochet shawl collar men’s sweater in the post below, or you can find an ad-free printable PDF (that includes all photo tutorials + schematic), on Ravelry, or on Etsy.
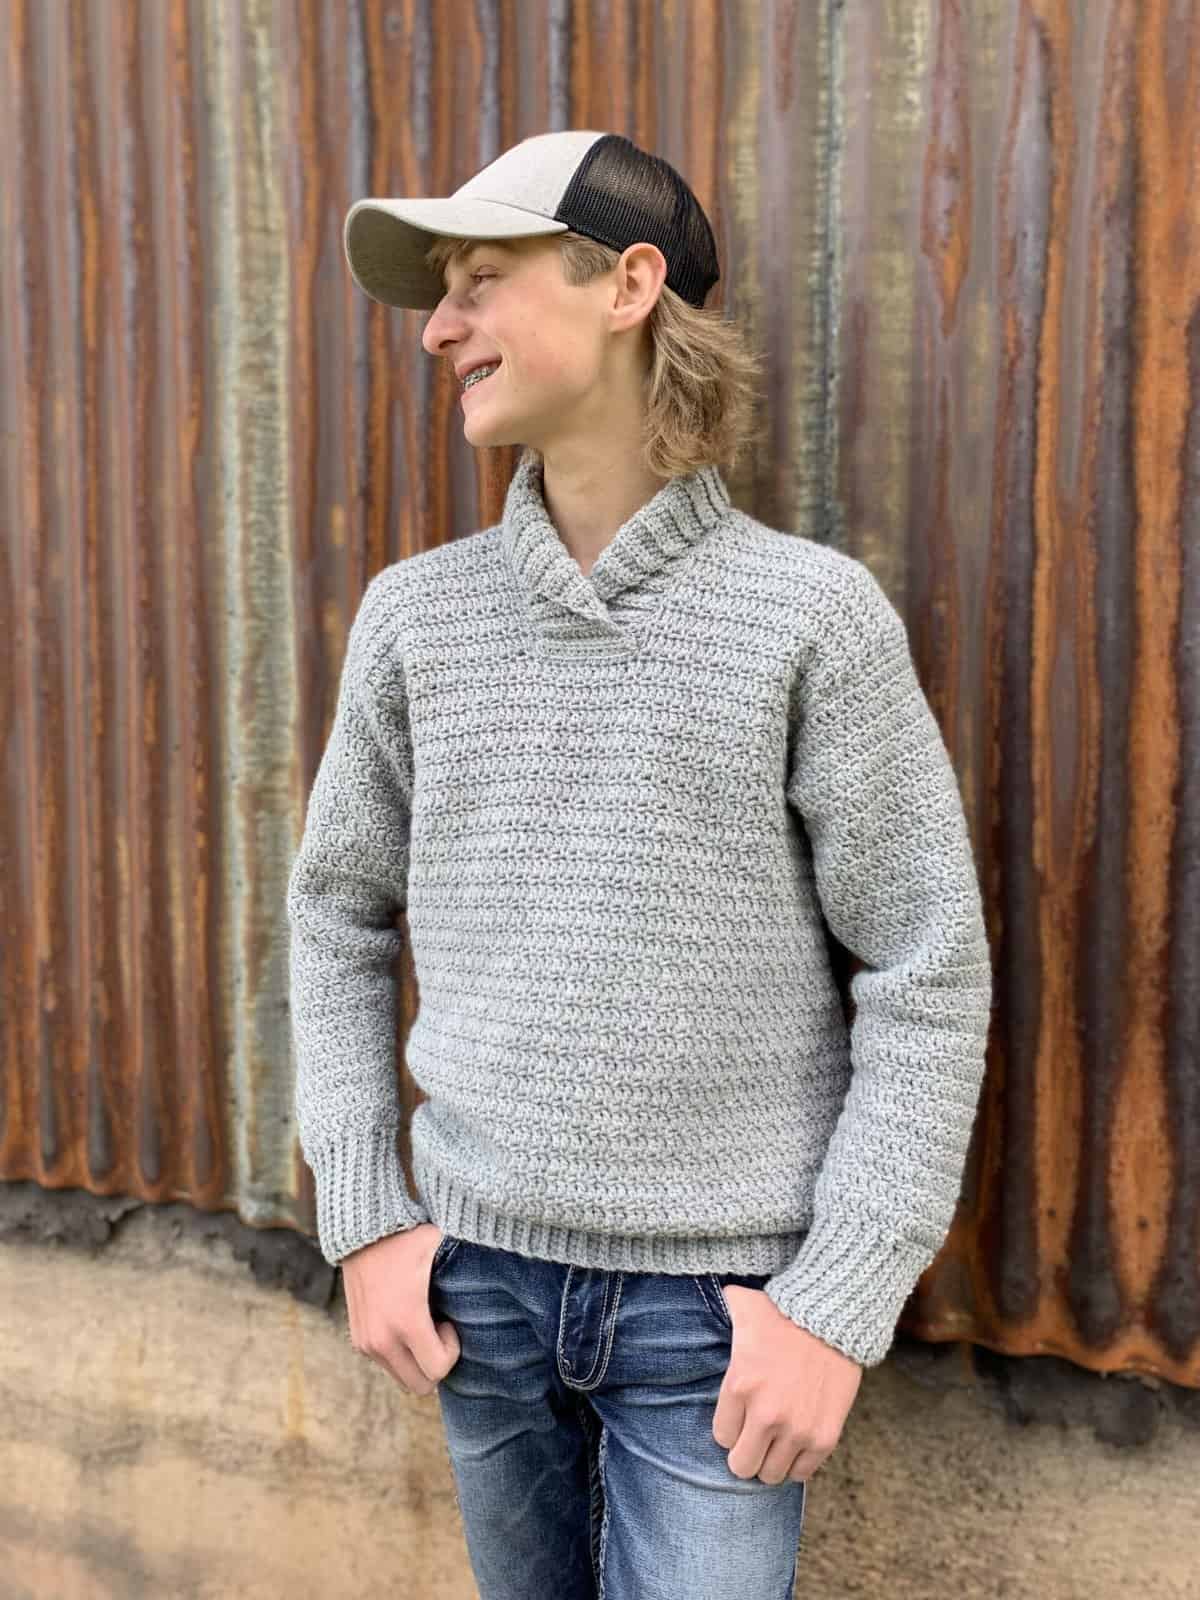
Whether you have a laid-back day planned with a walk in the woods or are hosting a backyard barbecue with friends and family, this sweater is the perfect companion to keep you warm. It has a classy look to it without being too bold and showy. For those who like to have a sweater on hand in their car to pull on when it gets chilly, this durable piece is perfect.
Related: If you like the look of a crochet shawl collar mens sweater but want a buttoned option, make this pattern.
How to Crochet a Sweater
The construction of this crochet shawl collar men’s sweater has nothing complex to it. You’ll start by working from the bottom up, from the hem to the shoulders. Once the main body is ready, there will be minimal seaming at the shoulders only.
This is the point at which the collar is added to give it that distinct look. The sleeves are then worked directly from the armhole openings and ended at the cuffs. That’s all there is to it and after you’ve gotten the hang of the pattern, you can make multiple pullovers for the men in your family!
How To Get The
Brentwood Crochet Shawl Collar Men’s Sweater
Option 1: Scroll down for the free sweater crochet pattern right here in this blog post.
Option 2: Purchase the ad-free printable PDF from one of my shops:
Best Yarn for Crochet Sweaters
For crochet sweaters such as this one, while there are many options to choose from, I used an acrylic and wool blend yarn. This type of yarn is easy to care for and it suits a practical, everyday garment. It also holds its shape well and has good stitch definition, which is especially great for patterns that have ribbing such as this one.
This yarn is also readily available and comes in a variety of colors which allows you to choose just the right one for whoever is receiving this crochet pullover.
Choosing Which Size to Crochet
To choose your size, look over the size & yardage chart below.
- Fits Chest’ measurement is the measurement of the intended wearer, not the garment’s finished measurement.
- Finished Chest and Finished Length are measurements of the finished garment.
- This men’s crochet sweater has 2 – 4″+ of positive ease built in for a relaxed fit.
- If you prefer a more fitted look, I would suggest sizing down (as long as your chest size fits range of the smaller size).
- Sweater length is measured from the top of the shoulder to the bottom edge of sweater (including the bottom ribbing).
- Adjusting Sweater Length: See the notes below for adjusting length. Note: If you add length to your sweater, you will need more yarn than what is listed in the chart below.
- Adding Length to the Sleeves: See the notes below for adding length.
Lengthening the Torso
Do you have a guy who has a longer than average torso? No worries, simply use this guide to make your custom length sweater!
Step 1: Work the waistband as written.
Step 2: Work the Body of Sweater as written. This is where you will add more length to the torso. Continue repeating Rnds 2 – 3, ending with a Round 3, until you’ve added the additional length you desire. Continue on to Front Upper Center Panel.
Lengthening Sleeves
The sleeves are worked in joined rows (rounds) from armhole to cuff. To lengthen the sleeves, simply repeat rounds 3 – 4, making sure to end with a RS round, until your sleeves are the desired length and then add the 3″ cuff.
Size & Yardage Chart
The notes above refer to this size chart.
| Size | Fits Chest | Finished Chest | Finished Length (without collar) | Yardage |
| XS | 32″ – 33″ | 35″ | 25″ | 1,450 yards |
| S | 34″ – 36″ | 38″ | 26″ | 1,550 yards |
| M | 38″ – 40″ | 42″ | 26-3/4″ | 1,650 yards |
| L | 42″ – 44″ | 46″ | 27-1/2″ | 1,850 yards |
| XL | 46″ – 48″ | 51″ | 28-1/4″ | 2,100 yards |
| 2XL | 50″ – 52″ | 54.5″ | 29″ | 2,300 yards |
| 3XL | 54″ – 56″ | 59″ | 30″ | 2,500 yards |
Yarn
This men’s crochet sweater was designed with a worsted weight yarn to make sure it would be warm enough to be worn on colder winter days. I chose not to use a bulky yarn for fear it would then be too thick to be worn in the transitioning months of autumn and spring (we want to get the most wear out of this everyday piece).
Lion Brand Wool-Ease is an excellent choice for this adult crochet poncho pattern. This is a worsted weight / 4, acrylic and wool blend yarn and it’s currently available in glitter, multi, prints, and frosts. This yarn offers a smooth even texture in a contemporary color palette with plenty of neutral tones.
Brentwood Crochet Shawl Collar Men’s Sweater – Free Pattern
The crochet mens sweater pattern is free below, but if you love to work offline, I’ve got a couple other great options for you.
Purchase the ad-free, printable PDF, (that includes all photo tutorials, + a garment schematic), on Ravelry, or on Etsy (aff).
Purchase the crochet sweater kit (aff): Lion Brand has a full kit of the Brentwood Men’s Crochet Pullover, available on their website. The crochet men’s sweater kit includes your choice of colors and a digital copy of the crochet pattern.
This post contains affiliate links.
Materials
- Yarn: Worsted Weight / 4 / Yarn, Lion Brand Wool-Ease [80% acrylic / 20% wool (197 yds / 180 m / 85 g / 3 oz)].
- Yardage: See Size Chart Above
- Crochet Hook: J/10/6.00mm; H/8/5.00mmor size needed to obtain gauge (My favorite crochet hooks are the Clover Amour Crochet Hooks, I’ve never had an ache in my hand since switching).
- Measuring Tape
- Locking Stitch Markers
- Scissors
- Yarn Needle
Abbreviations (US Terms)
- ch(s): chain(s)
- sl st(s): slip stitch(es)
- st(s): stitch(es)
- sp: space
- sc: single crochet
- hdc: half double crochet
- dc: double crochet
- sc2tog: single crochet decrease
- RS: right side
- WS: wrong side
- yo: yarn over
- Rep: repeat
- Rnd(s): round(s)
- SM: stitch marker
- beg: beginning
- yo: yarn over
- BLO/FLO: back loop only / front loop only
- Alt-dc: alternate double crochet
- Alt-dc2tog: alternate double crochet decrease
- Join yarn with a standing sc
Experience Level
- Easy / Intermediate
Gauge
- Waistband: 9 sts = 2.25″; 10 rows = 2.60″
- Sweater: In pattern stitch as written (6mm hook), 14.5 sts = 4”; 6 rows = 2.125″
Sizes
- Men’s Sizes XS through 3XL
- See Size & Yardage Chart above.
Special Stitches
- Double Crochet Decrease (dc2tog): (Yo, insert hook in next st, yo, pull up a loop, yo, pull thru 2 loops on hook) twice, yo, pull thru remaining 3 loops on hook.
- Alternate Double Crochet (Alt-dc): After turning your work, do not ch, instead, insert your hook into the first st, yo, pull up a loop, yo, pull thru both loops, insert your hook between the legs of the st just made, yo, pull up a loop, yo, pull thru one loop, yo, pull thru remaining loops.
- Alternate Double Crochet Decrease (Alt-dc2tog): After turning your work, do not ch, instead, insert your hook into the first st, yo, pull up a loop, yo, pull thru both loops, insert your hook between the legs of the st just made, yo, pull up a loop, yo, pull thru one loop, yo, insert your hook into the next st indicated, yo, pull up a loop, yo, pull through 2 loops, yo, pull through remaining 3 loops.
- Join yarn with a standing sc: When instructed to “Join yarn with a standing sc”, begin with a slip knot on your hook. Insert your hook into the stitch or space indicated, yo, pull up a loop, yo and draw thru both loops on hook.
- Half Double Crochet Decrease (hdc2tog): (yo, insert hook into next stitch, yo, pull up a loop) twice, yo, pull thru all remaining loops on your hook.
Pattern Notes
- I tend to crochet on the tighter side. You may need to go down a hook size (or two) to meet gauge if you crochet on the looser side.
- Turning chains are not included in stitch count.
- Yarn Notes: Lion Brand Yarns Wool-Ease (3.5 oz / 100 g / 246 yards / 225 m / 100% acrylic). Yarns similar in fiber content and weight can be substituted as long as gauge is met.
- Yardage: Please refer to the size chart above.
- Changes for sizes are written as follows: X-Small (Small, Medium, Large, X-Large, 2X-Large, 3X-Large
- Chains (for chain spaces) are included in stitch count.
- Construction Notes: This pullover is worked from the bottom up then split for front and back panels. After the panels are worked, the shoulders are seamed, then sleeves and collar are added.
Brentwood Crochet Shawl Collar Men’s Sweater – Written Pattern
Waistband
Hook: H/8/5.00mm
Row 1 (RS): Ch 10, hdc in 2nd ch from hook, hdc in each ch across. Turn. (9 sts)
Row 2: Ch 1, BLO sl st across. Turn. (9 sts)
Row 3: Ch 1, BLO hdc across. Turn. (9 sts)
Rows (4- 100) (4 – 112) (4 – 126) (4 – 140) (4 – 158) (4 – 172) (4 – 188): Repeat Rows 2 & 3, ending with a Row 2 repeat. With RS together, sl st Both Loops of Row 1 to BLO of the last row. (9 sts)
Turn RS out and continue on to the Body of Sweater.
Body of Sweater
Hook: J/10/6.00mm
Sizes (XS)
Rnd 1 (RS): Working into the sides of the rows of the waistband, ch 1, sc in each of the next 22 rows, (sc in each of the next 2 rows, 2 sc in the next row) 26 times. Join with a sl st to the 1st st. Turn. (126 sts)
Size (S)
Rnd 1 (RS): Working into the sides of the rows of the waistband, ch 1, sc in each of the next 8 rows, (sc in each of the next 3 rows, 2 sc in the next row) 26 times. Join with a sl st to the 1st st. Turn. (138 sts)
Size (M)
Rnd 1 (RS): Working into the sides of the rows of the waistband, ch 1, sc in each of the next 22 rows, (sc in each of the next 3 rows, 2 sc in the next row) 26 times. Join with a sl st to the 1st st. Turn. (152 sts)
Size (L)
Rnd 1 (RS): Working into the sides of the rows of the waistband, ch 1, sc in each of the next 10 rows, (sc in each of the next 4 rows, 2 sc in the next row) 26 times. Join with a sl st to the 1st st. Turn. (166 sts)
Size (XL)
Rnd 1 (RS): Working into the sides of the rows of the waistband, ch 1, sc in each of the next 2 rows, (sc in each of the next 5 rows, 2 sc in the next row) 26 times. Join with a sl st to the 1st st. Turn. (184 sts)
Size (2XL)
Rnd 1 (RS): Working into the sides of the rows of the waistband, ch 1, sc in each of the next 16 rows, (sc in each of the next 5 rows, 2 sc in the next row) 26 times. Join with a sl st to the 1st st. Turn. (198 sts)
Size (3XL)
Rnd 1 (RS): Working into the sides of the rows of the waistband, ch 1, sc in each of the next 6 rows, (sc in each of the next 6 rows, 2 sc in the next row) 26 times. Join with a sl st to the 1st st. Turn. (214 sts)
All Sizes
Rnd 2: Ch 1, sc in the first st, ch 1, skip the next st, (sc in the next st, ch 1, skip the next st) rep around. Join. Turn.
Rnd 3: Alt-dc in the first ch-1 sp, dc in each sc and ch-1 sp around. Join. Turn.
All Sizes: Rep Rnds 2 – 3, until work measures 16″ (17″, 17.75″, 17.5″, 18.25″, 18.25″, 19″), ending with a Rnd 3 rep.
Do not fasten off. Continue on to Front Upper Center Panel for the size you’re making.
Front Upper Center Panel
Note: Work the armhole shaping noted below, for the size pullover you’re making, then continue on to Row 1 of the Front Upper Center Panel.
X-Small Armhole Shaping: BLO sl st in each of the next 3 sts, then continue to Row 1 and work next 57 sts only. Skip 6 sts after Row 1 is complete, place a SM in 7th st to mark beg of back panel.
Small Armhole Shaping: BLO sl st in each of the next 4 sts, then continue to Row 1 and work next 61 sts only. Skip 8 sts after Row 1 is complete, place SM in 9th st to mark beg of back panel.
Medium Armhole Shaping: BLO sl st in each of the next 6 sts, then continue to Row 1 and work next 65 sts only. Skip 11 sts after Row 1 is complete, place SM in 12th st to mark beg of back panel.
Large Armhole Shaping: BLO sl st in each of the next 7 sts, then continue to Row 1 and work next 69 sts only. Skip 14 sts after Row 1 is complete, place SM in 15th st to mark beg of back panel.
XL Armhole Shaping: BLO sl st in each of the next 8 sts, then continue to Row 1 and work next 77 sts only. Skip 15 sts after Row 1 is complete, place SM in 16th st to mark beg of back panel.
2X Armhole Shaping: BLO sl st in each of the next 9 sts, then continue to Row 1 and work next 81 sts only. Skip 18 sts after Row 1 is complete, place SM in 19th st to mark beg of back panel.
3X Armhole Shaping: BLO sl st in each of the next 12 sts, then continue to Row 1 and work next 85 sts only. Skip 22 sts after Row 1 is complete, place SM in 23rd st to mark beg of back panel.
All Sizes
Row 1 (WS): Ch 1, sc in the first st, ch 1, skip the next st, (sc in the next st, ch 1, skip the next st) 27 (29, 31, 33, 37, 39, 41) times, sc in the next st. (57, 61, 65, 69, 77, 81, 85) sts *Before you turn to complete Row 2, skip 6 (8, 11, 14, 15, 18, 22) sts after Row 1 is complete, place a SM in 7 (9, 12, 15, 16, 19, 23) st to mark beginning of Back Panel. Turn to work Row 2.
Row 2 (RS): Alt-dc in the first st, dc in each of the next 56 (60, 64, 68, 76, 80, 84) sc and ch-1 sps. Turn.
Row 3: Ch 1, sc in the first st, ch 1, skip the next st, (sc in the next st, ch 1, skip the next st) 27 (29, 31, 33, 37, 39, 41) times, sc in the next st. Turn.
X-Small: Rows 4 – 8: Rep Rows 2 – 3, ending with a Row 2 rep. Upper Center Panel height should be 2.75″.
Small: Rows 4 – 8: Rep Rows 2 – 3, ending with a Row 2 rep. Upper Center Panel height should be 2.75″.
Medium: Rows 4 – 6: Rep Rows 2 – 3, ending with a Row 2 rep. Upper Center Panel height should be 2.125″.
Large: Rows 4 – 8: Rep Rows 2 – 3, ending with a Row 2 rep. Upper Center Panel height should be 2.75″.
XL: Row 4: Rep Row 2. Upper Center Panel height should be 1.5″.
2X: Rows 4 – 8: Rep Rows 2 – 3, ending with a Row 2 rep. Upper Center Panel height should be 2.75″.
3X: Rows 4 – 8: Rep Rows 2 – 3, ending with a Row 2 rep. Upper Center Panel height should be 2.75″.
Do not fasten off. Continue on to the Upper Right Panel for the size you’re making.
Upper Right Panel
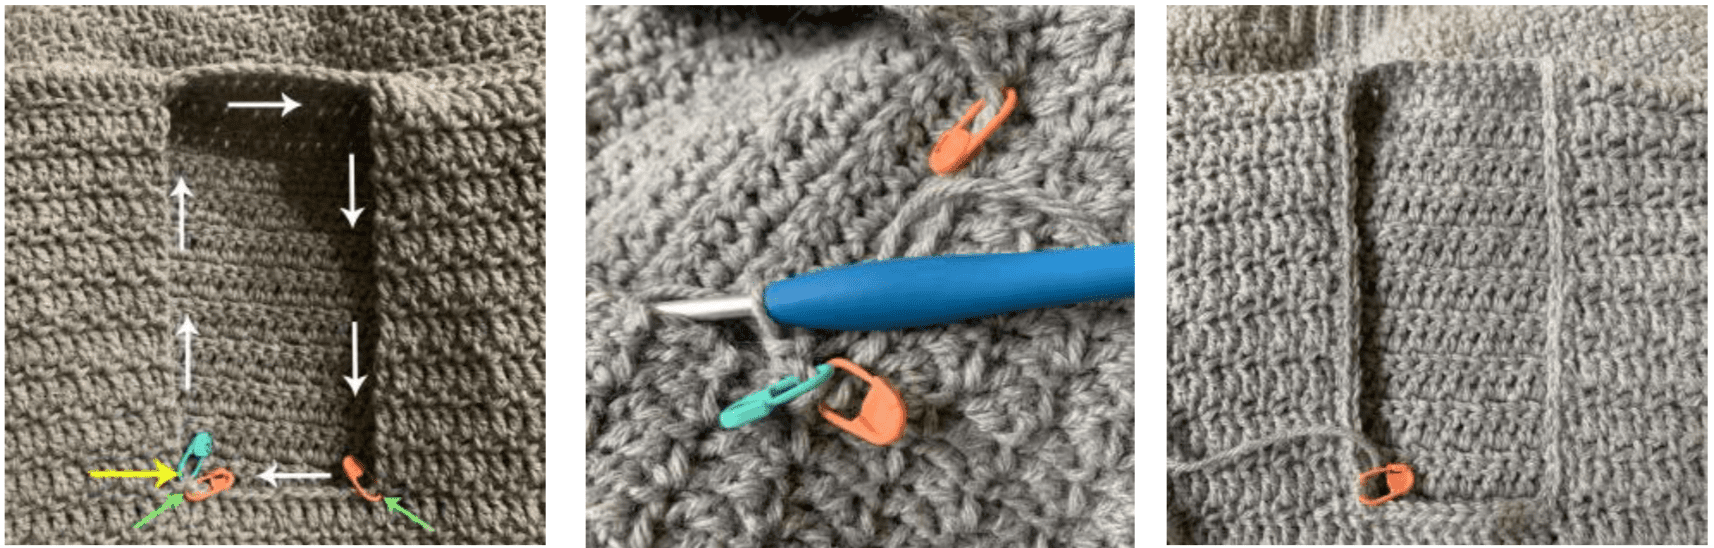
Row 1 (WS): Ch 1, sc in the first st, ch 1, skip the next st, (sc in the next st, ch 1, skip the next st) 10 (11, 12, 13, 15, 16, 17) times, sc in the next st. (23, 25, 27, 29, 33, 35, 37) sts *Before you turn to work Row 2, place a SM in the following (see photos below):
- Place a SM (orange on left) in the same st as the last sc worked in Row 1 to mark the last st of the Set-up round of the Collar.
- Place a SM (green on left) in the side of the last sc worked in Row 1 to mark the beg of the Set-up round of the Collar.
- Skip 11 sts after working Row 1, place a SM (orange on right) in the 12th st to mark the beg of the Upper Left Panel AND to also mark where you’ll place an additional st in the set-up of the collar (that will become the bottom left corner of the collar).
Turn to work Row 2.
Row 2 (RS): Alt-dc in the first st, dc in each of the next 22 (24, 26, 28, 32, 34, 36) sc and ch-1 sps. Turn.
Row 3: Ch 1, sc in the first st, ch 1, skip the next st, (sc in the next st, ch 1, skip the next st) 10 (11, 12, 13, 15, 16, 17) times, sc in the next st. Turn.
Rows 4 – 18 (18, 20, 20, 22, 22, 22): Rep Rows 2 – 3, ending with a row 2 rep. Fasten off. Weave in ends. Continue on to Upper Left Panel.
Upper Left Panel
Row 1 (WS): Join yarn with a sc in st with marker that marks the beginning of the upper left panel, ch 1, skip the next st, (sc in the next st, ch 1, skip the next st) 10 (11, 12, 13, 15, 16, 17) times, sc in the next st. Turn. (23, 25, 27, 29, 33, 35, 37) sts You should have a gap of 11 sts between the upper right & left panels.
Row 2 (RS): Alt-dc in the first st, dc in each of the next 22 (24, 26, 28, 32, 34, 36) sc and ch-1 sps. Turn.
Row 3: Ch 1, sc in the first st, ch 1, skip the next st, (sc in the next st, ch 1, skip the next st) 10 (11, 12, 13, 15, 16, 17) times, sc in the next st. Turn.
Rows 4 – 18 (18, 20, 20, 22, 22, 22): Rep Rows 2 – 3, ending with a row 2 rep.
Fasten off. Weave in ends. Continue on to Back Panel.
Back Panel
Row 1 (WS): Join yarn w/ a sc in st with st marker for back panel, ch 1, skip the next st, (sc in the next st, ch 1, skip the next st) 27 (29, 31, 33, 37, 39, 41) times, sc in the next st. (57, 61, 65, 69, 77, 81, 85) sts
Row 2 (RS): Alt-dc in the first st, dc in each of the next 56 (60, 64, 68, 76, 80, 84) sc and ch-1 sps. Turn.
Row 3: Ch 1, sc in the first st, ch 1, skip the next st, (sc in the next st, ch 1, skip the next st) 27 (29, 31, 33, 37, 39, 41) times, sc in the next st. Turn.
Rows 4 – 26 (26, 26, 28, 28, 30, 30): Rep Rows 2 – 3, ending with a row 2 rep.
Fasten off. Weave in ends. Continue to Shoulder Seams.
Shoulder Seams
Turn sweater inside out. Line up the outer corners of the back panel with the outer corners of the front panels. Using a tapestry needle and yarn, whipstitch each stitch of the front panel to the back panel. Weave in ends. Turn sweater right side out. Continue on to Collar on the next page.
Collar
Gauge: With a 5.00mm hook, in BLO hdc: 12.5 sts = 3″; 9 rows = 3″
Note: When working a hdc2tog in the last st of a row and into the next st along the edge of the neck opening, work thru BOTH loops along the edge of the neck opening.
Set up Round: With RS facing you & using a H/8/5.00mm hook, join yarn with a sc in the side of the sc marked for beginning the collar (yellow arrow), work 2 sc into the side of each dc row and work 1 sc into the side of each sc row up the side of the neck opening until you reach the back of the neck, work 1 sc into each of the 11 sts across the back of the neck opening, rotate to work down the opposite side, work 2 sc into the side of each dc row and work 1 sc into the side of each sc row down the side of the neck opening, work 1 sc into the st marked with a SM (green arrow right), sc in each of the 11 sts across the bottom of the neck opening, work last 1 last sc into the st marked with a SM (green arrow left). Join. (78, 78, 84, 84, 90, 90, 90 sts)
Collar Sizes X-Small & Small
Row 1: Turn sweater inside out, ch 1, turn, FLO hdc in next 12 sts long the bottom of the neck opening, hdc2tog in next st and next st along edge of neck opening. (13 sts)
Row 2: Sl st in next st along edge of neck opening, turn, BLO hdc across. (13 sts)
Row 3: Ch 1, turn, BLO hdc in next 12 sts, hdc2tog in next st and next st along edge of neck opening. (13 sts)
Rows 4 – 5: Rep Rows 2 & 3. (13 sts)
Row 6: Sl st in next st along edge of neck opening, turn, BLO hdc in next 12 sts, 2 hdc in last st. (14 sts)
Row 7: Ch 1, turn, BLO hdc in next 13 sts, hdc2tog in next st and next st along edge of neck opening. (14 sts)
Row 8: Sl st in next st along edge of neck opening, turn, BLO hdc in next 13 sts, 2 hdc in last st. (15 sts)
Row 9: Ch 1, turn, BLO hdc in next 14 sts, hdc2tog in next st and next st along edge of neck opening. (15 sts)
Row 10: Sl st in next st along edge of neck opening, turn, BLO hdc in next 14 sts, 2 hdc in last st. (16 sts)
Row 11: Ch 1, turn, BLO hdc in next 15 sts, hdc2tog in next st and next st along edge of neck opening. (16 sts)
Row 12: Sl st in next st along edge of neck opening, turn, BLO hdc across. (16 sts)
Row 13: Ch 1, turn, BLO hdc in next 15 sts, hdc2tog in next st and next st along edge of neck opening. (16 sts)
Rows 14 – 54: Rep Rows 12 & 13, ending with a Row 12 Rep. (16 sts)
Row 55: Ch 1, turn, BLO hdc2tog, hdc in next 13 sts, hdc2tog in next st and next st along edge of neck opening. (15 sts)
Row 56: Sl st in next st along edge of neck opening, turn, BLO hdc across. (15 sts)
Row 57: Ch 1, turn, BLO hdc2tog, hdc in next 12 sts, hdc2tog in next st and next st along edge of neck opening. (14 sts)
Row 58: Sl st in next st along edge of neck opening, turn, BLO hdc across. (14 sts)
Row 59: Ch 1, turn, BLO hdc2tog, hdc in next 11 sts, hdc2tog in next st and next st along edge of neck opening. (13 sts)
Row 60: Sl st in next st along edge of neck opening, turn, BLO hdc across. (13 sts)
Row 61: Ch 1, turn, BLO hdc in next 12 sts, hdc2tog in next st and next st along edge of neck opening. (13 sts)
Row 62: Sl st in next st along edge of neck opening, turn, BLO hdc across. (13 sts)
Rows 63 – 65: Rep Rows 61 & 62, ending with a Row 61 rep. (13 sts)
Fasten off leaving an 8” tail. Continue on to Finishing Collar.
Collar Sizes Medium & Large
Row 1: Turn sweater inside out, ch 1, turn, FLO hdc in next 12 sts long the bottom of the neck opening, hdc2tog in next st and next st along edge of neck opening. (13 sts)
Row 2: Sl st in next st along edge of neck opening, turn, BLO hdc across. (13 sts)
Row 3: Ch 1, turn, BLO hdc in next 12 sts, hdc2tog in next st and next st along edge of neck opening. (13 sts)
Rows 4 – 5: Rep Rows 2 & 3. (13 sts)
Row 6: Sl st in next st along edge of neck opening, turn, BLO hdc in next 12 sts, 2 hdc in last st. (14 sts)
Row 7: Ch 1, turn, BLO hdc in next 13 sts, hdc2tog in next st and next st along edge of neck opening. (14 sts)
Row8: Sl st in next st along edge of neck opening, turn, BLO hdc in next 13 sts, 2 hdc in last st. (15 sts)
Row 9: Ch 1, turn, BLO hdc in next 14 sts, hdc2tog in next st and next st along edge of neck opening. (15 sts)
Row 10: Sl st in next st along edge of neck opening, turn, BLO hdc in next 14 sts, 2 hdc in last st. (16 sts)
Row11: Ch1, turn, BLO hdc in next 15 sts, hdc2tog in next stand next st along edge of neck opening. (16sts)
Row 12: Sl st in next st along edge of neck opening, turn, BLO hdc across. (16 sts)
Row 13: Ch 1, turn, BLO hdc in next 15 sts, hdc2tog in next st and next st along edge of neck opening. (16 sts)
Rows 14 – 60: Rep Rows 12 & 13, ending with a Row 12 Rep. (16 sts)
Row 61: Ch 1, turn, BLO hdc2tog, hdc in next 13 sts, hdc2tog in next st and next st along edge of neck opening. (15 sts)
Row 62: Sl st in next st along edge of neck opening, turn, BLO hdc across. (15 sts)
Row 63: Ch 1, turn, BLO hdc2tog, hdc in next 12 sts, hdc2tog in next st and next st along edge of neck opening. (14 sts)
Row 64: Sl st in next st along edge of neck opening, turn, BLO hdc across. (14 sts)
Row 65: Ch 1, turn, BLO hdc2tog, hdc in next 11 sts, hdc2tog in next st and next st along edge of neck opening. (13 sts)
Row 66: Sl st in next st along edge of neck opening, turn, BLO hdc across. (13 sts)
Row 67: Ch 1, turn, BLO hdc in next 12 sts, hdc2tog in next st and next st along edge of neck opening. (13 sts)
Row 68: Sl st in next st along edge of neck opening, turn, BLO hdc across. (13 sts)
Rows 69 – 71: Rep Rows 67 & 68, ending with a Row 67 rep. (13 sts)
Fasten off leaving an 8” tail. Continue on to Finishing Collar.
Collar Sizes X-Large, 2XL, 3XL
Row 1: Turn sweater inside out, ch 1, turn, FLO hdc in next 12 sts long the bottom of the neck opening, hdc2tog in next st and next st along edge of neck opening. (13 sts)
Row 2: Sl st in next st along edge of neck opening, turn, BLO hdc across. (13 sts)
Row 3: Ch 1, turn, BLO hdc in next 12 sts, hdc2tog in next st and next st along edge of neck opening. (13 sts)
Row 4: Sl st in next st along edge of neck opening, turn, BLO hdc in next 11 sts, 2 hdc in each of the last 2 sts. (15 sts)
Row 5: Ch 1, turn, BLO hdc in next 14 sts, hdc2tog in next st and next st along edge of neck opening. (15 sts)
Row 6: Sl st in next st along edge of neck opening, turn, BLO hdc in next 14 sts, 2 hdc in last st. (16 sts)
Row 7: Ch 1, turn, BLO hdc in next 15 sts, hdc2tog in next st and next st along edge of neck opening. (16 sts)
Row 8: Sl st in next st along edge of neck opening, turn, BLO hdc in next 15 sts, 2 hdc in last st. (17 sts)
Row 9: Ch 1, turn, BLO hdc in next 16 sts, hdc2tog in next st and next st along edge of neck opening. (17 sts)
Row 10: Sl st in next st along edge of neck opening, turn, BLO hdc in next 16 sts, 2 hdc in last st. (18 sts)
Row 11: Ch 1, turn, BLO hdc in next 17 sts, hdc2tog in next st and next st along edge of neck opening. (18 sts)
Row 12: Sl st in next st along edge of neck opening, turn, BLO hdc across. (18 sts)
Row 13: Ch 1, turn, BLO hdc in next 17 sts, hdc2tog in next st and next st along edge of neck opening. (18 sts)
Rows 14 – 66: Rep Rows 12 & 13, ending with a Row 12 Rep. (18 sts)
Row 67: Ch 1, turn, BLO hdc2tog, hdc in next 15 sts, hdc2tog in next st and next st along edge of neck opening. (17 sts)
Row 68: Sl st in next st along edge of neck opening, turn, BLO hdc across. (17 sts)
Row 69: Ch 1, turn, BLO hdc2tog, hdc in next 14 sts, hdc2tog in next st and next st along edge of neck opening. (16 sts)
Row 70: Sl st in next st along edge of neck opening, turn, BLO hdc across. (16 sts)
Row 71: Ch 1, turn, BLO hdc2tog, hdc in next 13 sts, hdc2tog in next st and next st along edge of neck opening. (15 sts)
Row 72: Sl st in next st along edge of neck opening, turn, BLO hdc across. (15 sts)
Row 73: Ch 1, turn, BLO (hdc2tog) twice, hdc in next 10 sts, hdc2tog in next st and next st along edge of neck opening. (13 sts)
Row 74: Sl st in next st along edge of neck opening, turn, BLO hdc across. (13 sts)
Row 75: Ch 1, turn, BLO hdc in next 12 sts, hdc2tog in next st and next st along edge of neck opening. (13 sts)
Row 76: Sl st in next st along edge of neck opening, turn, BLO hdc across. (13 sts)
Row 77: Rep Row 75. (13 sts)
Fasten off leaving an 8” tail. Continue on to Finishing Collar.
Finishing Collar
Turn sweater RS out. Line up the last row of the collar with the remaining loops of Row 1 of the collar. Whipstitch the last row to the remaining loops of Row 1. Weave in ends. Continue on to Sleeves.
Sleeves
Sizes XS, S, L, 2XL, 3XL
Rnd 1 (RS): With a 5mm crochet hook, join yarn nearest the center of the bottom of the armhole opening, ch 1, work 1 sc into the side of each sc, 2 sc into the side of each dc. Join with a sl st to the 1st st. Do not turn. (84, 86, 98, 108, 112 sts)
Sizes M & XL
Rnd 1 (RS): With a 5mm crochet hook, join yarn nearest the center of the bottom of the armhole opening, ch 1, sc2tog, then work 1 sc into the side of each sc, 2 sc into the side of each dc and 1 sc in each sc. Join with a sl st to the 1st st. Do not turn. (88, 98 sts)
All Sizes
Rnd 2 (RS): Switch to a 6.00mm crochet hook, ch 1, sc in the first st, sc in each of the next 3 (5, 7, 17, 17, 7, 11) sts, (sc2tog, sc in each of the next 2 (2, 2, 2, 2, 3, 3) sts) rep from ( to ) around. Join. Do not turn. (64, 66, 68, 78, 78, 88, 92 sts)
Rnd 3 (RS): Alt-dc in the first st, dc in each sc around. Join. Turn.
Rnd 4 (WS): Ch 1, sc in the first st, ch 1, skip the next st, (sc in the next st, ch 1, skip the next st) rep from ( to ) around. Join. Turn.
Rnd 5: Alt-dc2tog over the first 2 sts, dc in each st around to the last 2 sts, dc2tog. Join. Turn. (62, 64, 66, 76, 76, 86, 90 sts)
Rnd 6: Ch 1, sc in the first st, ch 1, skip the next st, (sc in the next st, ch 1, skip the next st) rep from ( to ) around. Join. Turn.
Rnds 7 – 14: Repeat Rnds 5 – 6. (54, 56, 58, 68, 68, 78, 82 sts)
Rnds 15 – 18: Repeat Rnds 3 – 4.
Rnds 19 – 28: Repeat Rnds 5 – 6. (44, 46, 48, 58, 58, 68, 72 sts)
Rnds 29 – 32: Repeat Rnds 3 – 4.
Rnds 33 – 40: Repeat Rnds 5 – 6. (36, 38, 40, 50, 50, 60, 64 sts)
Sizes (XS, S, M)
Repeat Rnds 3 – 4, ending with a round 3 repeat, until sleeve measures (19″, 19-1/2″, 20″), or desired length, measured along the underarm. Do not turn at the end of the last round. Do not fasten off. Continue on to Cuff.
Sizes (L, XL, 2X, 3X)
Rnds 41 – 44: Repeat Rnds 3 – 4.
Rnds 45 – 52: Repeat Rnds 5 – 6. (42, 42, 52, 56 sts)
Repeat Rnds 3 – 4, ending with a round 3 repeat, until sleeve measures (21″, 21-1/2″, 22″, 23″), or desired length, measured along the underarm. Do not turn at the end of the last round. Do not fasten off. Continue on to Cuff.
Cuff
Gauge: With a 6.00mm hook, in stitch pattern as written below: 8 sts = 2″; 10 rows = 2″
Row 1 (RS): Ch 15, working into the back hump of the foundation ch, sc in the 2nd ch from your hook, sc in next 12 chs, sc2tog in next ch and same st as ch 15. (14 sts)
Row 2: Sl st in next st along edge of sleeve, turn, BLO sl st across. (14 sts)
Row 3: Ch 1, turn, BLO, sc in next 13 sts, sc2tog in next st and next st along edge of sleeve. (14 sts)
Repeat Rows 2 – 3, ending with a row 3, around circumference of the sleeve.
Last Row (cuff seam): Sl st in next st along edge of sleeve, turn, line up last row with Row 1, holding working yarn on the inside of the cuff sl st FLO of 1st row to BLO of last row across. (14 sts)
Note: If you want to know a couple of stitch patterns and techniques I use regularly when it comes to adding a stretchy knit-look ribbed band or cuff, check this post.
Fasten off. Weave in ends. Repeat Sleeve and Cuff for opposite sleeve then weave in all ends. Blocking isn’t mandatory, but it does add a nice finished look to crochet wearables.
I MADE IT! NOW WHAT?
Pin this post!: Save this crochet men’s sweater pattern to your Pinterest boards so that you can come back and make it again.
Leave a comment below: We love to hear your feedback.
Share Your Finished Projects on Facebook or Instagram: I love to see your finished projects! Share with us on social media and tag me @acrochetedsimplicity or use the hashtag #ACrochetedSimplicity so I can find your posts.
Join us in the Facebook Community Group!
Come share your finished projects with us in the A Crocheted Simplicity Crochet Community Group on Facebook. Join us for fun community events such as crochet alongs, join in on crochet conversations, ask questions, get advice, and share your love for crochet!

THANK YOU! This is exactly what I have been looking for and I had actually saved this design in your Etsy store!
You’re welcome!
Is this pattern true to size
Hi Sonia,
I use the Craft Yarn Councils’ size charts when sizing all of my garment patterns. There size chart is in alignment with standard sizing of clothing you’ll find in the stores.
Jennifer
Took me nearly a year, but I’m FINALLY on the second sleeve. This pattern is beautiful
Jennifer is so helpful! I had a question about one of the steps in this pattern. I emailed her and she wrote back that same day! This is working up beautifully and will be a great father-in-law (sort of) christmas present this year!!!
Hi! I was wondering which stitch you used for the gauge?
Hi,
For the waistband, complete a few rows of the waistband to check gauge. For the Body of Sweater, the gauge is in the pattern stitch as written. So check Rnds 2 & 3 under Body of Sweater.
Please let me know if you have additional questions.
Happy Crocheteing,
Jennifer
this is one of my favorite designs by you and been on my makes list for a while. Maybe 2024 will be the year it gets completed!!
My dad loved this sweater. Thank you for a brilliant pattern.
Thank you for sharing such a great pattern! I really like the style of this sweater and appreciate your creativity in designing it! Thanks for sharing!
2024 is the year I finally make a sweater for my hubby. This looks like the perfect pattern.
This is a beautiful pattern! Thanks for publishing men’s crochet sweater patterns!
On the XL one side arm hole is 8 back loop slip stitches and the other side is 15 skipped stitches, will this give an even sleeves? I would hate to have to pull all of the collar, back panel, and front panel.
Hi Sara,
When you get to the Back Panel, you’ll see that it does not go all the way to the seam. You will leave additional stitches unworked and the armhole will be even.
Happy Crocheting,
Jennifer
Beautiful pattern! I’ve made 3 for my hubby in different colors and he loves them all! Now he wants a kangaroo pocket on the newest one. 🤔 I guess I’ll need to figure that out.
Thank you for sharing this pattern!
Hi Cindy,
I’m so glad to hear that your hubby loves his sweaters!
Happy Crocheting,
Jennifer
Hi Jennifer,
I have a question about the body of the sweater. When you say to repeat the rounds until the work measures a certain amount, does that measurement include the waistband?
Thanks for your help!
Hi Megan,
Yes, this measurement does include the waistband. 🙂
Happy Crocheting,
Jennifer
Thank you!
I don’t know how to describe my question perfectly, so please let me know if you need more information, or photos.
When working on the “front upper center panel”, the ends of the odd numbered rows have us crochet across in the pattern then “sc in next stitch”. Is this next stitch supposed to be the last stitch worked in the previous row, creating a 90 degree angle with 9 stitches skipped before the back panel? Or is the next stitch supposed to be one of the unworked 9, creating a curved join between the back panel? This is my first time making a sweater, sorry if the answer seems obvious! Thank you!
Hi Lara,
The last stitch of the row will be worked into the last stitch of the previous row. You’ll have a 90 degree angle.
Jennifer
Thank you so much! This is my first time making a sweater, and your pattern is working up beautifully. I’m onto the cuffs now, and have one more question. At the ends of the odd numbered rows, are we sc2tog in the back loop like the rest of the row? or in both loops?
Hi , is the front and back panel suppose to align perfectly ? as my front panel is a bit longer than the back ?
love the pattern thanks
Hi Minnie,
If you are making the size XL, your back panel will be two rows taller than your front (this was to adjust the neck opening). All other sizes should have the same number of rows for the front and back panels.
Let me know if you have anymore questions.
Jennifer