Kitty Cat Hand Towel – Free Crochet Towel Pattern
Welcome to the Black Cat Crochet Along!! A Crocheted Simplicity and Blackstone Designs are working together again to bring you another fun, crochet along. The theme of this crochet along (as you may have already guessed), is Black Cat. Because Sonya and I have had so much fun coming up with coordinating designs in past, themed crochet alongs, we decided it would be fun to continue tradition! We have both come up with a fun new design that will add a little black cat decor to your home this Halloween. Both new crochet projects are small enough for you to complete in less than a weekend.
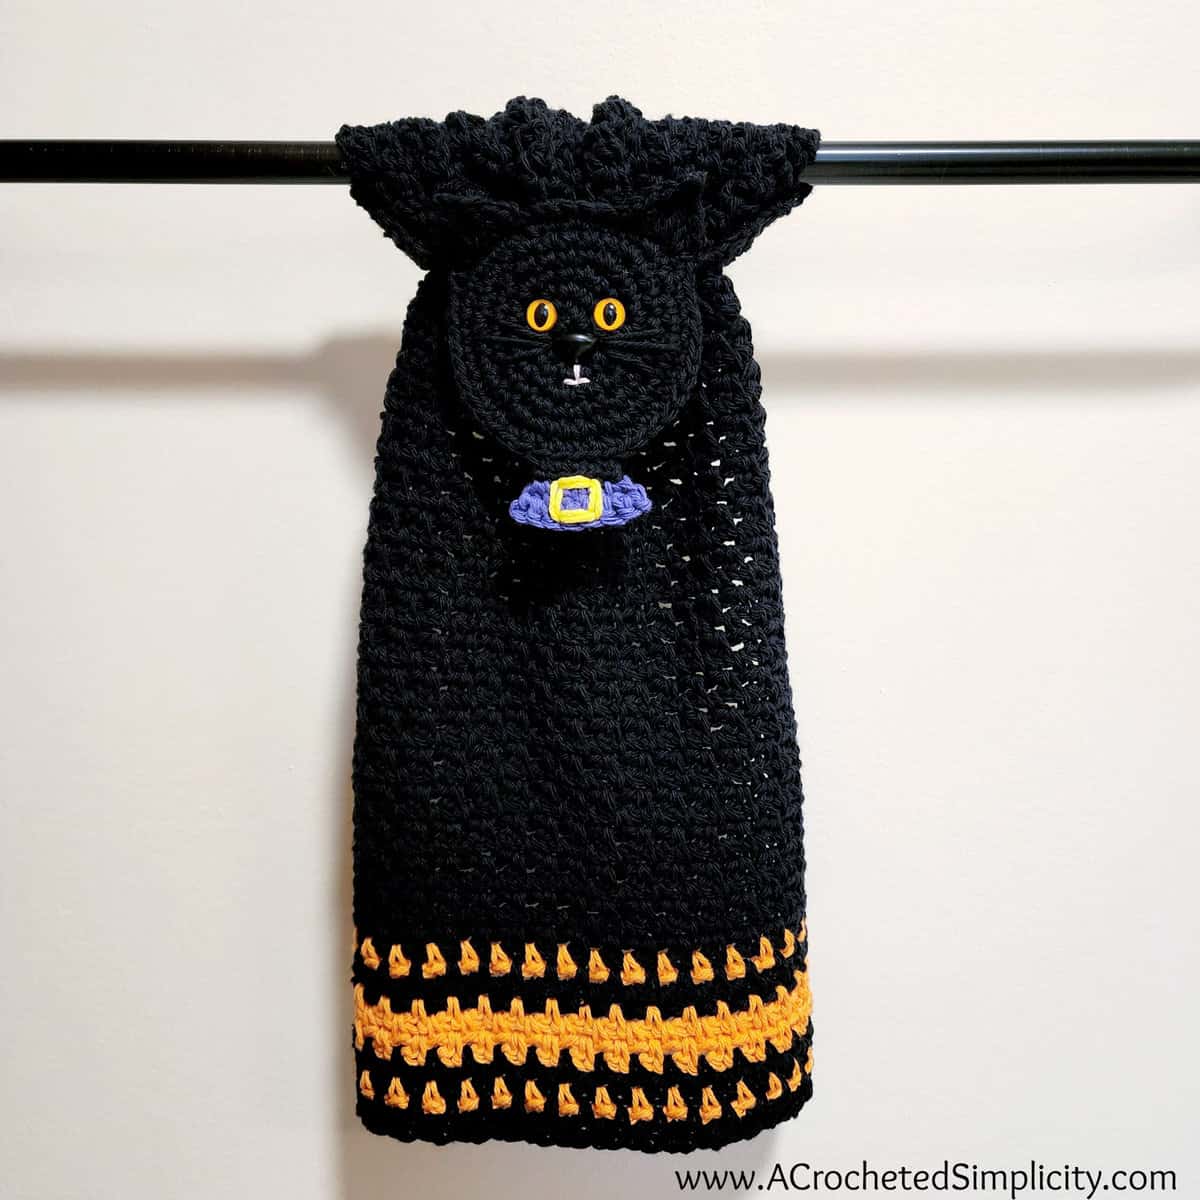
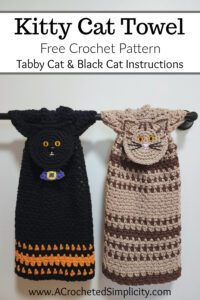
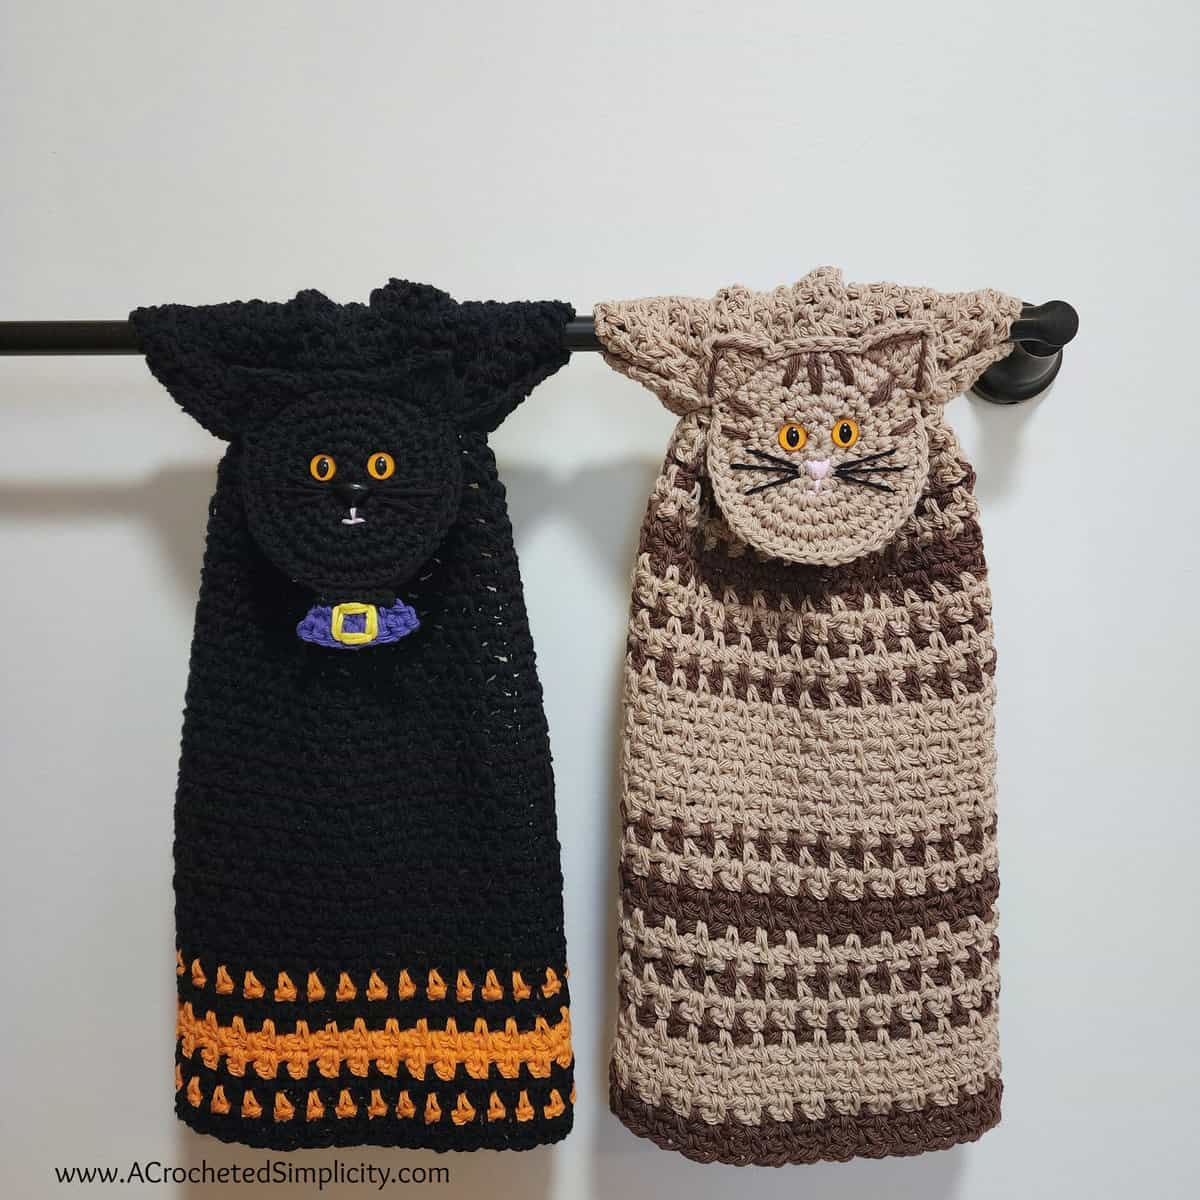
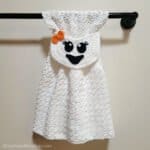
The Kitty Cat Hand Towel Crochet Pattern includes instructions for two versions, a black cat and a striped tabby cat.
You can find the free crochet pattern for the Kitty Cat Hand Towel in this post below, or an ad-free print friendly version on Love Crafts here, Ravelry here, or on Etsy here.
>Click HERE to sign-up to receive our newsletter!<
Find all the Black Cat Crochet Along Info HERE.
Come crochet along with us from September 9 – 15, 2022 and you’ll have the chance to win a free pattern from each participating designer, (1) of 2 yarn prizes, AND you’ll also have the chance to win a $25 Amazon Gift Card!
Crochet Character Keyhole Towels
Since designing my first crochet Christmas towel, I’ve received requests for all sorts of characters for the different holidays. The following are the character keyhole towels I’ve designed to date. They can all be found on my blog by clicking the links below:
- Ghost Kitchen Towel
- Frankenstein’s Monster Kitchen Towel
- Kitty Cat Kitchen Towel – in this blog post below!
- Turkey Kitchen Towel
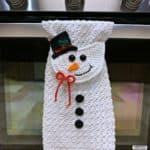
- Snowman Kitchen Towel
- Gingerbread Man Kitchen Towel
- Santa Kitchen Towel
- Mrs. Claus Kitchen Towel
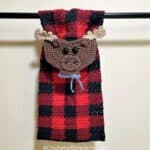
- Reindeer Kitchen Towel
- Elf Kitchen Towel
- Buffalo Plaid Moose Kitchen Towel
- Leprechaun Kitchen Towel
- Easter Bunny Towel & Washcloth Set
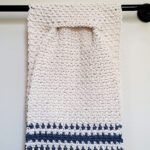
Non-Character Crochet Stay Put / Keyhole Towels
I’ve also designed several other crochet kitchen towels that are not characters.
You’ll find a variety of styles to match your home. Styles range from buffalo plaid to farmhouse to basic keyhole towel patterns that you can customize to match your home’s decor.
You can find all non-character keyhole towel patterns here: Free Crochet Kitchen Towel Patterns
YARN
Cotton is the go-to fiber for crochet dish cloths, dish towels, and hand towels as it’s the most absorbent. There are several cotton yarns out there that would be perfect for this project, but I chose to use Lily Sugar n’ Cream 100% worsted weight cotton yarn. Lily Sugar n’ Cream is available in 39 colors so I was able to find the perfect colors I needed for this project within the same yarn line.
KITTY CAT HAND TOWEL – FREE CROCHET TOWEL PATTERN
The free pattern is below, but if you love to work offline, or need to order your yarn, I’ve got a couple other great options for you.
Purchase the ad-free, printable PDF that includes all photo tutorials, on Love Crafts here, Ravelry here, or Etsy here.
Save this pattern to your Ravelry favorites here.
Pin it for later here.
This post contains affiliate links.
Materials
- Yarn: Yarn I used for my sample is Lily Sugar n’ Cream; 4 / Worsted Weight Cotton Yarn; (100% cotton / 120 yards / 70.9 g / 109 m / 2.5 oz )
- Black Cat Version
- Black (MC): 160 yards
- Orange (CC1): 30 yard
- Purple (CC2): 1 yard
- Yellow: 18″
- Light Pink: 8″
- White: 18″ (for crocheted eyes only)
- Striped Tabby Cat Version
- Jute – Medium Brown (MC): 150 yards
- Dark Brown (CC): 50 yards
- Light Pink: 1 yard
- Black: 1 yard (for whiskers only)
- Black Cat Version
- Crochet Hooks: H/8/5.0mm; J/10/6.00mm; G/6/4.00mm (my favorite hooks are Clover Amour Hooks, I’ve never had an ache in my hand since switching)
- Measuring Tape
- Scrap of yarn to use as a stitch marker
- Scissors
- Tapestry Needle
- (2) 12mm Plastic Safety Cat Eyes (optional – alternative provided)
- (1) Plastic Safety Animal Nose (18mm) (optional – alternative provided);
Many of the materials are available for purchase through our affiliates:
 Lily Sugar 'N Cream Super S...Shop on Amazon
  Clover 1047/H Deep Blue Amo...Shop on Amazon
  Fiskars All Purpose Scissor...Shop on Amazon
  Lion Brand Yarn 400-5-5002 ...Shop on Amazon
Abbreviations (US Terms)
- ch(s): chain
- sl st(s): slip stitch(es)
- st(s): stitch(es)
- sc: single crochet
- hdc: half double crochet
- dc: double crochet
- tr: treble crochet
- sp: space
- RS: right side
- Rnd: round
- Rep: repeat
- MC: Main Color
- CC: Contrasting Color
Gauge
- Cat’s Head: 4″ across (not including ears)
- Towel in linen stitch with a 6.00mm hook: (sc in next, ch 1, skip next): 11 sts = 3″; 11 rows = 3″
Size
- One Size: 11.5″ W x 16.5″ L (not including the cat’s head)
Notes
- Turning chains are not counted as a stitch or included in stitch count.
- The first stitch of each row is worked into the same stitch as the turning chain, unless stated otherwise.
- I tend to crochet on the tighter side. You may find yourself needing to go down a hook size (or two) to properly meet gauge, but gauge isn’t critical for this project.
- Yarn Notes: Lily Sugar n’ Cream worsted weight cotton yarn was used for the sample, 100% Cotton (120 yards / 109 m / 71 g / 2.5 oz).
- Yardage
- Black Cat Version
- Black (MC): 160 yards
- Orange (CC1): 30 yard
- Purple (CC2): 1 yard
- Yellow: 18″
- Light Pink: 8″
- White: 18″ (for crocheted eyes only)
- Striped Tabby Cat Version
- Jute – Medium Brown (MC): 150 yards
- Dark Brown (CC): 50 yards
- Light Pink: 1 yard
- Black: 1 yard (for whiskers only)
- Black Cat Version
- This hand towel is constructed by first crocheting the cat’s head. You’ll then create a keyhole and begin working the body of towel in rows. The keyhole is how the towel is secured when hanging. Facial features will be added to complete your towel.
Kitty Cat Hand Towel Instructions
Black Cat Version:
- First, complete the Cat’s Head.
- Next, work the Body of Towel for the Black Cat.
- Lastly, complete the facial features for the Black Cat.
Tabby Cat Version:
- First, complete the Cat’s Head.
- Next, work the Body of Towel for the Striped Tabby Cat.
- Lastly, complete the facial features for the Striped Tabby Cat.
Note: The cat’s head is worked in continuous rounds to keep from having an unsightly seam. Do not join at the end of each round, instead use a scrap piece of yarn to keep track of the beginning of each round. Move the scrap of yarn up as you complete each round.
Center of Cat’s Head (Make 2)
Rnd 1 (RS): With MC yarn & a 5.00mm crochet hook, ch 2, work 6 sc into the 2nd ch from your hook. (6 sts)
Rnd 2: 2 sc in each st around. (12 sts)
Rnd 3: * 2 sc in the next st, sc in the next st, rep from * around. (18 sts)
Rnd 4: * 2 sc in the next st, sc in each of the next 2 sts, rep from * around. (24 sts)
Rnd 5: * 2 sc in the next st, sc in each of the next 3 sts, rep from * around. (30 sts)
Rnd 6: * 2 sc in the next st, sc in each of the next 4 sts, rep from * around. (36 sts)
Center of Cat’s Head #1: Fasten off. Weave in ends. Continue on to make Center of Cat’s Head #2.
Center of Cat’s Head #2: Do not fasten off. Continue on to Joining the Centers.
Joining the Centers
Rnd 1: Lay Center #2 on top of Center #1, join the 2 centers by working into the stitches from Rnd 6 from both centers, work the following: *2 sc in the next st, sc in each of the next 5 sts, rep from * around. Join with a sl st to the 1st st. (42 sts)
Do not fasten off. Continue on to the Cat Ears.
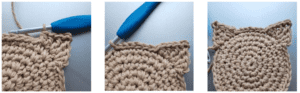
Cat Ears
Rnd 1: Ch 1, (hdc, dc) in the first st, (tr, ch 2, sl st in the 1st ch, tr) in the next st, (dc, hdc) in the next st, sl st in each of the next 7 sts, ch 1, (hdc, dc) in the next st , (tr, ch 2, sl st in the 1st ch, tr) in the next st, (dc, hdc, sl st) in the next st, ch 32, turn, sl st to join the ch 32 to the sl st join from the previous rnd. Turn. See photos below. (2 ears)
Do not fasten off. Continue on to the Body of Towel for either the Black Cat or Striped Tabby Cat.
Body of Towel for Black Cat
Changing Colors: For all color changes, you’ll change colors on the last pull through of the last stitch of the row.
Row 1: Continuing on from the Cat’s Ears, with MC yarn and a 5.00mm crochet hook, ch 1, working into the back hump of the foundation chain, (2 sc into the next ch, sc in each of the next 3 chs) 7 times, 2 sc in the next ch, sc in each of the next 2 chs, 2 sc in the last ch. Turn. (41 sts)
Row 2: Switch to a 6.00mm crochet hook, ch 1, sc in the first st, (ch 1, skip the next st, sc in the next st), rep from ( to ) across. Turn.
Row 3: Ch 1, sc in the first st, sc in the next ch-1 sp, (ch 1, skip the next st, sc in the next ch-1 sp) rep from ( to ) across to the last st, sc in the last st. Turn.
With MC yarn, repeat Rows 2 – 3, ending with a row 3 repeat, until your Body of Towel measures 14″ (from Row 1 of Body of Towel). *Switch colors to CC yarn then complete the Striped Section.
Note: If your towel bar is thicker (the towel bar in my bathroom is pretty narrow), you may want to add another 1″ – 2″ to the Body of Towel before you move on to the Black Cat Striped Section.
Black Cat Striped Section
Row 1: With CC yarn, ch 1, sc in the first st, (ch 1, skip the next st, sc in the next st), rep from ( to ) across. Turn. *Switch colors to MC yarn.
Row 2: With MC yarn, ch 1, sc in the first st, sc in the next ch-1 sp, (ch 1, skip the next st, sc in the next ch-1 sp) rep from ( to ) across to the last st, sc in the last st. Turn.
Row 3: With MC yarn, Rep Row 1. *Switch colors to CC yarn.
Row 4: With CC yarn, Rep Row 2.
Row 5: With CC yarn, Rep Row 1.
Row 6: With CC yarn, Rep Row 2. *Switch colors to MC yarn.
Rows 7 – 8: With MC yarn, Rep Rows 1 – 2. *Switch colors to CC yarn.
Row 9: With CC yarn, Rep Row 1. *Switch colors to MC yarn.
Row 10: With MC yarn, Rep Row 2.
Row 11: With MC yarn, Rep Row 1.
Fasten off. Weave in ends. Continue on to the Neck.
Neck
First, use stitch markers to mark the centermost 5 sts at the bottom of the cat’s head.
Row 1 (RS): With 5.00mm crochet hook and MC yarn, join yarn with a standing sc in the BLO of the st marked with SM to the right, BLO sc in each of the next 4 sts. (5 sts)
Fasten off. Continue on to the Collar.
Collar
Row 1 (RS): With 5.00 mm crochet hook and CC2 yarn, join yarn with a standing sc in the BLO of the 1st st of Row 1 of the neck, BLO sc in the same st, BLO sc in each st across to the last st, BLO 2 sc in the last st. Turn. (7 sts)
Row 2: Ch 1, sc in each st across.
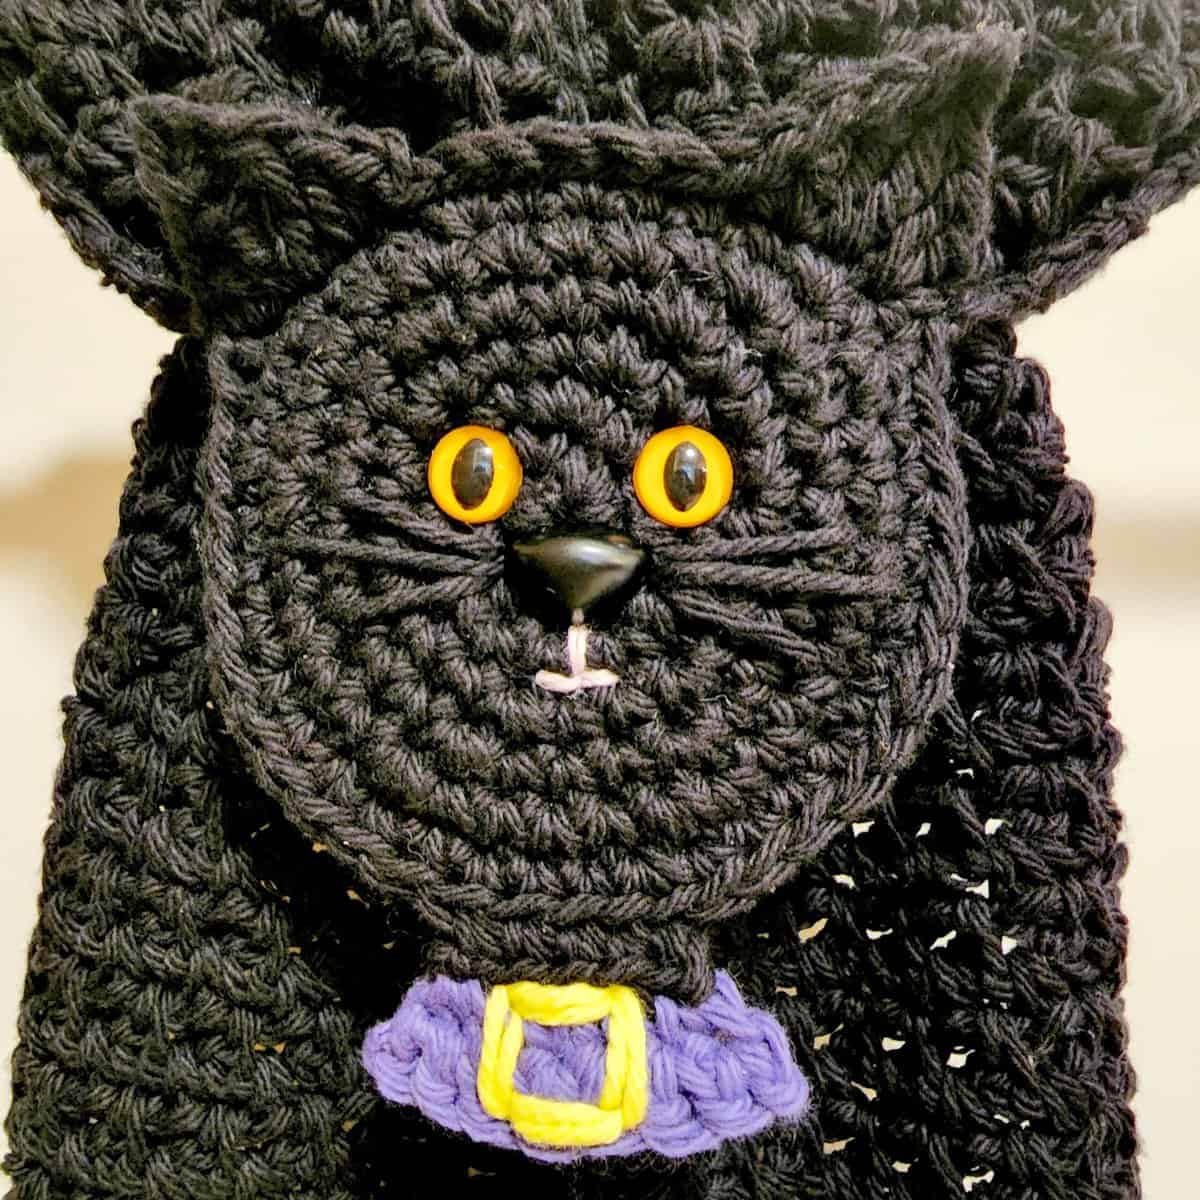
Fasten off. Weave in ends. Using a yarn needle and yellow yarn, create a small buckle on the center of the collar by adding lines in the shape of a square. Then continue on to the Facial Features.
Body of Towel for Striped Tabby Cat
Changing Colors: For all color changes, you’ll change colors on the last pull through of the last stitch of the row.
Row 1: Continuing on from the Cat’s Ears, with MC yarn and a 5.00mm crochet hook, ch 1, working into the back hump of the foundation chain, (2 sc into the next ch, sc in each of the next 3 chs) 7 times, 2 sc in the next ch, sc in each of the next 2 chs, 2 sc in the last ch. Turn. (41 sts)
Row 2: Switch to a 6.00mm crochet hook, ch 1, sc in the first st, (ch 1, skip the next st, sc in the next st), rep from ( to ) across. Turn.
Row 3: Ch 1, sc in the first st, sc in the next ch-1 sp, (ch 1, skip the next st, sc in the next ch-1 sp) rep from ( to ) across to the last st, sc in the last st. Turn.
With MC yarn, repeat Rows 2 – 3, ending with a row 3 repeat, until your Body of Towel measures 4.5″ (from Row 1 of Body of Towel). *Switch colors to CC yarn then complete the Striped Section.
Note: If your towel bar is thicker (the towel bar in my bathroom is pretty narrow), you may want to add another 1″ – 2″ to the Body of Towel before you move on to the Tabby Cat Striped Section.
Tabby Cat Striped Section
Row 1: With CC yarn, ch 1, sc in the first st, (ch 1, skip the next st, sc in the next st), rep from ( to ) across. Turn. *Switch colors to MC yarn.
Row 2: With MC yarn, ch 1, sc in the first st, sc in the next ch-1 sp, (ch 1, skip the next st, sc in the next ch-1 sp) rep from ( to ) across to the last st, sc in the last st. Turn.
Row 3: With MC yarn, Rep Row 1. *Switch colors to CC yarn.
Row 4: With CC yarn, Rep Row 2.
Row 5: With CC yarn, Rep Row 1.
Row 6: With CC yarn, Rep Row 2. *Switch colors to MC yarn.
Rows 7 – 8: With MC yarn, Rep Rows 1 – 2. *Switch colors to CC yarn.
Row 9: With CC yarn, Rep Row 1. *Switch colors to MC yarn.
Row 10: With MC yarn, Rep Row 2.
Row 11: With MC yarn, Rep Row 1. *Switch colors to CC yarn.
Row 12: With CC, Rep Row 2. *Switch colors to MC yarn.
Rows 13 – 21: With MC, Rep Rows 1 – 2, ending with a Row 1 repeat. *Switch colors to CC yarn.
Row 22: With CC, Rep Row 2. *Switch colors to MC yarn.
Rows 23 – 24: With MC, Rep Rows 1 – 2. *Switch colors to CC yarn.
Row 25: With CC yarn, Rep Row 1.
Row 26: With CC yarn, Rep Row 2.
Row 27: With CC yarn, Rep Row 1. *Switch colors to MC yarn.
Row 28: With MC, Rep Row 2.
Row 29: With MC, Rep Row 1. *Switch colors to CC yarn.
Row 30: With CC, Rep Row 2. *Switch colors to MC yarn.
Rows 31 – 32: With MC yarn, Rep Rows 1 – 2. *Switch colors to CC yarn.
Row 33: With CC, Rep Row 1. *Switch colors to MC yarn.
Row 34: With MC, Rep Row 2.
Rows 35 – 39: With MC, Rep Rows 1 – 2. *Switch colors to CC yarn.
Rows 40 – 42: With CC, Rep Rows 1 – 2, ending with a Row 2.
Fasten off. Weave in ends. Continue on to the Facial Features.
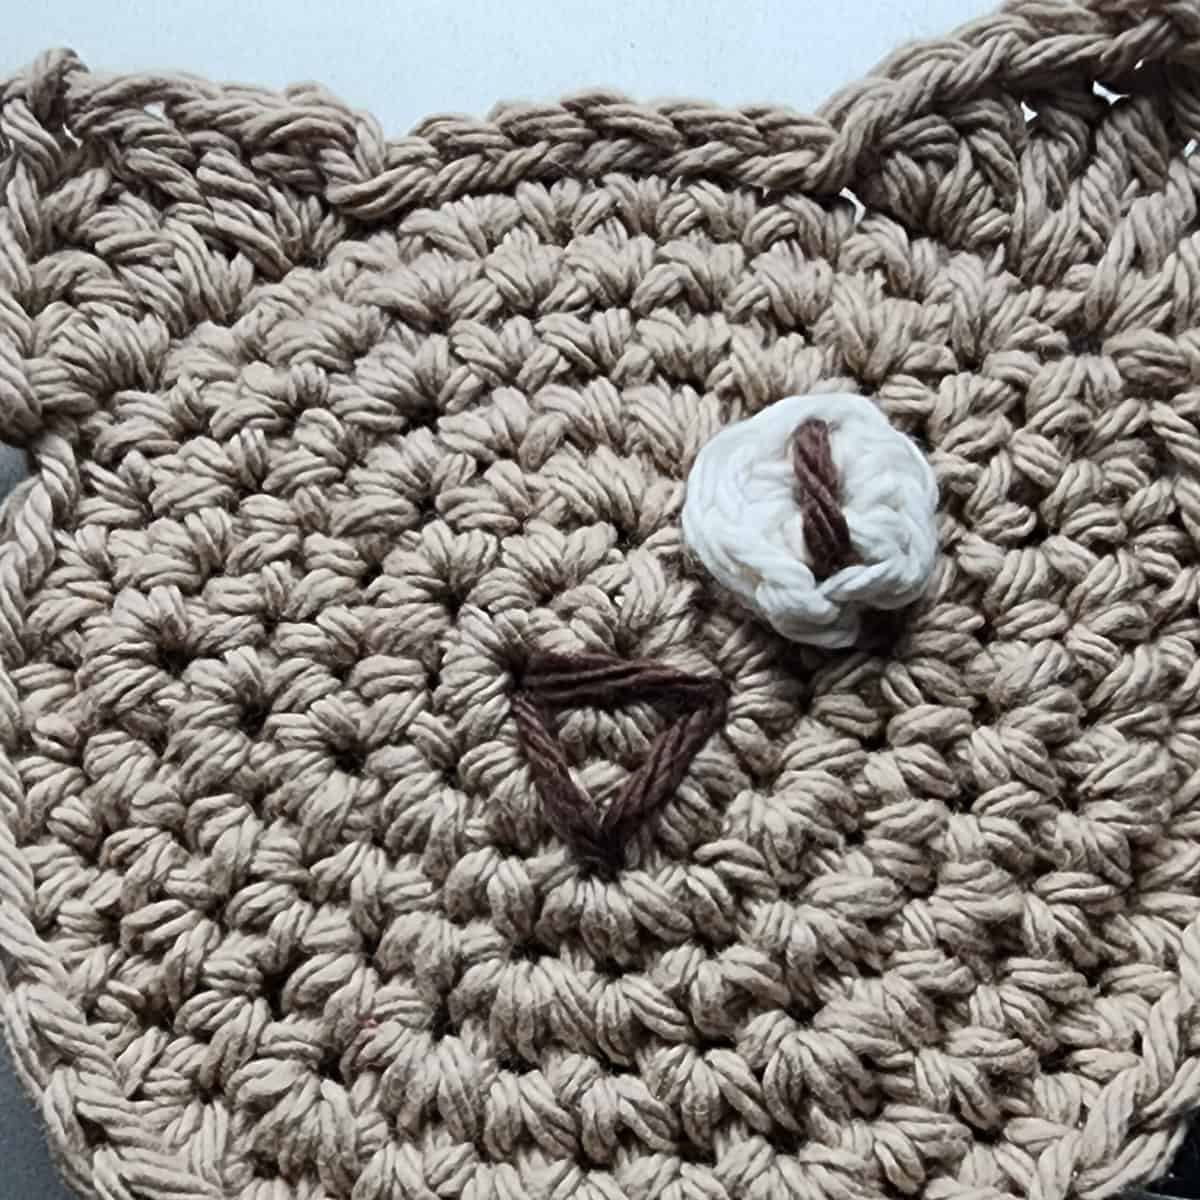
Optional Yarn Eyes
Rnd 1: With white yarn and a 4.00 mm crochet hook, ch 2, work 5 sc in the 2nd ch from your hook. Join with a sl st to the first st. (5 sts)
Fasten off leaving a 8” tail for sewing. Weave in beginning tail end. Then, using a yarn needle and whatever color yarn you’d like, create the pupil of the cat’s eye by sewing a vertical line up the center. See photo below. Eyes are approximately 5/8″ in diameter. Continue on to the Facial Features.
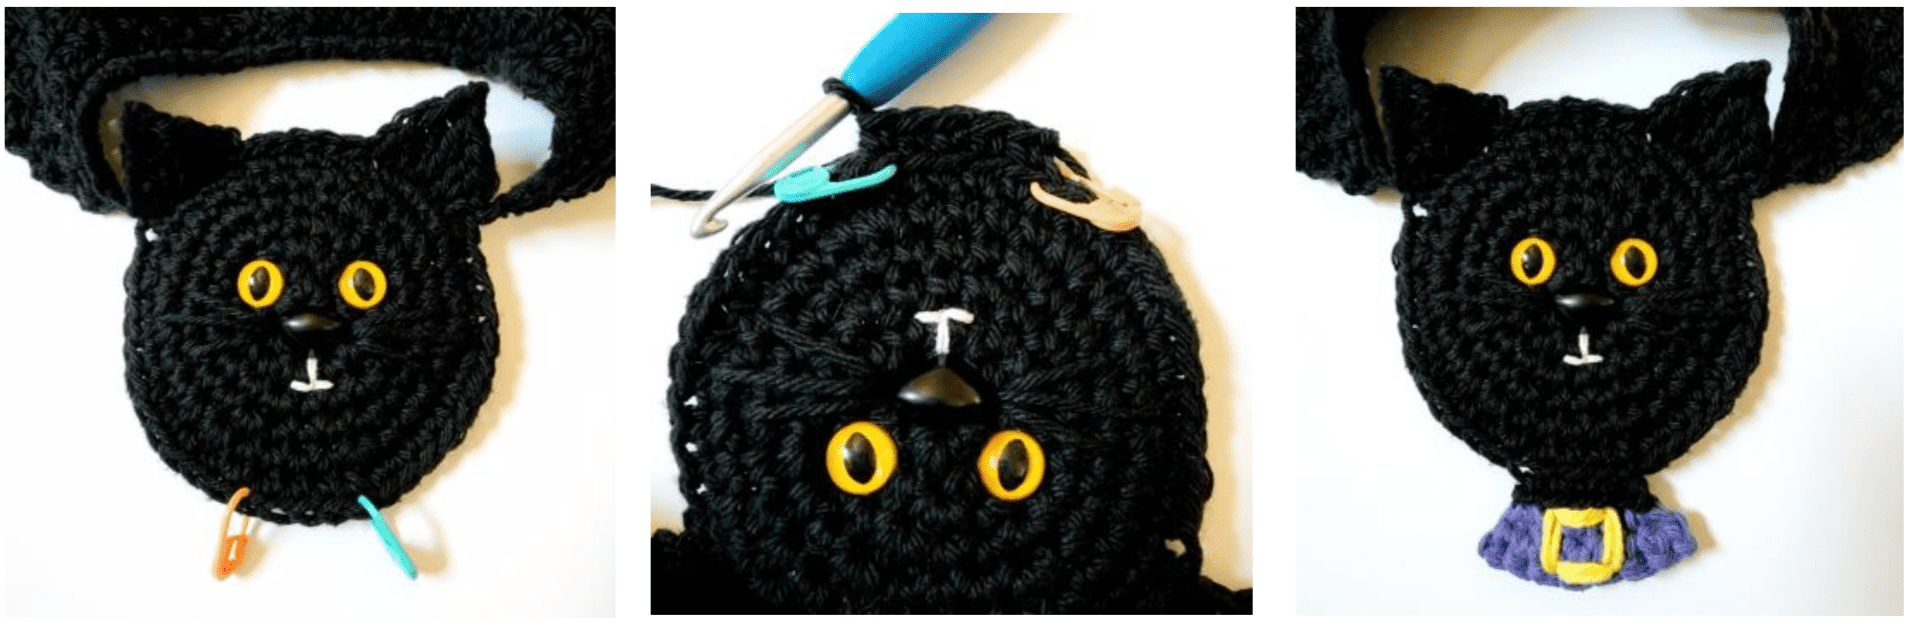
Facial Features
Eyes: Center and attach the eyes (snap on 12mm safety eyes or sew on yarn eyes) on the cat’s head as shown in the photos below. I placed mine between the stitches of Rows 2 & 3 of the head with approximately 1/2″ between them.
Nose: Position the nose as shown in the photo below. Snap on safety animal nose, or embroider yarn nose. If embroidering nose, begin by creating a “V”, then add a line across the top to create a triangle. Complete by filling in the triangle. See photos below.
Mouth: Using a yarn needle and 8″ piece of cotton pink yarn, make an upside down “T” to resemble a mouth.
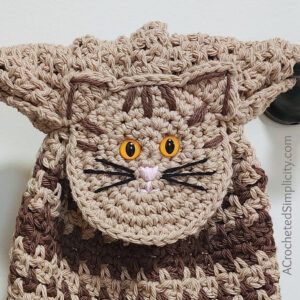
Whiskers: Using a yarn needle and black yarn, create 3 whiskers on each side of the nose as shown in the photo below. Note: For the Tabby Cat, I split the plies of the black yarn and used only 2 strands to create thinner whiskers.
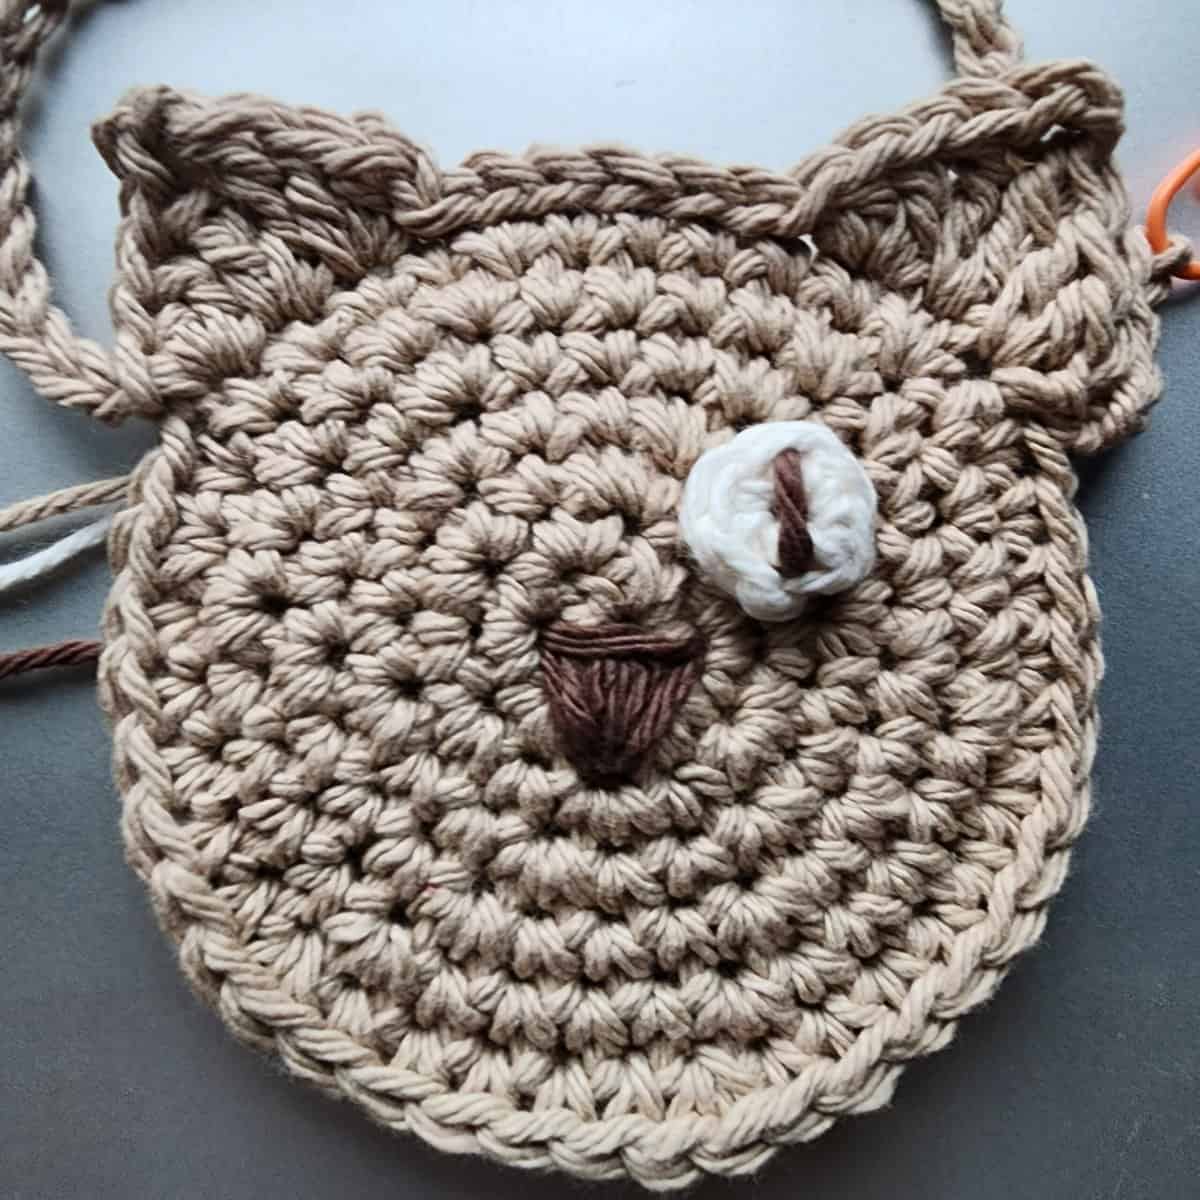
Striped Tabby Cat Dark Brown Facial Accents: Create stripes on the cat’s face, as shown in the photo below, using a yarn needle and dark brown yarn. Also, add dark brown accents to the cat’s ears as shown in the photo below.
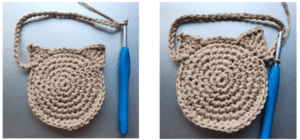
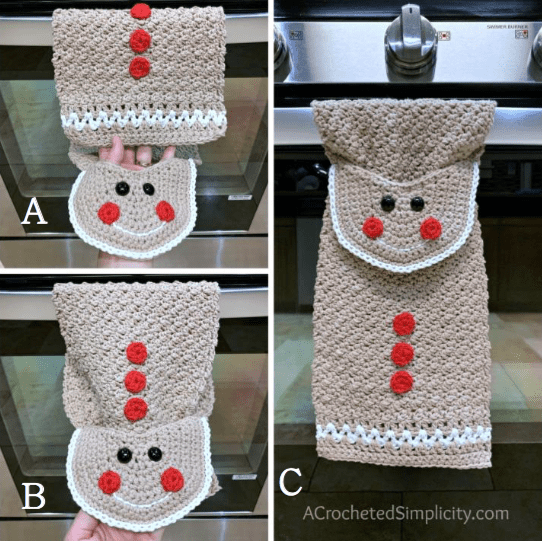
NOW THAT I’VE COMPLETED MY KITTY CAT HAND TOWEL, HOW DO I HANG IT UP?
Step 1 (photo A): With the RS of the Cat’s Head facing you, insert your hand behind it and through the hole. Bring the bottom edge of the towel, up and over the oven door handle from behind it.
Step 2 (photo B): Grab the bottom edge of the towel and pull it through the hole.
Step 3 (photo C): Pull the body of the towel all the way down to secure it. Step back and enjoy your talents!
Black Cat Dish Scrubby – Make a Coordinating Set

MORE FREE CROCHET PATTERNS FROM A CROCHETED SIMPLICITY
If you enjoy this crochet pattern for your kitchen, you may enjoy these other projects as well. And if you just want to browse, you can find all of our free crochet patterns HERE.

Are you intimidated by knit-look crochet? Would you love to learn my tips & tricks? Take an Annies Video Class with me and let me ease your fears and help you increase your skills! Click on the photo below to watch a free preview. You can also see the other 4 video classes I have available!

Please share your finished ACS projects with us in the A Crocheted Simplicity Crochet Community Group on Facebook! Use hashtag #ACrochetedSimplicity when sharing on social media so I can find your posts!

Can you make one of the items and sell it?
Of course! 🙂
Super cute towel pattern!! These were a huge hit with my family!
I love these, they are adorable! I’m going to be making some for sure!