Wasilla Crochet Poncho Pattern
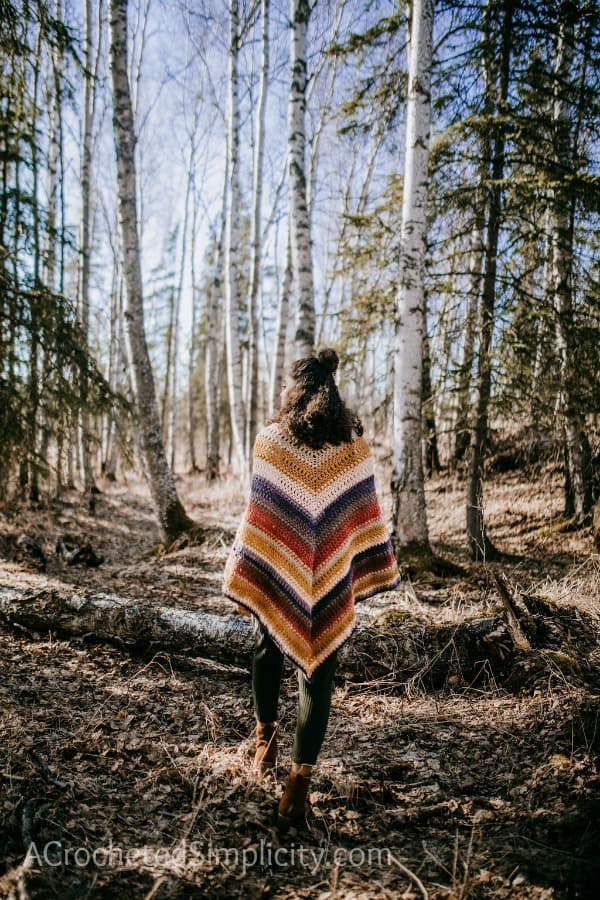
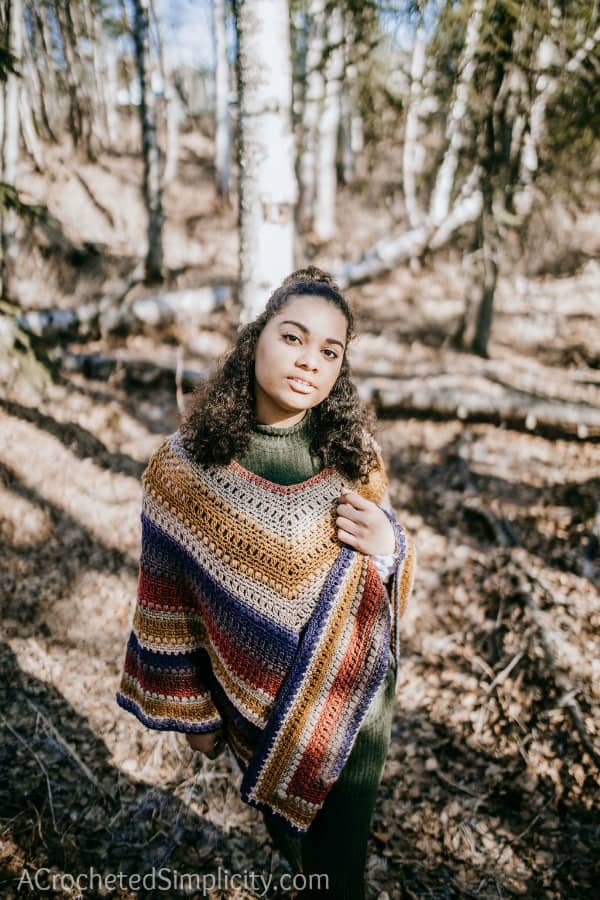
My oldest daughter had been asking me to make her a simple crochet poncho. And while crocheting samples for a couple of my designs, the Centaur Mandala Afghan and Chimera Scarf, I realized that a combination of the simple crochet stitches I was using would be perfect for a crochet poncho pattern. This is how the Wasilla Poncho came to be!
You’ll find the free crochet poncho pattern in the post below, or you can find an ad-free printable PDF (that includes all photo tutorials + size options for girls and women), on Ravelry, or Etsy (aff).
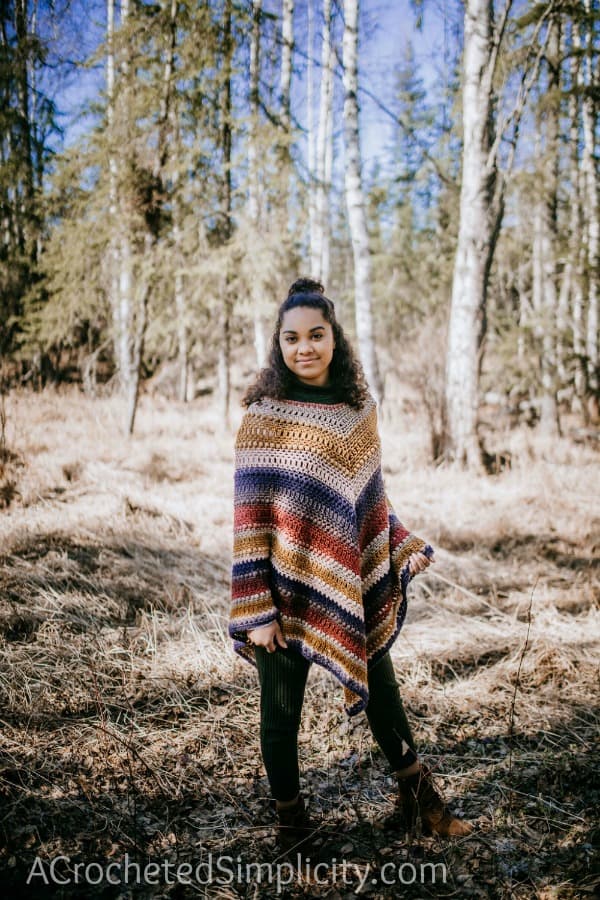
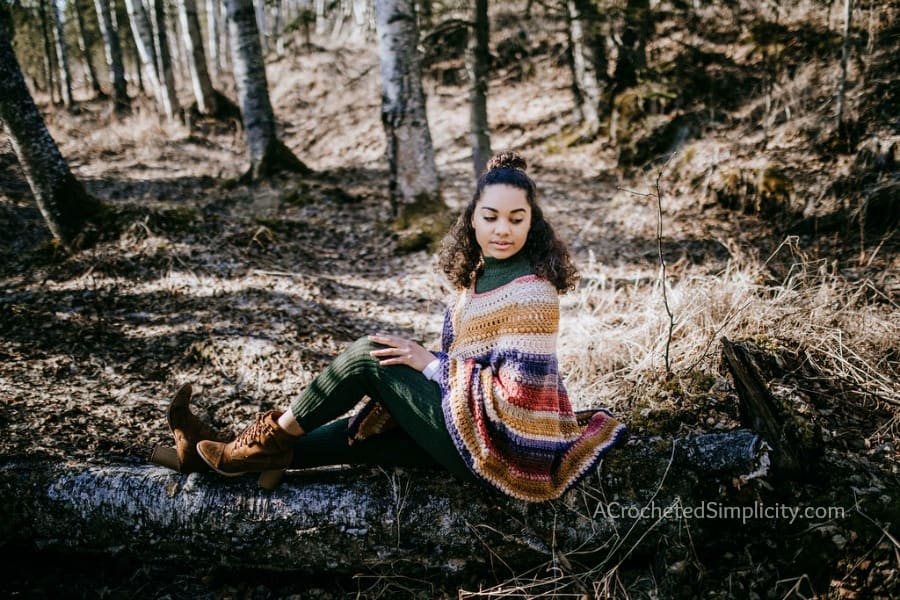
Ponchos are great to wear for seasonal transition pieces. They’re also great for late night bonfires when the air gets chilly. Dress them up, dress them down. You really can’t go wrong with a poncho!
How To Get The
Wasilla Crochet Poncho Pattern
Option 1: Scroll down for the free crochet poncho pattern right here in this blog post.
Option 2: Purchase the ad-free printable PDF from one of my shops:
Yarn
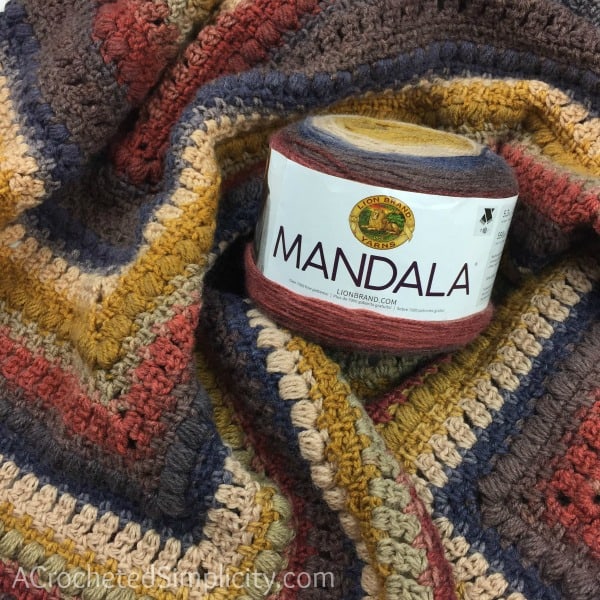
For this crochet poncho, I chose Lion Brand Yarns Mandala, which is a DK weight, self-striping yarn. All of the colorwork was done for me which made this a perfect crochet project for binge watching my favorite TV shows. And I don’t know about you, but my favorite part about this yarn is that I wasn’t left with a bunch of ends to weave in!
If you’ve been following my most recent new releases, you’ll already know that I previously purchased several cakes of Lion Brand Yarns, Mandala, and I’ve been trying to use them for various projects. I’m normally a solid color girl when it comes to most everything in life, especially yarn. But there’s just something about these gorgeous cakes of yarn… I hear them calling my name every time I walk down the yarn aisle! While I love them all, I am ashamed to admit that I’ve been hoarding more cakes than I’ve been using.
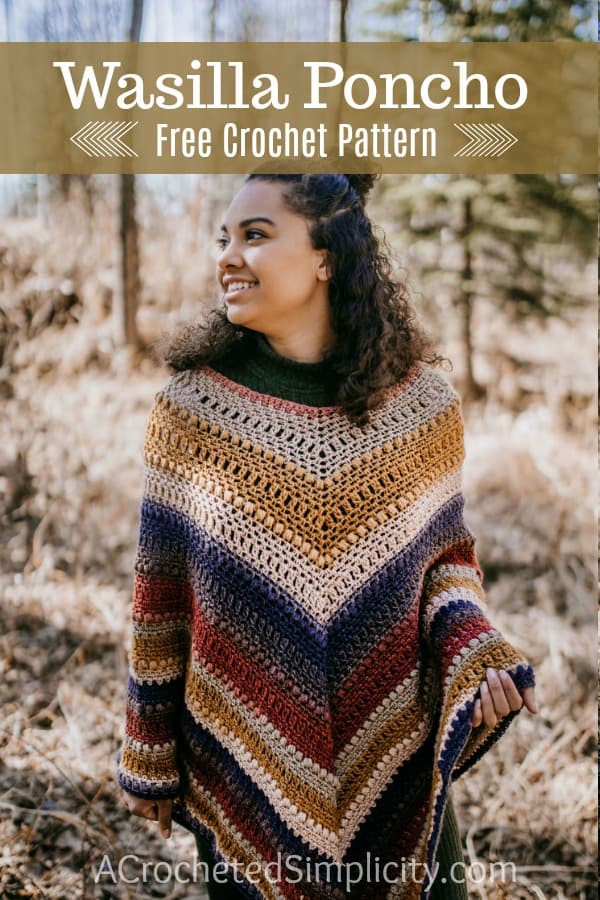
Wasilla Crochet Poncho – Free Pattern
The crochet poncho pattern is free below, but if you love to work offline, I’ve got a couple other great options for you.
Purchase the ad-free, printable PDF, (that includes all photo tutorials + size options for girls and women in one pdf), on Ravelry, or Etsy (aff).
Purchase the crochet poncho kit (aff): Lion Brand has a full kit of the Wasilla Crochet Poncho Pattern, available on their website. The crochet poncho kit includes your choice of 5 colorways and a digital copy of the crochet pattern.
Save this pattern to your Ravelry favorites.
Subscribe to my YouTube channel!
This post contains affiliate links.
Materials
- Yarn: DK Weight / 3 / Yarn, 1,770 yards (Lion Brand Yarns, Mandala, in Centaur was used for the sample in the photos) (150 g / 5.3oz / 590 yards / 540 meters / 100% acrylic) per cake
- Yardage: You’ll need just under 3 cakes for an adult poncho, or 1,770 yards.
- Crochet Hook: J/10/6.00mm (My favorite crochet hooks are the Clover Amour Hooks, I’ve never had an ache in my hand since switching)
- Scissors
- Yarn Needle
Gauge
- In sc: 11 sts = 3″ + 5 rows = 1.25″
Abbreviations (US Terms)
- ch(s): chain(s)
- sl st: slip stitch
- st(s): stitch(es)
- sc: single crochet
- dc: double crochet
- puff st: see special stitches below
- RS: right side
- yo: yarn over
- rep: repeat
- sp: space
- 2dc-cl: 2 double crochet cluster
- Alt-dc-cl: alternate double crochet cluster
Finished Size
- Adult Poncho Size: 25″ (neck opening) x 22″ L (at sides) x 32″ L (at center point)
- Child Sizes
Special Stitches
- Single Crochet Puff Stitch (puff st): Yo, insert your hook into the indicated stitch/space, yo and pull up a long loop, (yo, insert your hook into the same stitch/space, yo, and pull up a long loop) 4 more times, yo, pull through all 11 loops on your hook. Note: You typically close a puff stitch with a ch 1, but for this design, it is written to ch-1 after the stitch. This ch-1 is used to close the puff stitch and create the next ch-1 space in the design. So only work one ch 1 after each puff stitch, not 2 like you may be used to.
- Alternate Double Crochet – Double Crochet Cluster (alt-dc-cl): After turning your work, do not ch, instead, insert your hook into the first st, yo, pull up a loop, yo, pull thru both loops, insert your hook between the legs of the st just made, yo, pull up a loop, yo, insert your hook into the same stitch/space, yo, pull up a loop, yo, pull thru 2 loops, yo, pull thru remaining loops.
- 2 Double Crochet Cluster (2dc-cl): Yo, insert hook where indicated, yo, pull up a loop, yo, pull thru 2 loops, yo, insert hook in same st, yo, pull up a loop, yo, pull thru 2 loops, yo, pull thru remaining loops.
Pattern Notes
- I tend to crochet on the tighter side. You may need to go down a hook size (or two) to meet gauge if you crochet on the looser side.
- Turning chains are not included in stitch count.
- Yarn: Yarn used for the sample shown here is Lion Brand Yarns Mandala in Centaur, 3 / DK Weight Yarn (150 g / 5.3oz / 590 yards / 540 meters / 100% acrylic). You’ll need 3 cakes for an adult size poncho, or approximately 1,770 yards. Yarns similar in fiber content and weight can be substituted.
- Chains (for chain spaces) are included in stitch count. When reading the instructions, skipped stitches can be chains or stitches.
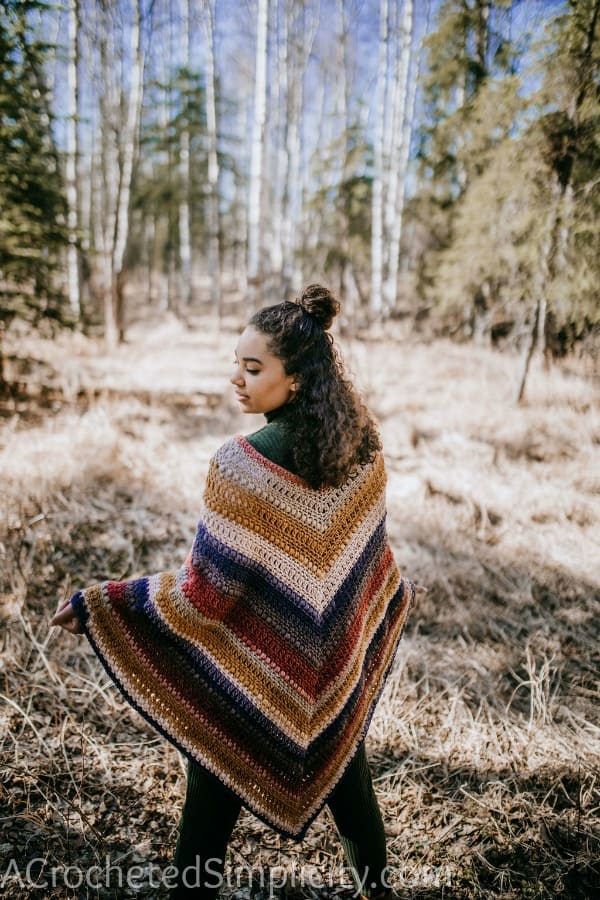
- Adjusting Length: You can easily adjust the length of your poncho. The measurements given above are the length of my poncho shown in the photos in this post. If you choose to lengthen or shorten your poncho, I suggest ending with 2 – 4 repeats of round 3.
- Construction: The Wasilla Crochet Poncho is worked in joined and turned rounds, from the neck opening down.
Wasilla Crochet Poncho – Written Pattern
Set-Up: Using a 6.00mm crochet hook, 100, being careful not to twist the chain, join with a sl st to the 1st ch.
Rnd 1 (RS): Ch 1, working into the back hump of the chain, sc in each ch around. Join. (100 sts)
Rnd 2 (RS): Ch 1, sc in the first st, ch 1, skip the next st, (sc in the next st, ch 1, skip the next st) 11 times, (sc, ch 2, sc) into the next st, ch 1, skip the next st, (sc in the next st, ch 1, skip the next st) 24 times, (sc, ch 2, sc) into the next st, ch 1, skip the next st, (sc in the next st, ch 1, skip the next st) 12 times. Join. Turn. (106 sts) *Chains (not including turning chains) are counted as stitches.
Rnd 3 (WS): Sc in the 1st ch-1 sp, ch 1, skip the next st, [ (sc in the next ch-1 sp, ch 1, skip the next st) rep around to the next ch-2 sp, (sc, ch 2, sc) in the next ch-2 sp, ch 1, skip the next st ] work from [ to ] twice, then (sc in the next ch-1 sp, ch 1, skip the next st) rep around to the end. Join. Turn. *Stitch count increases by 4.
Rnds 4 – 6: Repeat Round 3.
Rnd 7: Alt-dc-cl in the first ch-1 sp, ch 1, skip the next st, [ (2dc-cl in the next ch-1 sp, ch 1, skip the next st) rep around to the next ch-2 sp, (2dc-cl, ch 2, 2dc-cl) in the next ch-2 sp, ch 1, skip the next st] work from [ to ] twice, then (2dc-cl in the next ch-1 sp, ch 1, skip the next st) rep around to the end. Join. Turn. *Stitch count increases by 4.
Rnds 8 – 10: Repeat Rnd 3.
Rnd 11: Ch 1, puff st in the 1st ch-1 sp, ch 1, skip the next st, [ (puff st in the next ch-1 sp, ch 1, skip the next st) rep from ( to ) around to the next ch-2 sp, (puff st, ch 2, puff st) in the next ch-2 sp, ch 1, skip the next st ] work from [ to ] twice, then work (puff st in the next ch-1 sp, ch 1, skip the next st) rep around to the end of the rnd. Join. Turn. *Stitch count increases by 4.
Rnds 12 – 14: Repeat Rnd 3.
Repeat Rnds 7 – 14 until your poncho is the desired length. I ended mine when it measured 32″ along the center point and 22″ at the sides.
Adjusting the Length: You can easily adjust the length of your poncho. The measurements given above are the length of my poncho shown in the photos in this post. If you choose to lengthen or shorten your poncho, I suggest ending with 2 – 4 repeats of round 3.
Fasten off. Weave in ends. Block, if desired. Blocking isn’t mandatory, but it does add a nice finished look to crochet wearables.
Add a little fun to your crochet poncho by embellishing with yarn tassels!
I MADE IT! NOW WHAT?
Pin this post!: Save this crochet poncho pattern to your Pinterest boards so that you can come back and make it again.
Leave a comment below: We love to hear your feedback.
Share Your Finished Projects on Facebook or Instagram: I love to see your finished projects! Share with us on social media and tag me @acrochetedsimplicity or use the hashtag #ACrochetedSimplicity so I can find your posts.
Join us in the Facebook Community Group!
Come share your finished projects with us in the A Crocheted Simplicity Crochet Community Group on Facebook. Join us for fun community events such as crochet alongs, join in on crochet conversations, ask questions, get advice, and share your love for crochet!

Beautiful pattern. I would love to make it for my daughter she is 5’7″. Would you mind telling me how tall the model is I can gauge the length. Thank you
Hi Linda,
The model is 5’3″.
Jennifer
May I ask….hook size, are they US sizing? If so, would you know the equivalent in UK size please.
Hi Denise,
US & UK are both listed in the material list: J/10/6.00mm.
J/10 is the US size and the metric size 6.00mm is the UK size.
I hope this helps,
Jennifer
I love love love this pattern! Made myself one and can’t wait for winter to wear it! Am I able to sell finished products with proper credits? Thank you in advance and thank you for this wonderful pattern.
Thank you for sharing this pattern with the world! I’m in love with it. 😆 Mine is nearly finished and I just needed to tell you how awesome it is.
Thank you, Dana! <3
Beautiful pattern, and I love the colors you chose! Adding it to my list to gift to myself one day!
This is such a beautiful pattern, and my current WIP! I even chose the same colour yarn as the designer as the Fall colours are lovely in this poncho 😍
Love this pattern! I try to make 1 thing each year just for me and I think this may be my project for the coming year.
Love this pattern! About 2/3 of the way done.
This is lovely pattern and I have plenty of Mandala. Is going to br on my to-do list.
This poncho looks so cozy! I love the colors you used!
I haven’t made this pattern yet but have made a few wearables with mandala yarn in centaur and it’s so pretty!! I love how this looks!
I’ve been looking for a nice poncho pattern. I love this one! I’m going to go look for some yarn…to start this.
I love. Your Wasilla Poncho for adults and love the earth tones doorway of Fall. I aim to purchase the kit grok Lion Brand for a late birthday present for myself, my birthday was Christmas. I. Enjoyed the Candy cane holders they were fun to make and I used them as pkg ornaments with candy canes.
This is such a lovely pattern. it looks just challenging.enough for me to stretch a bit and learn some new techniques.