Touch of Plaid Beanie & Slouch – Free Crochet Hat Pattern
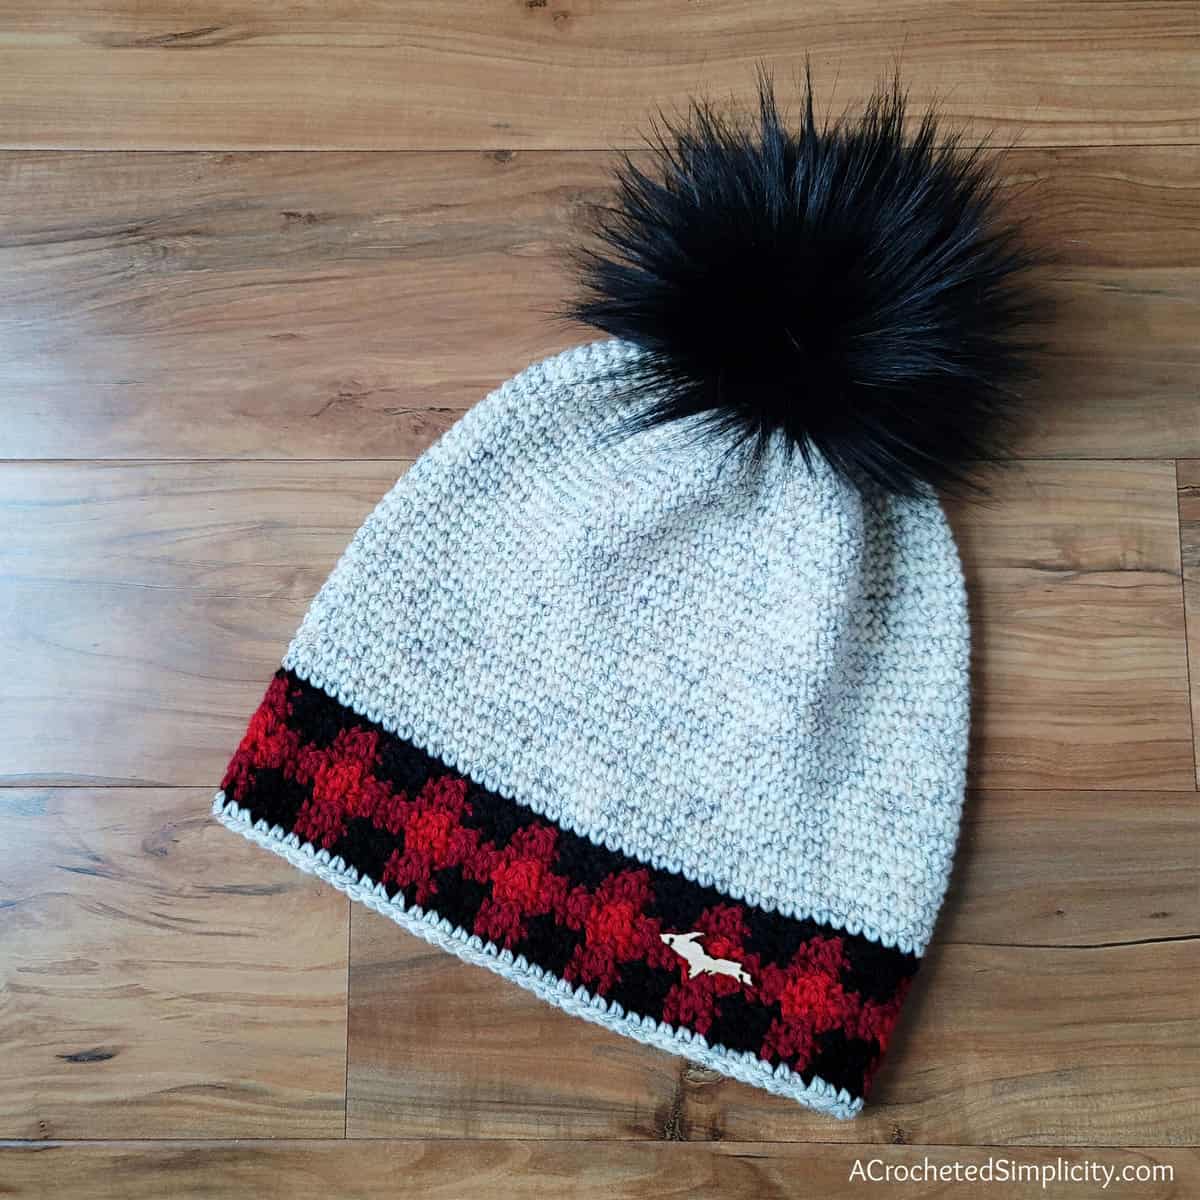
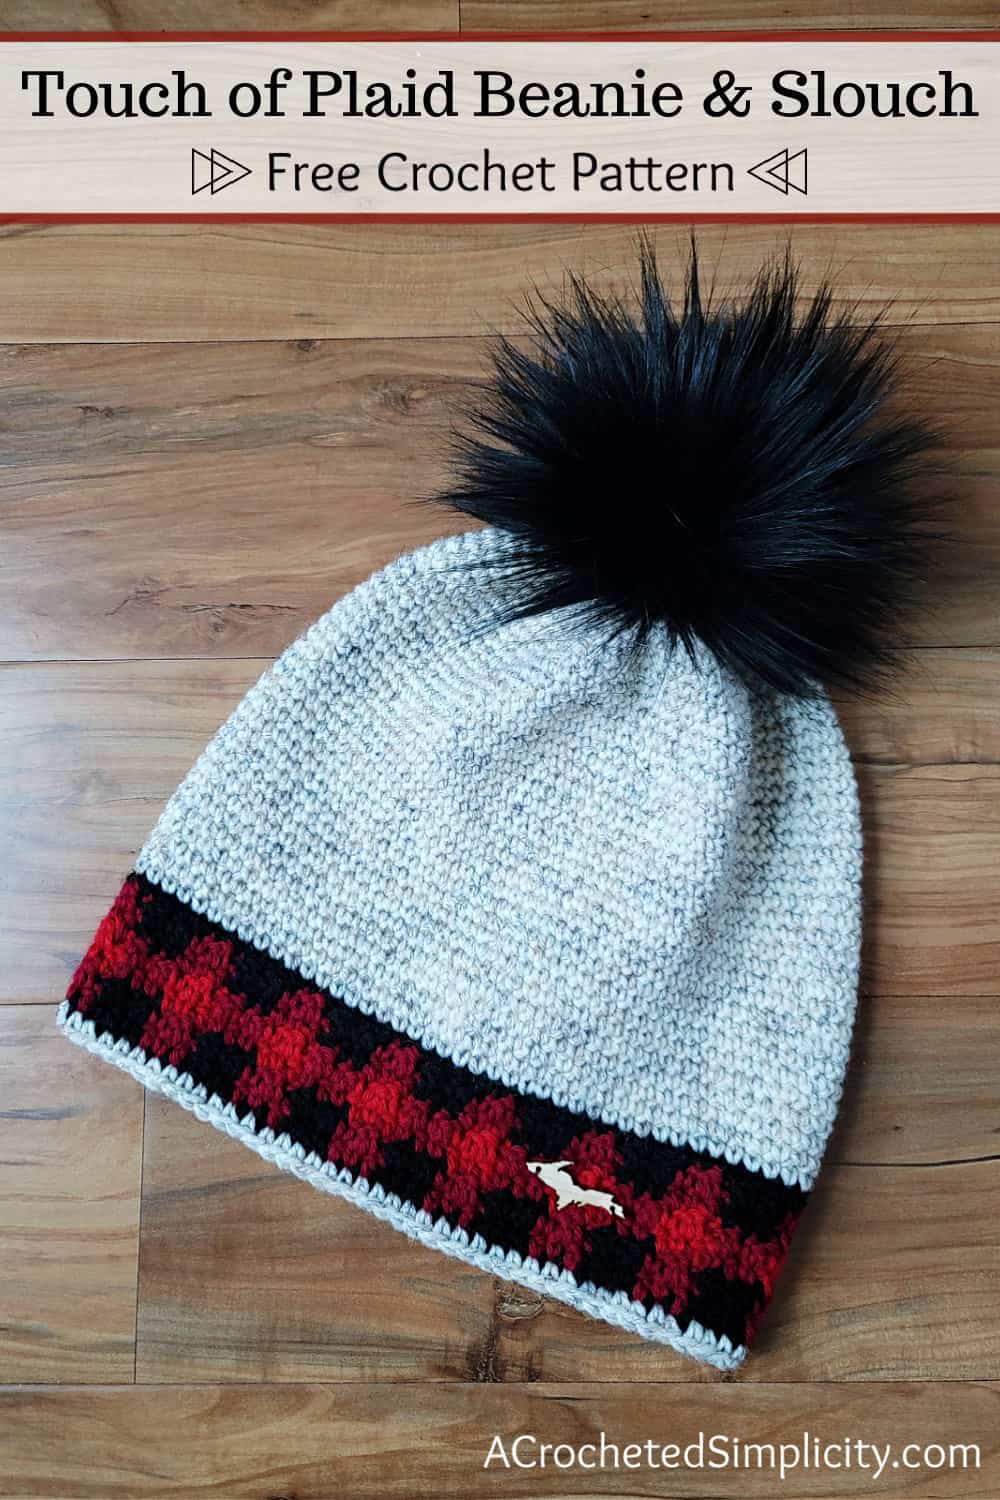
I love the classic look of buffalo plaid, but wanted to use it only as an accent on my newest crochet hat design. The buffalo plaid hat band is the perfect accent for my new Touch of Plaid Beanie & Slouch pattern.
You can find the free crochet pattern for the Touch of Plaid Beanie & Slouch in this post below, or an ad-free print friendly version on Love Crafts here, Ravelry here, or on Etsy here.
> Click HERE to sign-up to receive our newsletter <
Check out the awesome wooden tags in the shape of Michigan’s Upper Peninsula that I had custom made by a maker on Etsy. I ordered my custom wooden tags HERE. And the big black pom I also ordered from another maker on Etsy. I ordered my pom HERE. If you prefer smaller faux fur poms, I love these ones on Amazon HERE.
YARN
TOUCH OF PLAID BEANIE & SLOUCH – FREE CROCHET HAT PATTERN
The free pattern is below, but if you love to work offline, or need to order your yarn, I’ve got a couple other great options for you.
Purchase the ad-free, printable PDF that includes all photo tutorials, on Love Crafts here, Ravelry here, or Etsy here.
Save this pattern to your Ravelry favorites here.
Pin it for later here.
This post contains affiliate links.
Materials
- Yarn: Yarn I used for my sample is Lion Brand Yarns Wool Ease; 4 / Worsted Weight Yarn; (80% acrylic / 20% wool / 197 yards / 85 g / 180 m / 3 oz )
- Purchase Yarn directly from Lion Brand HERE
- Cranberry (MC): 25 (30, 35, 40) yards
- Black (CC1): 29 (31, 33, 15) yards
- Red (CC2): 12 (13, 14, 15) yards
- Wheat (CC3): 130 (150, 160, 170) yards *less for beanie
- Crochet Hook: H/8/5.00mm; I/9/5.50mm (my favorite hooks are Clover Amour Hooks, I’ve never had an ache in my hand since switching)
- Measuring Tape
- Scrap piece of yarn or stitch marker
- Scissors
- Tapestry Needle
- Customized Wooden U.S. Shape Tags, I ordered them HERE.
- Black Faux Fur Pom, I ordered HERE.
- Smaller Faux Fur Poms HERE.
Many of the materials are available for purchase through our affiliates:
 Lion Brand Wool-Ease Yarn -...Shop on Amazon
  Tengsen 16pcs 4" Faux Fur P...Shop on Amazon
  Clover 1047/H Deep Blue Amo...Shop on Amazon
  Fiskars All Purpose Scissor...Shop on Amazon
  Lion Brand Yarn 400-5-5002 ...Shop on Amazon
Abbreviations (US Terms)
- ch(s): chain(s)
- st(s): stitch(es)
- sl st(s): slip stitch(es)
- sc: single crochet
- dc: double crochet
- invsc2tog: invisible single crochet decrease
- CSC: chainless single crochet (click here for video tutorial)
- Join with a standing sc: (click here for tutorial)
- RS: right side / WS: wrong side
- Rep: repeat
- Rnd: round
- yo: yarn over
- BLO: back loop only
- FLO: front loop only
- MC: main color
- CC1, CC2, & CC3: contrasting color
- Color Changes: Click HERE for a color change photo tutorial.
Gauge
- Hat Band in plaid pattern with 5.00 mm hook: 10.5 sts = 3″; 6 rows = 2″
- Body of Hat in sc with 5.50 mm hook: 10.5 sts = 3″; 8.5 rows = 2″
Sizes
- Toddler: 16″ – 17-1/2″ circumference
- Child: 18″ – 20″ circumference
- Teen / Adult Small: 20-1/2″ – 22″ circumference
- Adult Medium / Large: 22-1/2″ – 24″ circumference
Notes
- Beginning chains are not counted as a stitch or included in stitch count.
- The first stitch of each row is worked into the same stitch as the beginning chain, unless stated otherwise.
- I tend to crochet on the tighter side. You may find yourself needing to go down a hook size (or two) to properly meet gauge.
- Yarn Notes: Lion Brand Yarns Wool Ease worsted weight yarn was used for the sample shown. Another comparable lighter worsted weight 4 yarn may be used as long as gauge is met.
- Lion Brand Yarns Wool Ease in Cranberry, Black, Red & Wheat: 80% Acrylic / 20% Wool (197 yards / 180 m / 85 g / 3 oz).
- Yardage:
- Cranberry (MC): 25 (30, 35, 40) yards
- Black (CC1): 29 (31, 33, 15) yards
- Red (CC2): 12 (13, 14, 15) yards
- Wheat (CC3): 130 (150, 160, 170) yards *less for beanie
- Changes for sizes are written as follows: Toddler (Child, Teen/Adult Small, Adult Medium/Large)
- The plaid hat band is worked in joined and turned rounds. The body of hat is then worked from hat band to crown. A simple single crochet edge is then added to the band of the hat.
- Color Changes: Click HERE for a color change photo tutorial.
- Customized Wooden U.S. Shape Tags, I ordered them HERE.
- Black Faux Fur Poms, I ordered HERE.
Special Stitches
- Join with a standing sc: When instructed to “Join with a standing sc”, begin with a slip knot on your hook. Insert your hook into the stitch or space indicated, yo, pull up a loop, yo and draw thru both loops on hook. (click here for tutorial)
-
Invisible Single Crochet Decrease (invsc2tog): Insert hook into the FLO of stitch indicated, insert hook into FLO of next stitch, yo, pull up a loop, yo, pull thru all loops on hook.
Touch of Plaid Beanie & Slouch Instructions
Buffalo Plaid Wide Hat Band
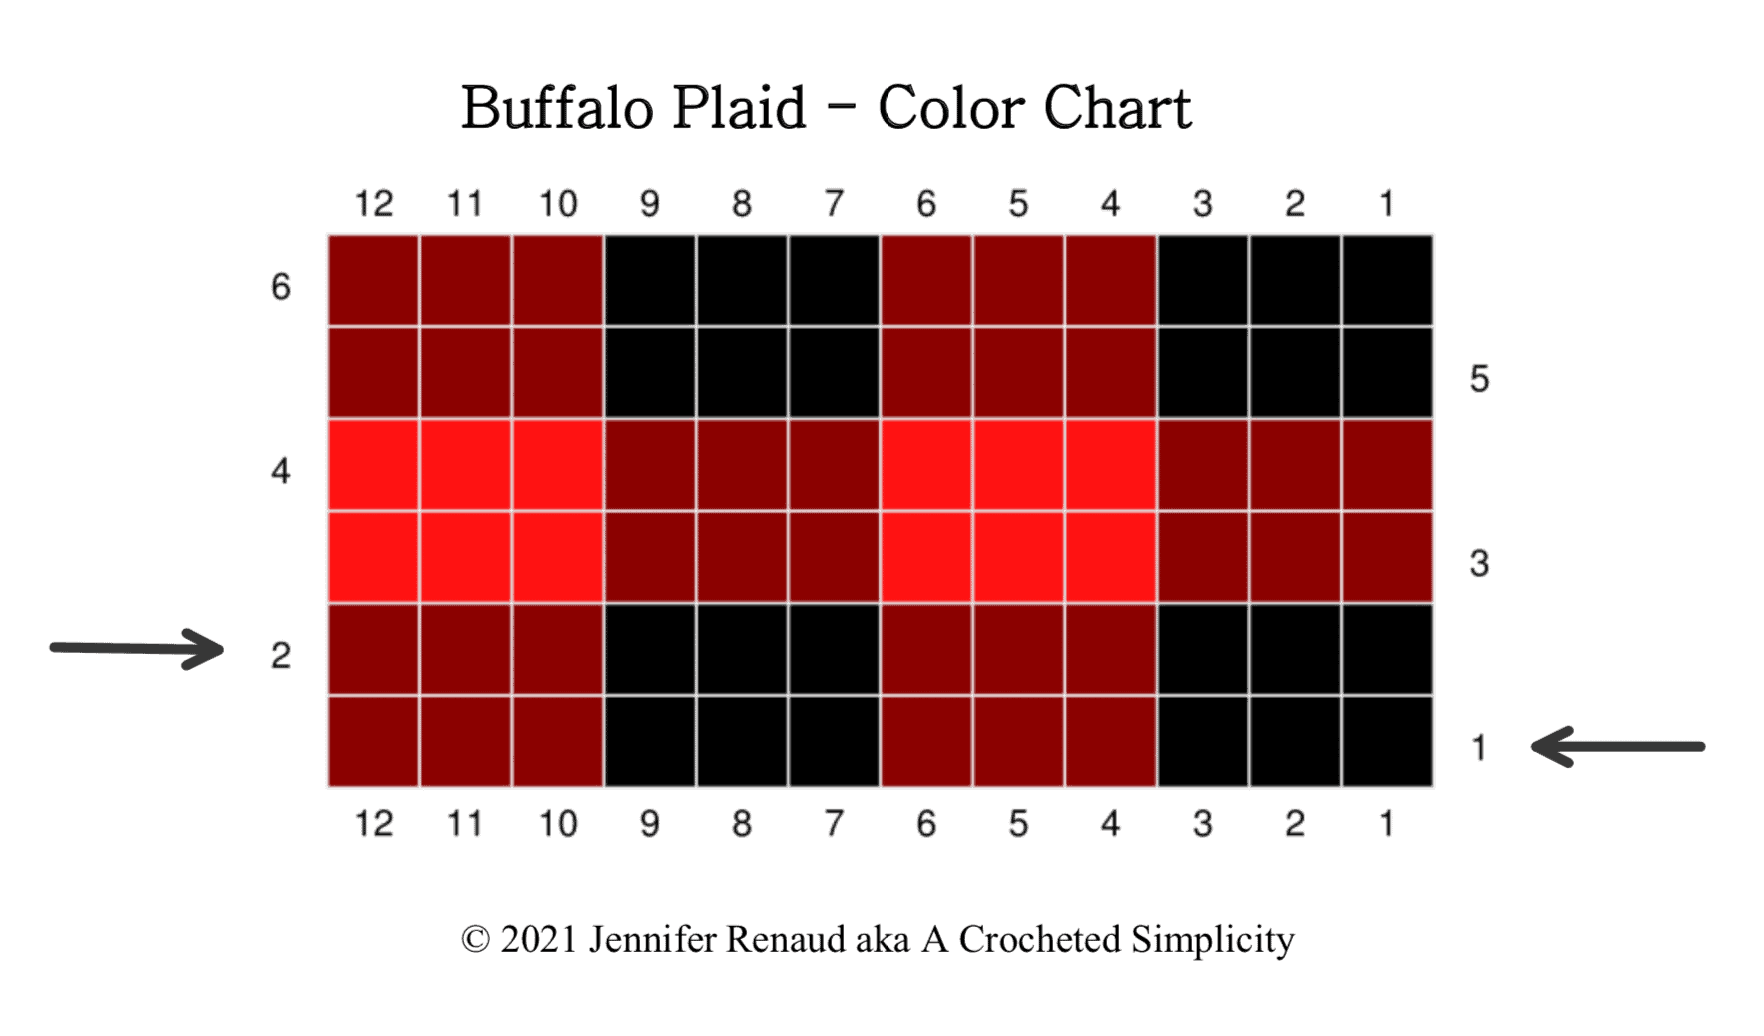
Buffalo Check Color Pattern – See Color Chart Below (MC: Cranberry; CC1: Black; CC2: Red)
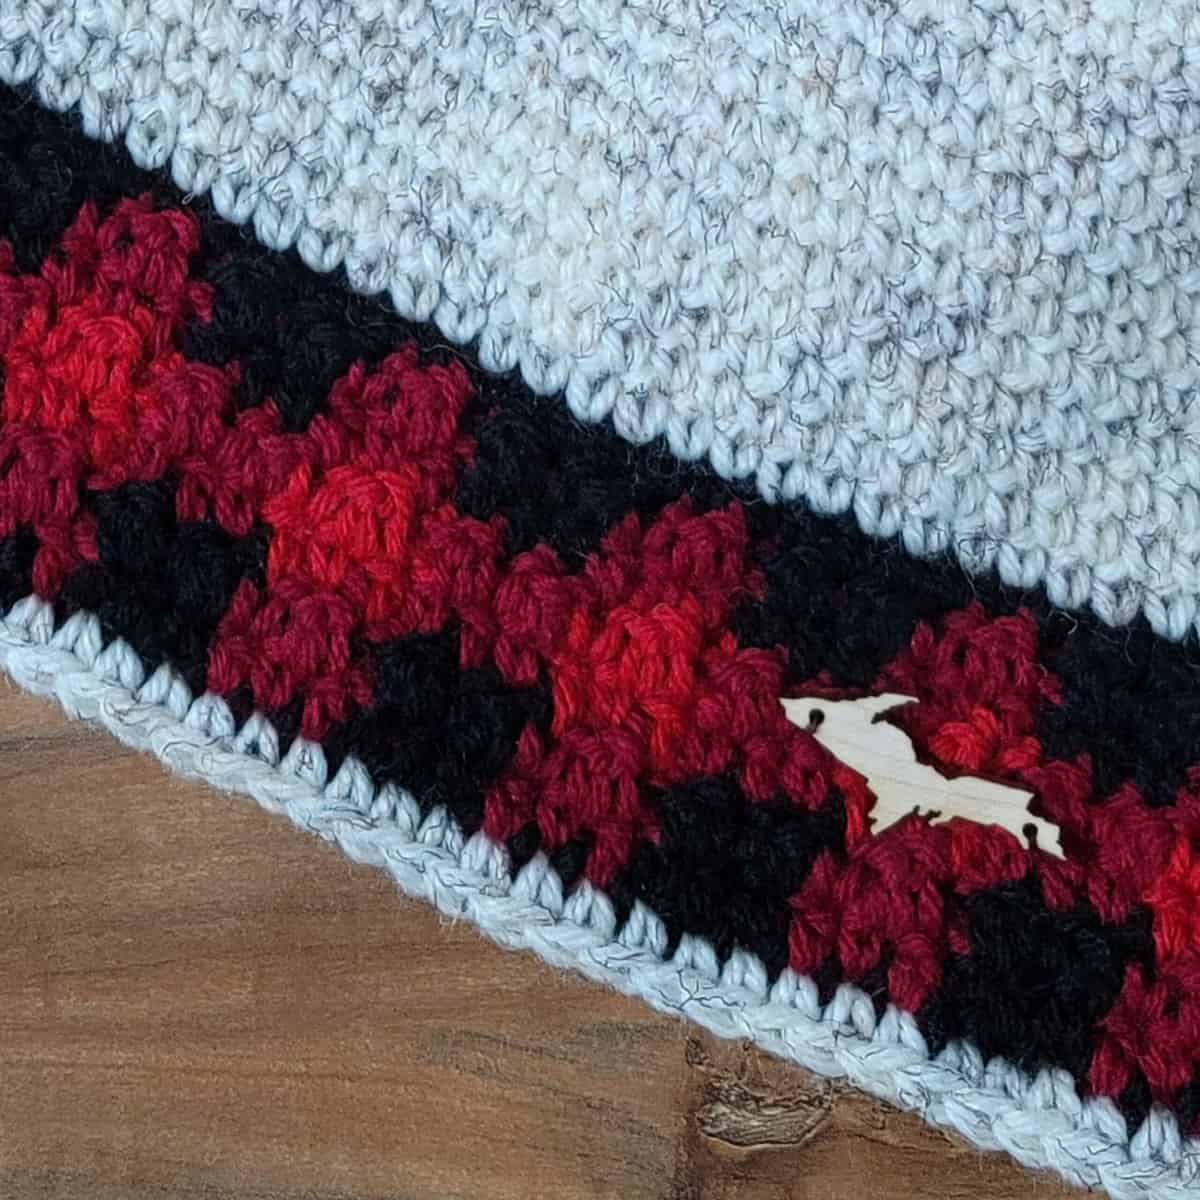
- Pattern Stitch: 1st color (sc in the next st, dc in the next st, sc in the next st); 2nd color (dc in the next st, sc in the next st, dc in the next st)
- Color Pattern for Rnds 1 & 5: (3 sts CC1, 3 sts MC)
- Color Pattern for Rnds 2 & 6: (3 sts MC, 3 sts CC1)
- Color Pattern for Rnd 3: (3 sts MC, 3 sts CC2)
- Color Pattern for Rnd 4: (3 sts CC2, 3 sts MC)
Changing Colors: For all color changes, you’ll change colors on the last pull through of the last stitch in each colored section. Click HERE for a color change photo tutorial.
Set-Up: With CC1 yarn & a 5.00mm crochet hook, work 60 (66, 72, 78) CSC (click here for video tutorial). Join with a sl st to the 1st st. (60, 66, 72, 78 sts)
Row 1 (RS): Ch 1, * CC1 (sc in the next st, dc in the next st, sc in the next st), MC (dc in the next st, sc in the next st, dc in the next st) rep from * around. Join. Turn. (60, 66, 72, 78 sts)
Rnd 2: Ch 1, * MC (sc in the next st, dc in the next st, sc in the next st), CC1 (dc in the next st, sc in the next st, dc in the next st) rep from * around. Join. Turn. Fasten off CC1. Pick up CC2.
Rnd 3: Ch 1, * MC (sc in the next st, dc in the next st, sc in the next st), CC2 (dc in the next st, sc in the next st, dc in the next st) rep from * around. Join. Turn.
Rnd 4: Ch 1, * CC2 (sc in the next st, dc in the next st, sc in the next st), MC (dc in the next st, sc in the next st, dc in the next st) rep from * around. Join. Turn. Fasten off CC2. Pick up CC1.
Rnds 5 – 6: Rep Rnds 1 & 2. At the end of Rnd 6, fasten off MC.
Rnd 7 (RS): With CC1, ch 1, sc in each st around. Join. Do not turn.
Fasten off. Weave in ends. Continue on to Body of Hat.
At this point your work should measure approximately: 8.5″ (9.25″, 10″, 11″) W x 2″ H (laid flat).
Body of Hat
The remainder of the hat is worked in continuous rounds. I strongly suggest using a scrap piece of yarn to keep track of the beginning and ending of each round.
Row 1 (RS): With CC3 yarn & a 5.50mm crochet hook, join yarn with a standing sc in a st nearest to where you fastened off your yarn at the end of Rnd 7 of plaid section, work 1 sc in each st around. Do not join. Begin using a stitch marker or scrap piece of yarn to keep track of the beginning of each round as you work. (60, 66, 72, 78 sts)
Row 2: Sc in each st around. Do not join.
Beanie: Repeat Round 2 until your hat measures 5″ (6″, 6.25″, 6.75″) from the bottom edge of the plaid band.
Slouch: Repeat Round 2 until your hat measures 7″ (7.75″, 8.5″, 8.75″) from the bottom edge of the plaid band.
Do not fasten off. Continue on to Crown Shaping for the size you’re making.
Crown Shaping
Rnd 1: (FLO invsc2tog, both loops sc in each of the next 6 sts) rep from ( to ) around to the last 4 (2, 0, 6) sts, sc in each remaining st. (53, 58, 63, 69 sts)
Rnd 2: (FLO invsc2tog, both loops sc in each of the next 5 sts) rep from ( to ) around to the last 4 (2, 0, 6) sts, sc in each remaining st. (46, 50, 54, 60 sts)
Rnd 3: (FLO invsc2tog, both loops sc in each of the next 4 sts) rep from ( to ) around to the last 4 (2, 0, 6) sts, sc in each remaining st. (39, 42, 45, 51 sts)
Rnd 4: (FLO invsc2tog, both loops sc in each of the next 3 sts) rep from ( to ) around to the last 4 (2, 0, 6) sts, sc in each remaining st. (32, 34, 36, 42 sts)
Rnd 5: (FLO invsc2tog, both loops sc in each of the next 2 sts) rep from ( to ) around to the last 4 (2, 0, 6) sts, sc in each remaining st. (25, 26, 27, 33 sts)
Rnd 6: (FLO invsc2tog, both loops sc in the next st) rep from ( to ) around to the last 4 (2, 0, 6) sts, sc in each remaining st. (18, 18, 18, 24 sts)
Rnd 7: (FLO invsc2tog) rep from ( to ) around. Join. (9, 9, 9, 12 sts)
Fasten off leaving an 8″ tail of yarn. Using a yarn needle, weave the tail of yarn in and out of the stitches from the last round, pull tail to cinch the crown of the hat closed, knot to secure and weave in ends. Continue on to Finishing.
Finishing
Rnd 1: With CC3 yarn & a 5.50mm crochet hook, join yarn with a standing sc in a st nearest to where you joined your yarn at the end of the set-up of plaid section, sc in each st around the bottom edge of your hat. Join. (60, 66, 72, 78 sts)
Fasten off. Weave in ends. Your hat is complete!
Beanie: Finished hat height should be approximately 7″ (7.75″, 8.25″, 8.75″).
Slouch: Finished hat height should be approximately 8.5″ (9.25″, 10″, 10.5″).

Customized Wooden U.S. Shape Tags, I ordered them HERE.
Black Faux Fur Poms, I ordered it HERE.
MORE FREE CROCHET PATTERNS FROM A CROCHETED SIMPLICITY
If you enjoy this crochet pattern, you may enjoy these other projects as well. And if you just want to browse, you can find all of our free crochet patterns HERE.
Are you intimidated by knit-look crochet? Would you love to learn my tips & tricks? Take an Annies Video Class with me and let me ease your fears and help you increase your skills! Click on the photo below to watch a free preview. You can also see the other 4 video classes I have available!
Please share your finished ACS projects with us in the A Crocheted Simplicity Crochet Community Group on Facebook! Use hashtag #ACrochetedSimplicity when sharing on social media so I can find your posts!




The set up is 70 csc’s. My stitch pattern is 3 sts and 3 does not divide evenly into 70. And rnd 1 starts with 3 sts in black and ends with 3 sts in black with one empty st between. Please nudge me in the right direction if I’m just missing something in the pattern or tell me what to do. Thank you.
I am on rnd 1 of the band.