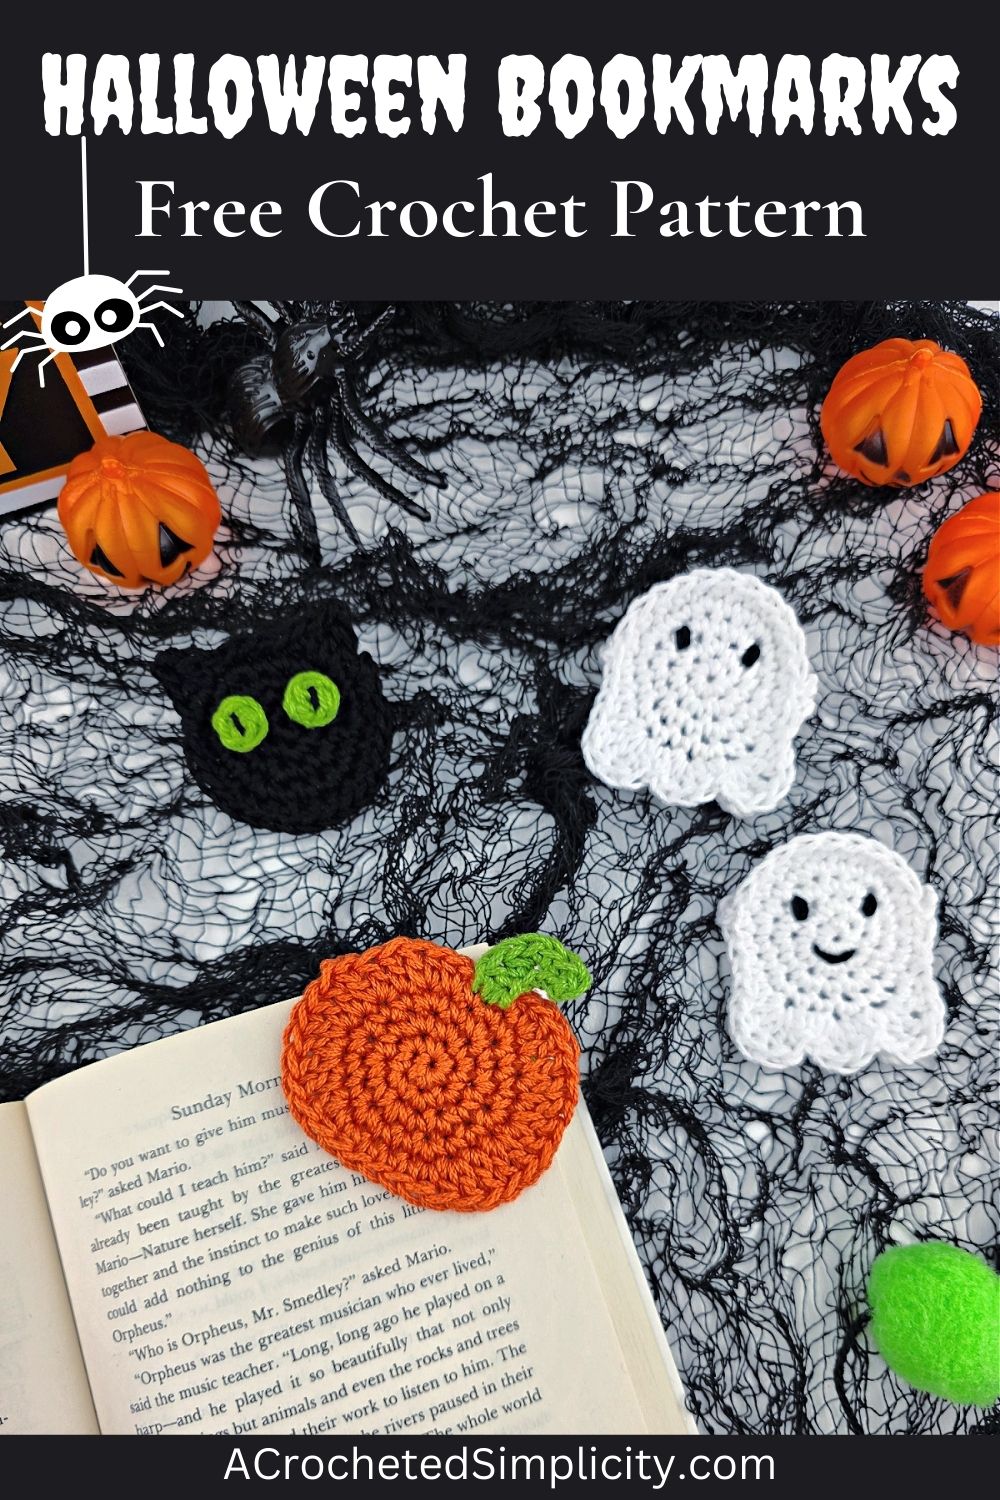
Halloween Crochet Corner Bookmarks
Do you have some scrap yarn on hand leftover from all of your Halloween projects? Time to put it to good use by making these spooky crochet corner bookmarks!
They’re quick and fun to make, using a little bit of yarn, and offering lots of utility. You can make them for yourself, add to treat bags, sell at a Halloween fair, or hand out to the trick-or-treaters on the big night!
You’ll find the crochet corner bookmarks pattern free below, or you can find an ad-free printable PDF (including all photo tutorials) on Ravelry, or on Etsy (aff).
These Halloween crochet bookmarks are very easy to make and I’ve included both step-by-step written instructions as well as pictures along the way to make your crocheting journey smooth and hiccup-free. Once you get the hang of the patterns, you’ll be working up entire batches to gift to loved ones!
Related: If you want to add a fourth Halloween-centric bookmark to your collection, check out the Happy Monster Bookmark.
A Little Inspiration Story
When my youngest daughter was still going out on Halloween to trick-or-treat with friends, there was a woman in town who handed out little crocheted items. The last time the girls went out, she gave them little mini-amigurumi fruits and they included a small printed tag with a cute little poem.
This is what inspired my little Halloween bookmarks AND the Free Printable Gift Tags that I’ve also included in the blog post. Make sure you read all the way to the end and download your printable gift tags.
These crochet corner bookmarks make great little treats to hand out to kids on Halloween. They also make great little classroom gifts and gifts for birthday parties.
How to Crochet a Bookmark
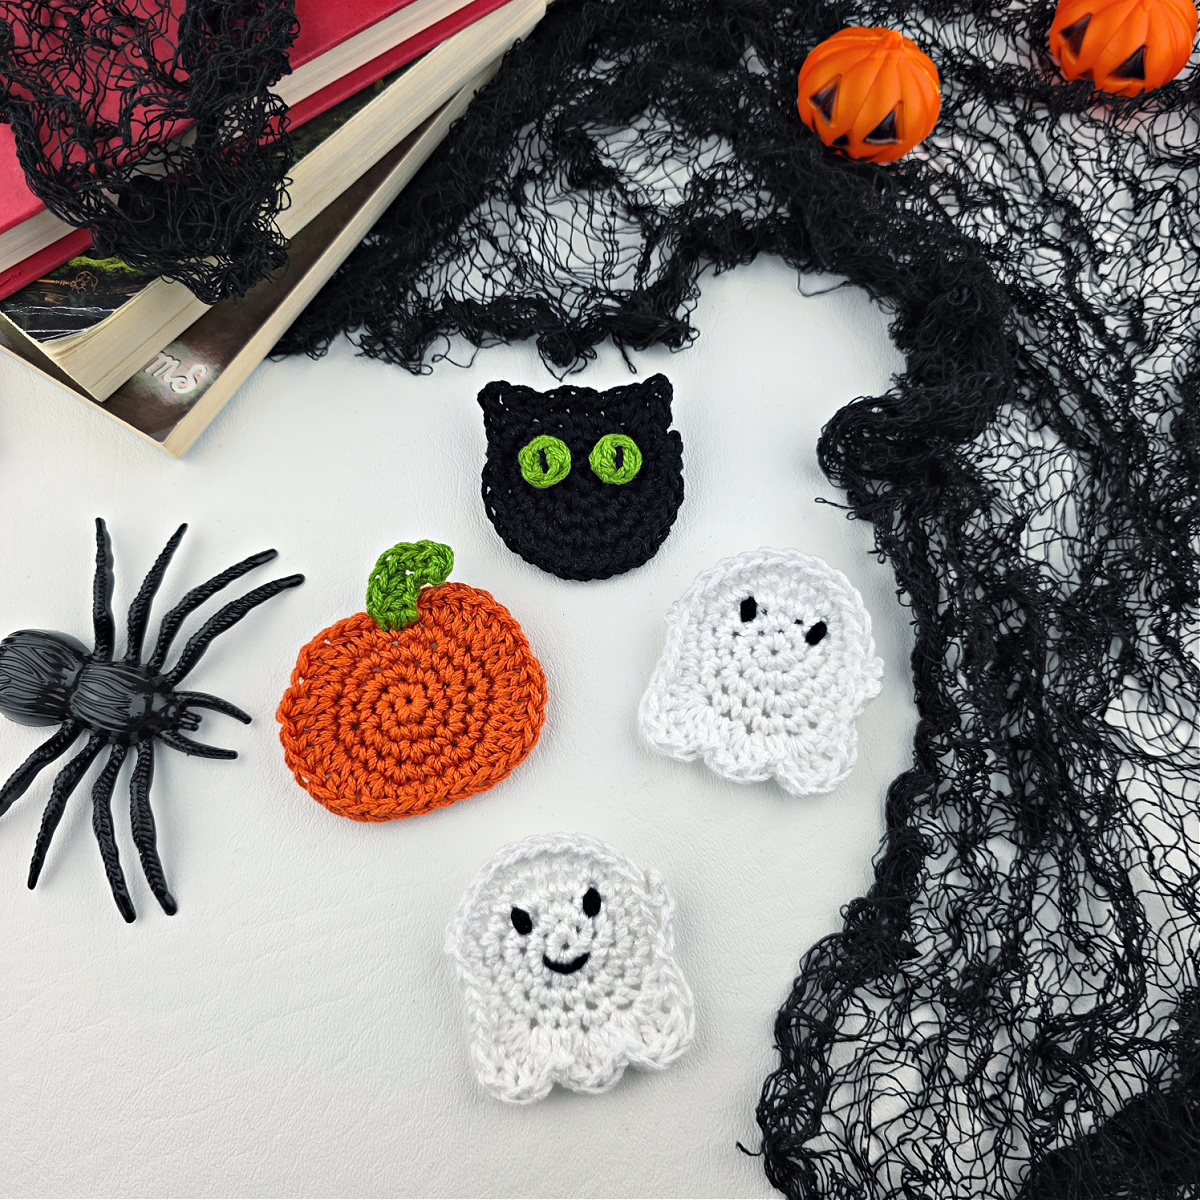
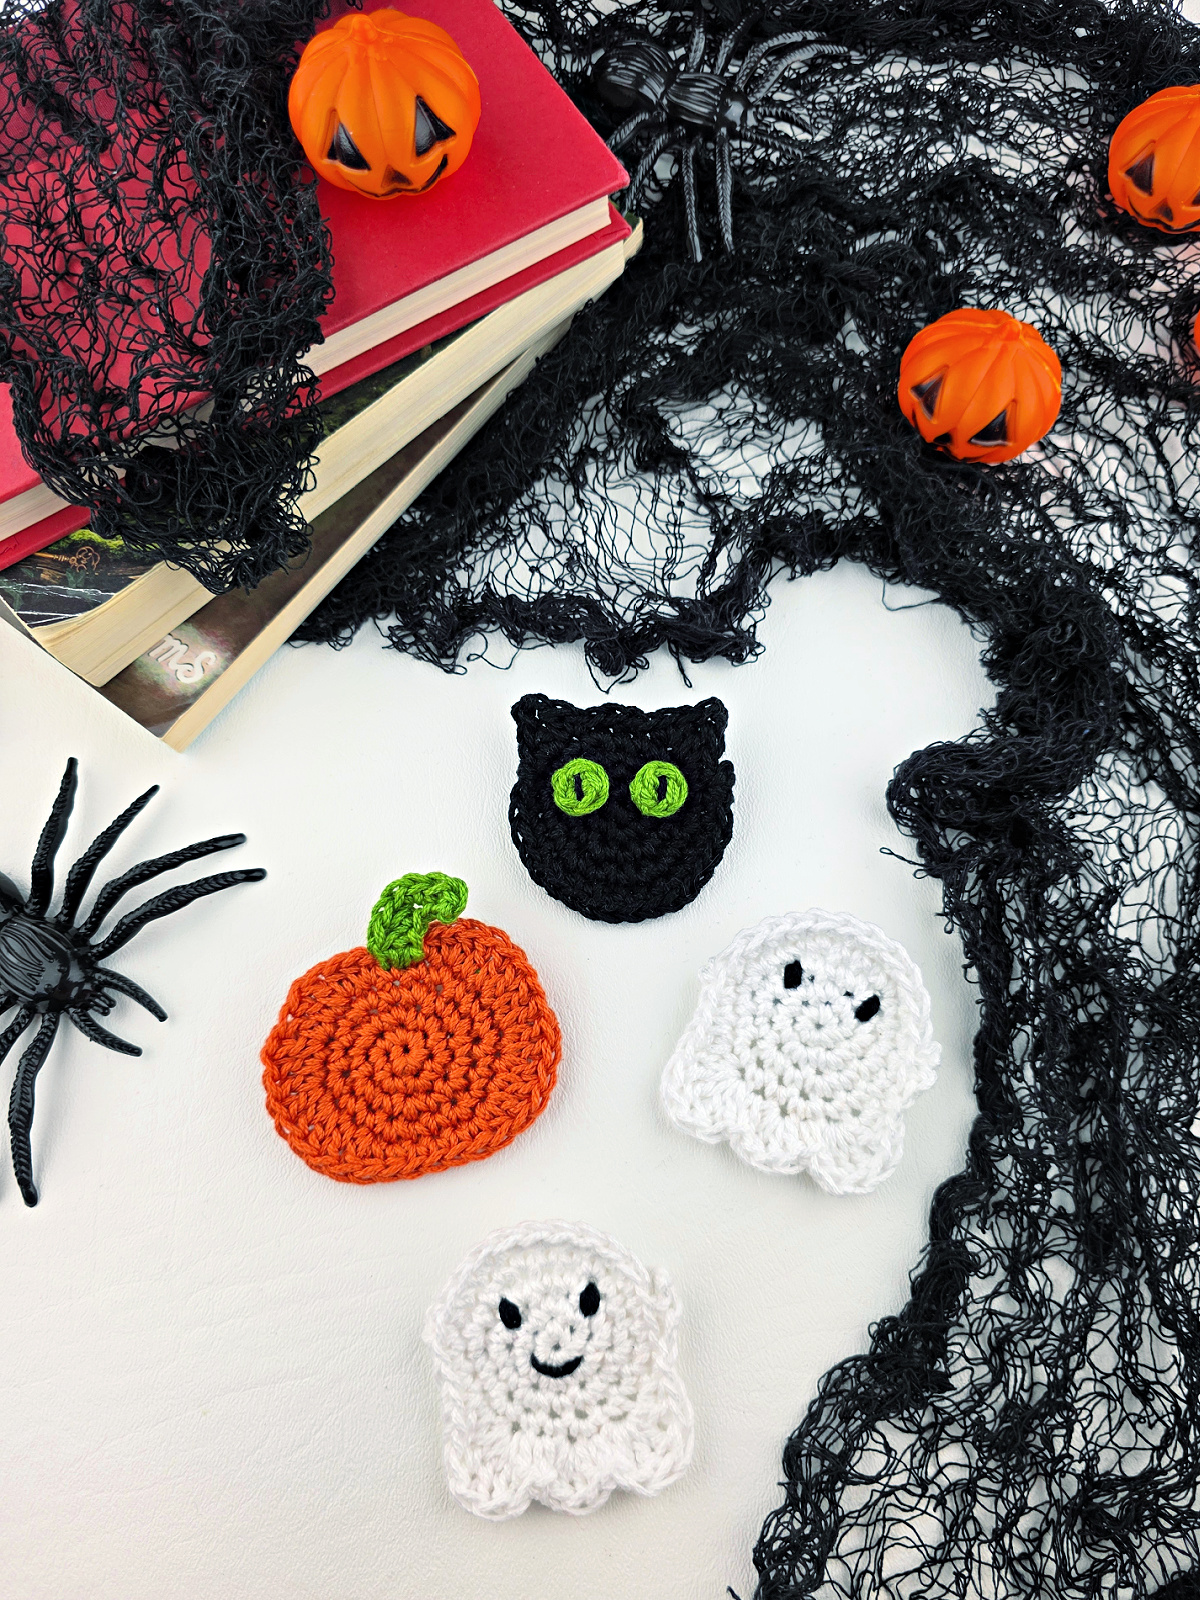
Whether you’re making a pumpkin, ghost, or cat, the construction is easy breezy. The basic structure is made first before a holder is attached to the back.
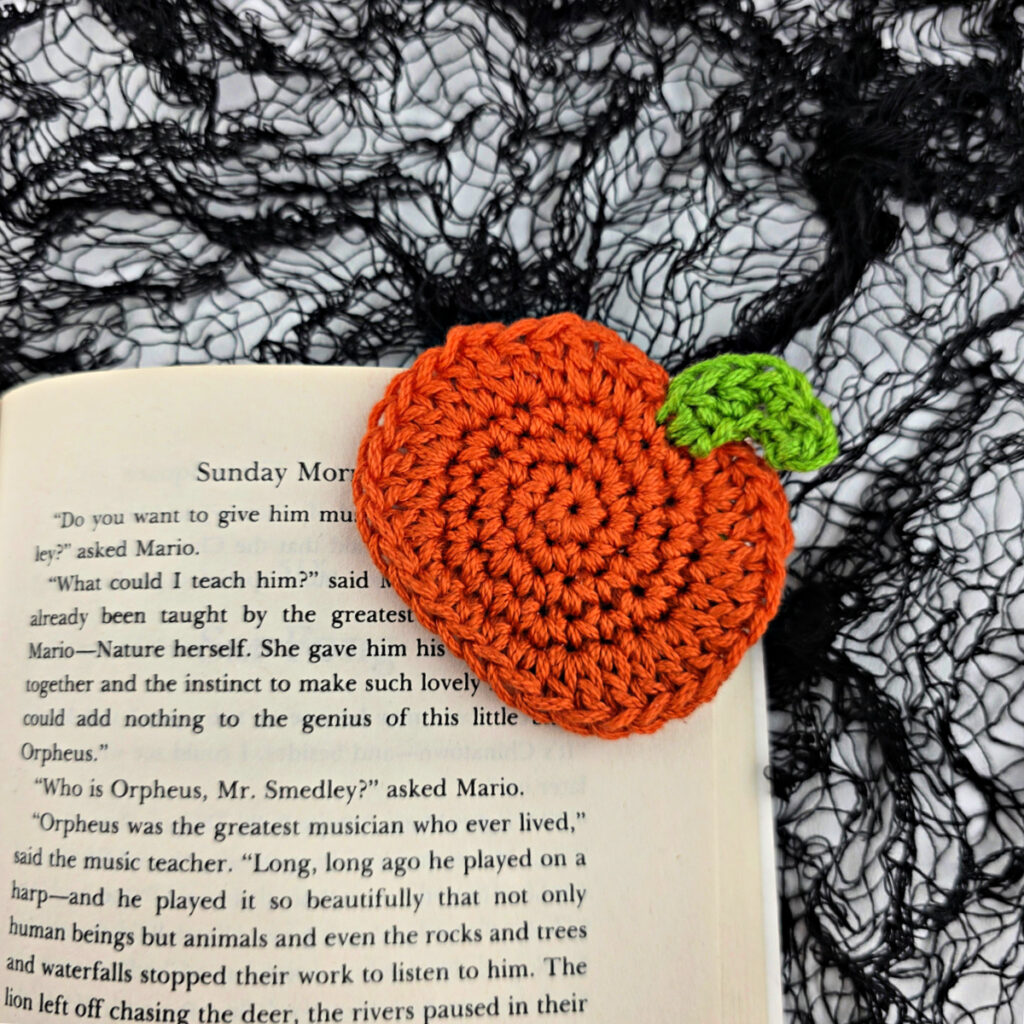
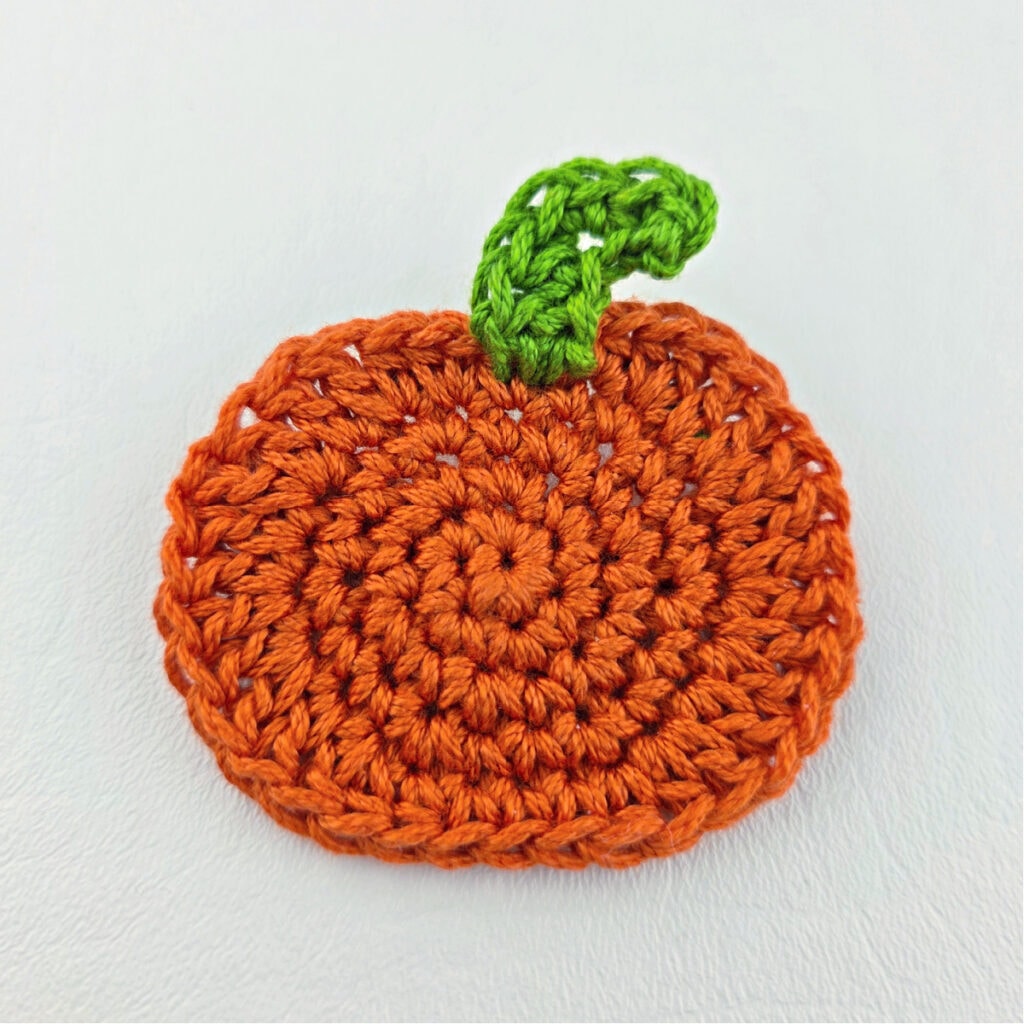
For the crochet pumpkin bookmark, you’ll make a circle and then give it the shape of a pumpkin. The stem is crocheted separately and then attached. To finish off, the holder loop is seamed to the back.
For the crochet cat bookmark, you’ll similarly start off with a circle and then shape the pointy ears. After sewing on the holder loop to the back of the cat, you’ll work on the eyes separately and then seam them on to the face of the cat, using some black thread for the pupils.
Lastly, for the crochet ghost bookmark, you’ll work a circle and add wavy edges to it. I made a smiley face to my ghost with black thread but you’re welcome to make whatever expression you like. And of course, don’t forget to attach the holder!
How To Get The
Halloween Crochet Bookmarks
Option 1: Scroll down for the free crochet corner bookmarks pattern right here in this blog post.
Option 2: Purchase the ad-free printable PDF from one of my shops:
Yarn
For the Halloween Crochet Corner Bookmarks pattern, I chose Lion Brand Yarn 24/7 Cotton in the colors Tangerine, Grass, White, and Black. This was the best choice for me because the colors matched the vision I wanted for my spooky bookmarks while offering me a durable, sturdy finish.
Lion Brand Yarn 24/7 Cotton is known for both its sheen and structure which remain no matter how much you wash and wear out your project. Since it’s machine washable, you don’t have to worry about your makes getting dirty or sitting out for too long, great qualities to have for bookmarks that may be left in books for a long time or accompany you in your travels.
While you can hand them out, these little DIY bookmarks also provide you company as you’re doing your late-night reading. You can theme them outside of Halloween; gift the cat to someone who loves their pet and use the pumpkins in fall and for Thanksgiving!
Halloween Corner Bookmarks – Free Crochet Bookmarks Pattern
The crochet corner bookmarks pattern is free below, but if you love to work offline, I’ve got a couple other great options for you.
Purchase the ad-free, printable PDF, (including all photo tutorials) on Ravelry, or on Etsy (aff).
This post contains affiliate links.
Materials
- Yarn: Aran / Worsted Weight / 4 / Yarn, Lion Brand Yarn 24/7 Cotton in Tangerine, Grass, White, and Black was used for the bookmarks shown in the photos.
- Yardage and Color:
- Tangerine: #761-186G / 7 yards
- Grass: #761-172H / 3 yards
- White: #761-100 / 8 yards
- Black: #761-153 / 7 yards
- Crochet Hooks: G/6/4.00mm; or size needed to obtain gauge (My favorite crochet hooks are the Clover Amour Crochet Hooks, I’ve never had an ache in my hand since switching).
- Measuring Tape
- Scissors
- Yarn Needle
- Locking Stitch Markers
- Jack-O-Lantern & Ghost Face Materials – see notes below
Abbreviations (US Terms)
- ch(s): chain(s)
- sl st(s): slip stitch(es)
- st(s): stitch(es)
- sc: single crochet
- hdc: half double crochet
- dc: double crochet
- tr: treble crochet
- Rep: repeat
- RS: right side
- SM: stitch marker
- Rnd: round
- BLO: back loop only
Experience Level
- Easy
Gauge
- Measurements given throughout pattern.
Sizes
- Sizes listed throughout pattern.
Pattern Notes
- Yarn Notes: Lion Brand Yarn 24/7 Cotton was used for the samples, 100% Mercerized Cotton (3.5oz / 100 g / 186 yds / 170 m). Another comparable worsted weight yarn may be substituted. Other yarn fibers will also work well.
- Yardage & Color:
- Tangerine: #761-186G / 7 yards
- Grass: #761-172H / 3 yards
- White: #761-100 / 8 yards
- Black: #761-153 / 7 yards
- Jack-O-Lantern & Ghost Faces: There are several options for turning your pumpkin into a Jack-O-Lantern. You can embroider a face using embroidery thread, draw on a face using fabric markers or puff paints, or cut little shapes out of black felt and glue them on. You can also use these options to make facial features for the ghost.
- FREE Printable Gift Tags: I’ve created a PDF with printable gift tags that pair great with these Halloween bookmarks. Scroll all the way down to the bottom of the post and make sure to download your pdf!
Halloween Crochet Corner Bookmarks – Written Pattern
Crochet Pumpkin Bookmark
Note: The pumpkin bookmark is worked in continuous rounds to keep from having an unsightly seam. Do not join at the end of each round, instead use a scrap piece of yarn to keep track of the beginning of each round. Move the scrap of yarn up as you complete each round.
Colors & Yardage: Orange (7 yards); Green (1 yard)
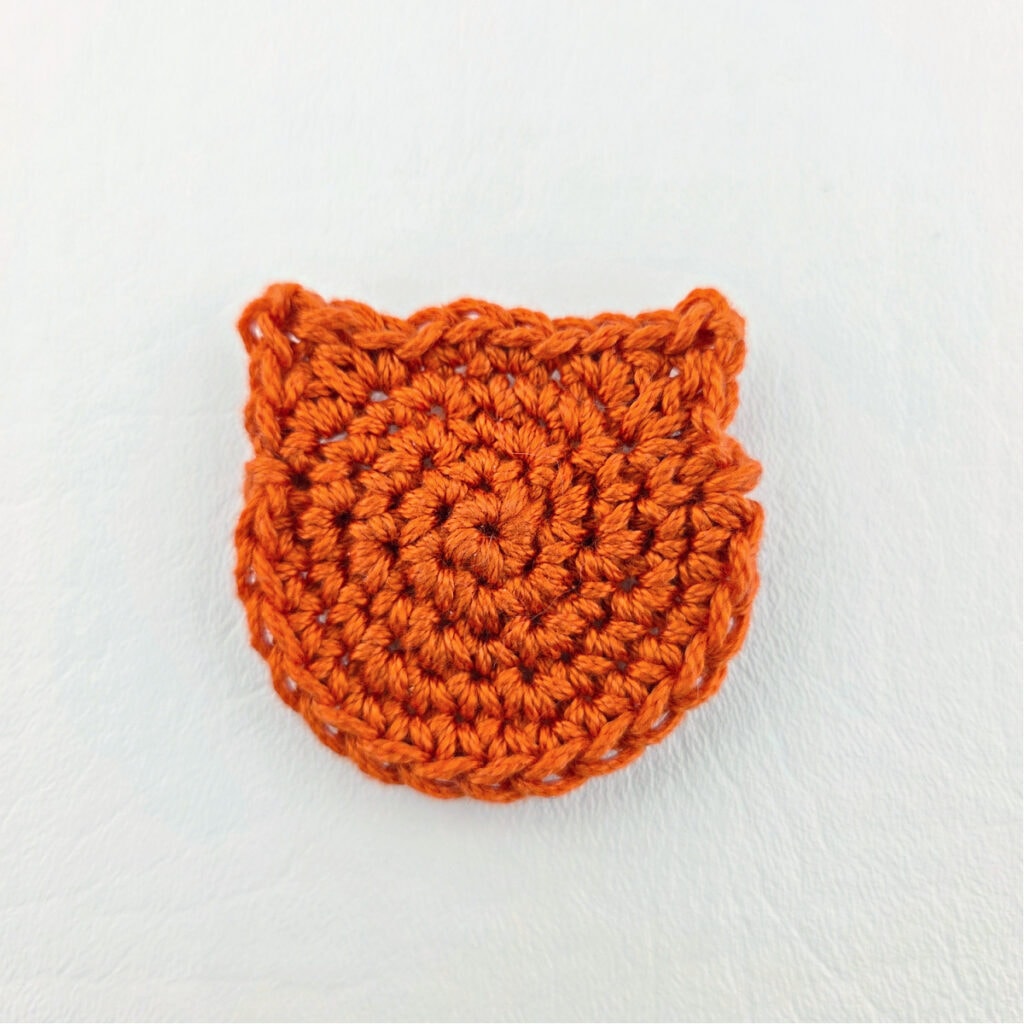
Rnd 1 (RS): Using a 4.00mm crochet hook & orange yarn, ch 2, work 6 sc into the 2nd ch from your hook. (6 sts)
Rnd 2: 2 sc in each st around. (12 sts)
Rnd 3: * 2 sc in the next st, sc in the next st, rep from * around. (18 sts)
Rnd 4: * 2 sc in the next st, sc in each of the next 2 sts, rep from * around. (24 sts)
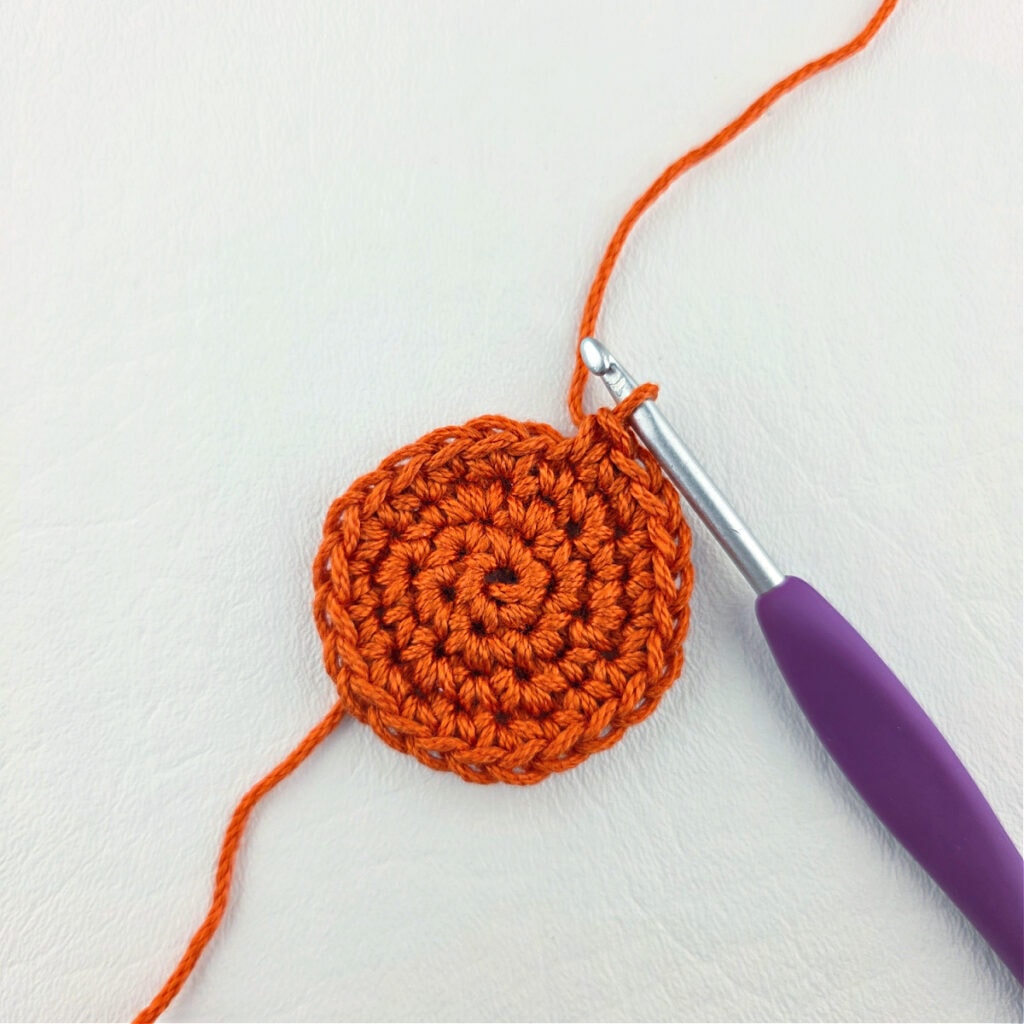
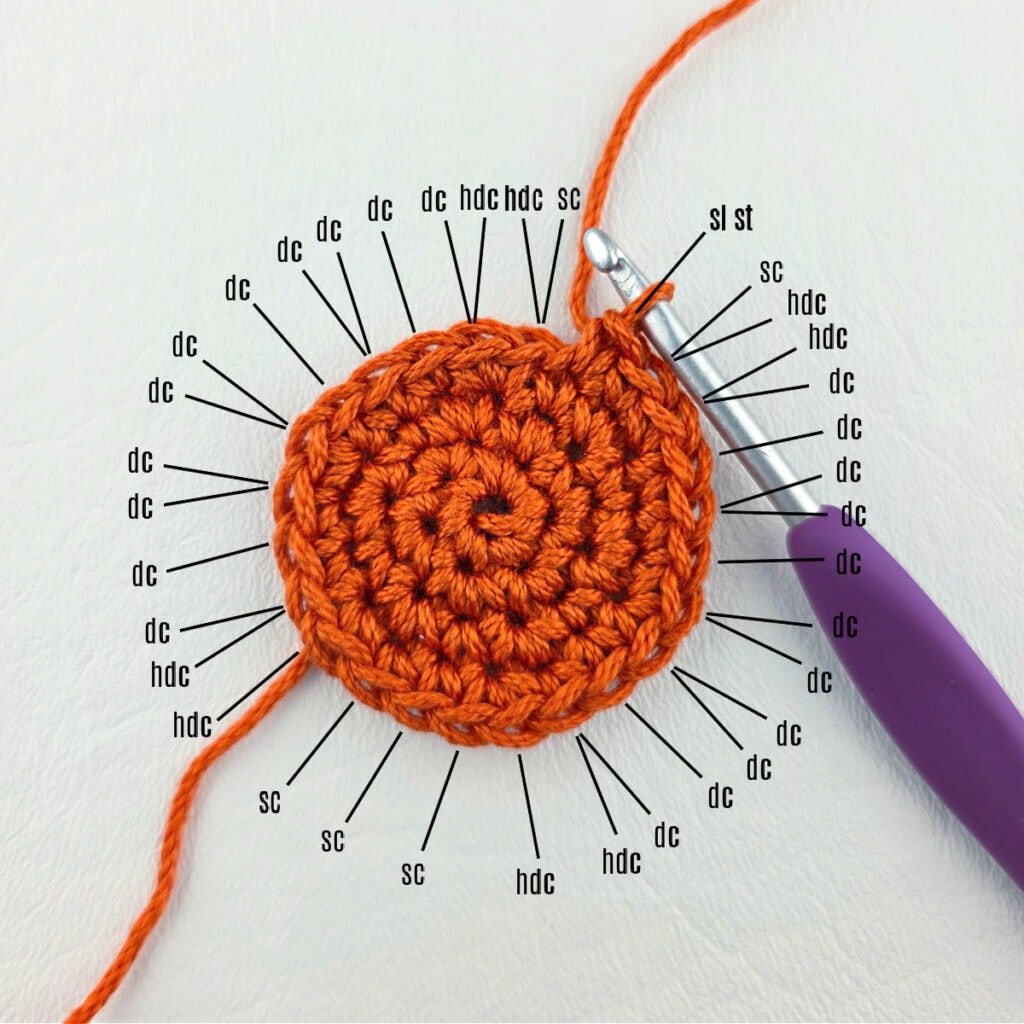
Rnd 5: (sc, hdc) in the first st, (hdc, dc) in the next st, dc in the next st, 2 dc in the next st, dc in the next st, 2 dc in each of the next 2 sts, dc in the next st, (dc, hdc) in the next st, hdc in the next st, sc in each of the next 3 sts, hdc in the next st, (hdc, dc) in the next st, dc in the next st, 2 dc in each of the next 2 sts, dc in the next st, 2 dc in the next st, dc in the next st, (dc, hdc) in the next st, (hdc, sc) in the next st, sl st in the last st. (36 sts)
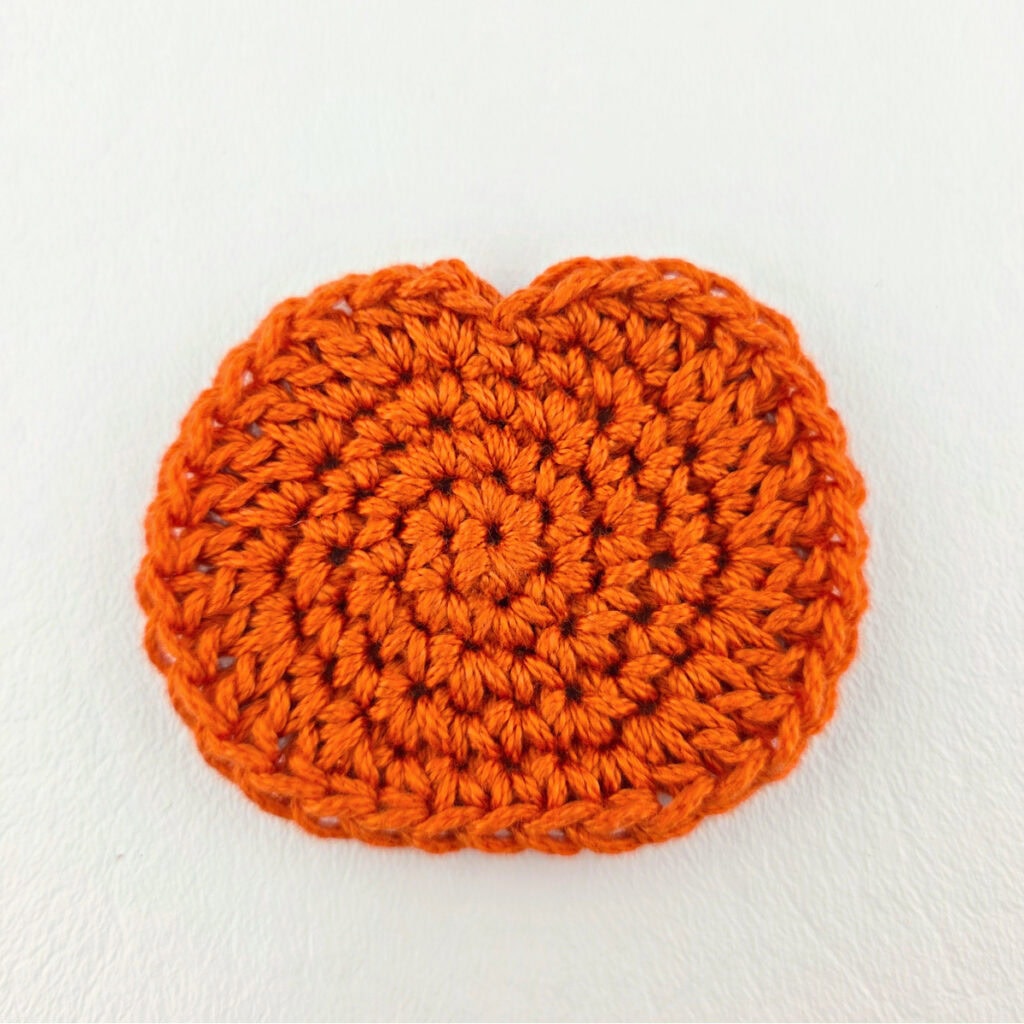
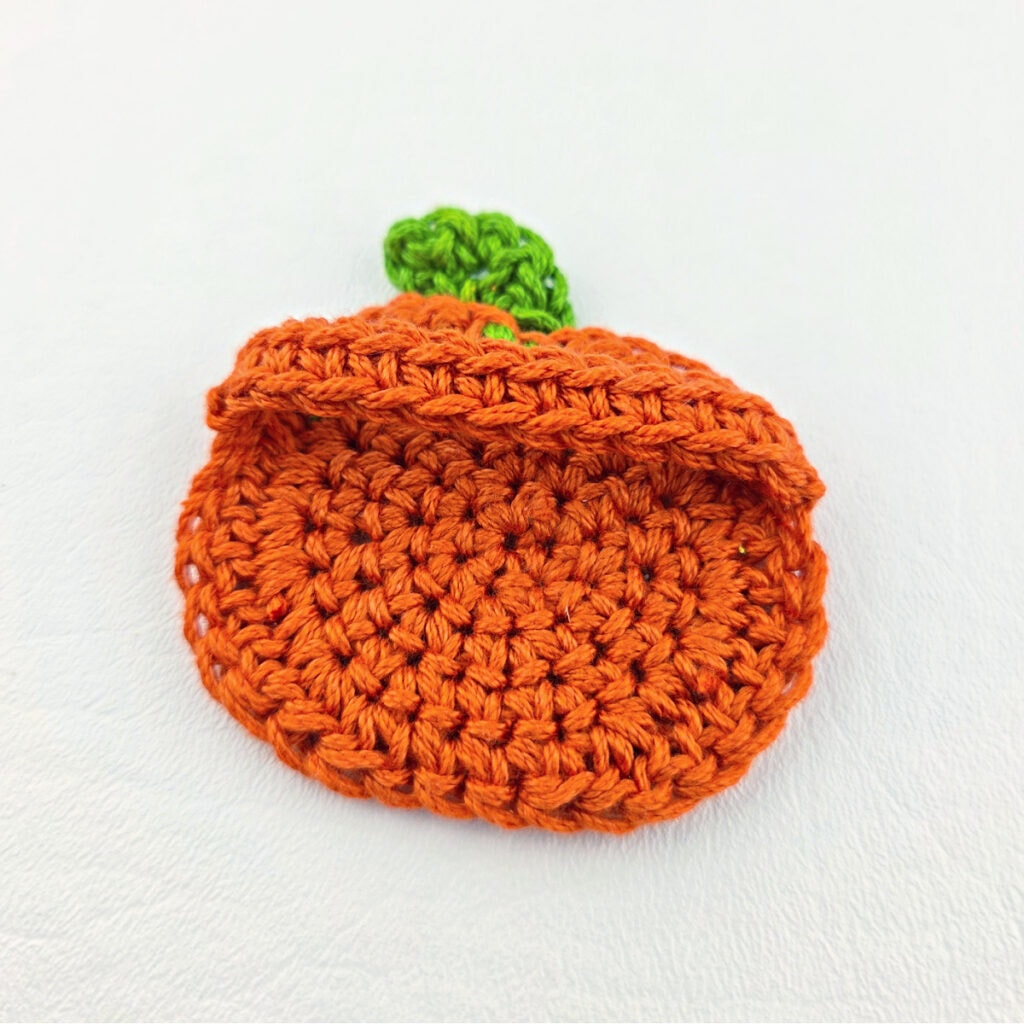
Fasten off. Weave in ends. Continue on to the Pumpkin Stem. Pumpkin measures approximately 2-3/4″ across, at the widest part.
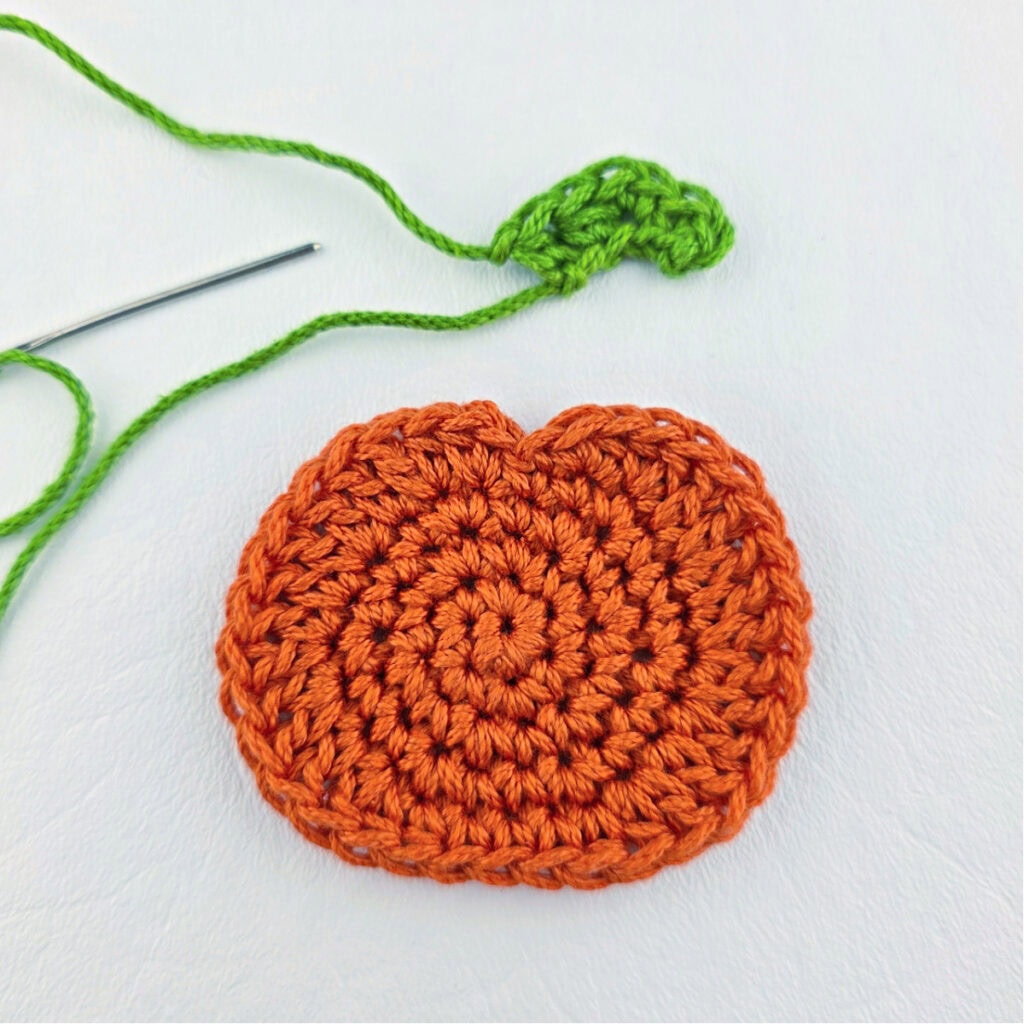
Pumpkin Stem
Row 1 (RS): Using a 4.00mm crochet hook & green yarn, ch 5, working into the back hump of the ch, work 2 sc into the 2nd ch from your hook, 2 sc into the next ch, hdc in each of the last 2 chs. (6 sts)
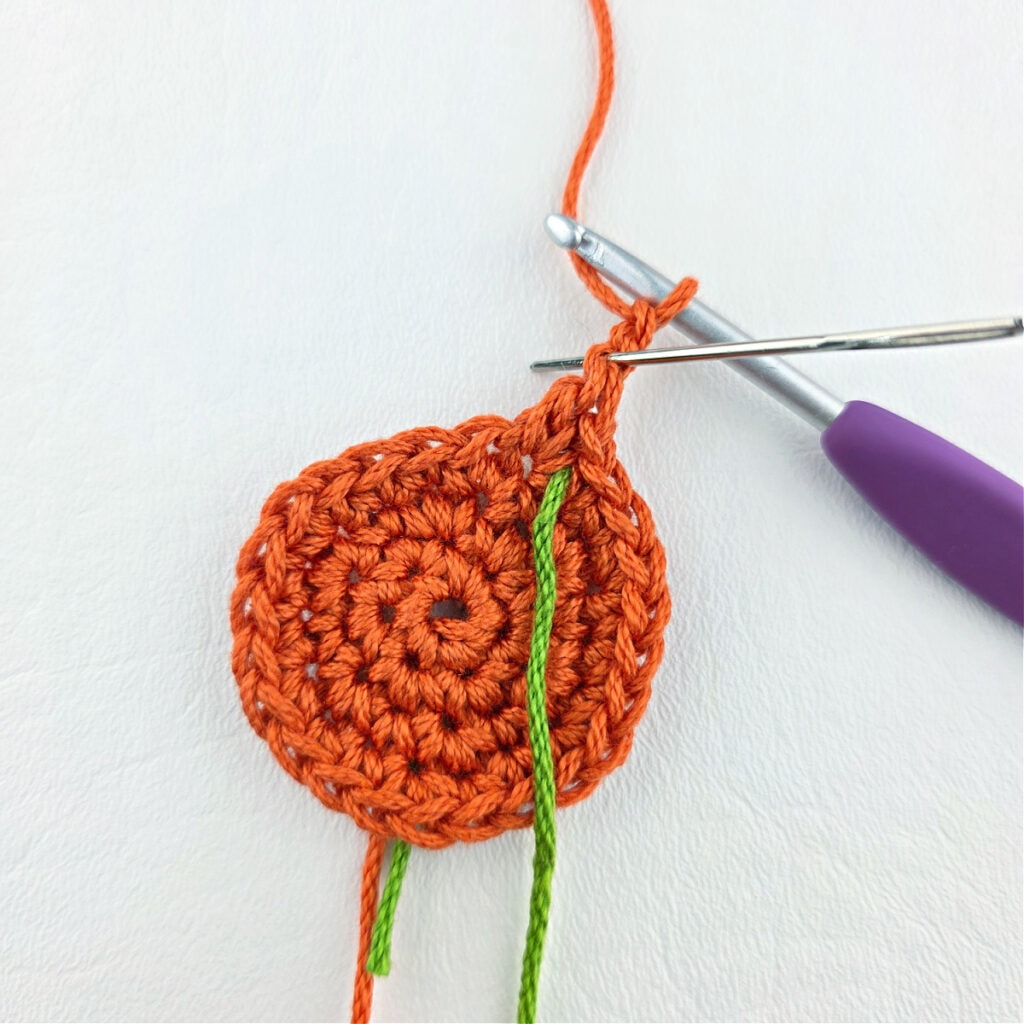
Fasten off, leaving a tail long enough to attach the stem to the top of the pumpkin. With a yarn needle and tail of yarn, attach the pumpkin stem to the top of the pumpkin (where you fastened off for the pumpkin itself). Continue on to the Page Holder Loop.
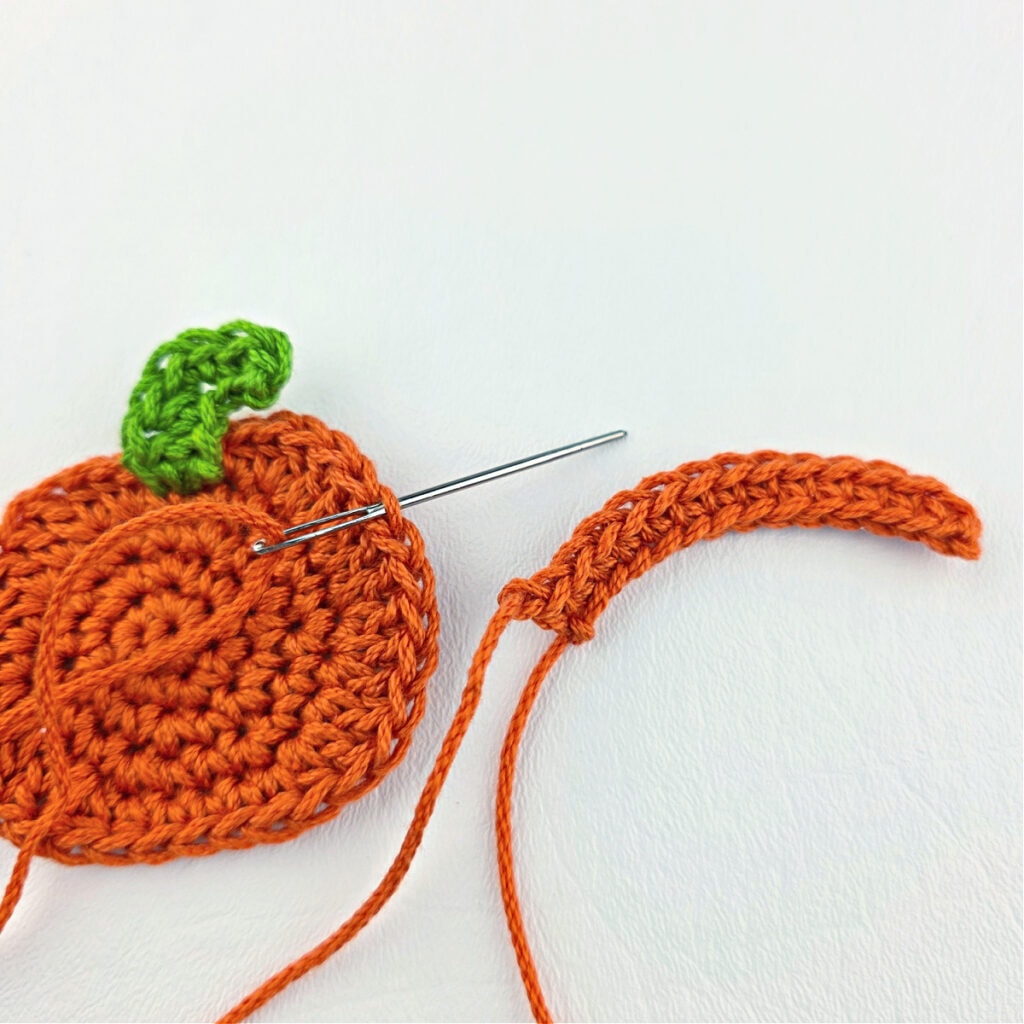
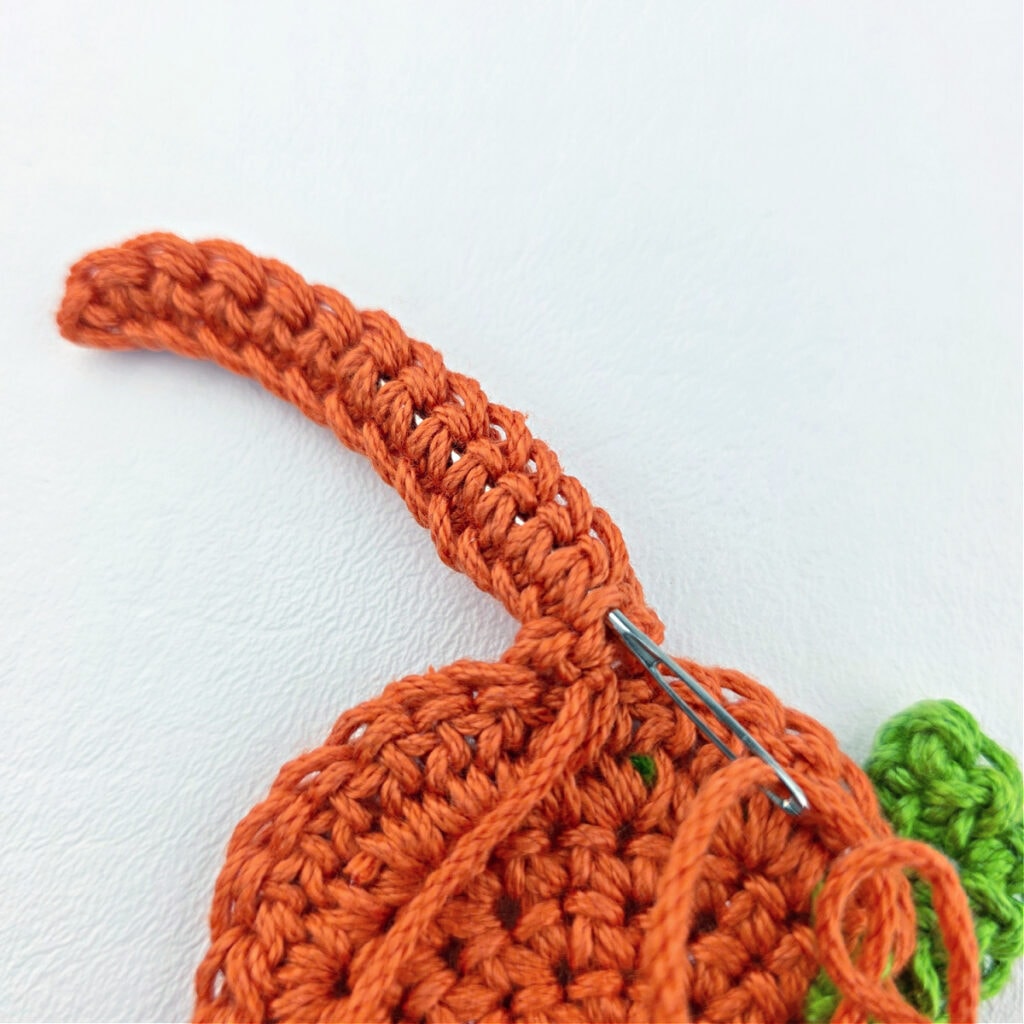
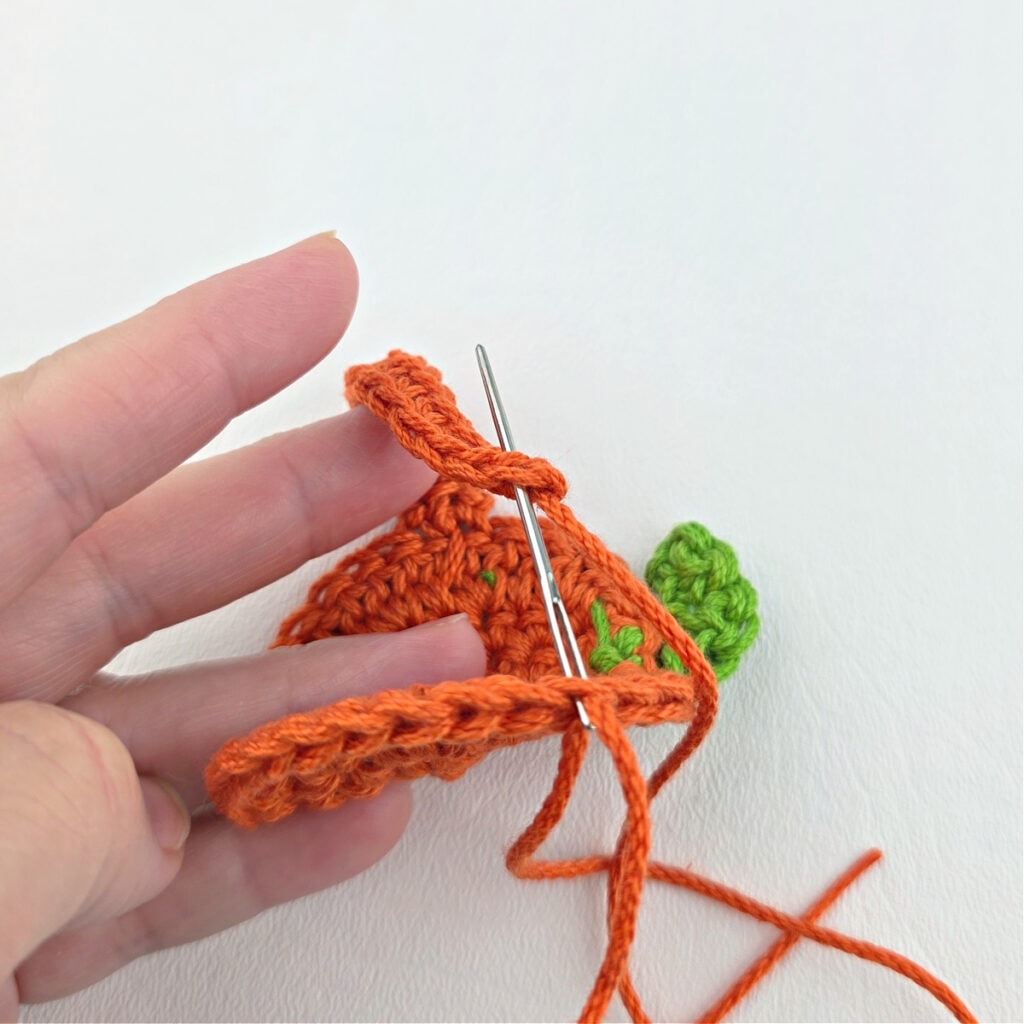
Page Holder Loop
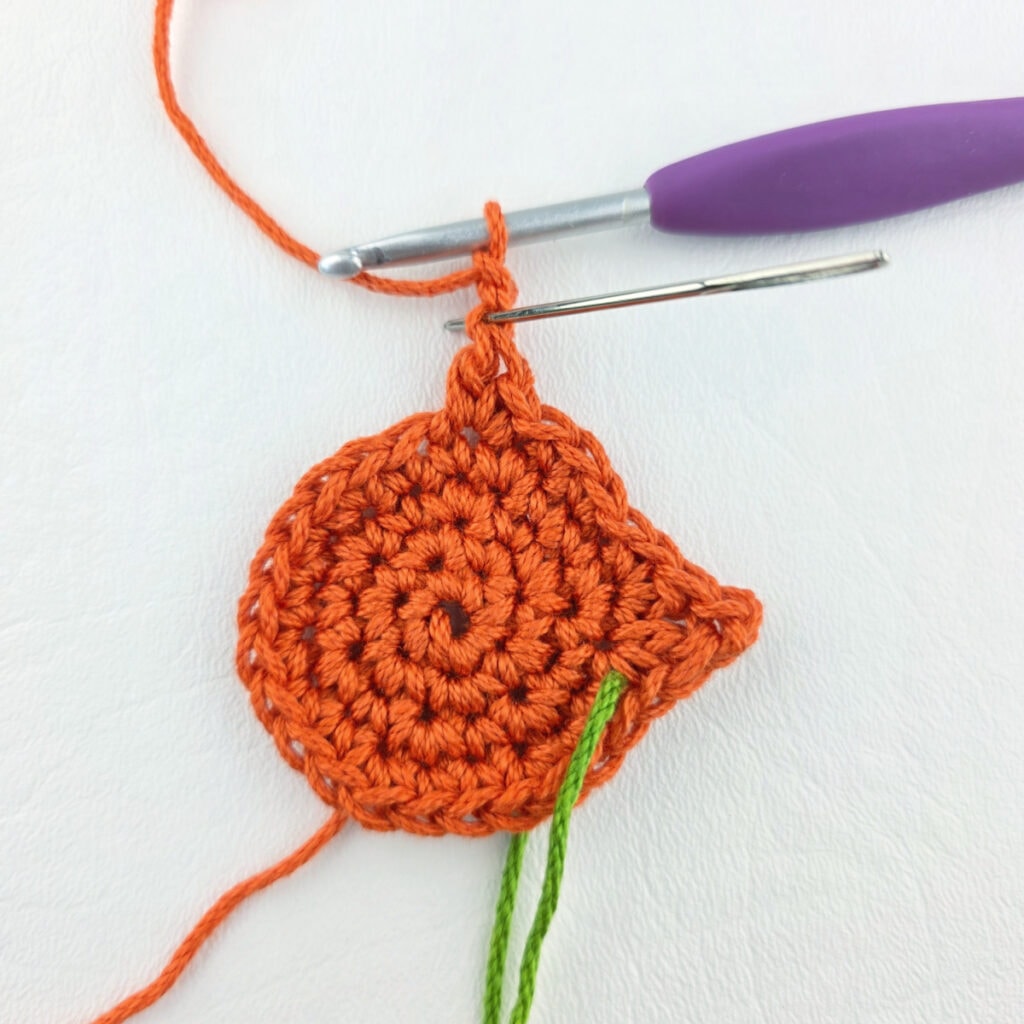
Row 1 (RS): Using a 4.00mm crochet hook & orange yarn, ch 14, working into the back hump of the ch, sc into the 2nd ch from your hook and in each ch across. (13 sts)
Fasten off, leaving a 12″ tail of yarn. Weave in the beginning tail of yarn. Then, with a yarn needle and 12″ tail of yarn, attach the first side of the page holder loop to the back loop of a stitch along one side of the pumpkin. Weave the tail of yarn through the page holder loop stitches all the way across to the end, then attach the second side of the page holder loop to the back loop of a stitch on the opposite side of the pumpkin. Weave in ends. Continue on to the Jack-O-Lantern Face, if desired.
Jack-O-Lantern Face
There are several options for turning your pumpkin into a Jack-O-Lantern. You can embroider a face using embroidery thread, draw on a face using fabric markers or puff paints, or cut little shapes out of black felt and glue them on.
Pumpkin Progression Photos
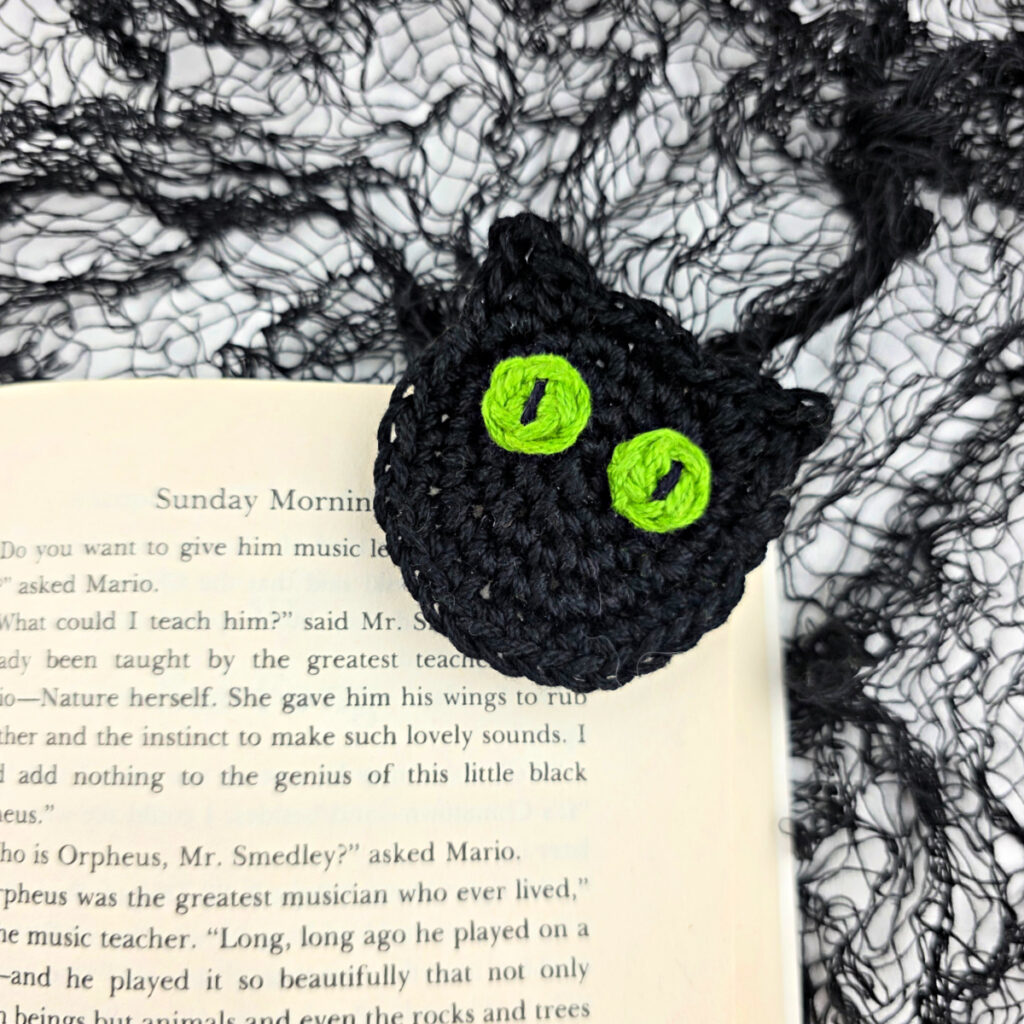
Black Cat Bookmark
Note: The cat’s head of the bookmark is worked in continuous rounds to keep from having an unsightly seam. Do not join at the end of each round, instead use a scrap piece of yarn to keep track of the beginning of each round. Move the scrap of yarn up as you complete each round.
Colors & Yardage: Black (7 yards); Green (2 yards)
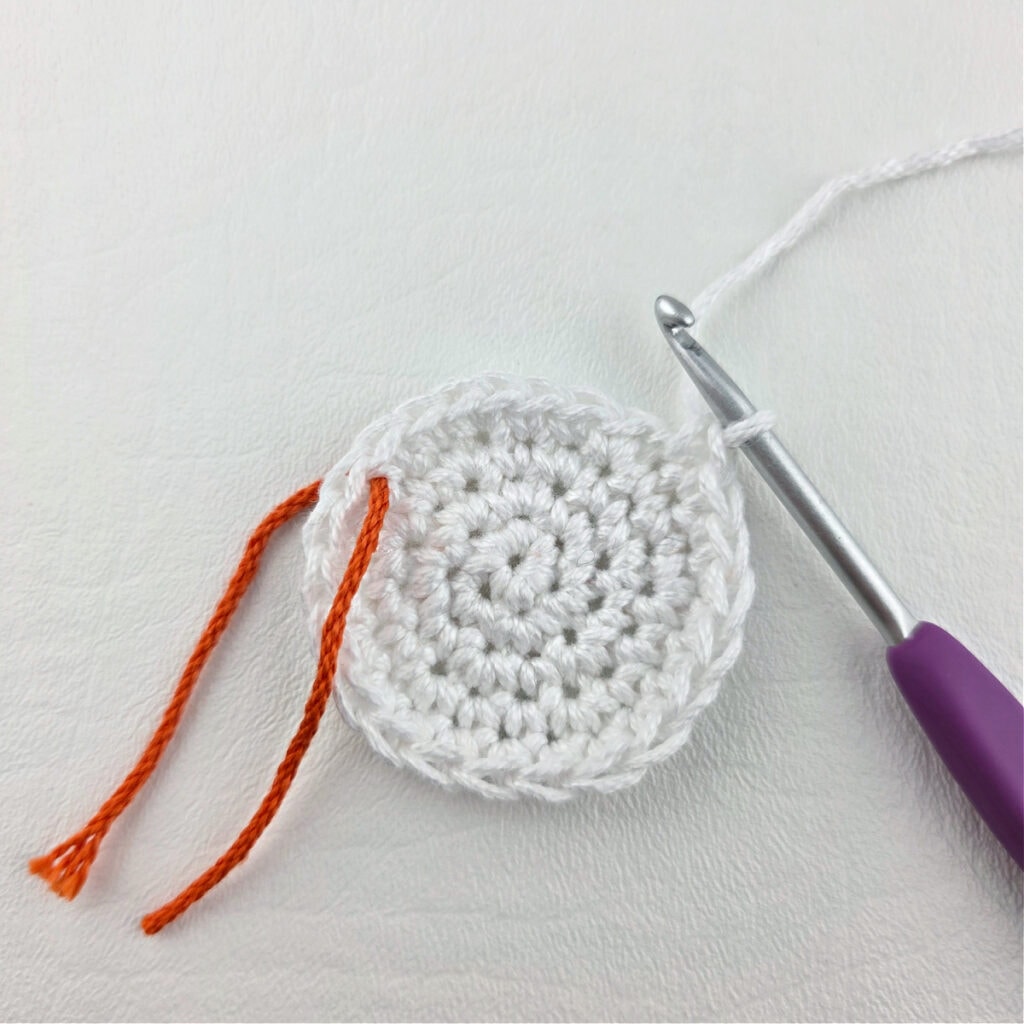
Rnd 1 (RS): Using a 4.00mm crochet hook & black cotton yarn, ch 2, work 6 sc into the 2nd ch from your hook. (6 sts)
Rnd 2: 2 sc in each st around. (12 sts)
Rnd 3: * 2 sc in the next st, sc in the next st, rep from * around. (18 sts)
Rnd 4: * 2 sc in the next st, sc in each of the next 2 sts, rep from * around. (24 sts)
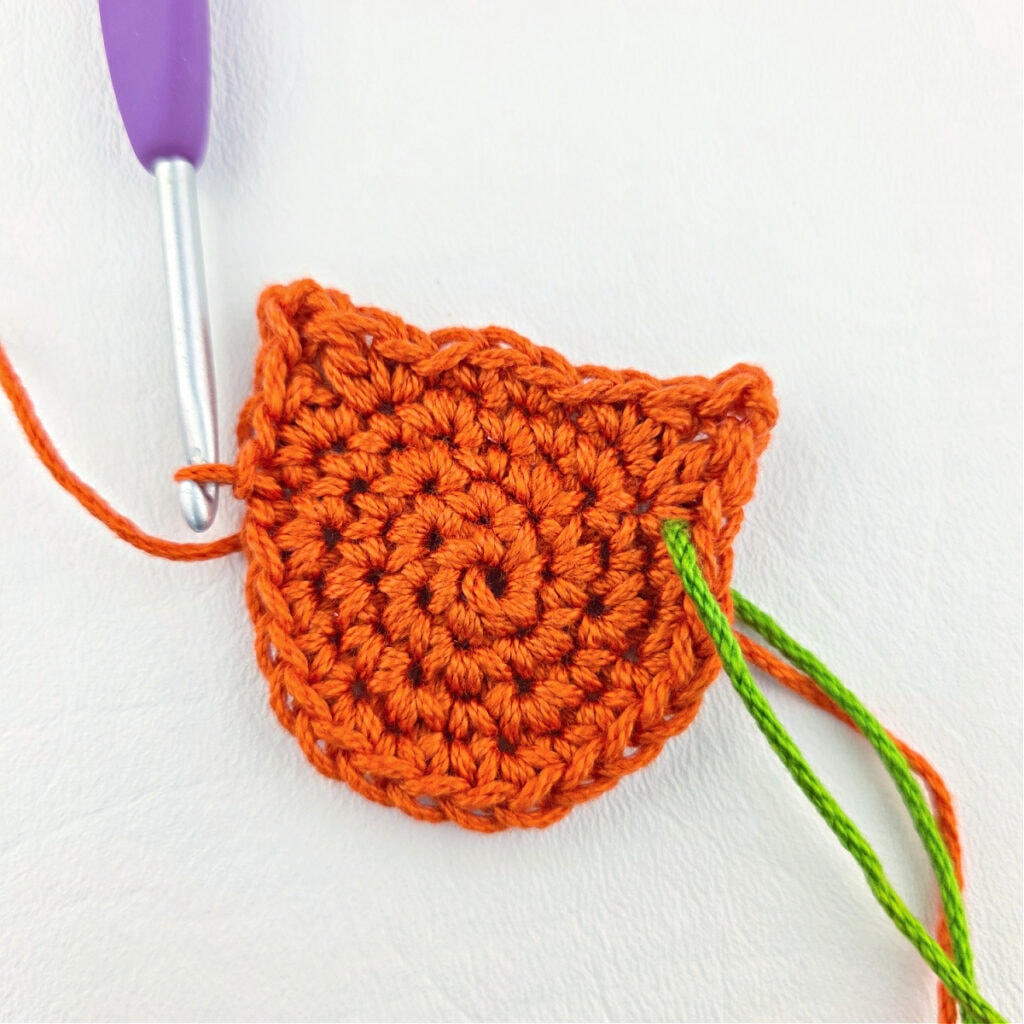
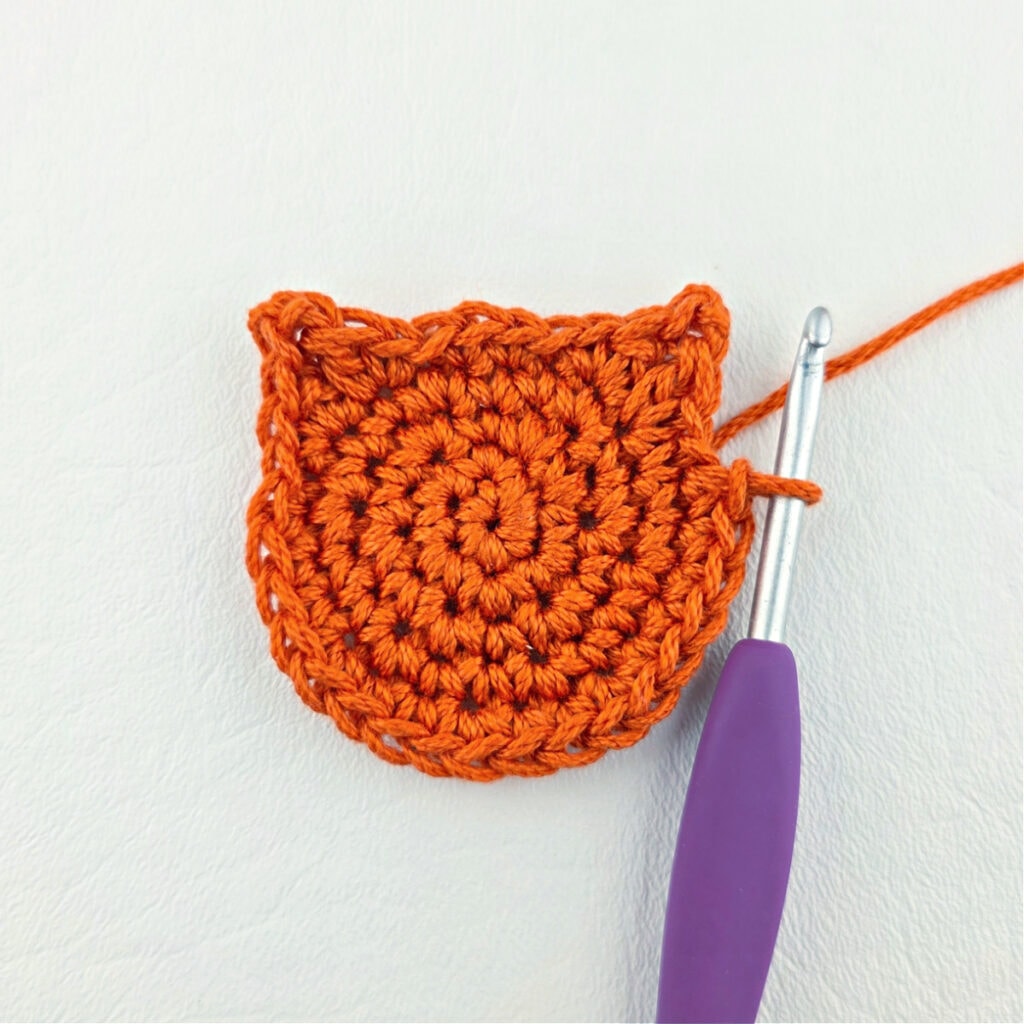
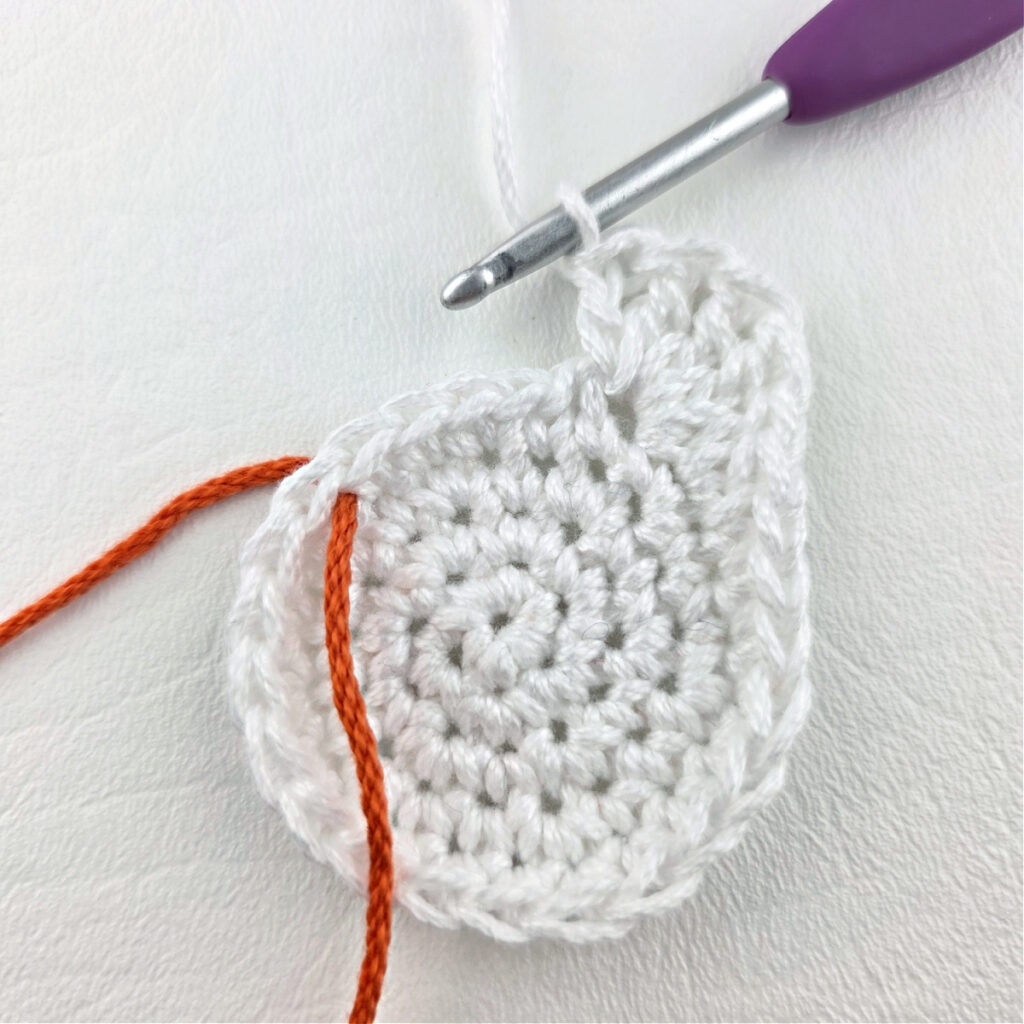
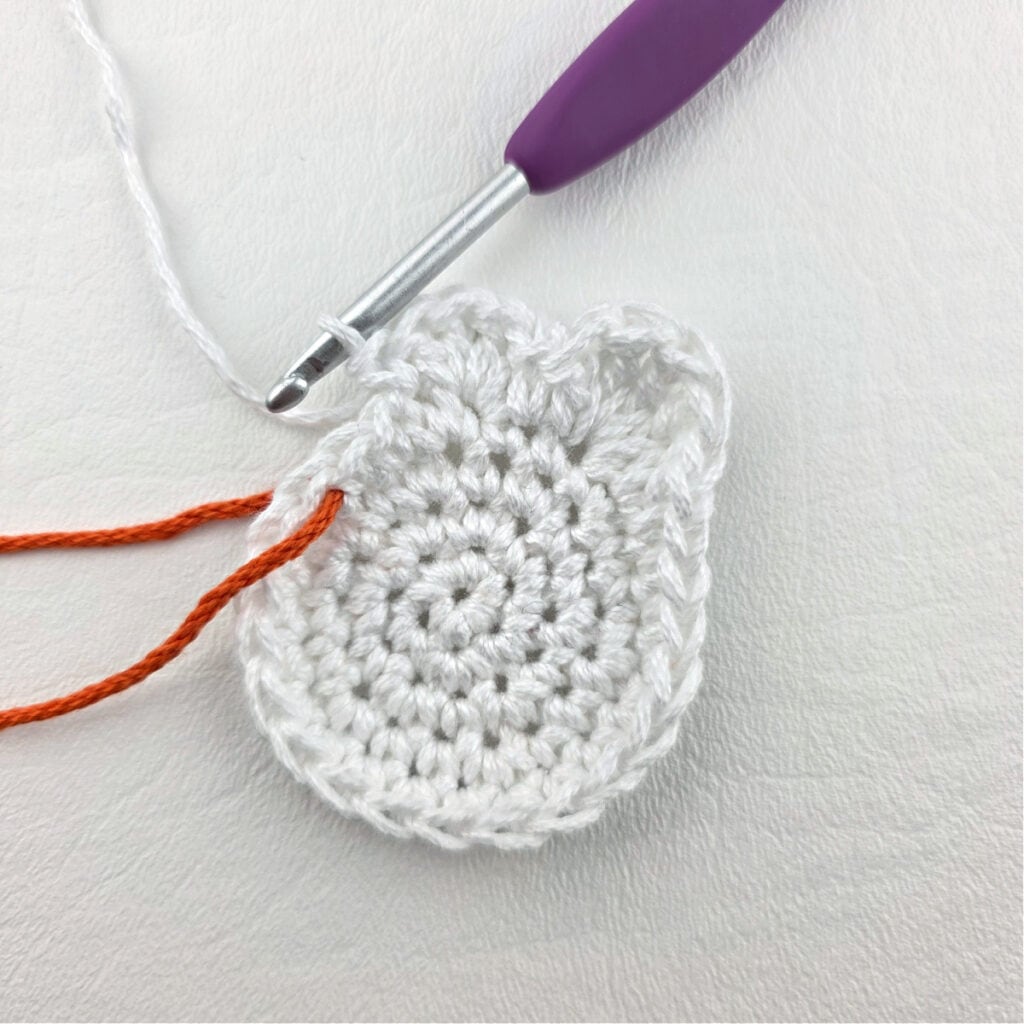
Rnd 5: (sc, dc) in the first st, ch 2, sl st in the 2nd ch from your hook, (dc, sc) in the next st, sl st in the next st, sc in each of the next 2 sts, sl st in the next st, (sc, dc) in the first st, ch 2, sl st in the 2nd ch from your hook, (dc, sc) in the next st, sl st in the next st, sc in each of the next 3 sts, (2 sc in the next st, sc in each of the next 2 sts) twice, 2 sc in the next st, sc in each of the next 4 sts, sl st in the last st. (30 sts)
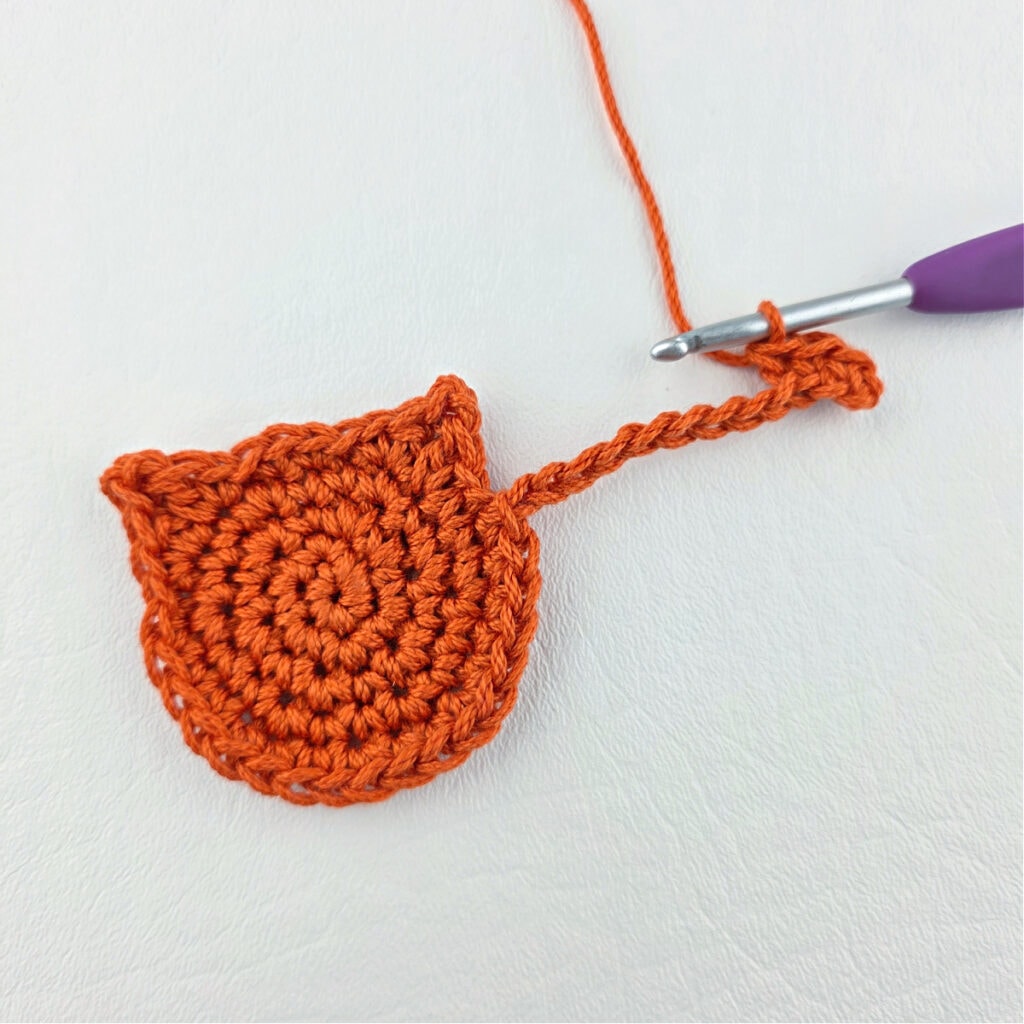
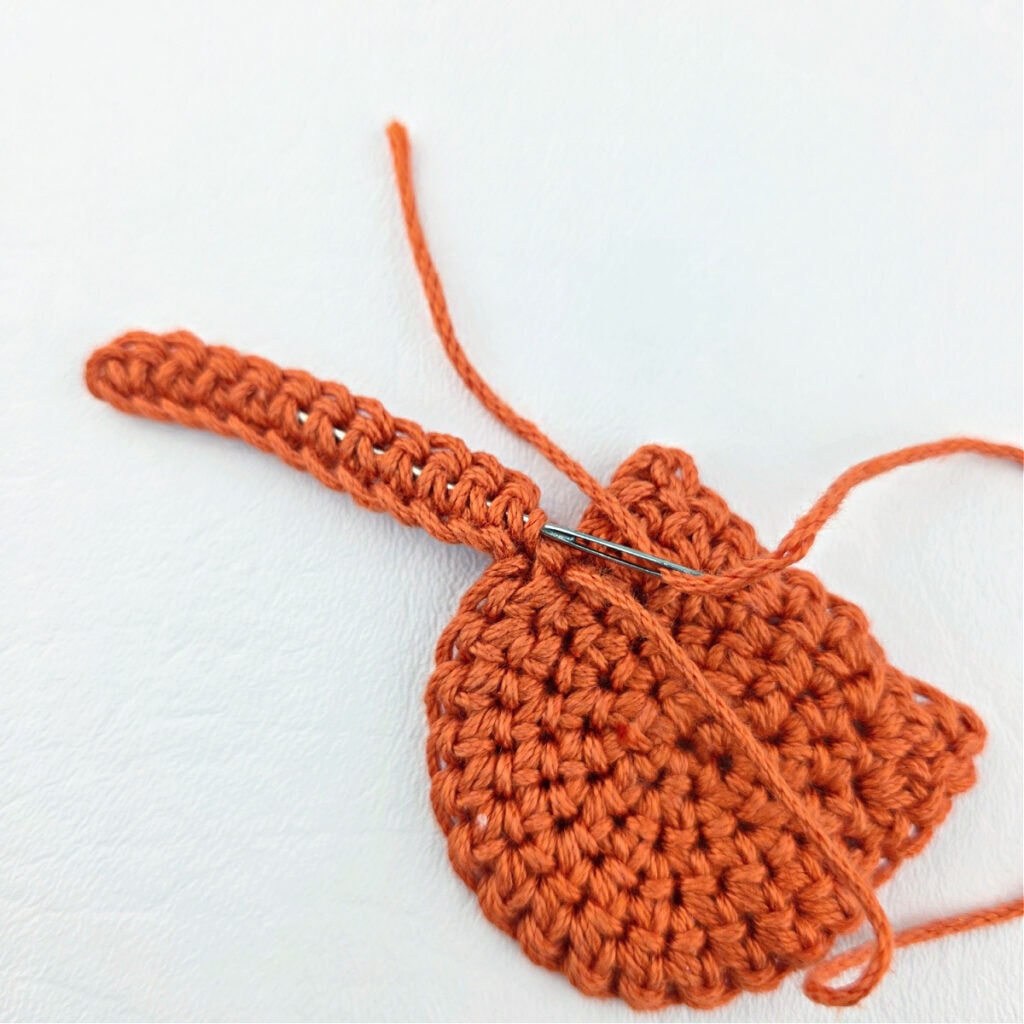
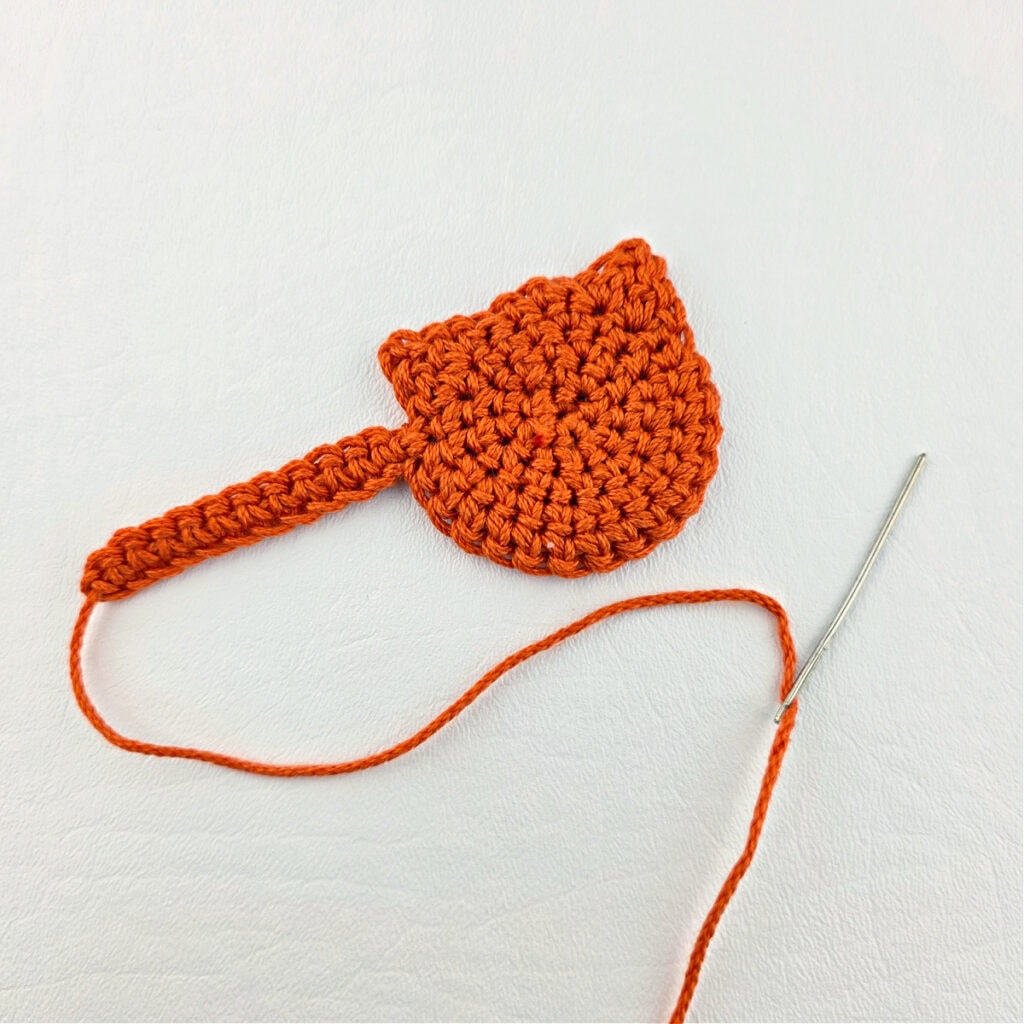
Last Step: Ch 13, working into the back humps of the ch, sc in the 2nd ch from your hook and in each ch across.
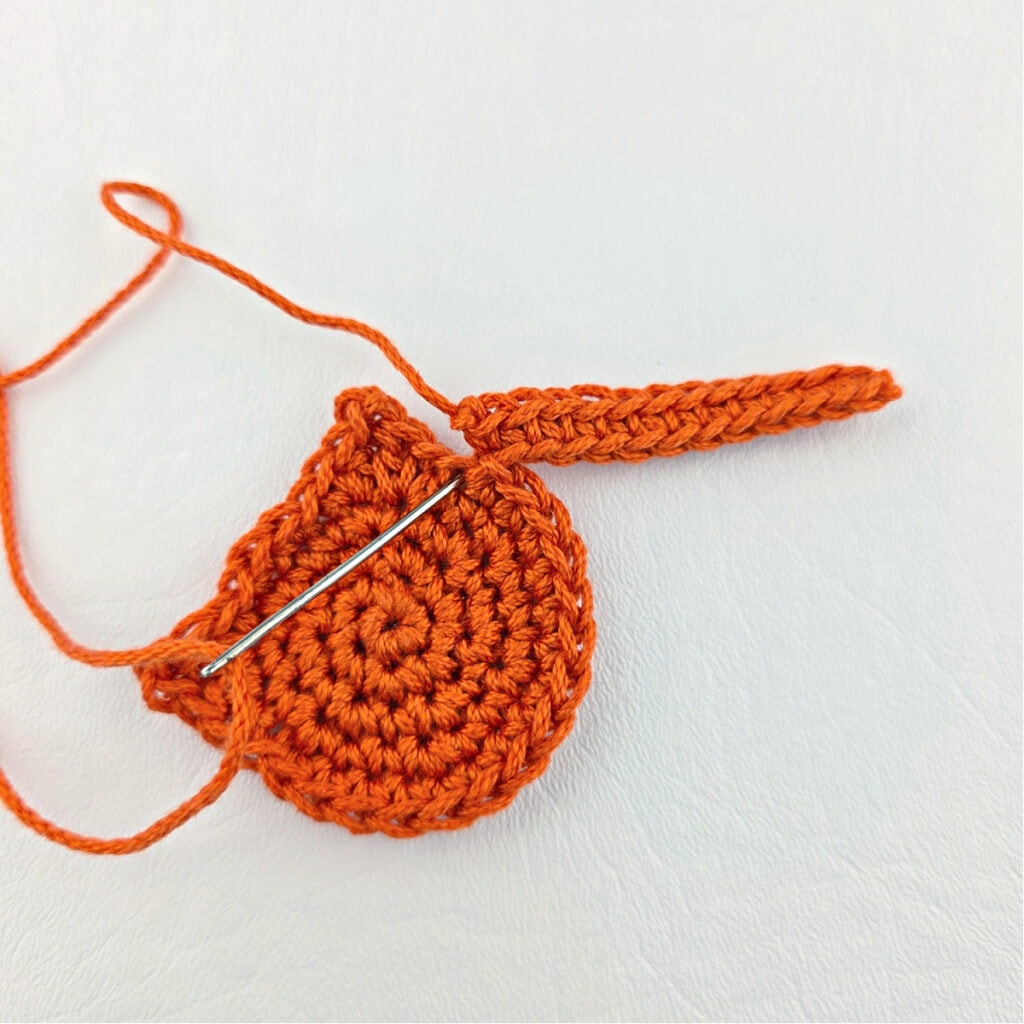
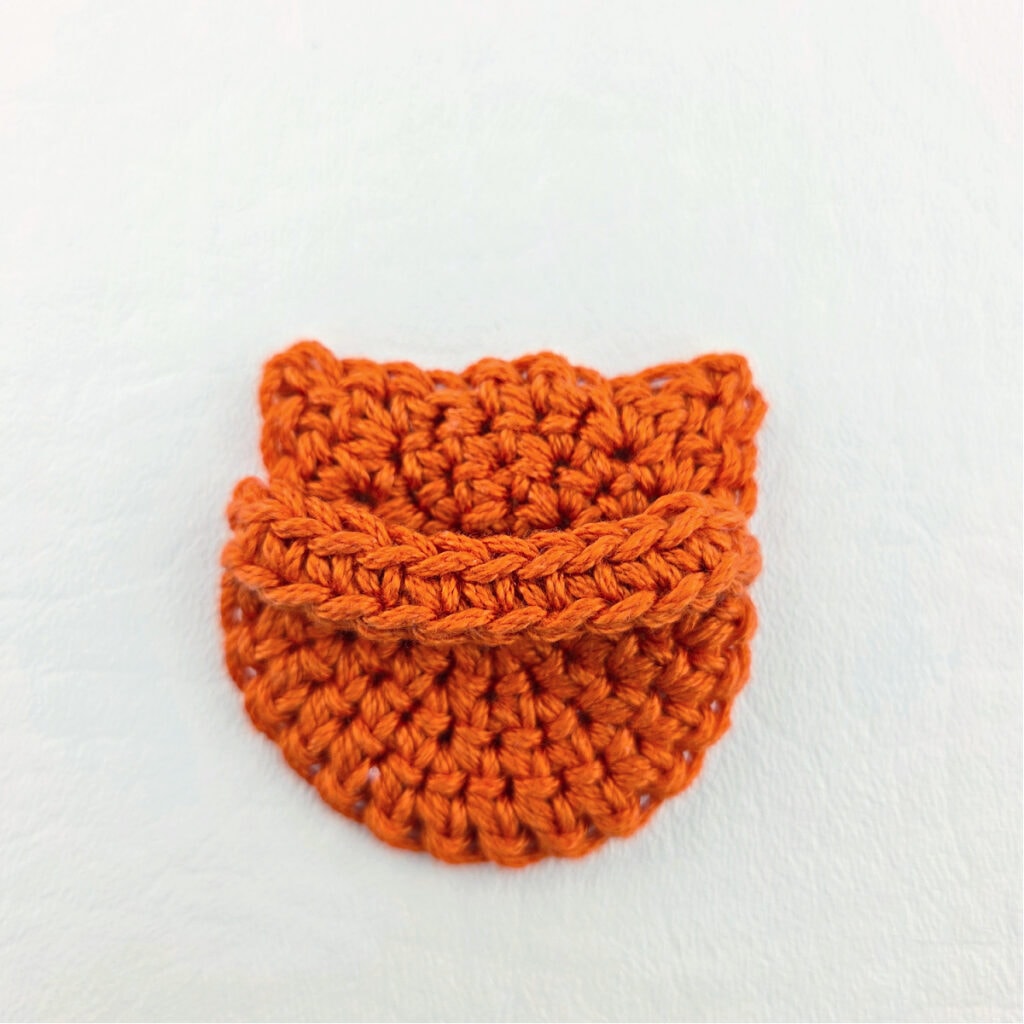
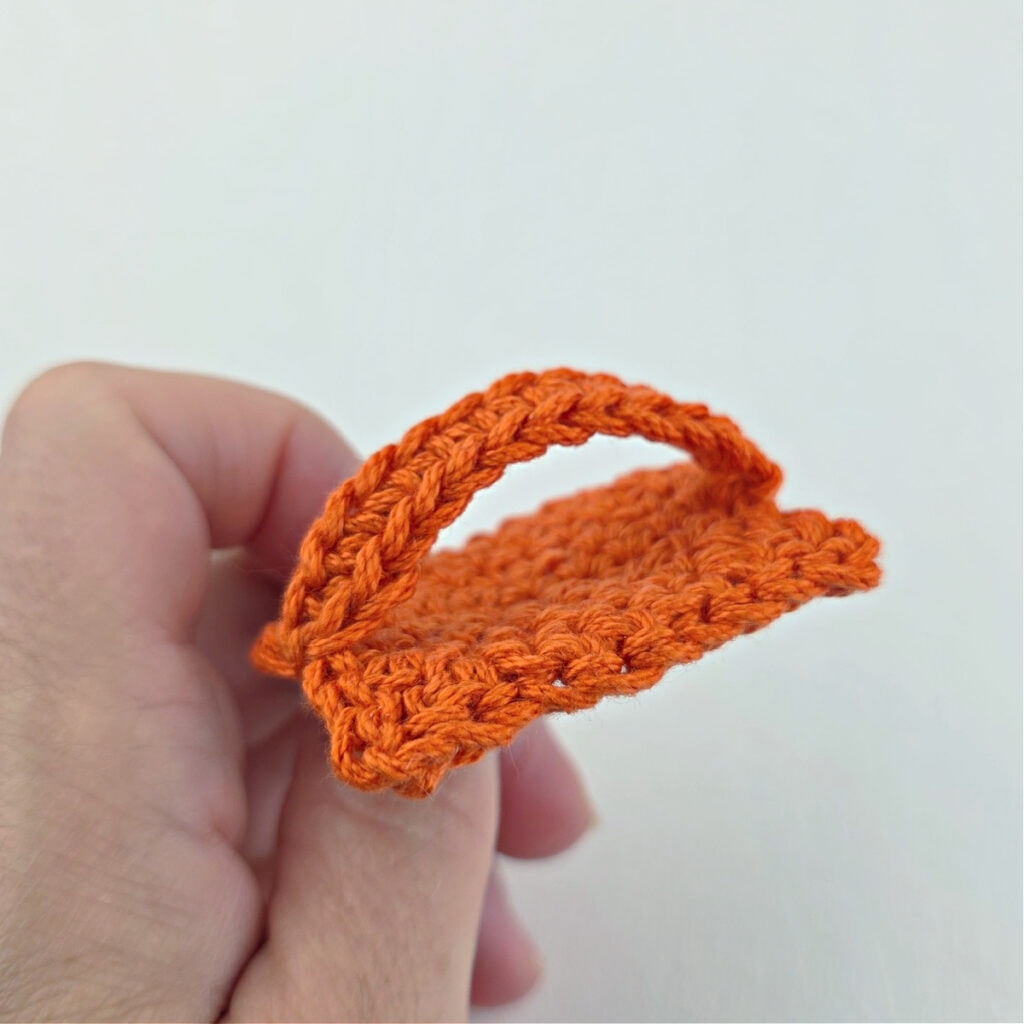
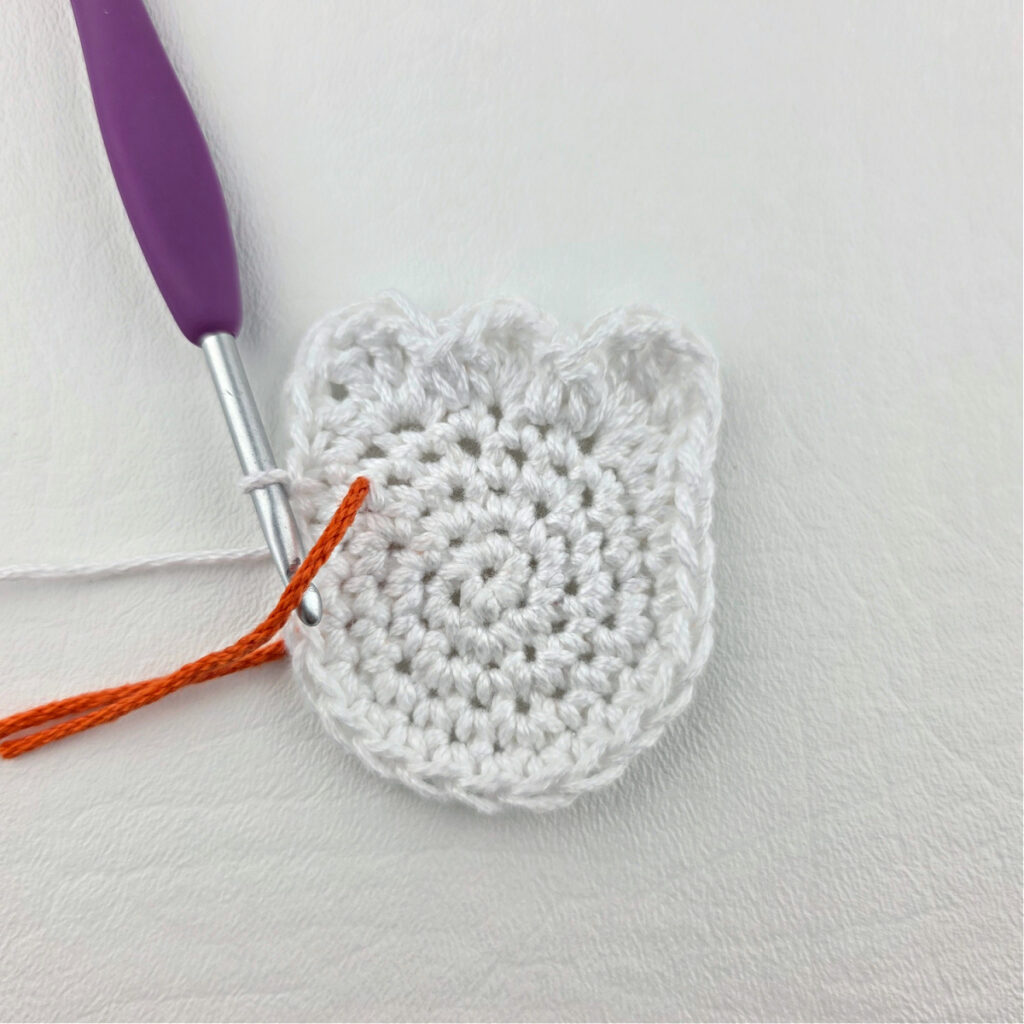
Fasten off, leaving a 12″ tail of yarn. With a yarn needle and tail of yarn, attach the last sc worked to the same stitch as the ch 13. Then weave the tail through the wrong side of the 12 sc. Lastly, attach the end of this piece to the opposite side of the cat’s head, to the slip stitch that was worked just below the cat’s ear. Weave in ends.
Continue on to the Cat’s Eyes. Approximate finished size is 2-1/8″ in diameter.
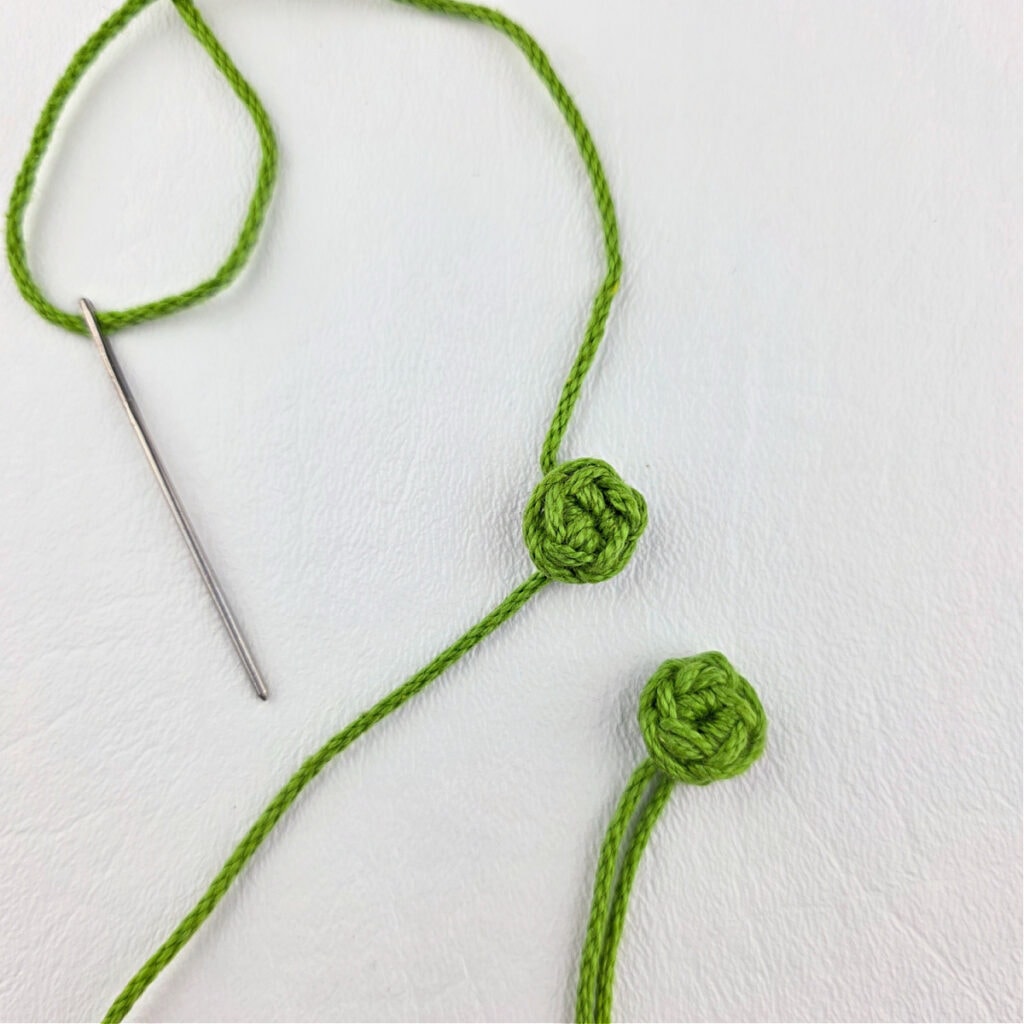
Cat’s Eyes (Make 2)
Rnd 1 (RS): With green cotton yarn and a 4.00mm crochet hook, ch 2, work 4 sc in the 2nd ch from your hook. Join with a sl st to the 1st st. (4 sts) Approximate finished size is 1/2″ in diameter.
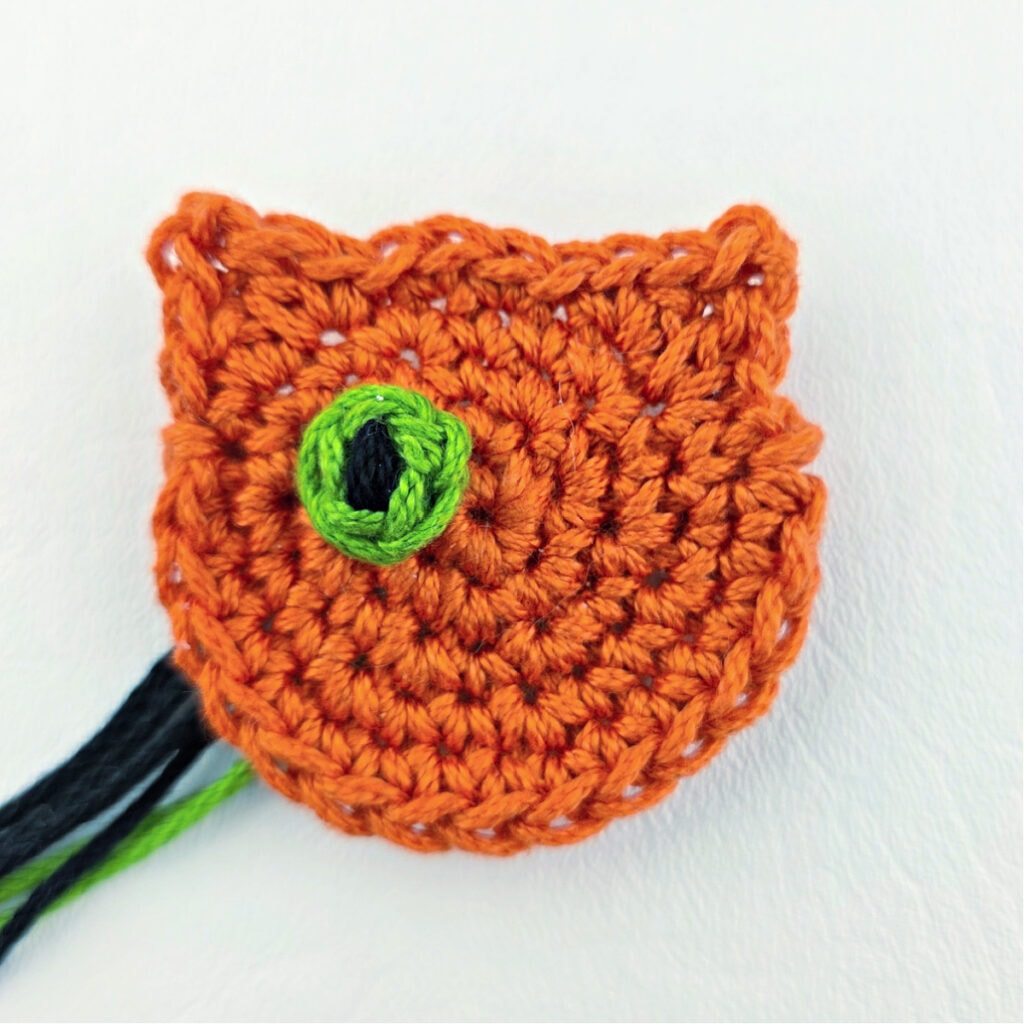
Fasten off leaving a 6″ tail of yarn. Make the second eye. Position the yarn eyes on the cat’s head as shown in the photos and use a yarn needle and tail of yarn to attach them. Then with a 6″ piece of black yarn and a yarn needle, sew a vertical line in the center of each eye to create pupils. Weave in ends.
Black Cat Progression Photos
The photos shown below begin with round 5.


Ghost Bookmark
Note: The ghost bookmark is worked mostly in continuous rounds to keep from having an unsightly seam. Do not join at the end of each round, instead use a scrap piece of yarn to keep track of the beginning of each round. Move the scrap of yarn up as you complete each round.
Colors & Yardage: White (8 yards)
Rnd 1 (RS): Using a 4.00mm crochet hook & white yarn, ch 2, work 6 sc into the 2nd ch from your hook. (6 sts)
Rnd 2: 2 sc in each st around. (12 sts)
Rnd 3: * 2 sc in the next st, sc in the next st, rep from * around. (18 sts)
Rnd 4: * 2 sc in the next st, sc in each of the next 2 sts, rep from * around. (24 sts)
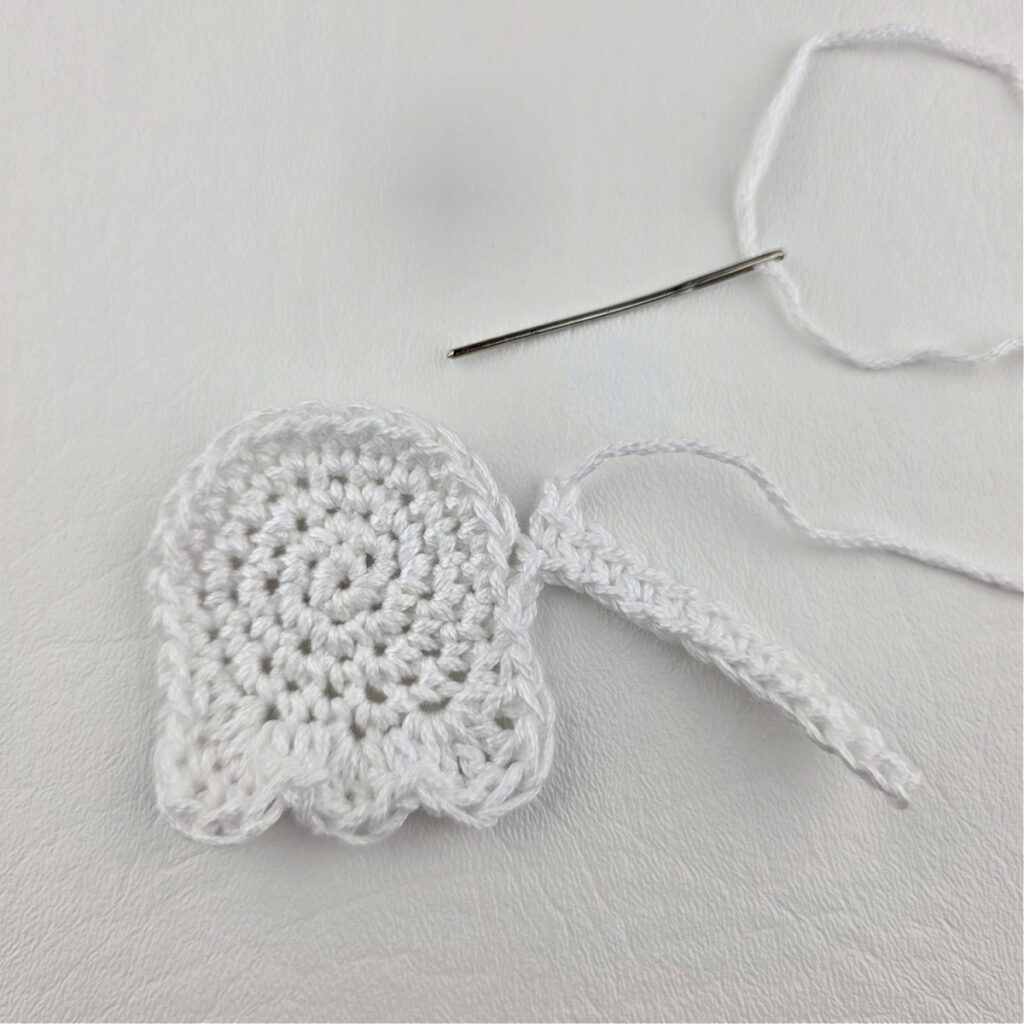
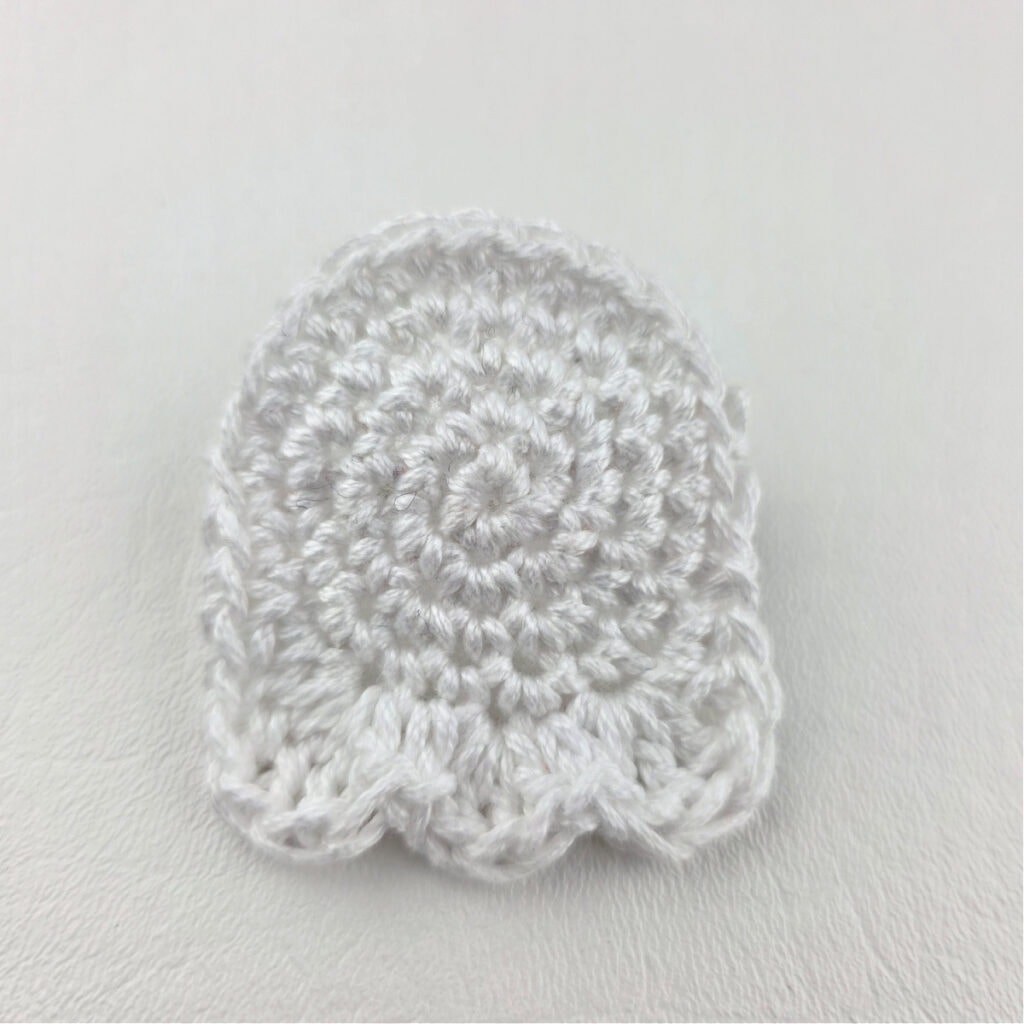
Rnd 5: Sc in each of the first 17 sts, hdc in the next st, (dc, 3 tr, dc) in the next st, sc in the next st, 4 dc in the next st, sc in the next st, (dc, 3 tr, dc) in the next st, hdc in the last st. Join with a sl st to the 1st st. (35 sts)
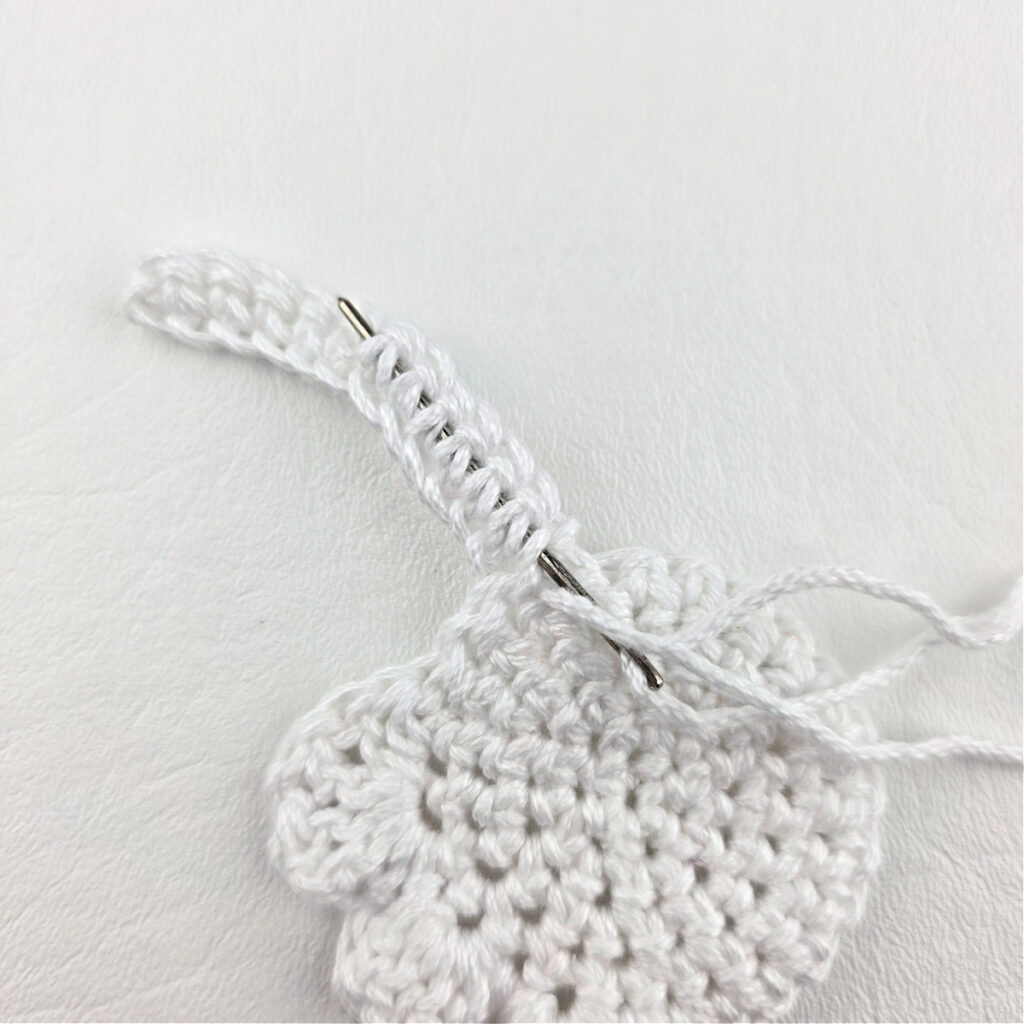
Last Step: Sl st into the BLO of each of the next 2 sts, ch 13, working into the back humps of the ch, sc in the 2nd ch from your hook and in each ch across.
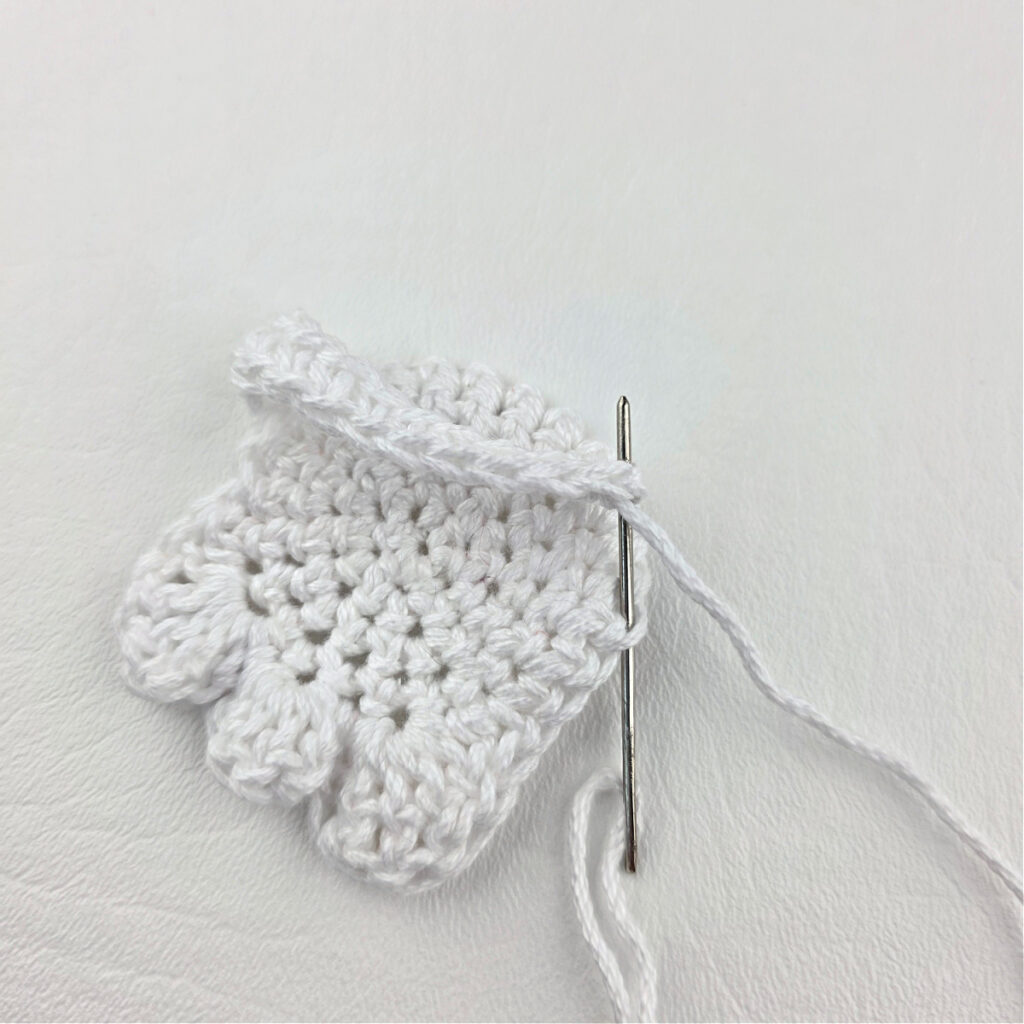
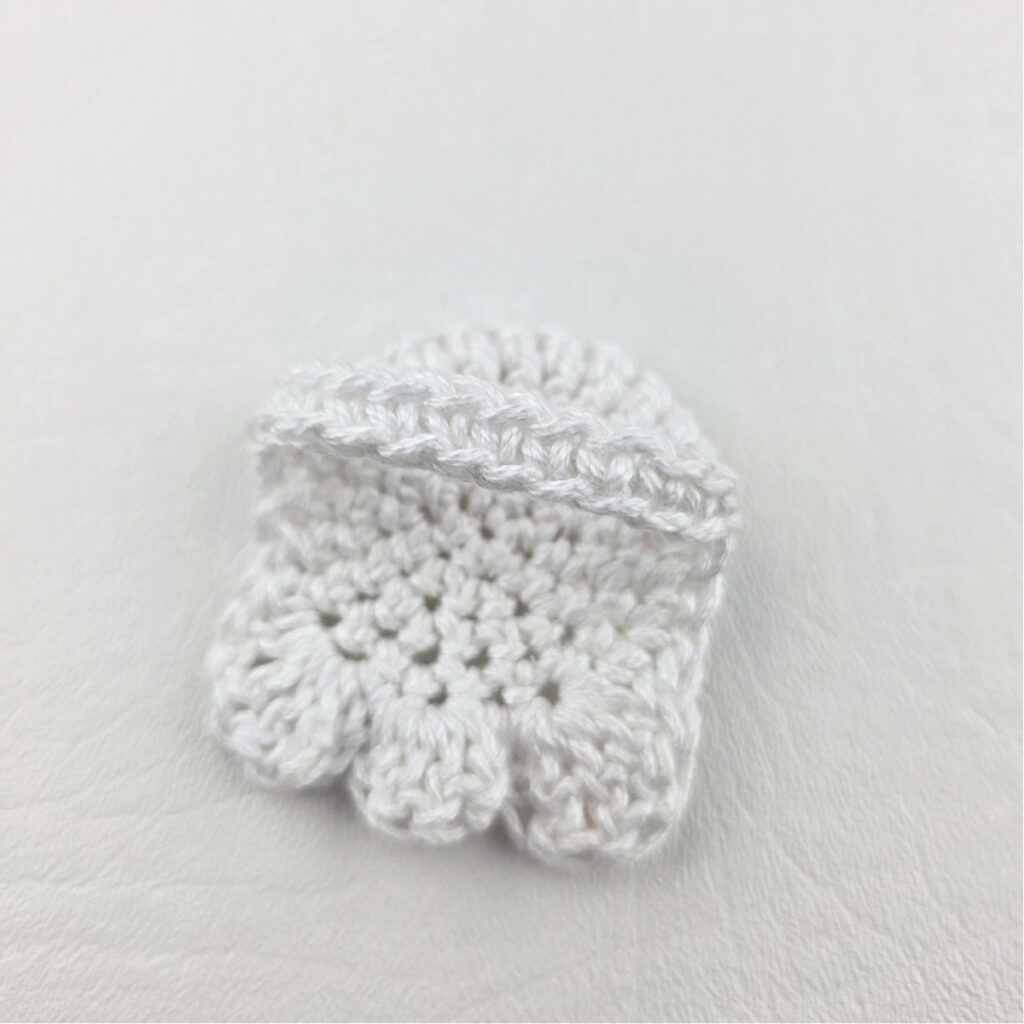
Fasten off, leaving a 12″ tail of yarn. With a yarn needle and tail of yarn, attach the last sc worked to the same stitch as the ch 13. Then weave the tail through the wrong side of the 12 sc. Lastly, attach the end of this piece to the opposite side of the ghost. Weave in ends.
Continue on to the Ghost’s Face. Approximate finished size is 2-1/2″ H.
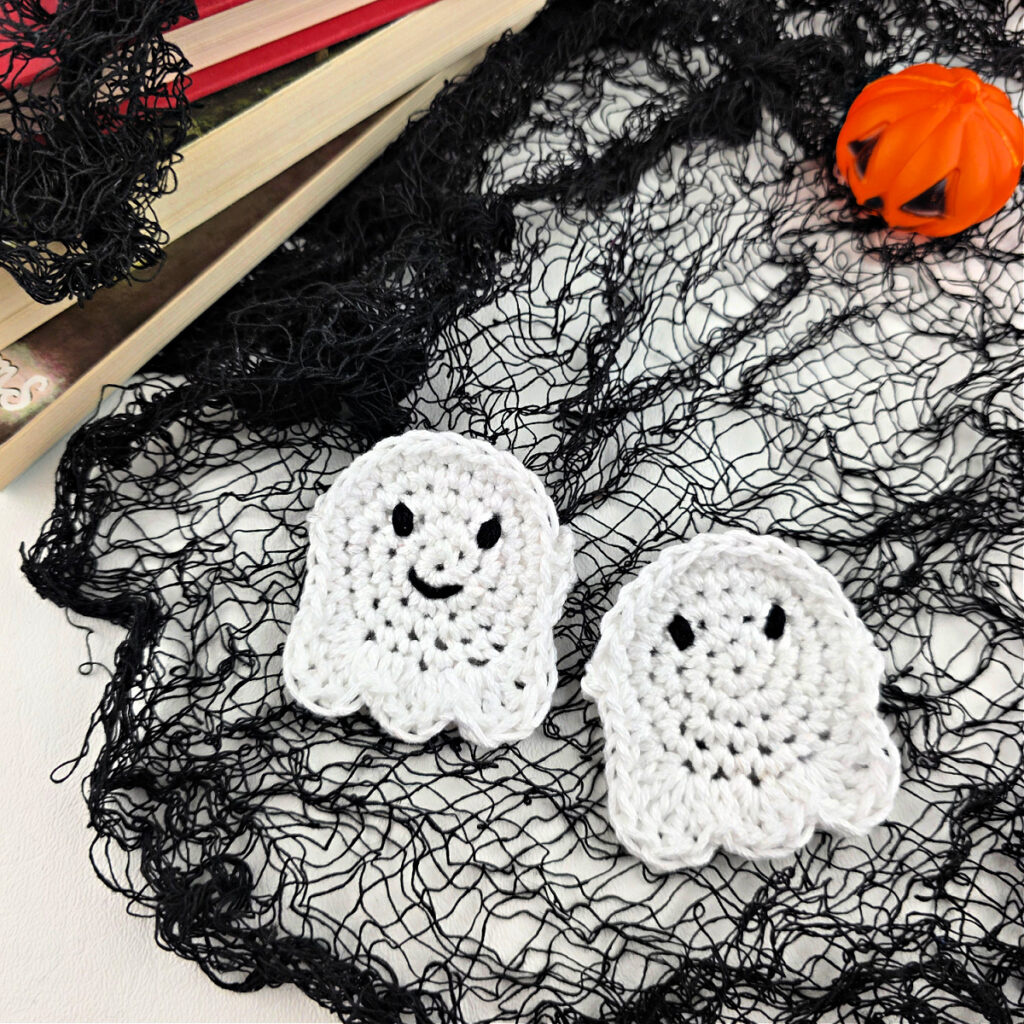
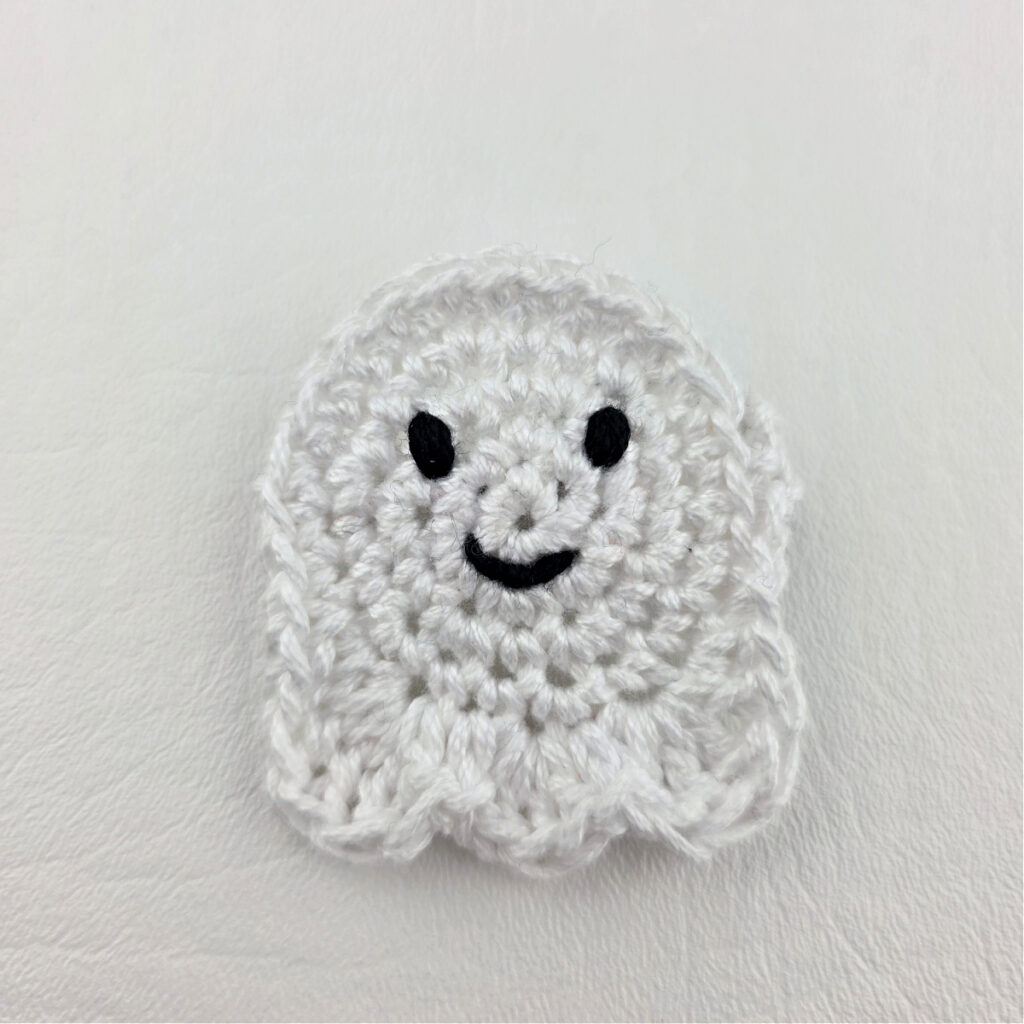
Ghost’s Face
There are several options for adding facial features to your ghost. You can embroider a face using embroidery thread, draw on a face using fabric markers or puff paints, or cut little shapes out of black felt and glue them on.
I used a single strand of black yarn and a yarn needle. I wrapped the yarn around one stitch 3 times to create each eye.
Ghost Progression Photos
The photos shown below begin with round 5.
Free Printable Gift Tags
I’ve created a FREE Downloadable PDF for a set of printable gift tags. Download, print, cut them out, and attach them to your Halloween bookmarks when passing them out to Trick-or-Treaters on Halloween.
To access the free download, simply click the Free PDF Download graphic below.
I Made It! Now What?
Pin this post! Save this crochet bookmarks pattern to your Pinterest boards so that you can come back and make it again.
Leave a comment below: We love to hear your feedback.
Share Your Finished Projects on Facebook or Instagram: I love to see your finished projects! Share with us on social media and tag me @acrochetedsimplicity or use the hashtag #ACrochetedSimplicity so I can find your posts.
Join us in the Facebook Community Group!
Come share your finished projects with us in the A Crocheted Simplicity Crochet Community Group on Facebook. Join us for fun community events such as crochet alongs, join in on crochet conversations, ask questions, get advice, and share your love for crochet!

More Halloween Patterns I Think You’ll Love
More Crochet Halloween Patterns Free
Are you looking for more Halloween Crochet Ideas? We have several more free crochet patterns on the blog as well as some crochet alongs that feature patterns from different designers. Check them out!