Poinsettia Crochet Dog Collar Flower
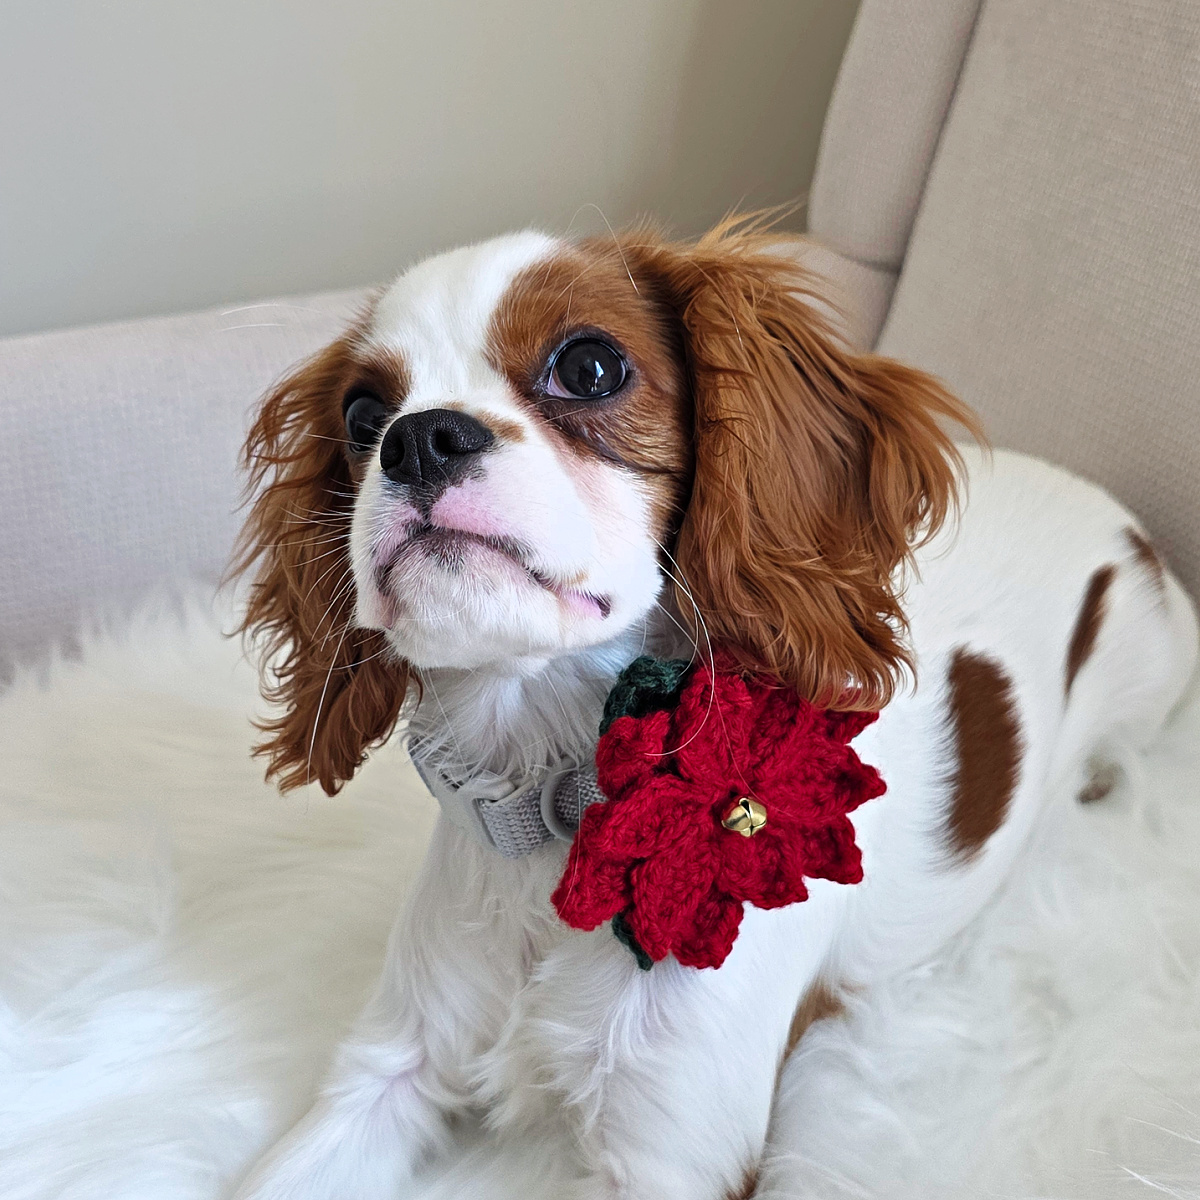
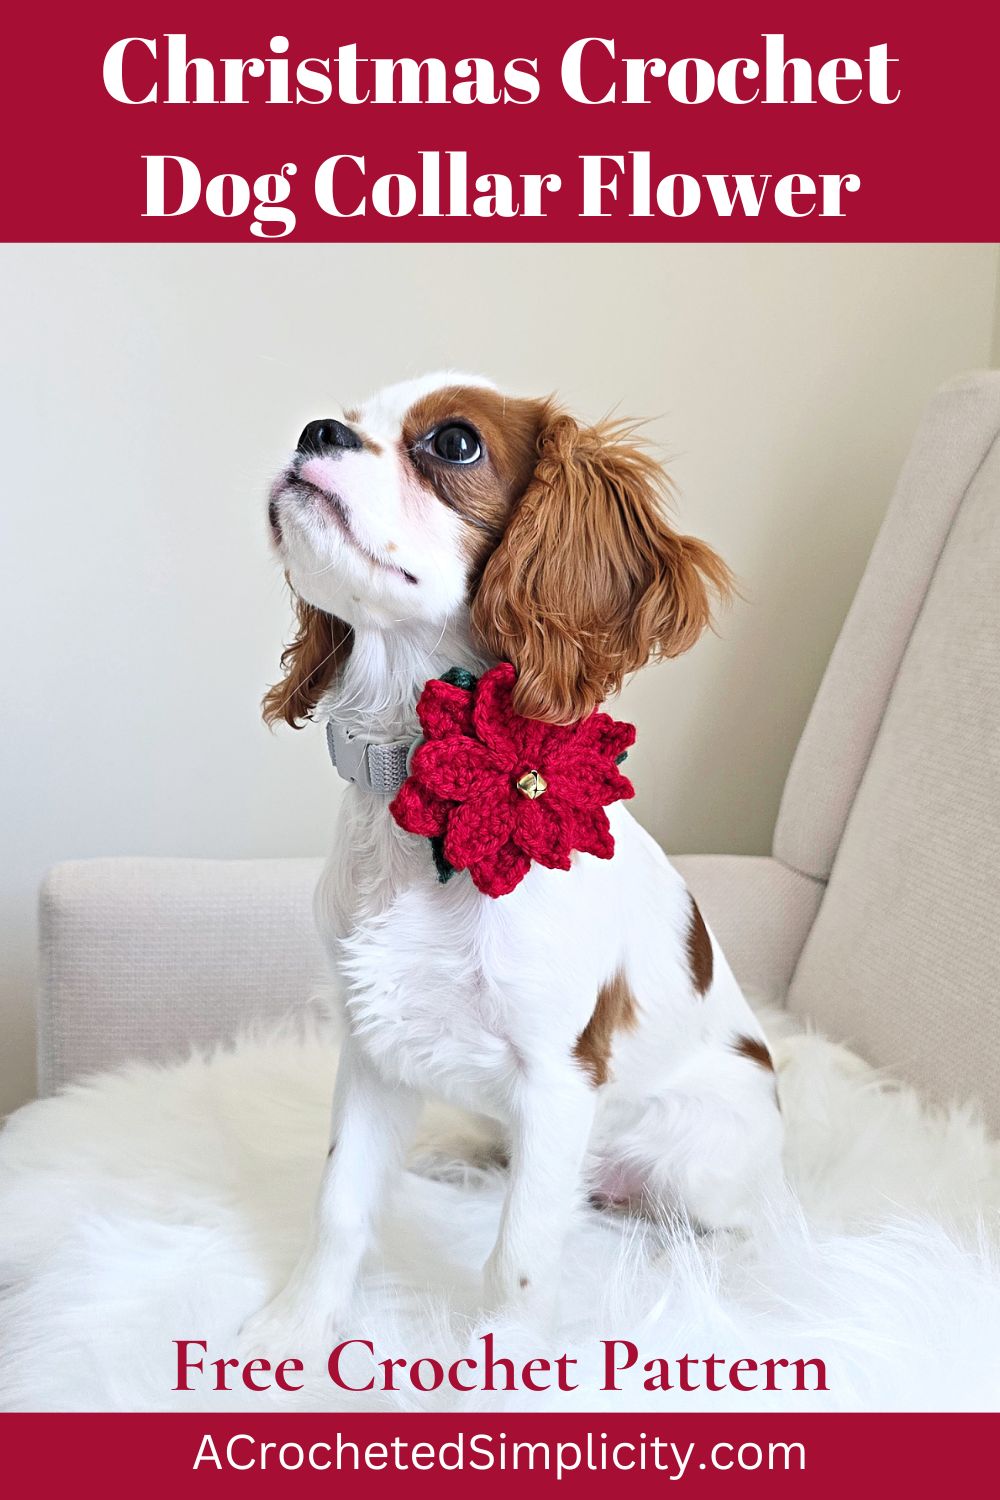
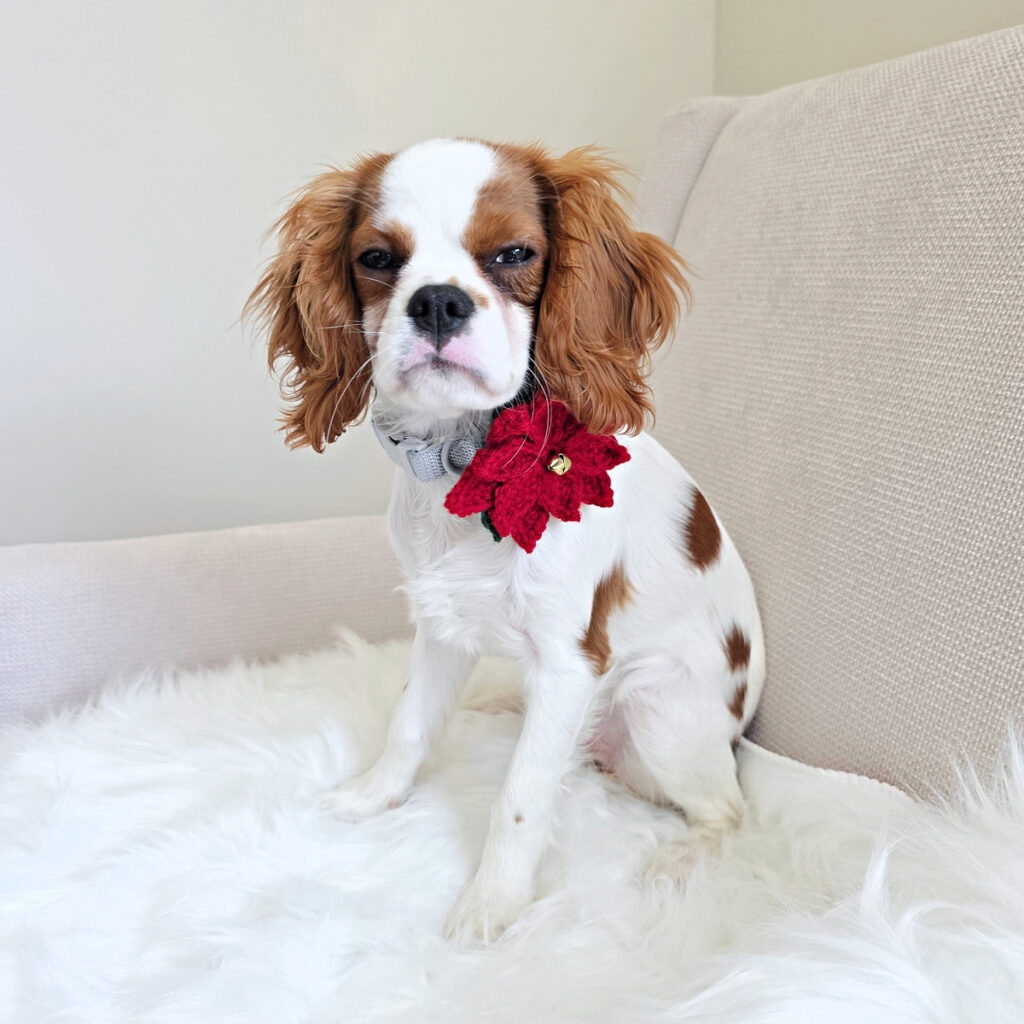
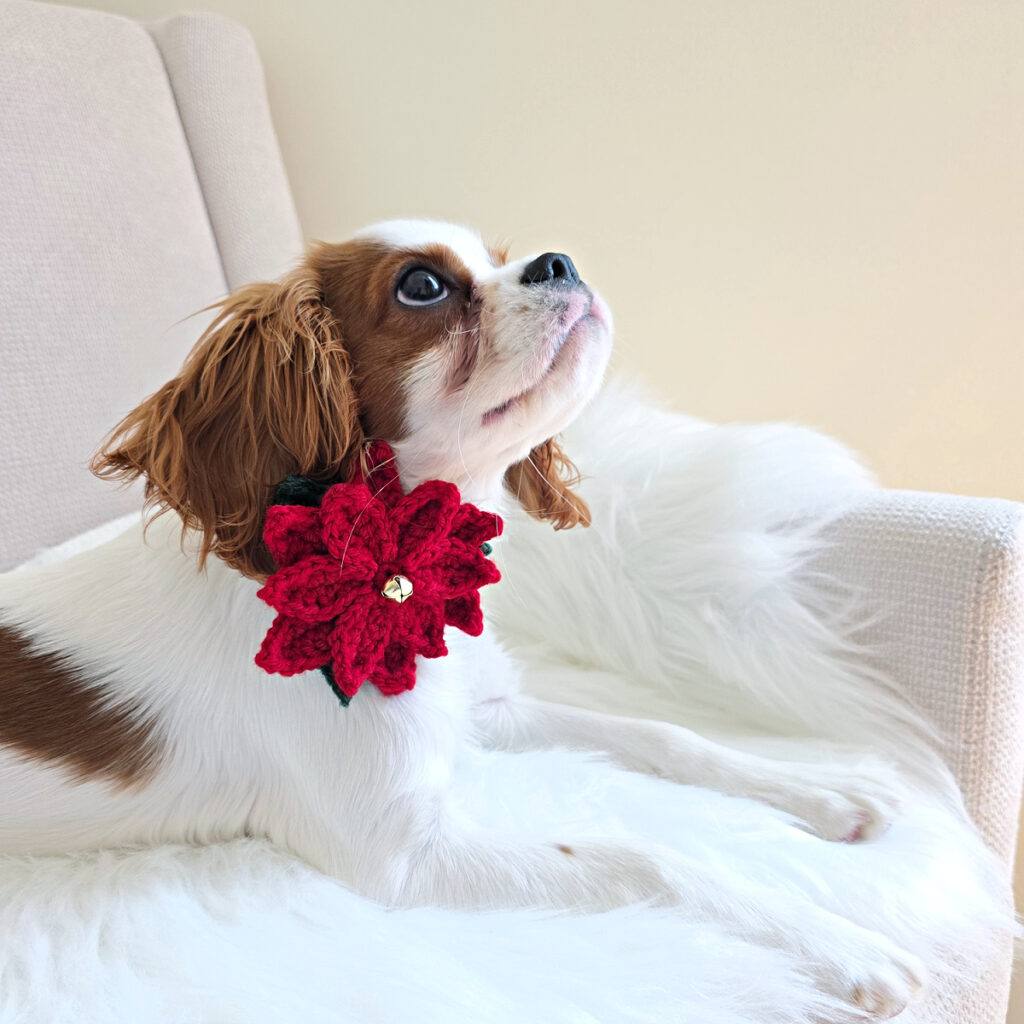
The holiday season is the perfect time to include every member of the family in the festivities—including your furry best friend! The Poinsettia Crochet Dog Collar Flower is a quick and easy accessory that transforms an ordinary dog collar into a festive holiday statement.
Whether you’re taking family Christmas photos, attending holiday gatherings, or simply spreading a little seasonal cheer on your daily walks, this adorable crochet flower is the perfect finishing touch.
You’ll find the free crochet dog collar flower pattern in the post below, or you can find an ad-free printable PDF (that includes all photo tutorials), on Ravelry, or Etsy (aff).
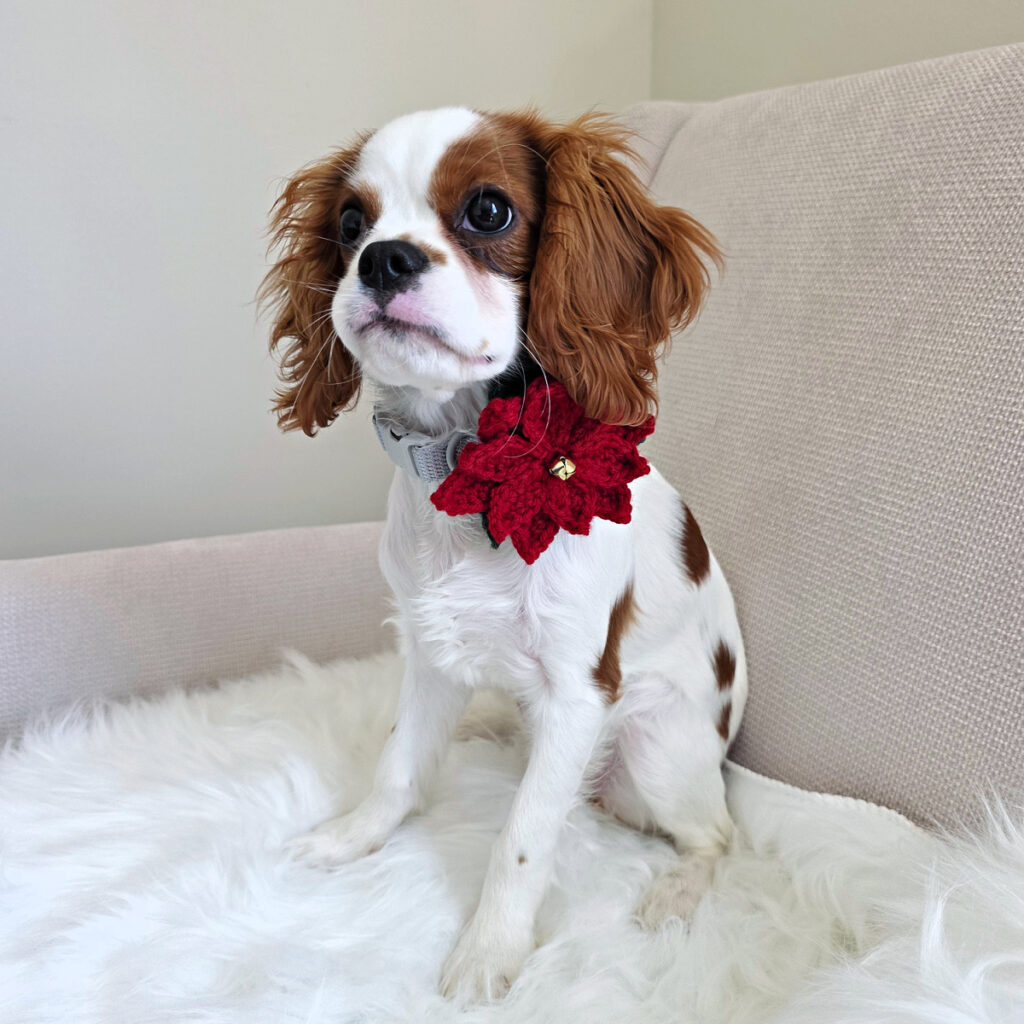
Best of all, this is a free crochet pattern that works up quickly, making it an excellent last-minute project or thoughtful handmade gift for the dog lovers in your life.
Join the 8th Annual Christmas in July Make Along on Underground Crafter
I’m participating in the 8th Annual Christmas in July Make Along with Underground Crafter. 28 bloggers have teamed up to bring you a month full of free patterns to kick start the handmade holiday season, including crochet and knitting projects. There’s something new to make every day in July. Each week will have a theme. This last week’s theme is PETS!
Find out more information about participating designers, prize sponsors, the schedule, and enter to win a prize on Underground Crafter. The deadline for entering the giveaway is Tuesday, August 4, 2026 at 11:59 pm Eastern.
A Festive Holiday Accessory
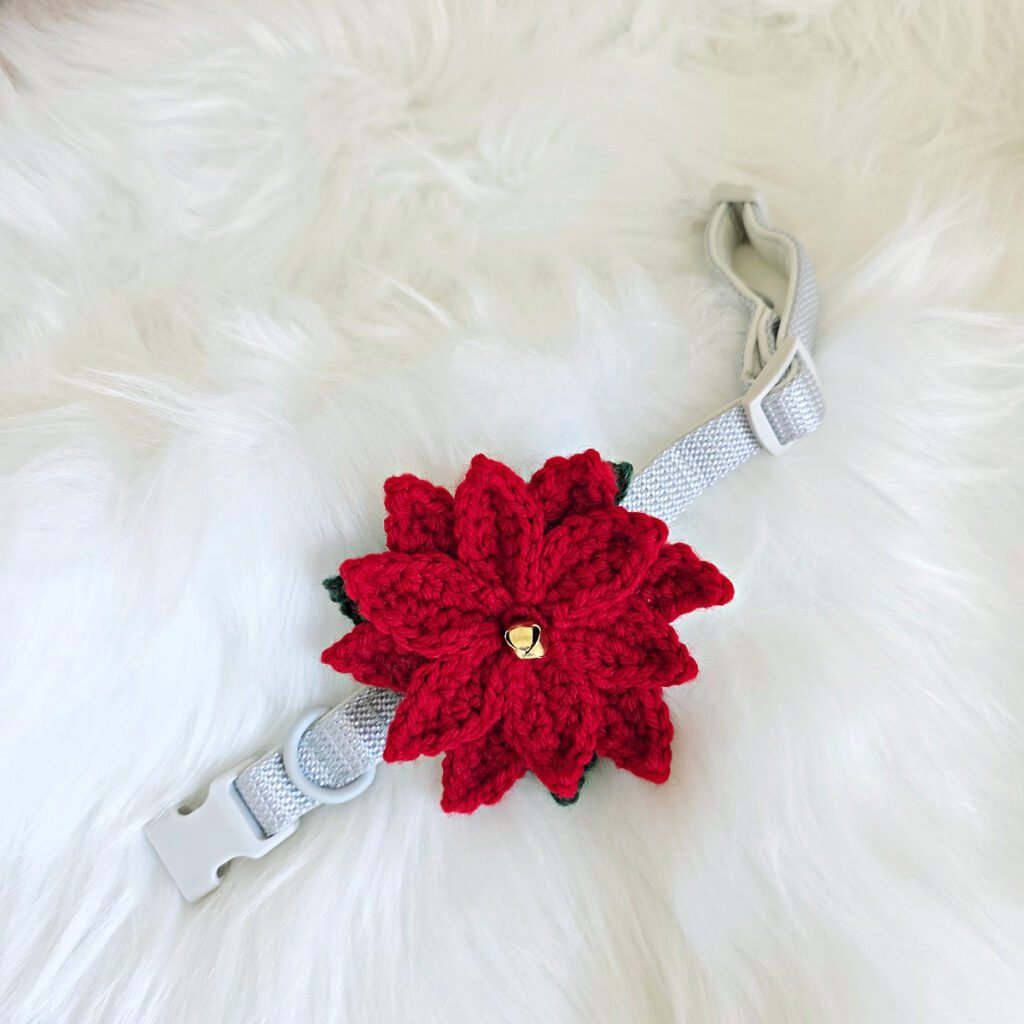
Inspired by the beautiful poinsettia, this crochet flower features layered petals and a cheerful center that captures the spirit of Christmas. The flower slides easily onto most standard dog collars, allowing you to dress up your pup without making a permanent change to their favorite collar.
It’s a fun way to celebrate the season while keeping your pet comfortable and stylish.
A Quick Crochet Project
One of the best things about this pattern is how fast it works up. With only a small amount of yarn needed, it’s a wonderful stash-busting project that you can easily crochet a flower in an evening.
This pattern is perfect for:
- Holiday pet photos
- Christmas parties
- Handmade gifts for pet owners
- Holiday craft fairs
- Animal shelter donations
- Matching accessories for multiple pets
Customize Your Flower
While the traditional Christmas poinsettia is bright red with a yellow center, don’t be afraid to get creative!
Try making your dog collar flower in:
- White for an elegant winter look
- Pink for a whimsical holiday style
- Burgundy for a classic Christmas feel
- Gold or cream for festive family photos
You can even make several flowers to coordinate with different holiday outfits or occasions.
Skill Level
This pattern is suitable for adventurous beginners and experienced crocheters alike. If you’re comfortable with basic crochet stitches and working in the round, you’ll have no trouble creating this festive accessory.
Because it’s a small project, it’s also a great way to practice new techniques without committing to a large project.
Safety First
While this crochet dog collar flower makes an adorable accessory, it should always be worn under supervision. Be sure the flower is securely attached to your dog’s collar and does not interfere with your pet’s comfort, movement, or identification tags. As with any pet accessory, remove it if it becomes damaged or if your dog shows signs of chewing or discomfort.
How To Get The
Poinsettia Crochet Dog Collar Flower Pattern
Option 1: Scroll down for the free crochet dog collar flower pattern right here in this blog post.
Option 2: Purchase the ad-free printable PDF from one of my shops:
Yarn
The Poinsettia Crochet Dog Collar Flower pattern is a great stash buster project. I chose a couple different yarns I had in my stash, Lion Brand Yarns Wool Ease in Forest Green Heather and Pound of Love in Cherry.
These yarns are machine-washable and highly-durable, ideal for pet projects. They are also readily available in a variety of colors and if you have some shades in your stash already, this is a great project to use them up. The fiber content of these yarns makes it hold its shape well, which is important for crochet flowers.
Eloise the Crochet Elephant – Free Pattern
The crochet dog collar flower pattern is free below, but if you love to work offline, I’ve got a couple other great options for you.
Purchase the ad-free, printable PDF, (that includes all photo tutorials), on Ravelry, or on Etsy (aff).
Materials
- Yarn: Worsted Weight / 4 / Yarn, Lion Brand Yarn Wool Ease, worsted weight yarn, 80% Acrylic / 20% Wool (197 yds / 180 m / 85 g / 3 oz) and Pound of Love, worsted weight yarn, 100% Premium Acrylic, (1,020 yards / 454 g / 16 oz / 932 m) were used for the sample in the photos.
- Yardage and Colors:
- Pound of Love in Cherry Red: 22 yards
- Wool Ease in Forest Green Heather: 10 yards
- Yellow/Gold: 1 yard (only needed if you want to replace the jingle bell center)
- Crochet Hook: E/3.50mm; or size needed to obtain gauge (My favorite crochet hooks are the Clover Amour Crochet Hooks, I’ve never had an ache in my hand since switching).
- Measuring Tape
- Scissors
- Yarn Needle
- Mini Jingle Bell – (1) 9.5mm
- Dog Collar
Abbreviations (US Terms)
- ch(s): chain(s)
- sl st(s): slip stitch(es)
- st(s): stitch(es)
- sc: single crochet
- hdc: half double crochet
- dc: double crochet
- tr: treble crochet
- Rep: repeat
- RS: right side
- yo: yarn over
Experience Level
- Easy
Gauge
- Measurements are given at the end of round 3 in each section.
Sizes
- 3-1/2″ Flower (adjust strap size to fit any size dog collar)
Pattern Notes
- Yarn Notes: Lion Brand Yarns Wool Ease and Pound of Love were used for the sample shown. Other comparable yarns may be used.
- Lion Brand Yarns Wool Ease, worsted weight yarn, 80% Acrylic / 20% Wool (197 yds / 180 m / 85 g / 3 oz)
- Lion Brand Yarns Pound of Love, worsted weight yarn, 100% Premium Acrylic, (1,020 yards / 454 g / 16 oz / 932 m).
- Yardage & Colors:
- Pound of Love in Cherry Red: 22 yards
- Wool Ease in Forest Green Heather: 10 yards
- Yellow/Gold: 1 yard (only needed if you want to replace the jingle bell center)
- Adjust Flower Size: Easily adjust the finished size of your dog collar flower by using a lighter or heavier weight yarn and a crochet hook that’s a size or two smaller than is recommended for the yarn you choose.
- Construction Notes: This crochet dog collar flower is constructed by layering four separate pieces. First, you’ll crochet the top and bottom flower layers. Next, you’ll crochet the leaf layer. Then you’ll assemble the layers and attach a jingle bell. Lastly, you’ll crochet and attach the strap that’s used to attach the flower to a dog collar.
Poinsettia Crochet Dog Collar Flower – Written Pattern
Poinsettia Top Layer
Alternative to Jingle Bell Center: If you do not have jingle bells, work Rnd 1 of the top layer in a contrasting color, such as yellow.
Rnd 1 (RS): With red yarn & a 3.50mm crochet hook, ch 2, work 6 sc into the 2nd ch from your hook. Join with a sl st to the 1st sc. (6 sts)
Rnd 2: * ch 6, working into the back humps of the ch, sl st into the 2nd ch from your hook, sl st in each of the next 4 chs, sl st into the same sc as the ch 6, sl st into the next sc, rep from * around. (6 flower veins)
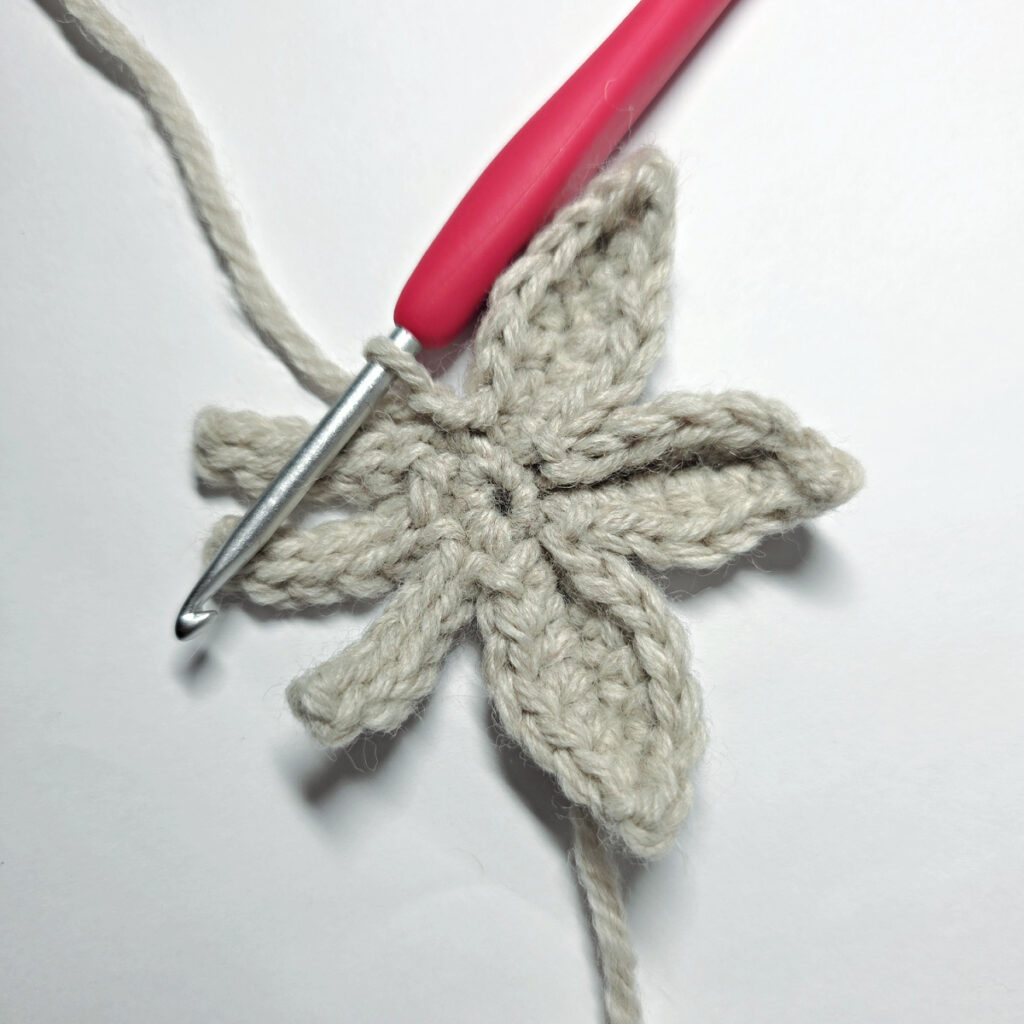
In Rnd 3, you’ll be working up and down each side of the 6 flower veins made in round 2.
Rnd 3: * Ch 1, hdc in the next st, dc in each of the next 2 sts, hdc in the next st, sc in the next st, ch 3, sl st into the back hump of the 3rd ch, then working down the opposite side of the vein, sc in the next st, hdc in the next st, dc in each of the next 2 sts, hdc in the next st, ch 1, sl st into the same sc from Rnd 1 as the current flower vein, sl st into the next sc from Rnd 1, rep from * around.
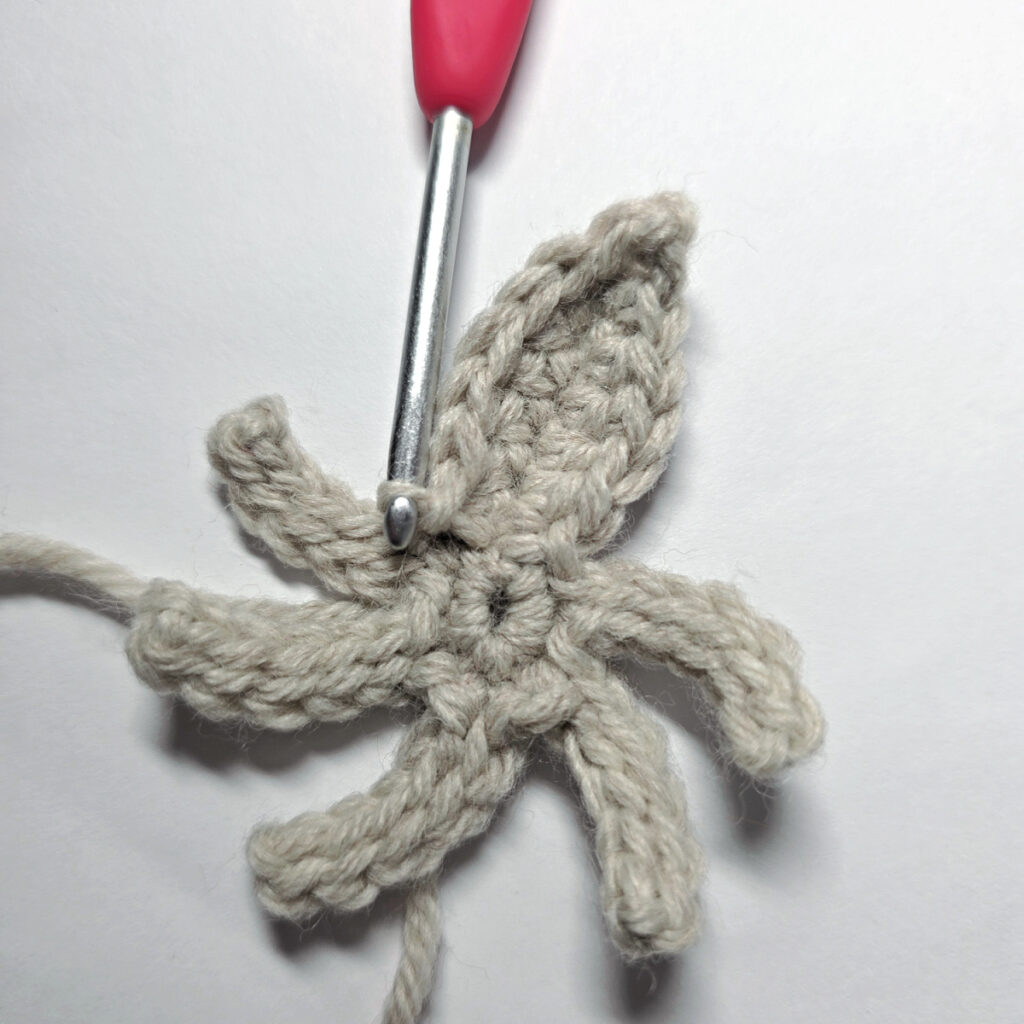
Fasten off. Top layer measures approximately 3-1/8″ across. Continue to the Bottom Layer.
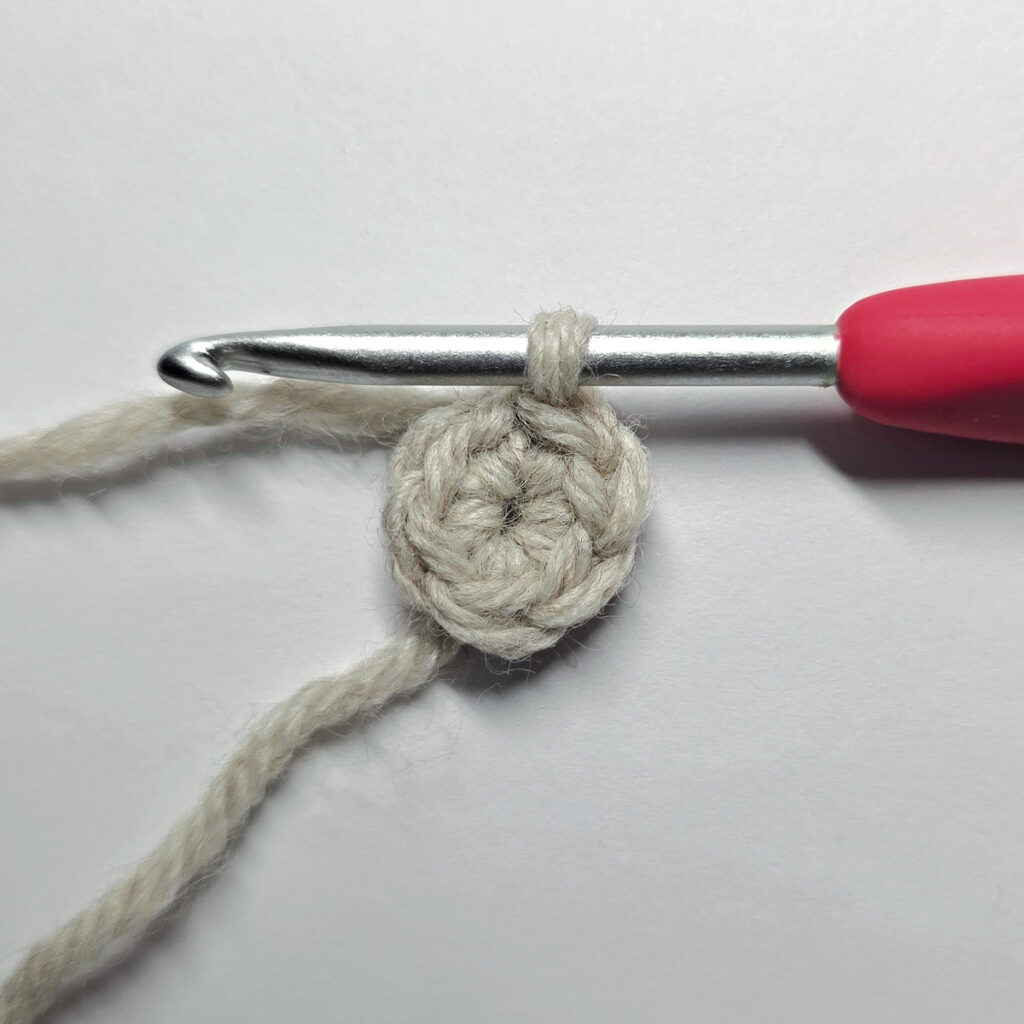
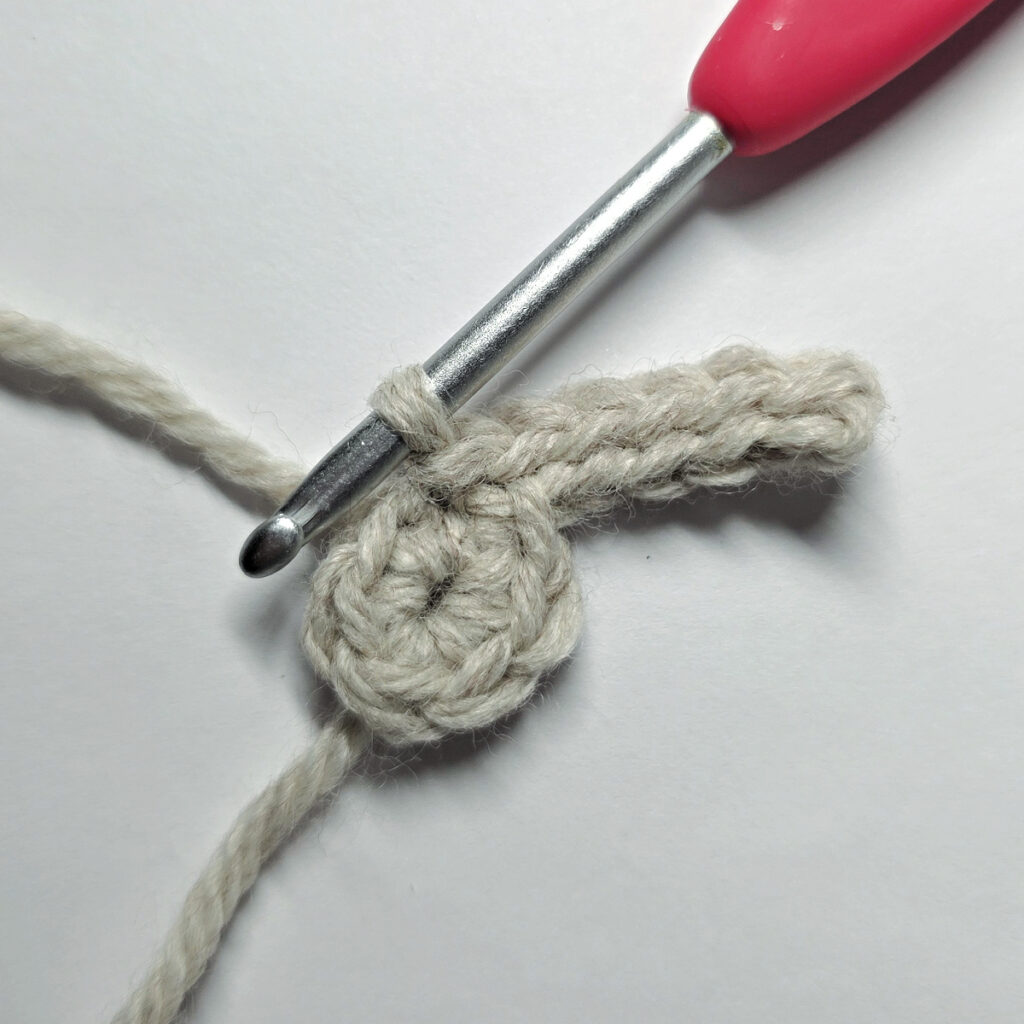
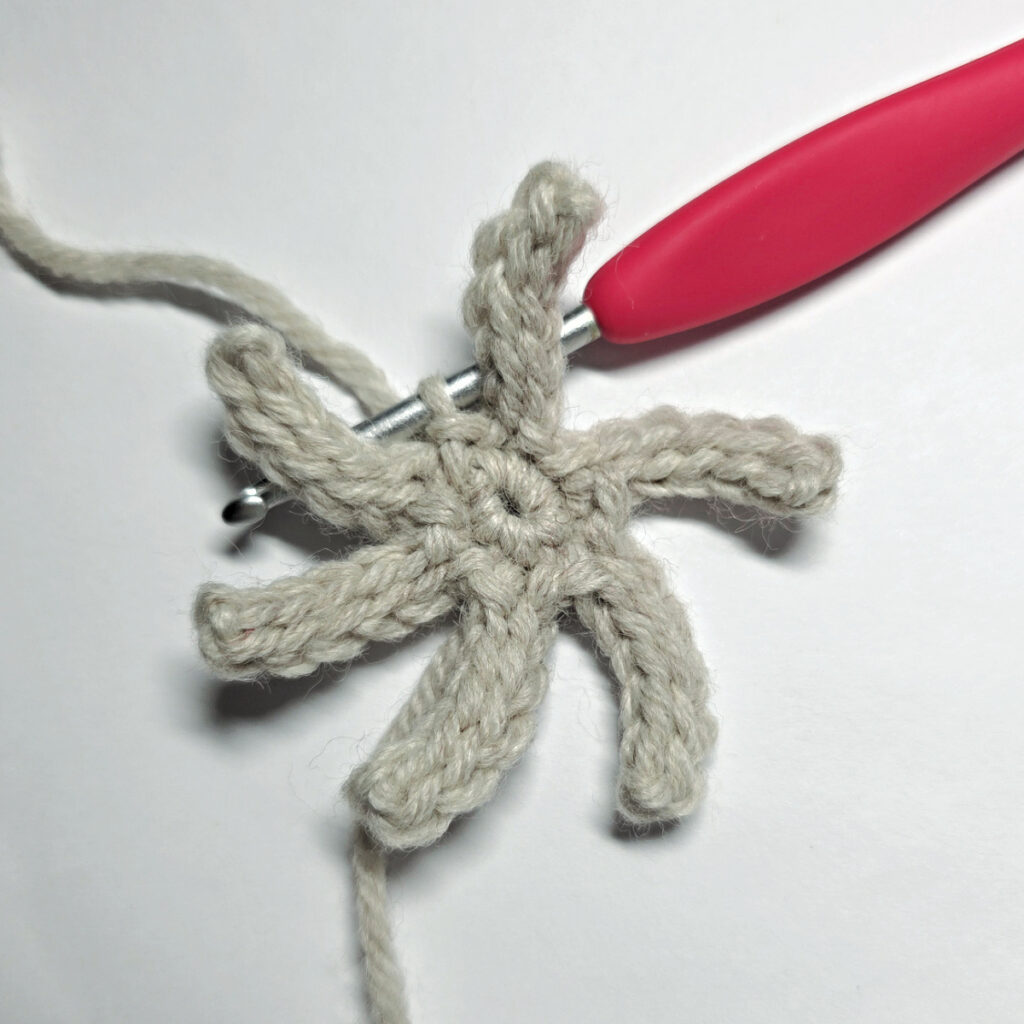
Left: Shows Rnd 1 complete. / Center: Shows the first flower vein made in Rnd 2. / Right: Shows Rnd 2 complete.
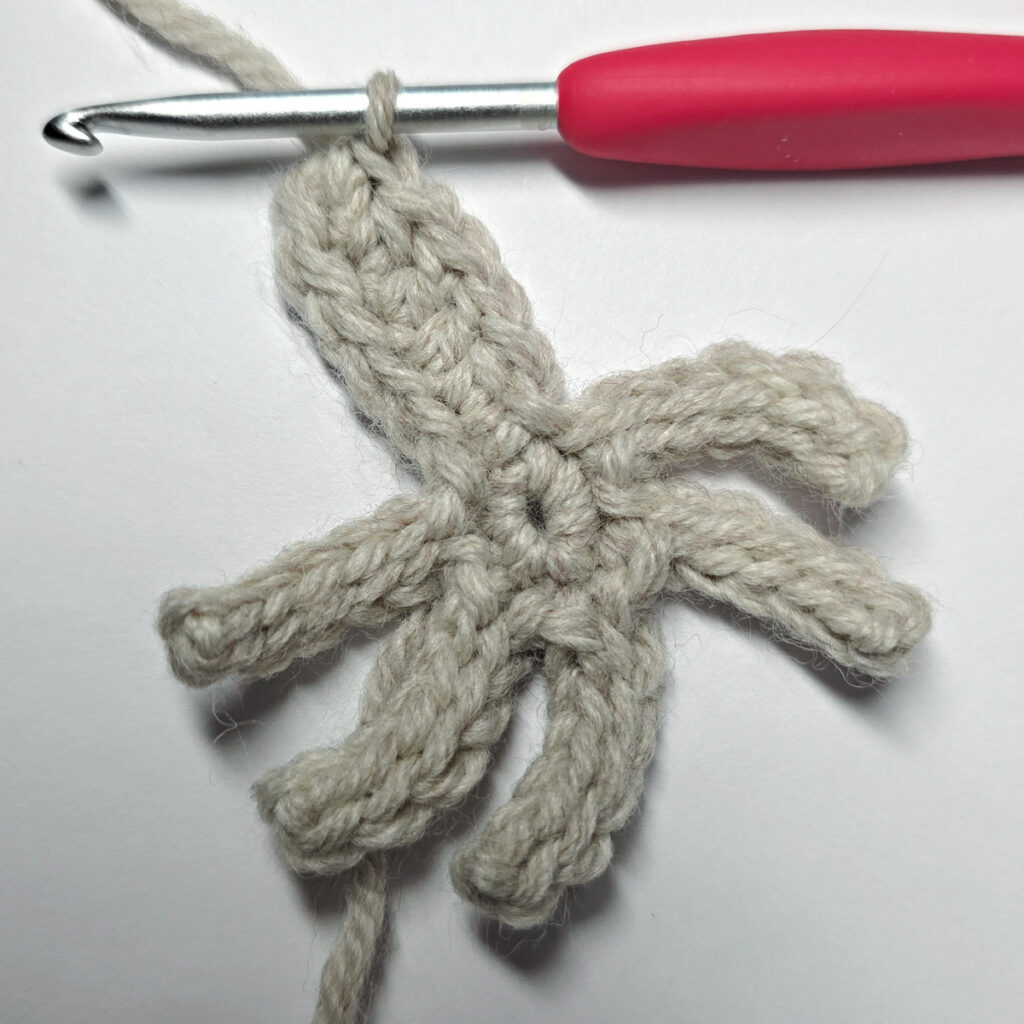
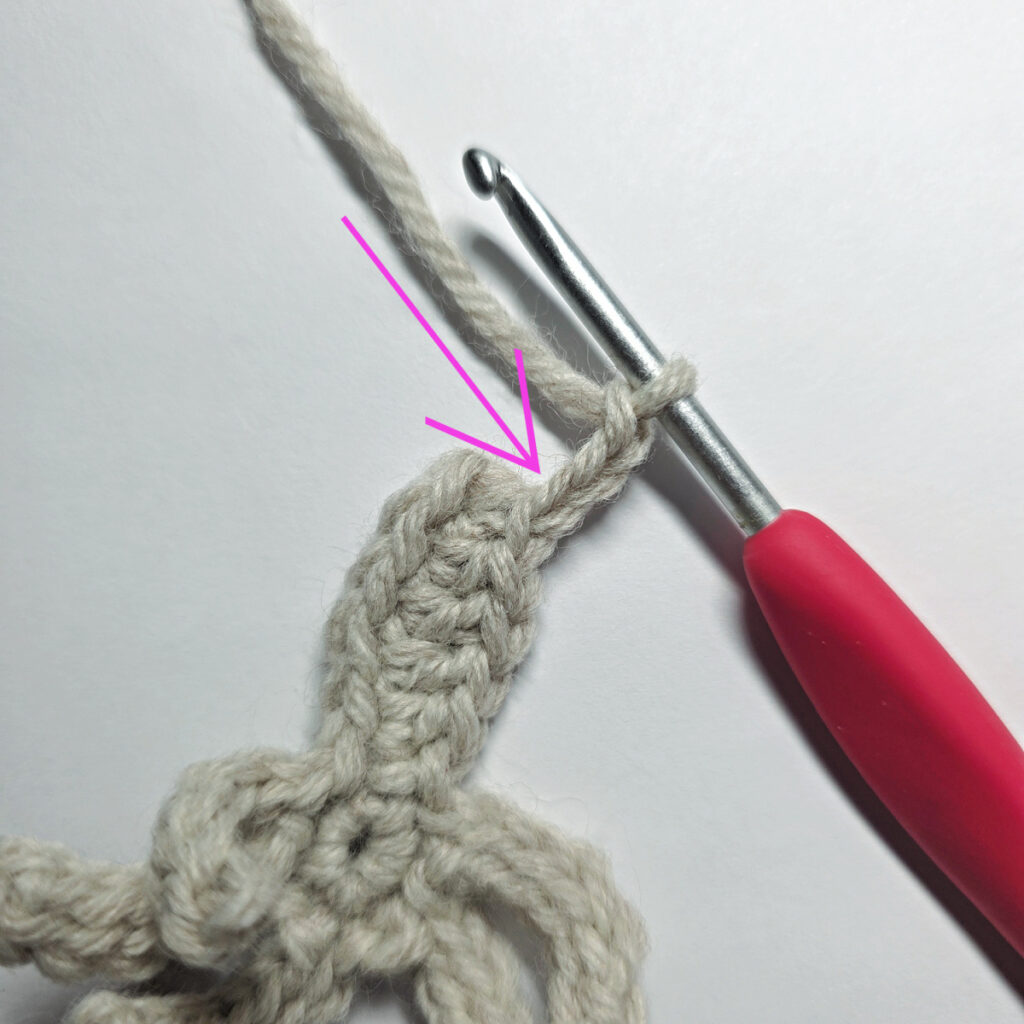
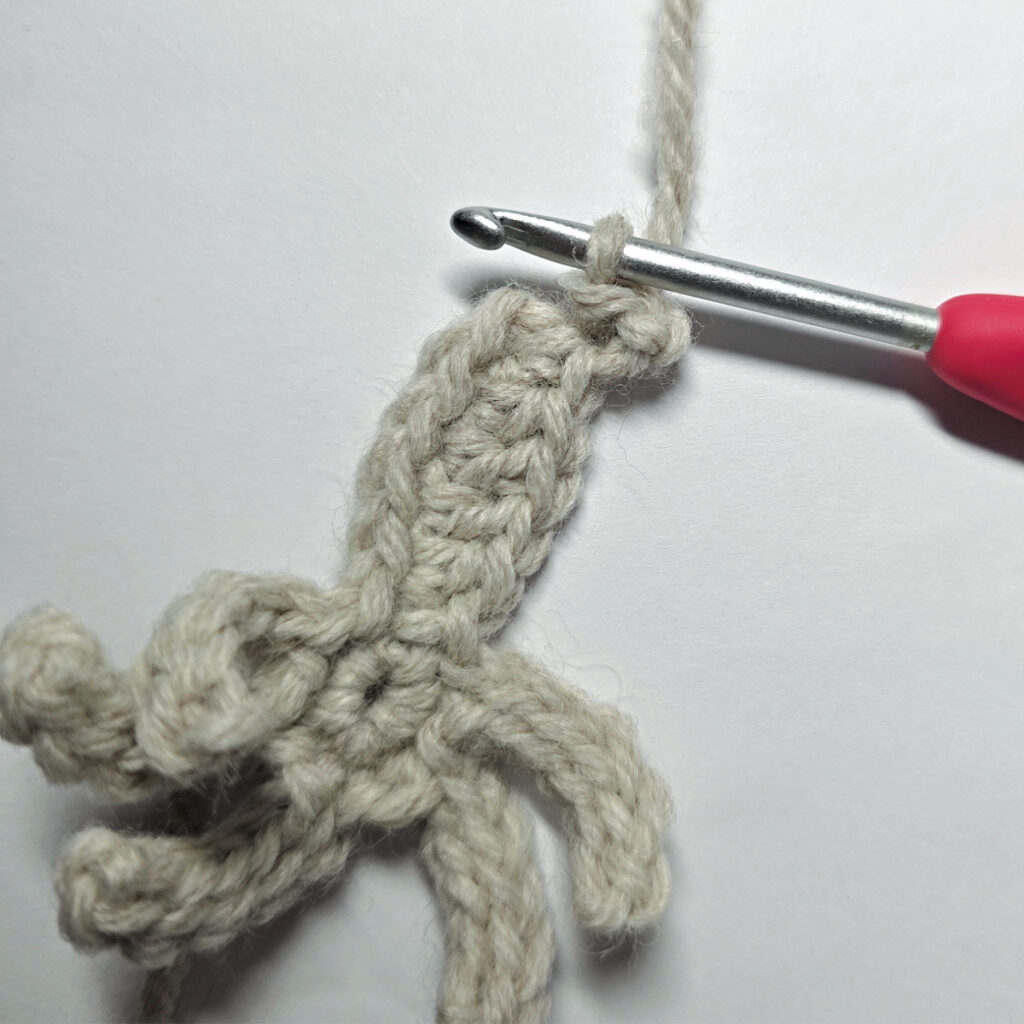
Left: Shows stitches worked on the first side of a vein in Rnd 3. / Center: Shows the ch 3 made to create the tip of the flower petal. The pink arrow is pointing to the 3rd ch where you will work the sl st. / Right: Shows the sl st worked into the 3rd ch.
Poinsettia Bottom Layer
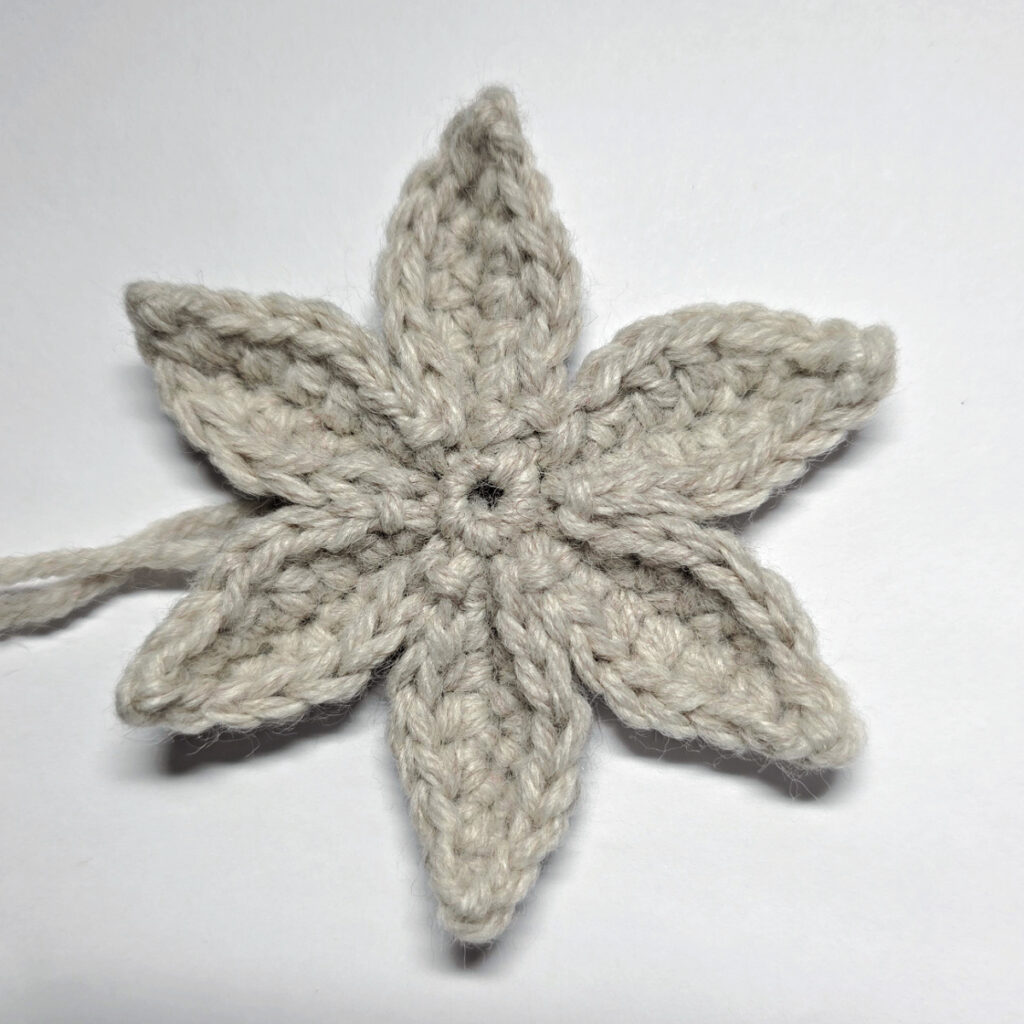
Rnd 1 (RS): With red yarn & a 3.50mm crochet hook, ch 2, work 6 sc into the 2nd ch from your hook. Join with a sl st to the 1st sc. (6 sts)
Rnd 2: * ch 7, working into the back humps of the ch, sl st into the 2nd ch from your hook, sl st in each of the next 5 chs, sl st into the same sc as the ch 7, sl st into the next sc, rep from * around. (6 flower veins)
In Rnd 3, you’ll be working up and down each side of the 6 flower veins made in round 2.
Rnd 3: * Ch 1, hdc in the next st, dc in each of the next 3 sts, hdc in the next st, sc in the next st, ch 3, sl st into the back hump of the 3rd ch, then working down the opposite side of the vein, sc in the next st, hdc in the next st, dc in each of the next 3 sts, hdc in the next st, ch 1, sl st into the same sc from Rnd 1 as the current flower vein, sl st into the next sc from Rnd 1, rep from * around.
Fasten off. Bottom layer measures approximately 3-1/2″ across. Continue to the Leaf Layer.
Leaf Layer
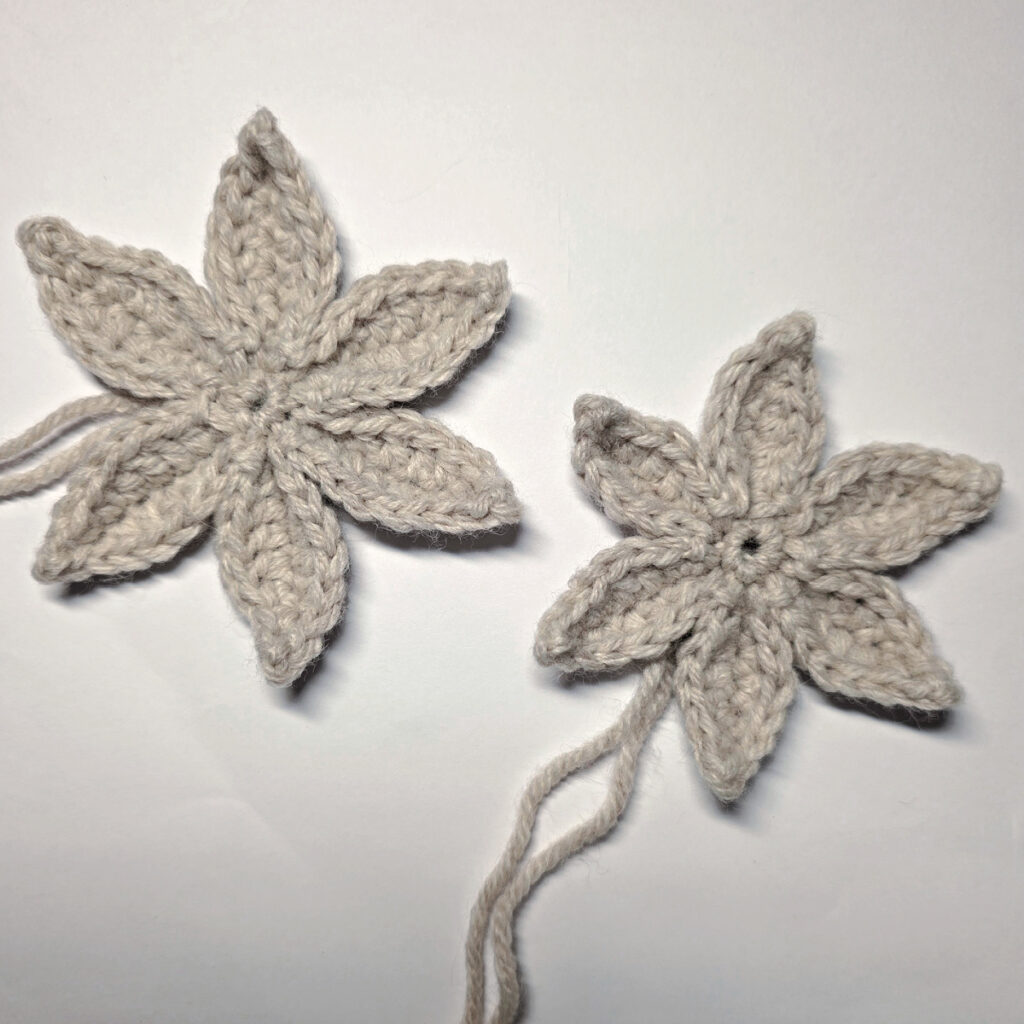
Rnd 1 (RS): With green yarn & a 3.50mm crochet hook, ch 2, work 6 sc into the 2nd ch from your hook. Join with a sl st to the 1st sc. (6 sts)
Rnd 2: * ch 8, working into the back humps of the ch, sl st into the 2nd ch from your hook, sl st in each of the next 6 chs, sl st into the same sc as the ch 8, sl st into the next sc, rep from * around. (6 leaf veins)
In Rnd 3, you’ll be working up and down each side of the 6 leaf veins made in round 2.
Rnd 3: * Ch 1, hdc in the next st, tr in each of the next 4 sts, hdc in the next st, sc in the next st, ch 3, sl st into the back hump of the 3rd ch, then working down the opposite side of the vein, sc in the next st, hdc in the next st, tr in each of the next 4 sts, hdc in the next st, ch 1, sl st into each of the next 2 sts, rep from * around.
Fasten off. Leaf layer measures approximately 3-1/2″ across. Continue to Flower Assembly.
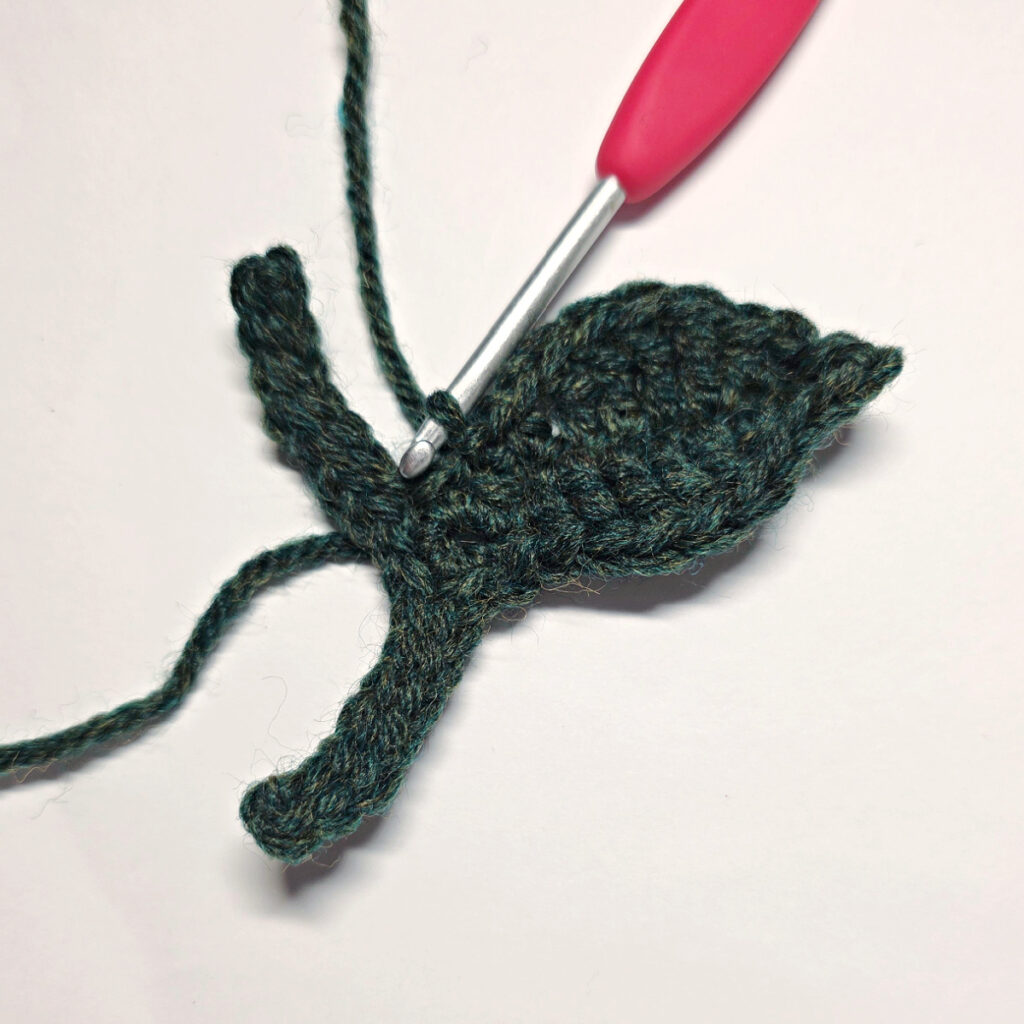
Flower Assembly
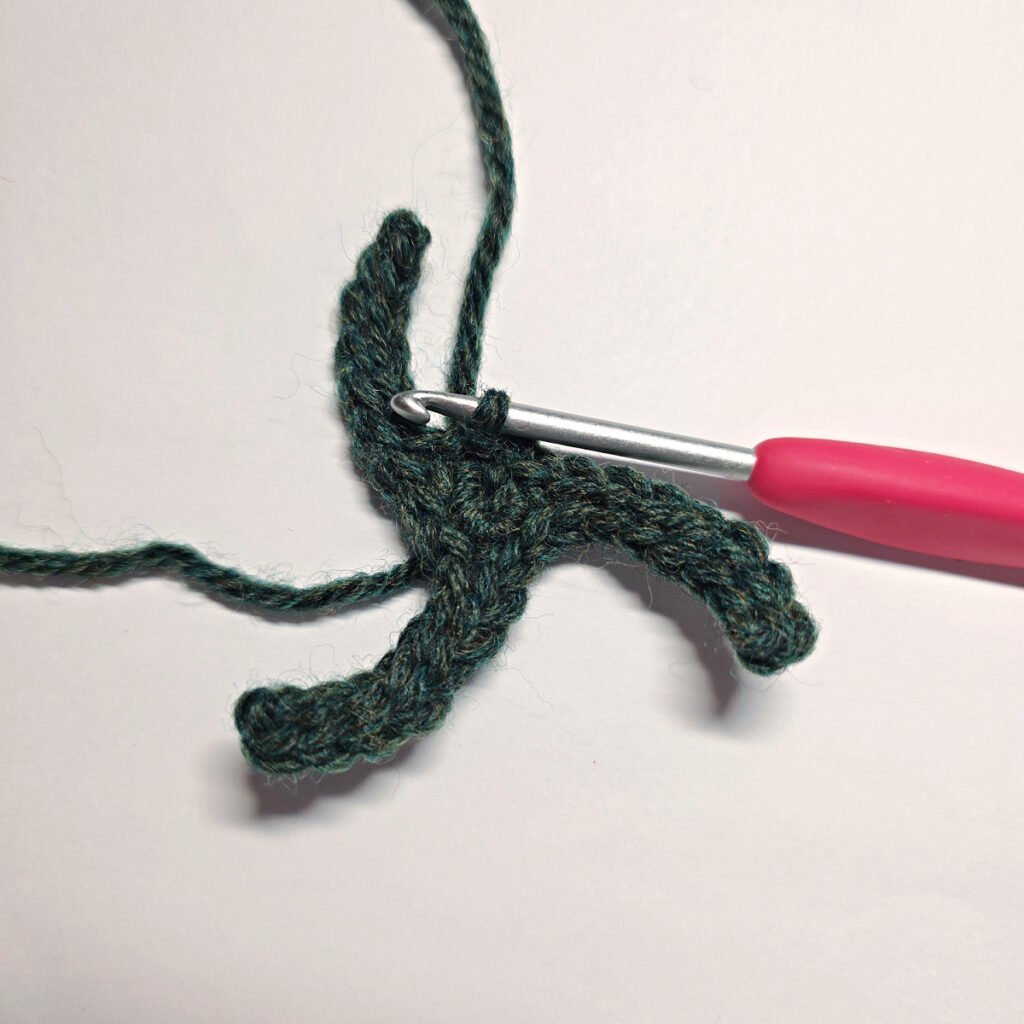
Step 1: Lay the top layer on the bottom layer, RS facing up. Pull the tails of yarn from the top layer through the center of the bottom layer. Tie the tails together from the top and bottom layers to join the pieces together.
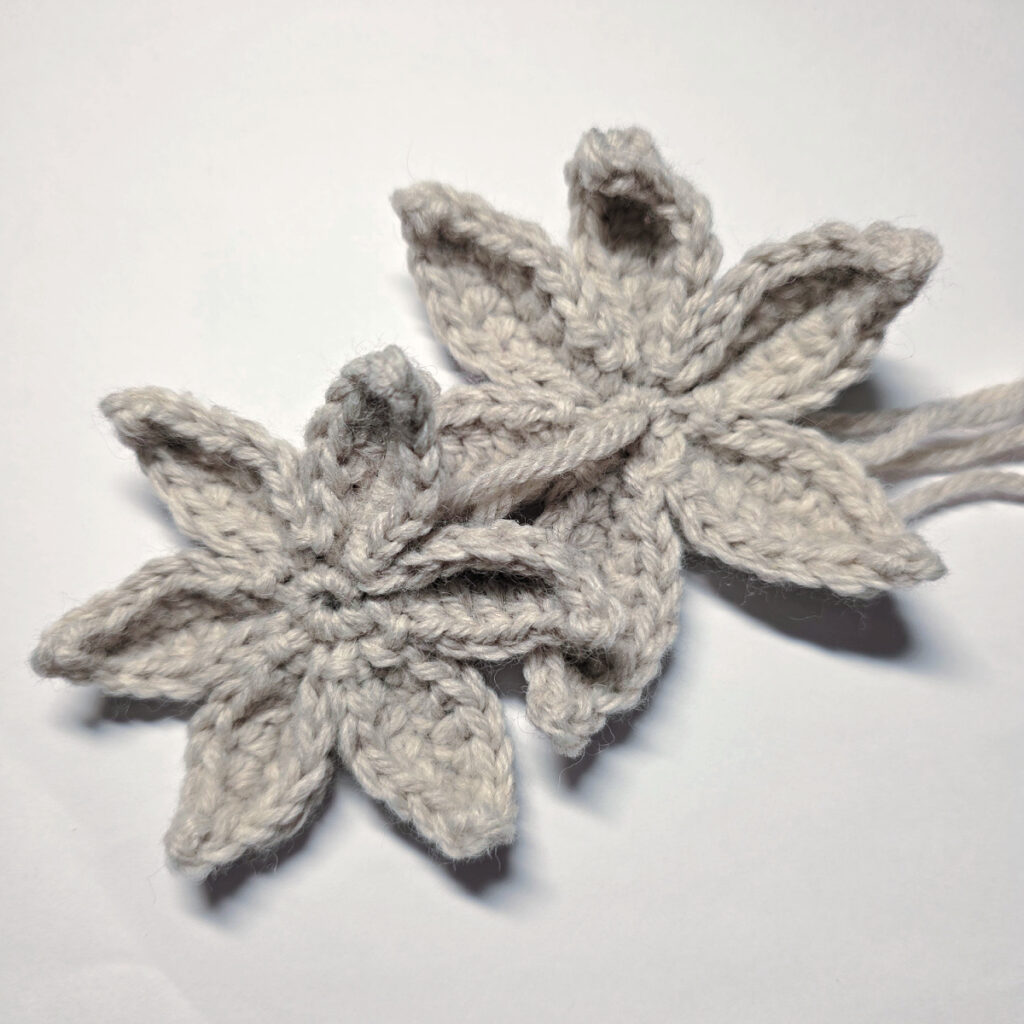
Step 2: Turn the flower back over to the RS. Rotate the pieces so that the petals are offset. Use a yarn needle and a tail of yarn to tack stitch a couple of the petals together to keep them in place.
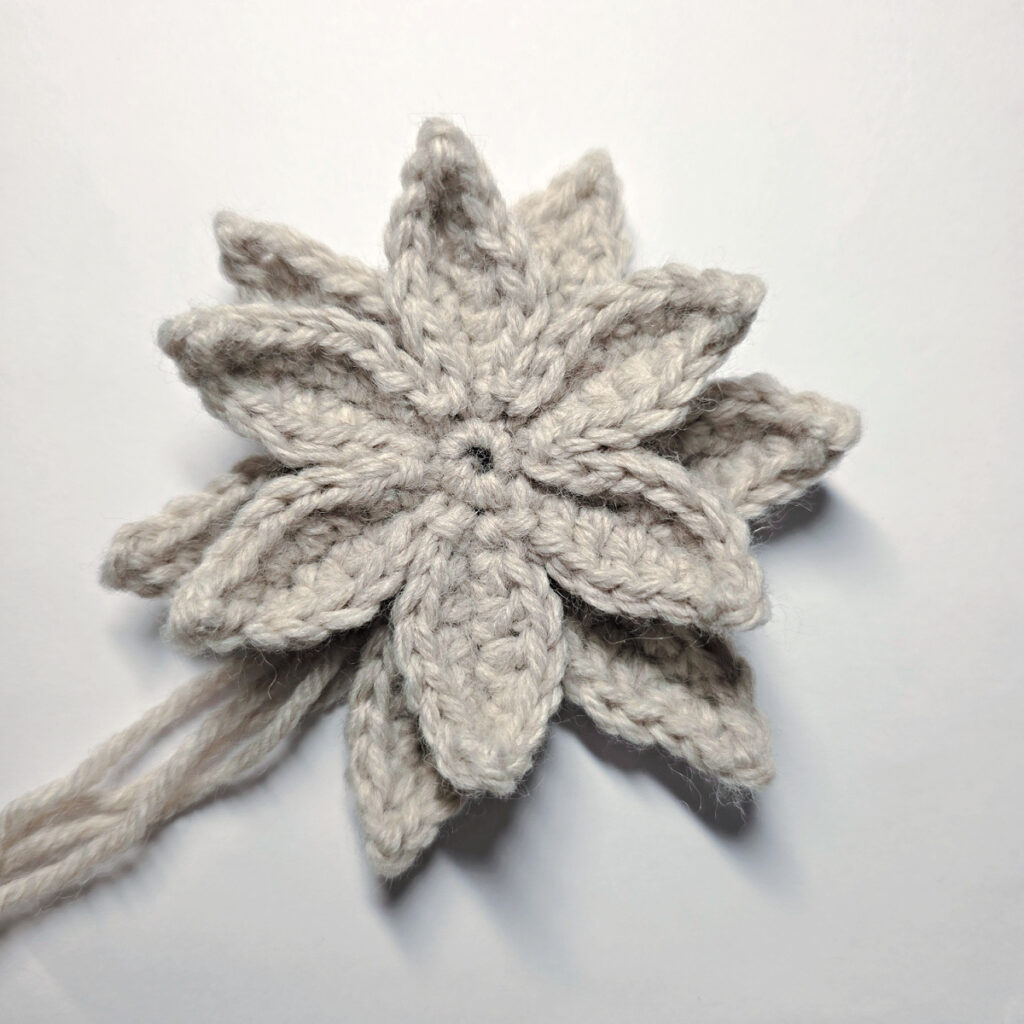
Step 3: Attach the leaf layer to the backside of the bottom layer.
Step 4: If adding a jingle bell, use yarn or thread to attach a jingle bell to the center of the flower.
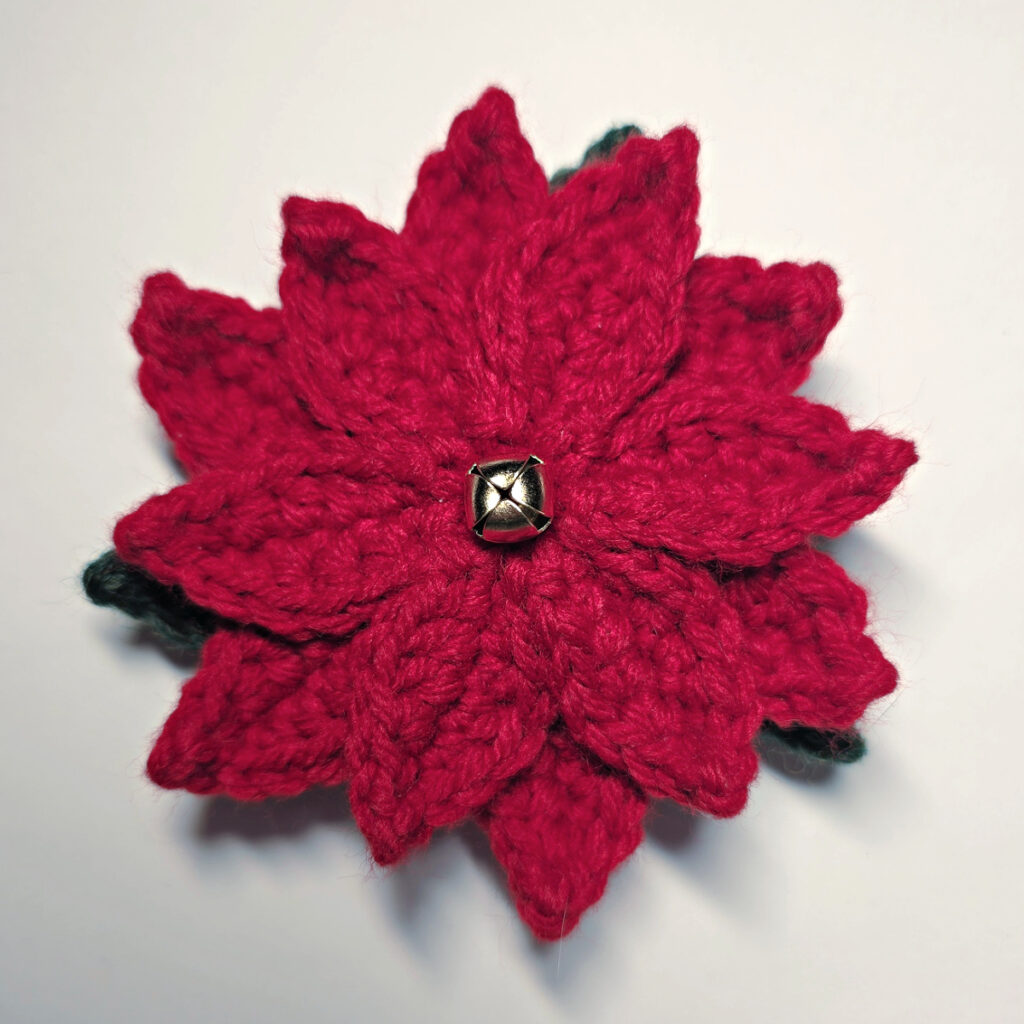
Continue to the Strap.
Strap
Row 1: With red yarn & a 3.50mm crochet hook, begin by leaving an 8″ tail of yarn, then ch 3, working into the back hump of the chs, sc in the 2nd ch from your hook, sc in the last ch. (2 sts)
Row 2: Ch 1, sc in each st. (2 sts)
Rep Row 2 until your strap is 1/2″ longer than the width of the collar you’ll be adding the poinsettia flower to.
Fasten off, leaving an 8″ tail of yarn. Continue to Attaching the Strap.
Attaching the Strap
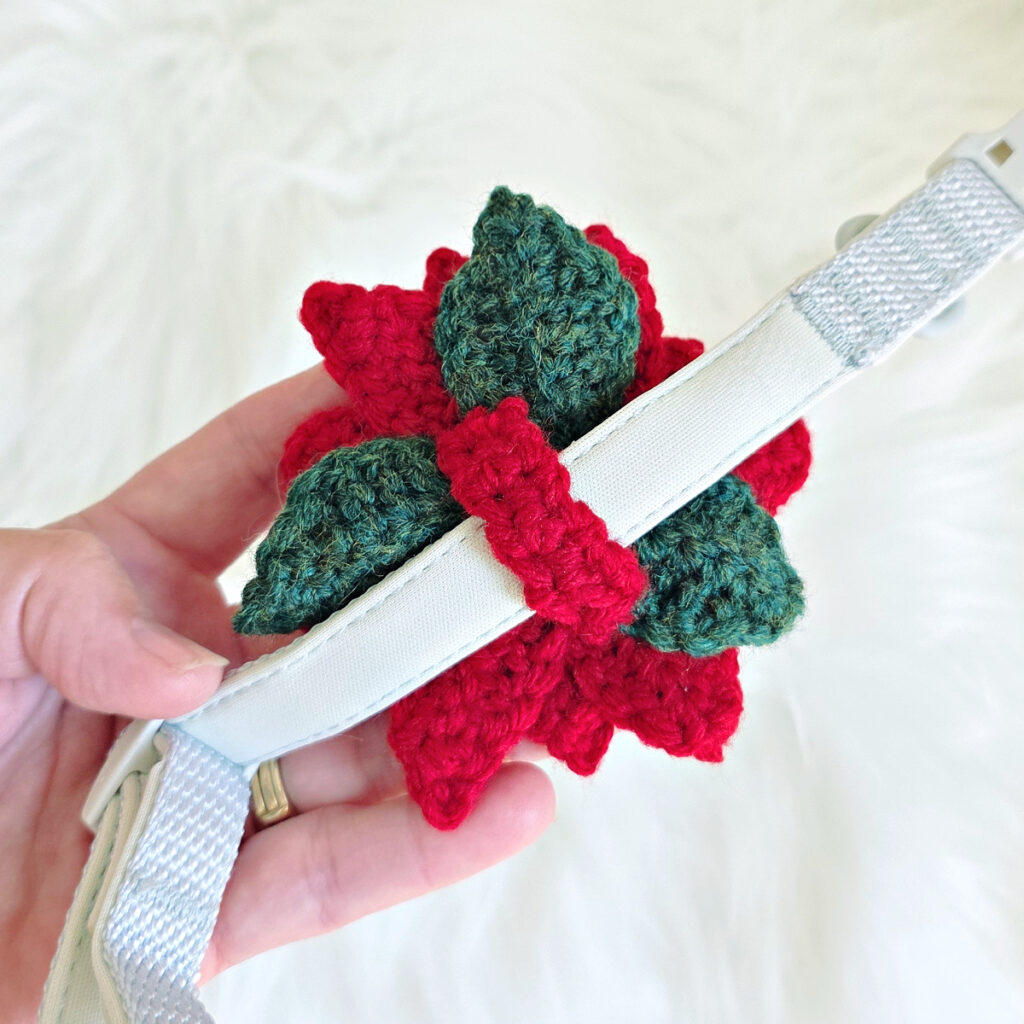
Step One: Place the poinsettia face down.
Step Two: With a yarn needle and tail of yarn from on one end of the strap, attach that end of the strap to the back of the flower, near the base of one of the petals.
Step Three: With a yarn needle and the remaining tail of yarn from on the opposite end of the strap, attach this end of the strap to the back of the flower, near the base of the petal opposite the end of the strap you previously attached.
Weave in ends. Attach the flower to the dog collar by inserting the collar through the hole created by the strap.
And Now for the Blooper Photo
I MADE IT! NOW WHAT?
Pin this post!: Save this crochet dog collar flower pattern to your Pinterest boards so that you can come back and make it again.
Leave a comment below: We love to hear your feedback.
Share Your Finished Projects on Facebook or Instagram: I love to see your finished projects! Share with us on social media and tag me @acrochetedsimplicity or use the hashtag #ACrochetedSimplicity so I can find your posts.
Join us in the Facebook Community Group!
Come share your finished projects with us in the A Crocheted Simplicity Crochet Community Group on Facebook. Join us for fun community events such as crochet alongs, join in on crochet conversations, ask questions, get advice, and share your love for crochet!

Is this your New addition to your Family? Shi sure is a sweetheart either way.