
Eloise the Crochet Elephant
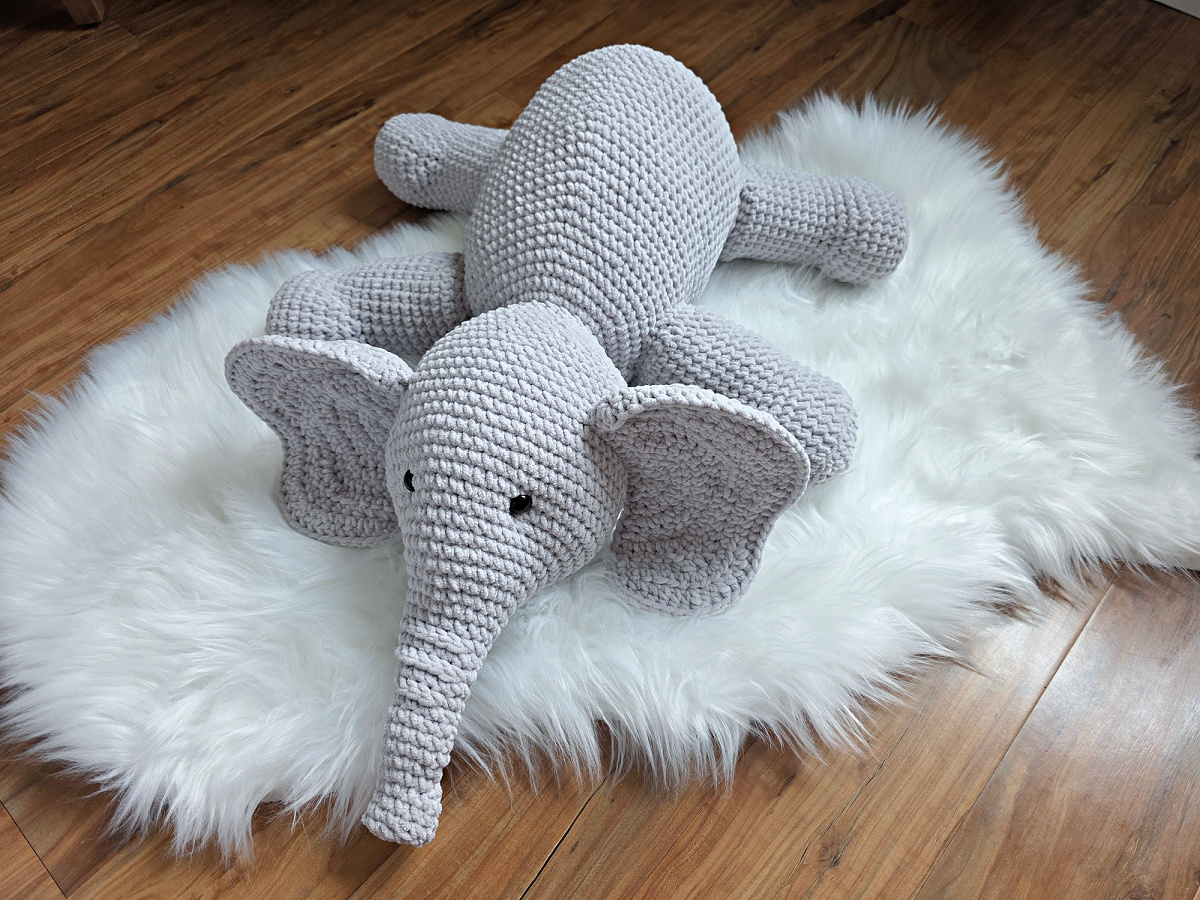
Have you ever wondered how to crochet an elephant? You’re a big fan of wildlife, or your child finds the gentle giants charming or maybe they’re your most favorite animal in the whole wide world? Eloise the crochet elephant is a pattern written just for you!
Elephants are the largest land animals and they have the most adorable traits. Not only do they learn very quickly, they’re very kind to human beings and the ecosystem around them and are considered quite social too. Their herds are led by the wisest and oldest female, known as the matriarch, and Eloise embodies all of their coolest traits.
You’ll find the free crochet elephant pattern in the post below, or you can find an ad-free printable PDF (that includes all photo tutorials), on Ravelry, or Etsy (aff).
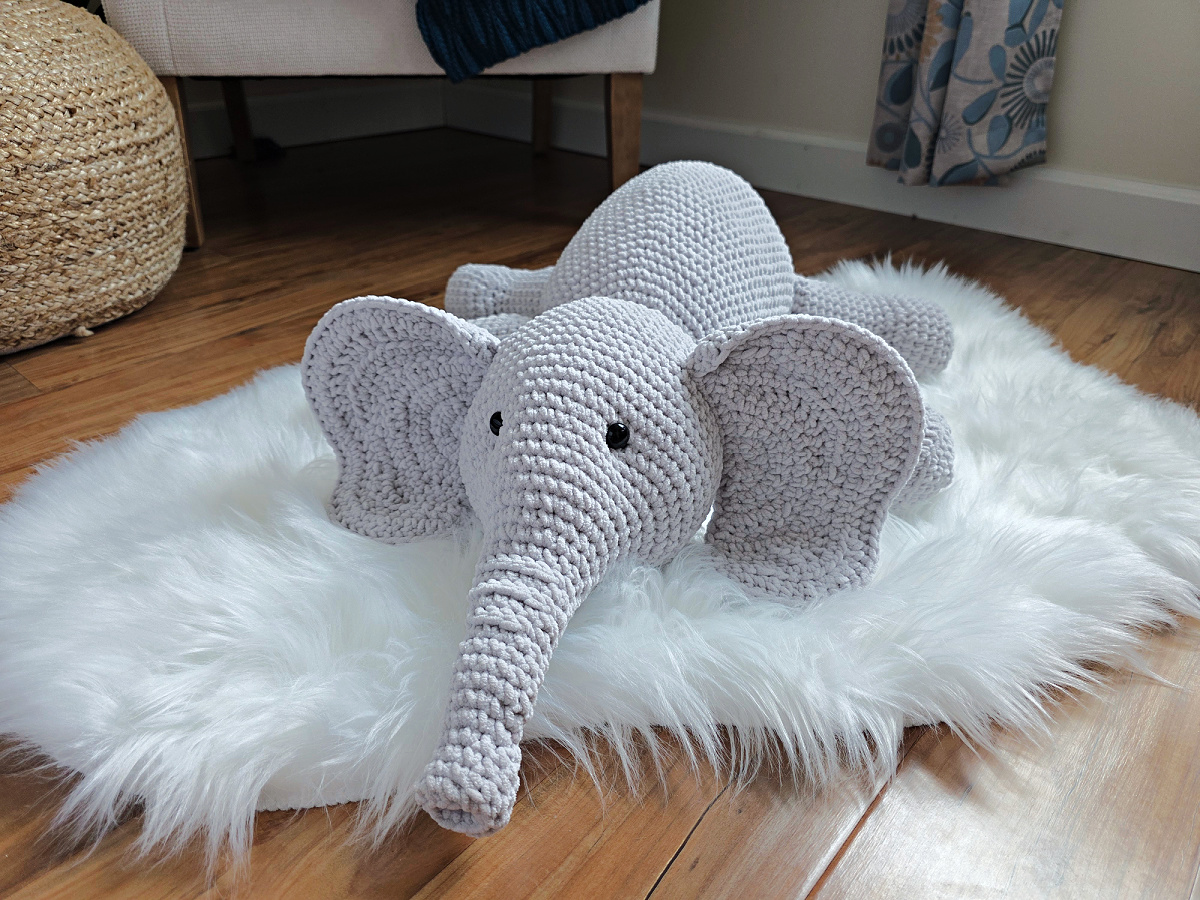
Did you know that elephants don’t just use their massive ears to hear; they flap them like fans to cool themselves down on hot days? Their signature features, including the ears, tufty tail, and large trunk are a big part of this elephant free crochet pattern and you’ll find all of the detailed instructions down below to ensure your amigurumi looks just right.
Related: If you want to crochet another large plush amigurumi to keep this one company, work on Marlow the Crochet Dog next!
How to Crochet an Amigurumi Elephant
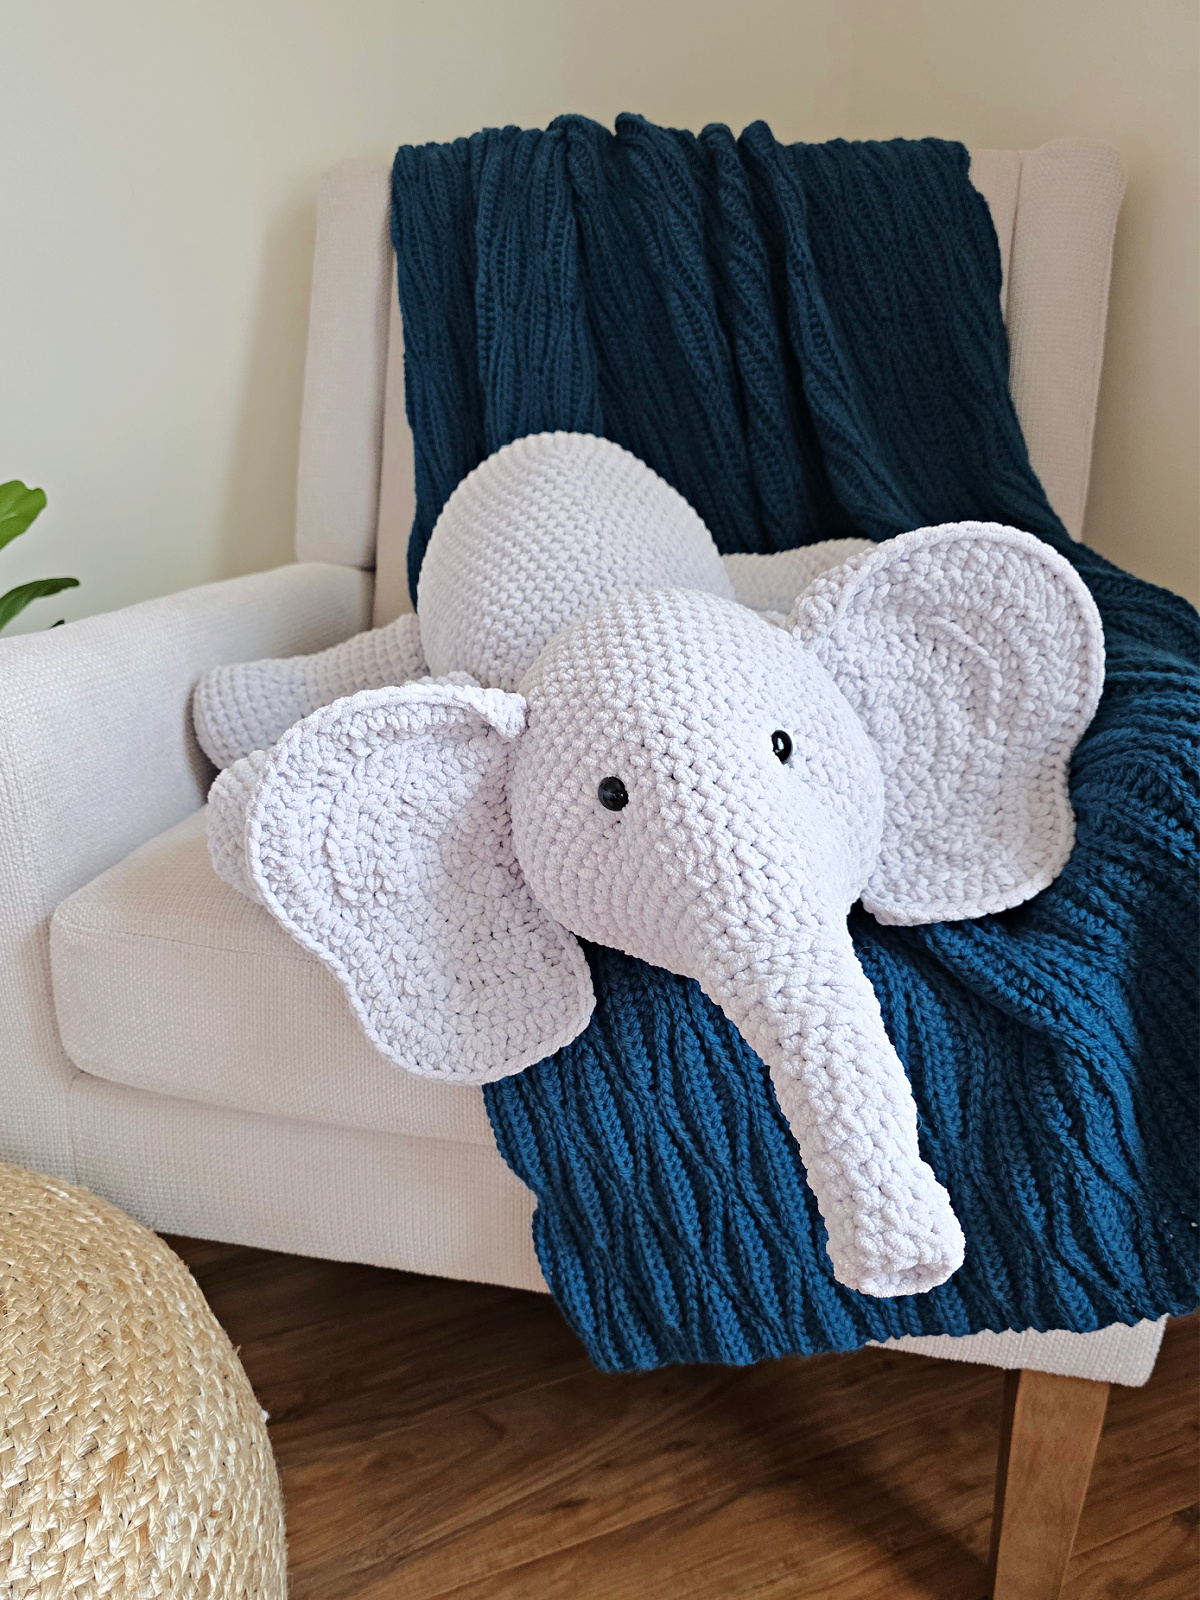
There are a few parts to this crochet elephant pattern and it’s important you have all of them so that Eloise ends up looking like she’s supposed to. You’ll start off by crocheting each of the individual parts including the head, body, ears, tail, legs, and trunk.
Be sure to take your time with each one and get the right quantity too (i.e., four ears, four legs). Once all of them are ready and you’ve cross-checked, you’ll begin seaming them together.
Follow along on the assembly instructions to get everything in its right place. Be sure to make your stitches as secure as possible so Eloise doesn’t unravel from all of the love she’s going to receive.
How To Get The
Eloise the Elephant Pattern
Option 1: Scroll down for the free crochet elephant pattern right here in this blog post.
Option 2: Purchase the ad-free printable PDF from one of my shops:
Yarn
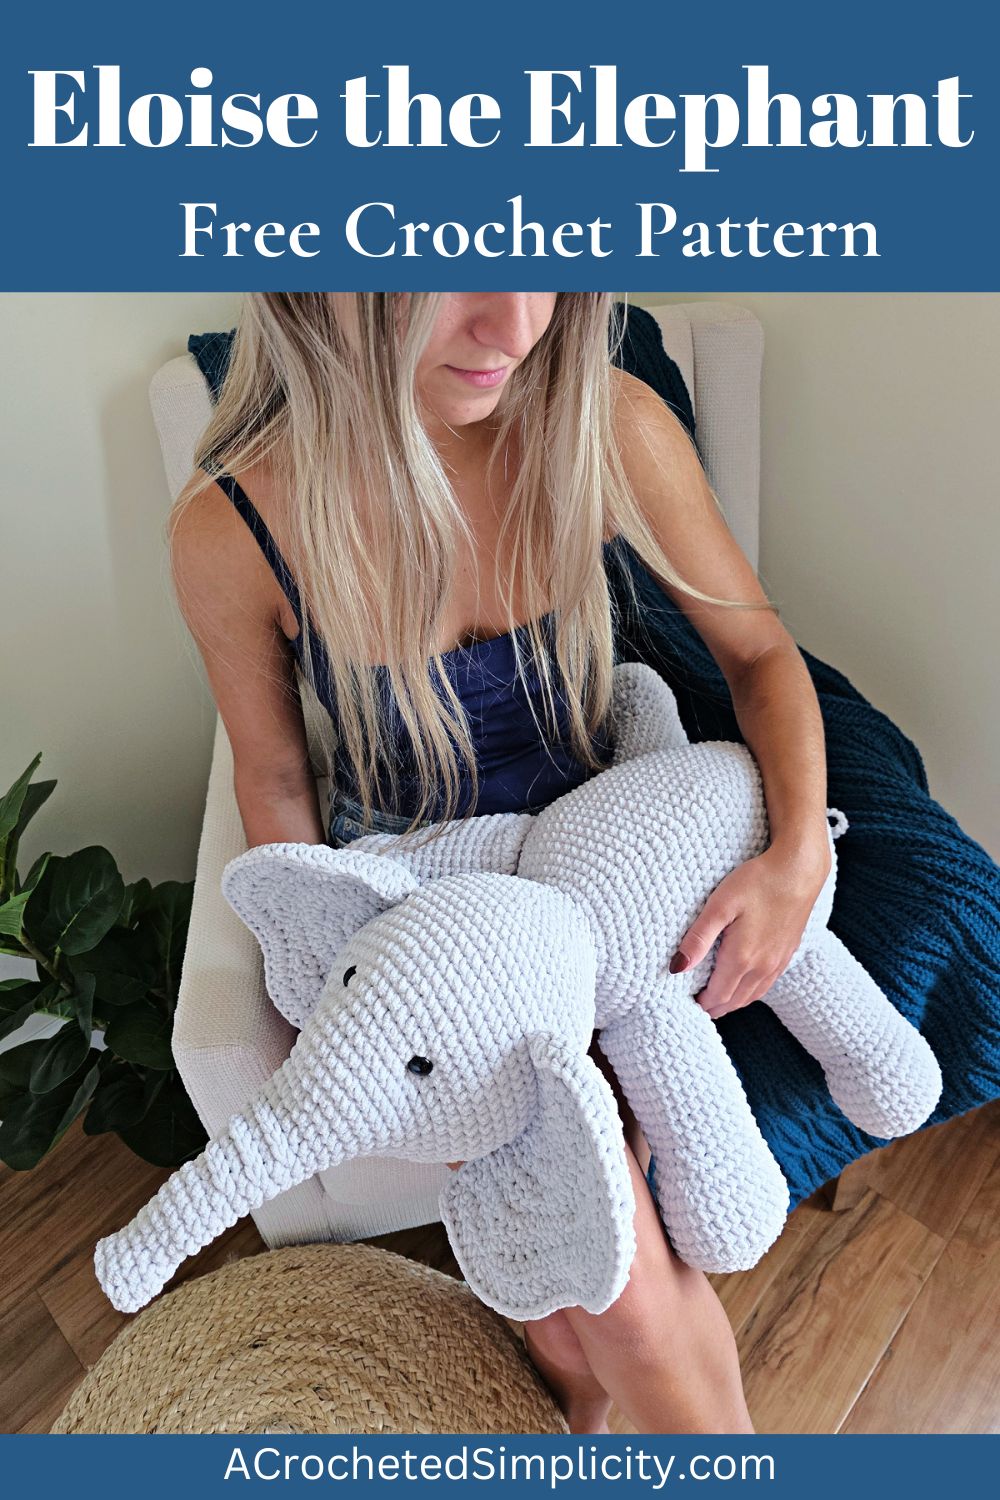
To capture the fluffiness of Eloise, it’s important to use the right type of yarn for your crochet elephant. For my version of Eloise, I used Lion Brand Yarn Posh Twist which is wonderfully plush and soft.
This is a great yarn for crochet amigurumi especially because it is strong and durable, helps the stitches look neat and defined, is low-maintenance (easily washable and dry quickly), and generally resists both shrinking and de-shaping. It is also readily available so you can make this crochet elephant pattern as many times as you want without the worry that you won’t find the same yarn again.
Eloise the Crochet Elephant – Free Pattern
The crochet elephant pattern is free below, but if you love to work offline, I’ve got a couple other great options for you.
Purchase the ad-free, printable PDF, (that includes all photo tutorials), on Ravelry, or on Etsy (aff).
Purchase the Eloise Crochet Elephant Kit (aff): Lion Brand has a full kit of the Eloise Crochet Elephant kit, available on their website. The includes your choice of colors and a digital copy of the crochet pattern.
This post contains affiliate links.
Materials
- Yarn: Chunky Weight / 5 / Yarn, Lion Brand Yarn Posh Twist [100% polyester (232 yds / 213 m / 200 g / 7.05 oz)] was used for the sample in the photos.
- Yardage and Color:
- Posh Twist Earl Grey #571-149BB (3 Balls / 600 yards)
- Crochet Hook: J/10/6.00mm; or size needed to obtain gauge (My favorite crochet hooks are the Clover Amour Crochet Hooks, I’ve never had an ache in my hand since switching).
- Measuring Tape
- Locking Stitch Markers
- Scissors
- Yarn Needle
- (2) 16mm Black Plastic Safety Eyes
- PolyFil 20 oz
Abbreviations (US Terms)
- ch(s): chain(s)
- sl st(s): slip stitch(es)
- st(s): stitch(es)
- sc: single crochet
- hdc: half double crochet
- dc: double crochet
- BPsc: back post single crochet
- Invsc2tog: invisible single crochet decrease
- Rep: repeat
- RS: right side
- SM: stitch marker
- BLO: back loop only
- FLO: front loop only
- yo: yarn over
Experience Level
- Easy
Gauge
- In sc with a 6.00mm hook: 9 sts = 3″; 8.5 rows = 3″
Sizes
- One Size: 19″ W x 24″ L (at widest and longest points)
Special Stitches
- Back Post Single Crochet (bpsc): Insert hook from back to front to back around the post of the designated stitch, yo, pull up a loop, yo, pull thru both loops on hook.
- Invisible Single Crochet Decrease (invsc2tog): Insert hook into the FLO of stitch indicated, insert hook into the FLO of the next stitch, yo, pull up a loop, yo, pull thru all loops on hook. Decreases by 1 stitch.
- Join with a standing single crochet: Begin with a slip knot on your hook, insert your hook into the stitch or space indicated, yo, pull up a loop, yo and draw thru both loops on hook.
Pattern Notes
- Turning chains are not included in stitch count unless noted otherwise.
- Yarn Notes: Lion Brand Yarn Posh Twist (232 yds / 213 m / 200 g / 7.05 oz / 100% polyester) was used for the sample. Other comparable weight yarns may be substituted.
- Yardage & Color:
- Posh Twist Earl Grey #571-149BB (3 Balls / 600 yards)
- Construction Notes: You’ll begin by crocheting the trunk, head, and body seamlessly from the tip of the trunk to the elephant’s bum. As you crochet these three, you’ll stuff the crochet elephant along the way and add the safety eyes. Next, you’ll crochet the elephant’s legs, ears, and tail. Lastly, stuff and assemble them.
Eloise the Crochet Elephant – Written Pattern
Elephant’s Trunk & Head
Note: This section is worked in continuous rounds to keep from having an unsightly seam. Do not join at the end of each round, instead use a scrap piece of yarn to keep track of the beginning of each round. Move the scrap of yarn up as you complete each round.
Rnd 1 (RS): With yarn & a 6.00mm crochet hook, ch 2, work 5 sc into the 2nd ch from your hook. Do not join. (5 sts)`
Rnd 2: 2 sc in the first st, (sc in the next st, 2 sc in the next st) 2 times. (8 sts)
Rnd 3: (2 sc in the next st, sc in each of the next 2 sts) 2 times, 2 sc in each of the next 2 sts. (12 sts)
Rnd 4: BLO sc in each st around. (12 sts)
Rnds 5 – 6: Both Loops, sc in each st around. (12 sts)
At this point, push the first 3 rounds into the center of the trunk.
Rnd 7: (sc in the next st, 2 sc in the next st) 3 times, (Invsc2tog) 3 times. (12 sts)
Rnd 8: (2 sc in the next st, sc in the next st) 3 times, (Invsc2tog) 3 times. (12 sts)
Rnd 9: Rep Rnd 7. (12 sts)
Rnds 10 – 13: Sc in each st around. (12 sts)
Rnd 14: Sc in each of the first 3 sts, 2 sc in the next st, sc in the next st, BPsc around each of the next 3 sts, sc in the next st, 2 sc in the next st, sc in each of the last 2 sts. (14 sts)
Rnd 15: Sc in each st around. (14 sts)
Rnd 16: Sc in each of the first 3 sts, 2 sc in the next st, sc in the next st, BPsc around each of the next 5 sts, sc in the next st, 2 sc in the next st, sc in each of the last 2 sts. (16 sts)
Rnd 17: Sc in each st around. (16 sts)
Rnd 18: Sc in each of the first 4 sts, 2 sc in the next st, sc in the next st, BPsc around each of the next 5 sts, sc in the next st, 2 sc in the next st, sc in each of the last 3 sts. (18 sts)
Rnd 19: Sc in each st around. (18 sts)
Gauge Check: At this point, the trunk should measure approximately 5-1/2″ H (with the first 3 rounds pushed up into the center of the trunk). It should measure approximately 1-3/4″ W across the tip of the trunk and 3″ W across Rnd 19.
Lightly Stuff the Trunk: Before proceeding to Rnd 20, lightly stuff the trunk with Poly-fil. I wanted my trunk to be very pliable so I stuffed it very lightly.
Rnd 20: Sc in each of the first 5 sts, 2 sc in the next st, sc in each of the next 2 sts, 2 sc in the next st, sc in the next st, 2 sc in the next st, sc in each of the next 2 sts, 2 sc in the next st, sc in each of the last 4 sts. (22 sts)
Rnd 21: Sc in each st around. (22 sts)
Rnd 22: Sc in each of the next 4 sts, (2 sc in the next st, sc in the next st) 3 times, 2 sc in the next st, sc in each of the next 2 sts, (2 sc in the next st, sc in the next st) 3 times, 2 sc in the next st, sc in each of the last 2 sts. (30 sts)
Rnd 23: Sc in each st around. (30 sts)
Rnd 24: Sc in each of the next 4 sts, (2 sc in the next st, sc in the next st) 2 times, 2 sc in the next st, sc in each of the next 14 sts, (2 sc in the next st, sc in the next st) 2 times, 2 sc in the next st, sc in each of the last 2 sts. (36 sts)
Rnd 25: Sc in each of the next 8 sts, 2 sc in the next st, sc in each of the next 2 sts, 2 sc in the next st, sc in each of the next 16 sts, 2 sc in the next st, sc in each of the next 2 sts, 2 sc in the next st, sc in each of the last 6 sts. (40 sts)
Rnd 26: Sc in each of the next 7 sts, 2 sc in the next st, sc in each of the next 2 sts, 2 sc in the next st, sc in each of the next 20 sts, 2 sc in the next st, sc in each of the next 2 sts, 2 sc in the next st, sc in each of the last 5 sts. (44 sts)
Rnd 27: Sc in each of the next 9 sts, 2 sc in the next st, sc in each of the next 3 sts, 2 sc in the next st, sc in each of the next 18 sts, 2 sc in the next st, sc in each of the next 3 sts, 2 sc in the next st, sc in each of the last 7 sts. (48 sts)
Rnd 28: Sc in each of the next 11 sts, 2 sc in the next st, sc in each of the next 4 sts, 2 sc in the next st, sc in each of the next 16 sts, 2 sc in the next st, sc in each of the next 4 sts, 2 sc in the next st, sc in each of the last 9 sts. (52 sts)
Rnd 29: Sc in each of the next 8 sts, 2 sc in the next st, sc in each of the next 4 sts, (2 sc in the next st, sc in each of the next 6 sts) 3 times, 2 sc in the next st, sc in each of the next 4 sts, 2 sc in the next st, sc in each of the last 12 sts. (58 sts)
Rnd 30: Sc in each st around. (58 sts)
Rnd 31: Sc in each of the next 27 sts, 2 sc in the next st, sc in each of the next 6 sts, 2 sc in the next st, sc in each of the last 23 sts. (60 sts)
Rnds 32 – 40: Sc in each st around. (60 sts)
Gauge Check: When laid flat, your Trunk & Head at this point should measure approximately 9-3/4″ W (at the widest point) x 12″ H (including the trunk).
Rnd 41: (sc in each of the next 10 sts, Invsc2tog) 5 times. (55 sts)
Rnd 42: Sc in each of the next 4 sts, (Invsc2tog, sc in each of the next 9 sts) 4 times, Invsc2tog, sc in each of the last 5 sts. (50 sts)
Do not fasten off. Continue on to Attaching Eyes before finishing and stuffing the Elephant’s Head with Poly-fil.
Attaching Eyes
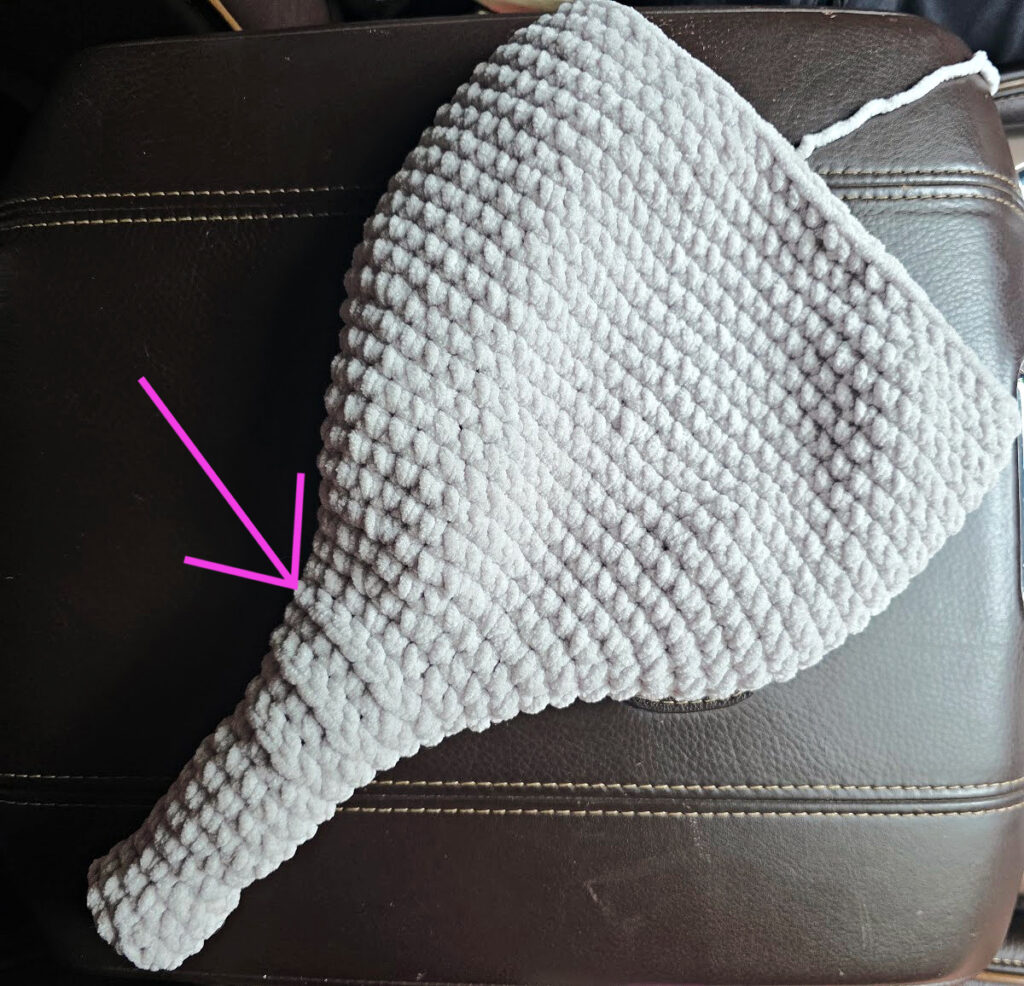
Step 1: Position the elephant’s head as shown below. Locate the last line on the top of the trunk that was created with BPsc’s (see the PINK arrow in the photo below).
Step 2: Count up 10 rounds from the last line on the trunk (this is Rnd 28 from the Trunk & Head). Center the safety eyes on the elephant’s face between the 10th & 11th rounds from the last line on the trunk (Rnds 28 & 29). Place them so there are 9 – 10 stitches showing between them (approximately 3″ or 3-1/4″).
Continue to Shaping Elephant’s Head.
Shaping Elephant’s Head
With Poly-fil, begin stuffing the elephant’s head to a medium firmness.
Continue to Finishing Elephant’s Head.
Finishing Elephant’s Head
Continue Elephant’s Head from where you previously left off.
Rnd 43: Sc in each of the next 5 sts, Invsc2tog, (sc in each of the next 10 sts, Invsc2tog) 3 times, sc in each of the last 7 sts. (46 sts)
Rnd 44: (Invsc2tog, sc in each of the next 9 sts) 3 times, Invsc2tog, sc in each of the last 11 sts. (42 sts)
Rnd 45: Sc in each of the next 5 sts, (Invsc2tog, sc in each of the next 8 sts) 3 times, Invsc2tog, sc in each of the last 5 sts. (38 sts)
Rnd 46: (Invsc2tog, sc in each of the next 3 sts, Invsc2tog, sc in each of the next 2 sts) 4 times, sc in each of the last 2 sts. (30 sts)
Rnd 47: (Invsc2tog, sc in each of the next 3 sts) 6 times. (24 sts)
Do not fasten off. Finish stuffing Elephant’s Head with Poly-fil. After being stuffed, the Elephant’s Head should measure approximately 13-1/2” from the tip of the trunk to the neck x 7-1/2” W x 6” H.
Continue to Elephant’s Body.
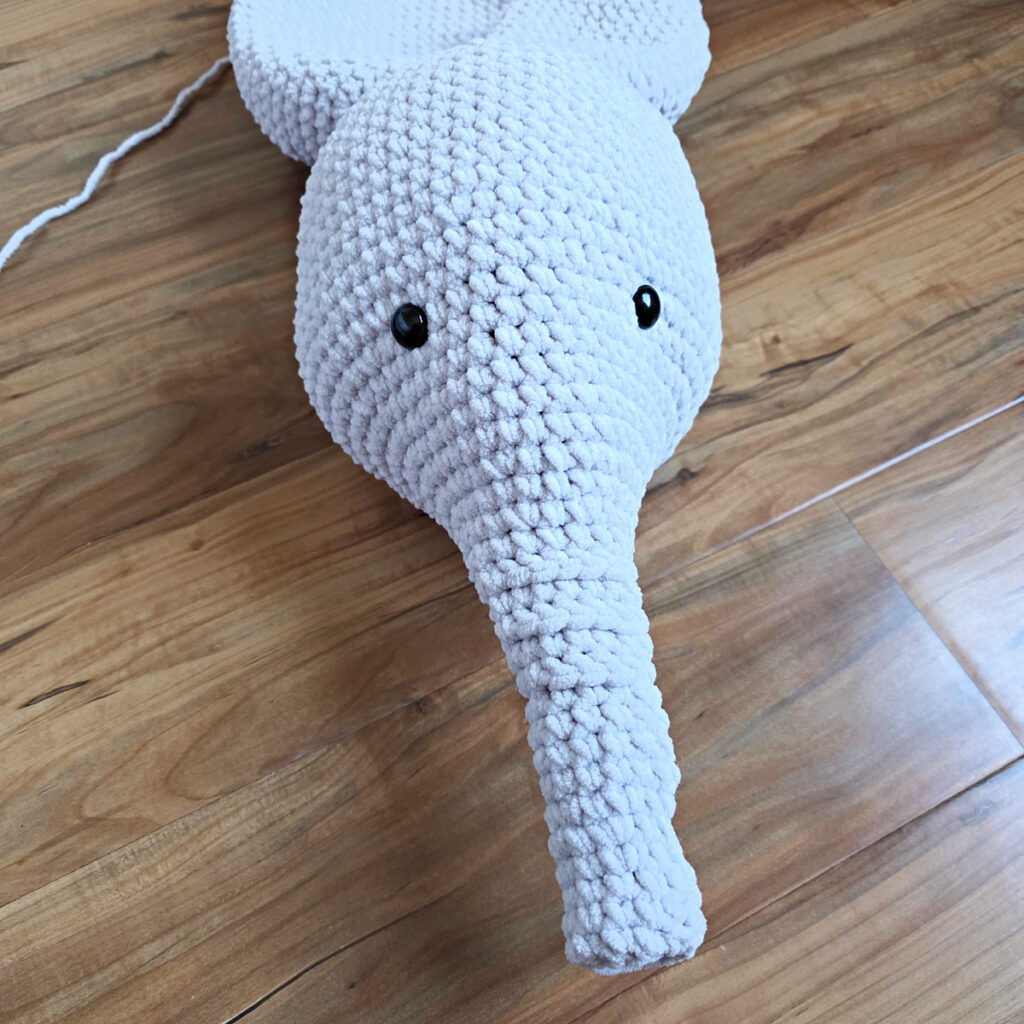
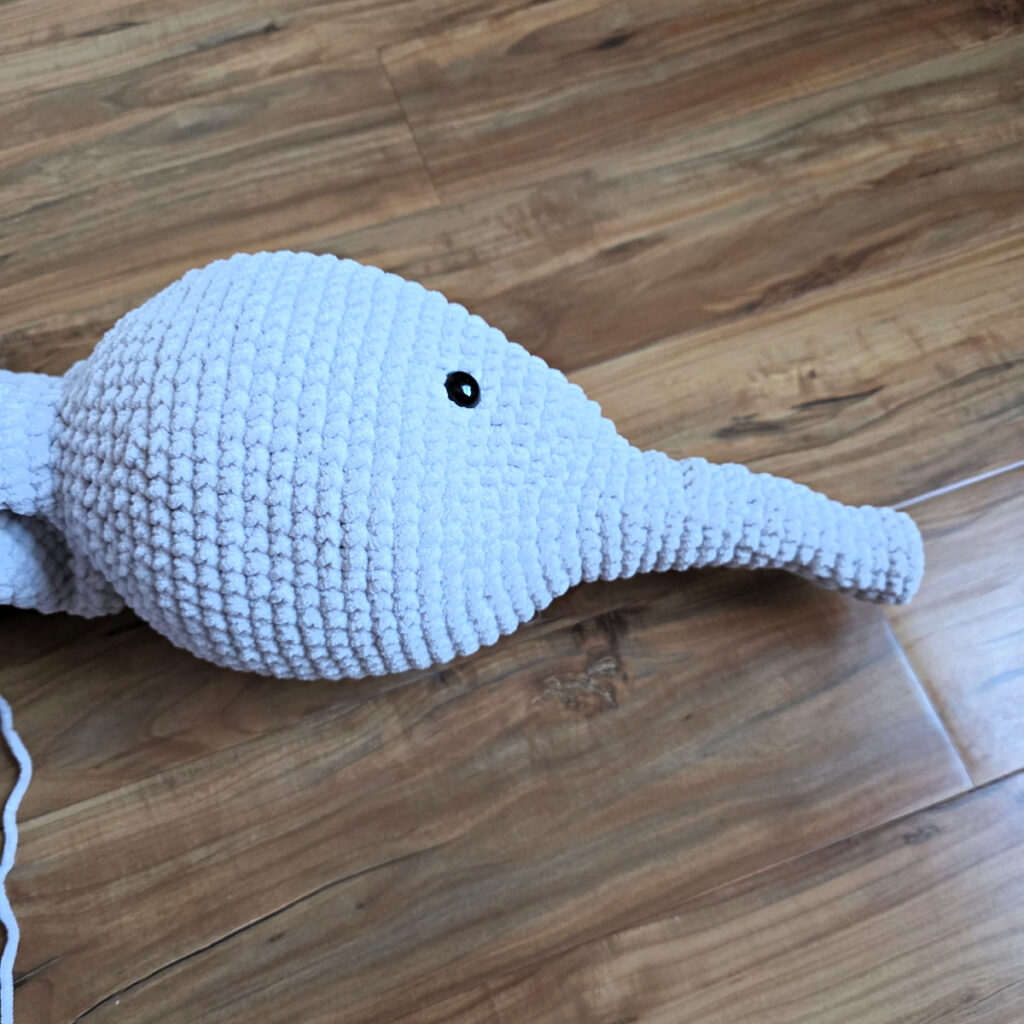
Elephant’s Body
Note: This section is worked in continuous rounds to keep from having an unsightly seam. Do not join at the end of each round, instead use a scrap piece of yarn to keep track of the beginning of each round. Move the scrap of yarn up as you complete each round.
Rnd 1 (RS): Continuing on from the elephant’s head with a 6.00mm crochet hook, work 2 sc in each st around. Do not join. (48 sts)
Rnd 2: Sc in each of the next 11 sts, 2 sc in the next st, sc in each of the next 6 sts, 2 sc in the next st, sc in each of the next 16 sts, 2 sc in the next st, sc in each of the next 6 sts, 2 sc in the next st, sc in each of the last 5 sts. (52 sts)
Rnd 3: Sc in each of the next 12 sts, 2 sc in the next st, sc in each of the next 6 sts, 2 sc in the next st, sc in each of the next 18 sts, 2 sc in the next st, sc in each of the next 6 sts, 2 sc in the next st, sc in each of the last 6 sts. (56 sts)
Rnd 4: Sc in each of the next 30 sts, 2 sc in the next st, sc in each remaining st around. (57 sts)
Rnd 5: Sc in each of the next 2 sts, (Invsc2tog, sc in each of the next 7 sts) 2 times, 2 sc in the next st, sc in each of the next 21 sts, 2 sc in the next st, sc in each of the next 7 sts, Invsc2tog, sc in each of the last 5 sts. (56 sts)
Rnd 6: Sc in each of the next 14 sts, 2 sc in the next st, sc in each of the next 9 sts, 2 sc in the next st, (sc in each of the next 5 sts, 2 sc in the next st) 2 times, sc in each of the next 9 sts, 2 sc in the next st, sc in each of the last 9 sts. (61 sts)
Rnd 7: Sc in each of the next 32 sts, 2 sc in the next st, sc in each remaining st around. (62 sts)
Rnd 8: Rep Rnd 7. (63 sts)
Rnd 9: Sc in each of the next 34 sts, 2 sc in the next st, sc in each remaining st around. (64 sts)
Rnd 10: Rep Rnd 9. (65 sts)
Rnd 11: Sc in each of the next 35 sts, 2 sc in the next st, sc in each remaining st around. (66 sts)
Rnd 12: Rep Rnd 11. (67 sts)
Rnd 13: Sc in each of the next 36 sts, 2 sc in the next st, sc in each remaining st around. (68 sts)
Rnd 14: Rep Rnd 13. (69 sts)
Rnd 15: Sc in each of the next 37 sts, 2 sc in the next st, sc in each remaining st around. (70 sts)
Rnds 16 – 30: Sc in each st around. (70 sts)
Gauge Check: The length of the Body at this point, when laid flat, should be approximately 10″ L. The Body width, at the widest point, should be approximately 11-1/2″ W.
Rnd 31: (sc in each of the next 7 sts, Invsc2tog) 6 times, (sc in each of the next 6 sts, Invsc2tog) 2 times. (62 sts)
Rnd 32: (sc in each of the next 13 sts, Invsc2tog) 4 times, sc in each of the last 2 sts. (58 sts)
Rnd 33: Sc in each of the next 6 sts, (Invsc2tog, sc in each of the next 12 sts) 3 times, Invsc2tog, sc in each of the last 8 sts. (54 sts)
Rnd 34: (sc in each of the next 4 sts, Invsc2tog, sc in each of the next 5 sts, Invsc2tog) 4 times, sc in each of the last 2 sts. (46 sts)
Begin Stuffing: With Poly-fil, begin stuffing the elephant’s body to a medium firmness.
Rnd 35: Sc in each of the next 2 sts, (sc in each of the next 4 sts, Invsc2tog, sc in each of the next 3 sts, Invsc2tog) 4 times. (38 sts)
Rnd 36: (sc in each of the next 2 sts, Invsc2tog, sc in each of the next 3 sts, Invsc2tog) 4 times, sc in each of the last 2 sts. (30 sts)
Rnd 37: (sc in each of the next 3 sts, Invsc2tog) 6 times. (24 sts)
Rnd 38: (sc in the next st, Invsc2tog) 8 times. (16 sts)
Rnd 39: (Invsc2tog) 8 times. (8 sts)
Fasten off, leaving a tail of yarn to close the last round. With a yarn needle, weave the tail of yarn in and out of the stitches from the last round. Pull on the end to cinch the hole closed. Weave in ends. Continue on to the Legs.
Elephant’s Body, after being stuffed and the last round cinched closed, measures approximately 7-1/2″ W x 7-1/2″ H x 11-1/2″ L (not including the head and trunk). With the head the elephant measures 24″ L.
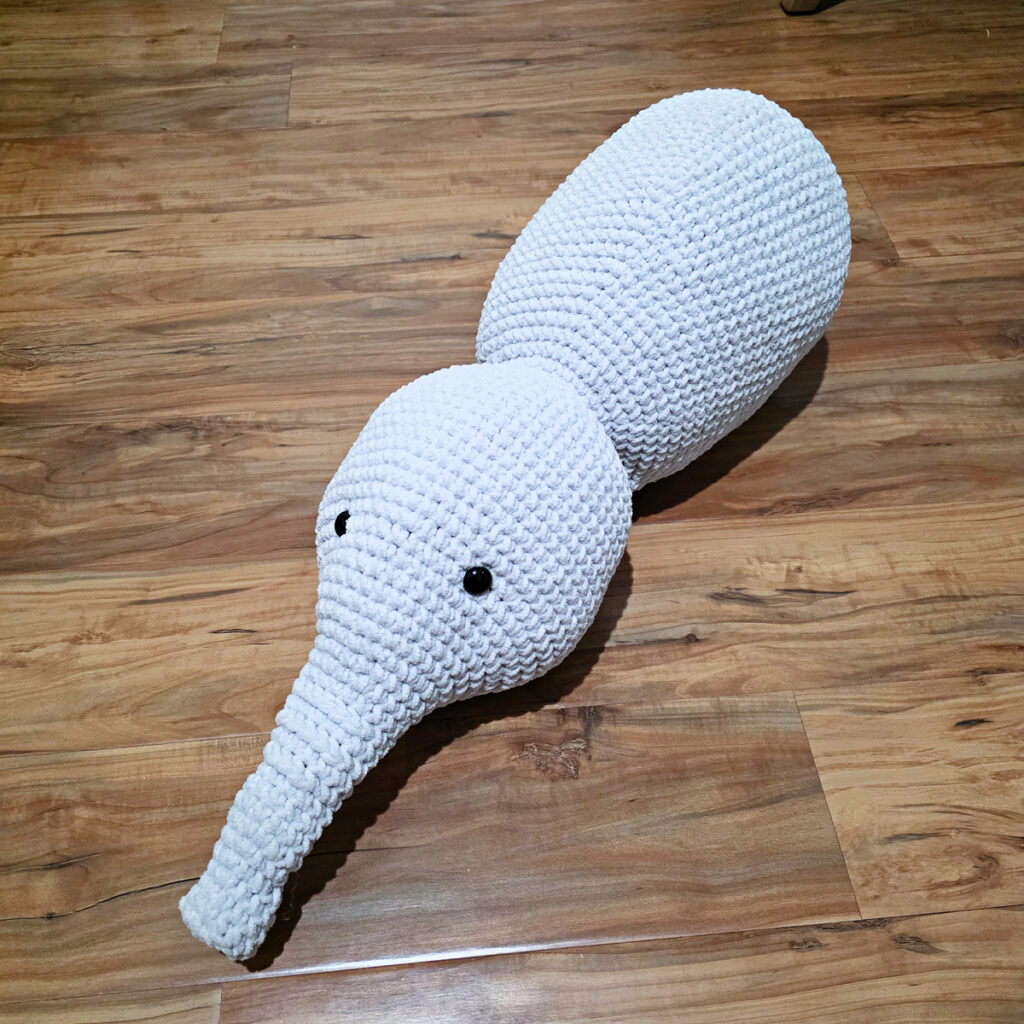
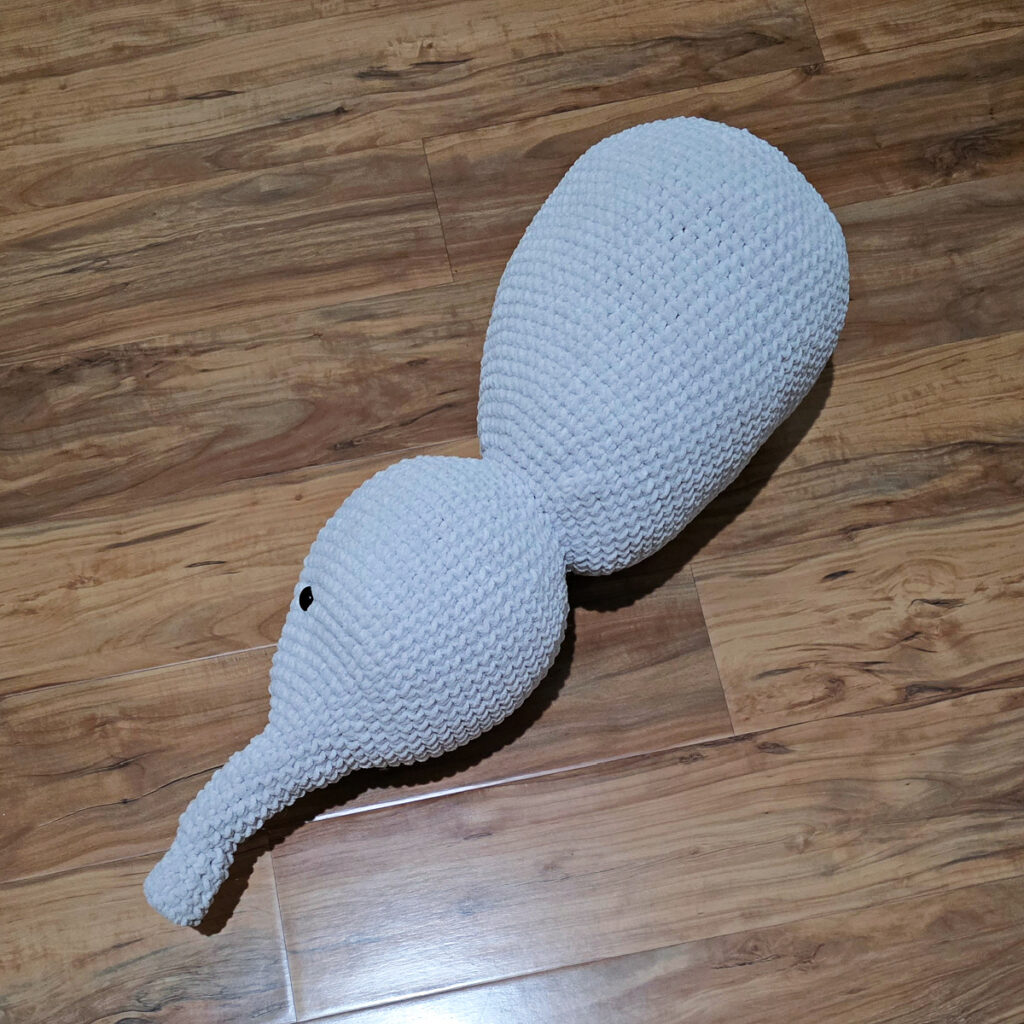
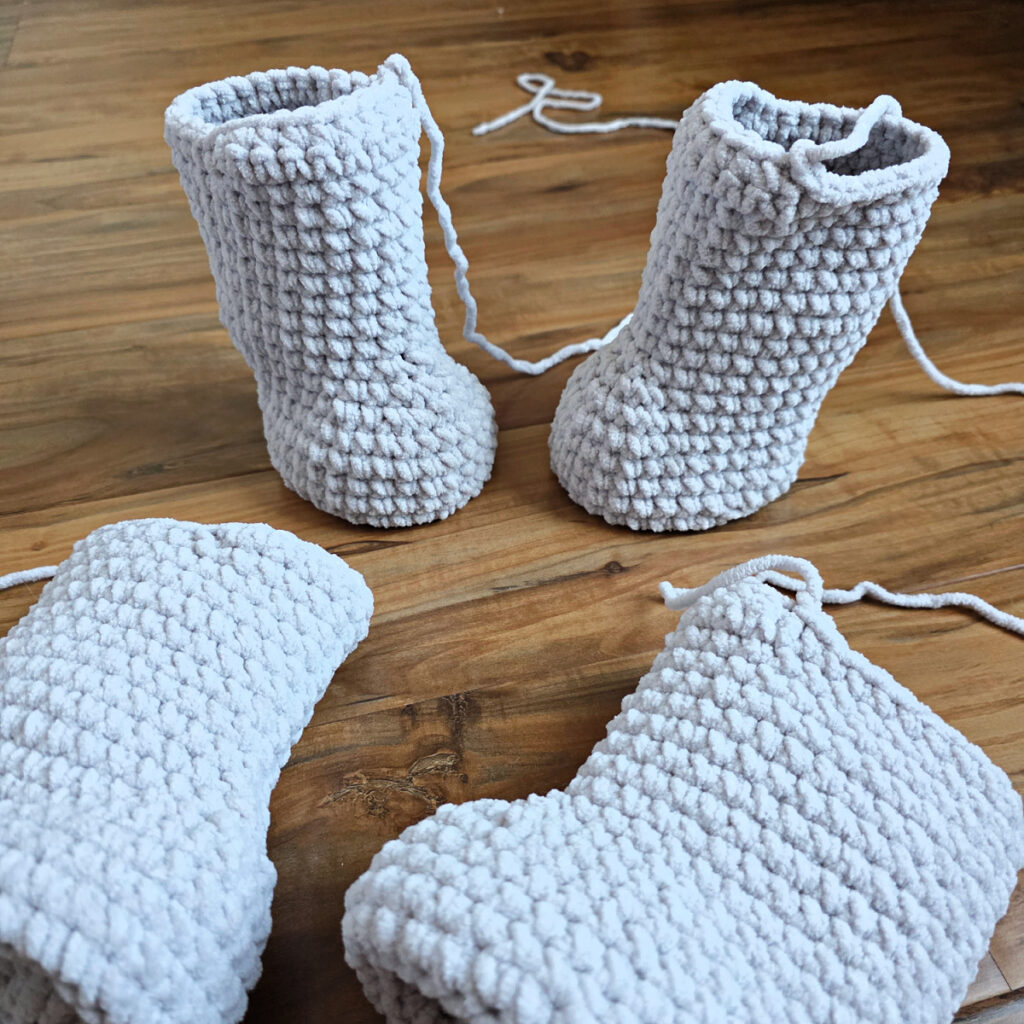
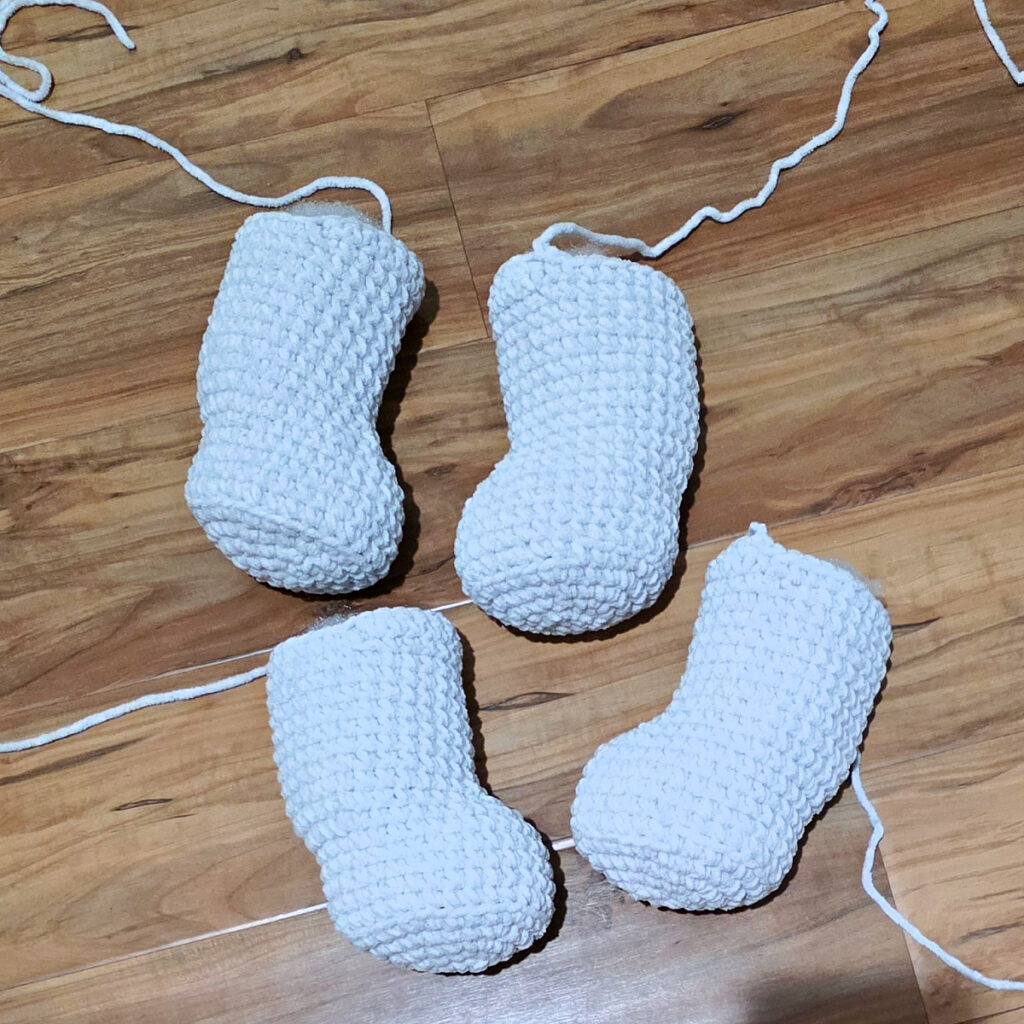
Legs (Make 4)
Note: This section is worked in continuous rounds to keep from having an unsightly seam. Do not join at the end of each round, instead use a scrap piece of yarn to keep track of the beginning of each round. Move the scrap of yarn up as you complete each round.
Rnd 1: With yarn & a 6.00mm crochet hook, ch 4, work 3 sc into the 2nd ch from your hook, sc in the next ch, 3 sc in the next ch, rotate to work into the bottom of the ch, sc in the next ch. Do not join. (8 sts)
Rnd 2: * 2 sc in each of the next 3 sts, sc in the next st, rep from * . (14 sts)
Rnd 3: * (2 sc in the next st, sc in the next st) 3 times, sc in the next st, rep from * . (20 sts)
Rnd 4: * (2 sc in the next st, sc in each of the next 2 sts) 3 times, sc in the next st, rep from * . (26 sts)
Rnd 5: * (2 sc in the next st, sc in each of the next 3 sts) 3 times, sc in the next st, rep from * . (32 sts)
Rnd 6: BLO sc in each st around. (32 sts)
Rnds 7 – 10: Sc in each st around. (32 sts)
Rnd 11: Sc in each of the next 4 sts, (Invsc2tog, sc in the next st) 4 times, sc in each of the next 4 sts, (2 sc in the next st, sc in the next st) 4 times, sc in each of the next 4 sts. (32 sts)
Rnd 12: Sc in each of the next 4 sts, (Invsc2tog, sc in the next st) 2 times, sc in each remaining st. (30 sts)
Rnd 13: Sc in each of the next 4 sts, (Invsc2tog) 2 times, sc in each remaining st. (28 sts)
Rnds 14 – 20: Sc in each st around. (28 sts)
You’ll work back and forth in rows for the next 2 rows. Then for the final round, you’ll work all the way around the leg again.
Row 21: Sc in each of the next 12 sts. Turn. (12 sts)
Row 22: Ch 1, sc in each of the next 10 sts. Turn. (10 sts)
ROUND 23: Ch 1, sc in each st around the leg opening. Join with a sl st to the 1st st. (28 sts)
Fasten off, leaving a tail of yarn long enough to later sew the leg onto the body. Make four legs total, then continue to Tail. Legs should measure 4-1/2” W x 6-1/4” L (at widest and longest points).
Elephant’s Tail
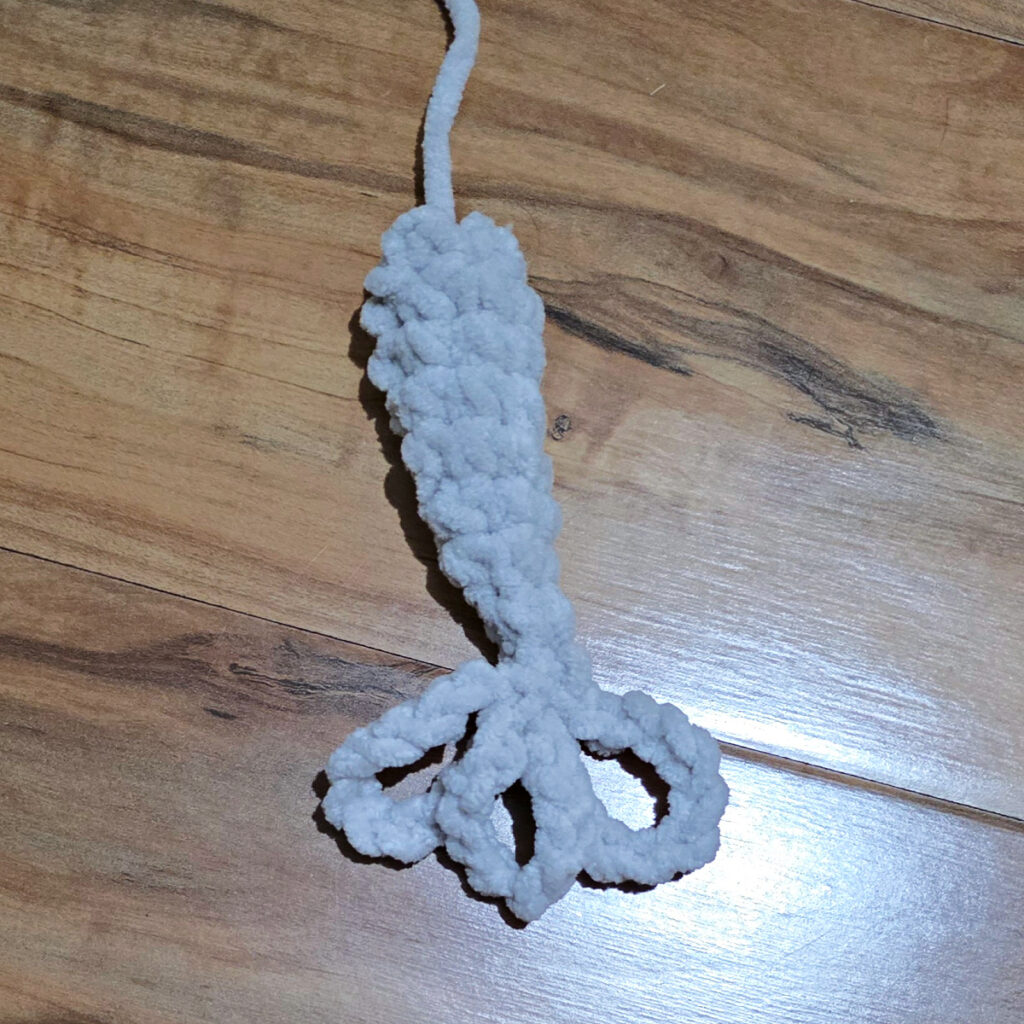
Rnd 1: Begin by leaving a 10″ tail of yarn, then with a 6.00mm crochet hook, ch 5. Join with a sl st to the first chain. Ch 1, sc in each ch around. Do not join. (5 sts)
Rnds 2 – 5: Sc in each st around. (5 sts)
Rnd 6: Invsc2tog, sc in each remaining st around. (4 sts)
Rnd 7: Sc in each st around. (4 sts)
Rnd 8: Invsc2tog, sc in each of the last 2 sts. (3 sts)
Make Tail Hair: (ch 11, sl st into Row 8) 3 times.
Fasten off. Weave in the last tail of yarn, but make sure to leave the beginning tail. Elephant’s Tail should measure approximately 4-3/4″ L. Continue on to the Ears.
Elephant’s Ears (Make 4)
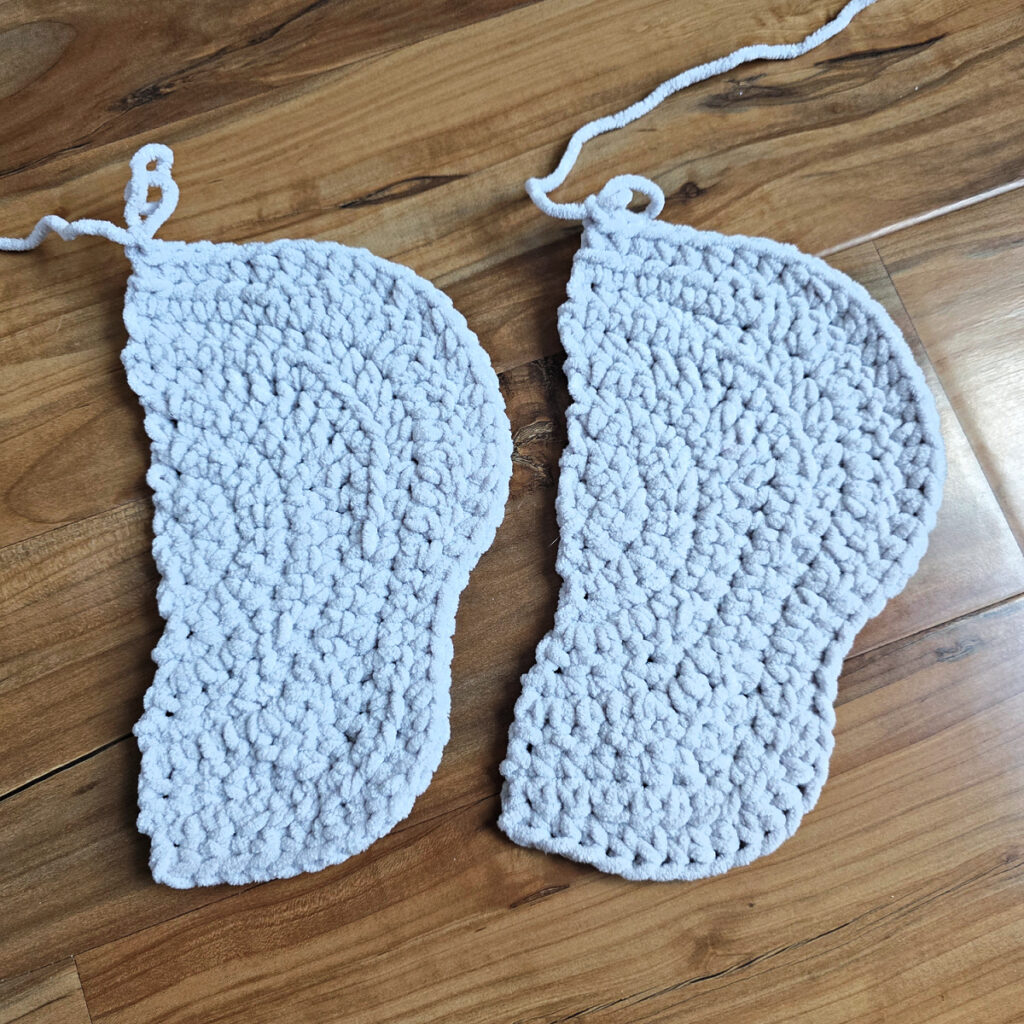
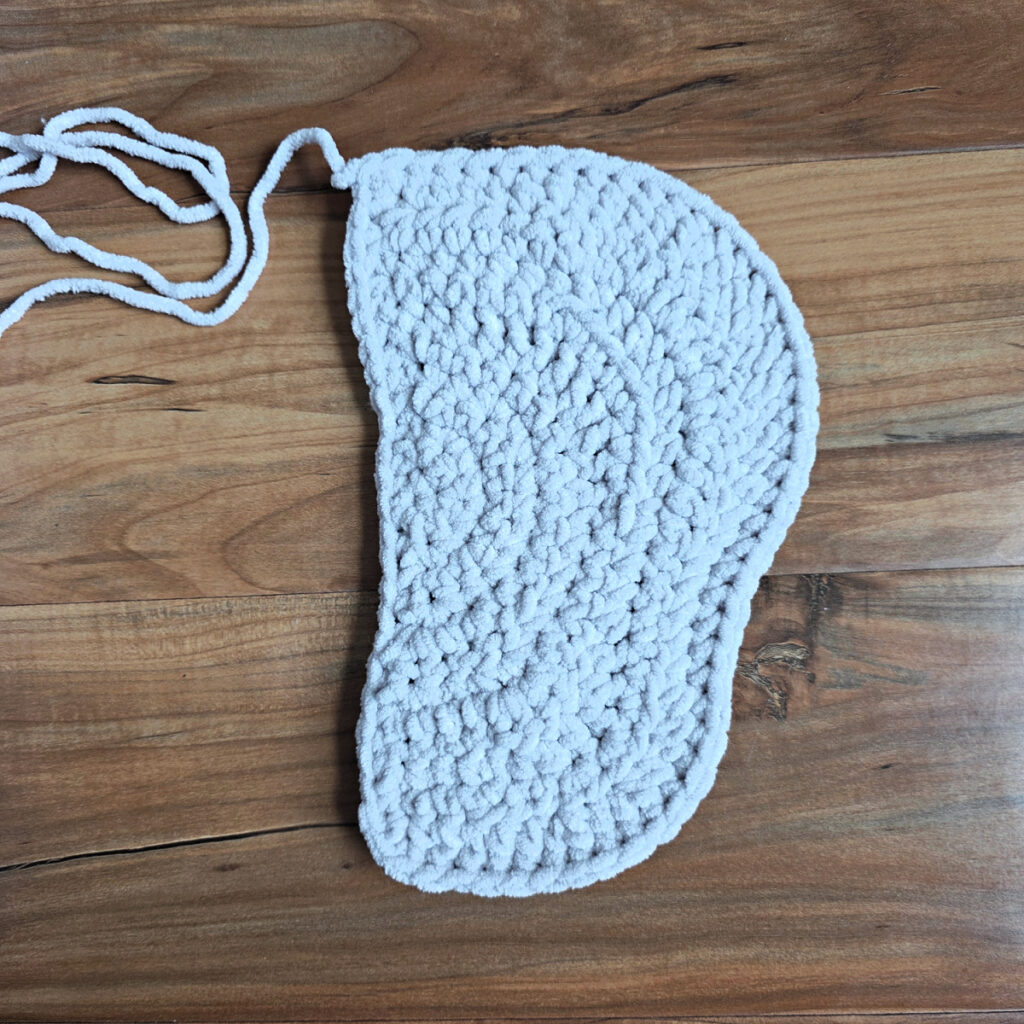
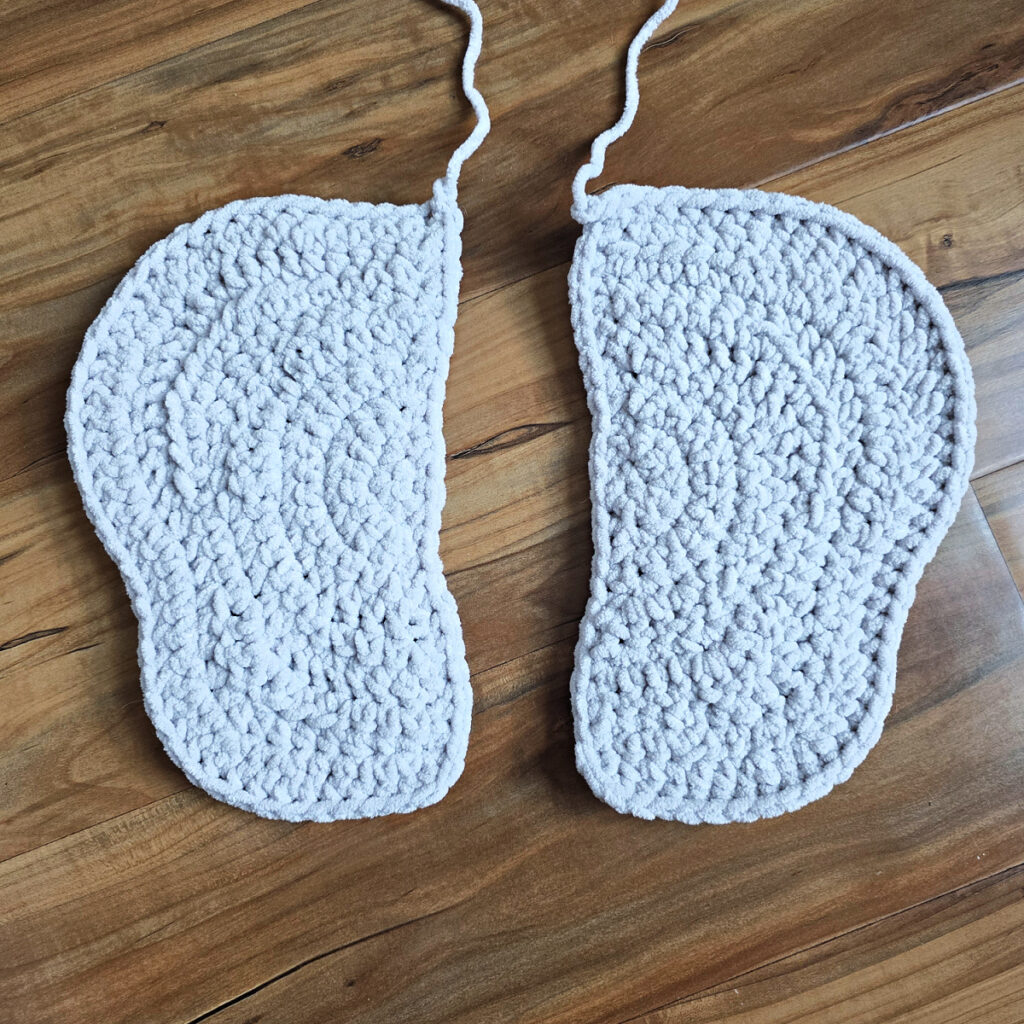
The elephant’s ears are made by joining two identical ears together with a single crochet around. You’ll make 4 pieces and then join 2 together to make one ear.
Row 1: With yarn & a 6.00mm crochet hook, ch 2, work 3 sc into the 2nd ch from your hook. Turn. (3 sts)
Row 2: Ch 1, work 2 sc in each st across. Turn. (6 sts)
Row 3: Ch 1, 2 sc in the first st, sc in the next st, (2 sc in the next st, sc in the next st) 2 times. Turn. (9 sts)
Row 4: Ch 1, 2 sc in the first st, sc in each of the next 2 sts, (2 sc in the next st, sc in each of the next 2 sts) 2 times. Turn. (12 sts)
Row 5: Ch 1, 2 sc in the first st, sc in each of the next 3 sts, (2 sc in the next st, sc in each of the next 3 sts) 2 times. Turn. (15 sts)
Row 6: Ch 1, 2 sc in the first st, sc in each of the next 10 sts, hdc in the next st, 2 dc in the next st, dc in the next st, 2 dc in the last st. Turn. (18 sts)
Row 7: Ch 1, 2 sc in the first st, sc in each of the next 2 sts, 2 sc in the next st, sc in each of the next 5 sts, dc in the next st, 2 dc in each of the next 2 sts, dc in the next st, 2 dc in the next st, dc in the next st, hdc in each of the next 2 sts, 2 hdc in the last st. Turn. (24 sts)
Row 8: Ch 1, sc in each of the first 6 sts, 2 hdc in the next st, hdc in each of the next 2 sts, 2 hdc in the next st, hdc in each of the next 3 sts, sc in each of the next 4 sts, dc in the next st, 2 dc in each of the next 2 sts, dc in each of the last 4 sts. Turn. (28 sts)
Row 9: Ch 1, sc in each of the first 4 sts, hdc in each of the next 2 sts, dc in the next st, 2 dc in the next st, dc in the next st, hdc in the next st, sc in each of the next 4 sts, hdc in each of the next 2 sts, (2 hdc in the next st, hdc in the next st) 3 times, hdc in each of the next 2 sts, sc in each of the last 4 sts. Turn. (32 sts)
Row 10: Ch 1, hdc in each of the first 5 sts, (dc in the next st, 2 dc in the next st) 3 times, dc in each of the next 3 sts, 2 dc in the next st, dc in each of the next 2 sts, hdc in the next st, sc in each of the next 4 sts, hdc in each of the next 2 sts, 2 hdc in each of the next 2 sts, hdc in each of the next 3 sts, sc in each of the last 3 sts. Turn. (38 sts)
Row 11: Ch 1, sc in each of the first 3 sts, hdc in each of the next 2 sts, (2 hdc in the next st, hdc in the next st) 3 times, sc in each of the next 7 sts, hdc in each of the next 3 sts, 2 hdc in the next st, hdc in the next st, 2 hdc in the next st, hdc in each of the next 2 sts, 2 hdc in the next st, hdc in each of the next 6 sts, sc in each of the last 5 sts. (44 sts)
Make 2 Ears: Fasten off both and set aside. You do not need to weave in the ends. You can tuck them inside the ears.
Make the 3rd Ear: Do not fasten off. Continue on to the Right Ear Assembly & Edging. After completing the right ear, come back and make the fourth ear.
Make the 4th Ear: Do not fasten off. Continue on to the Left Ear Assembly & Edging.
After both ears are assembled, continue on to Final Assembly.
Right Ear Assembly & Edging
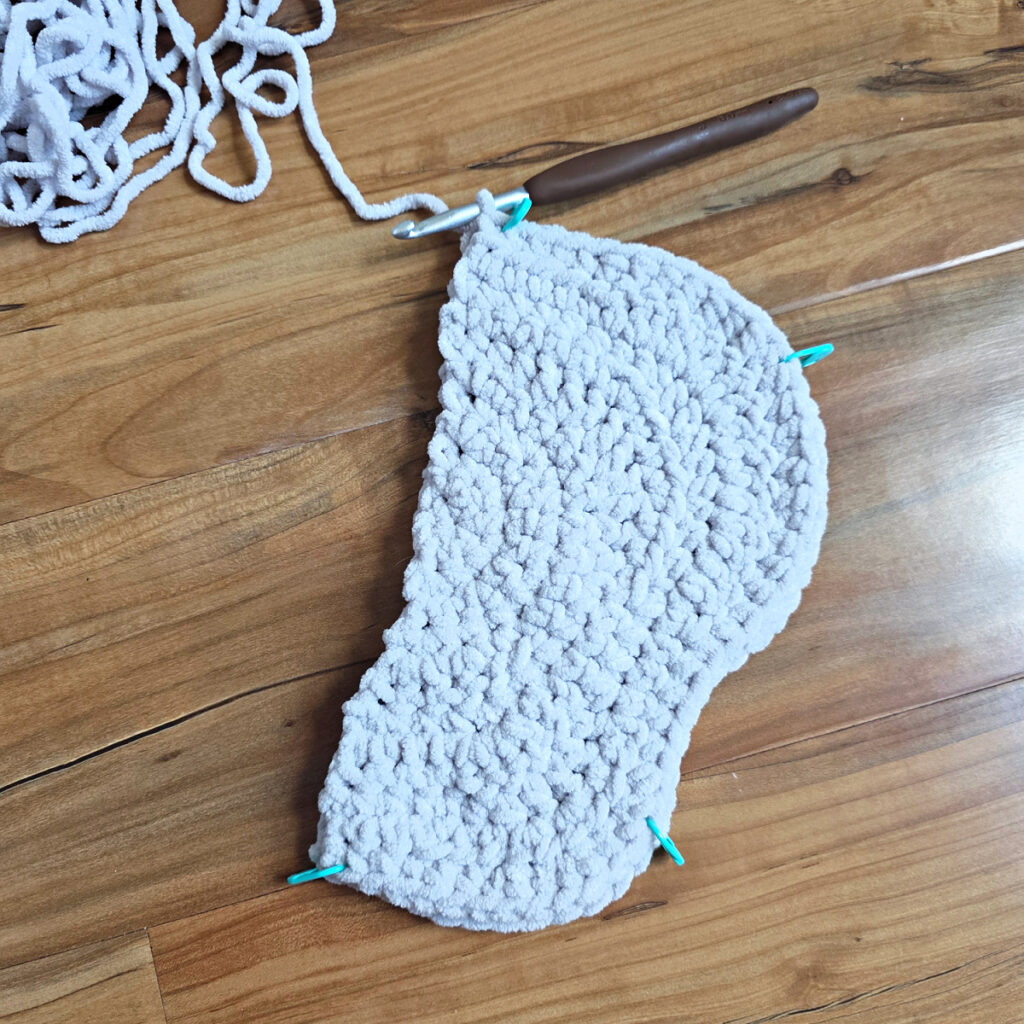
Step 1: Lay the 3rd Ear on top of one of the first two ears. Use locking stitch markers to hold the two ears together while you join them.
Note: When you’re joining the two right ears together and single crocheting around, and when you come to the BACK SIDE of the hdc stitches, instead of working under both top loops, work under the 3rd/back loop of the hdc.
Rnd 1: Continuing on from the 3rd Ear with a 6.00mm crochet hook, TURN to work along the wavy outer edge of the ear first. Ch 1, sc evenly around the entire ear. Join with a sl st to the 1st st. Stitch count is not crucial.
Fasten off leaving an 18″ tail of yarn. Continue on to make the 4th Ear.
Left Ear Assembly & Edging
Step 1: Lay the 4th Ear on top of the remaining ear. Use locking SM to hold the two ears together while you join them.
Rnd 1: Continuing on from the 4th Ear with a 6.00mm crochet hook, rotate to work along the straight edge of the ear first. Ch 1, sc evenly around the entire ear. Join with a sl st to the 1st st. Stitch count is not crucial.
Fasten off leaving an 18″ tail of yarn. Continue on to Final Assembly.
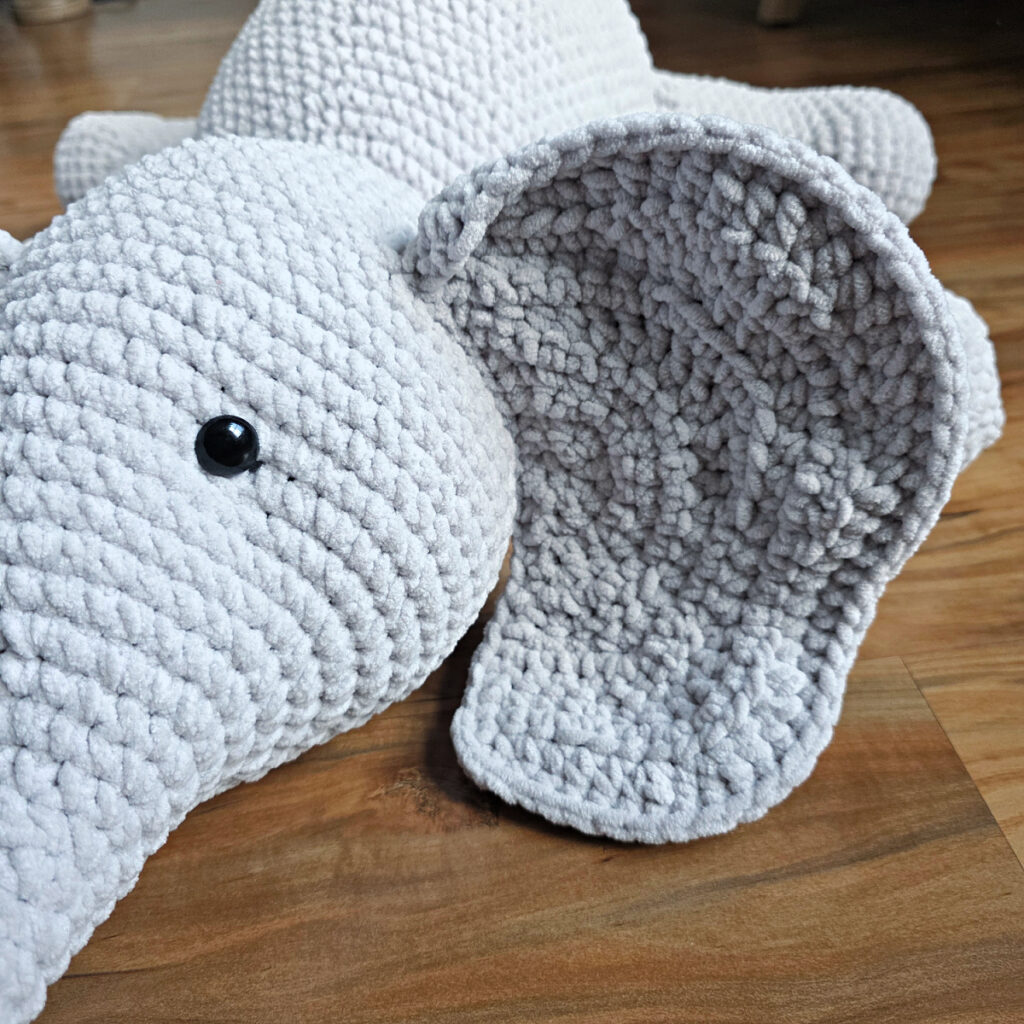
Ears should measure approximately 9″ H x 5-3/4″ W at the widest point.
Final Assembly
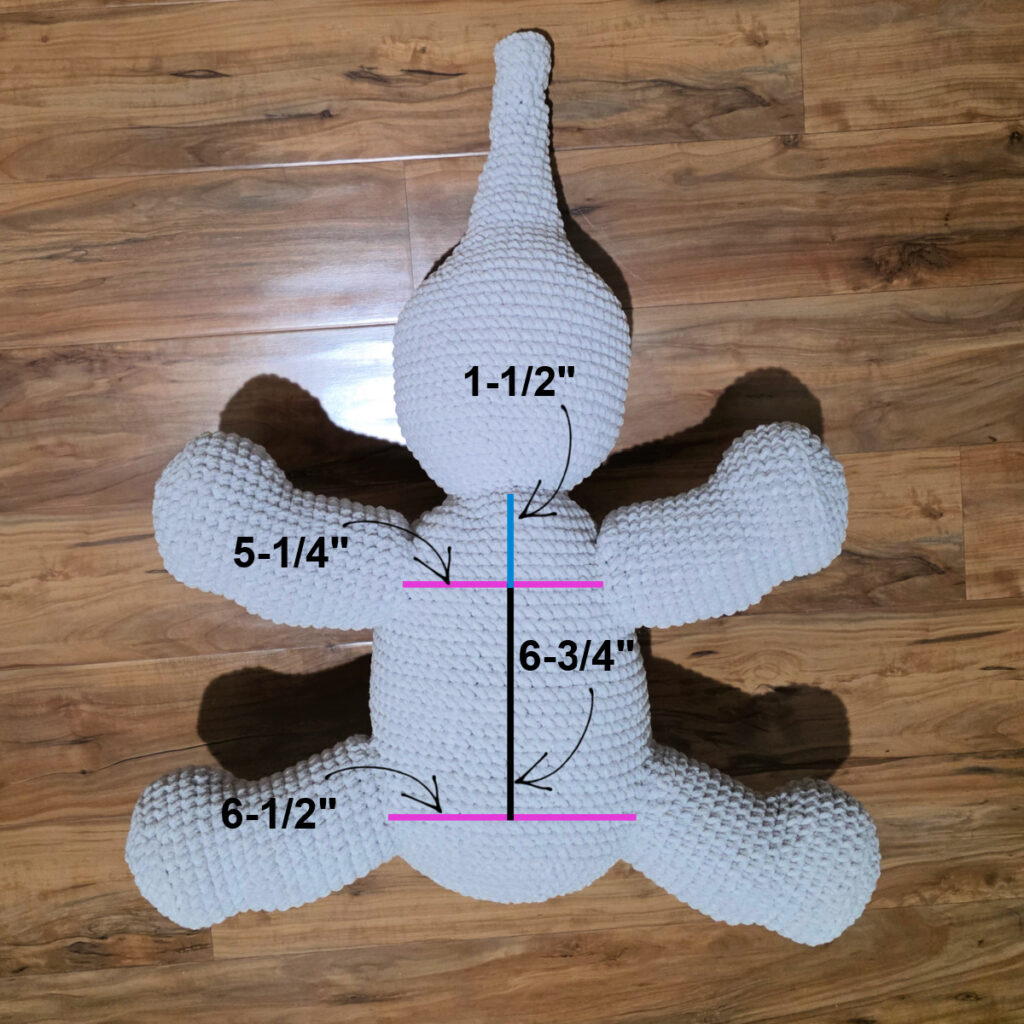
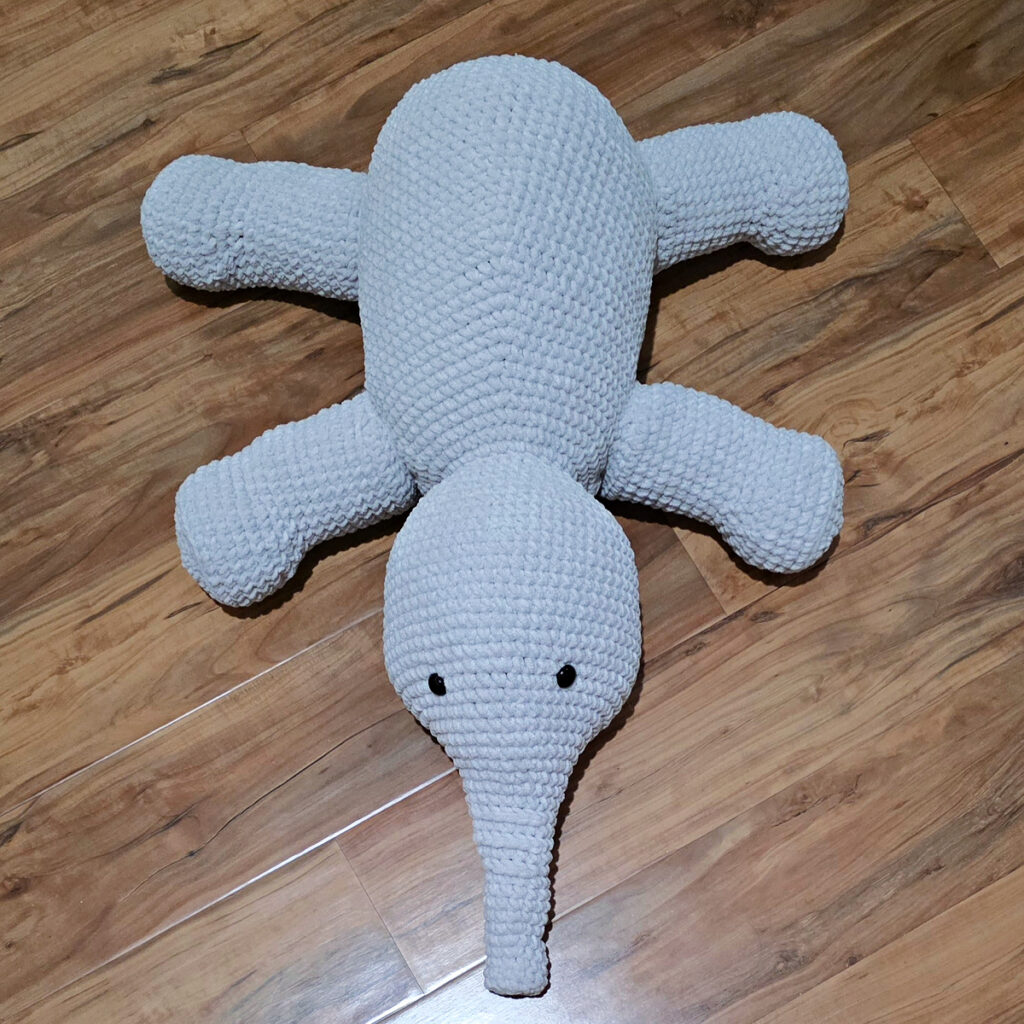
Step One: Stuff all four legs to the desired firmness. Position the back and front legs as shown in the photos below. The measurements shown between the legs were taken at the center of the legs and on the elephants underbelly. Use locking stitch markers to hold the legs in place. With yarn tails and a yarn needle, attach the legs to the elephant.
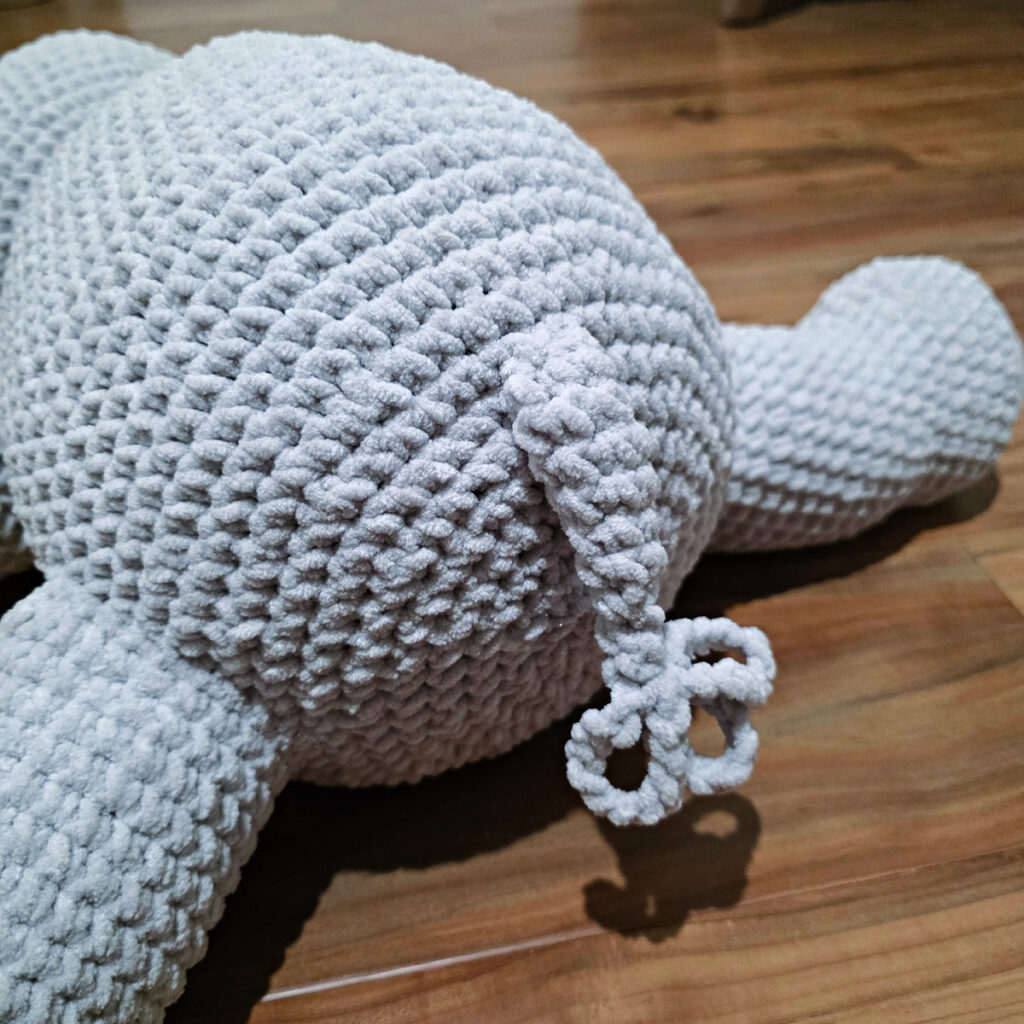
Step Two: Position the tail on the elephant amigurumi as shown below. I positioned mine in the 8th from last round of the body. Use a couple locking stitch markers to hold it in place. With tail of yarn and yarn needle, attach the tail to the elephant.
Step Three: In this step, you’ll cinch the area between the elephant’s eyes.
- With a 24″ L piece of yarn and a yarn needle, insert the yarn needle in a stitch near the bottom of either eye.
- Thread the needle through to the bottom of the opposite eye.
- Insert the yarn needle into a stitch closest to where it just came through and thread it back to the other side. Pull gently to cinch the area between the elephant’s eyes.
- Insert the yarn needle into a stitch closest to where it just came through and thread it out the bottom of the head to fasten off.
- Weave in ends.
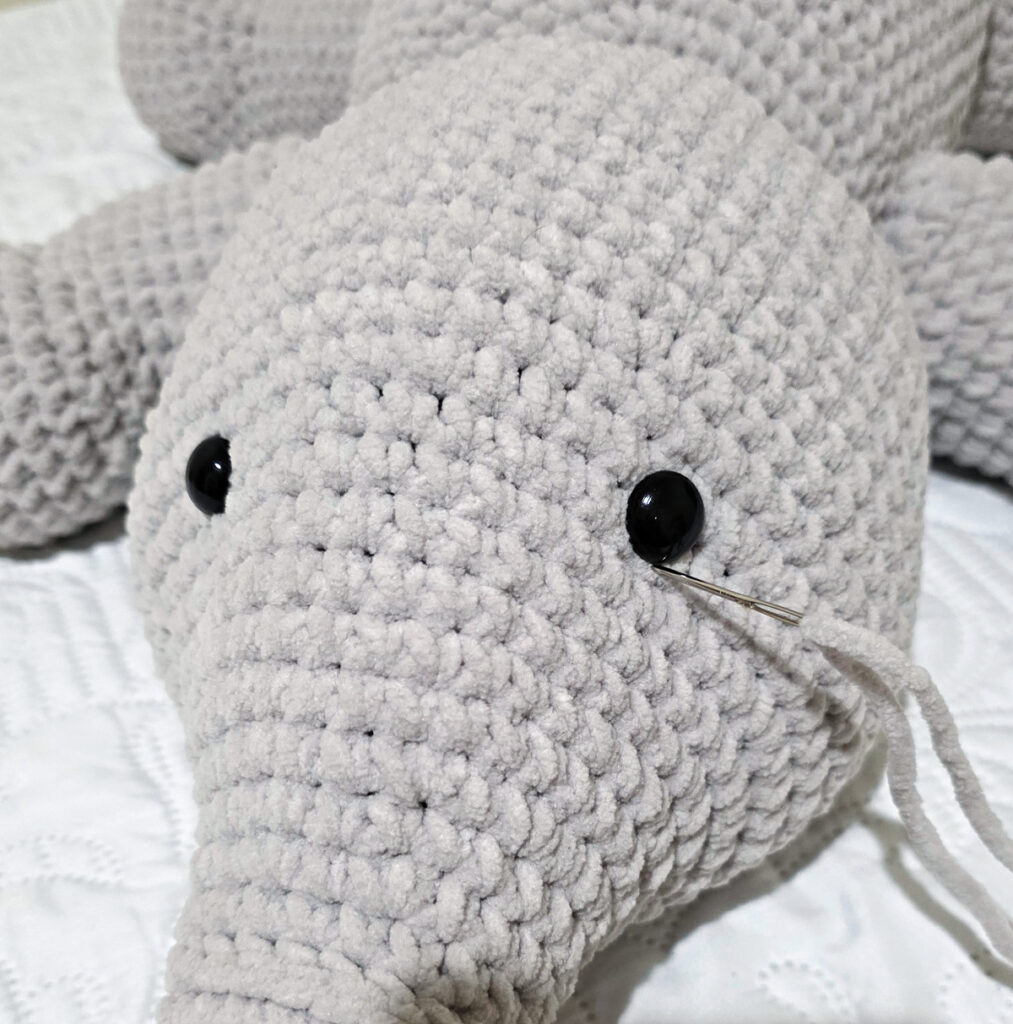
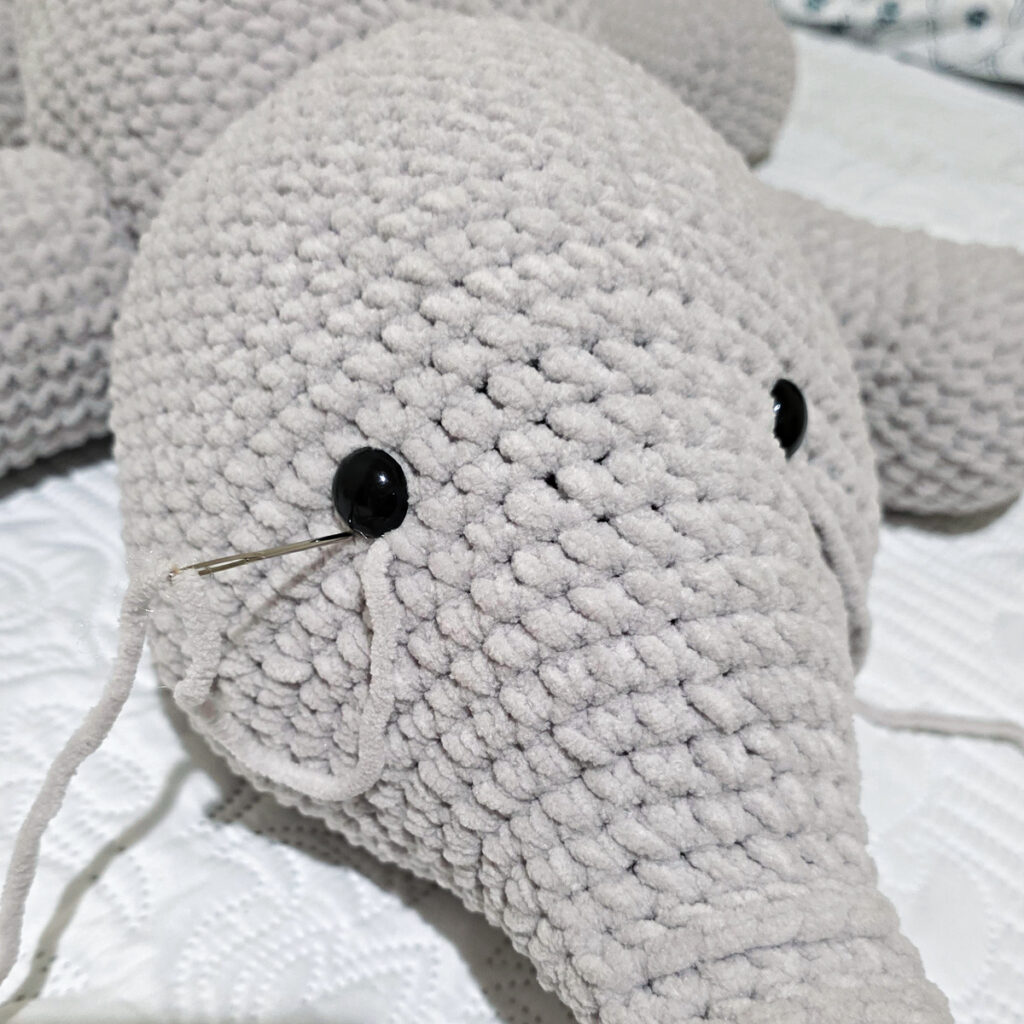
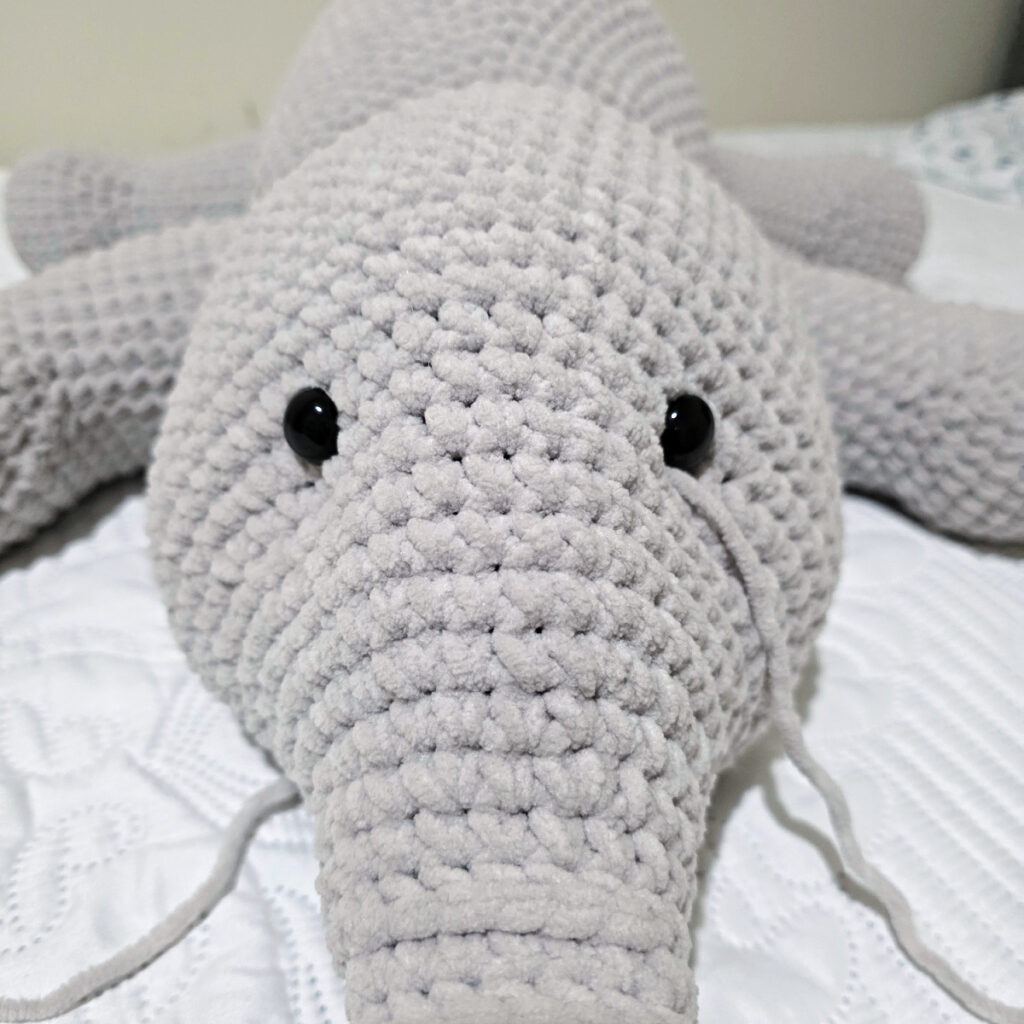
Step Four: Before attaching the ears to the elephant, there’s one more small task to complete to shape them a little.
- Find the Top 2 stitches along the straight edge of the ear and fold them down. Use a locking SM to hold them in place.
- With a yarn needle and the tail of yarn, secure the top two stitches to the straight edge of the ear as shown in the photos below.
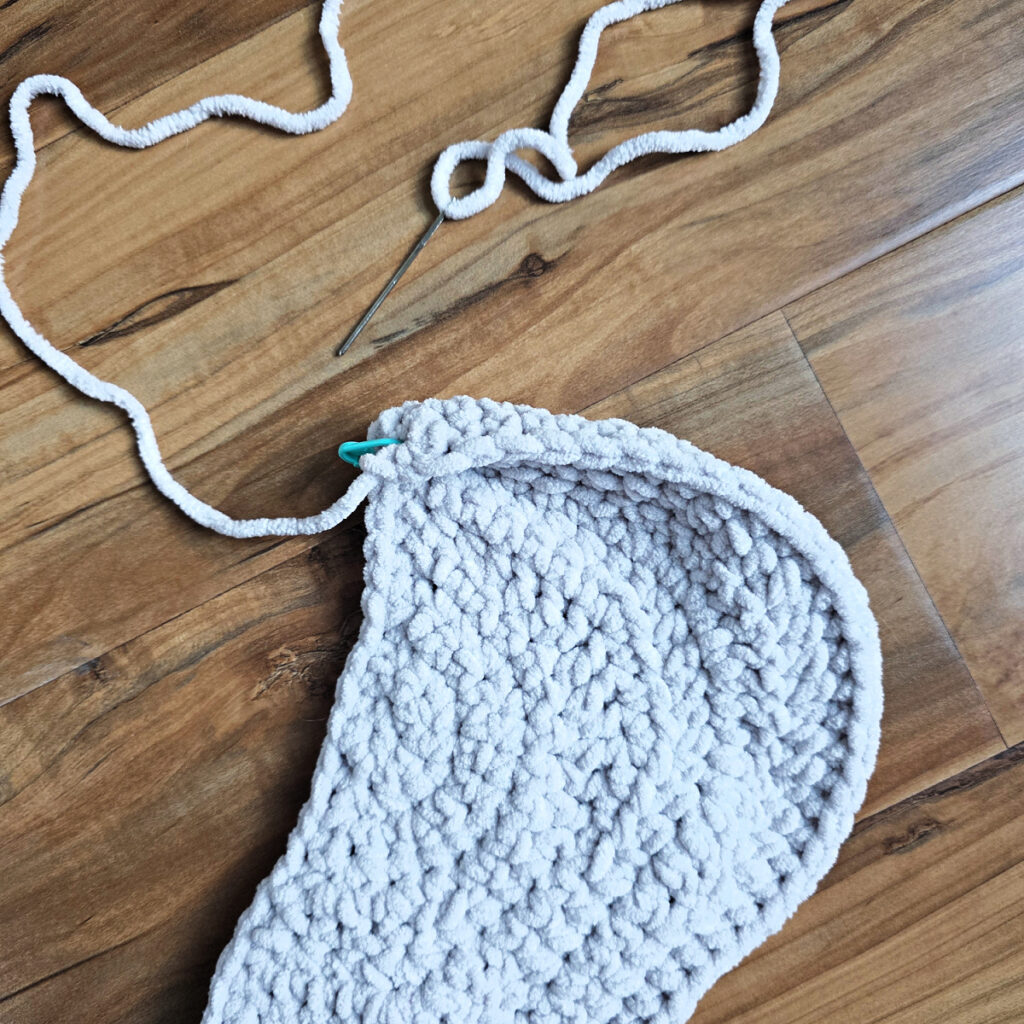
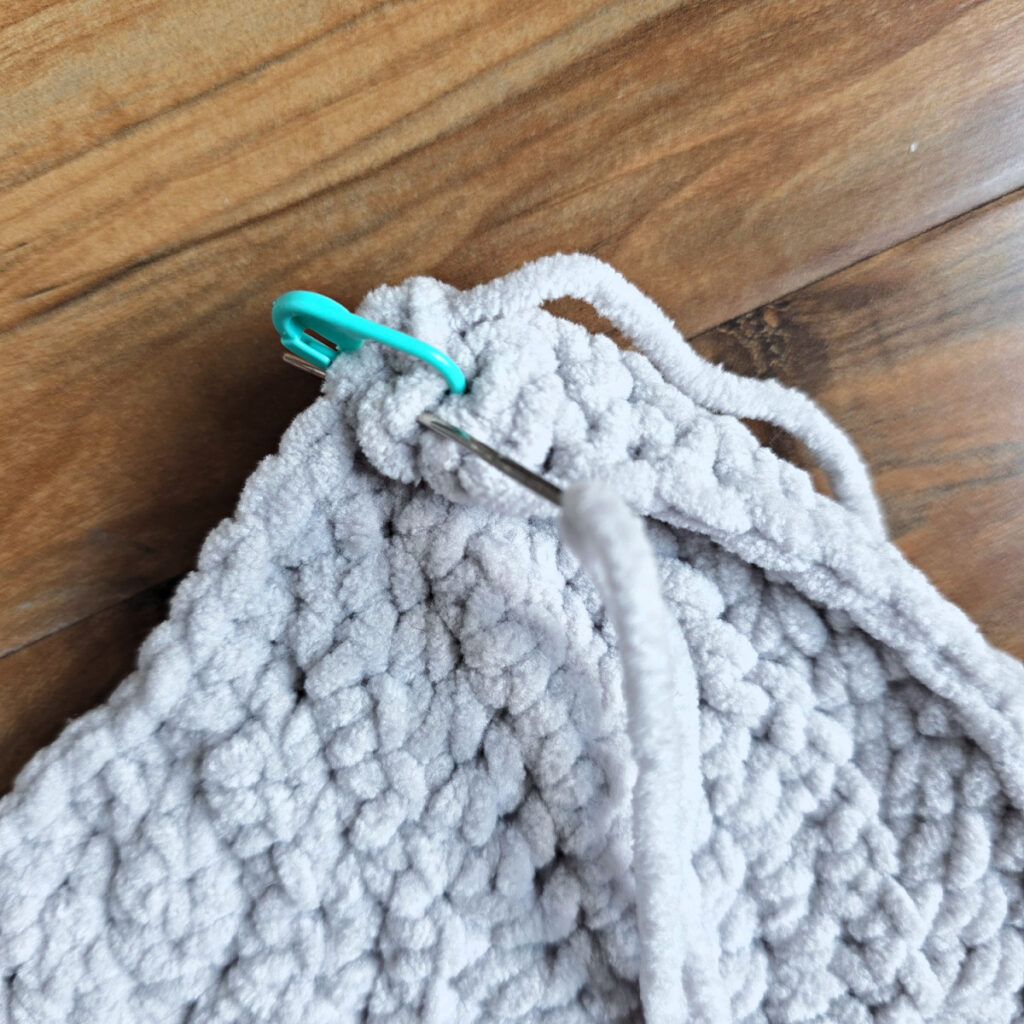
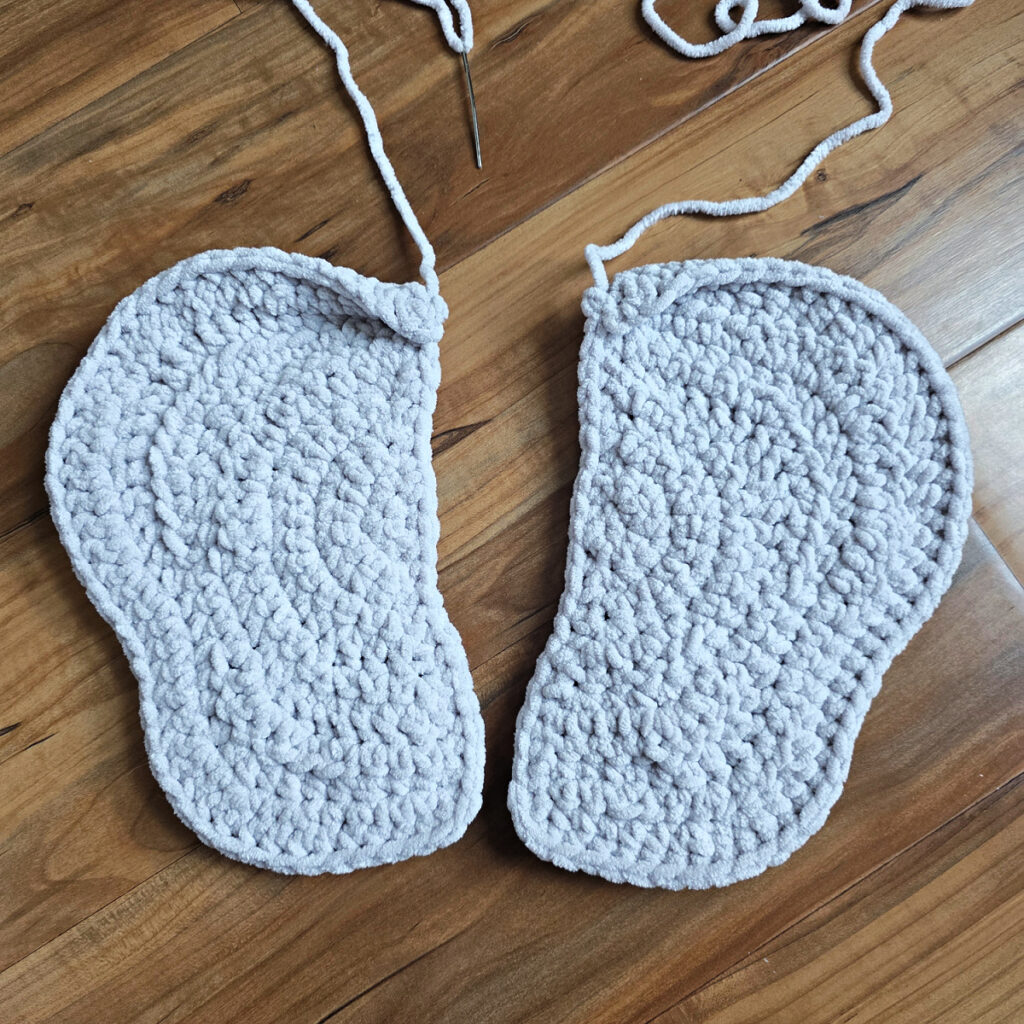
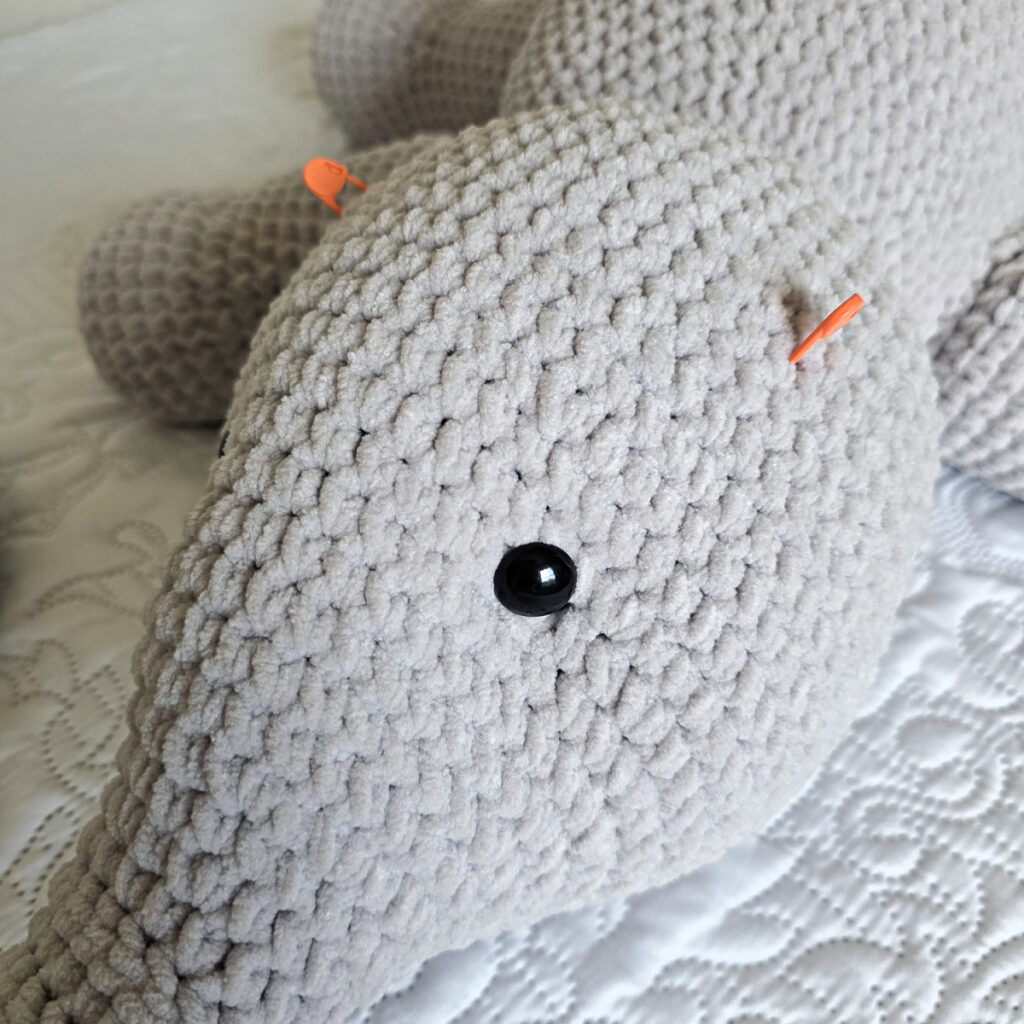
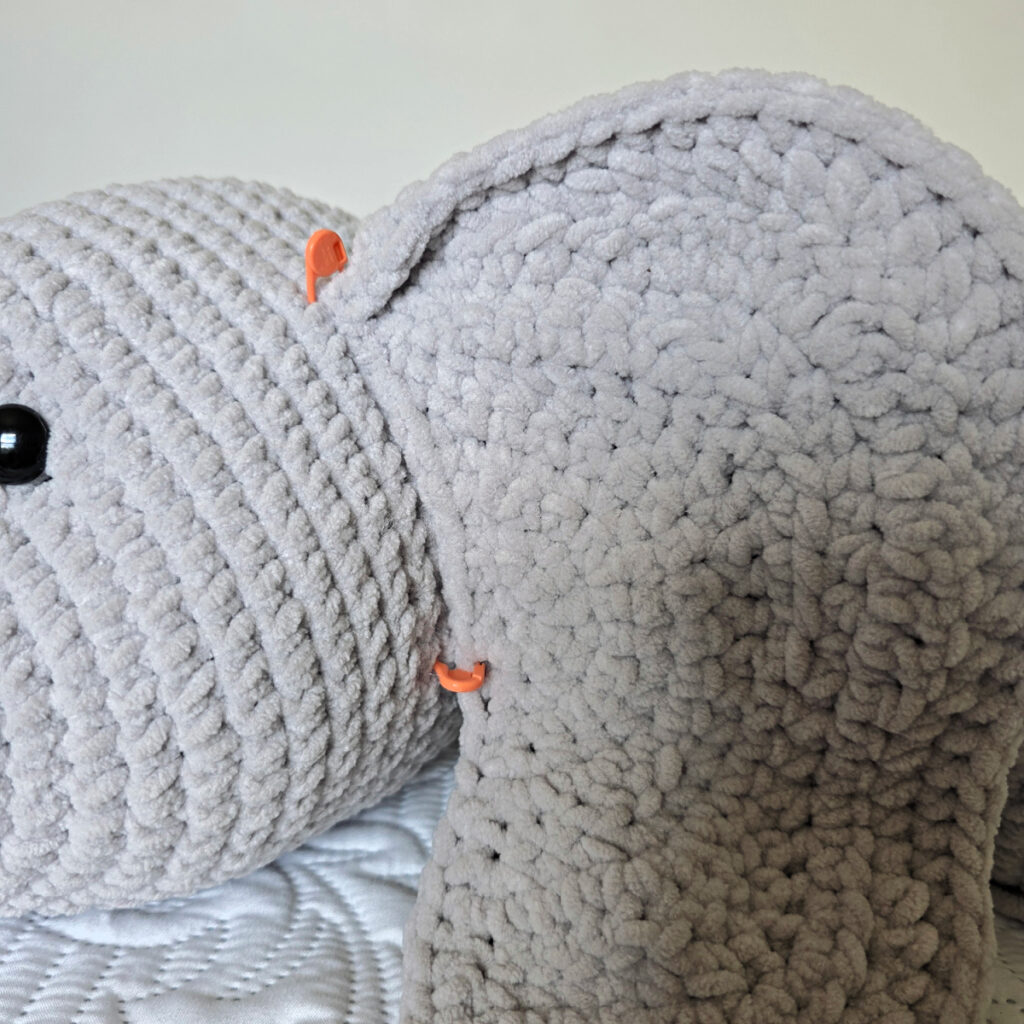
Step Five: I attached my ears on the stitches from Round 36. Remember that the eyes were attached between Rounds 28 & 29. This makes it easy to count from there to Round 36.
- Position the ears on the elephant’s head spaced 16 stitches apart.
- I attached only 11 stitches along the straight edge of the ear to the elephant’s head.
- Use locking stitch markers to hold them in place.
- With yarn tails and a yarn needle, attach the ears to the elephant’s head.
I MADE IT! NOW WHAT?
Pin this post!: Save this crochet elephant pattern to your Pinterest boards so that you can come back and make it again.
Leave a comment below: We love to hear your feedback.
Share Your Finished Projects on Facebook or Instagram: I love to see your finished projects! Share with us on social media and tag me @acrochetedsimplicity or use the hashtag #ACrochetedSimplicity so I can find your posts.
Join us in the Facebook Community Group!
Come share your finished projects with us in the A Crocheted Simplicity Crochet Community Group on Facebook. Join us for fun community events such as crochet alongs, join in on crochet conversations, ask questions, get advice, and share your love for crochet!