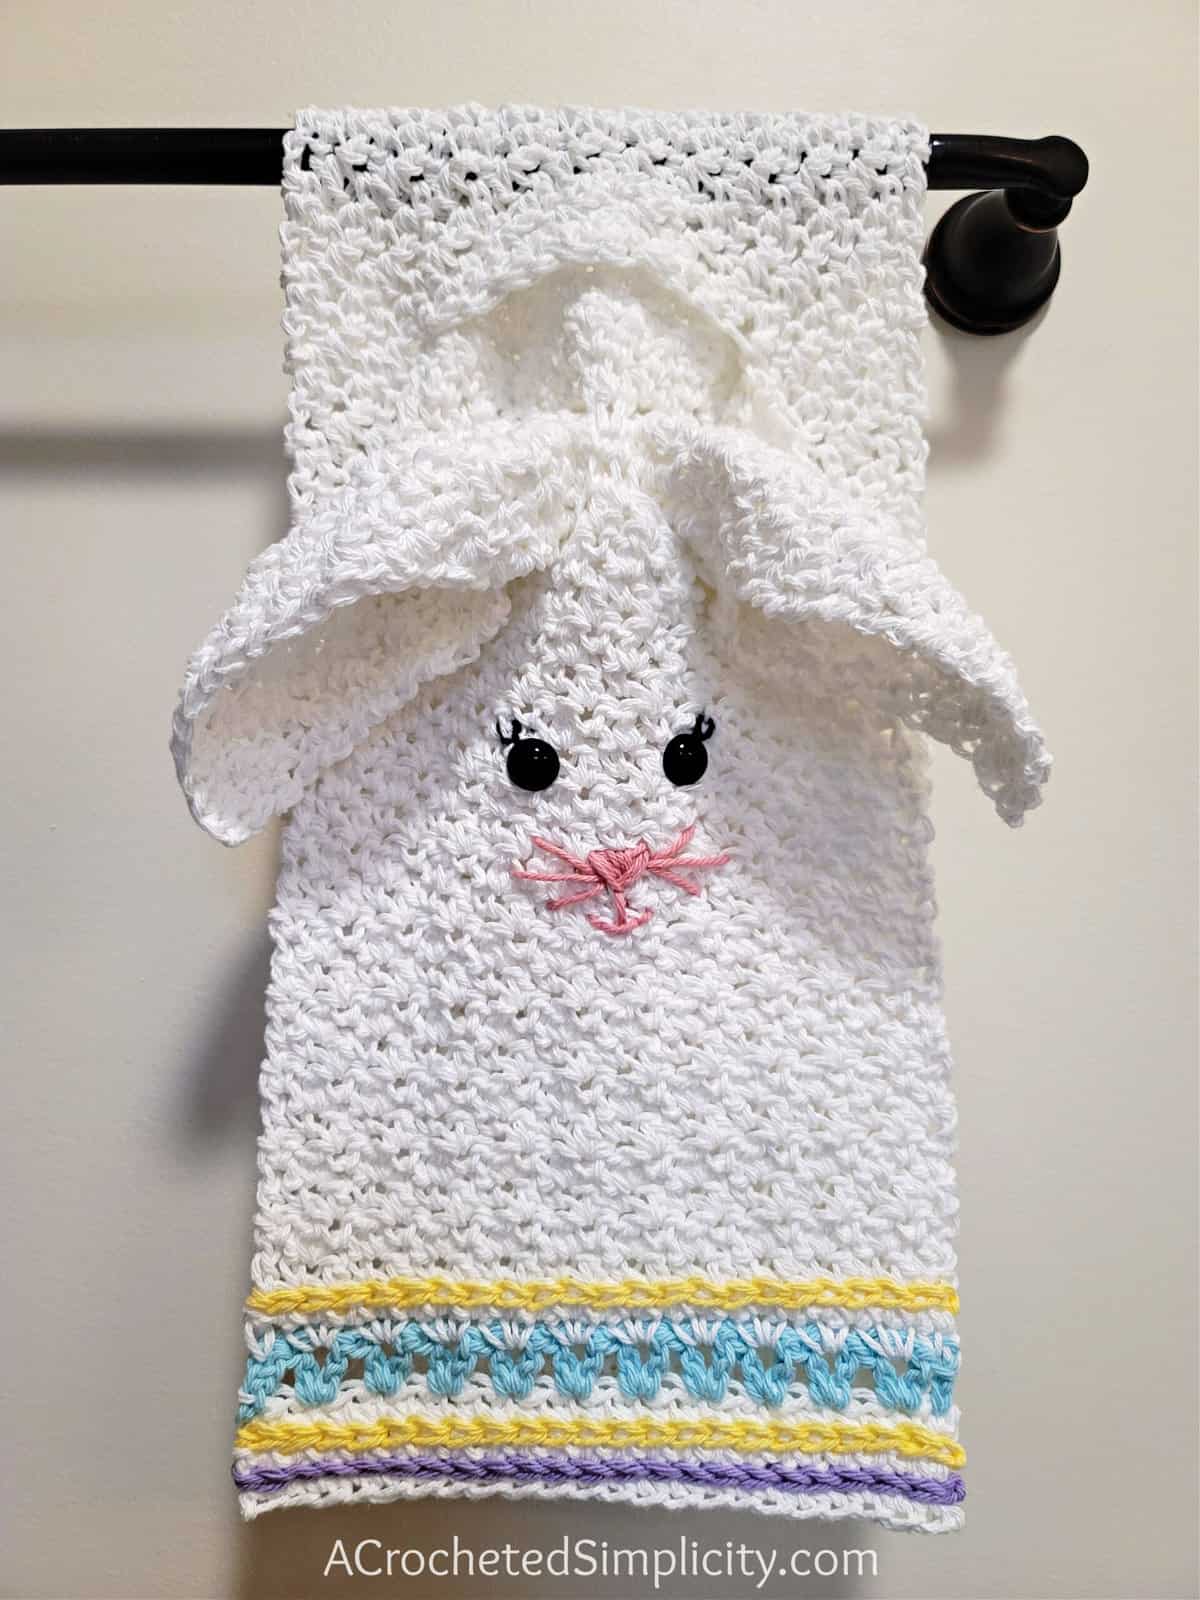
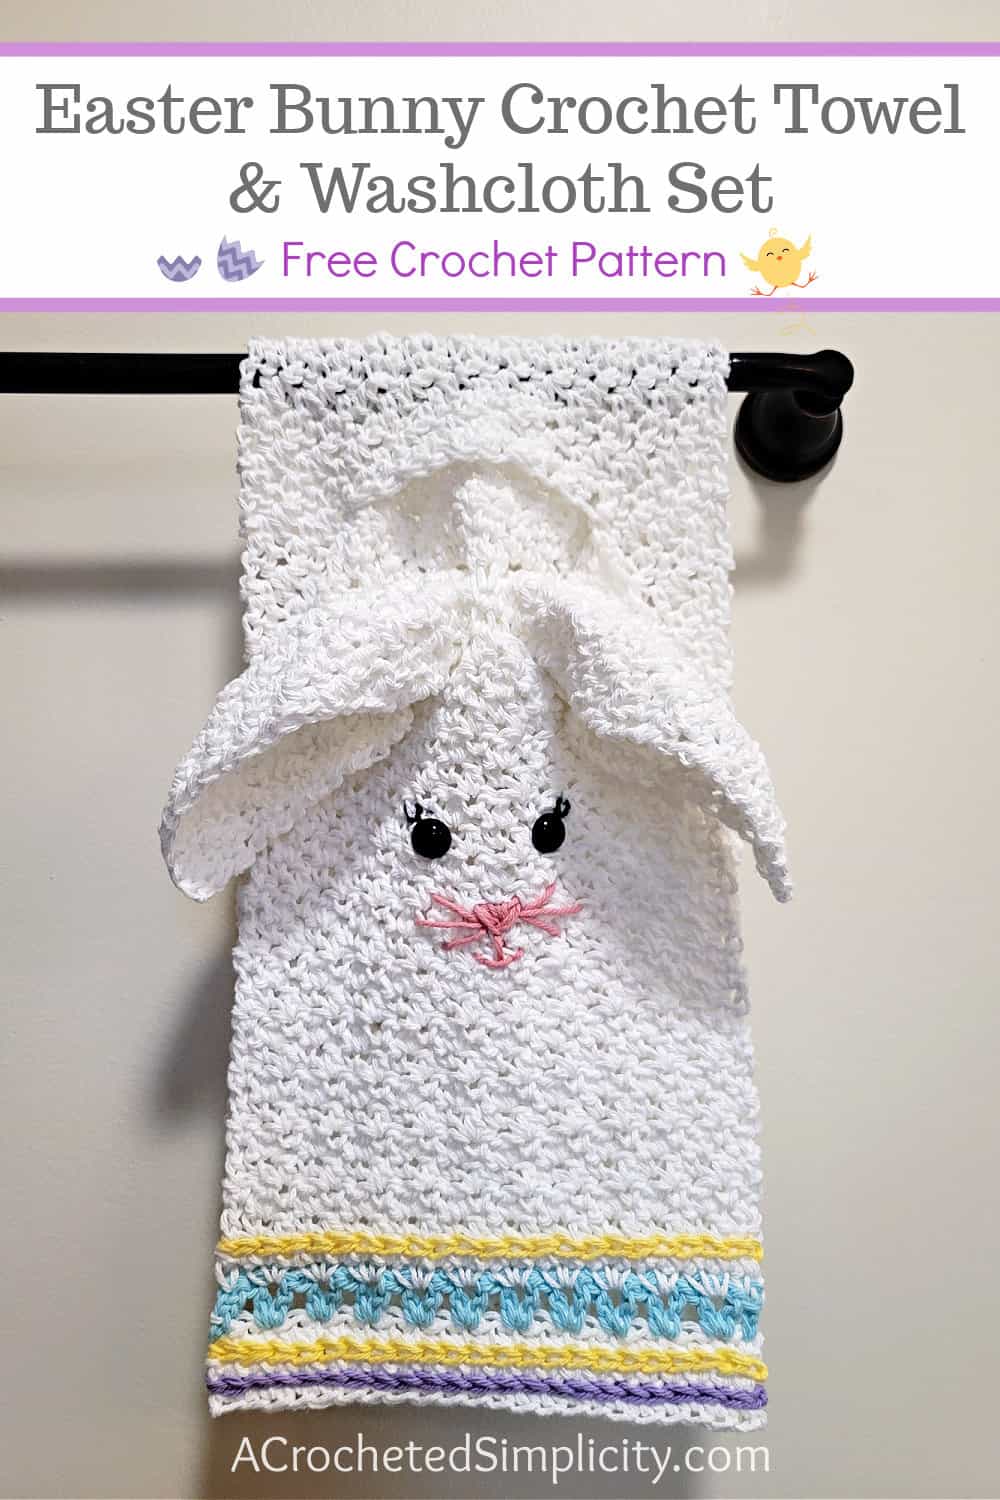
Easter Bunny Crochet Towel & Washcloth Set
Take the handy keyhole towel, add an adorable character to it, and mix in your favorite colors to put together this bunny crochet towel! Ever since designing the Snowman Kitchen Towel (my very first character holiday-themed towel) in 2019, I’ve wanted to design other character towels for all of the other holidays as well. That’s where this pattern comes in.
Since it’s a keyhole towel, you can hang it on your oven door or drawers for easy access. These hand towels are so useful when you need to mop up a spill, pick up a hot item, or just to enhance the decor of your kitchen.
You’ll find the free bunny crochet towel in the post below, or you can find an ad-free printable PDF (that includes all photo tutorials) on Ravelry, or Etsy (aff).
After I designed the pattern for the Snowman Towel and published it, I’ve received requests for all sorts of characters for the different holidays because this is such a great way to add adorable themed touches to your kitchen.
I’ve also designed several other crochet kitchen towels aside from this bunny crochet towel that are not characters. You’ll find a variety of styles to match your home and you can also switch them out after some time for a fresh new look. There are patterns ranging from buffalo plaid to farmhouse to basic keyhole towel patterns!
Related: Looking for more kitchen towel options that aren’t holiday specific? You can make these crochet towels to use year-round!
Why Crochet a Kitchen Towel?
A crochet kitchen towel is not only practical and decorative but there’s so much more to these handy little items. Here are a few reasons why you should consider making one:
- Easy to Make: This pattern is great for beginners and experienced crocheters alike, requiring only basic stitches and a few special stitches that are explained below.
- Customizable: A handmade kitchen towel instantly makes your space feel warm and uniquely yours. Choose your favorite yarn and color to match your personal style.
- Relaxing and Rewarding: Crocheting a hand towel such as this one is soothing, and every time you’ll see it on your oven door, you’ll feel a sense of accomplishment.
How to Crochet a Kitchen Towel
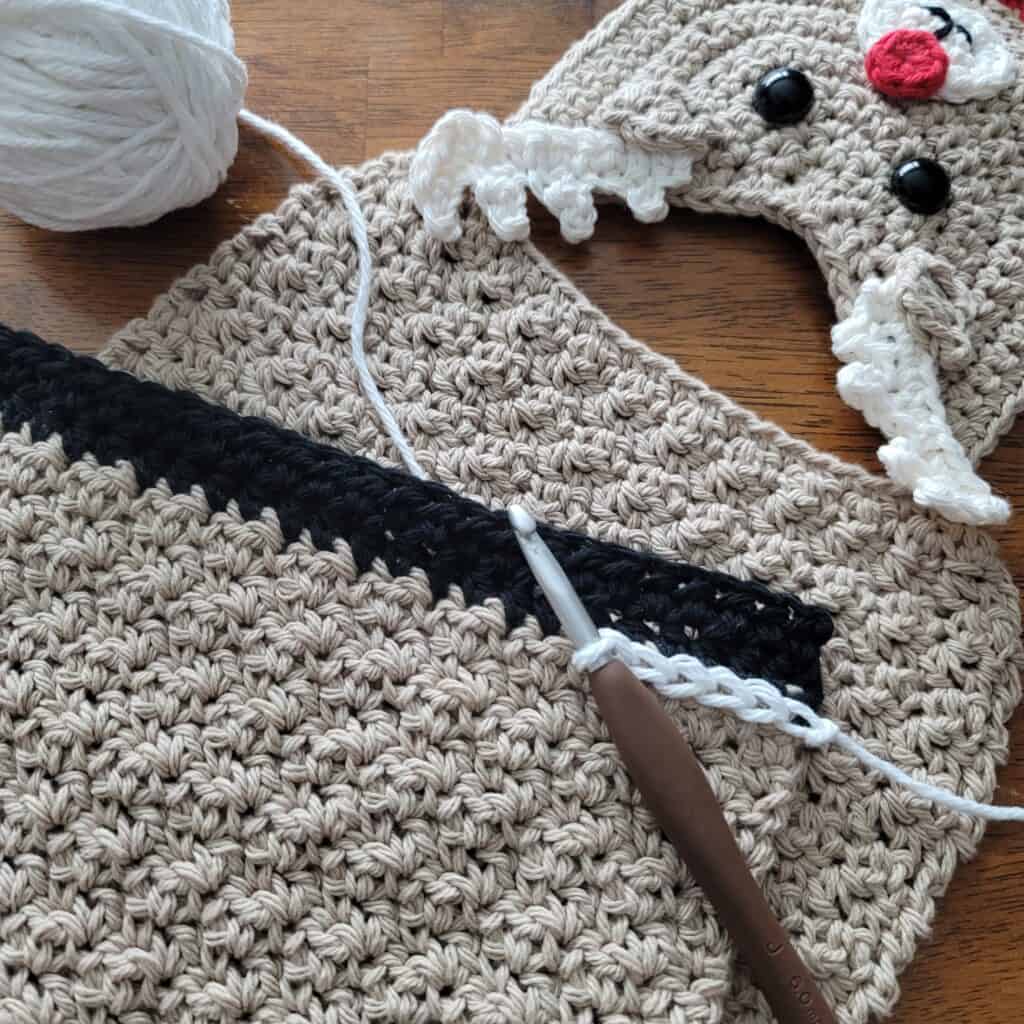
There’s not a lot construction-wise to this bunny crochet towel. It is crocheted up in rows from one short edge to the other. You’ll create a couple keyholes mid-way through at the points indicated in the instructions.
One of those keyholes will be used to hang up the towel on your oven door (or any other straight handle that you have in mind) and the others will hold the washcloth ears to complete the look of your bunny. Setting aside the bunny crochet towel, you’ll work up the washcloth to insert in the specified keyholes.
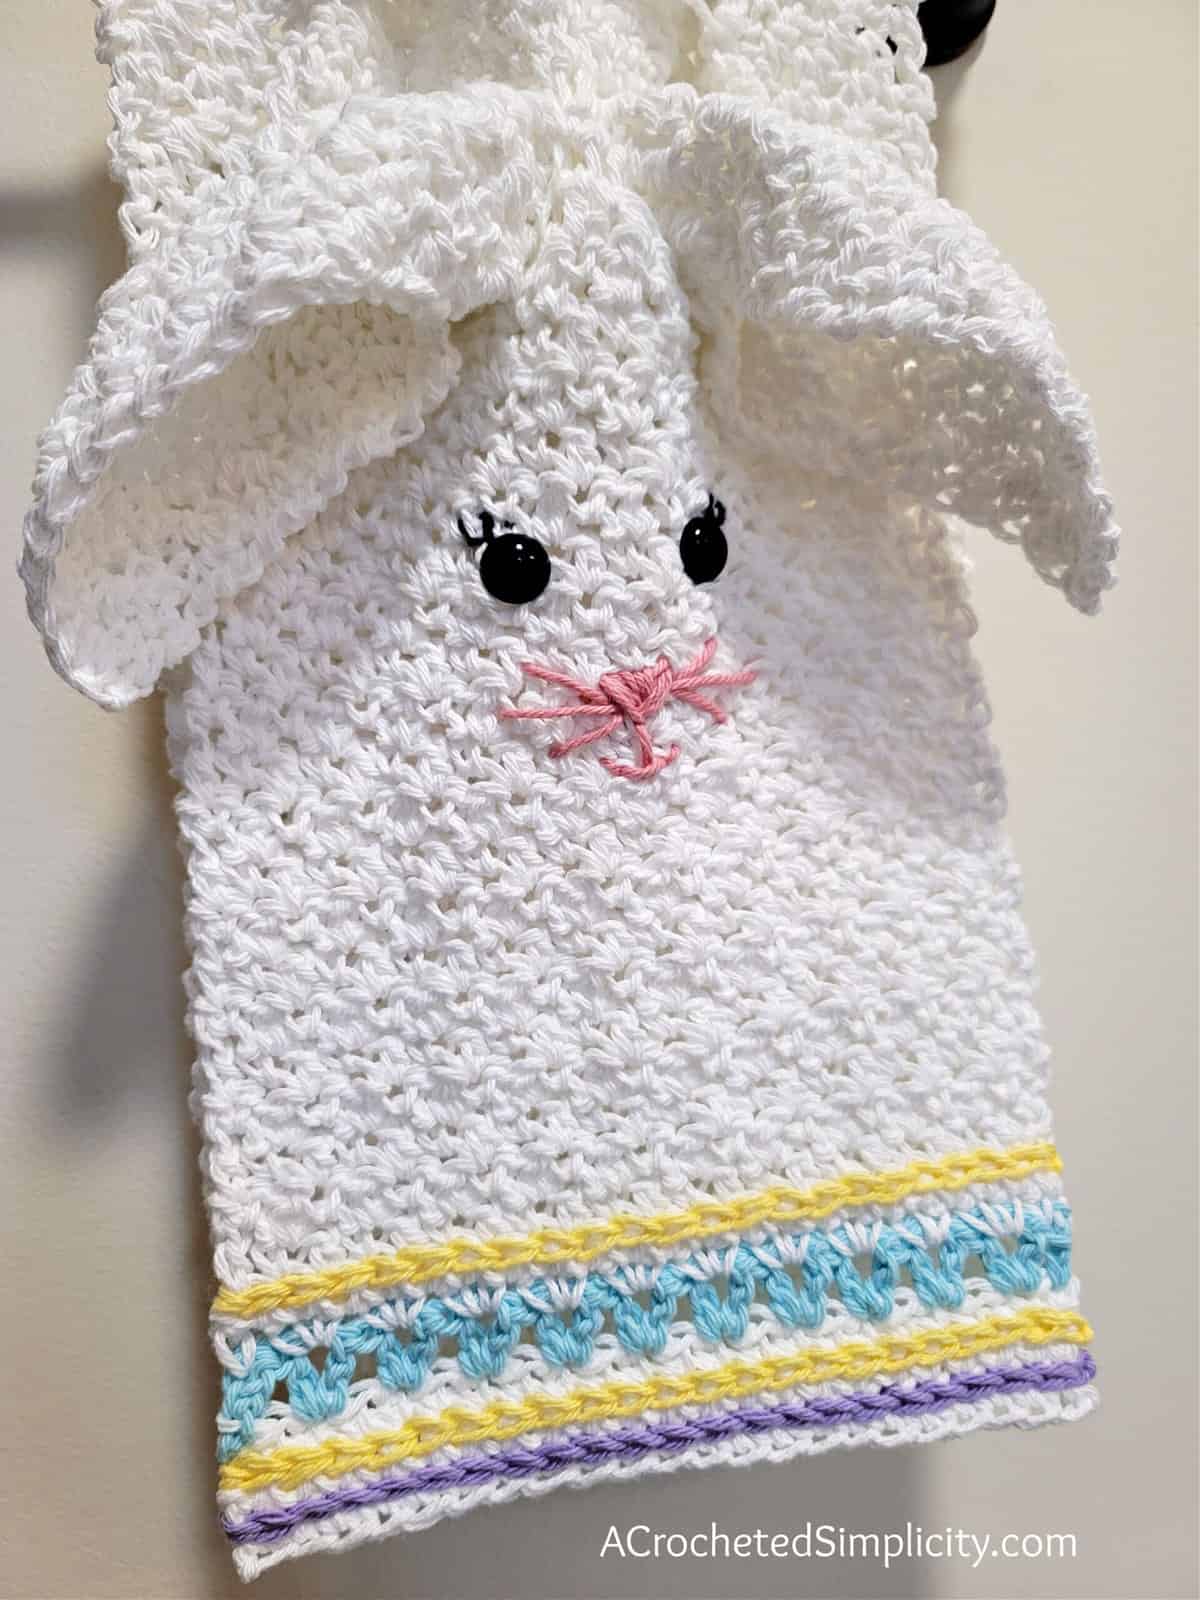
Once this is done, you’ll add facial features and details, depending on how you want your bunny to look.
How To Get The
Bunny Crochet Towel Pattern
Option 1: Scroll down for the free crochet kitchen towel pattern right here in this blog post.
Option 2: Purchase the ad-free printable PDF from one of my shops:
Yarn
I used Lily Sugar n’ Cream for my version of the Bunny Crochet Towel. This is a wonderfully soft 100% cotton yarn that’s perfect for year-round use. It’s currently available in multiple colorways which include beautiful solid colors so you can easily achieve the look you’re going for.
Because it’s cotton, it’s easily washable and very durable, making it great for kitchen towels that get a lot of use out of them, especially for holiday feasts.
Bunny Crochet Towel Pattern
The Bunny Crochet Towel is a free pattern below, but if you love to work offline, I’ve got a couple other great options for you.
Purchase the ad-free, printable PDF (that includes all photo tutorials), on Ravelry, or on Etsy (aff).
This post contains affiliate links.
Materials
- Yarn: Worsted Weight / 4 / Yarn, Lily Sugar n’ Cream was used for the sample shown in the photos.
- Yardage and Colors: Around 260 yards was used in total. For my version, I used:
- White (MC): 250 yards
- Robins Egg (CC1): 3 yards
- Yellow: 2 yards
- Light Purple: 1 yard
- Rose Pink: 2 yards
- Crochet Hooks: 7.00mm; K/10.5/6.50mm; H/8/5.00mm; or size needed to obtain gauge (My favorite crochet hooks are the Clover Amour Crochet Hooks, I’ve never had an ache in my hand since switching).
- Two 18mm Black Safety Eyes – optional (instructions included for yarn eyes)
- Measuring Tape
- Scissors
- Yarn Needle
Abbreviations (U.S. Terms)
- ch(s): chain
- st(s): stitch(es)
- sl st(s): slip stitch(es)
- sc: single crochet
- hdc: half double crochet
- dc: double crochet
- RS: right side
- Rep: repeat
- yo: yarn over
- MC: Main Color
- CC: Contrasting Color
- Alt-dc: alternate double crochet
Gauge
- In pattern stitch (sc in next, dc in next): 10 sts = 4″; 10 rows = 4″
Experience Level
- Easy
Size
- One Size: 9″ W x 29″ L
Special Stitches
- Alternate Double Crochet (alt-dc): Do not ch, instead, insert your hook into the first st, yo, pull up a loop, yo, pull thru both loops, insert your hook between the legs of the st just made, yo, pull up a loop, yo, pull thru one loop, yo, pull thru remaining loops.
Pattern Notes
- Turning chains are not counted as a stitch or included in stitch count.
- The first stitch of each row is worked into the same stitch as the turning chain, unless stated otherwise.
- Yarn Notes: Lily Sugar n’ Cream (71 g / 2.5oz / 120 yards / 109 m / 100% cotton) was used for the sample shown in the photos. Another comparable worsted weight yarn may be substituted.
- Yardage & Colors
- White: 250 yards
- Robins Egg: 3 yards
- Yellow: 2 yards
- Light Purple: 1 yard
- Rose Pink: 2 yards
- Construction Notes: This bunny crochet towel is constructed in rows from one short edge to the other. You’ll create a couple keyholes mid-way through. One to hang up the towel and the others to hold the washcloth ears. Lastly, you’ll add facial features and details.
Bunny Crochet Towel – Free Crochet Pattern
Set-Up: With MC & a 7.00mm crochet hook, ch 23.
Row 1 (RS): Switch to a 6.50mm crochet hook, working in the back humps of the foundation ch, sc in the 2nd ch from your hook and in each ch across. Turn. (22 sts)
Rows 2 – 3: Ch 1, sc in each st across. Turn.
Fasten off MC. Switch to CC1.
Row 4: With CC1, alt-dc in the first st, (skip the next st, 2 dc in the next st) rep across to the last st, dc in the last st. Turn. (22 sts)
Fasten off CC1. Switch to MC.
Row 5: With MC, ch 1, sc in the first st, (work 2 sc in the space of next 2 dc group from previous row) rep across to the last st, sc in the last st. Turn. (22 sts)
Row 6: Ch 1, sc in each st across. Turn.
Rows 7 – 28: Ch 1, sc in the first st, dc in the next st, (sc in the next st, dc in the next st) rep across. Turn.
Approximate length at this point is 11″.
Small Keyholes for Ears
Row 29: Ch 1, sc in the first st, dc in the next st, (sc in the next st, dc in the next st) twice, ch 4, skip each of the next 4 sts, sc in the next st, dc in the next st, ch 4, skip each of the next 4 sts, (sc in the next st, dc in the next st) 3 times. Turn.
Note: In the next row you’ll be working into stitches and chains.
Rows 30 – 44: Ch 1, sc in the first st, dc in the next st, (sc in the next st, dc in the next st) rep across. Turn.
Large Keyhole for Hanging the Towel Up
Row 45: Ch 1, sc in the first st, dc in the next st, (sc in the next st, dc in the next st) twice, ch 10, skip each of the next 10 sts, (sc in the next st, dc in the next st) 3 times. Turn.
Row 46: Ch 1, sc in the first st, dc in the next st, (sc in the next st, dc in the next st) rep across. Turn.
Rep Row 46 until your towel measures approximately 11-1/2″ from the large keyhole opening.
Last Row: Ch 1, sc in each st across.
Fasten off. Weave in ends. Continue on to Line Details.
Line Details
Row 1 (RS): With a 6.00mm hook and yellow & light purple yarn, add a row of surface crochet on top of the stitches from Rows 2 (purple), 3 (yellow), & 6 (yellow) of the towel.
Weave in ends. Continue on to the Washcloth Ears.
Washcloth Ears
Set-up: With MC & a 7.00mm crochet hook, ch 27.
Row 1 (RS): Switch to a 6.50mm crochet hook, working in the back humps of the foundation ch, sc in the 2nd ch from your hook, dc in the next st, (sc in the next ch, dc in the next ch) rep across. Turn. (26 sts)
Rows 2 – 20: Ch 1, sc in the first st, dc in the next st, (sc in the next st, dc in the next st) rep across. Turn.
Fasten off. Weave in ends. Approximate size: 10.5″ x 8.25″. Continue on to Optional Yarn Eyes if you’re crocheting your own eyes, or Bunny Face Tutorial if you’re using plastic safety eyes.
Optional: Yarn Eyes (Make 2)
Rnd 1: With black yarn and a 5.00 mm crochet hook, ch 2, work 6 hdc in the 2nd ch from your hook. Join with a sl st to the first st. (6 sts)
Fasten off leaving a 10” tail for sewing. Weave in beginning tail end. Eyes are approximately .75″ in diameter. Continue on to the Bunny Face Tutorial.
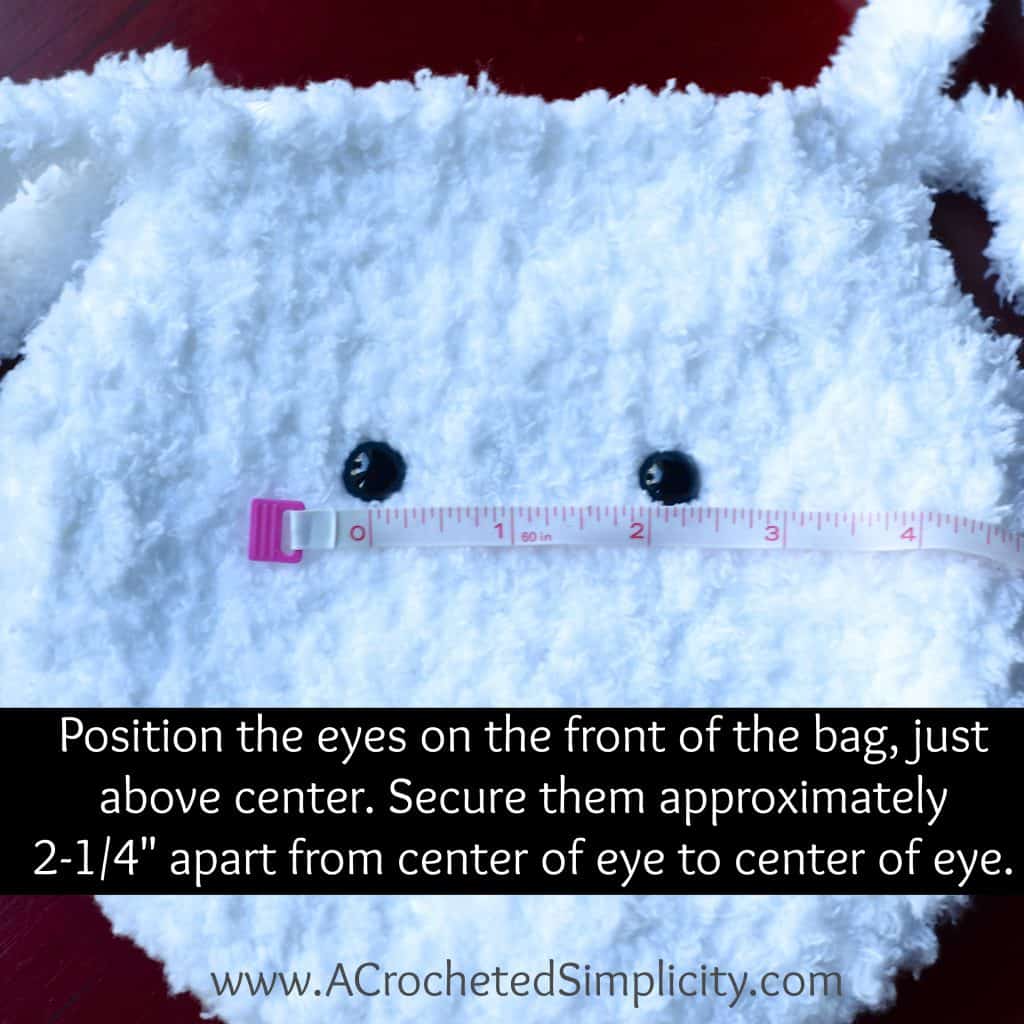
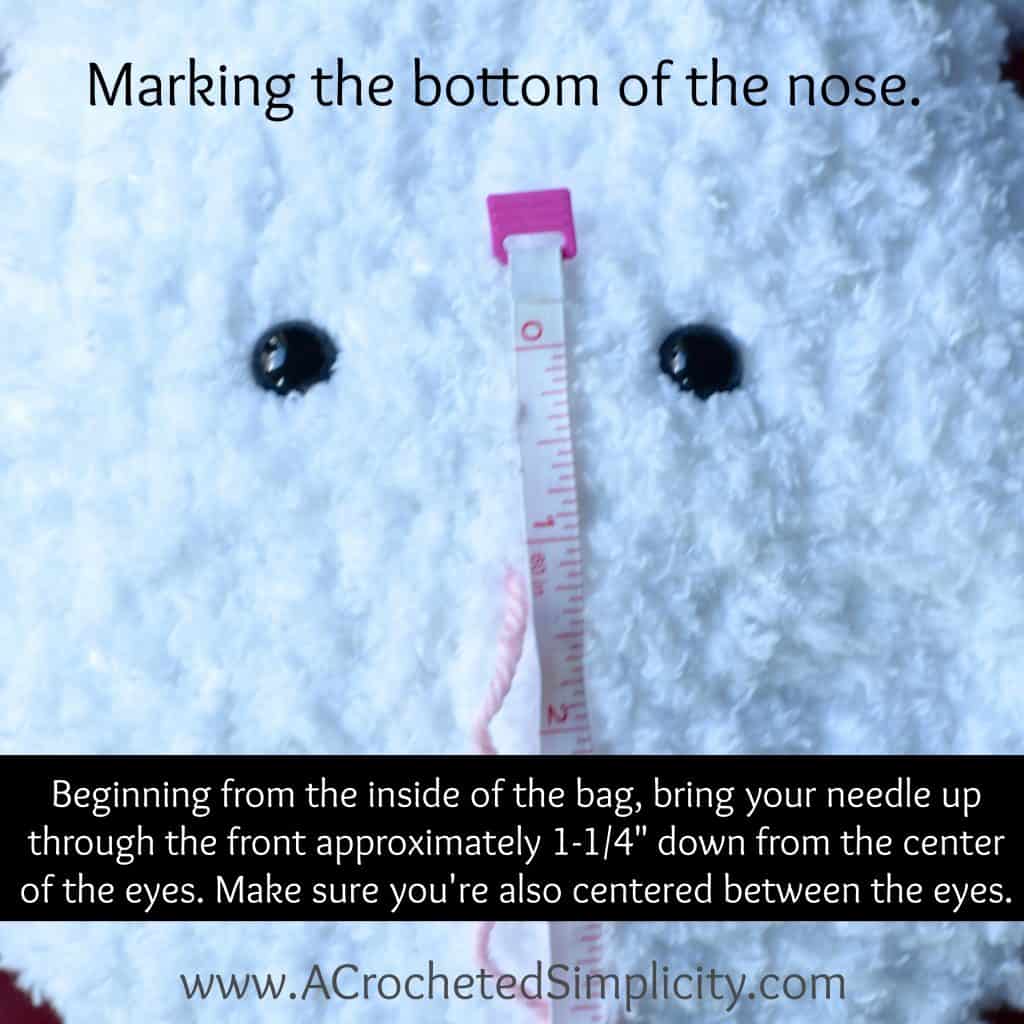
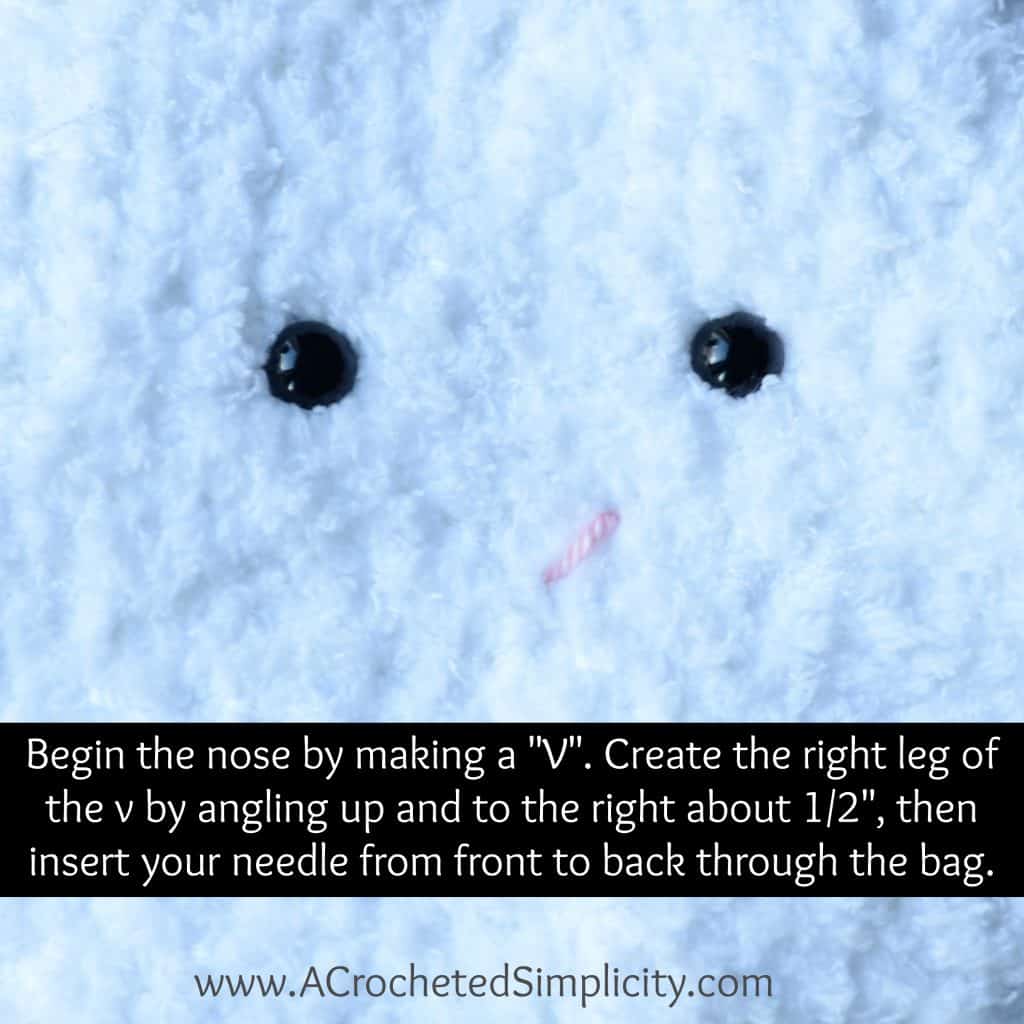
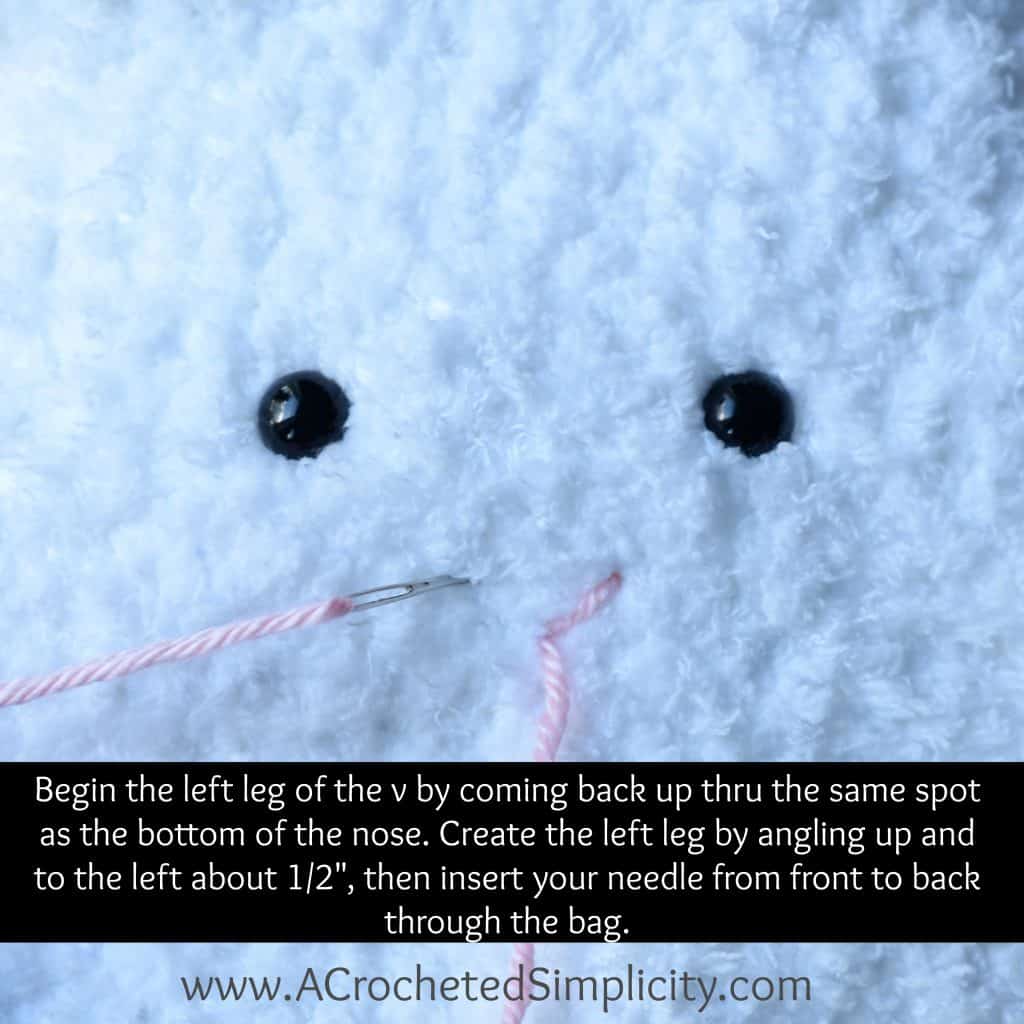
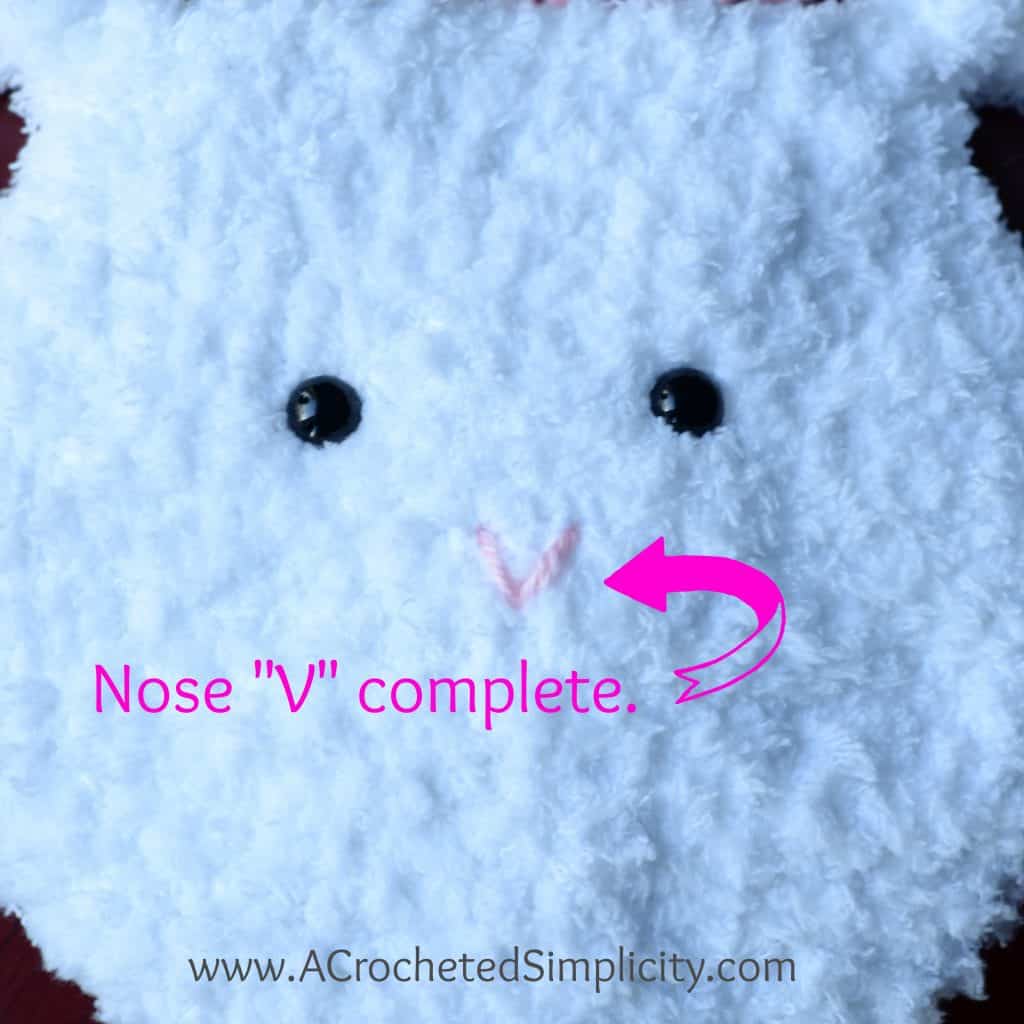
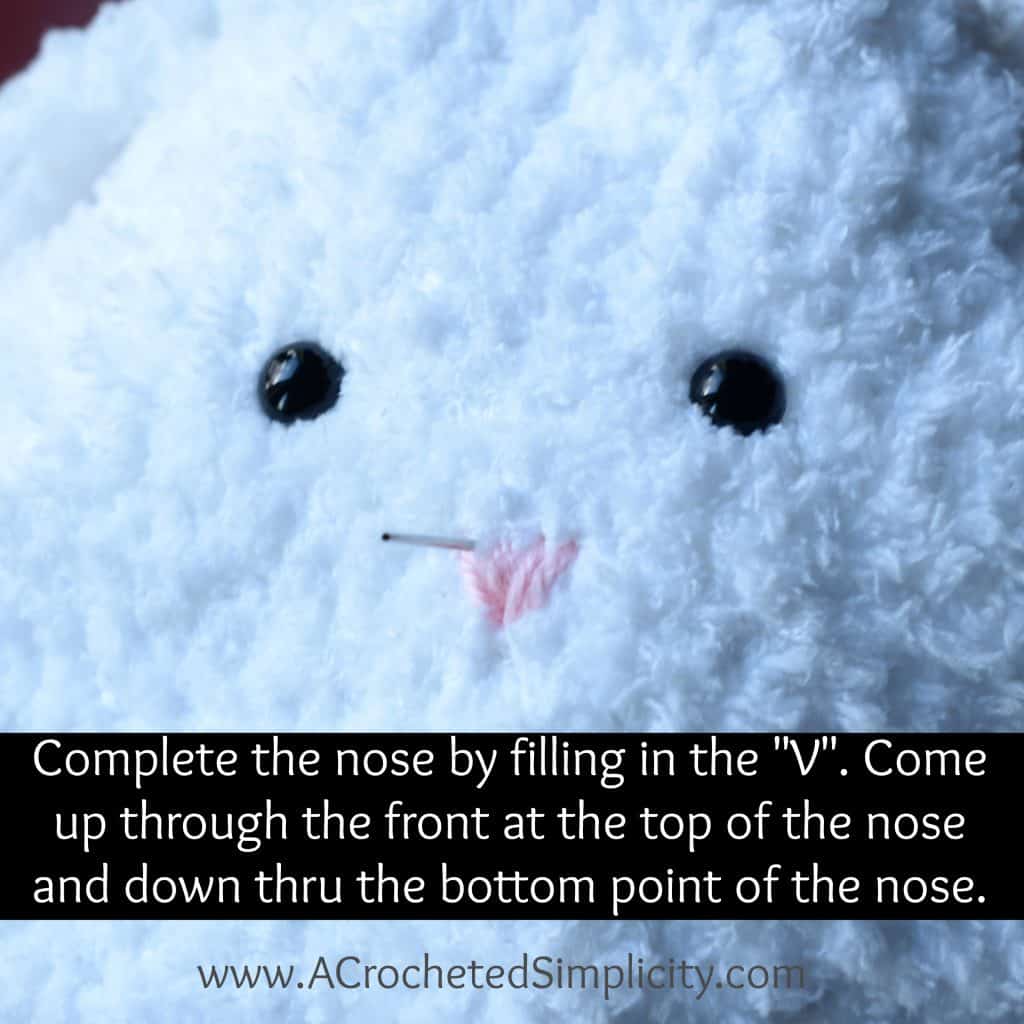
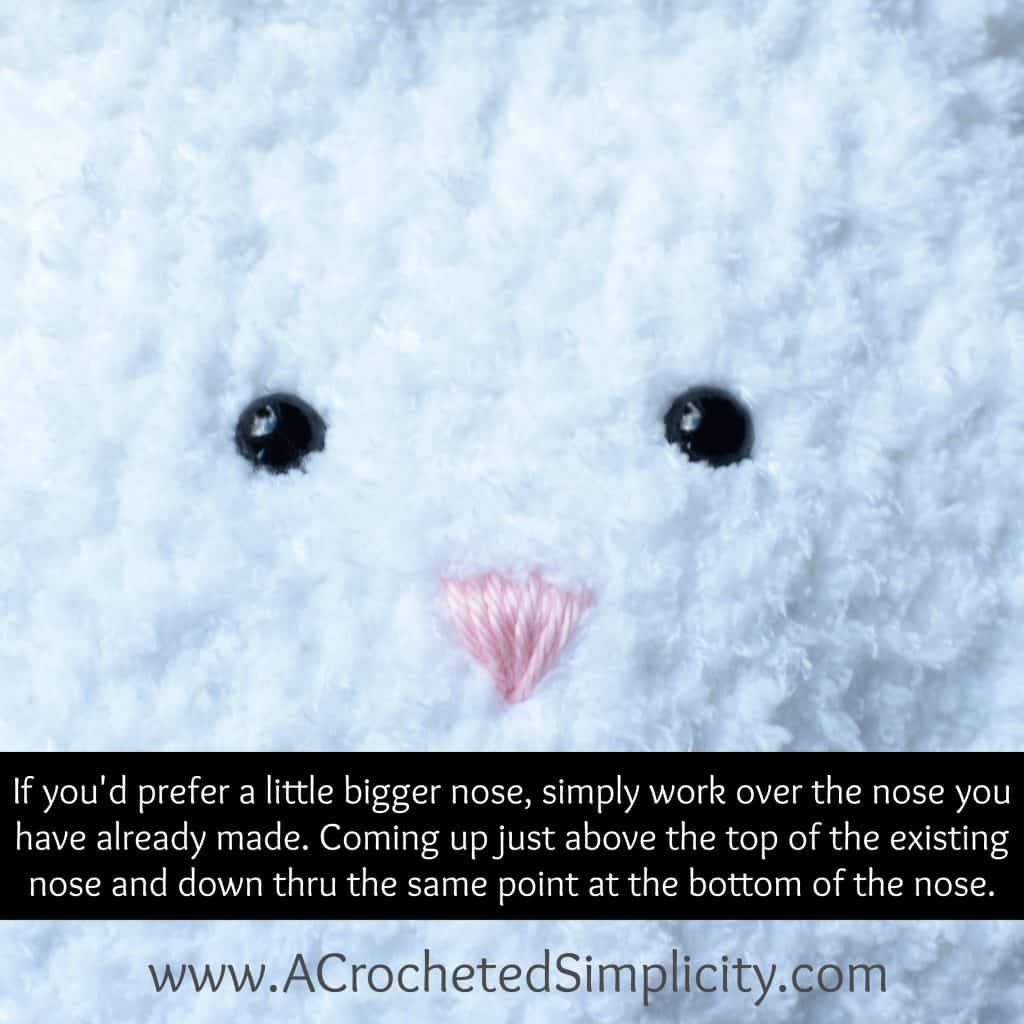
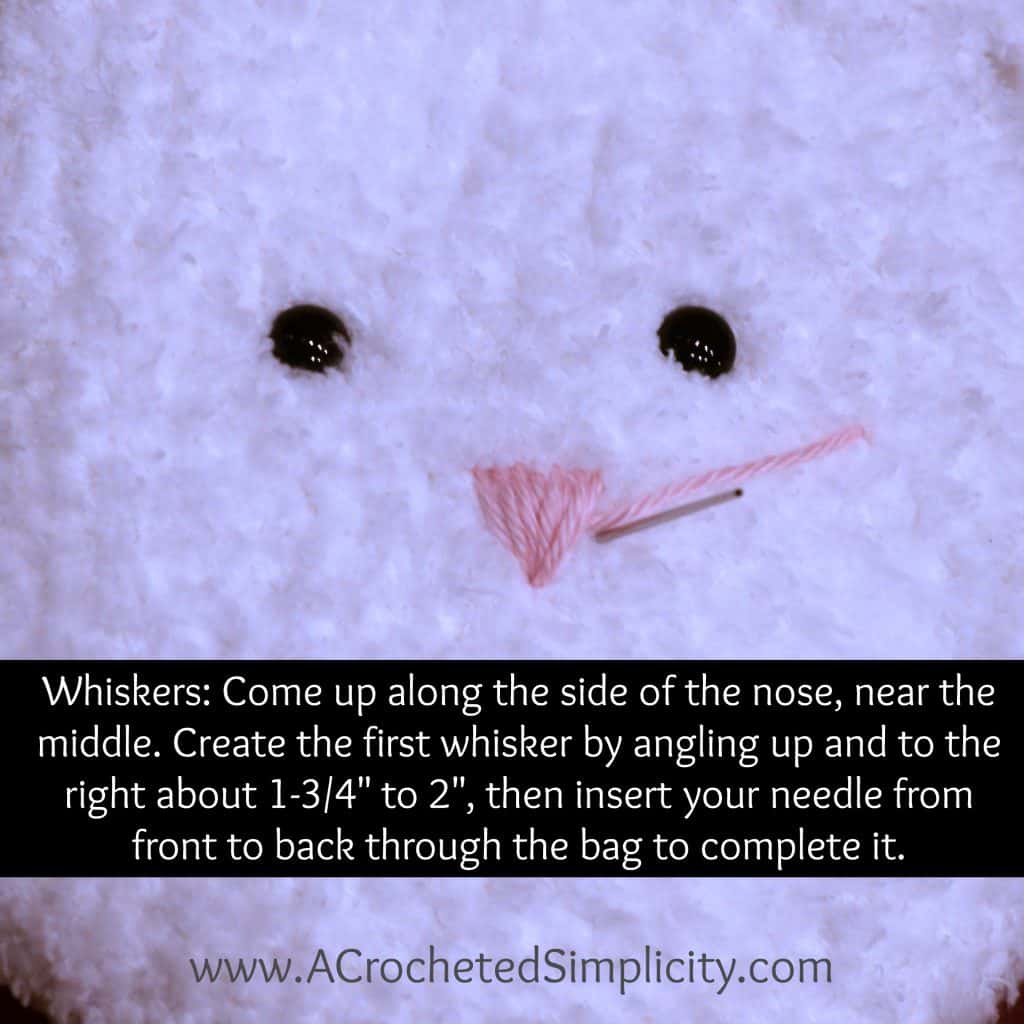
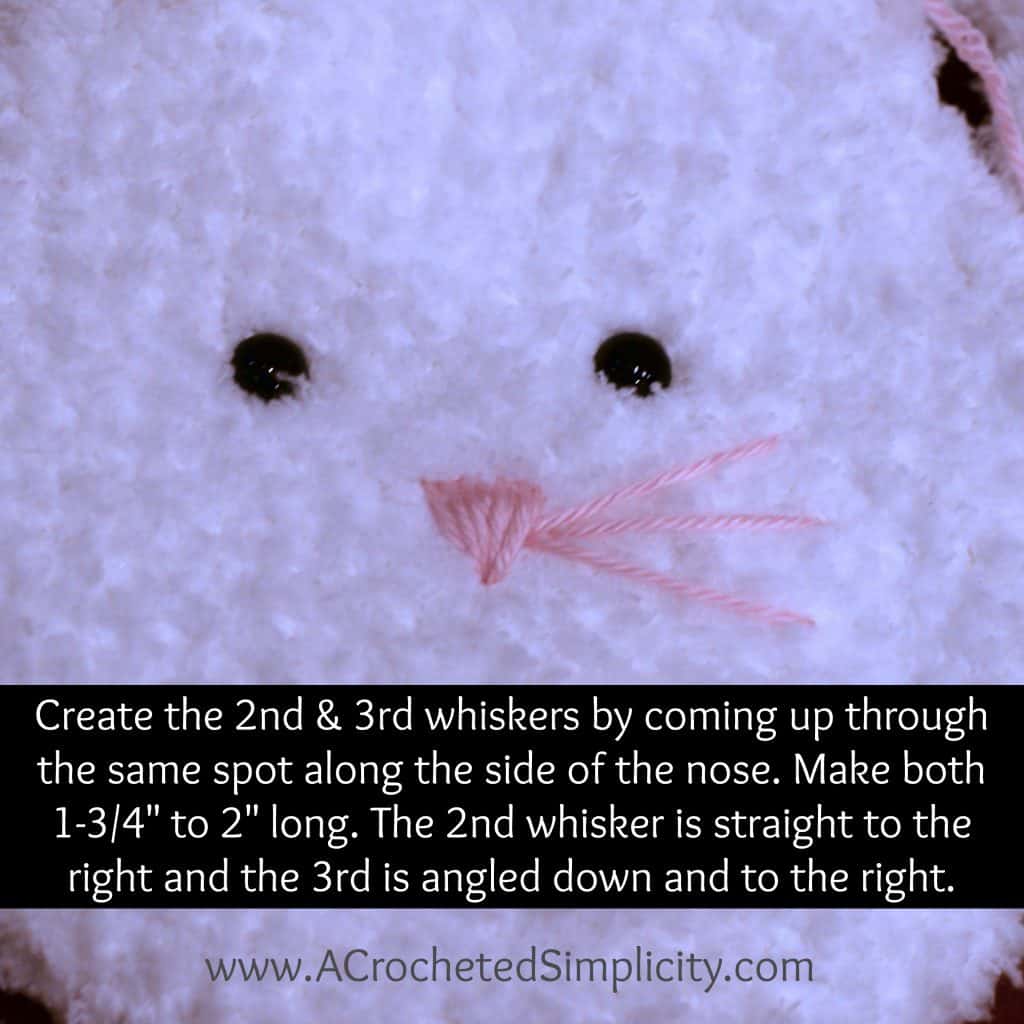
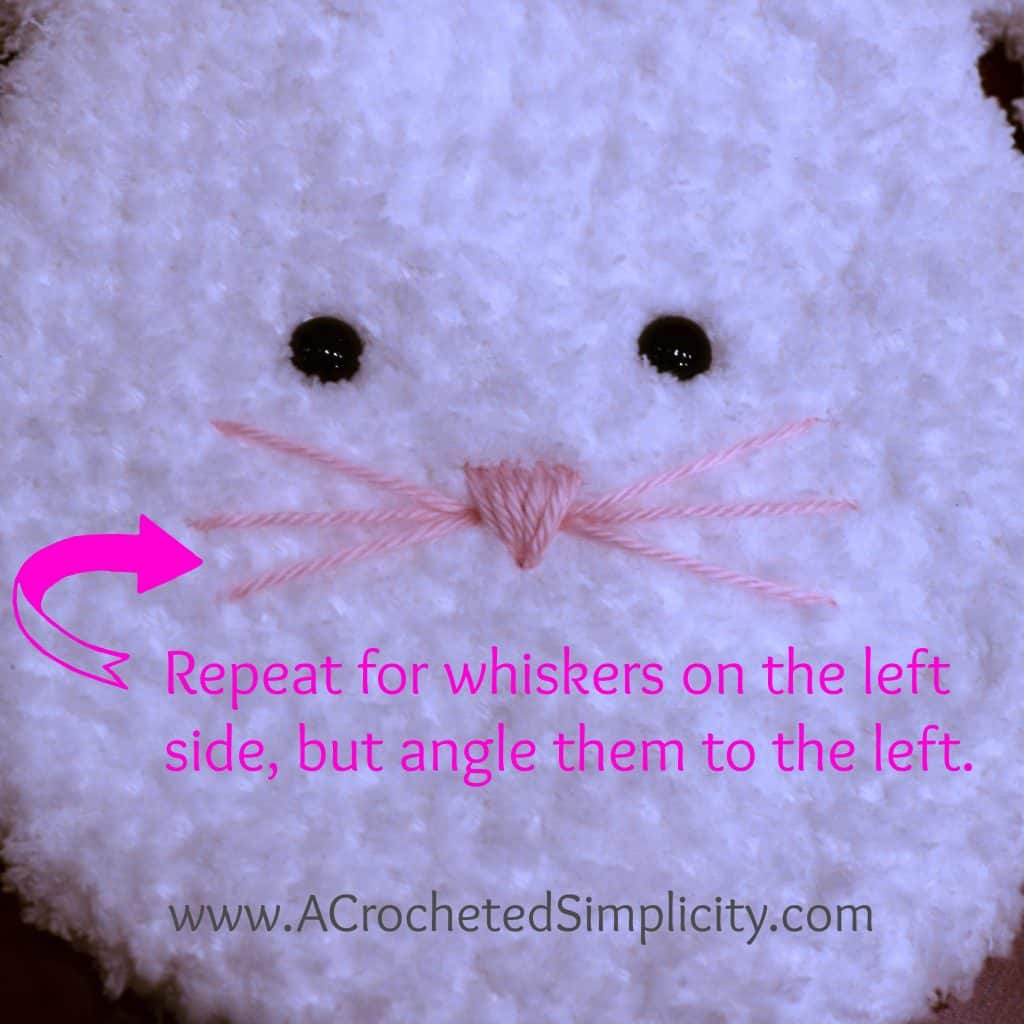
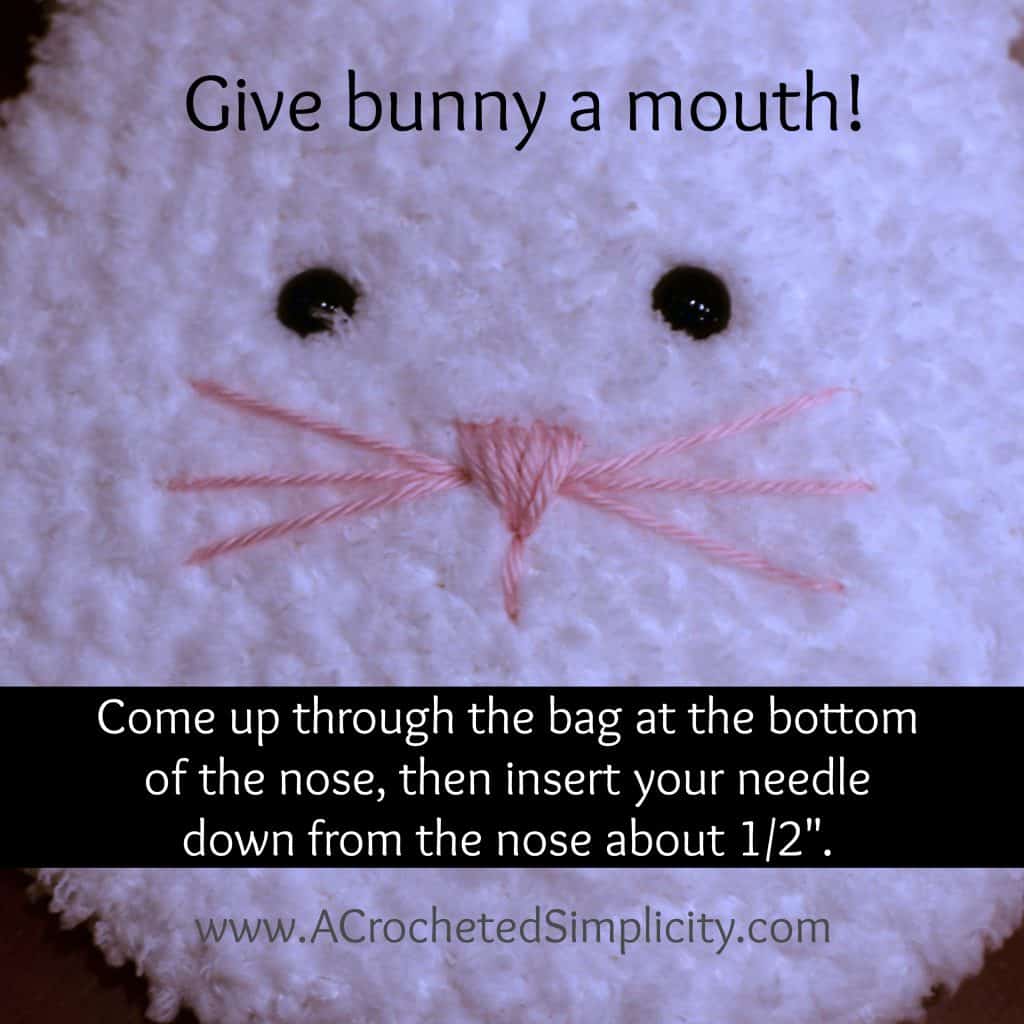
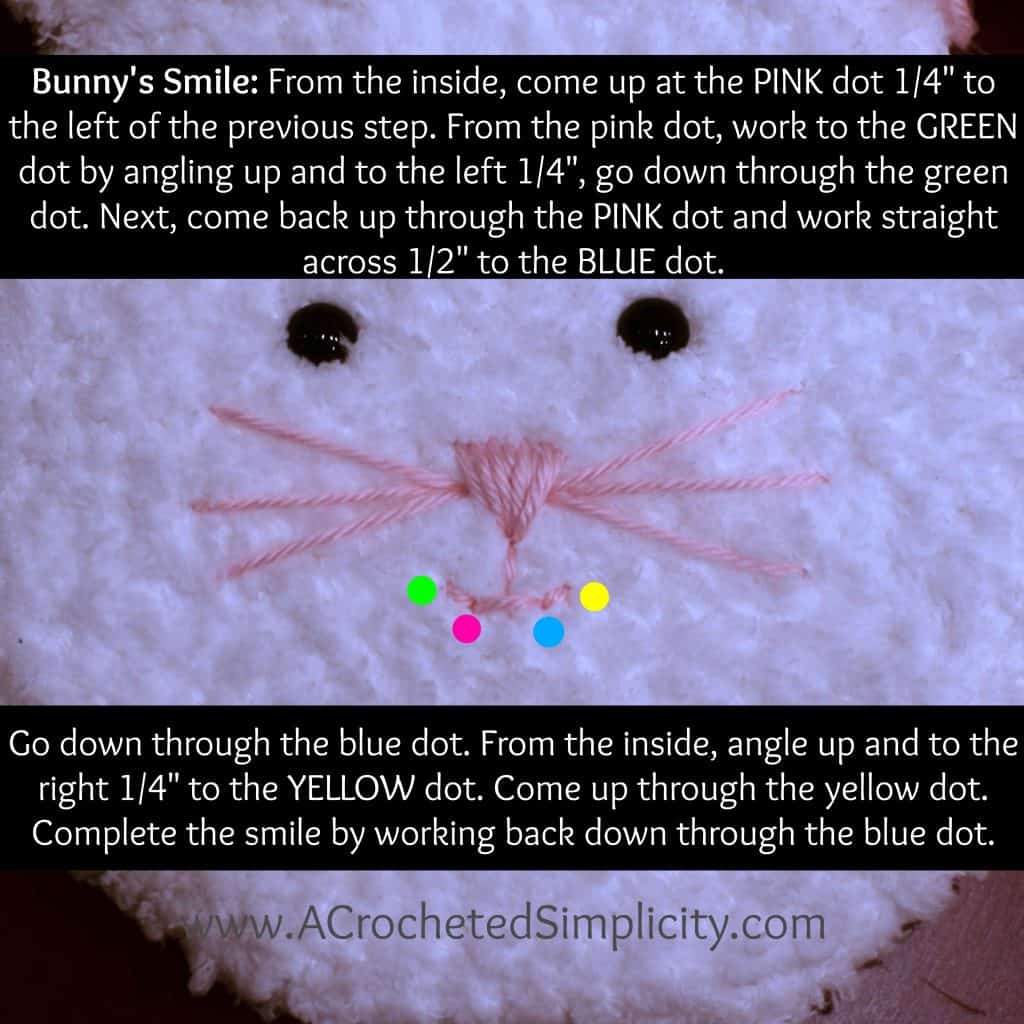
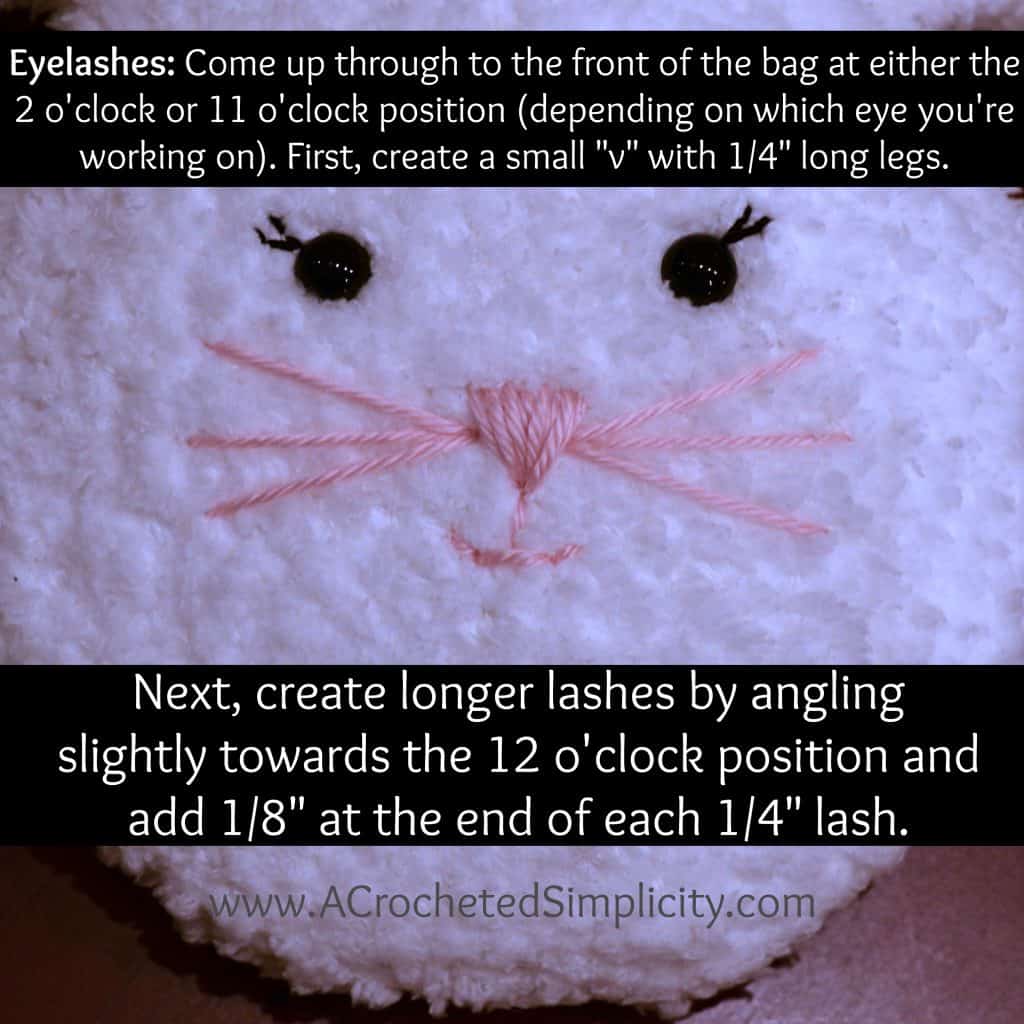
Bunny Face Tutorial
Note: The photos in this tutorial show the Pipsqueak Bunny Bag, but I used the same instructions to add the face to the bunny towel. If you crocheted your eyes, sew them onto the towel with a yarn needle and yarn, in place of the safety eyes.
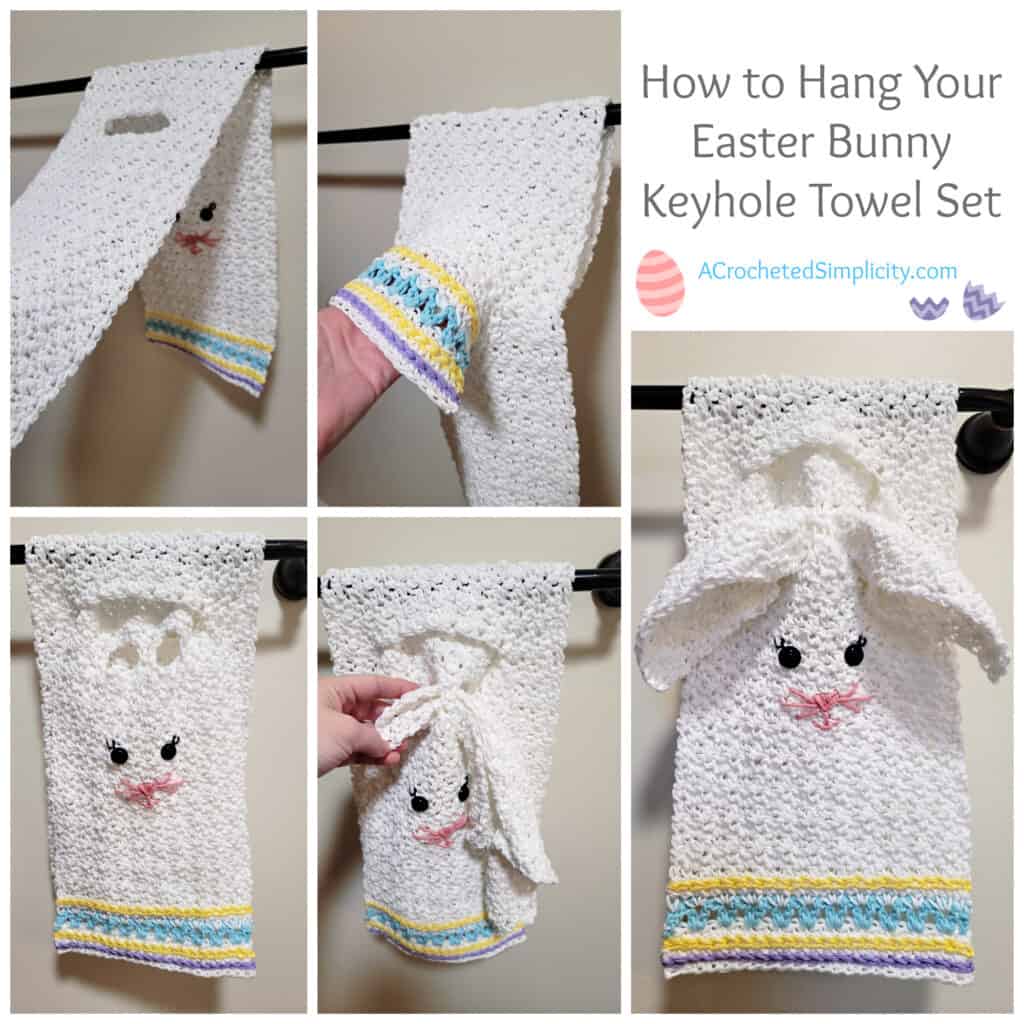
How to Hang the Bunny Crochet Towel Up
Now that you’ve completed your Bunny Crochet Towel set, how do you hang it up?
Step 1: Drape the towel over the towel bar as shown in the top left photo. Make sure the face of the bunny is facing out.
Step 2: Grab the bottom edge of the towel and pull it through the keyhole. Line up the short ends of the towel.
Step 3: Fold your washcloth ears in half, corner to corner. Insert the washcloth ears through the ear keyholes shown in the bottom left photo.
Step back and enjoy your talents!
I MADE IT! NOW WHAT?
Pin this post!: Save this bunny crochet towel to your Pinterest boards so that you can come back and make it again.
Leave a comment below: We love to hear your feedback.
Share Your Finished Projects on Facebook or Instagram: I love to see your finished projects! Share with us on social media and tag me @acrochetedsimplicity or use the hashtag #ACrochetedSimplicity so I can find your posts.
Join us in the Facebook Community Group!
Come share your finished projects with us in the A Crocheted Simplicity Crochet Community Group on Facebook. Join us for fun community events such as crochet alongs, join in on crochet conversations, ask questions, get advice, and share your love for crochet!

Looking for More Crochet Home Patterns?
Check out our other free crochet patterns that will enhance your home decor and give a unique handmade look to all of your spaces.
Love this bunny towel and wash cloth. Can’t believe you have not created a Gnome towel
I’m really excited to do more of these projects in 2024 to use as gifts